Community Brag Posts

Cedar planter boxes

Submitted by JavaJoe on Fri, 06/06/2014 - 20:00

I used the main plan for ideas, but opted to use 3.5 inch pickets instead, which allowed for a smaller planter that wasn't as big. Also chose to miter 1x3s for the top which I think really finishes it off. Sanded everything with a belt sander to 220 grit. Used min wax golden pecan plus three coats of poly inside and out. Finished size was about 17x17. Tile spacers work great to keep the gaps even!

Built from Plan(s)
Estimated Time Investment
Afternoon Project (3-6 Hours)
Finish Used
Min wax golden pecan
Recommended Skill Level
Intermediate

Comments

Nesting Office Station

Submitted by Sb1212 on Tue, 07/14/2020 - 18:38

So loving this nesting office station❤️! We will have a sofa sleeper in the office as well. So we needed a desk that could be moved to the wall when the sofa sleeper is being used by guest. I saw a post from Ana for her Nesting Grill Station and I came up with the idea to make this nesting office station. The cabinet includes a file folder drawer (which is from Ana's mail boss plans), a regular drawer, cabinet doors with shelves. One of the shelves is a pull out shelf for the printer. I think it came together great! Design for nesting desk inspired by these plans: https://www.ana-white.com/woodworking-projects/nesting-grill-station https://www.ana-white.com/woodworking-projects/mail-boss

Estimated Time Investment
Weekend Project (10-20 Hours)
Finish Used
Minwax Golden Pecan
Valspar Signature Ultra White in satin
Recommended Skill Level
Intermediate

Comments

Sb1212

Sat, 10/03/2020 - 08:35

Hi, Thank you! Actually I didn't add wheels to the design since this will be in an office with thick carpeting. I added adjustable metal foot pads to the bottom of the desk.

Console table

Submitted by Anonymous (not verified) on Tue, 01/19/2021 - 13:48

Made this to match the Tryde coffee and end table I made for my other half. She loved them, and loves this. We added the bottom piece which wasn't part of the plan. Using the 2x4 in different direction gave it a unique look. We love it.

Estimated Cost
$60
Estimated Time Investment
Day Project (6-9 Hours)
Finish Used
Dark walnut with poly finish.
Recommended Skill Level
Beginner

Classic Bunk Beds Re-Imagined With Stairs

Submitted by edeboode on Mon, 04/03/2017 - 07:57

I modified the plans for the Classic Bunk beds by making them 74" tall instead of 63" and added a fourth slat all the way around to add more protection from potential falls.  I created one opening in the front for my youngest to get into the bottom bunk, and built slats about 2/3's across the front to act as a gaurd rail. I created another opening on the side for my oldest to get into the top bunk with stairs instead of ladders to again prevent falls.  I had to modify the Sweet Pea stairs to accomodate for the extra height in the bunk beds, simplified the railings, and I created each cubby to be big enough to use cloth storage totes that were 11x11x11.  Sanded the whole bed and stairs so the corners and edges were all rounded and smooth, and put two coats of white Deck and Porch paint to stand up to the the boys running up and down.  I used brackets to secure the stairs to the bed, and sixteen 3" bolts to bind the bed together.  Precut and drilled 17 slats for each bed seperated them 2" apart.  Spent a few hours every night during the week measuring, cutting, glueing, drilling and assembling the bed and stairs.  Spent an entire weekend sanding and painting.  Very happy with the way these beds turned out.  Overall cost of the project including the paint was around $400.  

Estimated Cost
$400
Estimated Time Investment
Week Long Project (20 Hours or More)
Finish Used
Porch and Deck Paint
Recommended Skill Level
Beginner

Comments

Board and Batten Fireplace Surround

There was brick above my fireplace. I decided that I needed to lighten it up, but didn't want to necessarily paint the brick. Instead, I decided to panel above the fireplace using a board and batten style. I am so happy with the results! It is lighter and brighter in the room and goes with the style in the rest of the room (walls have board and batten as well).

Built from Plan(s)
Estimated Cost
$50
Estimated Time Investment
Day Project (6-9 Hours)
Finish Used
Painted white ("Linen White")
Recommended Skill Level
Intermediate

Comments

Backyard Patio Set

Submitted by Theavy on Tue, 05/04/2021 - 15:03

Used Ana's plan for chairs, coffee table, sofa and lounger. Stained and clear coated. Wife is happy. What can be better!

Estimated Time Investment
Week Long Project (20 Hours or More)
Finish Used
SPAR Urethane
Recommended Skill Level
Intermediate

Comments

DIY Vintage Step Stool

Several years ago, the first woodworking project I finished was the Vintage Step Stool built with plans by Ana White.  I use the step stool just about every day.  I had some scrap lumber taking up space in my garage, so I decided to use it to build another step stool.  Check out the blog link for more project details.

Built from Plan(s)
Estimated Time Investment
Day Project (6-9 Hours)
Finish Used
Miss Mustard Seed's Milk Paint in Boxwood and Ironstone, ECOS Paints WoodShield in Special Walnut and their Satin Varnish
Recommended Skill Level
Beginner

Comments

Cedar Raised Garden Planter

Submitted by Tamila on Wed, 03/09/2011 - 21:48

This was my first building project ever! It was so easy to do...the only problem was that we didn't have enough room for all the veggies we wanted to plant in our garden because we only built two! The plan is to build at least two more this summer!

Estimated Time Investment
An Hour or Two (0-2 Hours)
Recommended Skill Level
Starter Project

DIY Herringbone Barn Door

Submitted by susanshamp on Fri, 05/01/2015 - 22:25

This DIY Herringbone Barn Door is used over a simple hallway opening to separate the maing living space from the kids' bedrooms. I searched this site and Pinterest for inspiration, and loved the herringbone and chevron patterns that I found. This door was made of reclaimed barn wood and wrapped in raw steel channel iron. Hope you enjoy!

Estimated Cost
$150 for the wood and steel, not including the rolling hangers and track
Estimated Time Investment
Day Project (6-9 Hours)
Recommended Skill Level
Intermediate

My First Project: Spinning DVD Rack

Submitted by Dan Y. on Sat, 07/13/2013 - 20:19

I was looking online for a spinning DVD rack to buy when I stumbled across a picture of a custom built rack. I decided to give it a try and this is the result. This is the first project I've done outside of basic shelves and it was a great learning experience. The overall fit and finish isn't quite where I'd like it to be but overall I think it turned out pretty well. I was able to find a 12" lazy Susan at a hardware store that supports over 300lbs and worked perfectly for this project.

I used pocket holes for the shelves, finishing nails for the top and screws for the bottom and lazy Susan. I also used pocket holes to attach the shelf backs and hid them behind the shelves. One thing I definitely won't use next time is spray paint/enamel. The finish isn't nearly as nice as I wanted and it cost far more than I was expecting.

This is also my first time using SketchUp and I'm really impressed with it. I've uploaded a copy of the plans.

Criticism and suggestions are appreciated.

-Dan

Estimated Cost
$170
Estimated Time Investment
Weekend Project (10-20 Hours)
Finish Used
Rust-Oleum Universal Satin Spray Paint - Espresso Brown
Rust-Oleum Crystal Clear Enamel
Recommended Skill Level
Starter Project

Comments

Val Manchuk

Sun, 07/14/2013 - 11:35

I like this spinning DVD unit! Coincidentally, I just finished using spray enamel to redo some cupboard door handles. It's horrible stuff! I ended up sanding it off, and doing it over in flat black. I roughed up the edges with 180 grit to antique them a bit. Looks much better!

Breakfast Nook

Submitted by grovesteen on Mon, 07/15/2013 - 12:42

I made this breakfast nook by taking apart an old teak outdoor dining set, sanding all the boards, and turning the chairs into benches. For the full story and more pictures, please see my blog post on crunchyurbanites.blogspot.com entitled, Our Teak Breakfast Booth. Just click the link below to navigate to my blog. Happy Woodworking!

Estimated Cost
The cost of this project was purely in TIME - A LOT of sanding!
Estimated Time Investment
Week Long Project (20 Hours or More)
Finish Used
Table top- three coats of polyurethane
Benches- Teak Oil
Recommended Skill Level
Intermediate

Farmhouse King Bed

Submitted by gahan22 on Tue, 02/02/2016 - 10:36

This was our first ana white build. Bed build took one Saturday - to finish up took another week or so working nights - most of our time spent on getting the color we wanted and sanding and finishing. Building the 2x4 frame took more time than anticipated as well. We are super happy with how it turned out.

Estimated Cost
$250 for lumber, stain and lumber for bed frame. We used lag screws on the side and 2x4 hangers for the frame which increased costs.
Estimated Time Investment
Week Long Project (20 Hours or More)
Finish Used
Stain is two coats minwax dark mahogany plus classic grey over the top - wiped off and finished with minwax satin poly.
Recommended Skill Level
Starter Project

Shaker Style cabinet doors DIY style

Submitted by ksmith311 on Sun, 02/09/2014 - 21:18

Pleas excuse the mess in the pictures. It is too cold to work in the garage up here in the northwest, so this project took over our entire kitchen and dining room. We built these frame and panel-style doors using Ana's plans from the mom-plex bathroom vanity! We are so excited because we spent about $100 including paint and have plenty of leftover materials for the drawers next week!

These are the original cabinets in our 75 year old house and they were in serious need of rehab. We even contemplated ripping them out and using Ana's cabinet plans to build new ones but after we removed the shelves, the carcass of the cabinets were still in good shape. We filled, sanded, painted and built these new amazing doors that I'm seriously losing my mind over. They are so beautiful and I don't think I could have ordered something better. Maybe better made but how sweet is it to save all that money by building them yourselves?

We'll post drawer pictures after we get those finished up and hopefully have a clean kitchen at that point. :)

Thanks Ana! Our home is becoming truly special with the skills we learned from you!

Built from Plan(s)
Estimated Cost
$60
Estimated Time Investment
Weekend Project (10-20 Hours)
Finish Used
Benjamin Moore's Kendall Charcoal in Semi Gloss
Recommended Skill Level
Intermediate

Bar height table with stools

Submitted by jsutton78 on Wed, 08/03/2016 - 09:41

This is one of my favorite pieces because the white contrasts perfectly with the walnut hardwood.  The base of the table is all standard 2x4 and 4x4s, and the tabletop is 100% walnut.  

Built from Plan(s)
Estimated Cost
$400
Estimated Time Investment
Day Project (6-9 Hours)
Finish Used
Poly Gloss, white paint
Recommended Skill Level
Beginner

Comments

Pony Wall Workbench

Submitted by jboliver09 on Wed, 06/10/2020 - 19:22

Had to size the project done to fit my garage wall.
Left the sides open to use as storage for wood.
Overall Everything worked out, love it!

Built from Plan(s)
Estimated Cost
150.00
Estimated Time Investment
Weekend Project (10-20 Hours)
Recommended Skill Level
Intermediate

Comments

$40 Ping Pong table top game

With Father's Day rolling in, my sons and I needed a gift, stat! My husband thinks that Table Tennis is the quintessential father-son activity, so that was an obvious choice.
We needed something easy to make, easy to store, and budget friendly. With a 6, 4, and 2 year old helping out, I made a foldable mdf ping pong table that could easily be placed on our picnic table outside.
We had home depot cut the mdf in half, primed it, taped off some lines, spray painted it with chalkboard paint (bonus, you can keep score!), and screwed 4 small hinges to attach the 2 halves. We added a removable table tennis net, some paddles and balls, and have played nearly every day!

Estimated Cost
$40
Estimated Time Investment
Afternoon Project (3-6 Hours)
Finish Used
Chalkboard spray paint
Recommended Skill Level
Starter Project

Comments

Pallirondack Laundry Basket Dresser

I showed my wife the Laundry Dresser featured on Ana White's website and she asked if I could make one for her, but not quite so tall. I also turned the orientation to fit our laundry room space. I used primarily oak from recycled pallets to build the Laundry Basket Dresser. She wanted a work space on top, so folded laundry, empty baskets, etc. all have a temporary resting place depending on the day. From start to finish, it took me about 6 hours. She plans to stain the piece at some point, but its already in use, so I'm not 100% sure that will ever happen until we move or something. ;-) Great idea and laundry room organization!

Estimated Cost
Half a box of screws
Estimated Time Investment
Afternoon Project (3-6 Hours)
Recommended Skill Level
Intermediate

Comments

Kathy in Pittsburgh (not verified)

Mon, 09/10/2012 - 10:22

I love the open sides, plus it makes it much more feasible to build with scraps repurposed wood, which I love. Thanks for the inspriation

payne.kj

Mon, 04/08/2013 - 08:48

Hi, do you have any kind of plans for how you did this or atleast dimensions? I think this one fits more of what my wife needs, but I'm pretty new to making anything.

nicholas_ftm

Sun, 06/14/2015 - 20:16

Soooo I made this according to the measurements and no laundry basket I find fit. Kind of dissapointed in the fact that this cool thing I just built doesn't have any baskets that will fit it. Any advice on finding a basket that fits?

jkread

Fri, 07/10/2015 - 20:56

I think the idea is to build it to fit the baskets you have or buy some and build around them.

E's play kitchen AND garage workbench and laundry

Submitted by melodyrae on Wed, 07/16/2014 - 19:18

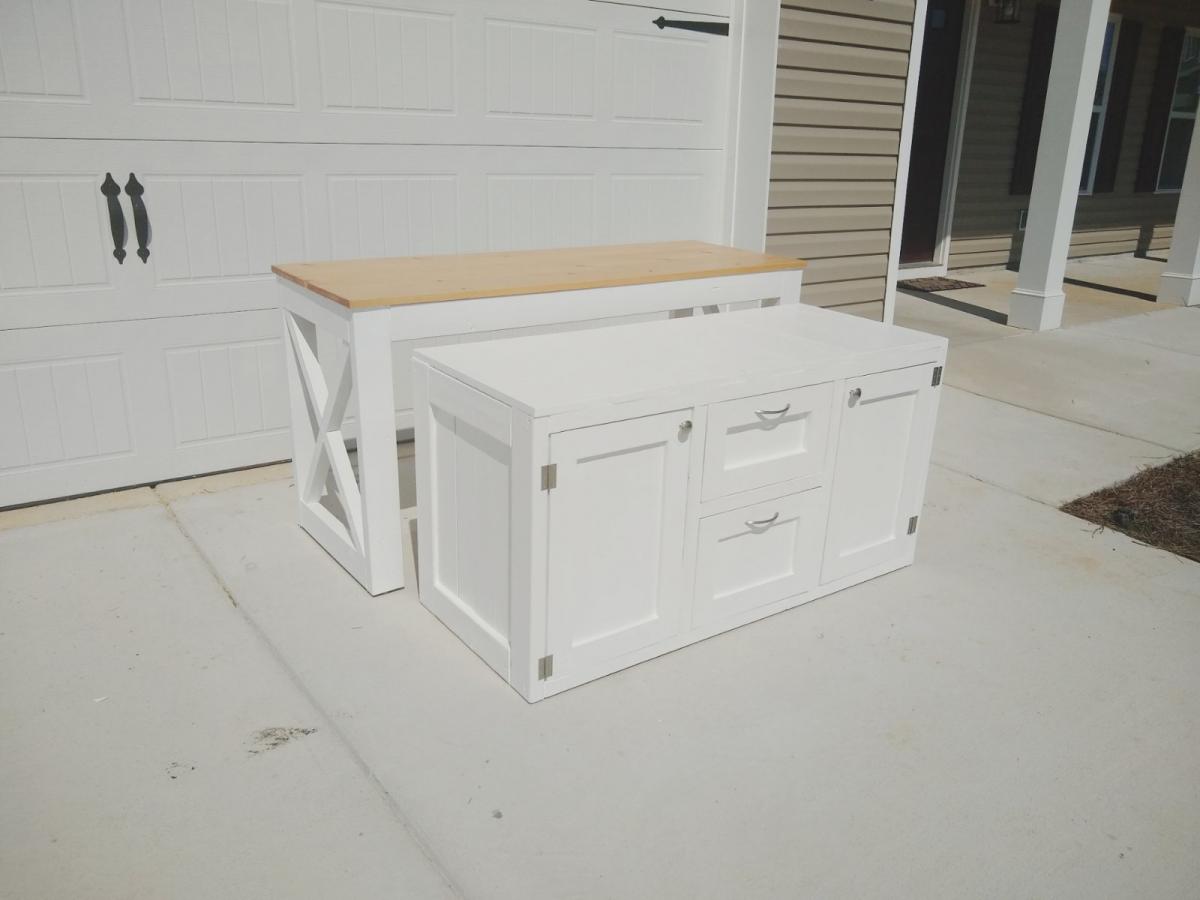
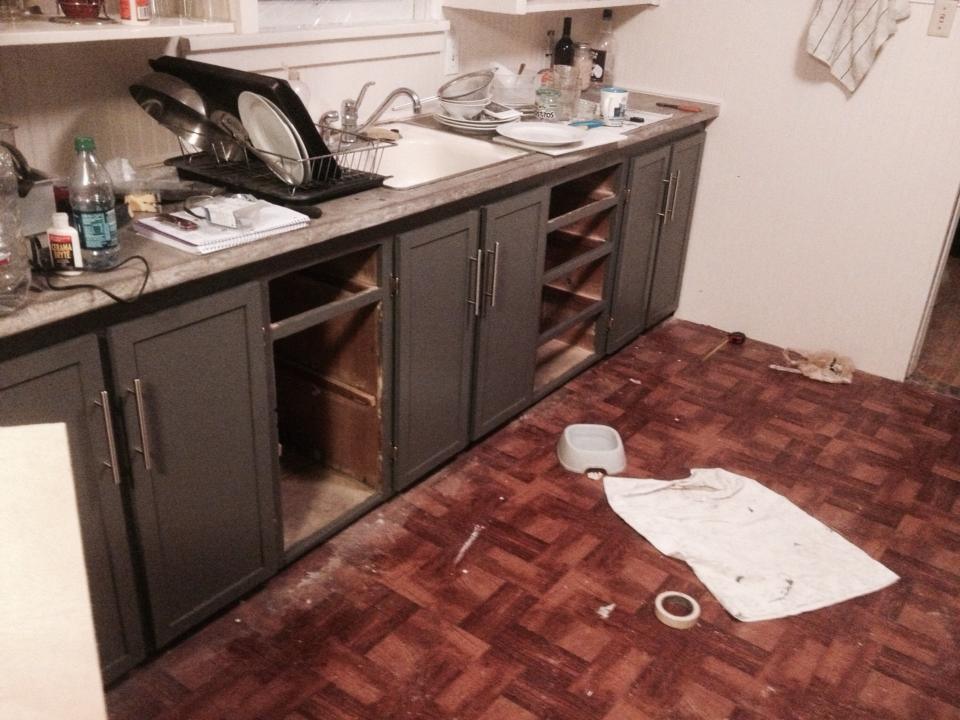
What's better than an Ana White play kitchen? 2 Ana White play kitchens back-to-back!

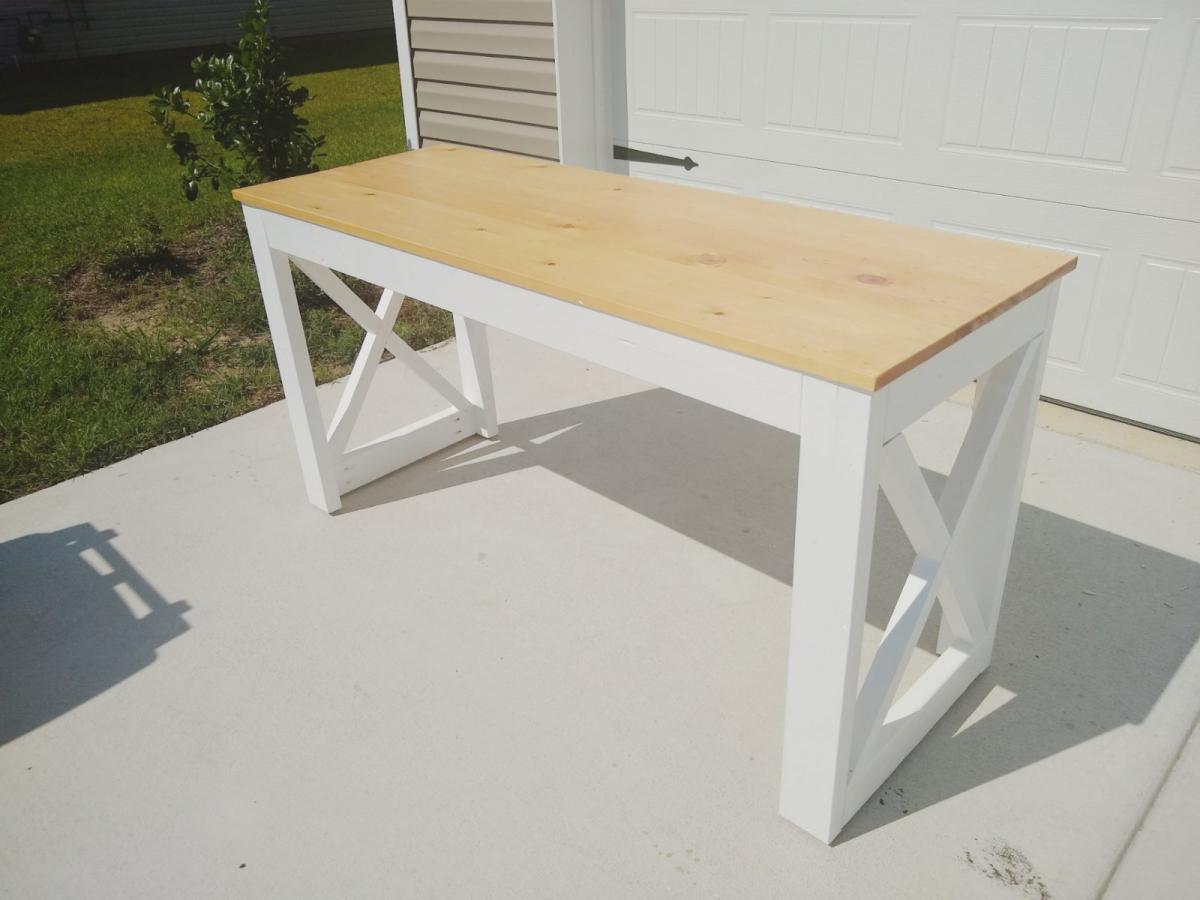
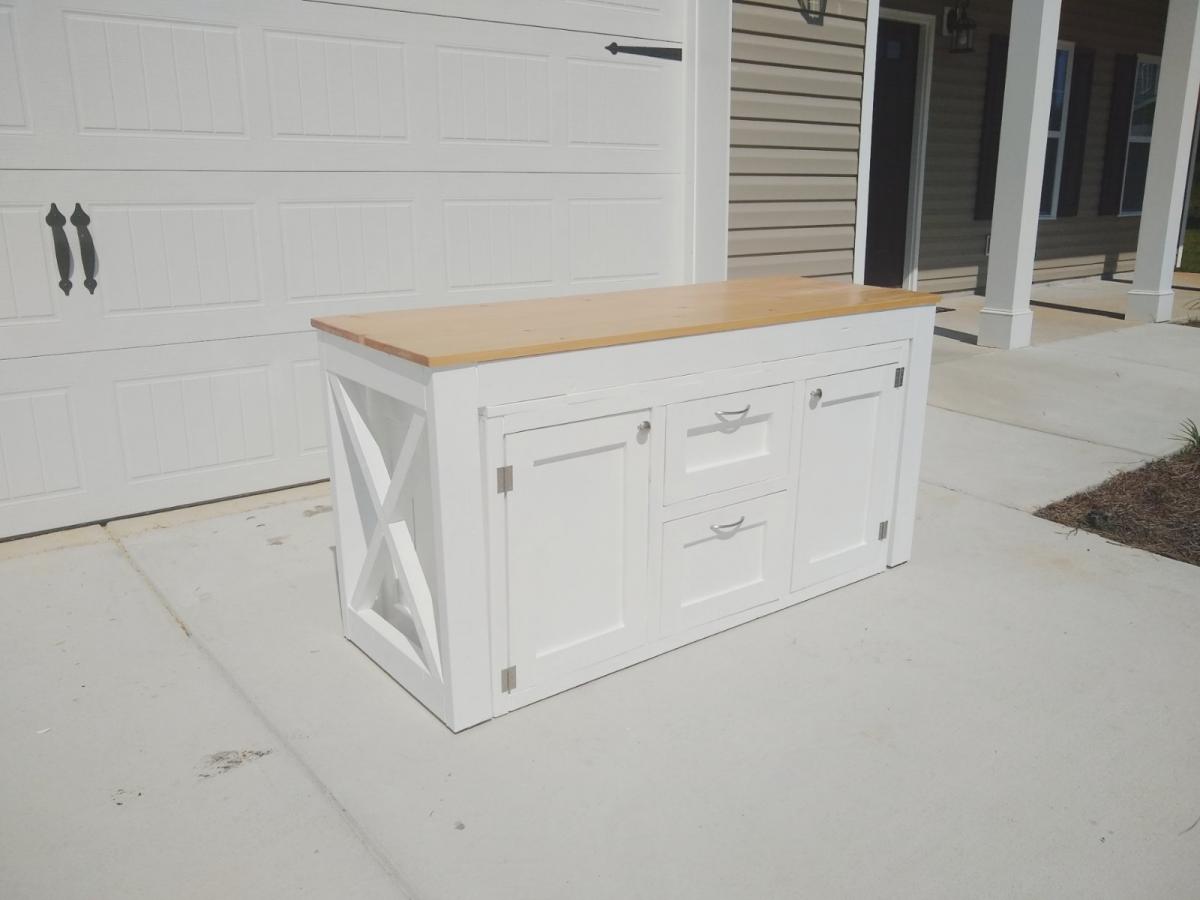
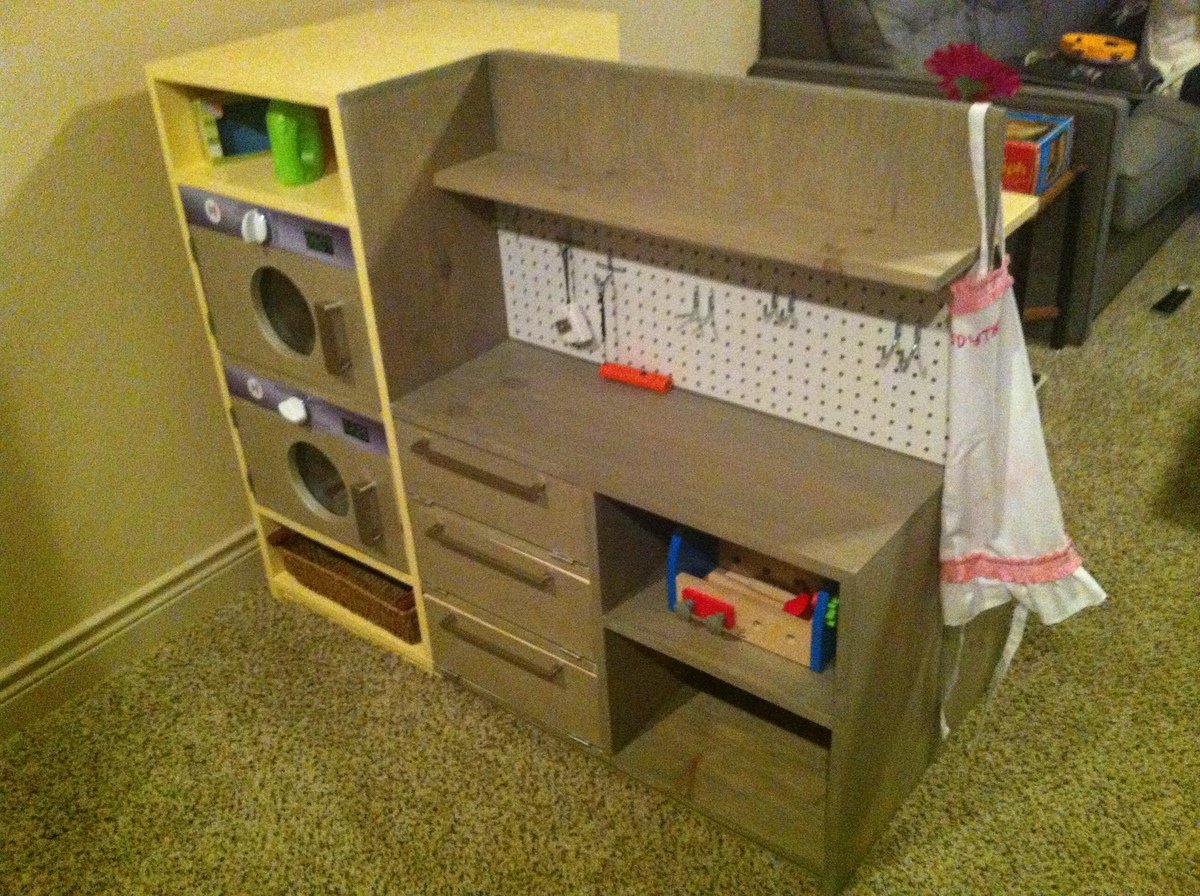
Slightly modified, we made 2 play kitchens, turning one into a garage workbench and laundry. We managed to just get the kitchen & garage done for Christmas morning (minus a latch & plexi for the microwave). We later added a window view above the sink, and a table and 3 storage stools to join the two units on one end. In a long mixed-use playroom with little wall-space available, they jut out from the wall, dividing the TV side of the room from the toy storage side.

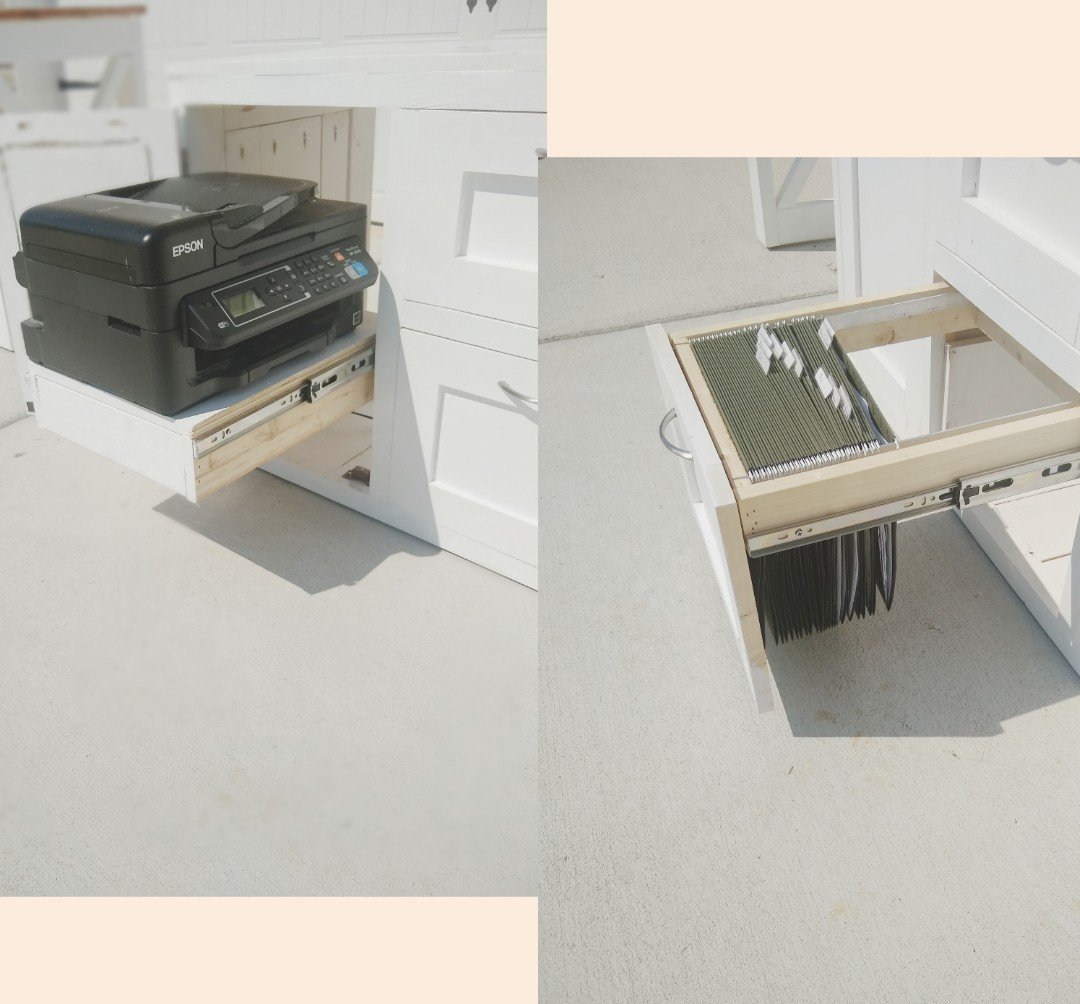
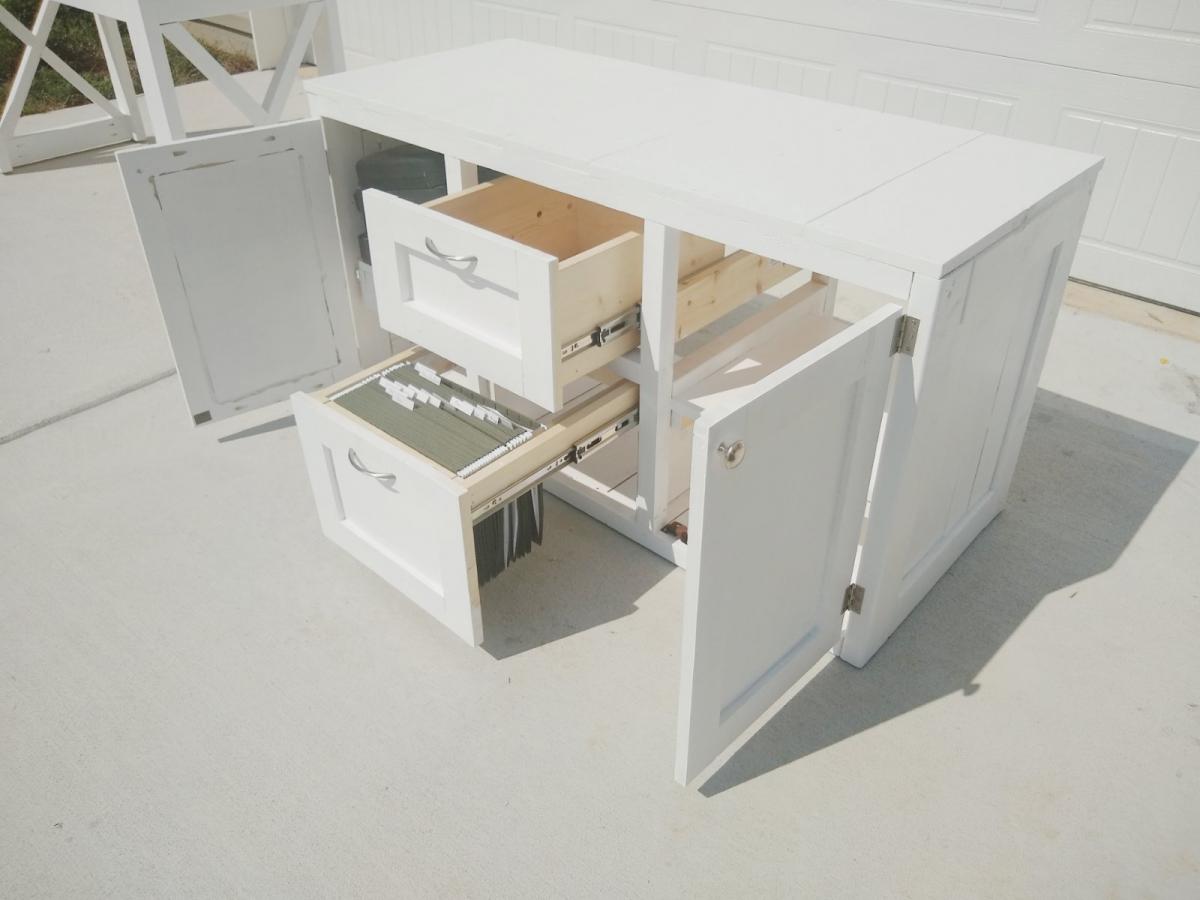
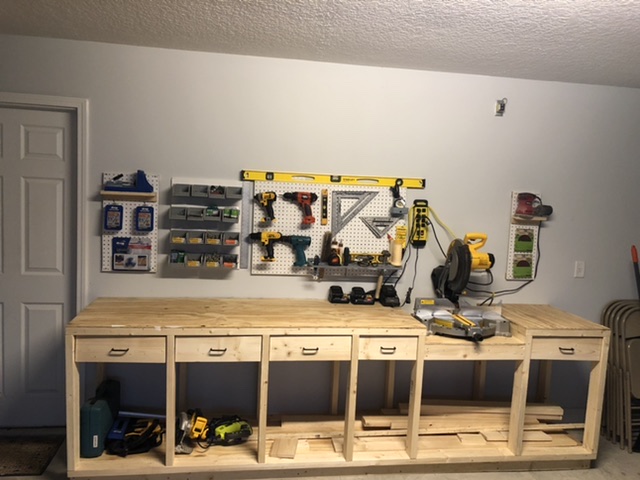
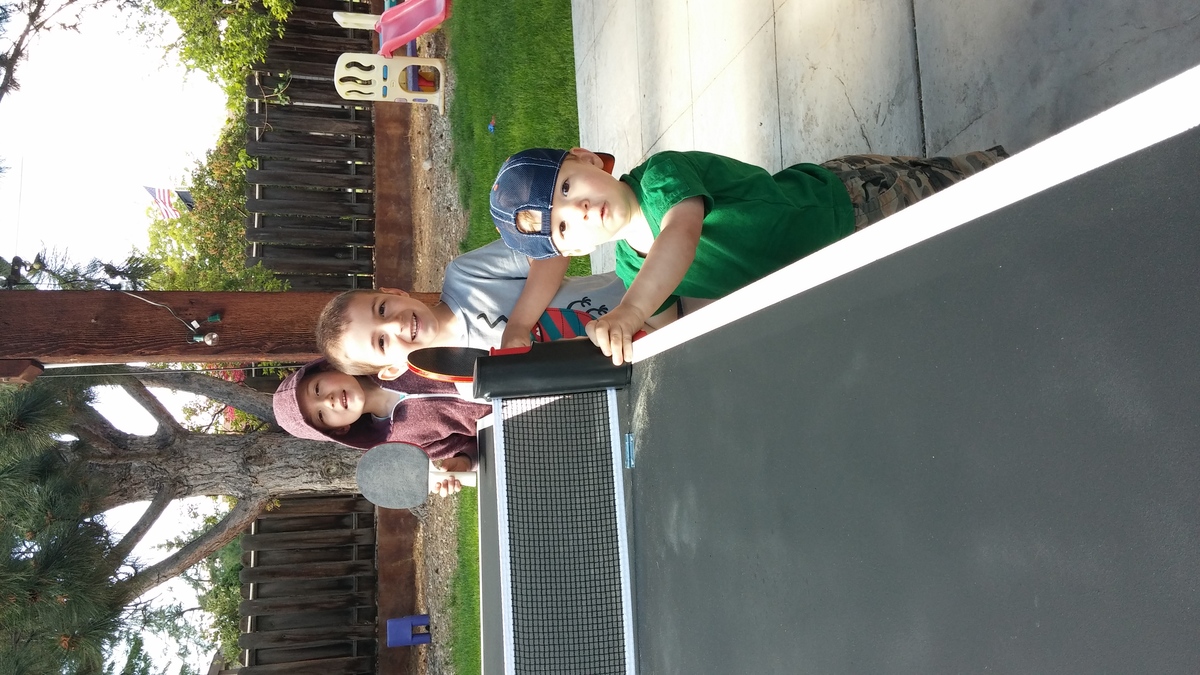
Dad was excited to help put the garage-side together and bought his little girl some peg-board to hang her tools on, and installed garage lighting. As pull-out drawers cut into the storage space, her "tool cabinet" doors just fold-down. Grandpa sent her a full tool-set with power drill for her new workbench. Big brother helped piece the gas burners together and chose paint colors.

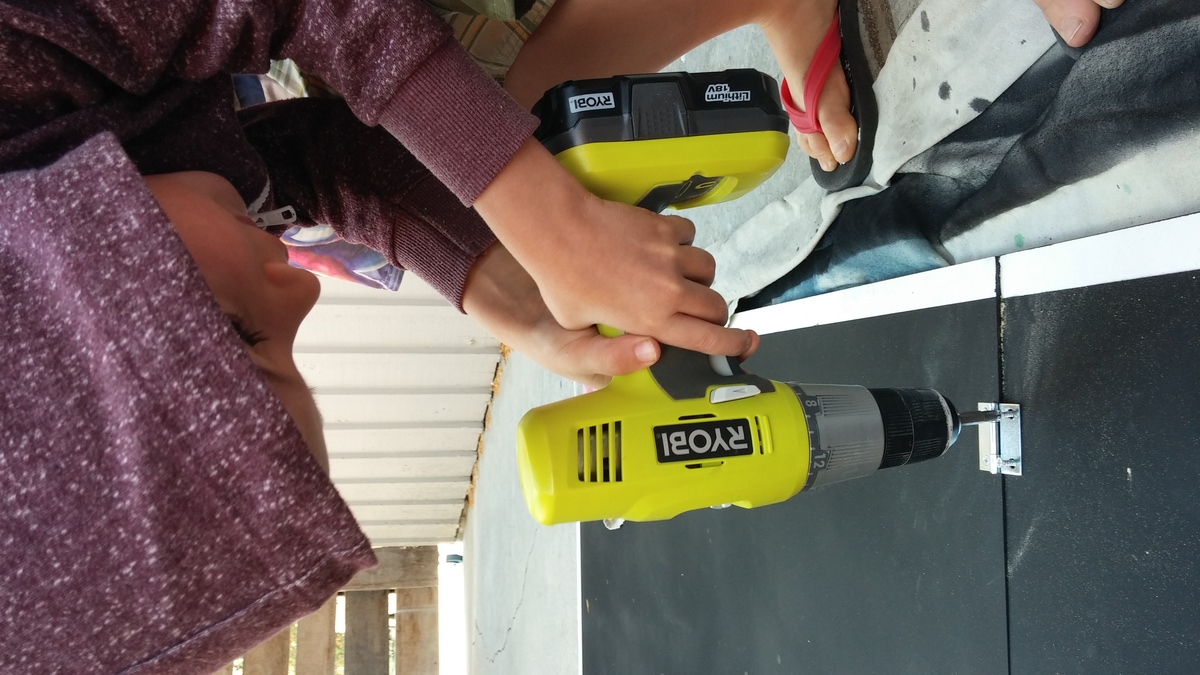
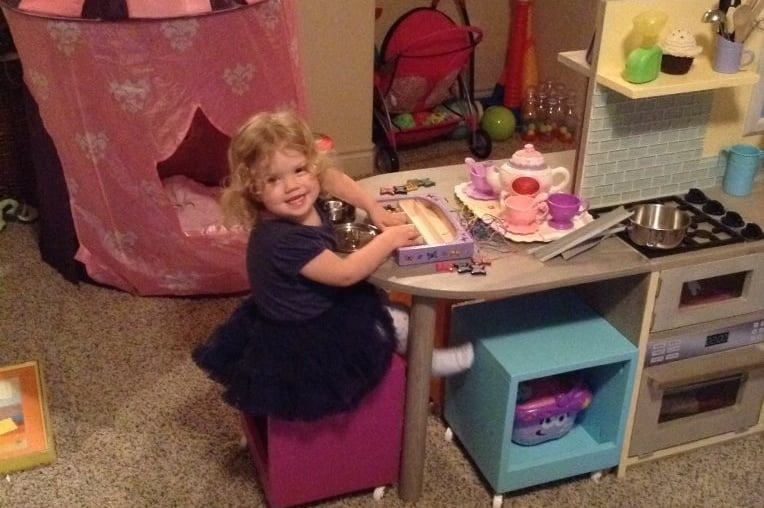
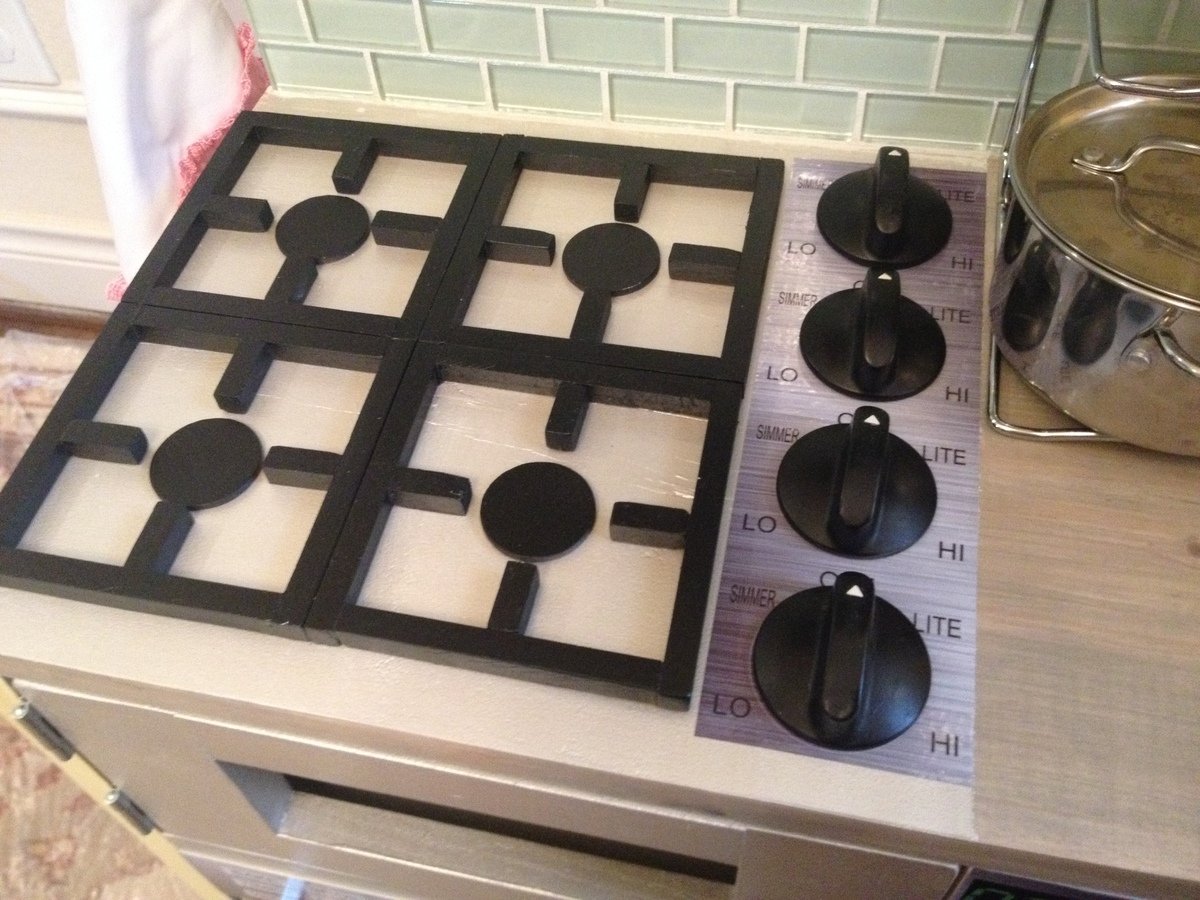
Little miss finger-painted in the garage next to me while I worked on this first woodworking venture, but she was not a bit interested in the contraption until we added the stickers! A local sign vendor we use was so tickled to be involved, he had the stickers printed in under an hour and for just $25 (which saved hours and hours of detail painting)!

Next up: the ana white dream dollhouse (which perhaps we should've started with).

Built from Plan(s)
Estimated Cost
Buying parts retail, last minute, we probably could've purchased a PB kitchen --but not custom to fit our space - and not with a garage and laundry and table and 3 storage stools!
Estimated Time Investment
Week Long Project (20 Hours or More)
Finish Used
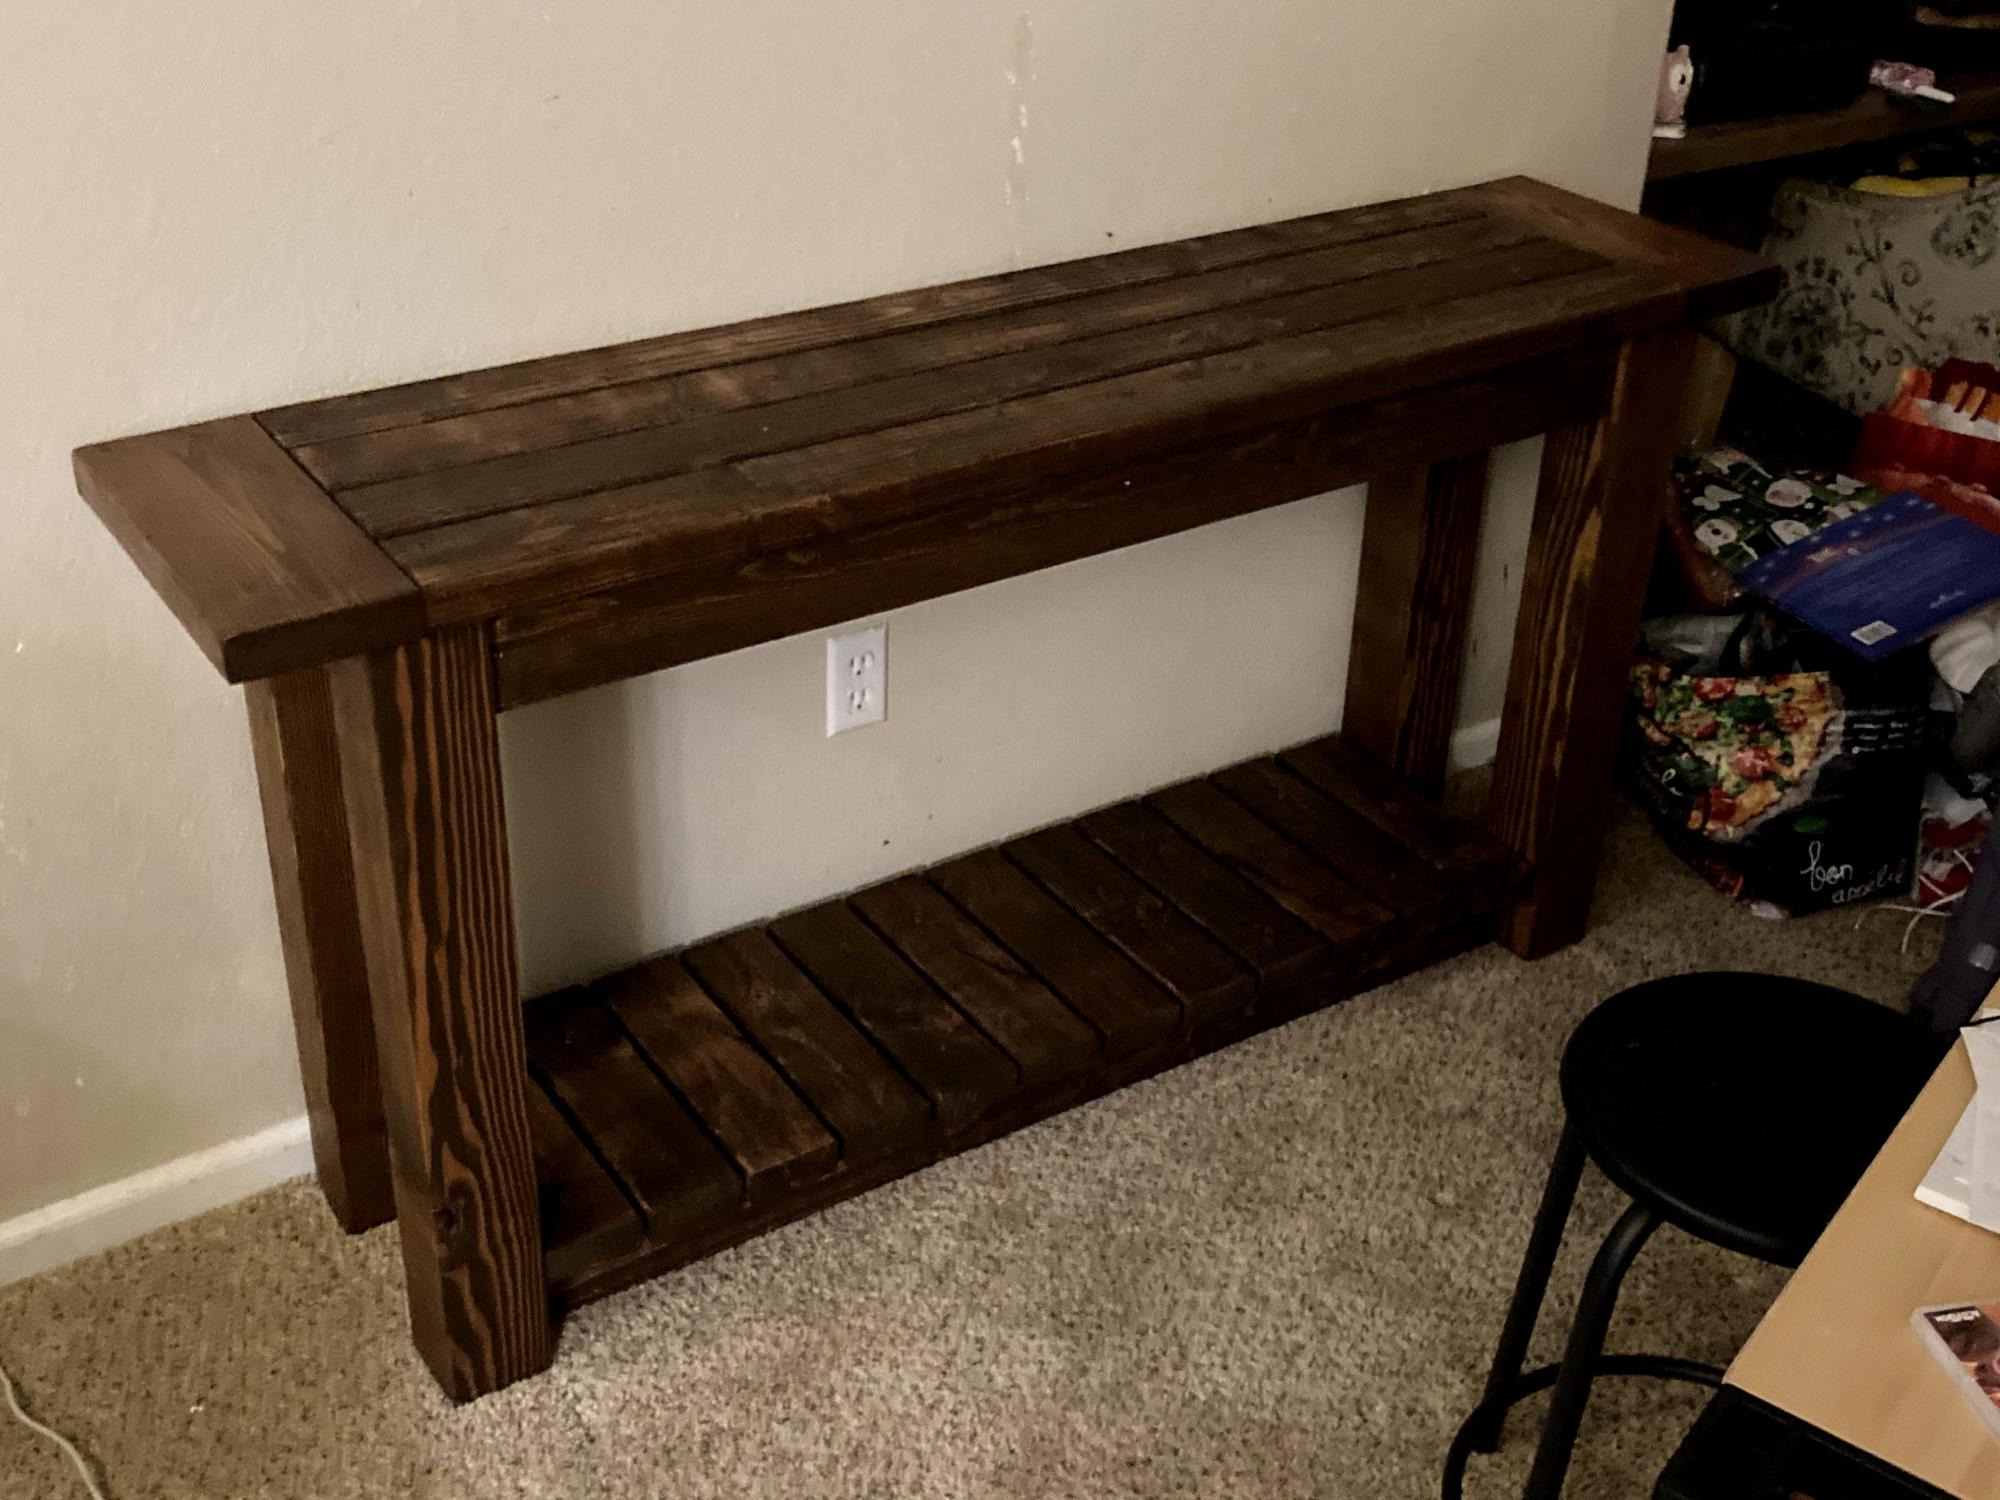
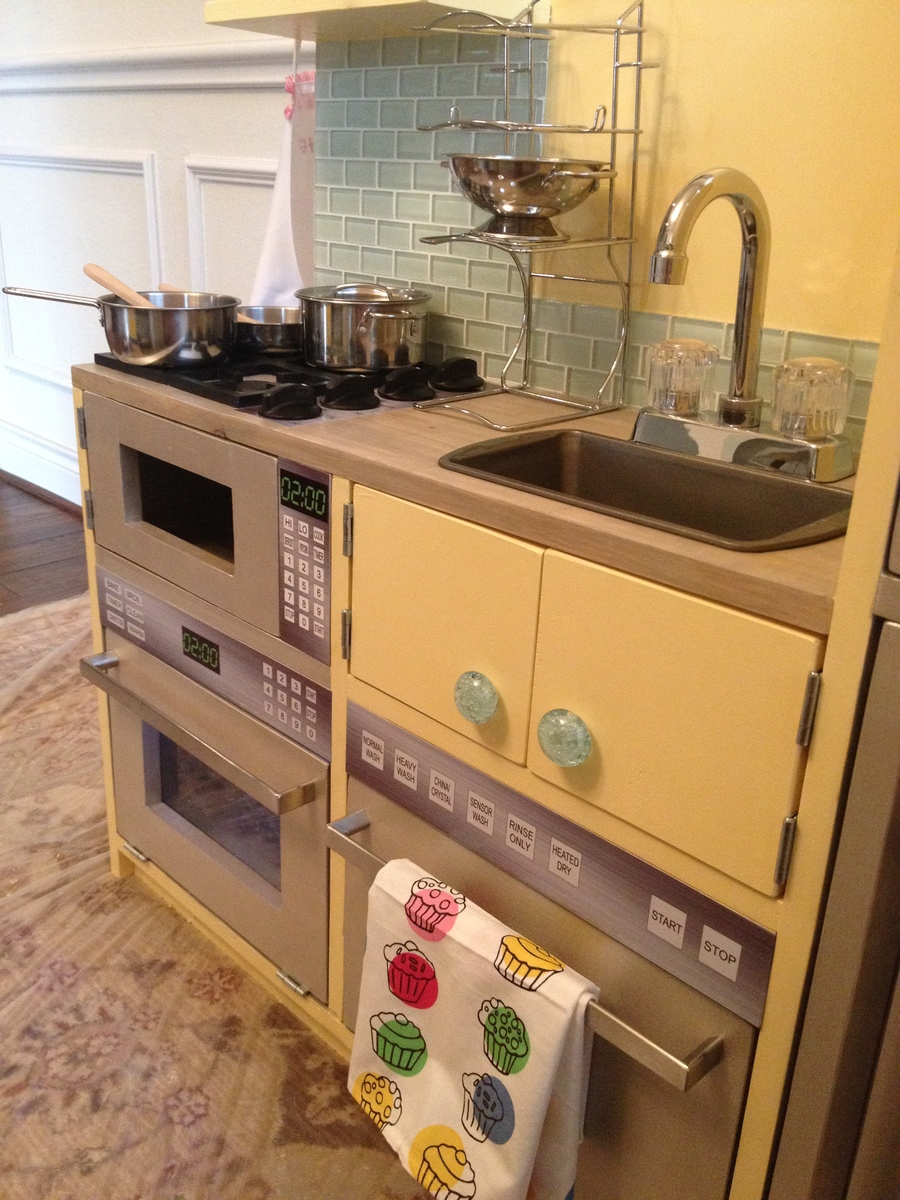
We used Valspar's 2 step metallic finish for the stainless appliances - honestly, lots of extra coats that were probably not needed since the gray base coat was super sweet with our yellow kitchen. We used leftover Behr stain from Dad's garage workbench for the wood countertops, and the rest of the paint is Sherwin Williams. Cabinet knobs from World Market; appliance knobs from a salvage yard; handles from Ikea; fridge shelves a cut closet shelf; real tile backsplash; gas burners from dowels; real faucet from ebay; loaf pan sink (left removable because we knew she'd immediately fill it with water).
Recommended Skill Level
Intermediate

Comments

spiceylg

Sat, 07/19/2014 - 20:15

I love this. Especially love the addition off the workbench and laundry area!

Greenhouse

Submitted by Anonymous (not verified) on Tue, 01/05/2021 - 08:08

We made some modifications to the greenhouse to include a bench with three levels, a working bench and a square foot garden. We also put it on concrete to keep all the weeds out from the bottom as well.

Built from Plan(s)
Estimated Cost
2500.00
Finish Used
We start our own seeds and plan to grow 15 different varieties of vegetables inside this greenhouse all year long.
Recommended Skill Level
Intermediate

Comments

Custom Dog Kennel

Submitted by Anonymous (not verified) on Sat, 04/29/2017 - 17:35

Why not treat your furry best friend like part of the family with a high end custom dog crate. This is an easy way to hide those ugly wire crates while providing another table space. Also has a top that opens up for easy access cleaning. More pictures of my work is available at:

https://www.facebook.com/Deezknotswoodworking/

Or on
PINTEREST: Ngo DIY Furniture


DIMENSIONS
4ft long X 2ft wide X 32" high 

Estimated Cost
$250
Estimated Time Investment
Week Long Project (20 Hours or More)
Finish Used
Rustoleum Oil Base Flat white, Varathane Ebony stain, Varathane Polyurethane Matte
Recommended Skill Level
Intermediate

Corner Desk for Craft Room Sewing - DIY

Submitted by Anonymous (not verified) on Mon, 10/23/2017 - 11:02


We made this sewing/craft table by combining plans from the modular office. It was a big job but SO worth it! We love your plans and use them all the time!

Submitted by Candace Ann Williams

Comments

melkaye

Wed, 02/19/2020 - 13:49

Could you tell me how much extra did you add on to the one side? And how did you fit your sewing machine in there?