Community Brag Posts

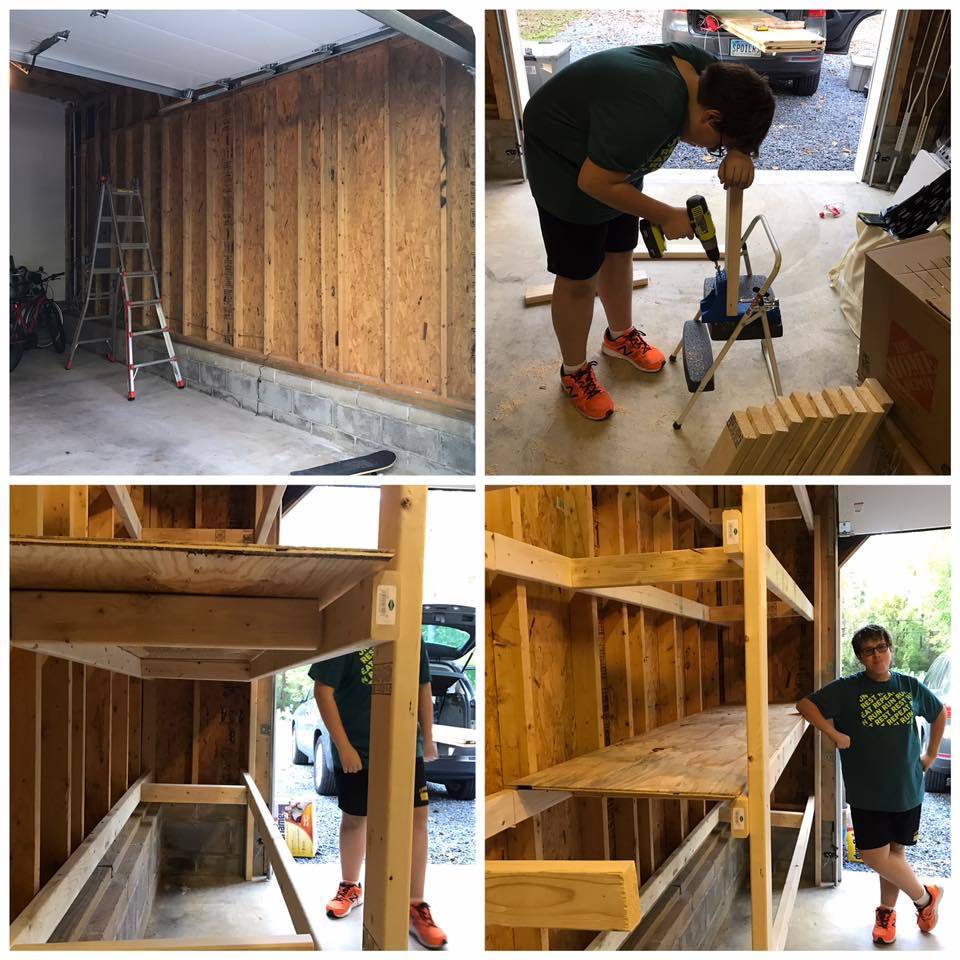
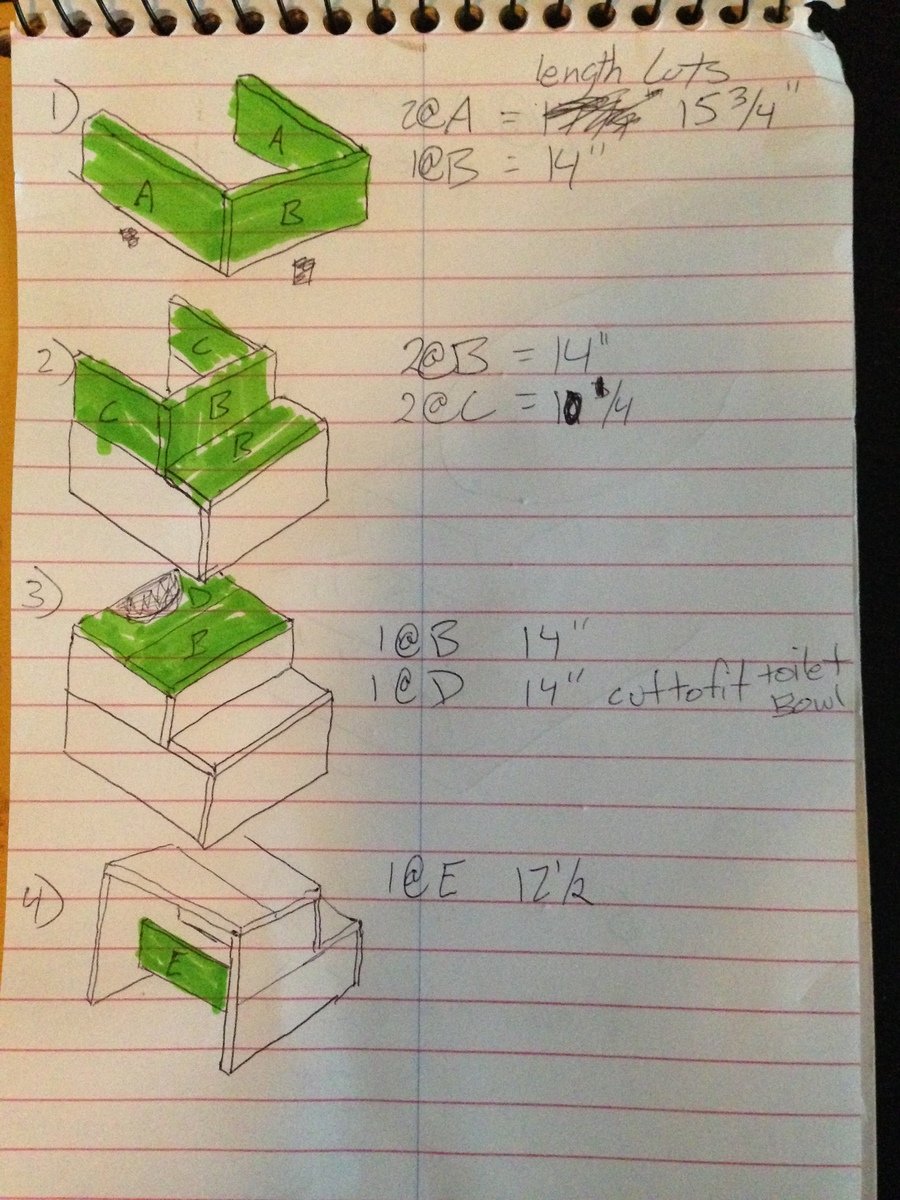
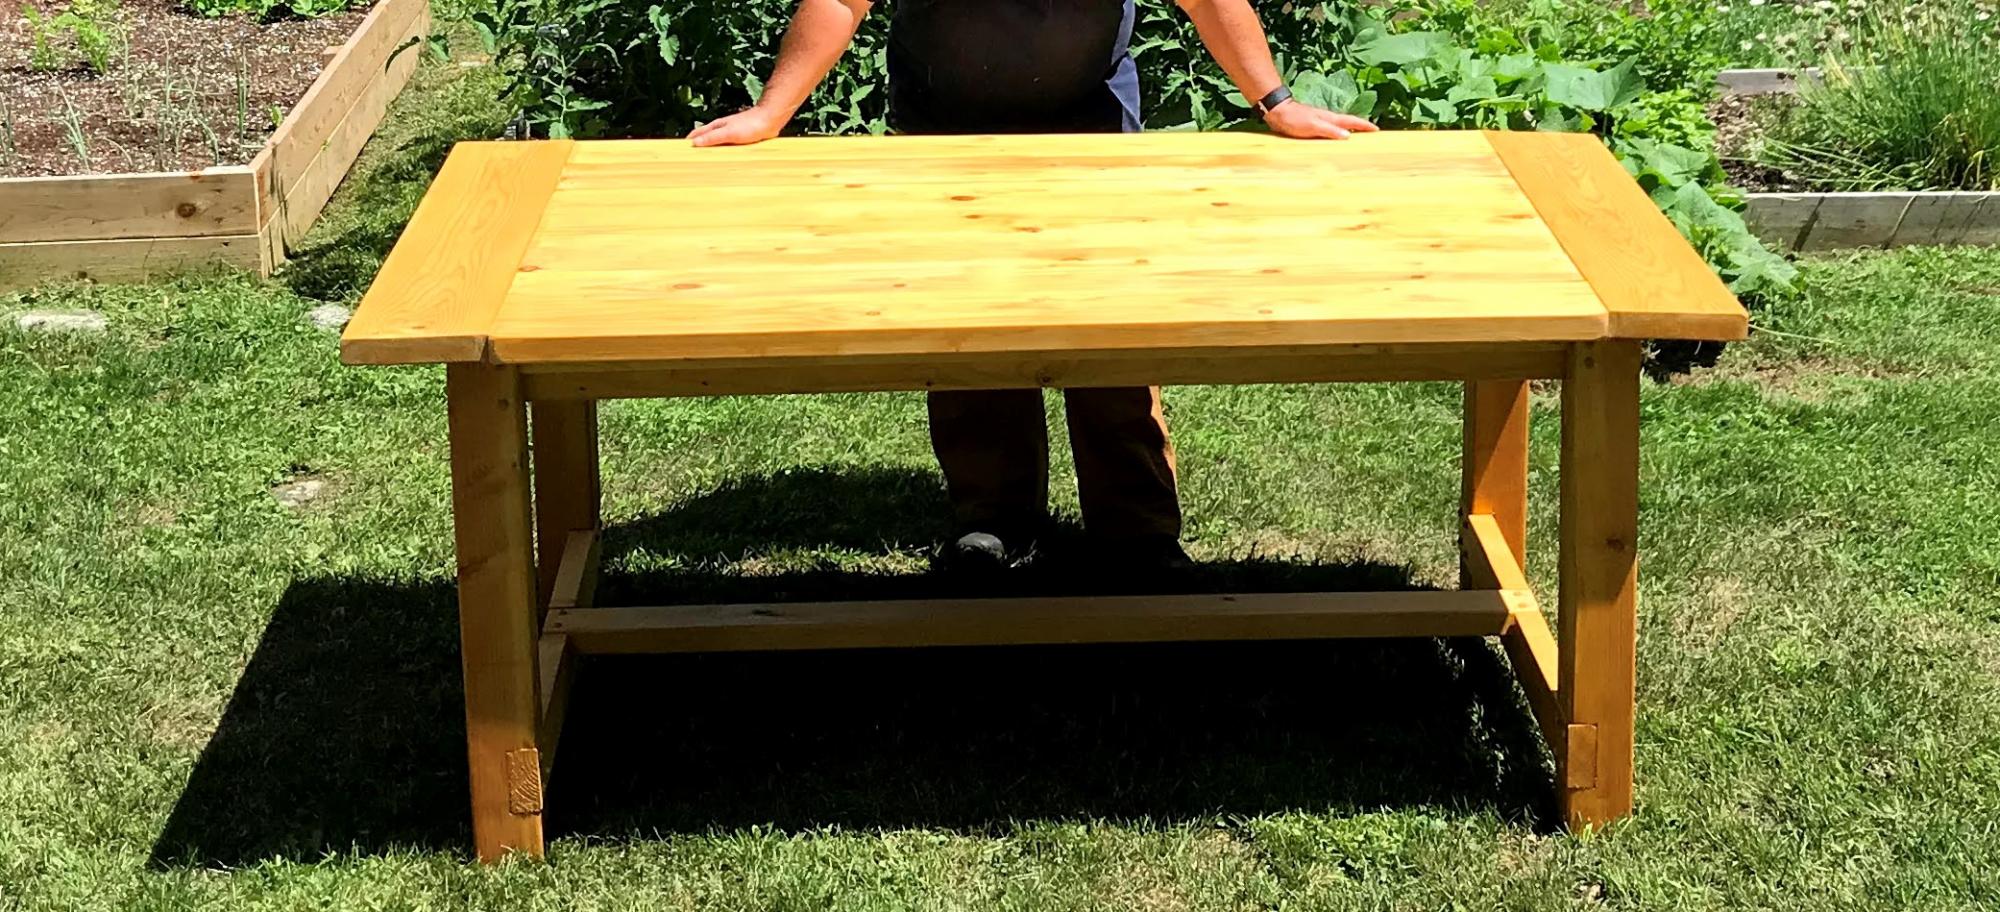
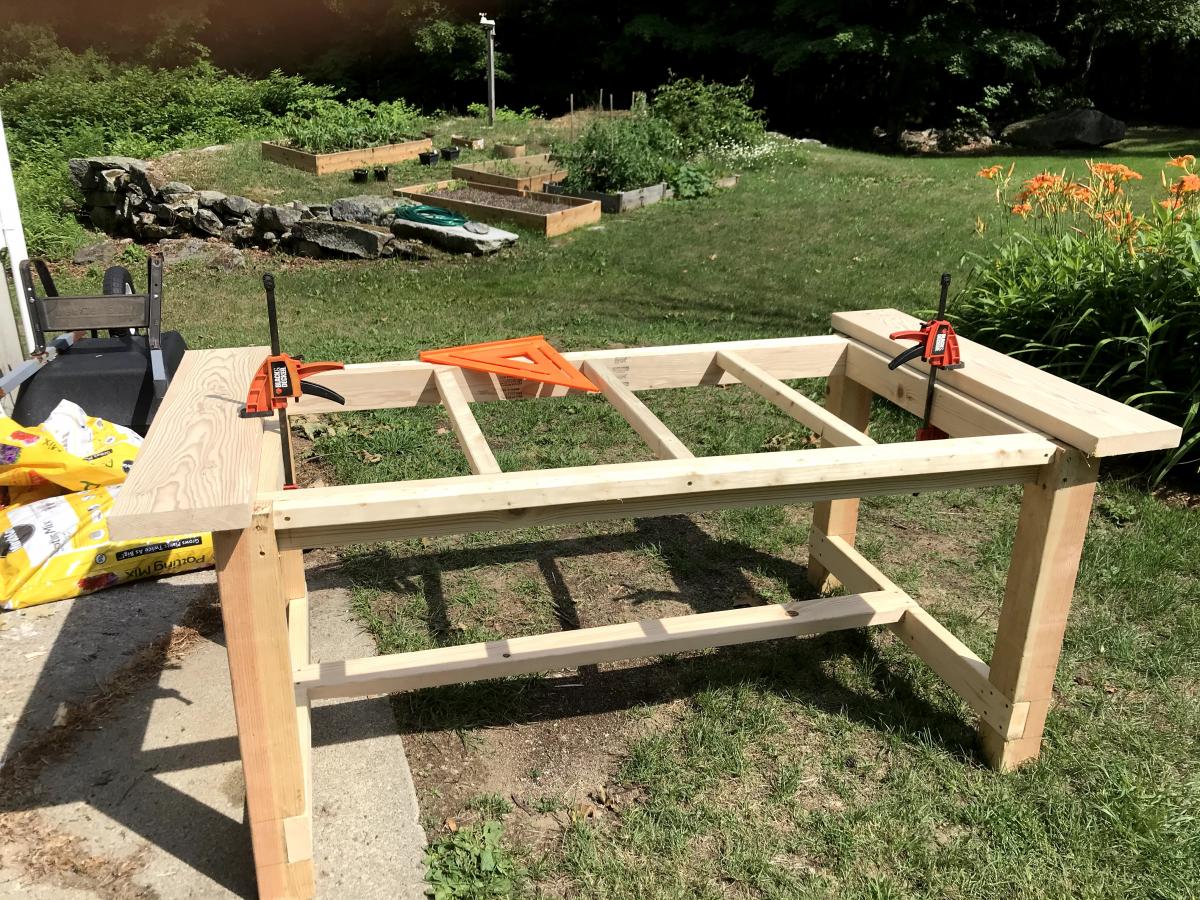
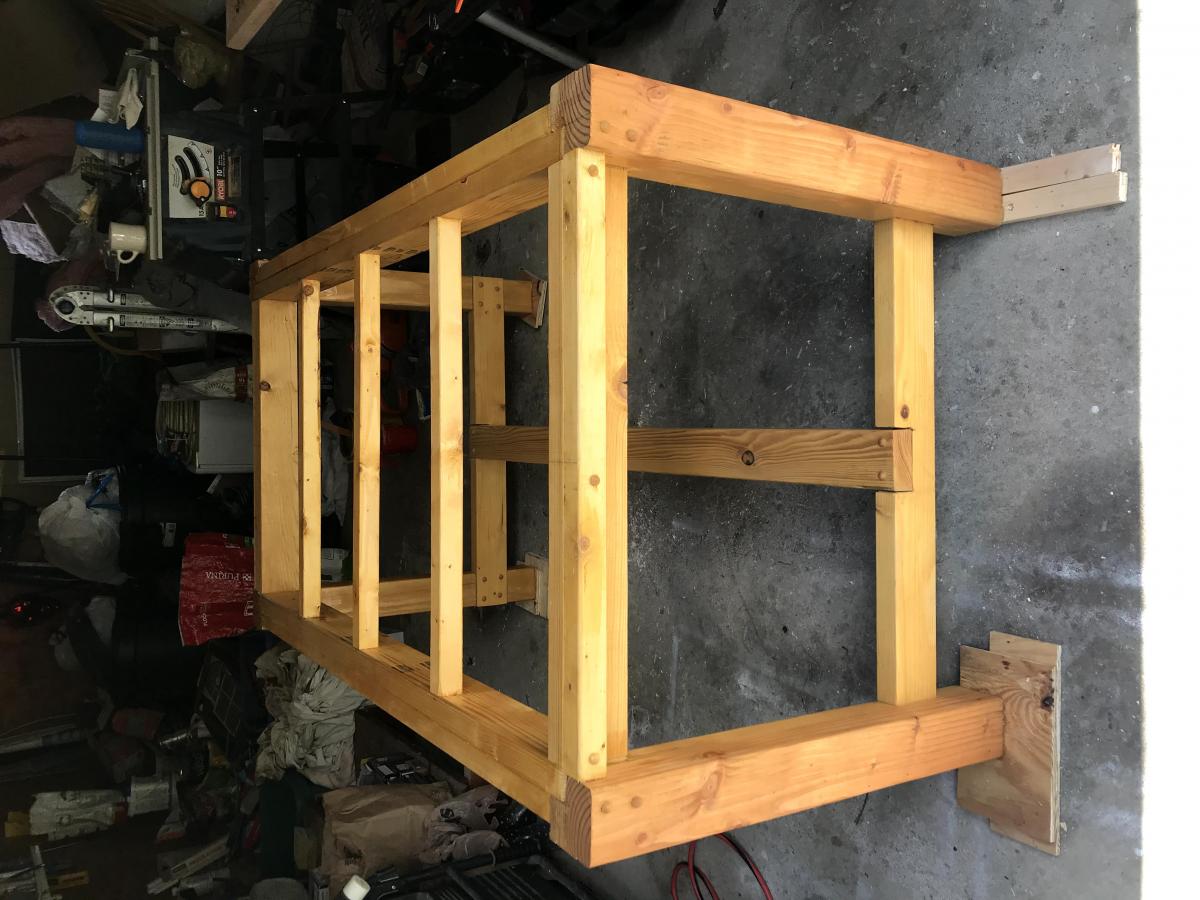
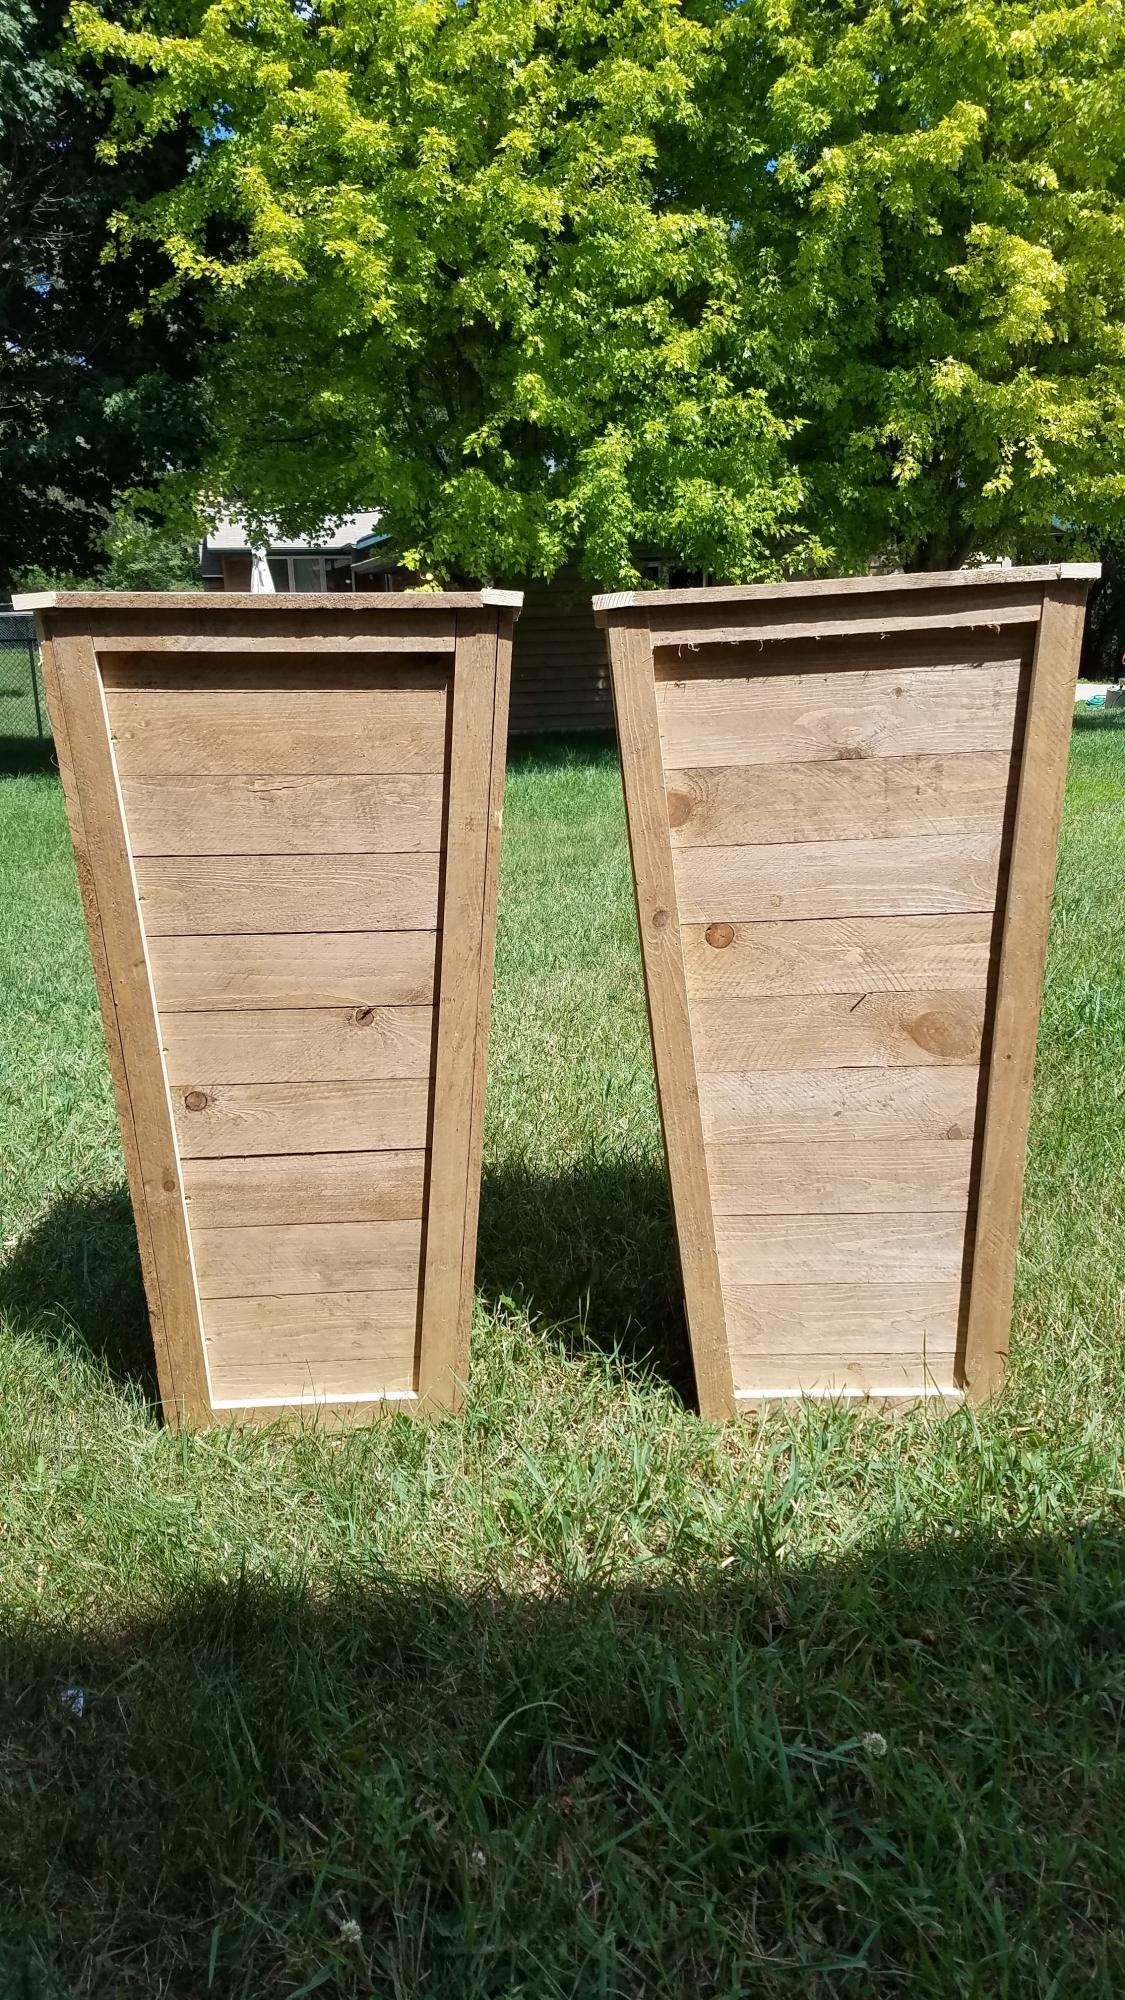
Easy & Fast Garage Shelving - Weekend Fun for 12yr Old!

Submitted by Anonymous (not verified) on Mon, 10/17/2016 - 10:02

Thanks for fantastic plans Ana!!  My 12yr old son and I knocked these out in an afternoon.

He learned new skills and we got a key project done.  The best thing was his statement of "these are awesome!!"  

Estimated Cost
$156 from Home Depot
Estimated Time Investment
Afternoon Project (3-6 Hours)
Recommended Skill Level
Beginner

Comments

Beautiful Outdoor chairs and Ottoman from 2x4s and 2x6s (and a 2x2)

The chairs were my first project ever and they came out great! I even made the ottoman/side table because the chairs looked so good. Ana, your plans were fantastic and easy for a beginner. I learned so much from this first project and I'm already working on another project from your site! The cushions were definitely the most expensive part of the chair.

Estimated Cost
$40-$50/chair (without cushions) including screws, wood and stain
Estimated Time Investment
Afternoon Project (3-6 Hours)
Finish Used
Behr semi-transparent stain and sealer (Chocolate) as noted in Ana's project plans.
Recommended Skill Level
Beginner

tilt out recycling center

Submitted by amyjeanae on Sun, 09/16/2012 - 08:09

Second wood project overall. First with a power-saw. Just found Ana-White - love it and thanks for sharing it all! I had to change the dimensions of this one to fit the space we needed it for. It holds two paper bags side by side to hold all of our recycling. So much neater then our plastic bin we had.

Looking forward to the next project...

Estimated Time Investment
Afternoon Project (3-6 Hours)
Finish Used
sanded all, wood filler in holes on plywood, sanded again, painted plywood (2 coats) and clear polyurethane (2 coats) rest of project.
Recommended Skill Level
Beginner

Comments

spiceylg

Mon, 09/17/2012 - 05:59

You can stain the perimeter and make the door that red to match the door on the right.

carajane

Sun, 11/29/2015 - 11:57

The bottom looks different as well. I'm trying to avoid having to use a jig saw for the bottom. Would you mind sharing if and what modifications you made to the bottom? Great work!


Cara

Simple Console Table

Submitted by GR82BNTX on Sun, 07/13/2014 - 19:51

This project was very simple but an excellent experience. With a lot of patience on the finishing, it turned out absolutely beautiful too! The wood cost was higher because Home Depot was out of several of the size boards in the cheap pine and I didn't want to wait till I found them to start. I began the project with our trusty circular saw, but was quickly frustrated trying to get nice square cuts (and even lengths) so back to Home Depot we went. We came home with more wood, a 12" Sliding Compound Miter Saw and a Kreg Jig, which increased my cost just a tiny bit. But boy was I a happy girl! Especially since they are all mine (maybe I'll share w/the hubby and kiddo)! :o) After that, it went together very quickly. I added a 1" apron on the bottom shelf which hid the bracer - just tapped it in with the finishing nails. I also added screw-in padded feet, which means it sits nice and even and I don't have to worry about it scratching the floor (or the bottom of the table getting damaged). The only thing I did not enjoy was filling in all the pocket holes from the Kreg, which took forever. I definitely learned how important pocket hole placement is, as I ended up having to paint the legs instead of staining them (as originally planned) so I could hide all the huge holes. But it turned out better than expected so I'm happy this happened. I also recommend attaching the top, the top bracers and the bottom shelf after sanding and filling all the holes if using a Kreg. I actually attached both the top and the bottom shelf after I'd stained and painted. This allowed me to get in all the crevices and kept the stain out of the paint and the paint out of the stain! A few touch ups once I attached the top and put in the bottom shelf and voila! Sealed it with the wax and am thrilled with the finished product. And the best part is, my son is finally interested in building and even started his own table! Thanks to Ana's site, our build list is growing every day! There are just not enough (cool) hours in the day to build during our 100 degree Central Texas summer!

Estimated Cost
$50 +/- $700
Estimated Time Investment
Day Project (6-9 Hours)
Finish Used
Miniwax water based stain in Onyx
Latex flat paint in Buttercream (had on hand from a room paint - would've preferred a satin or maybe a semi-gloss
Miniwax paste finishing wax
Recommended Skill Level
Starter Project

Comments

Versaille planters

Submitted by Anonymous (not verified) on Wed, 10/19/2016 - 04:00

Using the instructions (with some slight redesign to accomodate the wife's requirements) I built two Versaille planters. The timber I used was offcuts from the local timber yard (£18) plus some bits off of old pallets. The nobs on top pf the legs were wooden drawer handles (£10) Screws and paint from the workshop. The overall size is a 21inch cube with the height increased to 23inches with the wooden knobs.

Thanks for the basic info it made the job so much easier.

Estimated Time Investment
Weekend Project (10-20 Hours)
Finish Used
fence paint
Recommended Skill Level
Intermediate

A patio-sized picnic table with detached benches

Submitted by Emillie on Thu, 07/16/2020 - 10:43

We needed a long and narrow table for a patio, so we designed a table to fit! This simple Trussel table is made out of constructional lumber for an affordable outdoor dining option. Small enough for our tiny patio and large enough to comfortable seat 6, it is the perfect table!

Estimated Cost
$80
Estimated Time Investment
Afternoon Project (3-6 Hours)
Finish Used
Benjamin Moore Semi-transparent stain (Fresh Brew) and varnish.
Recommended Skill Level
Beginner

Mom's Train Table - our version

I was planning to make a train table trundle for my son's bed, but once I saw this plan everything changed. I'm so SO happy with it. Modifications: 1) We took off the bottom shelf because hubby likes to stretch his long legs out underneath. 2) We used laminated pine project panels for the top, they cost more, but they were already the correct size, and the finished look of the top would be nicer. We altered the design to make the panels go lengthwise. So far so good, neither have bowed whatsoever. 3) we used inset handles from Lee Valley with an antiqued finish. I had yet to lacquer this when I took the photo because we couldn't wait to get the trains in there! I have since done 3 coats of minwax Poly to protect it from little hands, crayons, etc.... We're hoping this table will graduate cars, then to legos, and then....who knows!? Thanks to Ana and all the contributors here.


Built from Plan(s)
Estimated Cost
$150 with the hardware
Estimated Time Investment
Afternoon Project (3-6 Hours)
Finish Used
Minwax Stain in Golden Pecan, one coat
Recommended Skill Level
Beginner

Comments

Toilet step stool

This was my first project at building some sort of furniture. we wanted a stool that really fits out toilet bowl shape, the height, etc. and 2x6's worked perfectly. I could have bought 2x12's for the sides, but it would have cost significantly more and with the inside support board it is plenty sturdy.

I bought 2# 2"x6"x6 foot coarse pine boards from Home Depot (not the expense Select Pine boards. They cost about $6 each. Then I bought a 100 count package of Kreg 1.25" coarse screws.

Cut lengths
2 @ 15 3/4" for lower sides
2 @ 10 1/4" for upper sides
5 @ 14" for steps and fronts
1 @ 12 1/2" for inside support

I used my Kreg Jig and connected all the pieces along with wood glue. I sanded the whole thing down after and tried to round/smooth the corners.

Estimated Cost
$17
Estimated Time Investment
An Hour or Two (0-2 Hours)
Finish Used
none yet.
Recommended Skill Level
Starter Project

Comments

pADDY1957

Tue, 03/01/2016 - 10:29

Does anybody have plans for a potty seat. I would like to build a childs chairs that has a ptty

Rustic X Coffee Table

Submitted by TJM1230 on Sat, 10/22/2016 - 09:20

Followed the plans listed, and it went pretty well. We purchased our lumber from Lowe's & as many of you have experienced it was difficult to find good lumber. 

The only major issue I had was due to quality of lumber. I noticed when I went to install the 2 (1×12) panels for the base, the frame wasn't square. So some heavy sanding and cajoling got the base pieces locked in.

Had a lot of fun building this with my wife. She gets complete credit for the color, ans finished look. The table was treated with preconditioner for oil-based stains which brought out a lot of the pine yellows. The finish is actually 3 different stains: Minwax weathered oak, dark walnut, and classic grey...applied in that order. The classic grey was a light coat to help bring out a more naturally weathered look. It was sealed with three coats of polyacryllic and a light hand sanding with 400 grit paper.

The build itself only took a couple hours. Then about an hour and a half of good sanding. With all the finish work & allowing stain to dry this project took a little over a week.


Built from Plan(s)
Estimated Cost
Lumber- $55
Stains- $27
Preconditioner - $11
Polycryllic- $16
Having this stuff on hand for more projects- PRICELESS.
Estimated Time Investment
Day Project (6-9 Hours)
Finish Used
Minwax preconditioner (oil-based stains)
Minwax Weathered Oak
Minwax Dark Walnut
Minwax Classic Grey
Minwax Polycryllic
Recommended Skill Level
Beginner

Comments

Farmhouse Table - No Pocket Holes Plan

Submitted by mcronin on Sun, 07/19/2020 - 07:48

The published plans for this were great. This was my first attempt at a project like this. I have always liked the idea of dining at a large table outdoors and the farmer's style is appealing to me. I adjusted the length to fit my deck, but also made a few changes for aesthetic purposes. I notched 4x4s rather than join a pair of 2x4s for the legs. Added caps to the screw holes rather than filler and used pegs to secure the top planks in addition to screws from the bottom. The frame and top were stained/sealed with Cabot Australian Timber Oil.

Estimated Cost
$200.00
Estimated Time Investment
Week Long Project (20 Hours or More)
Finish Used
Cabot Australian Timber Oil, Natural
Recommended Skill Level
Intermediate

Apothecary Console

Submitted by miiller on Wed, 09/19/2012 - 20:28

My husband and I decided to make an entertainment center from the Apothecary Console plans. We mostly followed the plans, but wanted it to be taller than the original in case we want to use it in a dining room as a buffet in the future. To do this we just added another level of drawers. I wanted the drawers on the bottom to be wider, so each of them is four false front's wide. The wood on top is walnut from some trees my dad cut down over 25 years ago. We wanted more of this to show than would have if we followed the original plan, so we put a two inch trim piece around it. I really wanted card catalogue drawer pulls but couldn't find any that were dark that were at all "cheap"...so I bought gold ones online and spray painted them with a "hammered" spray paint which worked really well.

Built from Plan(s)
Estimated Time Investment
Week Long Project (20 Hours or More)
Finish Used
Pittsburgh Paint--Latex--"Highest Peak"
Walnut on top: Minwax Polycrylic
Drawer Pulls: Rustoleum "Hammered" in Brown
Also, I very slightly sanded the edges of the false drawer fronts and then used coffee grounds to darken the wood a little bit. It's not very noticable, but without doing it I thought it all blended together too much.
Recommended Skill Level
Intermediate

Big Kids Picnic Table

I built this table in one day by myself. Well, just me and these three kiddos. We were at Home Deopt selecting wood at 9am and by 7pm they were sitting on a finished table. Thank you so much for the easy to follow plans, Anna!

Built from Plan(s)
Estimated Cost
$40
Estimated Time Investment
Day Project (6-9 Hours)
Finish Used
I used a hodge podge of three different kinds of stain that we had in the garage. Each board is slightly different. I like the final look that gave, actually.
Recommended Skill Level
Beginner

Cama casinha - Feita no Brasil :)

Submitted by Anonymous (not verified) on Tue, 10/25/2016 - 17:34

Sou Tatiana e moro no Brasil...

Essa foi a cama que fiz usando projeto deste blog. Minha filha amou e nós tb!!!

Estimated Time Investment
Week Long Project (20 Hours or More)
Recommended Skill Level
Advanced

Tall Wedding Planters

Submitted by swhitead on Mon, 07/20/2020 - 10:14

Made the planters to hold flowers for a small garden wedding. Used 3-1/2" wide fence boards as my HD was out of standard 5-1/2" boards. Used 11 boards for finished height of 38" top was 18" wide, bottom 12-1/2" using a 4° angle. Ripped fence boards to size to use in place of 1x2/1x3 boards. Added center trim as on another brag post, as well as, framed the top to finish off the planter.

Built from Plan(s)
Estimated Cost
$20 each
Estimated Time Investment
Afternoon Project (3-6 Hours)
Finish Used
None
Recommended Skill Level
Intermediate

Comments

modified farmhouse bed

Submitted by sheppard71 on Mon, 09/24/2012 - 08:49

spare room home project

Estimated Cost
250 - 300
Estimated Time Investment
Week Long Project (20 Hours or More)
Finish Used
ebony 2718
Recommended Skill Level
Beginner

Comments

made with love

Love this design. Good project for beginners.

Estimated Time Investment
Weekend Project (10-20 Hours)
Finish Used
Outdoor paint
Recommended Skill Level
Beginner

Entertainment center

Submitted by Sb1212 on Fri, 10/28/2016 - 11:18

I really liked the barn door entertainment center! I attempted to make my own hardware for the door. It didn't turn out as planned. So I had to come up with a different design. This is what I came up with. I love it!

Built from Plan(s)
Estimated Time Investment
Week Long Project (20 Hours or More)
Recommended Skill Level
Intermediate

Comments

lyds6382

Mon, 11/07/2016 - 07:14

I love this even more than the original!  I think I'd get tired of the sliding doors and my kids messing with them.  What size of TV will this fit?


8 Foot Picnic Table

Submitted by milleall on Wed, 07/22/2020 - 12:07

My teenage son and his father took over the bulk of the building duties this time. We chose to use treated lumber as untreated lumber with finish applied doesn't do well in Michigan weather in my experience. We made it more beautiful by using the treated lumber in cedartone. We used pocket holes to attach the top and seats to the supports to make for a smooth appearance. This is one large and heavy table! The plans were accurate and the build was fairly simple, but having many hands made working with the large piece easier.

Built from Plan(s)
Estimated Cost
$150
Estimated Time Investment
Afternoon Project (3-6 Hours)
Finish Used
None
Recommended Skill Level
Intermediate

Comments

Seasonal And Holiday

For Annika -

Submitted by sueslager on Wed, 09/26/2012 - 15:08

I have too many scraps … and a granddaughter with a 2nd birthday coming up soon … so spent a couple hours cutting the pieces … took extra time since i was trying to make scraps work … but it still came together well. I had trouble making pocket screws work on this project … but the design makes it easy to bury and cover regular screws.

Estimated Cost
free - used scraps
Estimated Time Investment
Afternoon Project (3-6 Hours)
Finish Used
martha stewart satin latex - custom mix - with wax finish
Recommended Skill Level
Intermediate

Extended Farmhouse Bedside Table/End Table

I used the Farmhouse Bedside Table plans as a starting point for this Christmas gift project for my husband. I removed 5" off the legs, omitted the shelf and doubled the width so that it would hold 30 DVDs in the drawer. I wanted something unique for his man cave and coming from England this seemed a great way of introducing our heritage without being overpowering in the room. Great project plan and easy to follow and only took a day to make including the painting time.

Built from Plan(s)
Estimated Cost
$20
Estimated Time Investment
Day Project (6-9 Hours)
Finish Used
Benjamin Moore Cloud White for the main unit with Martha Stewart's all purpose craft paints for the Union Jack.
Recommended Skill Level
Beginner

Dartboard Cabinet

I had a big empty wall in my den/man cave, so I decided to build a dartboard cabinet instead of just hanging a dartboard on the wall. No plans for this, I just made it up as I went. Measured twice, sketched it out and cut as I went.

I use pine 1x4's for the frame and back. 1x3's for the accessory box, 1x2's for the door frame, and poplar strips for the doors and door braces. The darts are held by 6" long 2x2's with holes drilled.

Wood screws, finish nails, and small brads were used to hold everything together.

The chalkboards are simple MDF's cut and sprayed with chalkboard paint. Overlay hinges are used for the doors, and the dartbord is held on with screws from the back so it can be replaced when needed.

The Alabama A is hand-painted.

Estimated Time Investment
Day Project (6-9 Hours)
Finish Used
Minwax Classic Gray with light coats of spray glosscoat.
Recommended Skill Level
Beginner