Community Brag Posts

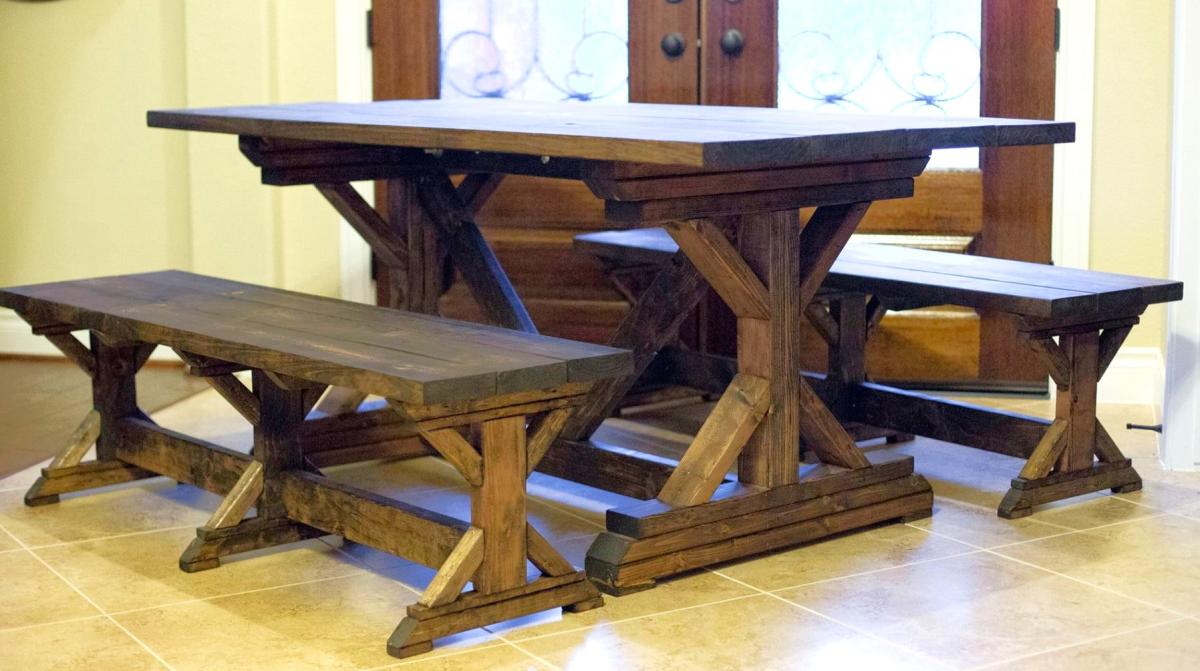
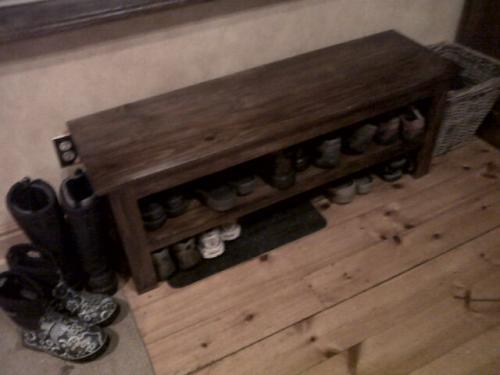
Farmhouse Dining Set

Submitted by Nor7 on Wed, 03/18/2015 - 10:22

This was a bit more work than I anticipated but I think it turned out great. The quoted buy list was a little off so I had to make an additional trip to the hardware store.

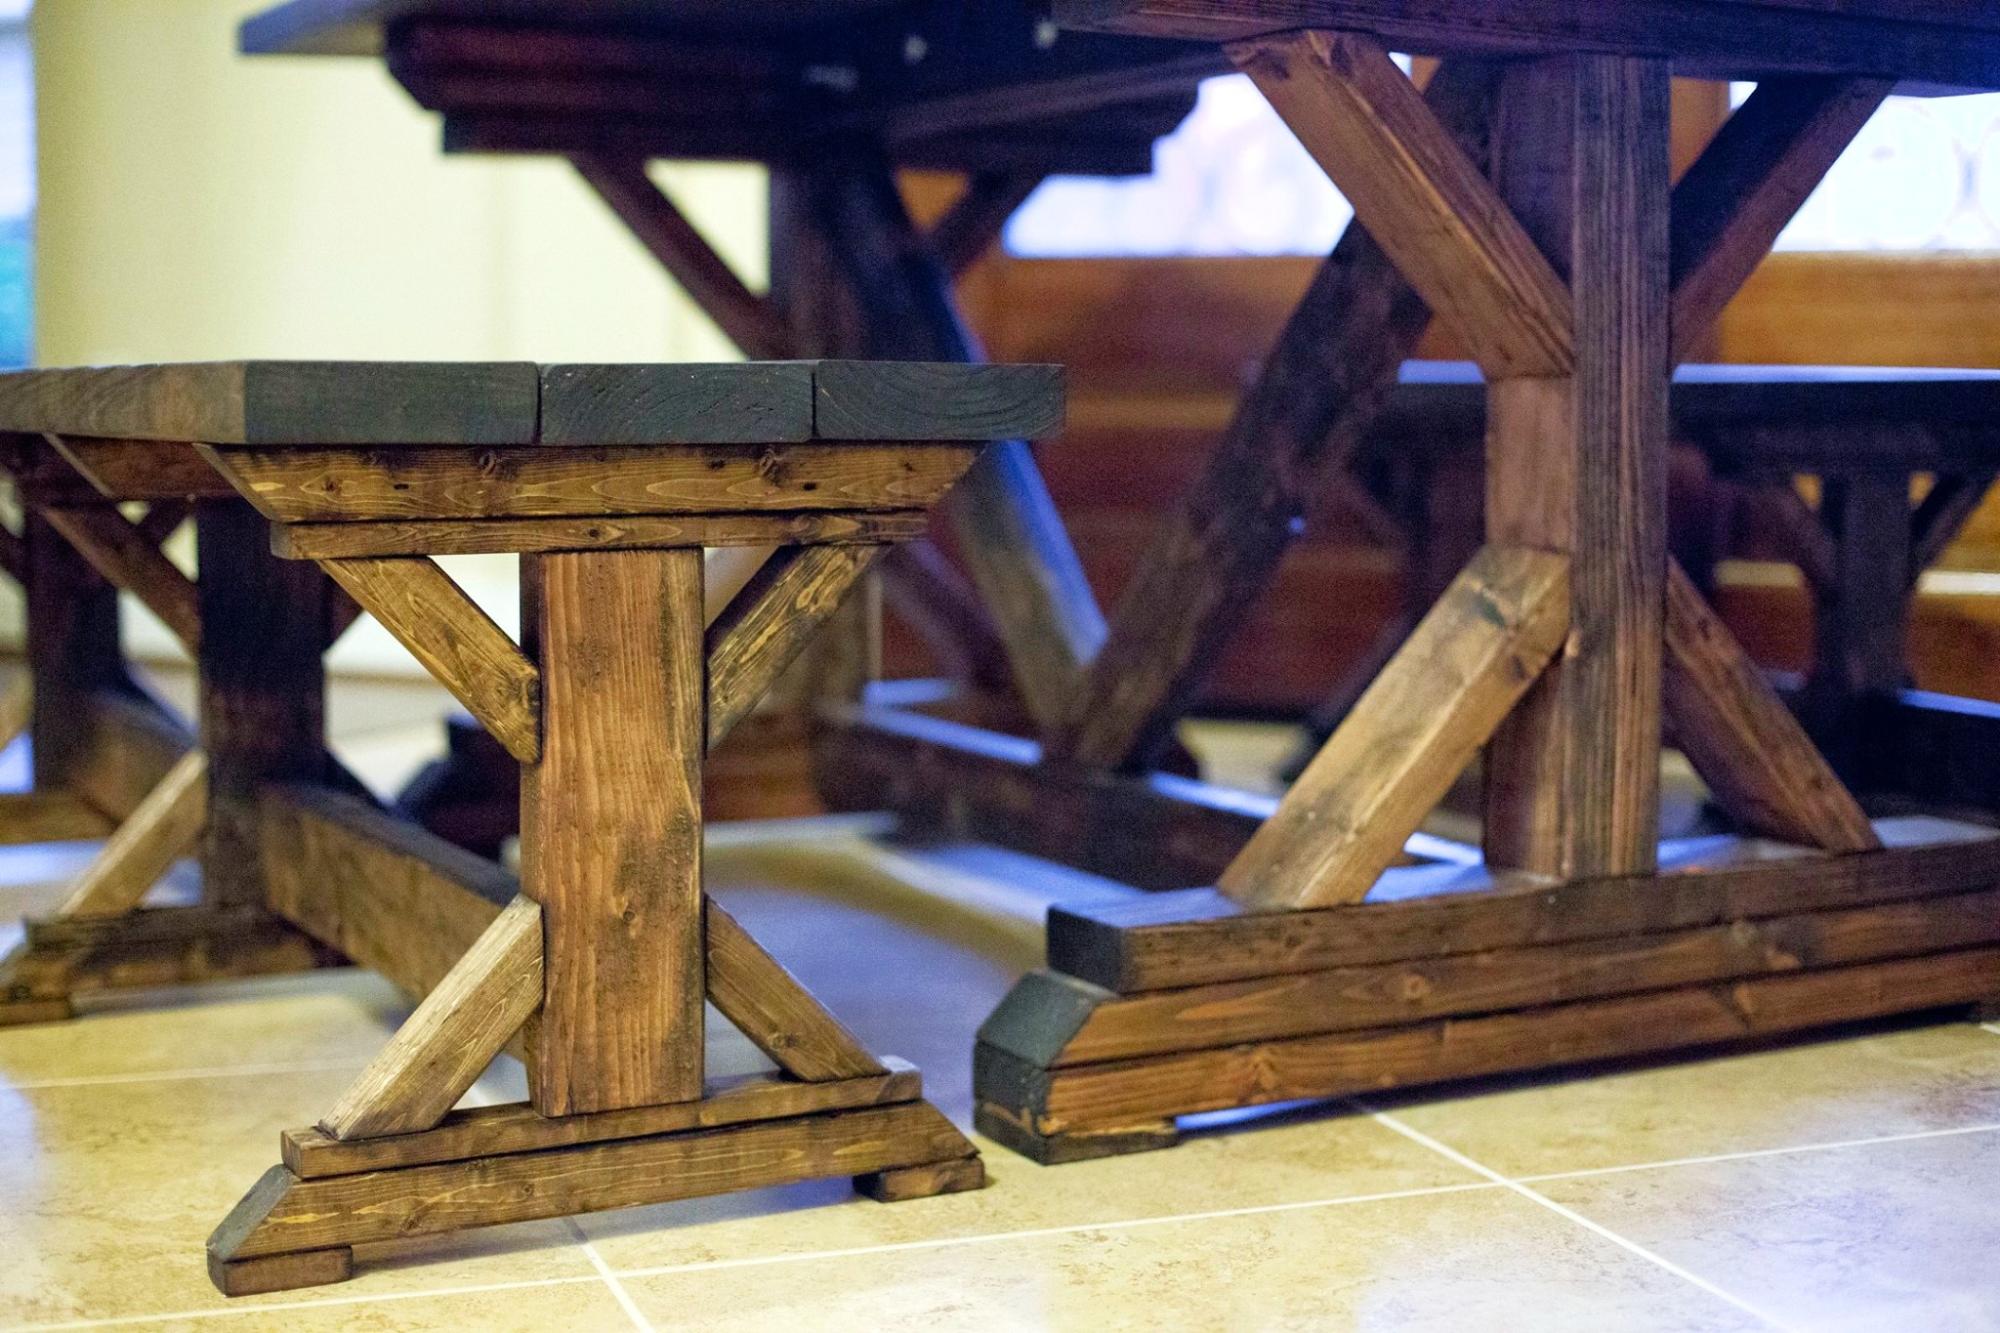
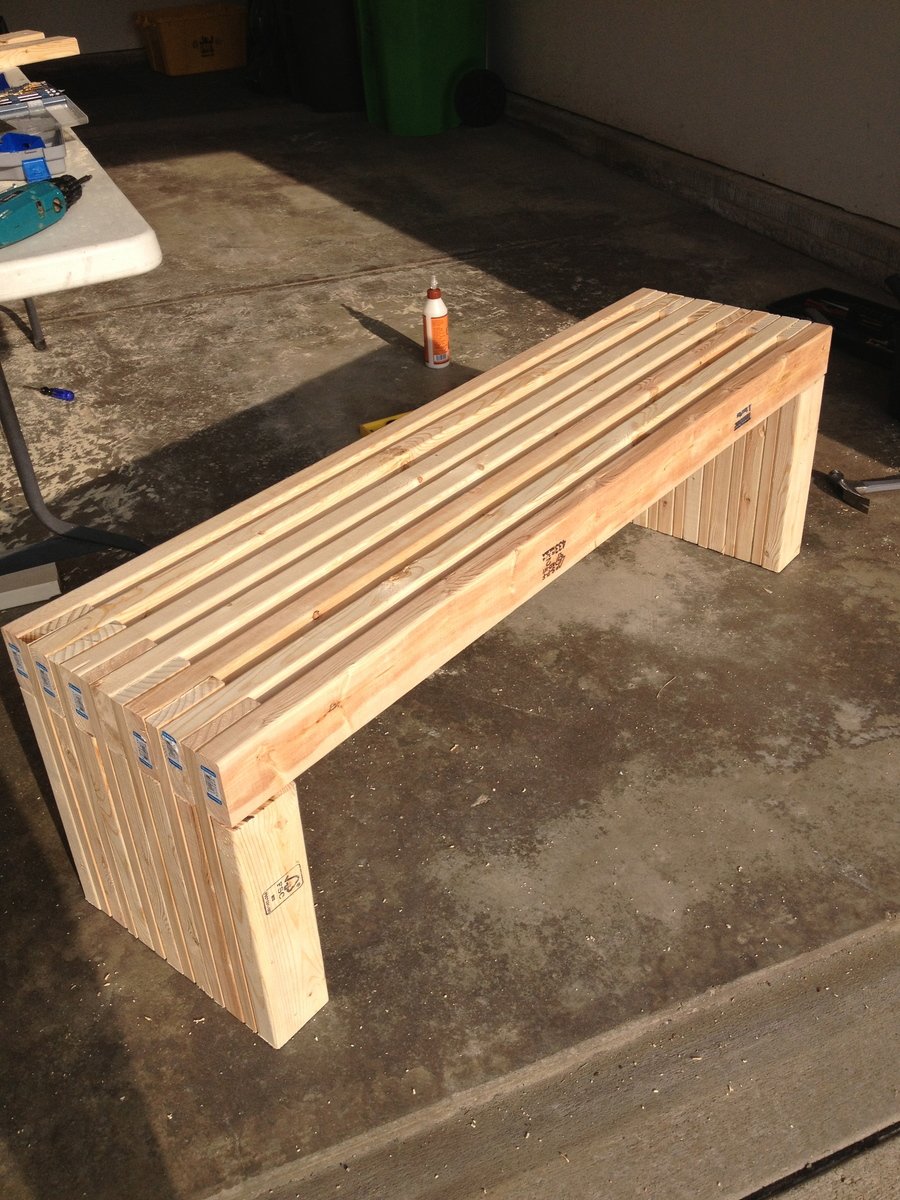
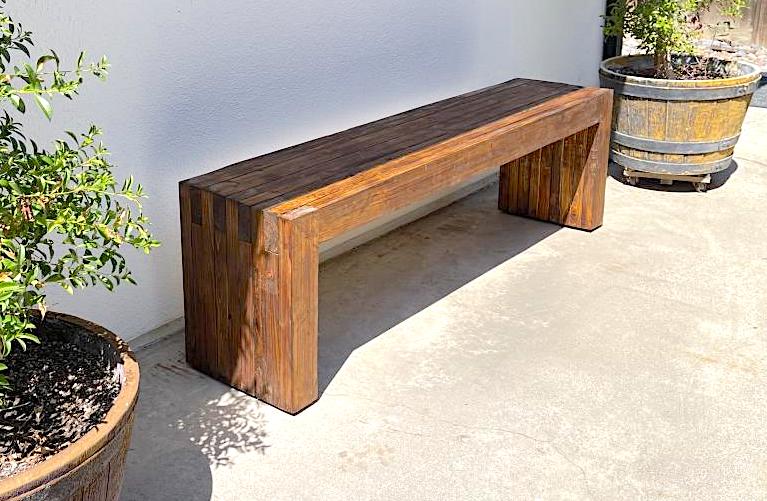
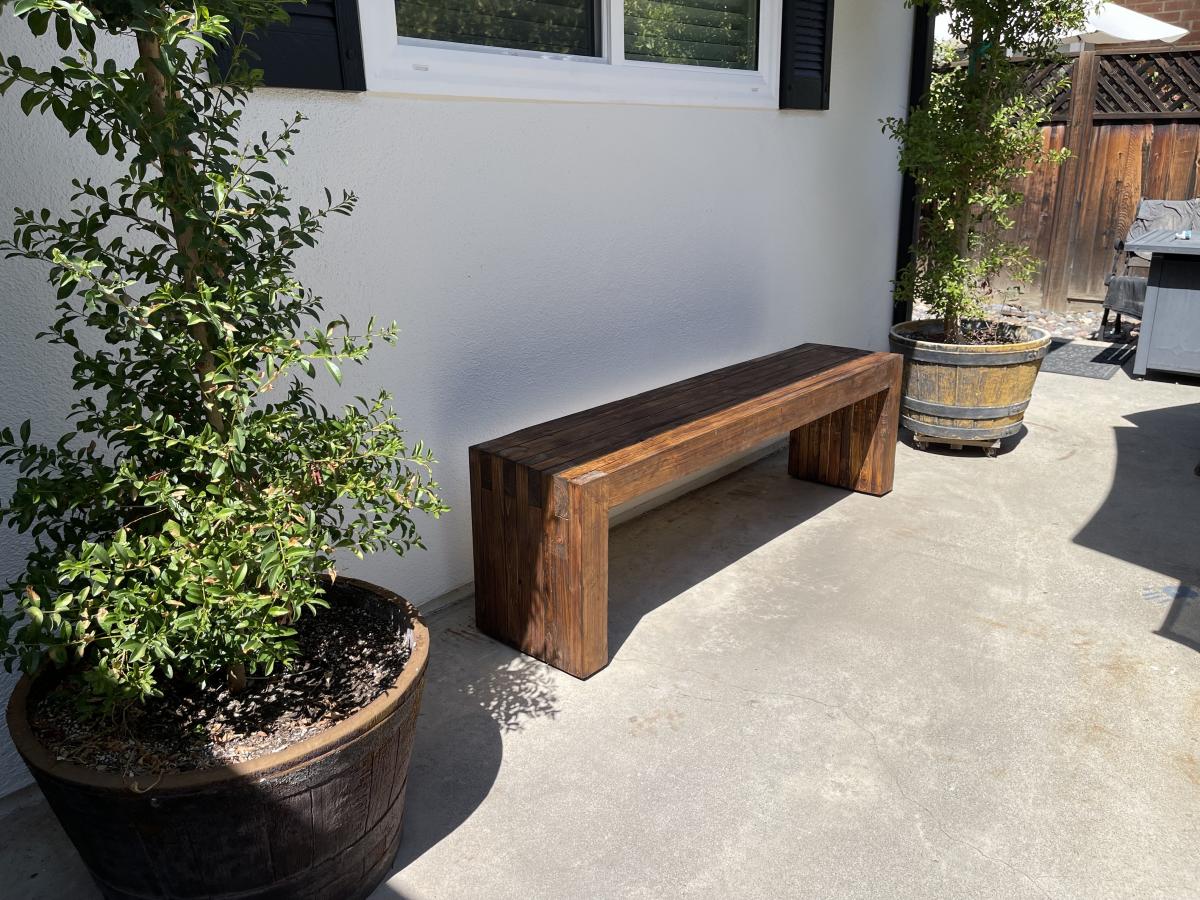
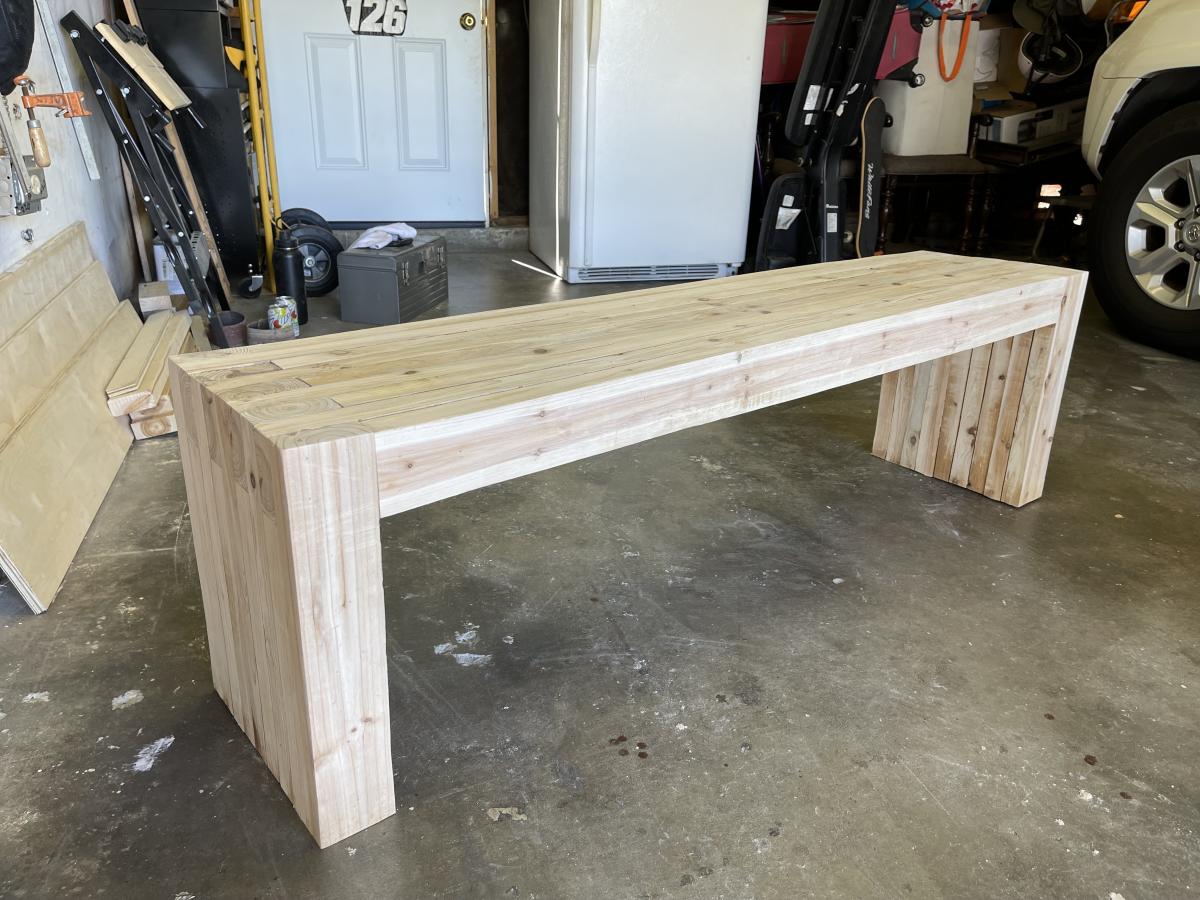
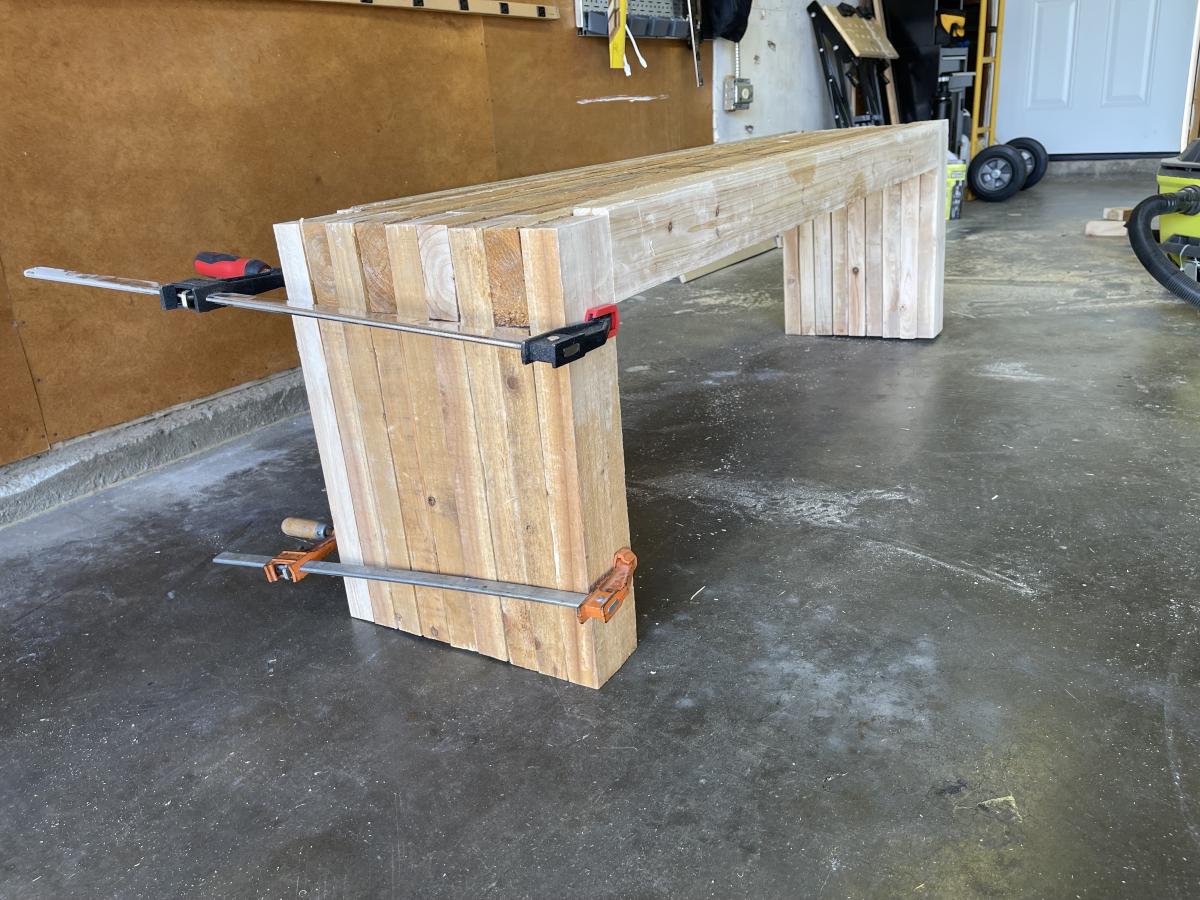
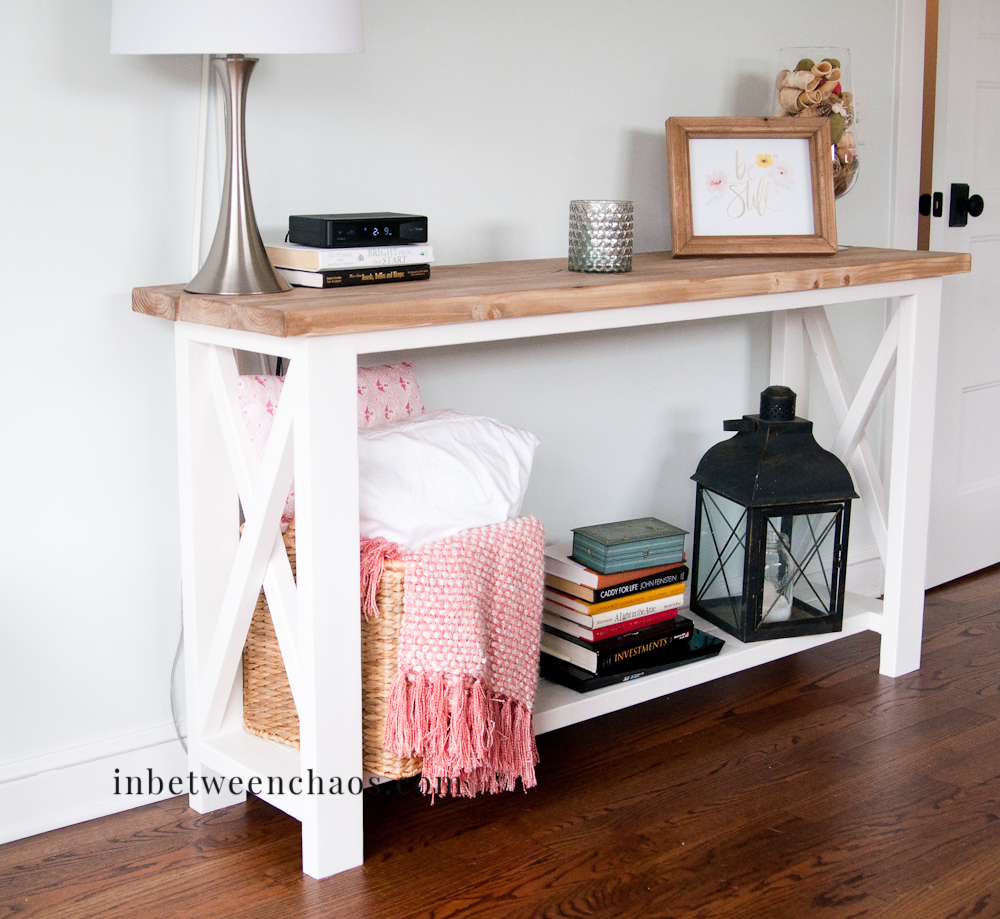
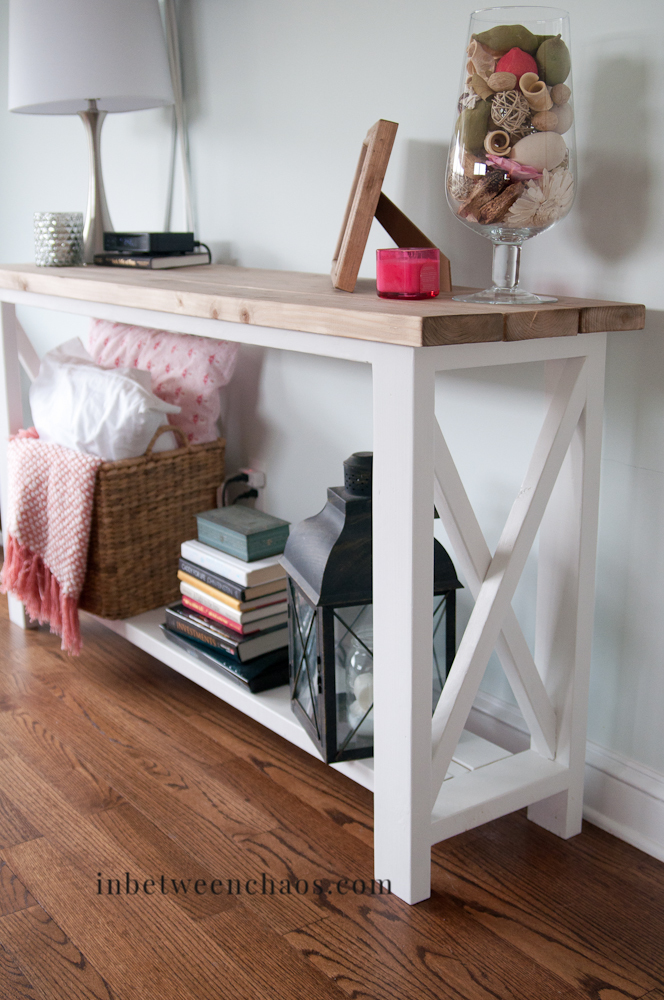
I used the Fancy X Table plan and the Fancy X Bench plan to make this set. Since I wanted it only 6' long I had to do some modification to the plan but not much.

I also designed the table top into two pieces that fastened together through the center piece so I could take it apart easily and fit it though a standard door.

Estimated Cost
$120 (since there were two benches and the table). I found the wood in my area to be a little more expensive than quoted on the plan. Particularly the 2x10's.
Estimated Time Investment
Week Long Project (20 Hours or More)
Finish Used
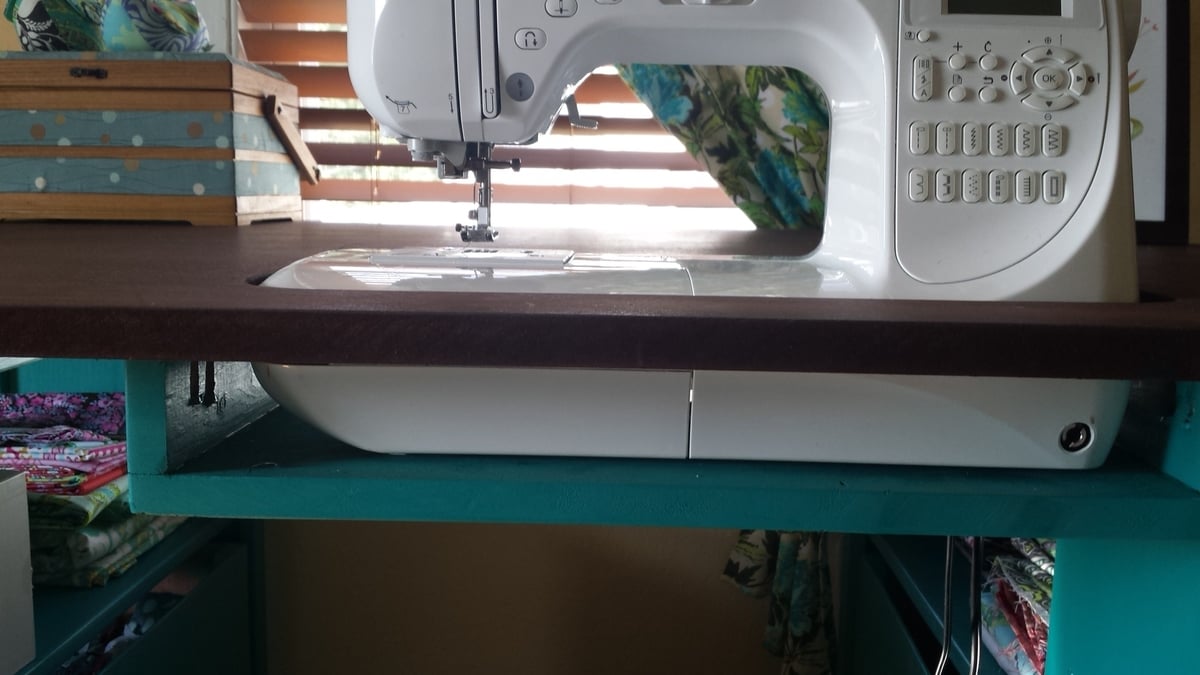
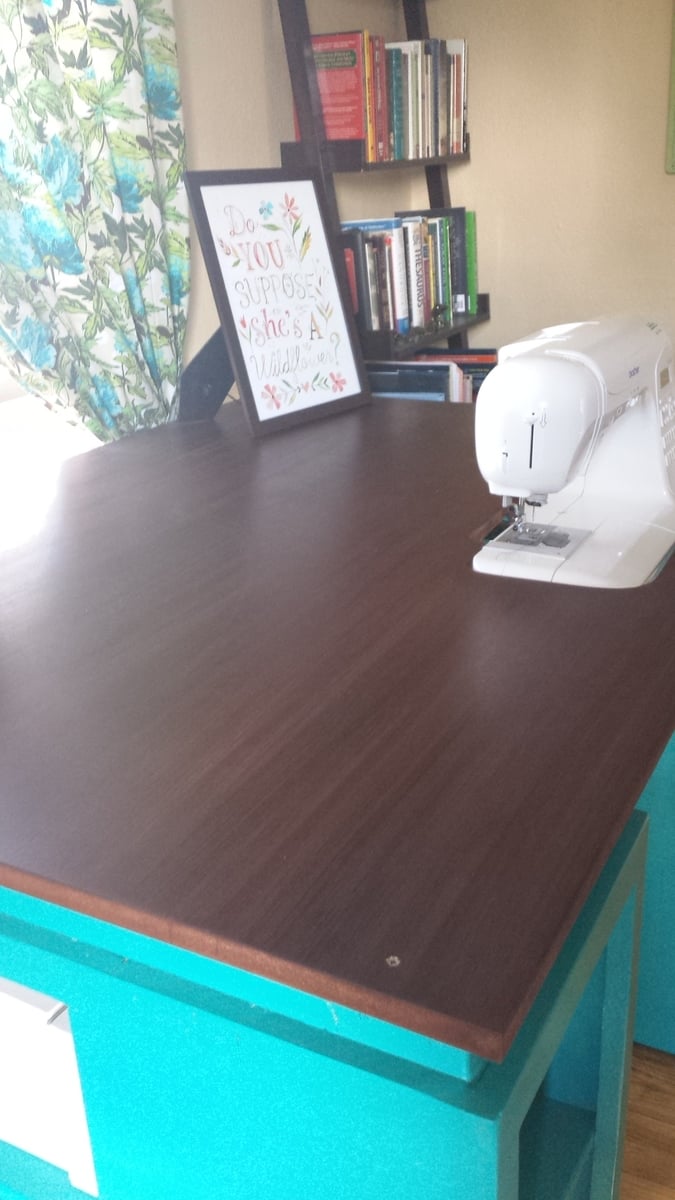
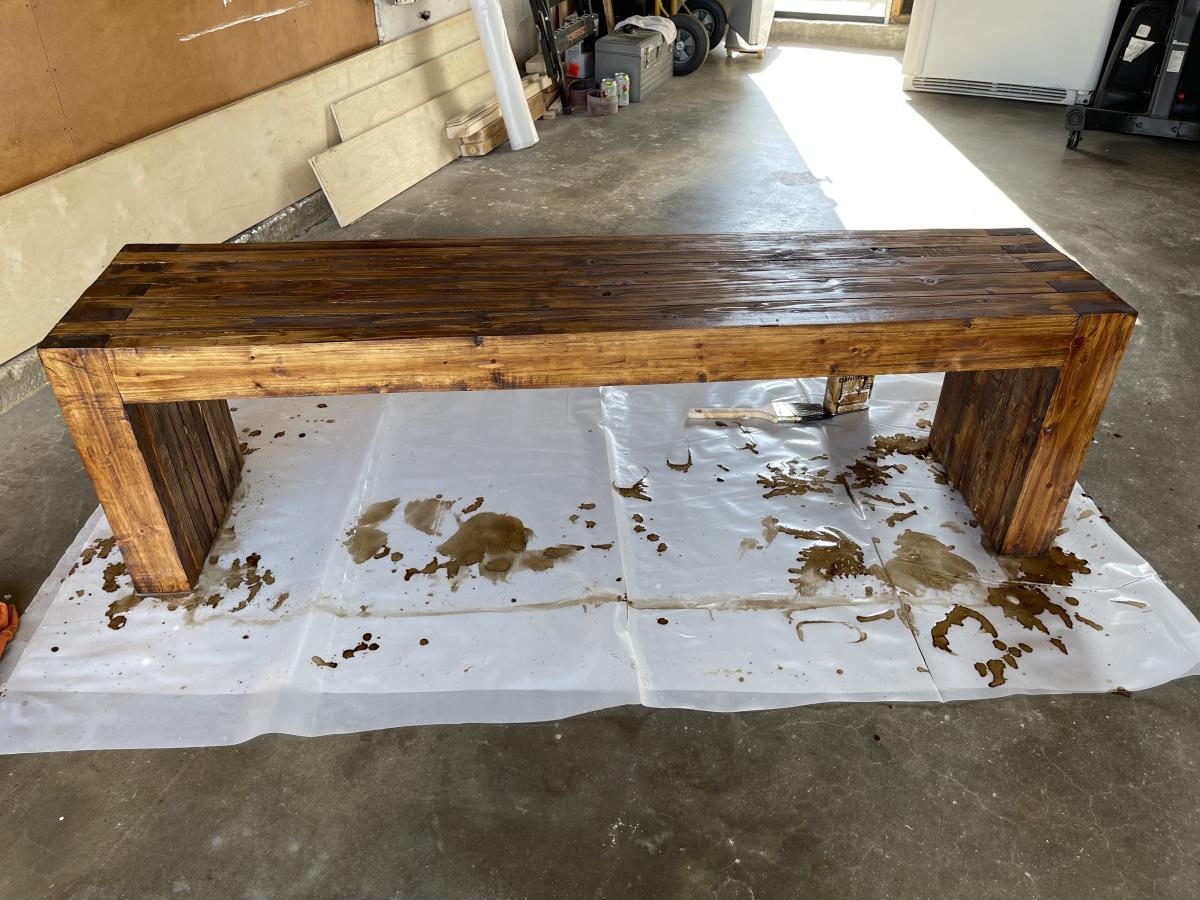
MinWax - Dark Walnut. To get the finish even I had to invest ALOT of time into sanding. I had to use 60 grit in some spots to even out the factory cuts but most of it I was able to go over with just 220 grit. DON'T FORGET TO SAND THE ENDS!
Recommended Skill Level
Intermediate

Comments

MrCoffee

Wed, 03/18/2015 - 13:35

Wow, this table and bench set came out awesome. I love the finish. What you ended up creating having only spent $120 is incredible when you think about how much these things cost in a furniture store. Good work.

Fancy X Desk L Desk

Submitted by Anonymous (not verified) on Tue, 06/27/2017 - 21:12

 Added an L section to the Fancy Desk to increase usable space  So far it still stands strong for me.  Thanks Ana

Recommended Skill Level
Beginner

Comments

Built in closet

Submitted by AndyH on Mon, 06/13/2016 - 19:14

Built in closet to replace builder grade wire wracking.  Closet is approximately 11 feet by 5 feet.  consists of two shoe racks with 7 shelves each.  6 large drawers and 4 small drawers.  Two hanger sections with storage  above them.  End wall has hanger for longer items and storage above and a cabinet with shelves.

Yet to finish the floor.

Estimated Cost
$1000
Estimated Time Investment
Week Long Project (20 Hours or More)
Finish Used
Sherwin Williams Extra White satin paint.
Recommended Skill Level
Intermediate

rustic X End table

Submitted by Anonymous (not verified) on Wed, 08/10/2016 - 05:28

Very straightforward build. Lowes didn't have many 2x4's that didn't have some sort of warp or bend in them so the bottom shelf had to be trimmed slightly to fit. 


There is a sweet spot with the vinegar/steel wool that takes some mixing and testing to find. To strong a solution and the wood turns nice and brown to weak and it's a hardly noticeable light grey. My advice is get a strong 3-4 day old solution and mix 50/50 with vinegar and test on scrap, wait and hour or so to dry and adjust the mix from there until you love it. 


I finished with minwax polishing wax.

Built from Plan(s)
Estimated Cost
$50
Estimated Time Investment
Weekend Project (10-20 Hours)
Recommended Skill Level
Beginner

Rolling Cart - pallet recovered wood

Submitted by jgrunwaldt on Thu, 08/25/2016 - 19:36

Rolling bar cart made entirely from recovered pallet wood.

Based on original Ana White's plan, I've just added a side pocket and rails on the lower shelf to prevent sliding of items placed on it. 

Later on I made another one for a friend who attached a hanger plate and a magnetic knife holder.

Built from Plan(s)
Estimated Time Investment
Weekend Project (10-20 Hours)
Finish Used
wax
Recommended Skill Level
Intermediate

Octagon picnic table, made from redwood. Modified after eight years.

I made the octagon picnic table in 2012, using redwood. We lived in California, then in Asia, and now in Australia. In 2020 I modified the table using a wine barrel, because the original legs had rotted.

Built from Plan(s)
Estimated Time Investment
Week Long Project (20 Hours or More)

Comments

Entry Shoe Bench

I've officially stopped stalking and started building! First project a modified spa bench. Still have to stain it, but it already makes the big pile of shoes by the door look neater! I'm a hands-on person and not afraid of power tools (got a band saw for my birthday!) but it's still a challenge building a piece of furniture. I've already learned lots of do's and don't do's for next time!
Thanx a bunch for your site, Ana! It definitely gets the mind plotting great projects to come!

Built from Plan(s)
Estimated Cost
~50$ (honestly, I can't remember!)
Estimated Time Investment
Day Project (6-9 Hours)
Finish Used
PolyShades Royal Mission, several coats... and a spray can of clear coat too.
Recommended Skill Level
Beginner

A bathroom cabinet for all that stuff!

Overall measurements: 24x40. I followed the same basic steps as the nursery armoire, but on a much smaller scale and with a 1x3 added to the back for hanging the cabinet on the wall. I sketched this out on my own and built it to fit above the toilet in my girls' bathroom.

For the first time, I used my table saw to route a space for the 1/8" MDF cabinet backing and drawer bottoms. I will probably use the same method again, but the MDF has to be absolutely square for it to work.

Also a first for me, I used a shelving jig to drill perfectly spaced shelf pin holes on the inside of the cabinet. I love the jig and the accompanying drill bit (from Woodcraft -- orange and blue do not carry it) and I'm looking forward to using it a lot more in the future.

The white latex paint finish is covered in Krylon "crystal clear" spray, which is (sadly) not actually crystal clear. I really like its durability and ease of application (re-coat after only one minute!), but will only use it on darker colored projects in the future. I'll have to sand, paint again, and recoat with my old standby, Minwax Polycrylic, to get rid of the yellow tones in the "crystal clear" Krylon spray.

Built from Plan(s)
Estimated Cost
$125
Estimated Time Investment
Weekend Project (10-20 Hours)
Finish Used
Spray primer followed by Sherwin-Williams ProClassic semi-gloss white (which I applied in several thinned coats). Krylon not-so "crystal clear" topcoat.
Recommended Skill Level
Beginner

MODERN SLAT TOP OUTDOOR WOOD BENCH

This was my first project. I am pretty excited how it turned out. If I did it again, I would recommend sanding and painting prior to building.

Estimated Cost
$60
Estimated Time Investment
Afternoon Project (3-6 Hours)
Finish Used
Valspar Spray Paint - Oasis
Recommended Skill Level
Beginner

Comments

The perfect sewing table!

I have been looking at sewing furniture for years, but the prices always made my jaw drop. I have a small craft room, so I needed a table that could also triple as a cutting table and fabric storage. Thank you so much to Ana White for this plan! I built exactly to the plan in The Handbuilt Home, and it's the PERFECT size.

So the sewing machine can sit flush with the top, making working on big sewing projects way easier, I traced the outline of my machine on the MDF and cut it out with a jig saw. Then I built a small shelf using a 1x12 scrap and 2 1x3 scraps. Putting the 1x3s on top of the 1x12 made the shelf 3.75 inches deep, which is exactly the depth I needed. I attached it to the underside of the tabetop using a pockethole jig and screws.

I built 2 boxes using 1/4 inch plywood, and installed drawer pulls on them, giving the illusion that the table has 2 drawers built in. This is where I keep my ugly stuff--interfacing and fabric scraps.

I got the color scheme for the table from the entryway console plan in The Handbuilt Home. In order to make the MDF top look like it had a wood grain, I applied mahogany gel stain with an old washcloth in very thick strokes that spanned the length of the tabletop. It soaked in and lost the "grain" look in some places, but the majority still looks like wood. I did have to apply several coats of polyurathane over the stain; the MDF has a prickly texture that grabs fabric and makes it hard to feed through the sewing machine.

My only complaint is that I didn't quite think through the fact that seating is bar height and I'm 5'7". It's a little difficult to reach my sewing machine pedal. I may build a small stool for the pedal to sit on so I don't have to half sit/stand to sew.

This is the first woodworking project I've done alone from start to finish: from going to Lowe's and picking out the wood, to cutting the wood with a circular saw, assembly, and finishing. (My fiance did carry it up the stairs for me. :) )

I'm so in love with this table! And now to finish the quilt I started 6 months ago....

Built from Plan(s)
Estimated Time Investment
Week Long Project (20 Hours or More)
Finish Used
I used 2 coats of Valspar Signature paint in Laguna Beach, and Minwax mahogany gel stain on the MDF tabletop.
Recommended Skill Level
Intermediate

Comments

MissMehndi

Mon, 09/23/2013 - 15:22

I love this idea!! I too have wanted a sewing table for a long time but the prices of them take my breath away. I may have to make myself one! Thanks for the inspiration!!

Herringbone Bar Height Dining Table with Hairpin Legs

Submitted by kwildman on Fri, 02/08/2019 - 07:13

We used 3/4" birch plywood and glued 1/2" thick x 3" wide wood pieces in a herringbone pattern to make the top.  We used 1 x 3 oak boards for the trim.  The wood is a variety including walnut, maple, cherry, sassafras, etc.   We ordered the metal hairpin legs.   

We started with a base stain of Danish Oil in Dark Walnut.  Once that dried, we went back over that with a very light coat of Minwax gray wash oil based stain.   We used 4 coats Laquer for the top coat.

Easy build and we love how it turned out!

Estimated Cost
$350 Bar Height hairpin legs were $100, 1/2" wood variety pack was $200
Estimated Time Investment
Weekend Project (10-20 Hours)
Finish Used
Two coats of Dark Walnut Danish Oil, one light coat of Minwax oil based gray wash, and four coats of laquer.
Recommended Skill Level
Intermediate

Comments

William Sonoma inspire outdoor bench

This was one first project and I am very proud of it. It was challenging but I think it turned out beautiful and everyone who visits loves it. I built it out of cedar wood for better durability and protection against rain and the elements.

Comments

My cozy outdoor loveseat

Submitted by Megan W on Sat, 10/08/2011 - 17:47

We followed the plans exactly. I I got 4 separate square cushions at Hobby Lobby, got the fabric there also. My friend sewed the cushions for me (so sweet!) because she knows I can't sew=)

I found the little side table at a garage sale for $3 and painted it white to match. I love this piece on my patio...it's great for reading, or to sit and sip coffee or a glass of wine!

Estimated Cost
cushions and fabric= $100ish, lumber= <$50
Estimated Time Investment
Weekend Project (10-20 Hours)
Finish Used
paint
Recommended Skill Level
Intermediate

Comments

storage chest

Submitted by Anonymous (not verified) on Sun, 02/07/2016 - 17:13

 Started as a tool chest for garage and after reading a article on ana white about finishings thought I would give it a tfy

Built from Plan(s)
Estimated Cost
about $15.00
Estimated Time Investment
Afternoon Project (3-6 Hours)
Finish Used
white wash then aged with vinegar and steel wool. Sealed with poly
Recommended Skill Level
Beginner

Cabin loft bunk bed

Submitted by Anonymous (not verified) on Wed, 10/02/2019 - 08:49

Elevated loft bed for my two boys! Easy build with the plans from Ana White! I modified this version and elevated it so I could fit my youngest underneath. It was my first time using a Kreg Jig and I’m obsessed now. I would recommend buying top quality wood and increasing all numbers by 2-3 inches to make getting the mattress in easier. I would also recommend a lower profile mattress than I used. Happy Building!

Built from Plan(s)
Estimated Cost
$300
Estimated Time Investment
Weekend Project (10-20 Hours)
Finish Used
I used SW marshmellow and stained the roof walnut. Ladder is made out of steel piping that I spray painted (with primer) black.
Recommended Skill Level
Beginner

Comments

Kid Table & Stools

My wife and I did this table and stools for our son’s class art project. We did something similar last year and they auction the items off in a fund raiser in March. More details and information on the blog – www.atouchofarkansas.com.

Estimated Cost
$100.00
Estimated Time Investment
Weekend Project (10-20 Hours)
Finish Used
Extra paint we had from other projects, so the estimated cost includes buying paint, but if you have some already, obviously you can take that off the total costs.
Recommended Skill Level
Beginner

Comments

Rustic X Console Table

Submitted by Anonymous (not verified) on Wed, 04/13/2016 - 17:17

I've always loved the Xs in this table. I needed to make mine a little shorter, and I took out the middle shelf because I didn't need so much shelf space. But I love it. Thanks so much for the great plans!!

Built from Plan(s)
Estimated Time Investment
Weekend Project (10-20 Hours)
Finish Used
I used Sherwin Williams Pure White on the bottom and my stain technique on the top with Minwax Special Walnut. Check out the stain technique here. http://inbetweenchaos.com/2016/04/10/farmhouse-vintage-stain-technique/
Recommended Skill Level
Intermediate

Comments

Corner Media Console

Submitted by craw4dz on Thu, 02/27/2020 - 10:39

We had just moved into our new house and were using an end table for our TV stand I just didn't like it.  I found this and modified it so it's shorter and fits in our room better.  I also opted to not put doors on it and use it to display items instead.  This was a relatively easy build and I'm learning new things with every build I make.  It took about 2 days to complete not including filling holes/paint/stain.  I love it, it looks so great in our room and I am planning on building end tables to match as well as replacing our buffet with movies in it to match also.  Thanks for the easy-to-follow plans!

Built from Plan(s)
Estimated Cost
$45
Estimated Time Investment
Weekend Project (10-20 Hours)
Finish Used
Whatever white paint I had on hand (haha) and Varathane Kona with a satin poly for the top.
Recommended Skill Level
Beginner

Tall Planters

Submitted by np78s on Mon, 05/25/2020 - 20:01

I love the way these planters look and knew I wanted to make them. My freehand circular skills aren't great, so I attached the pickets together with a furring strip and used a template (second picture) to make the cuts. I used screws to attach the furring strips so that once the trim pieces are attached, the furring strips can be removed - or not. This method takes a little longer but it allowed me to make uniform parts. It's also easier to align the sides of the planters since the pickets are already attached to one another - i.e. one unit. I've made two, have a third, shorter one in progress and plan to make more!

Built from Plan(s)
Estimated Time Investment
Afternoon Project (3-6 Hours)
Finish Used
No finish used. these are for vegetables and I didn't want to use a finish.
Recommended Skill Level
Beginner

Comments

Gun cabinet

Submitted by Flowerchld on Sat, 07/21/2012 - 11:36

This is a gun cabinet I made for my dad out of old barn wood.

Estimated Time Investment
Week Long Project (20 Hours or More)
Recommended Skill Level
Intermediate

Comments

Joshua_kubinski

Wed, 12/02/2015 - 20:47

I would love to get plans for this. I have been trying to come up with my own but I'm not very good at it. Thanks love your work.

Joshua