Community Brag Posts

Kitchen Cabinets

Submitted by Anonymous (not verified) on Wed, 10/02/2019 - 21:30

I followed the kitchen cabinet building plans to build all new upper cabinets up to my ceiling. I built all new drawers with soft close drawer slides also and built the refrigerator enclosure cabinet.I did the entire remodel myself including the new doors out of MdF.

Finish Used
Emerald urethane paint
BIN Shellac Primer

Comments

Ana White

Tue, 11/05/2019 - 10:41

We are so thrilled to let you know your entry WON the Best Brag contest!  There were many amazing entries, and it was tough to choose.

Look out for an email from us shortly!

My Simple Outdoor Lounge Chair with 2x4 modification

I modified this chair with 2x4's as the base and 2x2 for decoration on arms, this is prior to sanding and finishing

Built from Plan(s)
Estimated Cost
$15-$20 dollars, depending on local lumber prices and finishing options.
Estimated Time Investment
An Hour or Two (0-2 Hours)
Finish Used
Unfinished
Recommended Skill Level
Beginner

Comments

RandyW

Sat, 06/13/2020 - 16:33

I always take my sander to the sharp edges and round them off

Bookcase Dollhouse

We built this for our daughter's 6th birthday! Love how it turned out :D  As you can see we opted to leave the plywood backing off for the time being so she can use it as a doll house and play on both sides. When she grows out of the doll house phase we will either convert it to a book shelf, donate, or sell in a yard sale ... so many options!

Built from Plan(s)
Estimated Cost
$74 wood & white paint
Estimated Time Investment
Afternoon Project (3-6 Hours)
Finish Used
One quart semi-gloss white paint (2 coats) bought at Walmart. Pink and green colors were left over paints from when we painted the walls in our home.
Recommended Skill Level
Beginner

Comments

Mario Bunk bed Castle

Submitted by tdee on Wed, 05/28/2014 - 16:31

My son is a big Mario nut. And when it came down thinking about a new bed for him we sat down online and started searching for ideas. When we found this bed we both loved it right away. And when i found it was made from plans on Ana- white i was so excited as i have made a few projects already. My son was so happy the whole time this was being made. He was going to have his own castle. Once we finished the build he decided that he had to have a door so i made some curtains and embroidered Mario characters on each one. I let him decorate the inside with Mario stickers and he loves being able to have a Mario level right where he sleeps.

Built from Plan(s)
Estimated Cost
600
Estimated Time Investment
Week Long Project (20 Hours or More)
Finish Used
Paint in various colours to replicate a Mario castle.
Recommended Skill Level
Intermediate

Comments

Modified Garage Shelf (w/ Workbench)

Submitted by Anonymous (not verified) on Thu, 06/08/2017 - 11:15

Great plans allow for versatility and easy customization. Put the whole thing together in a day w/ one other person. My set up is 16' long - 5' on the side shelves and 6' for the workbench. Added a pegboard and fluorescent light under the top middle shelves. I'm also designing a slim drawer to go under the workbencheck area. Thanks a bunch!

Estimated Cost
~$150 including pegboard.
Estimated Time Investment
Afternoon Project (3-6 Hours)
Finish Used
Will stain dark in the future
Recommended Skill Level
Starter Project

Comments

Camp Loft Bed with Stairs

Submitted by Vc1700 on Mon, 10/19/2015 - 12:02

I wanted to create a loft bed for my daughter so that she could have space underneath to play since her room is small. This was the perfect solution! I went ahead and added a stair rail so she could feel a little safer coming down the stairs (she is 4 yrs old). She loves her princess bed and what's best she wants to sleep in it instead of with mommy and daddy! This was my first wood working project. 

Estimated Time Investment
Weekend Project (10-20 Hours)
Recommended Skill Level
Beginner

Mudroom Bench with Easy Drawers

Submitted by GeekAthair on Mon, 01/06/2020 - 20:12

We've been desperate for more storage in our little house and this build really helped. The whole bench is 103“ wide and each drawer gives us 24"x17" of usable space. We had to do some custom shaping for the benchtop (two joined fir 2x12's) fit as the walls are not square but in the end we were really pleased.

The hardest part of the project was getting all of this built and in place while working around a busy family as this is our only meal space and the majority of cutting/forming was done either on the weekends or after bedtimes. If I were to do this again I'd prioritize sending the kids to grandparents for the weekend and know king everything except for paint out in one go. 

We could have spent less time with the benchtop by using plywood like in the plans but we wanted the look of a separate benchtop. We may replace the fir with stained oak down the line but this should be plenty sturdy for the next several years. 

Built from Plan(s)
Estimated Cost
$300
Estimated Time Investment
Week Long Project (20 Hours or More)
Finish Used
Valspar paint, minwax clear poly
Recommended Skill Level
Intermediate

Comments

Butcher Block Kitchen Island

I built this piece from ana white's plans. I modified the shelf design and also the dimensions to meet my needs. Instead of using 2x6 douglas fir for the top, I built the top out of hard maple. The top is built by ripping down several strips of hard maple 1.75 inches wide, turn the strips on there edge and gluing all the strip together. This is what is known as a edge grain cutting board. I finished the top with mineral oil and bees wax. The top is food safe and knife friendly. If you have any questions please don't hesitate to ask. - Brad

Built from Plan(s)
Estimated Time Investment
Week Long Project (20 Hours or More)
Finish Used
Cream brulee paint by behr
early american stain by minwax
mineral oil and bees wax
Recommended Skill Level
Advanced

Comments

romanweel

Tue, 01/28/2014 - 18:42

Did you use a planer to level your top and bottom surfaces here, or just lots of sanding? I've been told not to attempt butcher block construction without a planer...but I'm thinking of maybe going for it!

timberandsoul

Fri, 01/31/2014 - 23:01

I did use a planer for this top. But because my planer is only 12 inches wide I had to glue three individual boards together leaving two seams that I could not plane but instead had to sand out. Just sanding those two seams took a long time, I cannot imagine sanding 20 seams. I would not suggest attempting without a planer.

Calmly

Mon, 04/10/2017 - 18:45

is it possible for you to share your measurements.  I need a smaller island. Thank you.

Biff Loman

Wed, 02/05/2014 - 17:25

I'm curious how you joined the stretchers to the legs. The construction appears different from the plans. Did you use pocket screws or something more advanced like mortise and tenon?

timberandsoul

Fri, 02/07/2014 - 16:58

I am not sure exactly what you mean by stretchers. If you are referring to the shelf frame, yes it is different than the plans, I modified it. I felt the shelf design on the plans was not enough for the weigh that was going to be place on top. I used simple pocket holes to joint the frame to the legs. Hope this helps, have a great day.

voorheisb

Fri, 08/12/2016 - 10:41

Thank you Brad.  This is a really nice piece.  I recently picked up an old table from a college.  I discarded the base and plan to use the heavy butcher-block-style top to build something similar to this.  Do you have plans you could share?   Thanks again, Brian

3 Square Picnic Tables!

I built 3 of the square picnic tables, as we have a large extended family. I enjoyed the project and the results. I did end up adding a cross brace and some metal clips, they added a little more strength for the table when it was full of people.

Thank you for sharing your plans.

Rick

Built from Plan(s)

Garden cutie

Submitted by Anonymous (not verified) on Sun, 04/26/2020 - 16:18

My honey built this farmhouse potting bench in a few hours. I needed it to store all the junk that was laying on the ground. It's so cute!

Built from Plan(s)
Estimated Cost
$100
Estimated Time Investment
Afternoon Project (3-6 Hours)
Finish Used
Early American minwax
Recommended Skill Level
Beginner

8 foot picnic table

Submitted by Abby721 on Sat, 07/18/2020 - 08:40

This picnic table was a quick build and turned out amazing. I modified the center base support by adding an extra table top support and seat support board to the opposite side of the center legs to give the table symmetry to accommodate an umbrella hole. I also shortened both cross supports by an inch to make sure the base wouldn’t be longer than the top boards. The space between the center table support boards and seat support boards is the perfect size to fit a standard umbrella. I used a 1 3/4” hole saw to make the umbrella hole. The build and stain/paint took me about 5 hours but additional time is needed to properly seal the table. I used untreated pine. Treated pine may give the table longevity but it would also add a lot of weight to an already heavy table. This was a relatively easy and quick build and is a great size to fit my whole family plus a couple guests! I’m happy with how it turned out and would recommend this build to anyone looking for a budget friendly and simple patio table.

Built from Plan(s)
Estimated Cost
$75
Estimated Time Investment
Day Project (6-9 Hours)
Finish Used
Varathane Briarsmoke for the top and Rustoleum Canyon Black Satin for the base. Sealed with 2 coats of Varathane Helmsman Spar Urethane
Recommended Skill Level
Beginner

Comments

Seasonal And Holiday

Christmas 3-tier cookie stand

Submitted by calcowoods on Thu, 12/31/2020 - 12:51

Inspired by Shara of Woodshop Diaries, created this 3 tier tray for displaying cookies for Santa. Added a 3 dimensional star as the topper and simply followed the excellent photos and schematics on Shara's website.

Estimated Cost
$5
Estimated Time Investment
Afternoon Project (3-6 Hours)
Finish Used
Minwax paste wax
Recommended Skill Level
Beginner

Comments

King Size Farmhouse Bed with Dog Stairs and Storage

Submitted by jkjackson on Sun, 05/30/2021 - 15:21

We have a frosty faced blind girl and an aging tri-pawed that we wanted to be able to continue snuggling with us so we adapted the Farmhouse Bed with Storage to make it a king size. We made the drawer boxes deeper which allowed us to get rid of our dresser to create more space in our room. And we added a flight of stairs for the pups.

Estimated Time Investment
Weekend Project (10-20 Hours)
Finish Used
General Finishes White Wash with Arm R Seal Oil Based Satin Finish top coat. (If you want the white wash to be more white and less amber, use water based.)
Recommended Skill Level
Intermediate

Comments

2x4 Adirondack Chair

Submitted by Anonymous (not verified) on Tue, 08/03/2021 - 06:27

Very easy instructions. I love the way they turned out. I used all 2x4's that I had left over from another project. I burned the top pieces and painted all other pieces. Love your easy instructions. My first time making furniture.
Thanks
Yvette

Recommended Skill Level
Beginner

DIY Modern Rustic Outdoor Chair

Submitted by susanshamp on Fri, 07/10/2015 - 15:07

I made this outdoor chair by looking at a variety of plans and designs from Restoration Hardware and other stores. Check out more info on the project on my blog link. Thanks for looking!

Estimated Time Investment
Afternoon Project (3-6 Hours)
Recommended Skill Level
Beginner

Comments

DIY Farmhouse King Size Bed

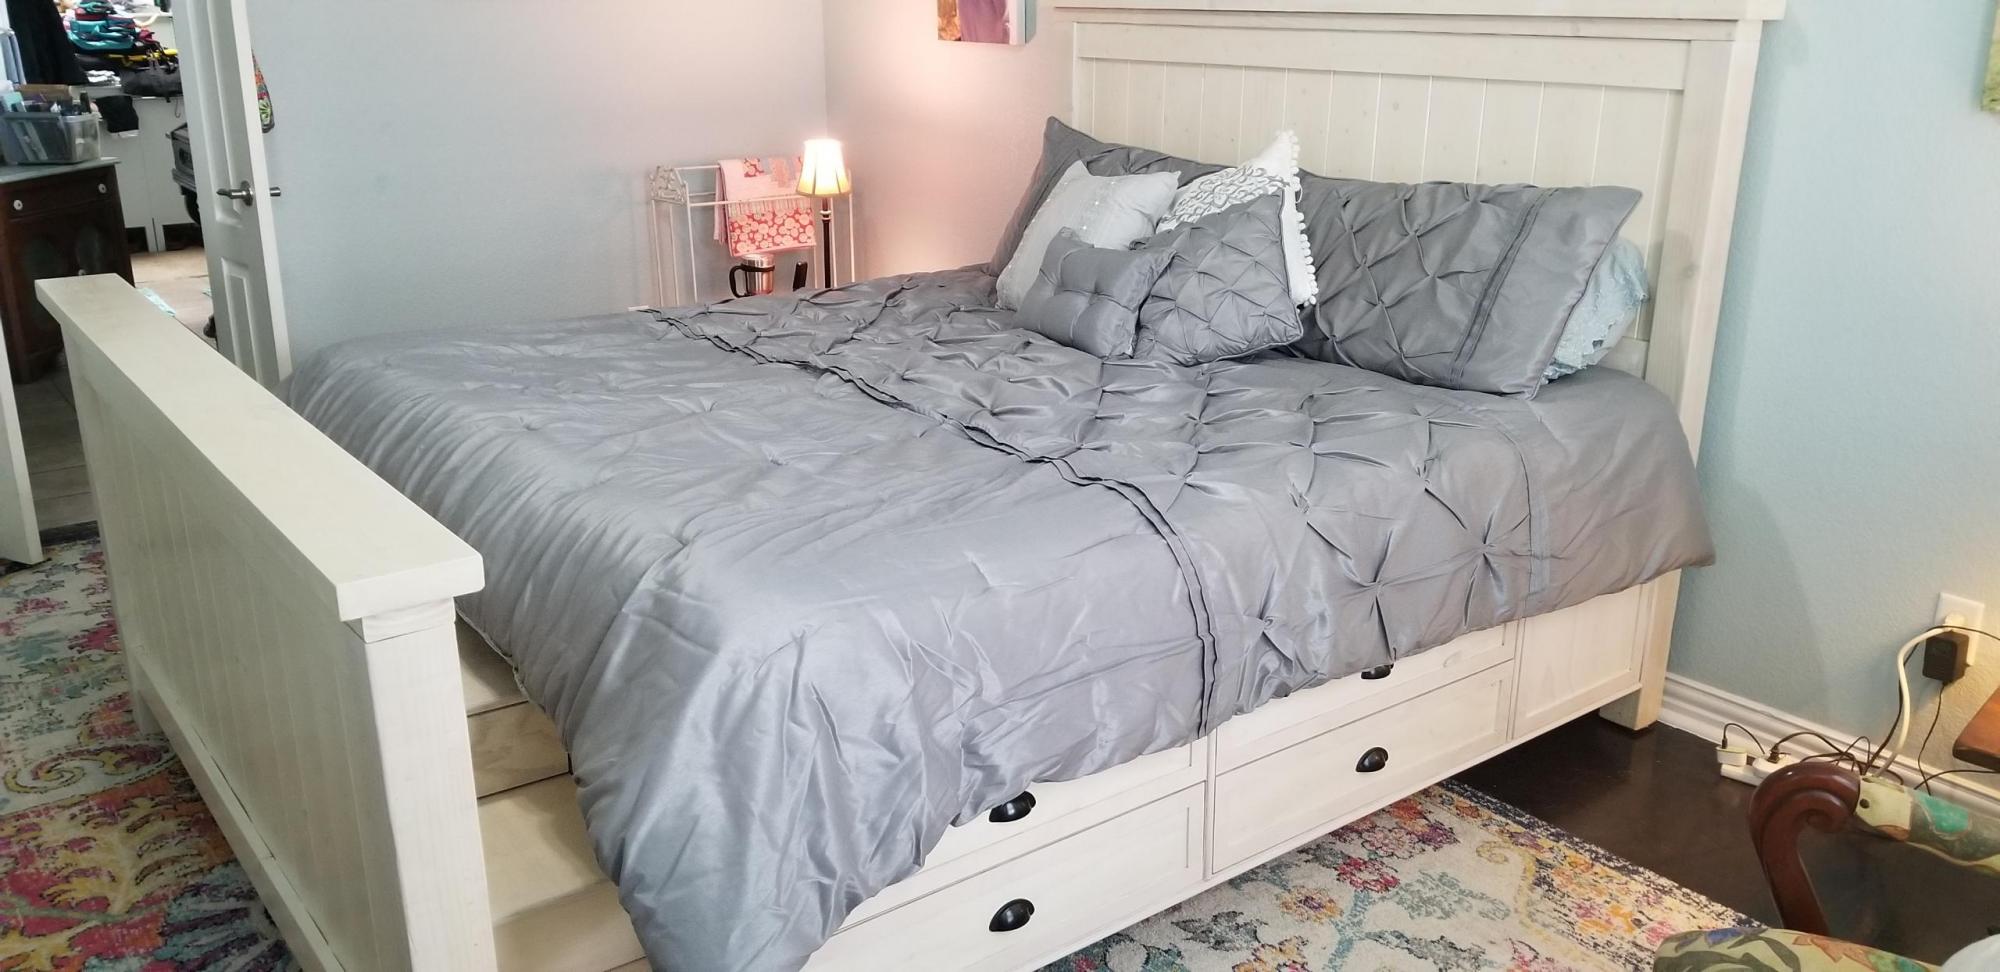
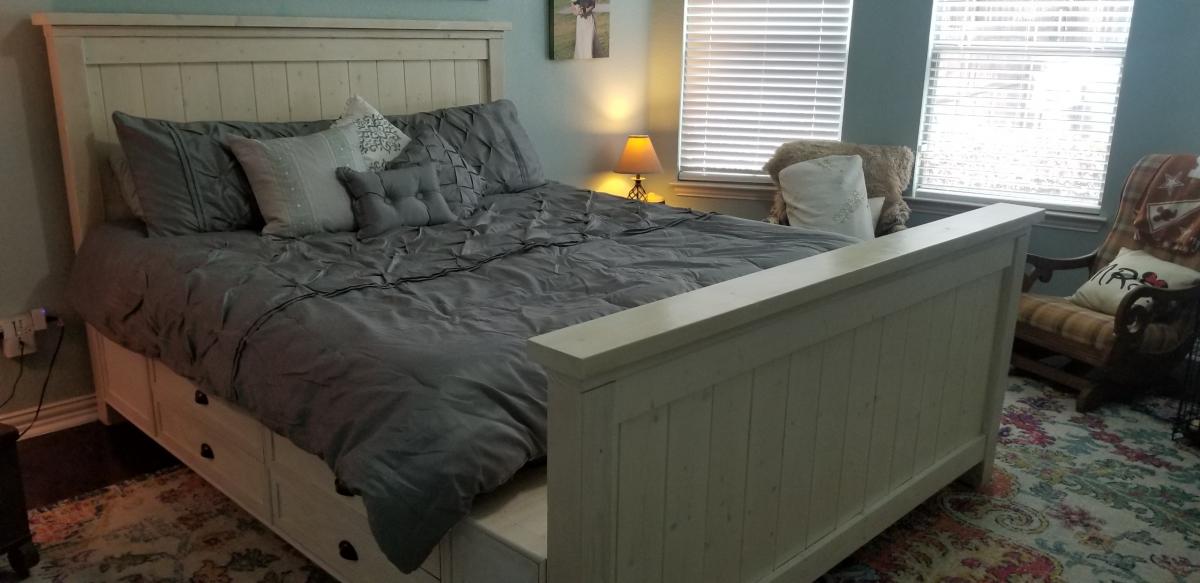
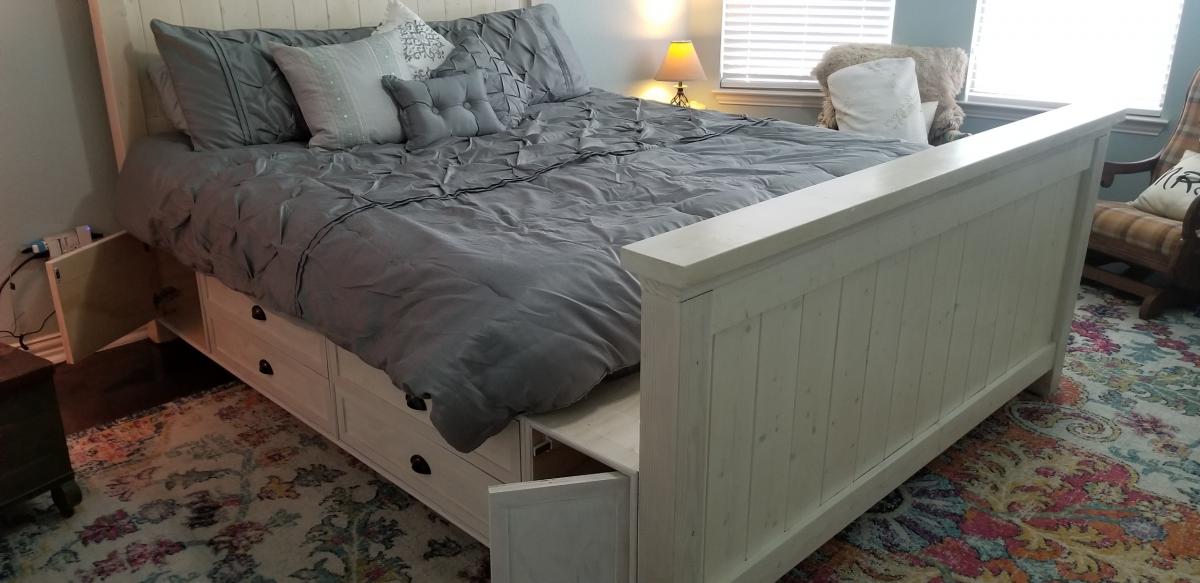
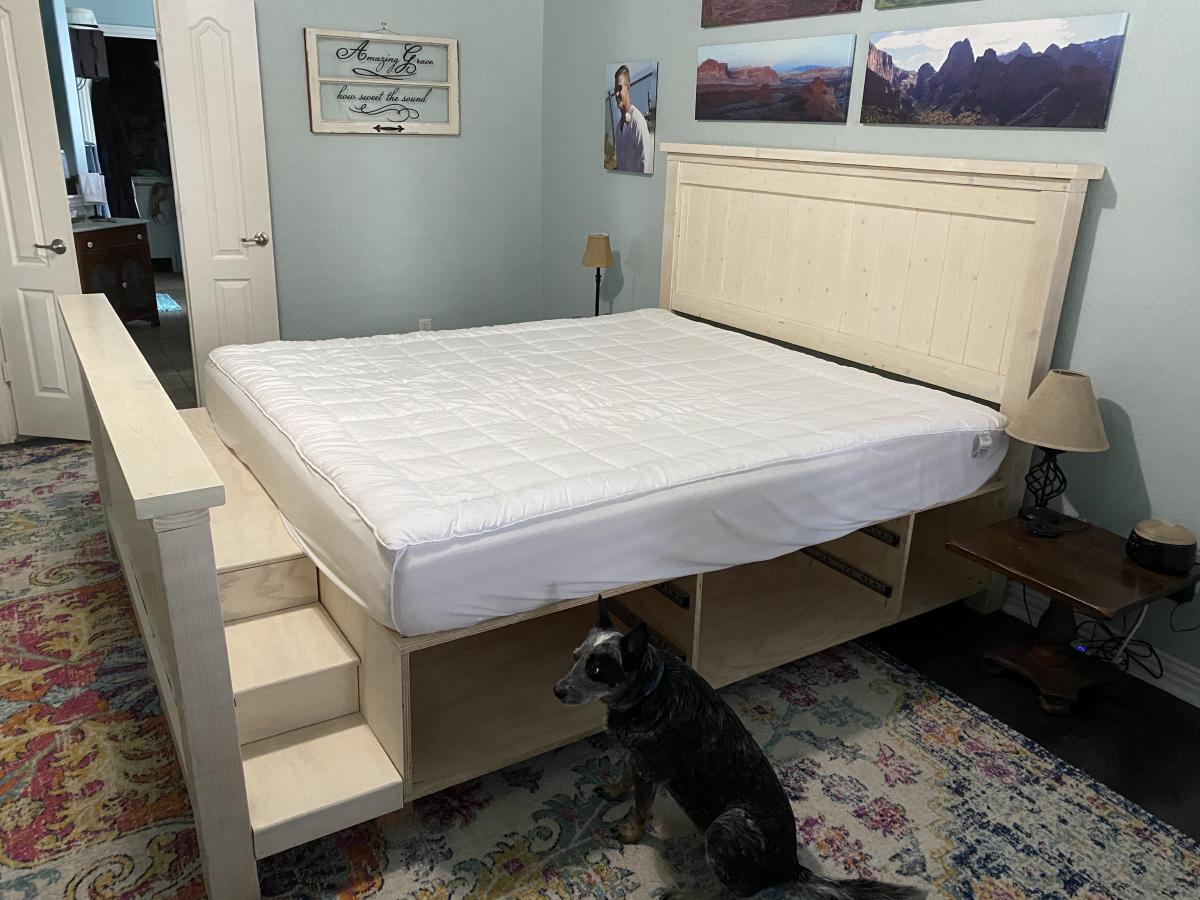
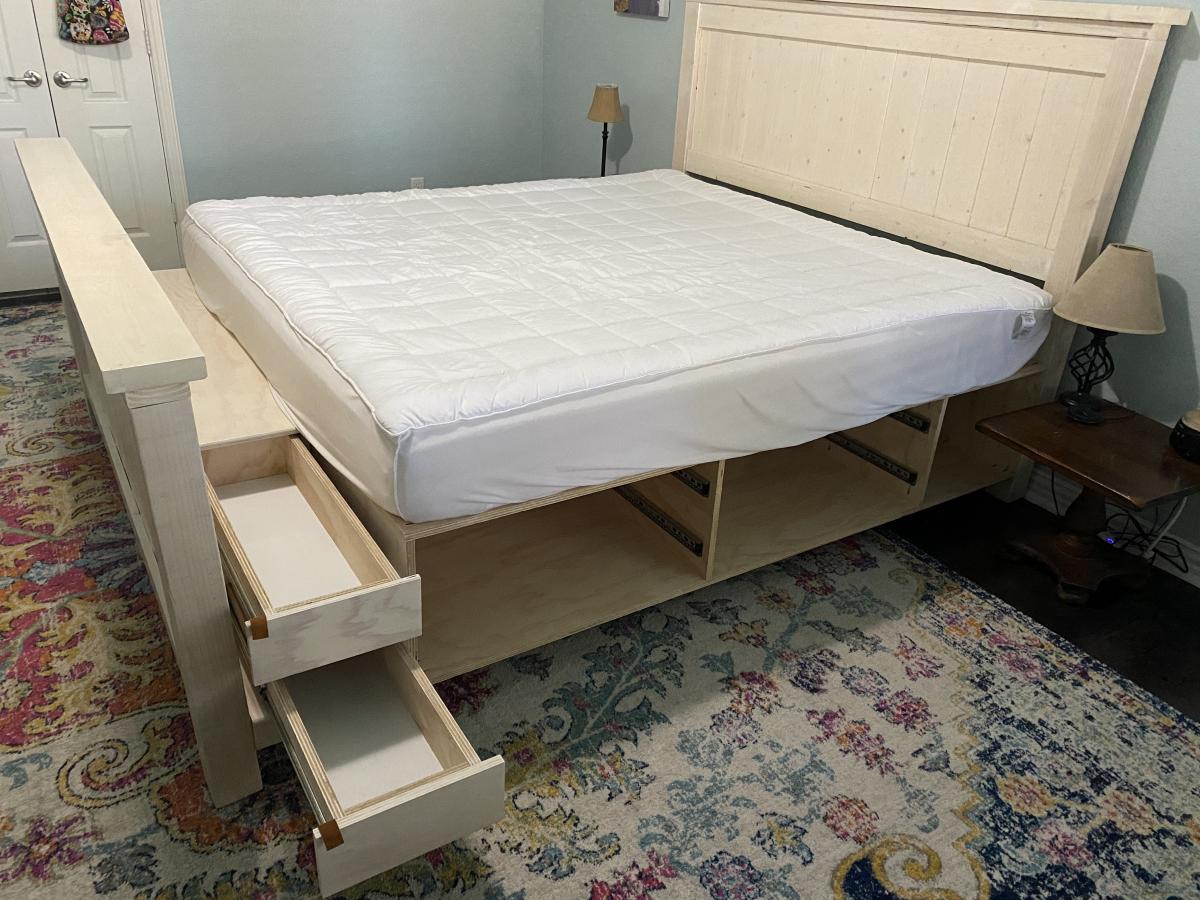
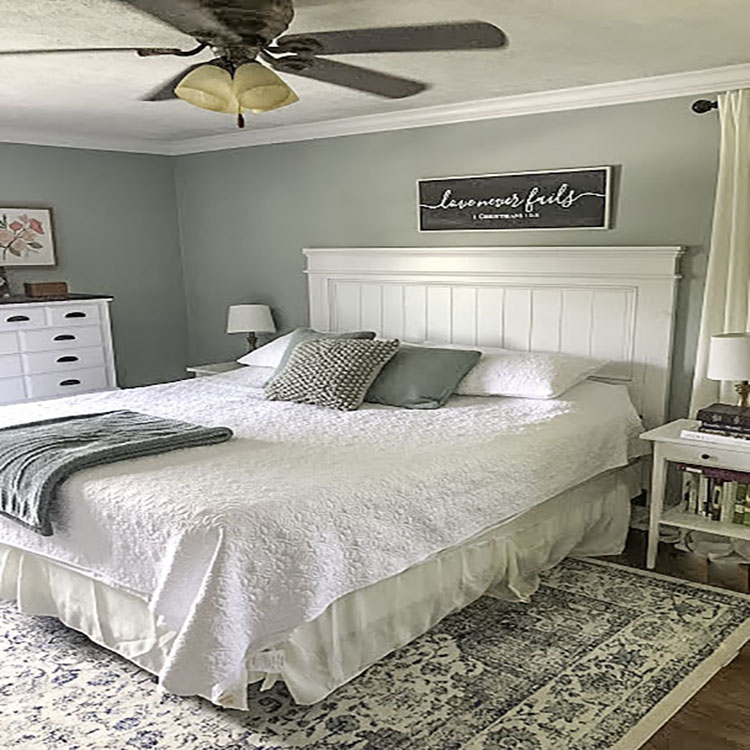
Ever since we moved into our current home, our master bedroom headboard has been at the top of our my project list. I knew I wanted a beautiful farmhouse style headboard. What I didn’t want was the heavy retail price tag. I searched high and low at places like Target, Wayfair, Amazon and even Walmart without finding an affordable option for us.

There is this perfect vantage point of our bedroom from the glider in my son’s room. I remember staring at that empty wall space above our bed for years, it felt like, while rocking our son to sleep. Just willing a headboard to appear. I wanted it so bad I could taste it. Something about looking at that same view, night after night, and waiting, waiting, waiting for it to happen just makes me appreciate it so much more now that it’s here, as so often happens in life.

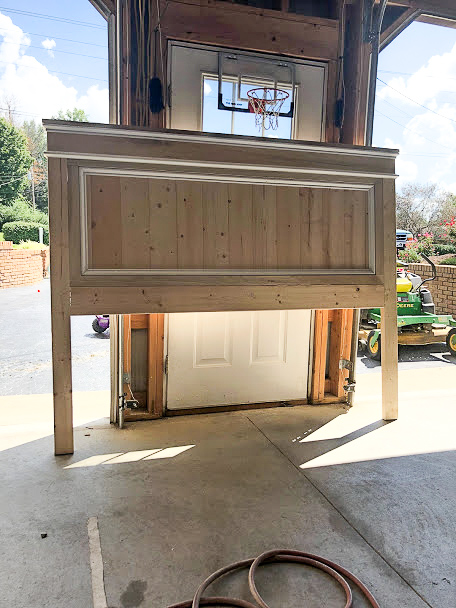
This project inevitably got put on hold over the years after one thing or another got in the way. Either we didn’t have the time to devote to it, or we always had something else to put our money into. Untilllll I stumbled across Ana White’s Farmhouse Headboard Plans.

Built from Plan(s)
Estimated Cost
~ $200
Estimated Time Investment
Weekend Project (10-20 Hours)
Finish Used
Valspar off the shelf white in semi gloss applied with paint sprayer in several, thin coats with sanding in between.
Recommended Skill Level
Intermediate
Back