Community Brag Posts

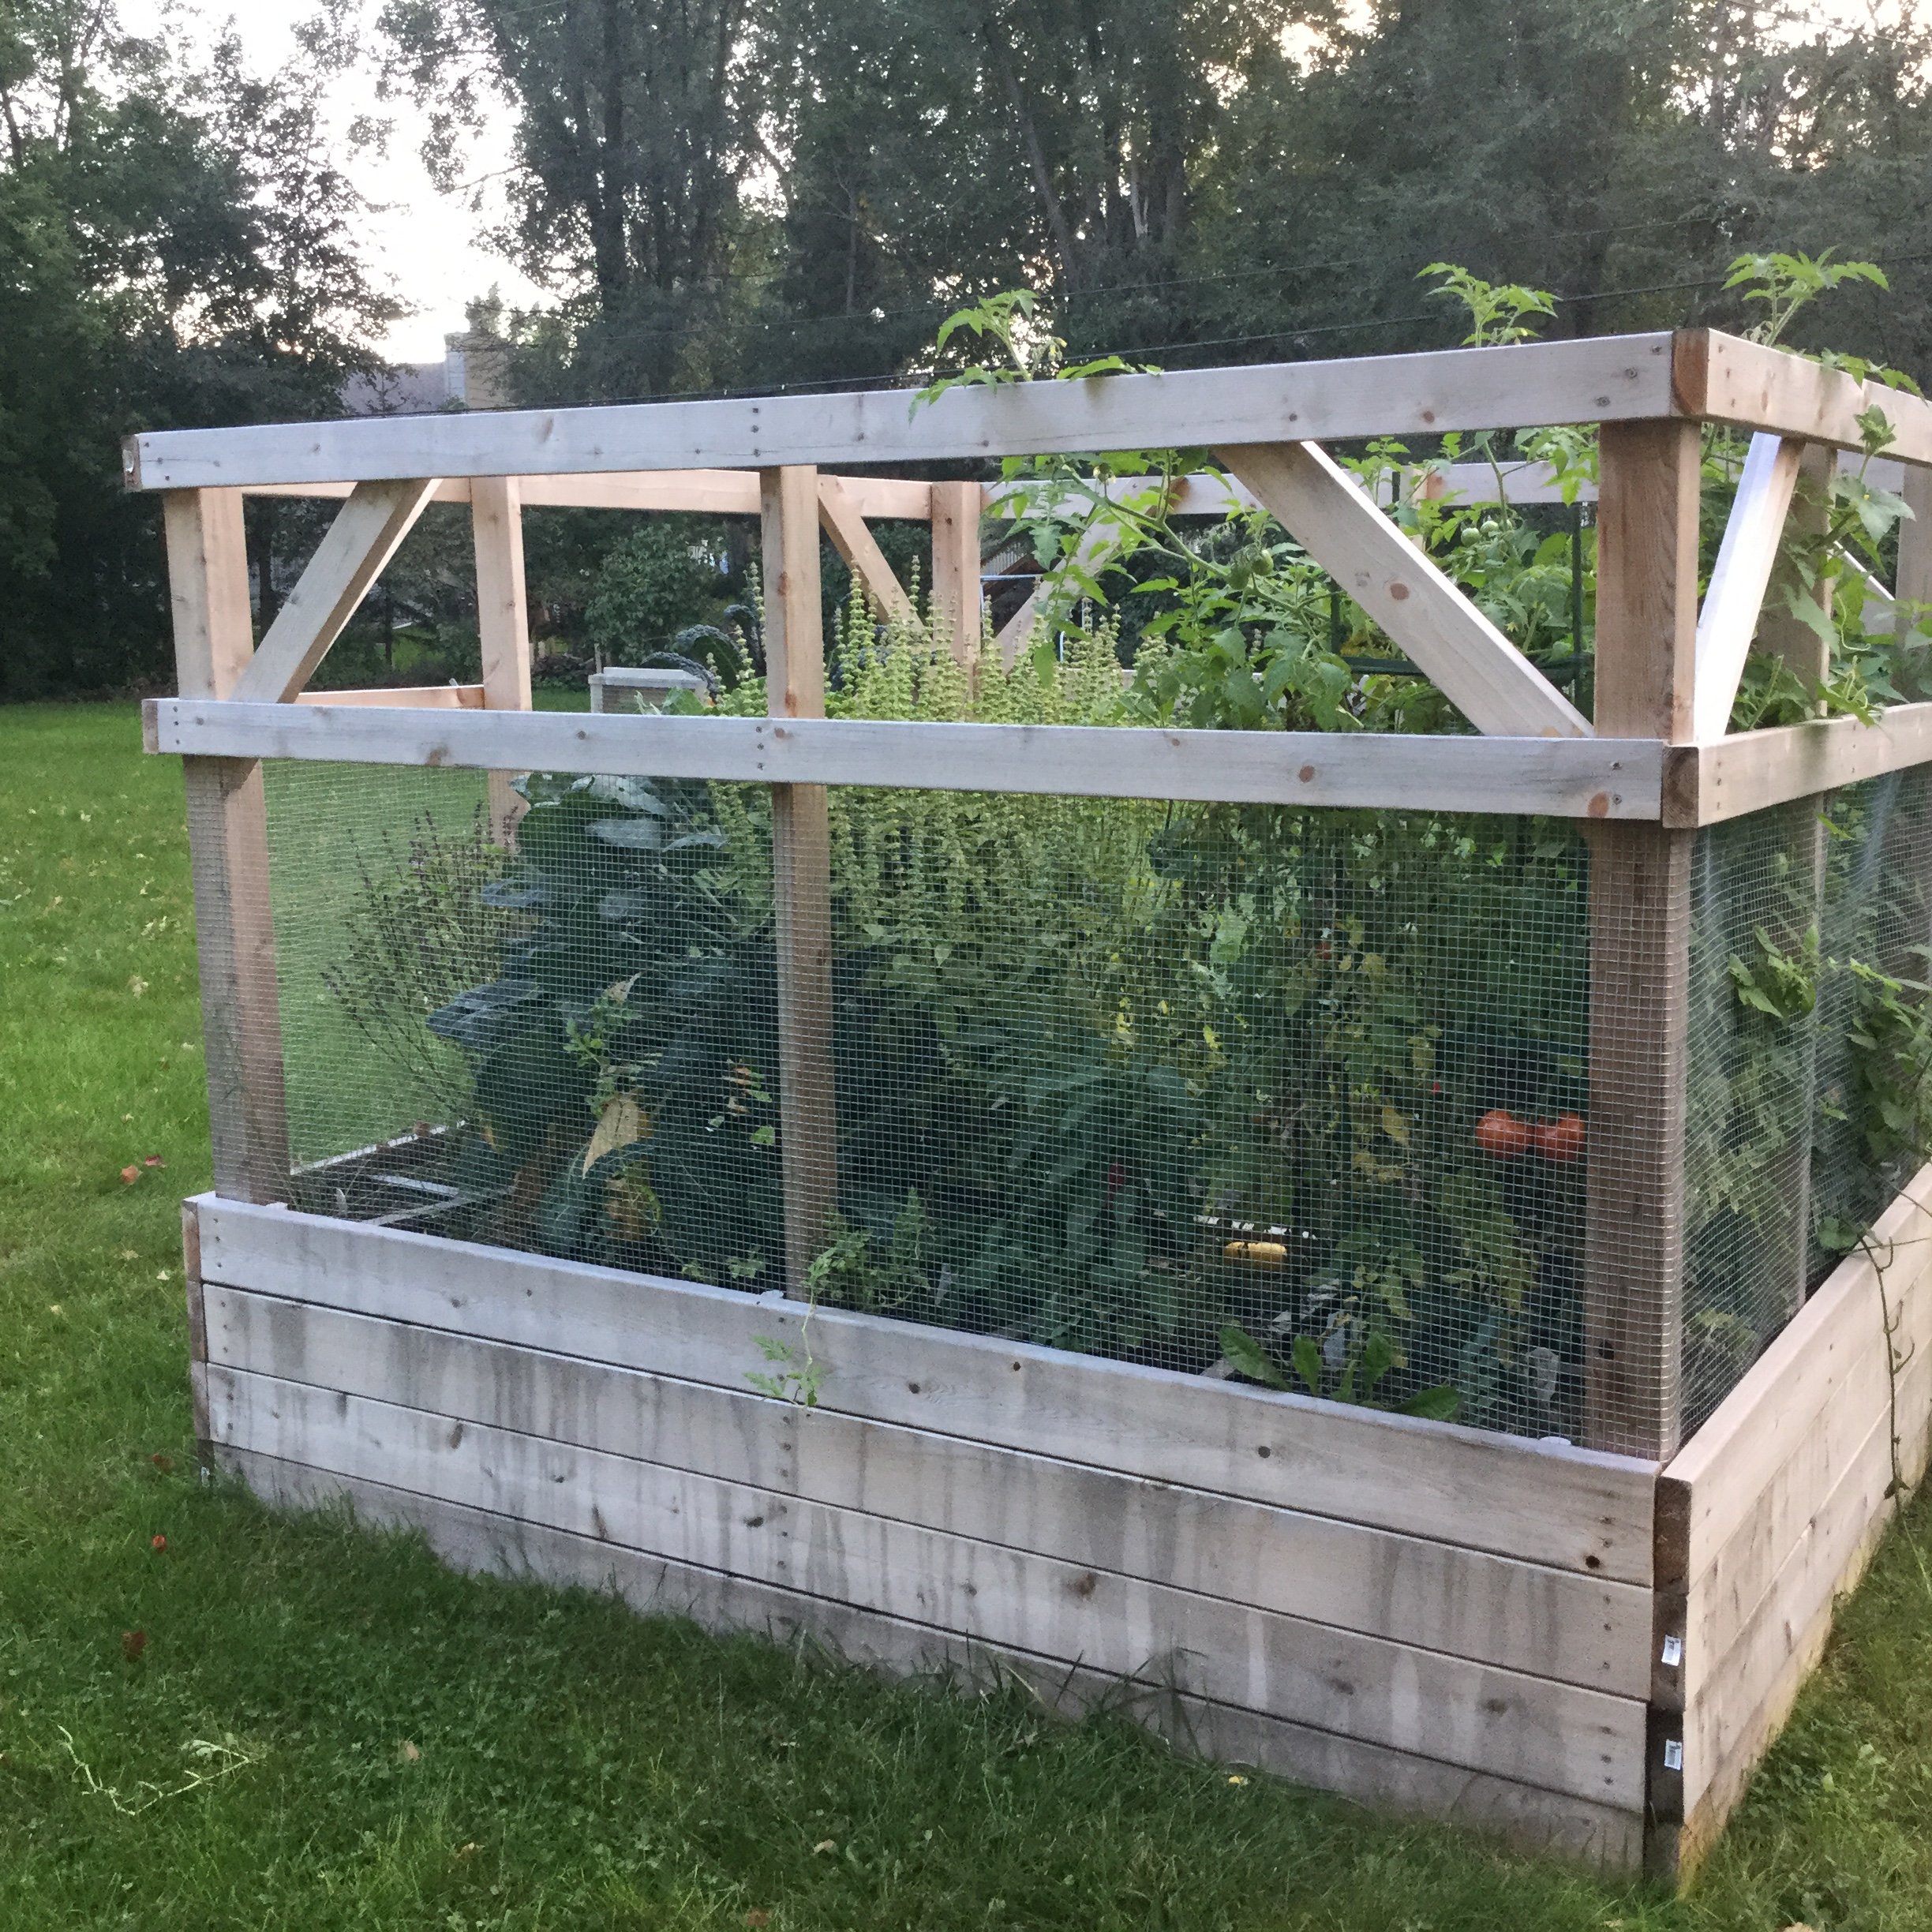
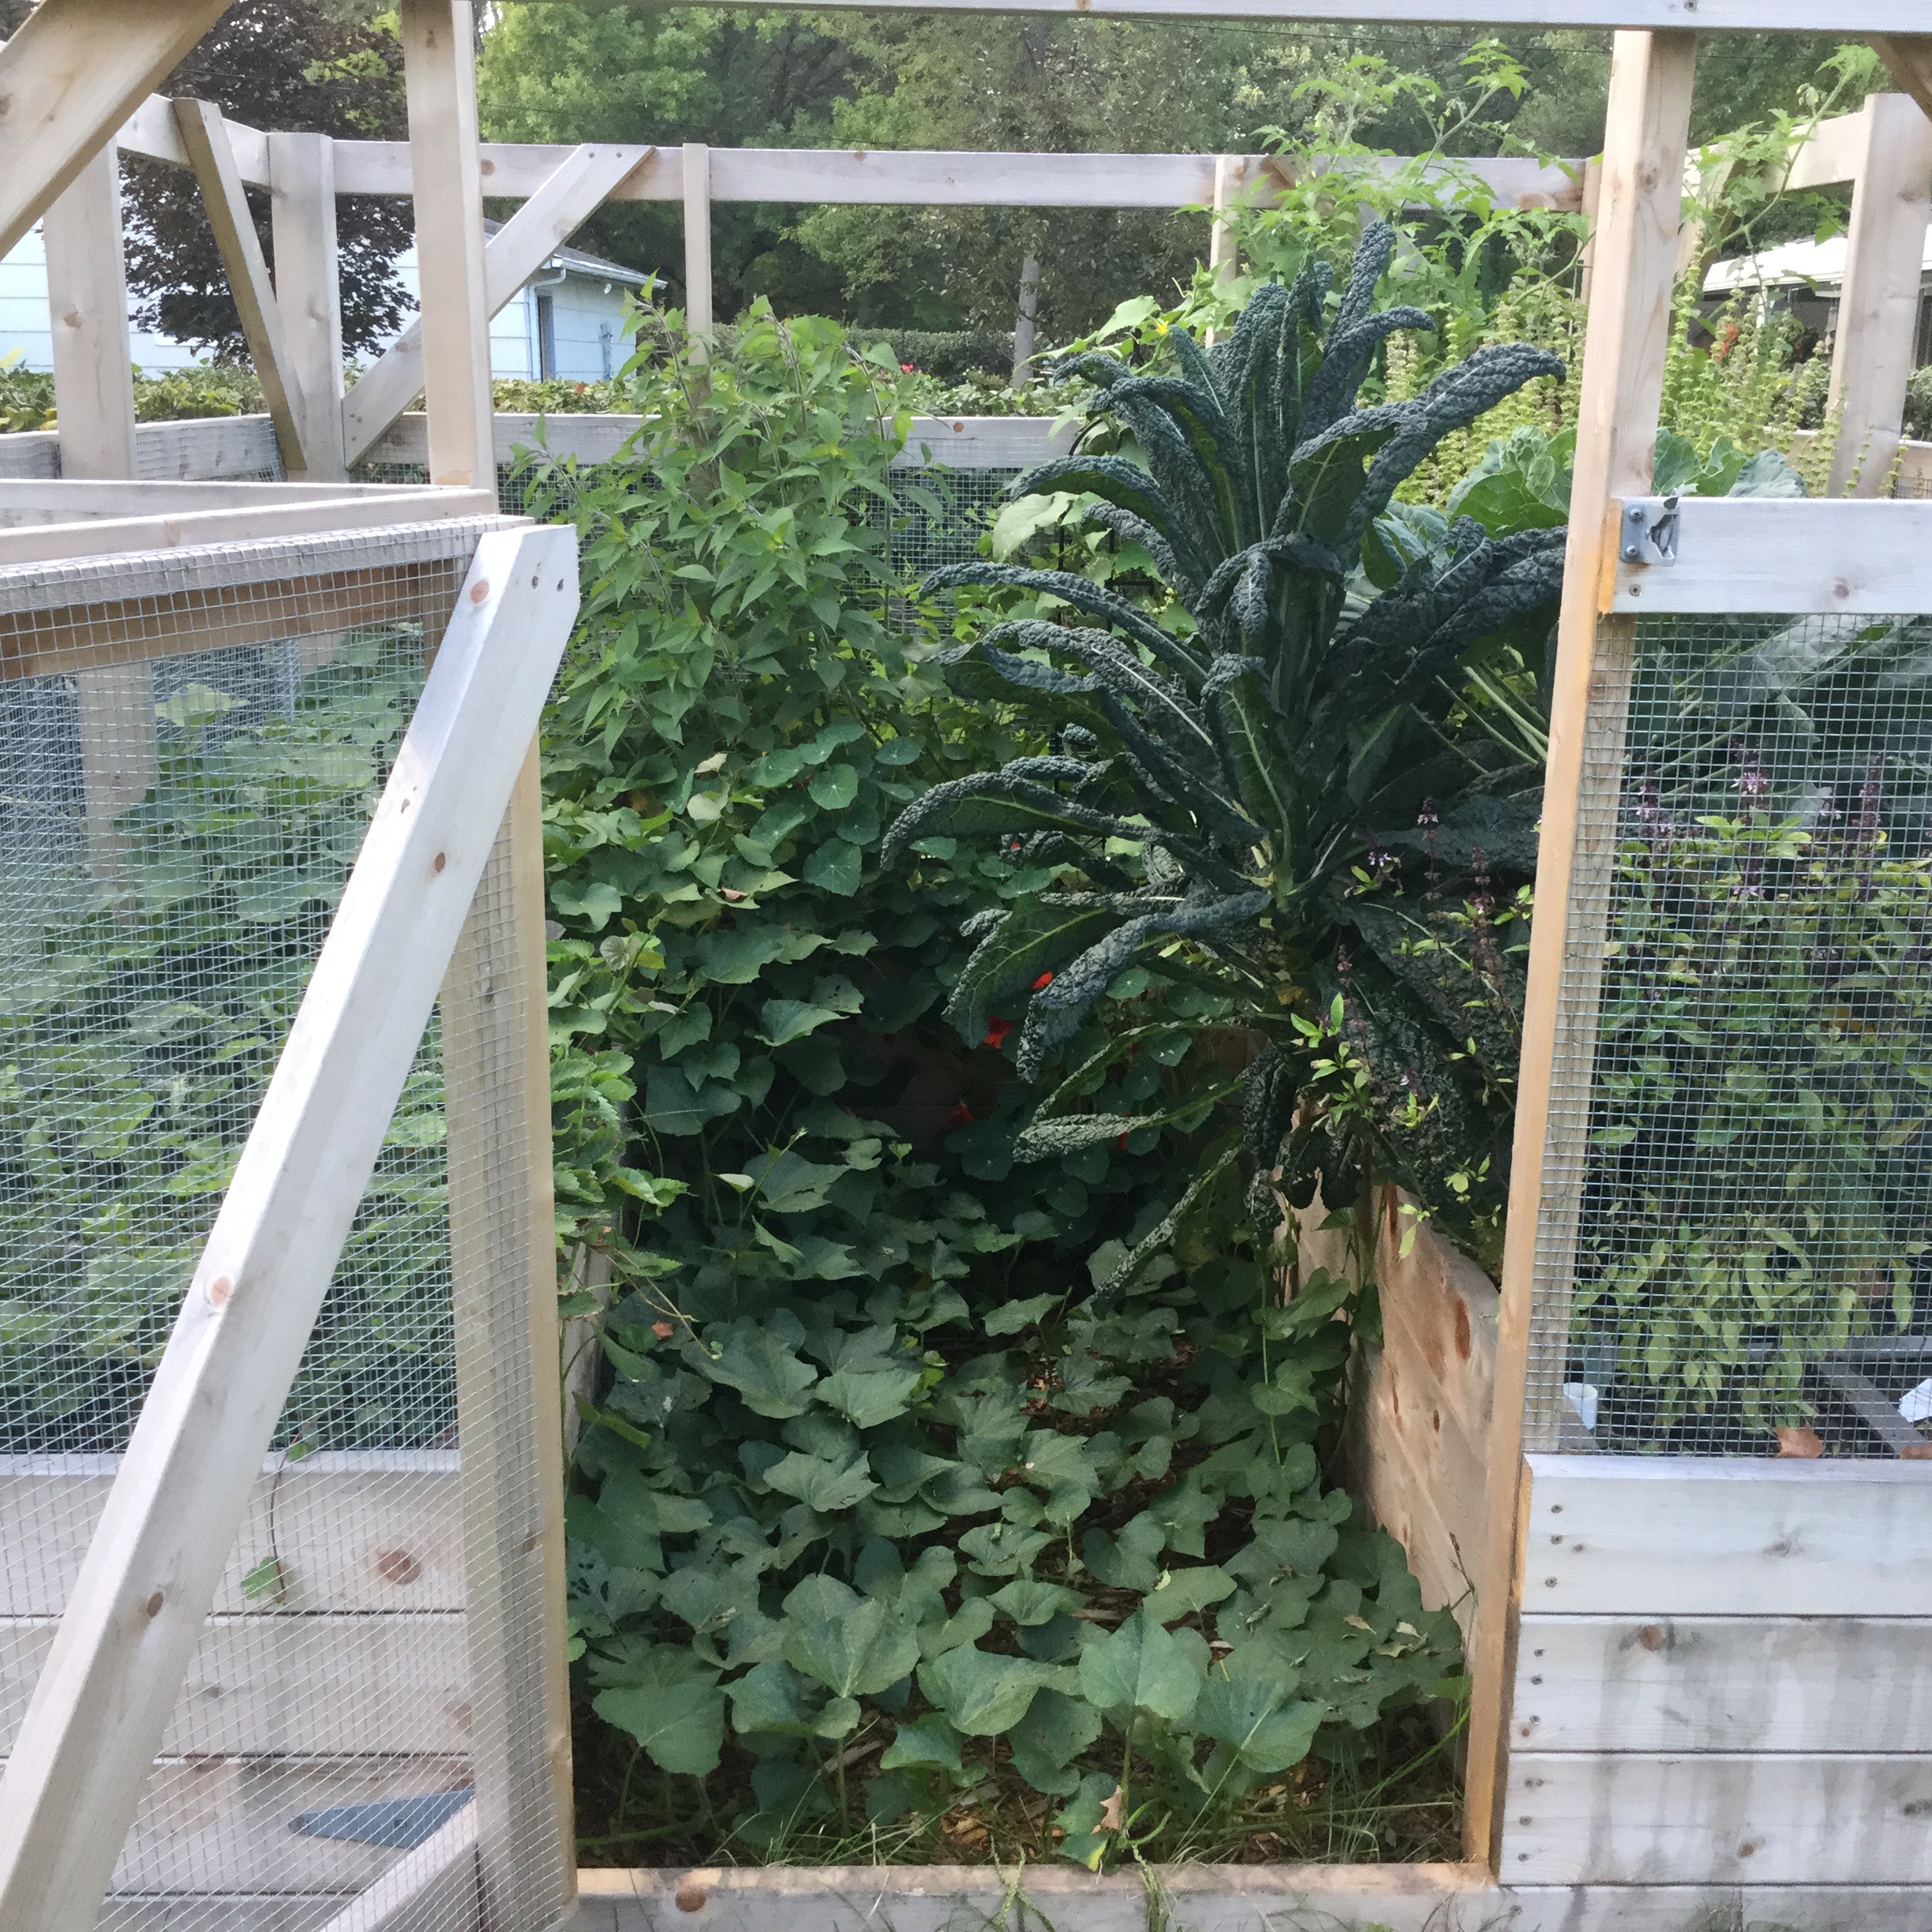
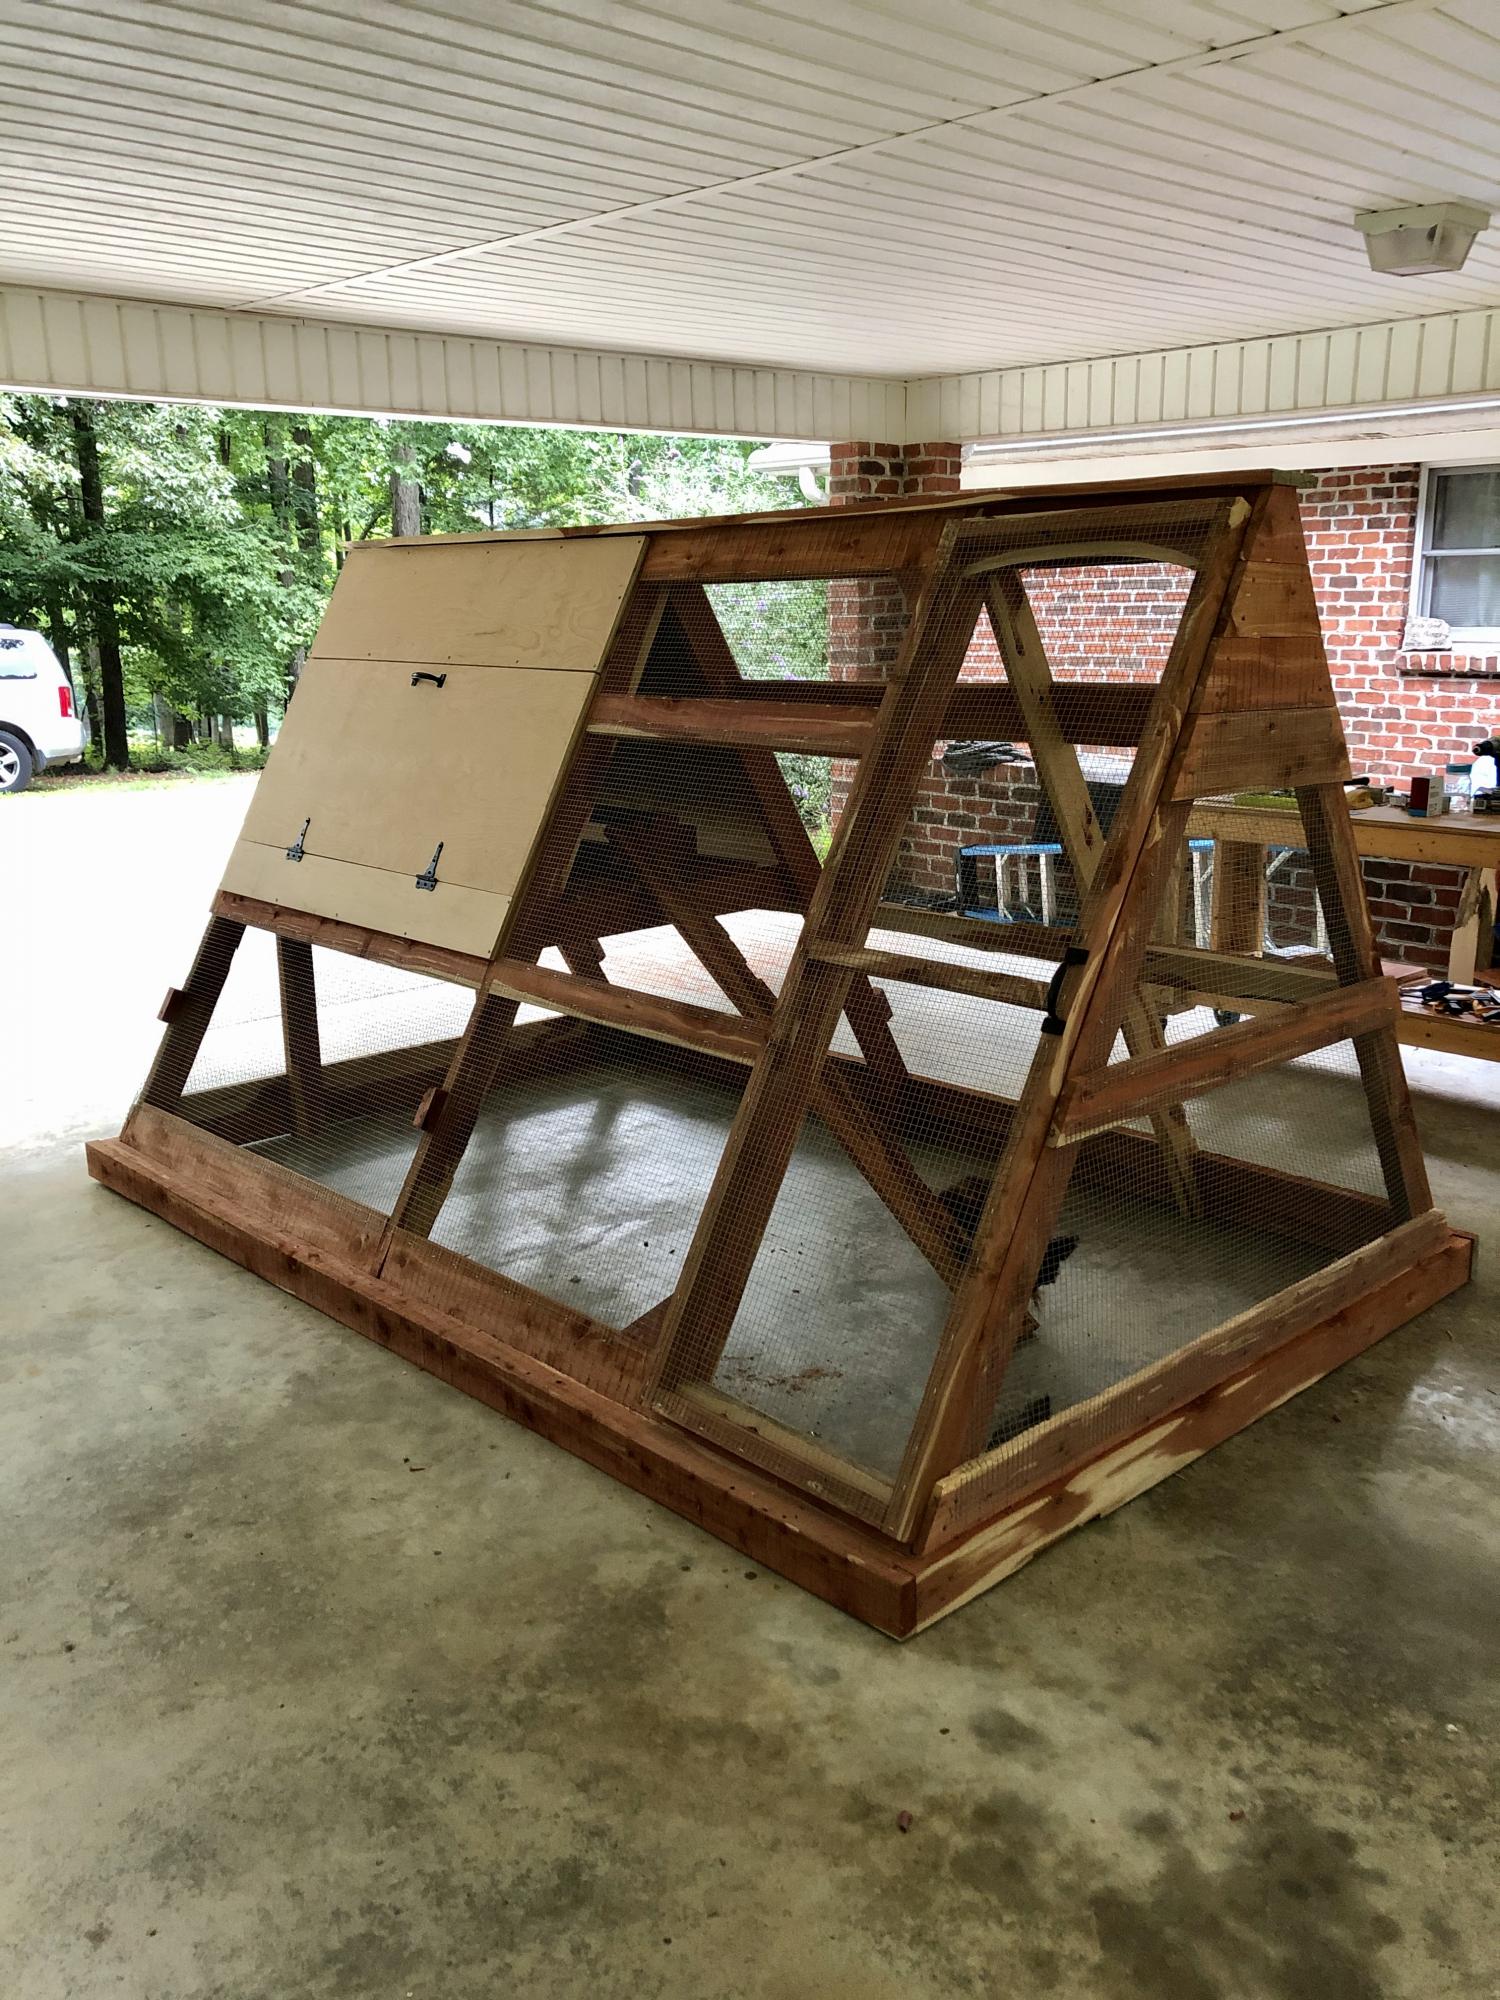
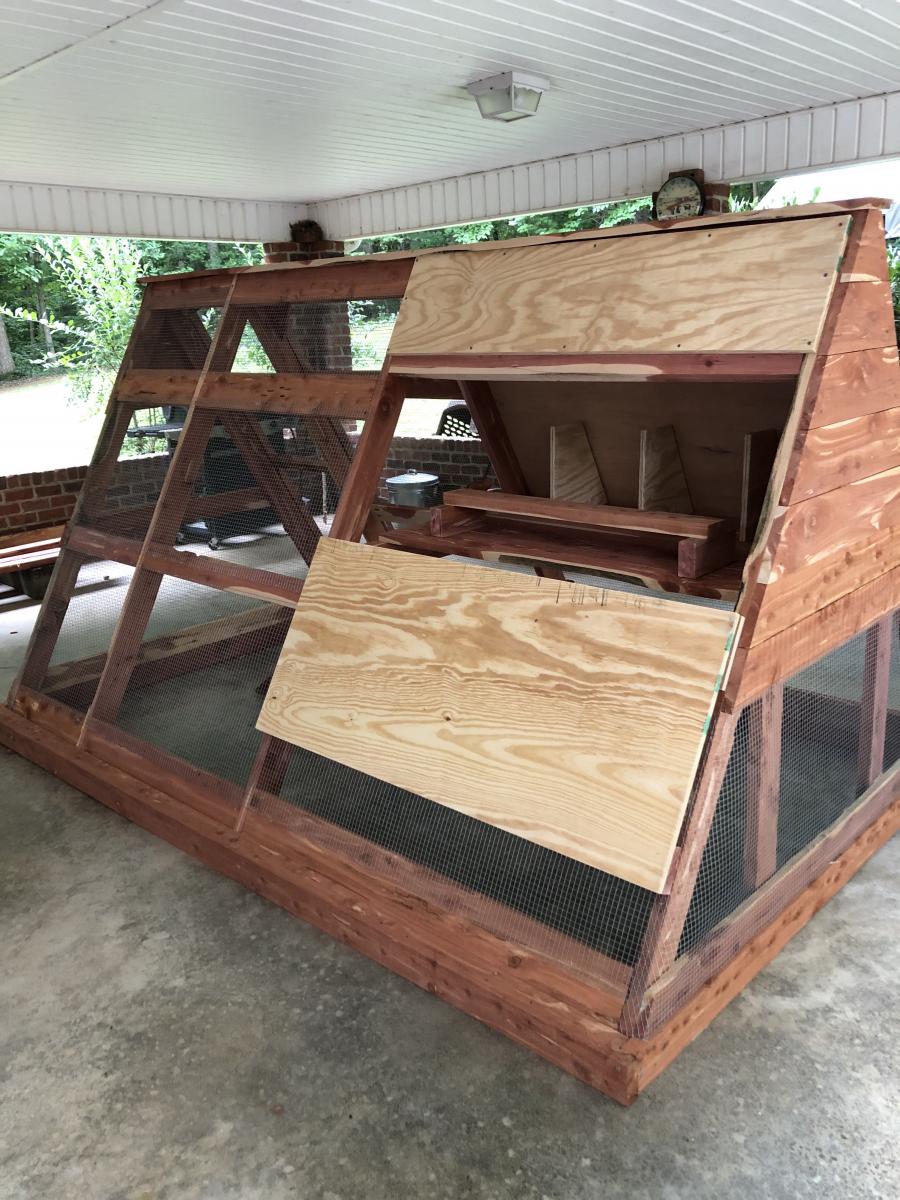
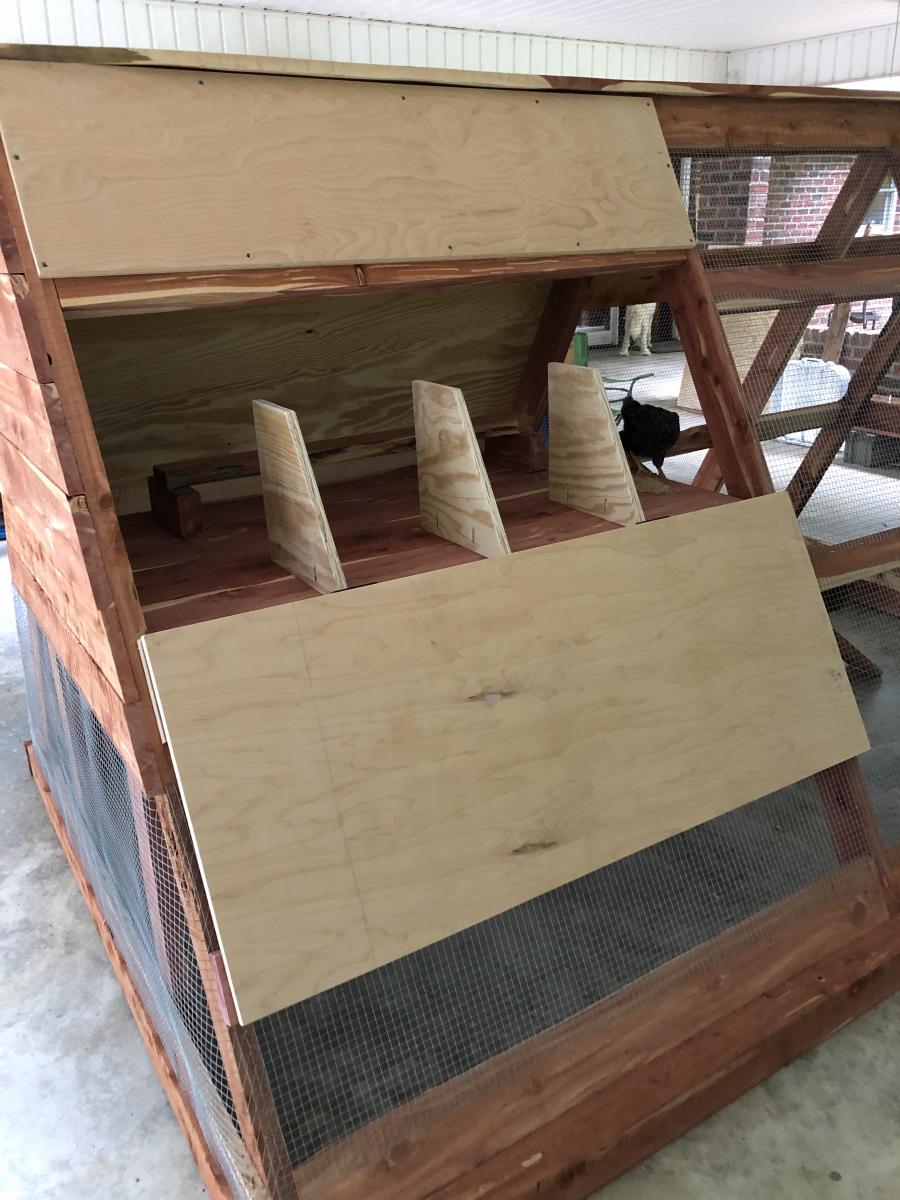
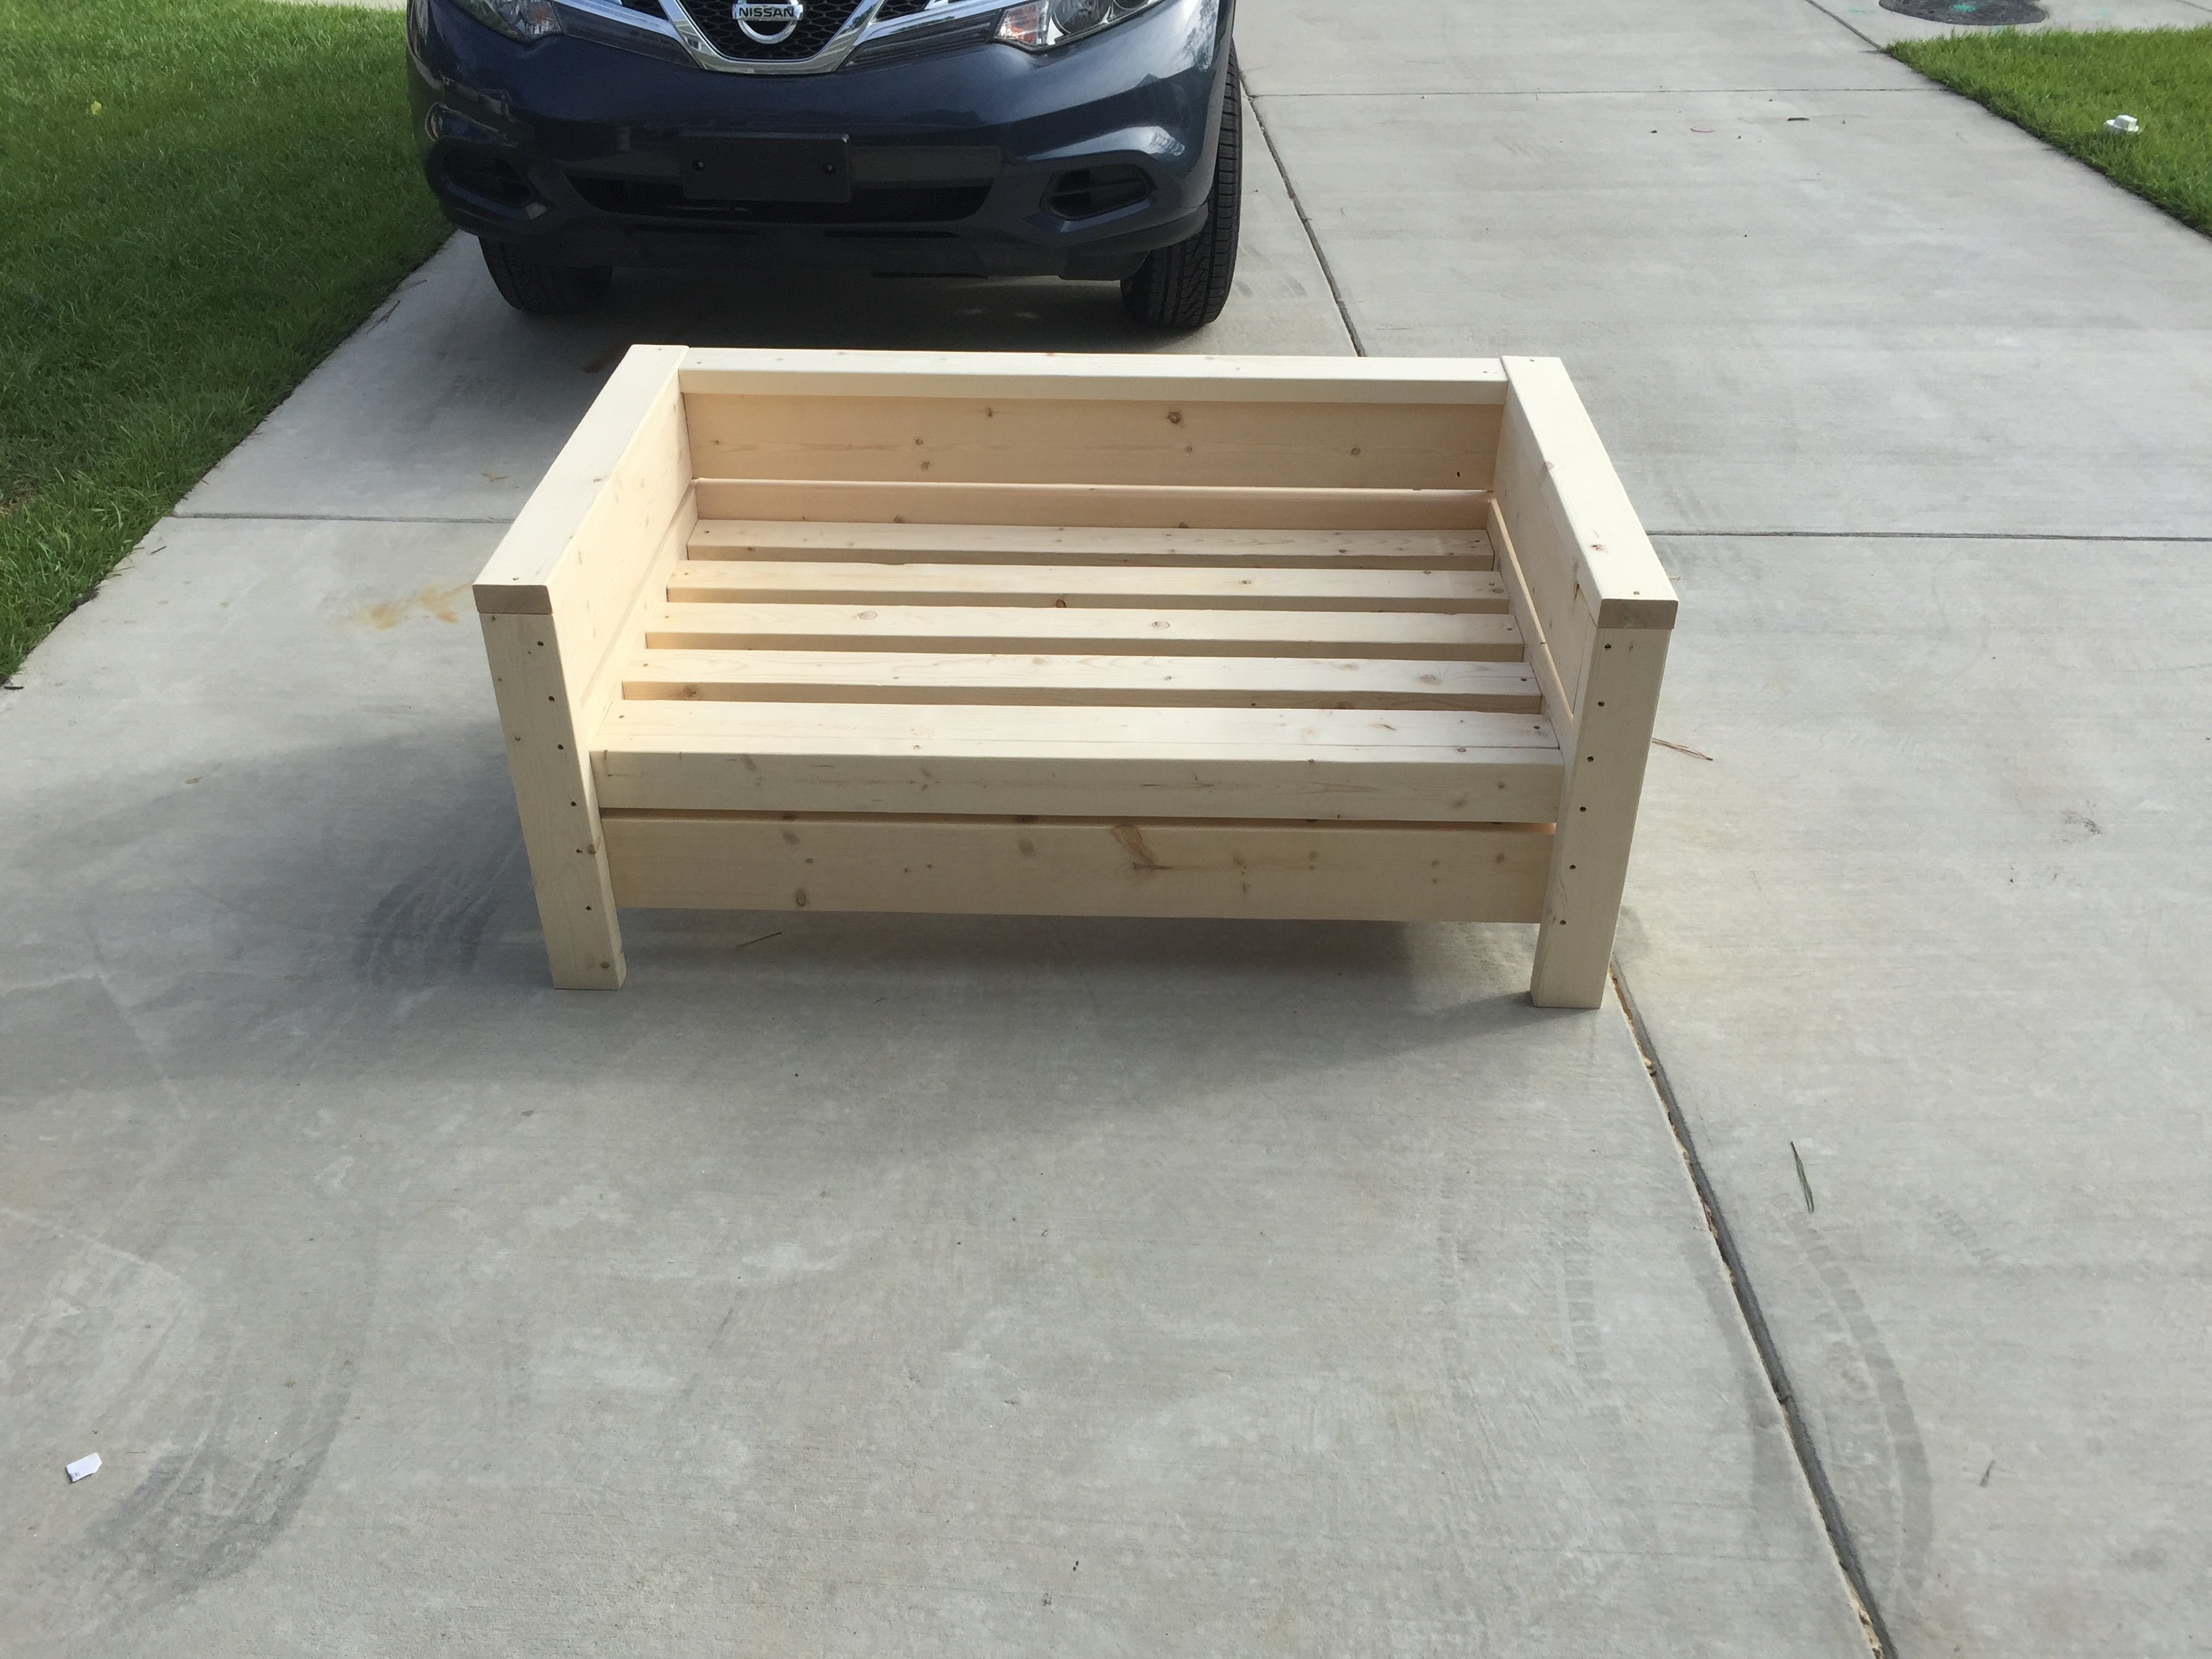
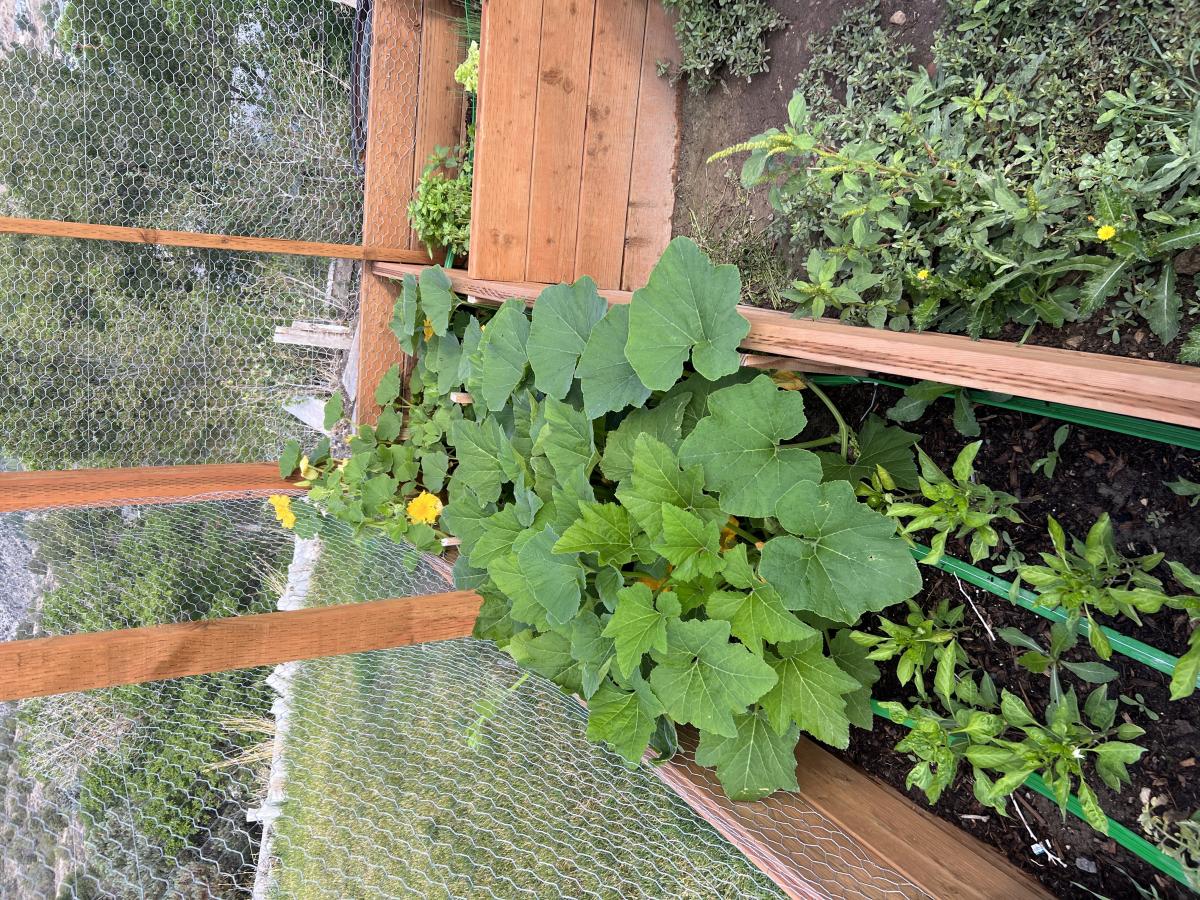
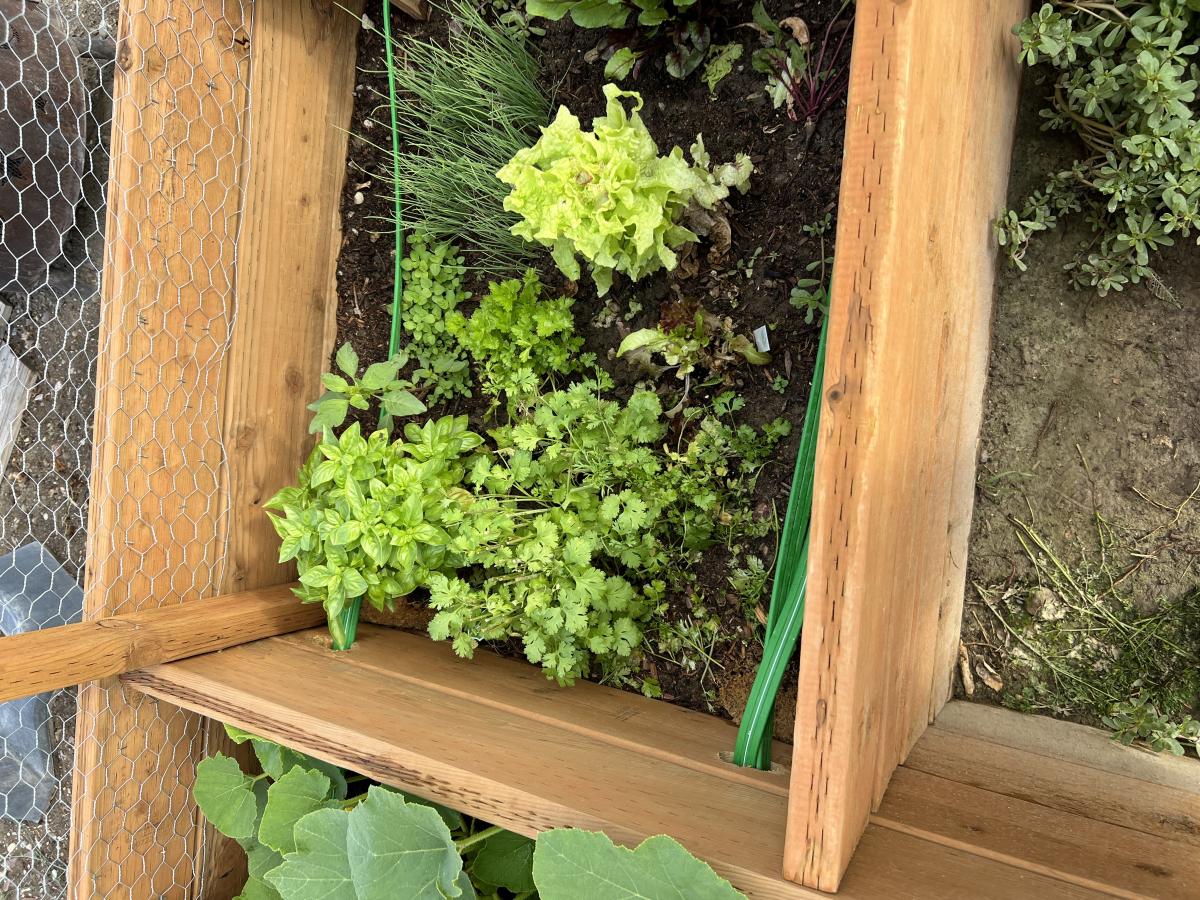
Deer Proof Garden Enclosure

Submitted by verarj on Fri, 08/05/2022 - 17:18

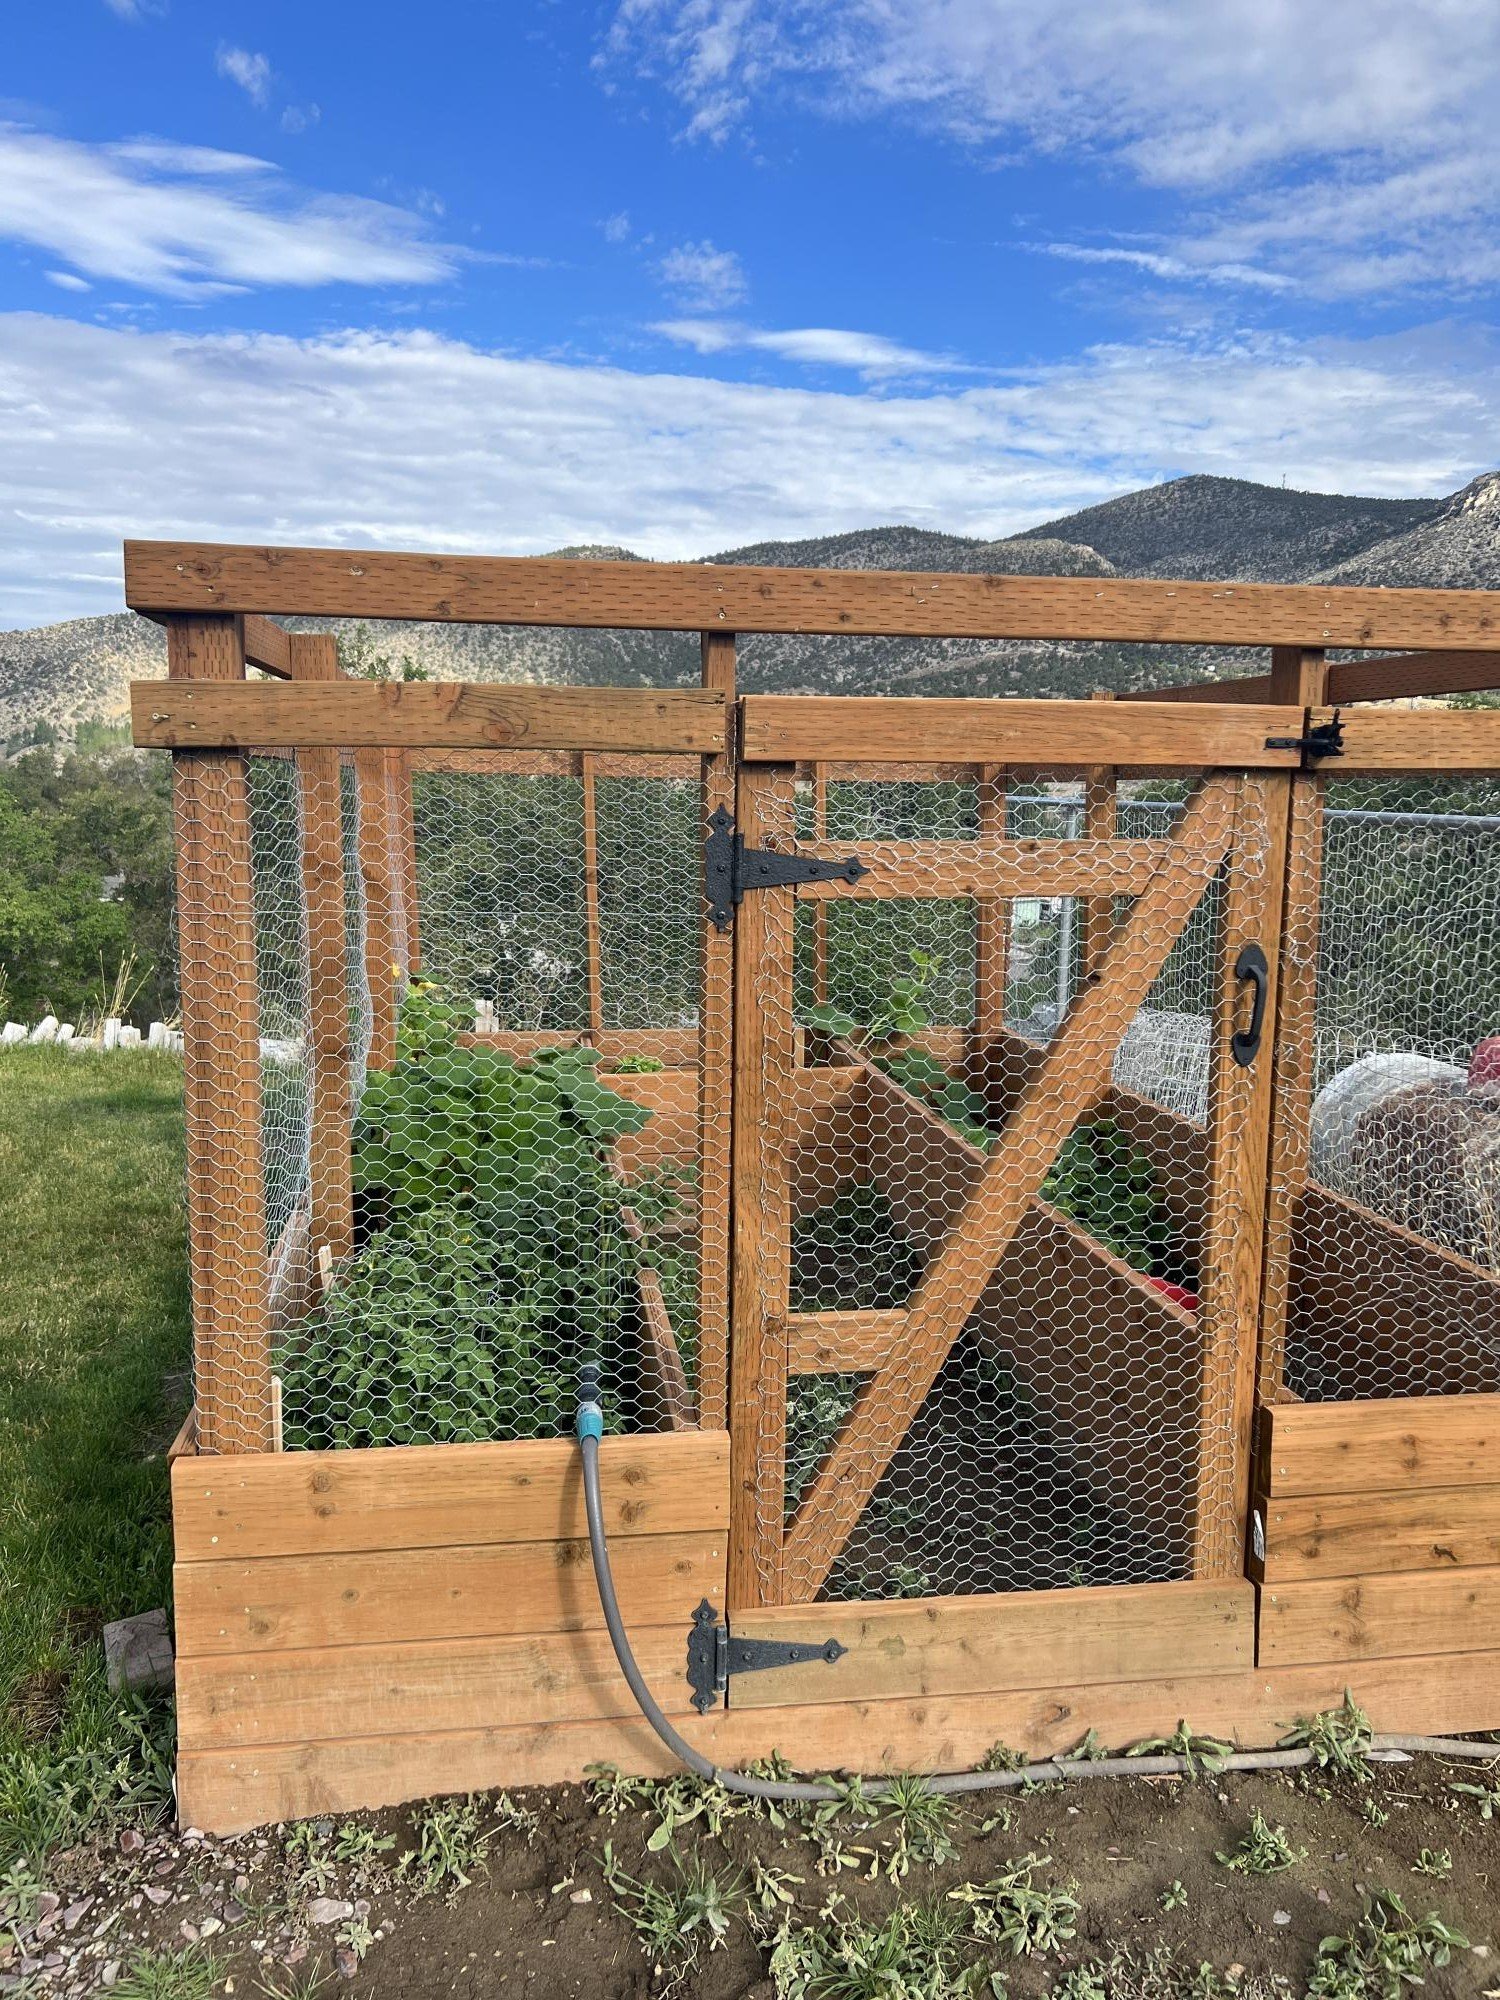
We used the plans from the Garden Enclosure, but built the sides twice as high to make for less bending. The only problem was this made our wire come up higher so we had to adjust the door height. We haven't produced too much yet, but hoping next year brings a quicker yield. The plans were so helpful and easy to use for us novices. *Sorry I couldn't get the pictures to rotate.
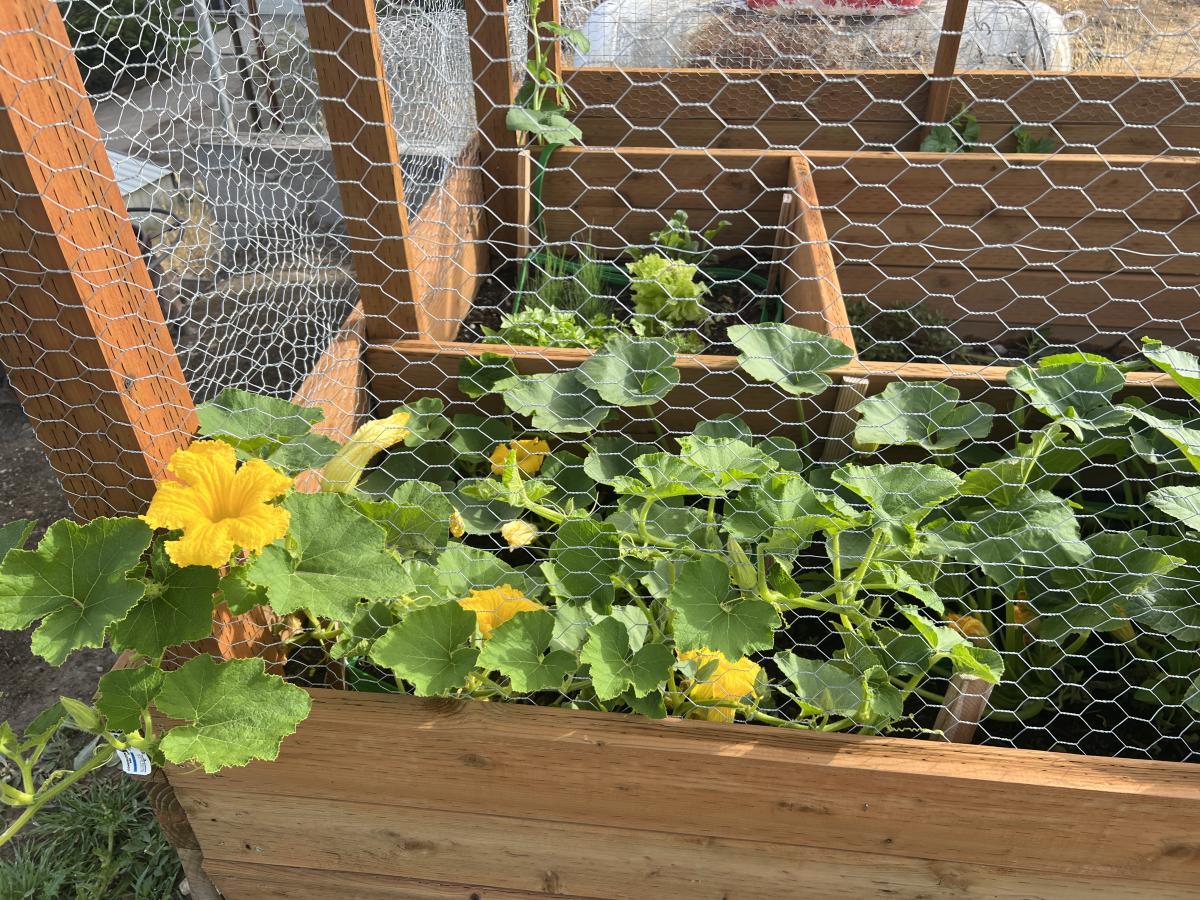
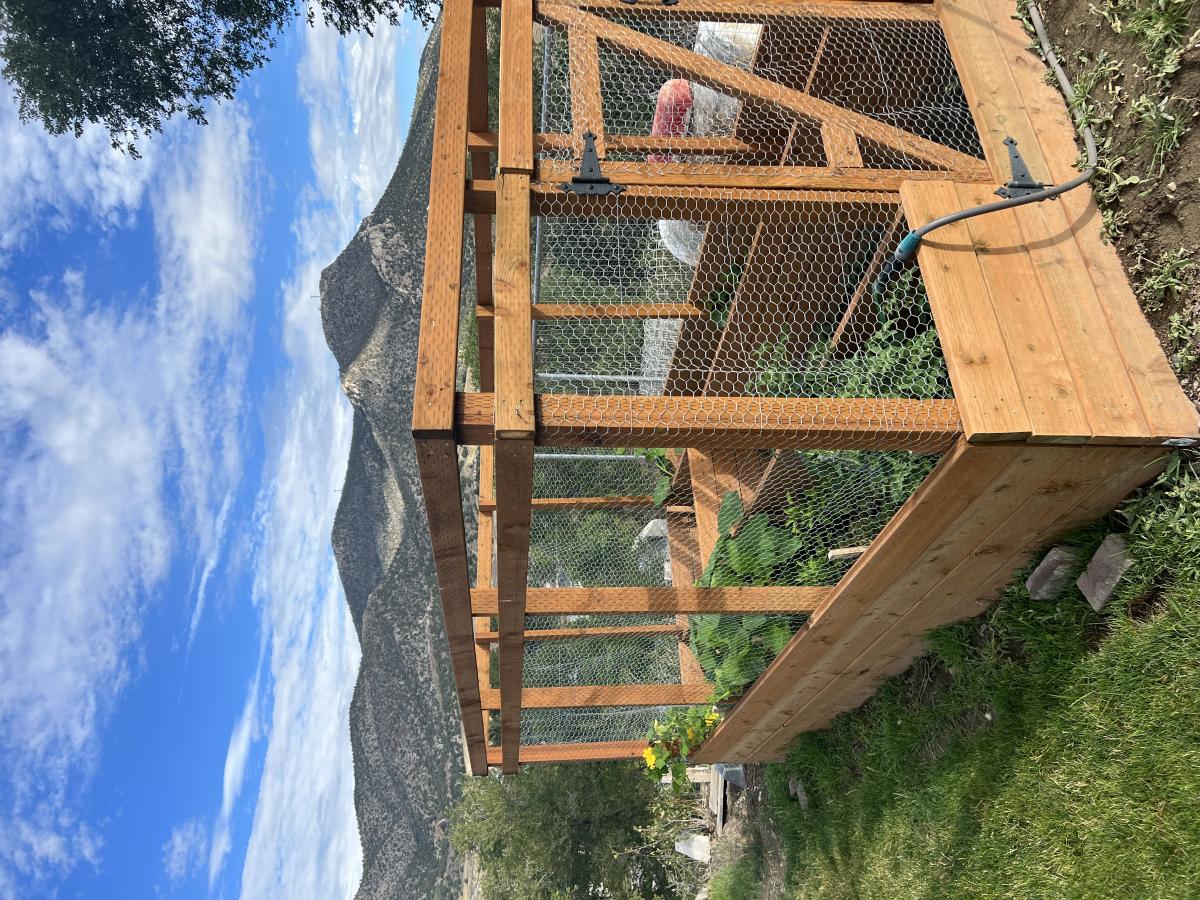
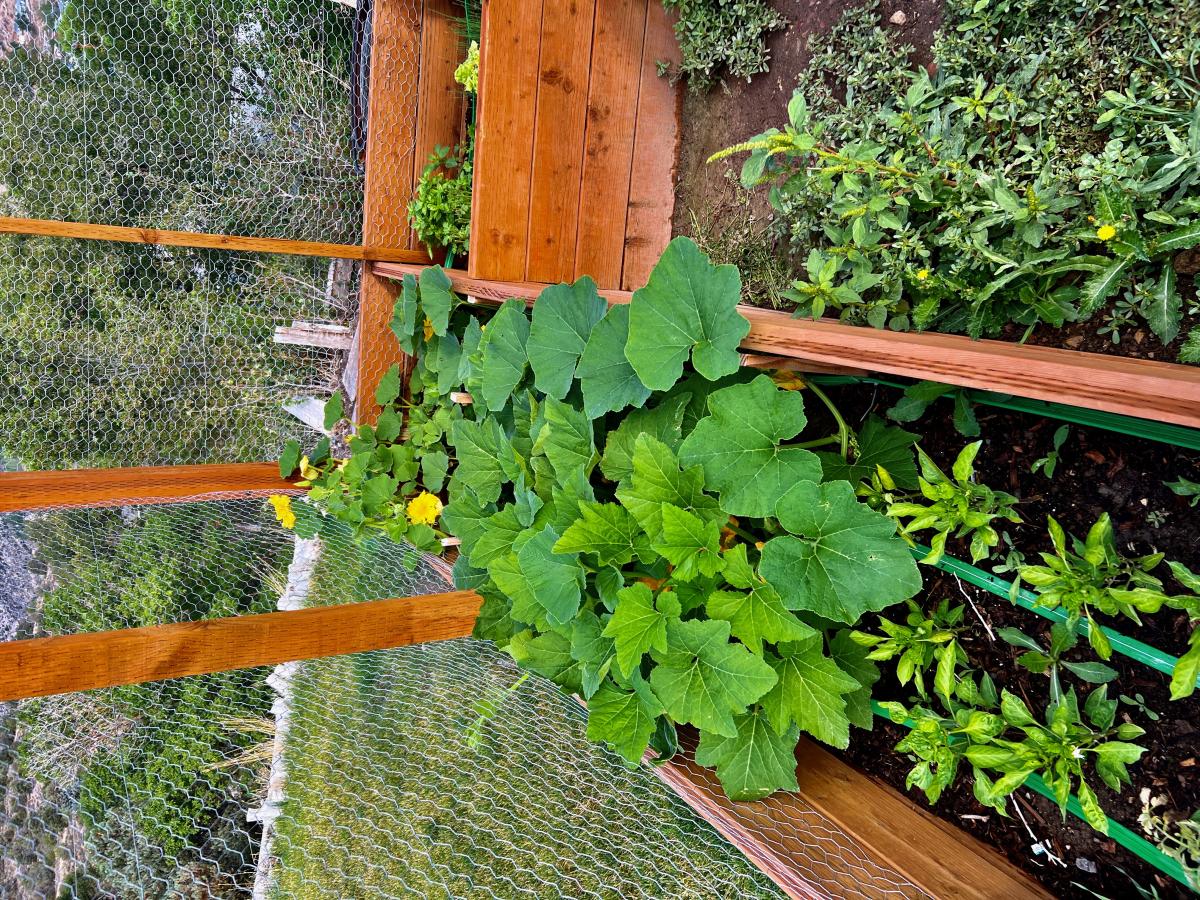
Built from Plan(s)

10 foot long Provence Table with 4x4's

My mom was looking for a new outdoor table, and asked me to come up with something. I found the link for these plans (http://www.thedesignconfidential.com/2011/04/free-diy-furniture-plans-t…) to knock off Restoration Hardware's $4000 Provence Beam outdoor table. Overall I liked the plan, with the chunkier look of the 4x4's. But there were a lot of errors in the diagrams, and the finished height is 34" which is ridiculously tall for a table. So we took it apart and cut the legs back down to change the finished height to 30". We chose rough-cut cedar for it's look and outdoor properties, not wanting to use treated lumber for a dining table. We couldn't find 2x10's like the plan, so we substituted seven 2x6's just like Ana's plan, but left a 1/2" gap in between so water can drain and not pool on top and rot the wood. Also, since we were working with 4x4's for the legs, we chose heavy duty lag bolts instead of screws to join them together. I love the finished look they give. Overall it's a sturdy, yet lightweight table that my mom loves and has already used for entertaining!

Built from Plan(s)
Estimated Cost
$230
Estimated Time Investment
Day Project (6-9 Hours)
Finish Used
outdoor sealer
Recommended Skill Level
Advanced

Comments

brookifer86

Wed, 04/25/2012 - 10:02

Thanks Brook! It was so much fun to build. I put my dad and husband to work while I was the "project manager" ;)

Garden Enclosure

This was a fun project.  The plans are written so that many of the boards don't need to be cut.  It's made from cedar that (thank goodness) was on sale.  I made the raised beds twice as deep as was called for in the plans because I wanted to minimize bending while I garden.  That added to the cost of the lumber and the soil.  I also like the way it looks.


I found it helpful to measure and cut the boards as I went.  This was crucial for fitting the door.  The most difficult part for us was working with the hardware cloth and trying to make it as smooth as possible.


It has been effective keeping deer and rabbits out of the garden.  Things that can fly in are another issue.  

Built from Plan(s)
Estimated Cost
>$500
Estimated Time Investment
Week Long Project (20 Hours or More)
Finish Used
None
Recommended Skill Level
Intermediate
Seasonal And Holiday

Entry Shoe Bench

I've officially stopped stalking and started building! First project a modified spa bench. Still have to stain it, but it already makes the big pile of shoes by the door look neater! I'm a hands-on person and not afraid of power tools (got a band saw for my birthday!) but it's still a challenge building a piece of furniture. I've already learned lots of do's and don't do's for next time!
Thanx a bunch for your site, Ana! It definitely gets the mind plotting great projects to come!

Built from Plan(s)
Estimated Cost
~50$ (honestly, I can't remember!)
Estimated Time Investment
Day Project (6-9 Hours)
Finish Used
PolyShades Royal Mission, several coats... and a spray can of clear coat too.
Recommended Skill Level
Beginner

Cottage bedroom bookcase

Submitted by yhaas on Thu, 10/29/2015 - 20:42

I used 1 x 10s to make the bookcase a little shallower, and left the back open. Thanks for the great plan.

Built from Plan(s)
Estimated Cost
$100
Estimated Time Investment
Weekend Project (10-20 Hours)
Finish Used
Varathane diamond finish water-based polyurethane, satin.
Recommended Skill Level
Beginner

Outdoor Loveseat

Still need to stain but this was my very first project and it turned out well!  The directions are very easy to follow and I am very happy with it!

Estimated Cost
$25
Estimated Time Investment
Afternoon Project (3-6 Hours)
Finish Used
Will be using Minwax oil-based stain over a wood conitioner, and a clear flat oil-based top-coat.
Recommended Skill Level
Beginner

Playset Addition

Submitted by Derek S on Wed, 06/10/2020 - 08:27

Decided our old play set needed an addition, landed on these plans of Ana's. Sat on them and mulled them over for months. Once the wife said something about adding on to it I made the purchases needed. Connected the two platforms with a bridge. I used 4"x4"x10' for the runners, same boards as the decking for the platform of the bridge(5/4"x6"), 2x4's and 1x4's for the railing. If you look at the 3rd photo, I had to chisel out the 4x4 post to get the 2"x6"x12" support to fit correctly. This should measure 2"x6"x13". Another change I made was to cut the bottom and top trim pieces longer on the front and back sections so that the trim would cover the framing of the gable end walls (see last photo). my son wanted windows so I faked in some windows with scrap 2x2's. I used 2x6's as supports from the 4x4's to the 2x6 framing (see photo 3) I added the monkey bars about a month before deciding to do the platform/deck and playhouse. The ladder is based loosely off of a couple of plans I found online. I was able to do all of this work myself except for the roof. Need my dads help to lift the plywood, he then helped me with the rest of the roof.

Estimated Cost
$1000
Estimated Time Investment
Week Long Project (20 Hours or More)
Finish Used
I used a dark wood stain fore the house, green exterior paint for the trim and white exterior paint for the interior of the house.
Recommended Skill Level
Intermediate
Seasonal And Holiday

Tall Wedding Planters

Submitted by swhitead on Mon, 07/20/2020 - 10:14

Made the planters to hold flowers for a small garden wedding. Used 3-1/2" wide fence boards as my HD was out of standard 5-1/2" boards. Used 11 boards for finished height of 38" top was 18" wide, bottom 12-1/2" using a 4° angle. Ripped fence boards to size to use in place of 1x2/1x3 boards. Added center trim as on another brag post, as well as, framed the top to finish off the planter.

Built from Plan(s)
Estimated Cost
$20 each
Estimated Time Investment
Afternoon Project (3-6 Hours)
Finish Used
None
Recommended Skill Level
Intermediate

Comments

Chicken Coop

Submitted by Elloh on Tue, 08/11/2020 - 11:05

This was my biggest build yet and these plans along with being able to see a few brag posts with modicifactions made this project less intimidating. I extended the coop in order to add a walk in door. The drop down doors on both sides will give plenty of access and help with cleaning. I've added door latches to all the doors since putting it in place. My dad provided the cedar so that greatly reduced my costs. This project took about six days to complete. The fun part was getting it out of my carport : ) This was built for my daughter's chickens and she is thrilled with it. So am I! Thanks for the plans Ana!

Estimated Cost
Hardware, screws, hardware cloth and plywood - around $150

Workbench

Submitted by Anonymous (not verified) on Sun, 11/22/2020 - 05:47

Thanks for the simple plans Anna, they worked out great!. I resized the table to make maximum use of the material, still within the same quantity you specified in your plans. I glued the legs along the lengths of the table, and kept the table top and shelf screwed in, for easy dismantling, if necessary.

Finally I added pop down heavy duty wheels allowing me to move the table (not shown in this pic) easily. When the wheels are not being used they pop up, making the table very stable. The height of the table is about 1/2” lower than the table saw, making it an ideal outfeed table as well.

Great design, and fun build.

Estimated Cost
Cn$148 (went with a finished 3/4” 4x8’ ply board)
Estimated Time Investment
Day Project (6-9 Hours)
Finish Used
None
Recommended Skill Level
Intermediate

Comments

Farmhouse Console Table - Modified

Submitted by mpjacob08 on Thu, 12/10/2020 - 05:35

I Modified the plan to eliminate the middle shelf and shortened the length to fit as an entryway table.

Built from Plan(s)
Estimated Cost
$68
Estimated Time Investment
Day Project (6-9 Hours)
Finish Used
White alkyd for bottom then conditioned the top before staining with special walnut then once dry used weathered oak. Sealed with oil based polyurethane.
Recommended Skill Level
Beginner

Comments

Game Cabinet

Submitted by Wifey on Wed, 03/01/2017 - 11:48

We have very little storage in our house and wanted someplace to store board games. This works great in the dining room. I made the hardware using patio door rollers and used my jigsaw to cut steel and aluminum bars to fit. I hammered the ends of the track in a curve and put a track on the bottom of the cabinet to keep the doors more flush against the cabinet. I spray-painted all the metal and bolts to match. It is 36" high, 13" deep and 63" long. I didn't use the center board in the front because I wanted to accomodate for larger games.

Estimated Cost
About $200
Estimated Time Investment
Weekend Project (10-20 Hours)
Finish Used
Behr paint and satin poly on top
Recommended Skill Level
Intermediate

Comments

Monika

Mon, 04/01/2024 - 01:12

Having a game cabinet is essential for any gaming enthusiast like me. It's where I keep all my favorite board games, card games, and video games neatly organized and ready to play. And if you're into online gaming, check out Duelbits promo codes on http://cs2lords.com/duelbits-promo-codes for some awesome bonuses and rewards. It improved my gaming experience and I recommend it to you!

8x12 Shed

Submitted by Anonymous (not verified) on Tue, 06/13/2023 - 03:26

My new garden shed built from your premium plans! I'm 62, never built a shed before, and worked mostly alone. My sons helped with some of the wall and roof sheathing. In the end, I did everything except for the shingling. I painted it to match my house main color and trim.

The video is very helpful - I watched it several times. My major change to the plans was using Simpson Strong Ties and hurricane ties to secure the rafters to the ridge pole and the top plates. Otherwise, I used all other methods. I recommend cutting the front wall sheathing before cutting the panels for the doors. I do not have a trim saw and thought my standard circular saw was too heavy for me to make the cuts like Jacob did.

Built from Plan(s)

Comments

Seasonal And Holiday

Farmhouse Console Table

Submitted by boneill on Mon, 07/06/2020 - 20:31

Modified the size to 60” length , 12” depth , 36” height . Went with satin white frame , Minwax classic grey stained top with 3 coats of poly clear coat satin (quick dry).

Built from Plan(s)
Estimated Cost
$50
Estimated Time Investment
Weekend Project (10-20 Hours)
Finish Used
Minwax classic grey with poly 3 coats quick dry
Recommended Skill Level
Beginner

Comments

Farmhouse Storage bed with platform modification

Submitted by Anonymous (not verified) on Mon, 10/04/2021 - 13:06

Hi, I’m Joe and love working on my cabin in Stanley Idaho. I needed a queen size bed on the ground floor but the room is small so I incorporated the footboard into into the platform to gain 6 inches of space in the room. It took a couple months working off and on but all fun. I also made the drawers deeper front to back to maximize storage. I did this at the peak of lumber prices and spent like $900 on lumber. It came out great, my Airbnb guests love it!

Comments

Chair Build with Loveseat Modification

Submitted by Joshh81 on Sat, 09/02/2017 - 12:26

Built the 2 chairs according to the plans, and then modified it for a bench that's 48" (our cushions are 23.5 x 23.5). Worked really well!

Estimated Time Investment
Weekend Project (10-20 Hours)
Recommended Skill Level
Beginner

Comments

Seasonal And Holiday

Modern Slat Top Outdoor Wood Bench

Submitted by ckaye on Sun, 07/07/2013 - 18:38

We wanted an outdoor bench for our front entrance way, this one is just what we were looking for! Thank you for the plans.

Estimated Time Investment
Day Project (6-9 Hours)
Finish Used
2" x 6" Spruce Black Stain
Recommended Skill Level
Beginner

Comments

beardjulie

Wed, 05/04/2016 - 10:01

I am really a novice. The plans say that the 1x4's should be 18-1/2" high? But the measurement of the vertical legs are 14", and the horizontal piece is 4" high, which adds to 18". It all looks flush in the photo. Could you explain what I am missing? Thank you so much!

In reply to by beardjulie

Rudystawarek

Wed, 05/04/2016 - 11:30

So from what i see in the plans Each 1x4 board is to be cut at 18" and the 2x4 is to be cut at 14-1/2". Cutting the 2x4 at 14-1/2" will insure the 1x4 and 2x4 are fluish for the end product. It doesnt seem to add up given the demensional names of the lumber hahaha however the actual width of a 2x4 (the one the will be going horizontal) is acutally 3-1/2". so then you cut you 2x4 leg piece at 14-1/2" and then lay the horizontal 2x4 on top the total height will be 18" and should be flush with your 1x4 that is cut at 18"

beardjulie

Fri, 05/27/2016 - 14:04

That is too funny! That is a dead give away that I'm new at this! Thanks you!

beardjulie

Fri, 05/27/2016 - 14:04

That is too funny! That is a dead give away that I'm new at this! Thanks you!

Modern Comfort Outdoor Sofa

Submitted by LinzFritz on Fri, 09/09/2011 - 18:45

I built this sofa in one day, and painted it the next! I procrastinated all summer, and now that it's almost fall I decided to finally build it so that I could relax on the sofa in the back yard for the last month of nice weather here in Winnipeg. The plans were fantastic, the only problem I had was finding 24x24 cushions. The closest I could find were 22x22, so I adjusted the plans accordingly. It turned out well but I prefer it without the back cushions because that way there's more lounging room. Thank you so much for the plans!

Estimated Time Investment
Day Project (6-9 Hours)
Finish Used
Rustoleum glossy white outdoor paint
Recommended Skill Level
Beginner

Comments

SingleMomThriving

Mon, 09/12/2011 - 08:56

Good idea to look for the cushions first and adjust accordingly. I love the color you chose to... works very well with the white sofa and warm wood deck. I agree that it is more inviting without the back pillows... That way you can see the wonderful detail of the back

karisaija

Tue, 05/12/2020 - 11:30

Beautiful!
I am so confused. Multiple people who have built this mention Ana's being 24 x 24. I can not find any plans for 2 x 4 sofa or couch with 24 x 24" cushions. I have spent days searching the interwebs.....

Seasonal And Holiday