Community Brag Posts
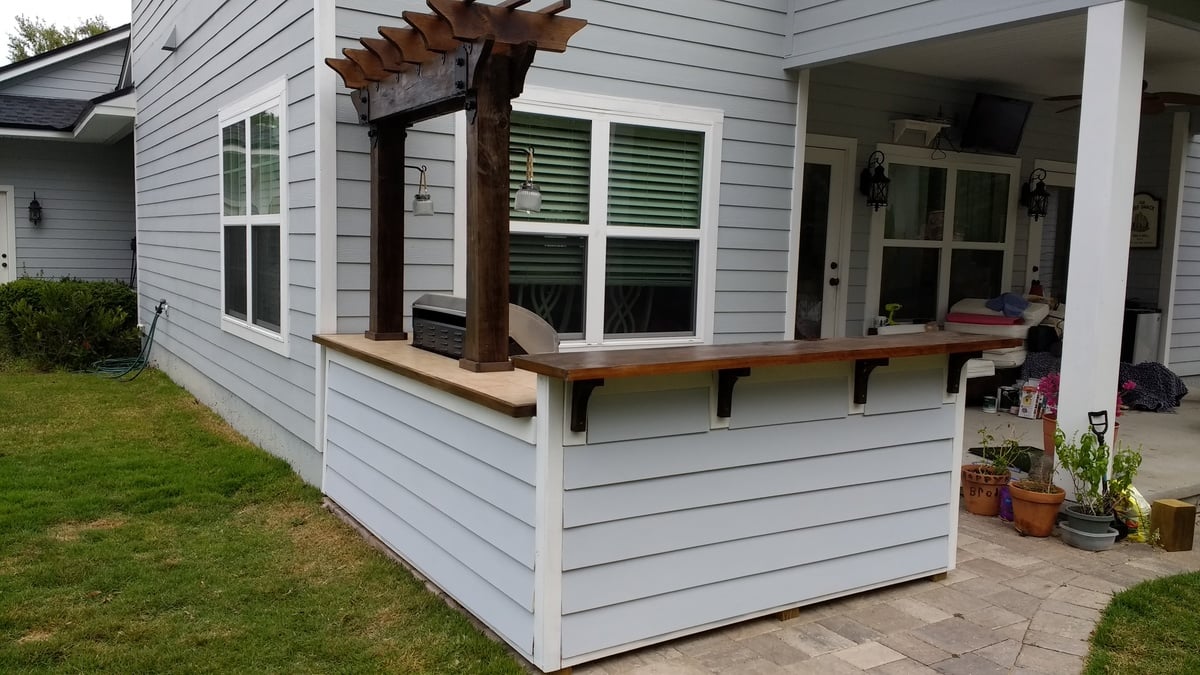
Outdoor bar grill surround with 2 post pergola
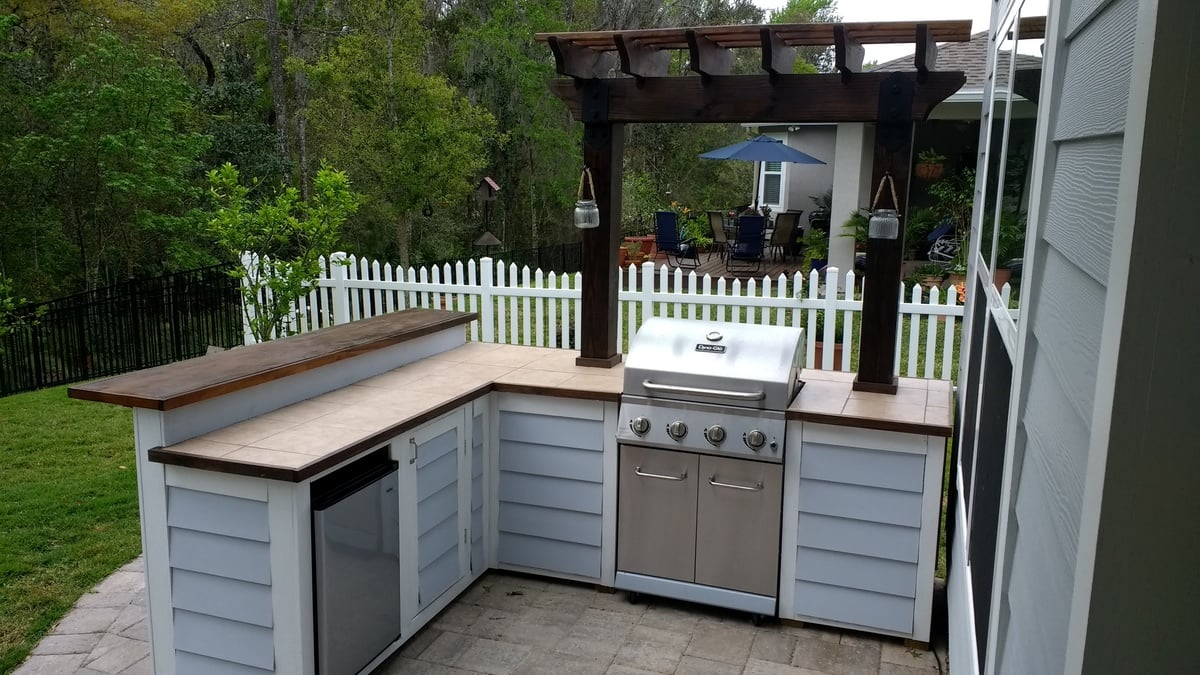
I wanted to build an L shaped outdoor bar with a 2 post pergola over the grill. I couldn't find any plans online that would fit the space I had, so I decided to build it myself with custom dimensions. The top bar is approx. 7'3" across, and 15" wide, while the distance from the right edge (next to the house) to the end of the bar is approx. 9'1".
I framed it with PT lumber and the 2 pergola posts are sitting on top of the pavers and supported internally within some of the framing studs. Since the pavers sit on top of concrete, I didn't feel the need to dig up the existing pavers and achor them in the ground.
I used hardiboard for the exterior and tiled the lower section of the bar.
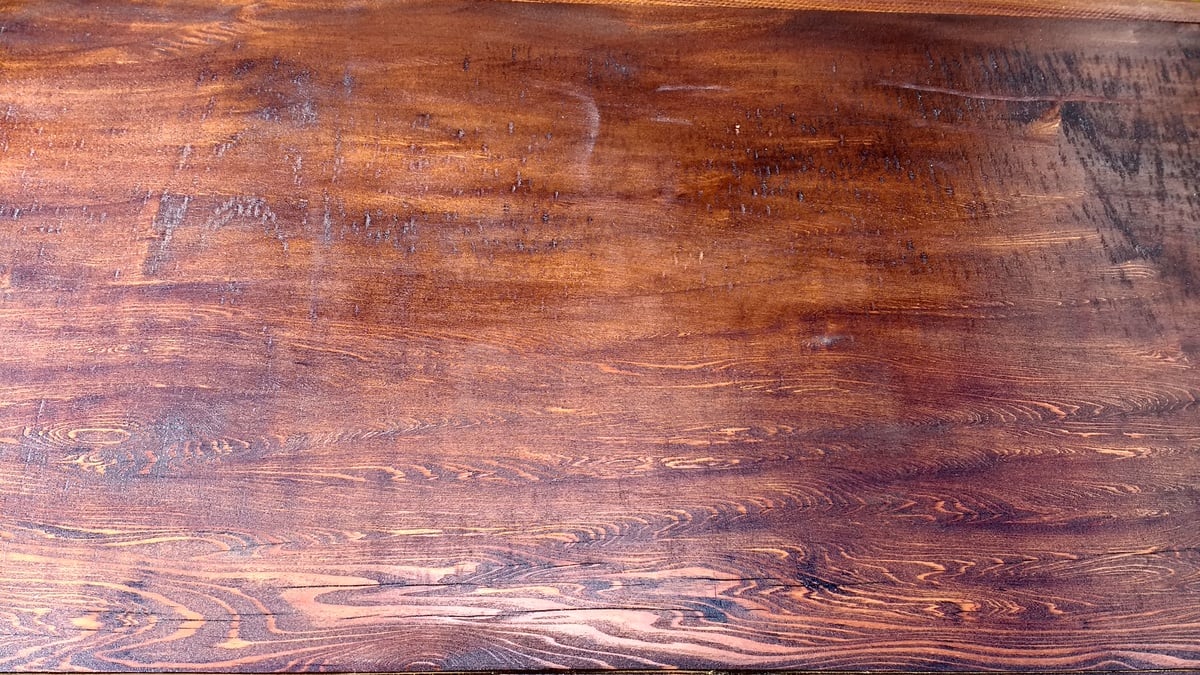
For the actual high bar top, I wanted to do something unique, and found a 900 year old scrap slab of Cypress at a local lumber yard. One side was smooth, but underneath was gouged out from different saw cuts and very uneven. I screwed a piece of 3/4" PT plywood underneath and trimmed it with 1-1/2" Cypress. I stained the whole thing with a dark honey colored stain and put a generous amount of poly on it once it was dry. There are a few cracks and nicks on it, but once it was stained, it looked awesome.

Estimated Cost
I lost track after a while, but I would say $600-700.
Estimated Time Investment
Week Long Project (20 Hours or More)
Finish Used
Minwax honey colored stain for the bar top. Minwax provincial stain for the pergola and minwax dark walnut stain for the oak trim.
Recommended Skill Level
Intermediate
Comments
Wed, 06/19/2019 - 13:23
Looks awesome. I have been…
Looks awesome. I have been wanting something like this for a while now. Where can we can plans for this?
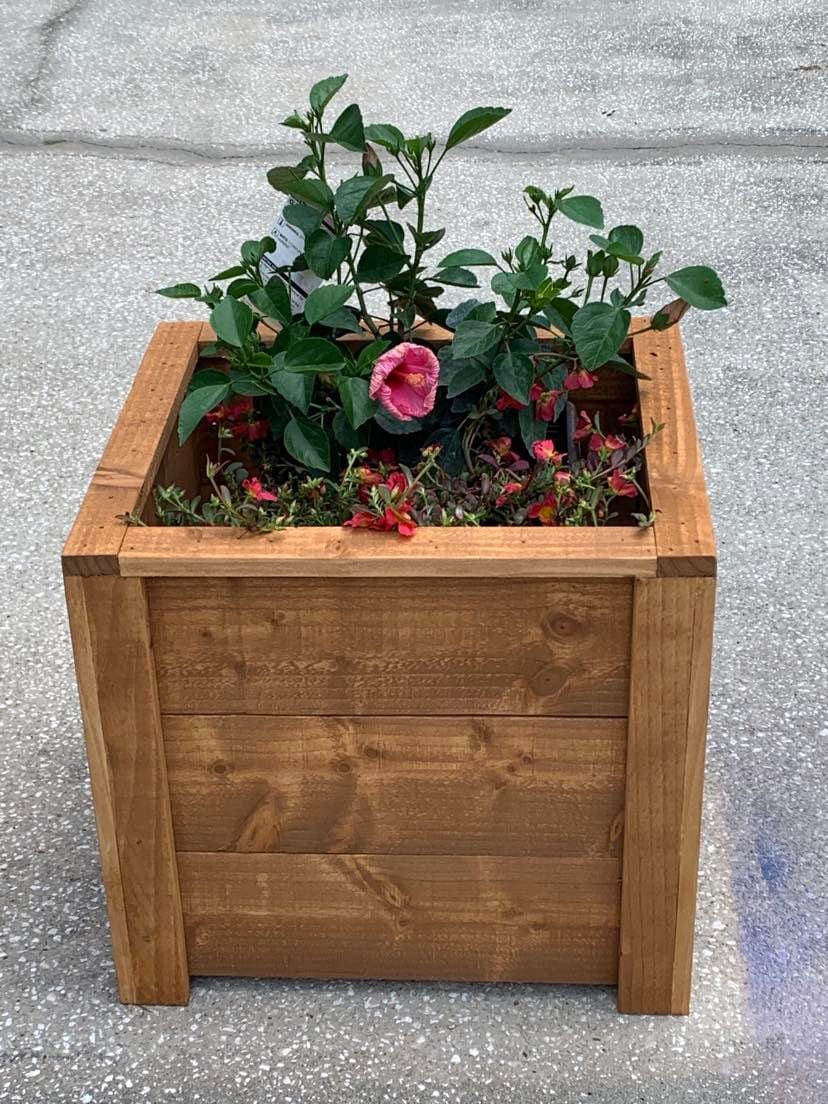
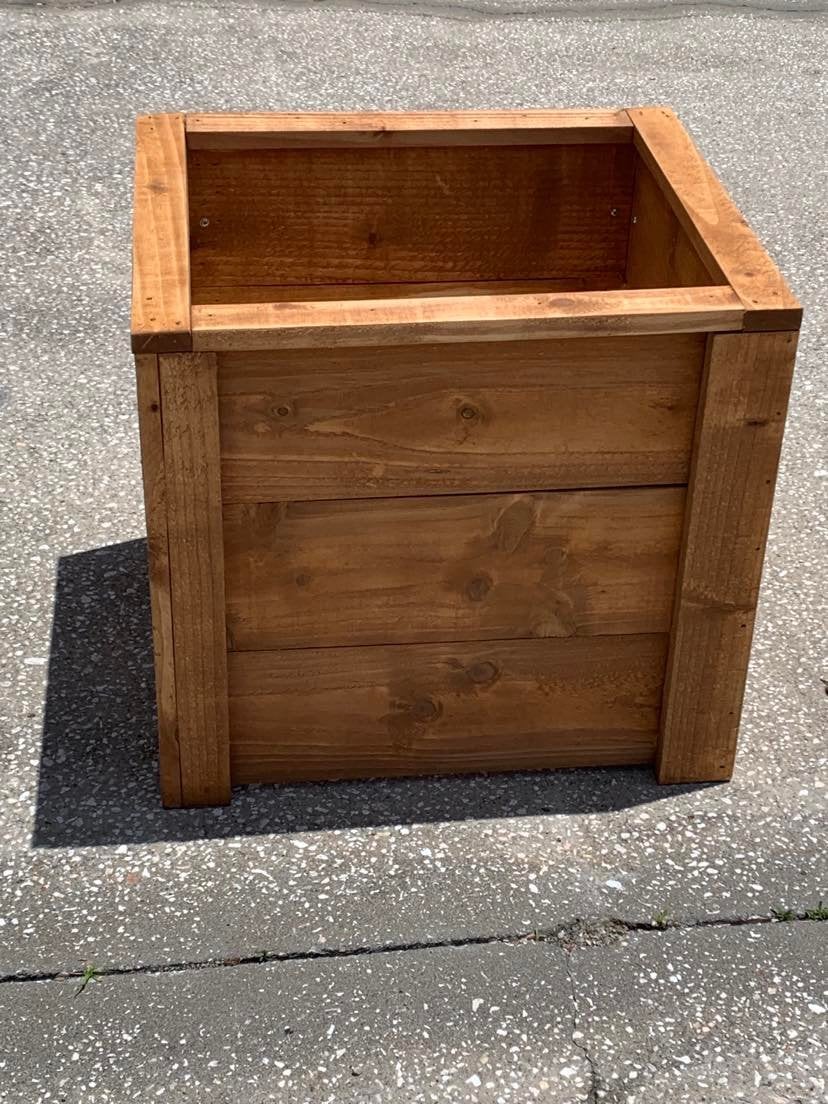
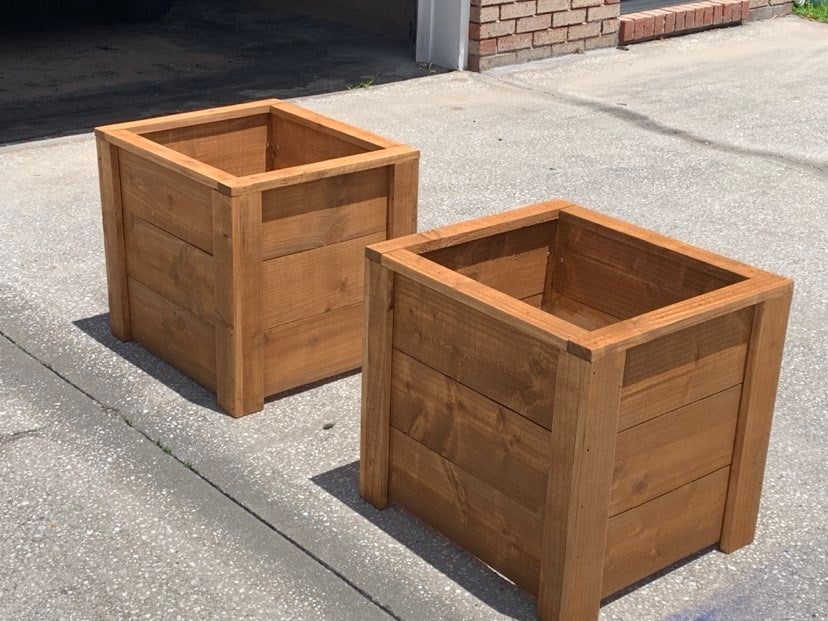
Picket Planter Boxes
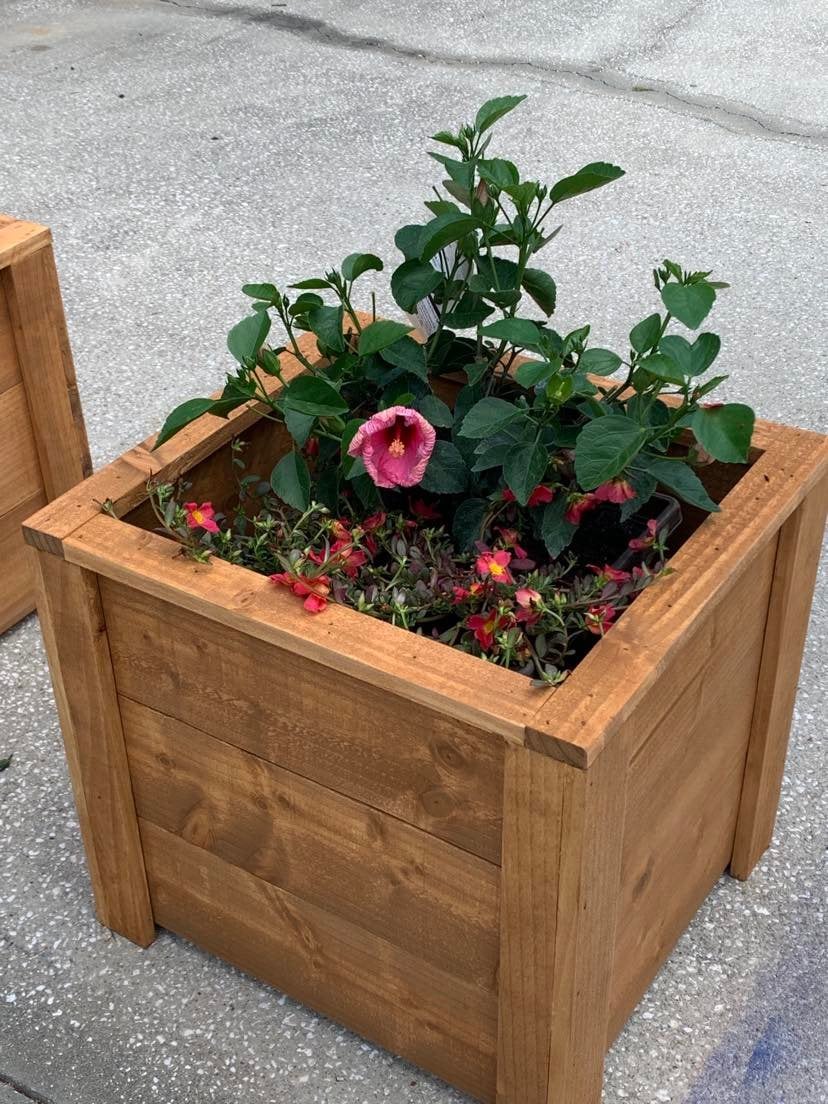
Thanks Ana, I built your planter box, actually built 2 of them, one for each mom. The were a huge hit and I already have people asking me to build them one.
So loved building this planter box. Thanks for all you do for your fellow woodworkers!
Dale G
Callahan, FL
Built from Plan(s)
Comments
Tue, 05/10/2022 - 07:05
Pretty Planters!
Love these, wonderful idea for a mother's day gift, thank you for sharing!
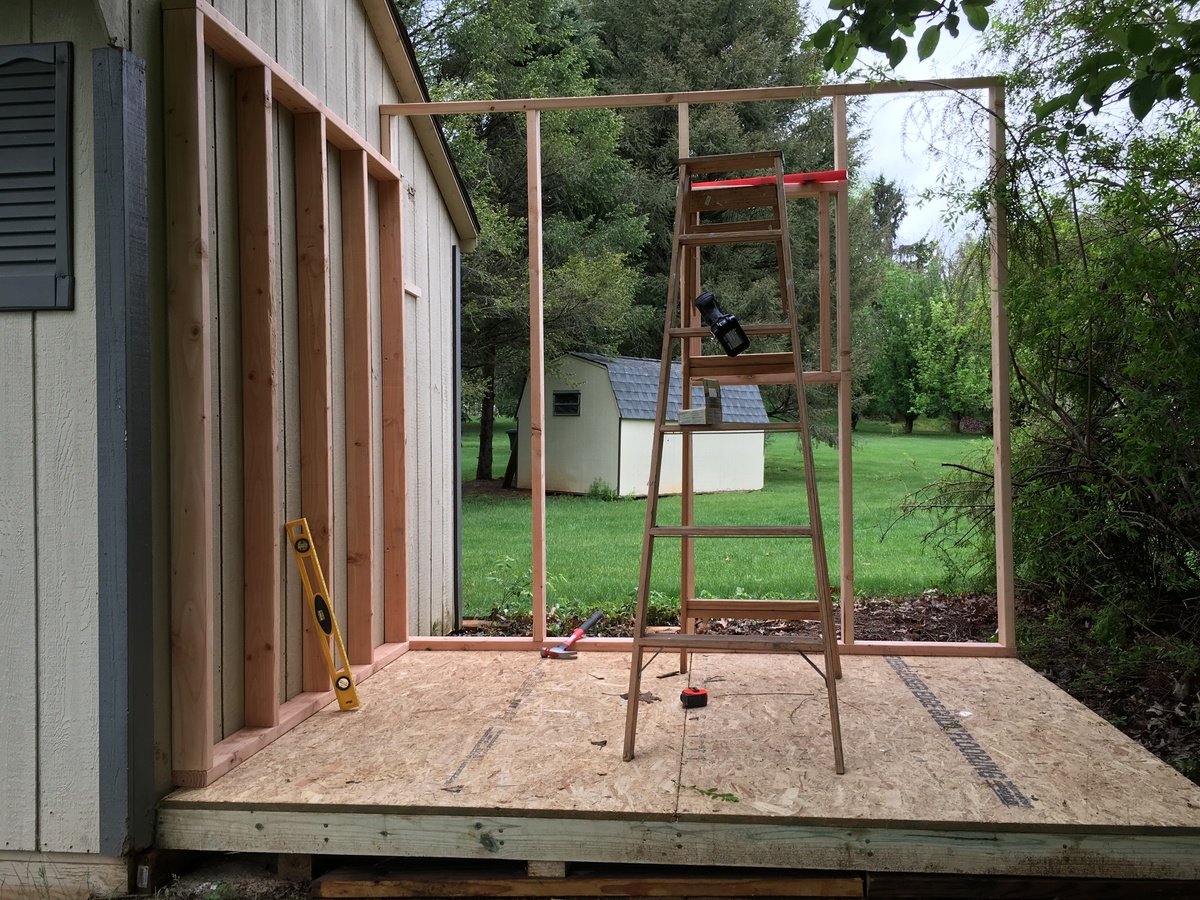
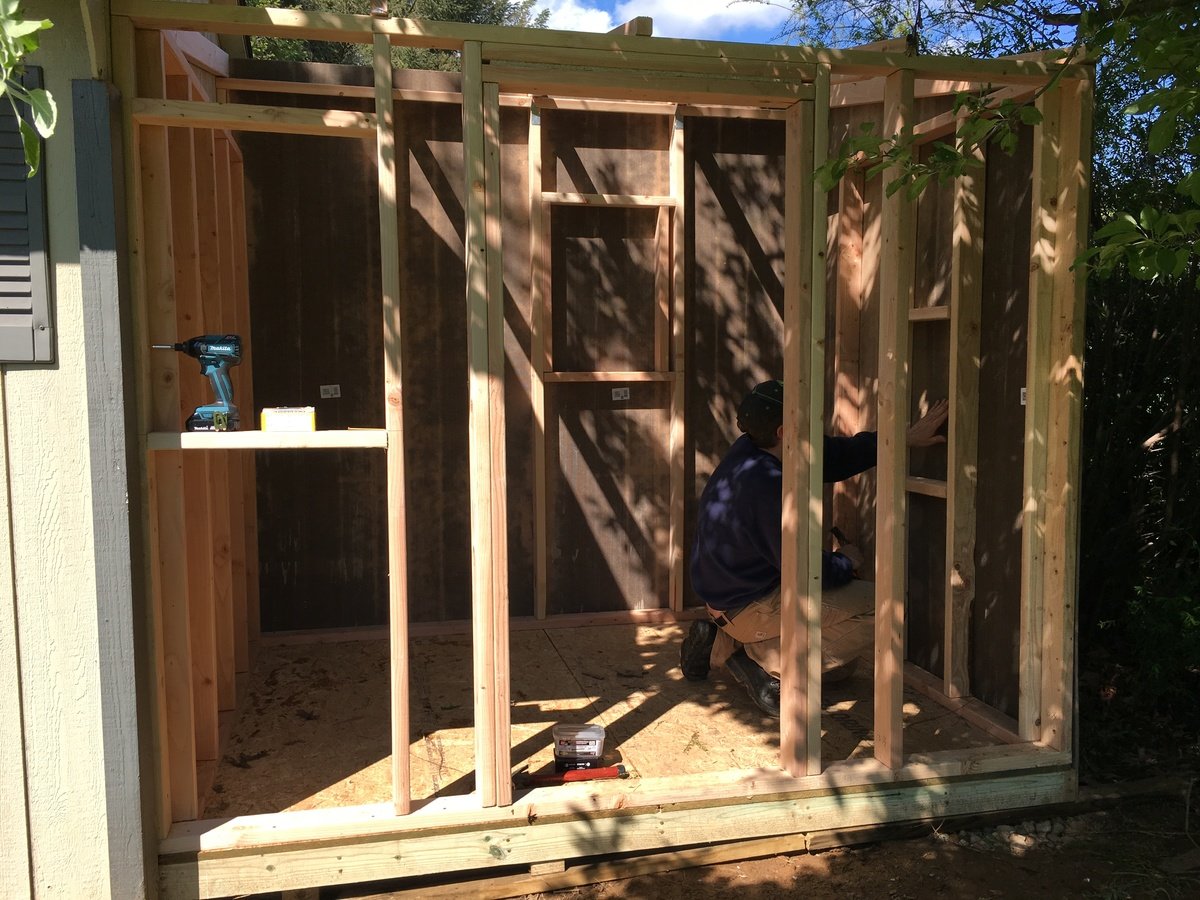
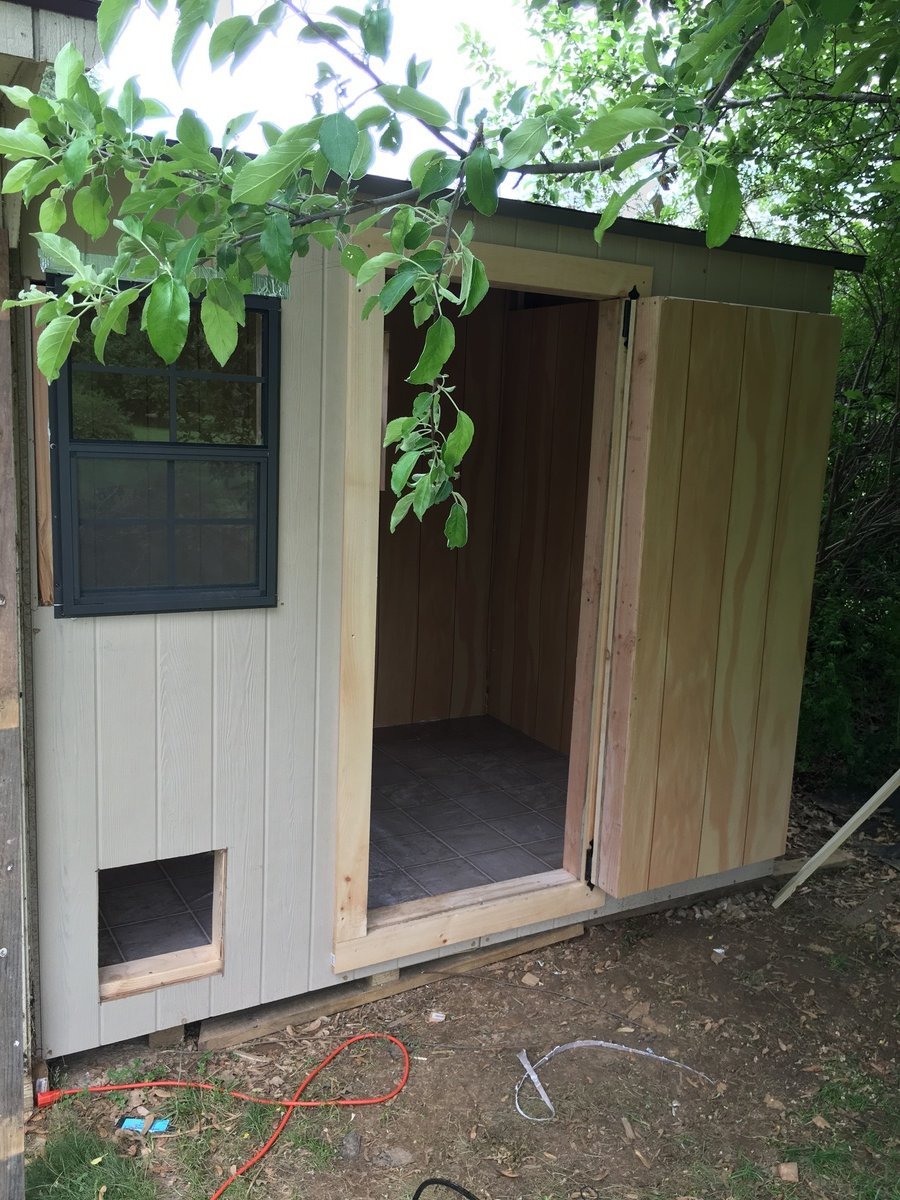
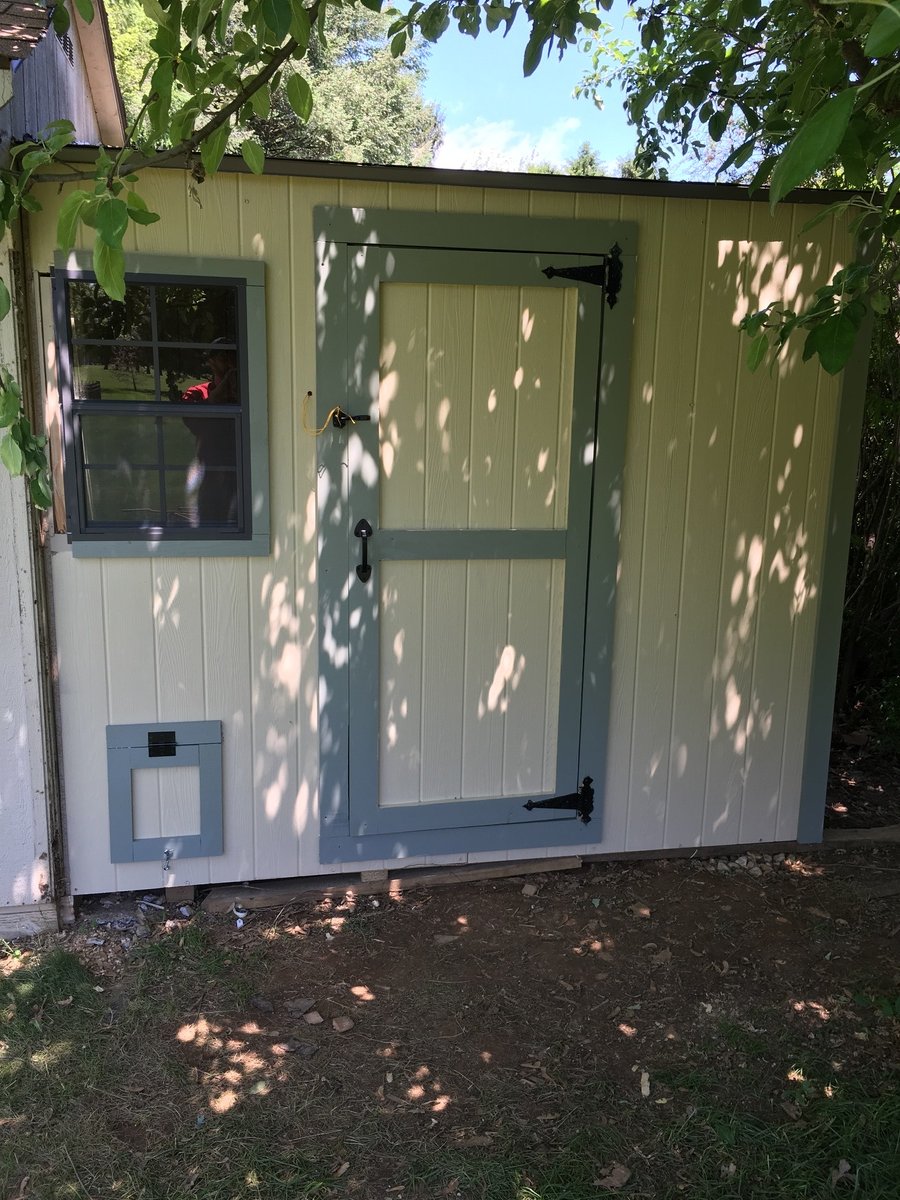
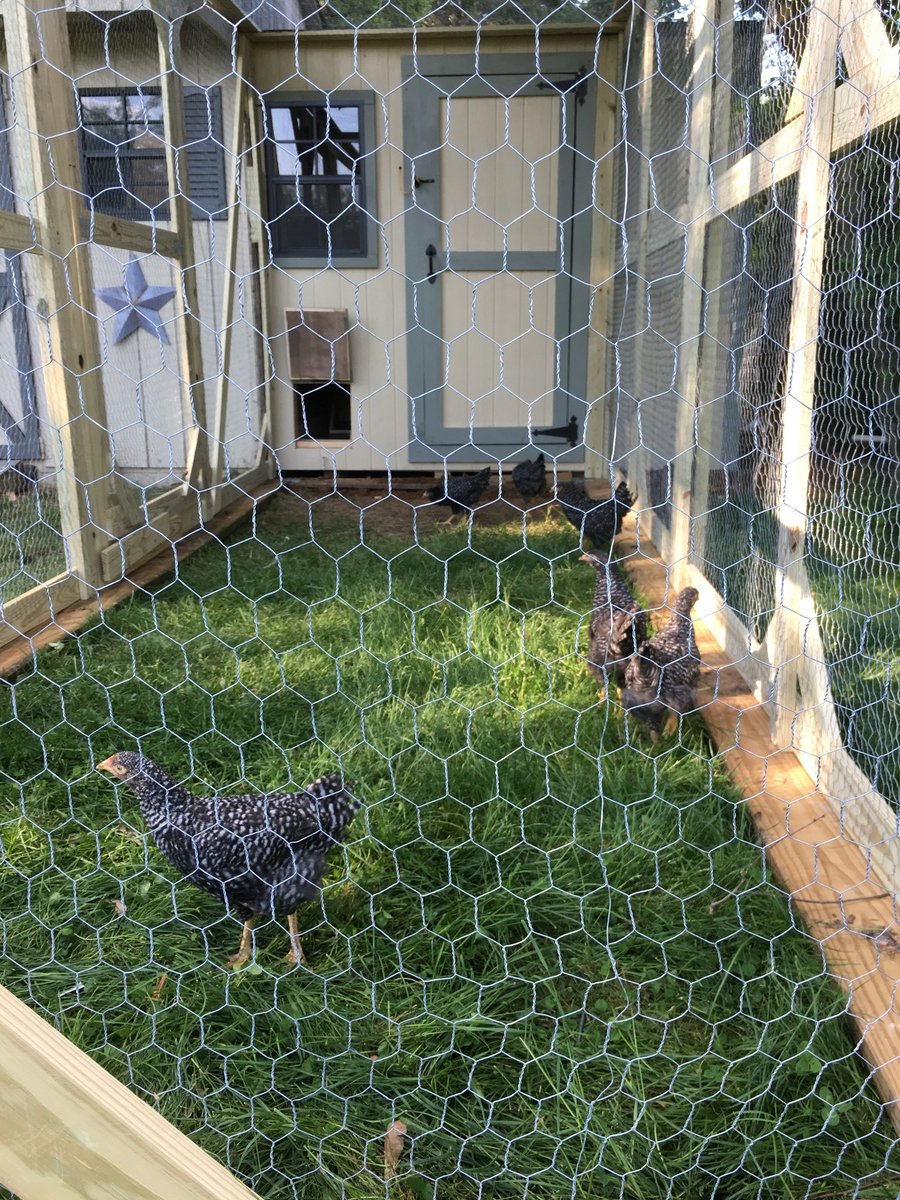
DIY Shed Chicken Coop 6x8
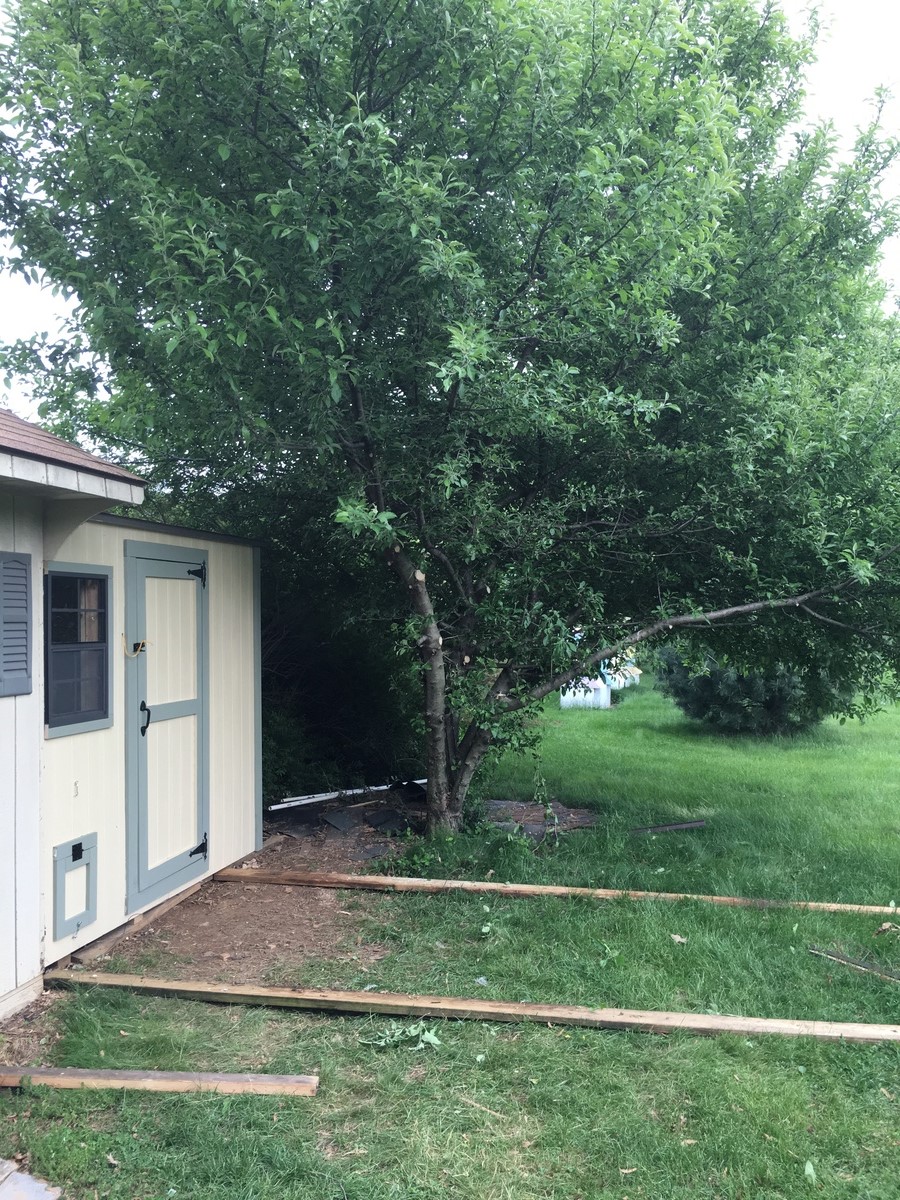
The project was used using the same plans but I extended the floor to be 6 feet wide vice 4 feet the additional 2 feet provided the perfect amount space I wanted. I also added an extra windows to get cross ventilation. I also insulated the coop and put paneling on the walls and lenolium on the floors. I dropped the back wall sheeting 1.5 inches for additional airflow since the shed doesn't have a ridge vent. The plans are easy to follow and easily adaptable.
Built from Plan(s)
Estimated Cost
$700. You may think that is a lot but you will learn a lot. Coops we were looking at were $1,200. This coop was less expensive and bigger and better plus you can say you built that.
Estimated Time Investment
Week Long Project (20 Hours or More)
Finish Used
T1-11 with home depot behr exterior paint.
Recommended Skill Level
Beginner
Comments

Thu, 07/02/2020 - 11:29
Great Coop!
Great job! We are getting ready to build a coop for our chickens which arrive in 3 weeks!
Potting bench with sink

Added an outdoor sink to the potting bench.

Built from Plan(s)
Estimated Cost
120
Estimated Time Investment
Afternoon Project (3-6 Hours)
Finish Used
Behr seal and stain, chocolate
Recommended Skill Level
Beginner
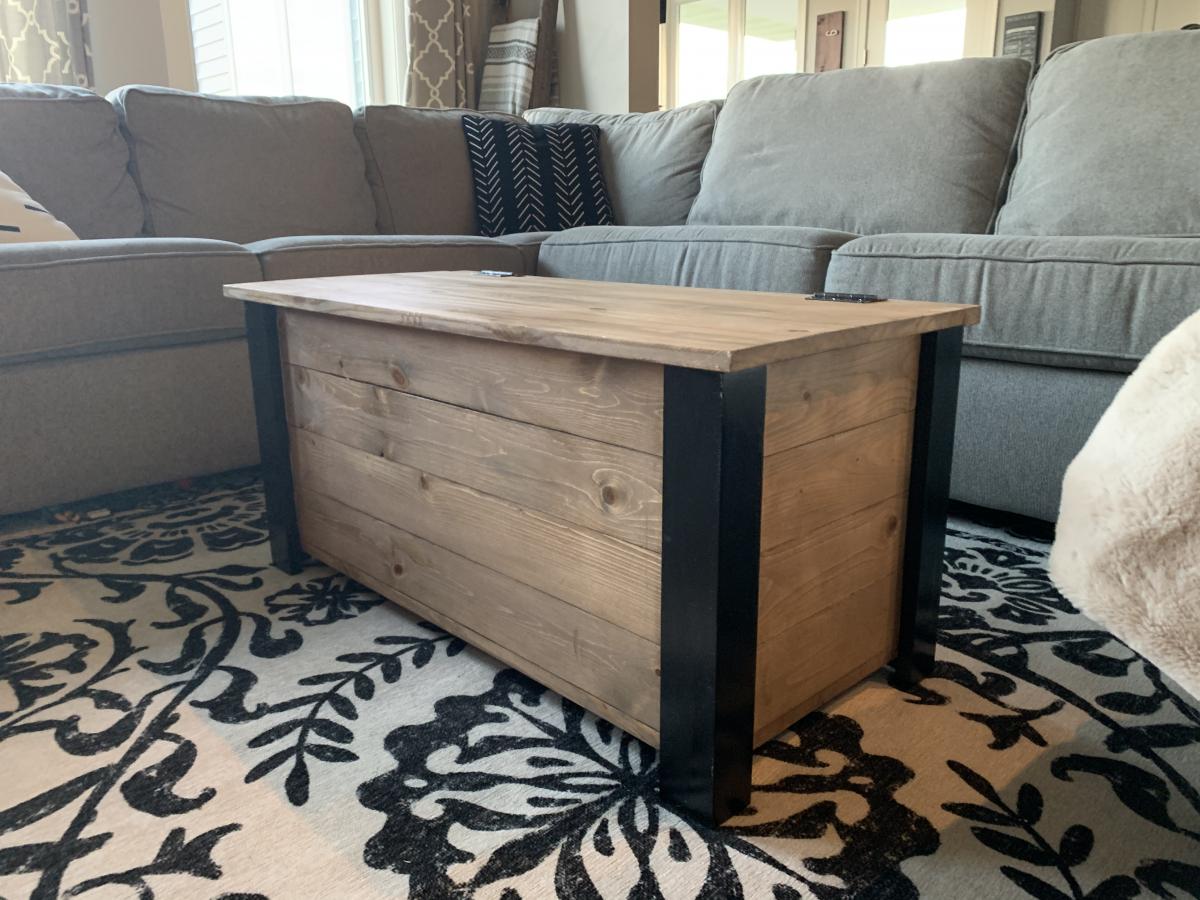
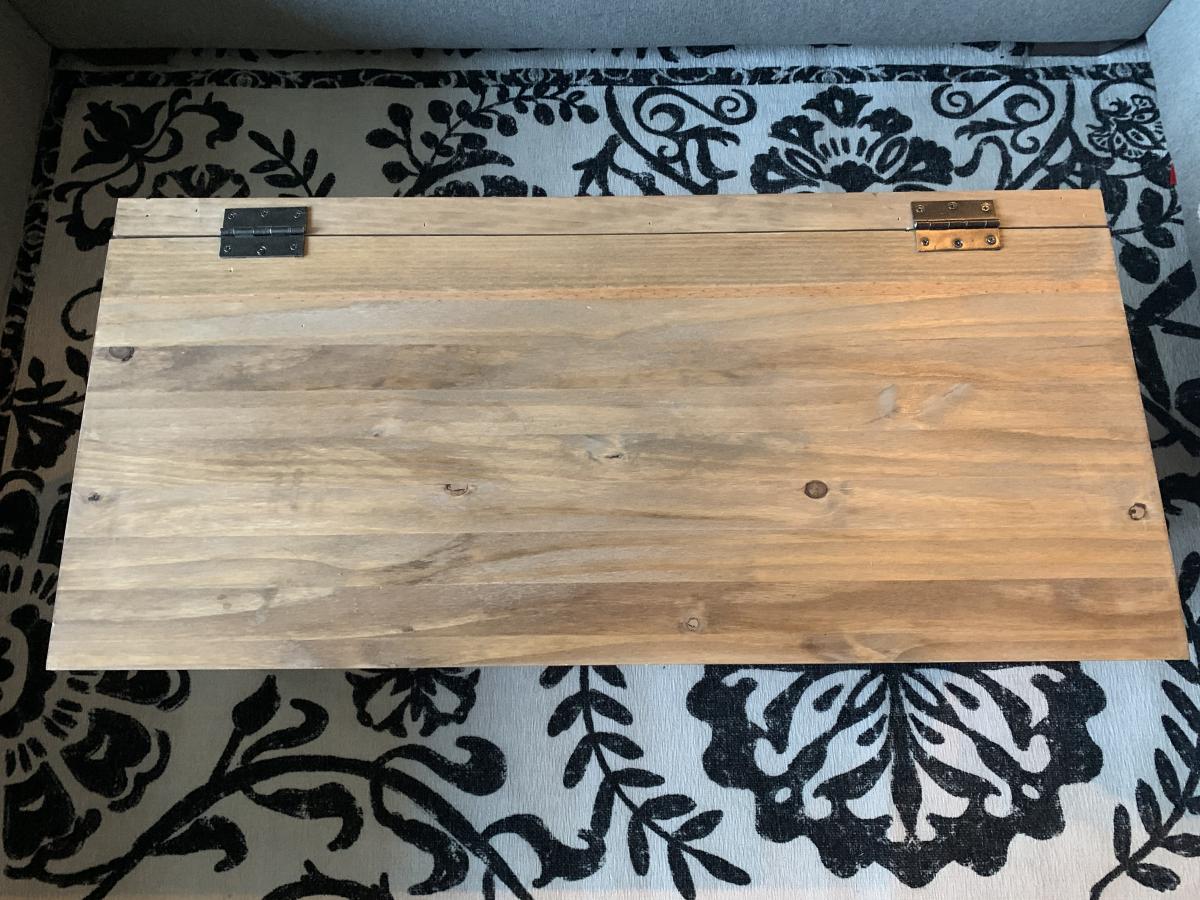
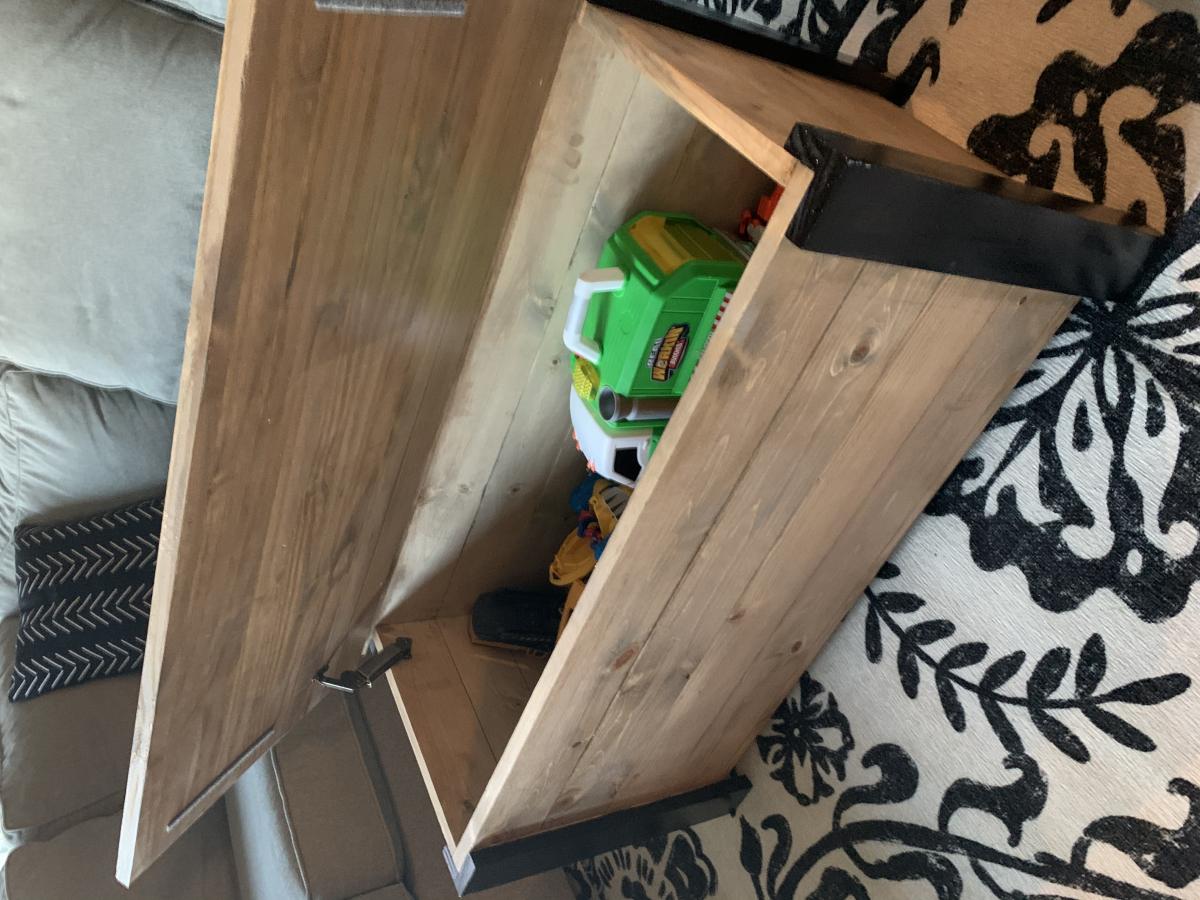
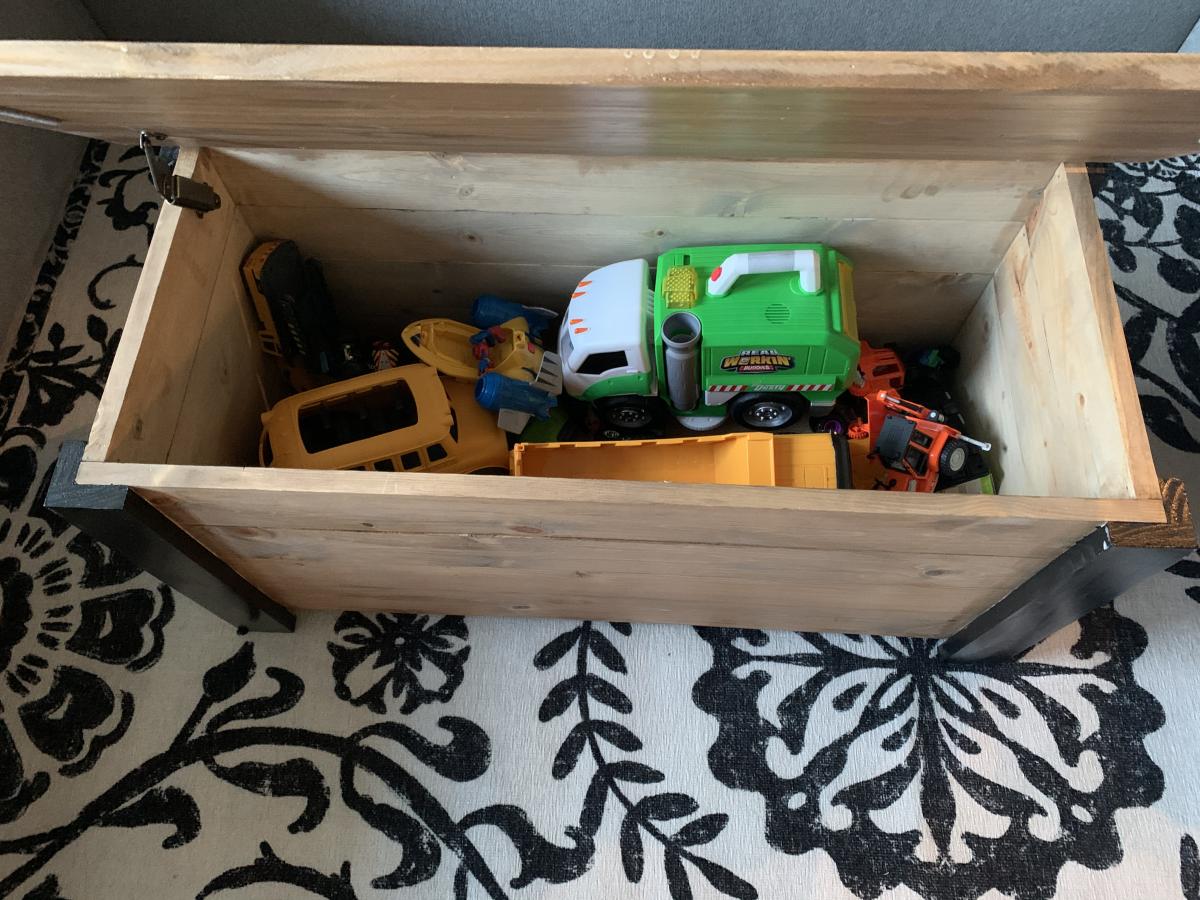
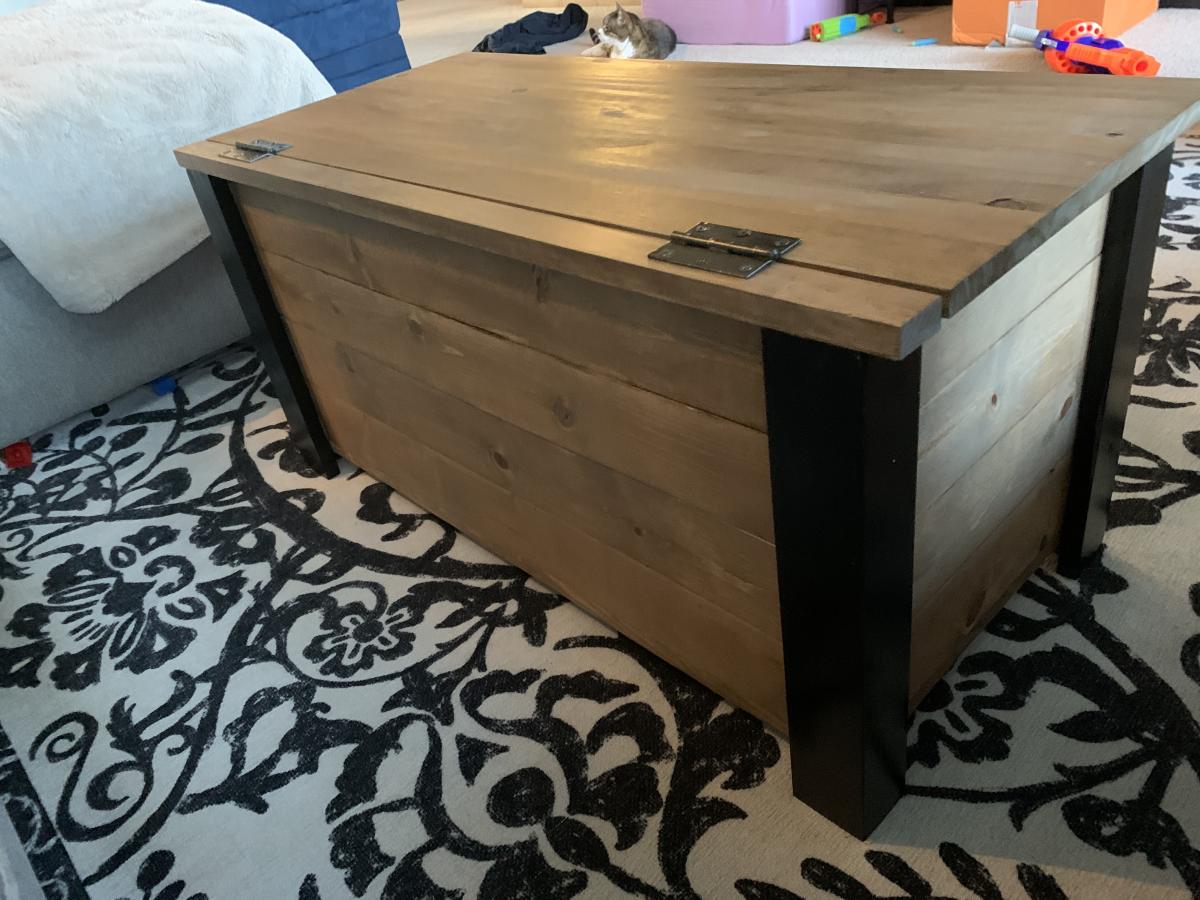
Farmhouse Toy Box
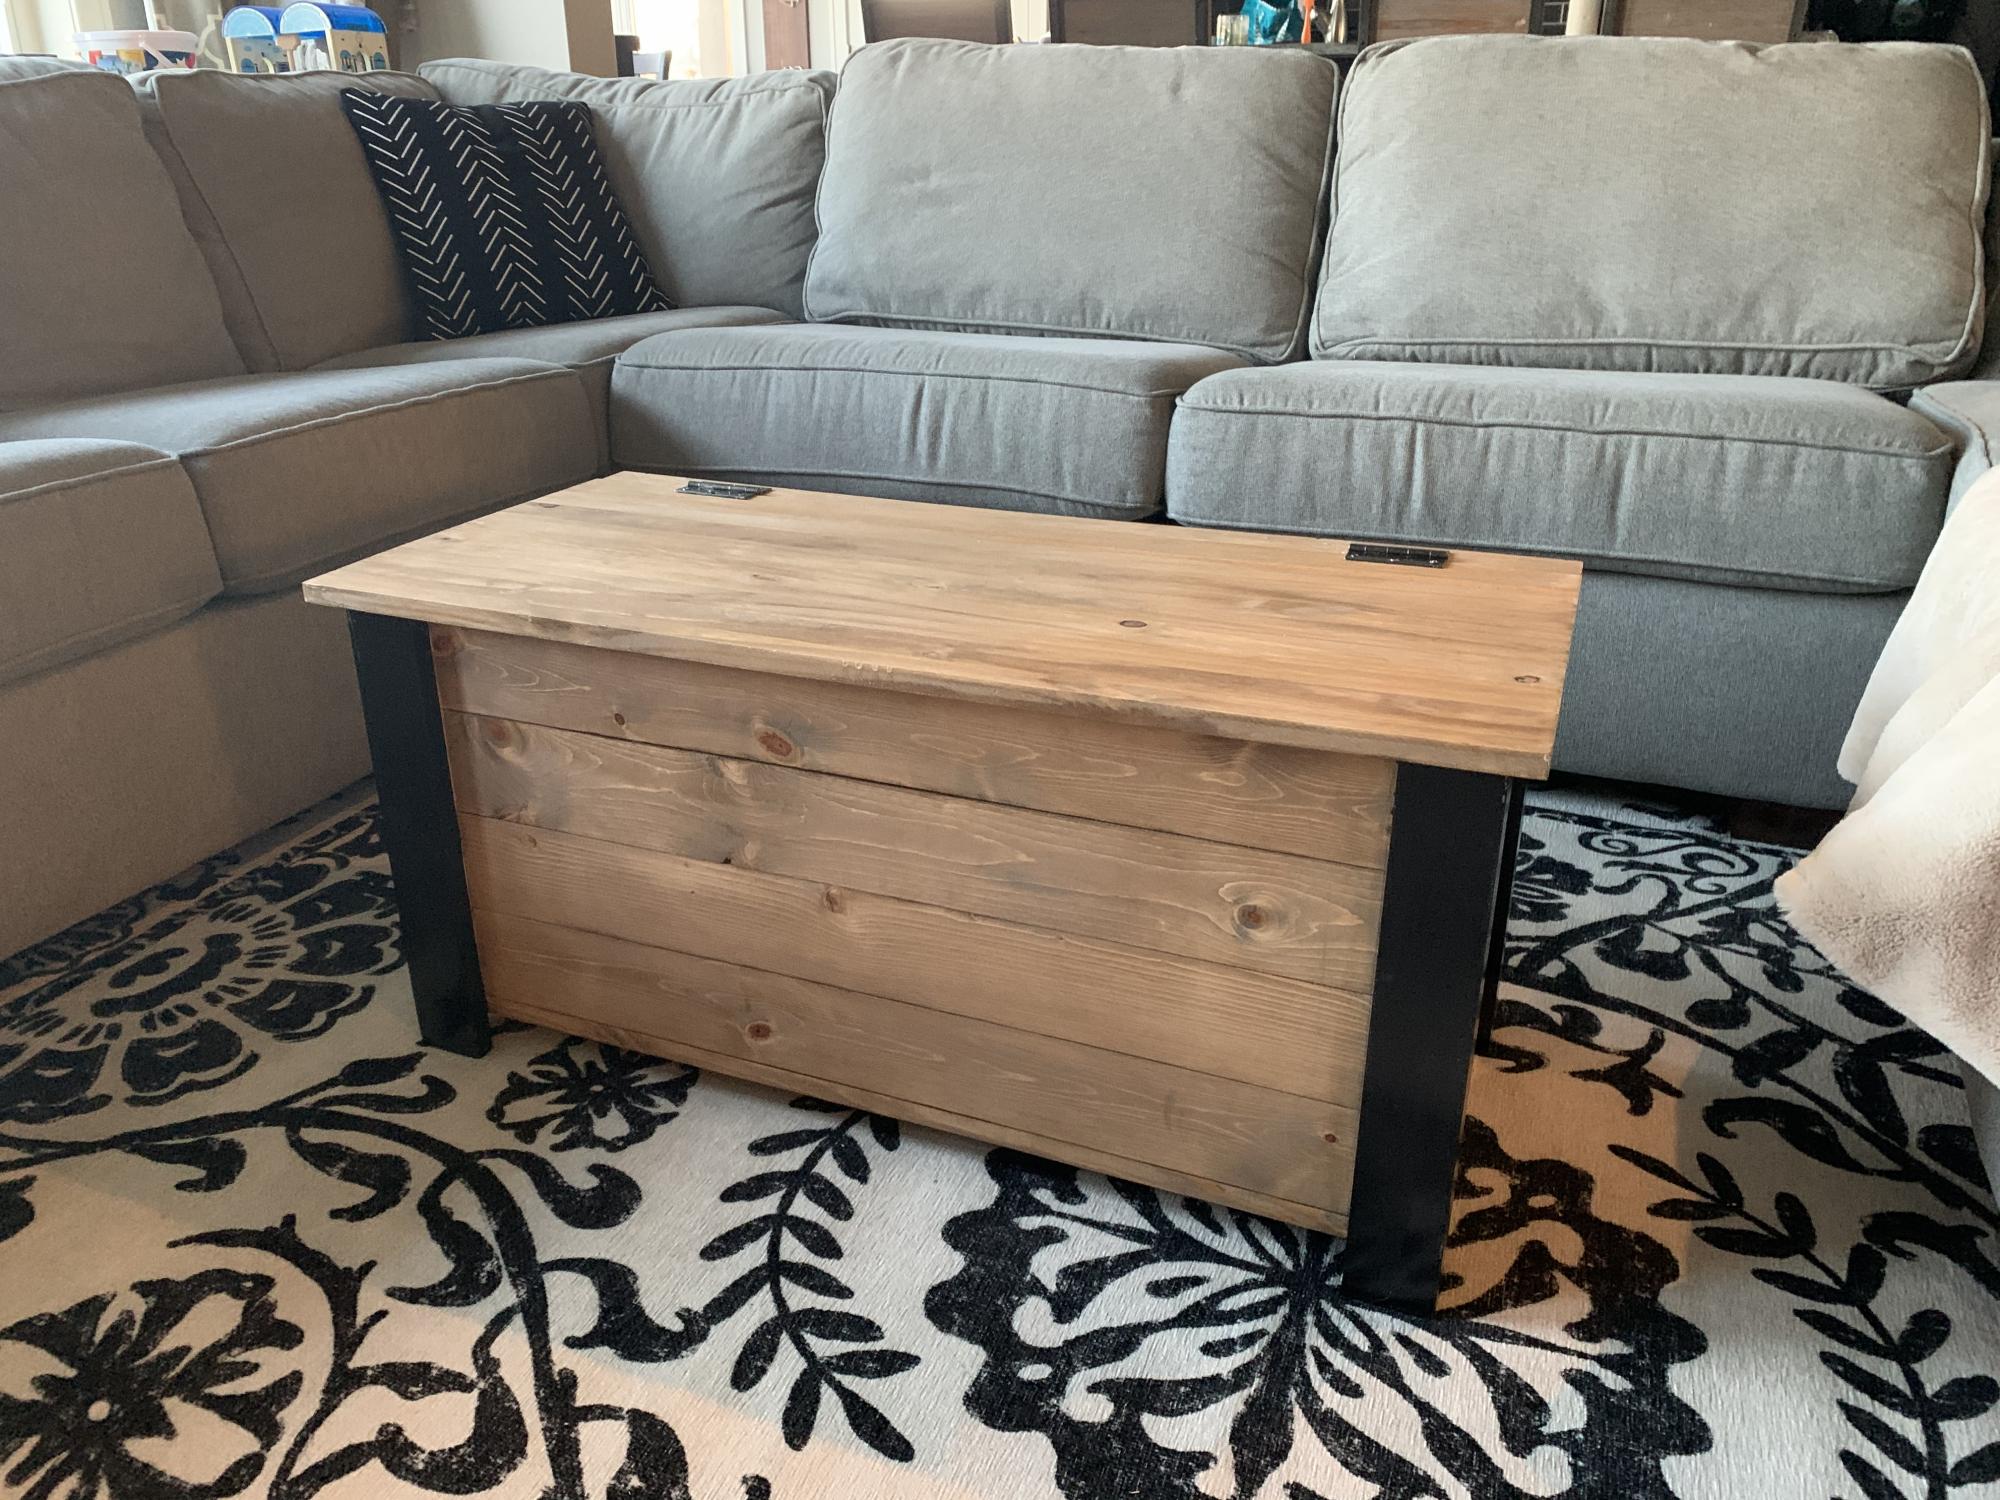
Super simple build with fabulous results! I have been using as a coffee table and it looks awesome and is functional for lots of toy storage as well. It would also work so great to house extra blankets and throw pillows. I added a lid support so it does not slam shut on little hands. This would also be a perfect addition to any playroom for some nice looking toy storage!
Built from Plan(s)
Estimated Cost
$50
Estimated Time Investment
Afternoon Project (3-6 Hours)
Finish Used
For the legs I used Rustoleum Canyon Black paint and for the rest I first used Minwax Weathered Oak with Minwax Early American over the top.
Recommended Skill Level
Beginner
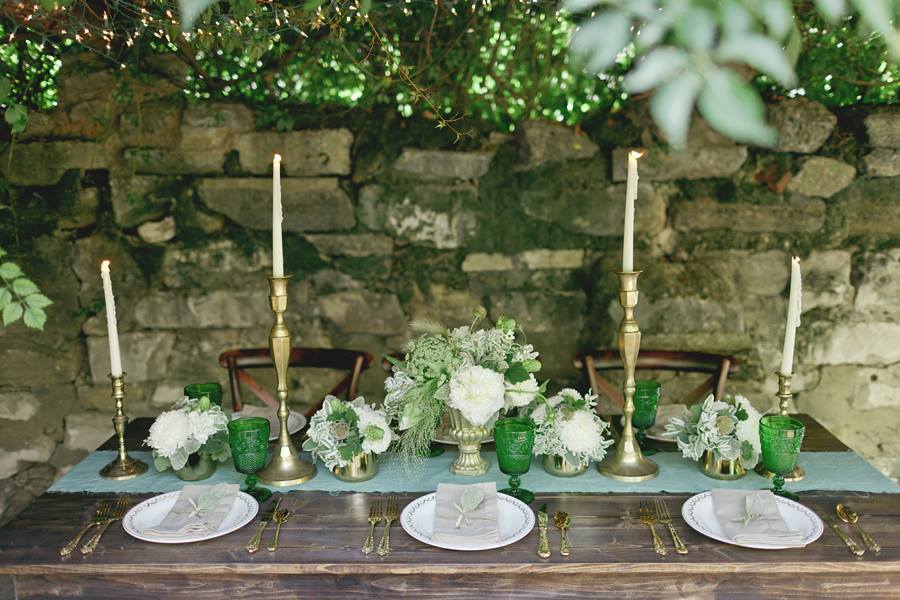
Foldable Farmhouse Table 2
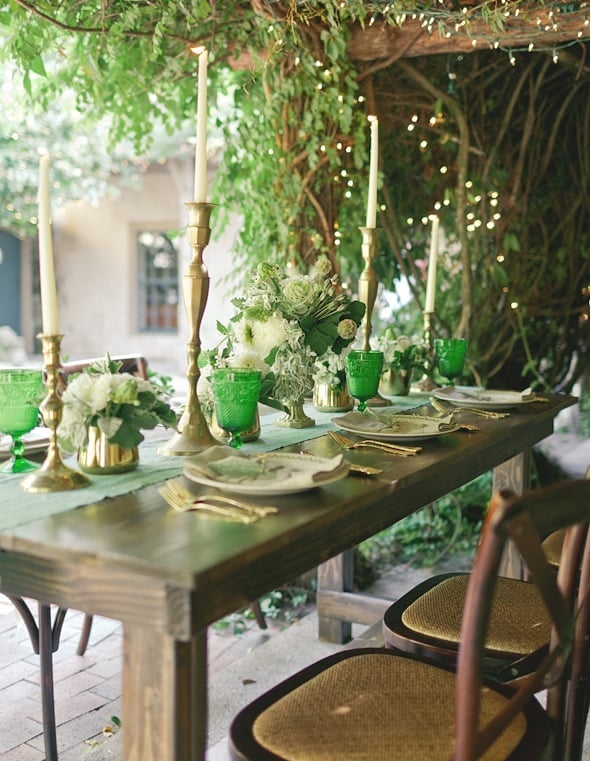
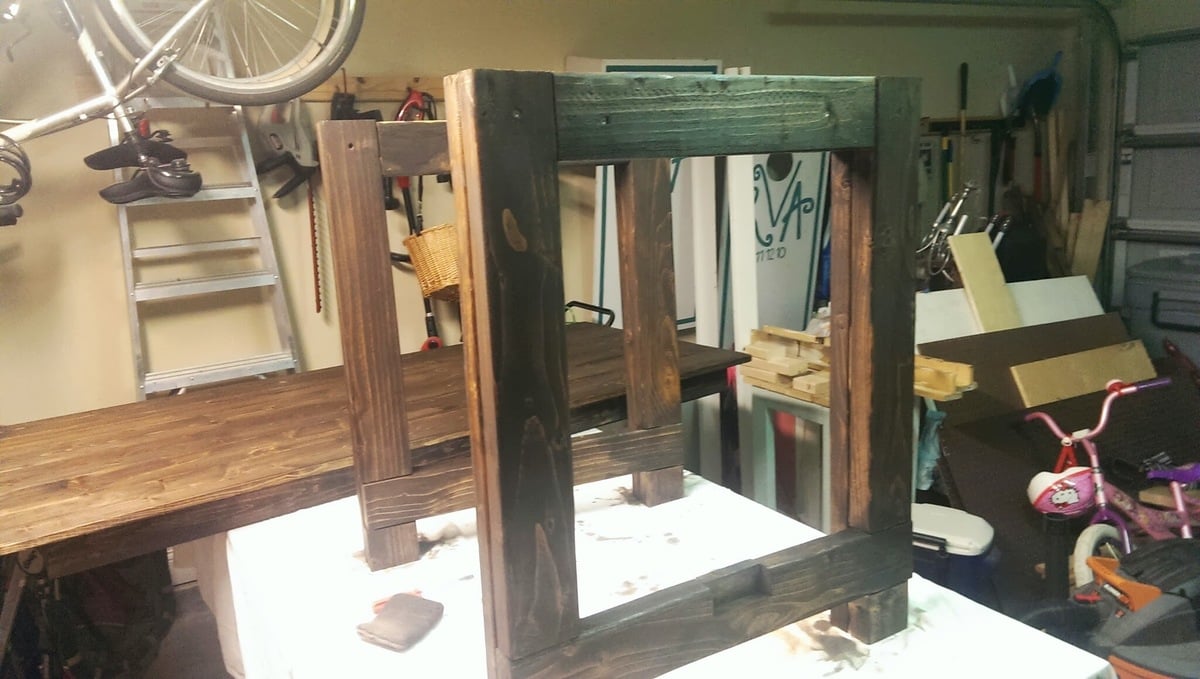
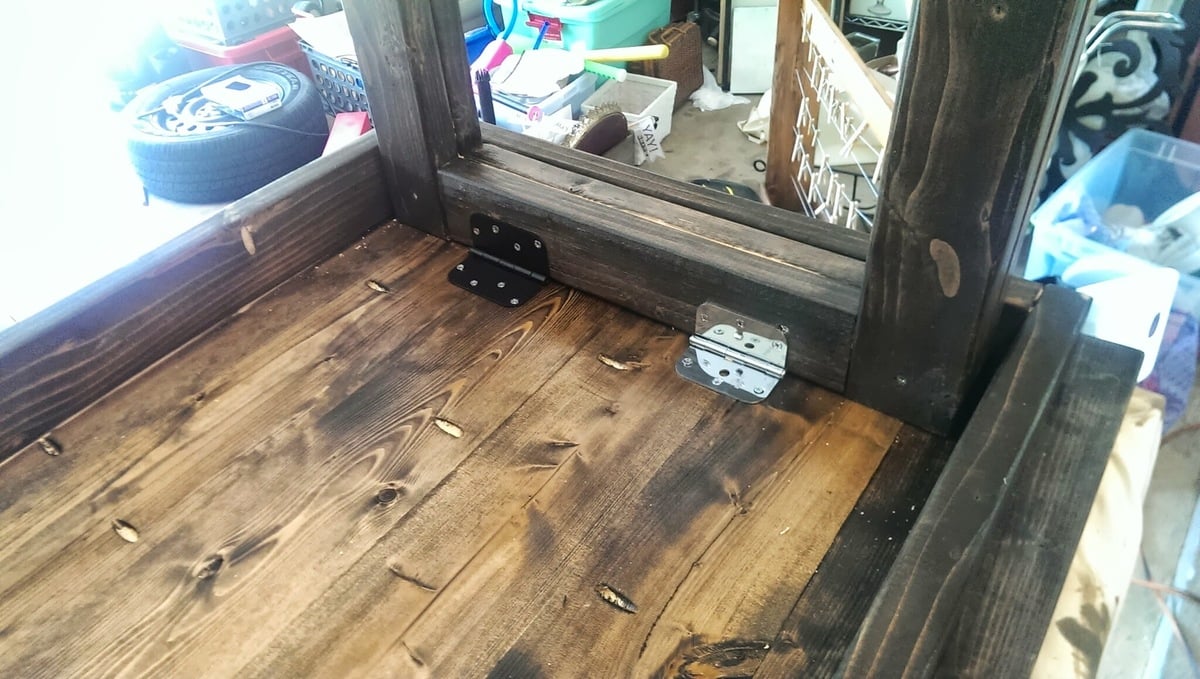
I recently published my first foldable farmhouse table last week here: http://ana-white.com/2013/06/foldable-farmhouse-table The first one I made was very heavy because I used 2x6 tops and 4x4 legs. I decided to make another one that would be lighter and easier to transport. The plans are basically the same just instead I used 1x6 for the top and put 2x4s together for the legs. I also shorted the length by about a foot. The only issue with making the table shorter length is that the legs don't fold completely flush. You could easily make the legs short enough to fold flush, but then the table was a little too short from the ground up for us. The same as before I simply used kreg joints to join the top boards together. I then made a 2x4 frame and attached it to the bottom. I made each of the legs separately by joining 2x4s together and sanding everything down. Everything was stained before putting the legs on using Miniwax Dark walnut stain. I used 2 coats of Miniwax water based clear coat to seal it. A notch was cut out on each of the bottom 2x4 supports on the legs and I glued in a small piece of wood cut to size. These are so I can put in a 2x4 support board under the table so that the legs do not fold in on themselves when it is standing up. The legs are just attached using door hinges you can buy in packs in the hardware section. Be careful when screwing into the 1x6 top not to use too long of screws or else you will over screw and have them come through into your table top. Table design was by Amber Veatch Designs and photographed by Andi Mans Photography
Built from Plan(s)
Estimated Cost
120.00
Estimated Time Investment
Day Project (6-9 Hours)
Finish Used
Sand to finish and then used Miniax dark walnut stain followed by Miniwax water based clear coat.
Recommended Skill Level
Beginner
Comments

Tue, 07/07/2015 - 06:41
Wobble
We have built something very similar and we have a good bit of wobble at the top, even though the stretcher down the center of the table is holding solid in there and secred with clasps. Were thinking of some sort of sliding pin into the top of the leg to the apron. Anyone run into this before?
Seasonal And Holiday
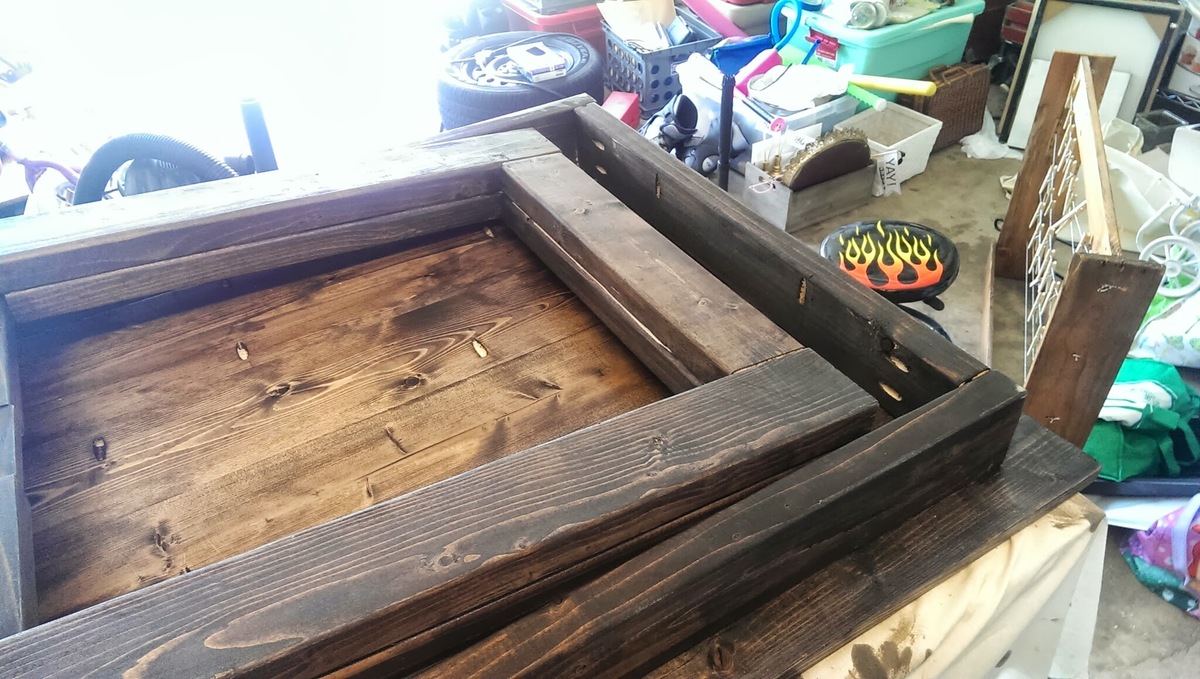
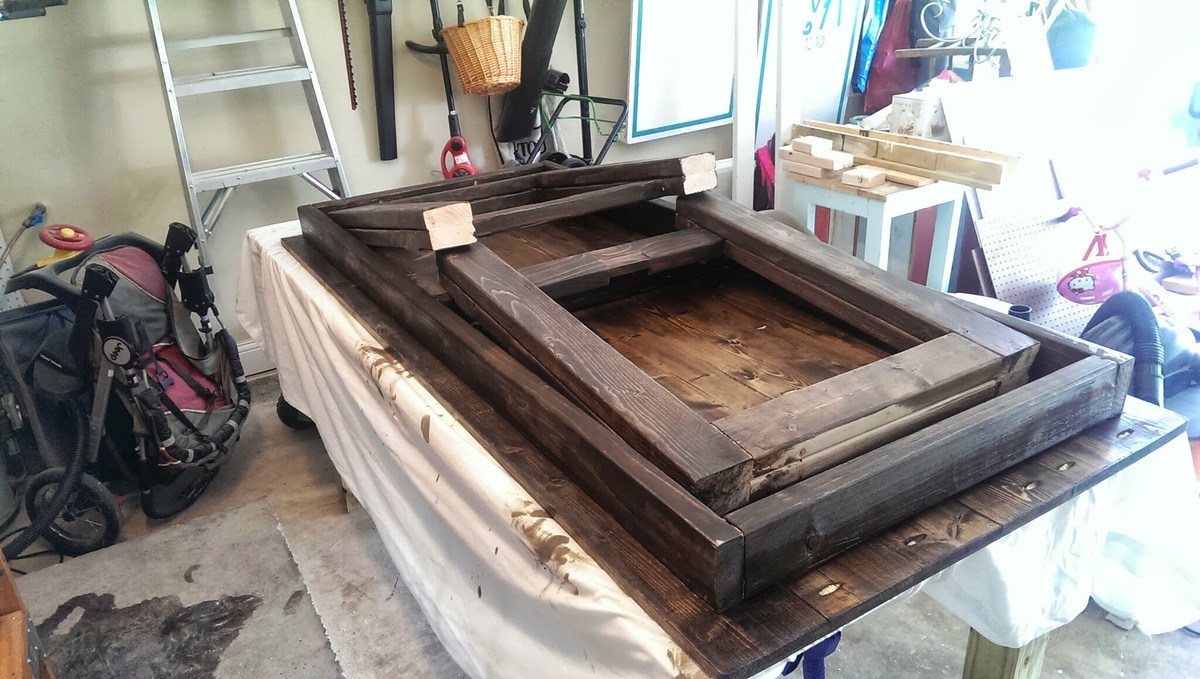
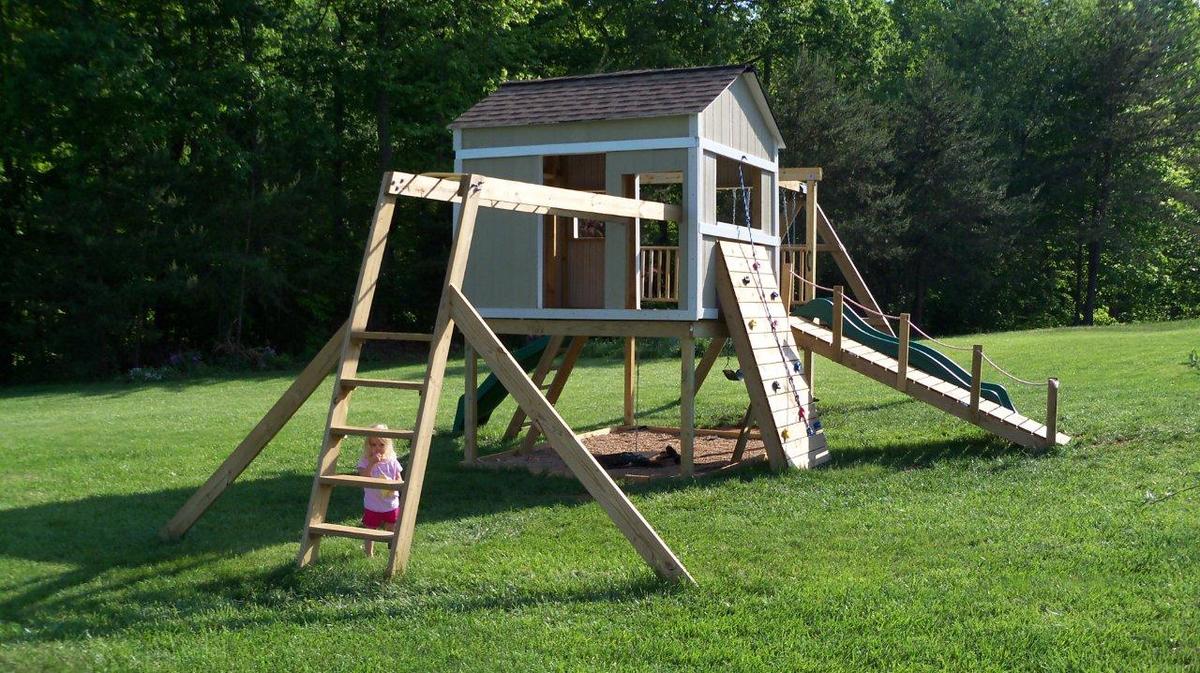
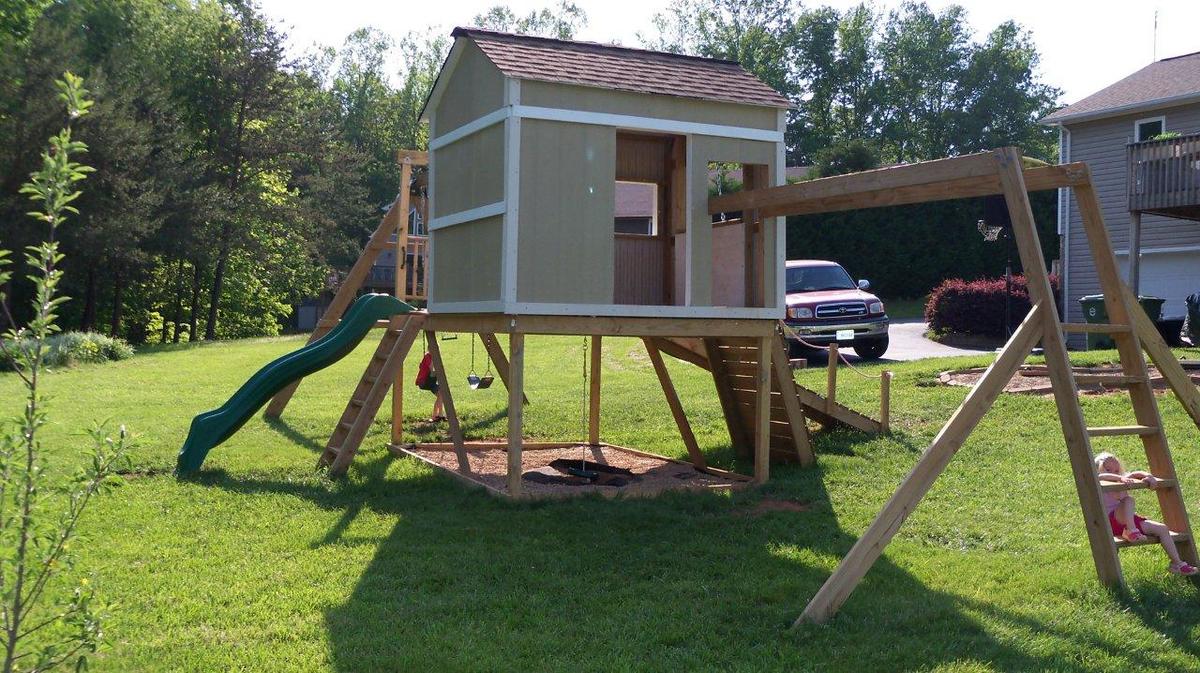
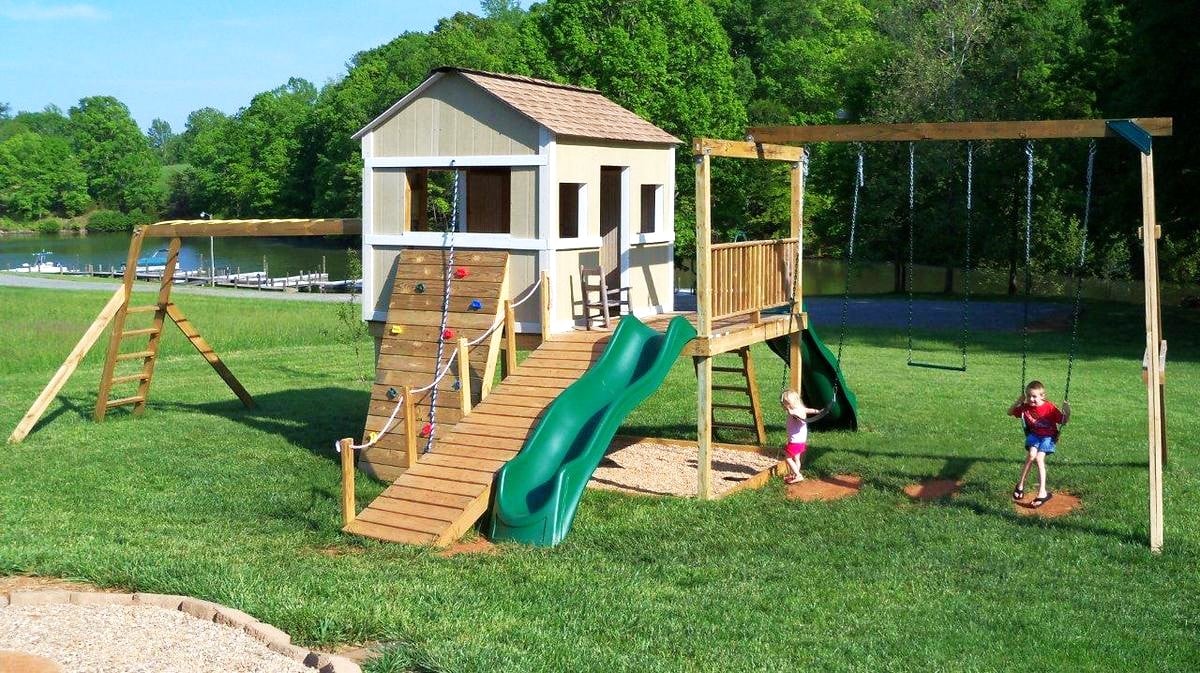
Clubhouse based on Ana's Plan
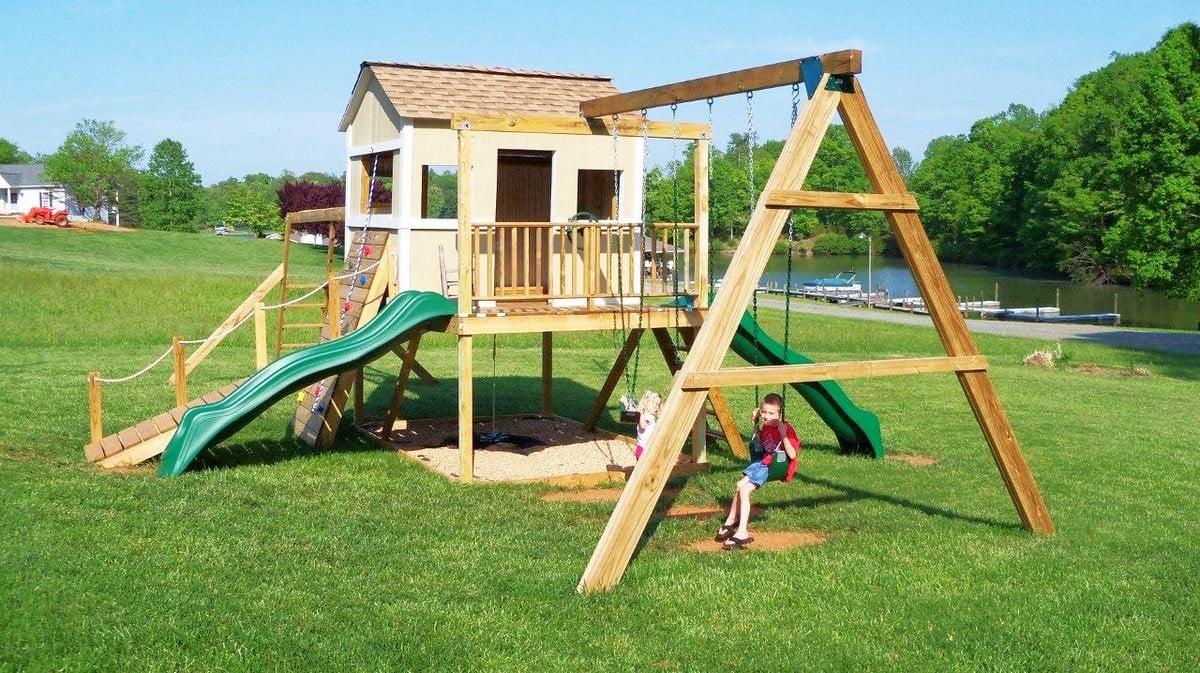
I used Ana's plan as a base.
I changed it from 8x8 to 8x12, made the 4x4x8's to 4x4x10' for a higher main platform and swing platform, and added a 12' long monkey bar set to the other side. Also, an 8' climbing wall and a plank walkway to accompany the two slides.
For the clubhouse, I used Hardiplank 4x8 sheets for the siding and an EZ-Framer kit for the structure itself.
The slides I purchased from Lowes, monkey bars from Amazon, and the swing frame braces from Amazon as well. The swing kits I got from ebay.


Built from Plan(s)
Estimated Cost
1500
Estimated Time Investment
Week Long Project (20 Hours or More)
Recommended Skill Level
Intermediate
DIY Farmhouse TV Console
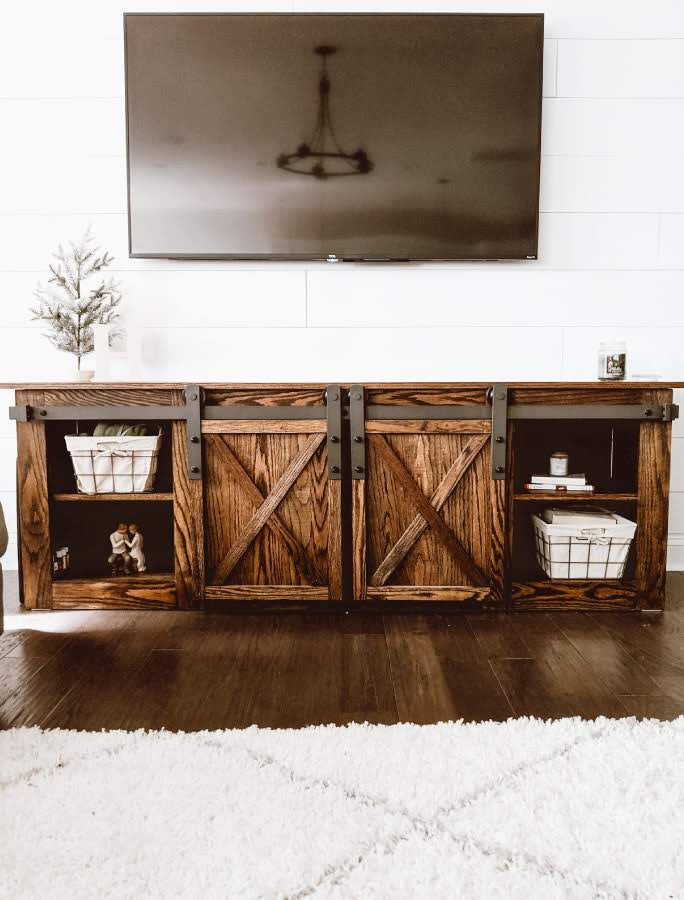
This was the second piece of furniture that my husband and I ever made. We had built a coffee table that had a lift up top so that we could eat dinner on the couch and store all of our board games. Once we tackled that, I thought we could conquer the world (even though the table was pretty basic). So when my now-husband was about to move into his first apartment without a roommate and I saw it as an opportunity to decorate my own place (even though I wasn’t living there). Luckily,he agreed it was time to get rid of his tiny Ikea TV stand that was probably 2ft off the ground and not a great height for a TV, and agreed to build this awesome TV console with me. To this day, it’s still my favorite piece of furniture in our house.
Comments
Sat, 11/09/2019 - 14:12
Love this, needing one in my…
Love this, needing one in my front entry way. How long did it take?
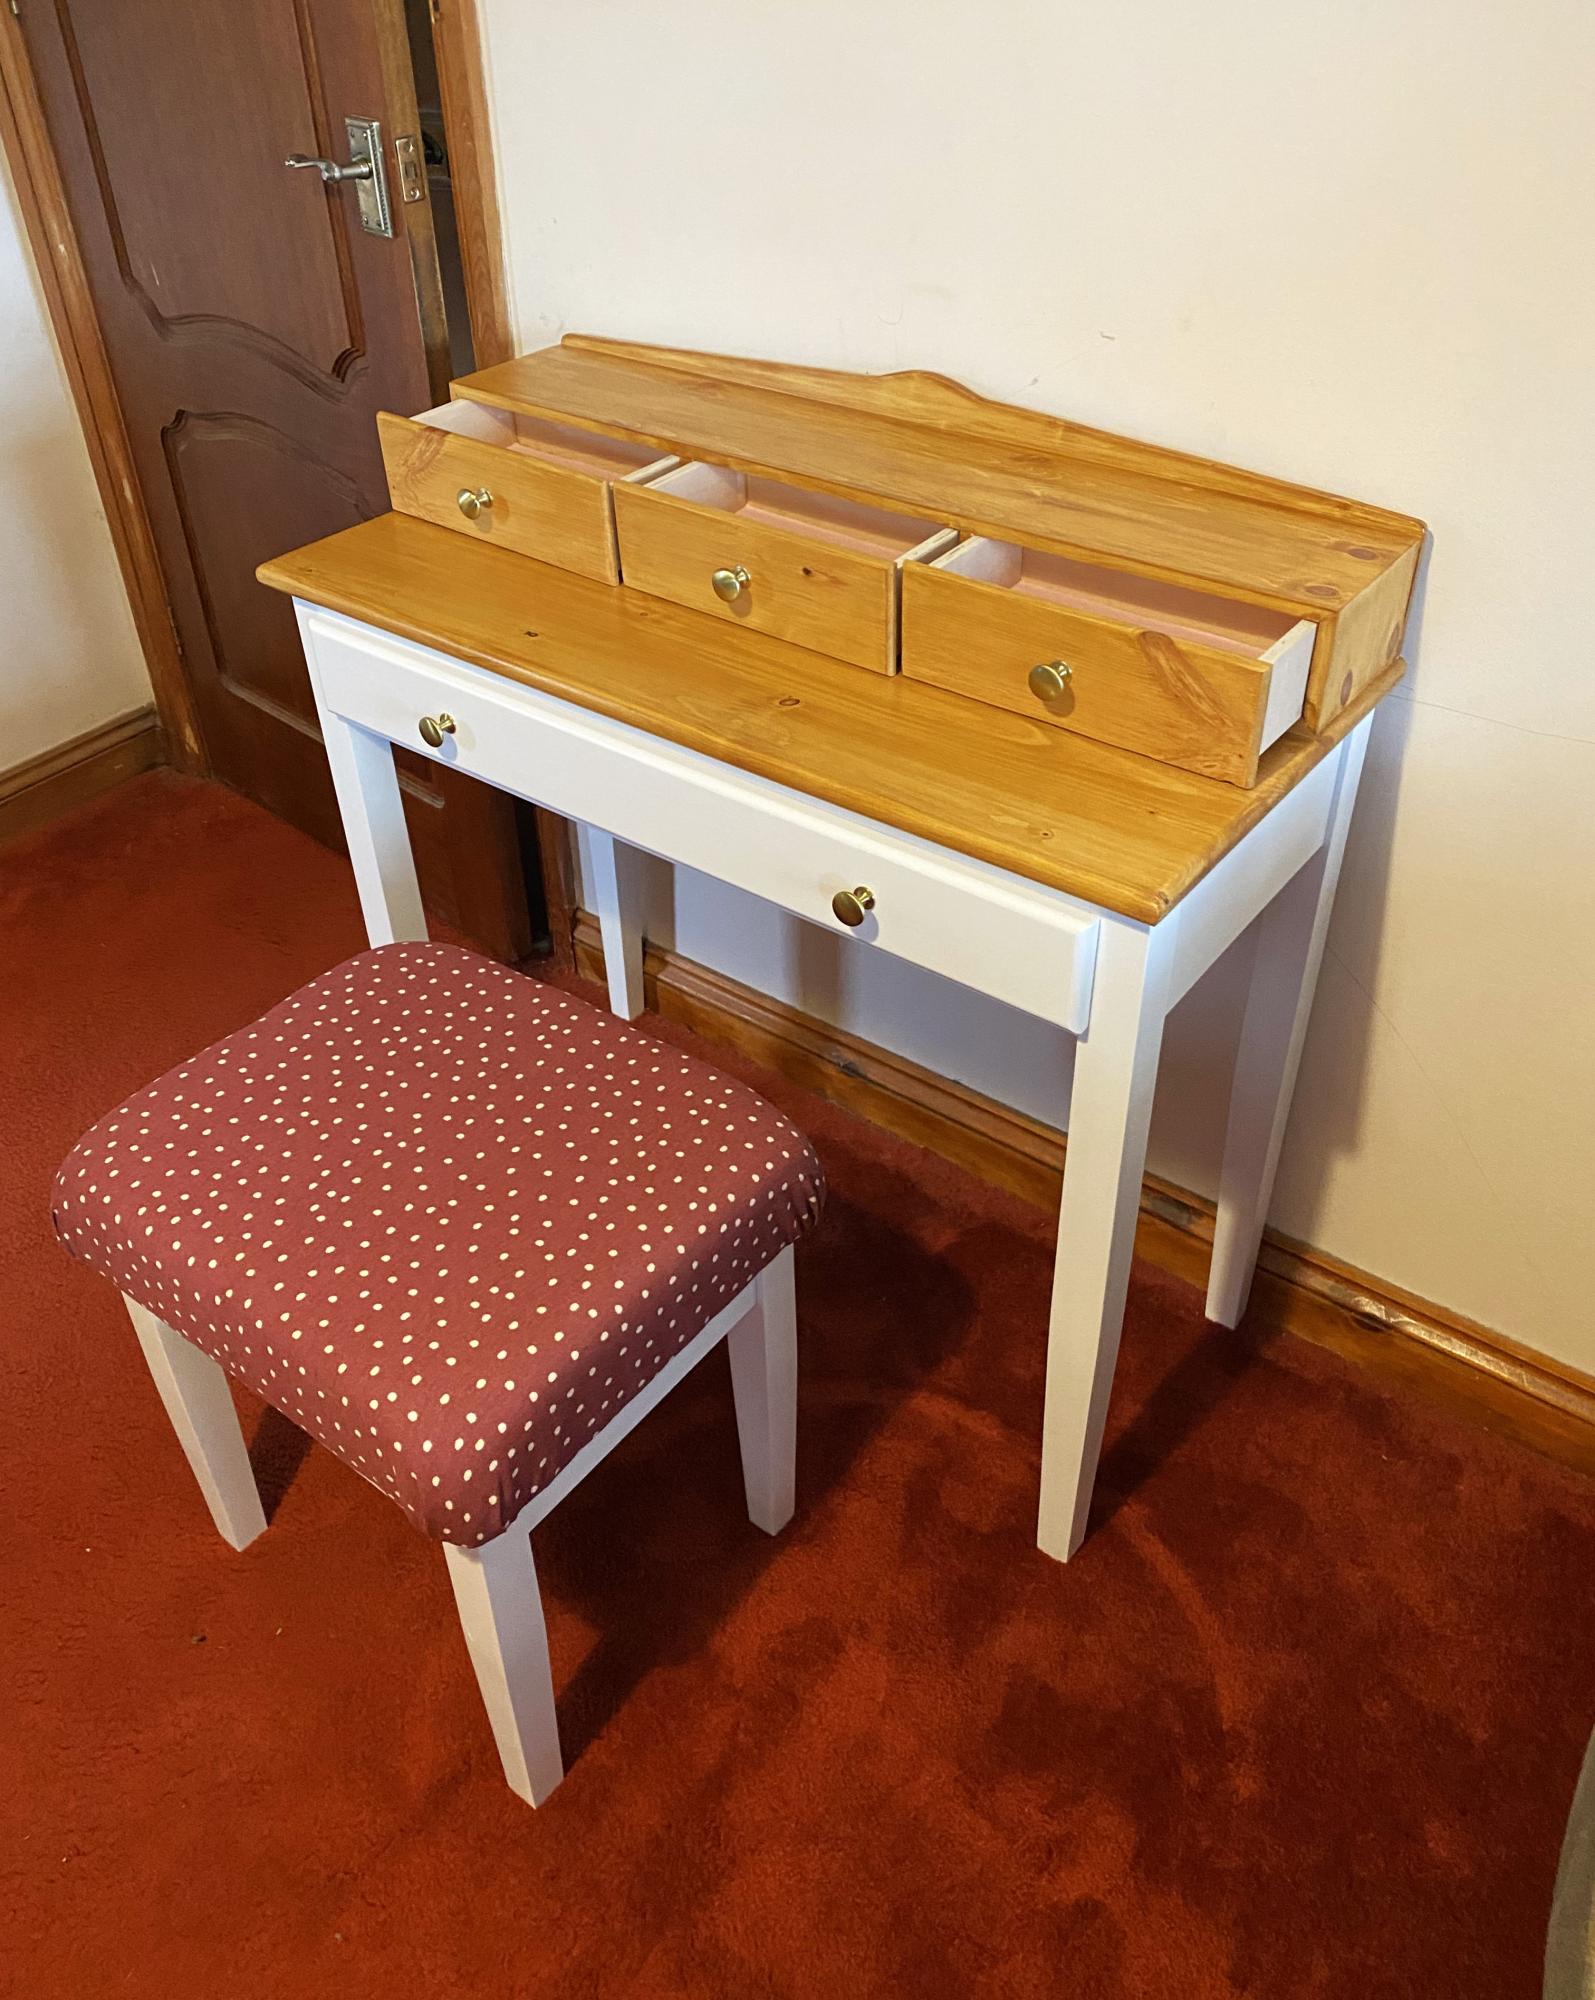
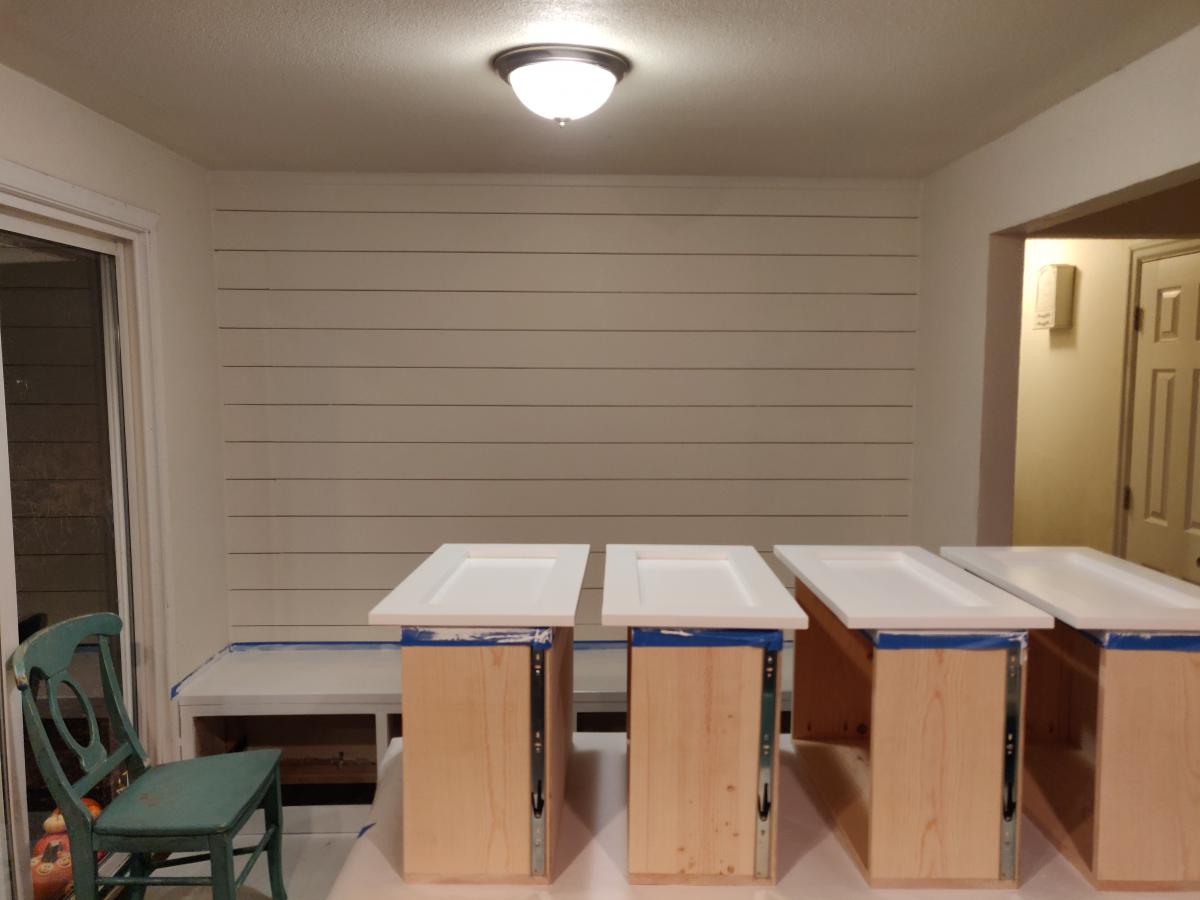
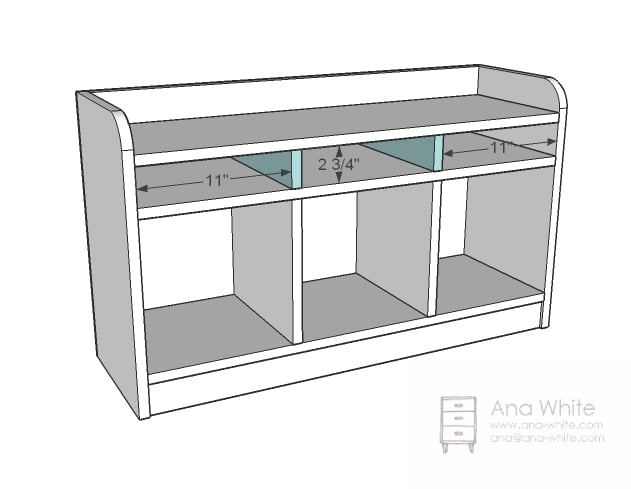
Mudroom Bench with Easy Drawers
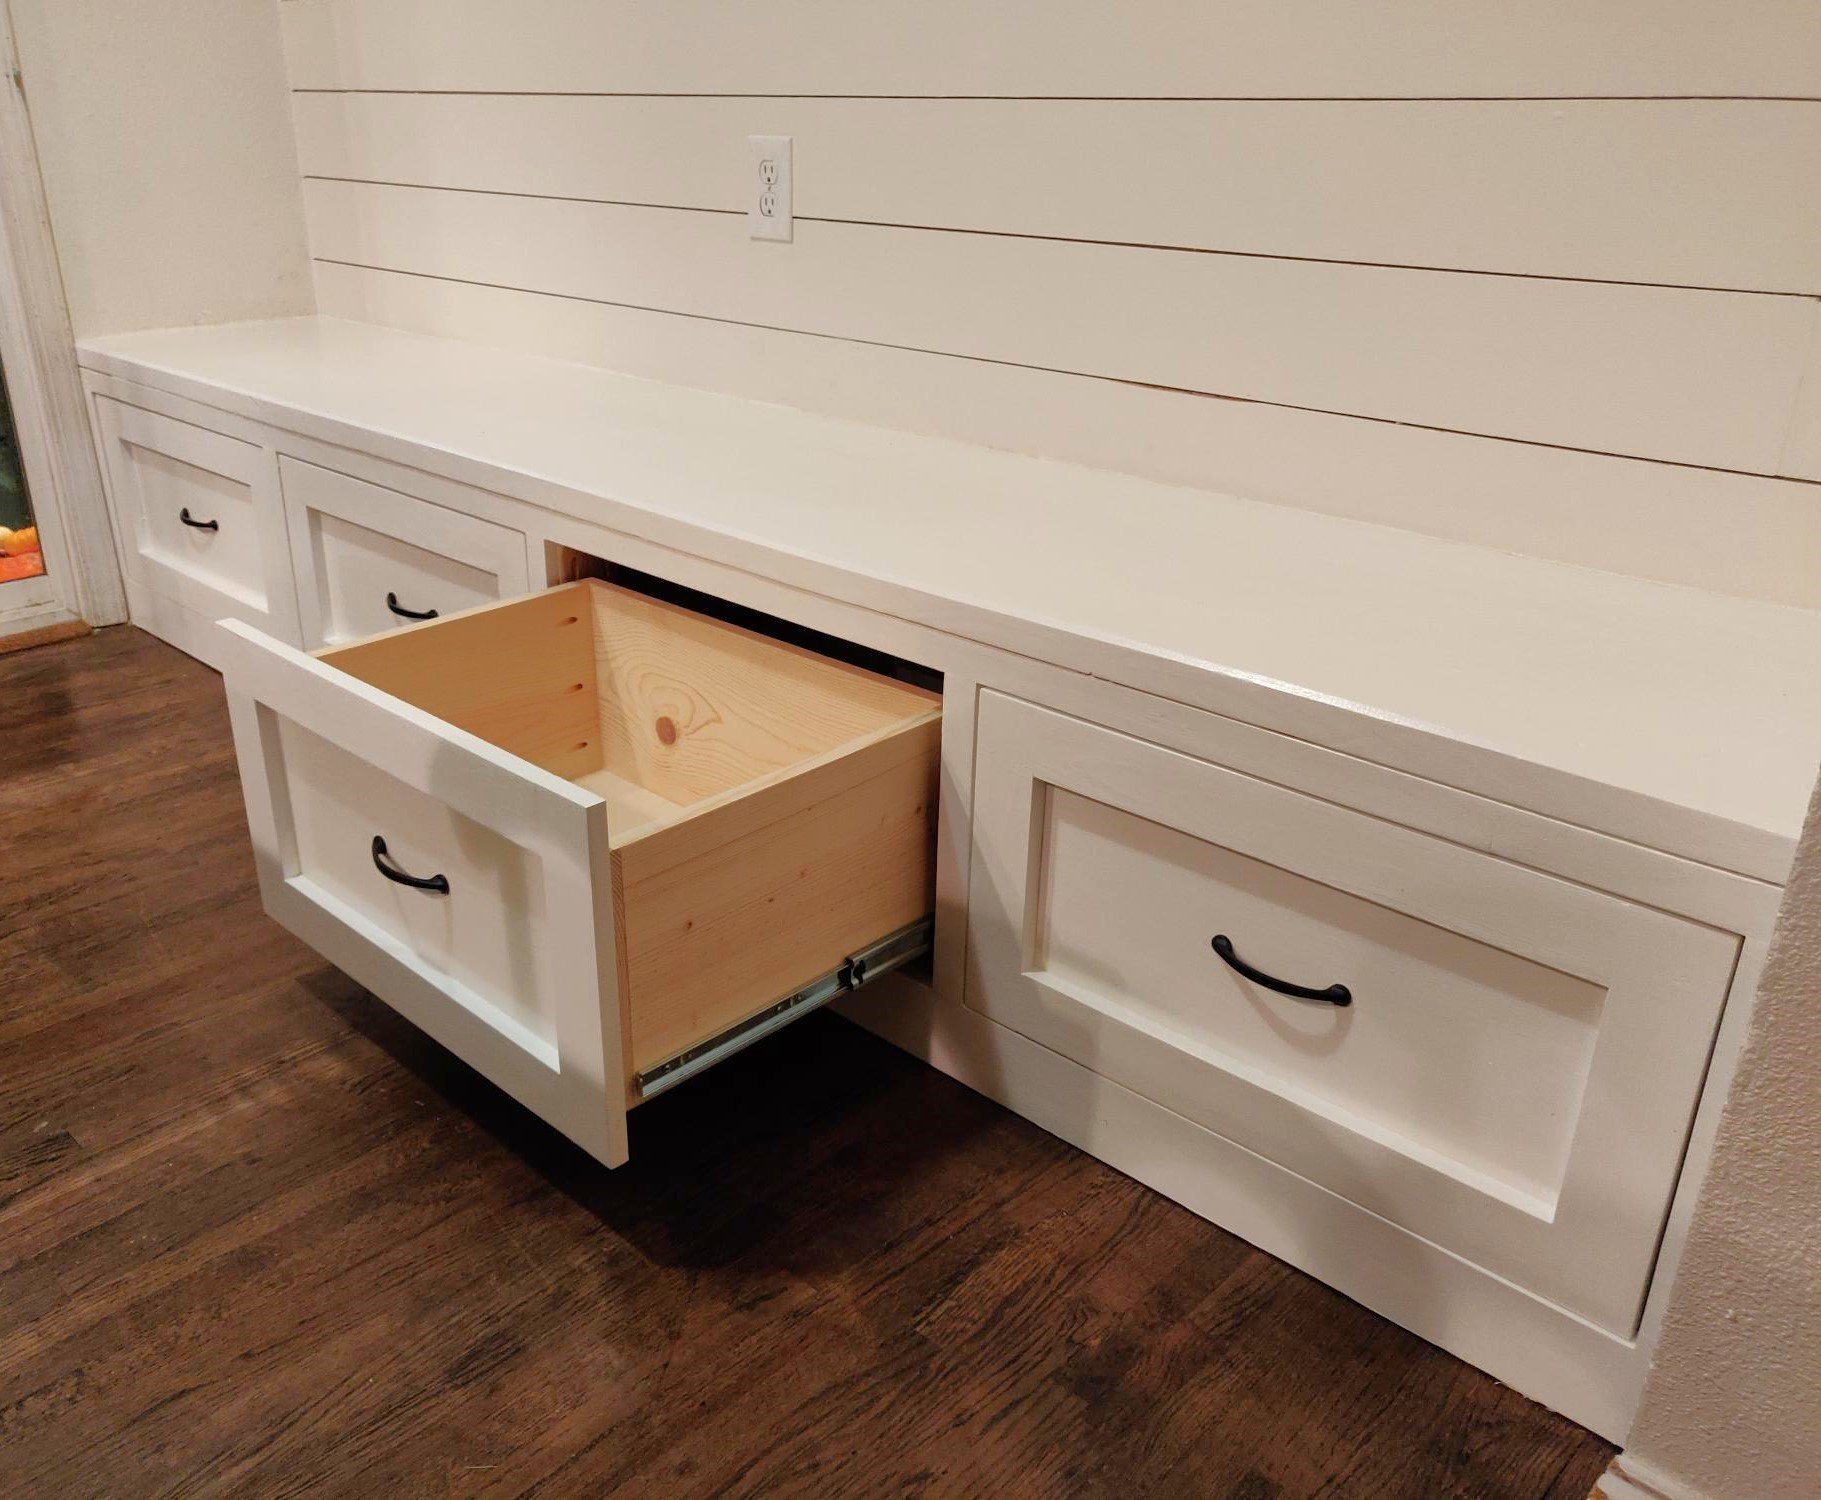
We've been desperate for more storage in our little house and this build really helped. The whole bench is 103“ wide and each drawer gives us 24"x17" of usable space. We had to do some custom shaping for the benchtop (two joined fir 2x12's) fit as the walls are not square but in the end we were really pleased.
The hardest part of the project was getting all of this built and in place while working around a busy family as this is our only meal space and the majority of cutting/forming was done either on the weekends or after bedtimes. If I were to do this again I'd prioritize sending the kids to grandparents for the weekend and know king everything except for paint out in one go.
We could have spent less time with the benchtop by using plywood like in the plans but we wanted the look of a separate benchtop. We may replace the fir with stained oak down the line but this should be plenty sturdy for the next several years.
Built from Plan(s)
Estimated Cost
$300
Estimated Time Investment
Week Long Project (20 Hours or More)
Finish Used
Valspar paint, minwax clear poly
Recommended Skill Level
Intermediate
Comments

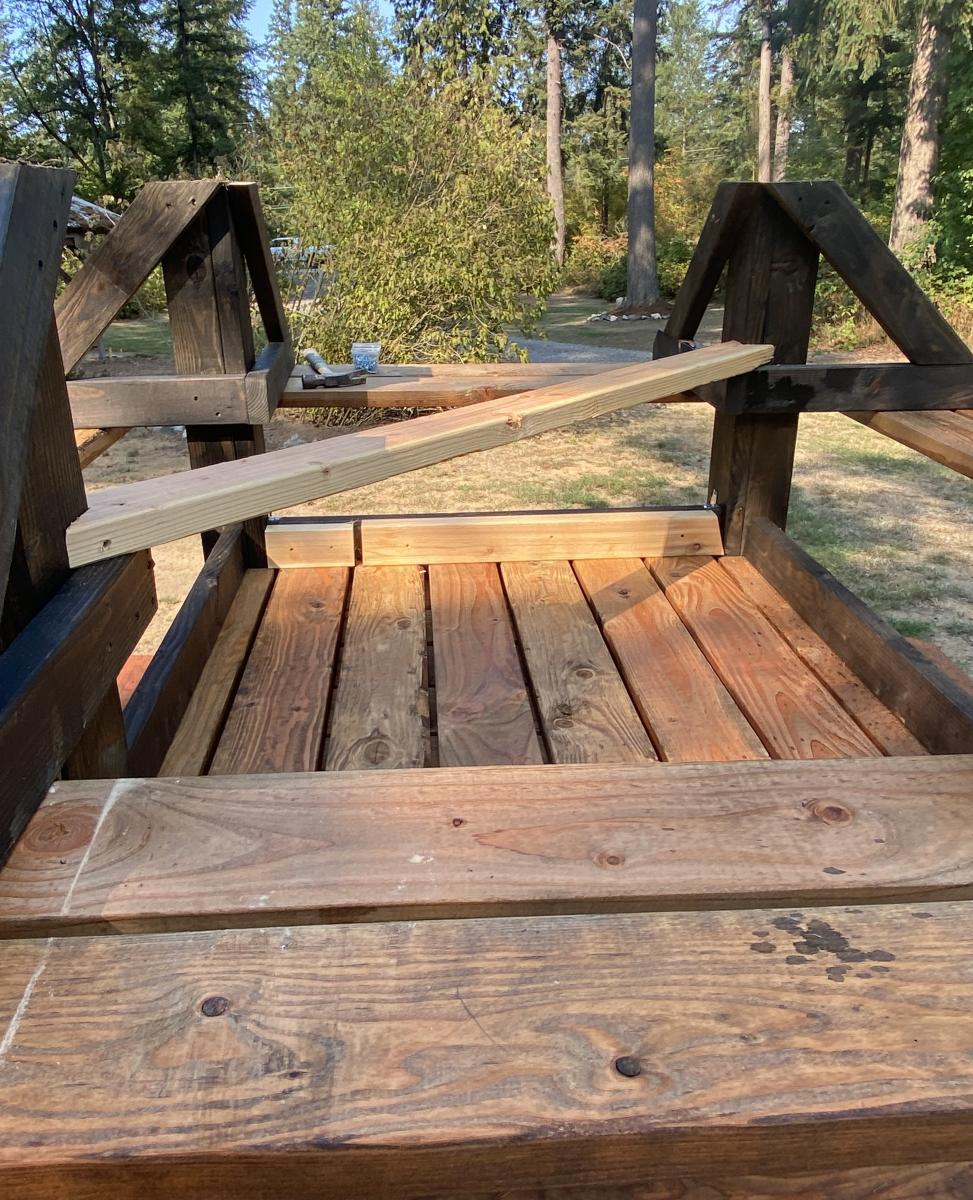
3 Square Picnic Tables!
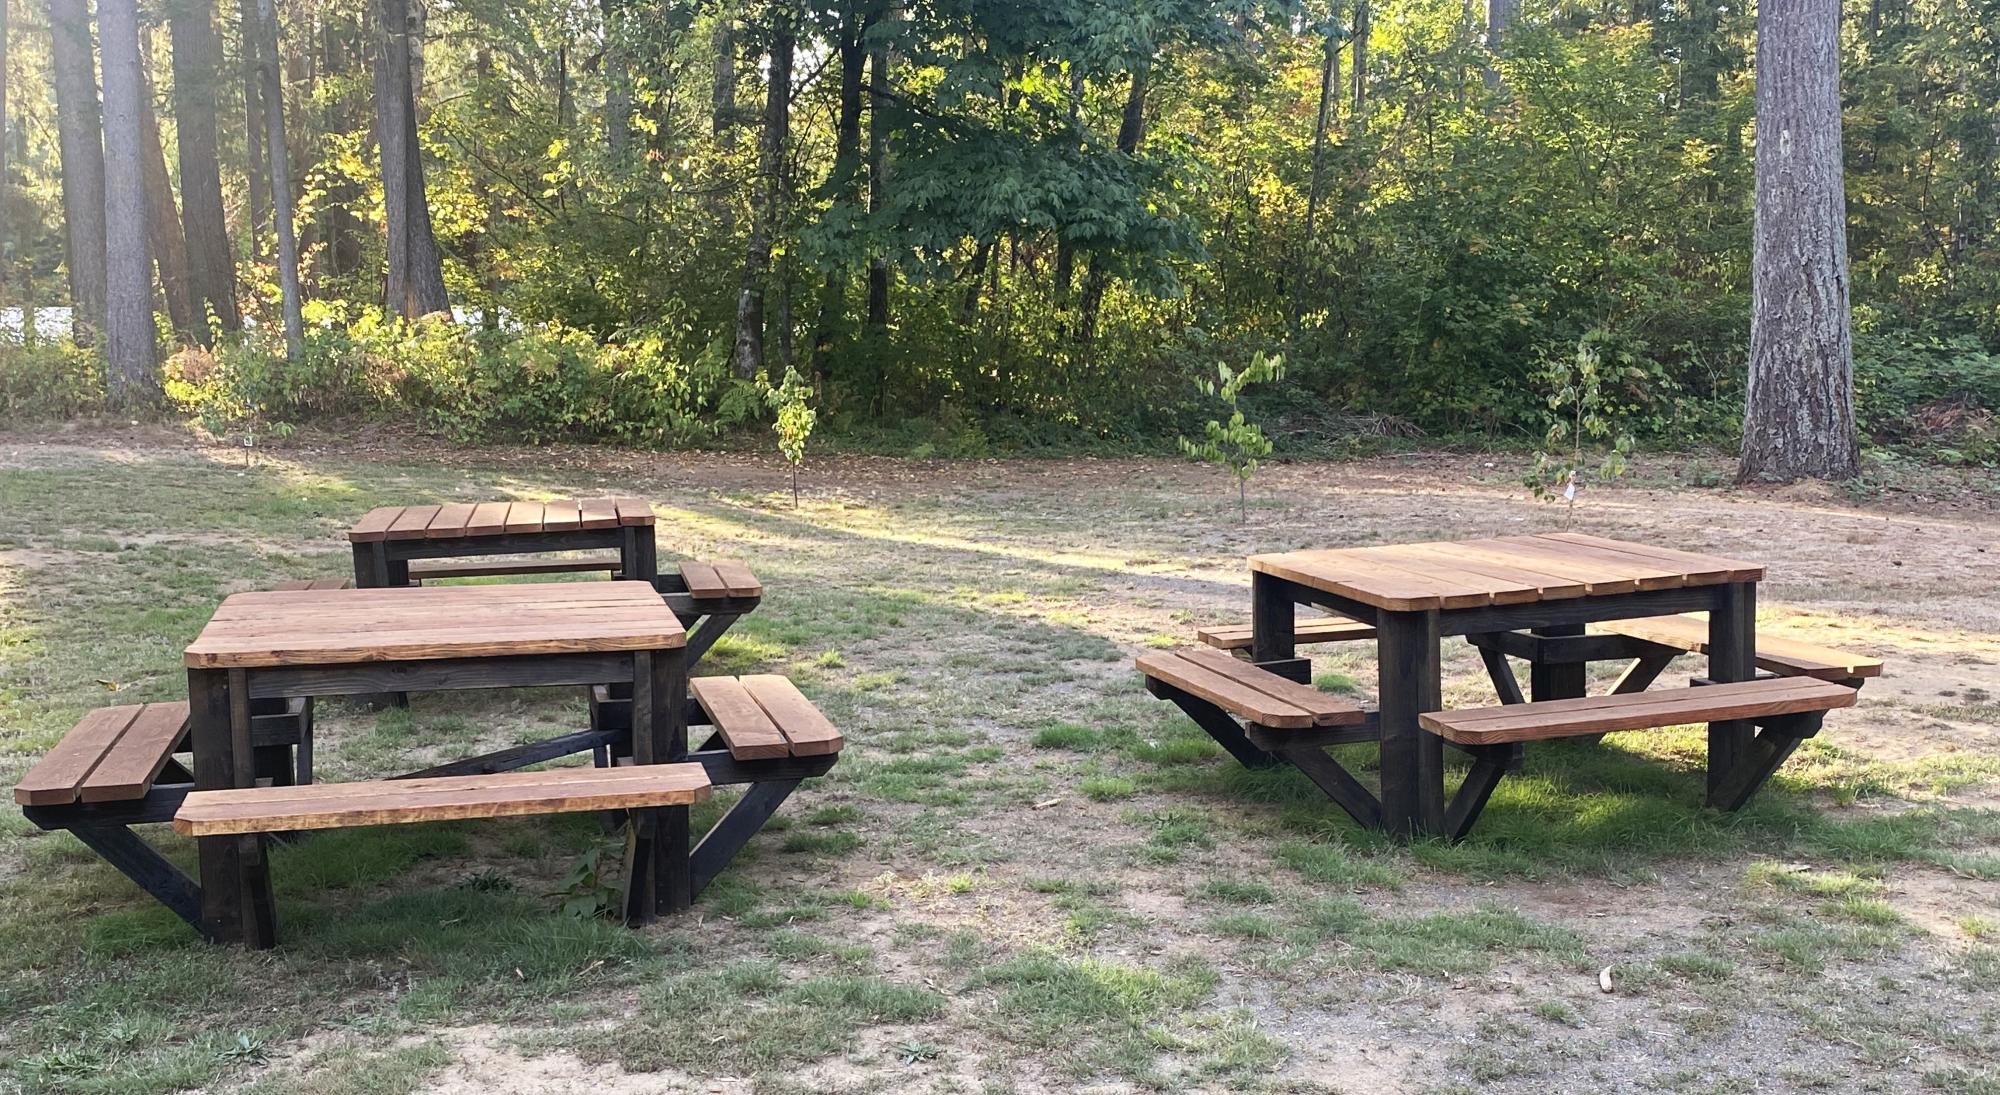
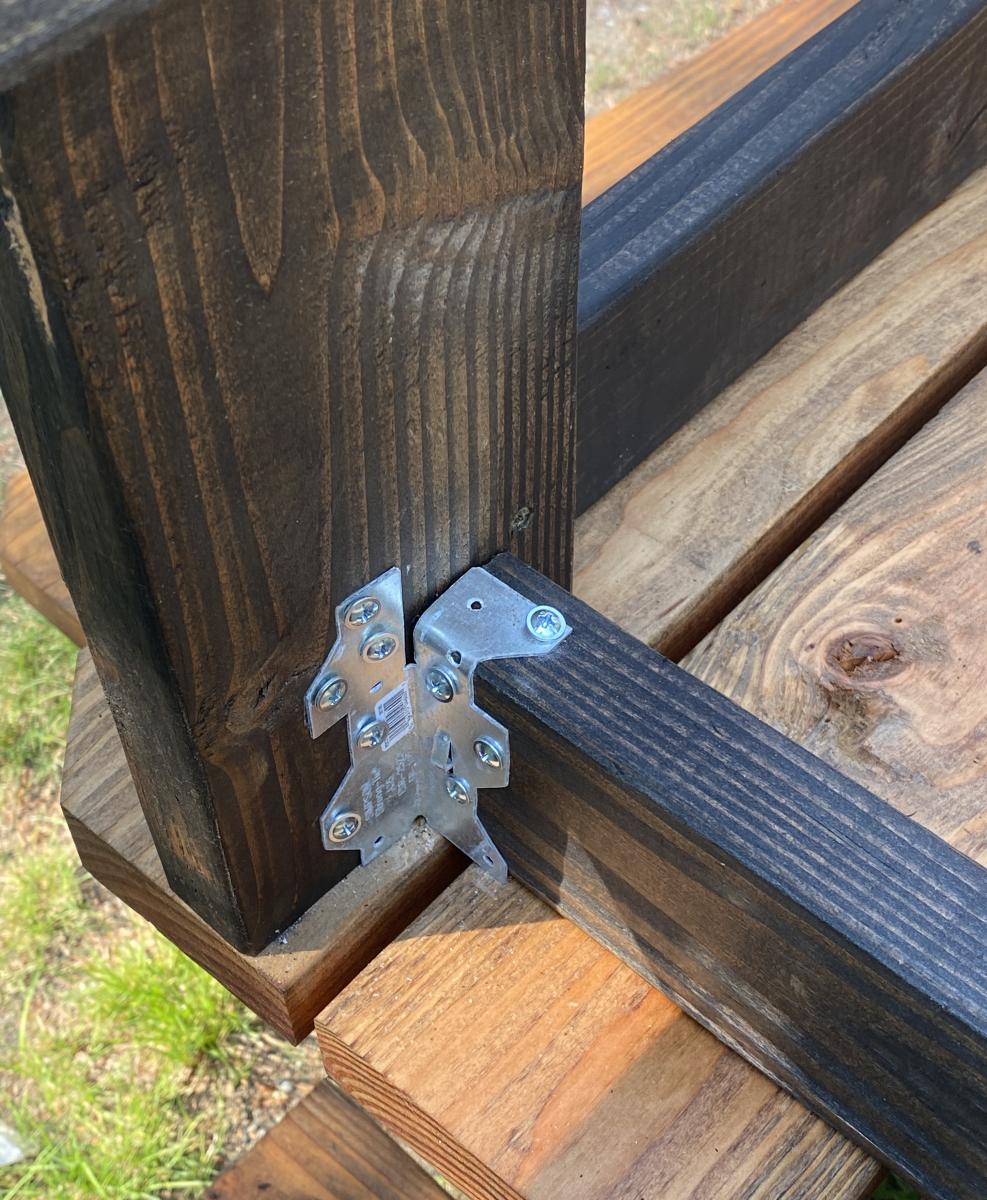
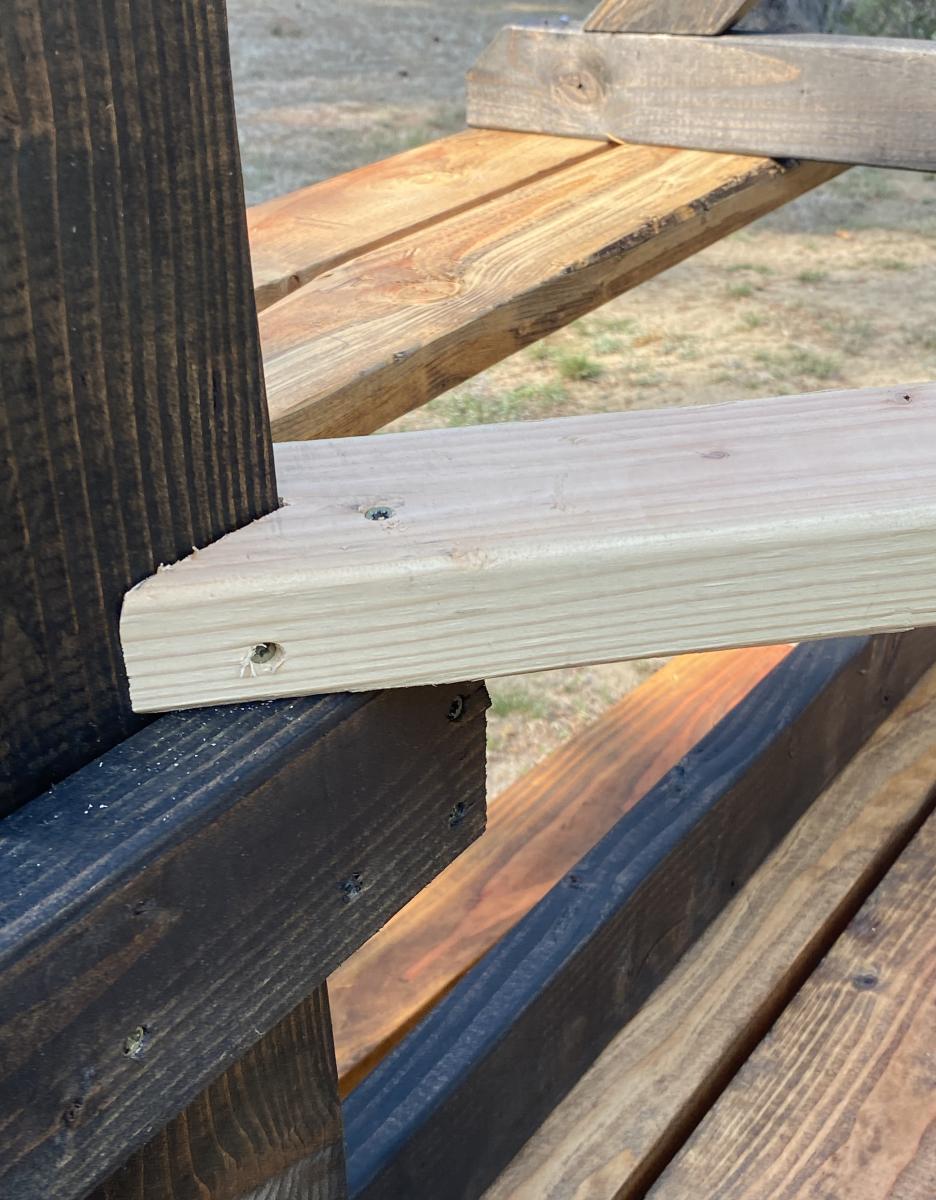
I built 3 of the square picnic tables, as we have a large extended family. I enjoyed the project and the results. I did end up adding a cross brace and some metal clips, they added a little more strength for the table when it was full of people.
Thank you for sharing your plans.
Rick
Built from Plan(s)
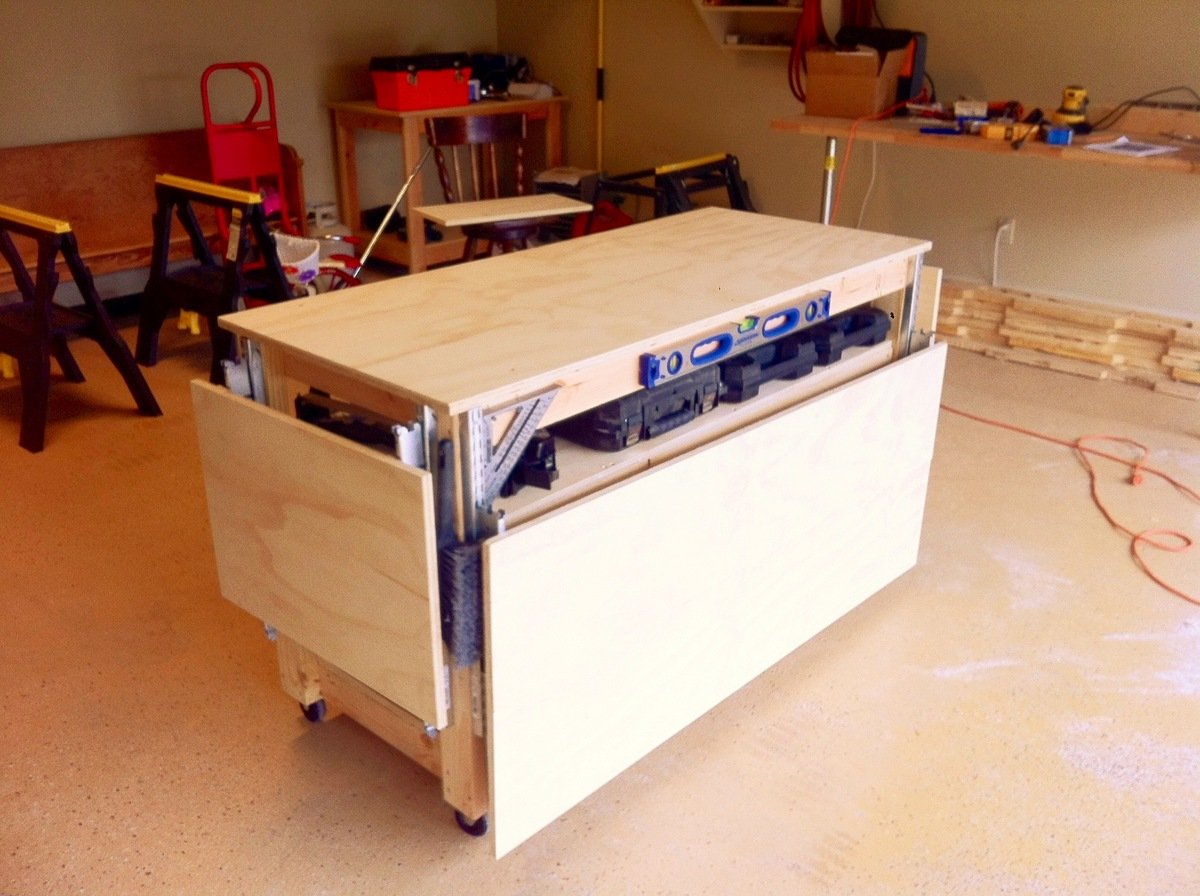
Do-It-All Mobile Workbench
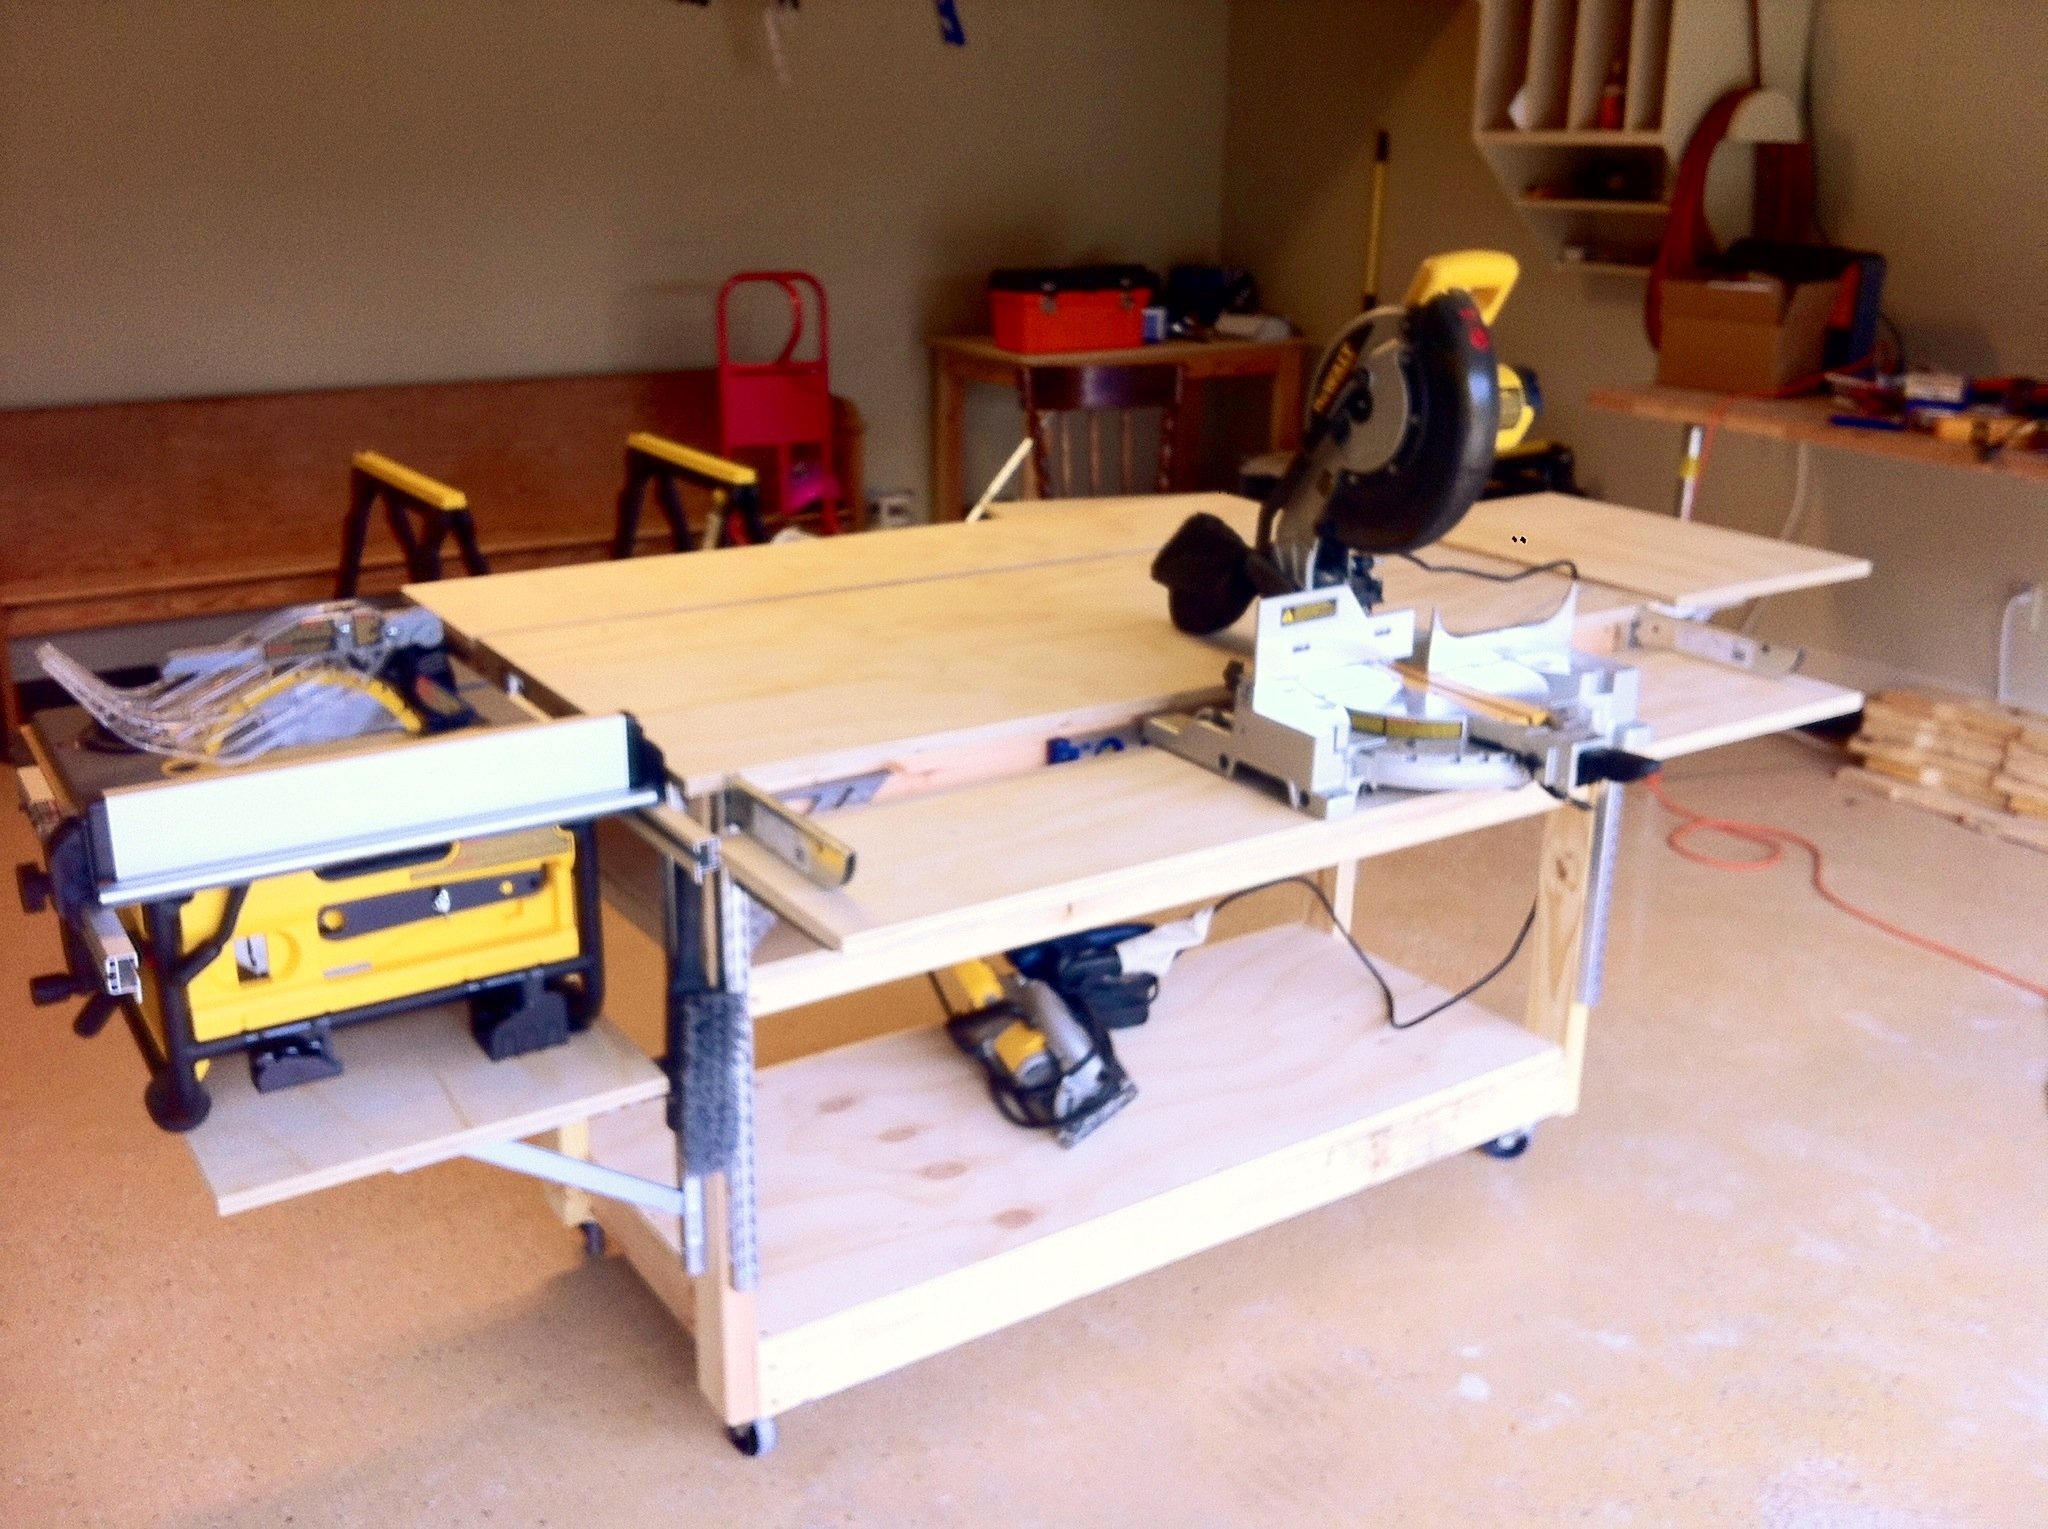
The need for a proper workbench in my garage/shop is a must, but. So is space! I already have a fold down workbench I’ve made with ¾ inch pipe & a door, but. I just need something that can handle all my tools. So, I stumbled upon these plans from the Family Handyman & couldn’t find a reason why this wouldn’t work in my shop. It has room for storage, can easily accommodate my tools & most importantly fold up to store. Easy to build too! Make sure you read all the plans first as some of the materials could be pricey, but well worth it. Technically it’s taken 2 months to build this bench, as I operate on a firefighter/teacher’s budget & during the holiday season no doubt. I ordered all the shelf standards & brackets through Amazon, $210.00 for those alone, but they hold so much weight to support your tools I figure it’s worth it. The rest materials (wood, screws) were purchased at Home Depot for around $150.00. The plans called for ¾ inch ply & it was $45.00 per sheet. However they did have a smaller thickness for $22.00 per sheet & was only a 1/32 inch thinner. I plan on topping all my surfaces with some ¼ inch tempered hardboard later on so I knew it would work. That also left me adjusting my screw size to mount my brackets. Due to the reduction in thickness of the plywood all my #8-1 inch screws needed to be adjusted to ¾ inch so to not screw through the ply. I also hit the molding isle to nab some pieces to use as furring strips to use under the shelves before attaching the brackets. This way I can sand each strip to match before mounting to make sure it lined up flat with the center top. One more thing; where it says “drill 1/8 inch hole in brackets make sure you use 1/8 inch pop rivets. I barrowed a pop rivet gun & was handed some rivets as well. Popped two & they had to be trashed because the rivet size turned out to be 5/32. So I stepped up in drill bit size & it all worked out. As I said, I’ll be topping it with some ¼ inch hardboard. I also plan to run it’s own electrical with an outlet on each post. I hope you all enjoy & this can help!


Estimated Cost
$350.00
Estimated Time Investment
Weekend Project (10-20 Hours)
Recommended Skill Level
Beginner
Comments
Thu, 11/29/2012 - 07:03
That is awesome!
This is by far the best workbench I have ever seen!!! Thanks for sharing. And excellent choice of table saw and miter saw.
In reply to That is awesome! by Rusty Cottage
Thu, 11/29/2012 - 14:59
Small rip saw
If I had it to do over I'd had gotten the contractor grade portable saw from Dewalt. The smaller version I have is the same 10" saw, but. It's maximum rip capasity is only 16. The other will at least rip a sheet of ply in 1/2.
Thanks for the kind words on the bench! I hope everyone that may find this valuable will. The plans came out of a 2005 issue & were hard to find on the internet.
Thu, 07/04/2013 - 18:28
Need Plans
I love this work bench and would love to build it but i cant find them. Could you post them or email them to me please. uniquetrio2000 [at] gmail [dot] com
Thu, 10/23/2014 - 09:04
Work Bench Plans
After some searching, found the plans at http://us.readersdigest.com/images/offer/fh/project_plans/pdf/FH05DJA_W…. Hope that helps. This is on my list of things to make very soon.
Wed, 10/22/2014 - 13:31
Standards & Brackets for Bench
I bought all the standards and brackets at Menards for $87.58 and this price included tax and shipping.
Mon, 12/10/2018 - 16:55
Do it all workbench plans
Thanks for sharing! Good job! Any chance you'd share palns? No luck on inet or with provided link. Thanks!
Wed, 08/07/2019 - 12:48
perfect workbench
This is the perfect workbench that I’d like to build. Could I get the plans for it?
Thu, 03/12/2020 - 12:46
Were you able to locate the…
Were you able to locate the plans?
The link in this thread doesn’t seem to be active.
Sun, 07/12/2020 - 17:59
I found the PDF download for…
I found the PDF download for these plans, here is the link:
https://docplayer.net/28130746-Do-it-all-mobile-workbench.html
The only place where I could find them, FH doesn't have them online any more.

Tue, 12/08/2020 - 17:57
Future Instructable?
Great build. I would love to see an instructable on this. :) Thank you for sharing..
Adirondack ski chair
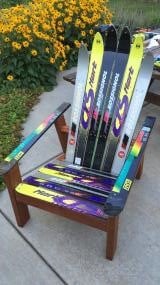
Had some old skis I've been wanting to make into a chair. The Home Depot plans worked perfectly for the base. Cut the back brace a bit longer to fit the skis
Built from Plan(s)
Estimated Cost
$50
Estimated Time Investment
Afternoon Project (3-6 Hours)
Recommended Skill Level
Beginner
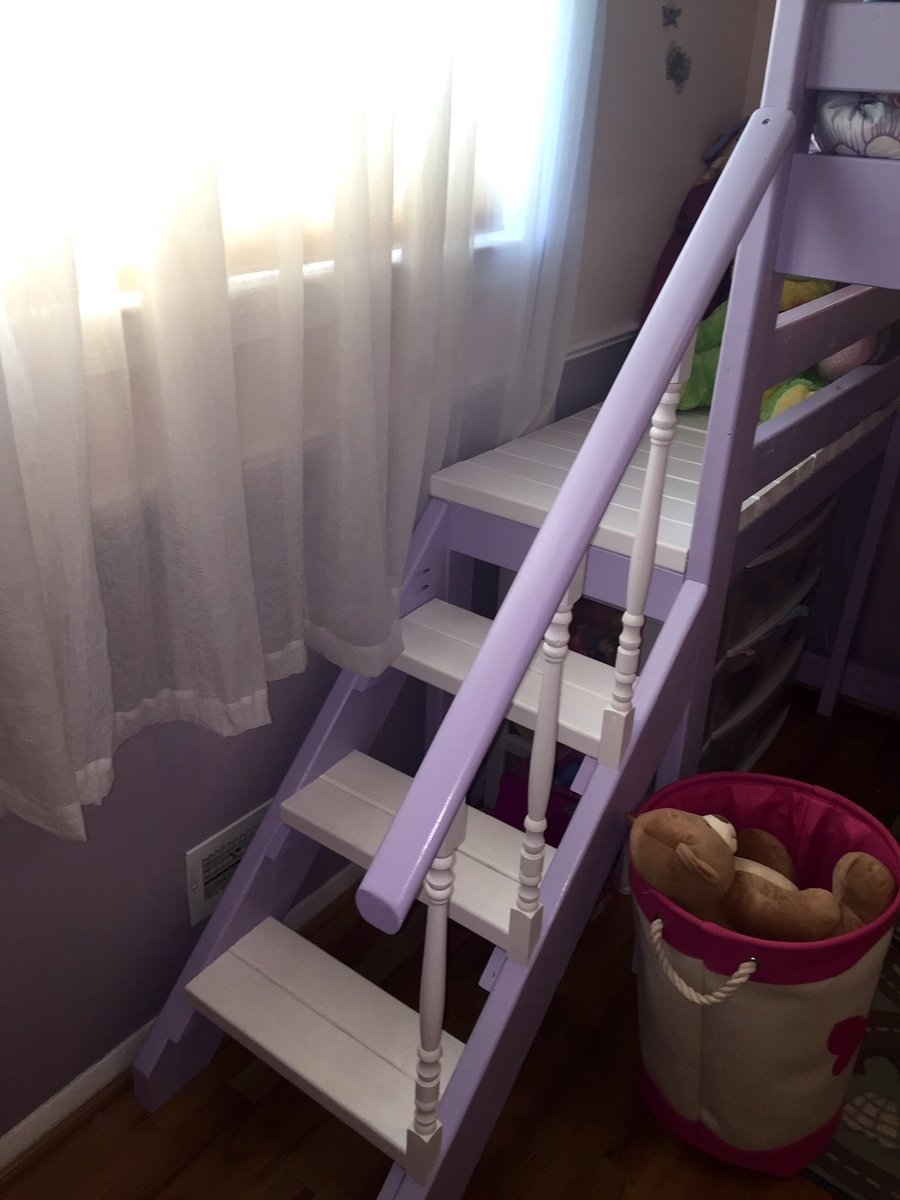
Camp Loft Bed with Stairs
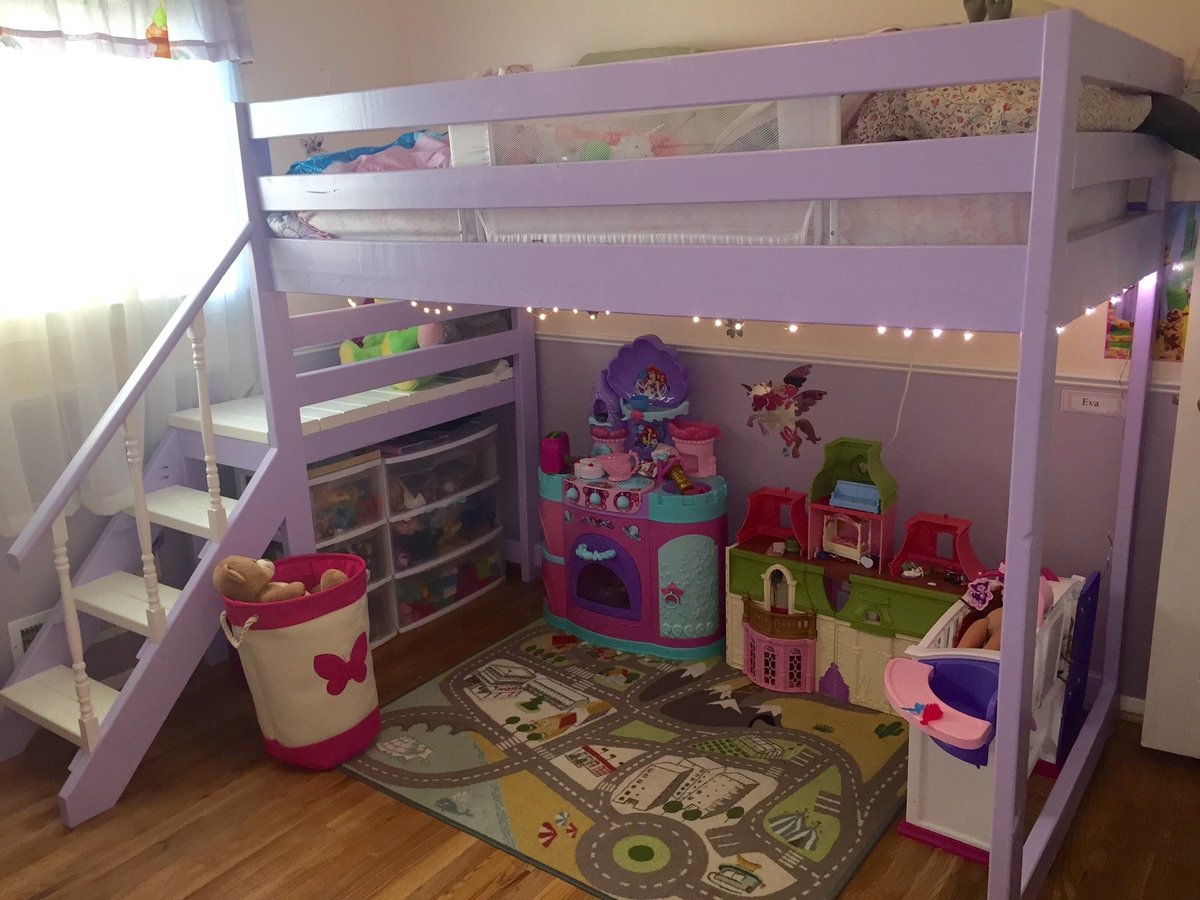
I wanted to create a loft bed for my daughter so that she could have space underneath to play since her room is small. This was the perfect solution! I went ahead and added a stair rail so she could feel a little safer coming down the stairs (she is 4 yrs old). She loves her princess bed and what's best she wants to sleep in it instead of with mommy and daddy! This was my first wood working project.
Built from Plan(s)
Estimated Time Investment
Weekend Project (10-20 Hours)
Recommended Skill Level
Beginner
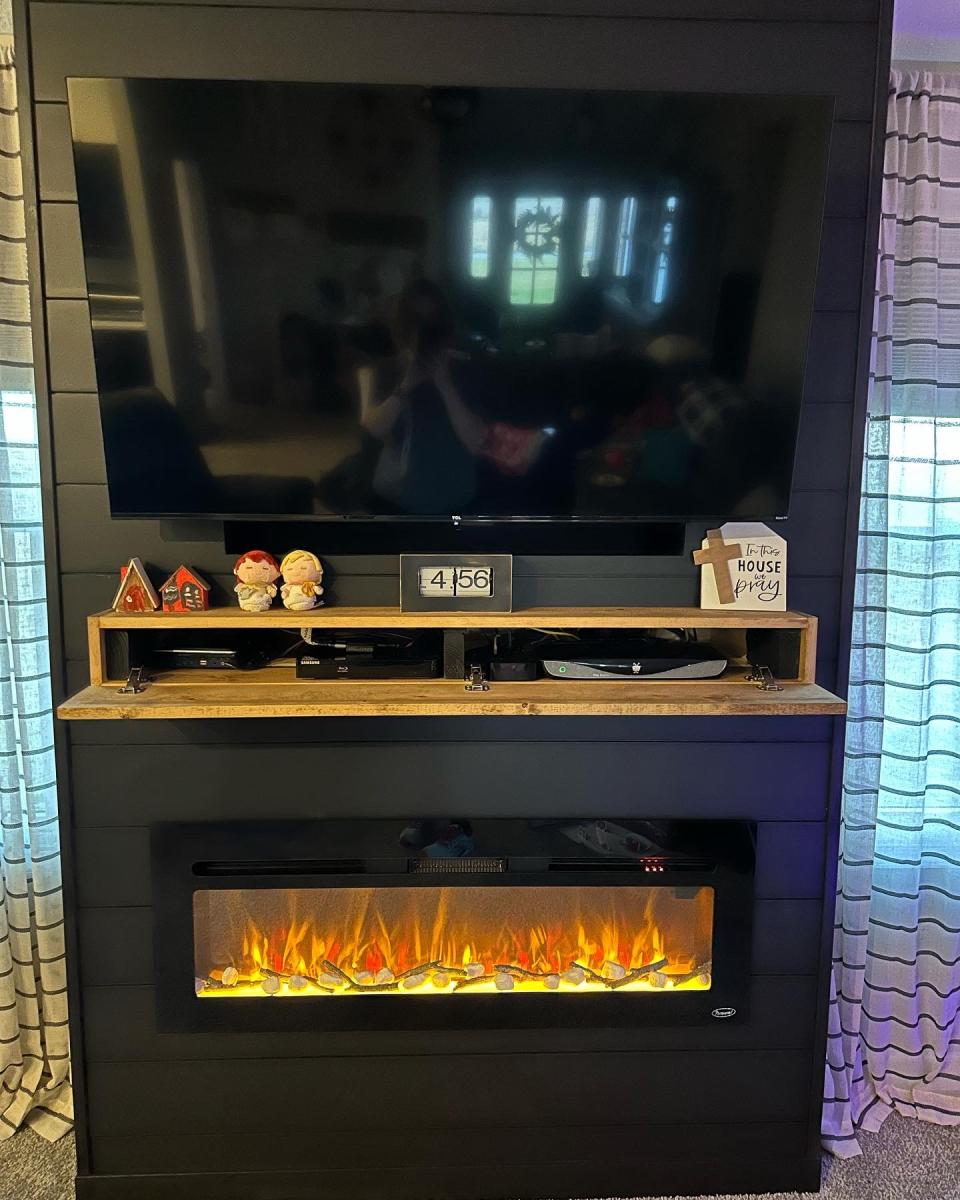
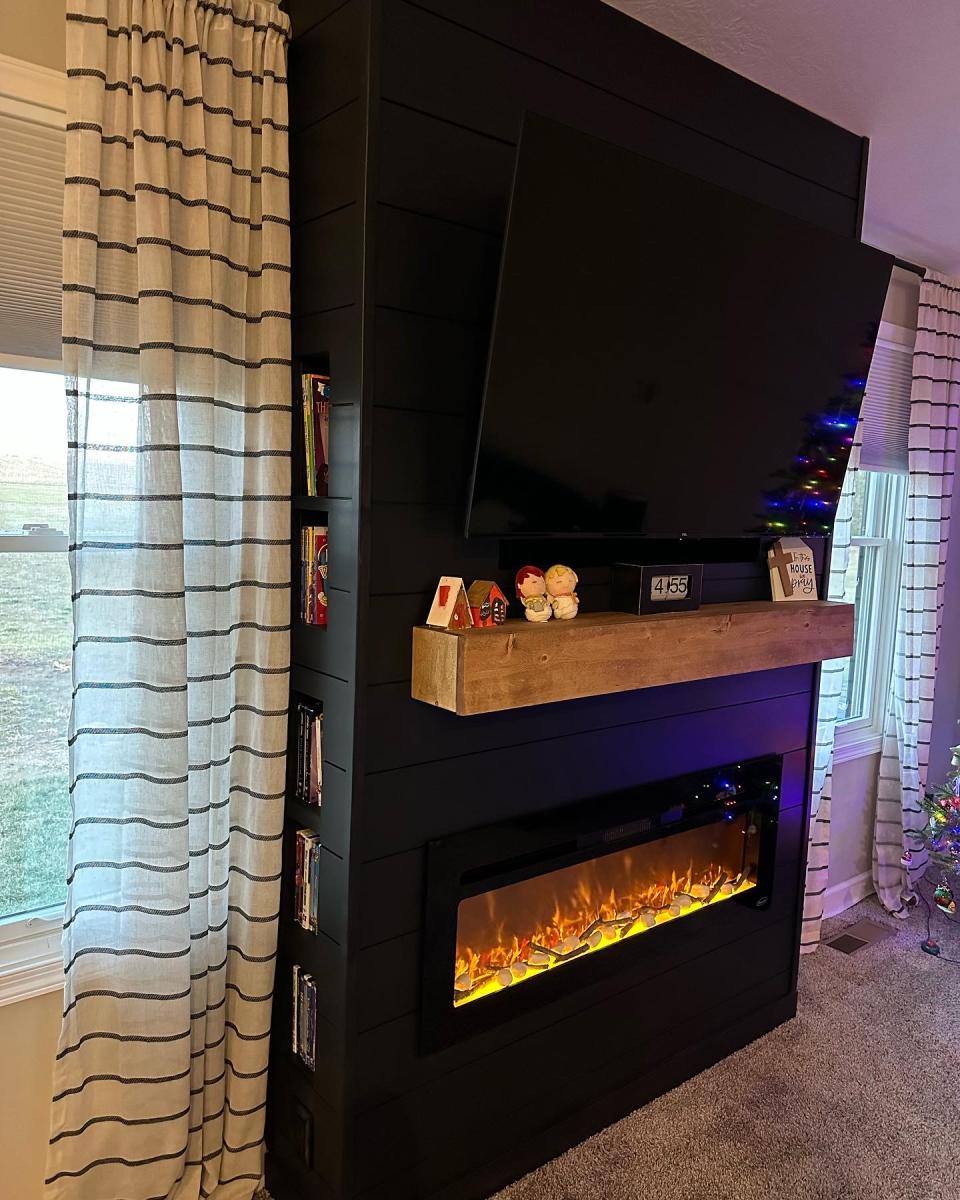
Fireplace with hidden Mantle storage and side bookshelves
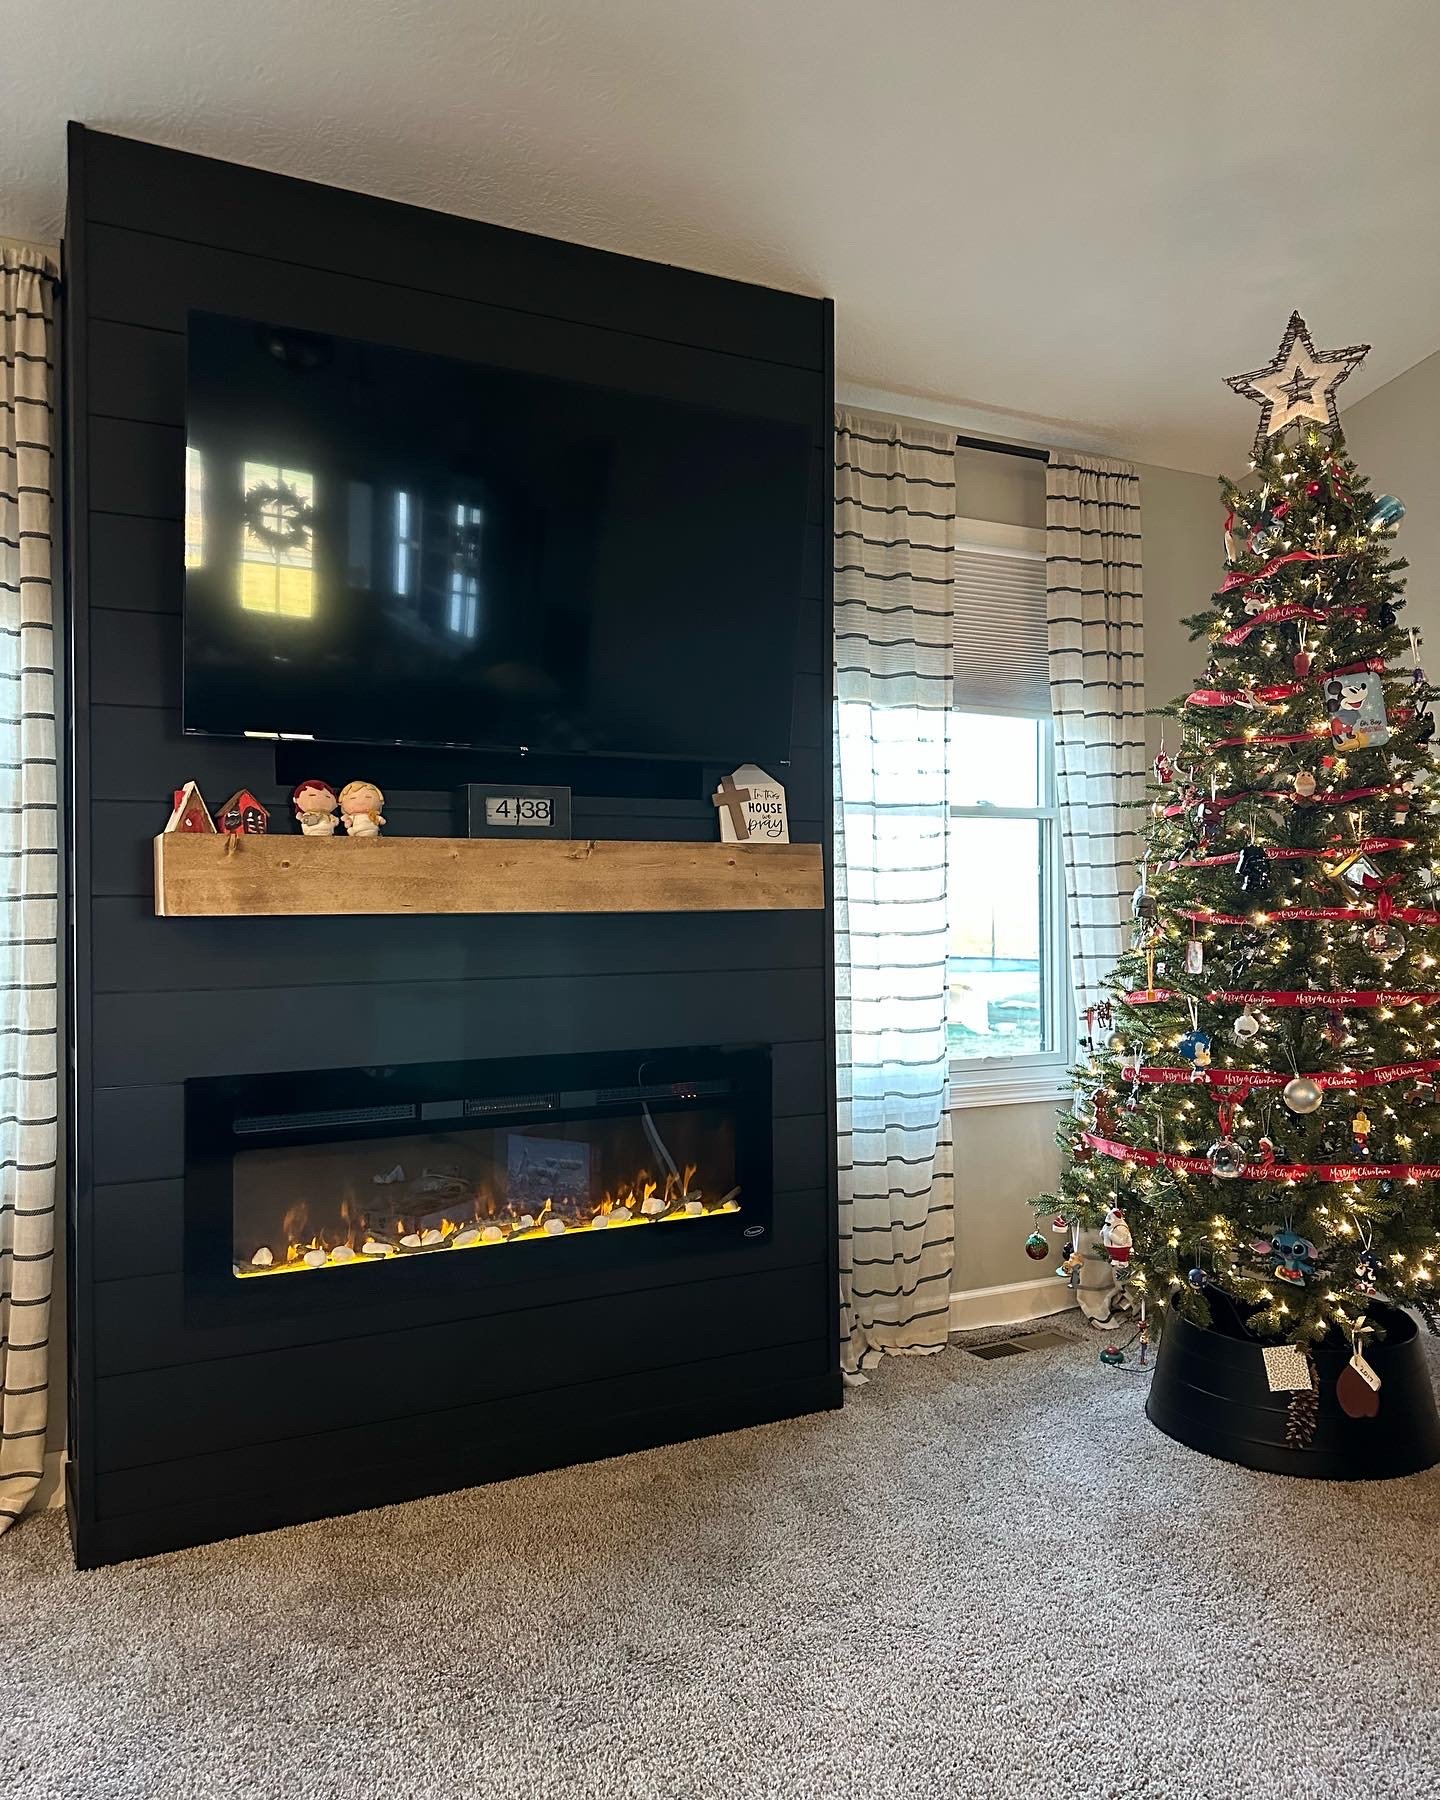
Thank you Ana for you Fireplace design as it was exactly what I needed! We’ve lived in our house for 3 years now and I’ve wanted a fireplace ever since. Your plan was perfect and with a few modifications I made it come to life. My 9yr daughter as I was almost done building thought there should be a shelf for books and movies below the fire place. It gave me the idea of adding storage on the sides. I had already had the idea of the mantle storage and just used a floating shelf idea and made that. This was a lot of fun!! It took me a little over a week to build. But can’t wait to build something else for our house… like the mudroom!
Amy
Built from Plan(s)
Comments
Thu, 12/01/2022 - 16:07
THIS IS AMAZING!!!
Oh my goodness, you knocked this one out of the park! Amazing job, thank you for sharing.
Sun, 01/08/2023 - 19:02
That looks awesome! My…
That looks awesome! My husband and I are planning on doing this as well. I do have a question, as I see you have carpet just like us. Did you cut out the carpet where you built out, and if so how did you go about that, or did you just build on top of it?
Farmhouse Playhouse
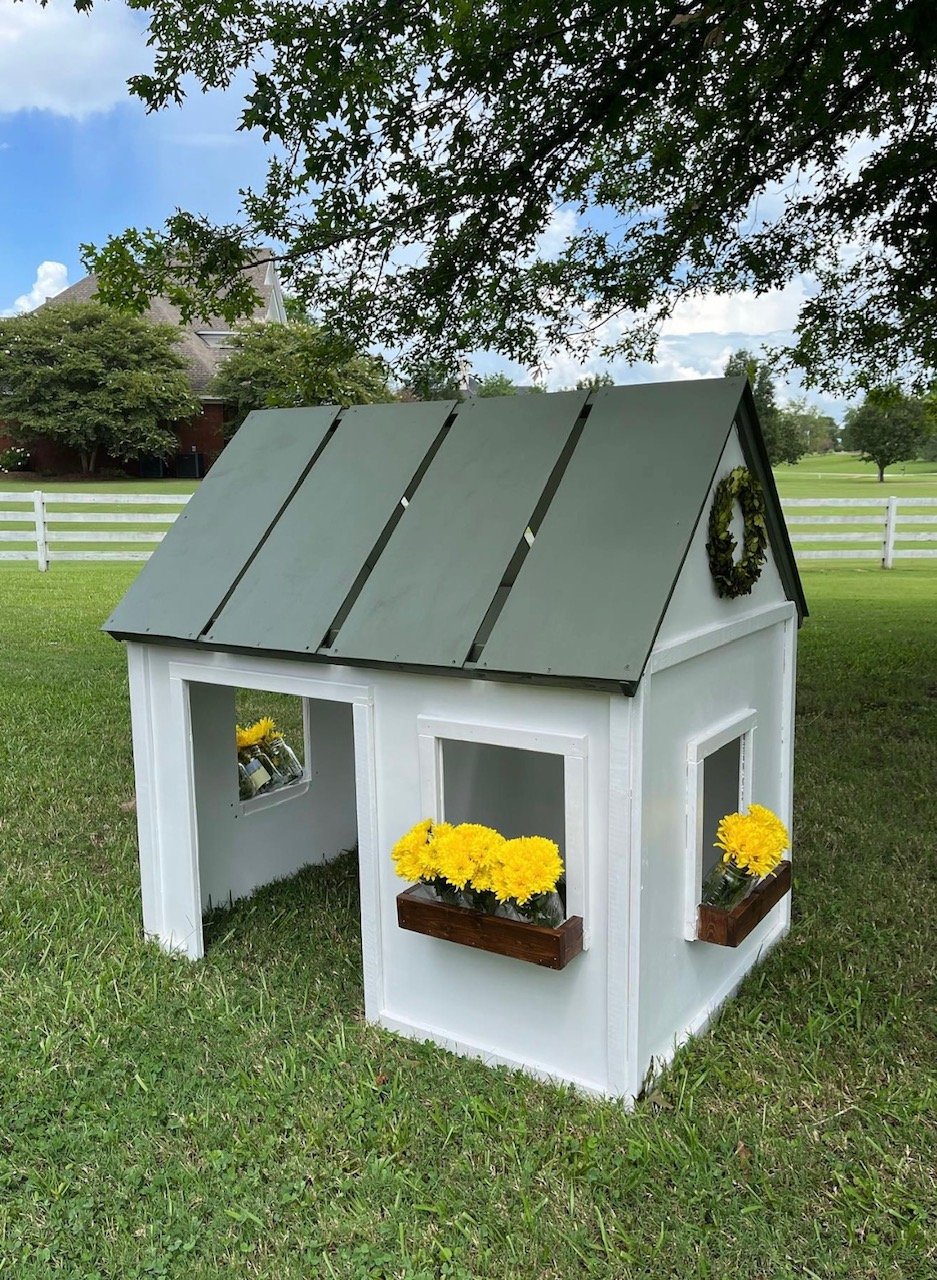
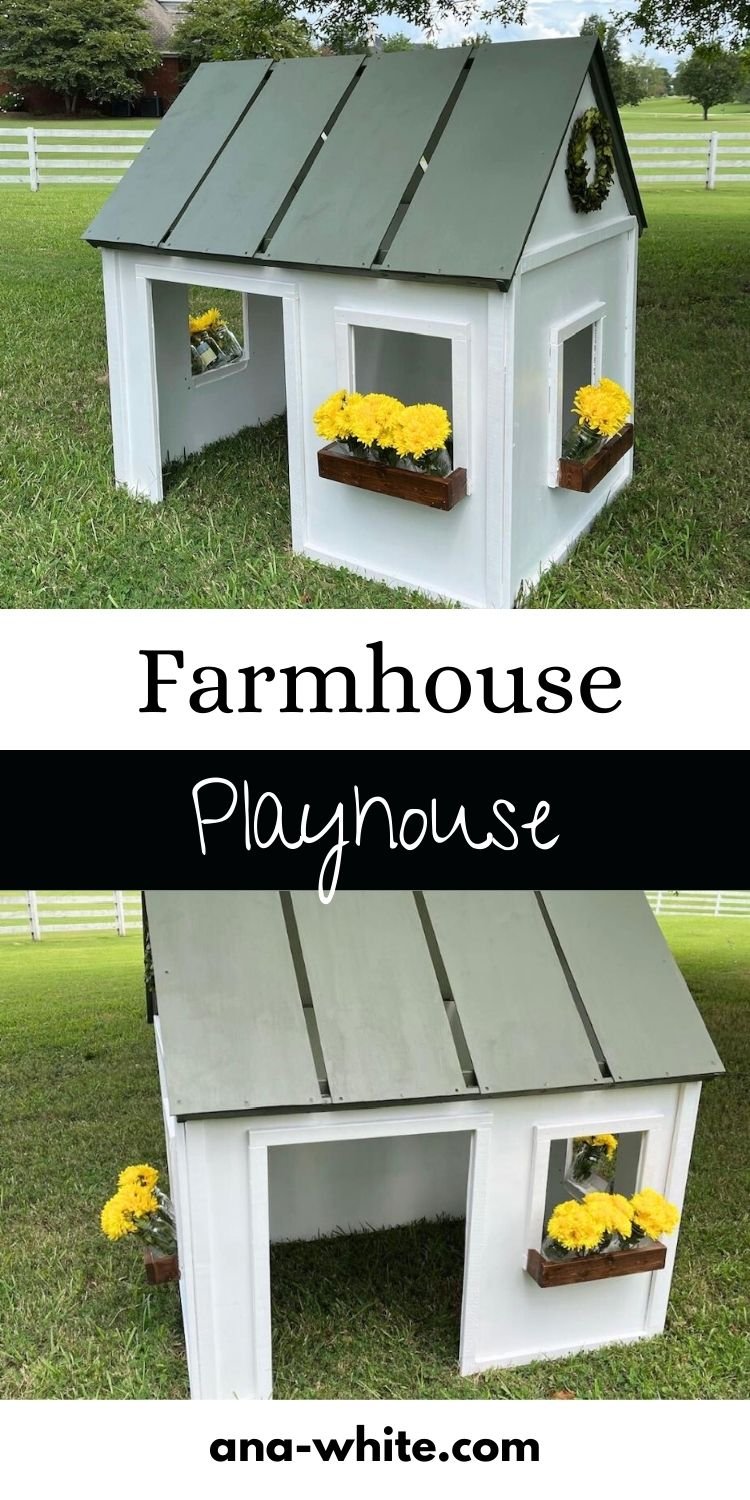
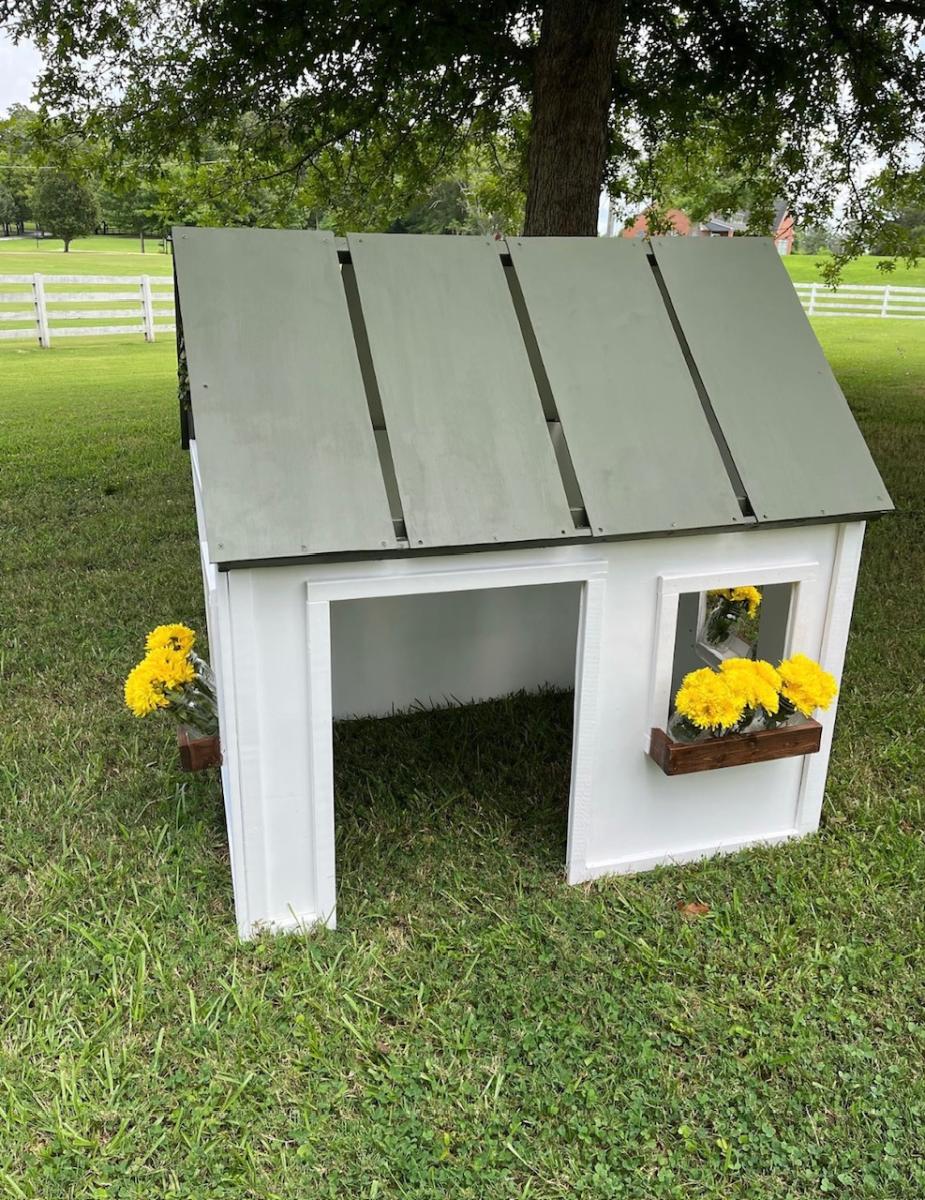
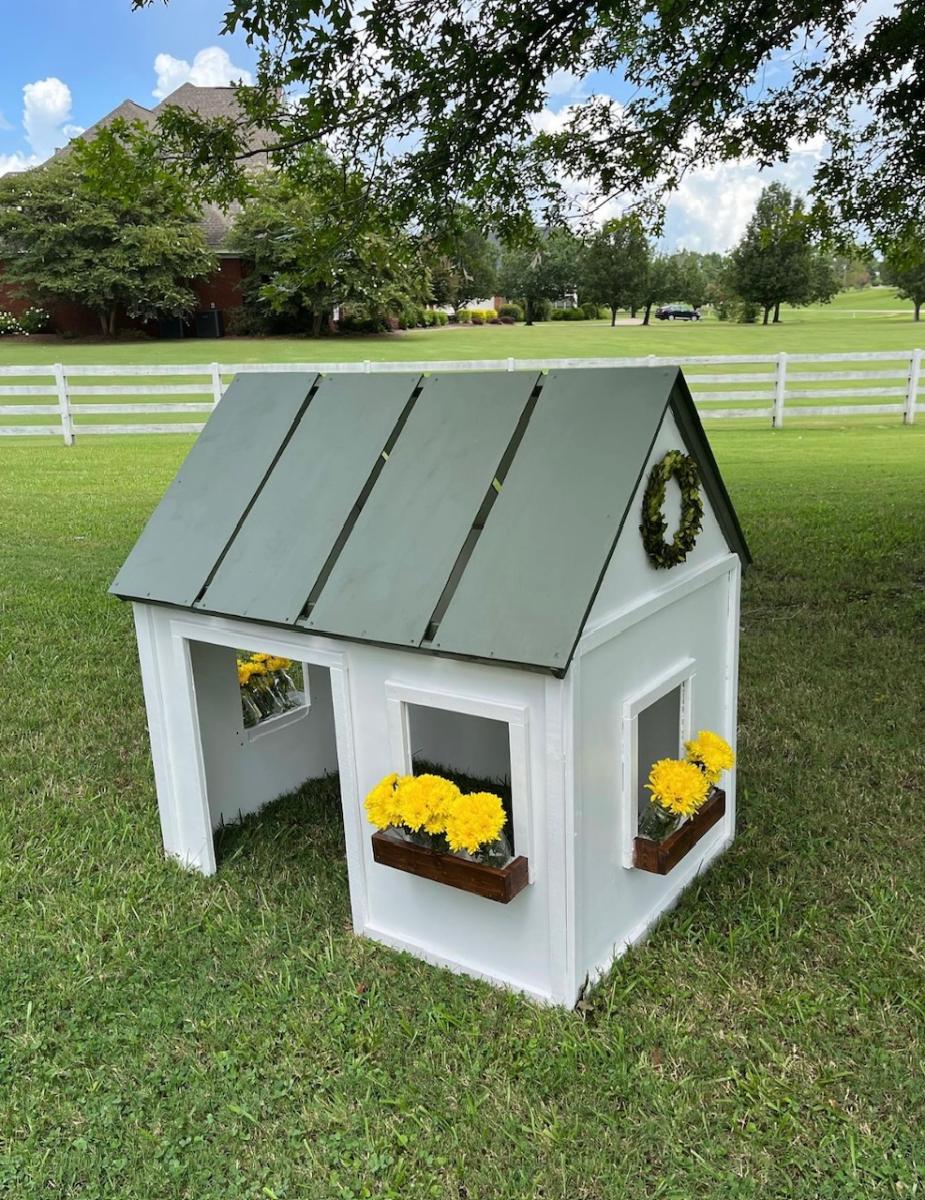
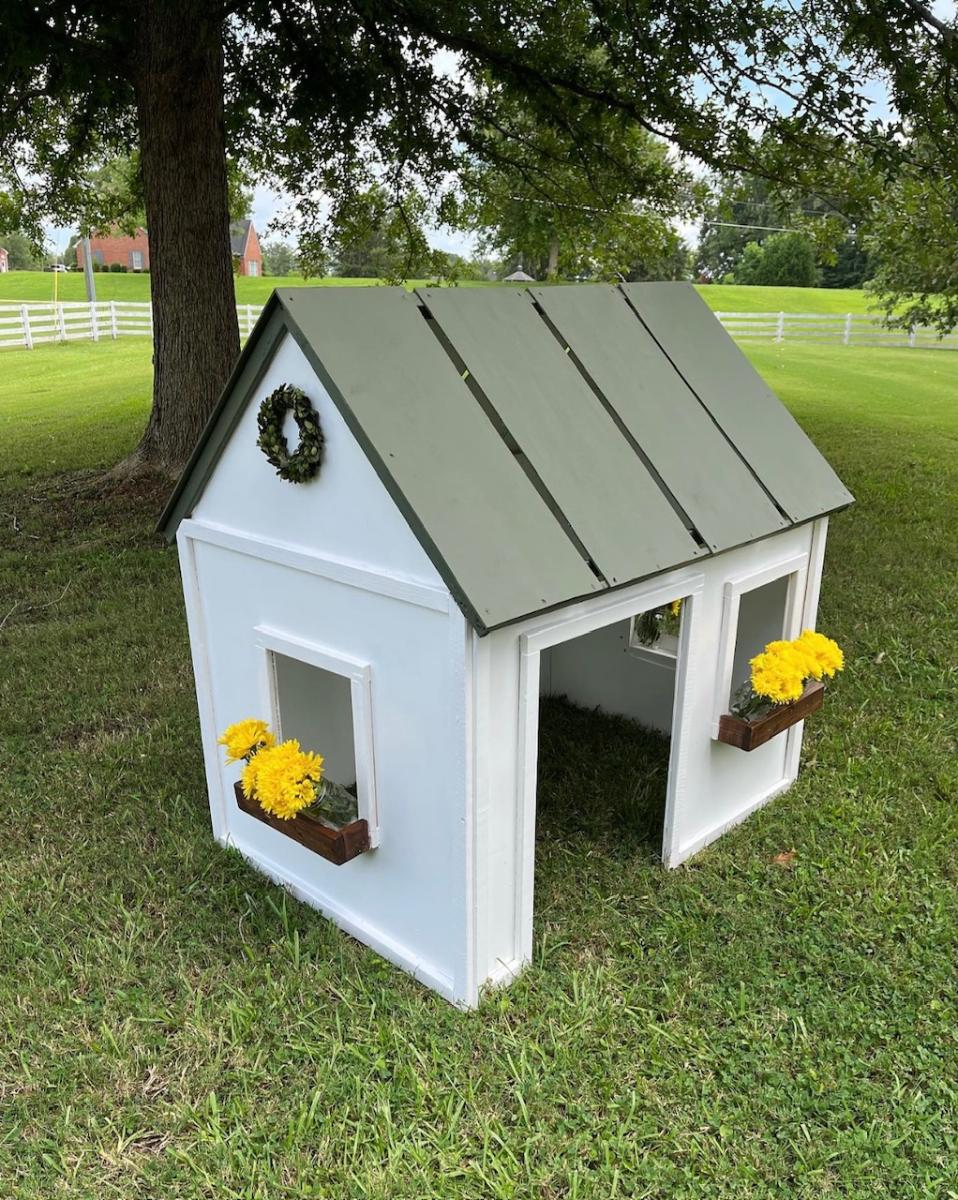
Built from Plan(s)
Seasonal And Holiday
Garden cutie
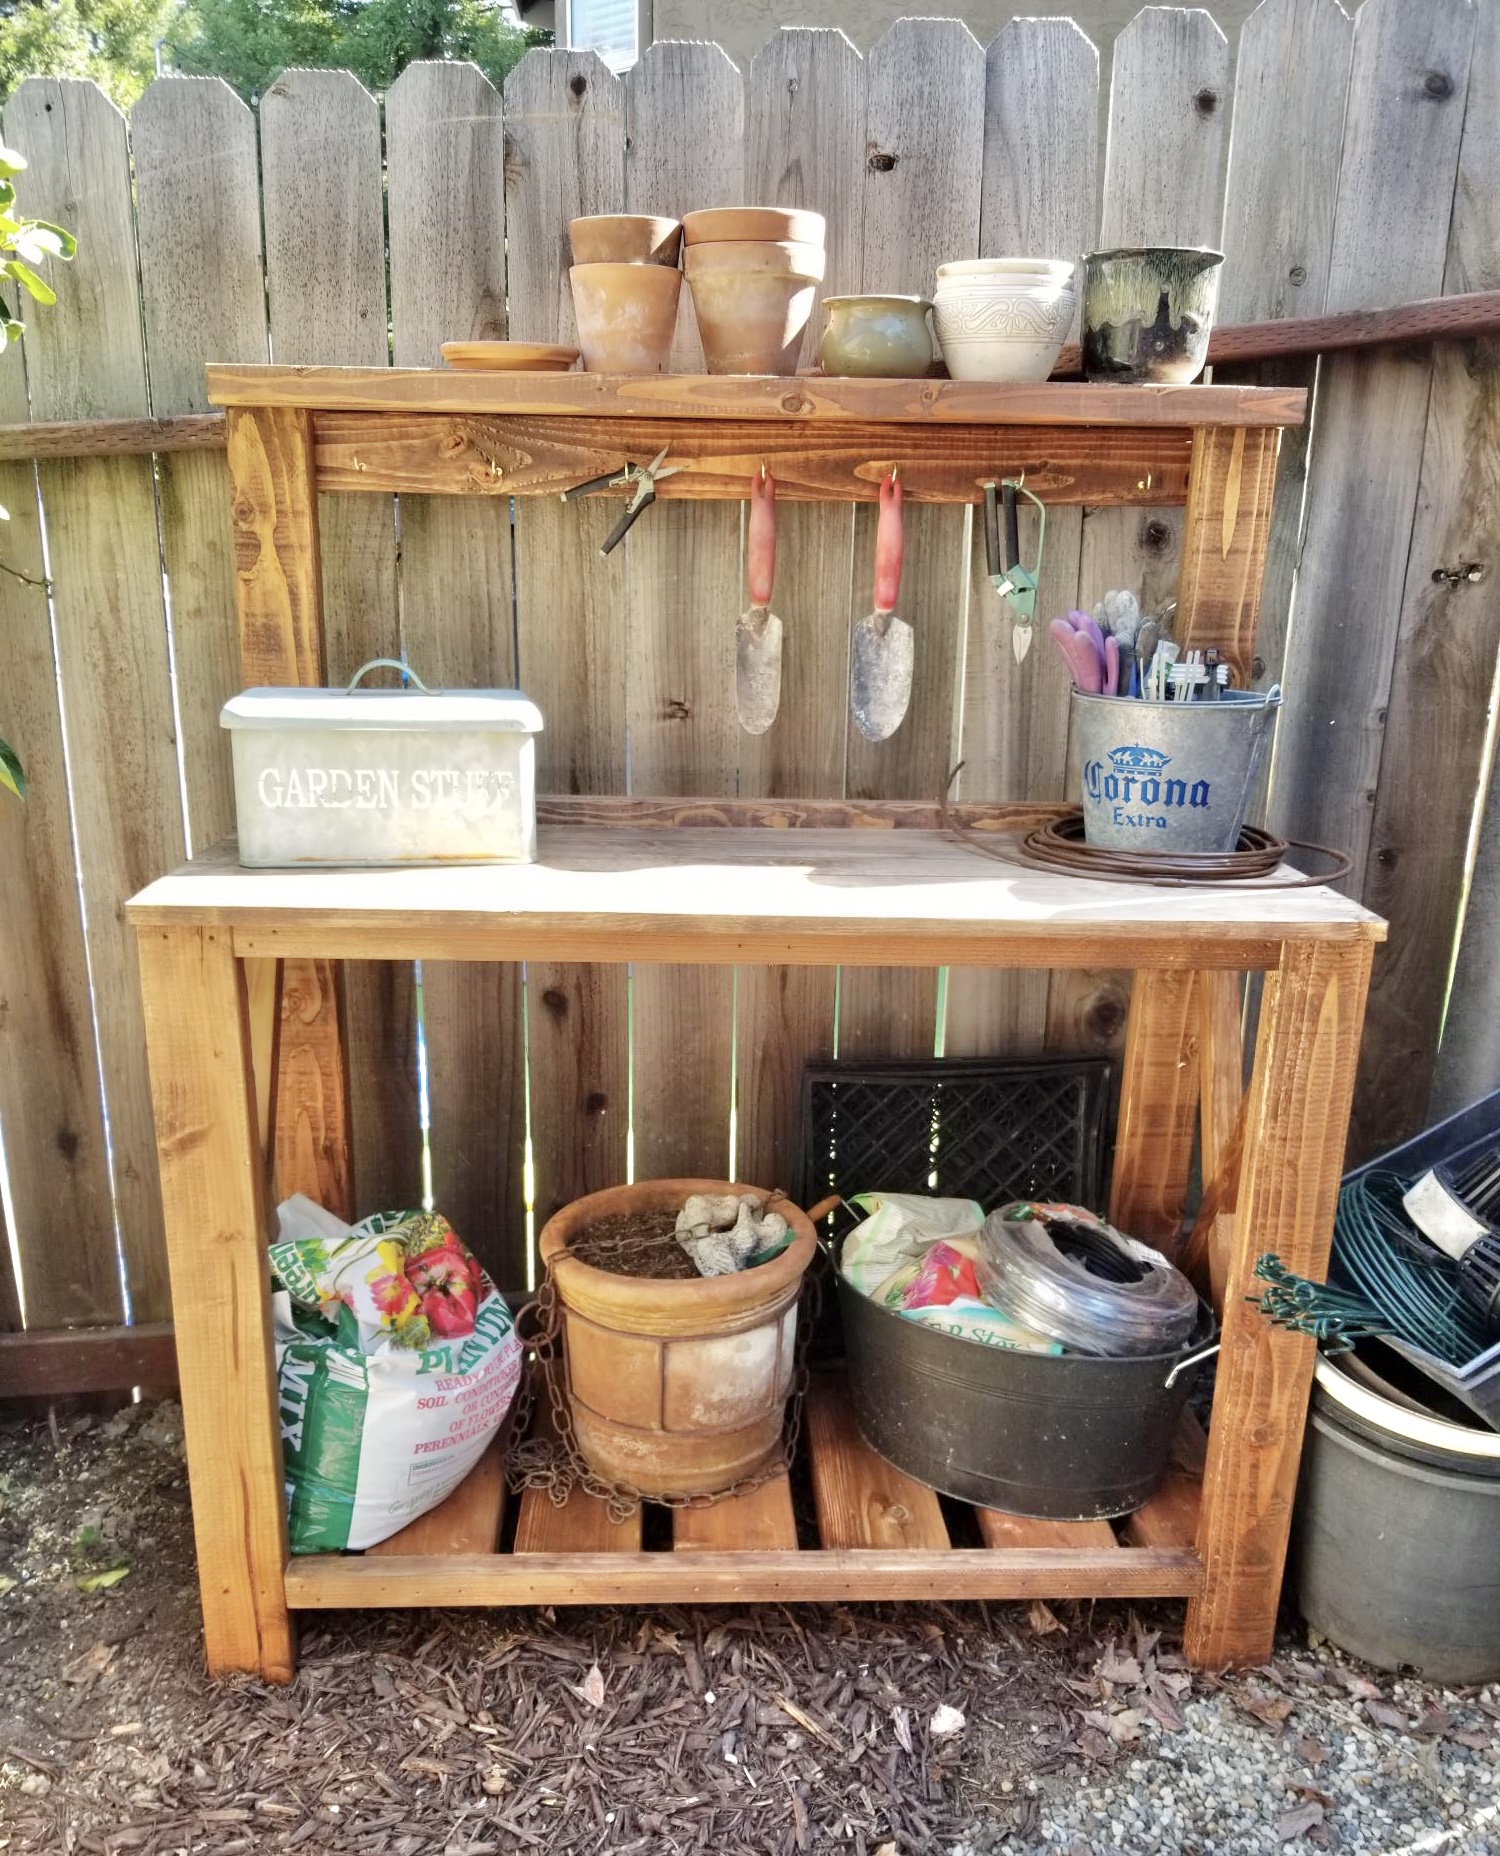
My honey built this farmhouse potting bench in a few hours. I needed it to store all the junk that was laying on the ground. It's so cute!
Built from Plan(s)
Estimated Cost
$100
Estimated Time Investment
Afternoon Project (3-6 Hours)
Finish Used
Early American minwax
Recommended Skill Level
Beginner
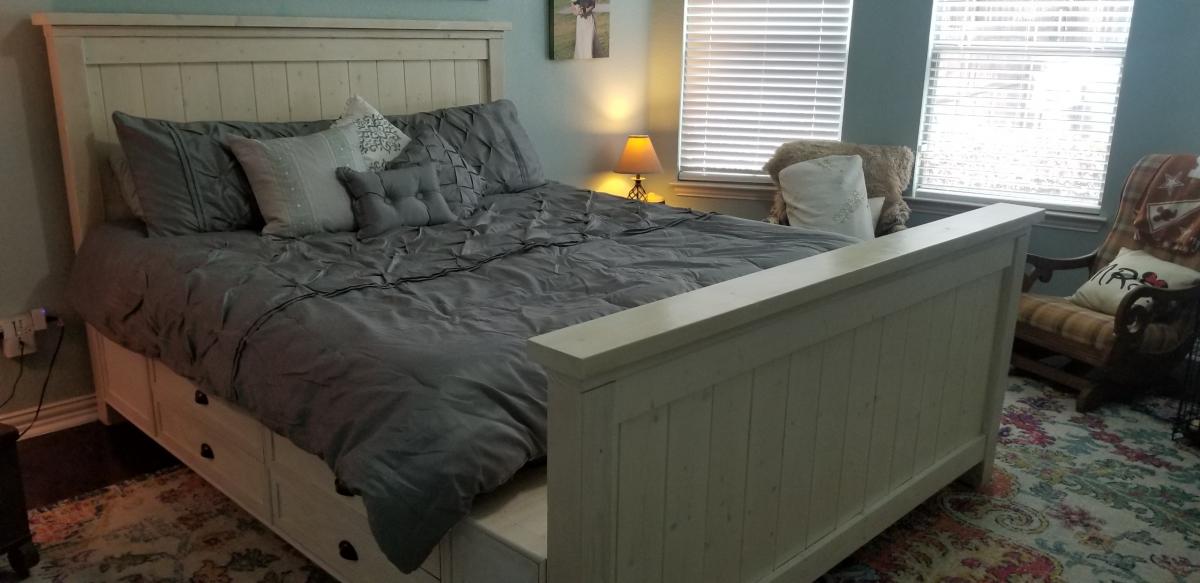
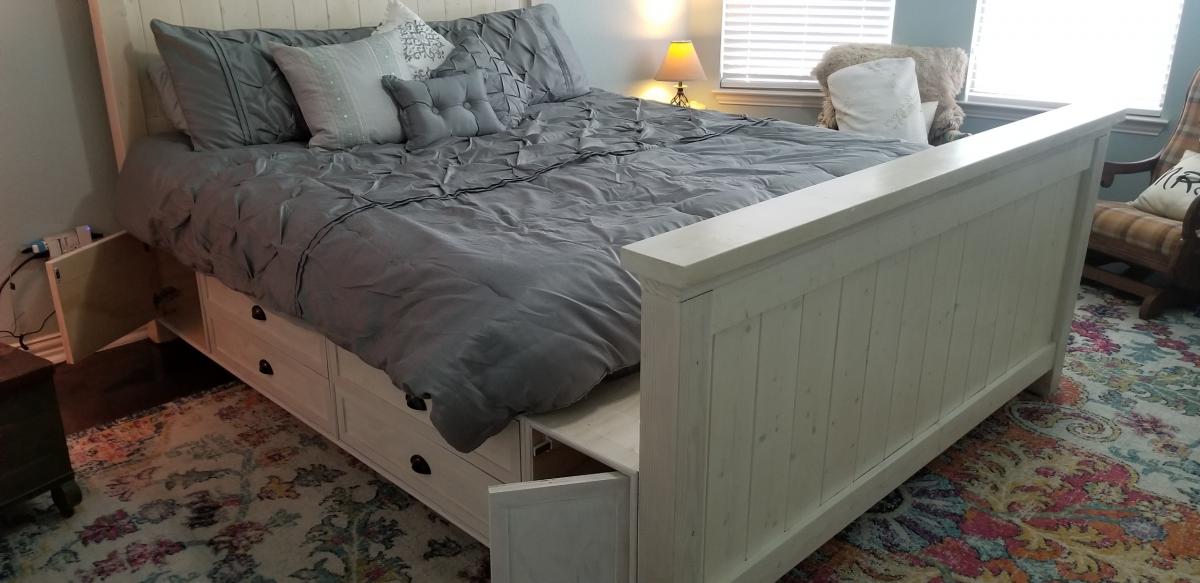
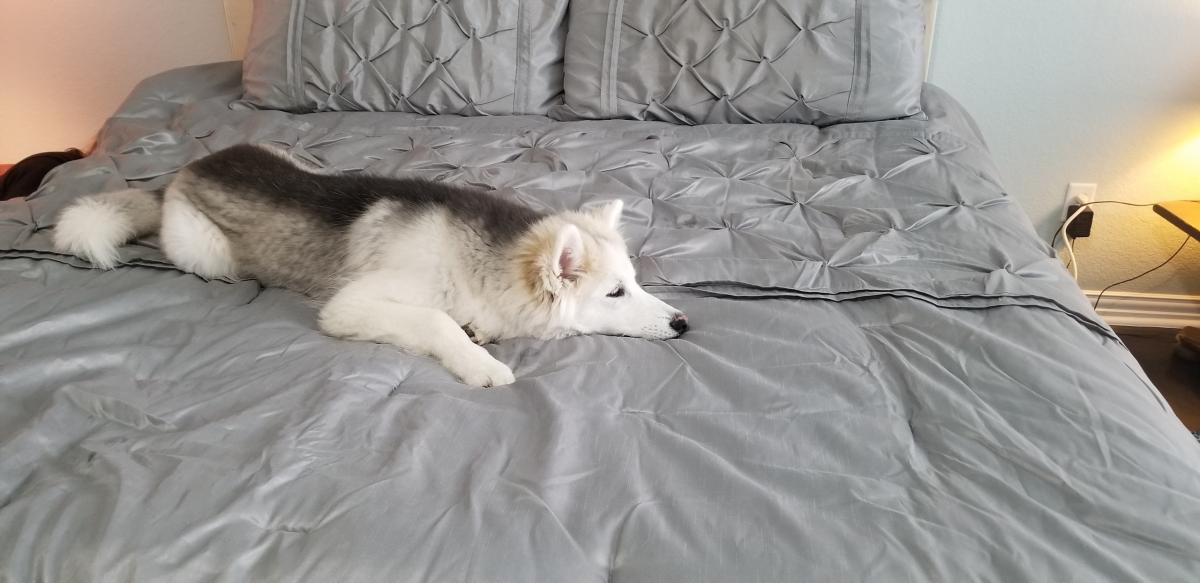
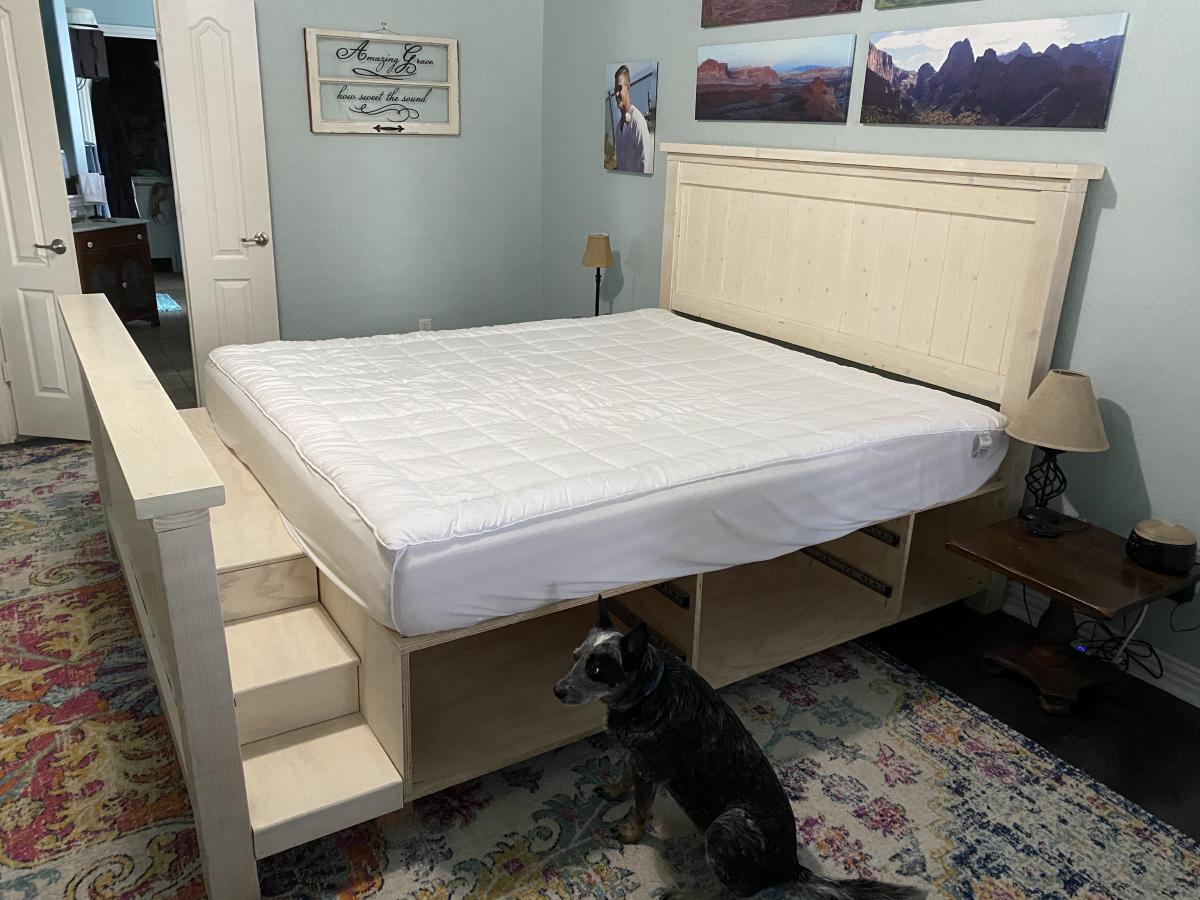
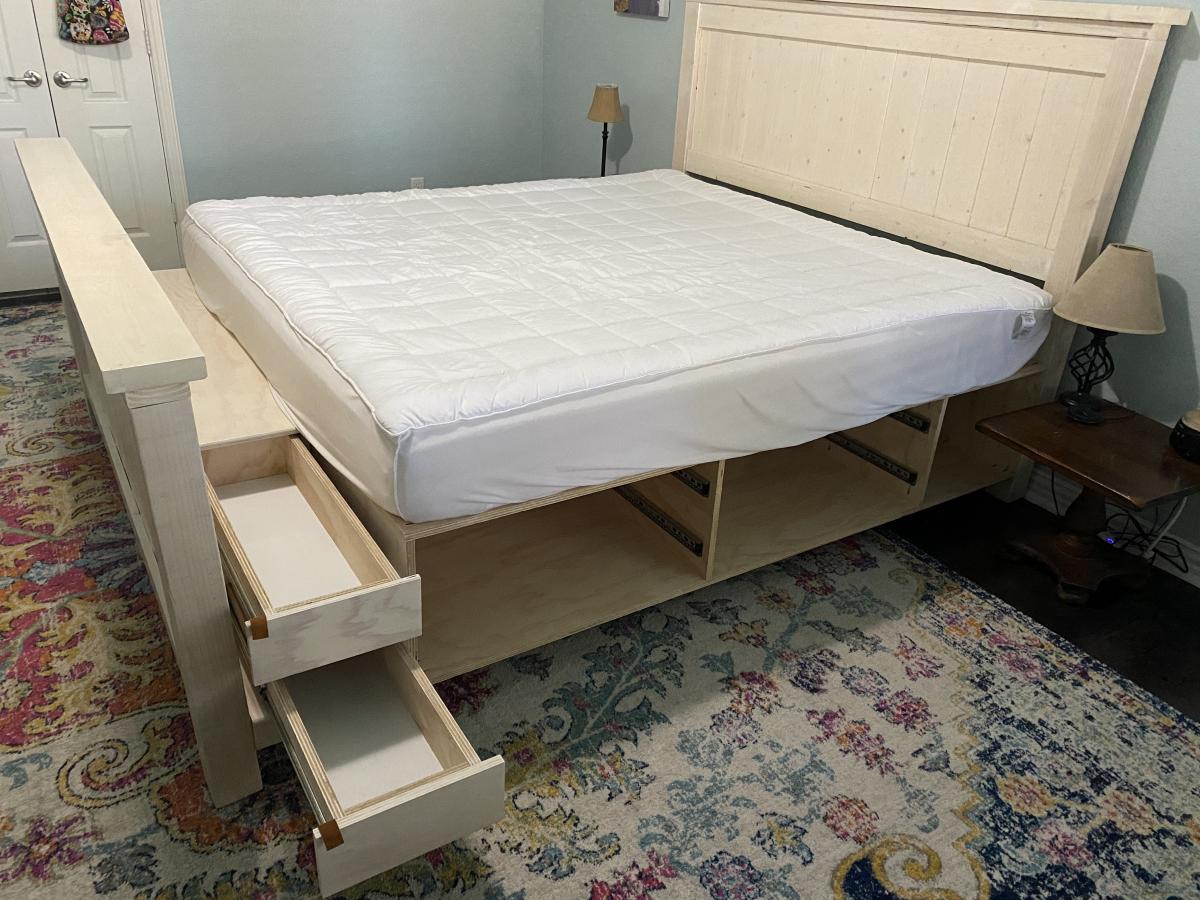
King Size Farmhouse Bed with Dog Stairs and Storage
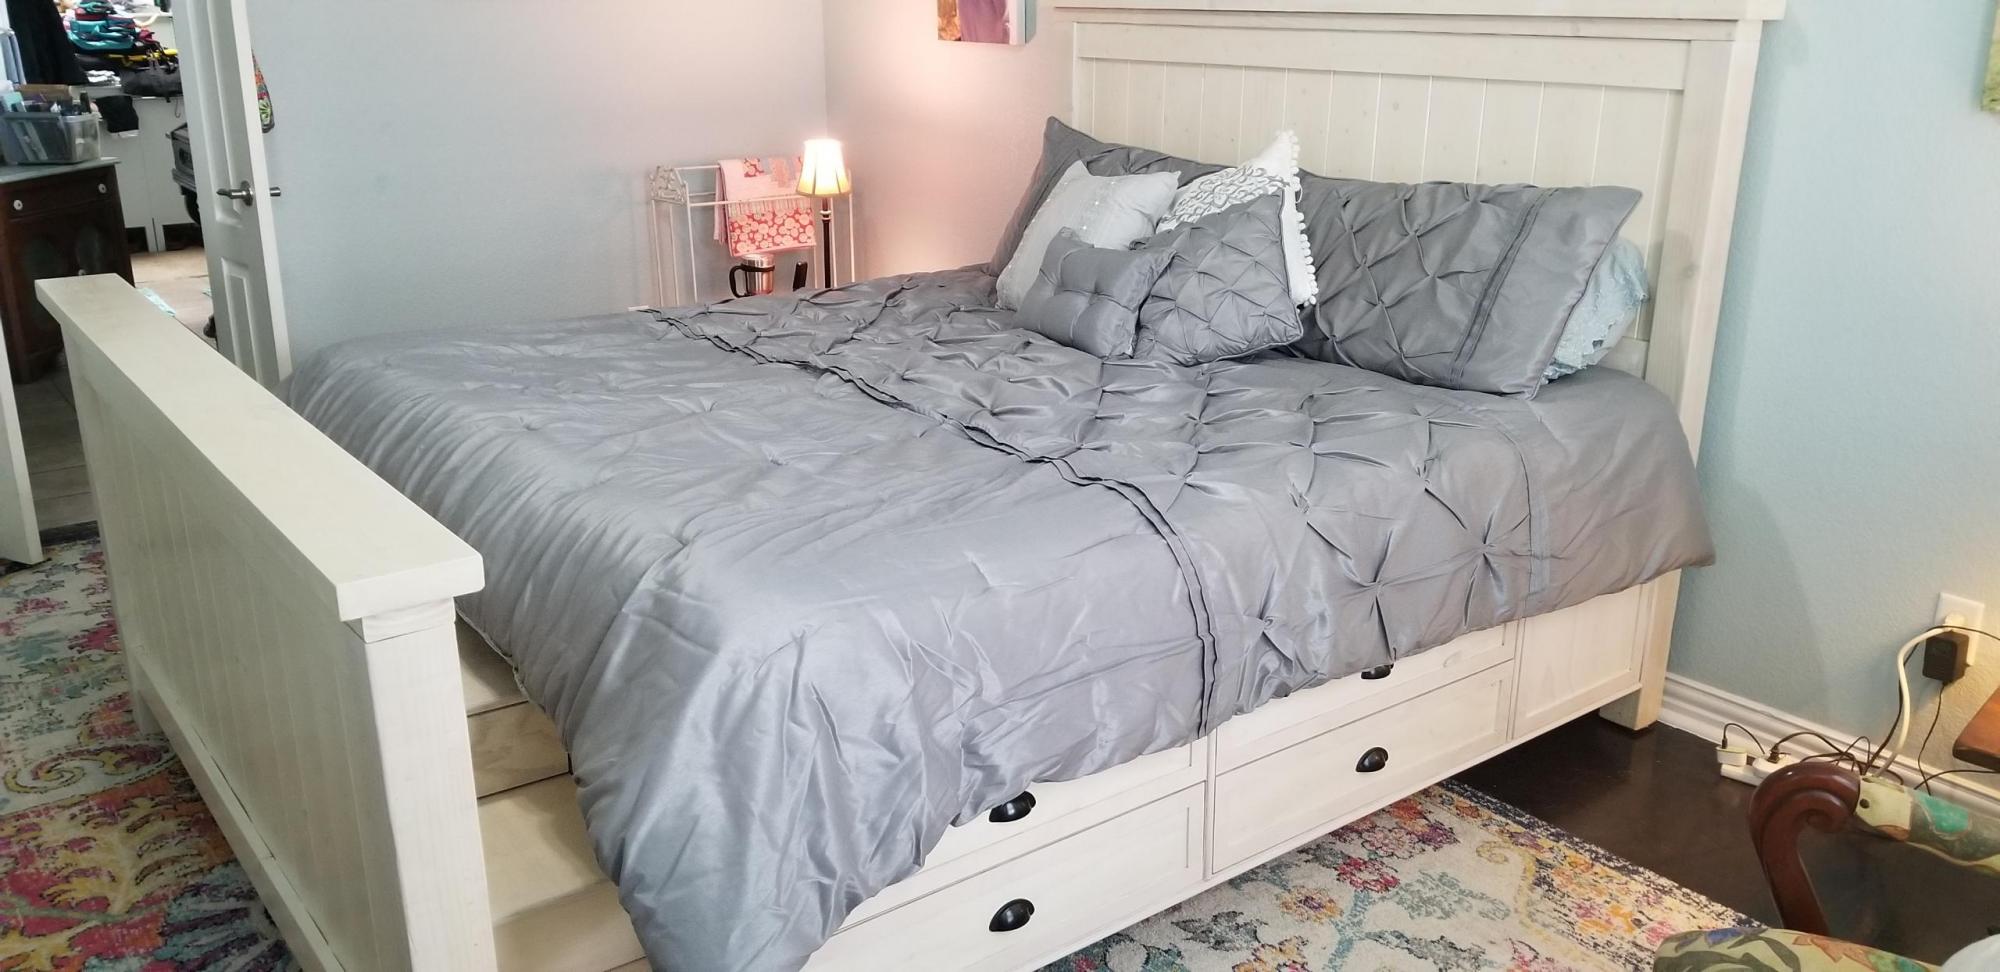
We have a frosty faced blind girl and an aging tri-pawed that we wanted to be able to continue snuggling with us so we adapted the Farmhouse Bed with Storage to make it a king size. We made the drawer boxes deeper which allowed us to get rid of our dresser to create more space in our room. And we added a flight of stairs for the pups.
Built from Plan(s)
Estimated Time Investment
Weekend Project (10-20 Hours)
Finish Used
General Finishes White Wash with Arm R Seal Oil Based Satin Finish top coat. (If you want the white wash to be more white and less amber, use water based.)
Recommended Skill Level
Intermediate
Comments
Fri, 12/30/2022 - 07:53
This is exactly what I’m…
This is exactly what I’m looking for! Perfect for our dogs. Although, I wonder if a ramp would work or if it would be too steep? Hmmm
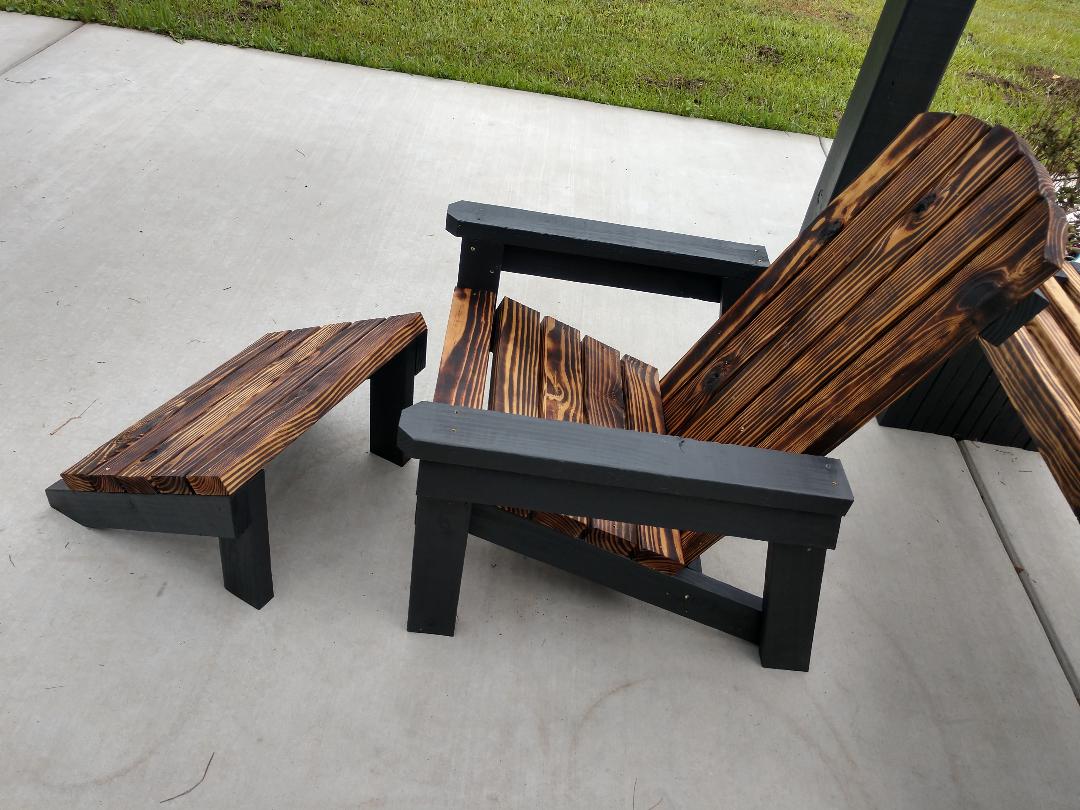
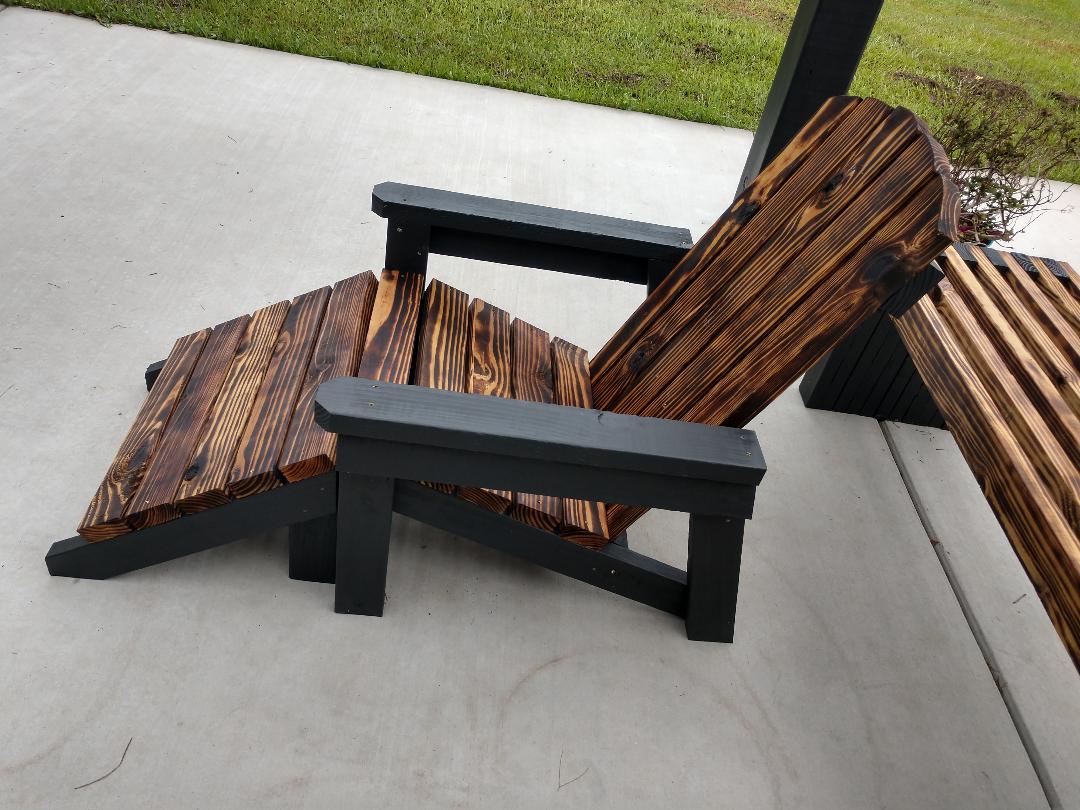
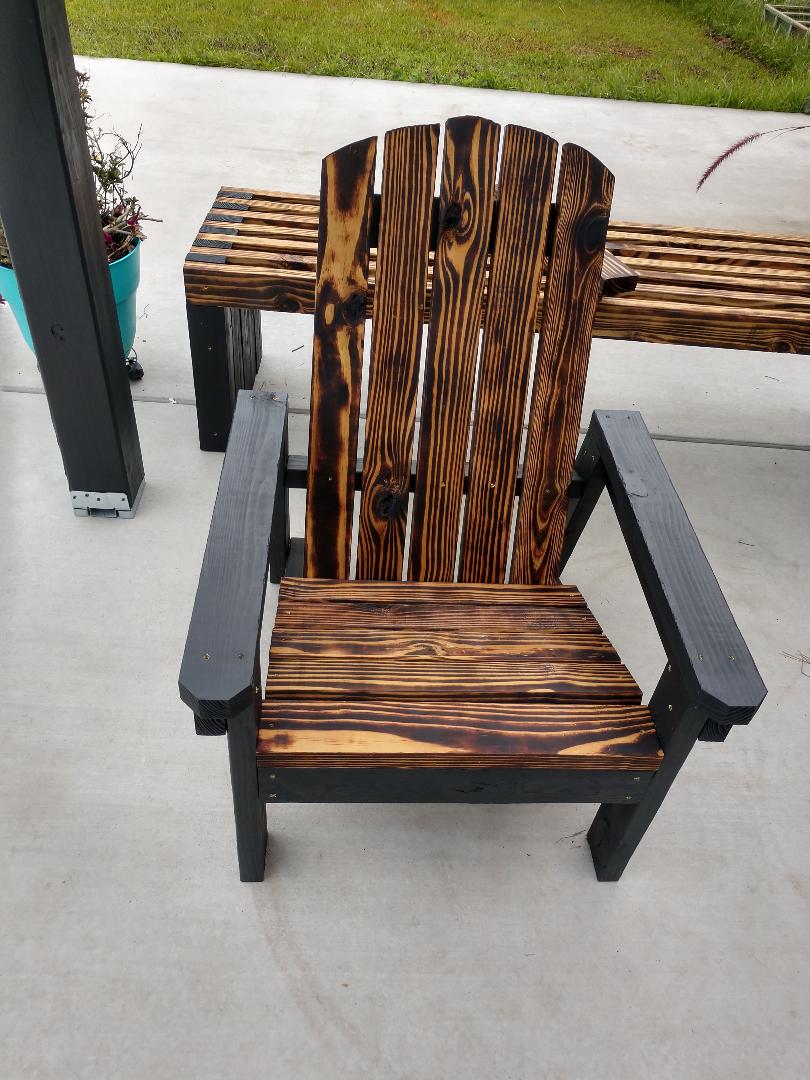
2x4 Adirondack Chair
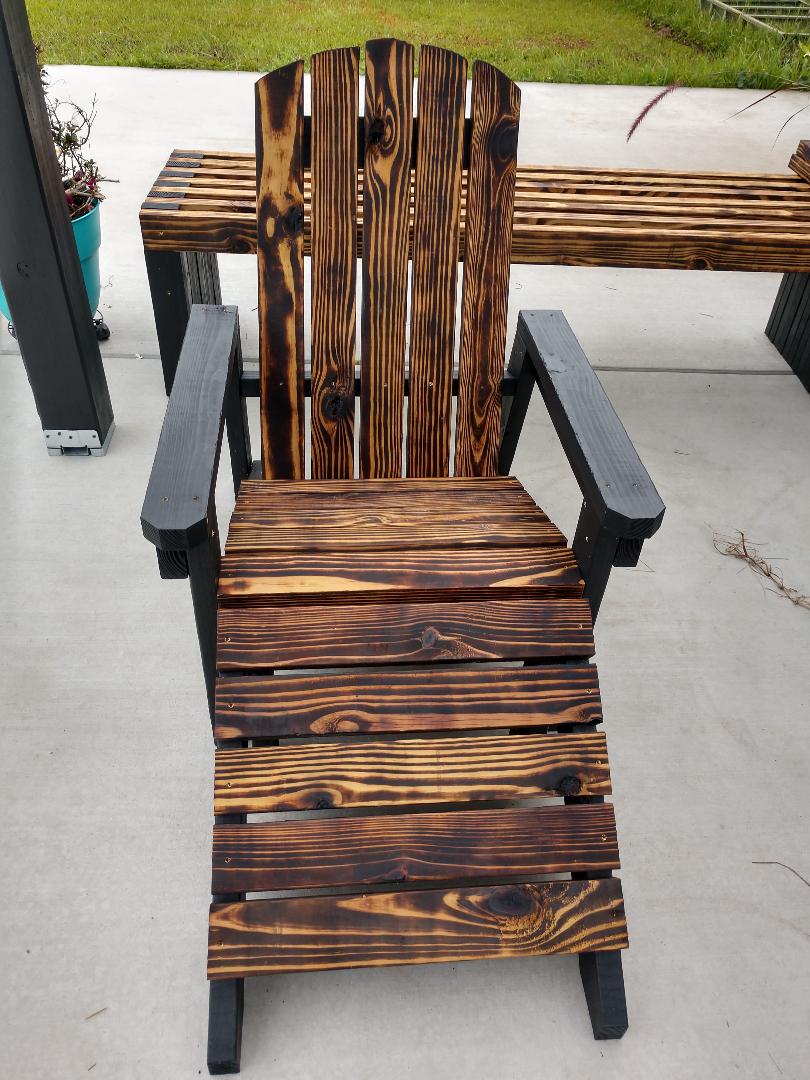
Very easy instructions. I love the way they turned out. I used all 2x4's that I had left over from another project. I burned the top pieces and painted all other pieces. Love your easy instructions. My first time making furniture.
Thanks
Yvette

Built from Plan(s)
Recommended Skill Level
Beginner
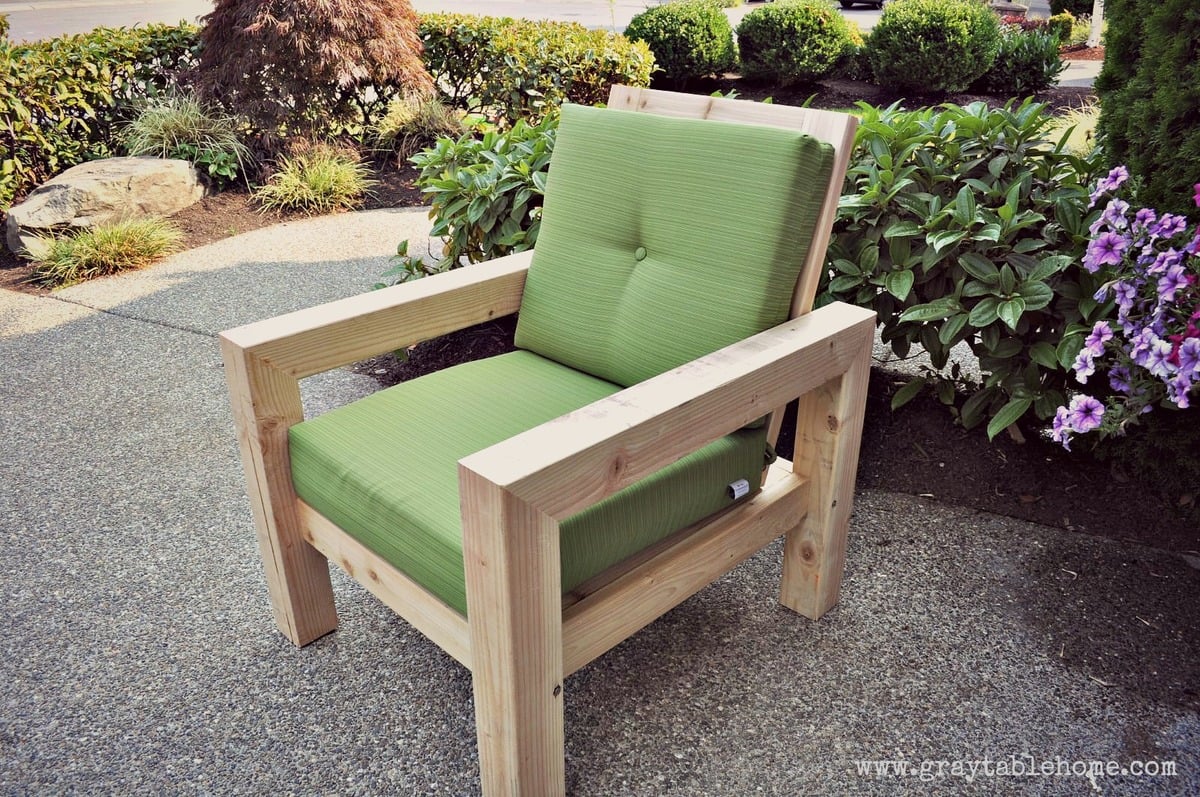
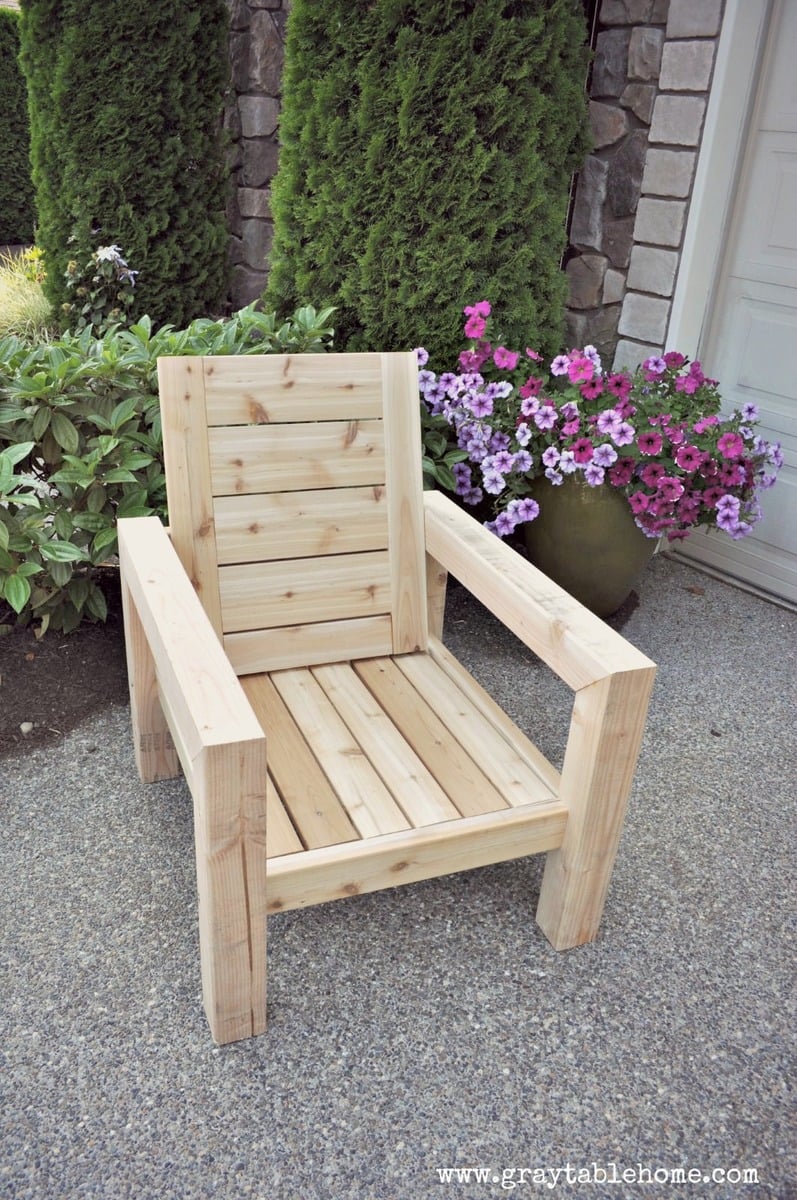
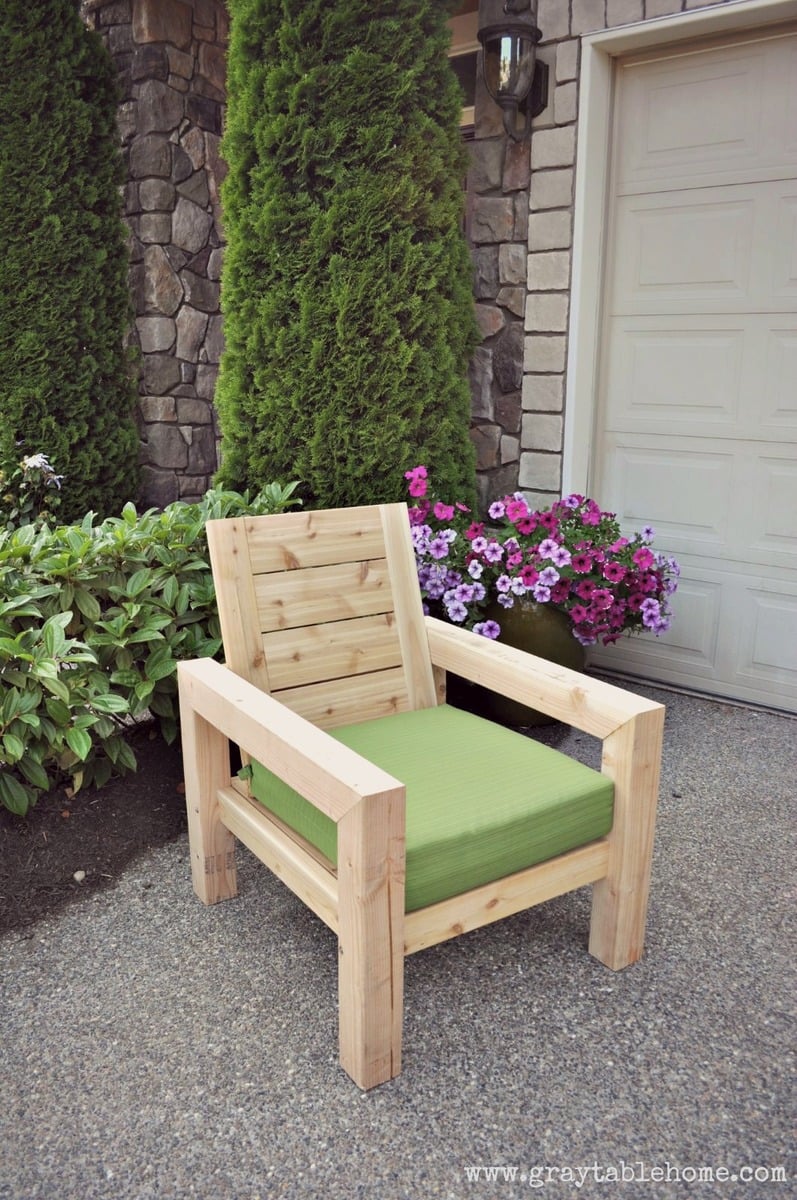
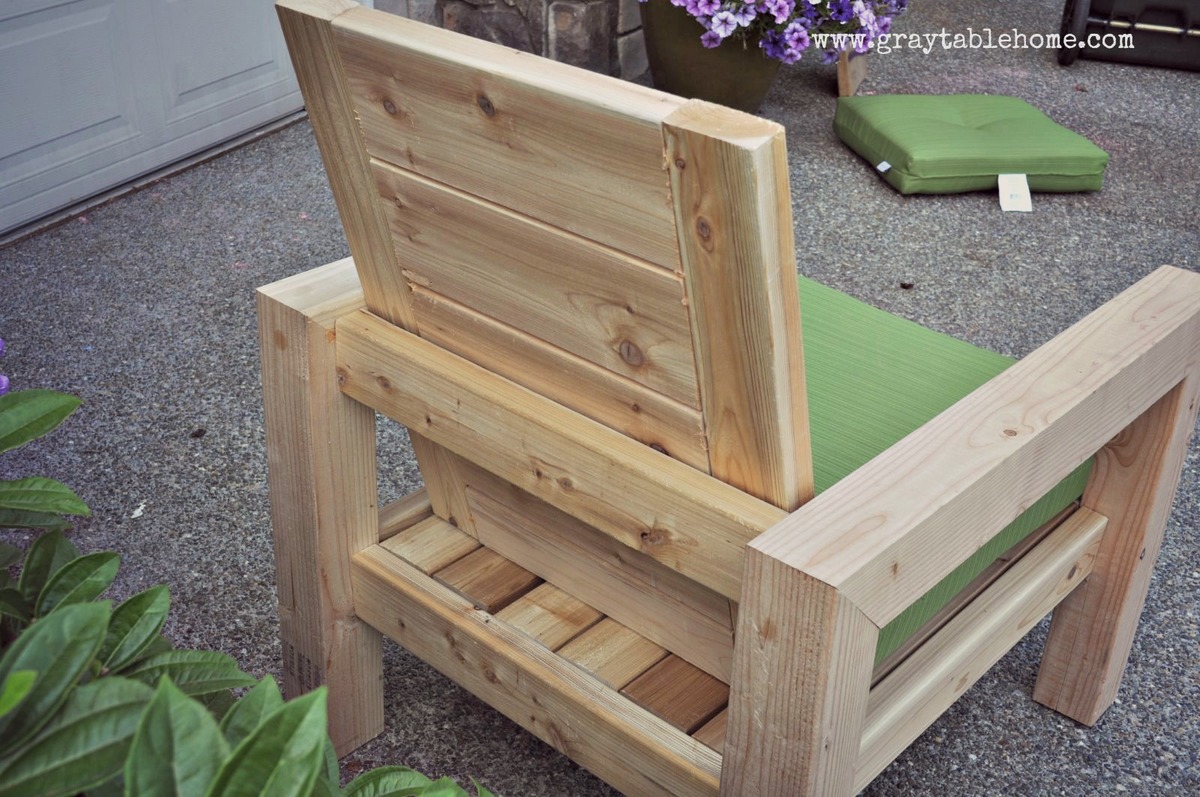
DIY Modern Rustic Outdoor Chair
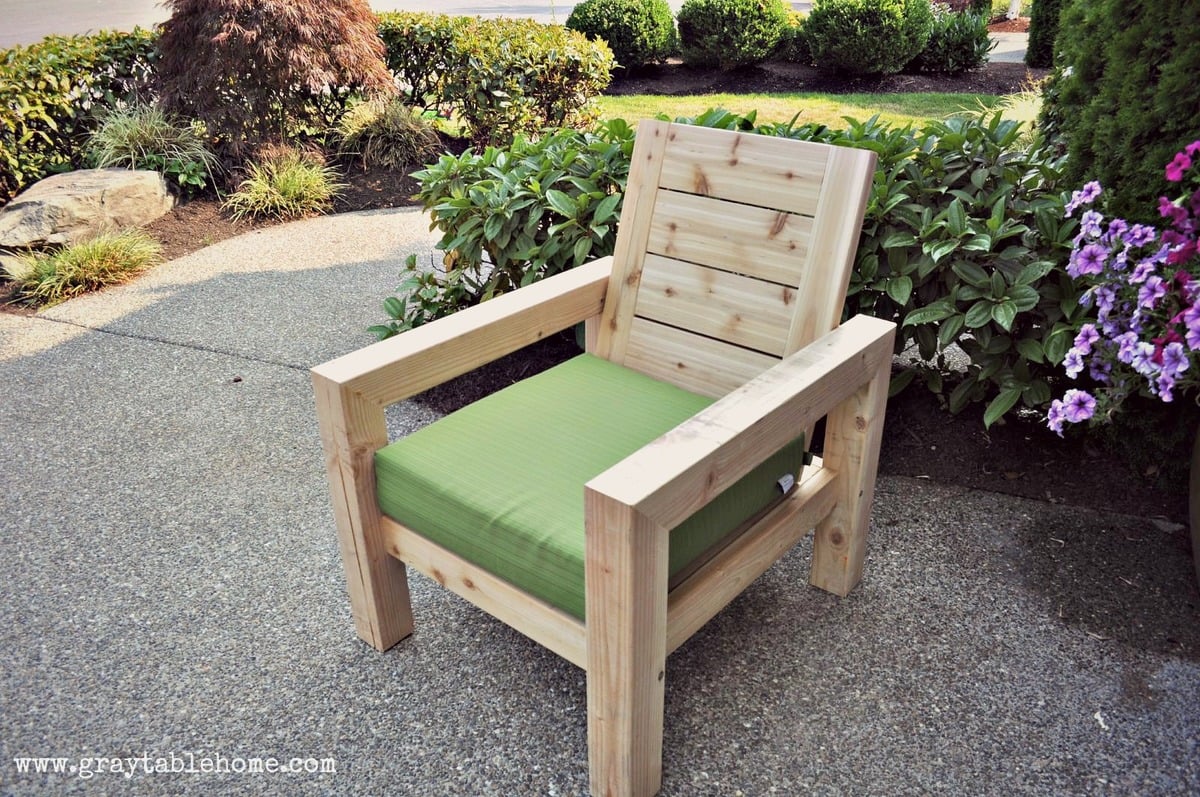
I made this outdoor chair by looking at a variety of plans and designs from Restoration Hardware and other stores. Check out more info on the project on my blog link. Thanks for looking!
Built from Plan(s)
Estimated Time Investment
Afternoon Project (3-6 Hours)
Recommended Skill Level
Beginner
Comments
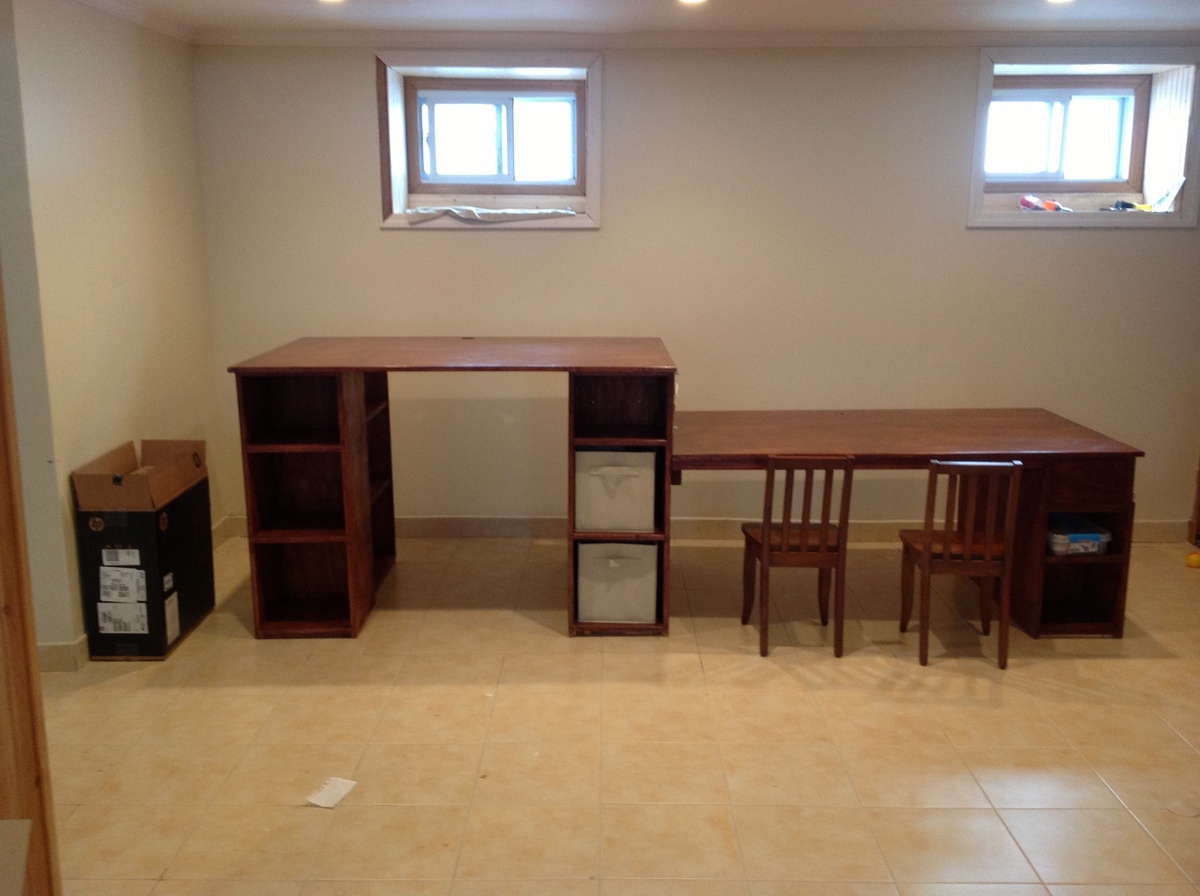
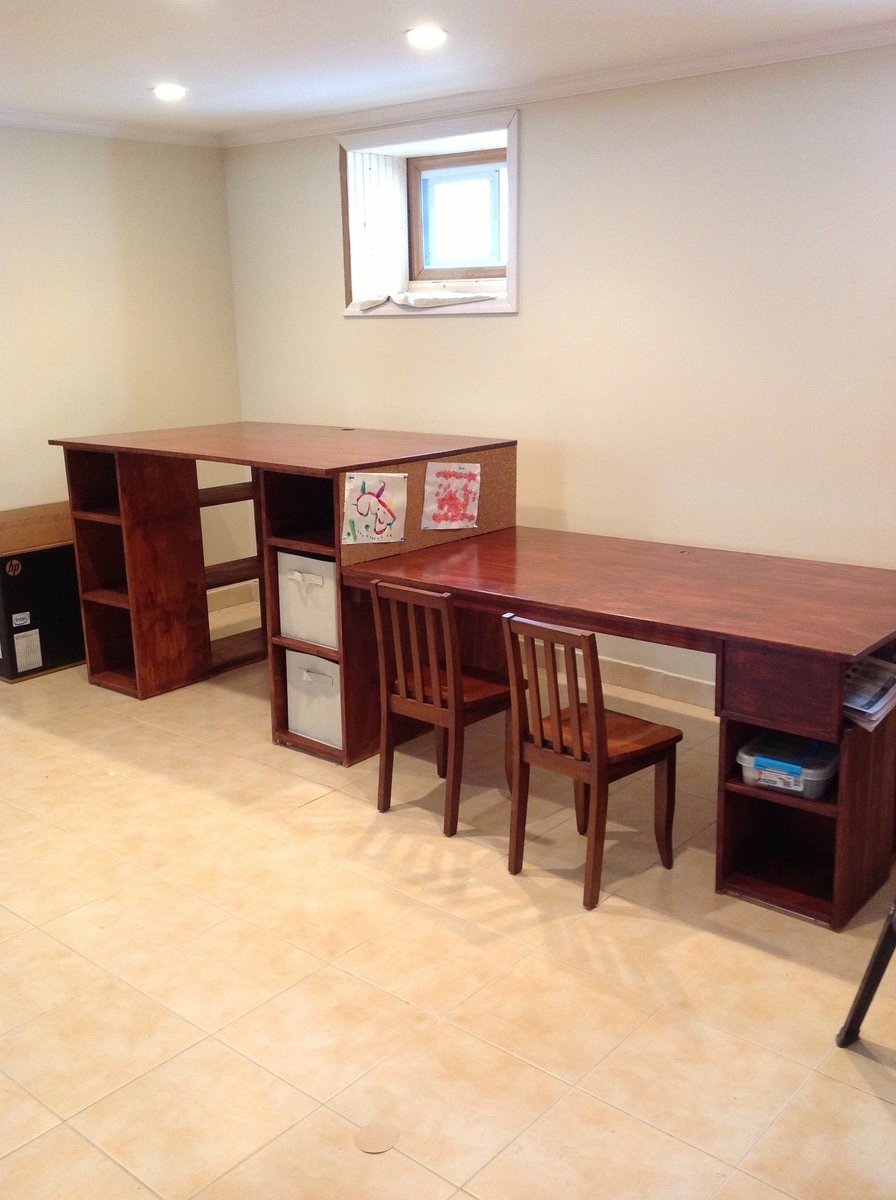
Project table with sidecar kids craft table

This was our first build, with help from my dad we used the plans for the modern craft table and added a side table for the kids to have their own crafting space and storage.
Built from Plan(s)
Finish Used
Mix of two stains red oak and red chestnut
Recommended Skill Level
Beginner
Comments
Tue, 02/12/2013 - 15:57
I LOVE THIS!
I love this! It's so cool that you put the kids table on the side of your table. Great job, and it looks fantastic!