Tall Wood Planters
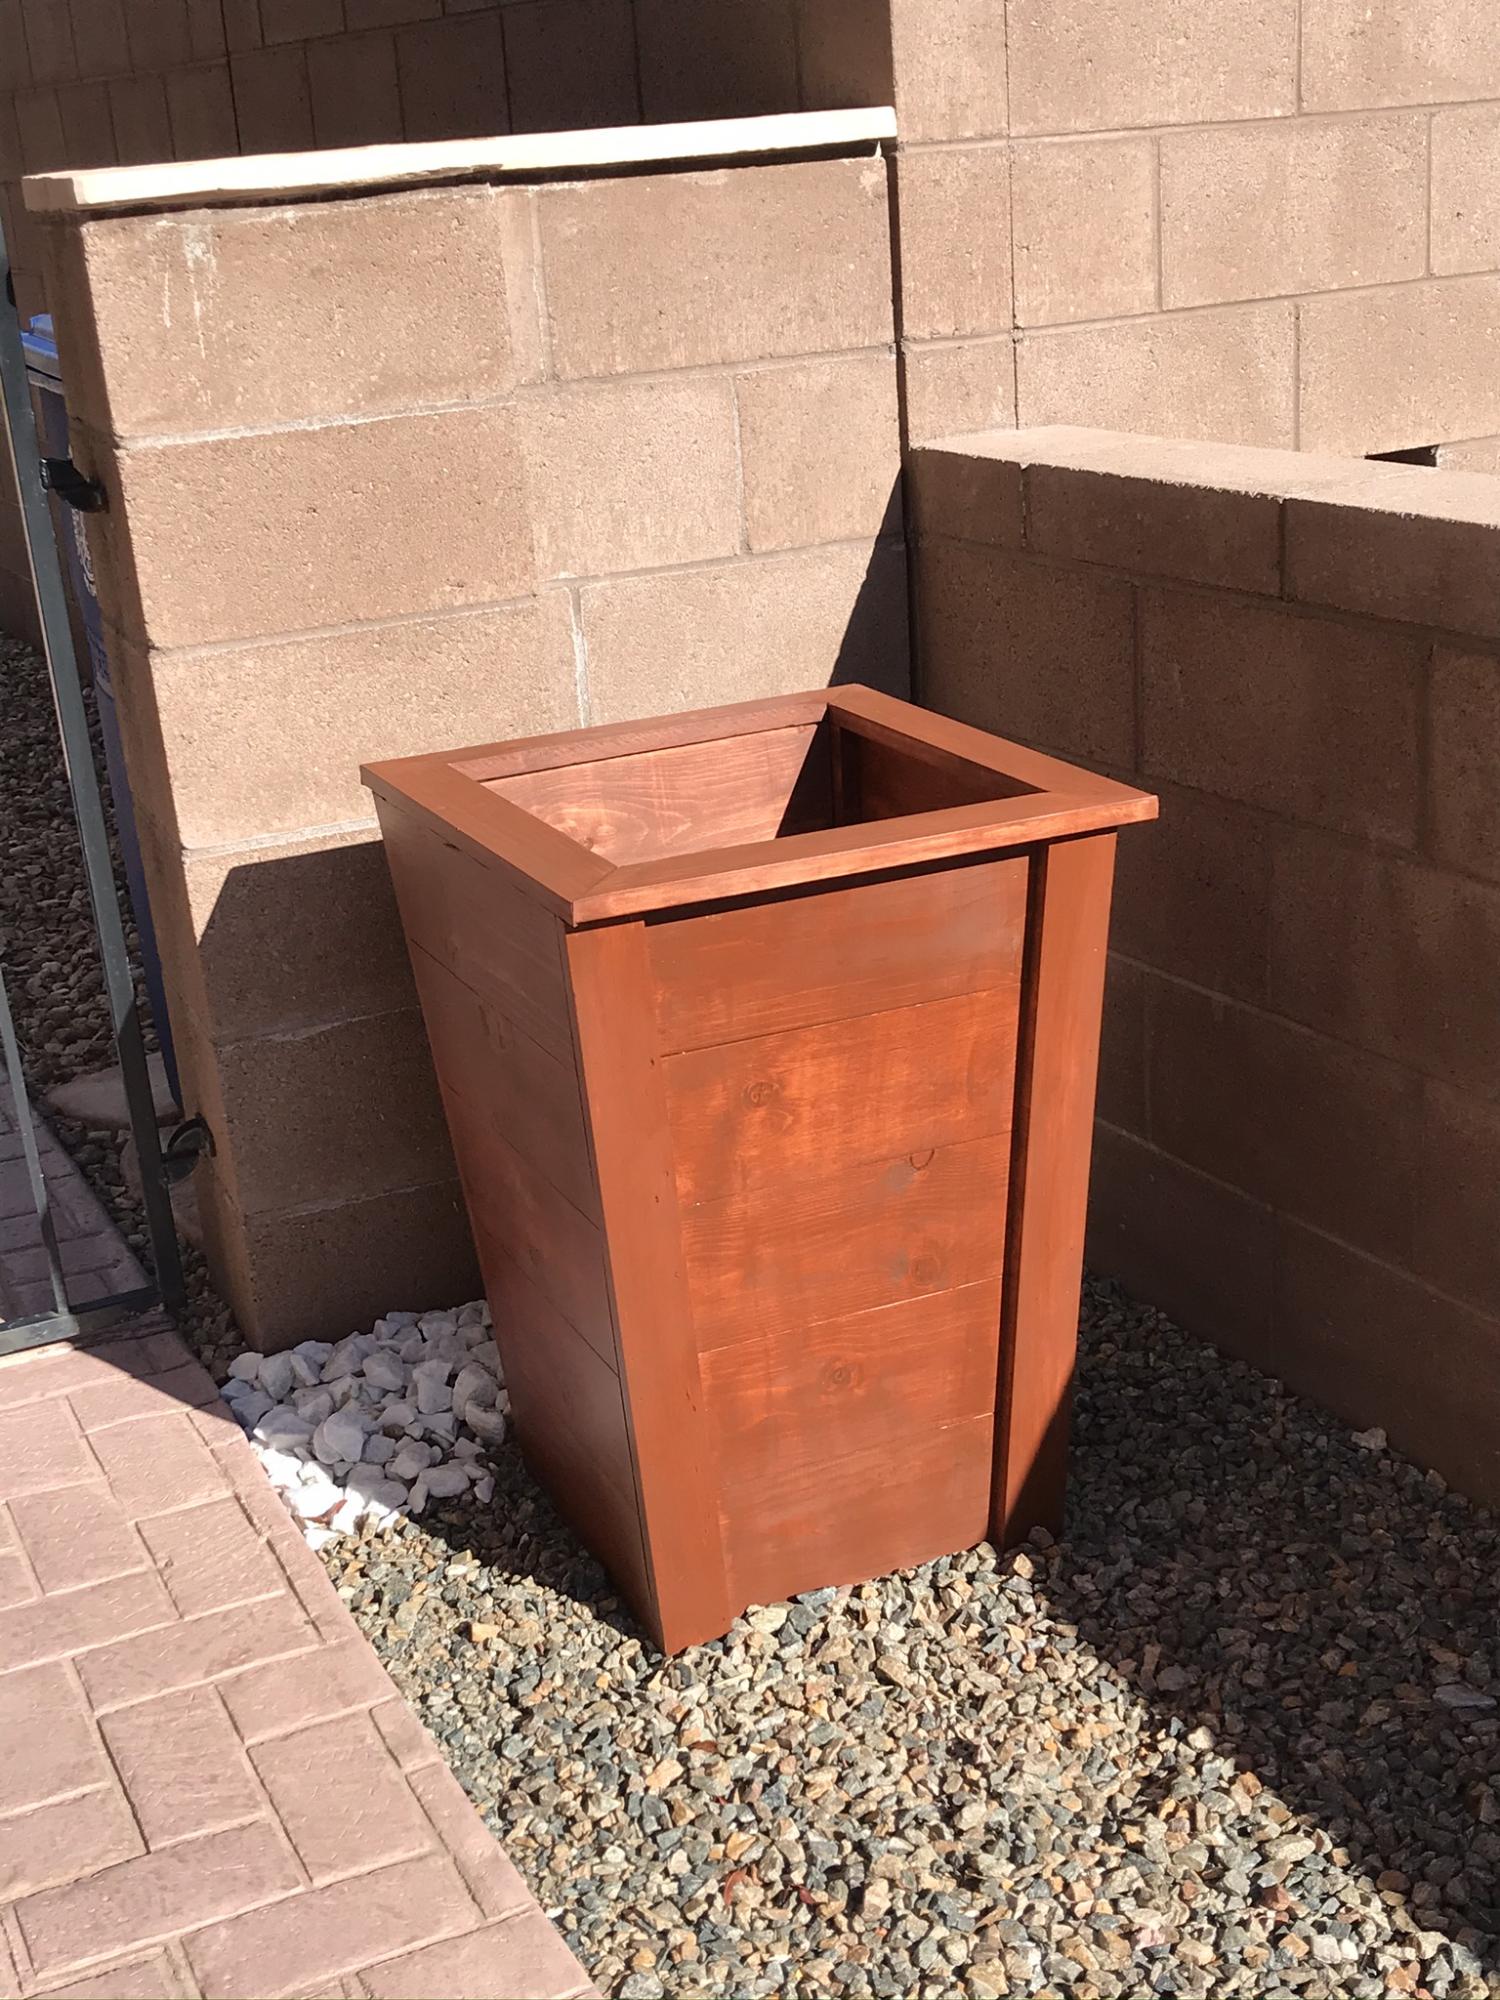
This planter was easy to make. Two days including finish.
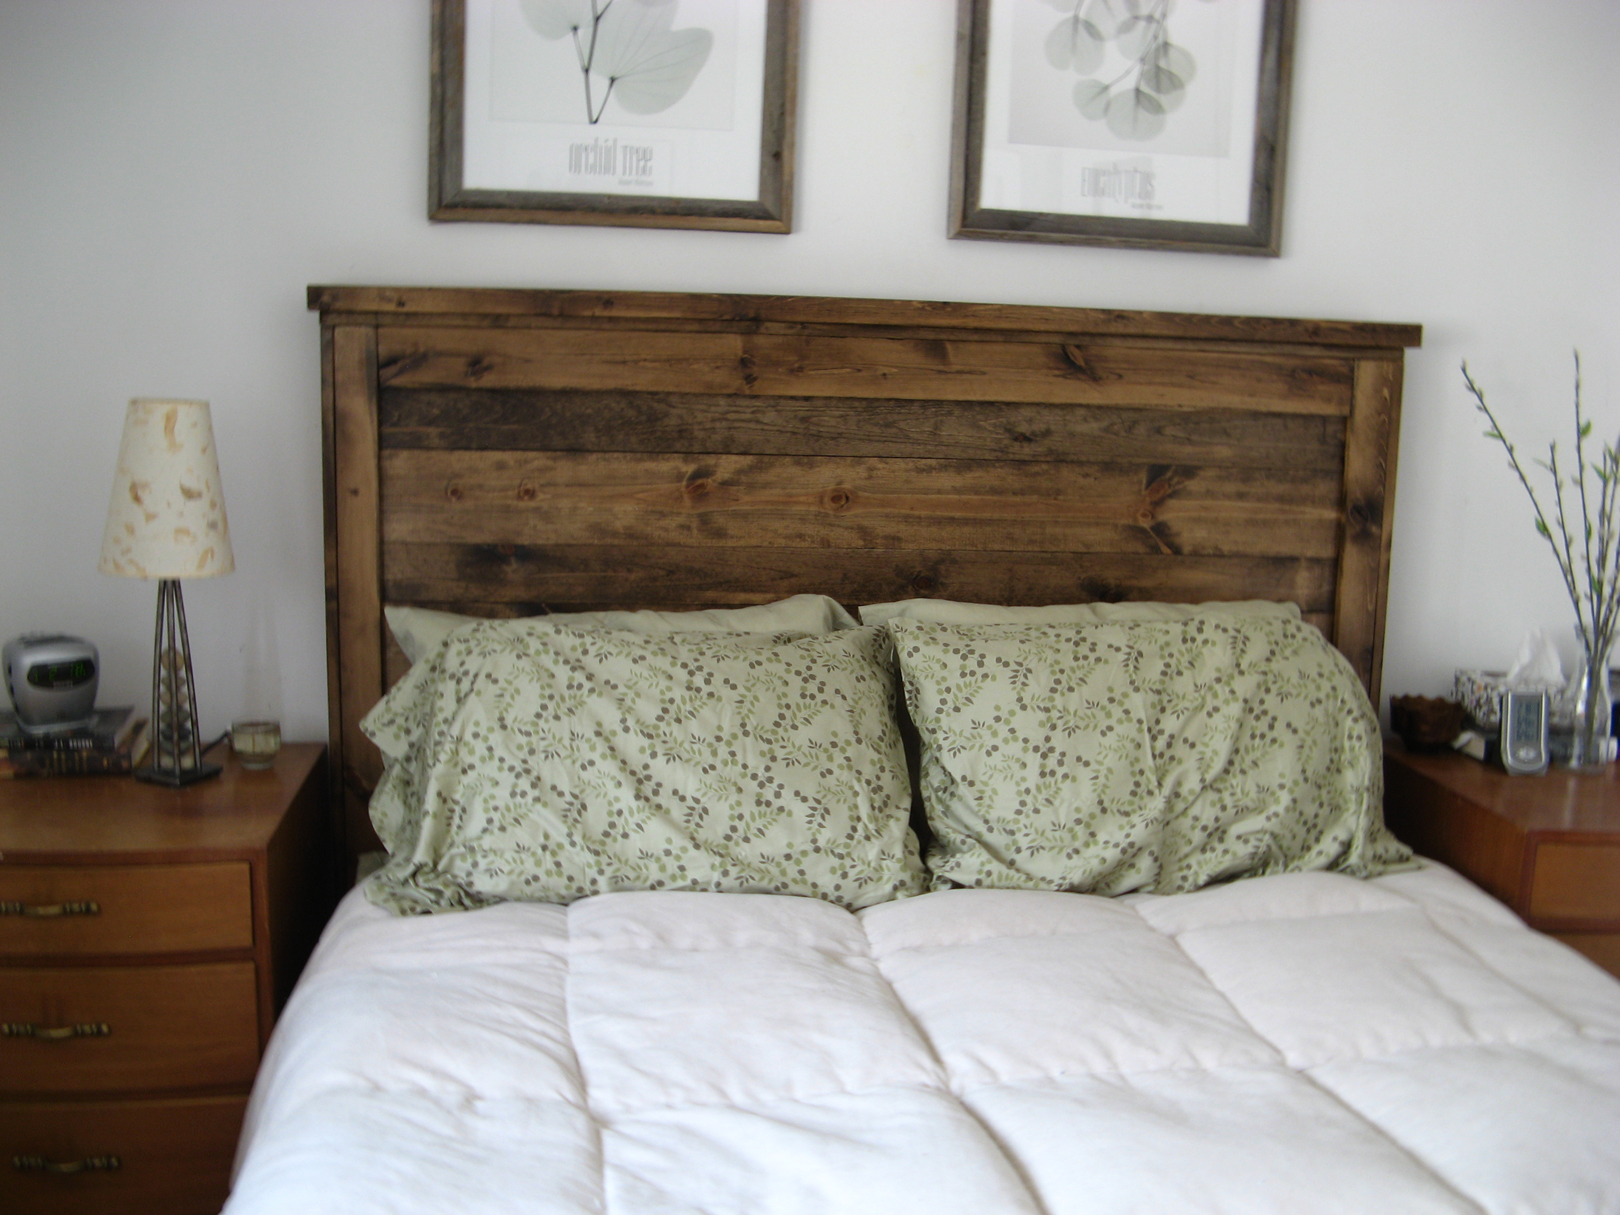
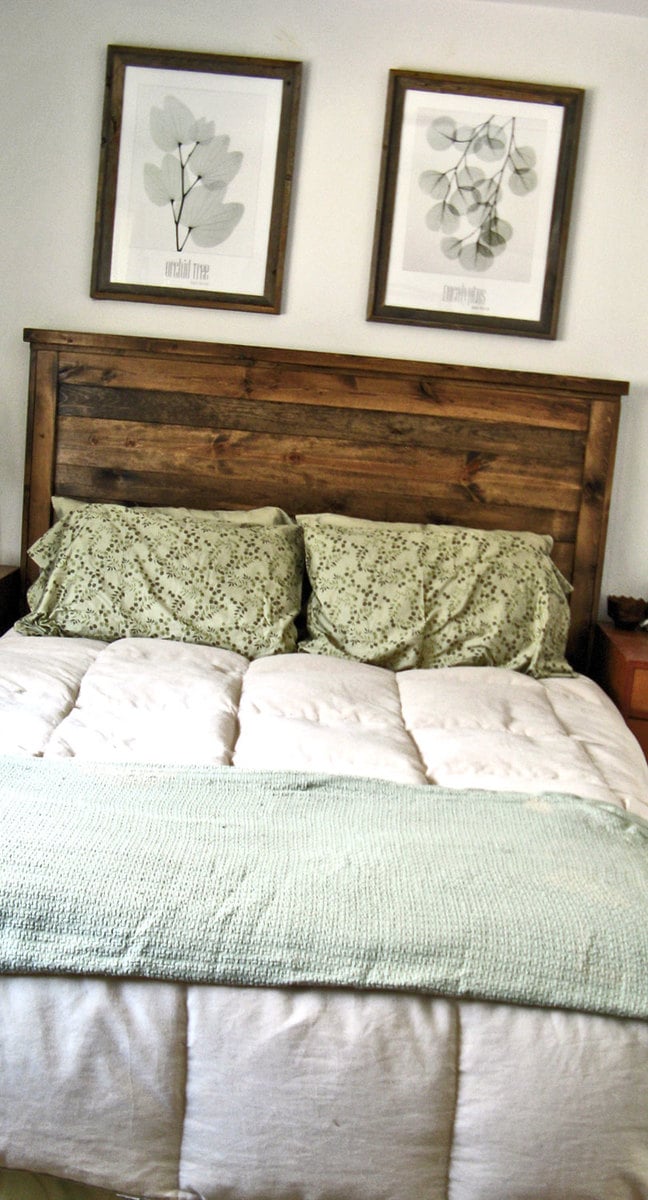
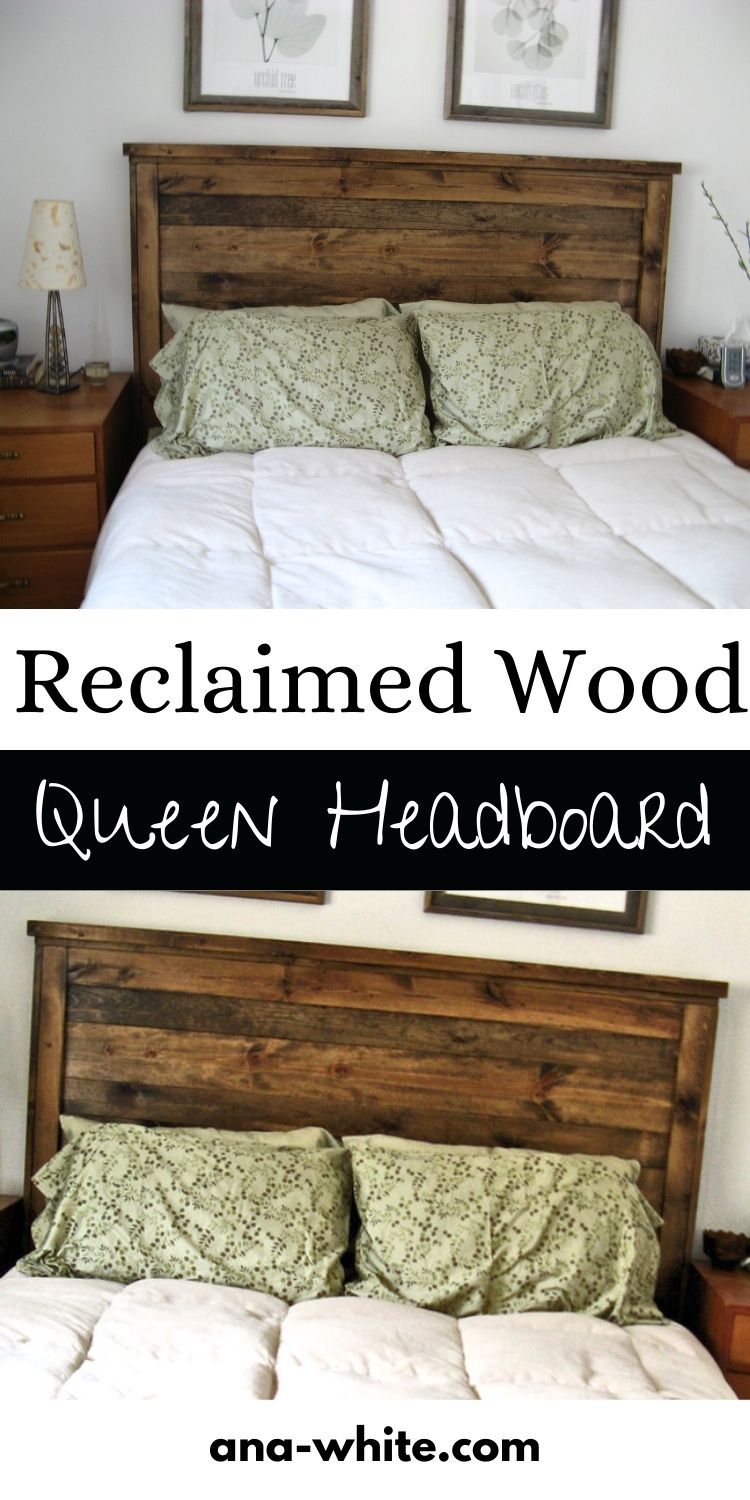
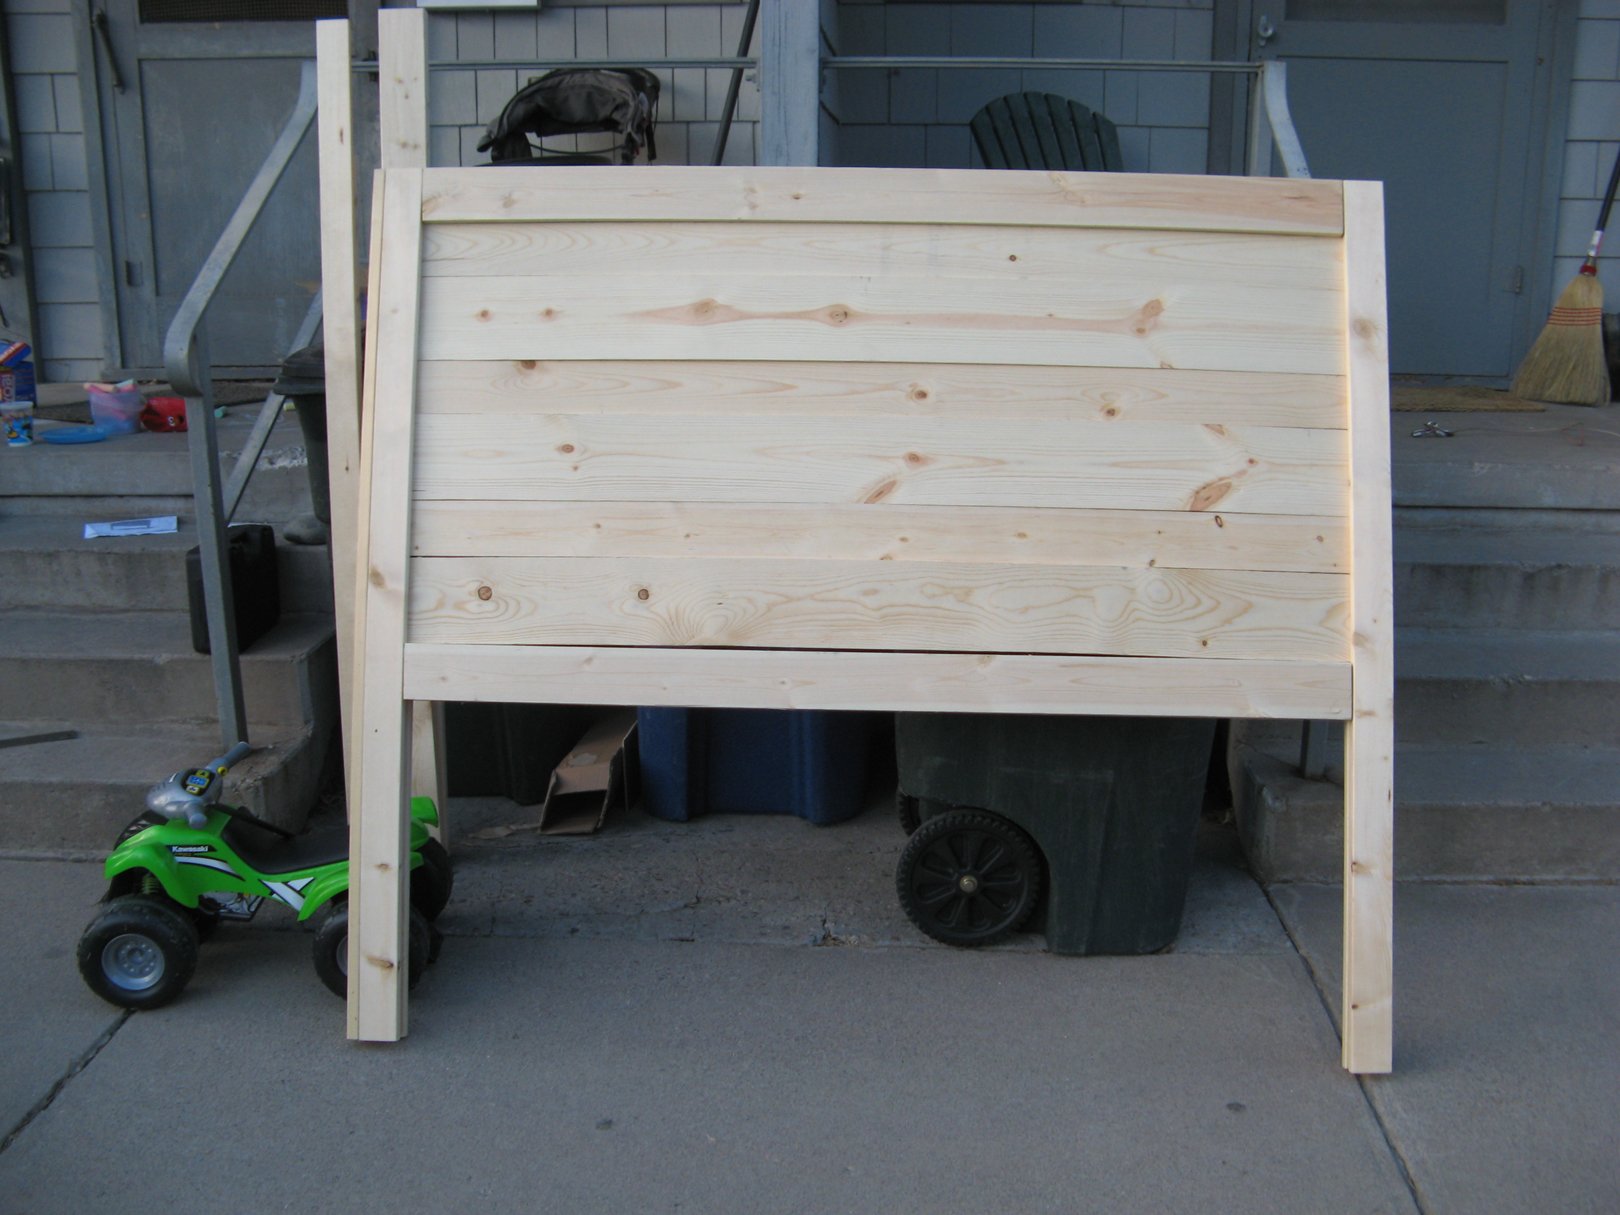
Built from Plan(s)
This planter was easy to make. Two days including finish.
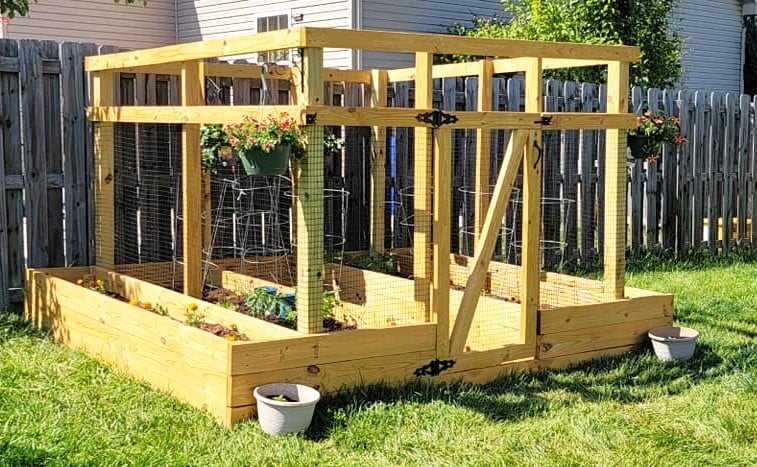
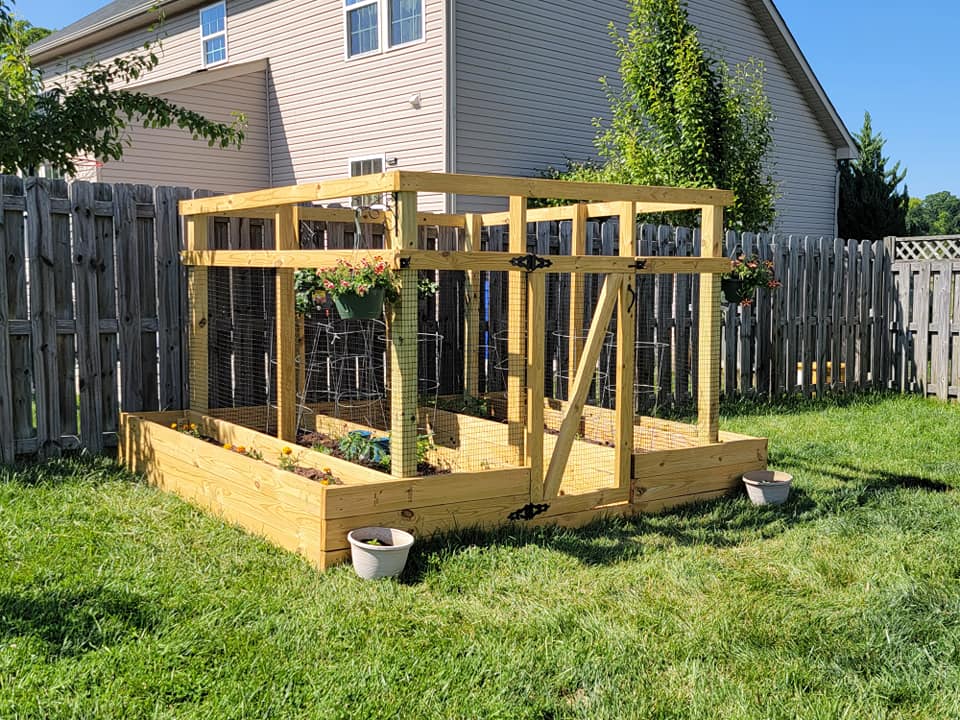
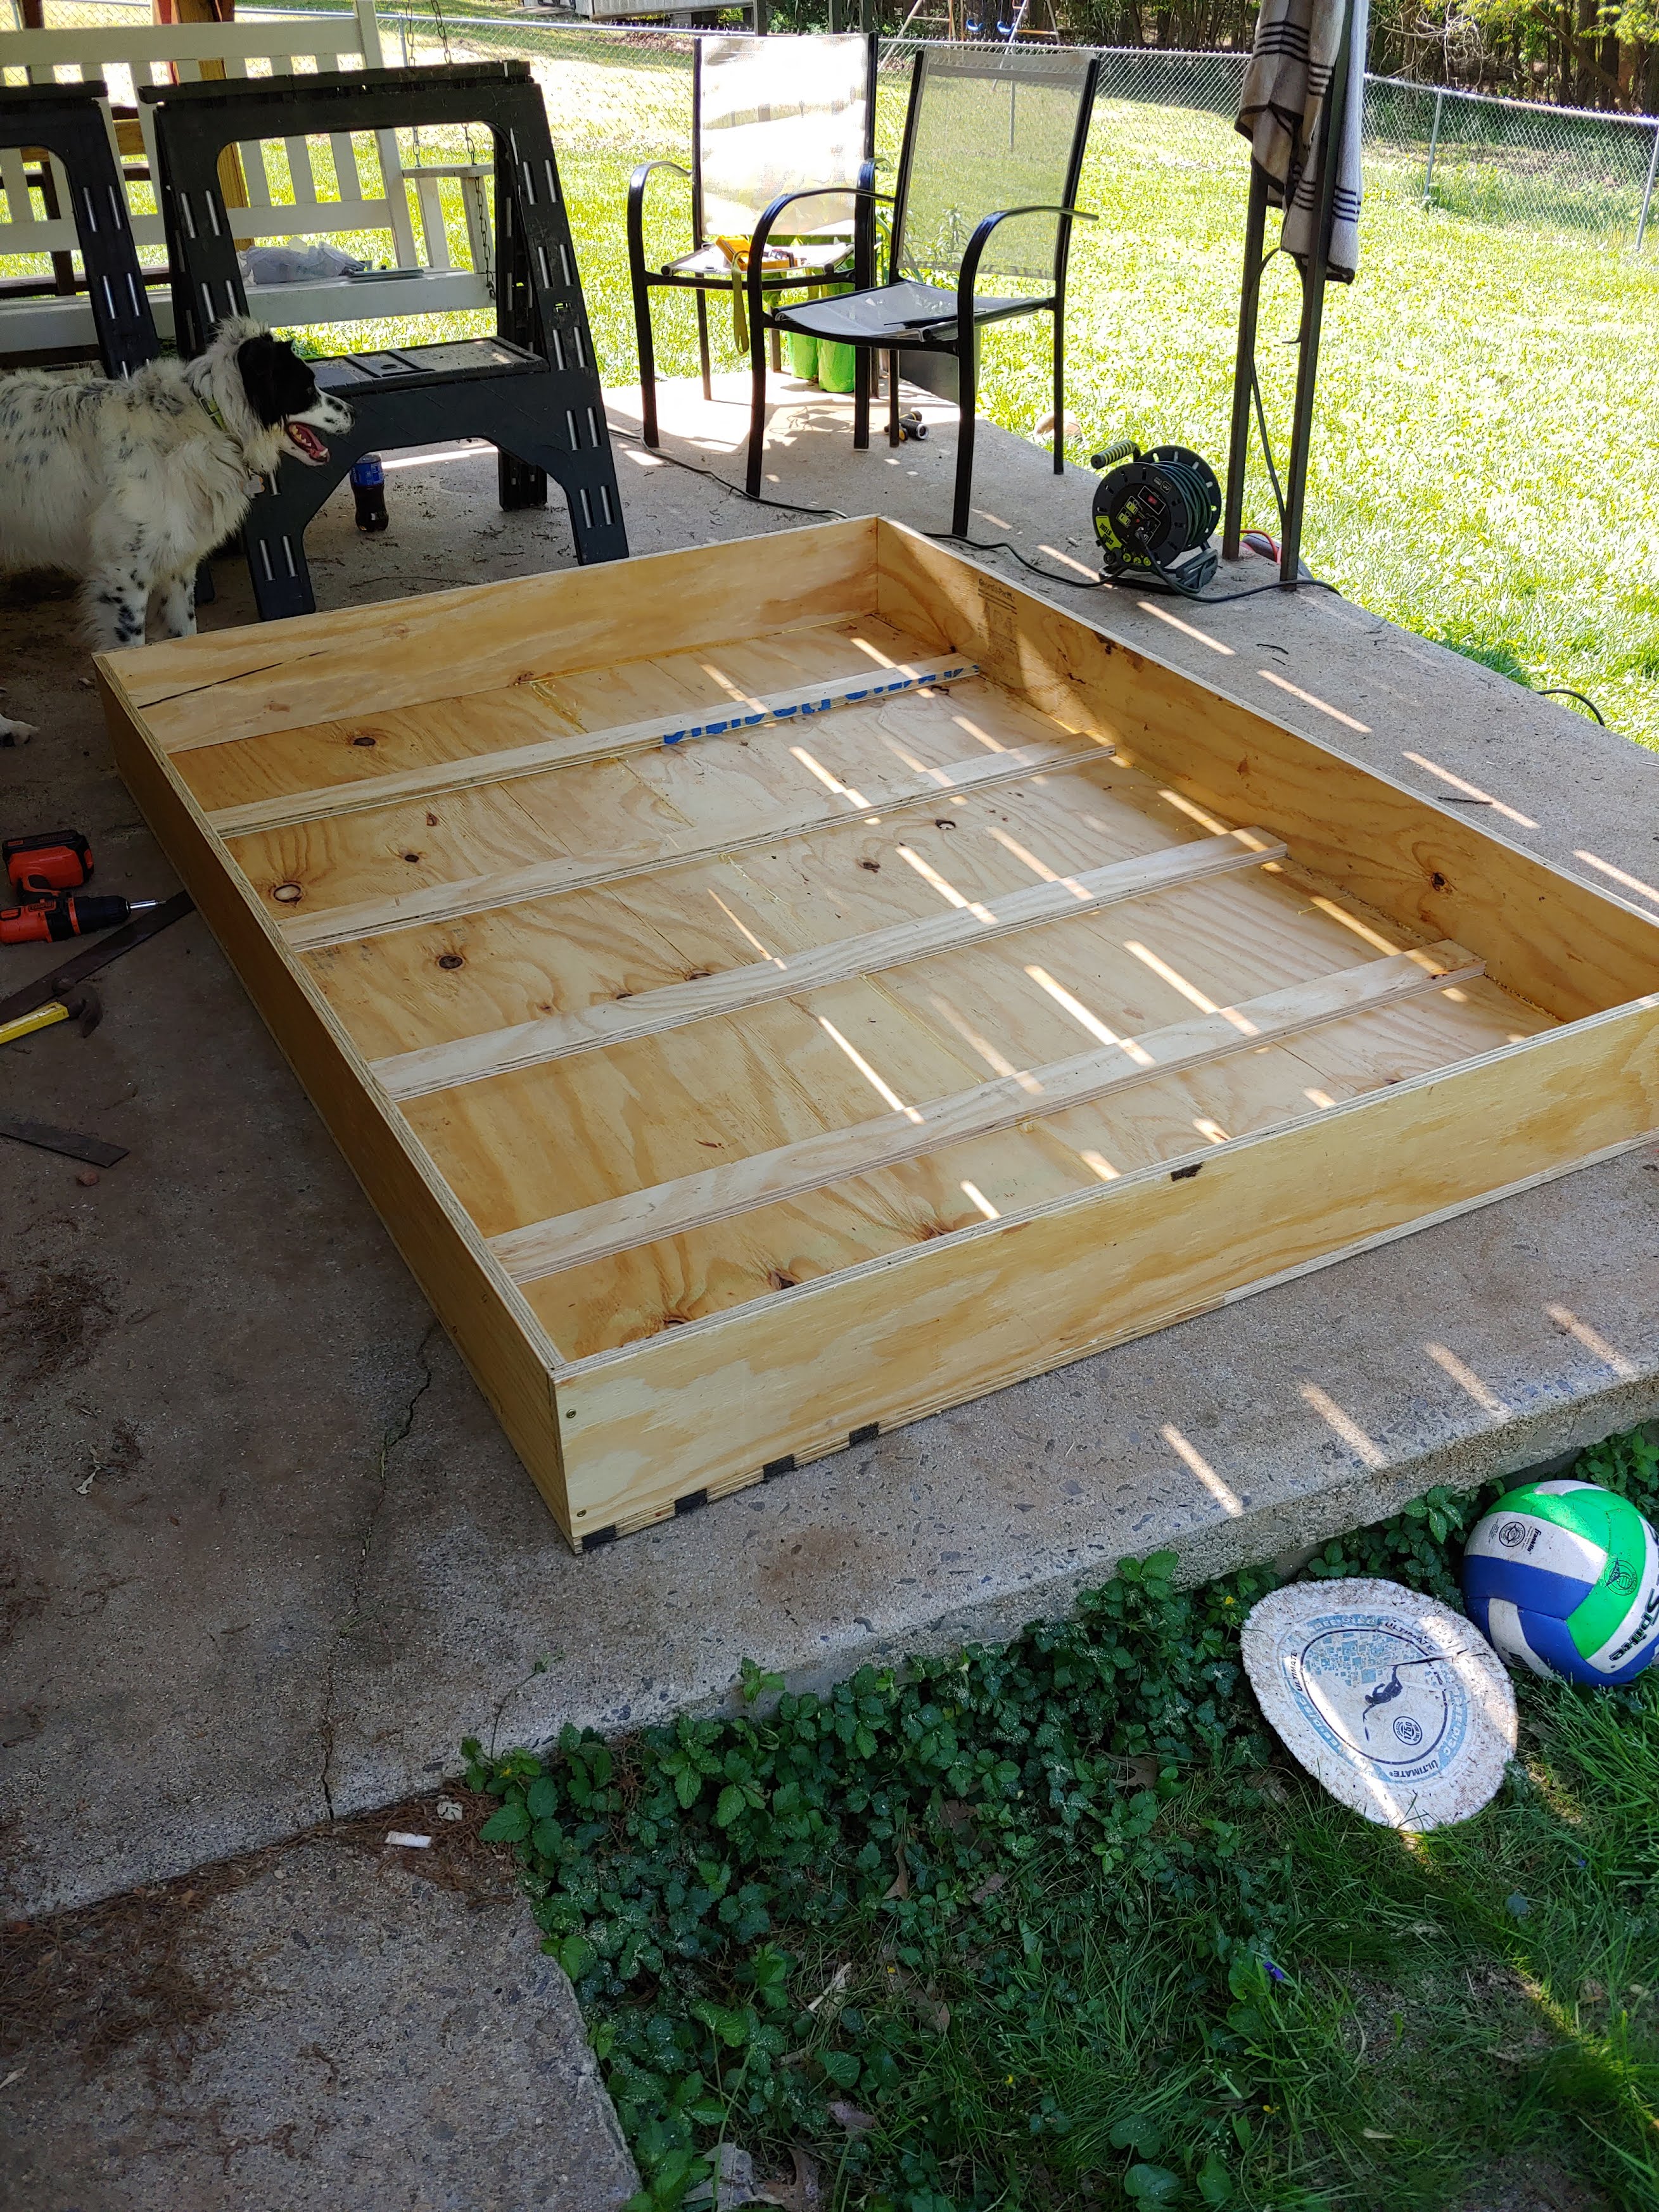
My husband and boys made a beautiful enclosed raised bed using your plans. It was modified to include exterior raised beds for flowers.

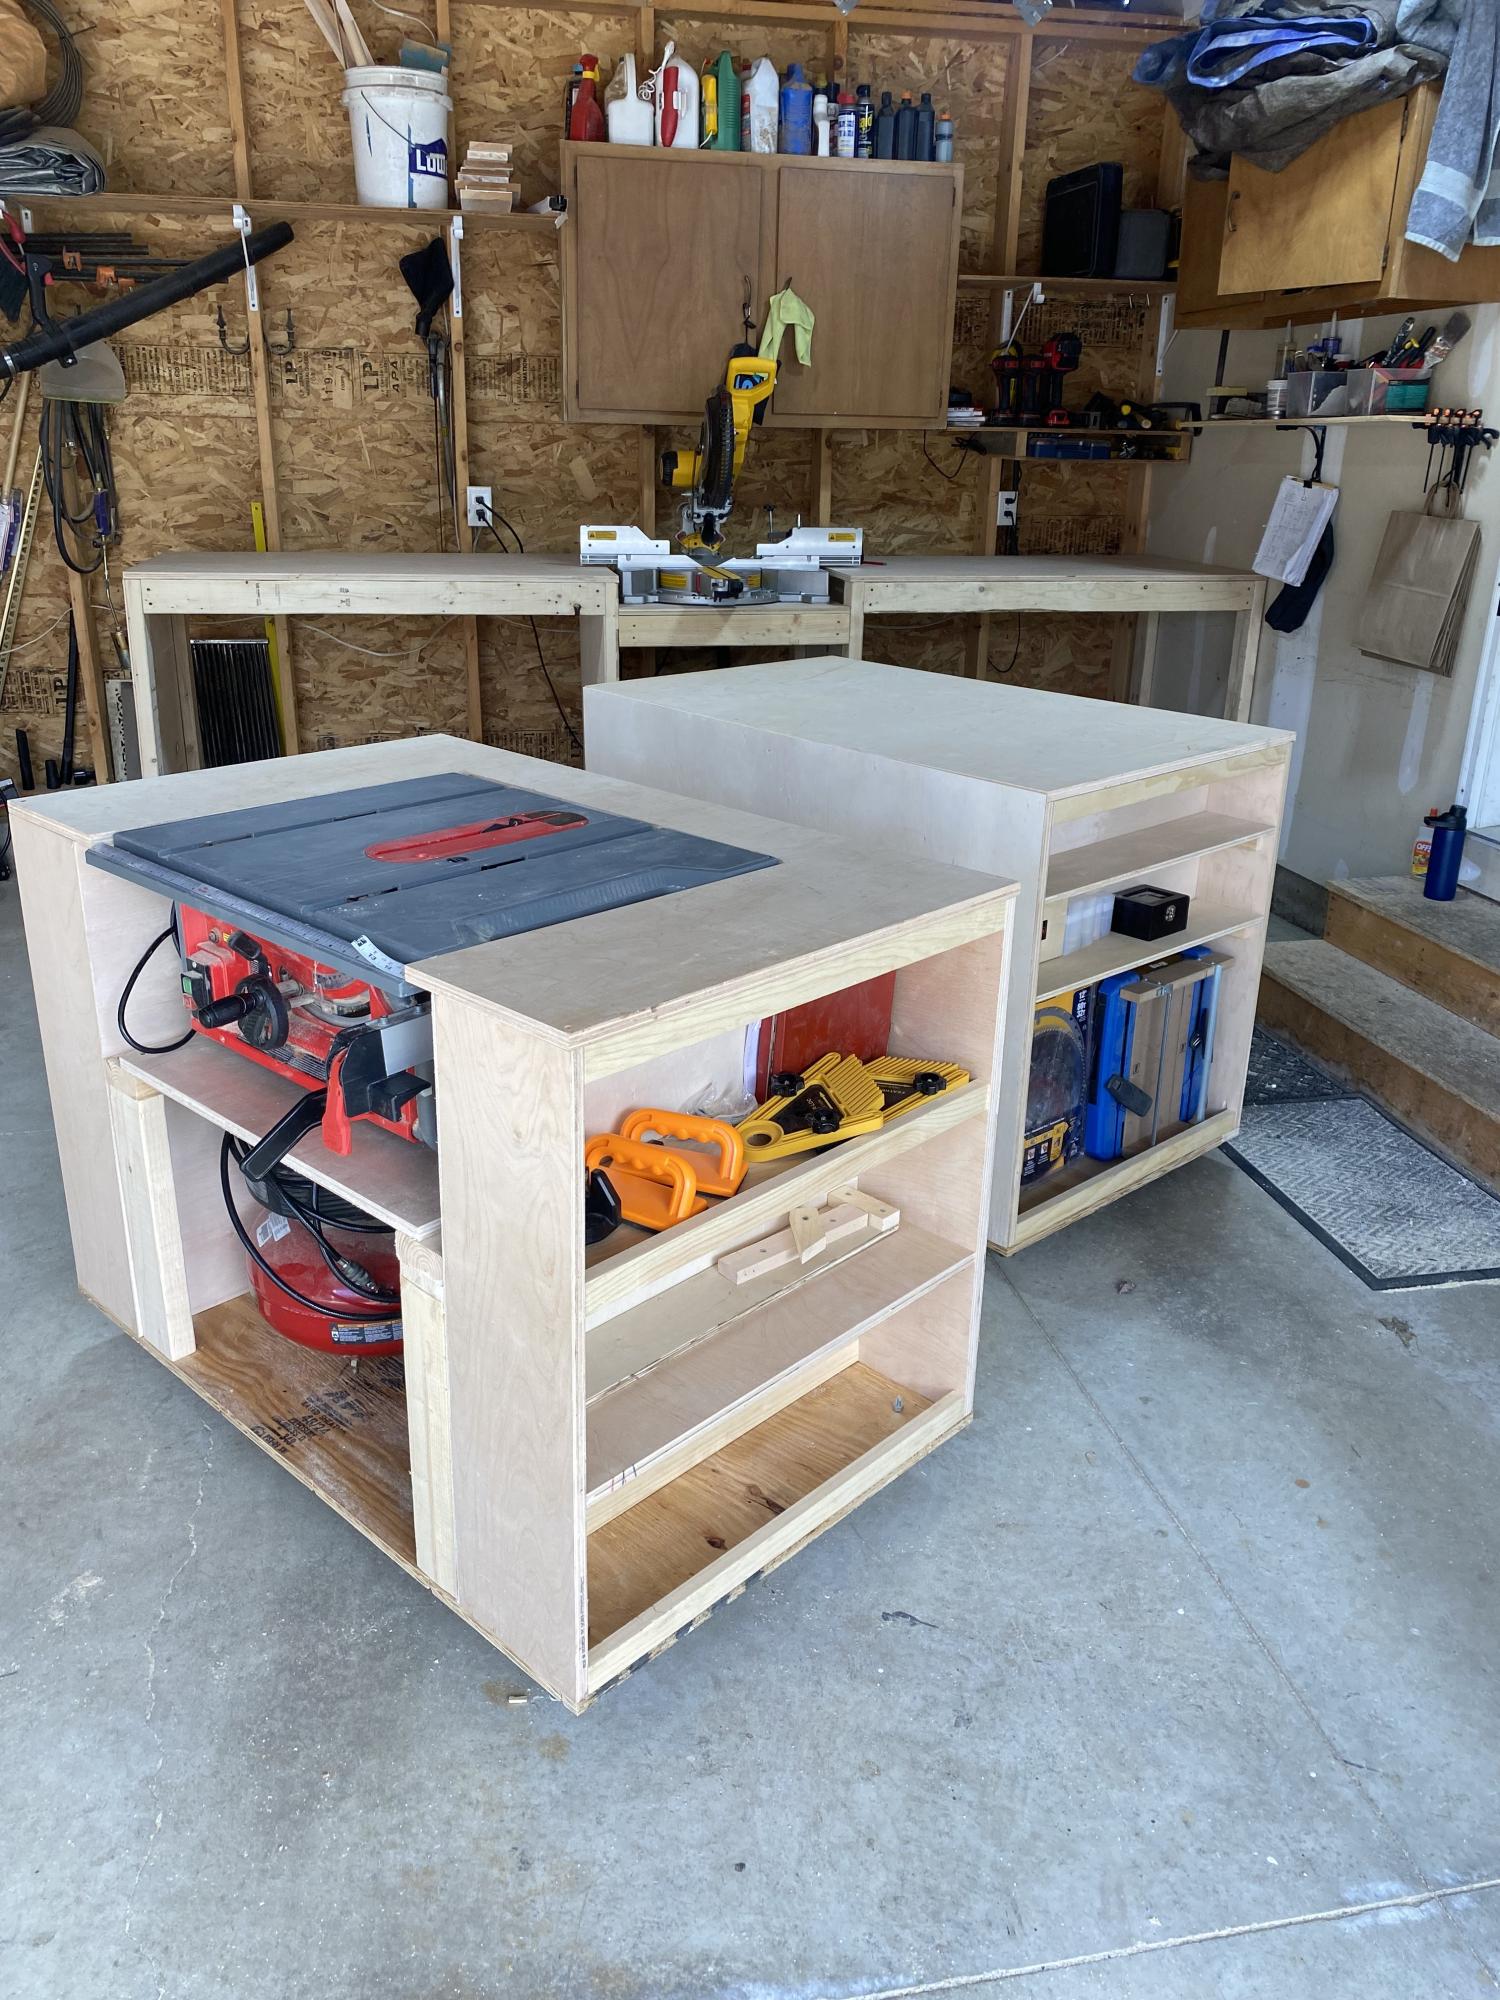
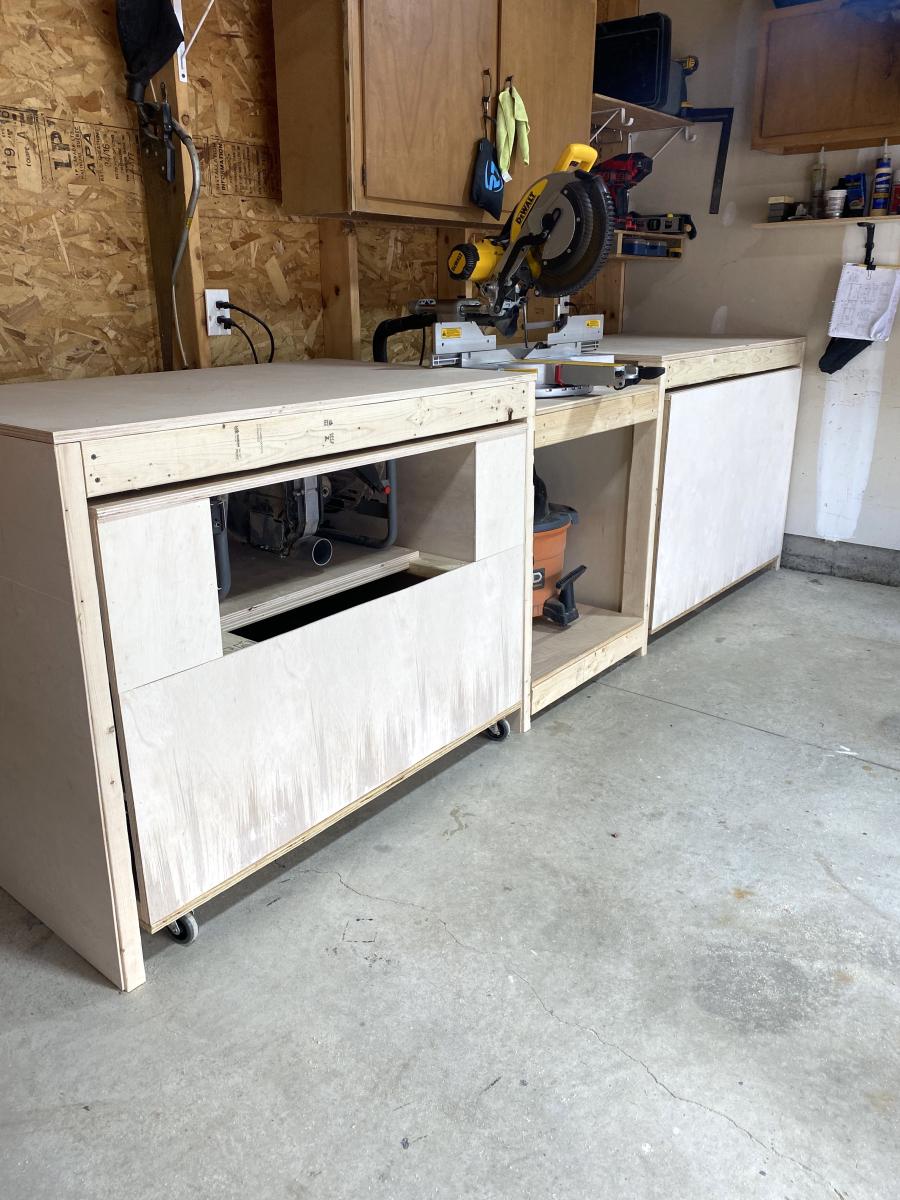
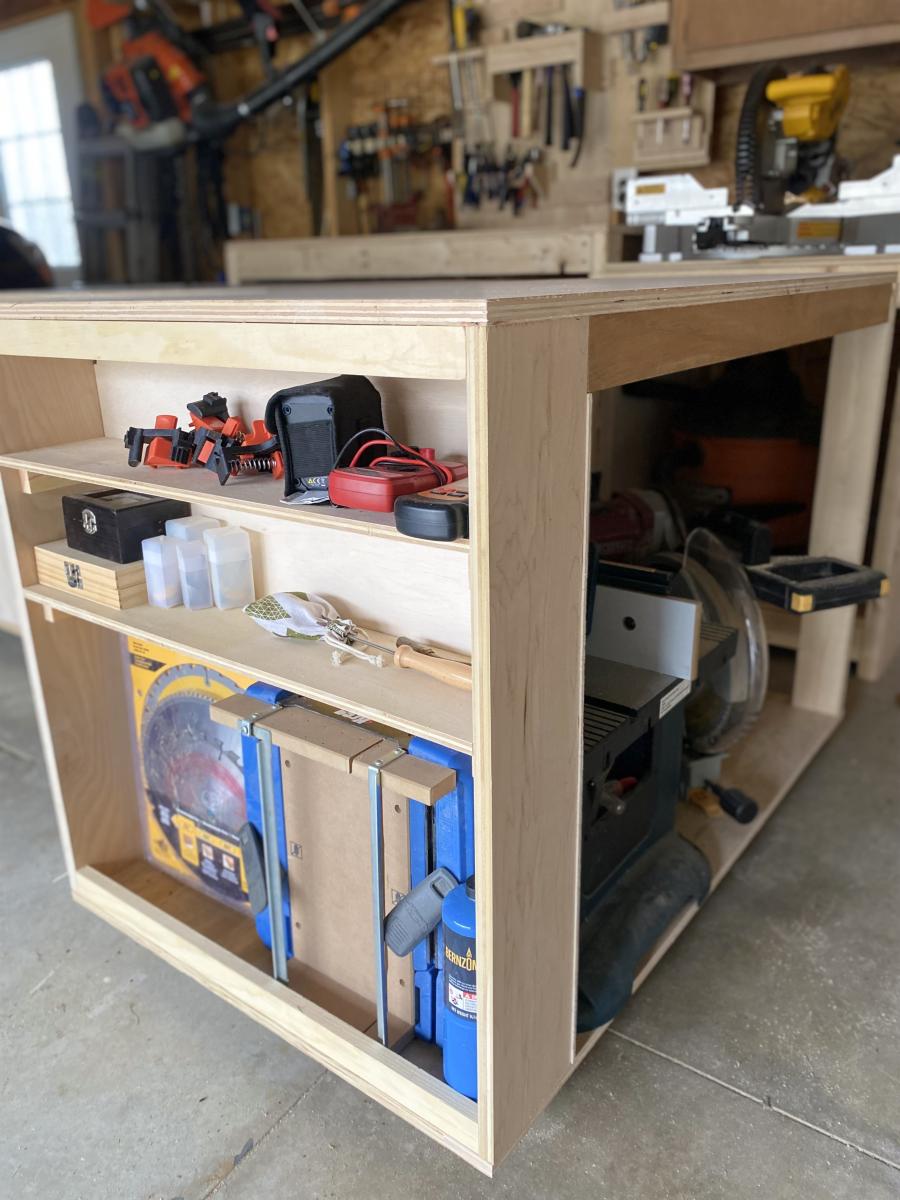
Modified these plans slightly for my needs. I kept the table saw open for easier dust collection and only had one side of shelving on the other bench to allow for storing larger items. I can’t get over how much storage in a small space you get with these and how multi functional they are.
I used Ana's plan as a base.
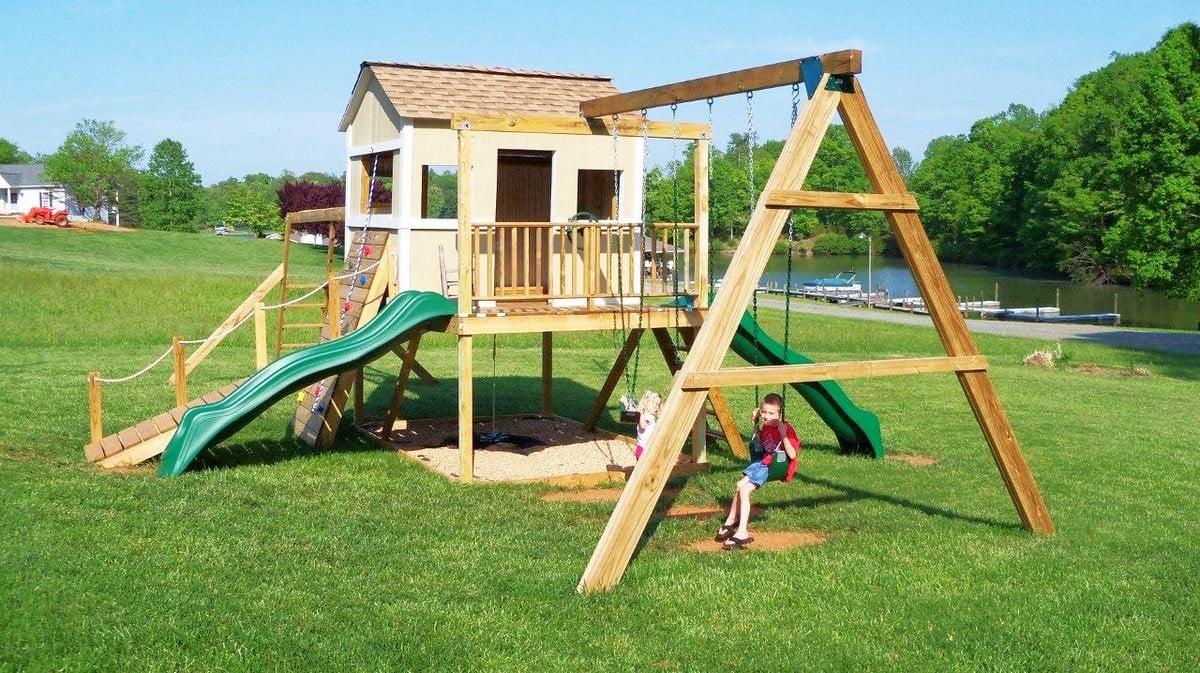
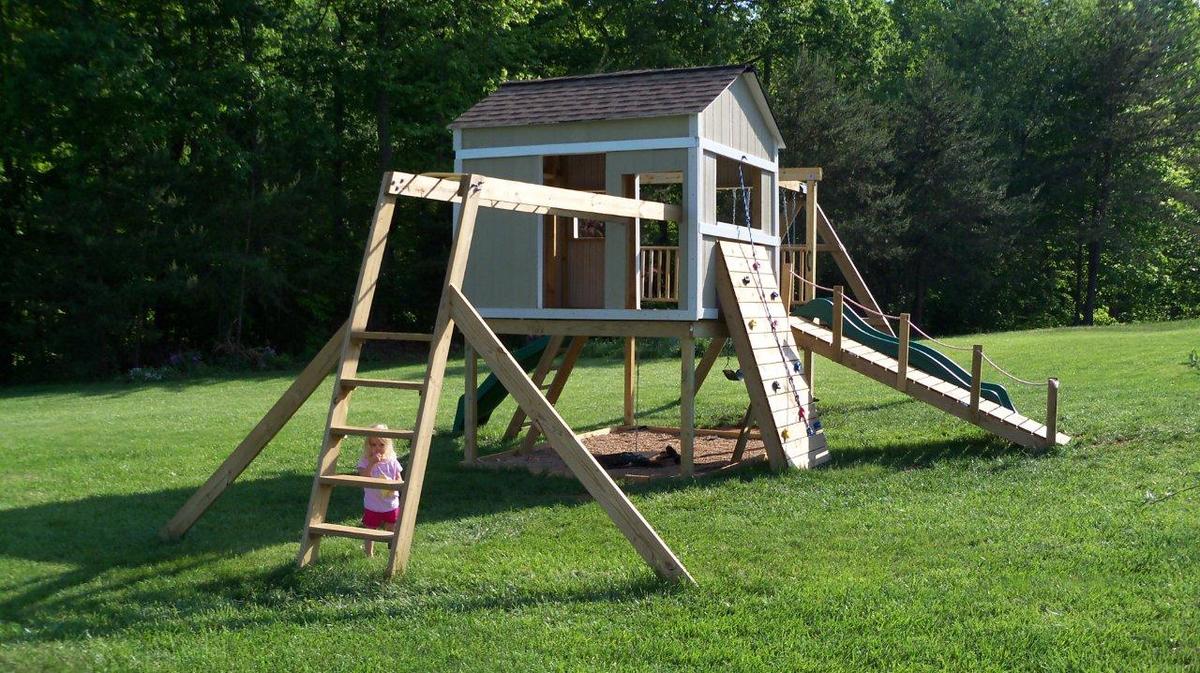
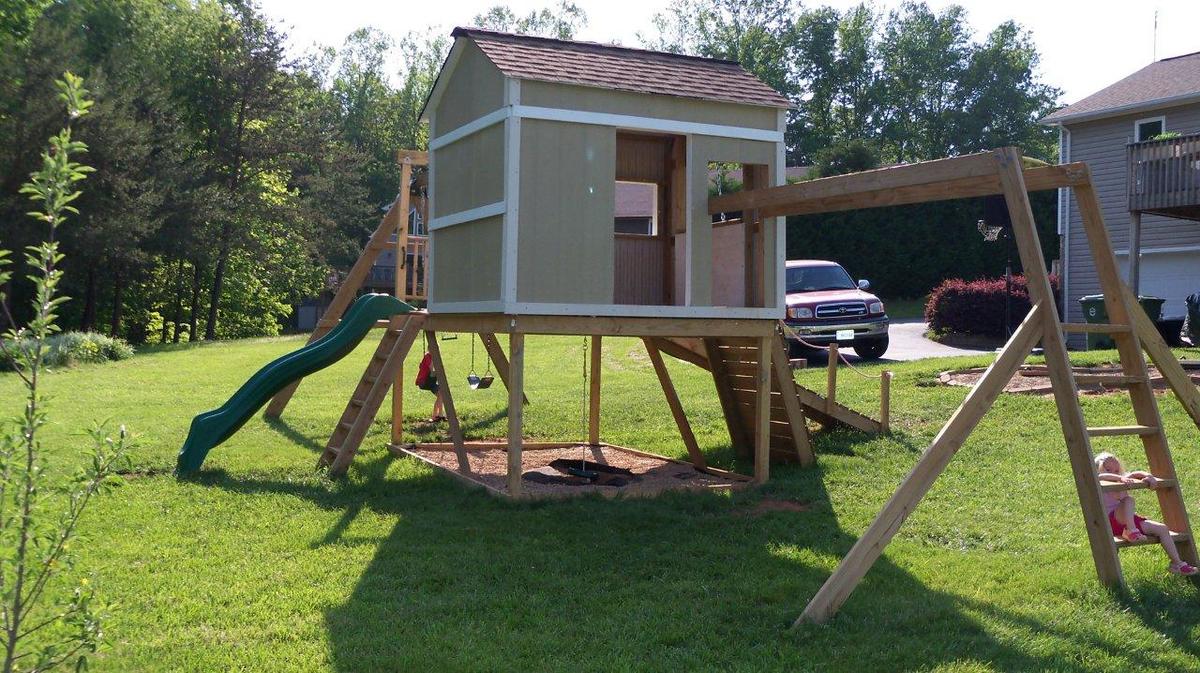
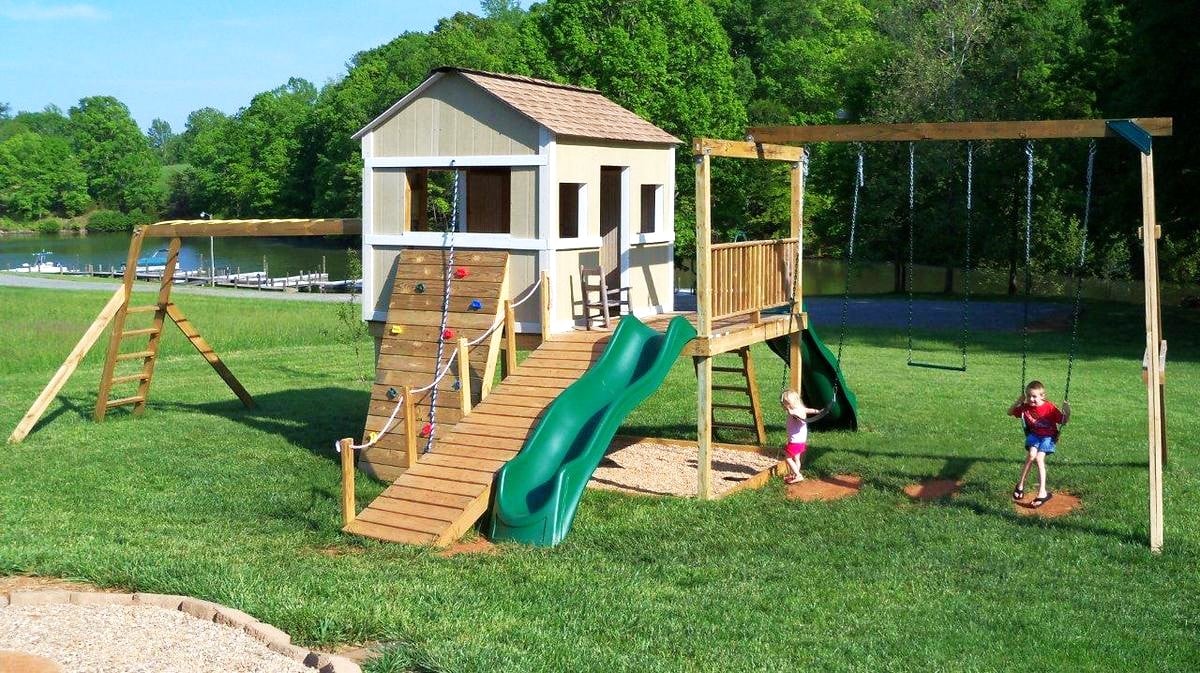
I changed it from 8x8 to 8x12, made the 4x4x8's to 4x4x10' for a higher main platform and swing platform, and added a 12' long monkey bar set to the other side. Also, an 8' climbing wall and a plank walkway to accompany the two slides.
For the clubhouse, I used Hardiplank 4x8 sheets for the siding and an EZ-Framer kit for the structure itself.
The slides I purchased from Lowes, monkey bars from Amazon, and the swing frame braces from Amazon as well. The swing kits I got from ebay.


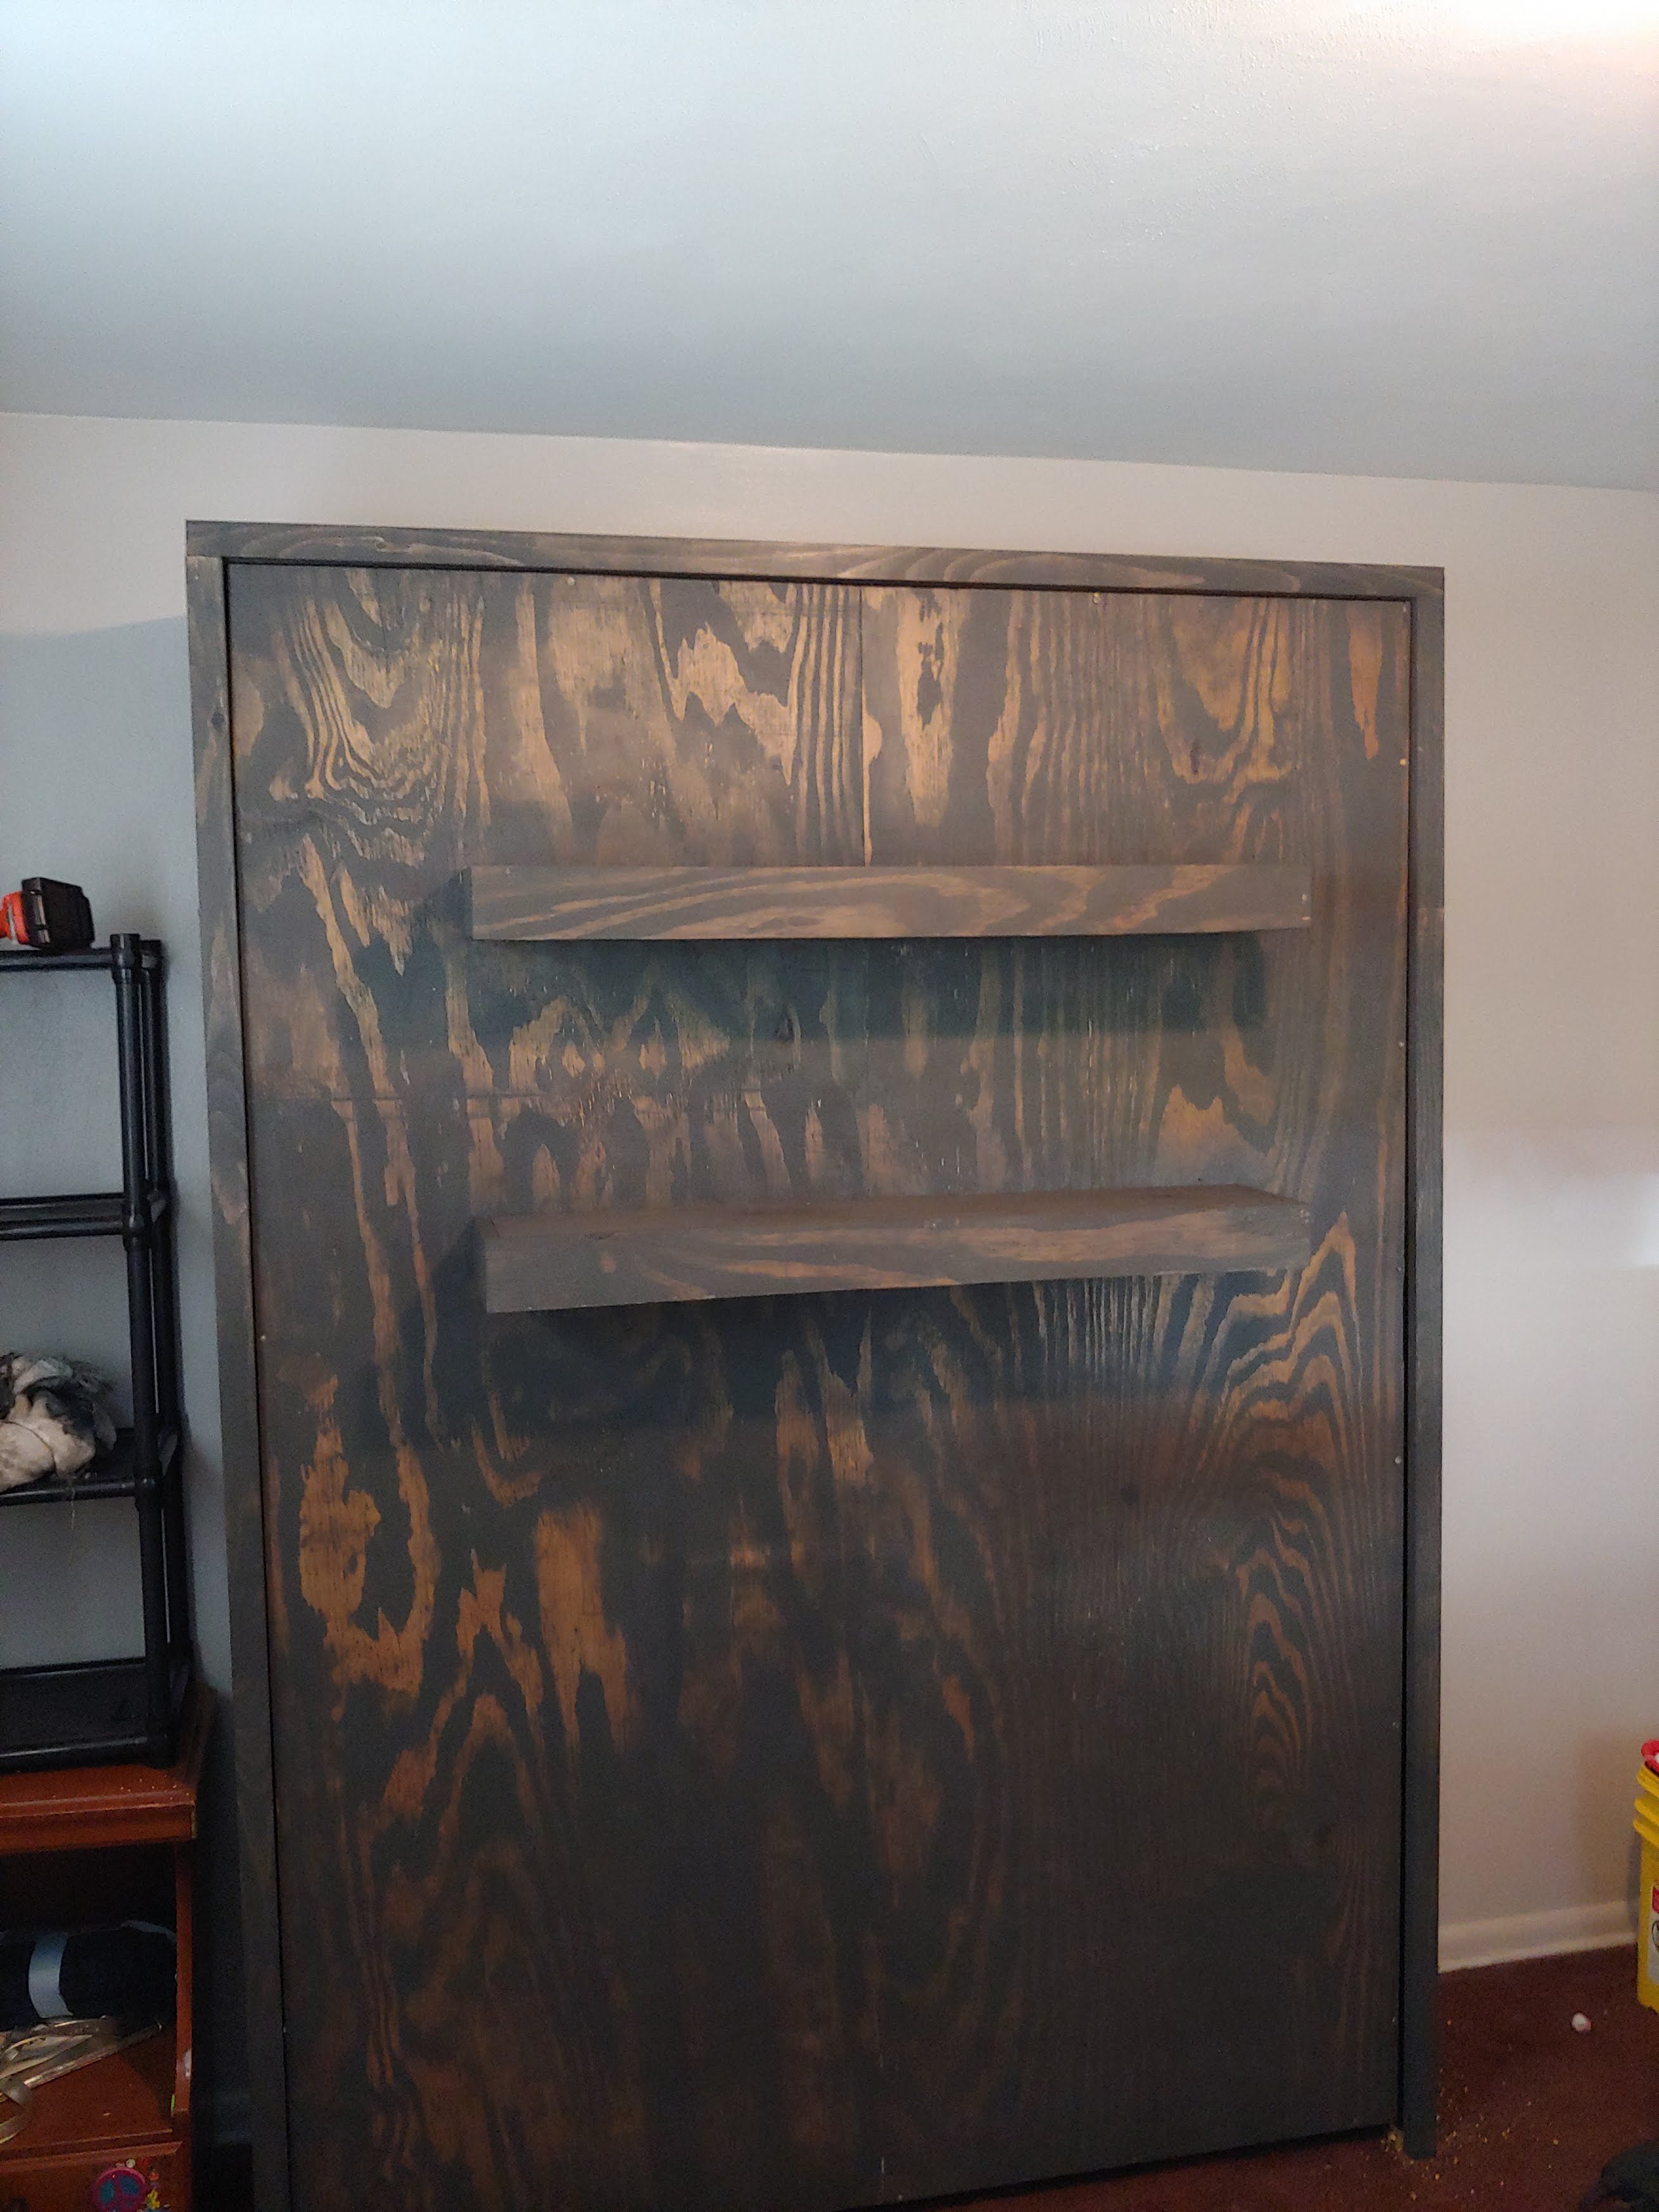
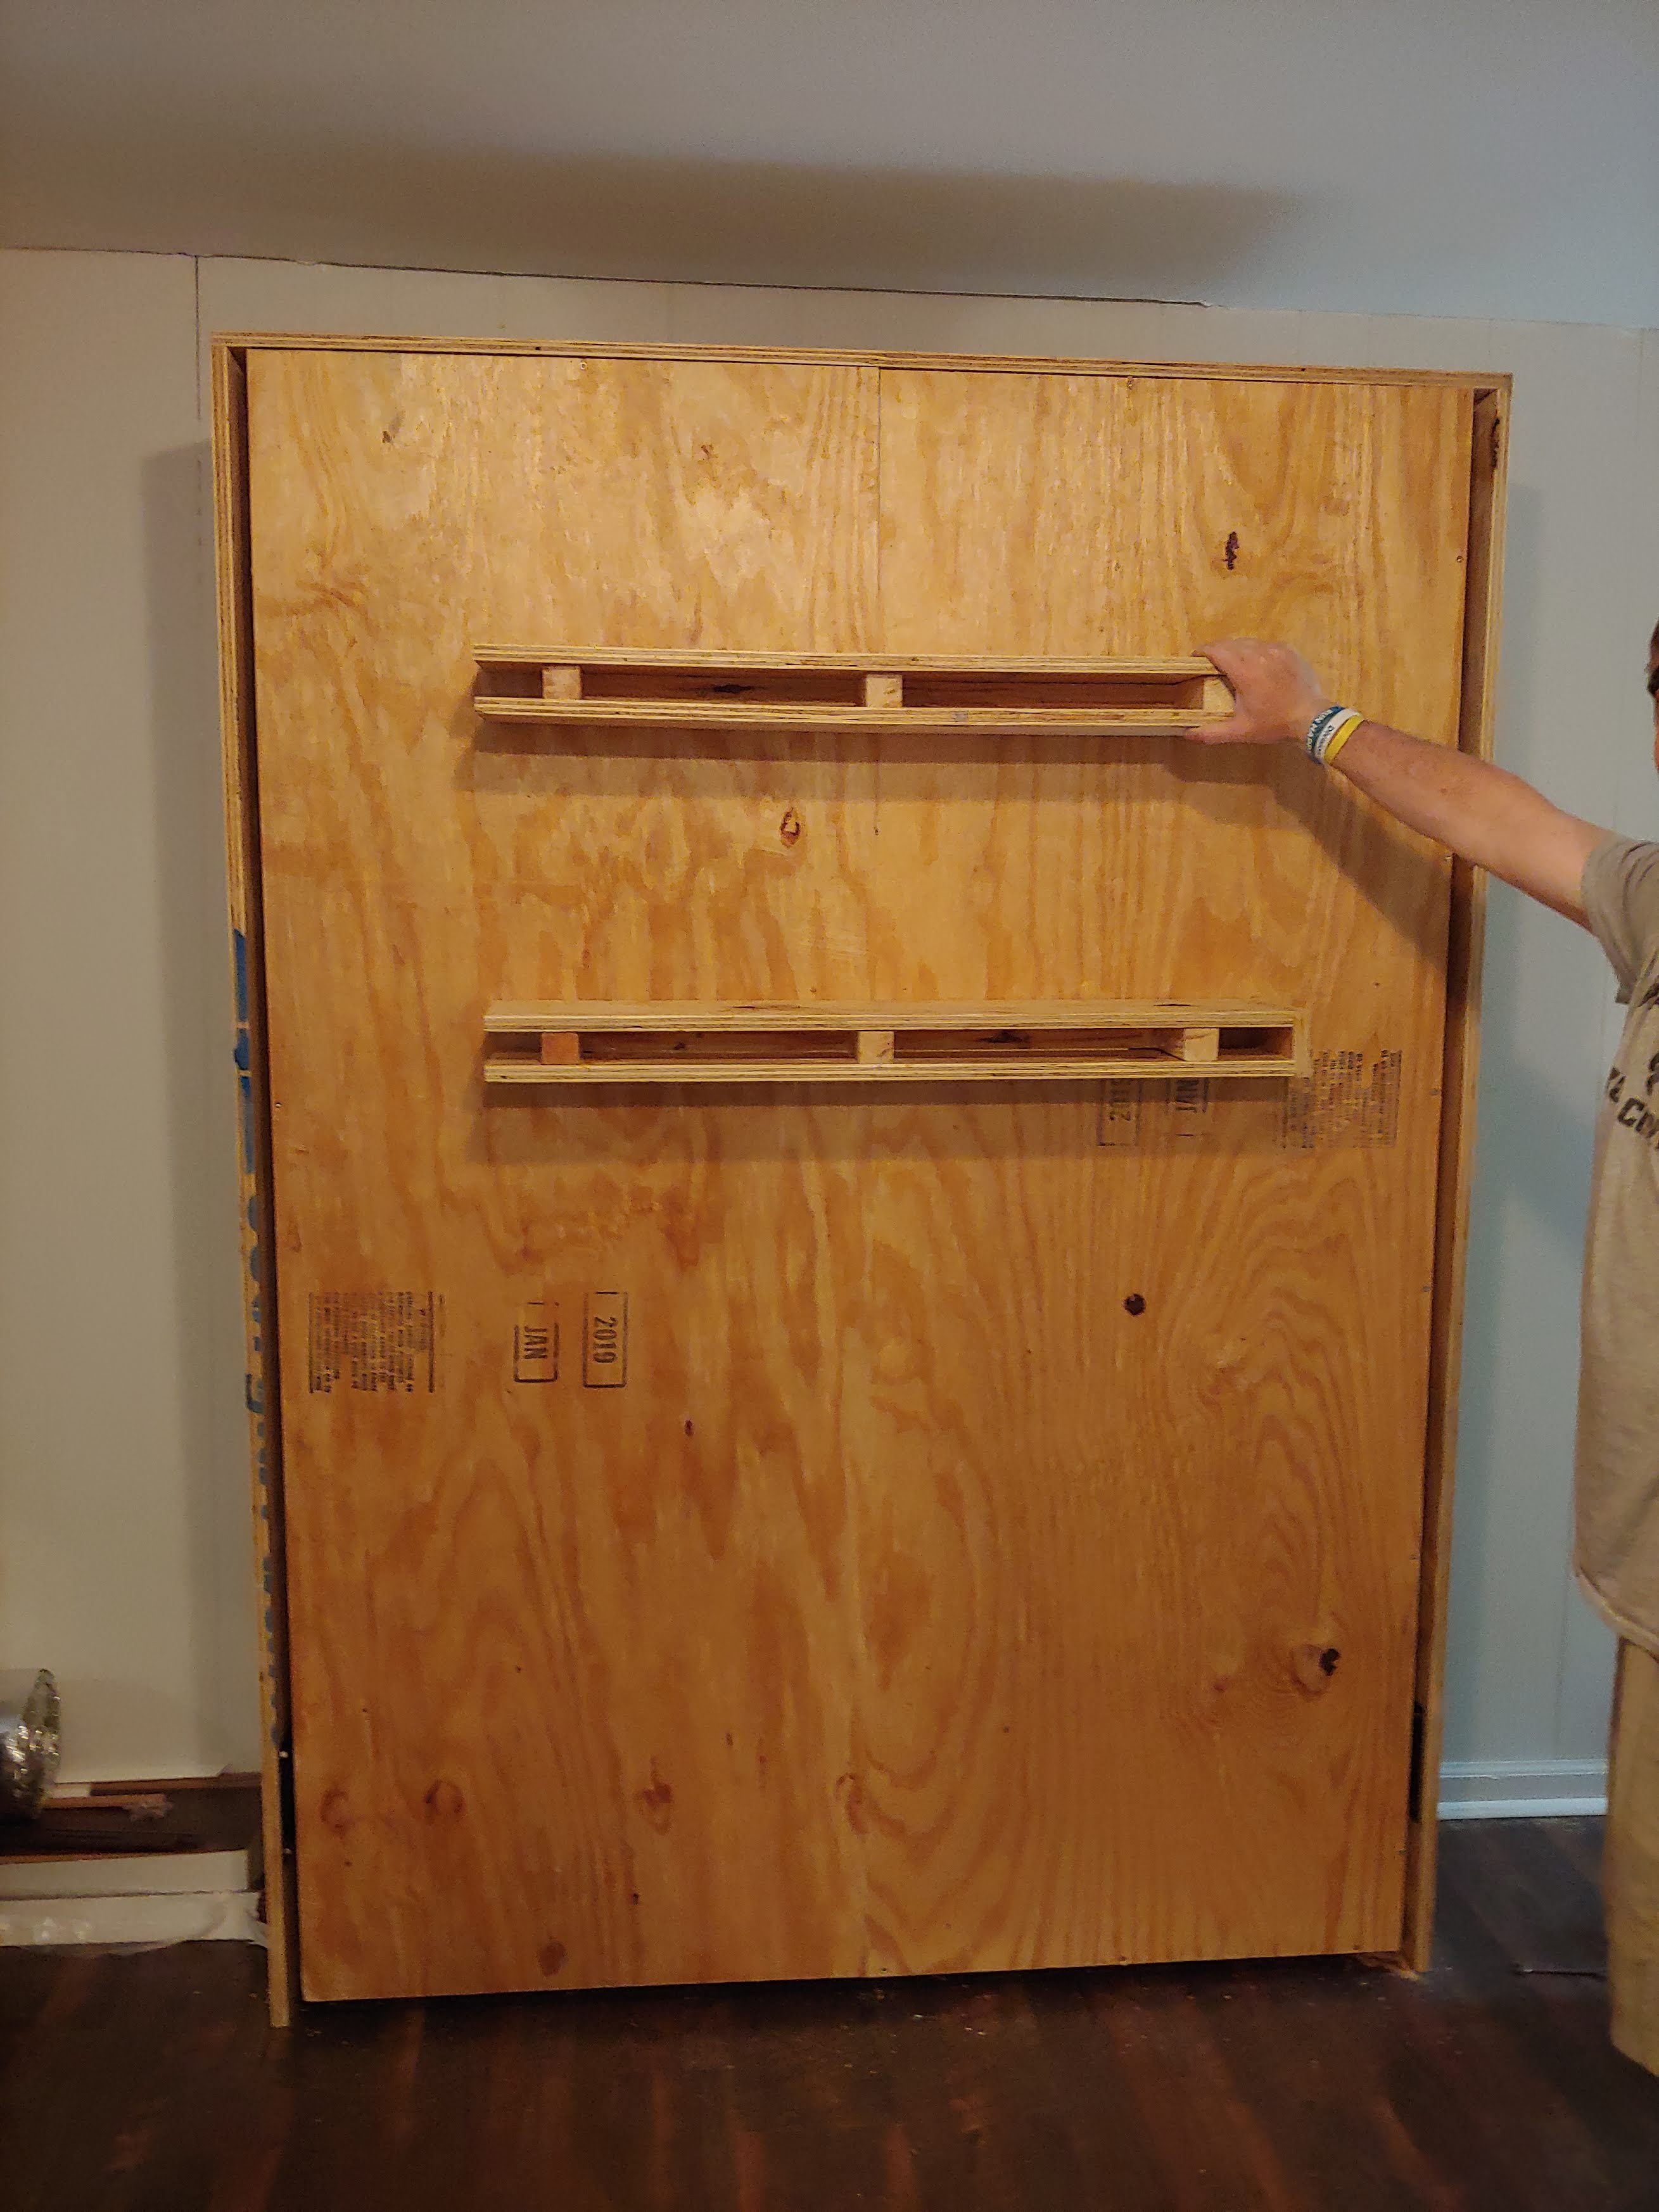
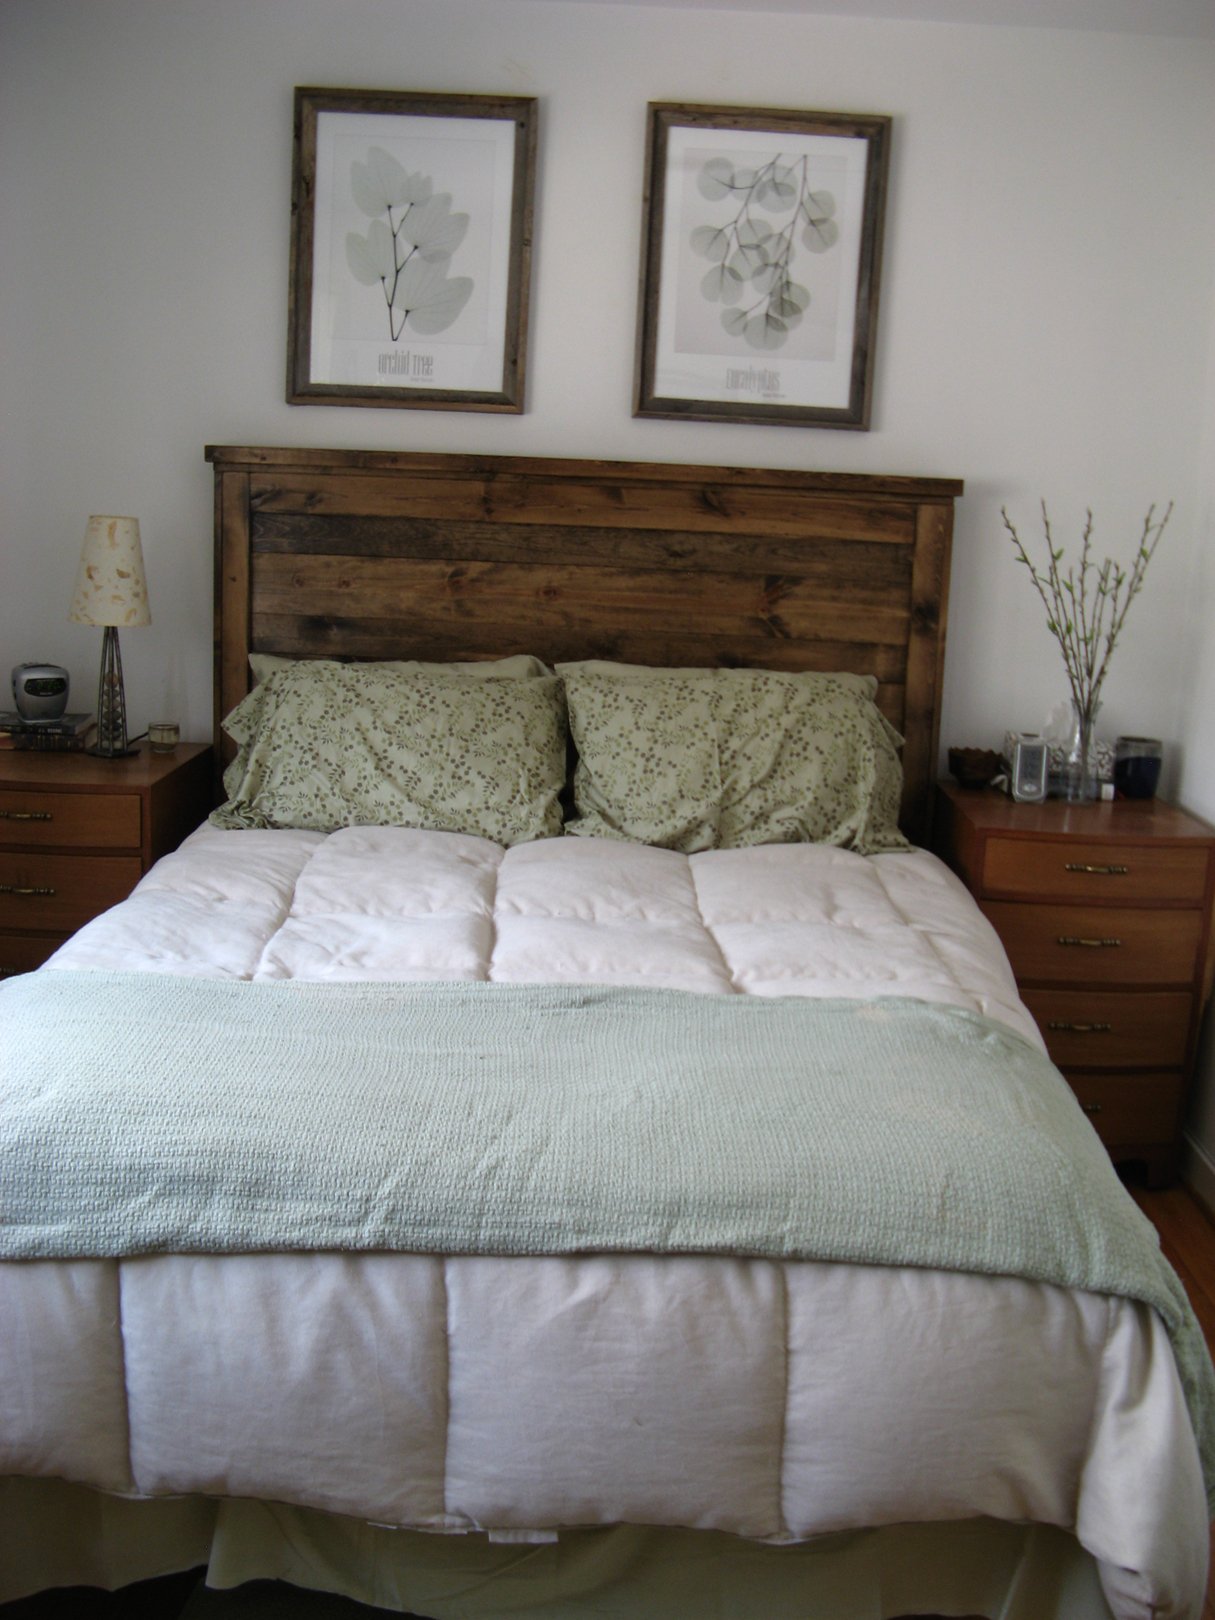
So I've always wanted to build a Murphy bed. And by always I mean since I first came across plans here that made it look so simple. It ended up taking me a while to do because my job has me working 6 days a week so I was only able to work on it for short chunks of time.
I ended up utilizing a few different plans and mashed them together to build a full size murphy bed. The shelves are the support legs when the bed is down. The "hinge" mechanism are heavy duty 360 degree seat swivels.
All-in-all it turned out WAY better than I expected with only some minor issues throughout the construction process.
Next up is a twin xl Murphy bed with a murphy desk attachment that will serve as a craft table when up.


Entire wall fireplace built-in!


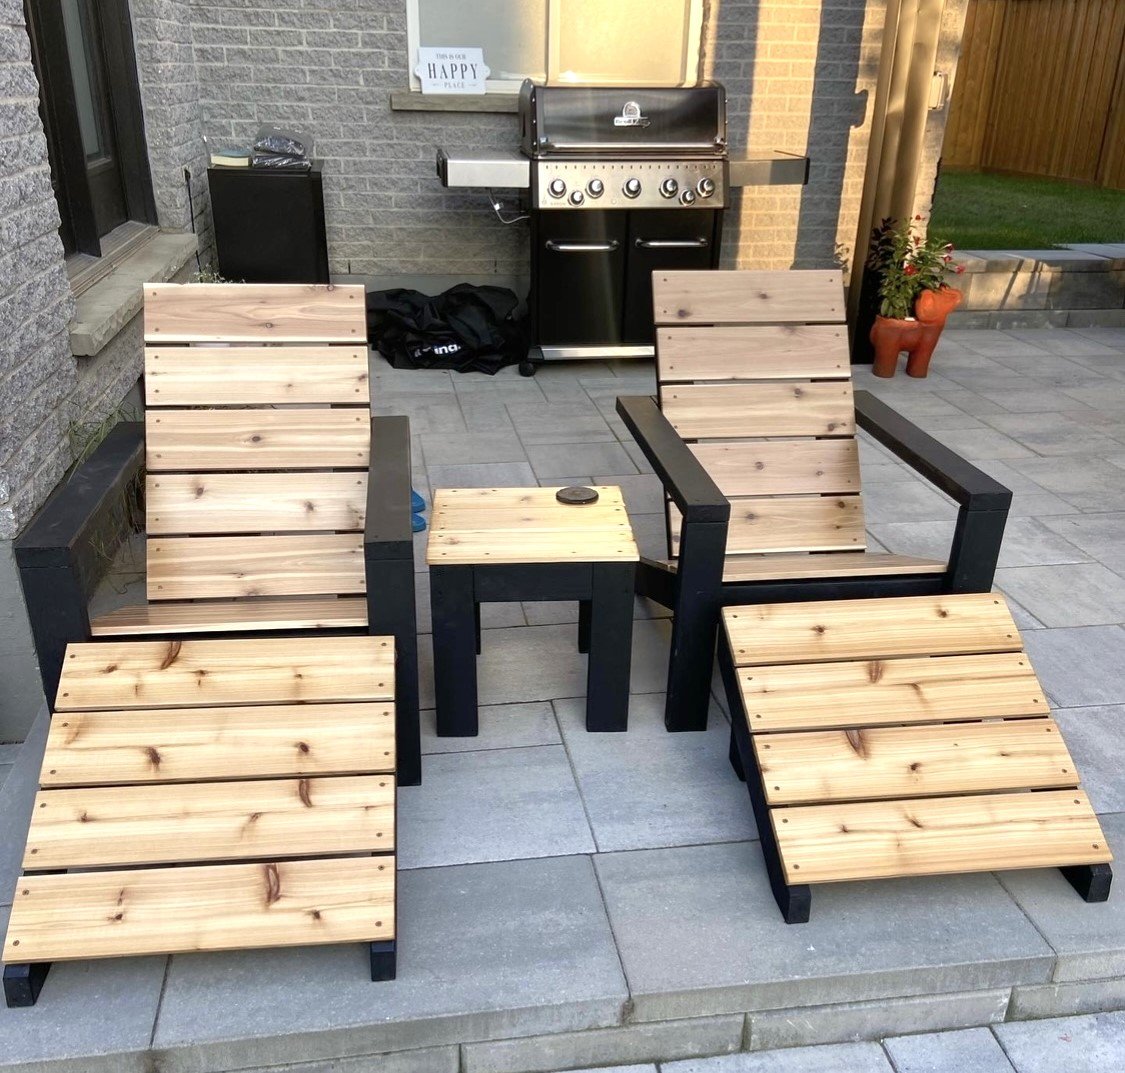
Great set of outdoor chairs with foot rest!
RG Design & Build

This is such a cute countertop organizer ! The possibilities for this are endless - maybe a tea / coffee bar or a hot chocolate bar - a breakfast bar or a snack bar ..... I may need to make another one...and definitely one for the bathroom !
.
The shelves slide to change the width or turn one and it becomes a corner piece!


Tue, 09/12/2023 - 12:30
So great to see you made this and it turned out awesome! Thank you so much for taking time to share photos.
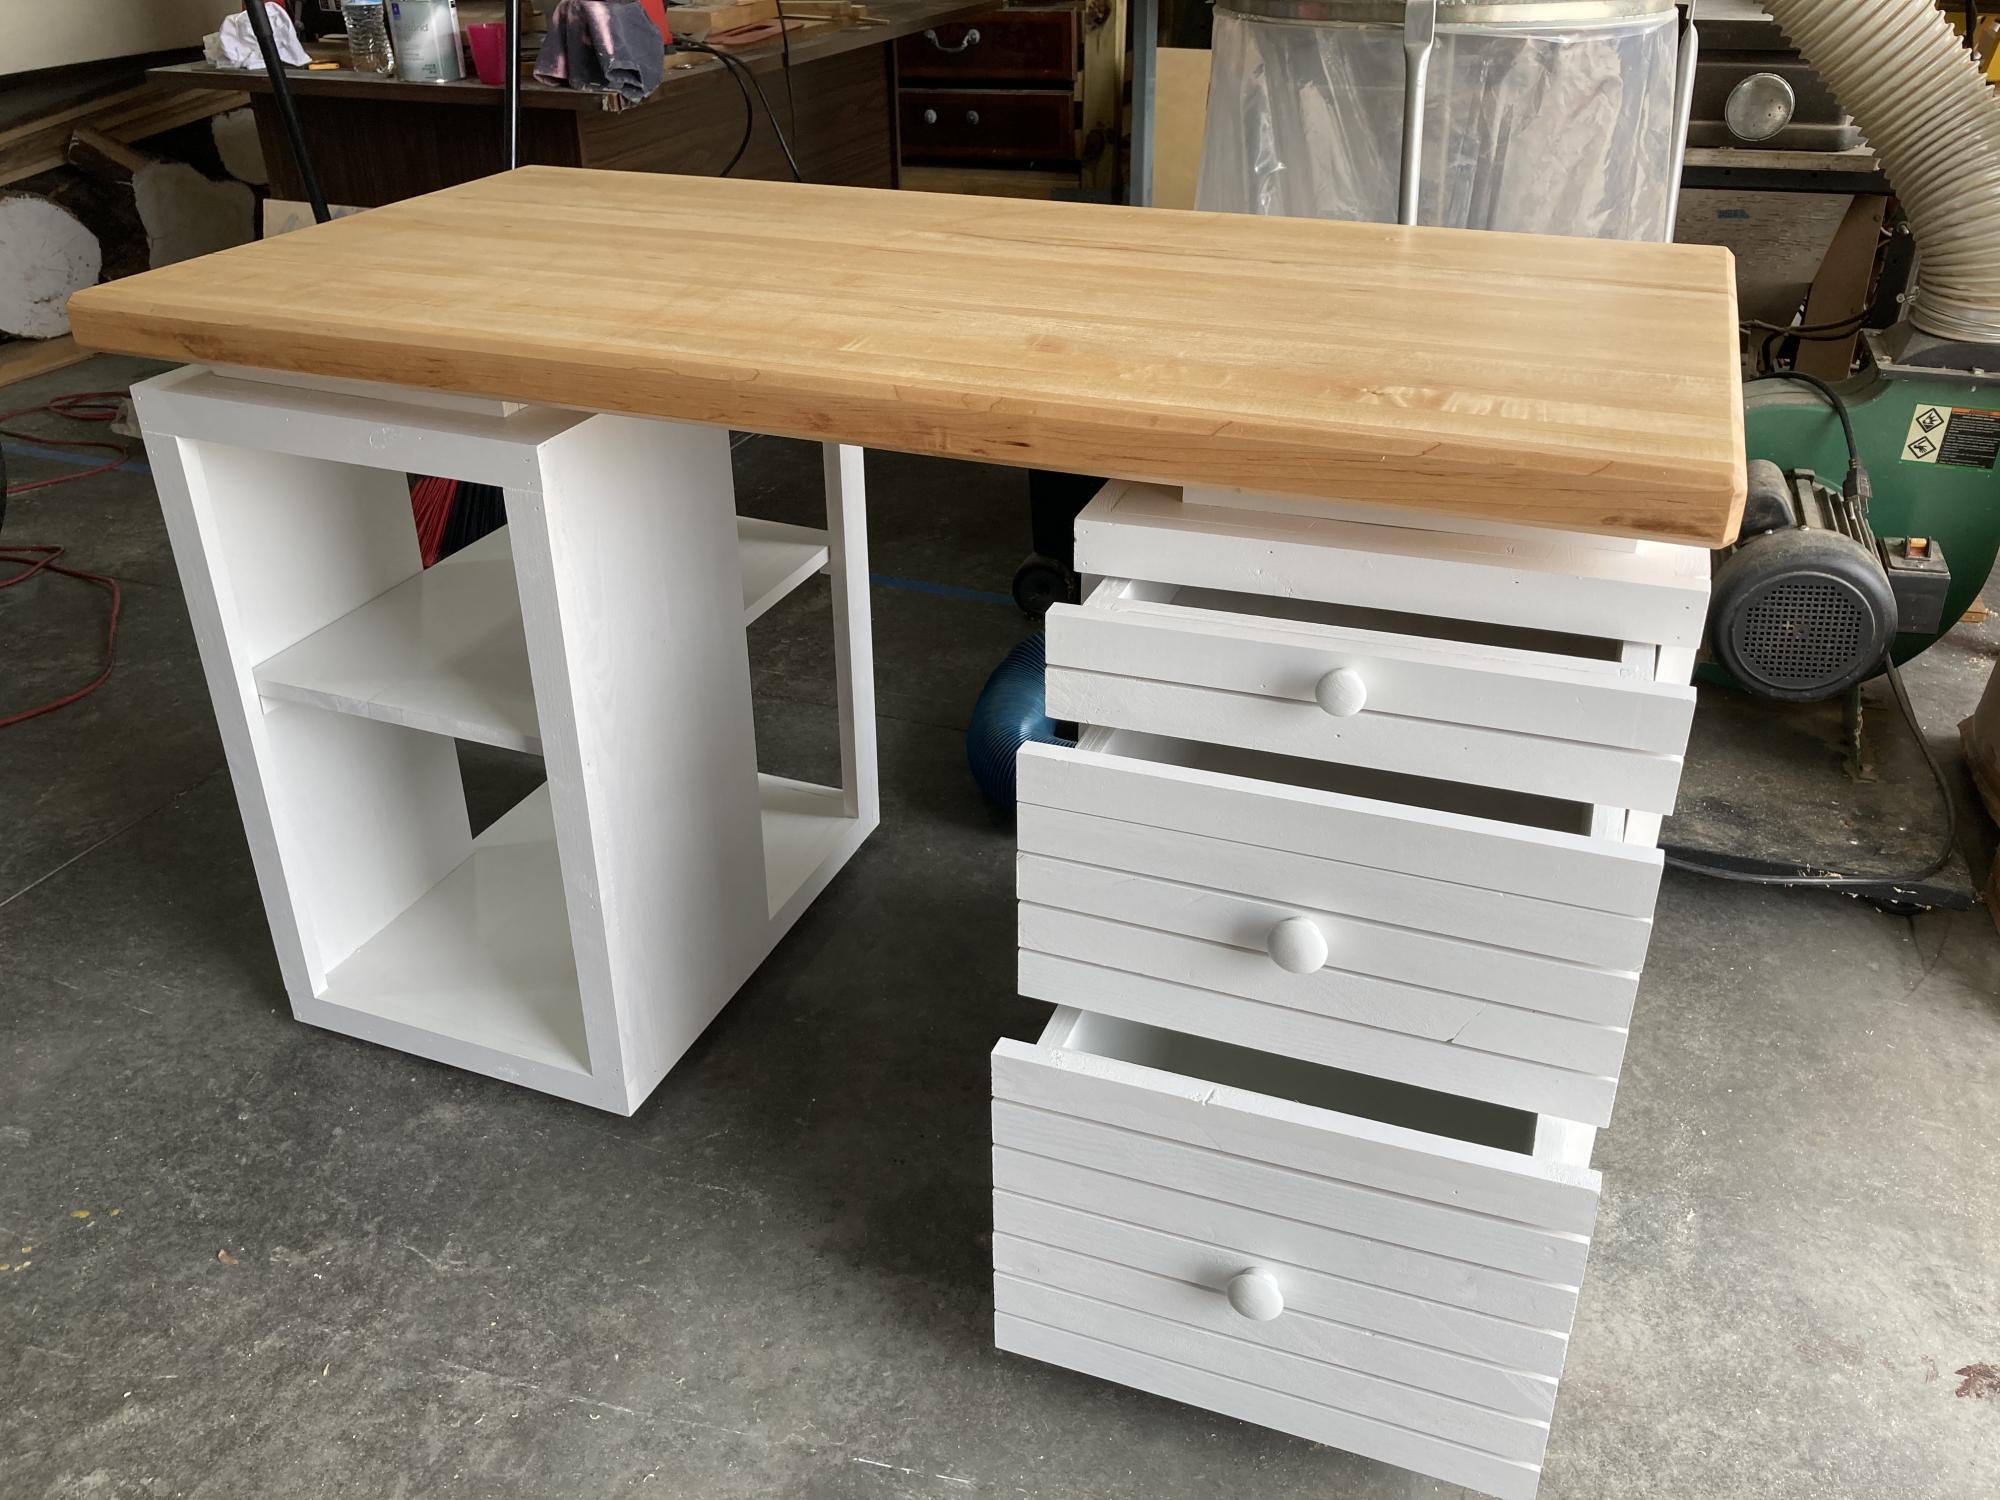
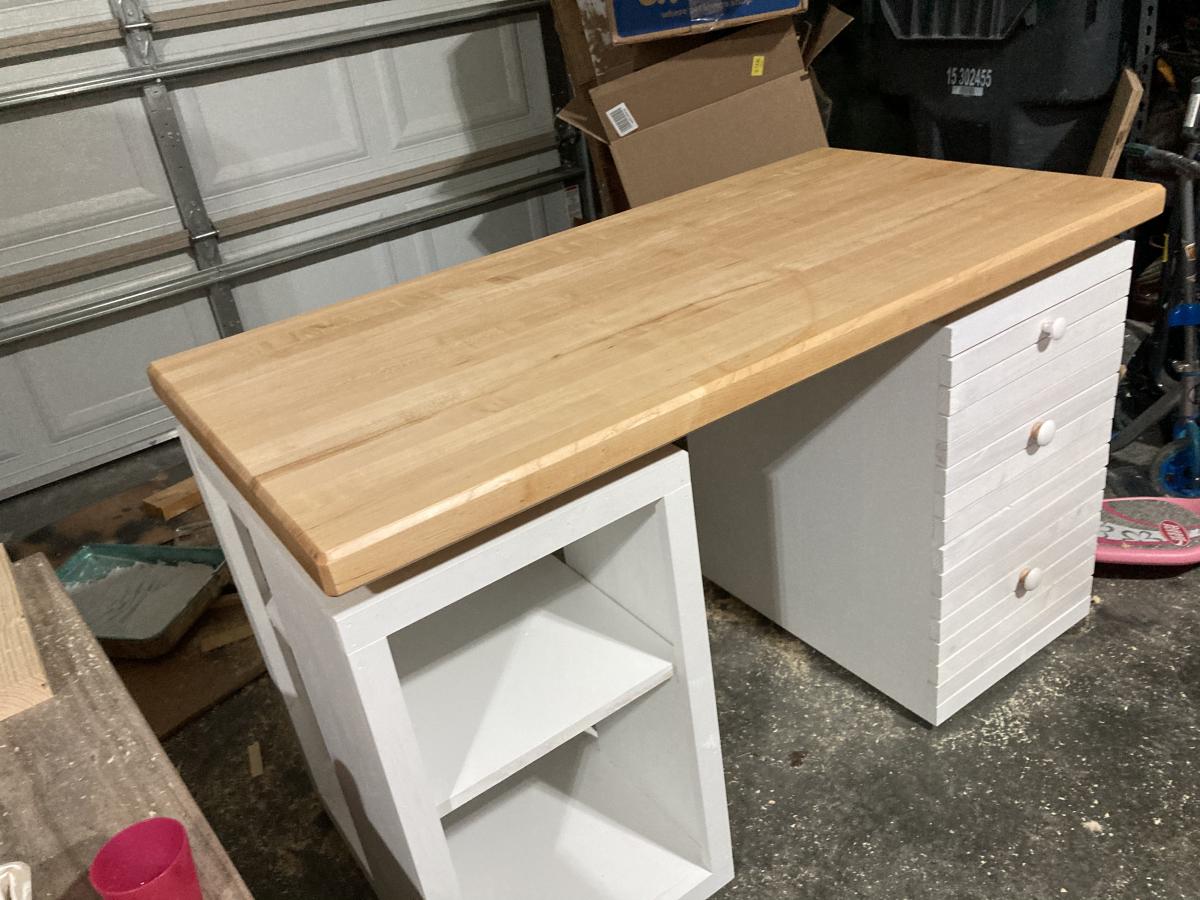
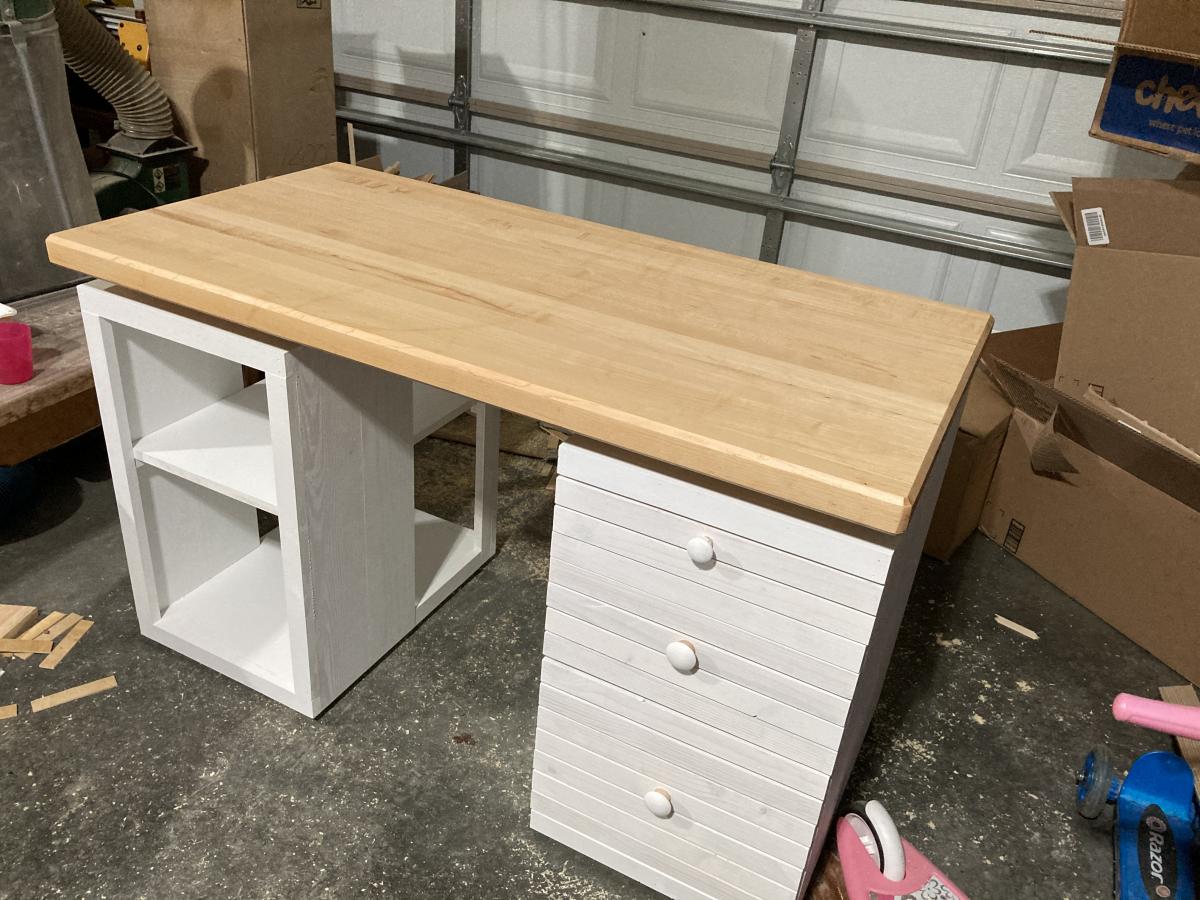
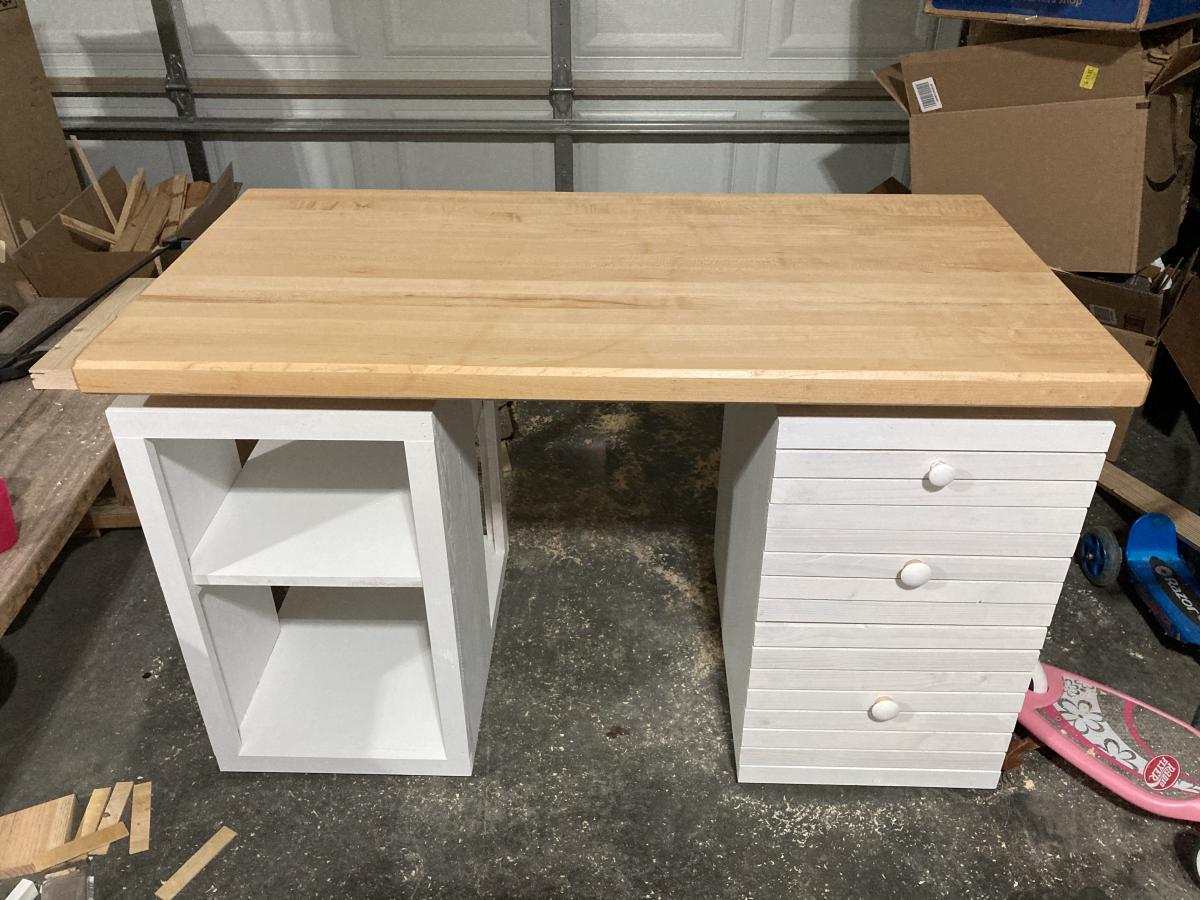
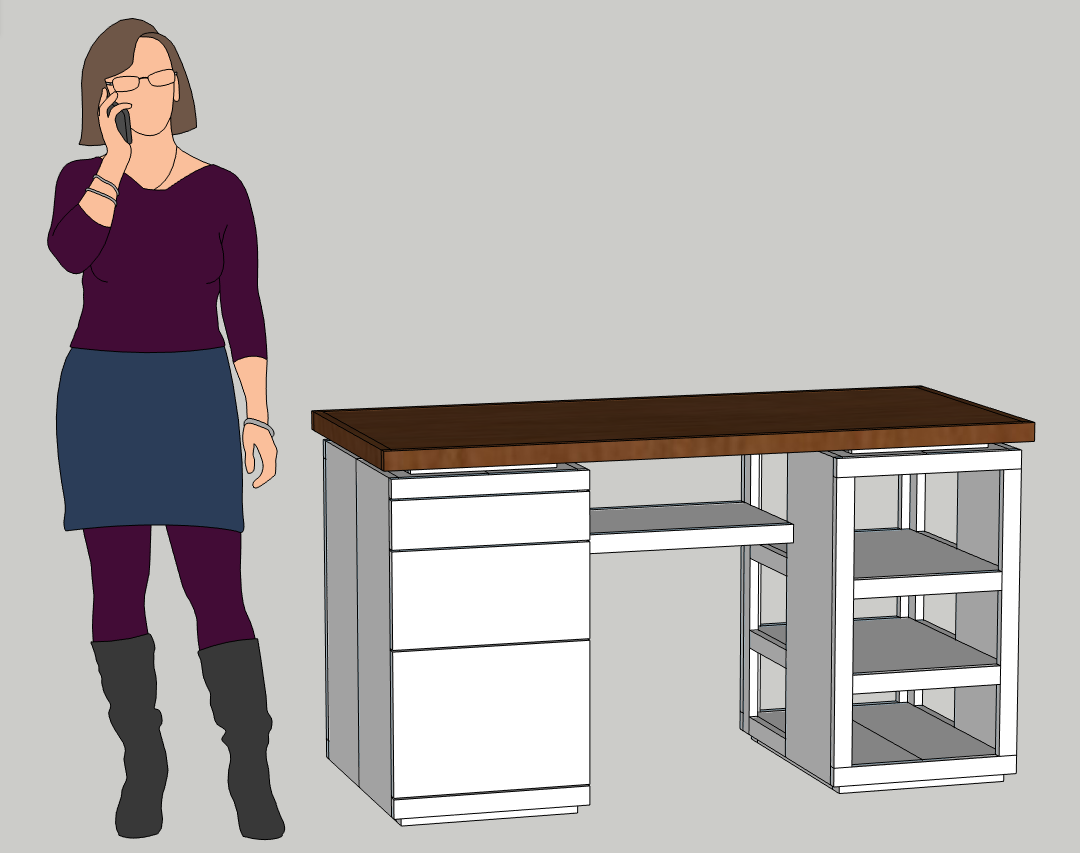
Your craft table was the kicking off point for this desk. Pine cabinets, plywood drawers, maple top.

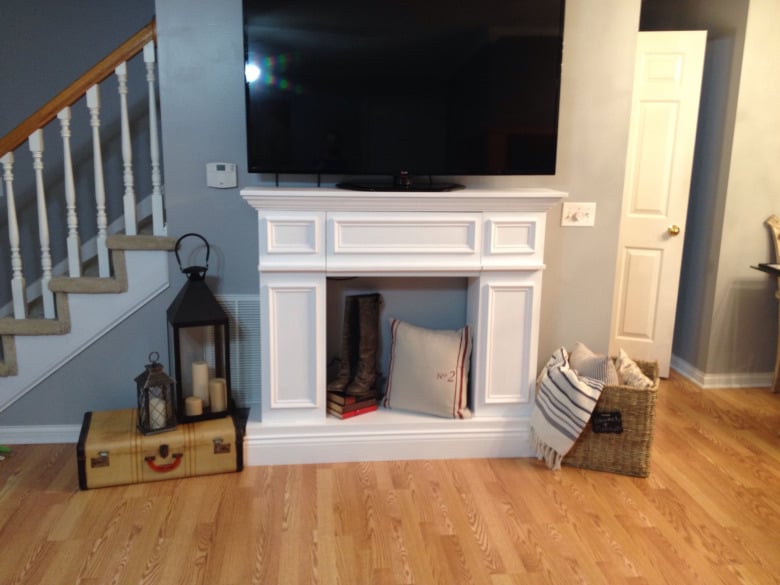
Modified from Ana White's Faux Fireplace with Hidden Storage Plan
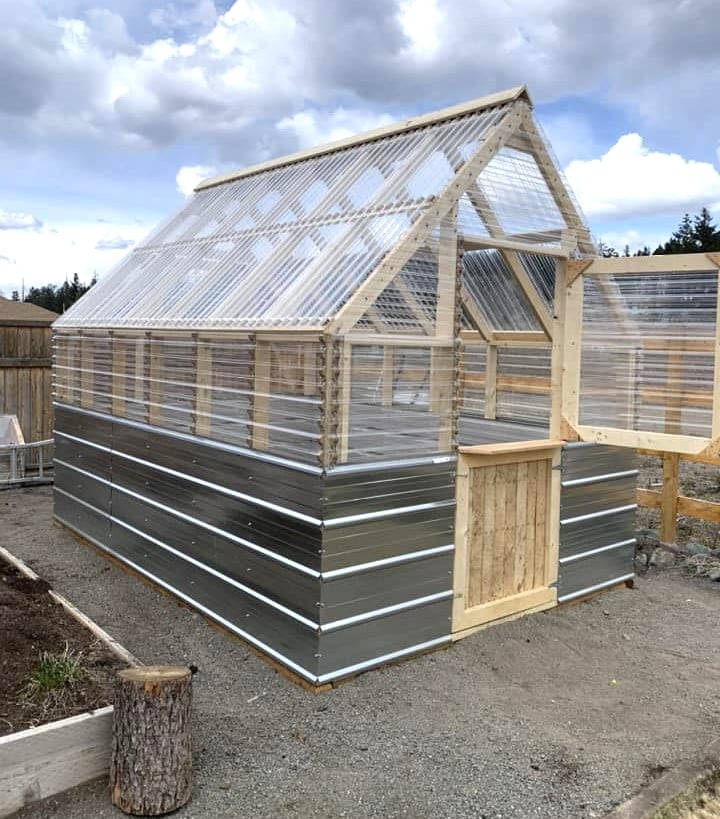
DIY Greenhouse by Trenton Kirby on Facebook!

We went off the Farmhouse table and bench design but had to customize the length of the table and bench so that it fit in our kitchen space. The table was our first ever project and we made a few mistakes but learned from them and built the bench and are hoping to move up to the Farmhouse bed and then the fullstorage bed.

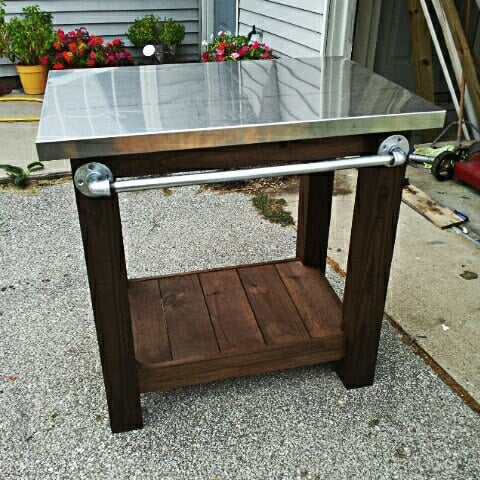
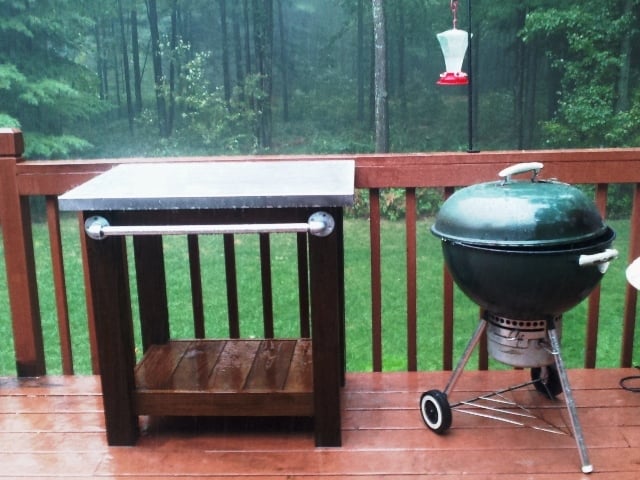
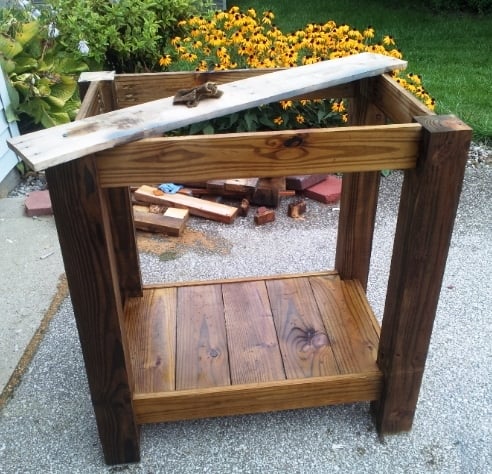
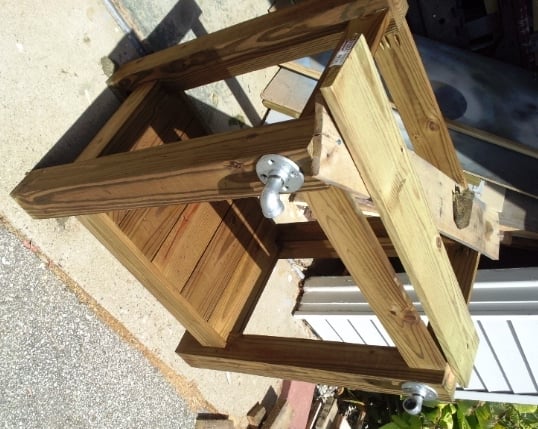
I made this table to go next to an outdoor grill to be used as a food prep area or just a surface for holding ingredients (instead of using the deck railing!). The top is stainless steel which fits tightly over 2 3/4" pieces of plywood laminated together. The bar/handle in front is made out of galvanized pipe. All wood was treated.
Legs - 4x4 posts
Bottom shelf - 1x6's
Sides - 1x4's
Top - 2 pieces of 3/4" plywood laminated together with a stainless steel top (custom fit) over top
Towel bar - galvanized pipe (cut and threaded to size at Lowe's), floor flanges and 90 degree elbows
Thu, 05/15/2014 - 10:33
Sorry about the late reply! Yes, I just gave my dimensions to a local steel supplier and they made the top. I think I have about $40 into the stainless. They didn't weld the corners but I've never had an issue with them.

Sat, 04/26/2014 - 15:41
I too would like to know your source for the sheet metal.

In reply to Stainless steel sheet metal by Pursuit of Handyness
Thu, 05/15/2014 - 10:35
I just found a local steel supplier, told them what I need and they formed the top. It cost me around $40 (without welding of the corners). I took a fine grit sandpaper to it afterward to scuff it up so it didn't look so bright.
Wed, 04/30/2014 - 12:55
I would like to know are there any plans available to make this table? I am very impressed of its design.
In reply to Grill table with stainless steel top by AMR4412
Thu, 05/15/2014 - 10:46
No...I didn't have any plans when I built it but it's a very simple concept. I chose to use all treated wood since I knew it would be sitting outside unprotected. However, my 4x4 posts weren't square so this caused a lot of problems and everything was built to fit. I believe I just used 4x4's, 1X6s (for the bottom shelf) and 1x4s for the sides (top and bottom). For the top, I just laminated 2 pieces of 3/4" plywood together to bulk it up and then had the stainless top built to fit. It fit perfectly so I didn't glue it to the plywood. This makes it easy to remove and clean, if necessary. For the galvanized pipe (towel bar), I bought it at Lowe's and had them cut/thread it to fit my dimensions.
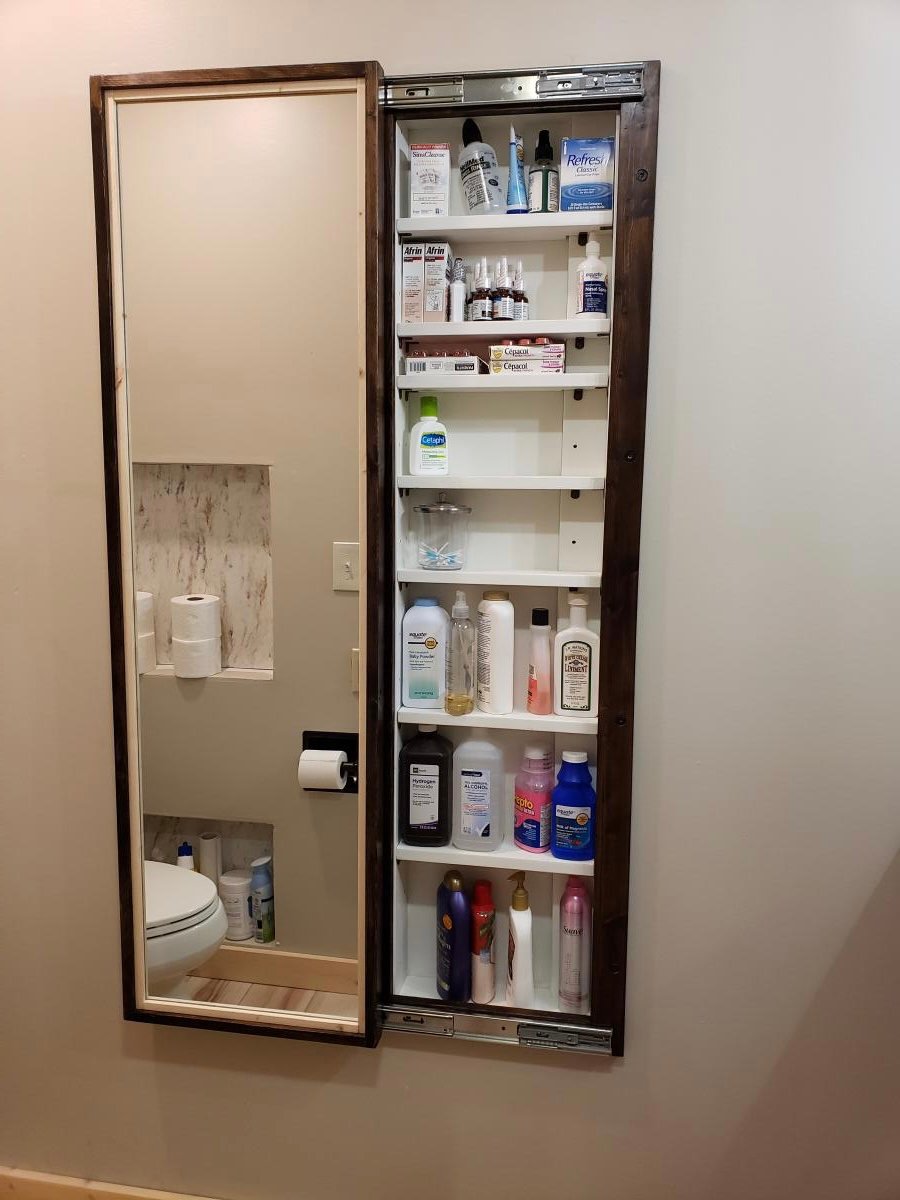
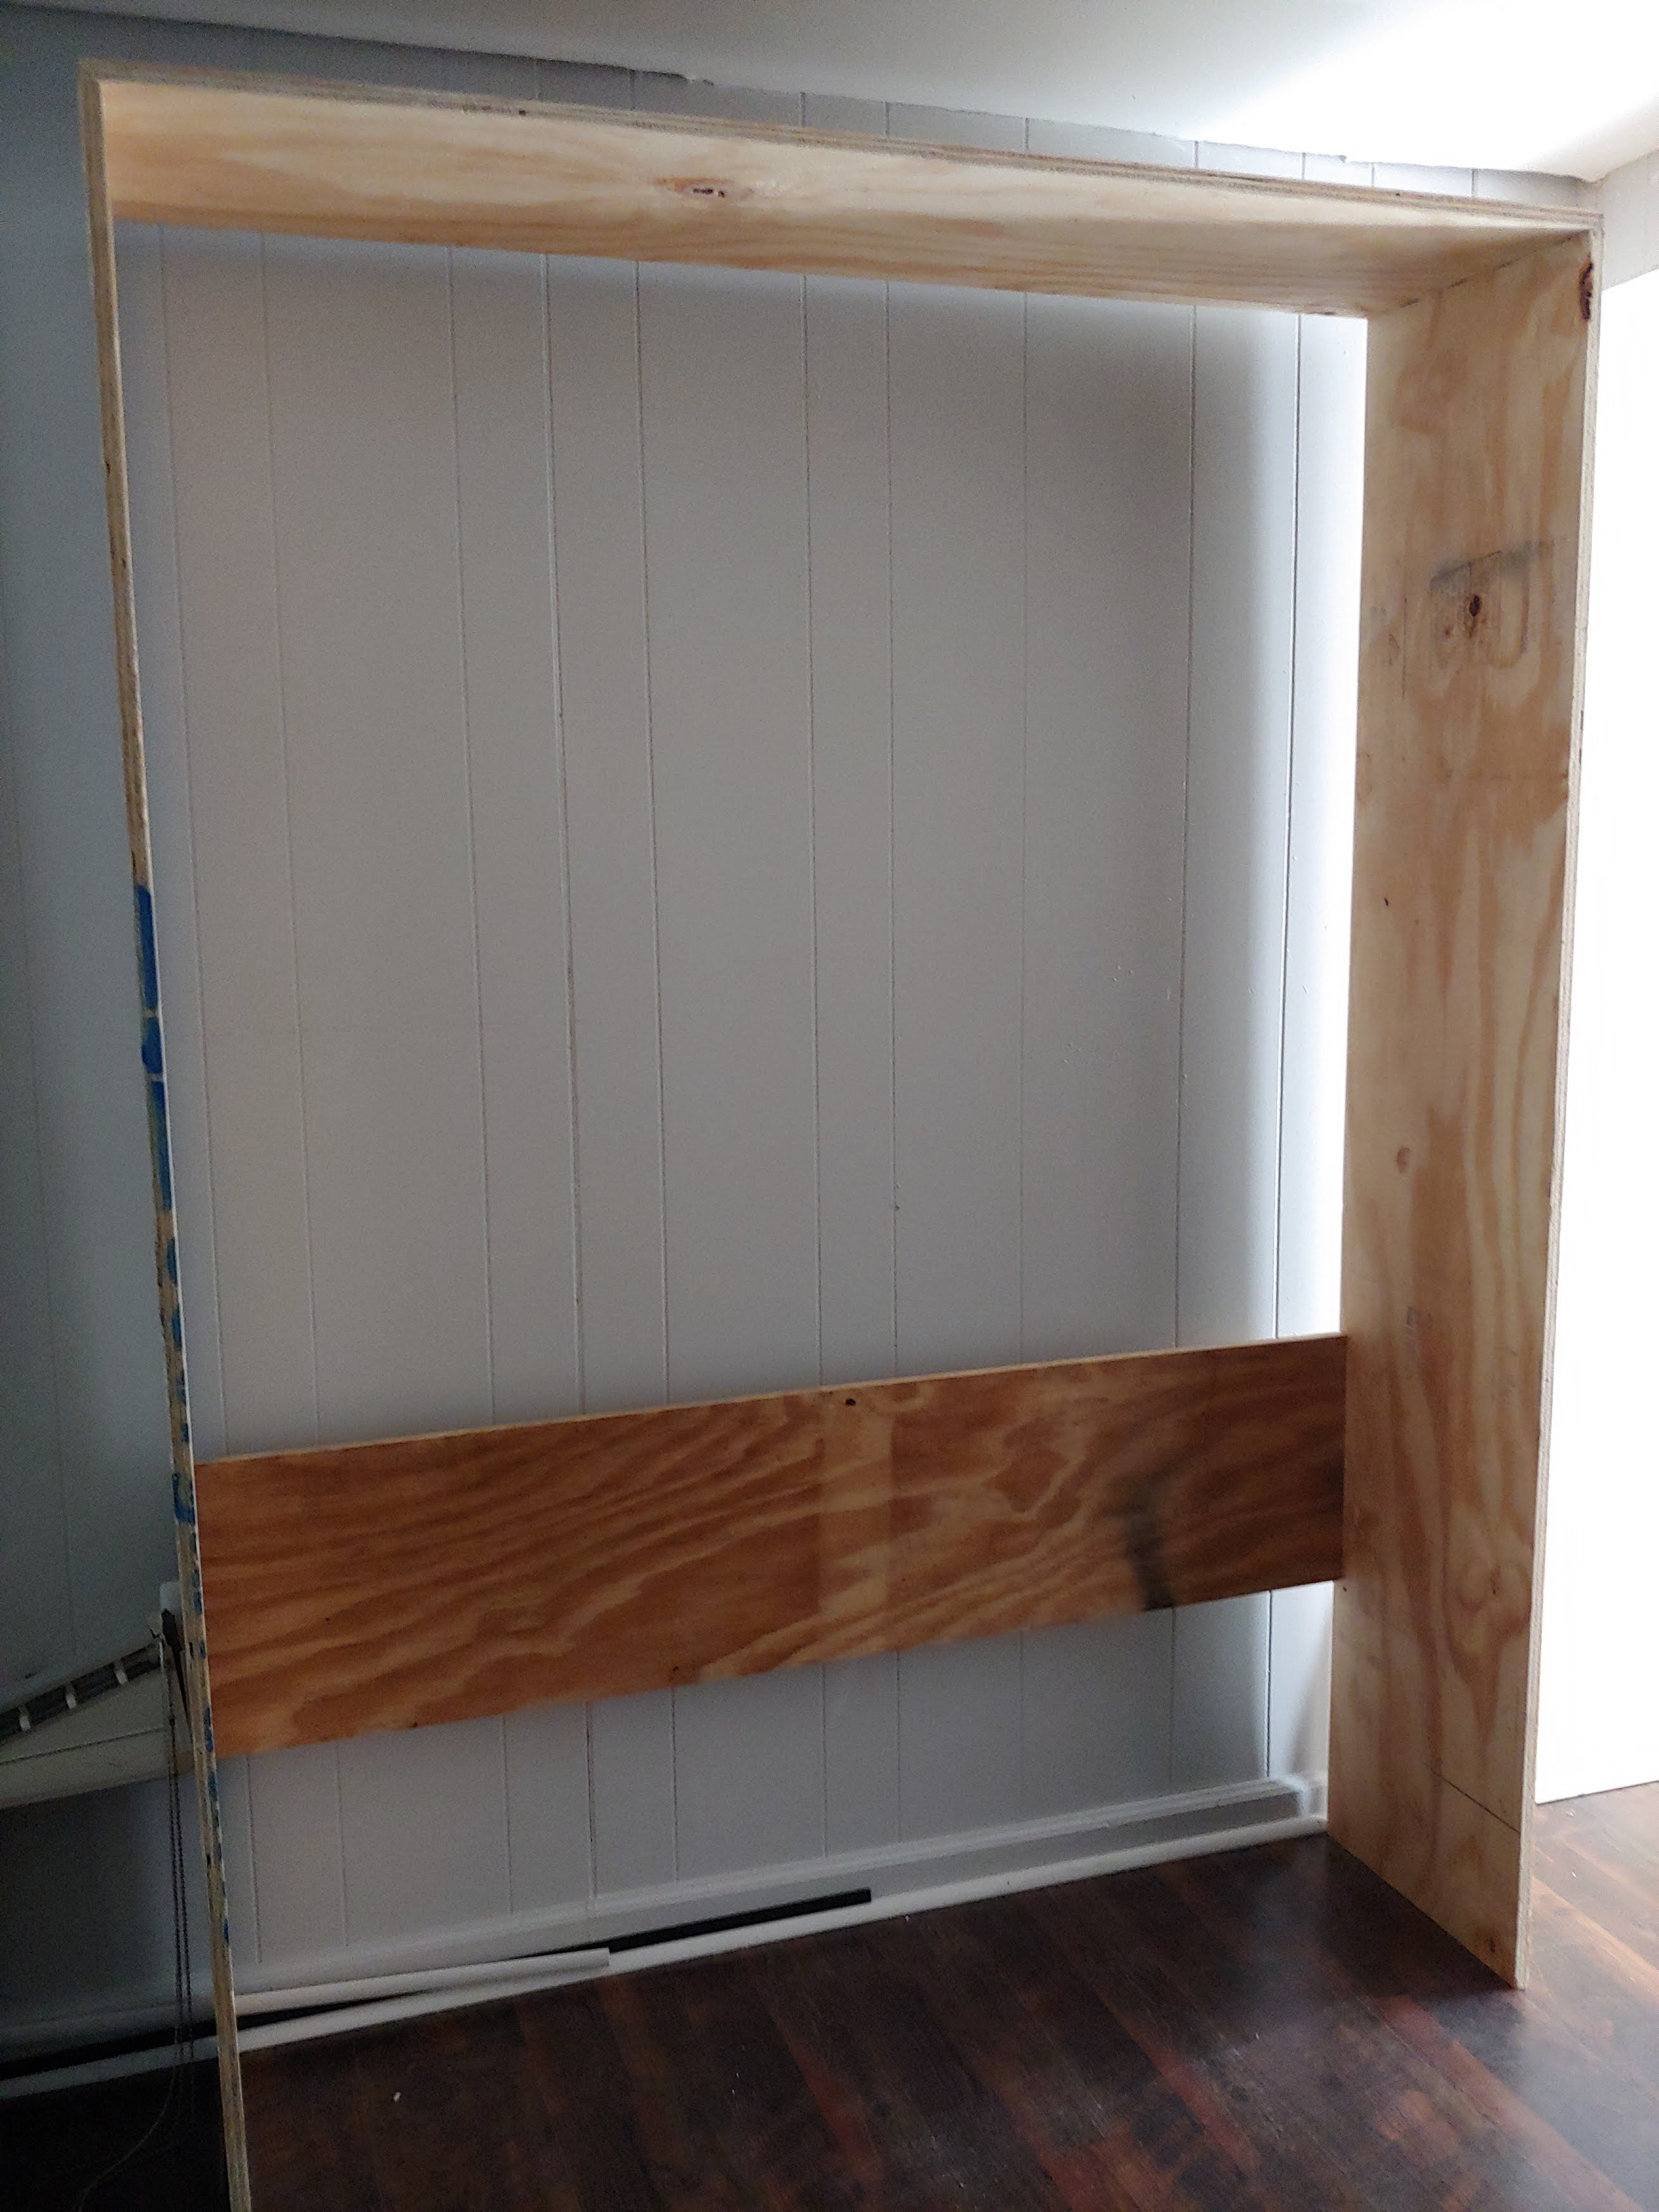
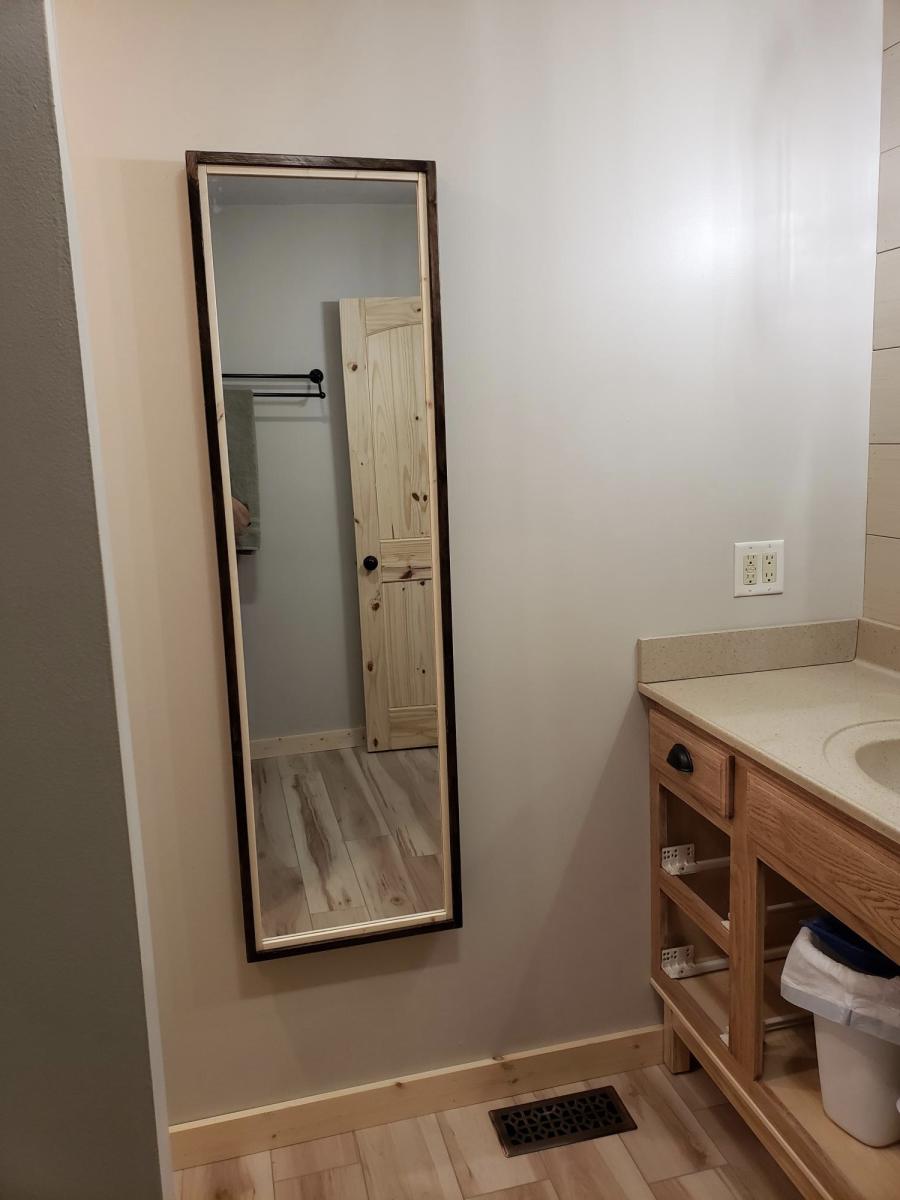
My bathroom has very little storage space. So during our recent remodeling of the room, I decided to add this cabinet. Changed the plan a little to make it recessed in the wall. I love how it turned out!

Sat, 09/03/2022 - 13:28
This looks amazing, love how it's recessed! Thankyou for sharing.
Loved this build had to make it smaller but wow.
Paula
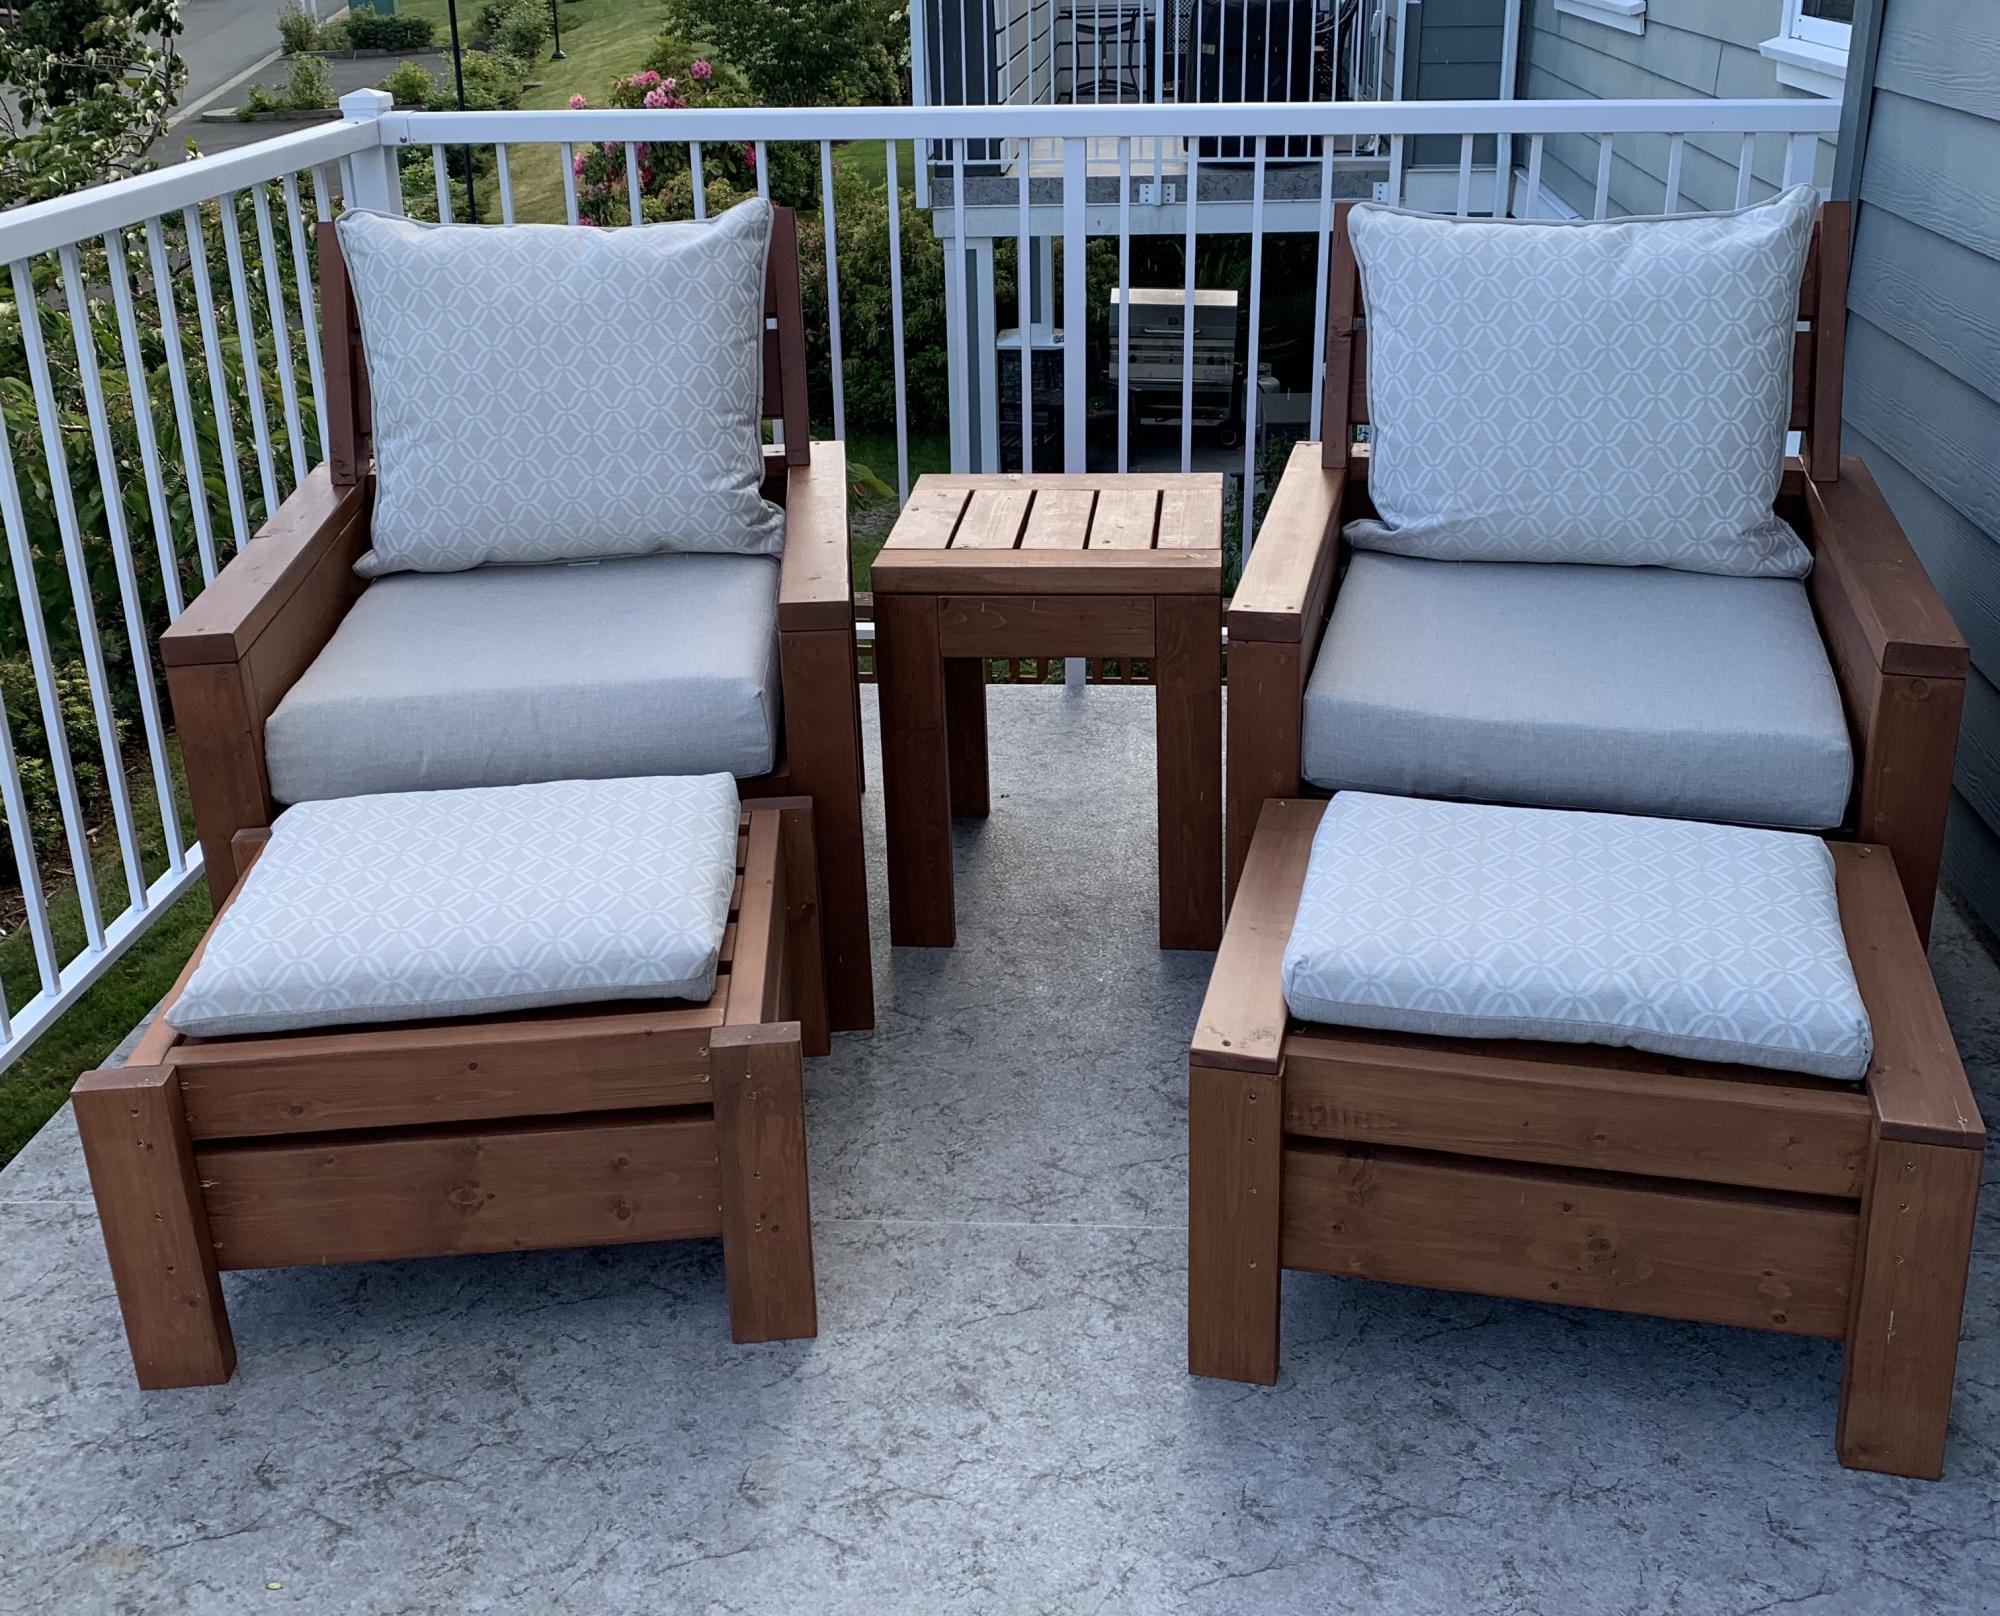
Love these plans! Made a modification and added backs to the chairs. Also, built ottomans to match the chairs which can also be used as additional seating.
Many compliments on the set. Thanks Ana!


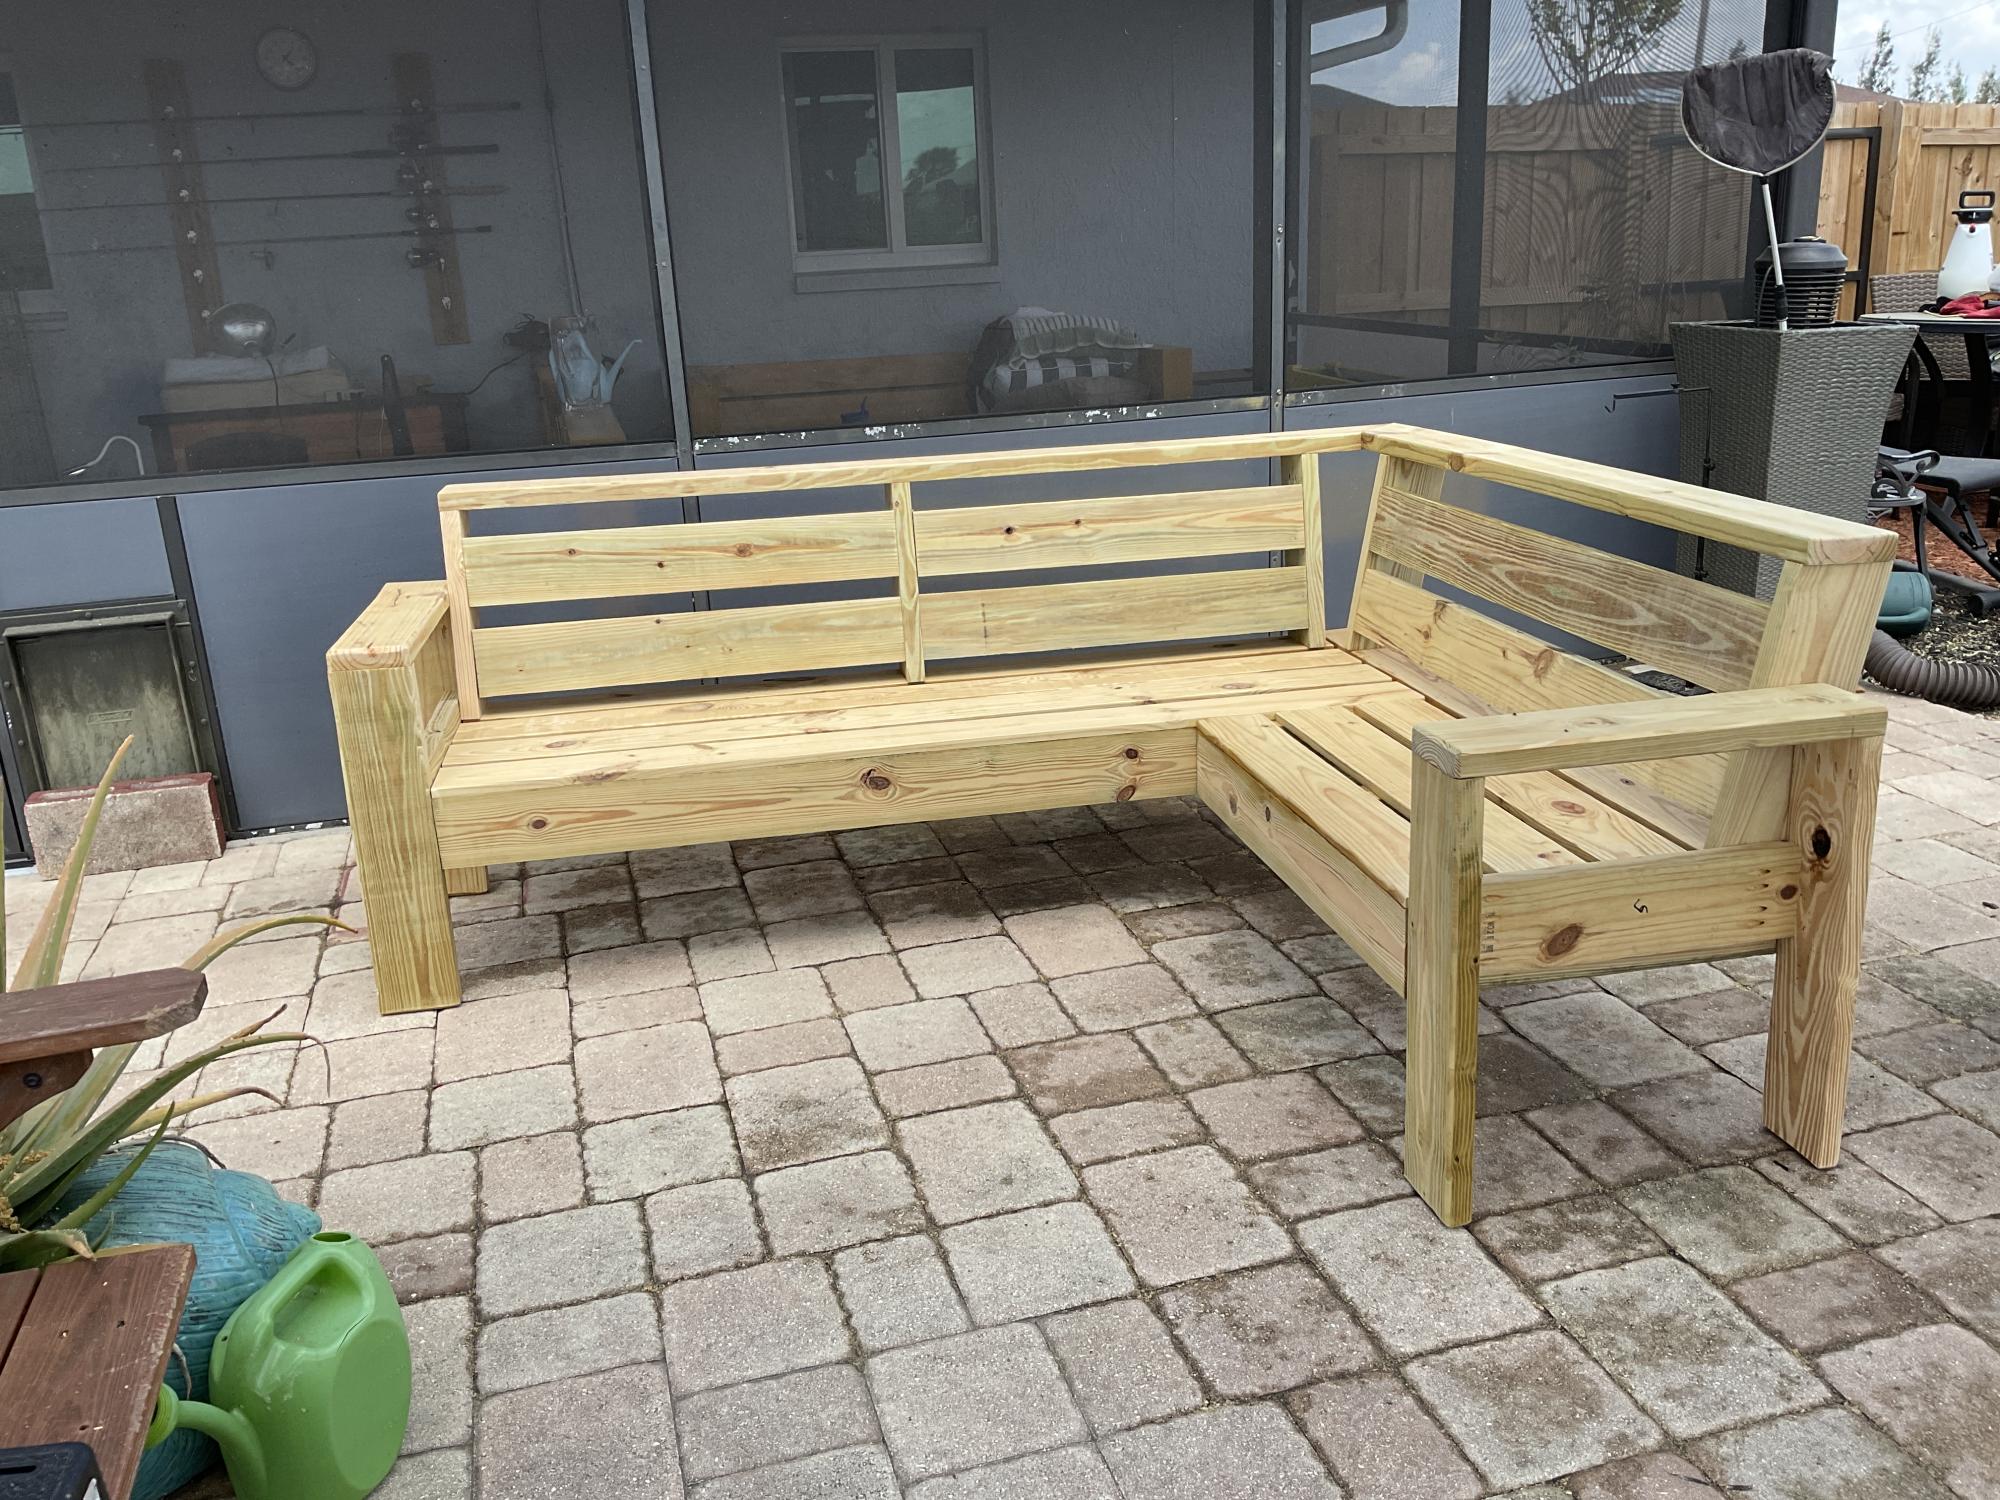
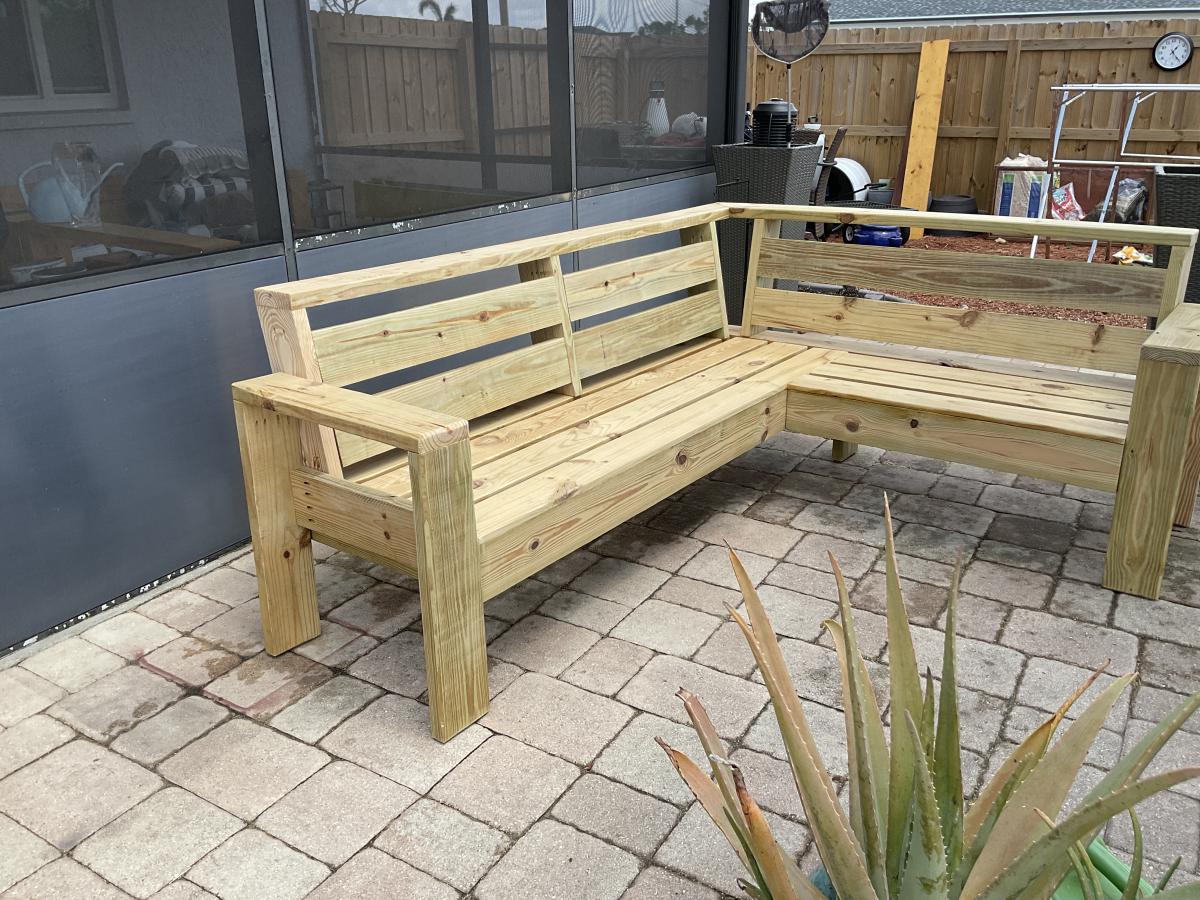
This was my seventh outdoor couch but my first sectional. My very first couches were all inspired by Ana White's plans and I have gotten so much better with my skills that I building other things as well. Thanks Ana for all your inspiration!

I've been planning on building a patio table for this coming spring and summer, but didn't know where to begin. I found Ana's wonderful site and now I don't know where to stop! So many great ideas.
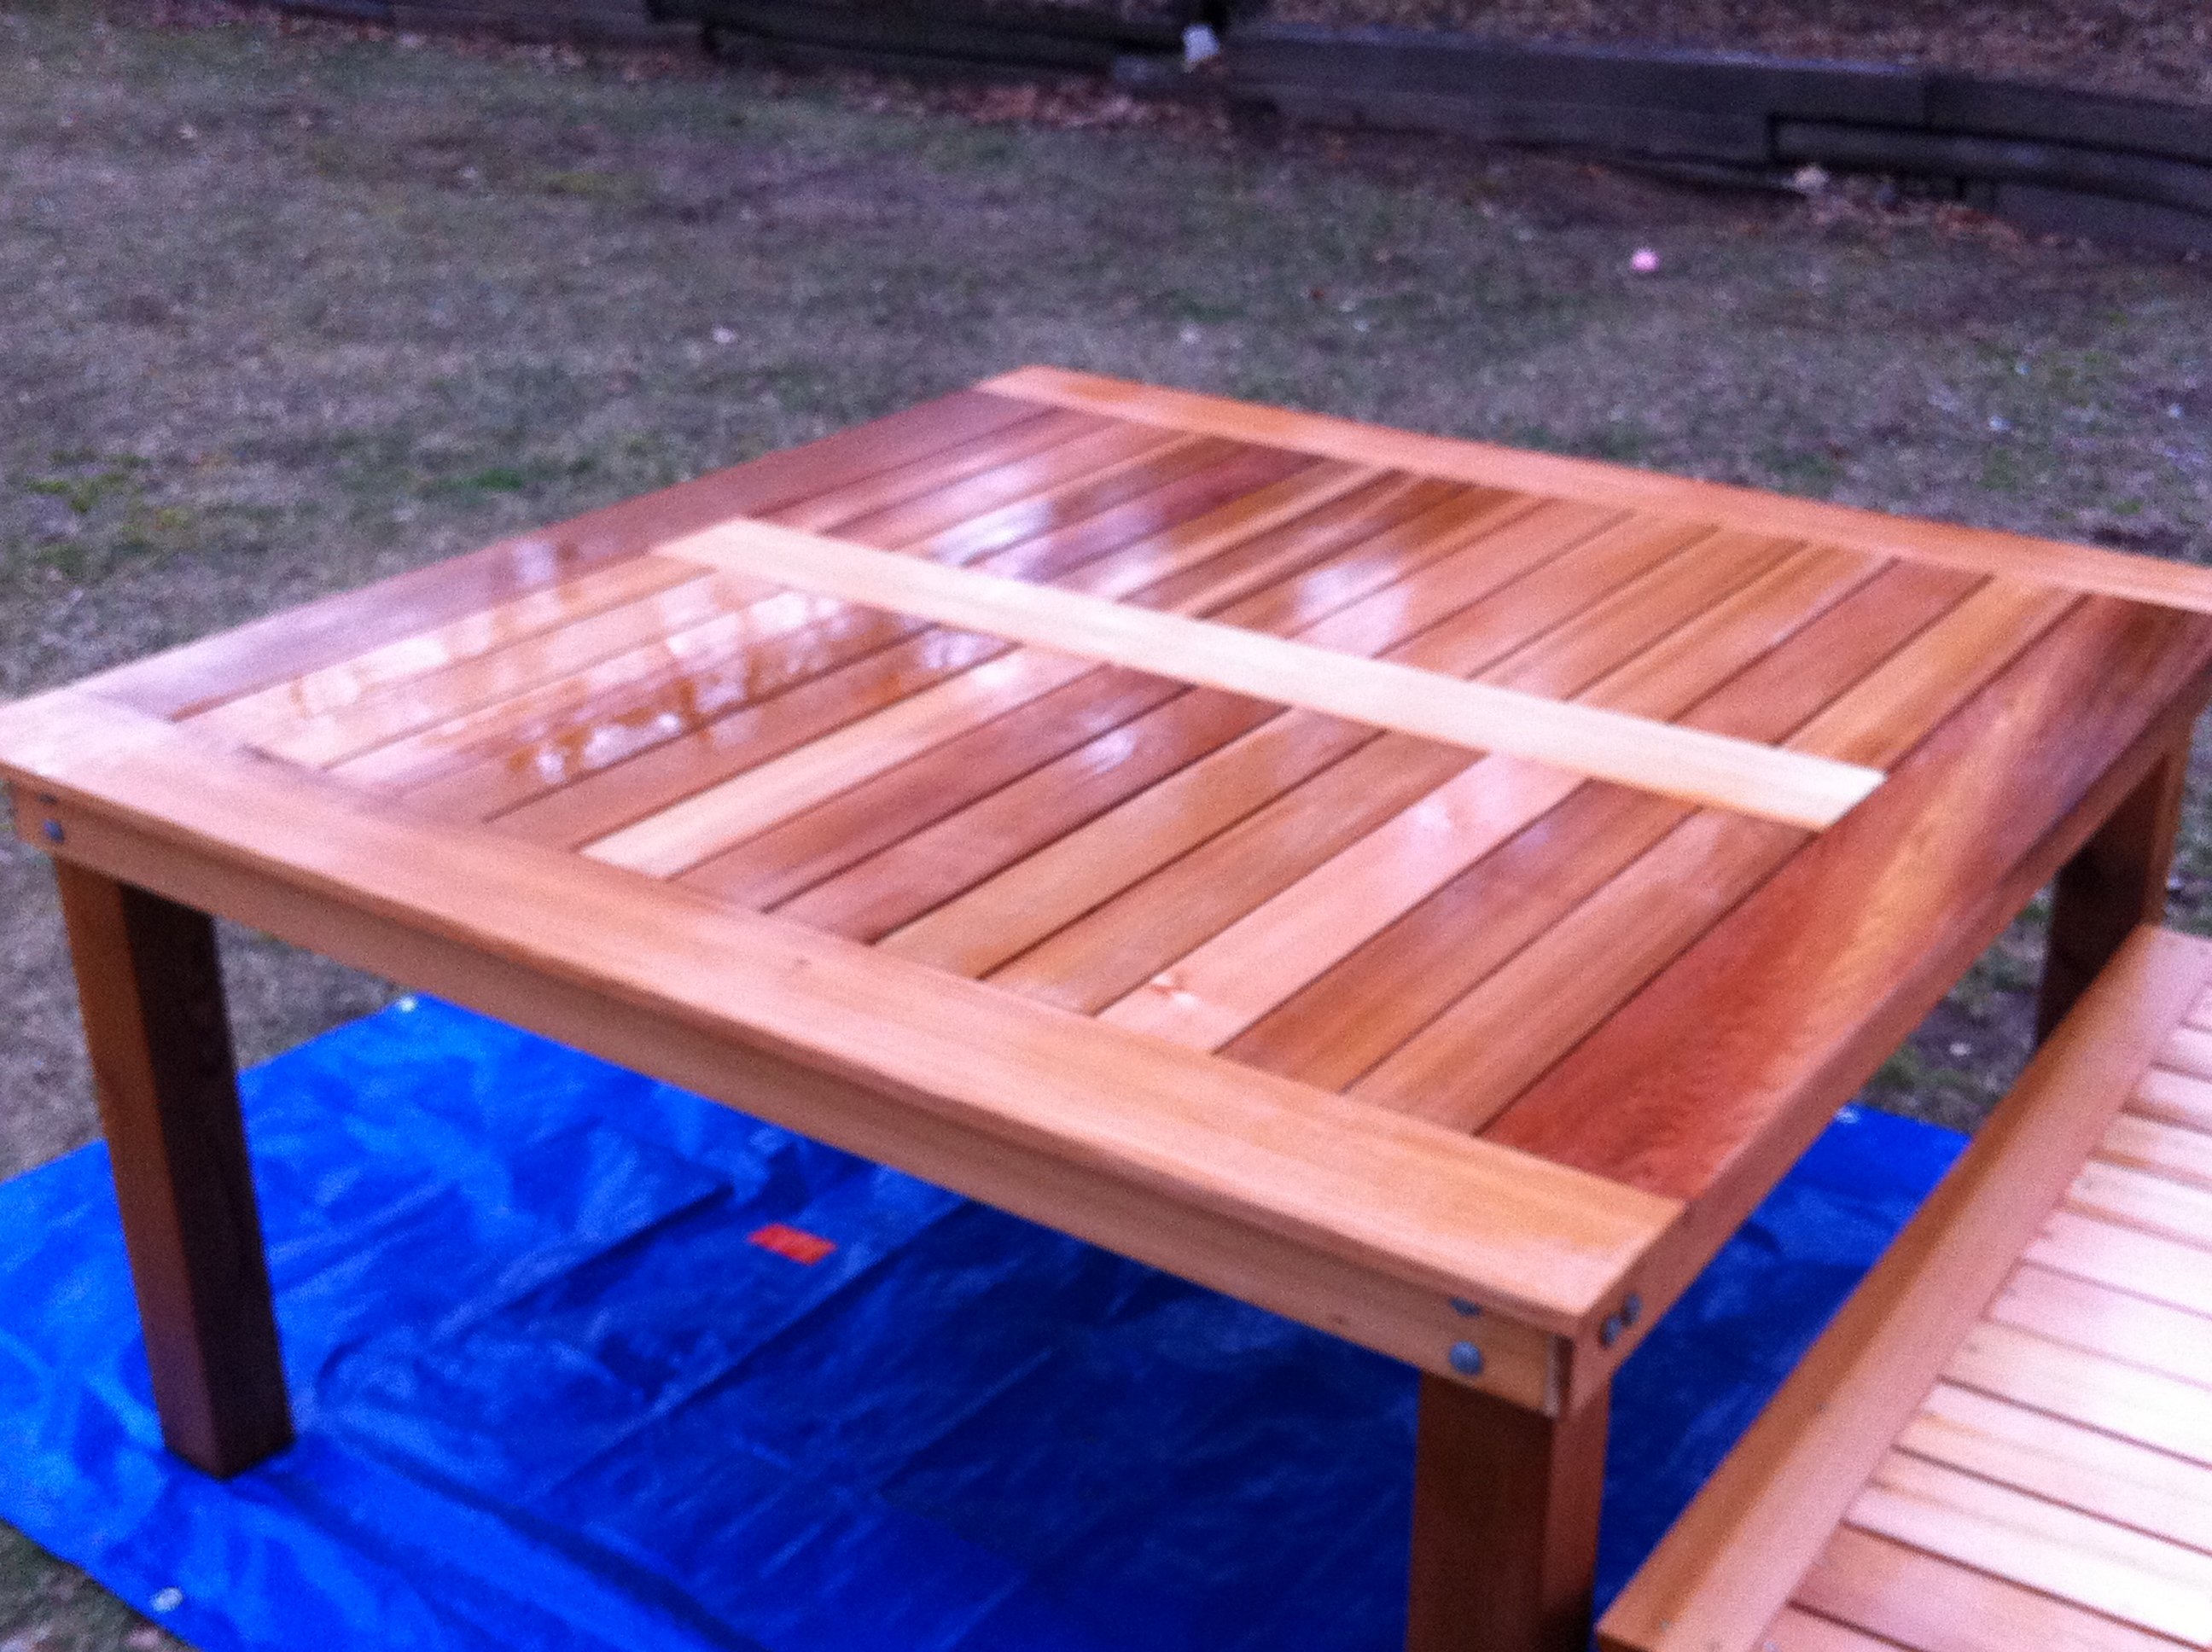
After seeing ewood's great table I decided to make one similar. I made my square table based on Ana's and ewood's basic designs. Thank you both. I also made a bench based on Ana's design.

Sun, 03/18/2012 - 16:36
That looks like it could handle a big and boisterous group. The cedar and the finish are beautiful.
Thu, 03/29/2012 - 07:37
I have a family of 7 (soon to be 8, I hope), and was trying to figure out how to fit us all on the rectangular table. This is the solution! I can simply make 4 benches to go with it! Thanks for the idea and the picture!
Mon, 04/09/2012 - 07:24
Love this table and your modifications to ewood's table. I was wondering what size are the legs on your table - I can't tell if they are 4x4s...which is sort of what I'd like to have on mine. And they are under mounted, which I love because I want to make ours with the ability to remove the legs for reduced storage space in the winter. If you could would you mind putting a few close up photos of how the outside corner came out and the underside of the corners. It would be much appreciated.
Mon, 04/09/2012 - 07:27
Love this table and your modifications to ewood's table. I was wondering what size are the legs on your table - I can't tell if they are 4x4s...which is sort of what I'd like to have on mine. And they are under mounted, which I love because I want to make ours with the ability to remove the legs for reduced storage space in the winter. If you could would you mind putting a few close up photos of how the outside corner came out and the underside of the corners. It would be much appreciated.

In reply to Questions :) by K_W (not verified)
Sat, 04/14/2012 - 13:35
Hi - sorry it took a little while to get back to you. Yes the legs are 4x4's. I used knotted cedar 4x4's for the legs and made them 29" tall. I wanted to be able to disassemble the table and put it away for winter, so I attached the legs using carriage bolts, 2 per side (4 total per leg). I drilled holes using a pilot bit, then used a spatter bit to make the larger holes for the carriage bolt.
I didn't bother to counter sink them, but if I made another I think I would try that to make a more polished look. The legs are sturdy, the table doesn't wobble at all, but I am sure that someone with more furniture building experience might have a different/better idea.
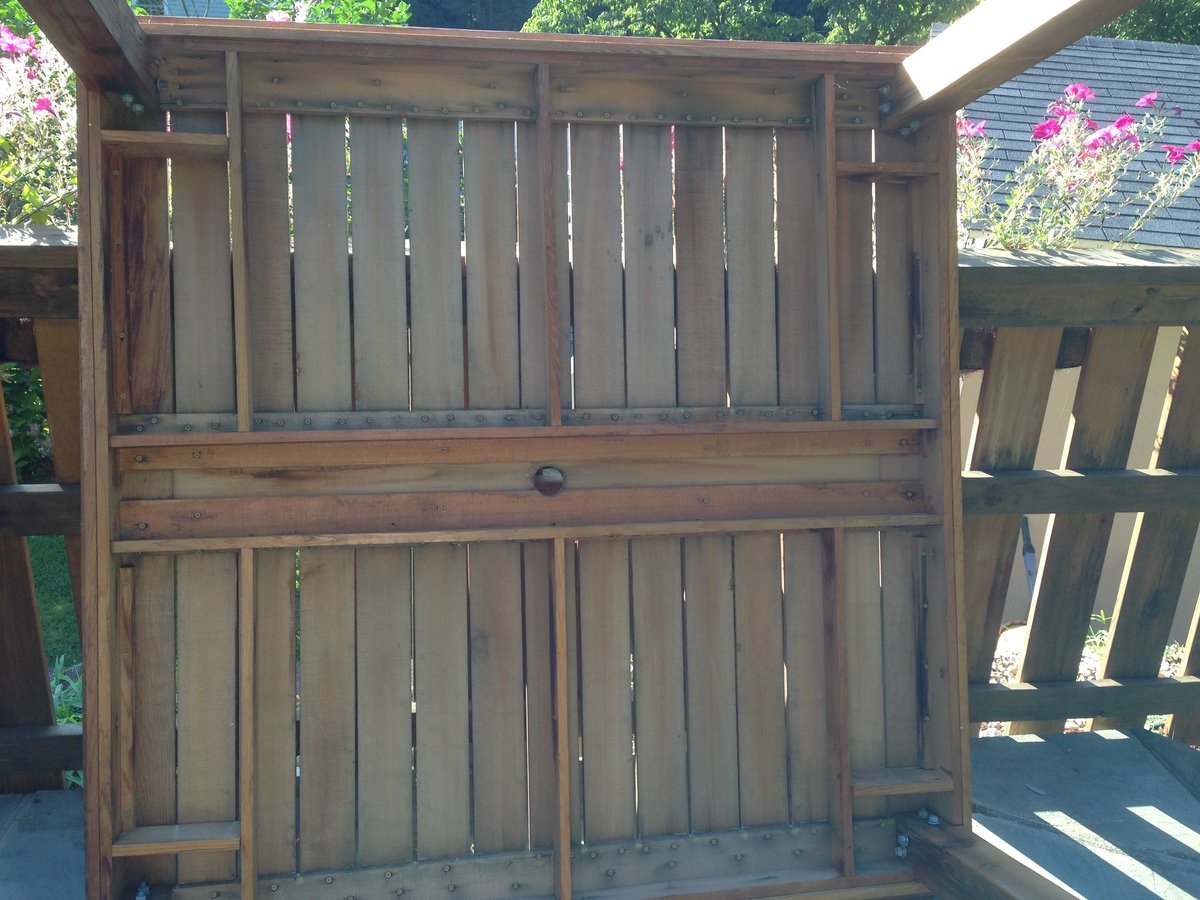
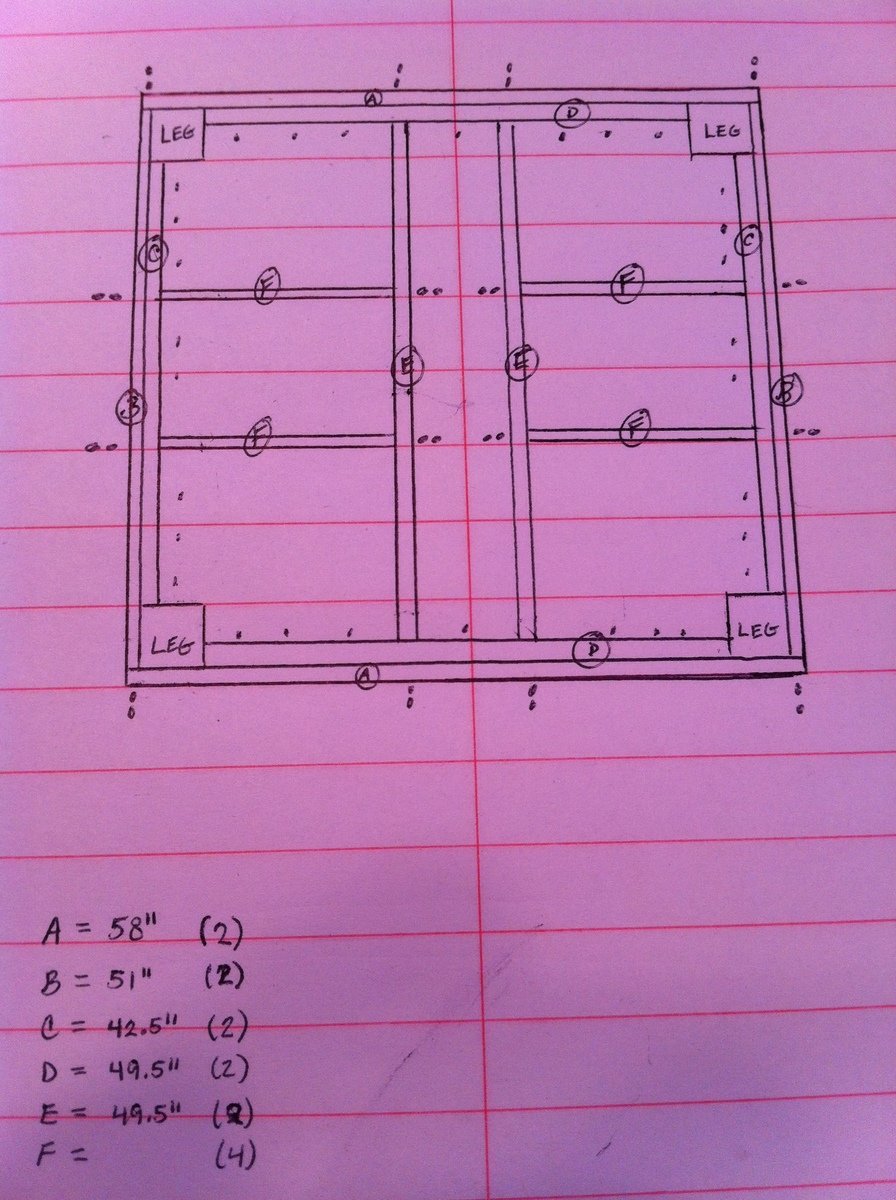
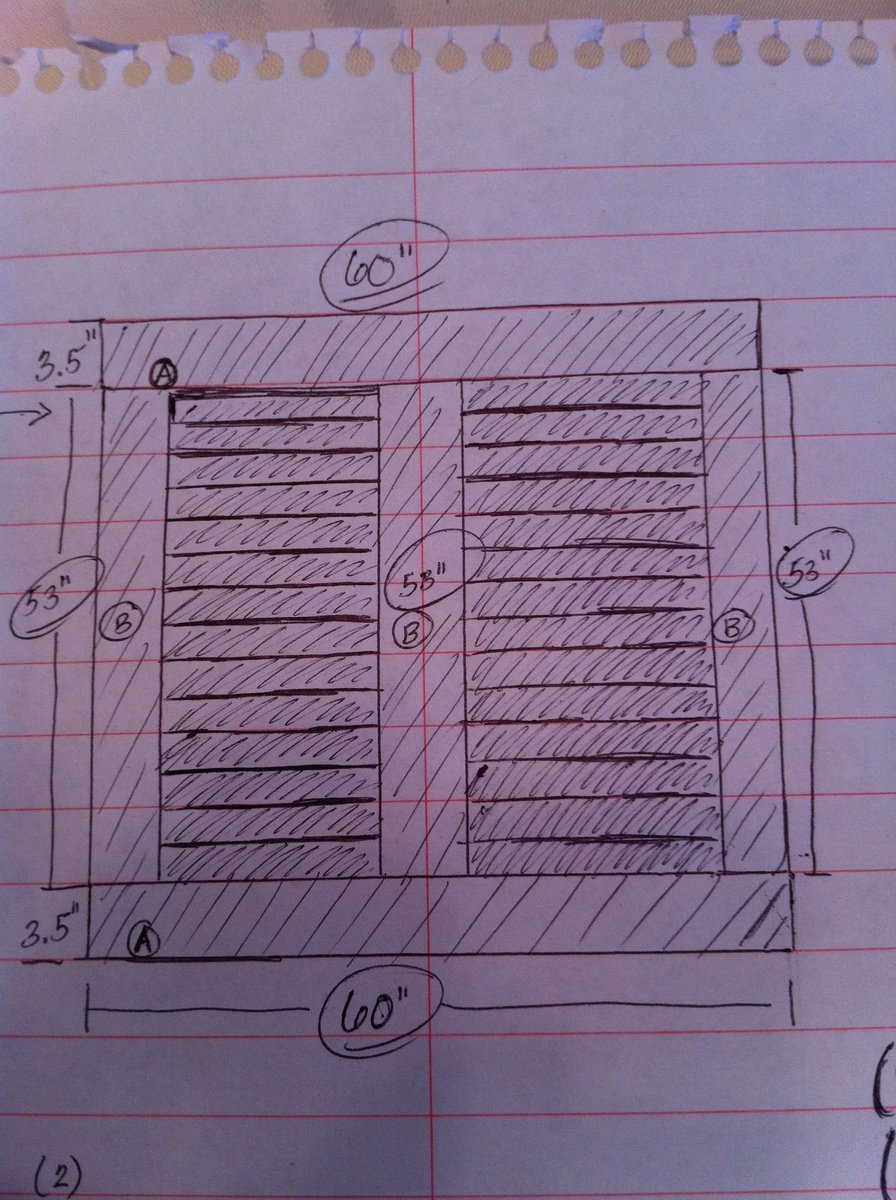
I've added a couple more photos showing the corners, outside and underneath. I've also added my very basic plans that I used to make the table, one of these days I will study Ana's post of how to use sketch-up, until then this is what I worked with.

Wed, 06/06/2012 - 09:26
Can you tell me what size (width) boards you used on the frame pieces of the table, and what size on the inner boards? From your diagrams, it looks like the frame is made of 1x4s, but the inner pieces look smaller. Thank you !!!
Your table is absolutely beautiful. It looks like a very high-end piece of furniture. One of my favorite things is how the carriage bolts are installed -- I wouldn't change a thing on them!
Tue, 07/30/2013 - 16:36
Sorry it took so long to reply - I didn't see your post. So far the table is holding up well.
You're right, the top is made from 1x4's, including the inlaid slats. To support the top, I cut 1x4's down to 1x3's so they remain hidden by the side 1x4's of the frame.
Tue, 10/16/2012 - 18:02
Love the table - looks absolutely fantastic! I have been looking for a decent square outdoor table for ages and this one certainly fits the bill.
Can you please add a photo of the underside of the table and advise how you fastened inner boards on table top. Thanks.
In reply to Question by Aussie Paul (not verified)
Tue, 07/30/2013 - 16:40
I added a new photo of the bottom. Hopefully this will help show how I attached the top. I have a number of additional photo's I can send to you if you like - this site limits the number of photos I can add.
Everything is attached from the bottom to hide the screws. I used a kreg jig and it helped so much - i really recommend it.
Wed, 08/14/2013 - 12:35
I love the look of this table, man - I think I'm gonna steal some ideas from this.
I have a question about your top, though. The slats look to be 1x4s, which I can understand, but the edges seem to be a bigger size.
Did you use 1x6 boards for the edges? 1x8s? Something else?
Thanks for your help.
Mon, 09/02/2013 - 11:03
Thank you - please take any ideas from it that you can. That is what I love that about Ana's site. You can take these great ideas and make them fit your own style...
You're right - the table top is made of 1x4's and 1x6's. When i put the top together I made the frame first. Then I added the exterior 1x6's. Next I added the center 1x6. Lastly I cut each 1x4 to size and added them.
Sat, 05/17/2014 - 07:15
This is an amazing table, it is beautiful! I am somewhat new to wood working and was wondering if there was a material list? I plan on creating this in AutoCAD first, so I have a visual to work off of. Also what did you use for spacing in between the boards or what was the allowance of space.
Thanks again, your work is beautiful!
Wed, 06/17/2015 - 11:48
Great table…any chance you can share the plan and material list? Cheers

Wed, 04/22/2020 - 20:37
In looking at the plans and the underside of the table, there are some measurements missing that make it a little hard to decipher. It would be good to know the lumber sizes e.g. 1x4x8 etc. the underneath side seems to have some additional boards that don’t seem to be in the drawing. I was just wondering if it might be possible to get some additional details?
Sun, 05/24/2020 - 08:05
This is a beautiful table and I'm going to try and replicate in a rectangular version. Primary question I have is what length screws you used to affix the framing pieces underneath to the top side so that the wood doesn't split and that the screws don't pop thru the top. Any help you can provide would be appreciated, if even you still look at this page. Thanks in advance!
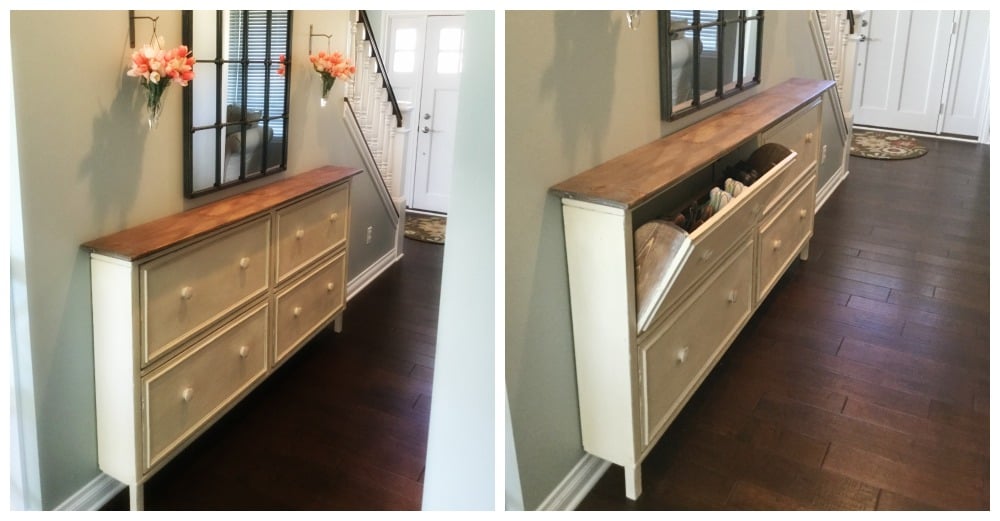
We used the shoe dresser instructions with some modifications to make it longer

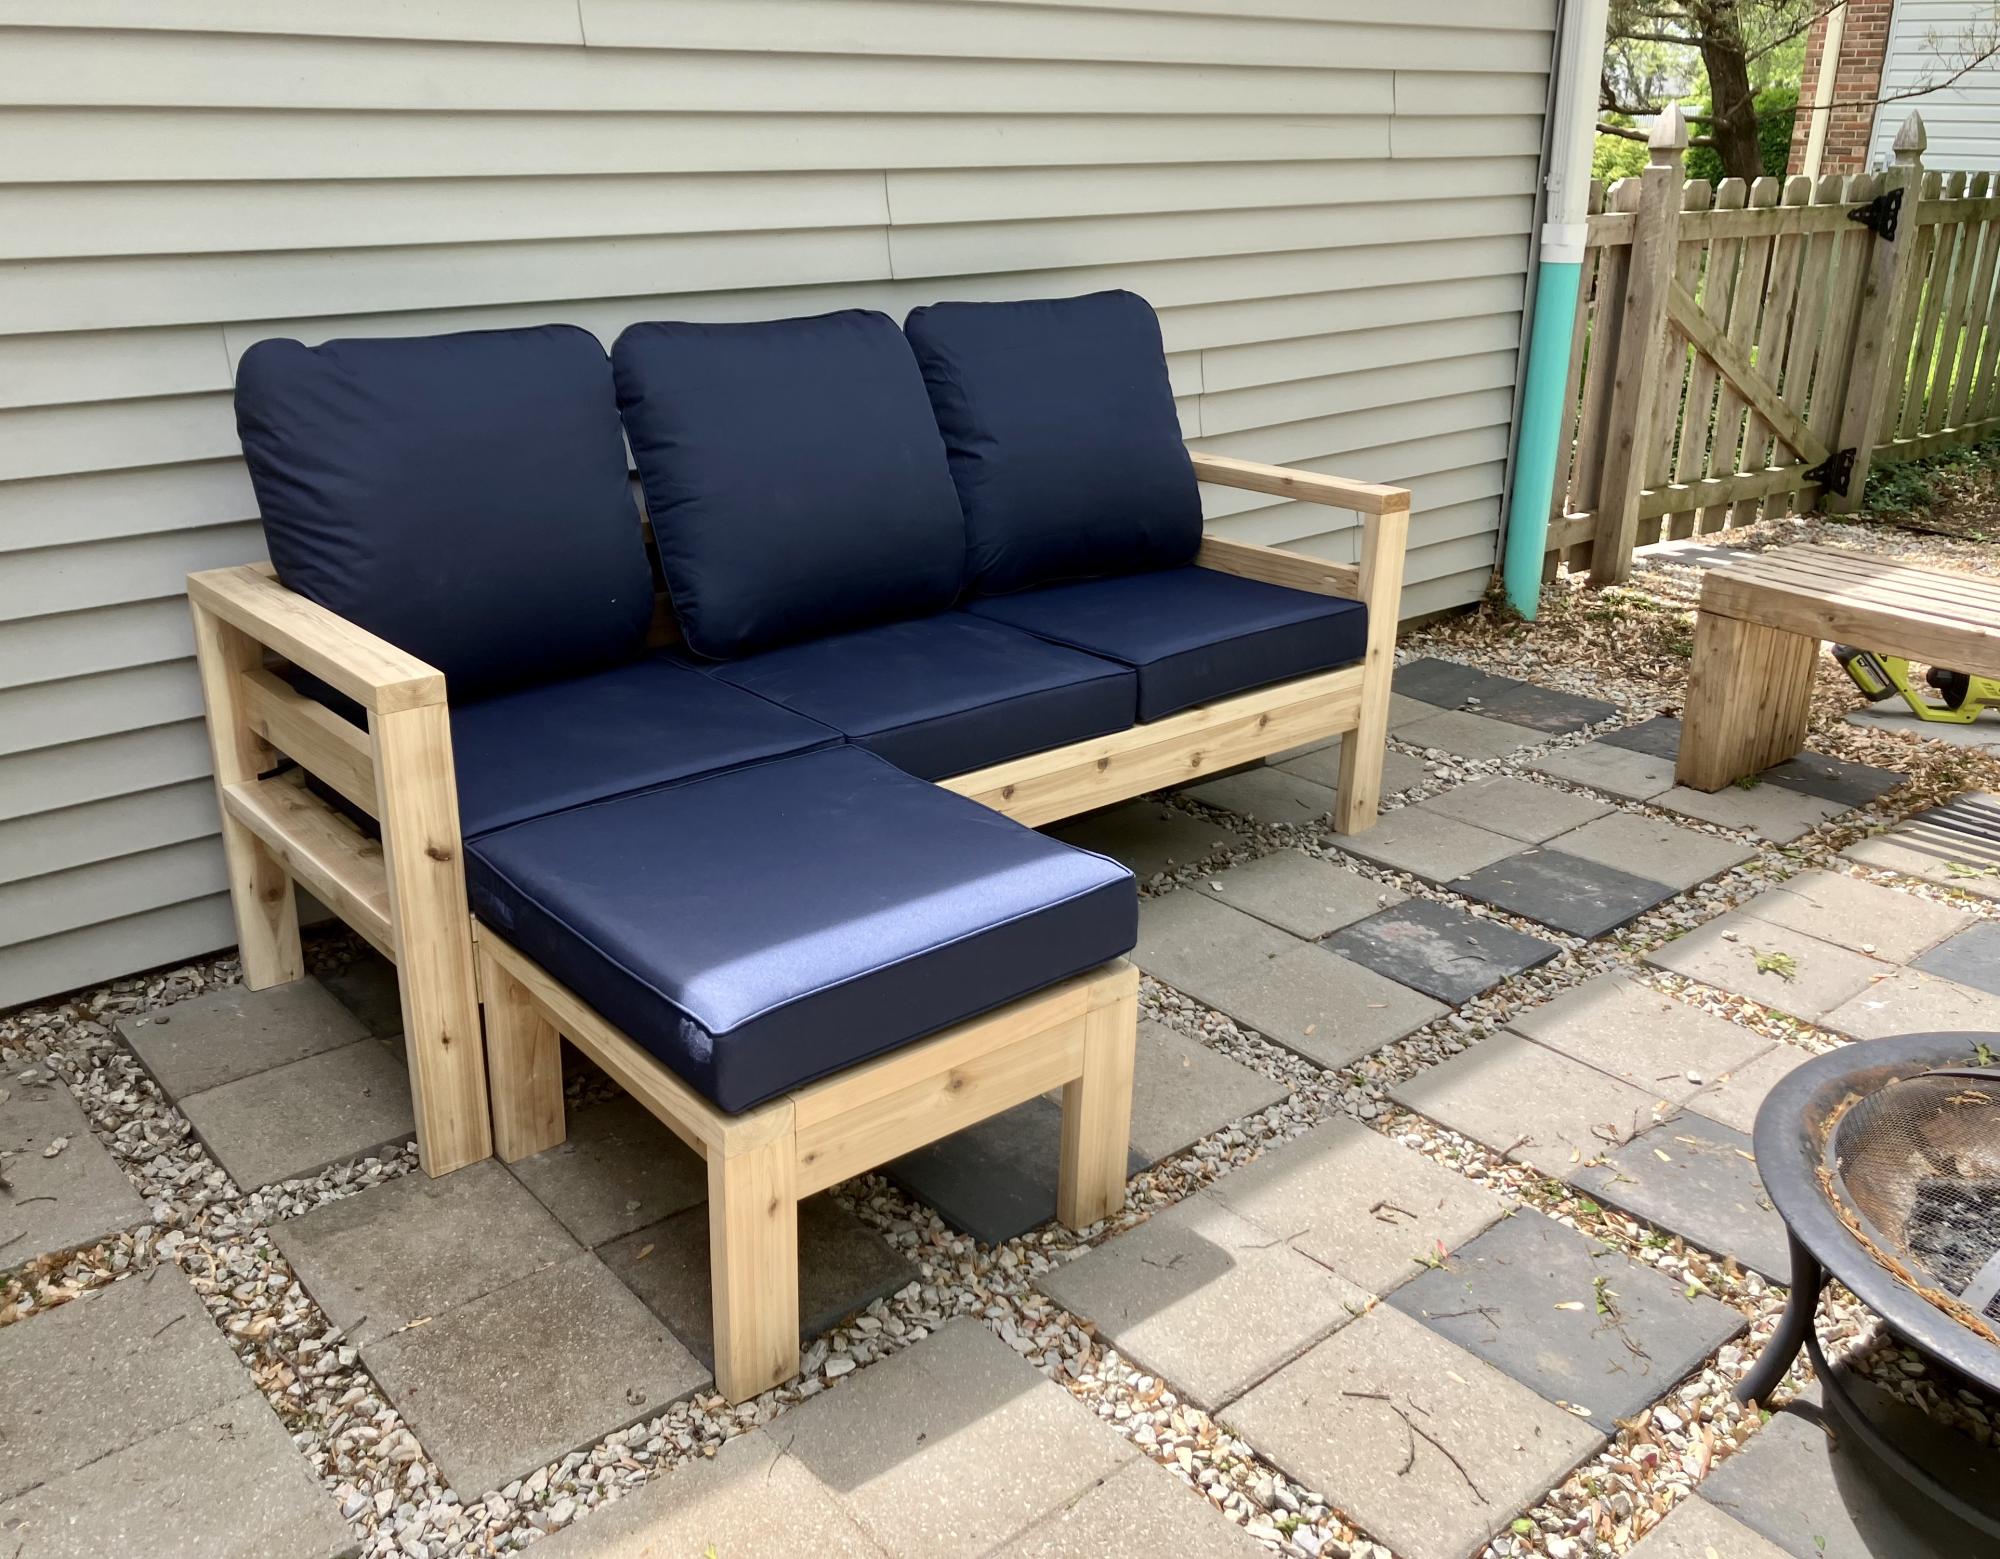
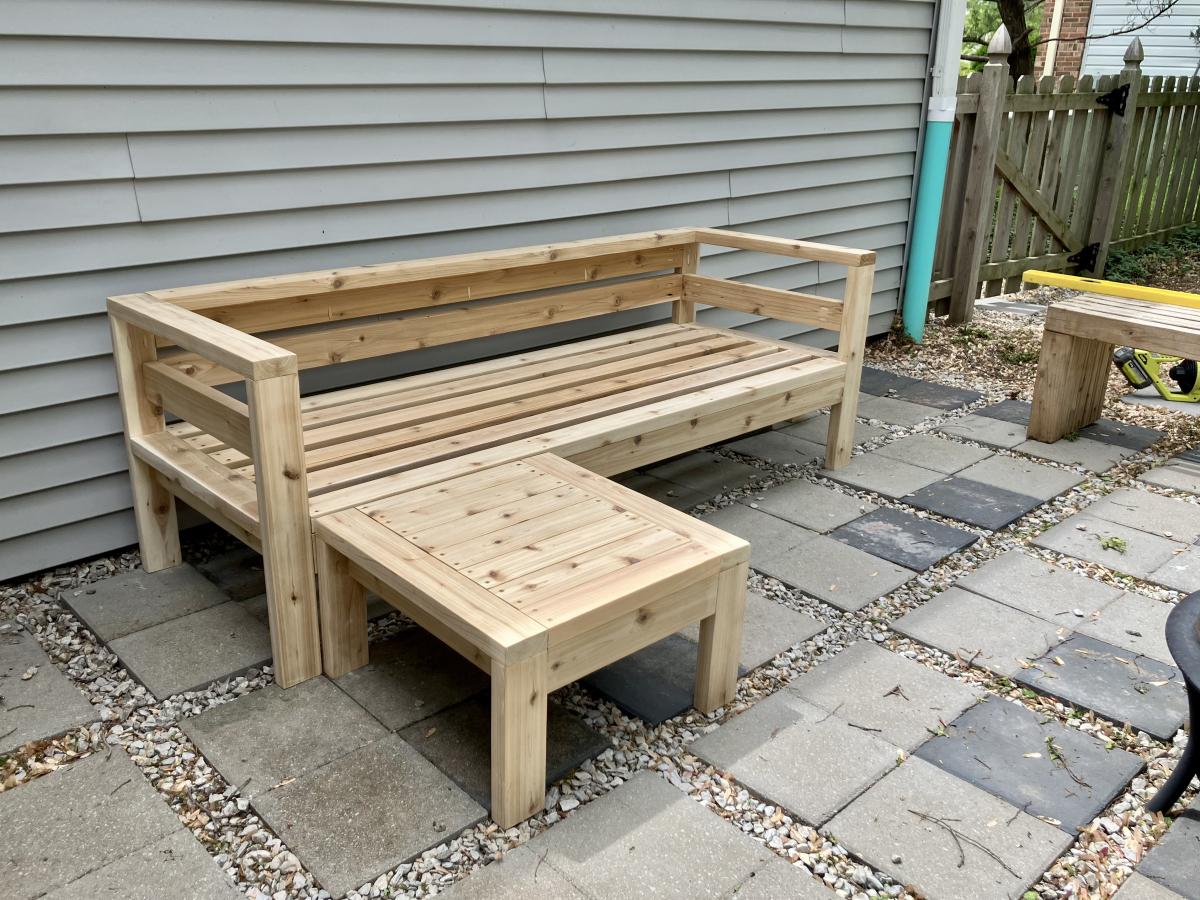
I used pocket holes to hide the screws. I made an ottoman out of the outdoor coffee table plans to my dimensions that can be used as a coffee table when we need it.

Comments
Ana White Admin
Wed, 10/06/2021 - 10:12
Fantastic planter!
That looks amazing, way to go!