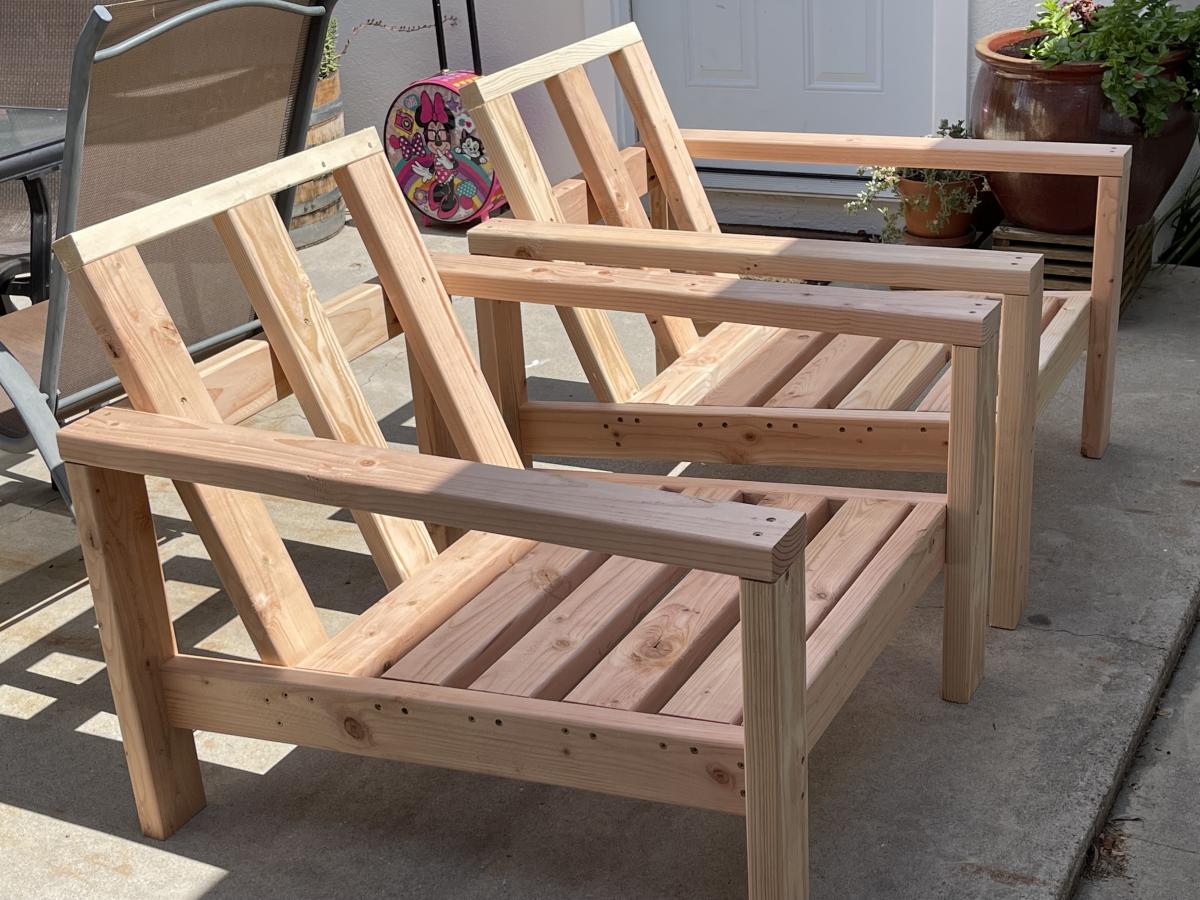
Modern outdoor chairs
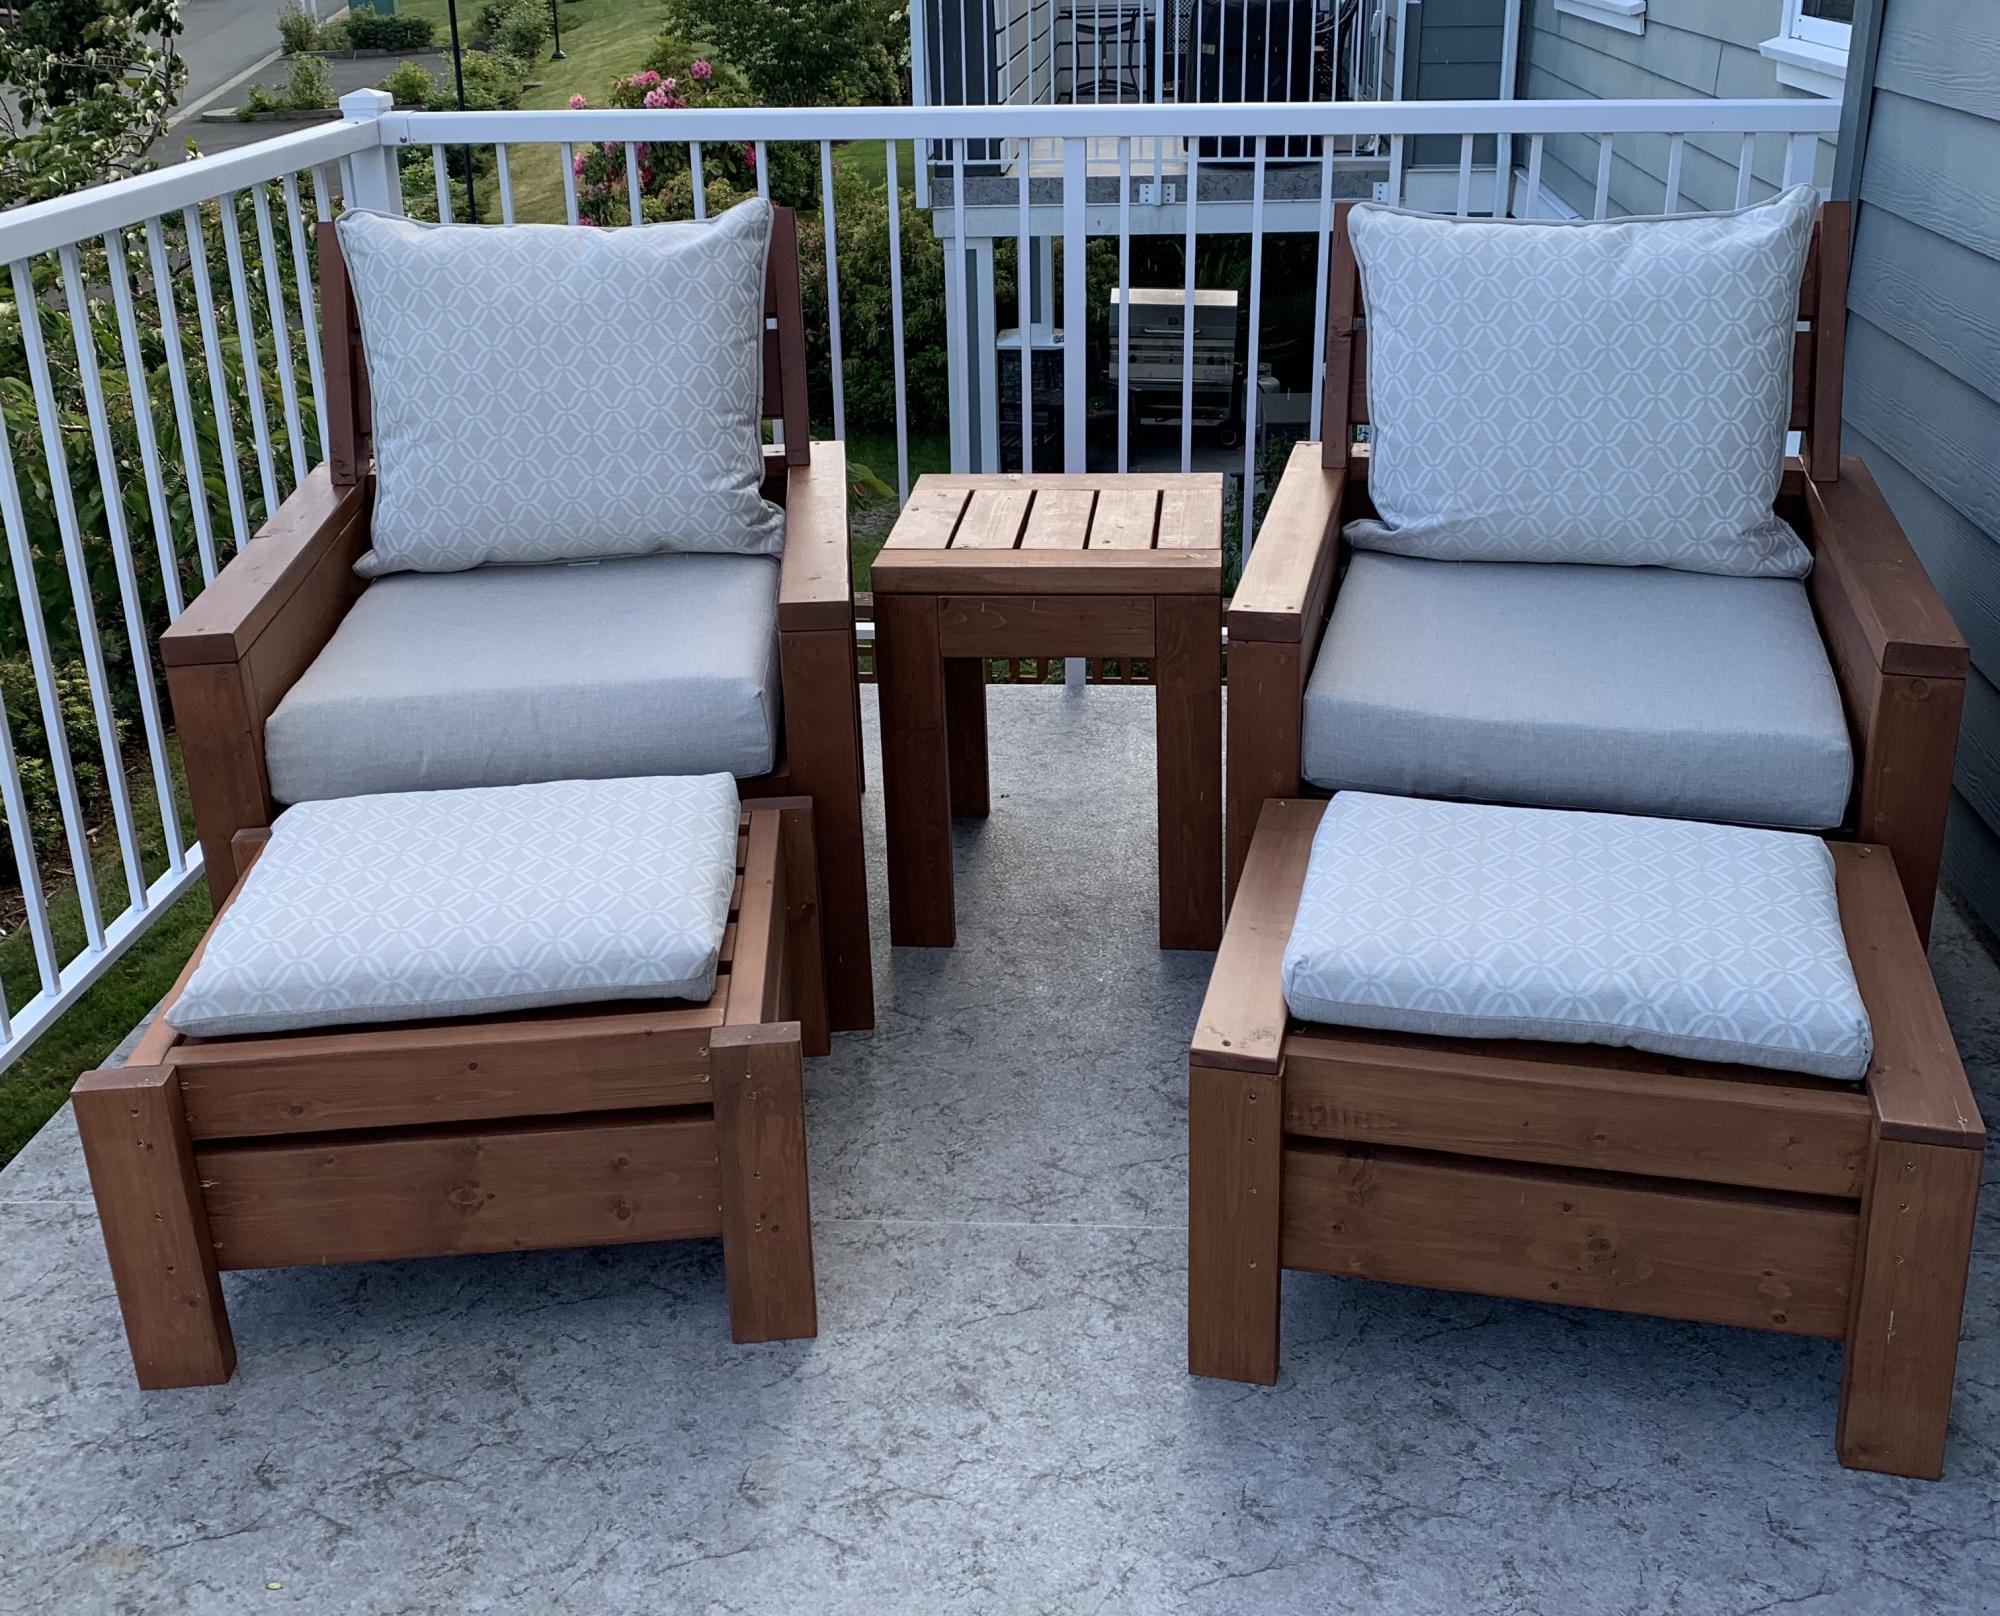
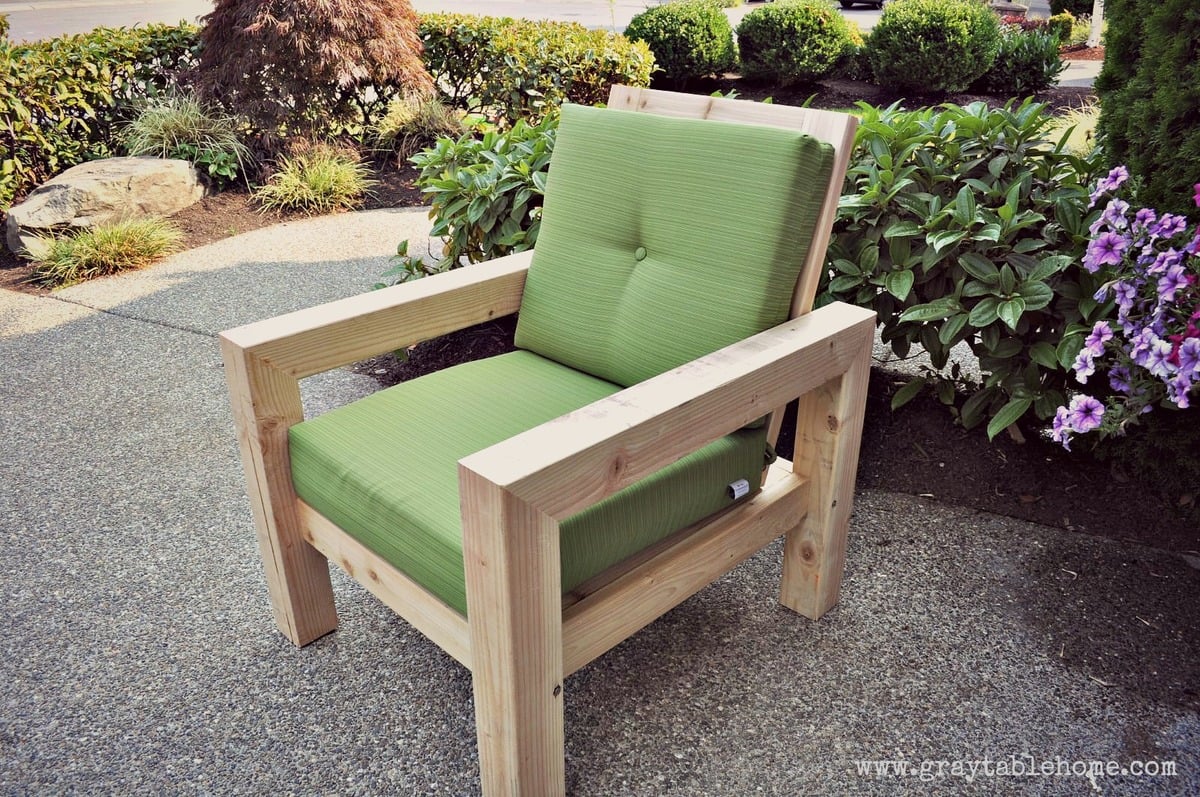
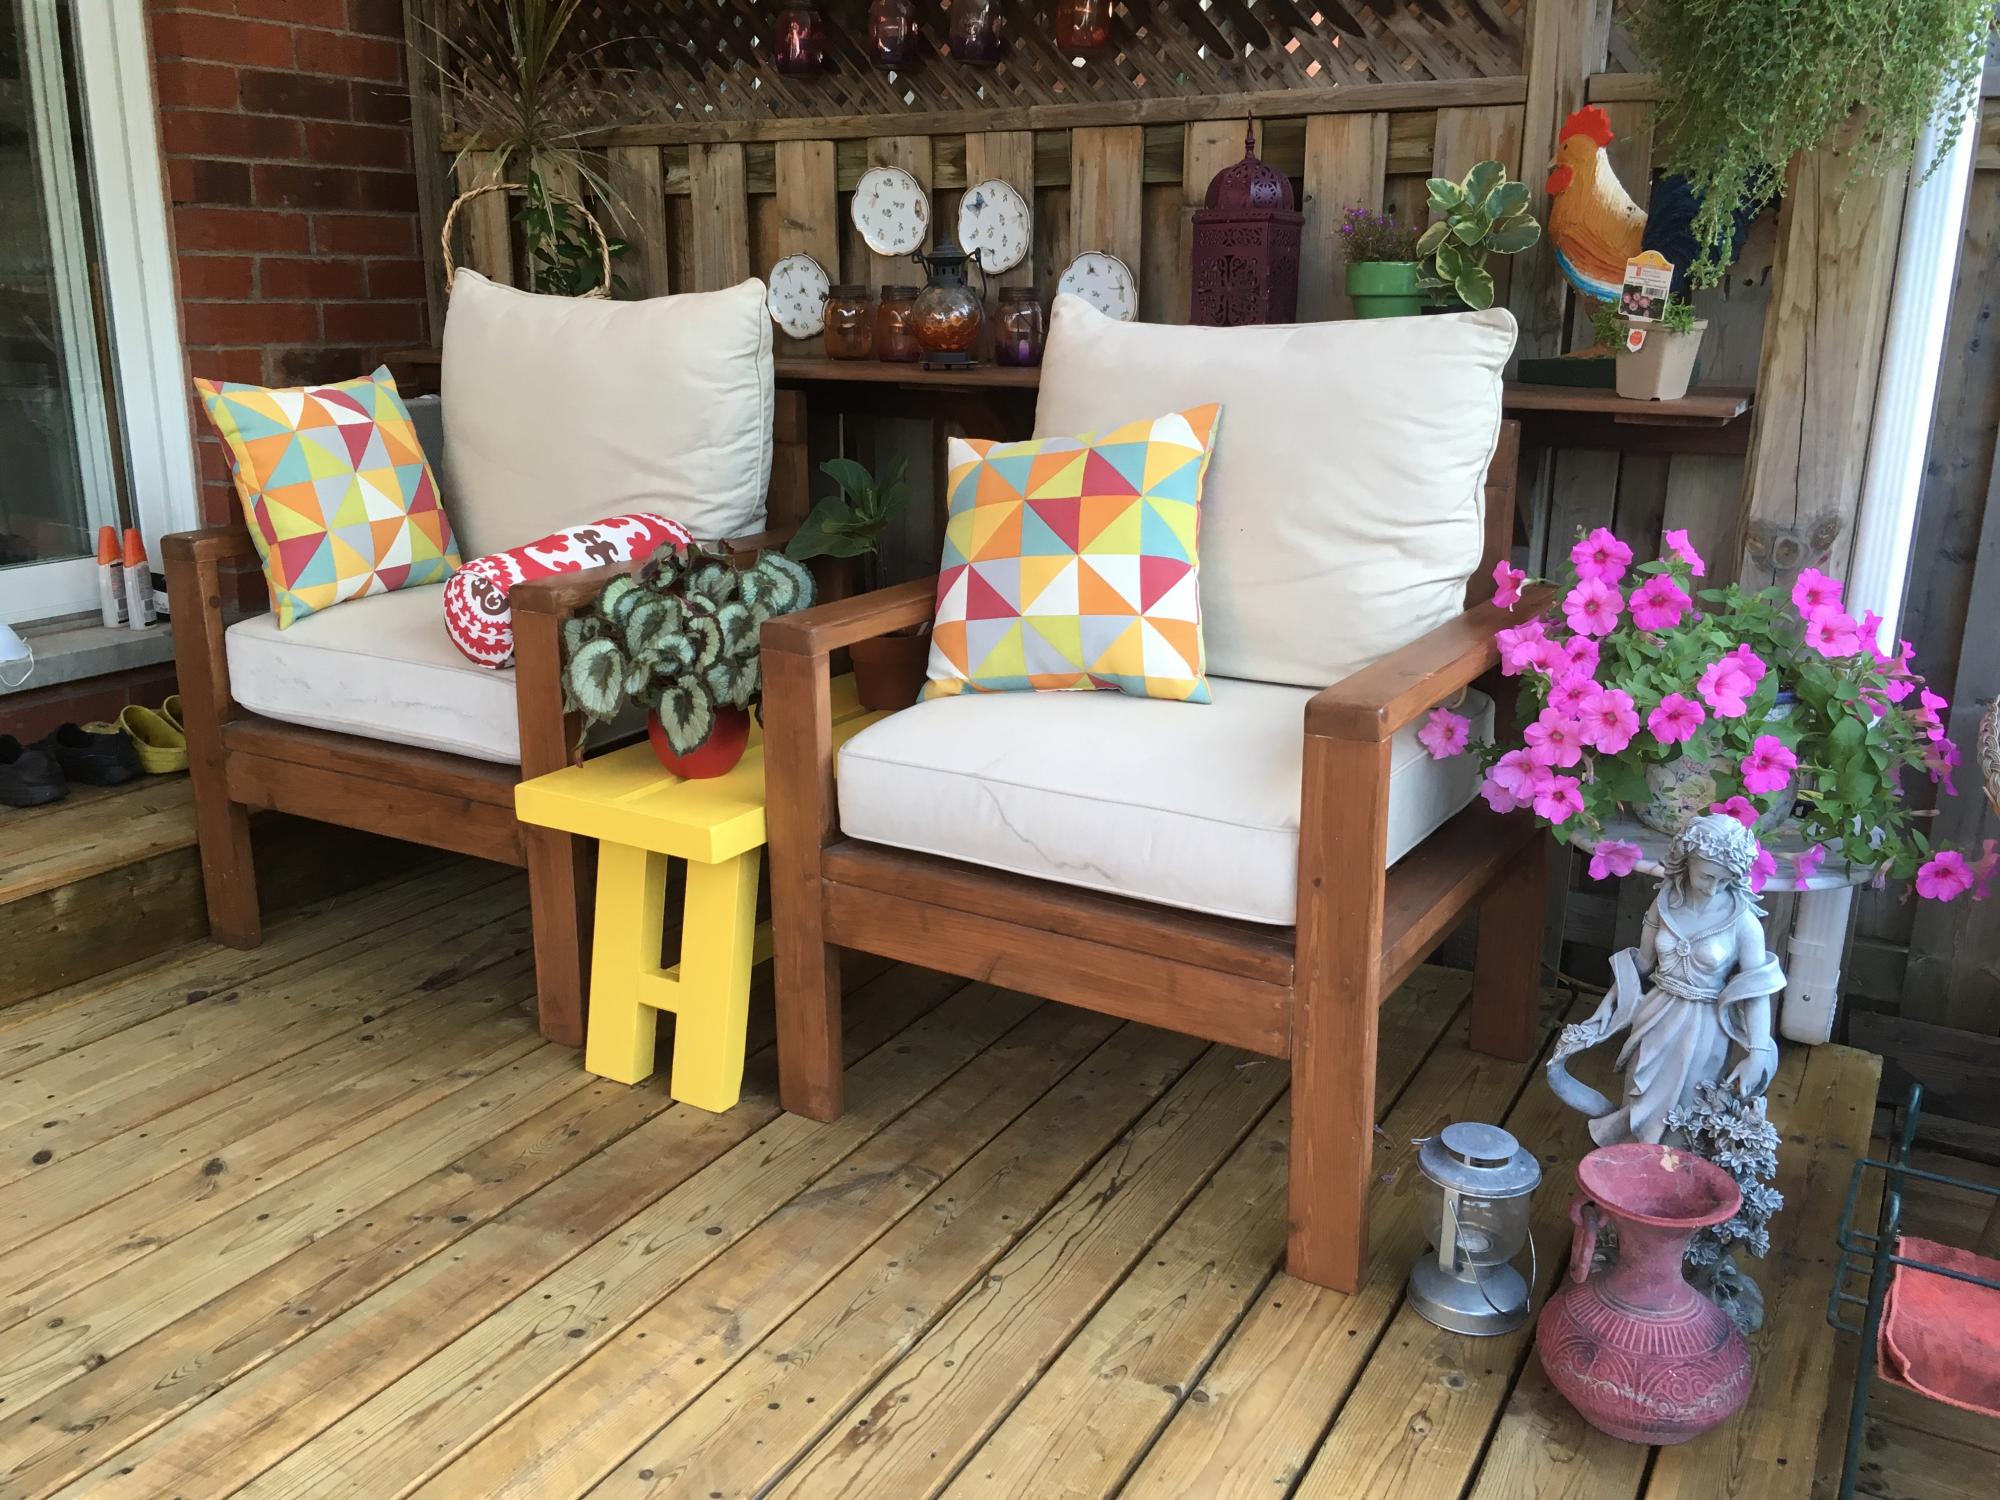
Love these plans! Made a modification and added backs to the chairs. Also, built ottomans to match the chairs which can also be used as additional seating.
Many compliments on the set. Thanks Ana!
Built from Plan(s)
Love these plans! Made a modification and added backs to the chairs. Also, built ottomans to match the chairs which can also be used as additional seating.
Many compliments on the set. Thanks Ana!
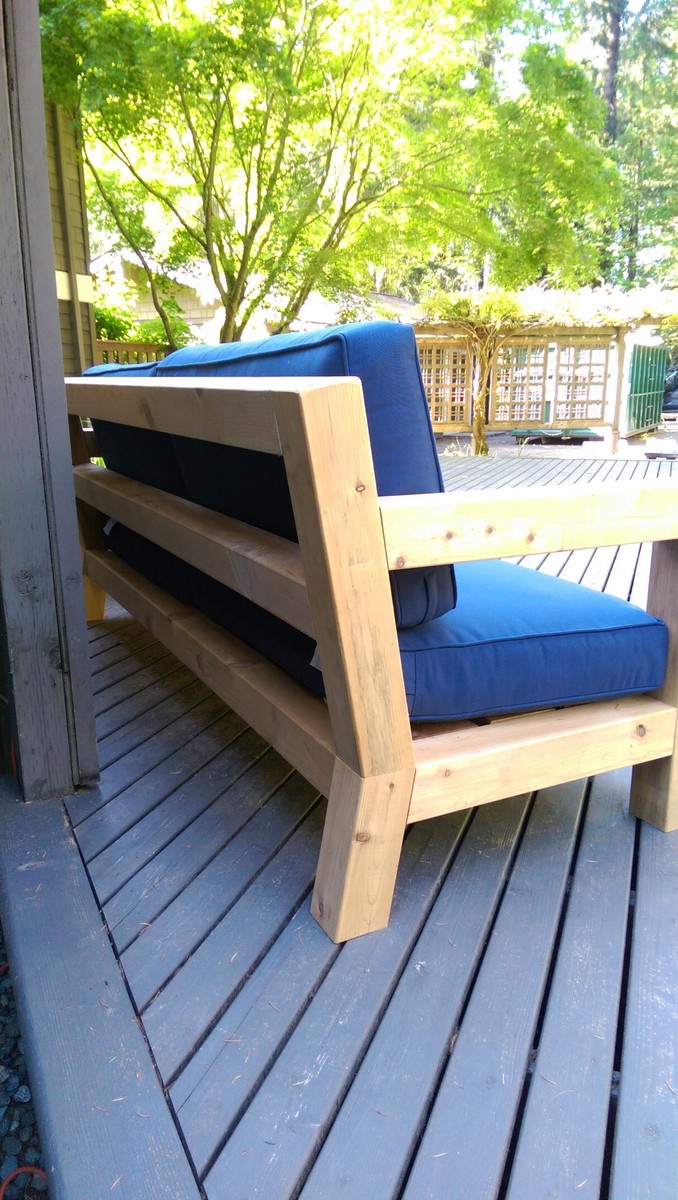
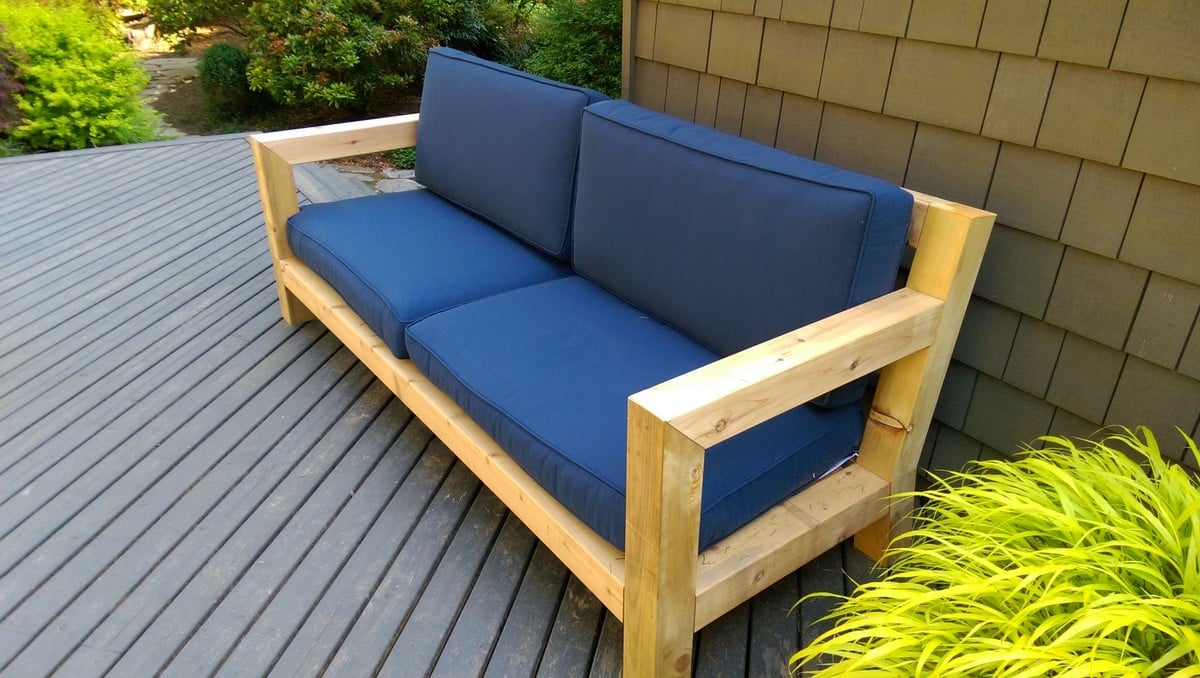
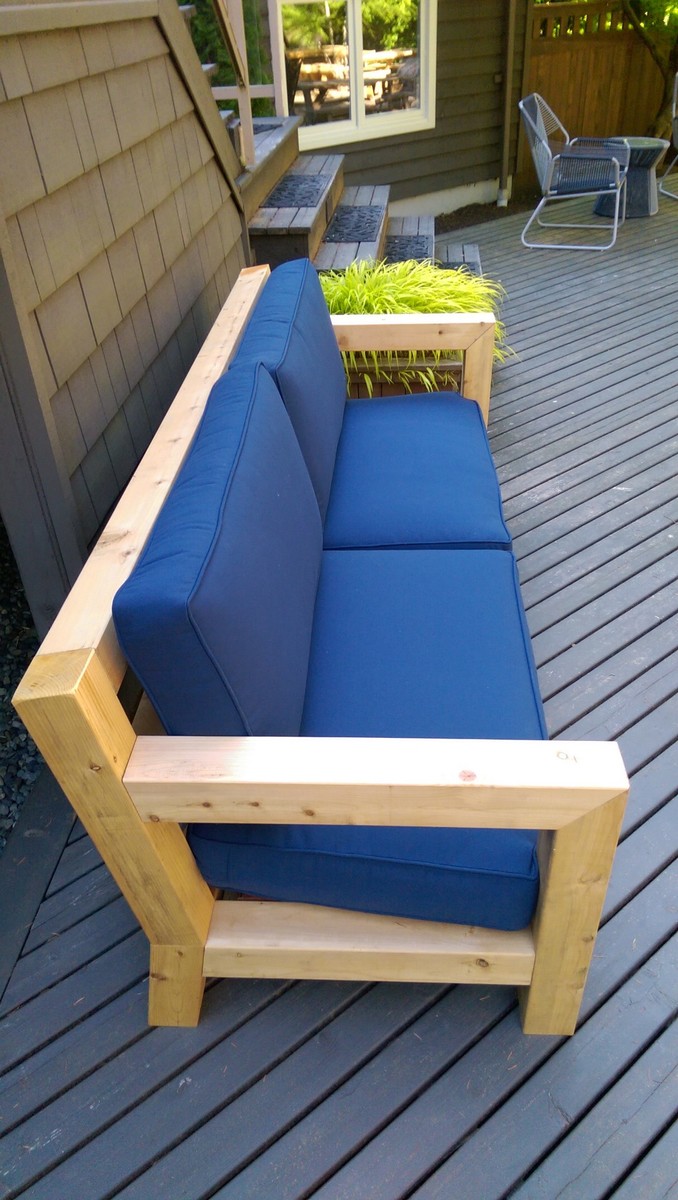
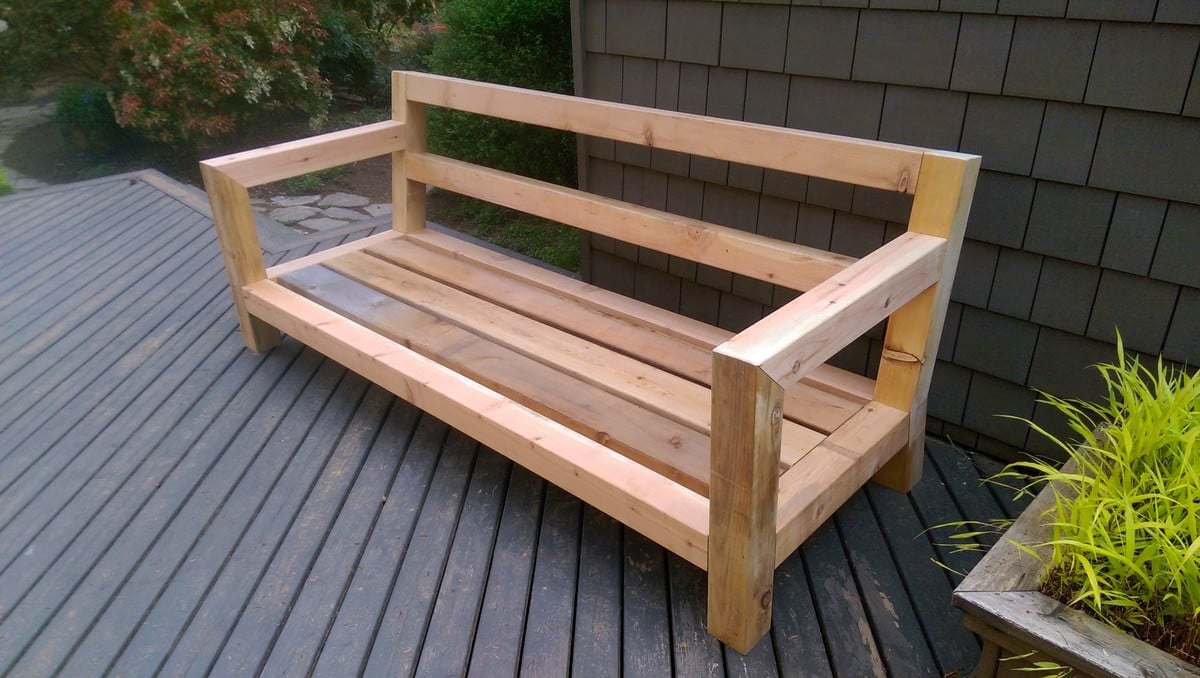
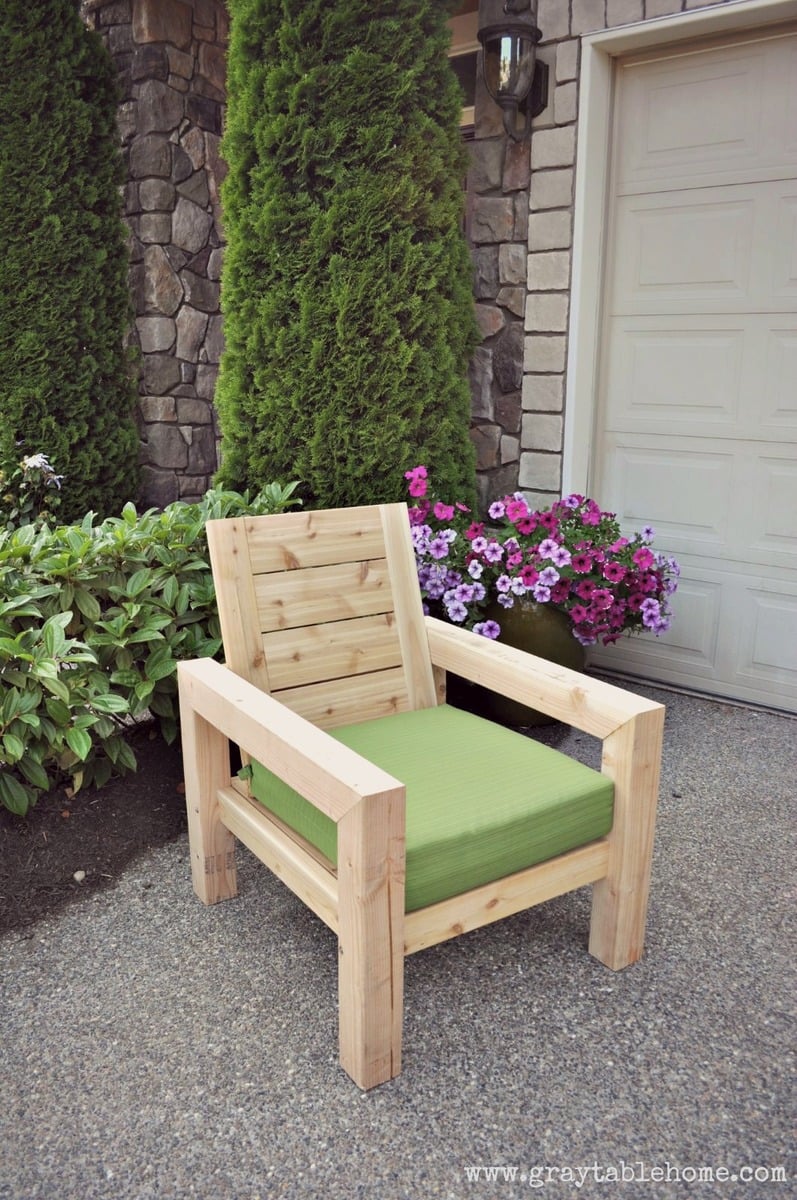
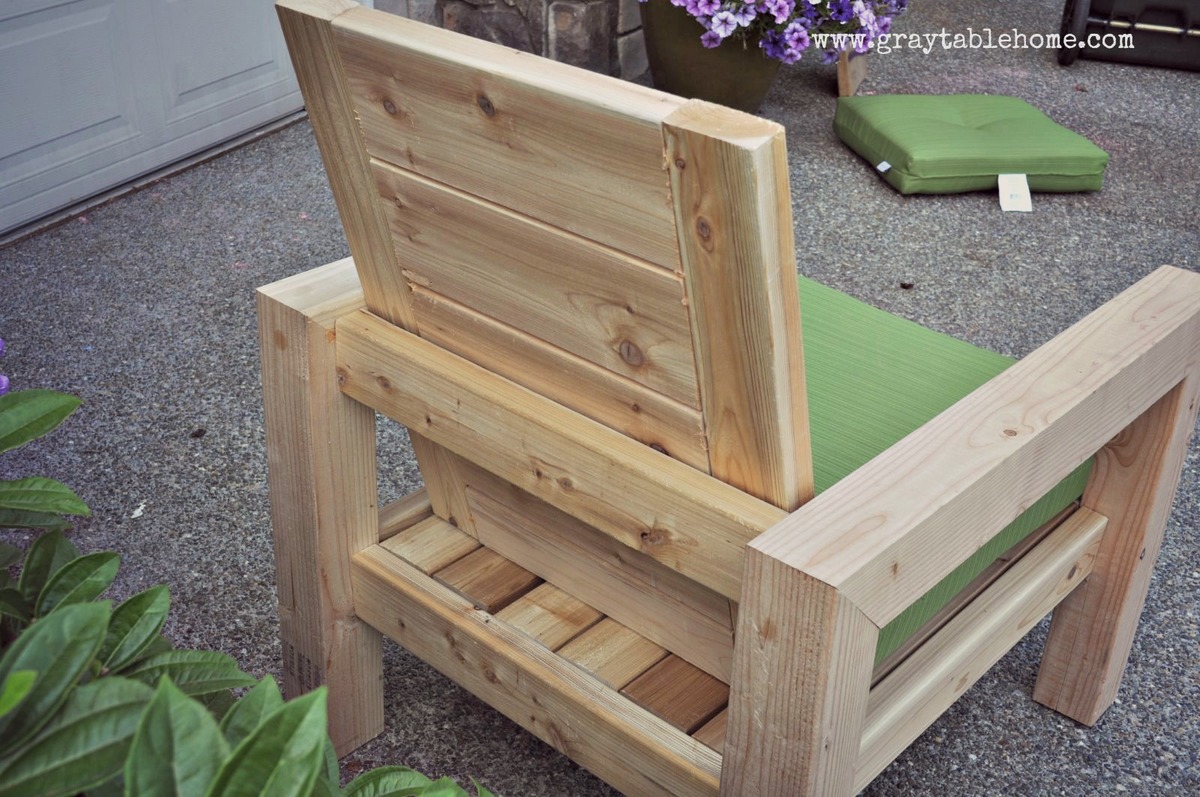
I was in love with the RH Merida set because of its clean lines and modern style. Also, the plan seemed simple enough that I could re-create it without a pattern. The only thing that I did not like about it is the lack of arms. I really like to have a place to put my arm or my beverage :) - so I added arms to the design.

Thu, 05/30/2019 - 18:45
It’s beautiful! Do you have a set of plans that you might be willing to share?
Wed, 05/20/2020 - 10:45
This is Awesome. I'm halfway in the middle as i thought I could complete without plans. Do you have any plans could share. Please....
Fri, 06/19/2020 - 15:54
were you able to get plans? I would LOVE plans too! we want to try and re-create this and would prefer NOT to get stuck!
Fri, 06/19/2020 - 15:55
Would LOVE to get plans, would even pay for them! Found rough drawings online but they are chicken scratch and hard to interpret!

I adapted the plan for the Shoe Rack Bench to give it multiple levels and allow it to serve as an entryway table in addition to a shoe rack. I used 2 x 10's for the project.
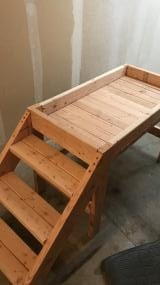
My dog loves to people watch all day while I'm at work and she needed a new bed so I took the plans for the lower platform and modified them so it would stand alone. Took the platform and put it on the bottom so that her bed would sit inside instead of on top where she could more easily fall off.
I tried building without PH screws at first and all I ended up with was a lot of cracked and wasted lumber. Got the PH jig and finished the whole build myself in 2 hours. Sanding, staining, and sealing tomorrow but I'm just so excited about it I had to post now!
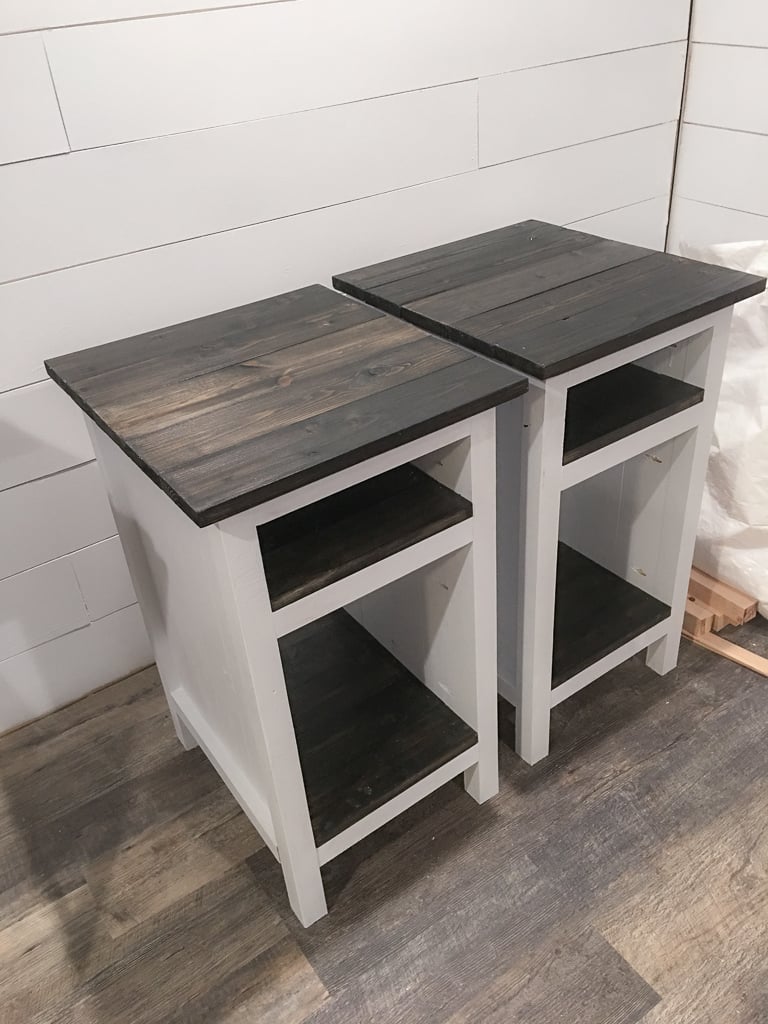
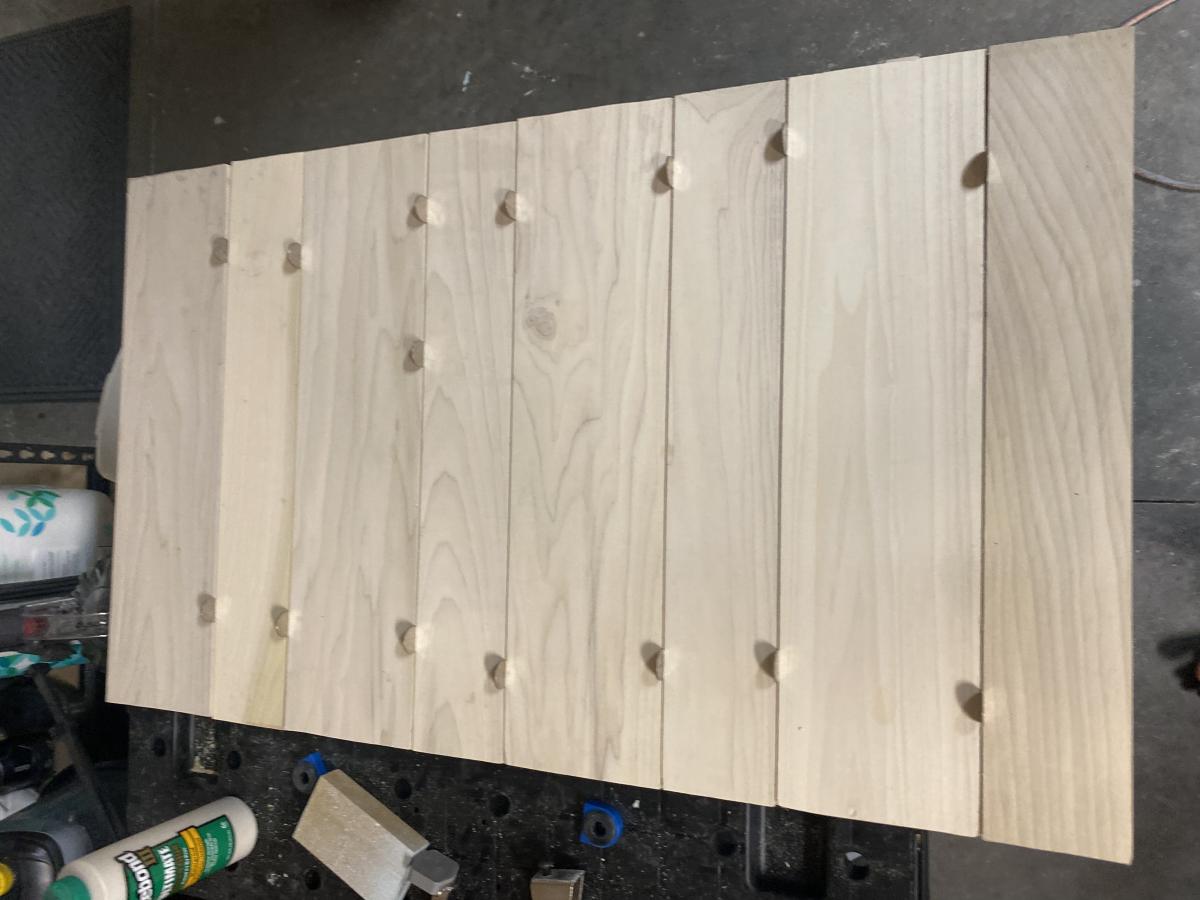
These are made from the three drawer plans but modified the size to meet our needs and used planks for shelves instead of drawers. Painted white and black gel stain.
UPDATE FROM ANA - We have received MANY requests for this plan and have created a plan inspired by this post here.
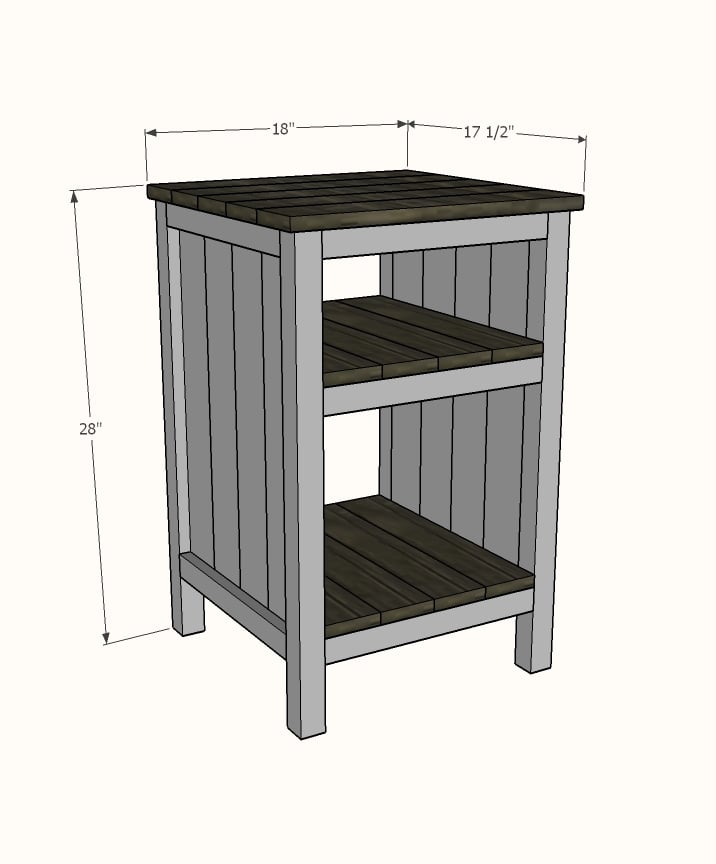
Shopping List (for ONE bedside table) + Tools
Cut List (for ONE bedside table)
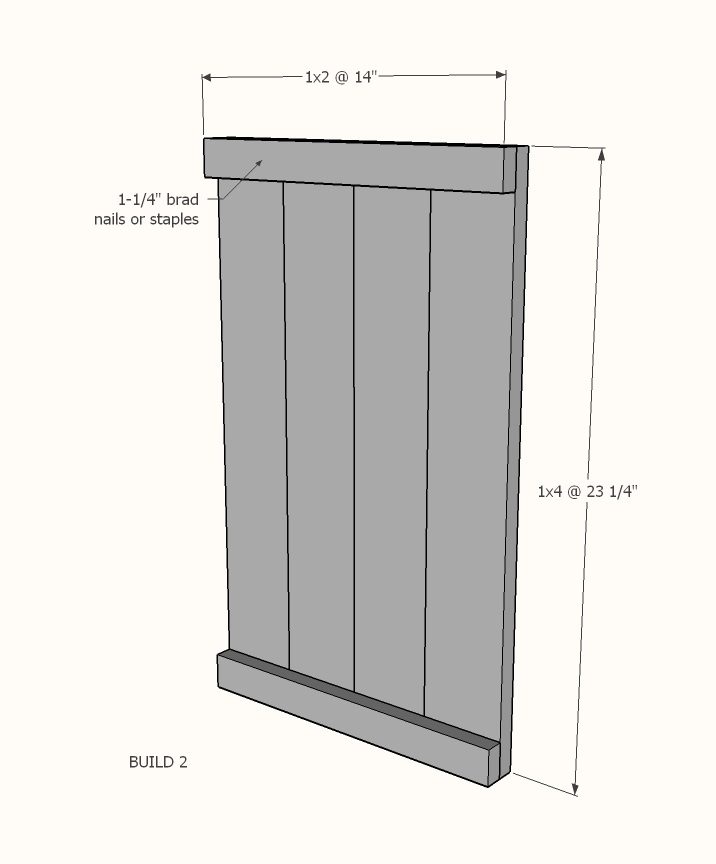
Cut 1x4s and 1x2s with miter saw. Layout side panel 1x4s as shown above. Measure and cut 1x2 to length. Nail the 1x2 to the 1x4s, two nails per overlap with glue. Make sure your side panels are square. Build two.
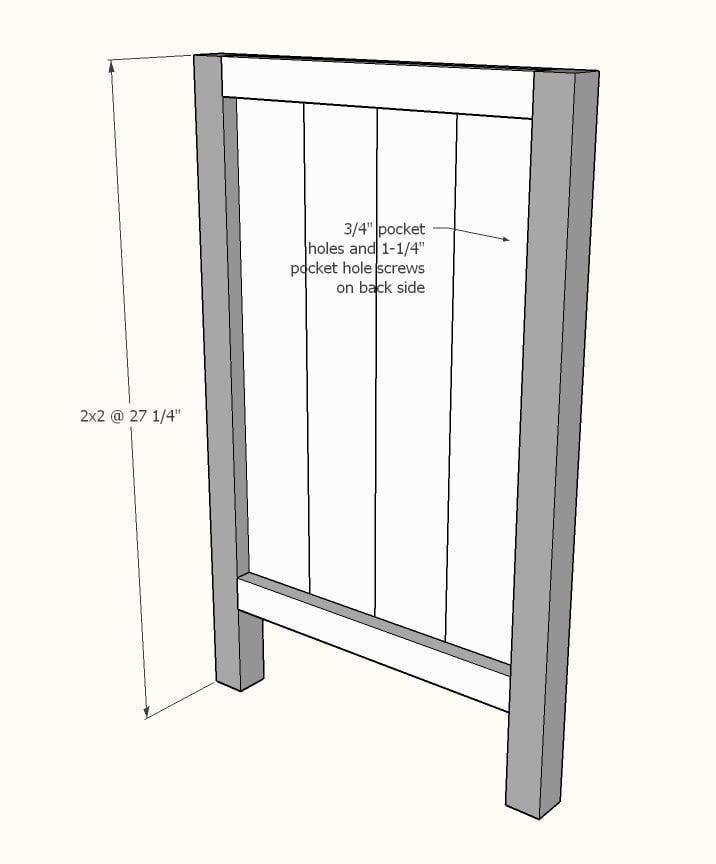
Drill 3/4" pocket holes on inside edge of 1x4 ends as shown above. Cut 2x2s with compound miter saw. Attach to the 2x2 legs with 1-1/4" pocket hole screws.

Set Kreg Jig to 1-1/2" setting. Drill 1-1/2" pocket holes on end of each 2x2, one per end. Attach to 2x2s with wood glue as shown above.
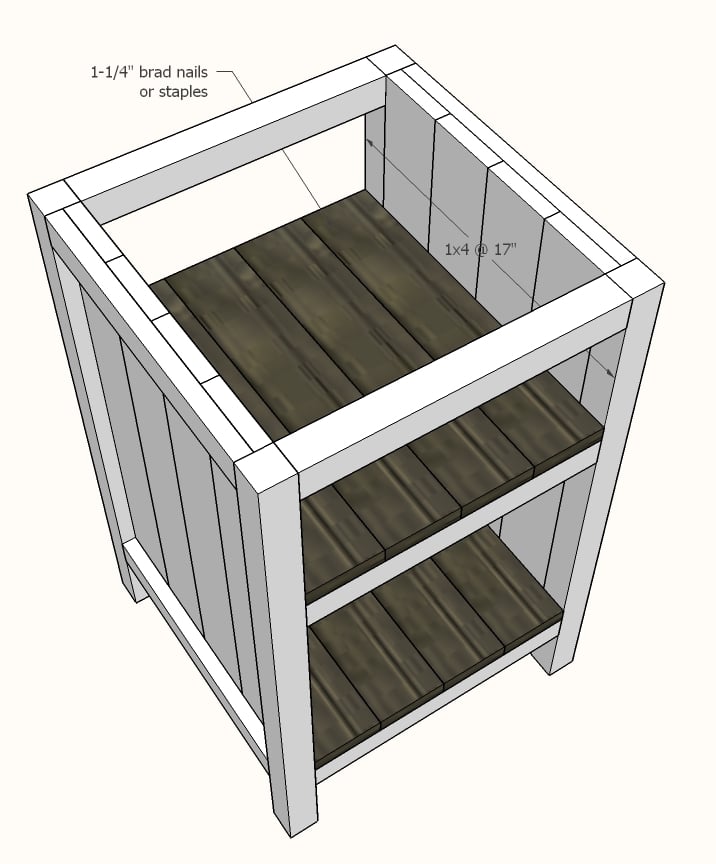
Cut 1x4 shelf boards with compound miter saw. Nail and glue to the inside of the project as shown above.
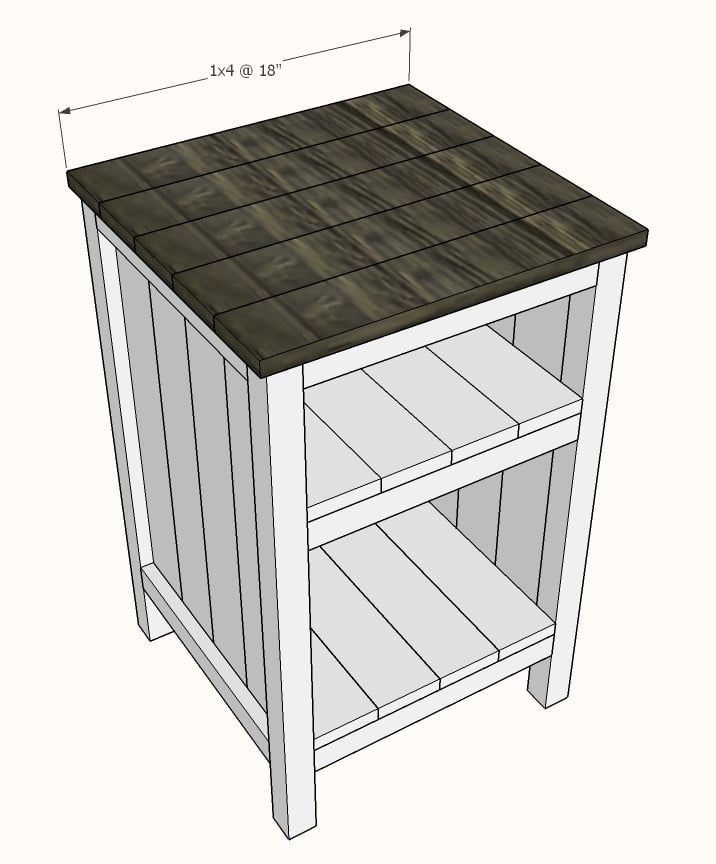
Cut 1x4 top boards with compound miter saw. Nail and glue to top with 1-1/4" nails and wood glue.
If you wish to add a back, measure and cut from 1/4" plywood and attach with 3/4" brad nails.
Mon, 02/12/2018 - 16:24
Is there plans for this one? Its gorgeous and I'd love to build it!

In reply to Is there plans for this one? by laurahamer07
Thu, 06/07/2018 - 15:37
Hello, this nightstand was built using these plans http://www.ana-white.com/2011/06/reclaimed-wood-look-bedside-table instead of adding drawers the builder added shelves. The shelves can be 3/4" plywood or 1x boards.
In reply to bedside end tables by karenlouder
Thu, 06/07/2018 - 15:40
Hello, this nightstand was built using this plan, but instead of drawers, simply measure and cut shelves to fit from 3/4" plywood. http://www.ana-white.com/2011/06/reclaimed-wood-look-bedside-table

Wed, 07/24/2019 - 09:24
It's taken us a couple of weekends, but we finished our bedside table. We made two, but one still needs painting.
Thank you for the plans. We had a great deal of fun and learning experience making these.
Want to see it? https://www.facebook.com/photo.php?fbid=2830583376957272&set=pcb.283058…

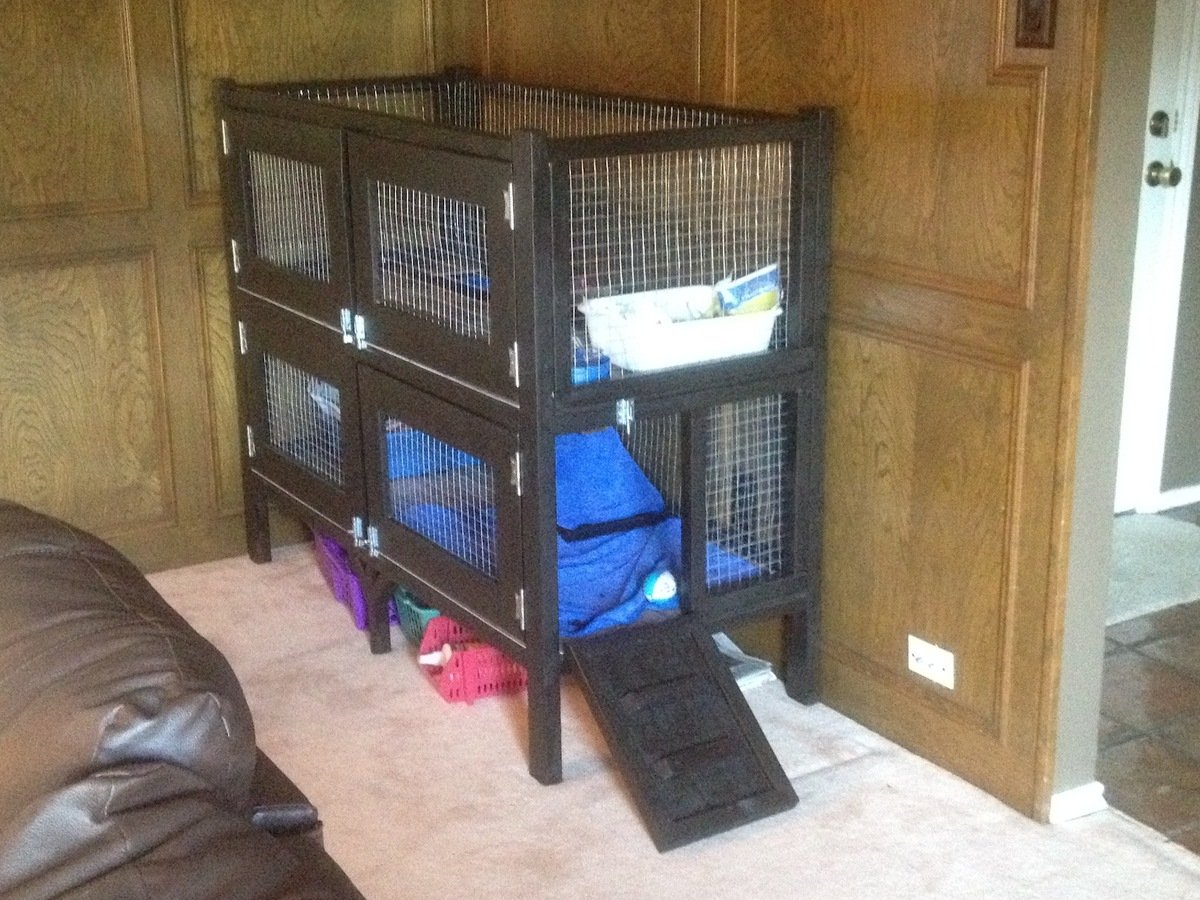
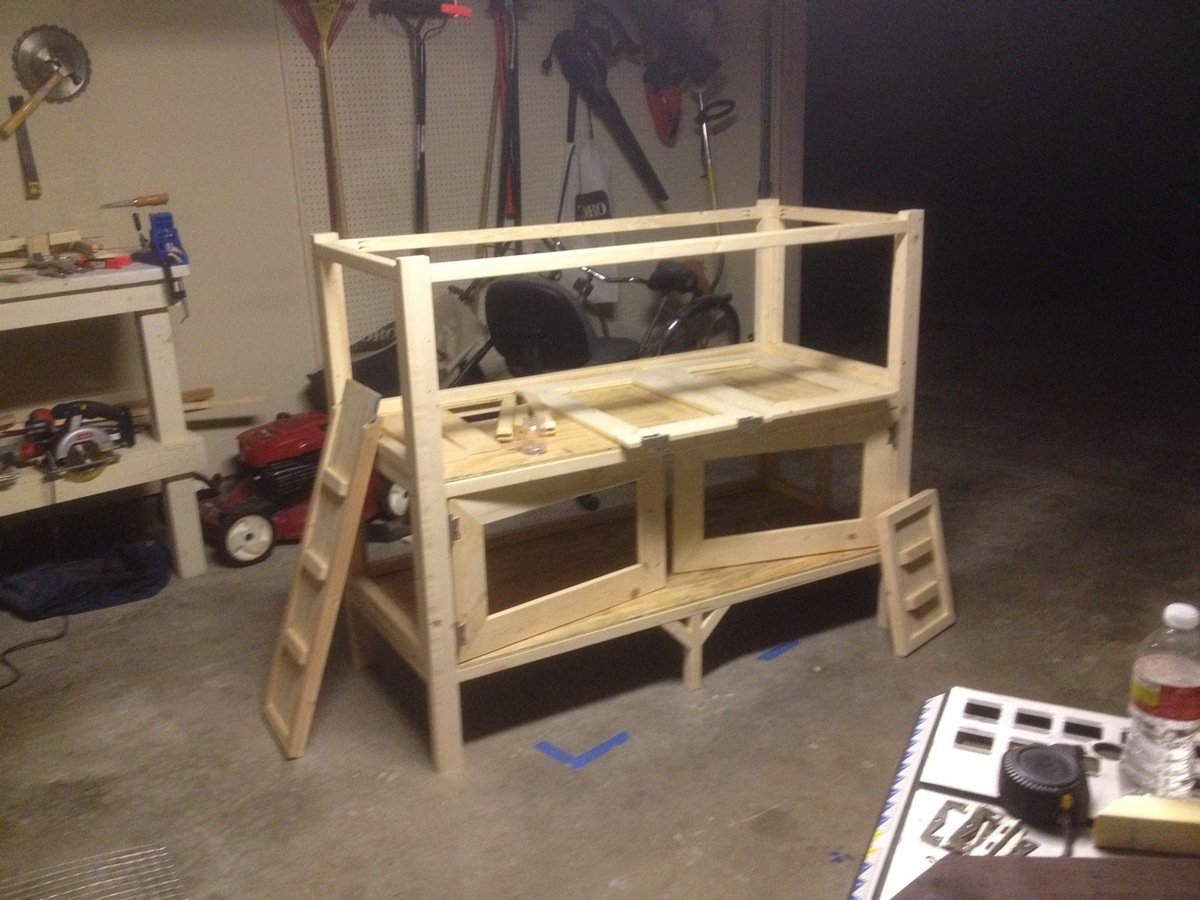
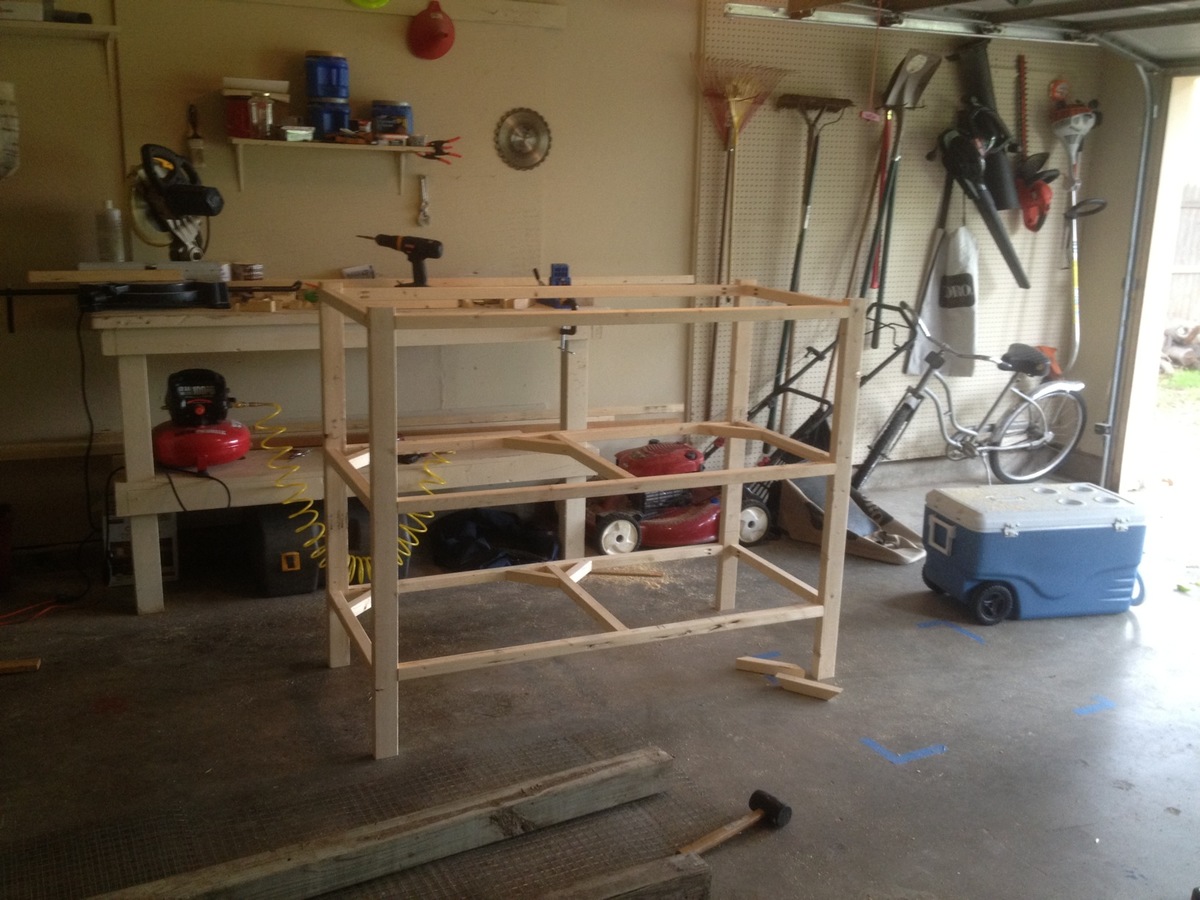
For my first woodworking project, I foolishly decided to build a rabbit hutch without plans for my daughters new Easter Bunny. So I literally scratched some ideas on my wood working bench and started going to work. I did some construction over a decade ago, but never attempted to build any furniture before, so I'm pretty happy with how this came out.
I spent a few days researching various rabbit cages and for our place we needed something that was ascetically pleasing and functional as it was going in our living room. I got some ideas from the web and decided the best thing for us would be to have an entry ramp, 2 sets of barn doors for each level (for easy cleaning) and an open roof. We went with linoleum floors since she's already litter trained. The floors could easily be modified to add 1/2" wire mesh if we decide to change things down the line. Also, we chose an espresso finish with silver hardware to accent the wire mesh
I pretty much crashed and burned on the staining as I've never done that before, but it ended up looking ok after all. I did a light sanding, but will probably invest in a planer and jointer to get my wood in better shape before assembling in the future. Also, I'll probably lightly dab some stain on ends of wood before final assembly as it made it difficulty trying to hide the white pine with the dark stain.
Other cages I saw ran around $200-$350.00 so i don't feel so bad about the cost. It's really the time that it took learning and making mistakes. I'm sure if I had plans I could of cut my time in 1/2.
Total Cost came out to around $150.00 but probably would of been cheaper if I had some plans to go by. I probably wasted a few 2x2s and accidentally mis-cut a scrap piece of 1/4"plywood which added another $16.00 to the bottom line.
Here's a breakdown of my total cost.
Hardware - $30.00
Includes 5 latches, 4 sets of hinges (8 total) and a 3' piano hinge
Stain - $8.00
Linoleum Tile @ ¢.69 sq ft - $16
Brushes, Stain Rags - $5.00
Screws - $6.00
Wire Mesh Roll $30.00
Needed 2 rolls at $15.00 each. I used 1" Wire Mesh measuring 2'x15'
Total Wood $50.00-$60
I used 2x3's for the legs - 2 @ 8' - $2.00 each ($4.00)
probably 15-20 2x2's - $1.52 each - can't remember how many I used to be honest ($30.00)
and a few 1x6's for the Doors - $2.00 each ($6.00)
Sheet of 1/4 plywood - $12.00

Thu, 05/03/2012 - 06:24
I bet your rabbit is pumped! What a nice house. Good Job.

In reply to I bet your rabbit is pumped! by Aargh (not verified)
Thu, 05/03/2012 - 06:57
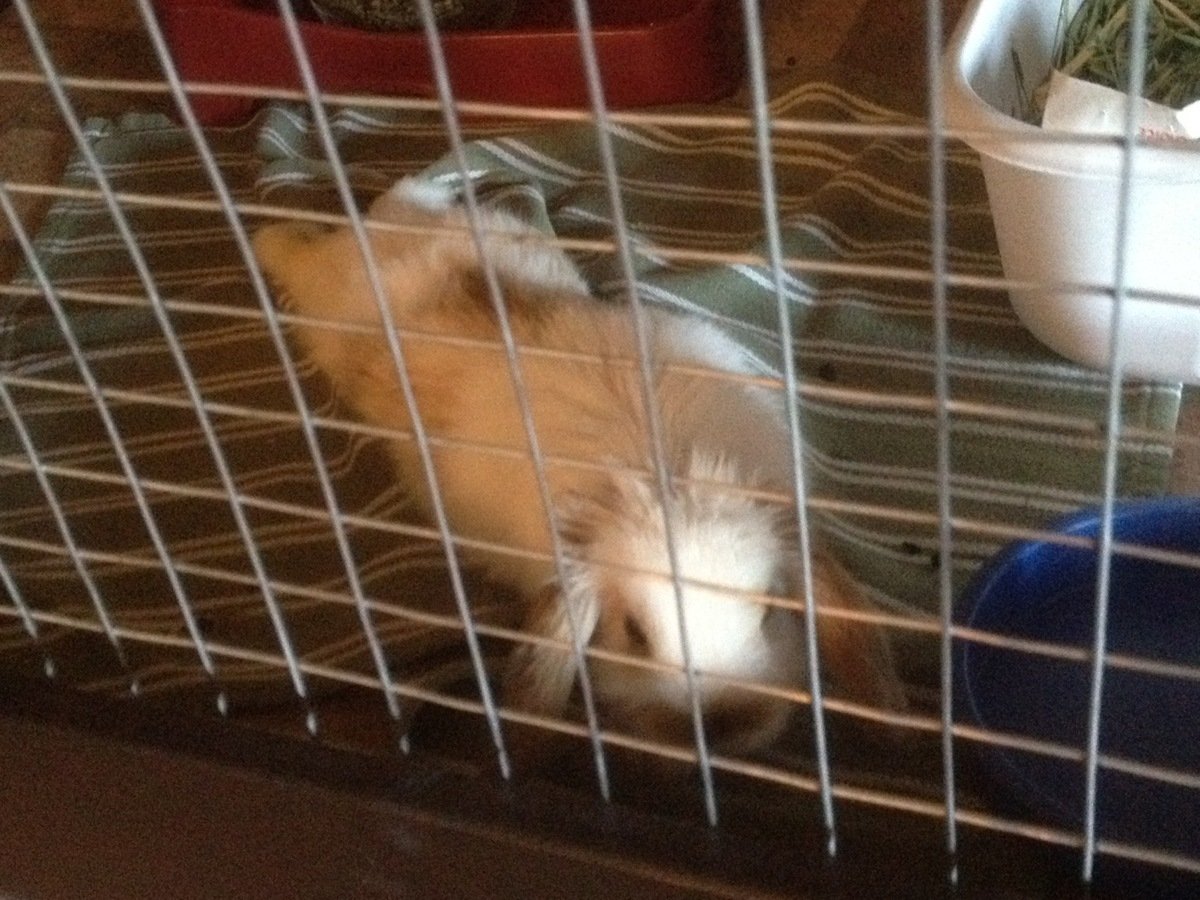
Thanks! The rabbit definitely seems happy.
Thu, 05/03/2012 - 08:09
I also have been thinking with the idea of building a two story hutch for our rabbit. I love your ideas so now i have a new project to work on. Thanks for sharing!
Mon, 10/08/2012 - 12:46
I LOVE your cage! We have 2 rabbits and 2 Guinea pigs which means we have 2 ugly cages in our living room. We are planning something similar, but a bit bigger (but lower if that makes sense). And we'll put a 3rd story on for our Guinea pigs. So we have everyone on the same patch of real estate so to speak. I was going to do 3 solid walls with wire "windows" too keep all the hay, poops and such contained. I am also going to put lockable wheels underneath, so I can move it to my office if I ever need to (parties and renovations).
Is there anything that you can now think of that you would like to change on yours? R my research purposes.. :) It looks awesome, I'm just picking your brain for "hindsight" tips.
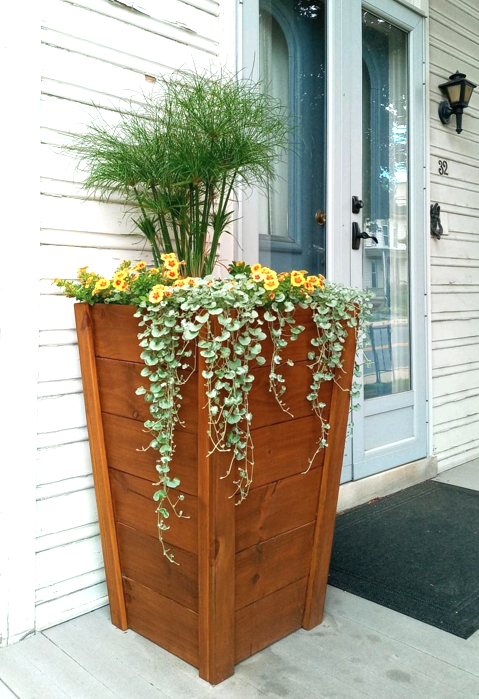
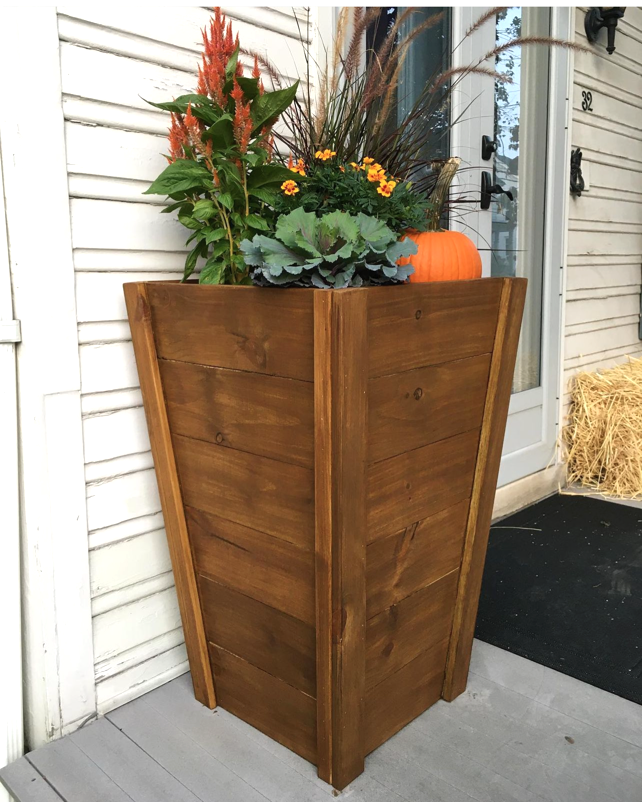
Check out this beautiful tapered Ana White planter that I made! Her videos are amazing and simple to follow be sure to check her out.
Alex

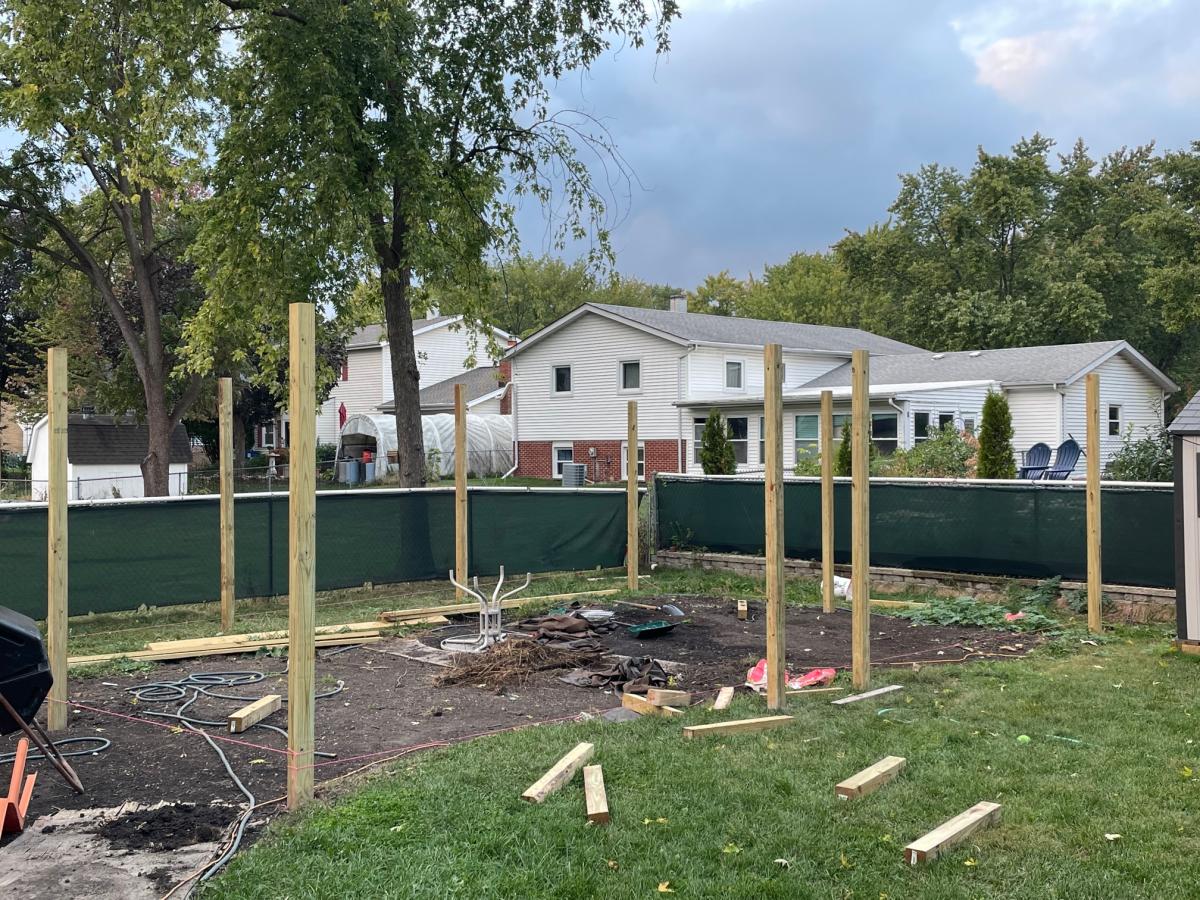
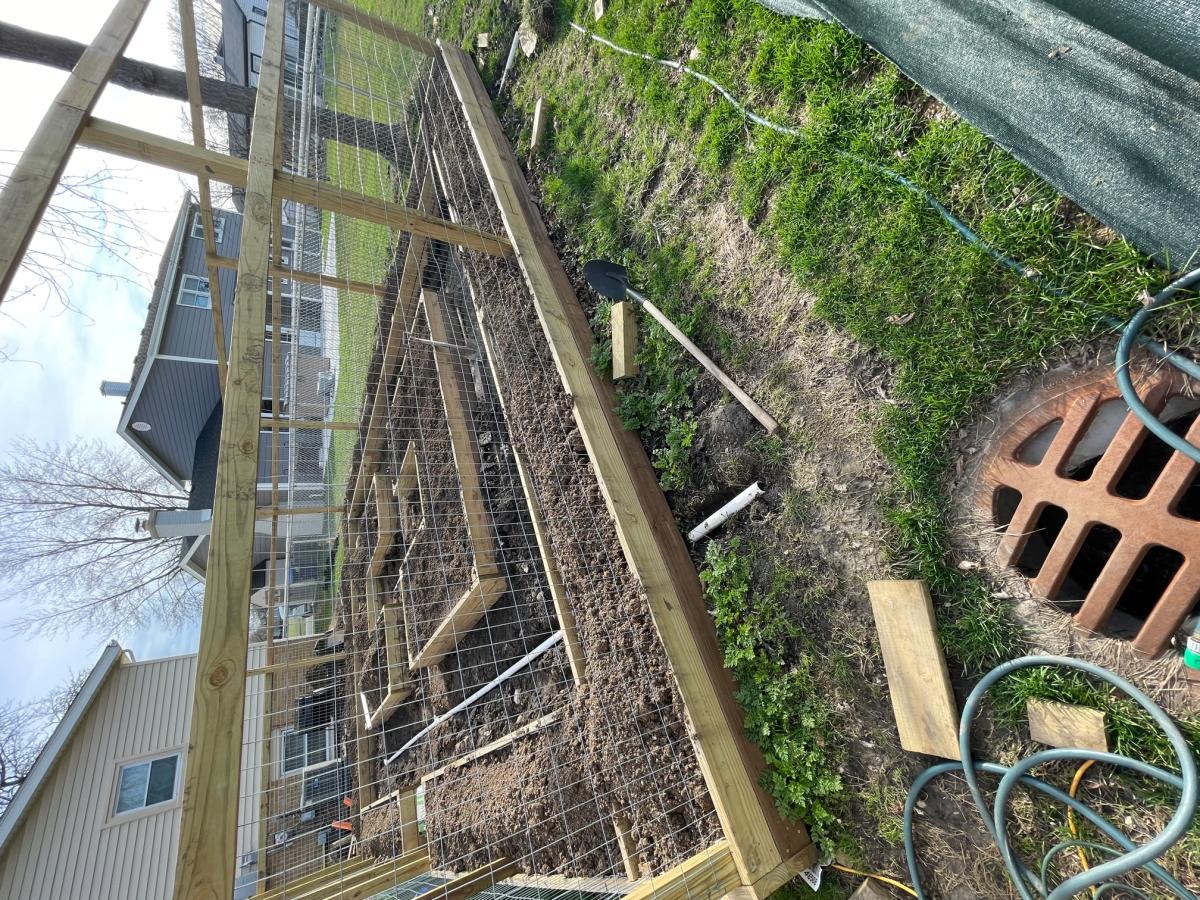
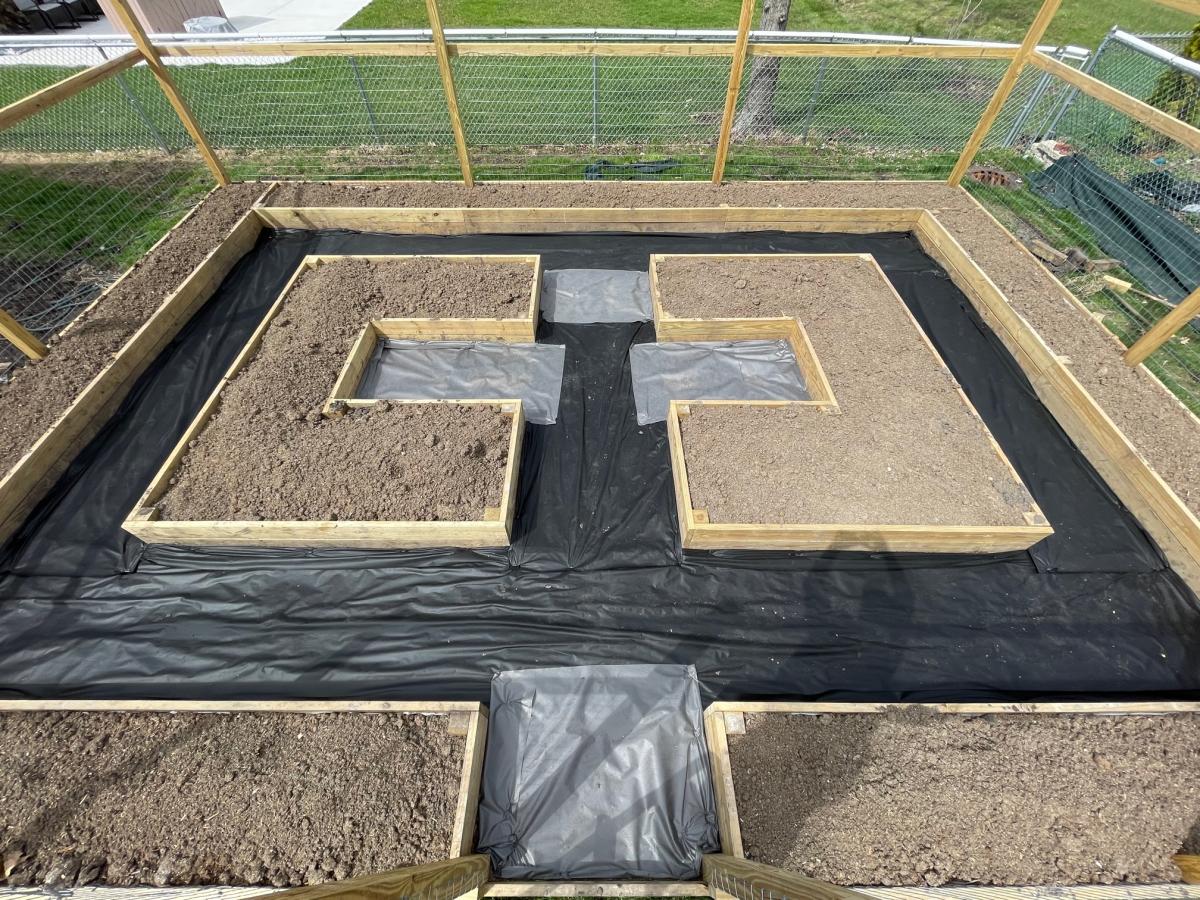
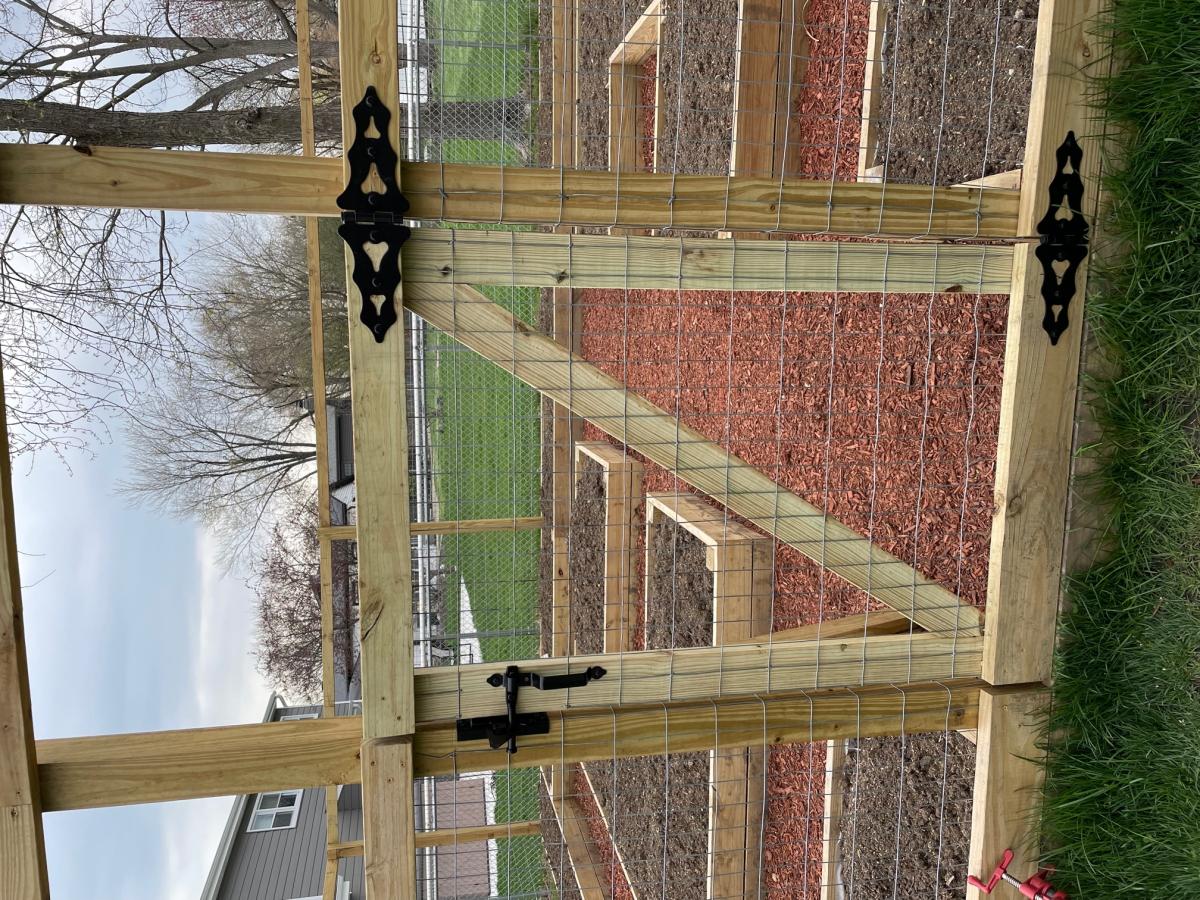
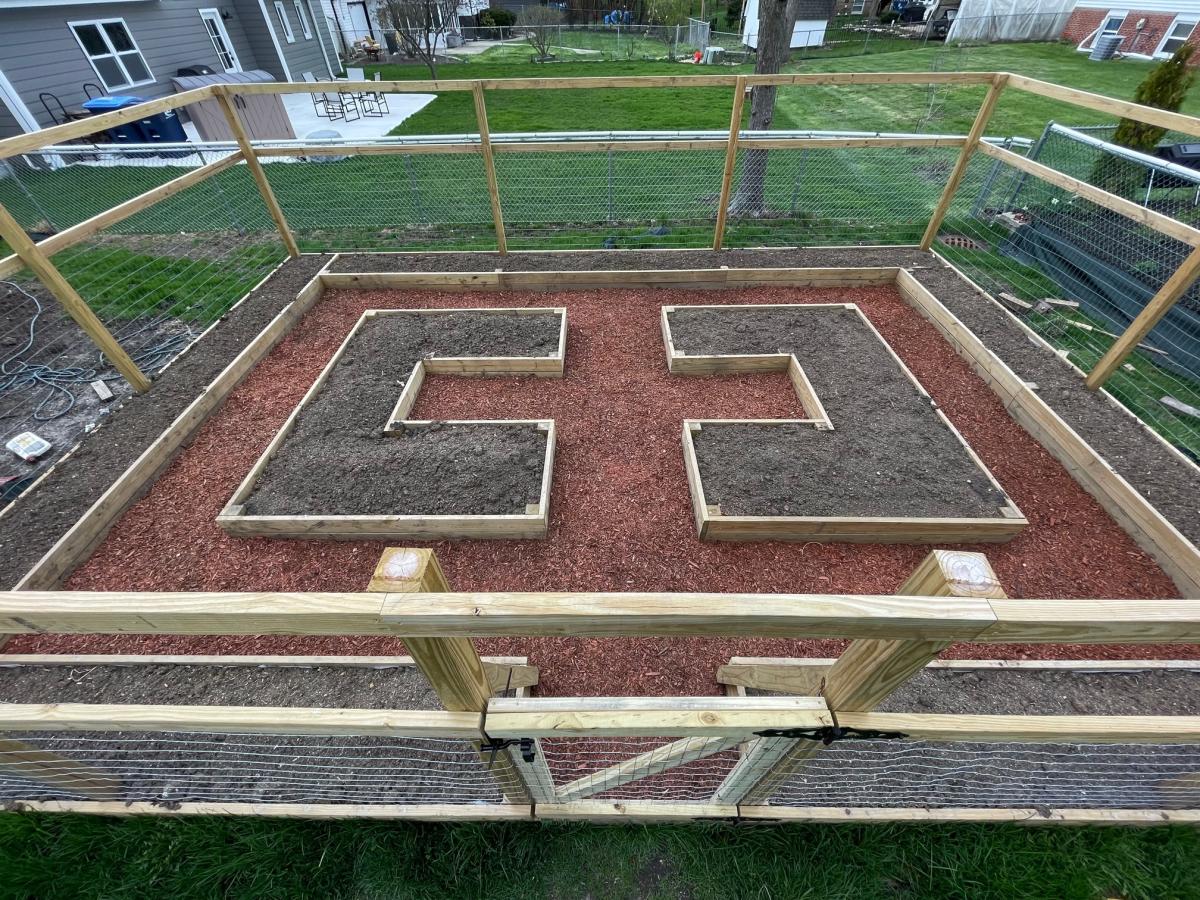
Used the Garden Enclosure plan as a reference, but wanted a much bigger area to walk through and relax in. Dimensions are about 30'x20'. Took a few months with a break for winter because it was just me working in spare time on weekends, would have gone a lot faster with an extra set of hands. Towards the end realized that drainage in the walk path was going to be an issue so I put in a very basic french drain before I weed fabric and mulched.
Really happy with how it turned out. Cost was pretty high, probably about $1500 all told, between wood, garden soil, etc. But we'll be able to enjoy it for many years.
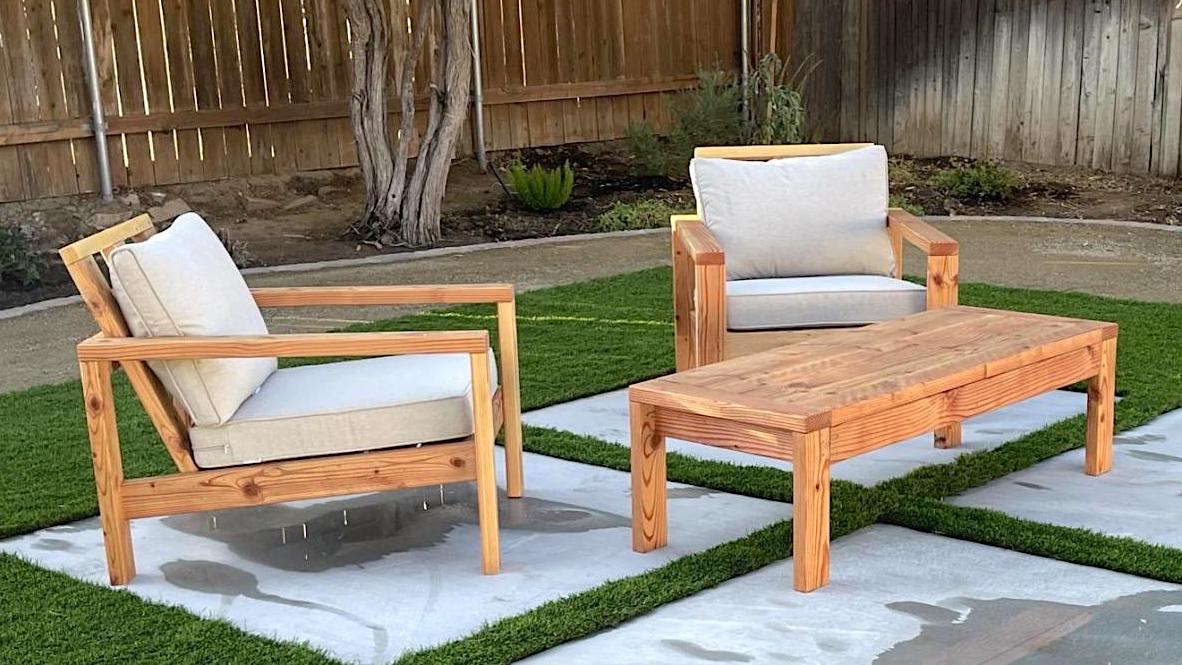
I built a set of chairs and a coffee table for our newly designed outdoor area. These look amazing and people love sitting on them and hanging out outside our house.
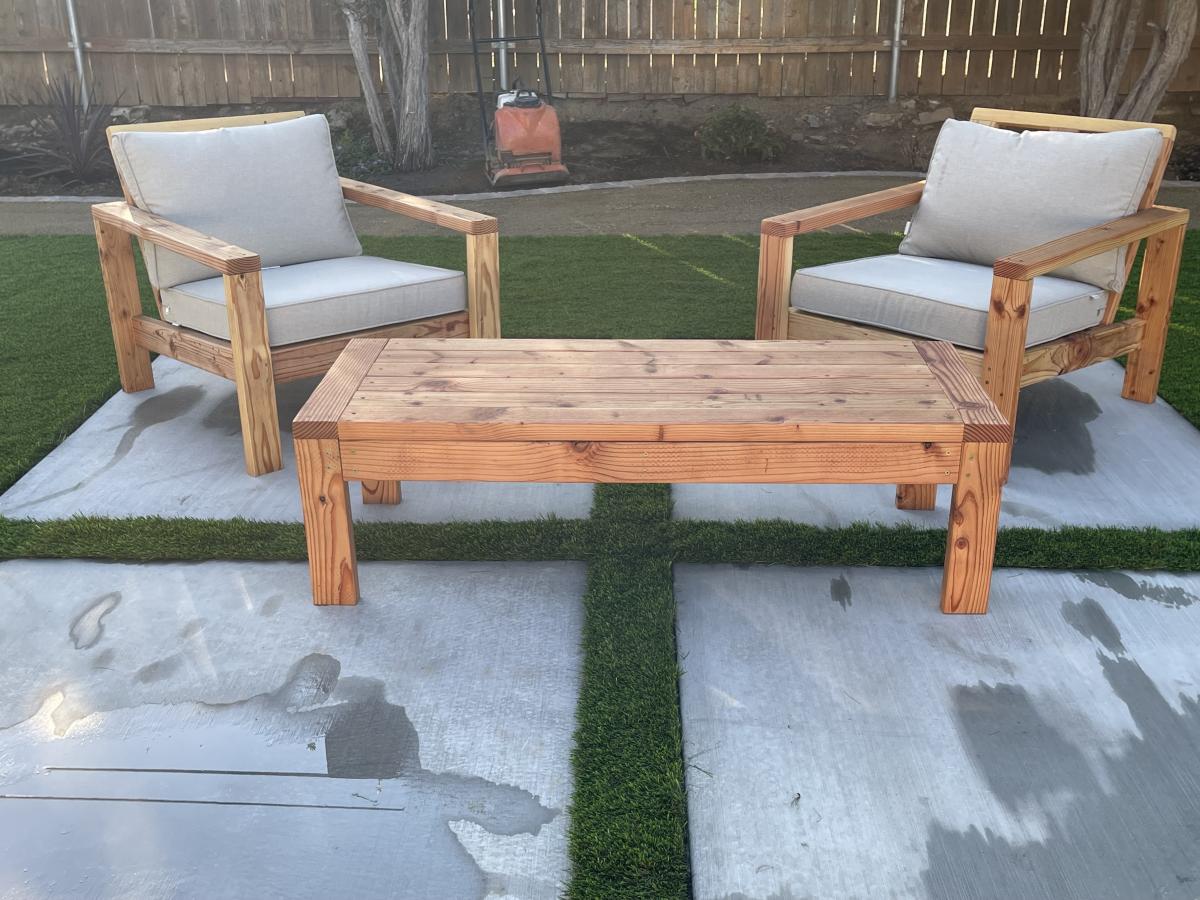
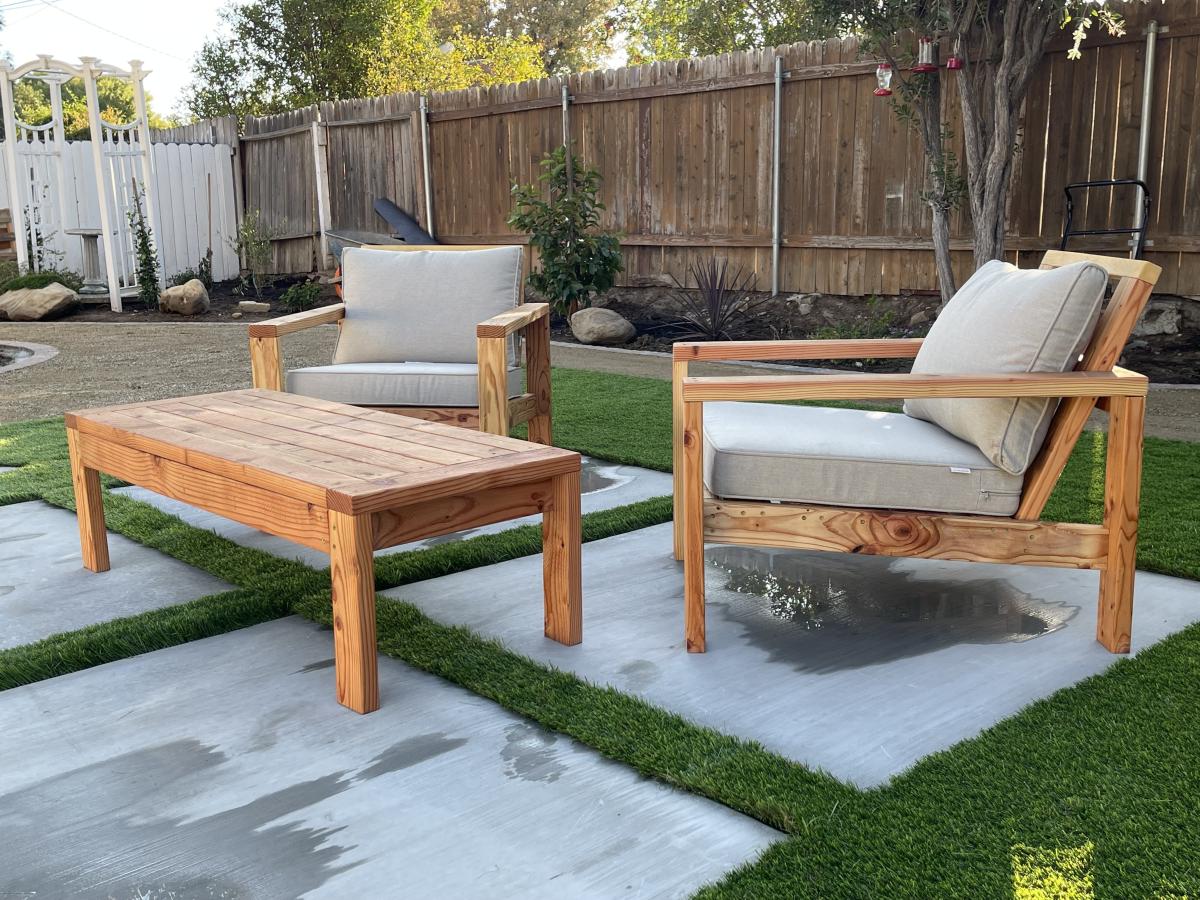
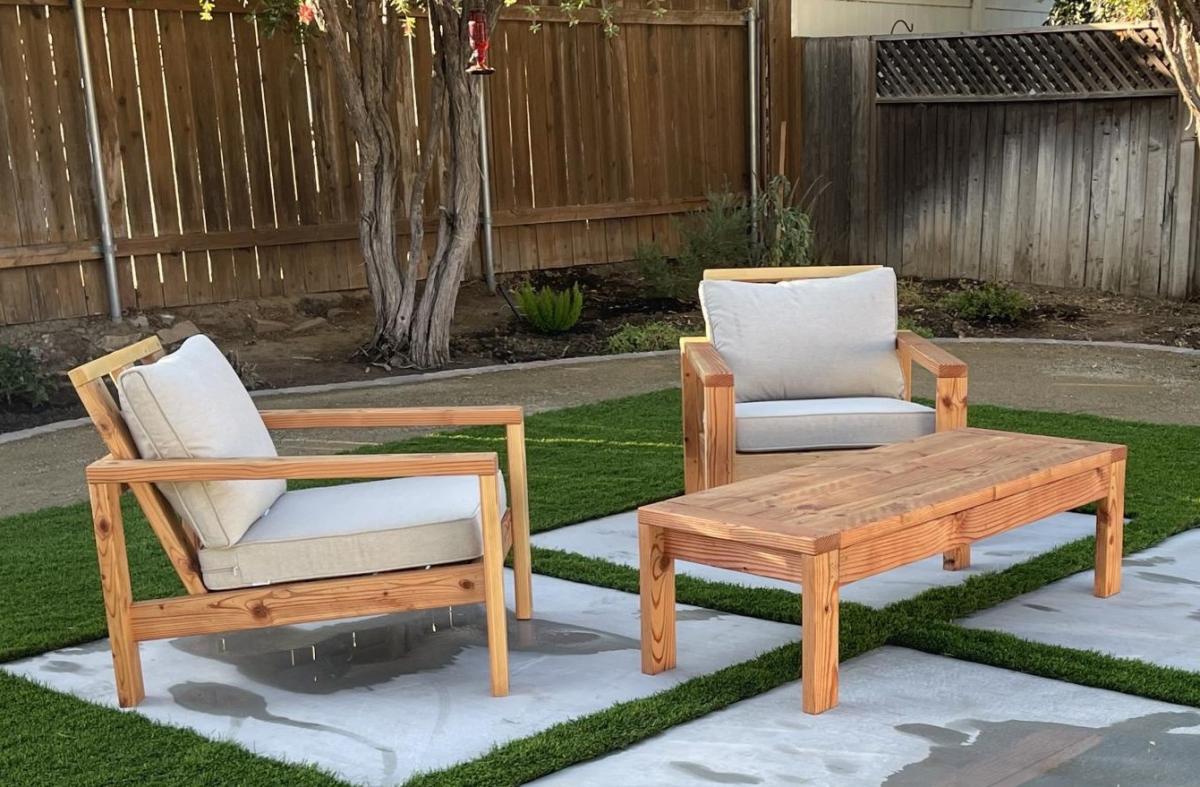
Used your plan as a start and improvised from there. Thanks

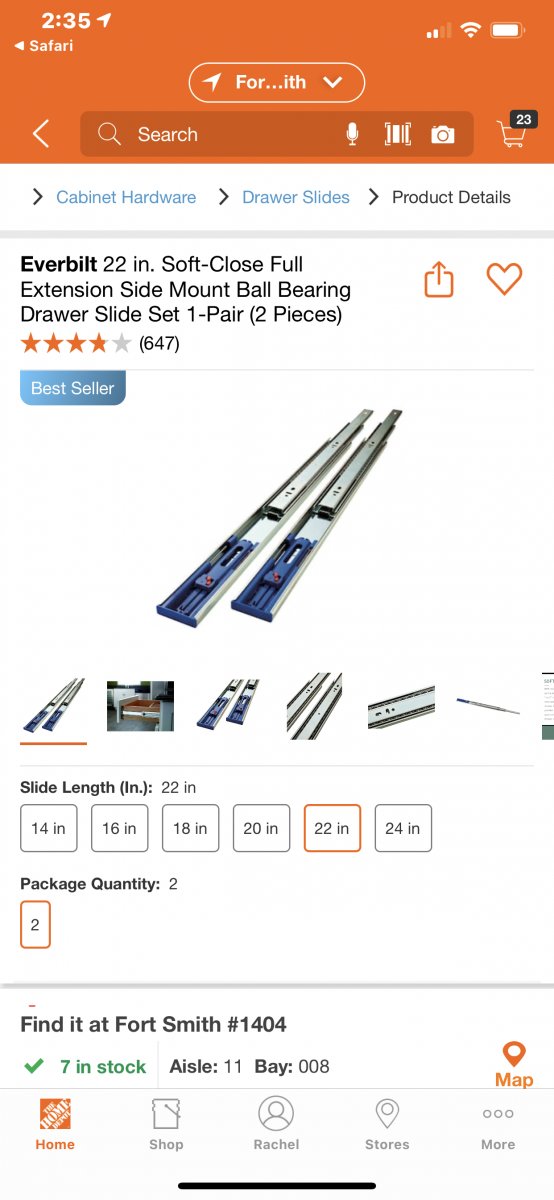
We needed a bench to fill the space in our front entry and provide some storage for seasonal gear. We couldn't find anything to buy that would work for us, so when my wife found these plans, I had to try it! Couldn't be happier with the results. We widened the bench by a foot to 84" to fill the space. Basically, it just made each drawer 4" wider. Everything else was built to plan. The most expensive thing was the soft-close 24" drawer slides (~$100). As soon as you go above that 24" depth, they get pricier! It was also tricky to get the drawers to catch properly on the soft-close mechanisms, but I made sure to take the time to get it right before closing it all in. Now I just open and close the drawers for the pure satisfaction of it! I used premium pine plywood for the top and I find it still doesn't give that smooth finish I like, even after sanding. I think I'll create a new top out of joined knotty pine planks later and just attach it to the top.


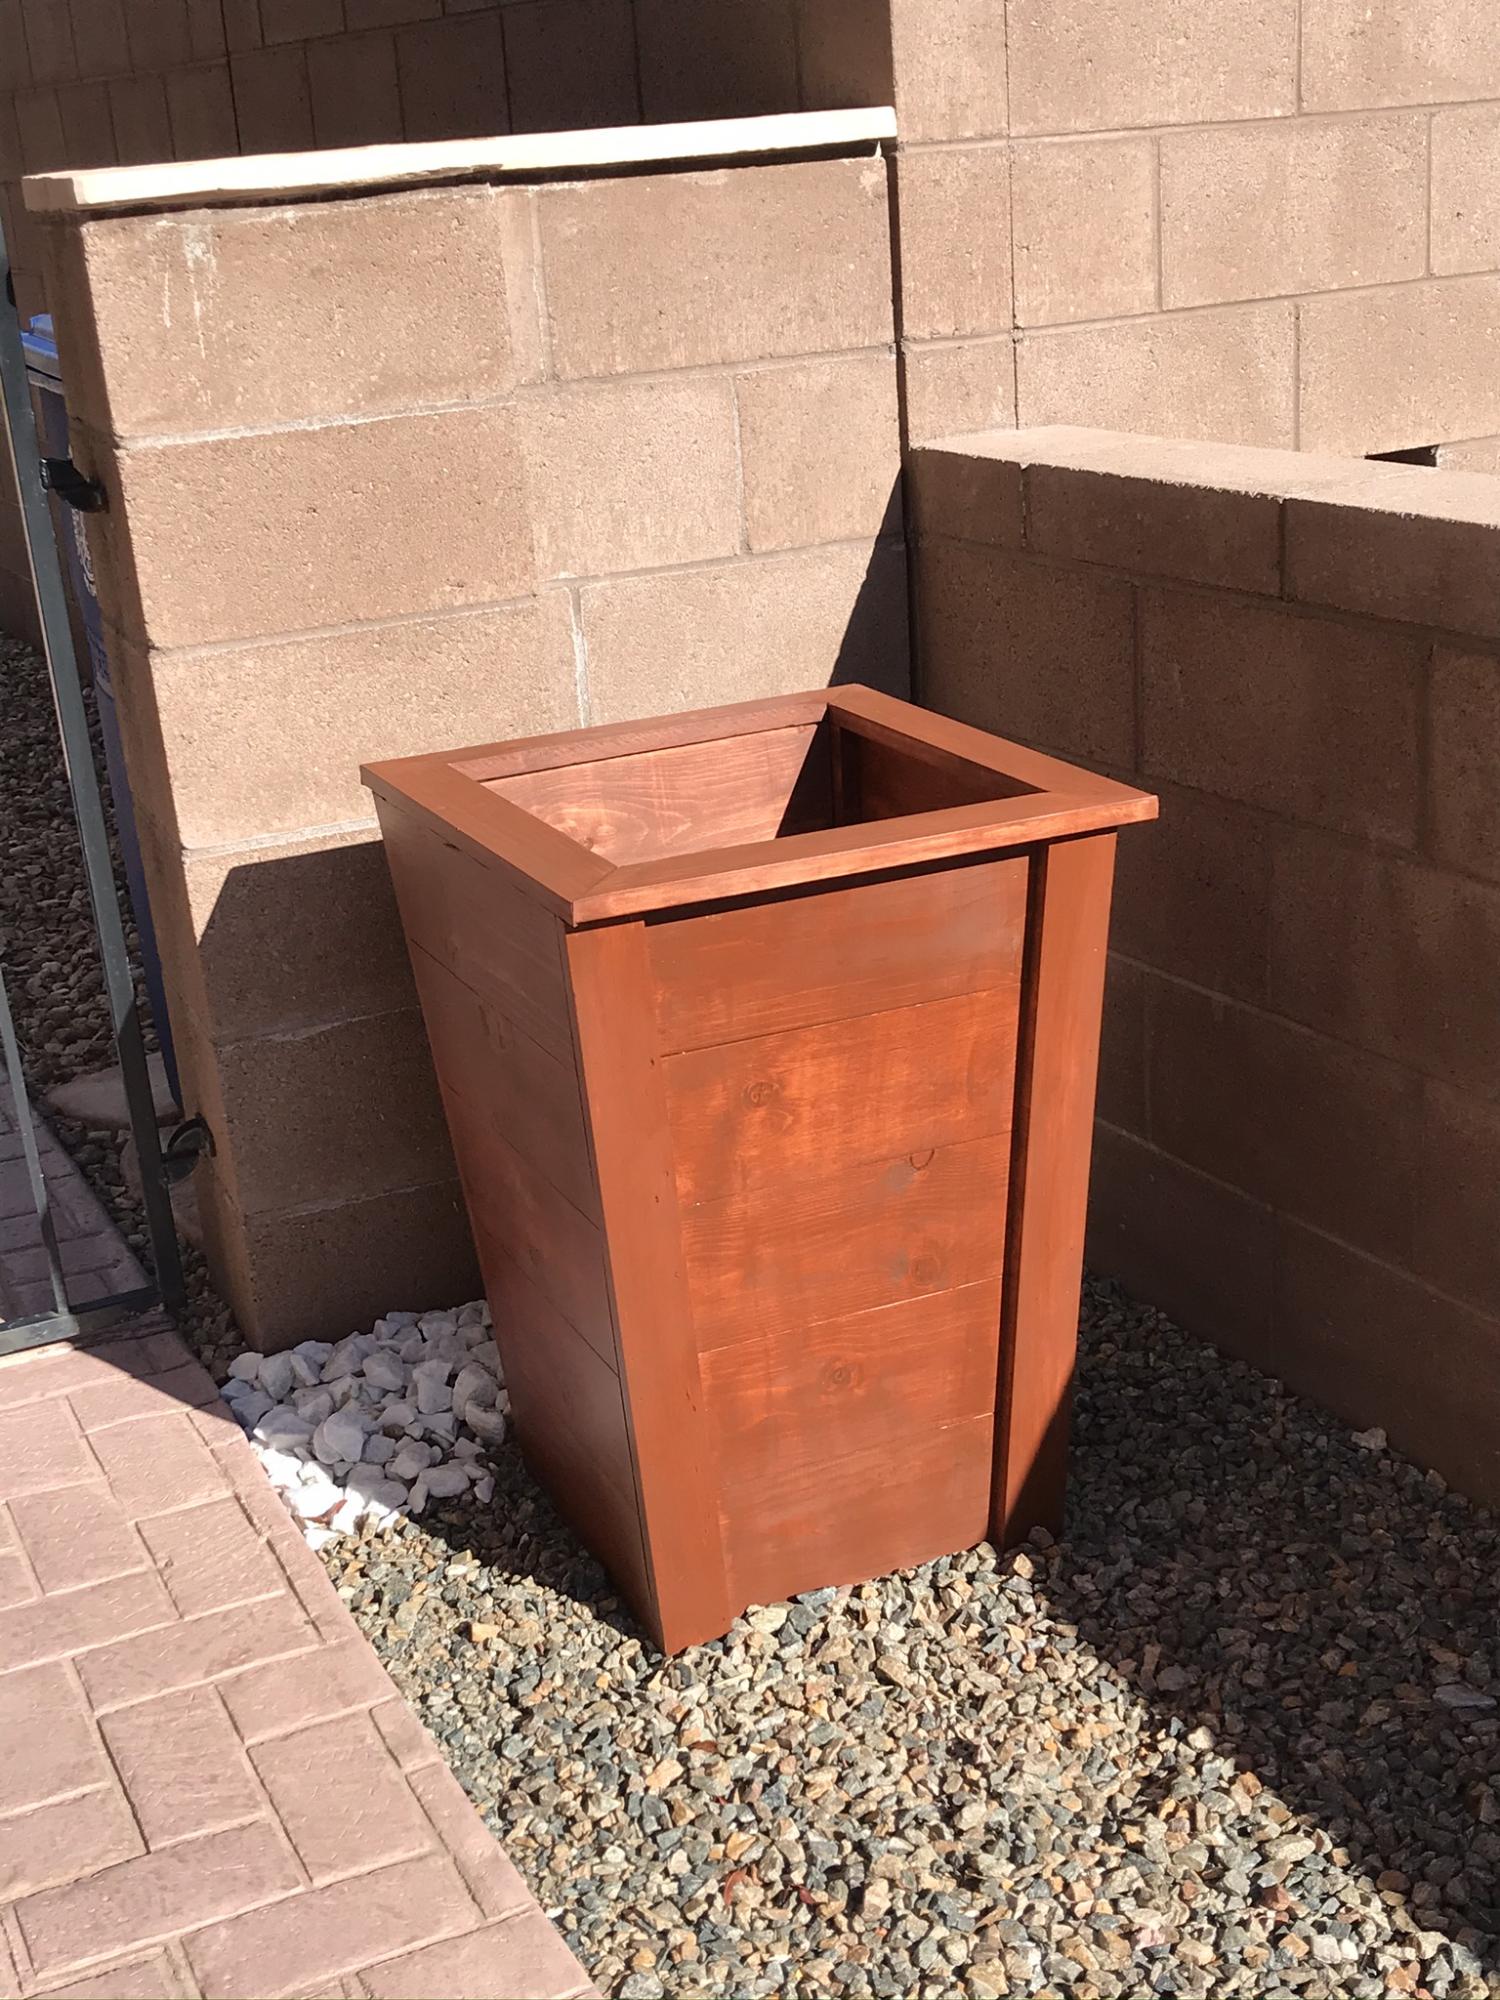
This planter was easy to make. Two days including finish.

I love how this bed frame turned out! Everywhere that has stain is cedar and the rest is all scrap spruce. Thanks for another great plan Ana!

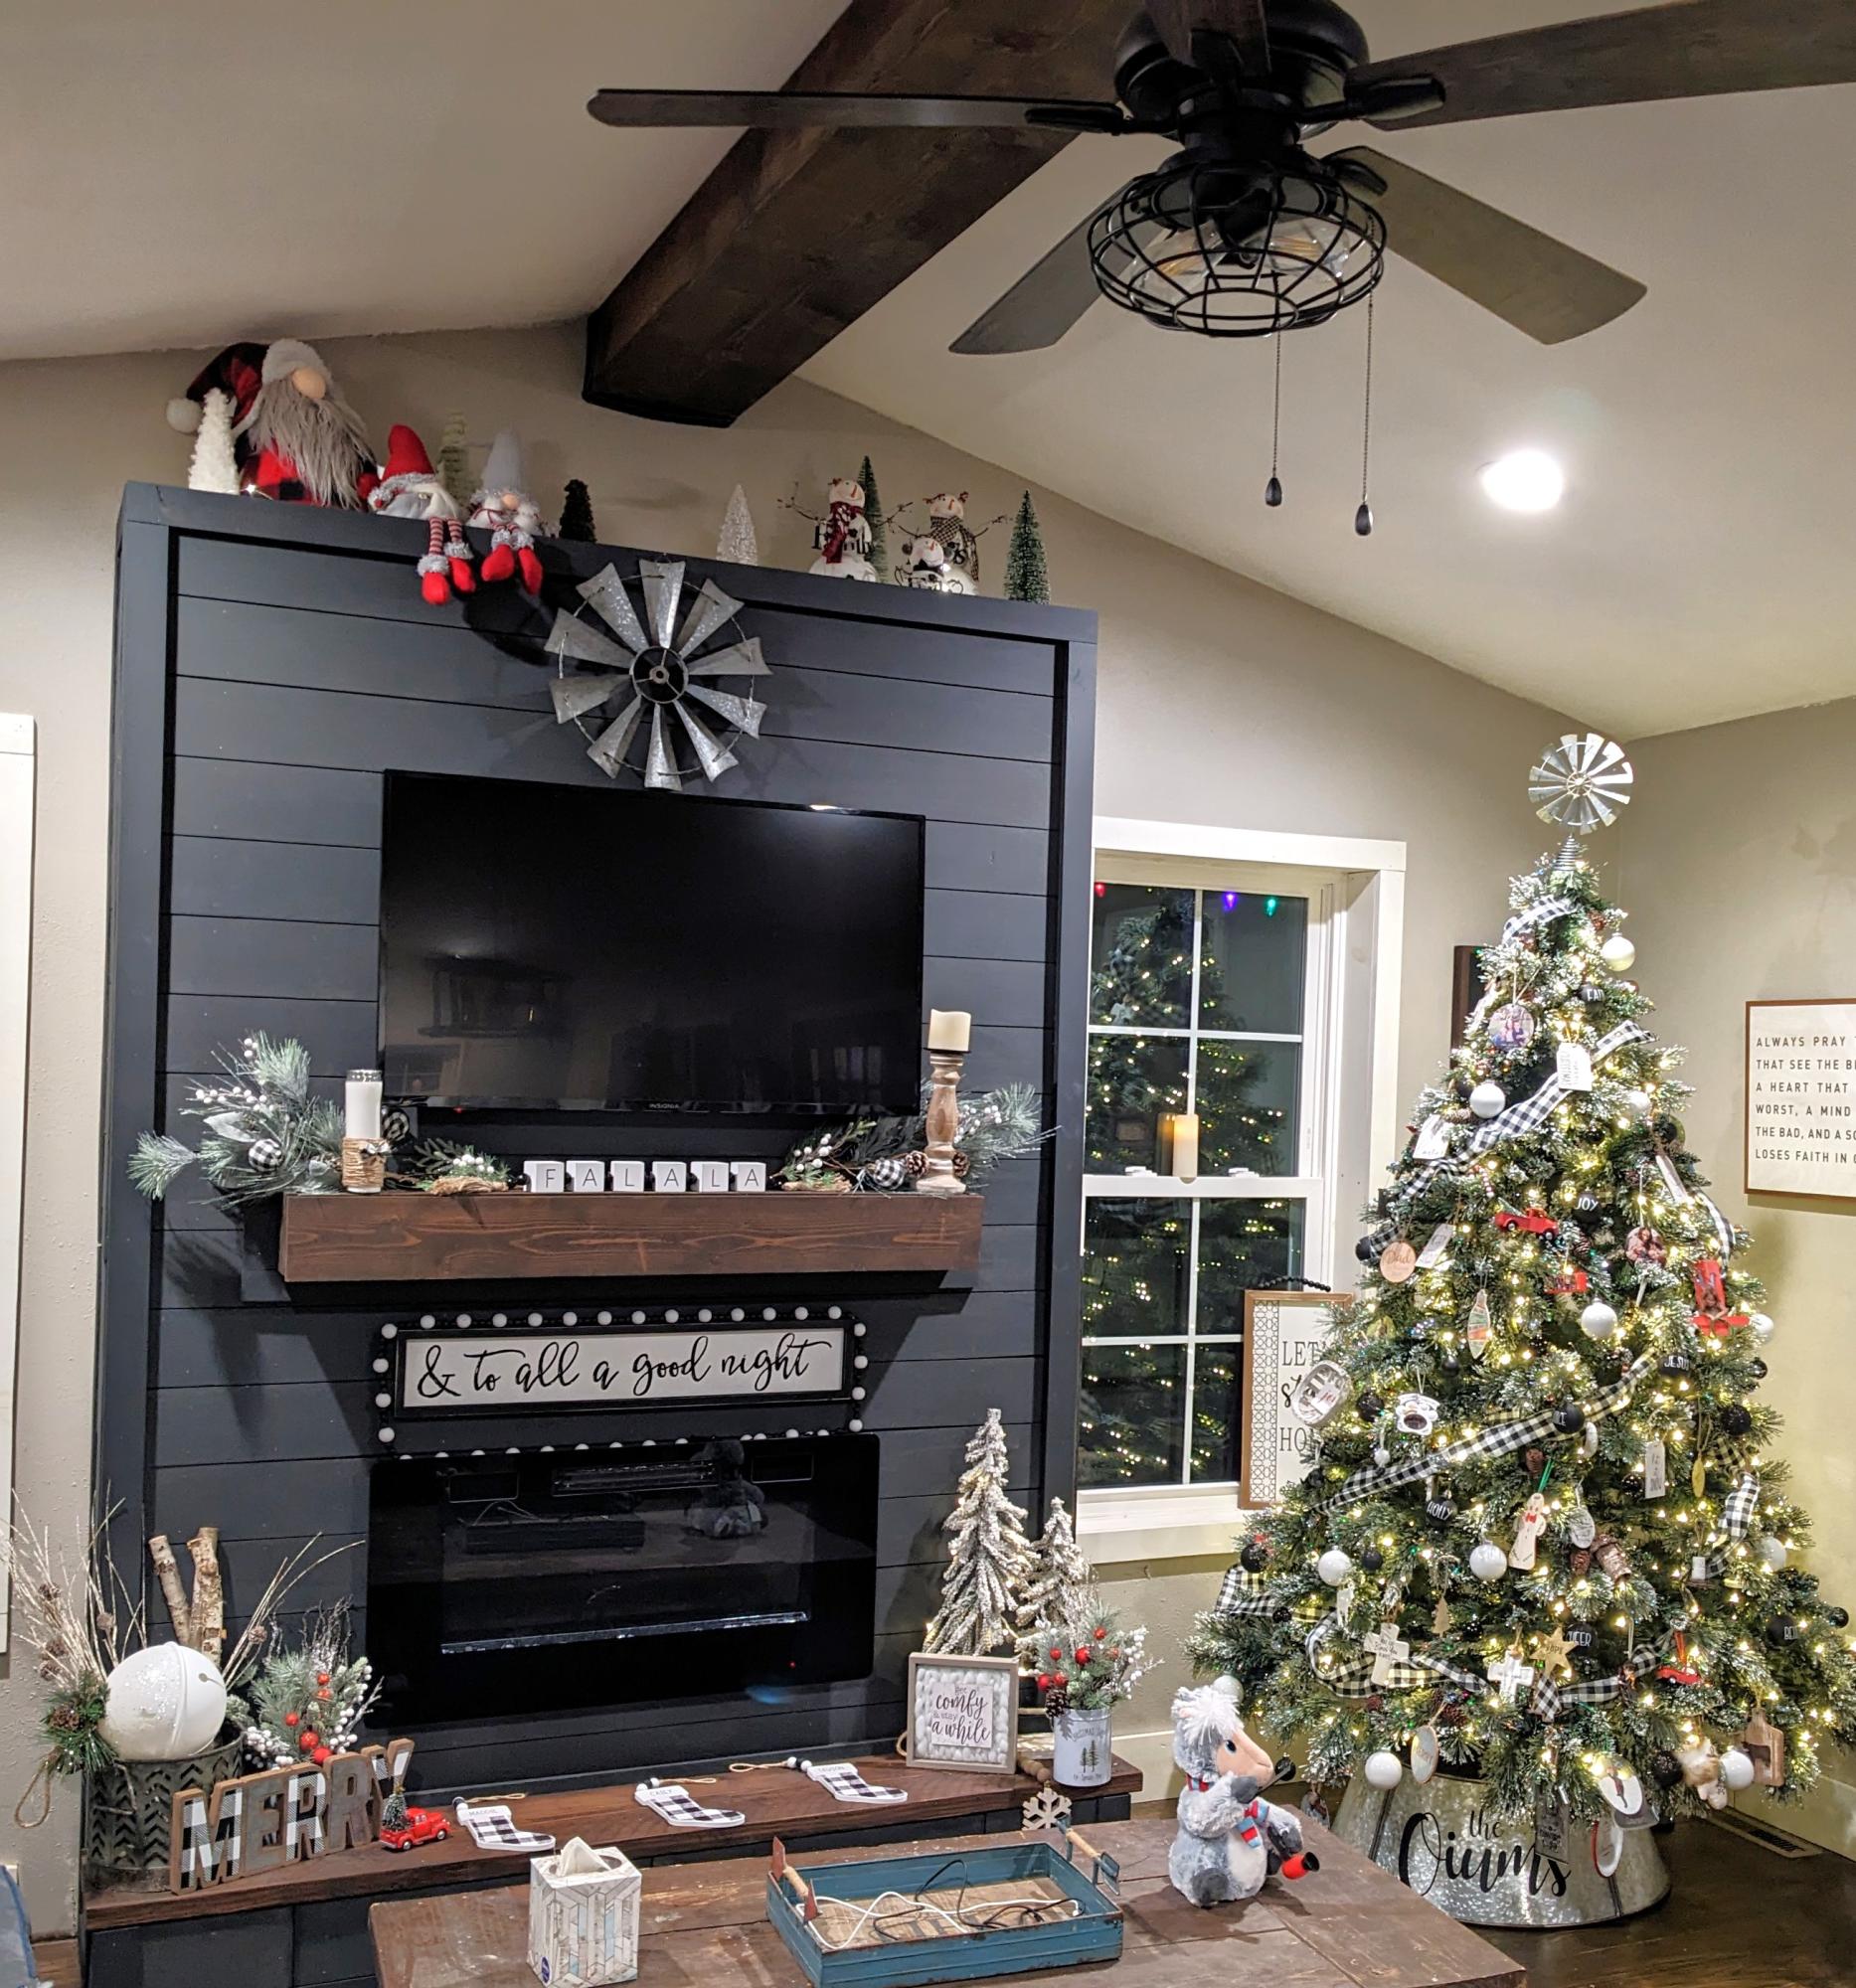
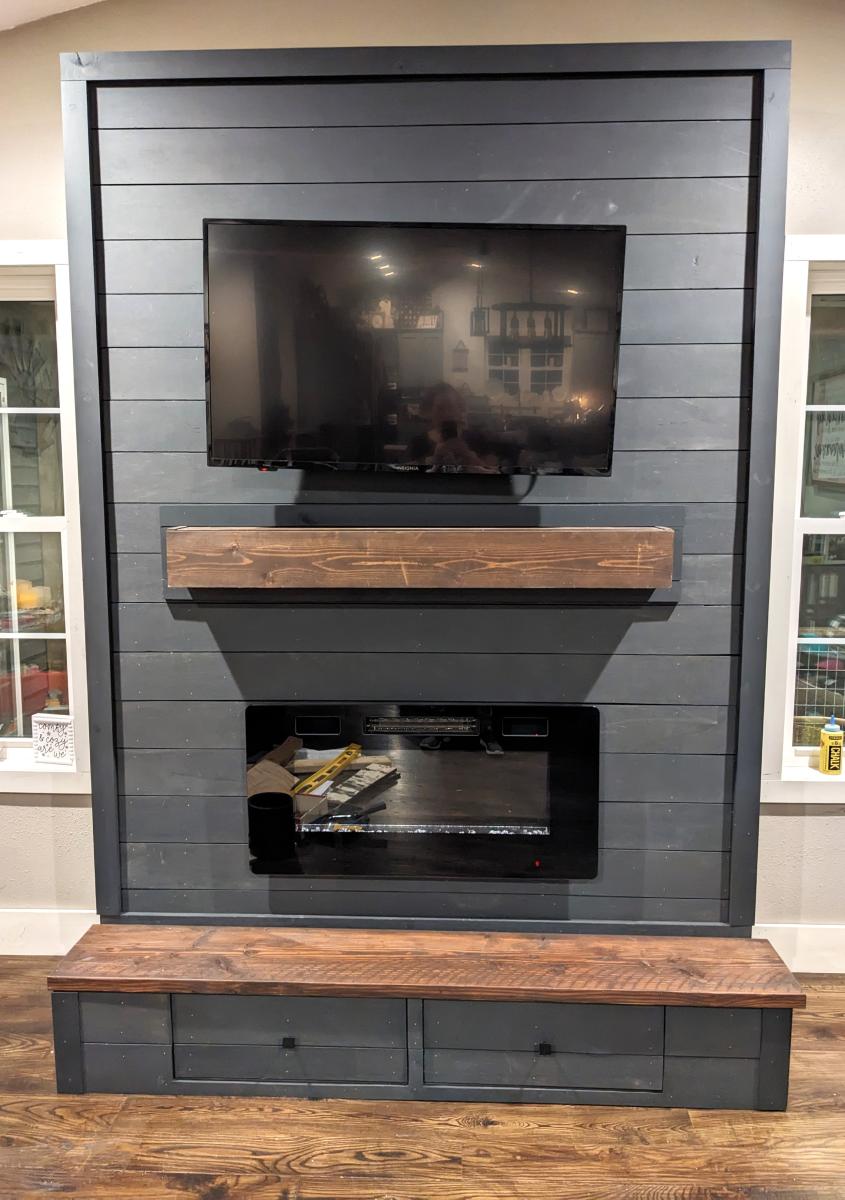
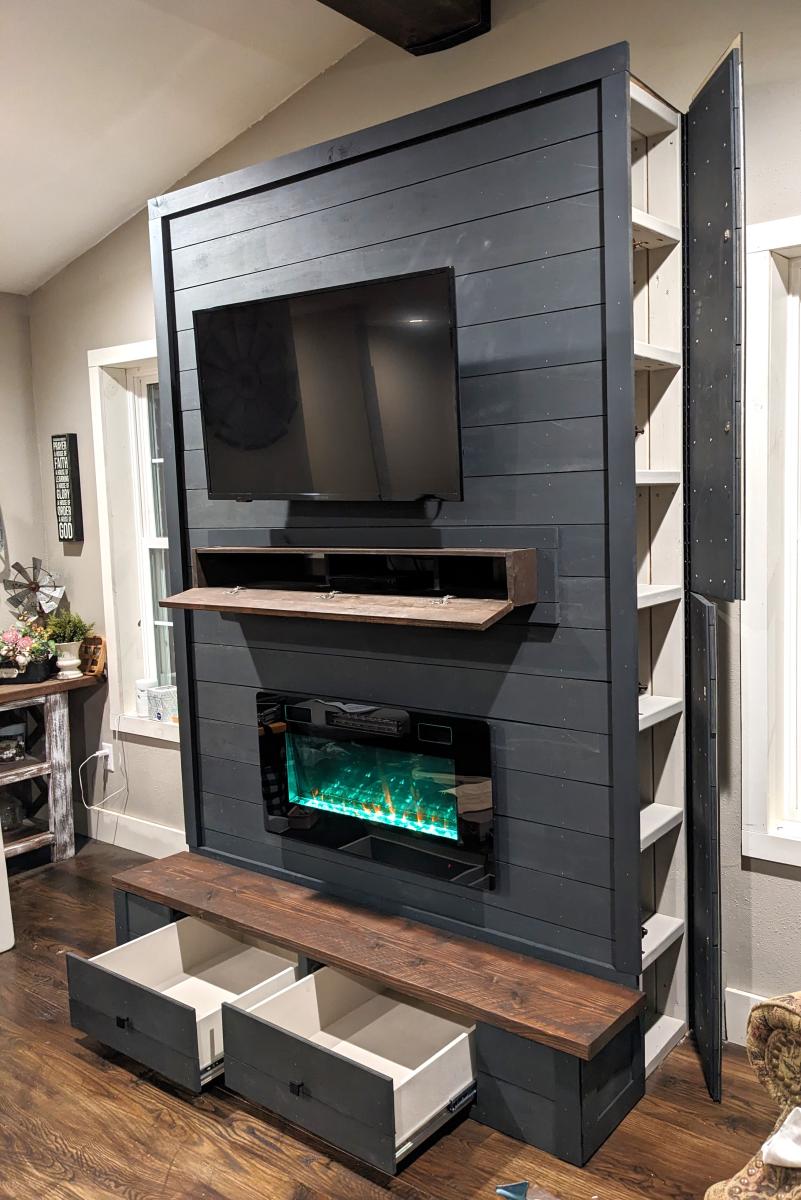
Modified plans to include game storage drawers, a flip open mantle for DVD player and hidden charging port, and hidden cupboards on both sides for DVD storage. I scoured the Internet for months before drawing this up to fit my space and tackling all on my own! I love it and all of my other Ana White inspired projects!
Casey O.
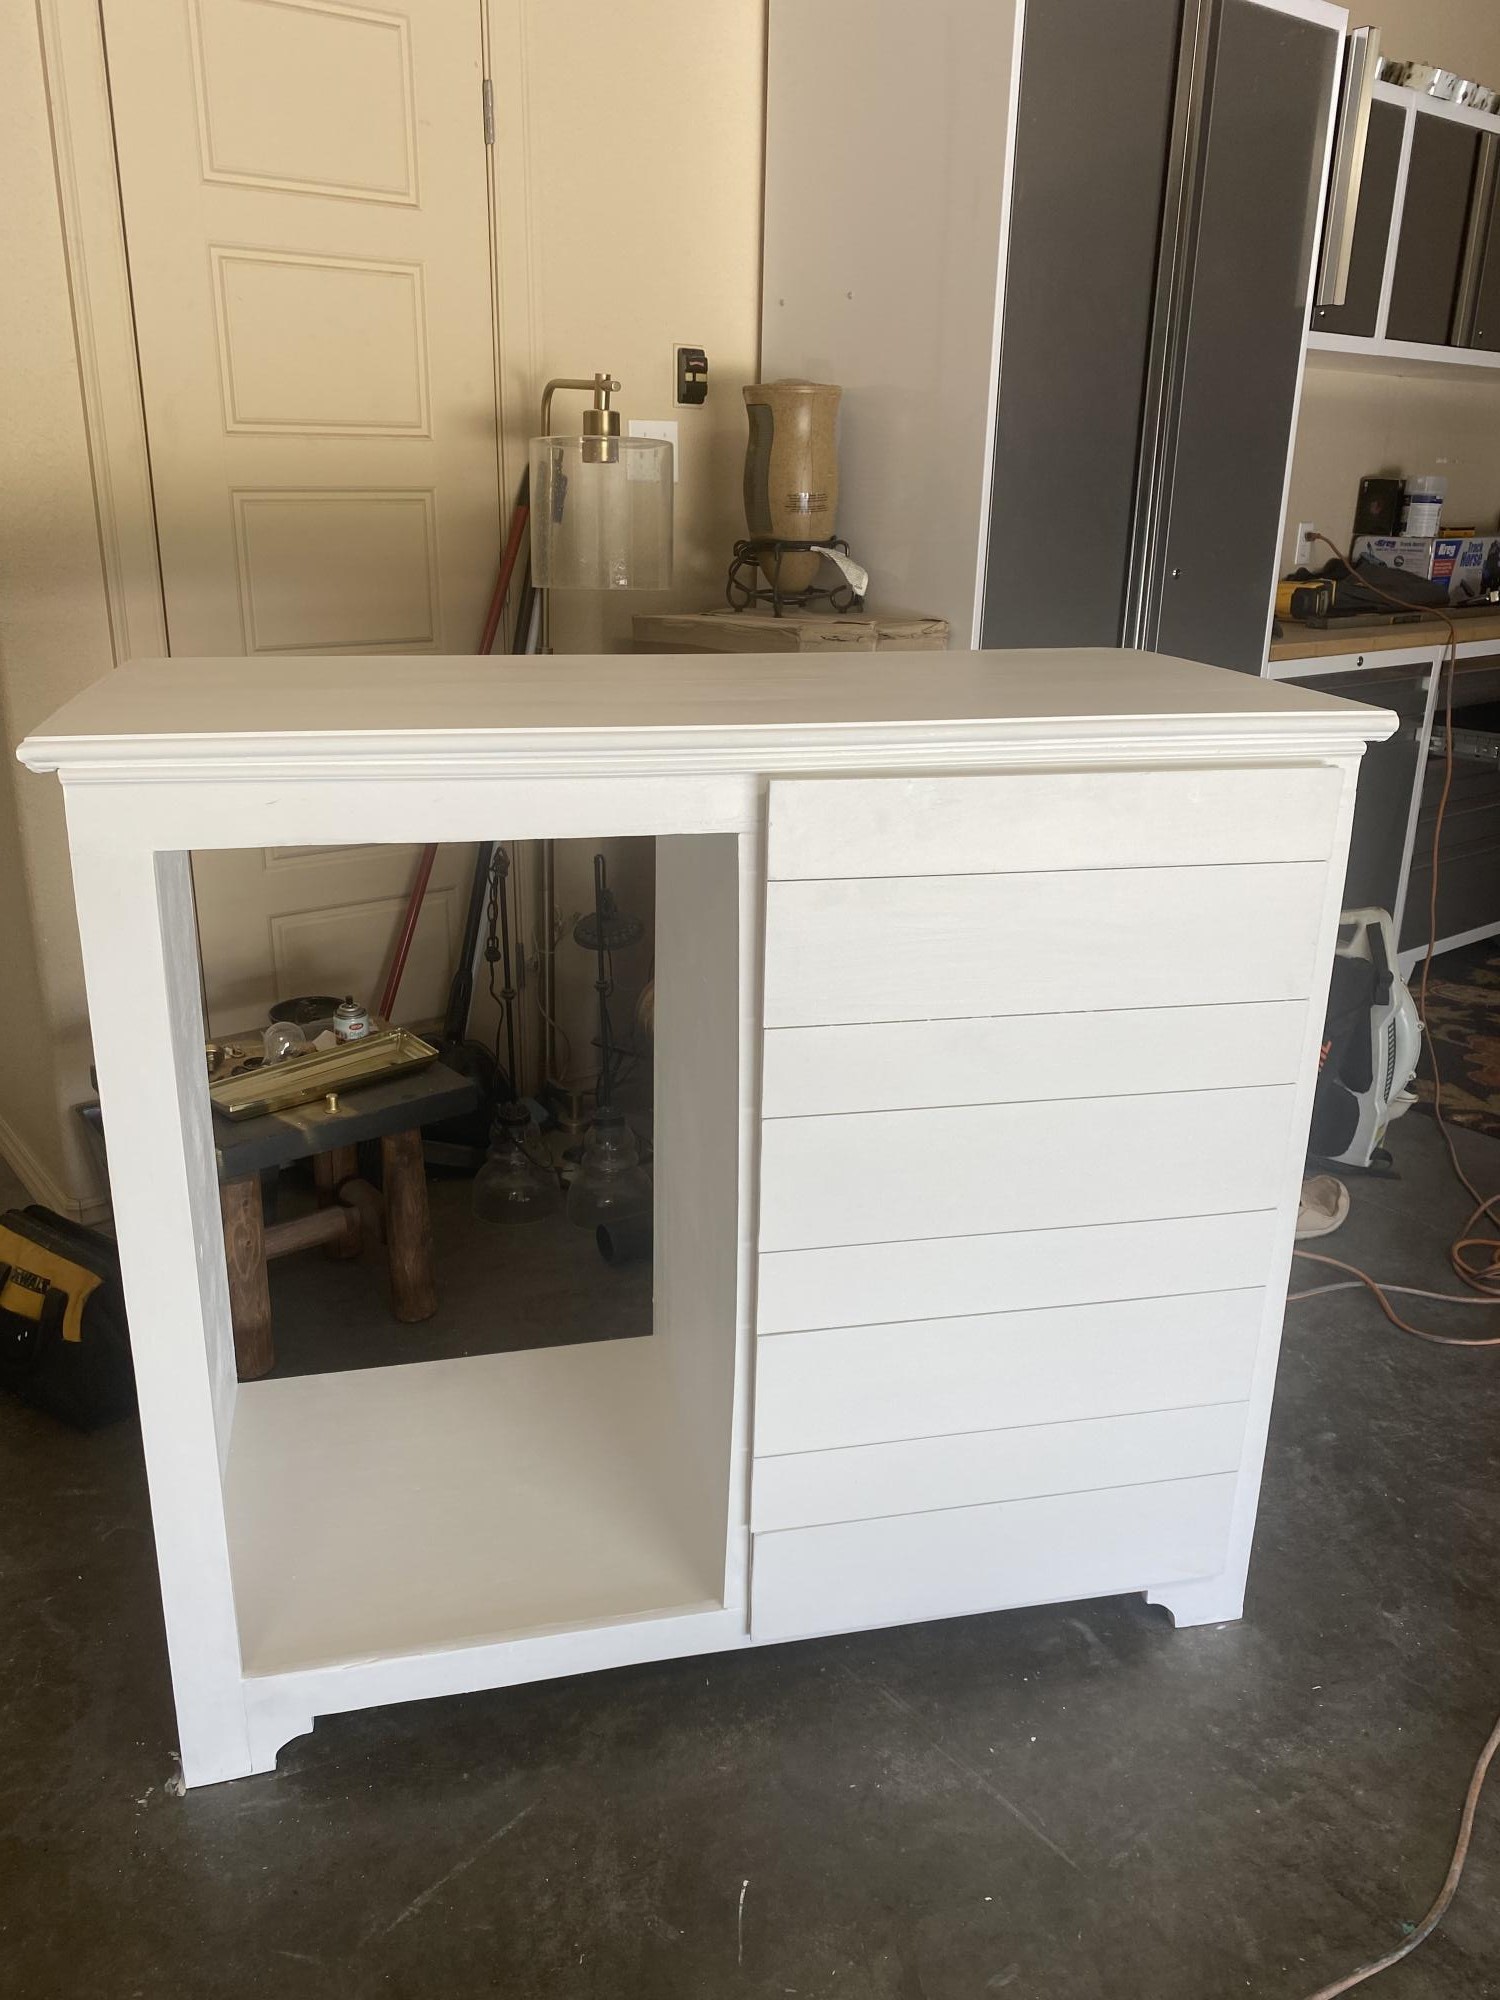
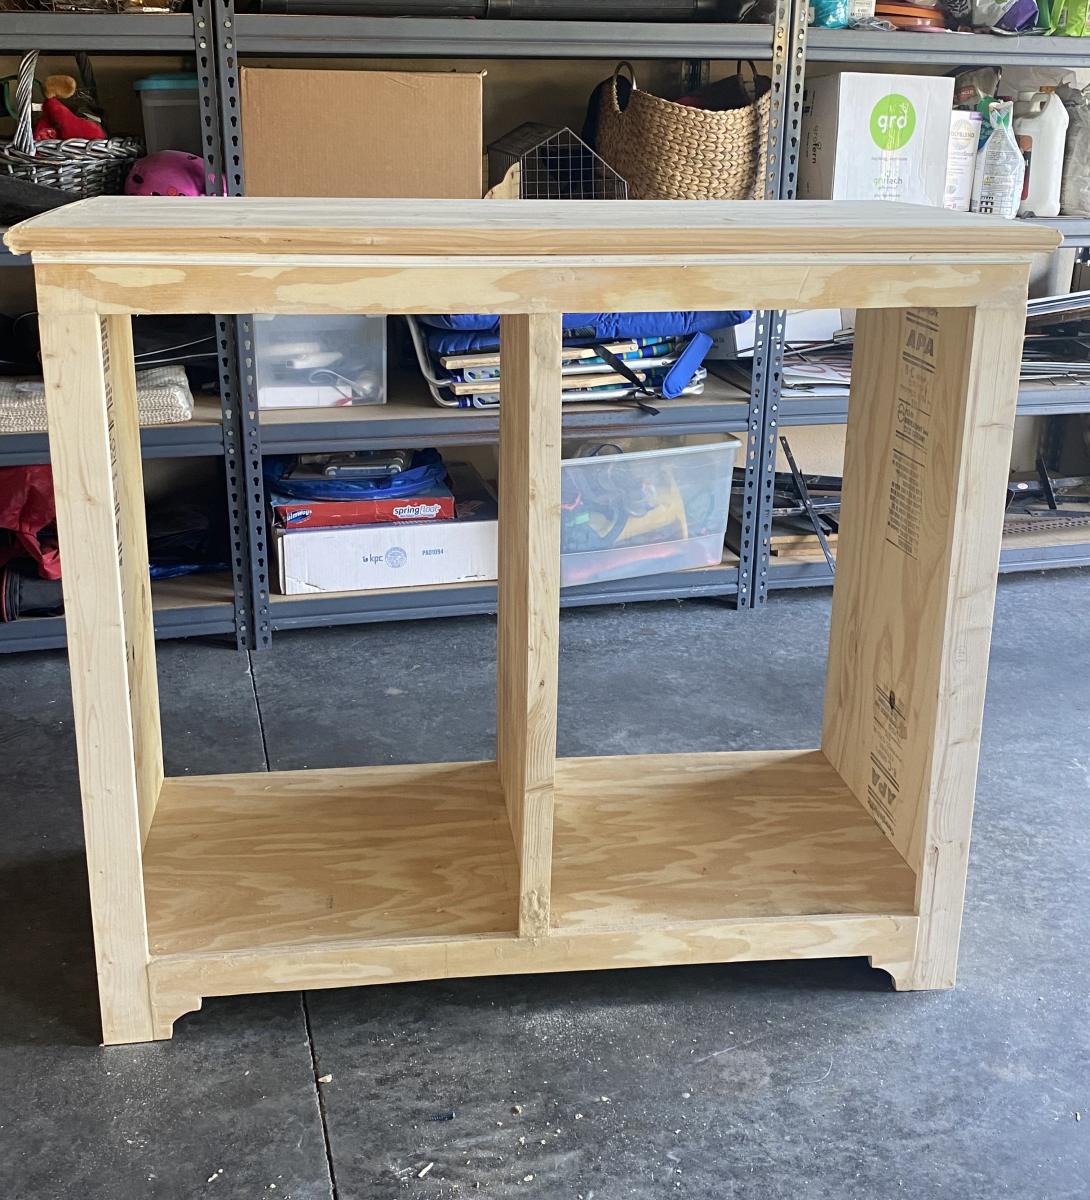
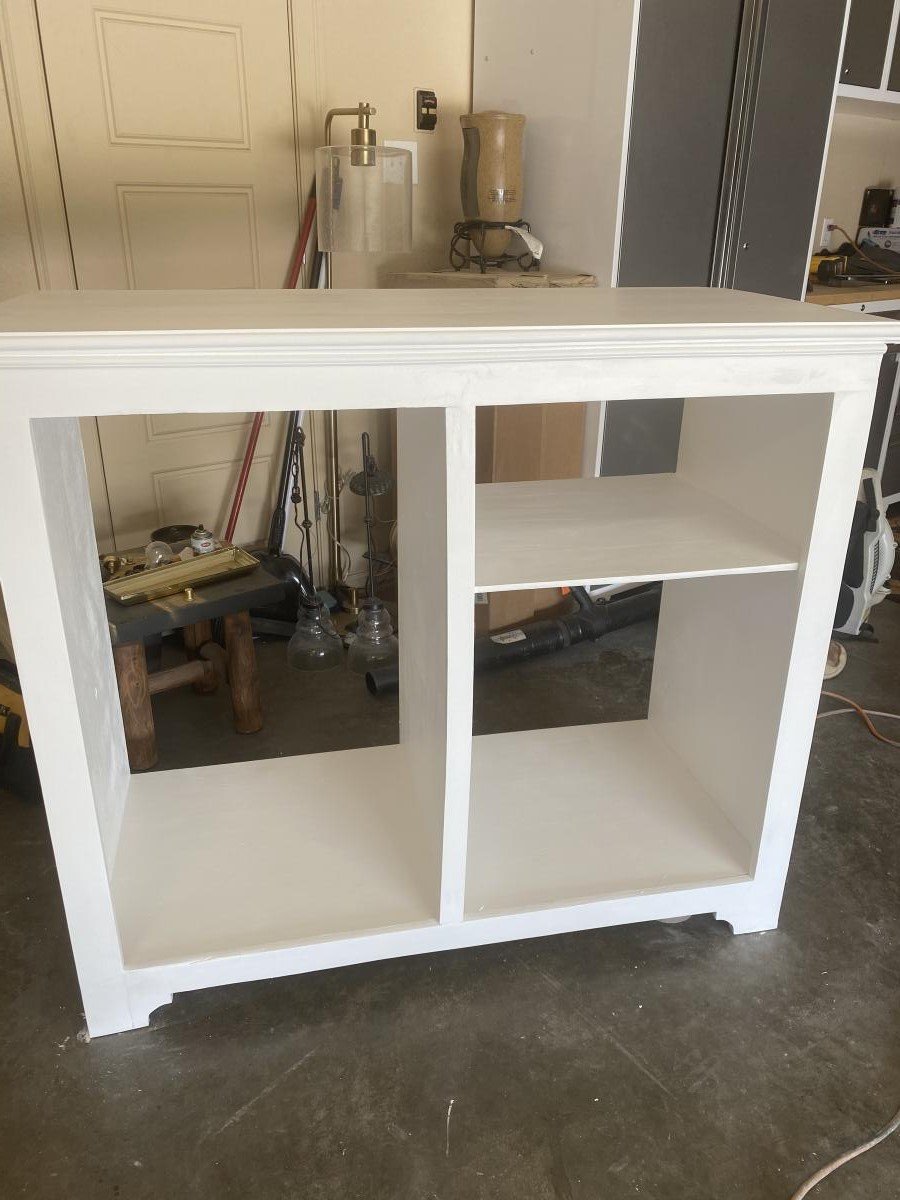
I changed plan to make deeper. I also modified the bottom trim and top. I put a ball bearing soft door drawer guide on modern door so it can slide back and forth. I feel we need more modern plans on here but with a bit of creativity and using plans you can make anything. I have never built anything before. I love General Finishes Milk Paint in Snow White and I brushed rolled it on (sanded between 3 coats). It’s basically self leveling and leaves a nice matte finish. Used door glide in picture bought from homedepot in the 24 inch and that’s how wide door was and it was 36” tall. Door glide I only used one on top of the door not on bottom as well. Door piece of fiberboard with just strips glued on and quarters spacing them correct.
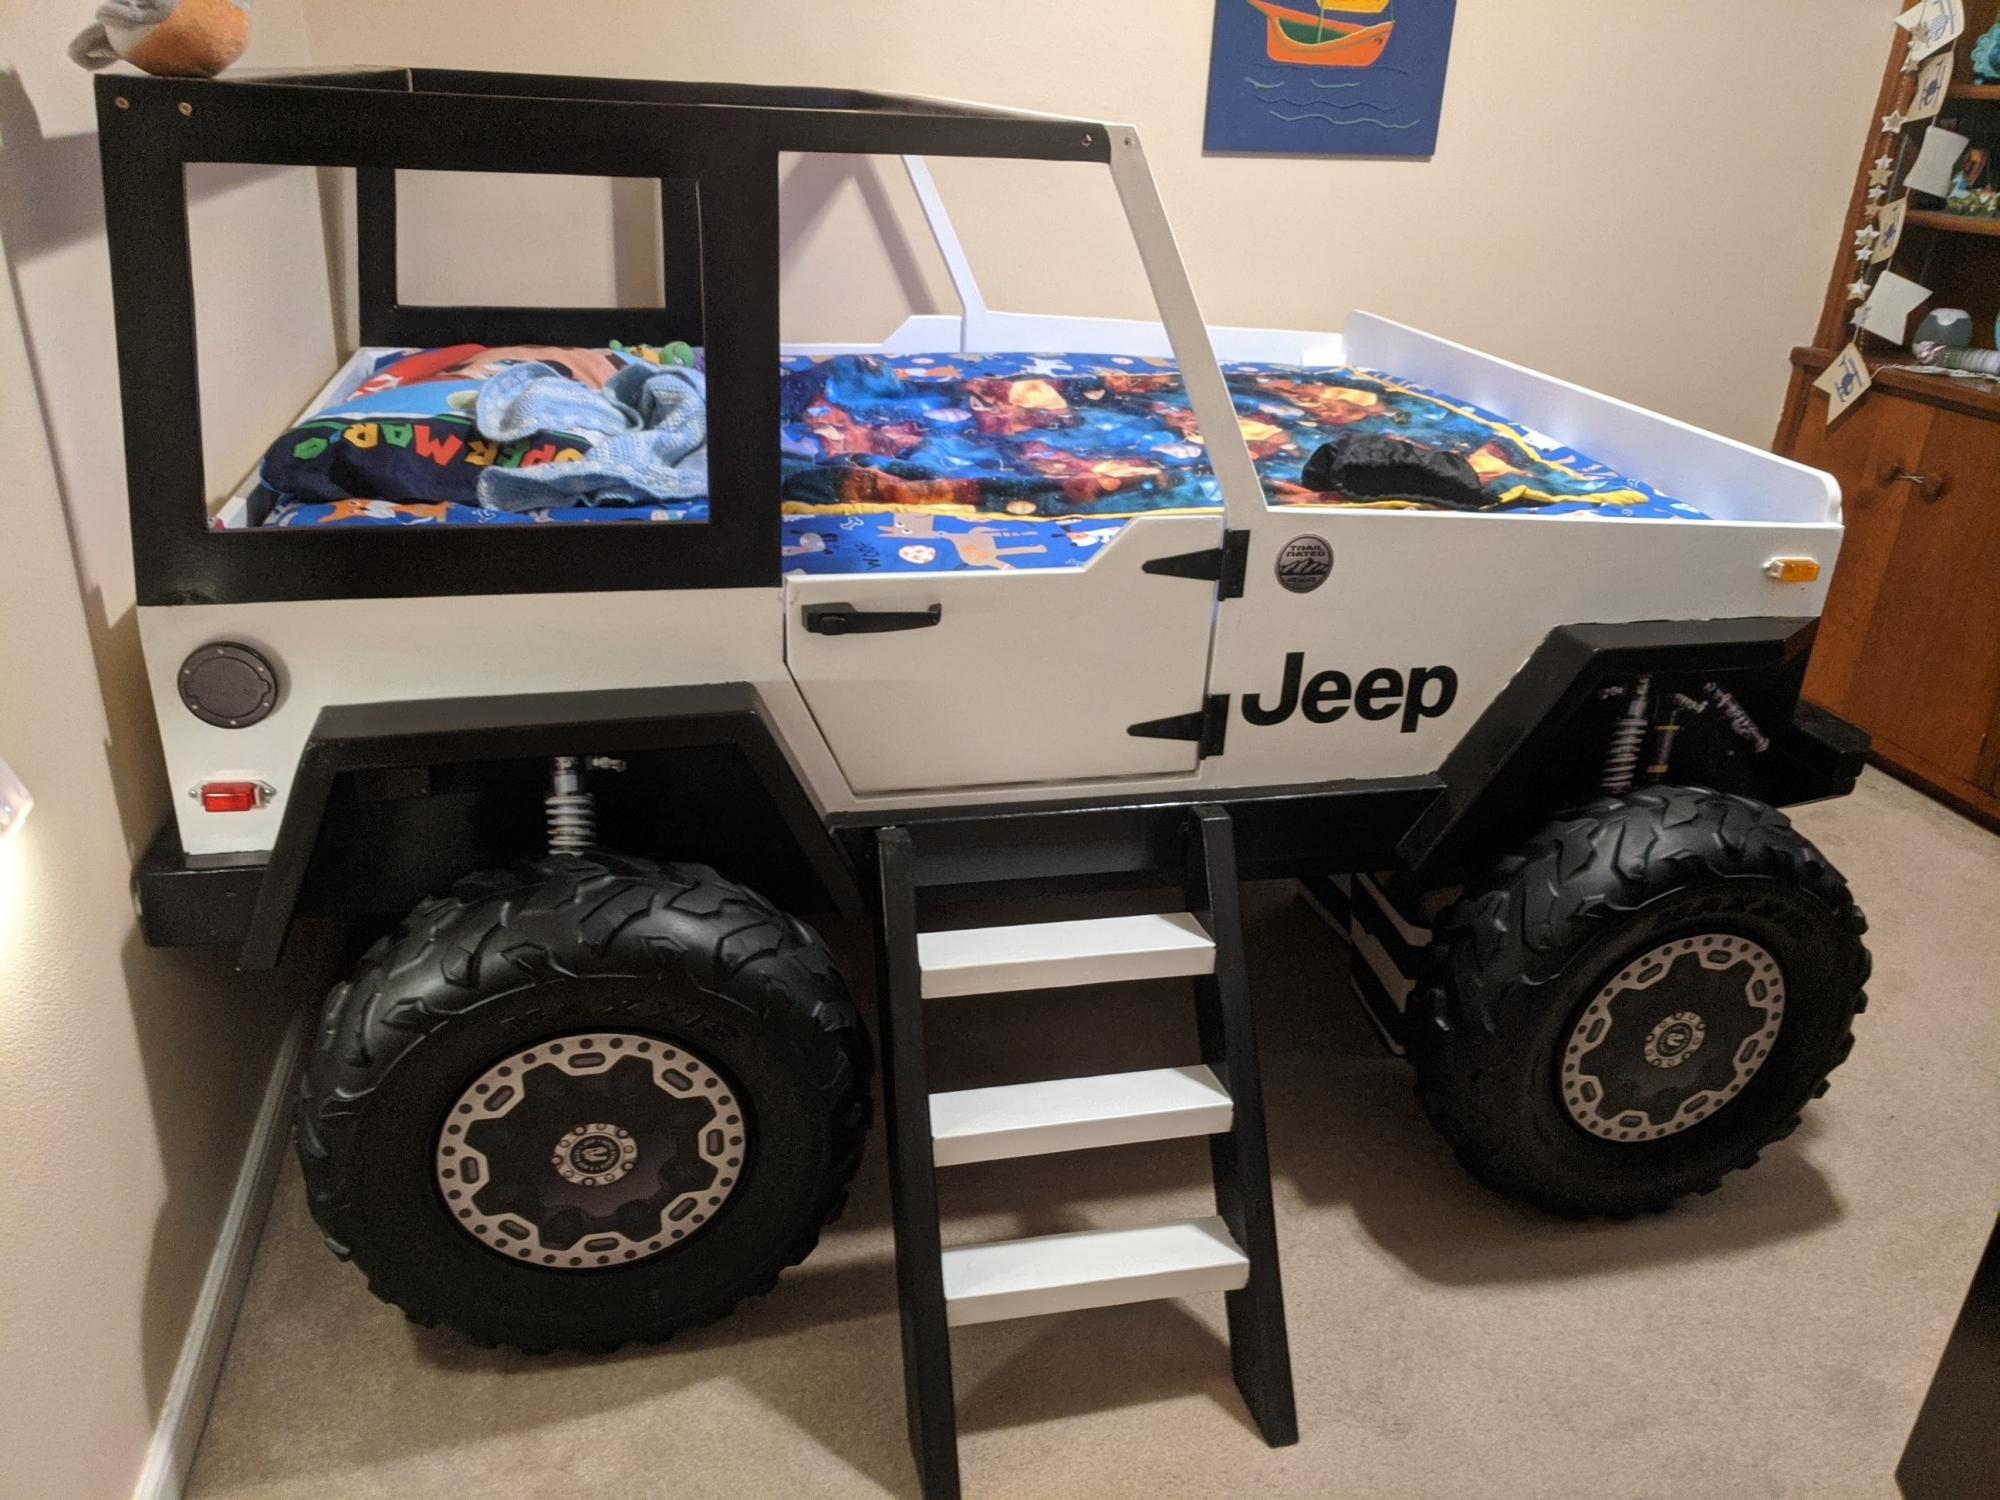
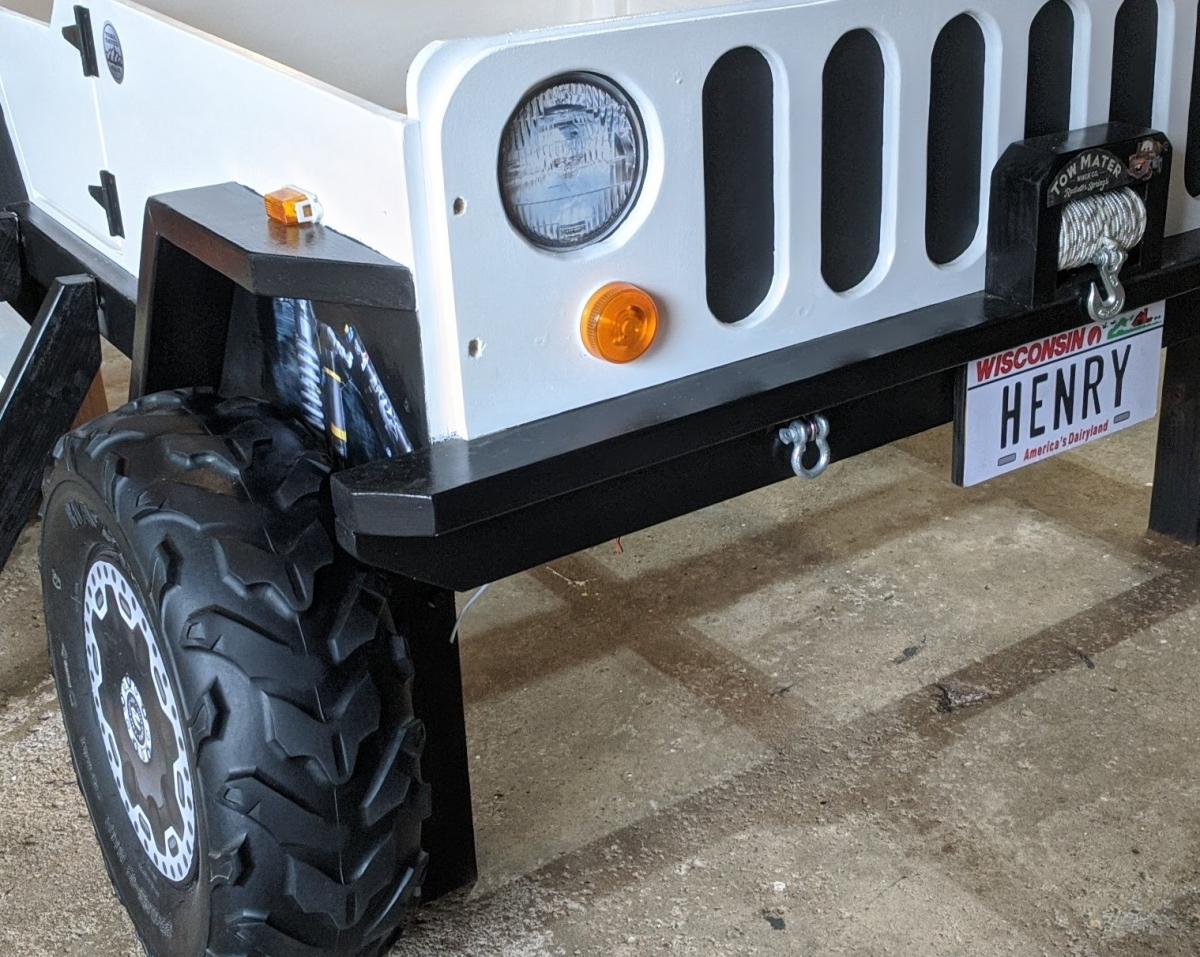
I hope this is OK to add here. It's not an Ana White plan, so moderator please delete if it is not allowed. I made this bed for my grandson. I bought a plan online and modified it from a twin to a full size bed. The dome light and running lights work as night lights. A motion sensor light activates if he crosses the door to illuminate the ladder. Front tire is made as a step so his parents can climb in and read to him. The whole thing is on EZ Sliders so they can move it away from the wall to make the bed.
Mon, 07/05/2021 - 21:59
Wonderful job, thank you for sharing! The details are spot on:)
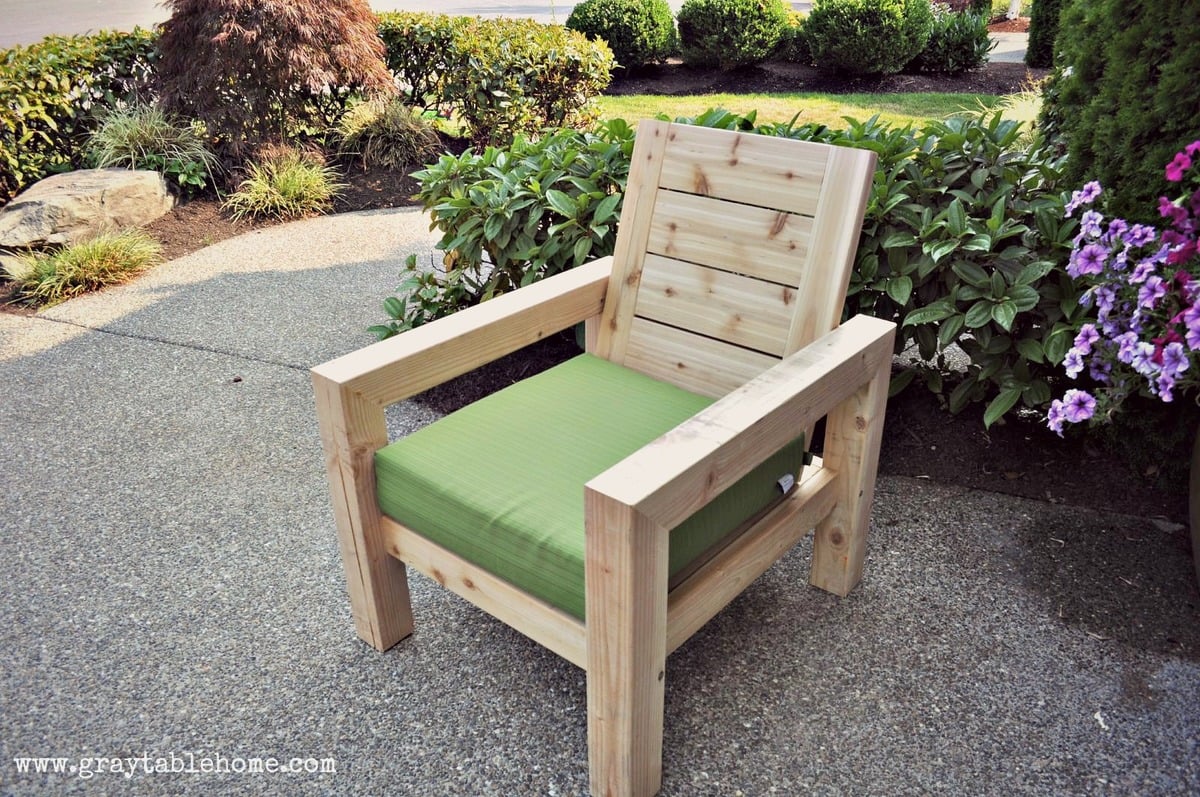
I made this outdoor chair by looking at a variety of plans and designs from Restoration Hardware and other stores. Check out more info on the project on my blog link. Thanks for looking!
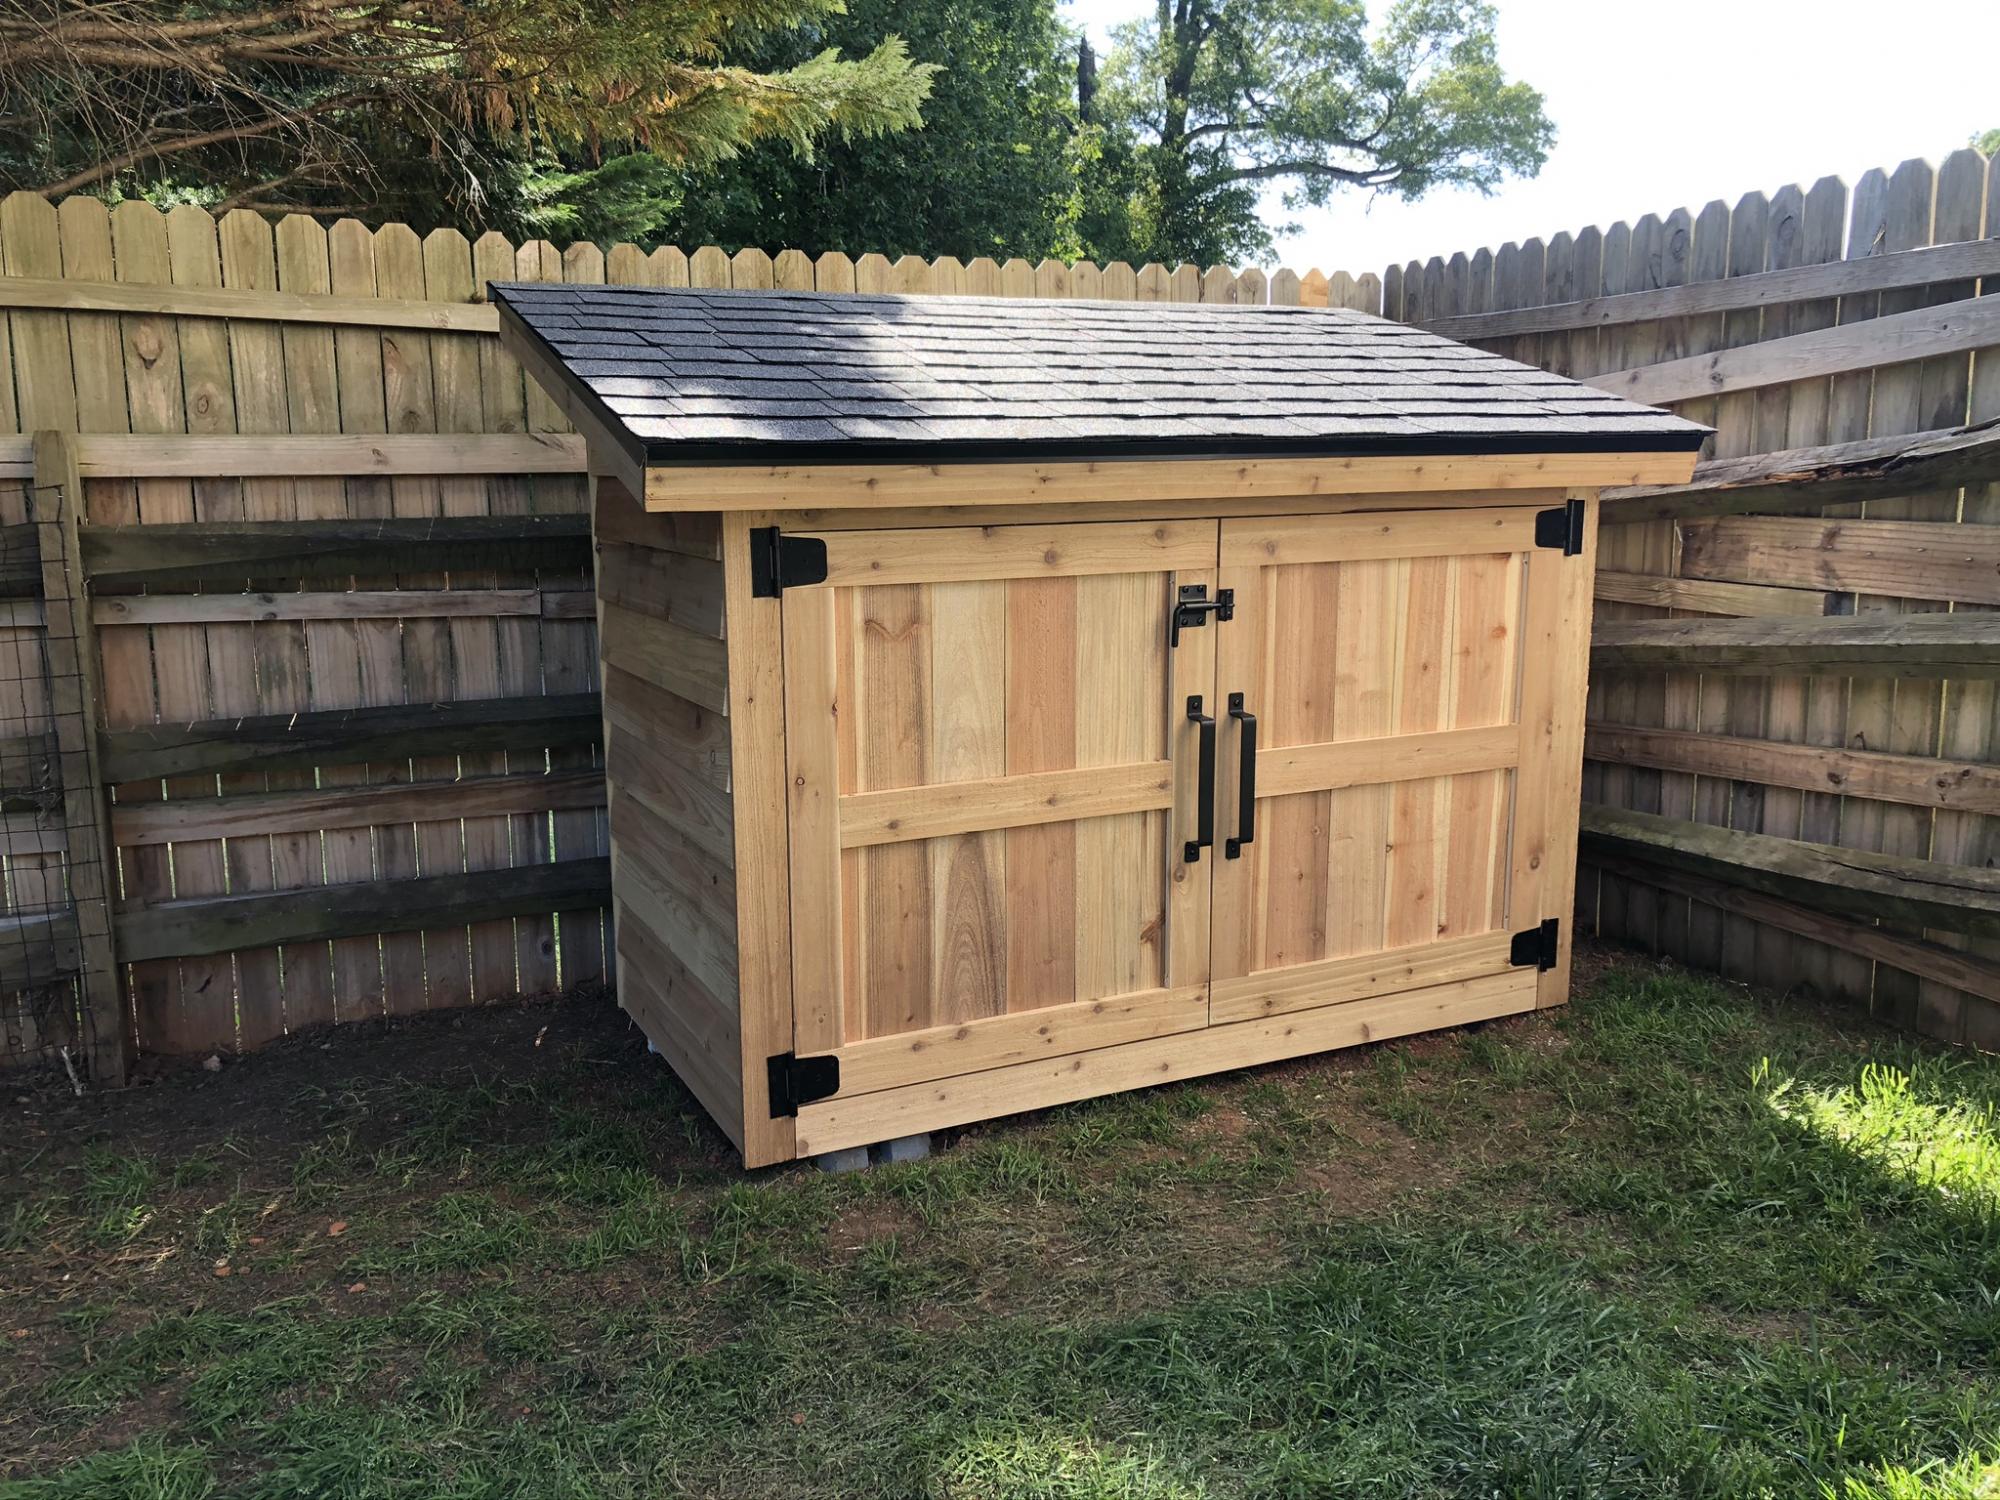
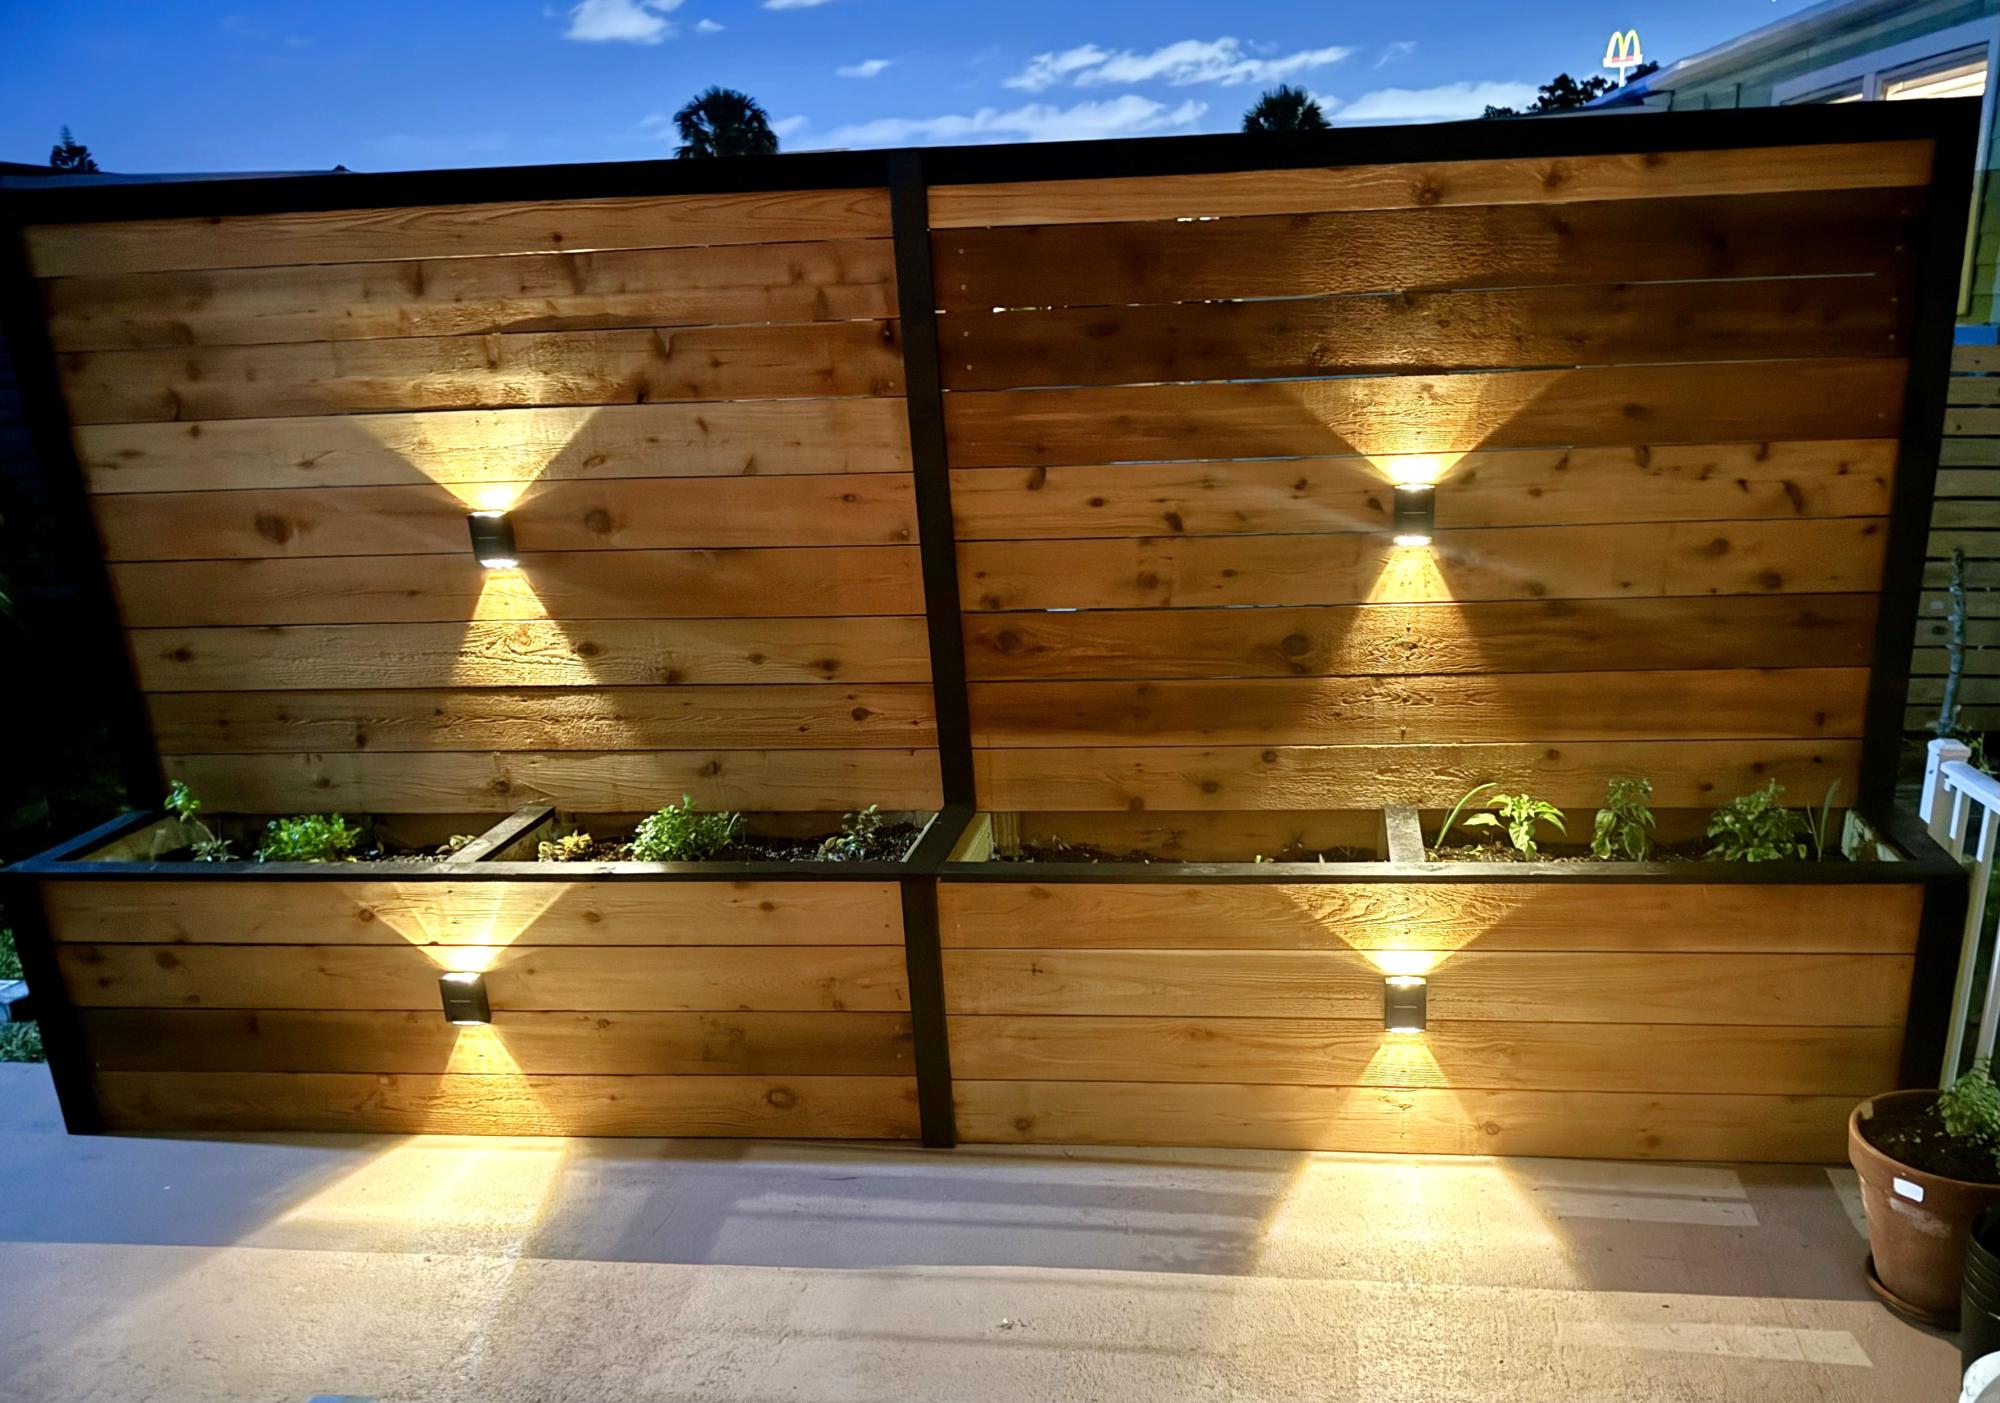
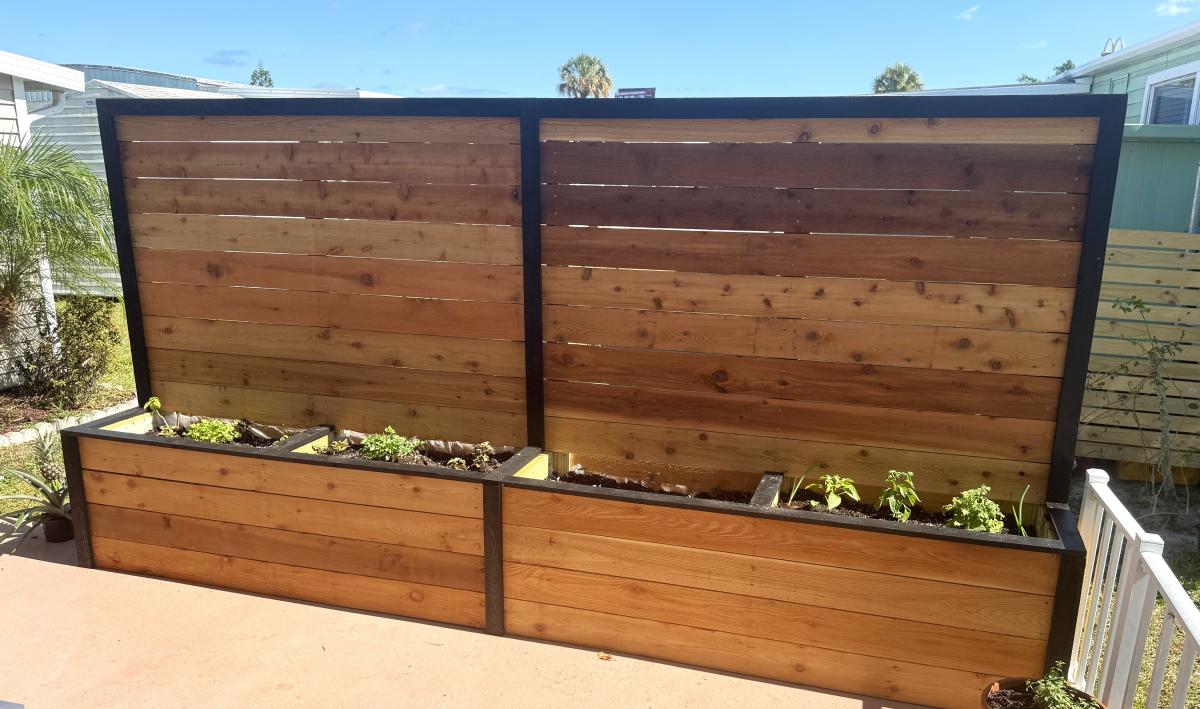
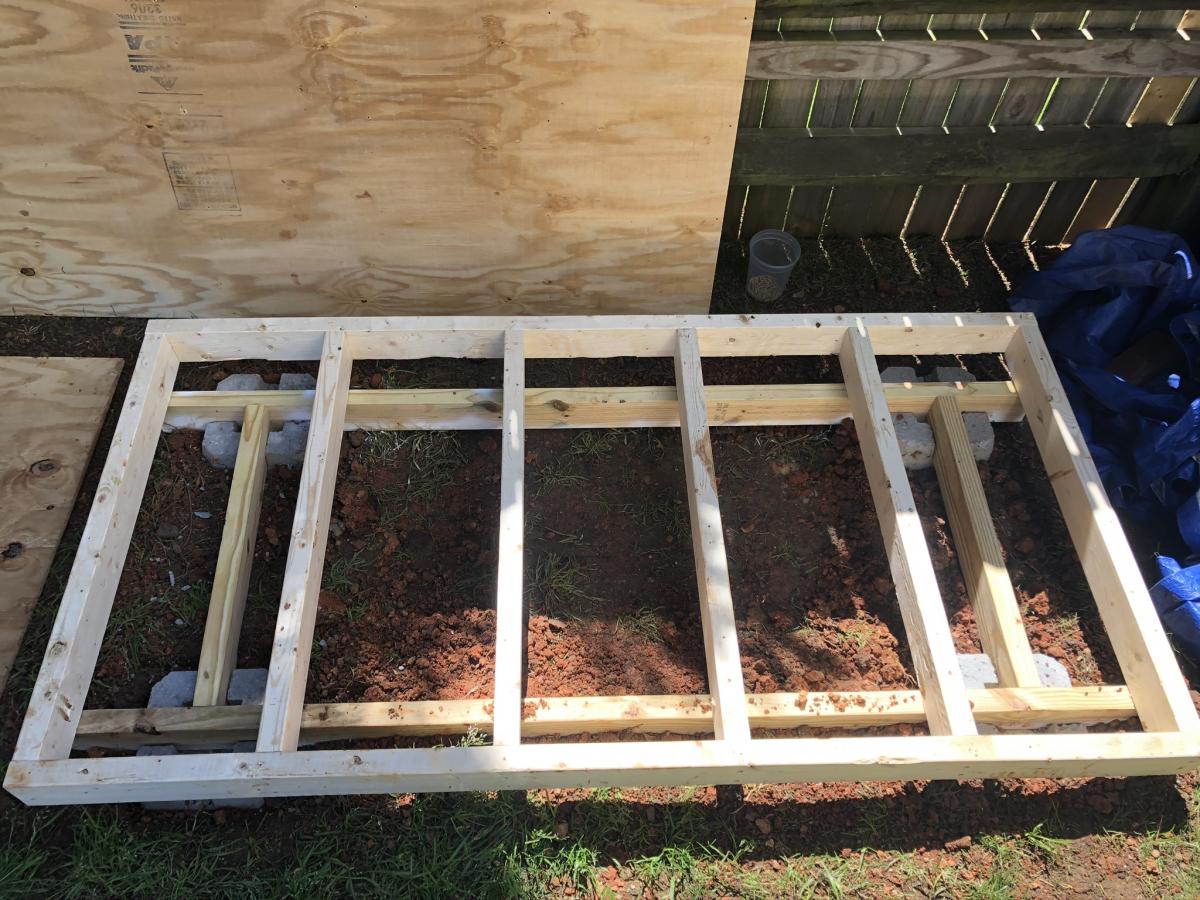
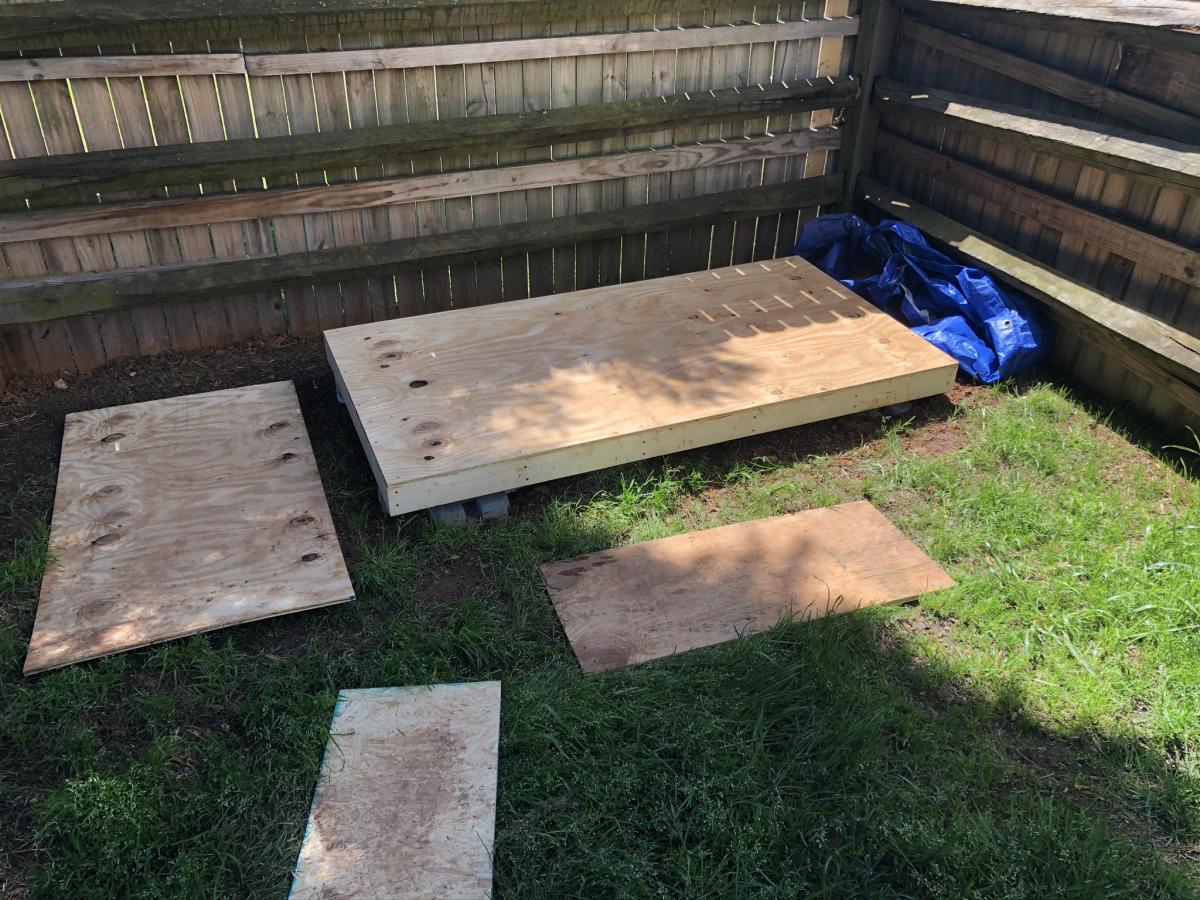
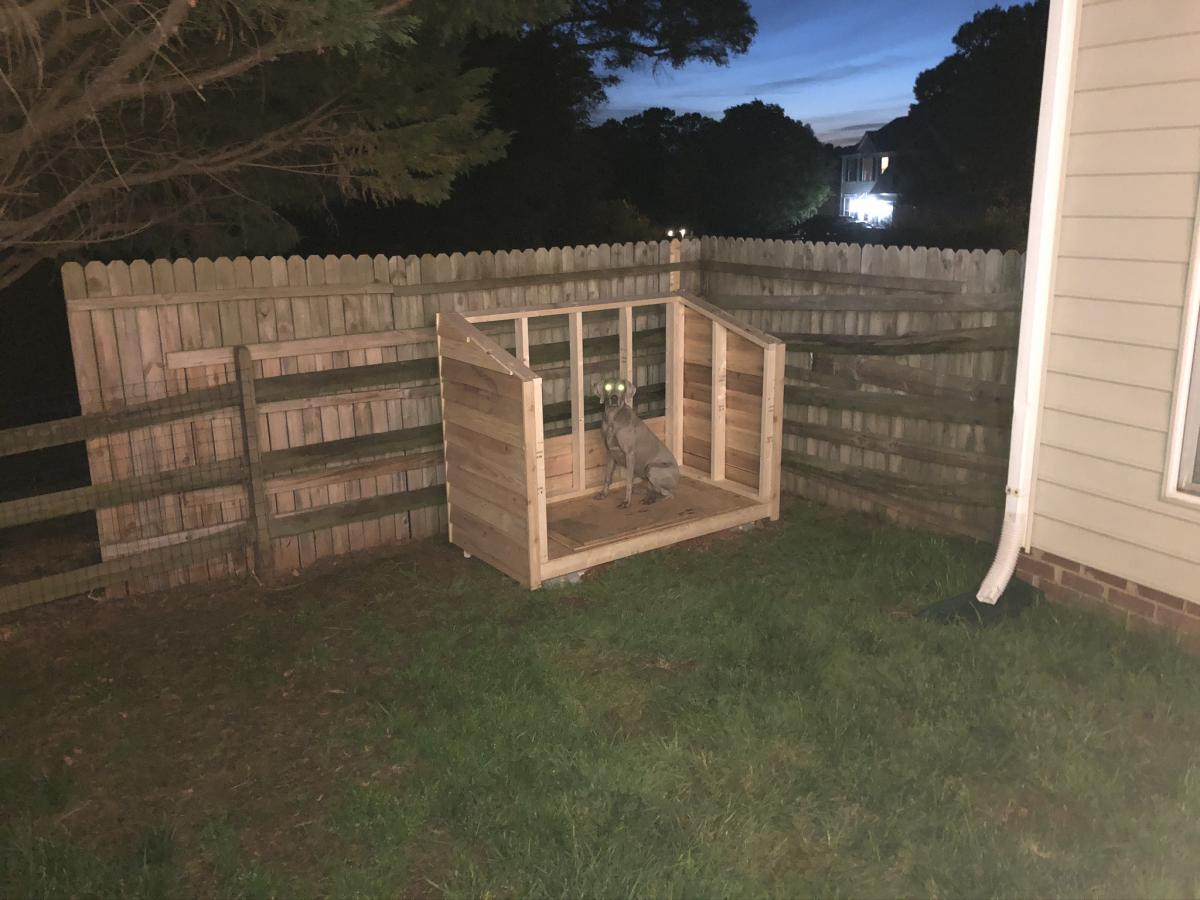
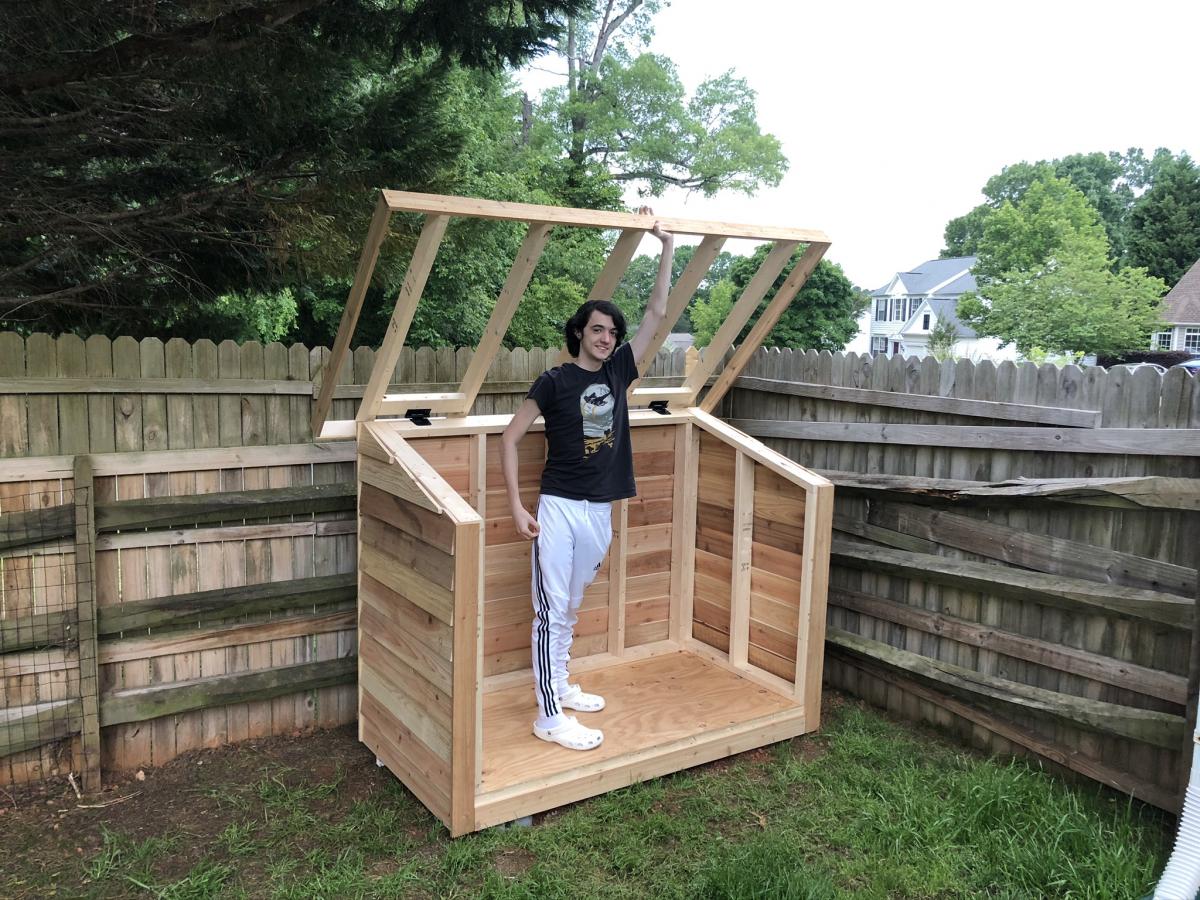
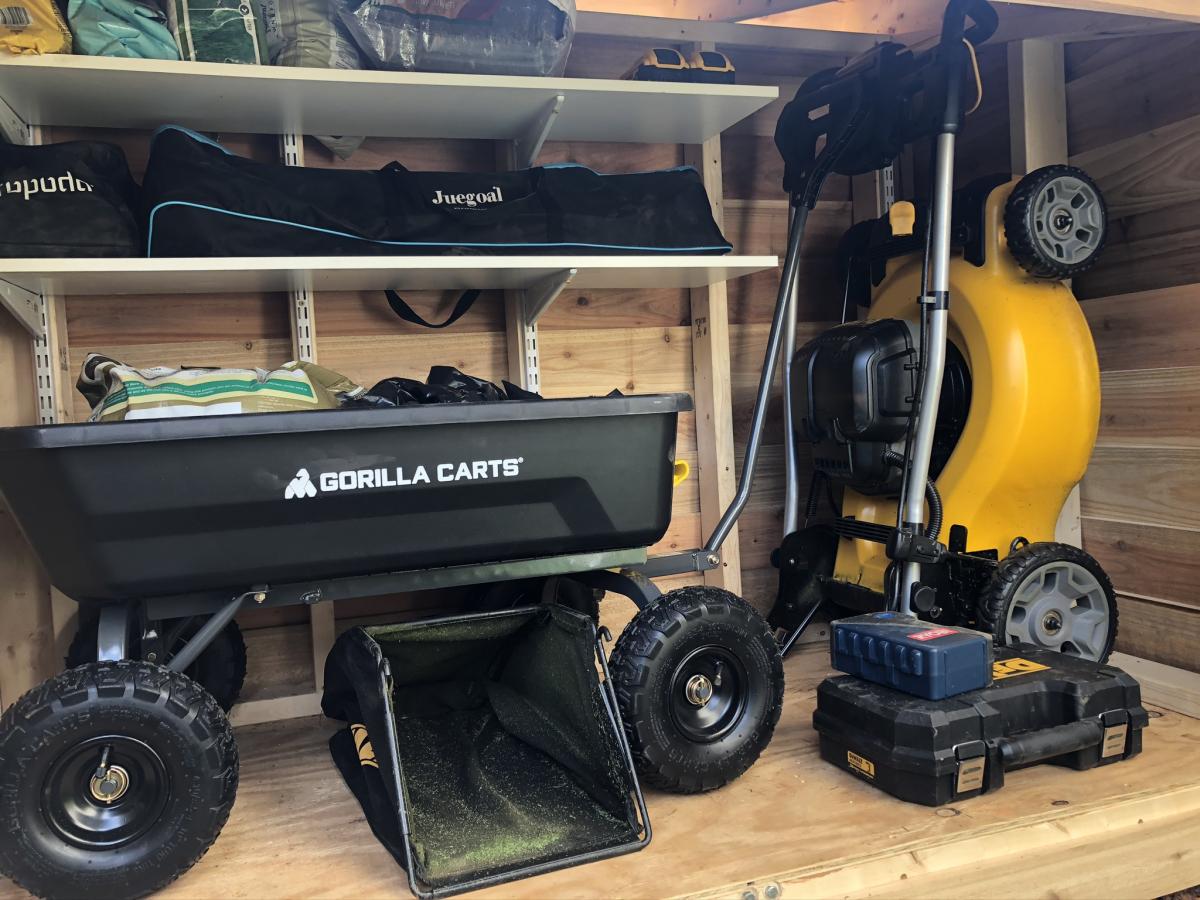
We wanted a shorter version, so that it would hide behind this fence. I just needed somewhere to store lawnmower, wheelbarrow, and a few yard supplies. I started putting the roof on hinges, but the gas struts couldn't support the 170 pound roof. So it's fixed in place (stronger structure anyway). That's why I went with 2x4's for the framed walls instead of 2x2's.

Thu, 06/11/2020 - 17:15
Very Nice modification. Two thumbs up! May I please ask you for the dimensions of the shed?
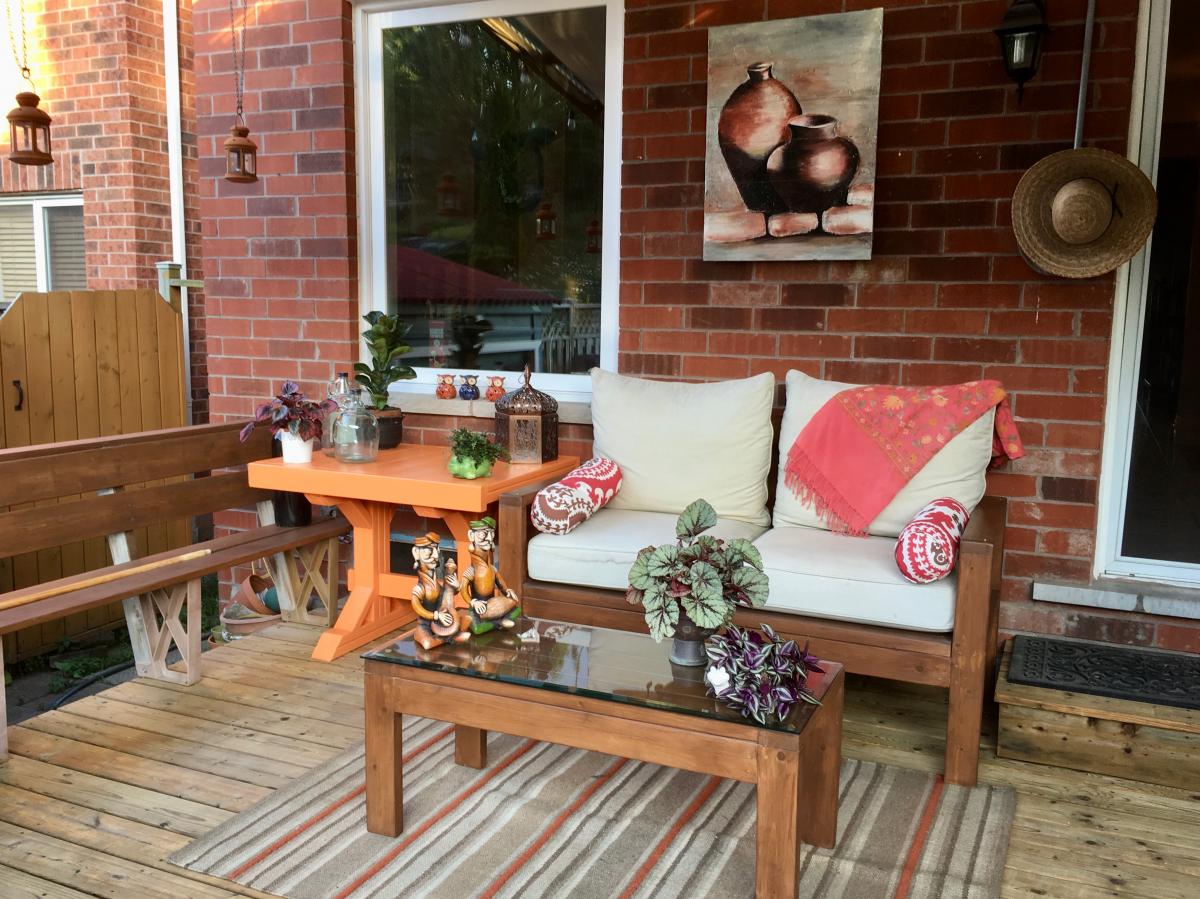
Someone on my street had thrown out 2 couches. The cushions were in perfect condition. So I built chairs and fit the cushions! I built a matching coffee table to fit a glass I had. To finish the space, I added a table to have my morning breakfast.
Mon, 11/01/2021 - 10:09
That's a steal! It looks like a very relaxing spot to hang out, thank you for sharing~
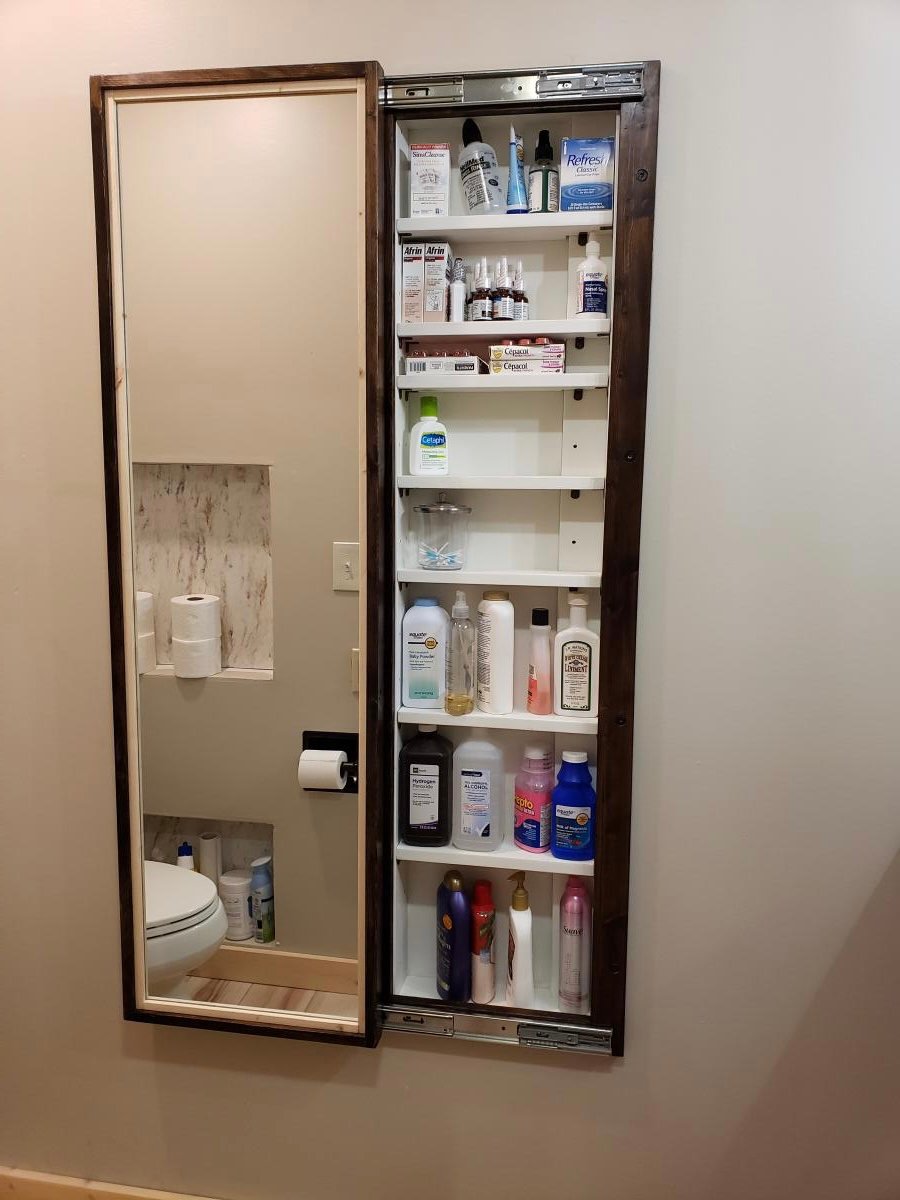
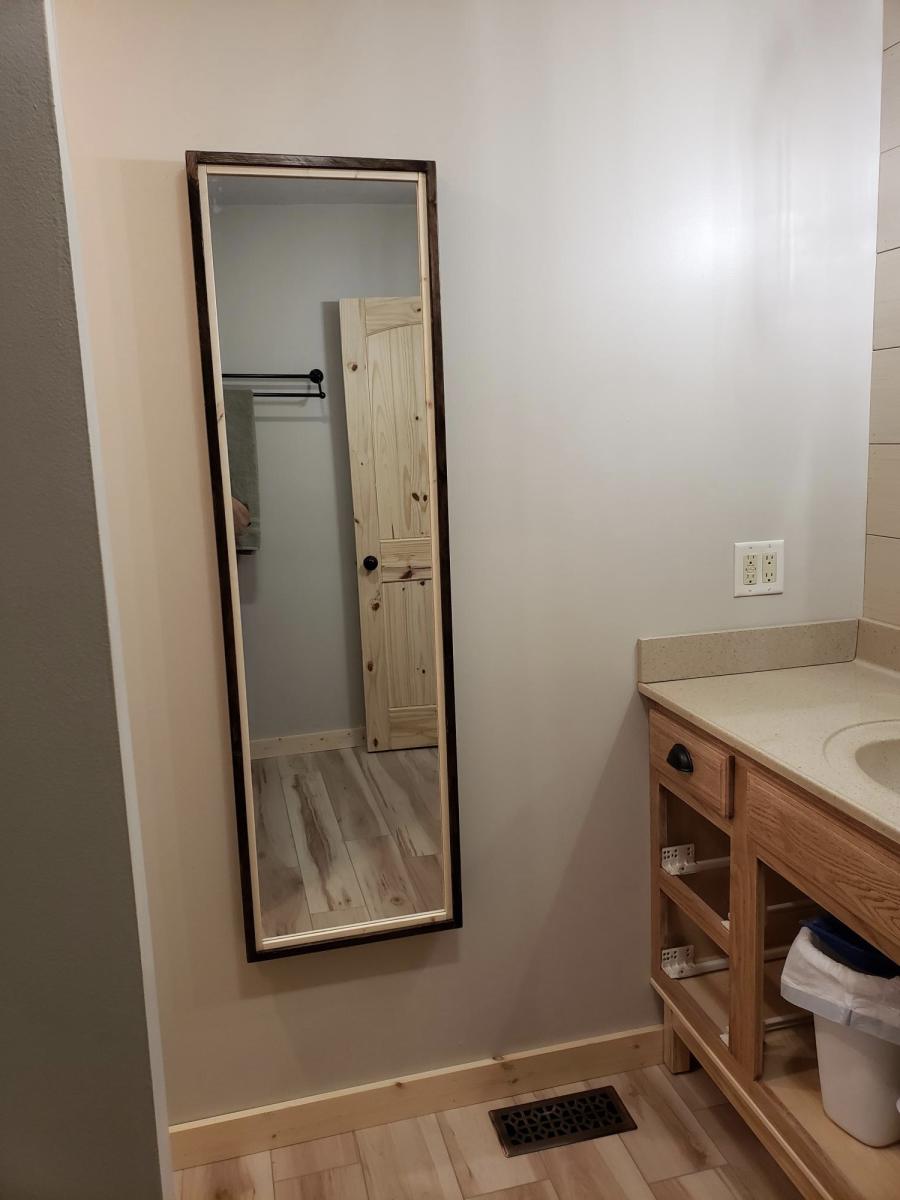
My bathroom has very little storage space. So during our recent remodeling of the room, I decided to add this cabinet. Changed the plan a little to make it recessed in the wall. I love how it turned out!

Sat, 09/03/2022 - 13:28
This looks amazing, love how it's recessed! Thankyou for sharing.
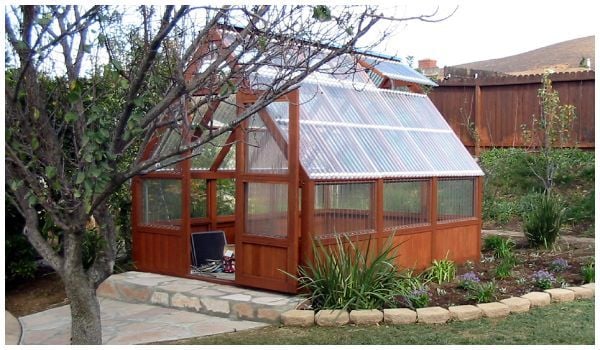
I saw the barn shaped greenhouse plan but preferred a regular roof pitch. I did however incorporate the corrugated polycarbionate as a covering. I find it odd that you guys installed the polycarbonate horizonitally instead of vertically.
Anyway thanks for the info on polycarbonate.
Tue, 09/01/2020 - 17:47
Love this! I really prefer the roofline on your greenhouse. Did you modify Ana's design, or did you get plans from another site? Would love to replicate your design if possible-very elegant.
Comments
Ana White Admin
Tue, 06/08/2021 - 10:44
Awesome!
Love the added ottomans! Great job all around, thank you for sharing.