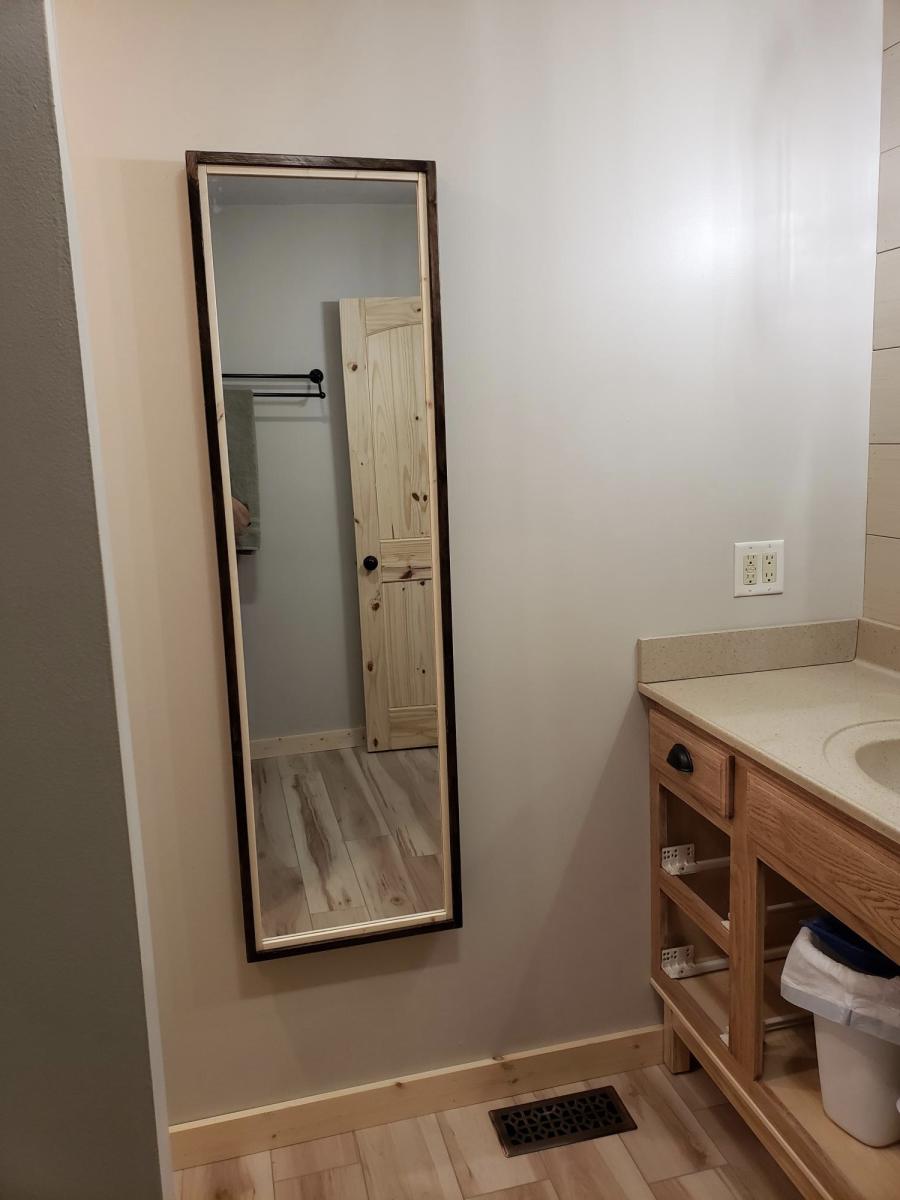
Recessed cabinet
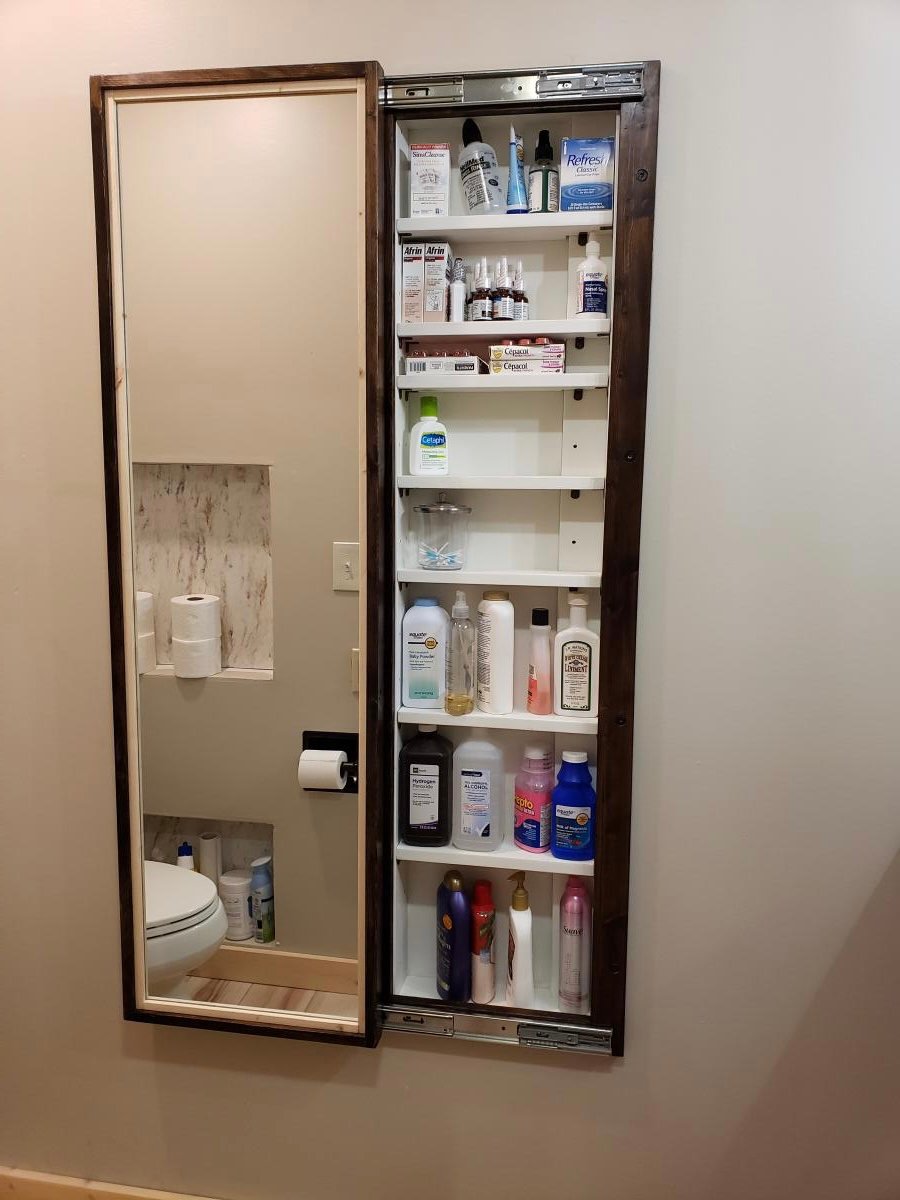
My bathroom has very little storage space. So during our recent remodeling of the room, I decided to add this cabinet. Changed the plan a little to make it recessed in the wall. I love how it turned out!

Built from Plan(s)
My bathroom has very little storage space. So during our recent remodeling of the room, I decided to add this cabinet. Changed the plan a little to make it recessed in the wall. I love how it turned out!

This was born out of the need for more counter space in our galley kitchen. We don't have the space to add an island. Especially around the holidays, it would be great to have extra space for making cookies, serving big meals, etc. I used Ana's Small Kitchen Island Prep Cart plans for inspiration. I adapted the dimensions to fit at the end of our counters when not in use and added a drop leaf to give us almost 4 additional feet of butcher block counter top when we need it. I used scrap lumber that I had for the cabinet and had an extra drawer handle that matches our kitchen cabinets but bought the butcher block, locking casters, drawer slide and hardware for the legs. Also, the weight of the butcher block makes it want to tip when it's away from the cabinet with the drop leaf down so I added a lead counter weight inside the drawer.


Tue, 04/27/2021 - 18:09
I am so interested in doing this, but would like more details on how the drop leaf was constructed. Would it be possible to get more information?

In reply to I am so interested in doing… by haartd
Sat, 07/24/2021 - 16:59
Sure! I used a 4 foot butcher block and cut it down. The horizontal part is 13 1/2" and the drop leaf part is 32 1/8" attached with a piano hinge. The legs need to be cut and hinged to fit when folded up. This one is made so that the drop leaf fits right under the overhang of the kitchen countertop that it is next to so it's snug against the cabinet and not an issue but, if you want it to be freestanding, the weight of the butcher block will pull it over if you don't weight the cabinet down with something as well. I got a 5 pound lead bar from Amazon in case we need to use it somewhere else. I hope that helps! Let me know if you have any other questions.

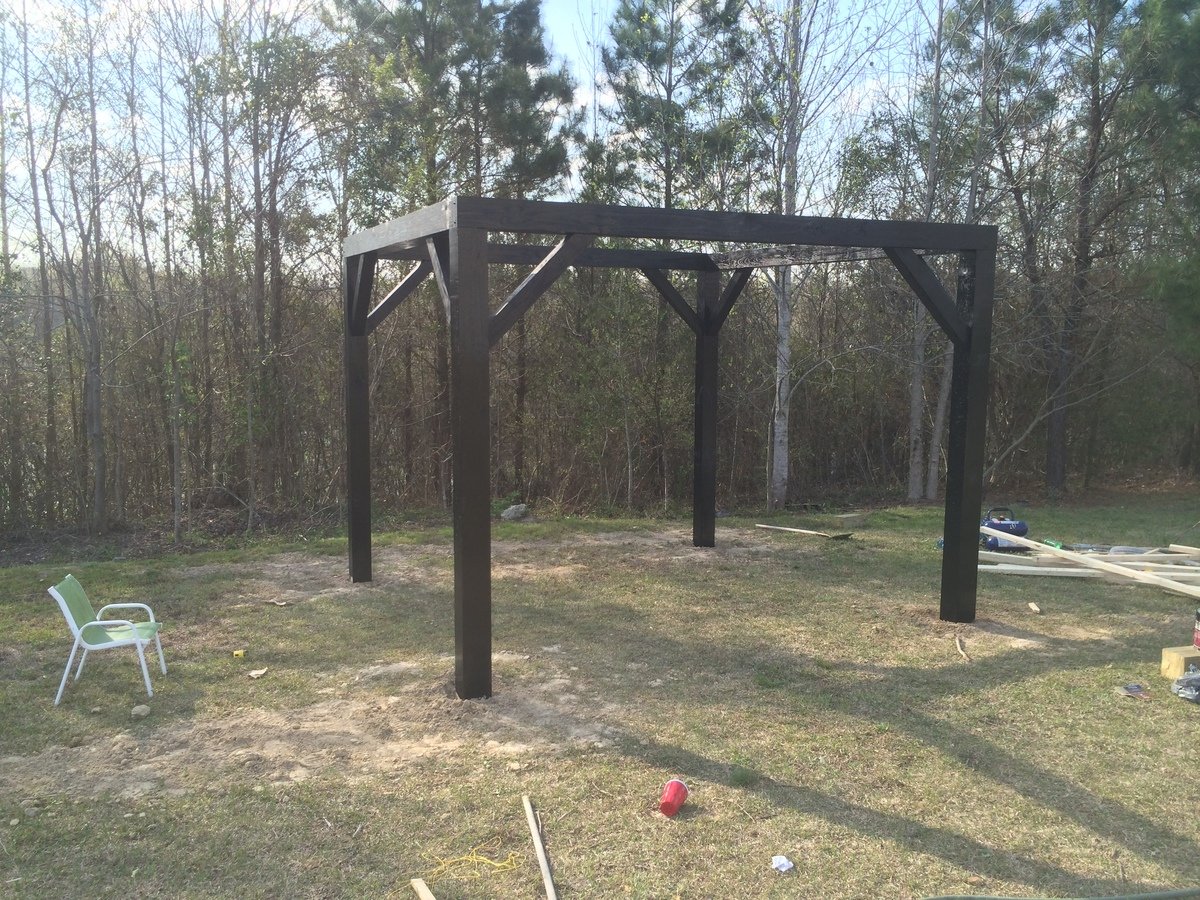
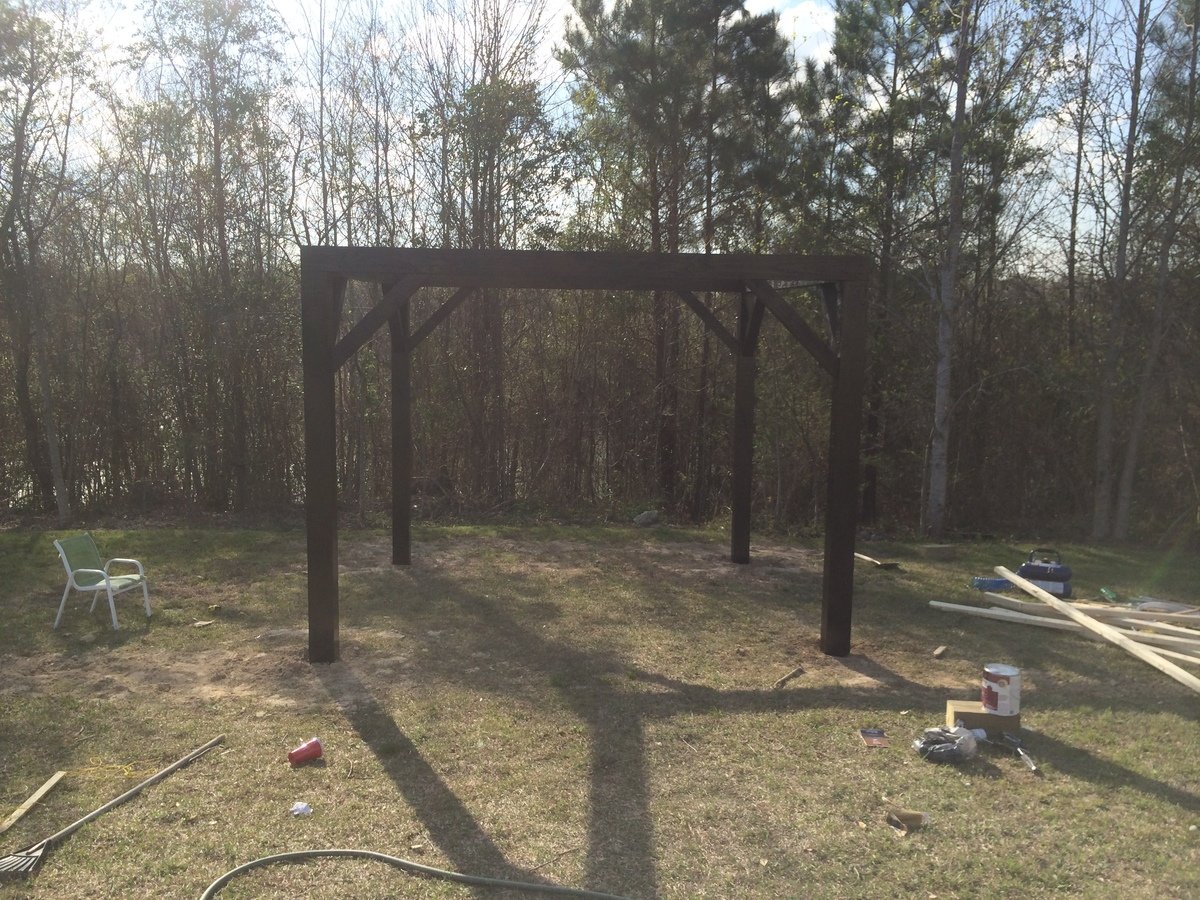
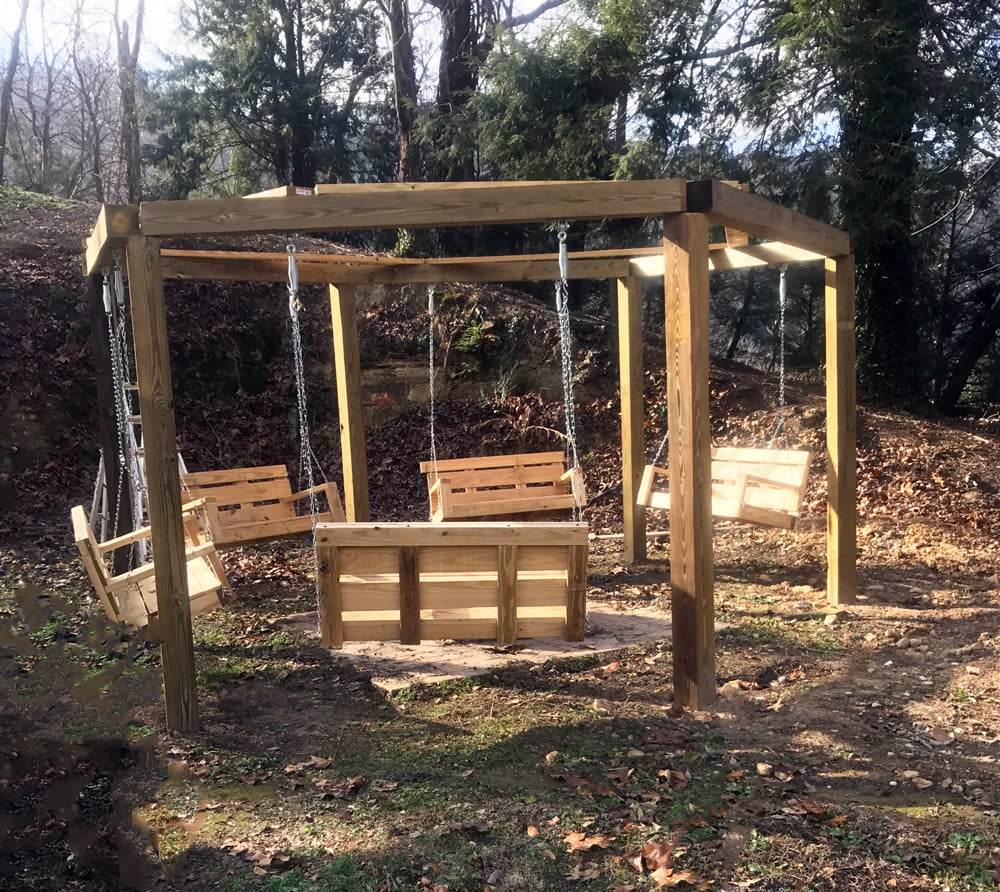
My wife saw something like this on Pinterest and desperately wanted one. The one she saw was hexagonal in shape. We didn't need as many swings so we went with just a plain square shape. We used 6x6s for the legs and posts across the top and used 4x4s for the angled support pieces. We built the swings using the plan from this website. All the materials can be picked up at the blue and orange stores. However when it came to the springs for the swings, the blue store was 1/3 of the price of HD. The legs are 12' long and buried 4' under the ground and cemented in for strength. Luckily I am retired military and was able to rent an auger for 1/2 the price of HD or the blue store. You could do it by hand but it saved us hours and lots of back pain. We found our dimensions for the size we wanted and spray painted dots on the ground where the posts were going to go. We dug the holes and stuffed the 6x6s in them. Using a post level we made sure they were plum. We braced them and added the quickrete and left them to setup over night. The next day we had to make sure all the tops were level with each other. This is where having some knowledge of physics paid off. I took clear tubing and screwed it above the height that I wanted on one post and then screwed the other end to another post. Fill it with water until the water level on the first post is where I wanted it (8 feet high) and it will automatically fill it level on the other end. There is a picture of this above. Water will always level itself out. I had to do this because my yard is at a slight down hill grade. We marked it and cut the tops off to make it level. After attaching the 6x6s on the top with 8" lag bolts it was time to paint. After painting was done we built 3 swings from Ana's plans. We shortened them by 6" to give room to walk between the legs and the swings. All in all it was a great project that only took two dedicated weekends. My wife still has to paint the swings though.


Wed, 05/27/2015 - 07:42
How did you attach the 6x6's to the top? Is it a miter cut at 45 degrees and then put together with the lag bolts. I'm kinda confused. Thanks.
Wed, 05/27/2015 - 22:38
It sounds and looks like the top 6x6s are mitered and sit on top of the end of the vertical posts. I'd say at least one lag bolt each way to hold the mitered corner together and then at least one in each piece down into the vertical to hold it in place.
Sun, 07/19/2015 - 16:26
I have looked at several versions including the hexagon pergola's, but this is exactly what we want. Do you have plans that you can email me? [email protected]
Sun, 04/19/2020 - 12:33
If you recurved plans can you please send to me?
[email protected]
Sun, 04/19/2020 - 12:33
If you recurved plans can you please send to me?
[email protected]
Wed, 04/29/2020 - 16:18
I was looking for material list and plans if you have any please send to [email protected] thanks
Mon, 04/27/2020 - 10:24
WOW, LOVE!!! This is simply gorgeous! What a warm and welcoming addition to your yard. And thanks for sharing your method of finding level for your posts on your sloped yard. I absolutely love it!
Thu, 10/22/2020 - 06:53
Love this, can you please email me the plans @ [email protected]
Fri, 03/26/2021 - 05:58
This is beautiful. Would love to see the plans for this. How small can it be made?
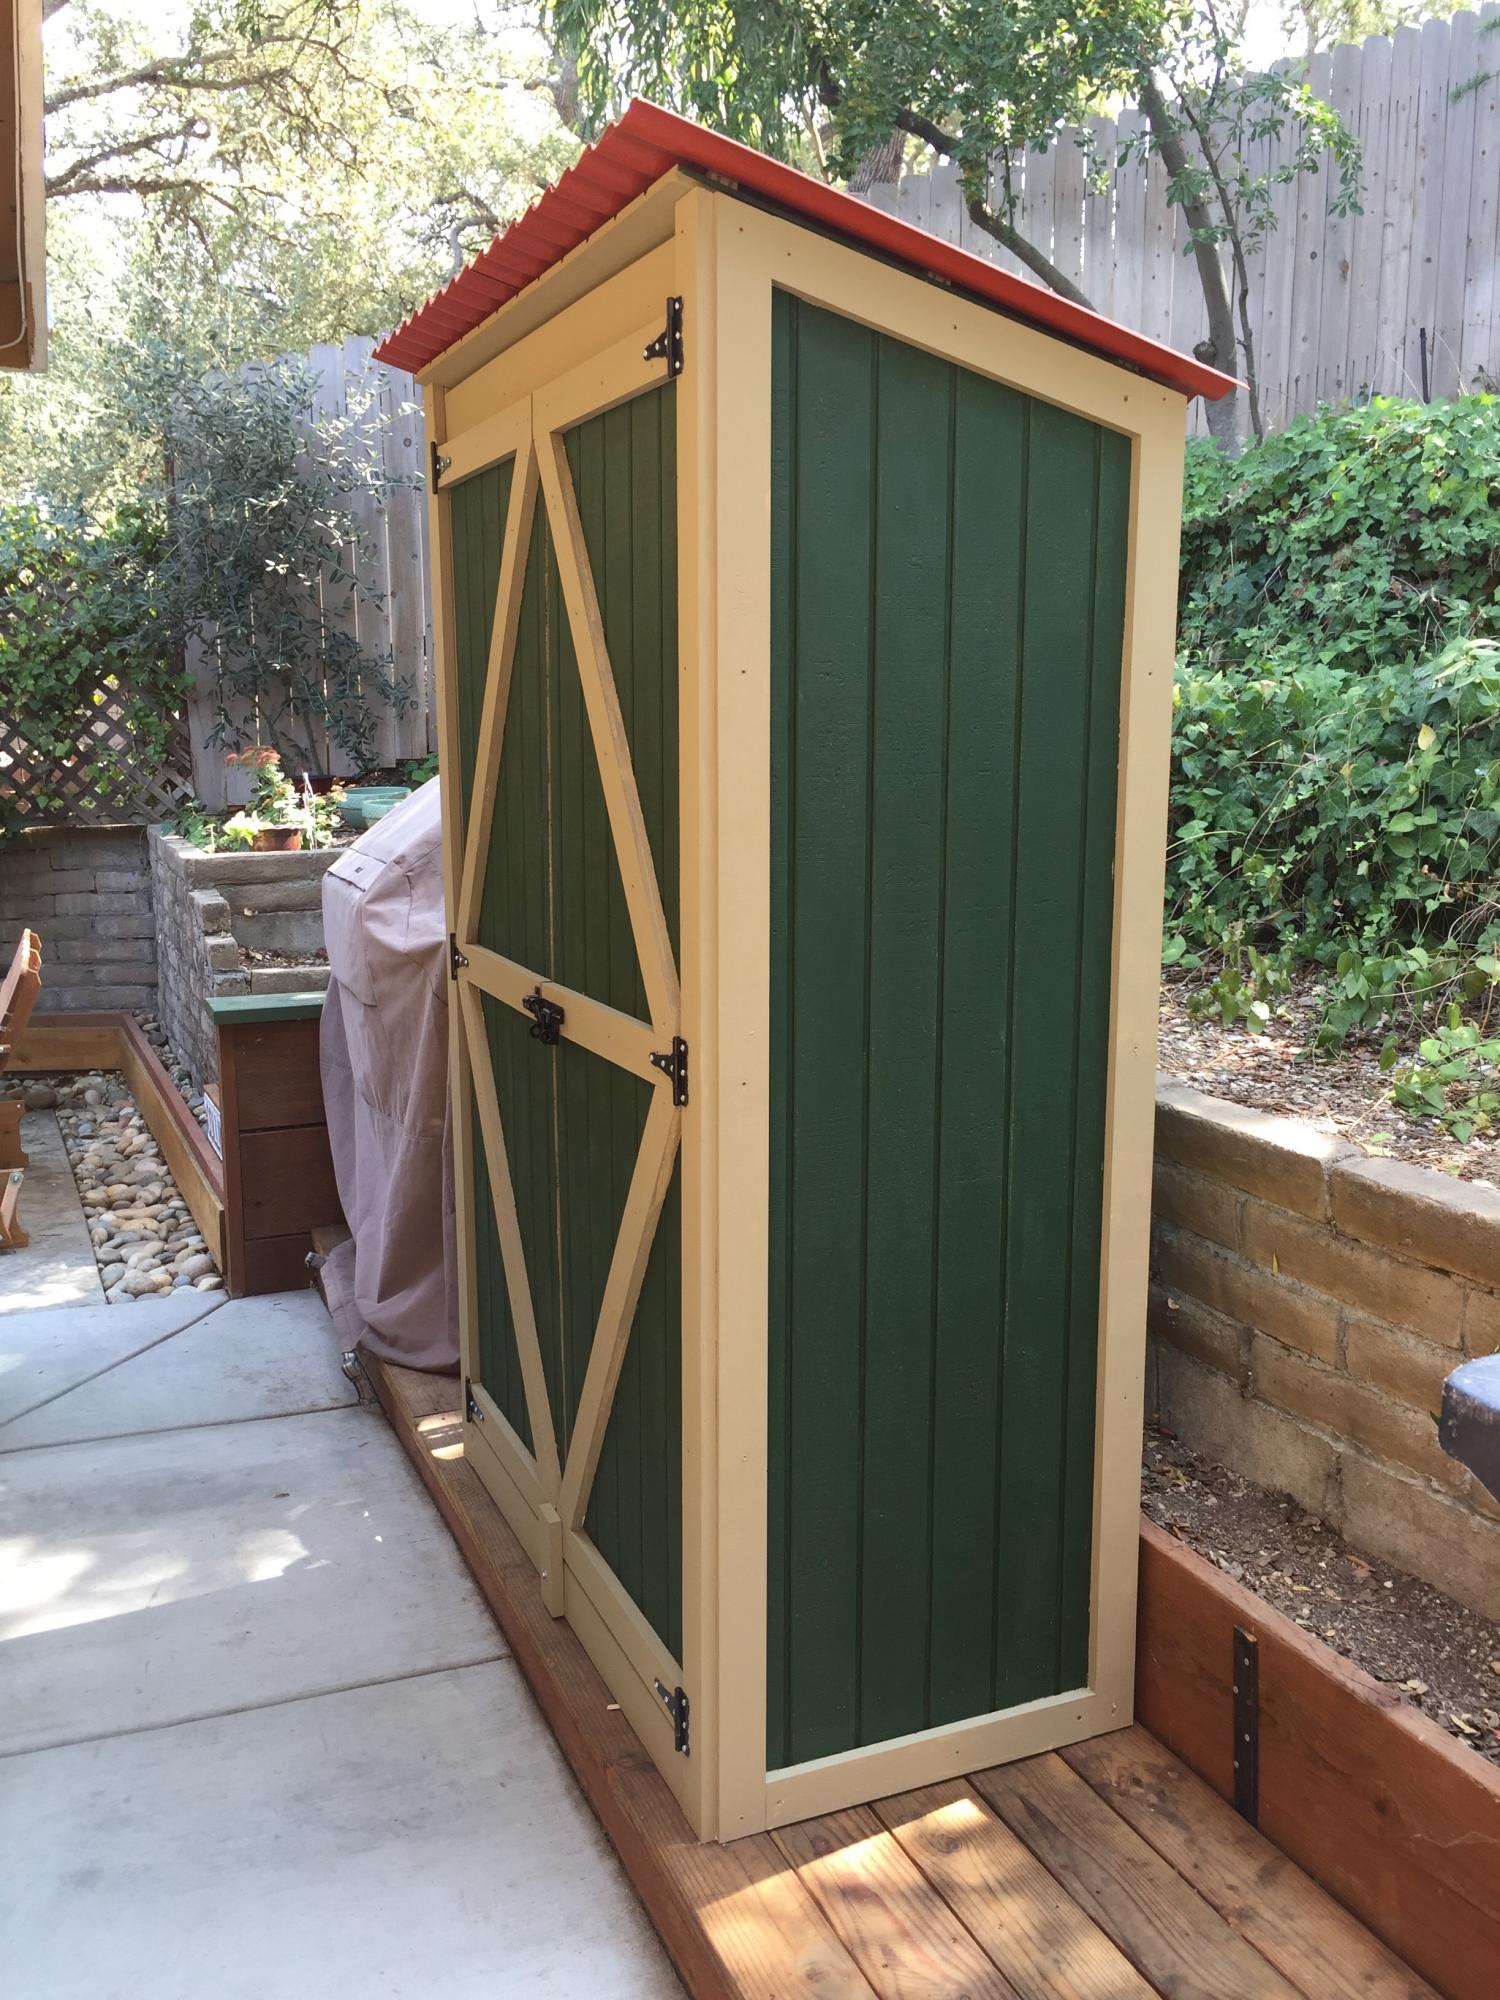
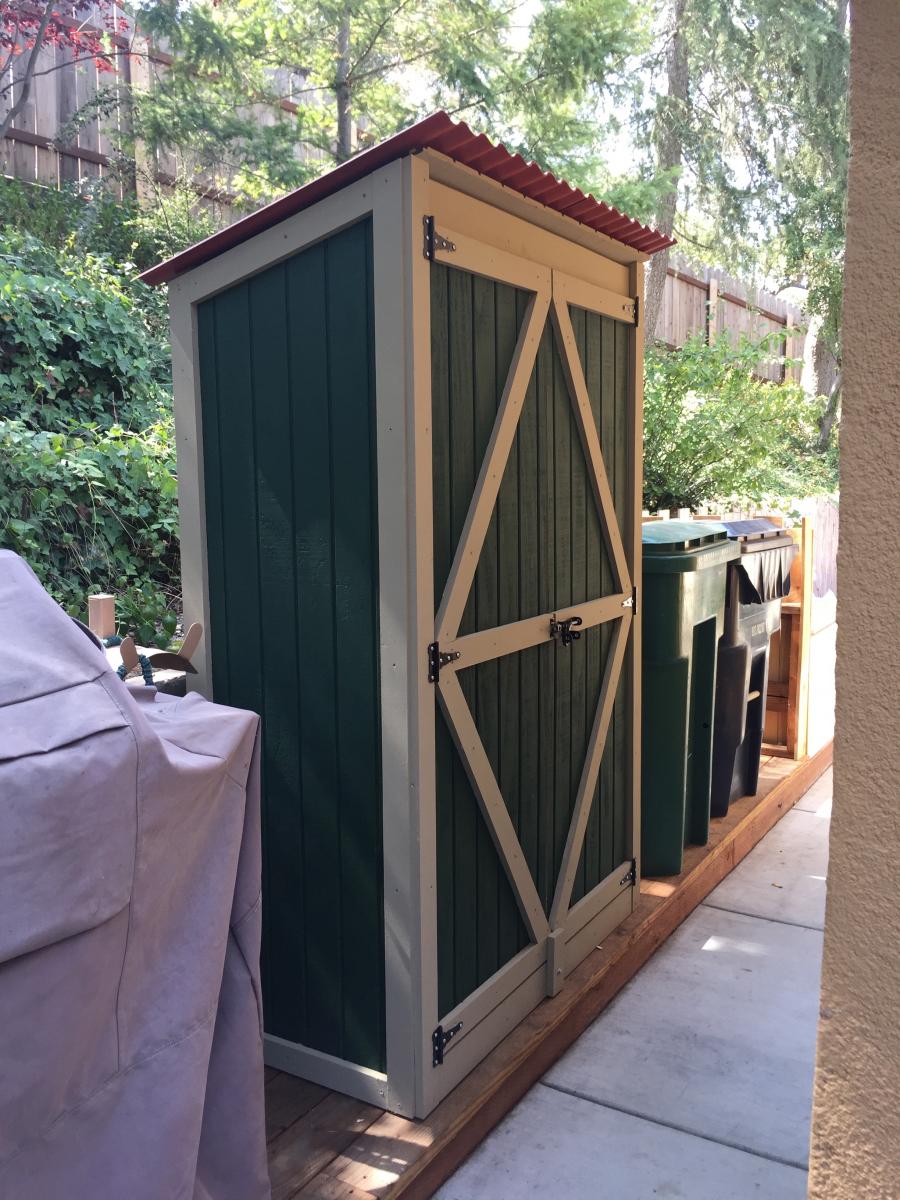
My husband and I built a garden tool shed using your plans for a "Small Outdoor Shed or Closet." We needed exactly this size for our available space. (THANK YOU! The video was really helpful and the plans were very detailed.) We are not handy at ALL, and are definitely beginners when it comes to woodworking. But, when the person who was supposed to build it for us was delayed, we thought we could try it, or at least START.
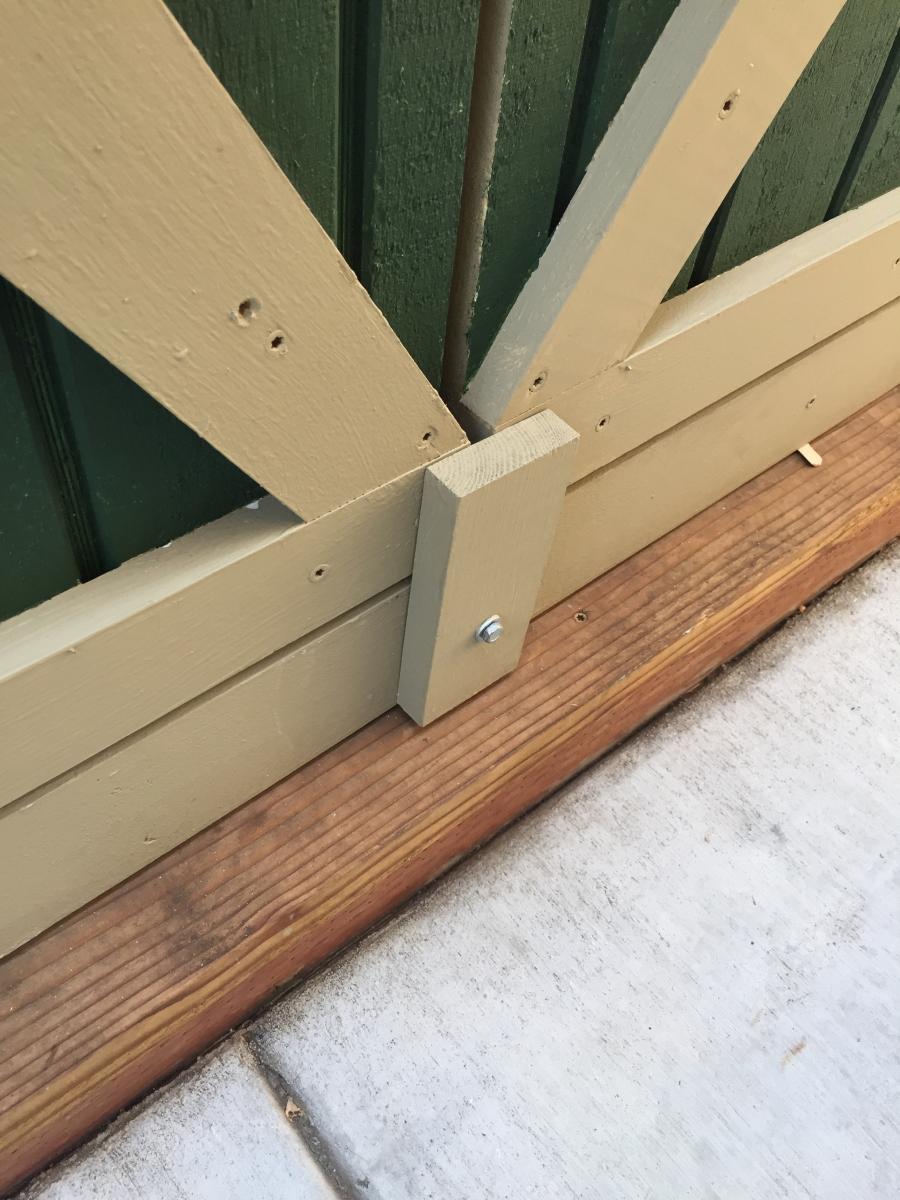
We bought a lower-end Kreg pocket jig and a secondhand mitre saw, and set to work, using T1-11 siding. We ended up building the entire shed ourselves, and were very surprised at the end result (and proud too!). The hardest part was building the doors, since we weren't really sure how to construct them to keep them from bowing. We ended up putting trim all around the edges of the T1-11 plywood doors, inside and out. (We were too far into building them when we realized we probably should have done it differently.) We also couldn't figure out how to get the double doors to stay tightly shut, but ended up using a rotating block (see picture) at the bottom and it works great, especially given that one of the doors had a slight bow at the bottom.
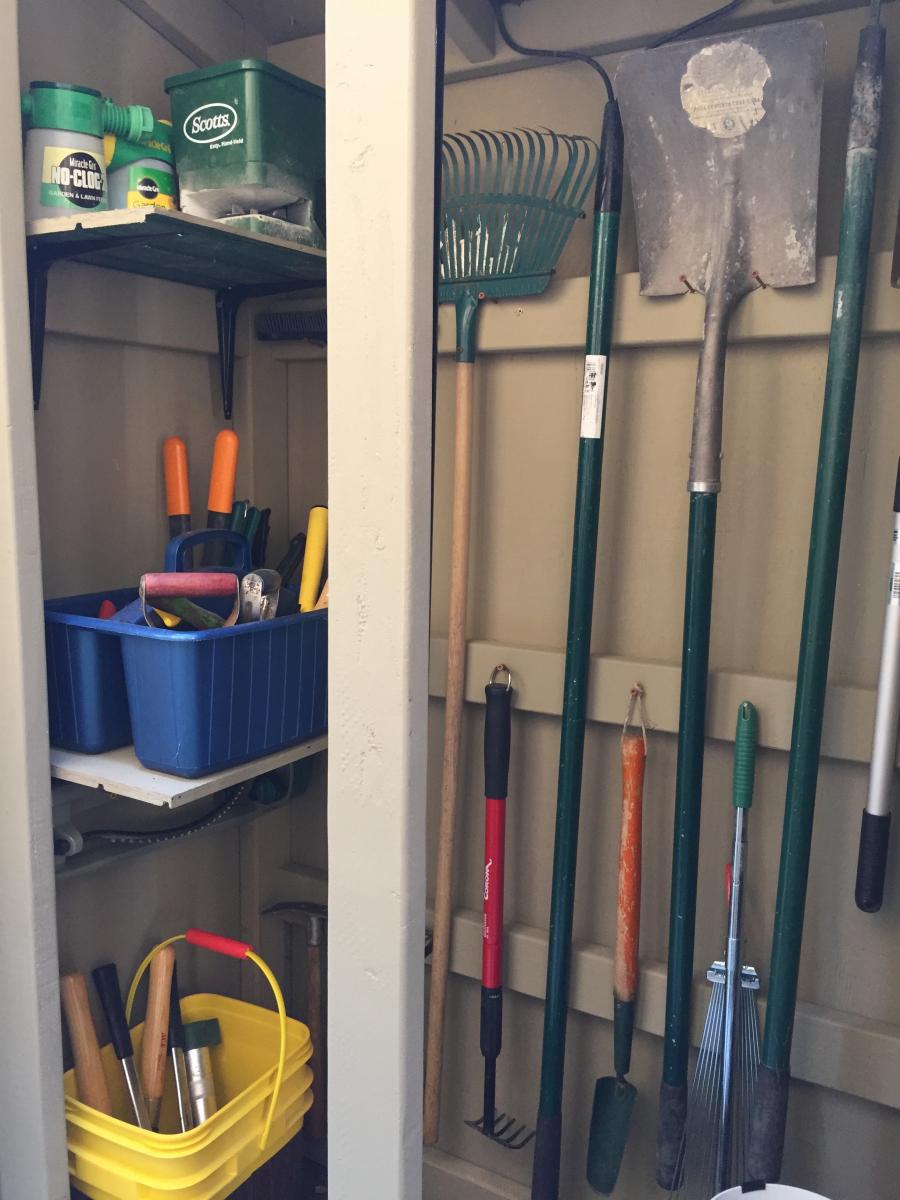
I think the only ways in which we deviated from the plan were that we added trim, an additional 2x4 up high across the back of the shed (for hanging long-handled tools), and two interior shelves on the left (from leftover siding). We used colored corrugated polycarbonate sheeting over the roof instead of asphalt shingles. (Unfortunately you have to use specific screws for the sheeting and one length was too short and the other too long and protrudes through the roofing slightly, into the interior. But we like the pop of color the sheeting adds, and REALLY didn't want to do shingles for such a small area, nor did we know how to do shingles.)
My final suggestions would be that a mitre saw and pocket jig are REALLY helpful and using star head screws is easier. I would also suggest that you paint everything (prime and color coat) before assembly and just touch up afterwards, especially if you use a lot of trim as we did. We primed and painted the siding but just primed the trim, and it was a real pain to put the color coat on all that 1x3 trim after construction.
This plan is listed as an "intermediate" project and I think that's probably a correct designation. As beginners, it just took BOTH of us to figure it all out (we work really well together) and to build it, and it took a much longer time than it would for someone with more experience.
Tue, 10/06/2020 - 15:56
Well done! I love this! Can I ask what dimension your garden tool shed is? And how did you decide on the new roof size/angle? I have a similar space and am contemplating something similar. Thanks!!
Tue, 10/06/2020 - 15:56
Well done! I love this! Can I ask what dimension your garden tool shed is? And how did you decide on the new roof size/angle? I have a similar space and am contemplating something similar. Thanks!!
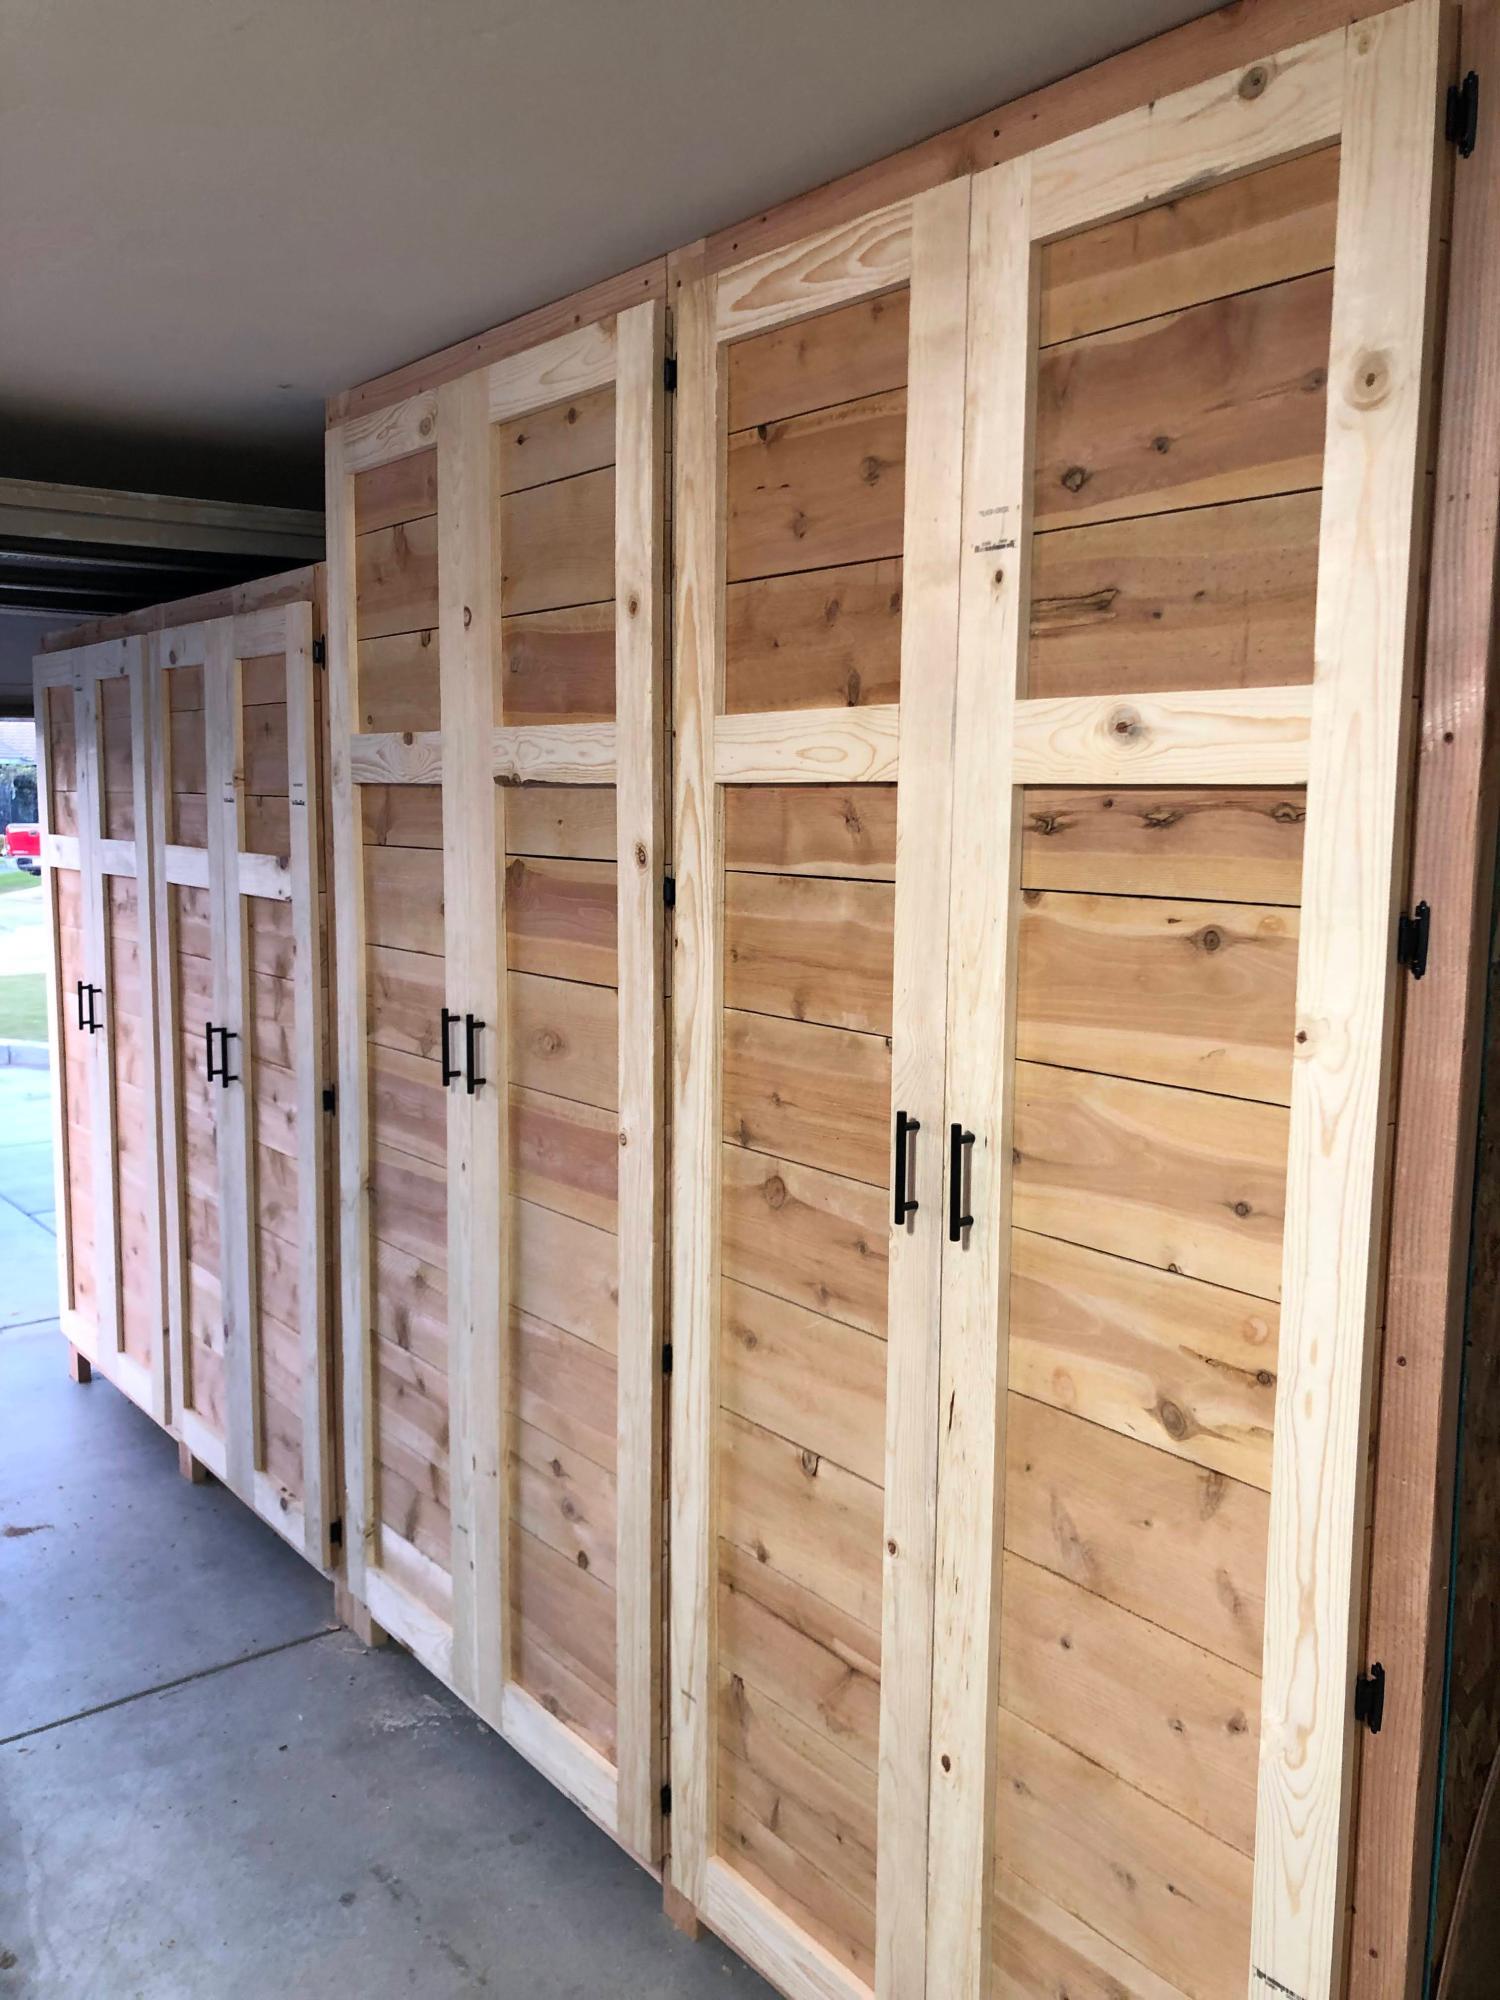
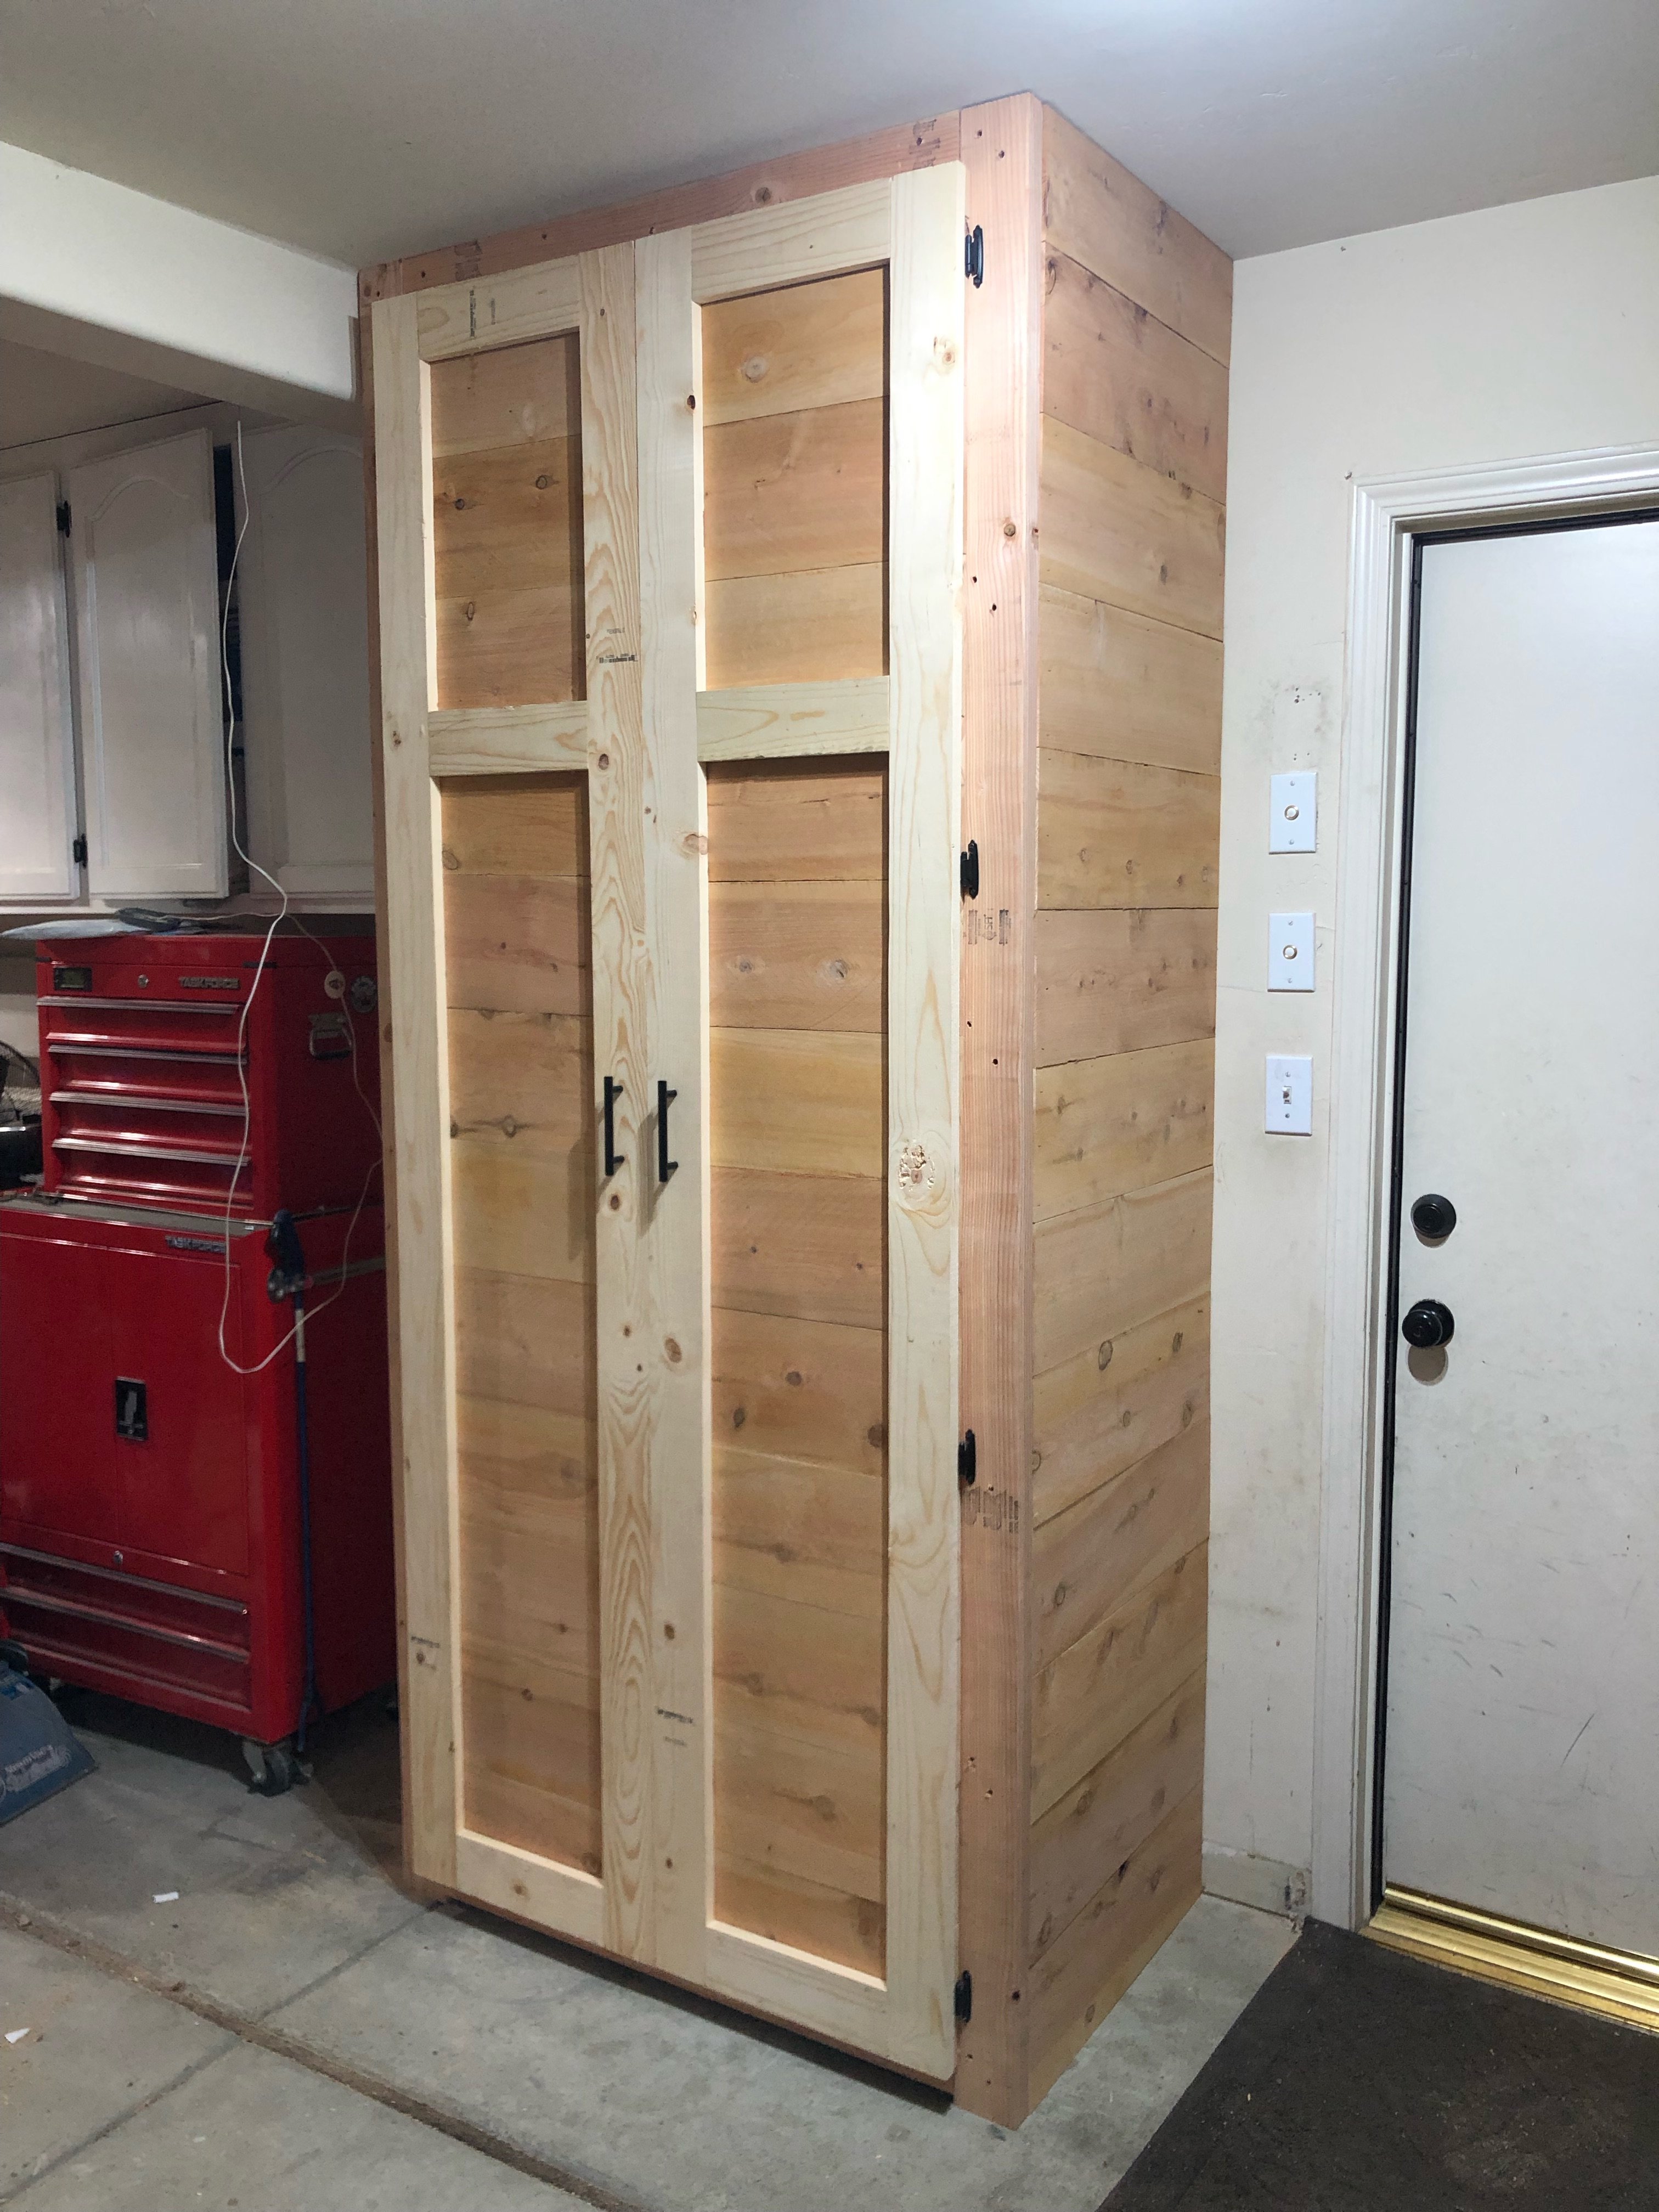
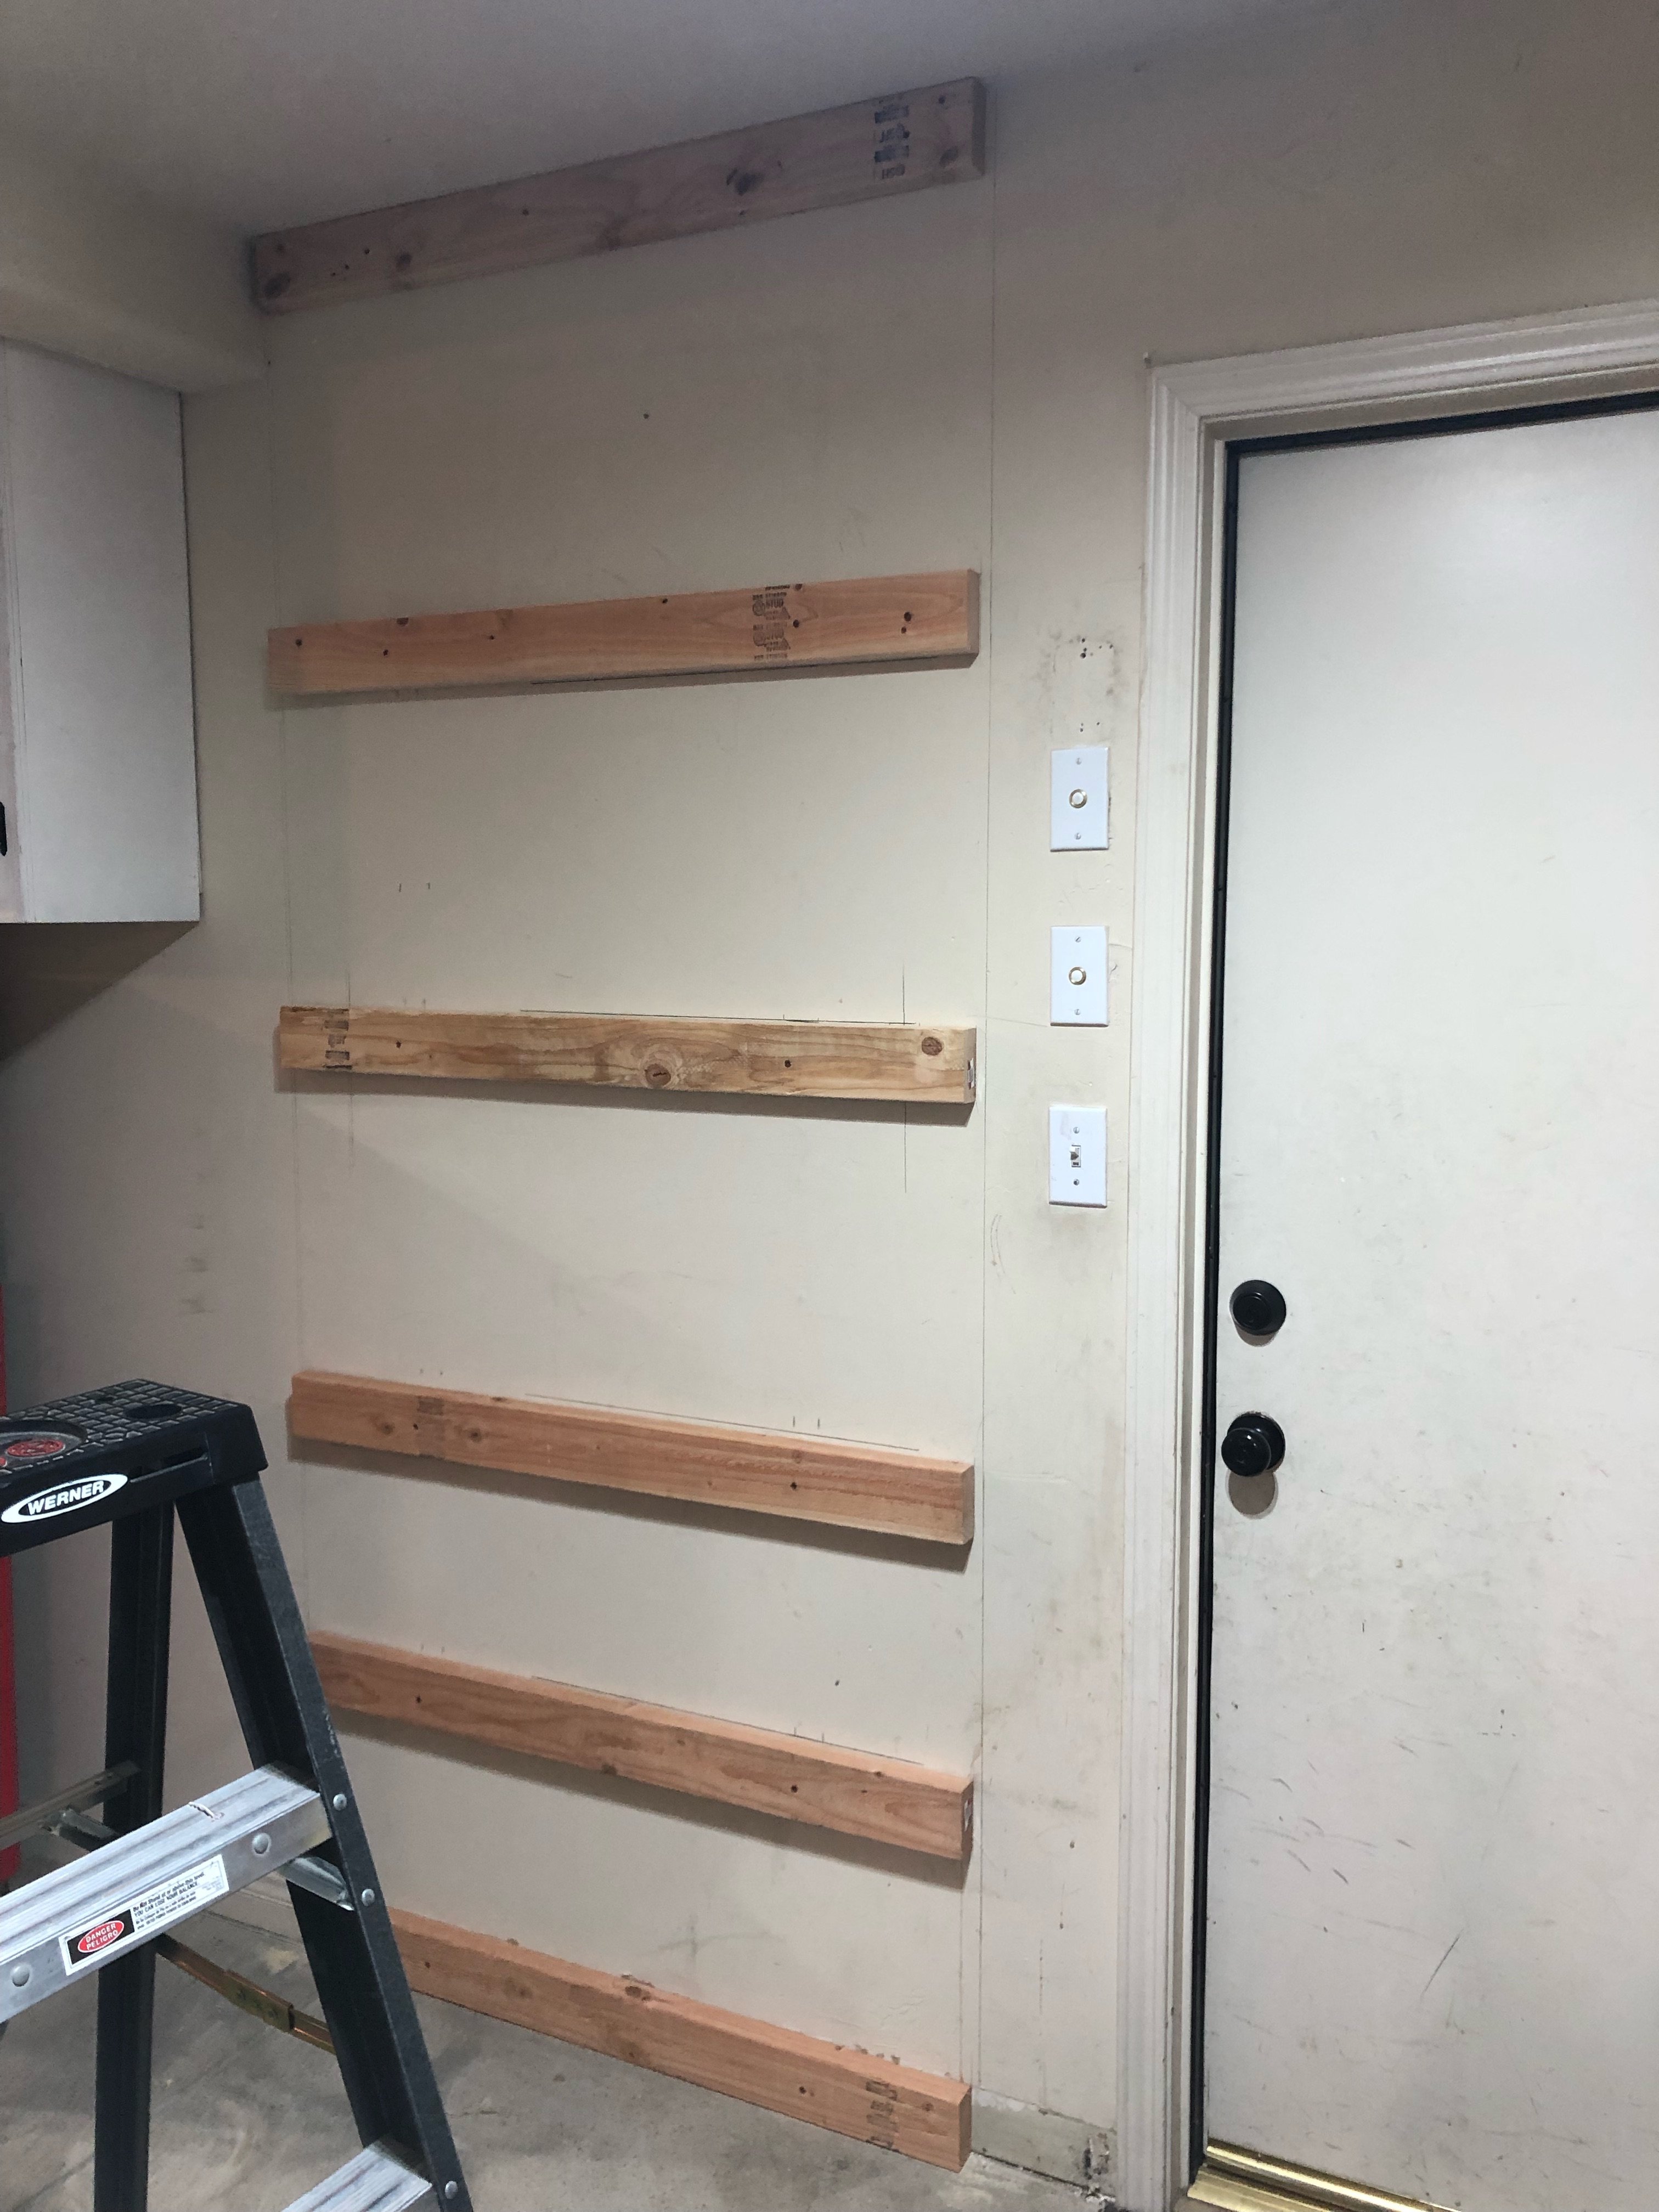
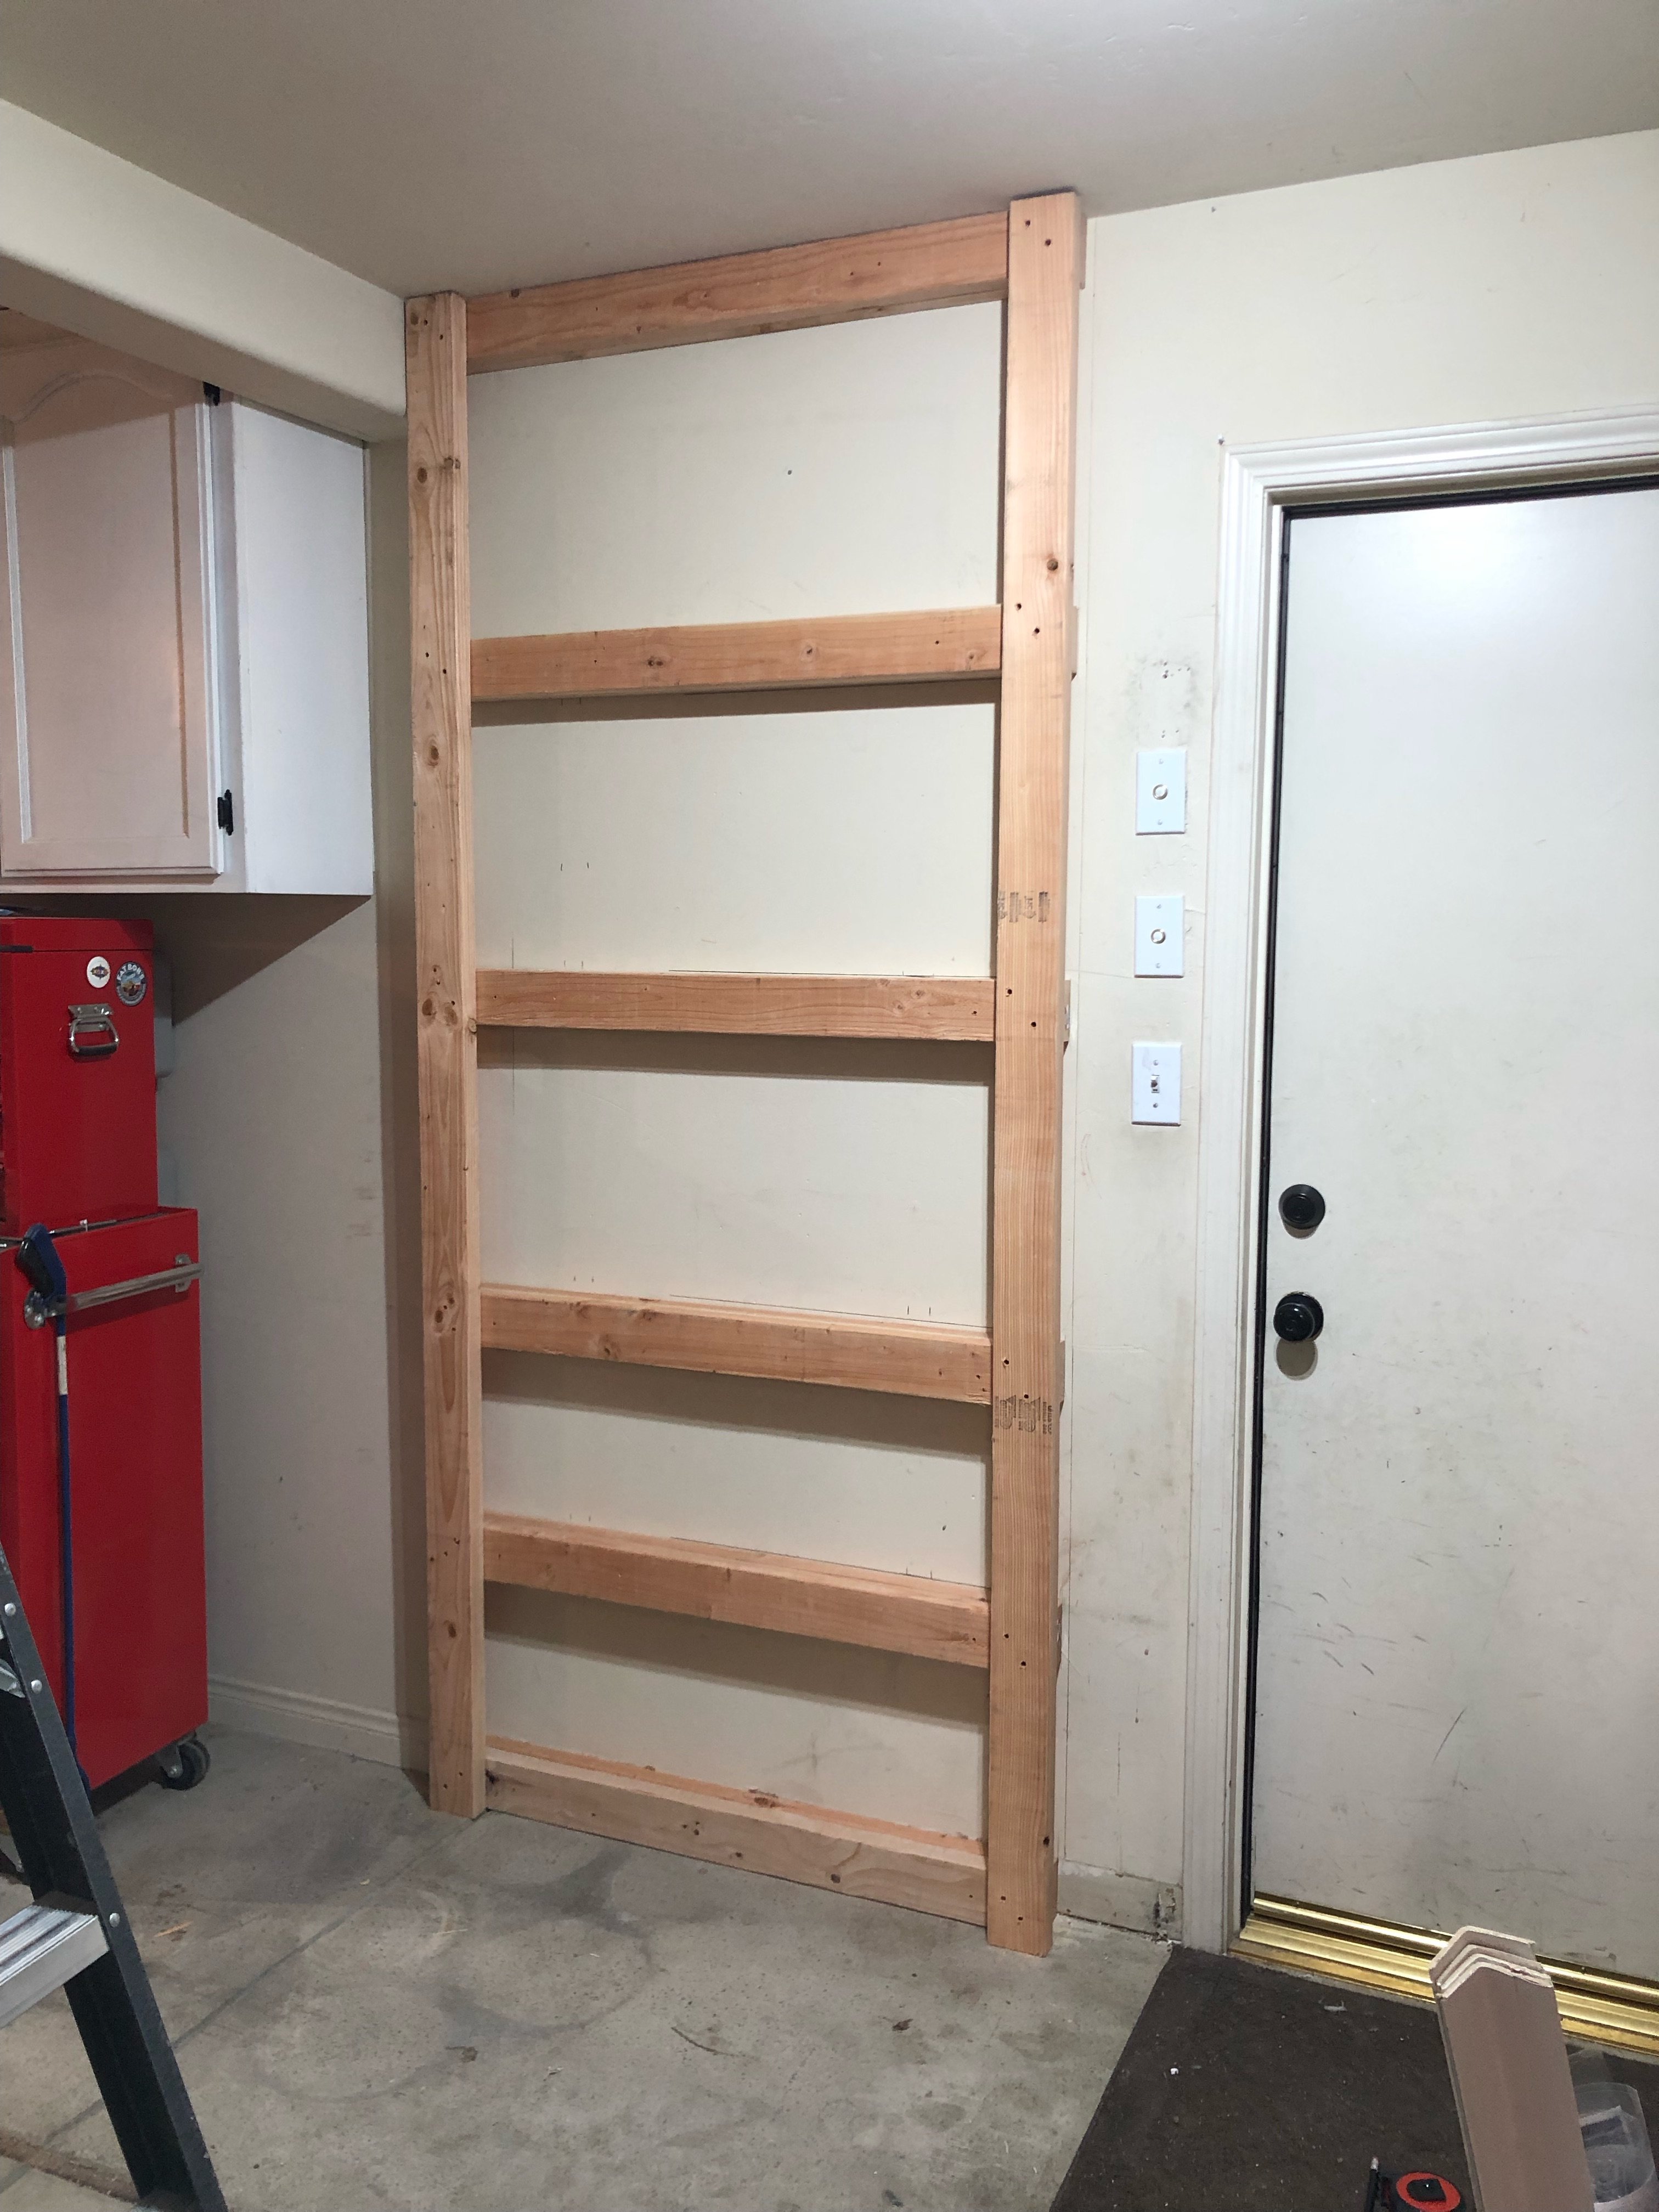
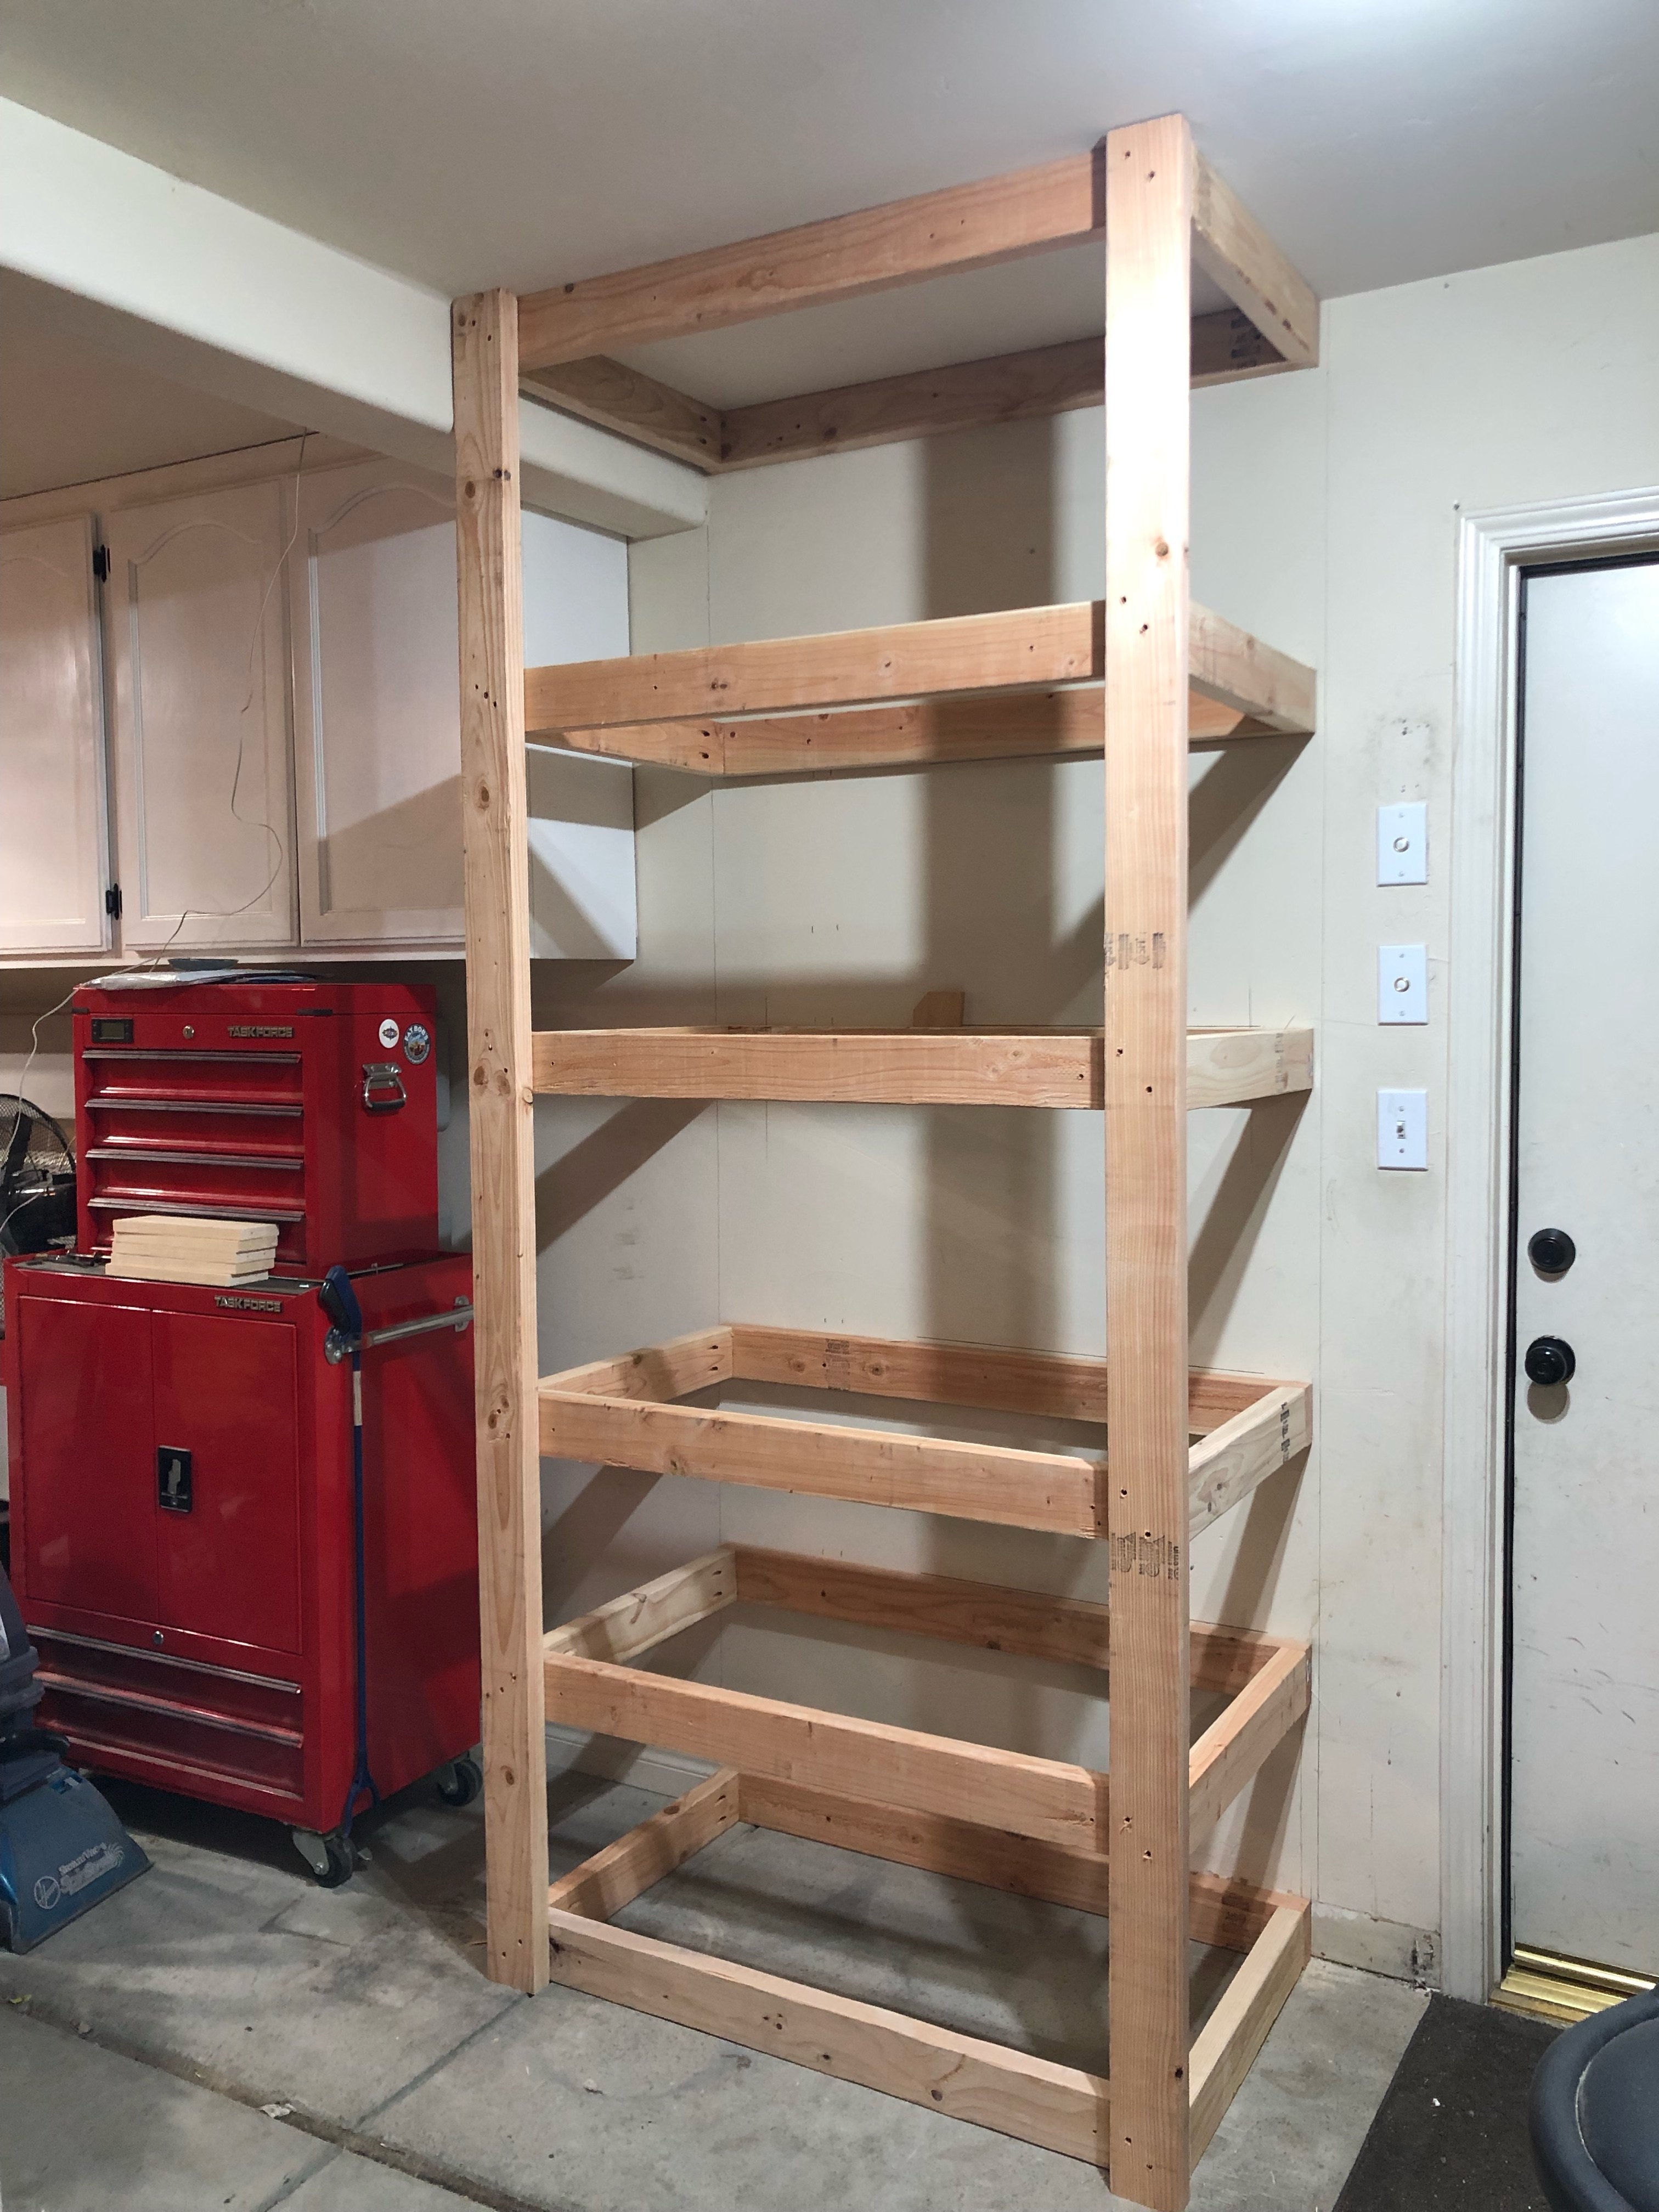
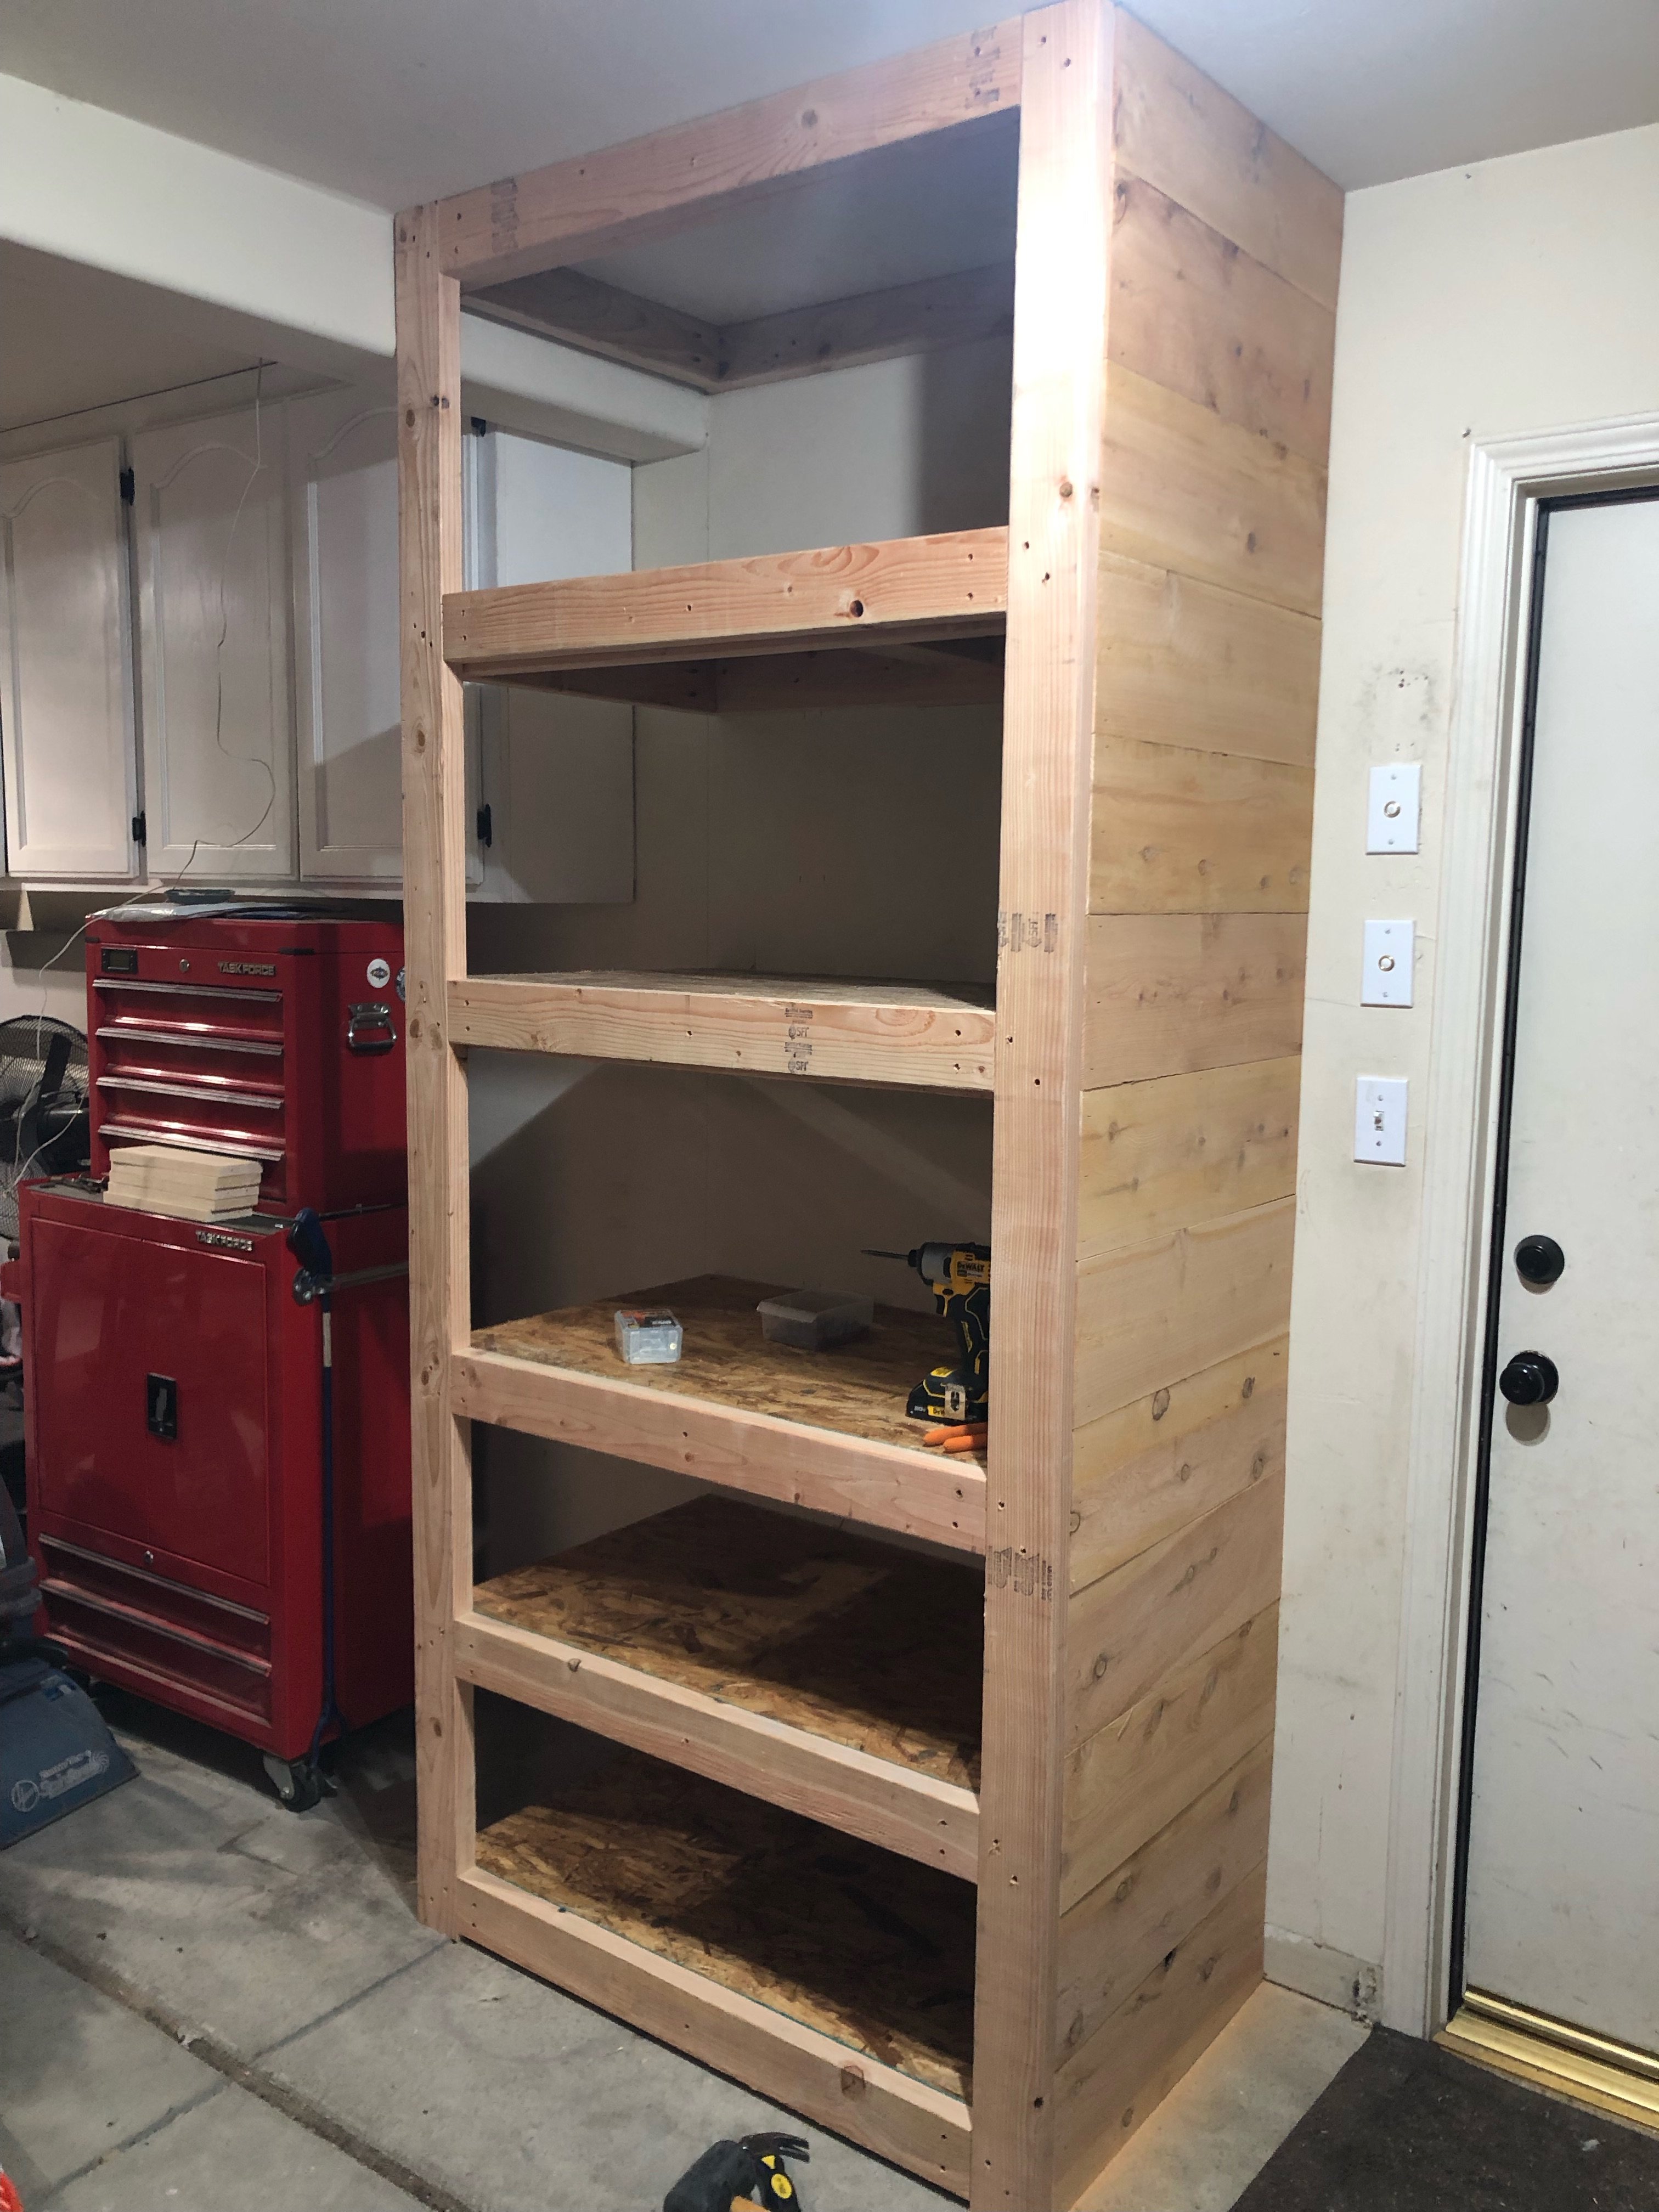
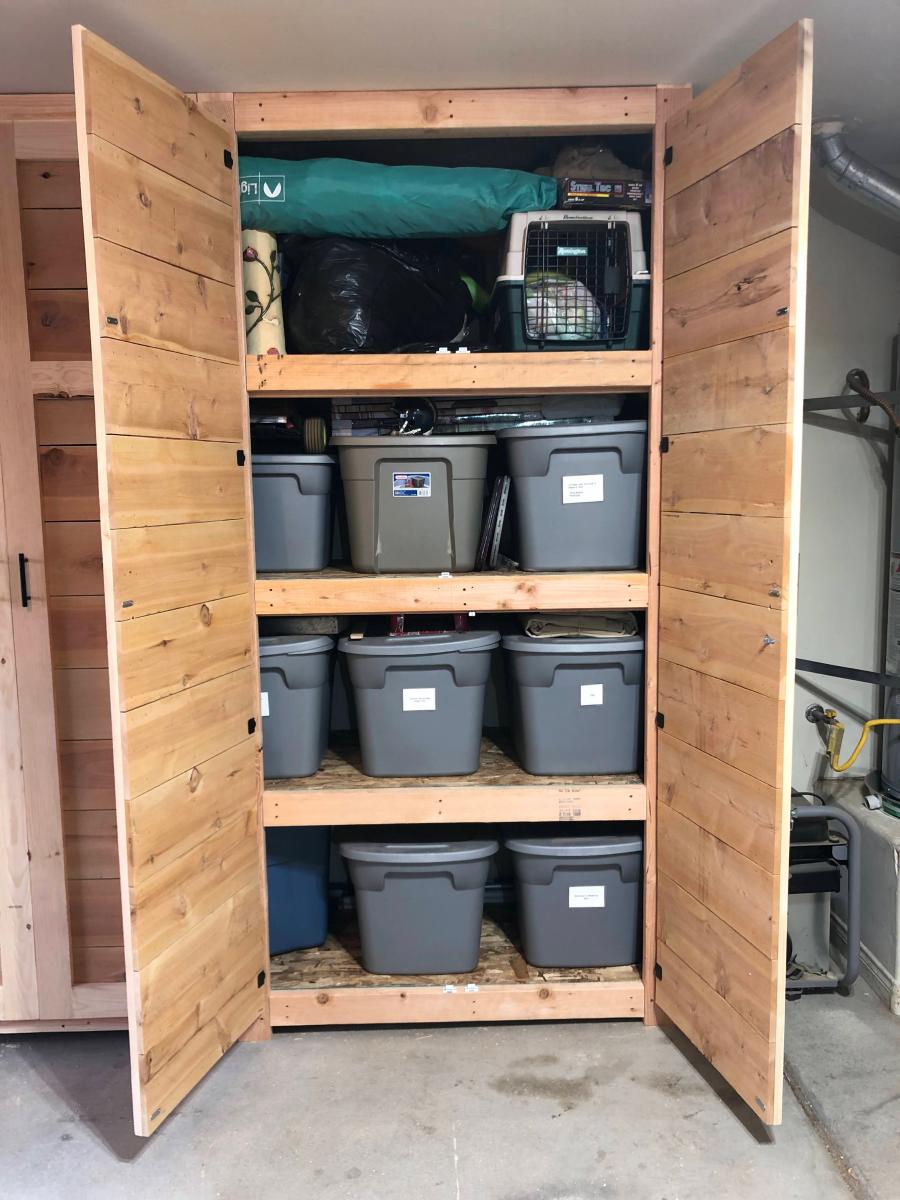
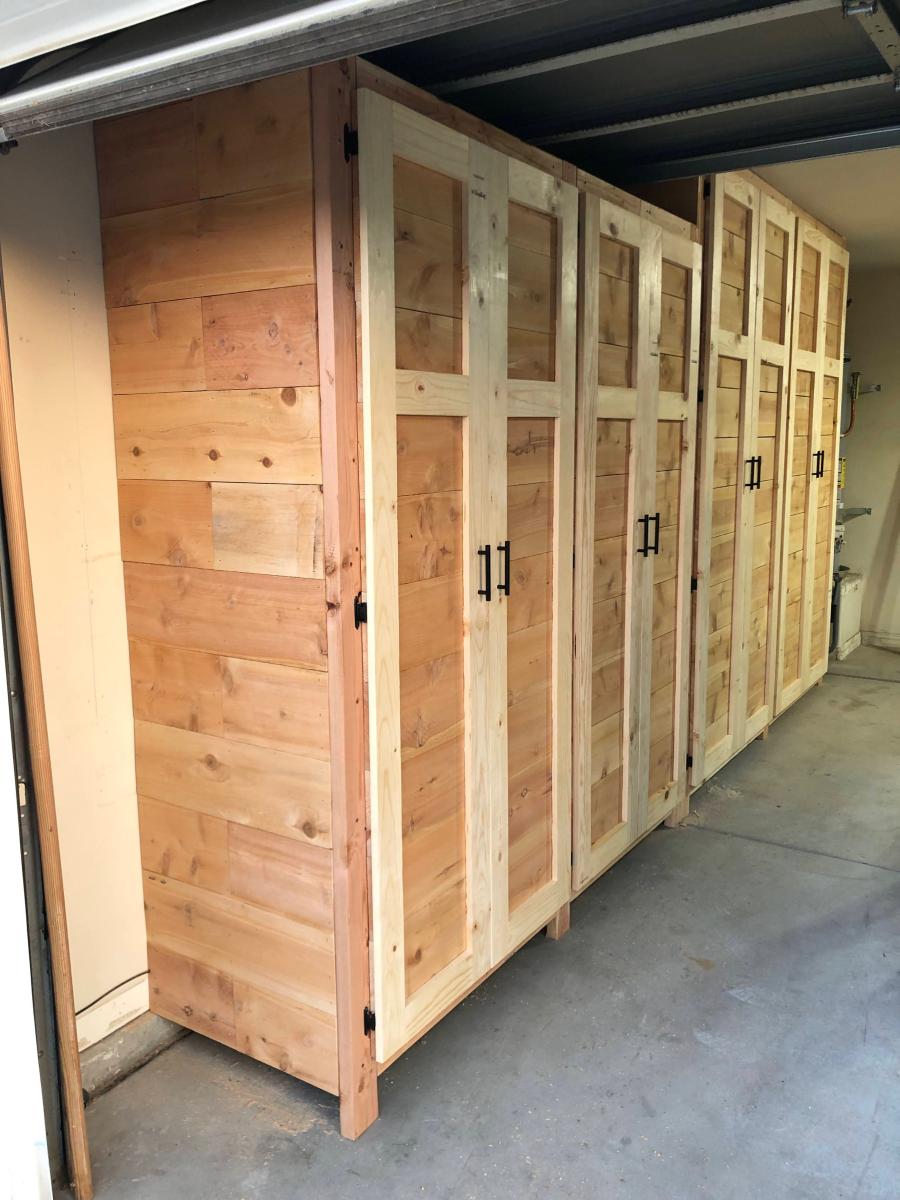
Garage Shelves Plan with Added Doors - Built and shared by Jeremy Doyle

Cost: $45
Made this bench smaller than the plan so it measures 48" X 18". Using it in a spare bedroom so it will eventually get stained to match the wood furniture.

Mon, 12/04/2017 - 09:17
That was my idea as well, to shorten it. My wife just asked me if we could part with a few chairs on the back side of our dining room table and if i would make a bench or two across the back wall. Well "of course" i said hahah!! Nice job on yours!! :{)
Sun, 09/13/2020 - 06:45
That's really beautiful. I think I'll look up the plans and try make one myself.
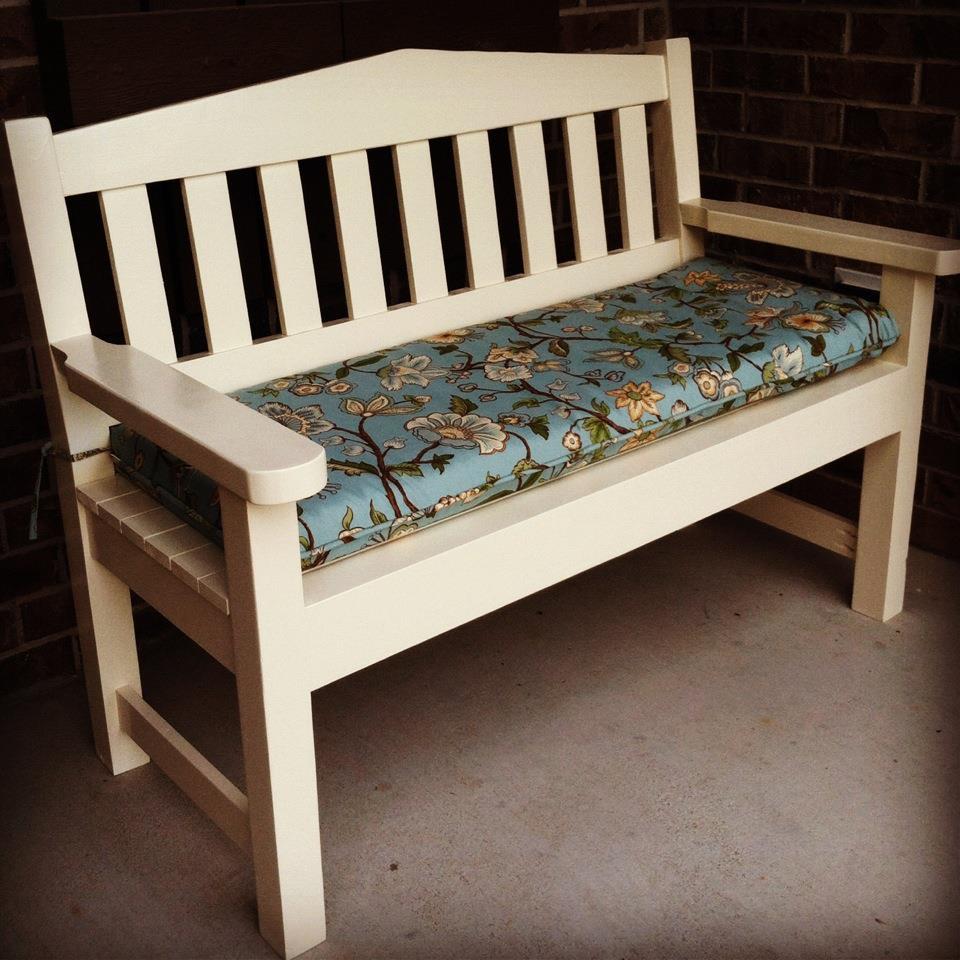
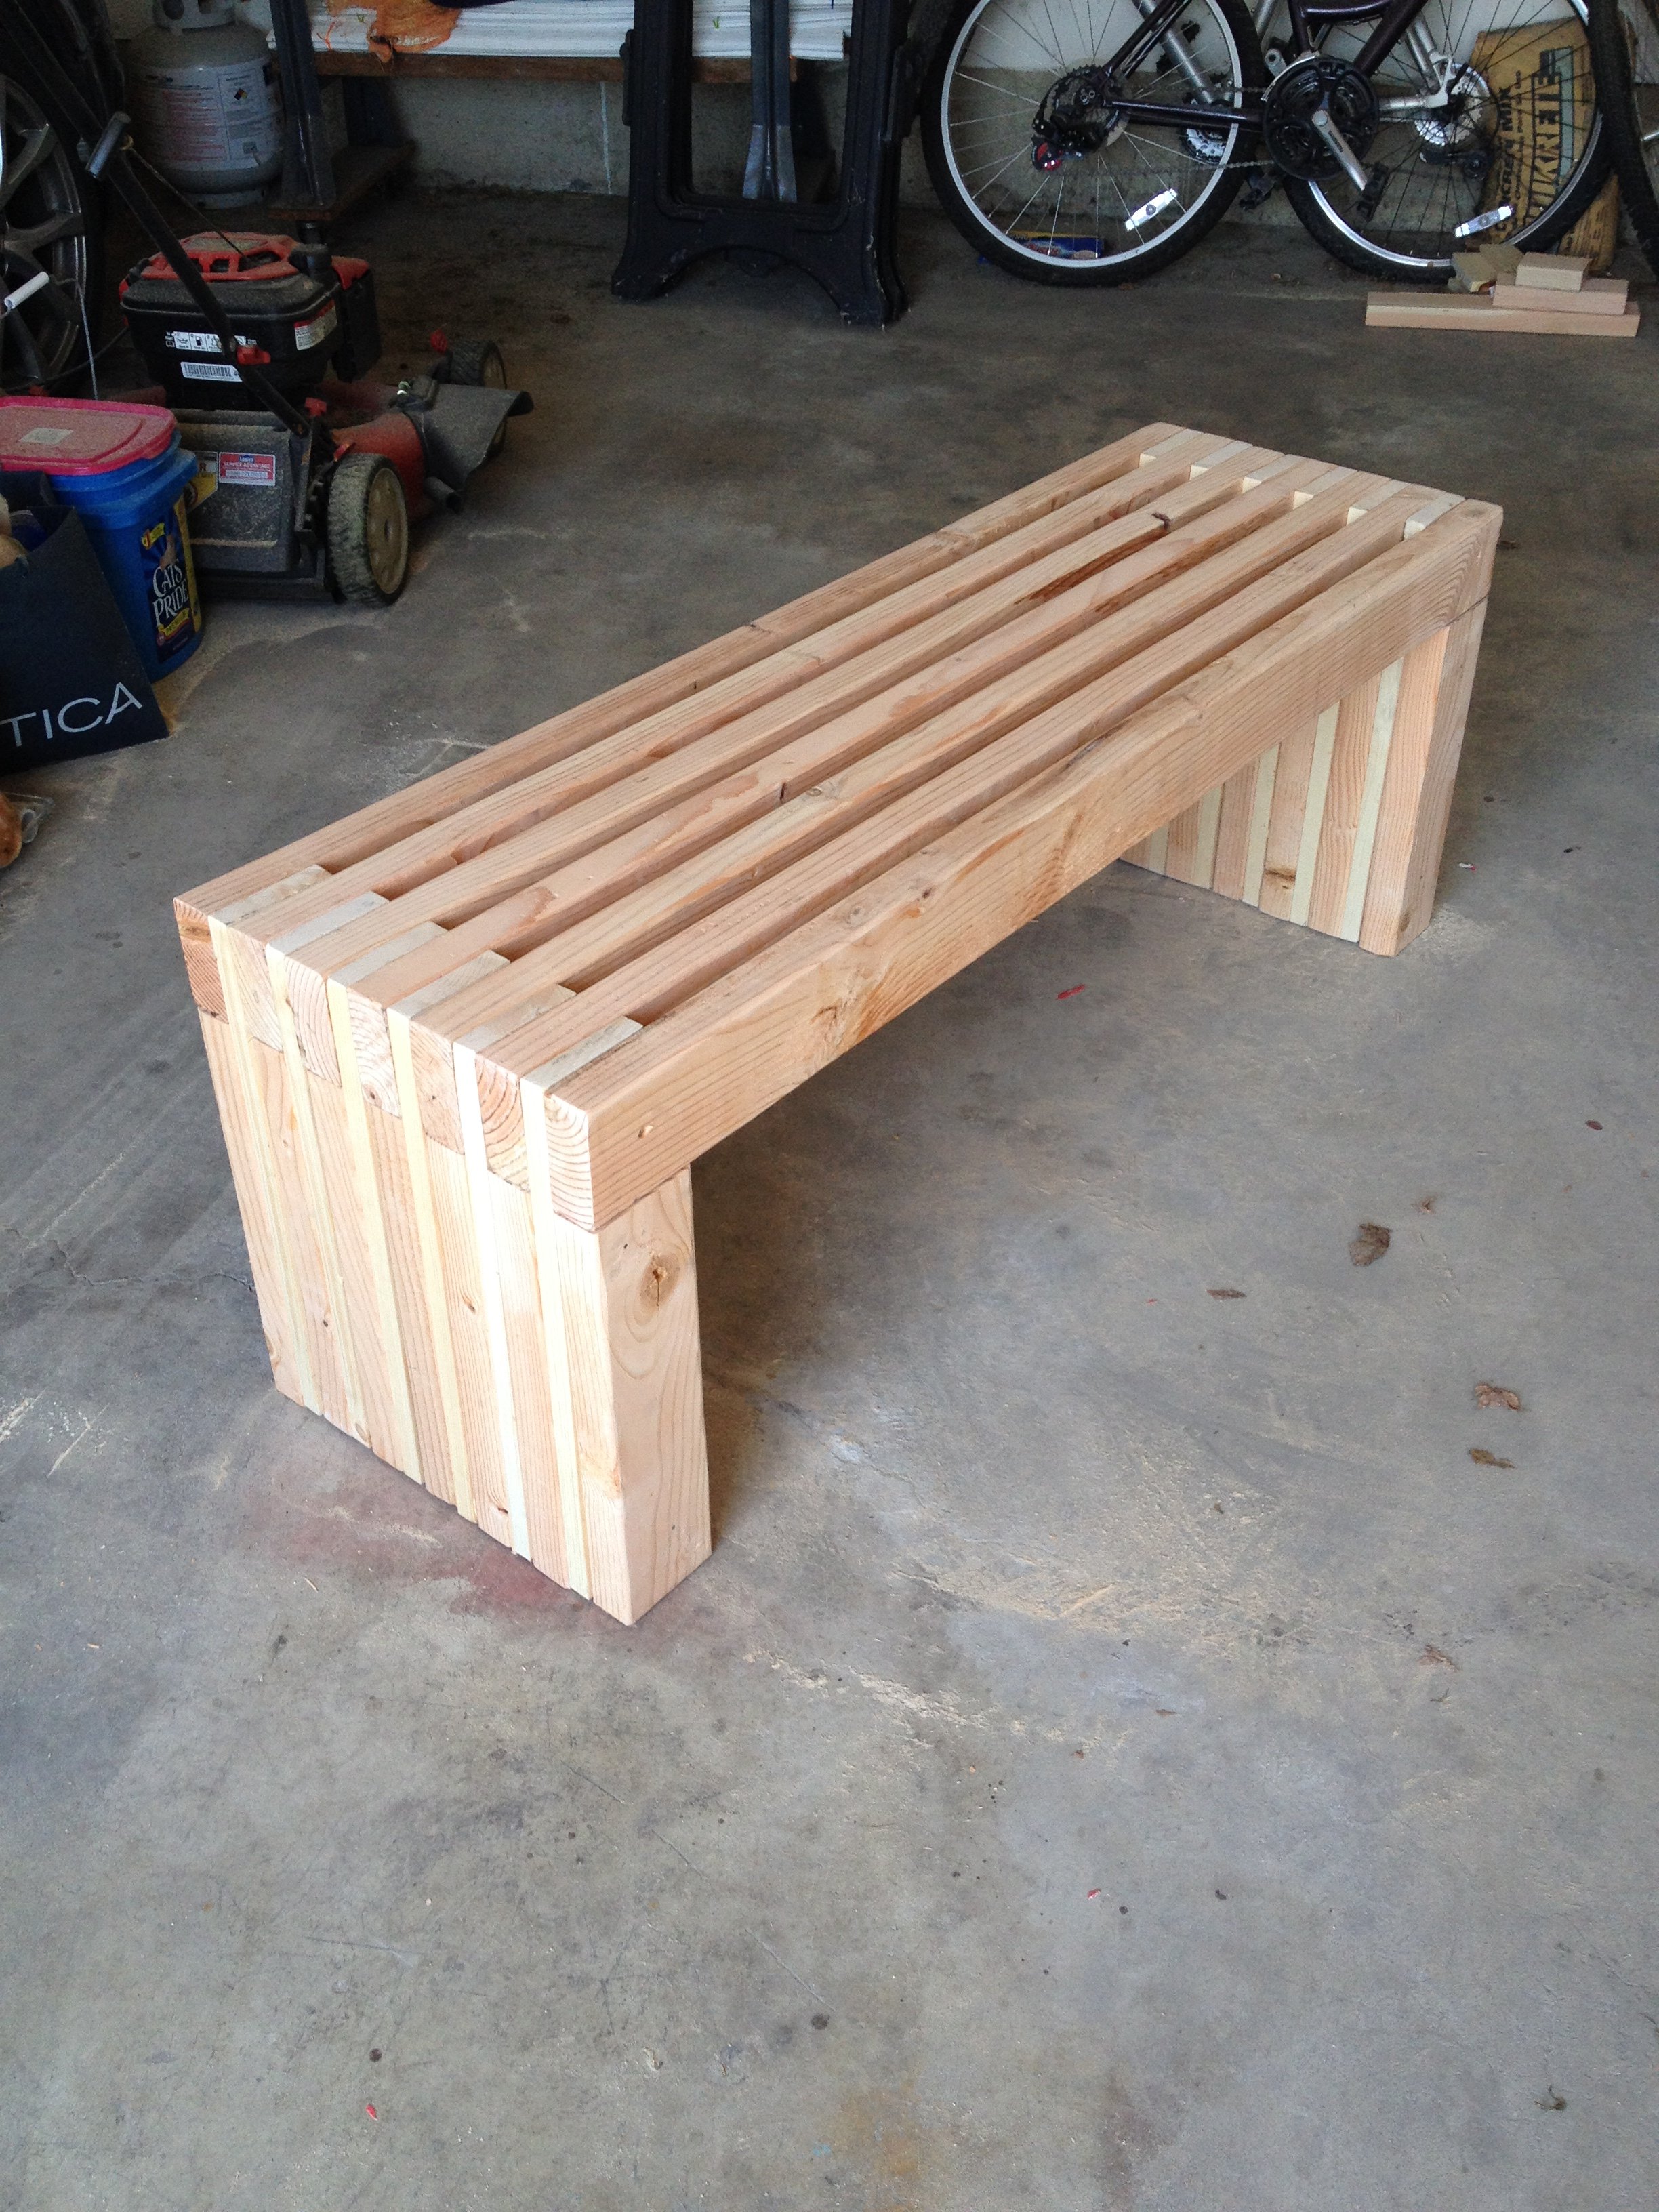
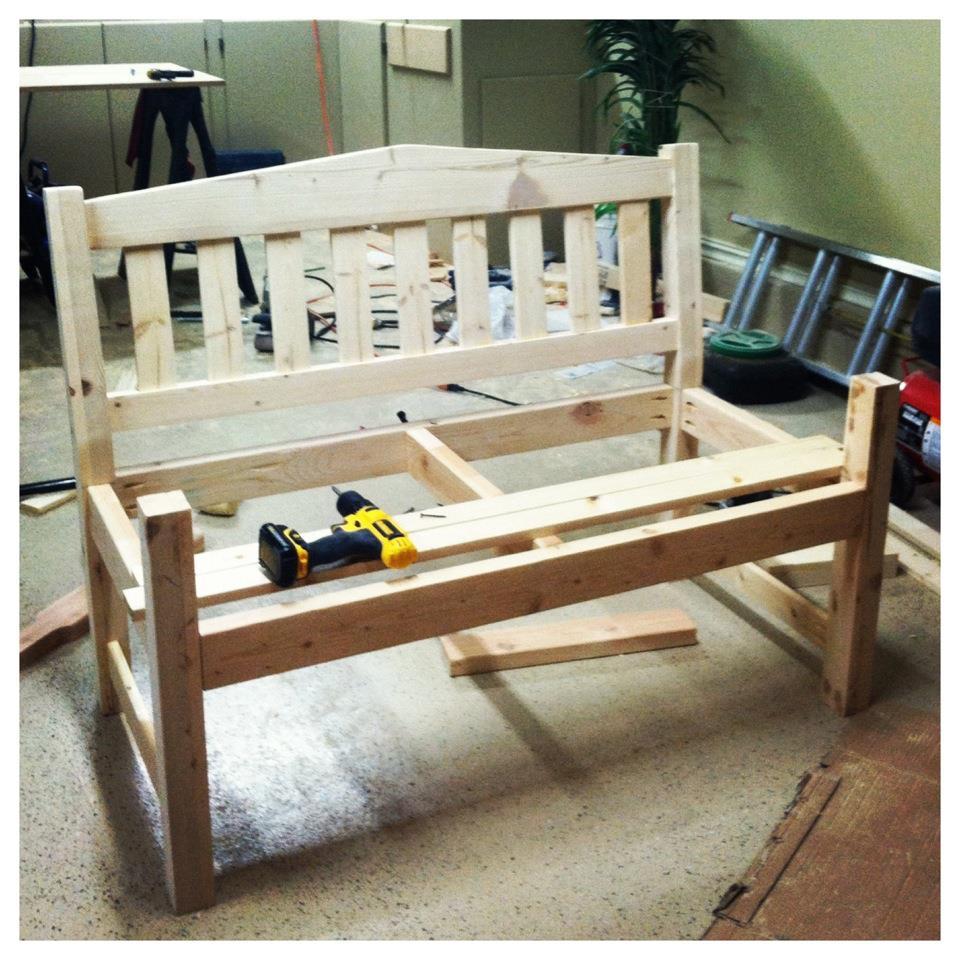
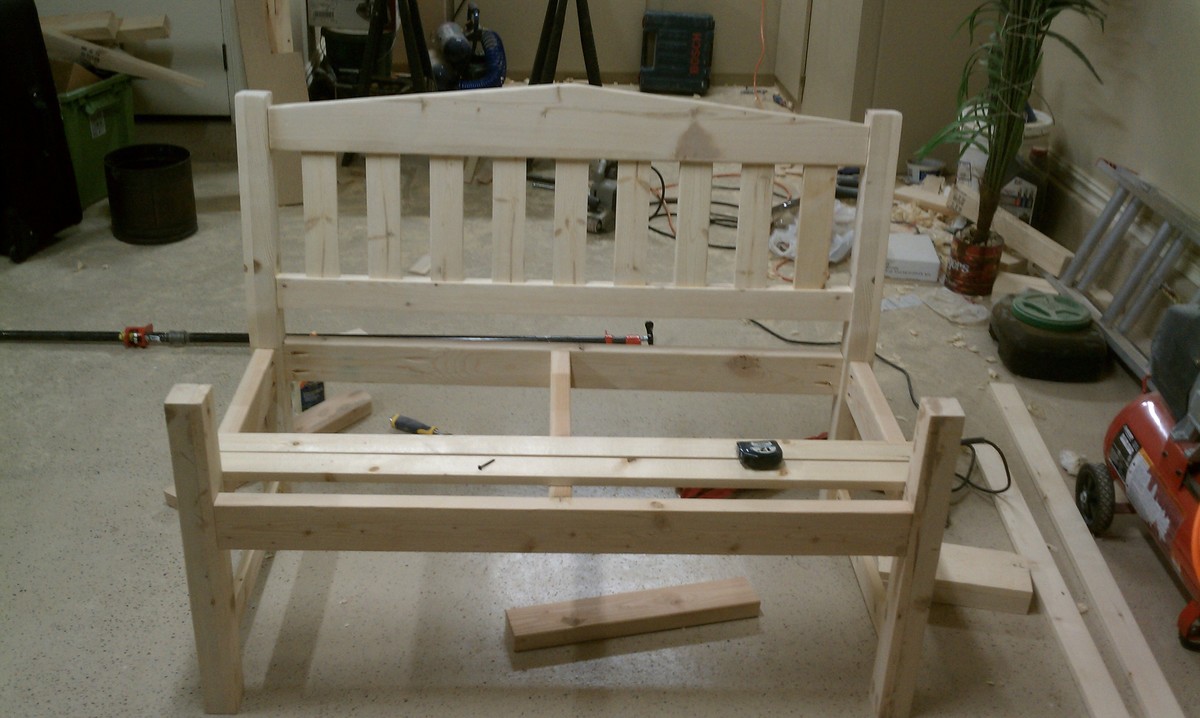
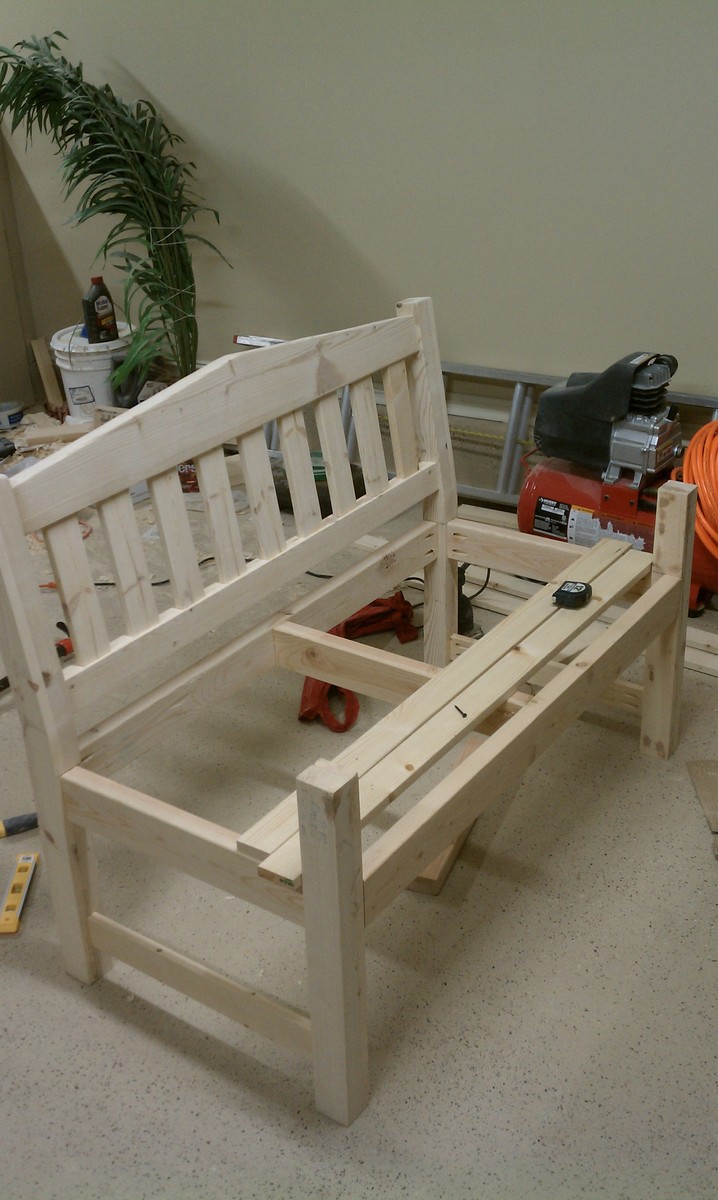
I built this for my wife for an anniversary present. She had wanted a garden bench for some time but the ones that she wanted were between $500-$700 which is ridiculous for this type of bench. So, I did a search on here for garden benches but there weren't really any plans for them and the few brag plans were not really the type of bench I was looking for. I printed off a few pictures of benches that I liked and got to work. The front and back legs a 2x6 and a 1x6 glued together and then cut to be straight. I wanted something thicker then just a plain old 2x6. If I had to do this again though, I would have just glued 3 1X6's together. The reason being, is that 1x6's usually do not have a rounded edge and a 2X6 does. So needless to say when you glue them together you have a nice little gap on either side. Without a table saw to take this off, its pretty difficult to get a straight cut. But I ended up getting it right after sweating for a few hours in the garage. The bench stands 36 inches high, 48inches wide and about 18 inches deep. The seat height is right at 18in also.
In the unfinished pictures I actually had the depth being 24 inches. After sitting on it though it was just way to deep. So I pulled it apart, made the adjustments and its now much more comfortable to sit in.
If anyone has any questions or wants more details feel free to drop me a line!
Thanks!

Fri, 06/19/2015 - 13:32
Yes I think thats what they came out to be. yes the cross pieces are 2x4 and the slats are 1x4's

In reply to back legs by smz1919
Fri, 06/19/2015 - 13:34
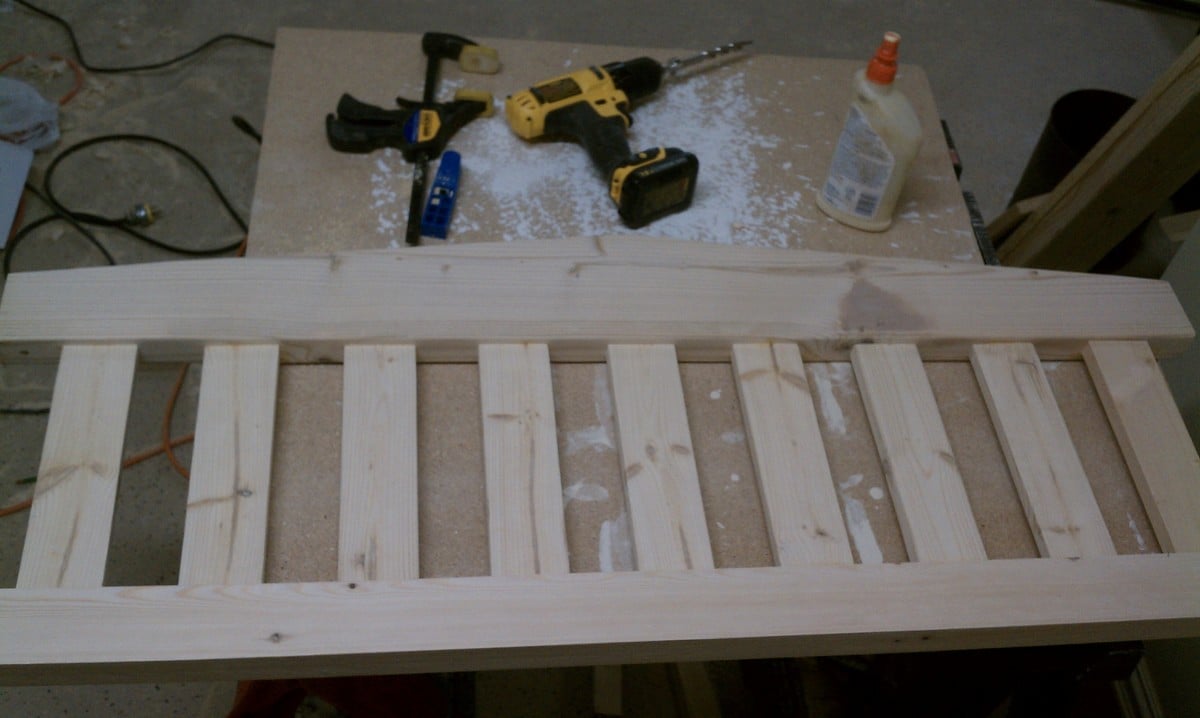
I glued a 2x6 and a 1x6 together to get the thickness. Now that i have a table saw and a jointer this entire process would have been much easier but after getting it to look like one solid piece i just outlined the slant i wanted and cut it using a jig saw.
Fri, 06/19/2015 - 20:17
So the back slats are just glued in place right? I wonder if it would be easier to use a biscuit joiner or not
Sun, 10/23/2016 - 17:46
Wed, 05/26/2021 - 08:32
Hi Nathan
Love the look of the bench. Would you have a list of material requirements. I intend to make a bench like this and would like to know the measurements of the top back spar (the shaped one).
Here in the Uk our timber yards do not always supply the same cuts as the US so I need to have some idea of the pieces I need
Many thanks
This was a real challenge as I did the whole project alone. 6x6 pressure treated lumber was used as posts and support beams. 120 lbs of quickcrete was used for each post and the support beams are bolted onto the posts. The swings were all made with pressure treated
lumber and I bought heavy duty mounting hardware for the chains. I bought the firepit kit at Lowe's and did the 4 block high enclosure. I had a lot of fun with this!
Tue, 03/07/2017 - 10:28
That is AWESOME! Job well done :) I need one of those in my back yard!
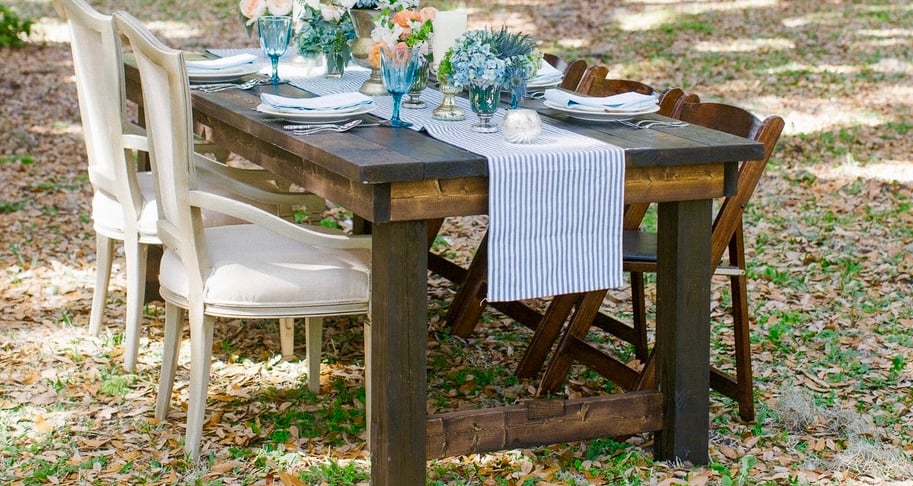
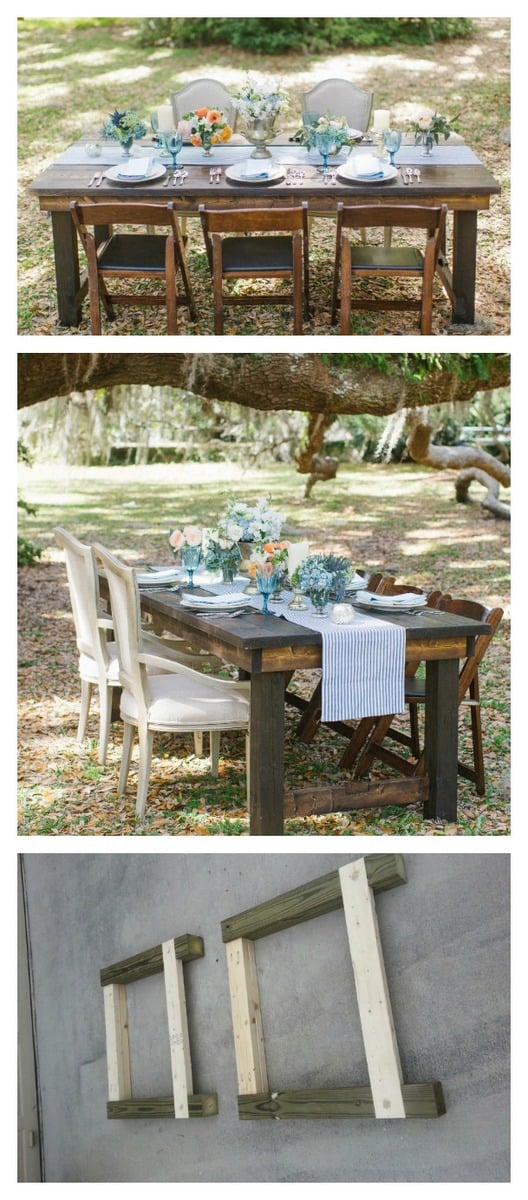
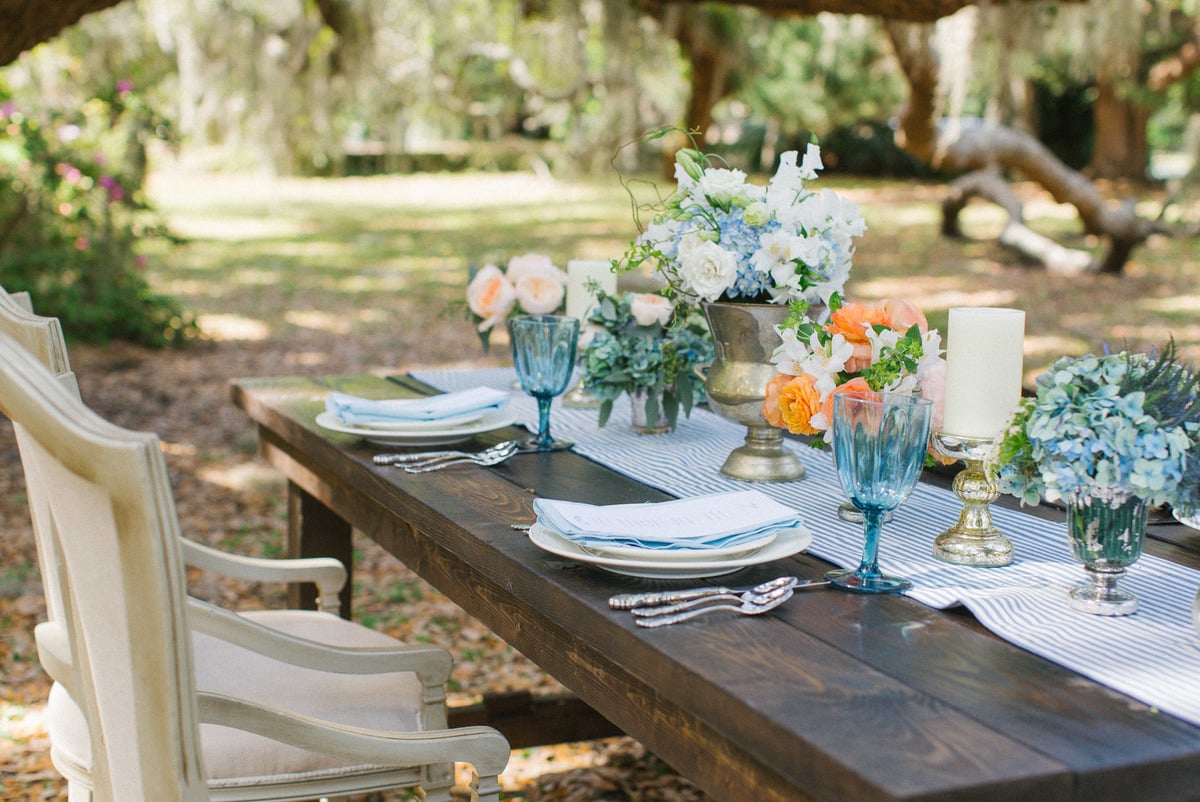
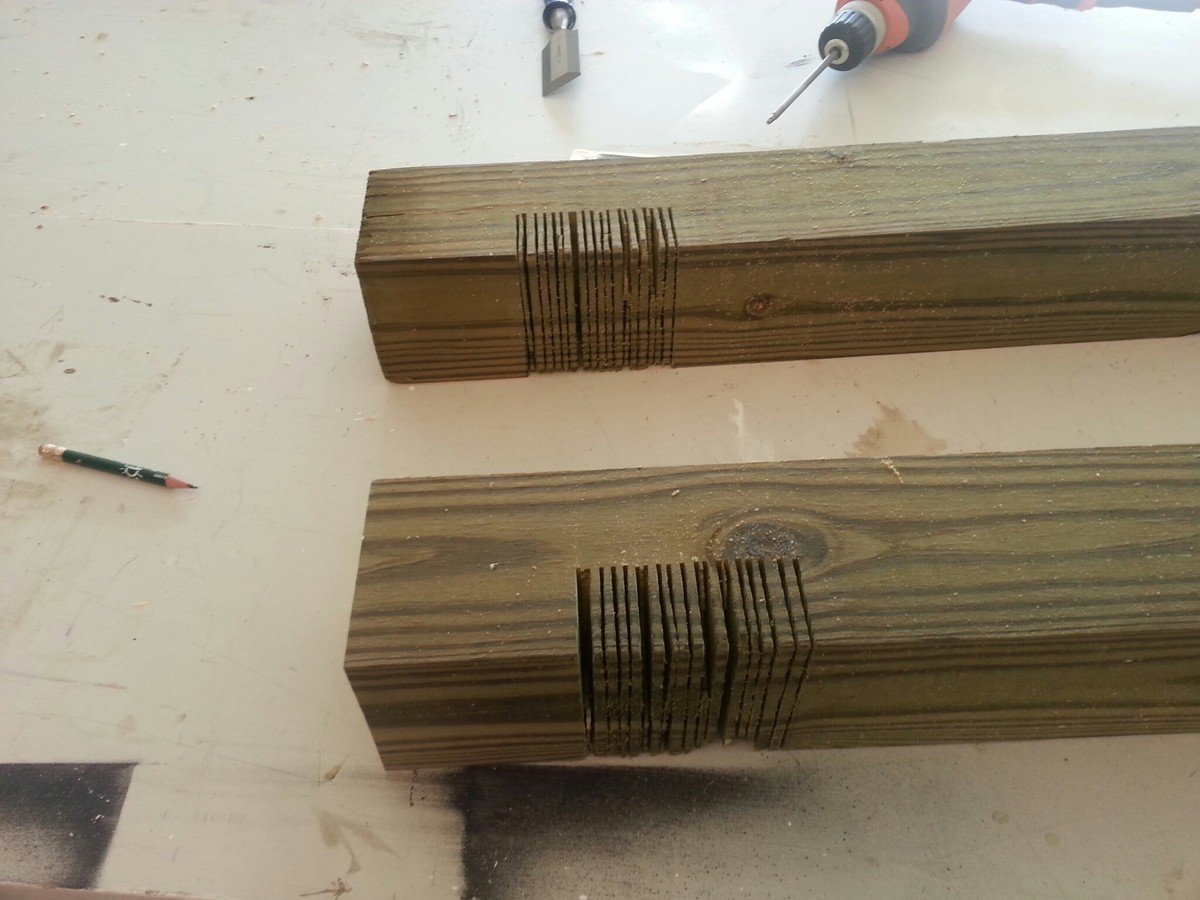
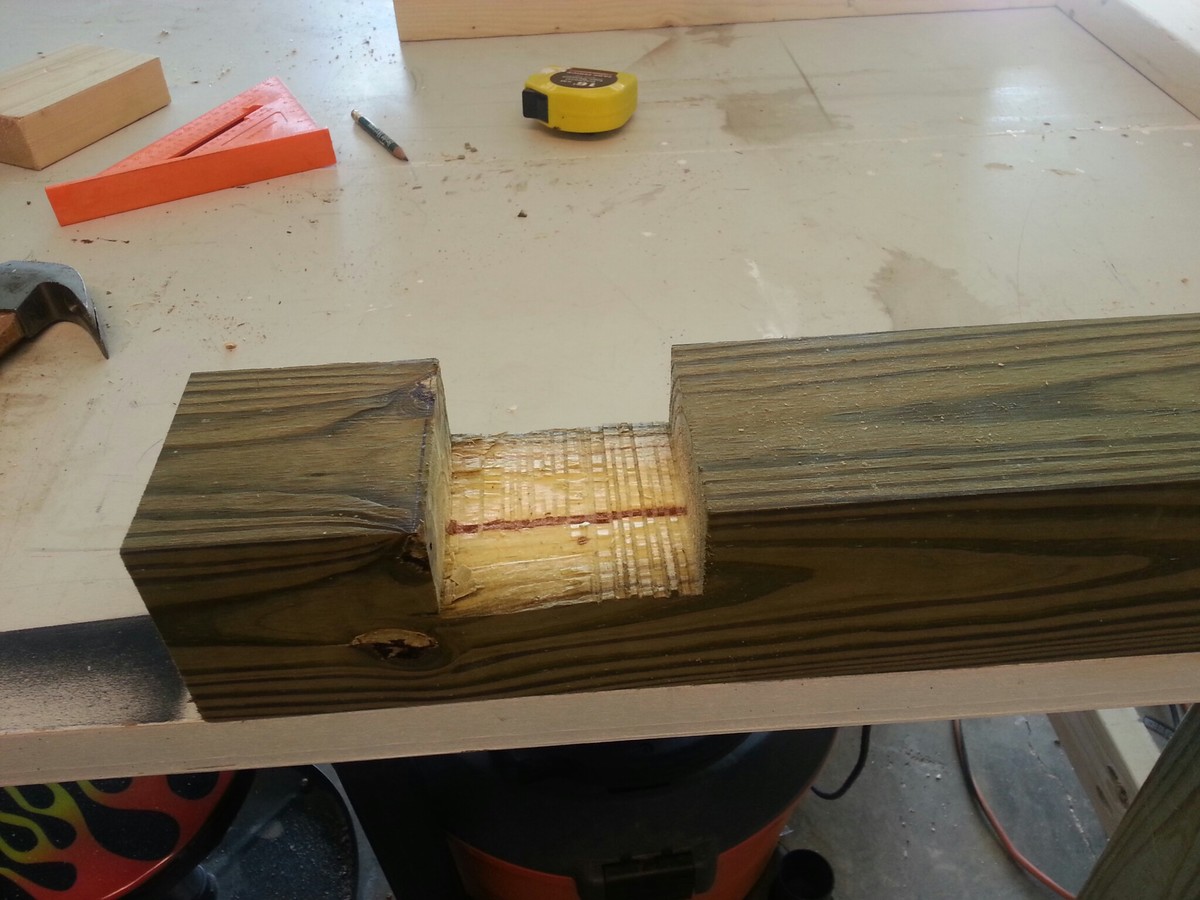
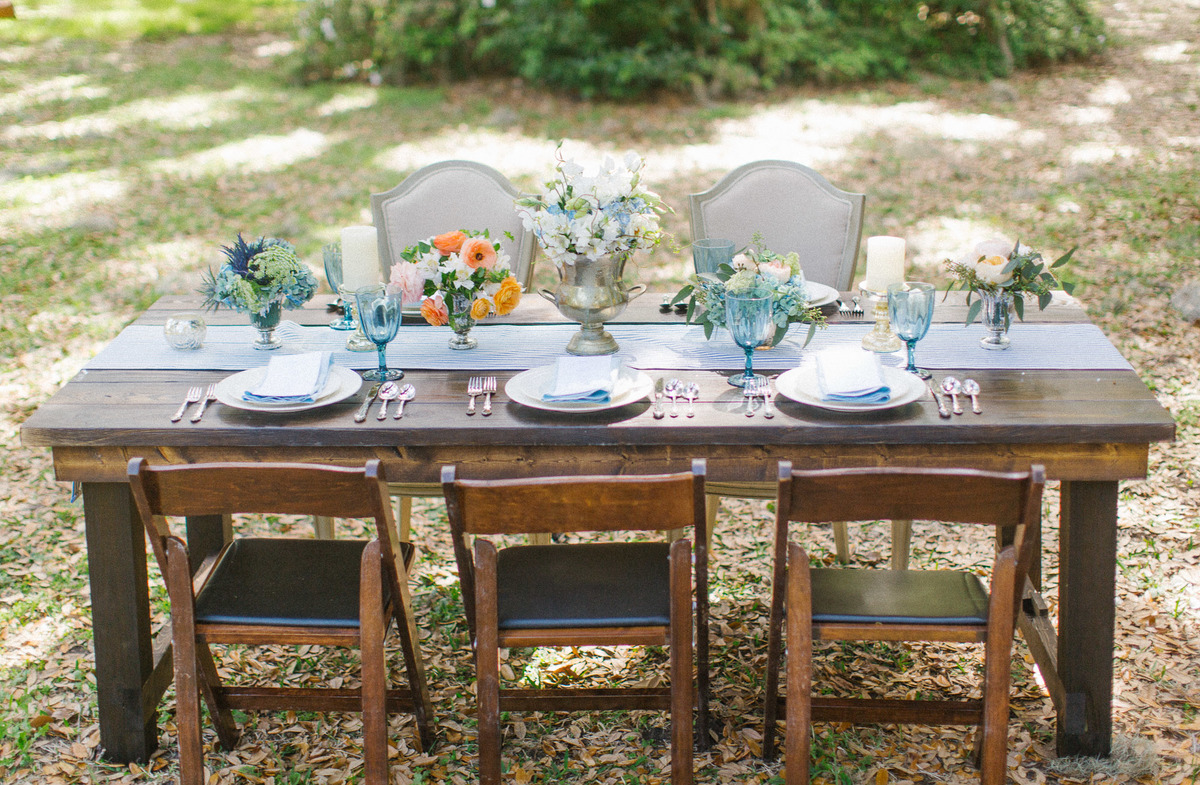
My wife wanted a portable farmhouse style rustic dining table that she could take to photoshoots and other events. I started with a top made with 2x6s and make the legs with 4x4s and the rest with 2x4s. Stain is dark walnut with a clear coat on top.
The legs are attached with door hinges and can fold into the top for more portable use. There is also a board that can be inserted in the bottom slots so that when in use the legs can not fold in.
So far the rustic dining table is working out great, although this table is VERY HEAVY and needs 2-3 strong people to carry it around. I have also made a lighter version using 1x6 tops and all 2x4 frame and legs.
Photos courtesy of Jennifer Blair Photography Designed by Amber Veatch Designs
Wed, 06/12/2013 - 04:15
Oh I really hope that you are able to put these modified plans up!!! A foldable farmhouse table.... what will they think of next!

Sat, 10/22/2016 - 12:25
Stunningly beautiful! Thank you for sharing and inspiring!
Sat, 10/22/2016 - 17:21
I cannot find the plans for the tiny house drawers any where. Can someone please point me in the right direction. Thank you!

I didn't use any plans but the Outdoor Ottoman comes really close. Needed an end table to go with our Outdoor Sectional that my husband and I built. While he was at a ballgame I whipped this up. Still have to sand and stain this as well as the sectional, but will probably do it as a winter project. We bought the 1x4s a while ago when we bought the 2x4s for the sectional so I wasn't exactly sure of the cost. I think I used 2 1/2 pieces of 8' lengths. Who would have thought a couple of years ago that so many of us would have attempted to build furniture and then even without a plan now and then?! Ana rocks! :)
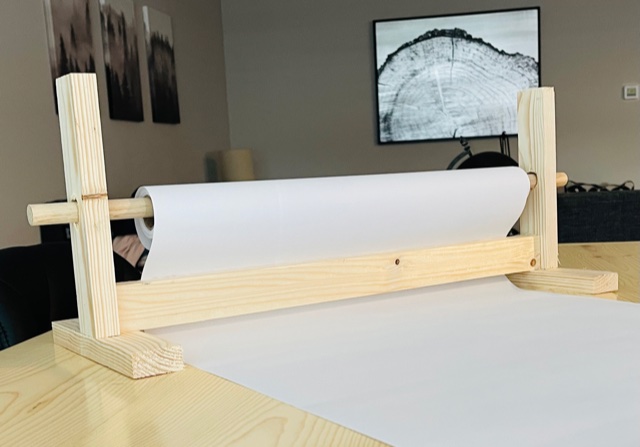
This took me about 20 minutes! I love the look of it and that it can just be left out when the kids aren't doing art. A great little item to add to keep the kids busy and inspired. I made a couple of mods from the plan. I used glue and nails instead of pocket holes and I did that bottom board flat instead of on it's side. I also used a little bigger dowel, and bought two rolls of paper on Amazon for $14.I'm giving this to my daughter for her birthday with some fun art supplies, so I think it's a great gift idea for any occasion for those crafty people out there!

Tue, 04/02/2024 - 06:09
Sometimes, when working with papers, you might need to convert file formats, right? So, I recently came across this website https://pdfflex.com/webp-to-png It's super handy for converting. It's been a real time-saver for me, especially when I need to tweak documents for printing or sharing. I'd desided to share in case it helps someone else out there too!
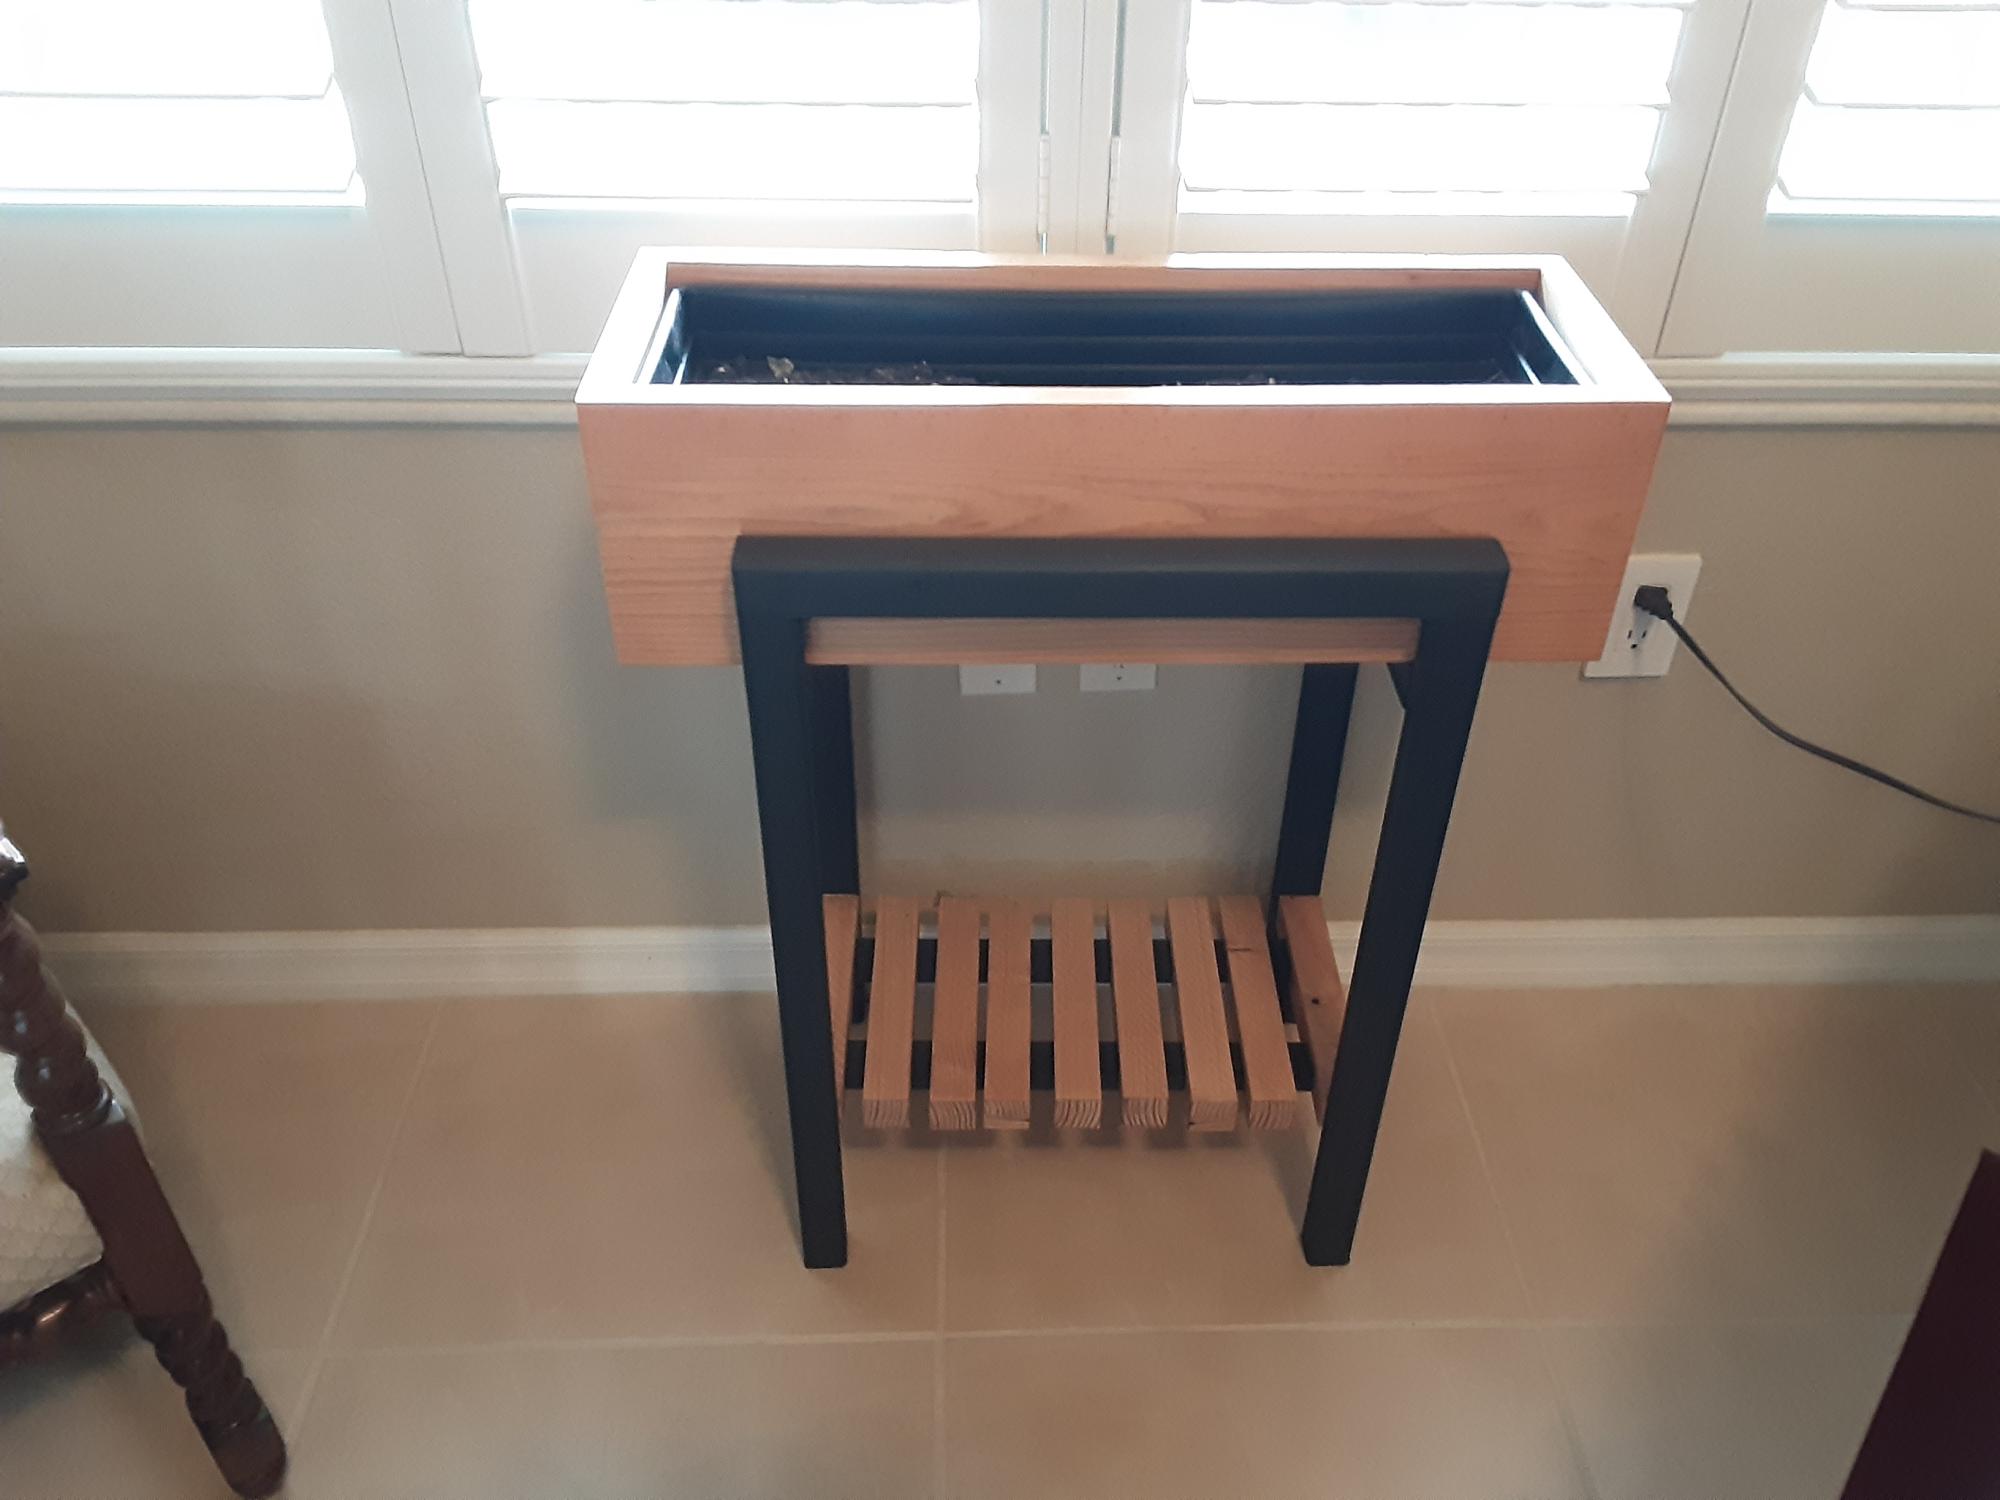
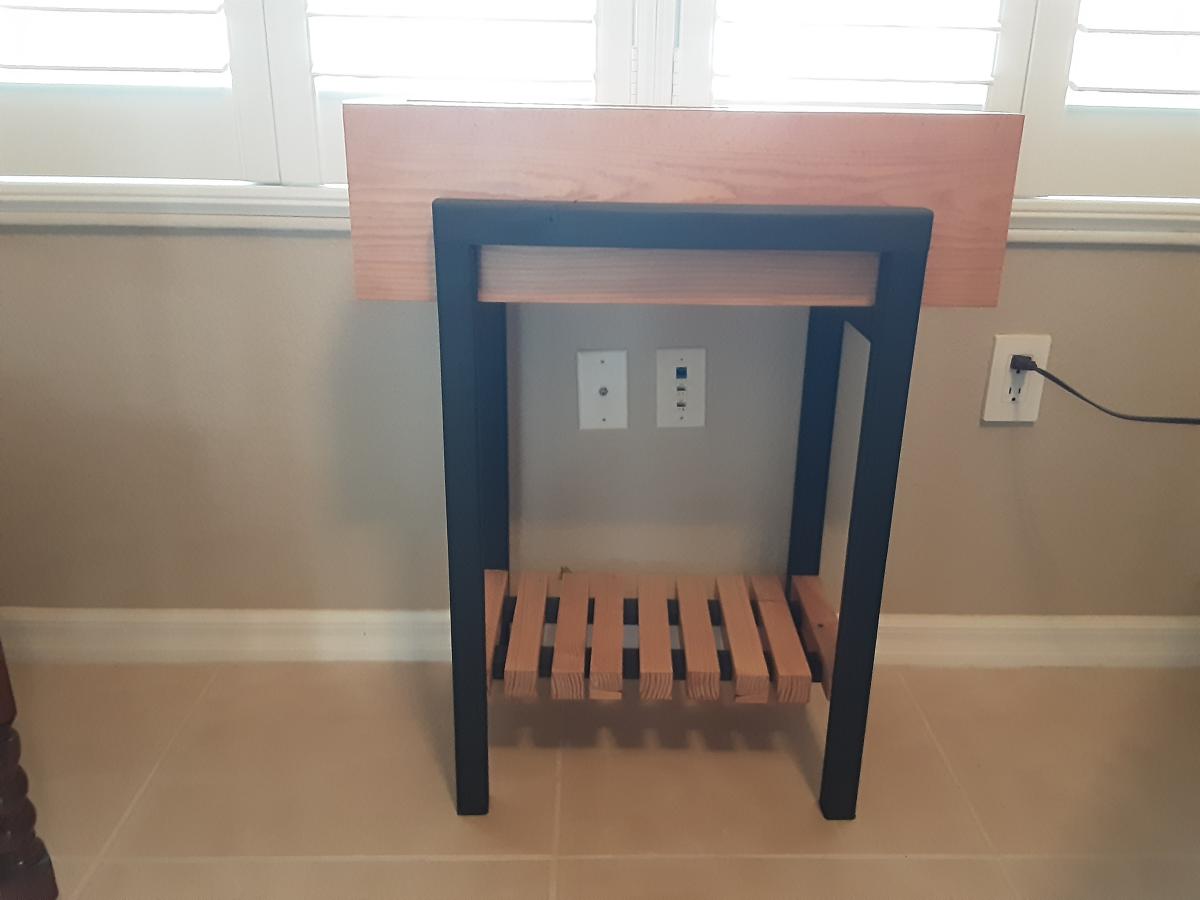
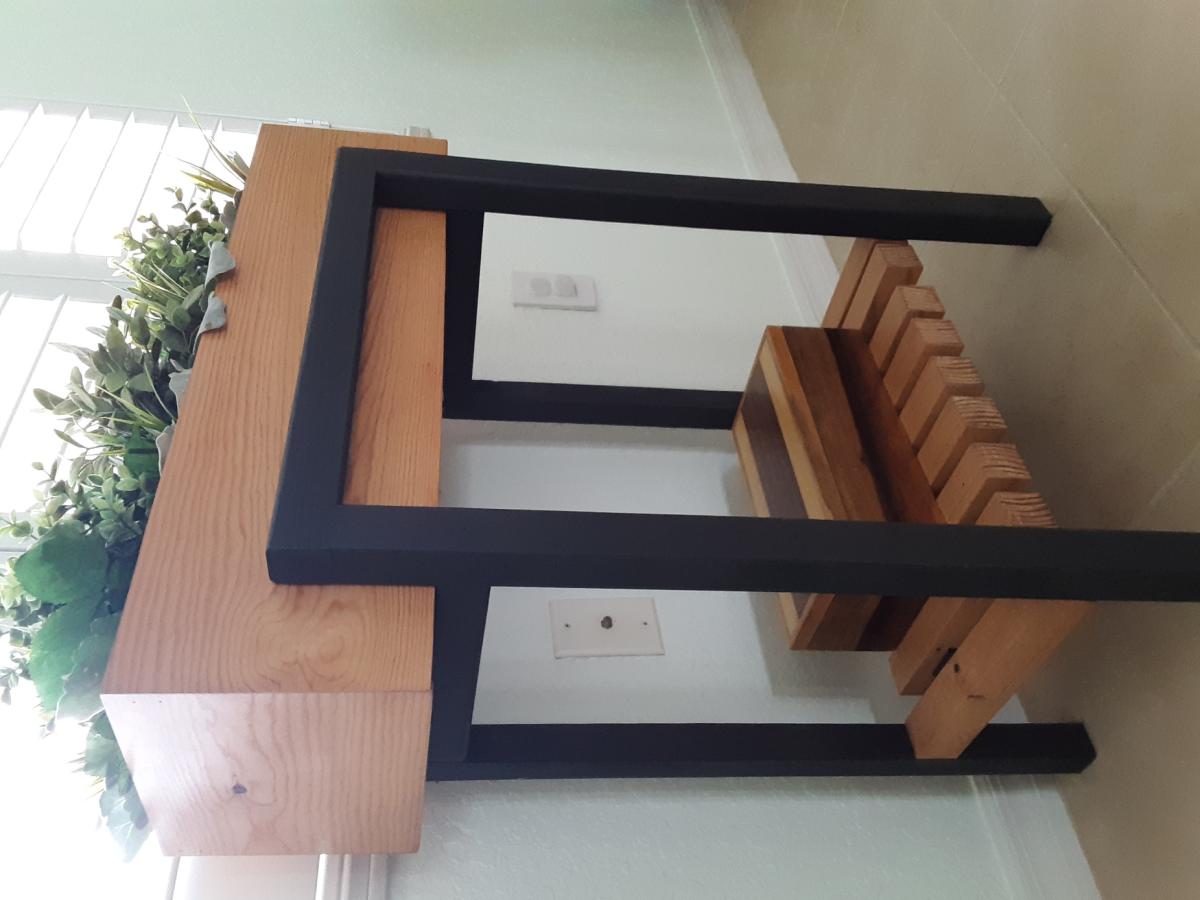
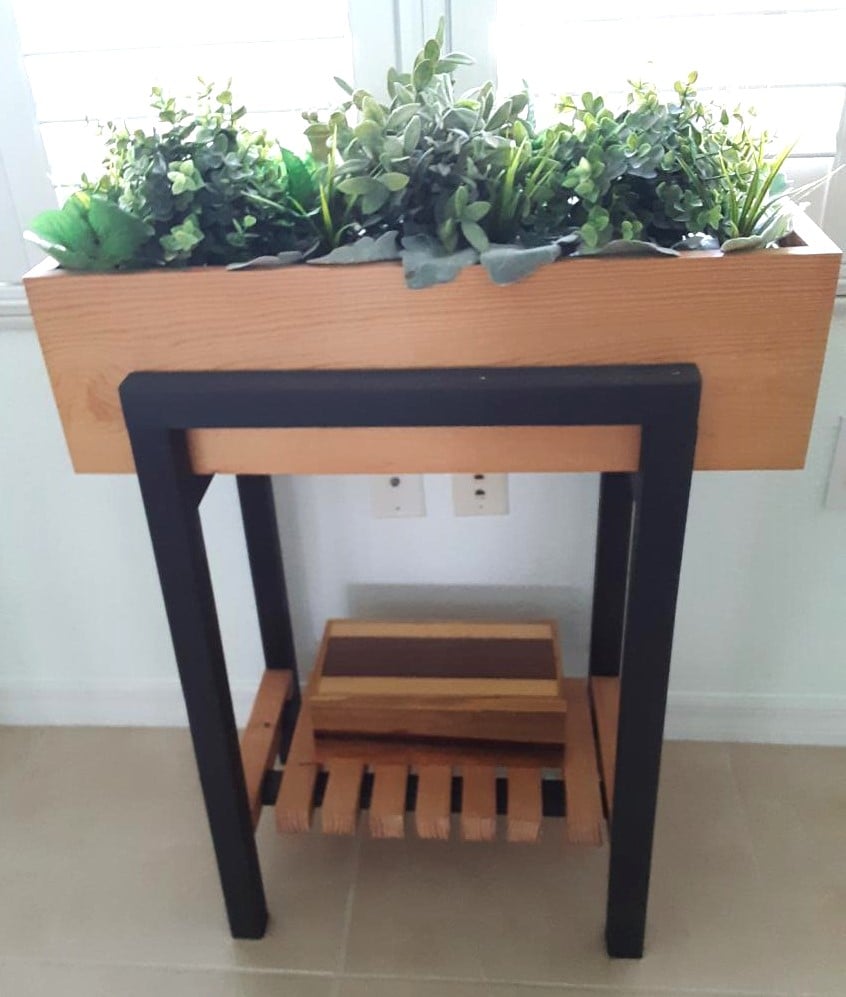
Created the stand for the raised planter using 2X2 assembled using dowels. Painted the stand mixing black with a bit of white to simulate metal. The actually plastic window box fits within a wood open box with mitered corners fir clean log. Bottom of the stand provides a shelf using (9) 2X2s with a dado placed on either end to fit on the runners of the stand.
Mon, 05/01/2023 - 08:24
It looks super high quality, love your take! Thanks for sharing.

I built this book rack using scrap wood and modified plans from the Full Length Plate Rack. It was a really straightforward build, and functions very well as vertical storage that takes up little space. I predrilled, screwed and glued all of the joints, vs. stapling.

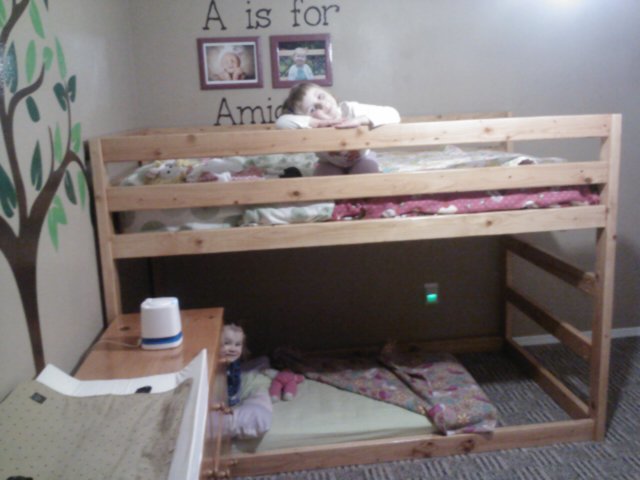
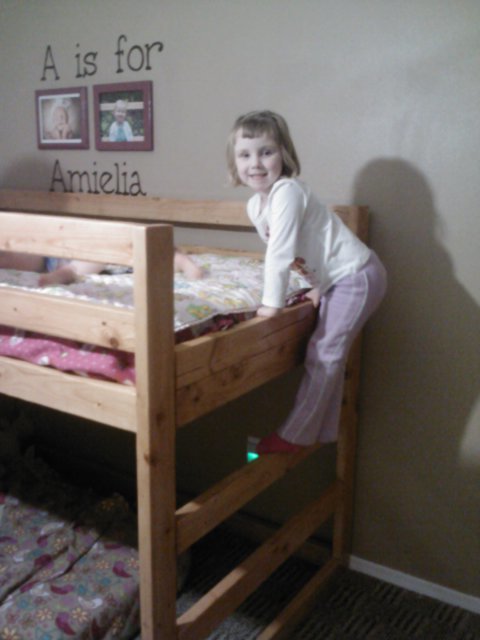
We loved the idea of the Jr. Loft Bed, but made some modifications to fit our needs.
Modifications:
-I didn't really feel the 2x6 railing was needed, so to cut costs, we used all 2x4s. On the end, I put two 2x4s one on top of the other to keep the mattress from sliding off the ladder side.
-Height was a concern for me as my kids are 4 & 2. So I lowered the overall height by about a foot. 54in is the height. Since we are putting my youngest on the bottom (on the floor) we made sure she had enough head room.
-We wanted this to be STURDY and reversible. So we added bottom supports on both long sides to ensure that the frame wasn't going to move. We also added six 2x4 supports under the mattress on the top. I can climb up there to tuck in sheets with no problem.
-We skipped the stairs & landing. I didn't want my kids to be playing on the bed. So we skipped the stairs and just built a ladder into the frame instead.
This was a fairly easy build. We previously built a HUGE Ana White Table. And I felt like I was kreg jigging for DAYS. This was only a few hours of cutting, sanding, kreg jigging, and a simple put together. Staining took the longest! It's a great bed and we're so excited it's finished!

Basically I took Ana's plan and tweaked it to create a diy sofa, a love seat, and a corner piece to make a sectional. All 3 pieces have the same basic design and function (they all have a storage compartment), although the corner piece, because of its placement and the thickness of the seating cushions, doesn't open unless the couch is opened first. We purchased custom cut, 6" thick foam cushions for the seats (we bought the XL-38 foam from https://www.buyfoam.com/, but if we had to do it again, we'd go with the XL-28 as the 38 is VERY firm). We also used upholstery fabric instead of a paint drop-cloth to cover the couches. The foam and upholstery fabric upped the overall cost significantly. Other changes from Ana's plan, I used 15/32" OSB because the 1/4" plywood just felt too flimsy (I'm a large guy). I also added I bolts to the underside of the seat before the foam and upholstery so I could add a stress relief rope to prevent the kids from opening the top and dropping it and ripping out the hinges. I used piano hinges as they seemed to me to provide the most support. Finally, I ended up using 1x2s for the base trim since I couldn't find any 2x2s that were straight and finish-ready, then I added router detailing to provide some visual interest. I used 3" pieces of 4x6 for the feet and added matching router detail. Additionally, I used T-Nuts and bolts to make the feet and base trim completely removable.


Mon, 08/17/2020 - 07:46
It is superb blog and i really appreciate your blog. It is because i always like the informative blogs. You did a great job and thanks for sharing.I am impressed by your post. It contains very informative data and i gain a lot information from it. It is very useful for me. Thanks for sharing and keep on sharing that type of posts.The Mobile App Developer Dubai provides good service you visit here site https://www.mistersaad.com/
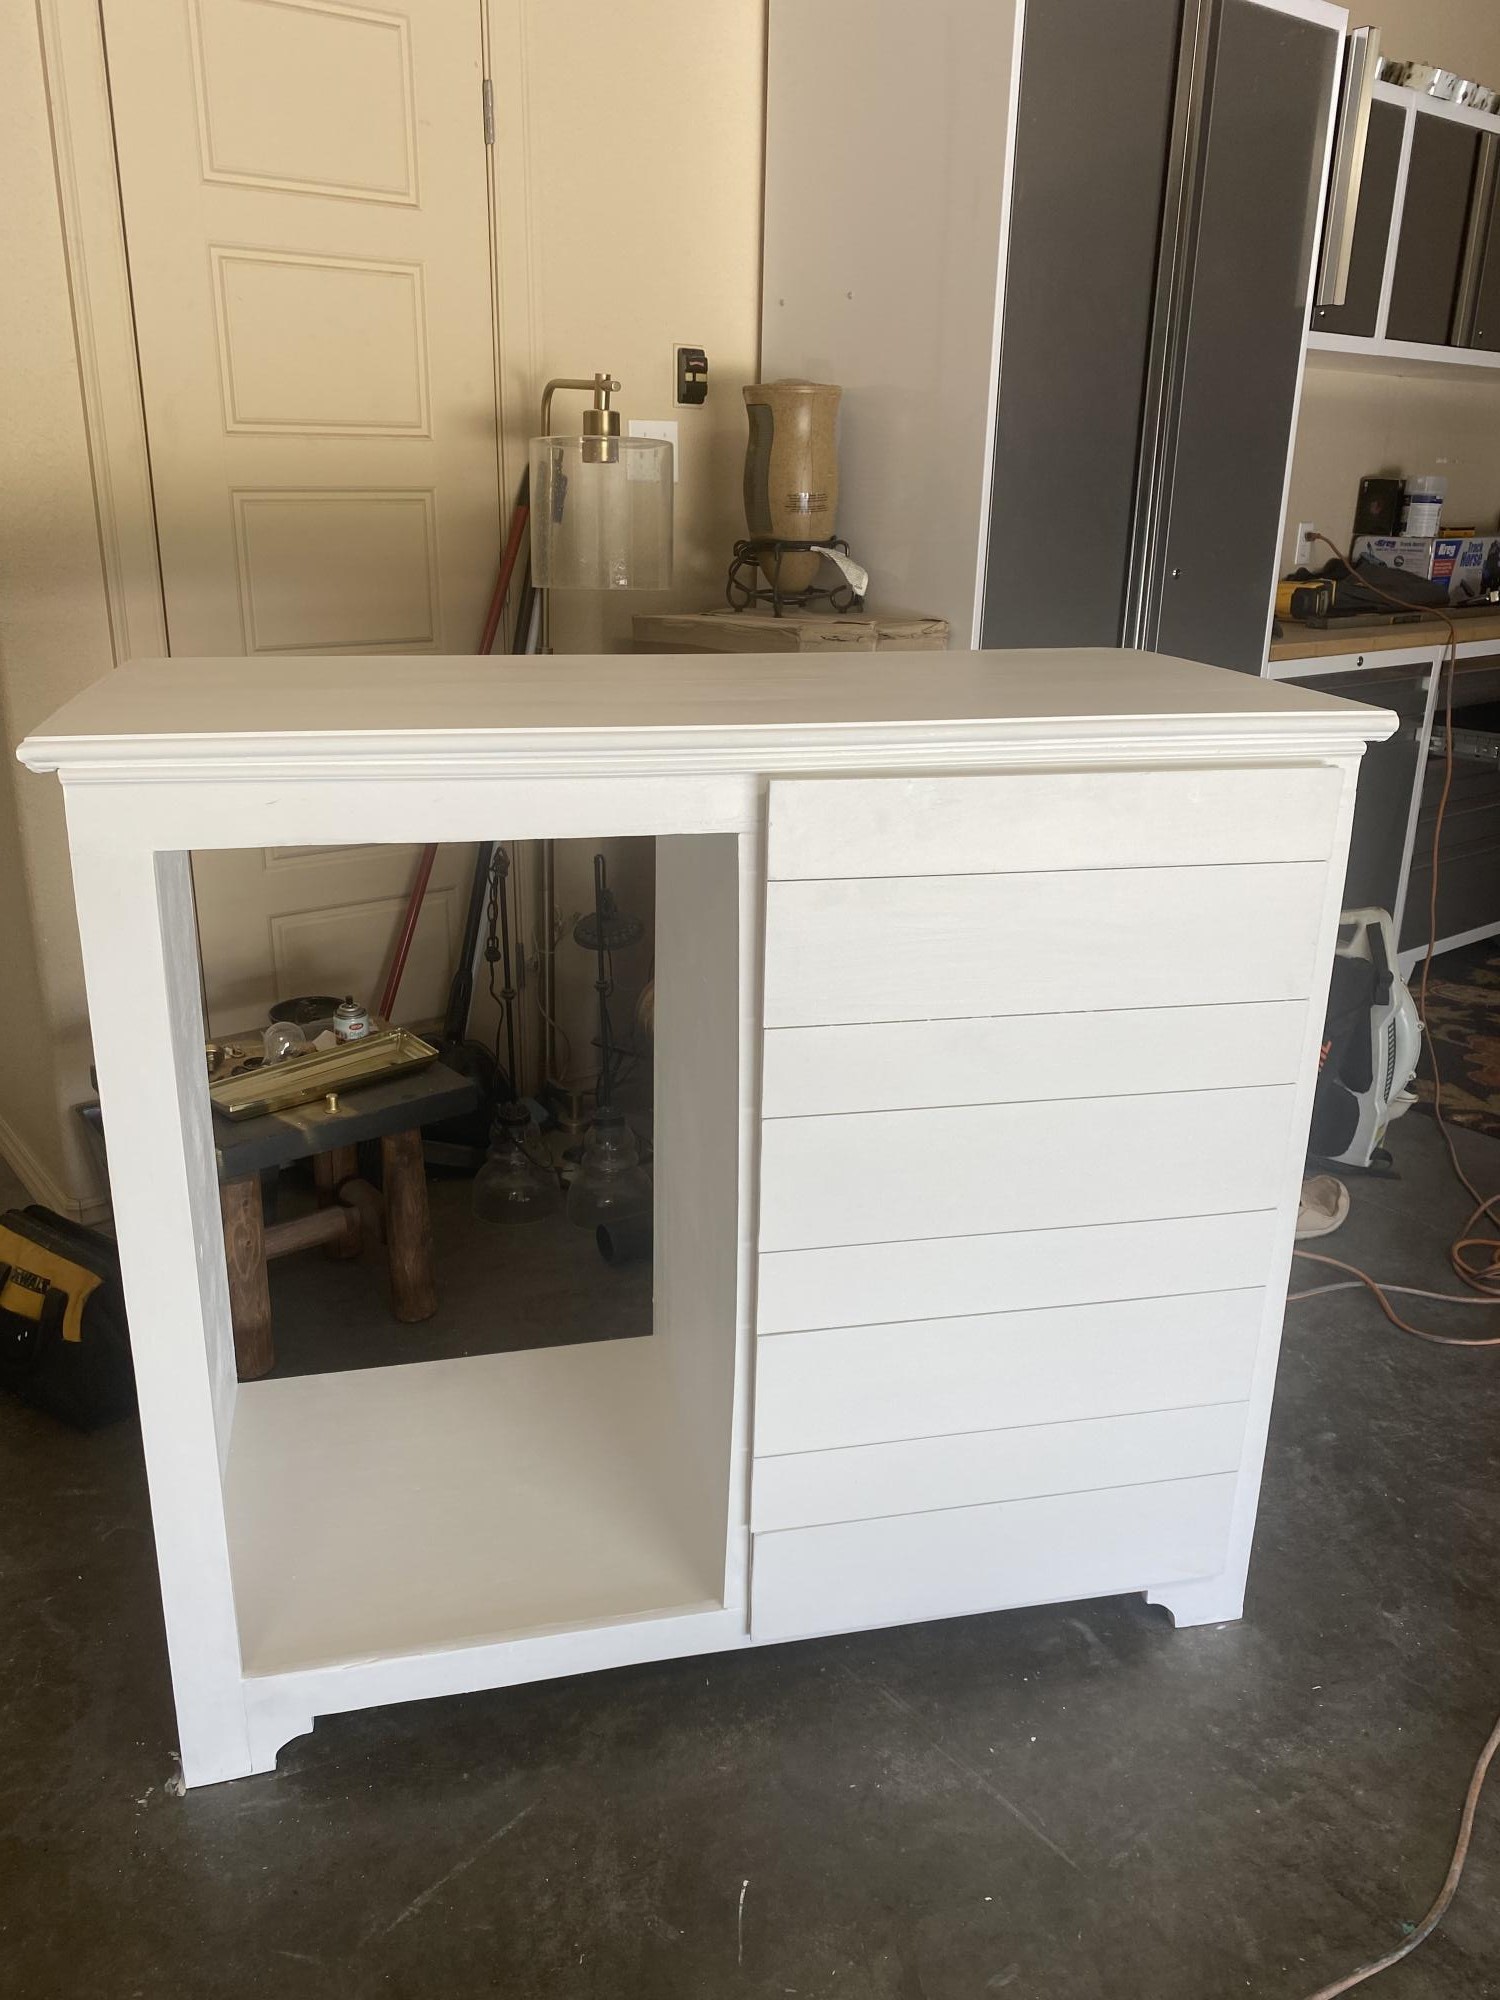
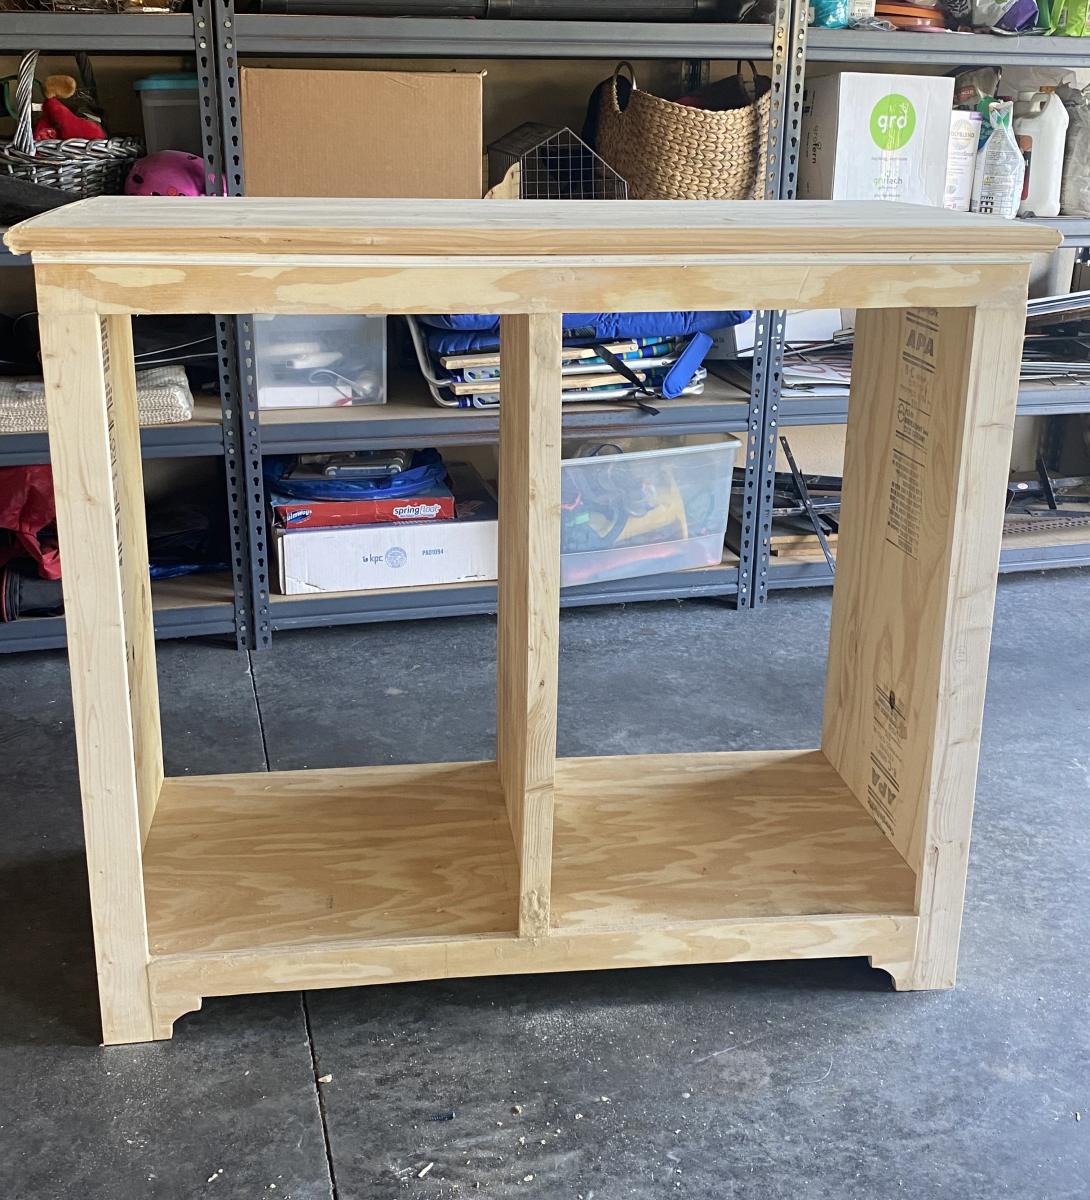
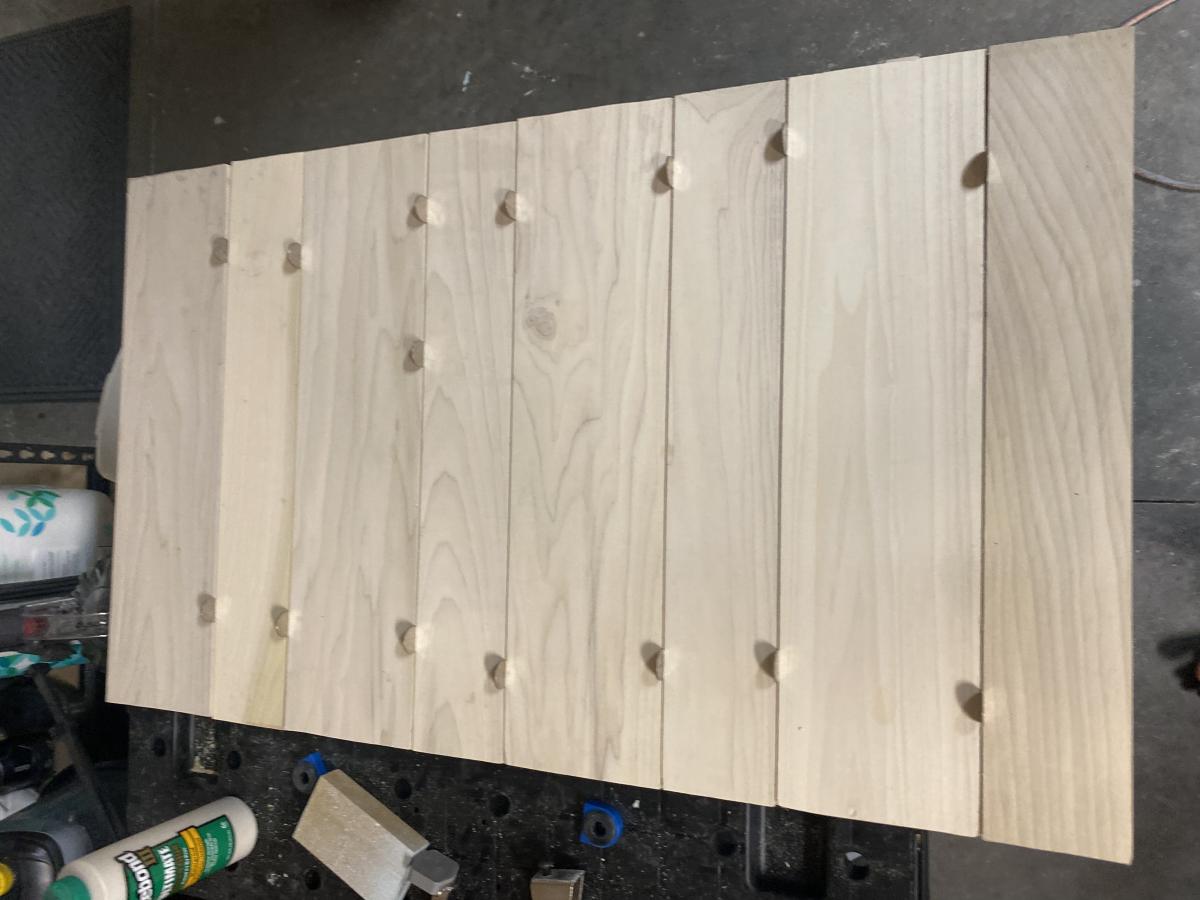
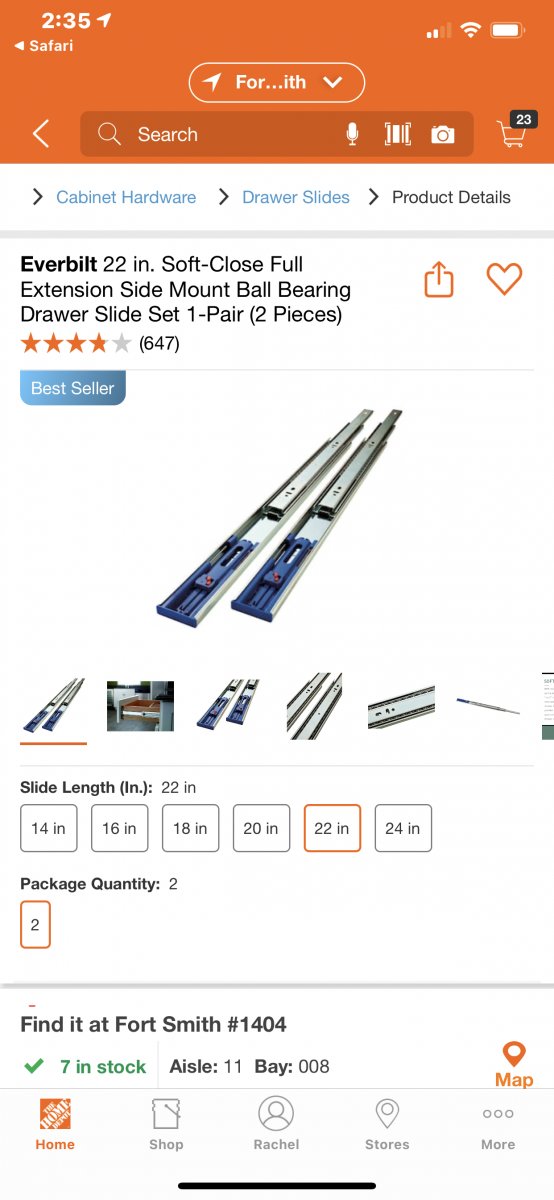
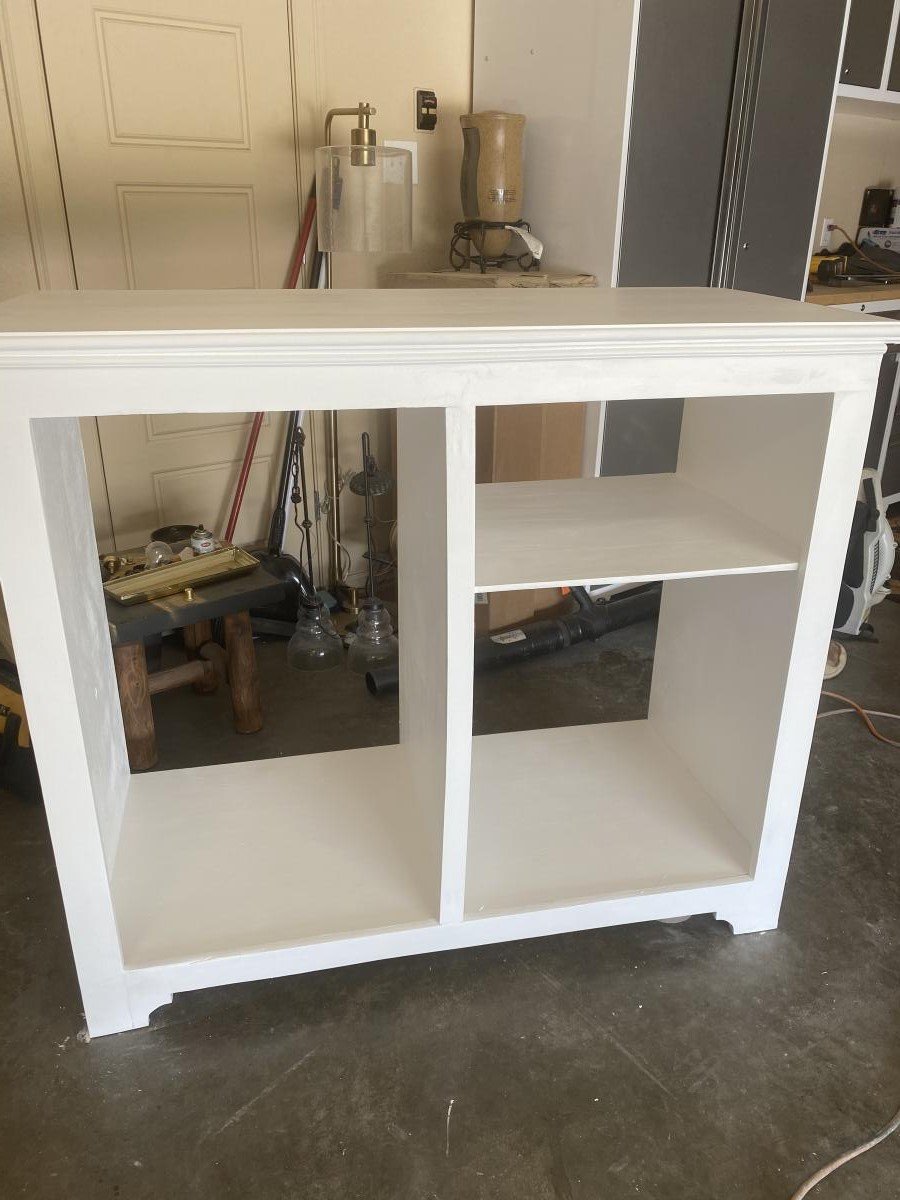
I changed plan to make deeper. I also modified the bottom trim and top. I put a ball bearing soft door drawer guide on modern door so it can slide back and forth. I feel we need more modern plans on here but with a bit of creativity and using plans you can make anything. I have never built anything before. I love General Finishes Milk Paint in Snow White and I brushed rolled it on (sanded between 3 coats). It’s basically self leveling and leaves a nice matte finish. Used door glide in picture bought from homedepot in the 24 inch and that’s how wide door was and it was 36” tall. Door glide I only used one on top of the door not on bottom as well. Door piece of fiberboard with just strips glued on and quarters spacing them correct.
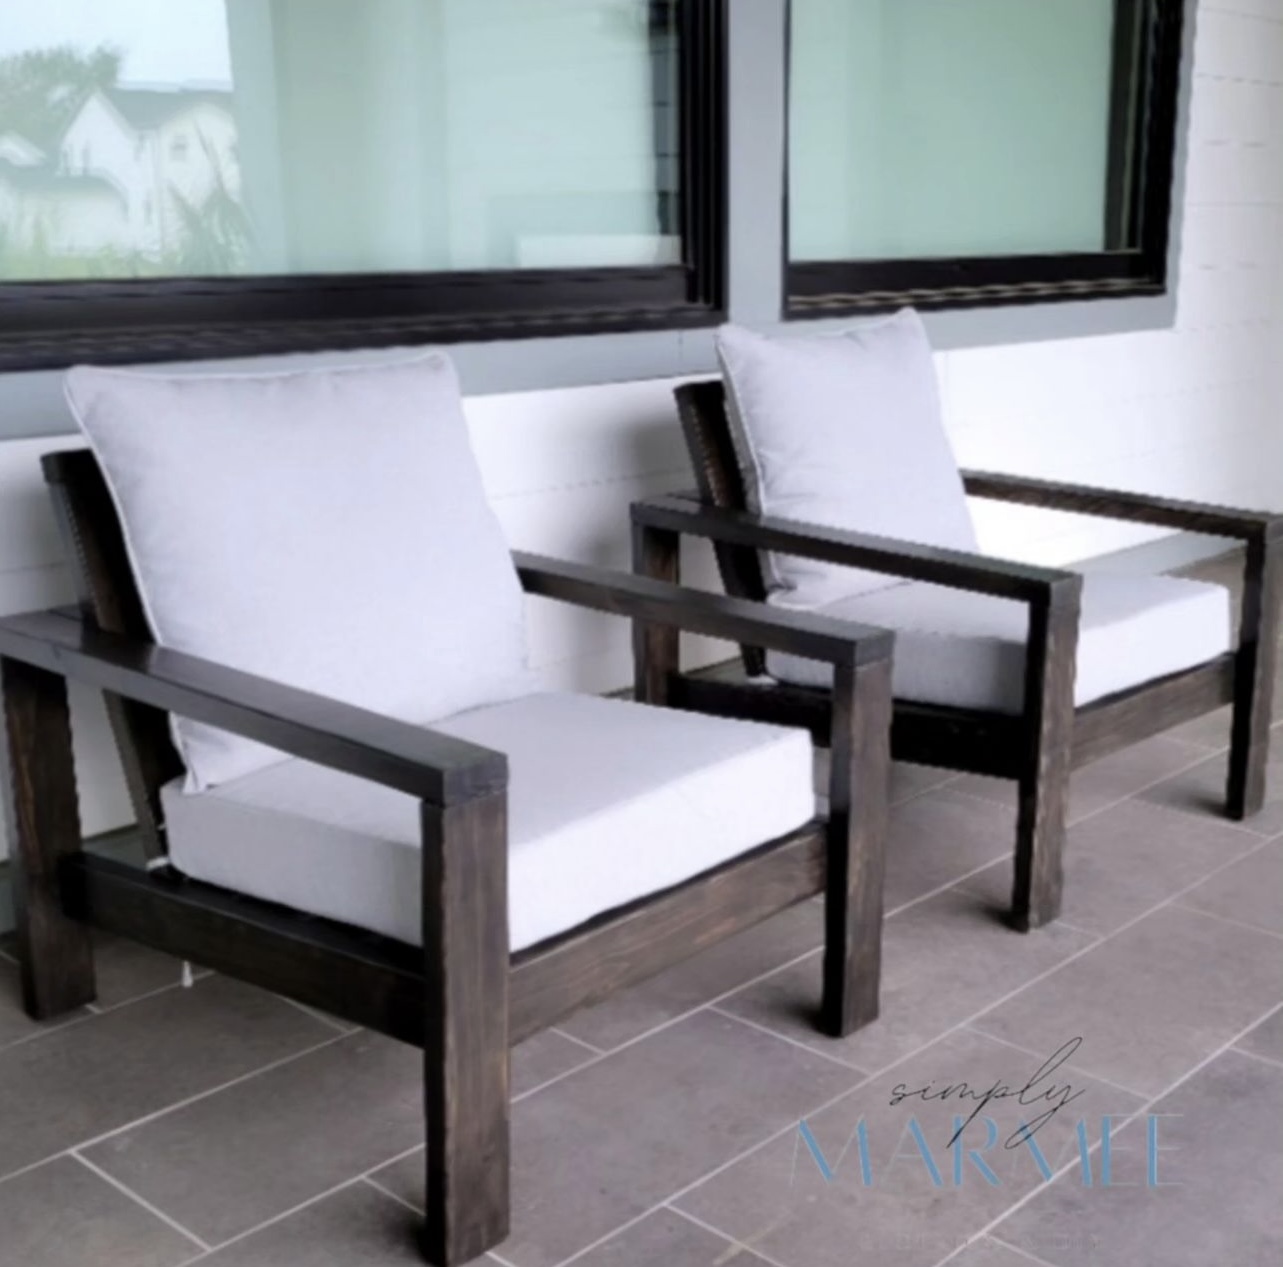
Using just basic tools, I was able to build this super comfy outdoor chair for the fraction of the cost. With a couple of modifications, Ana White's design plan made for a perfect fit for the new deep seat cushions I had found on fb marketplace.
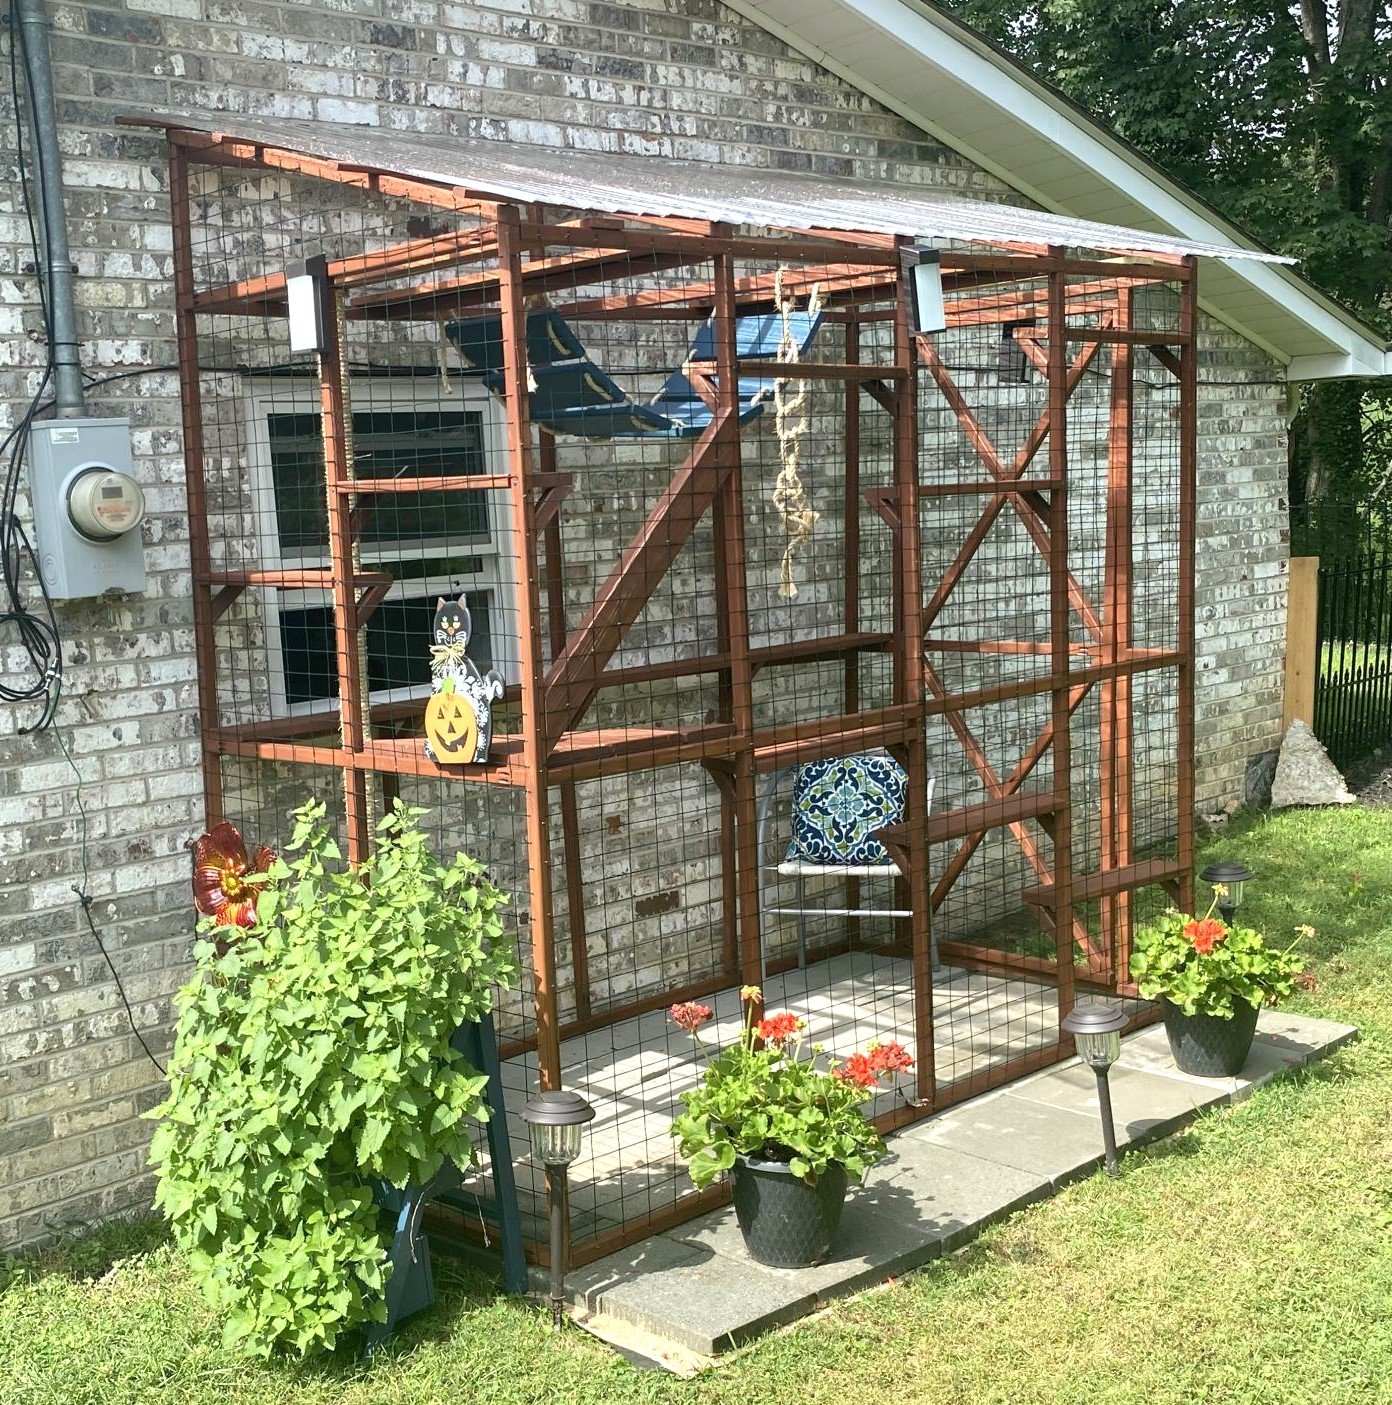
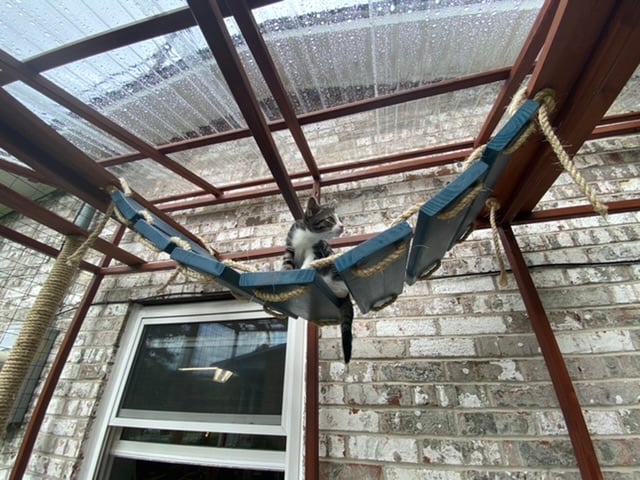
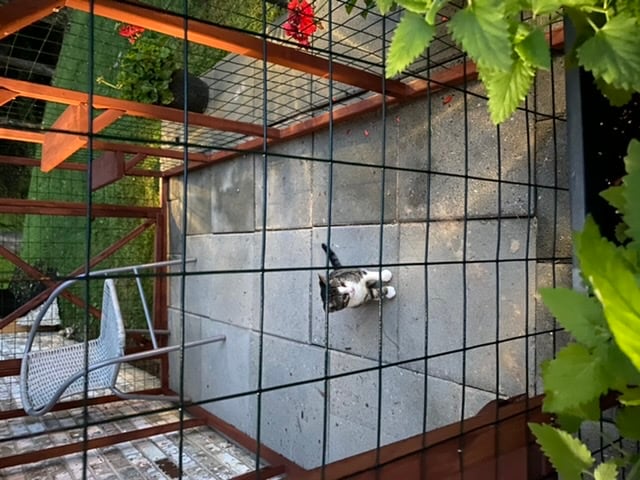
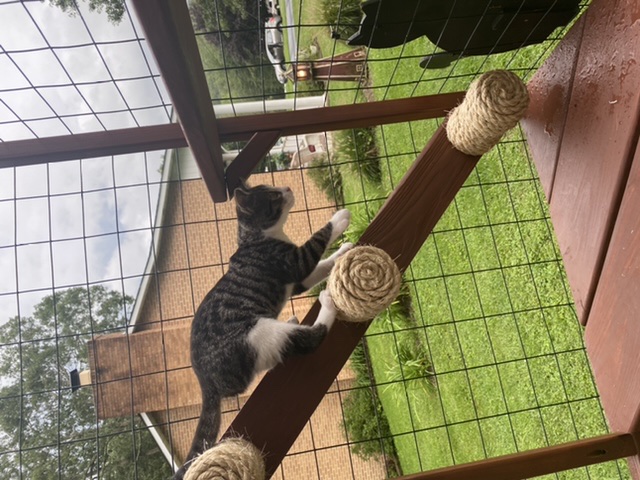
Ana doesn’t have a plan for a catio but she does for a playhouse and a cedar shed made from 2x2’s. I sort of combined my knowledge from making her plans over the last 10 years and came up with this for my cats. It was fun to make!! My baby kitten is loving it. I used garden fencing and stapled it to the outside and pocket holes for the walls. I made each wall individually like the playhouse then connected them once in place.


Wed, 06/09/2021 - 12:36
Thank you for sharing! My daughter wants a cat for her birthday but it can't be inside due to our son's allergies. Roaming outside isn't really an option because we have coyotes. We are going to use one of these in combination with an underground electric fence.

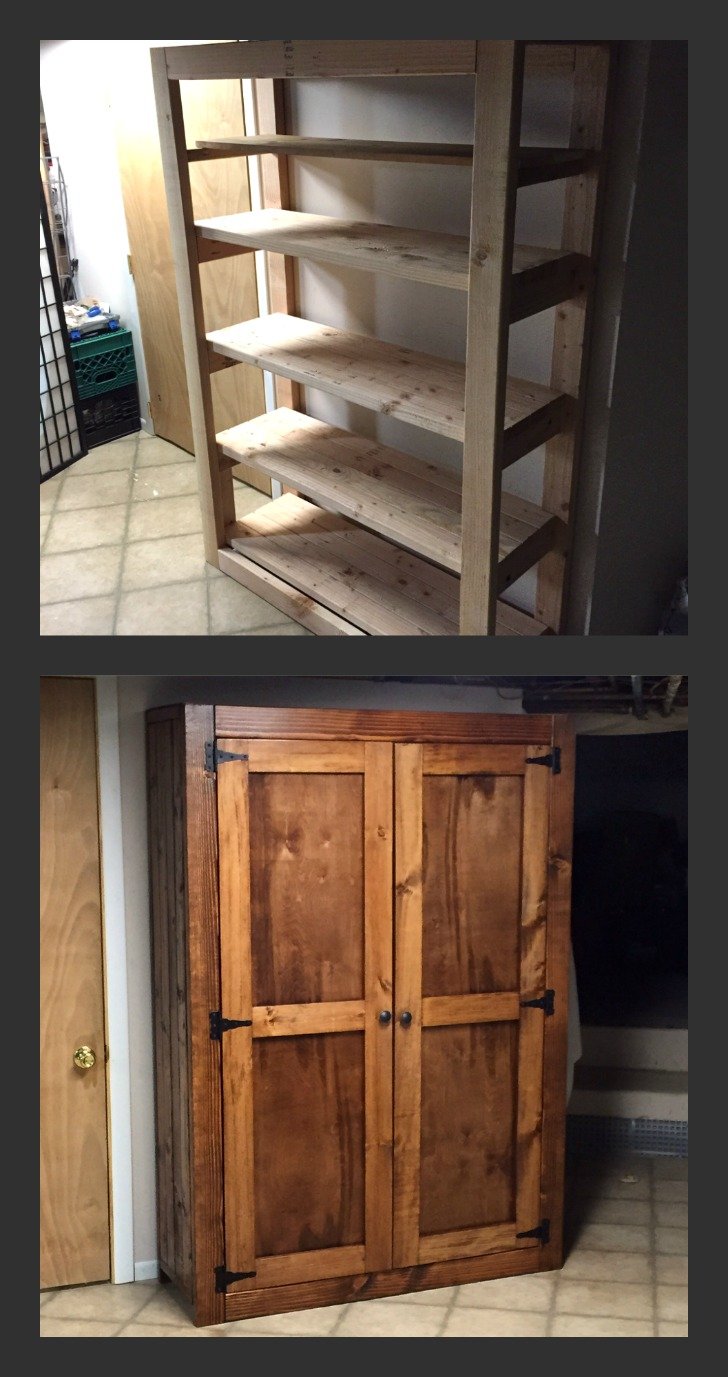
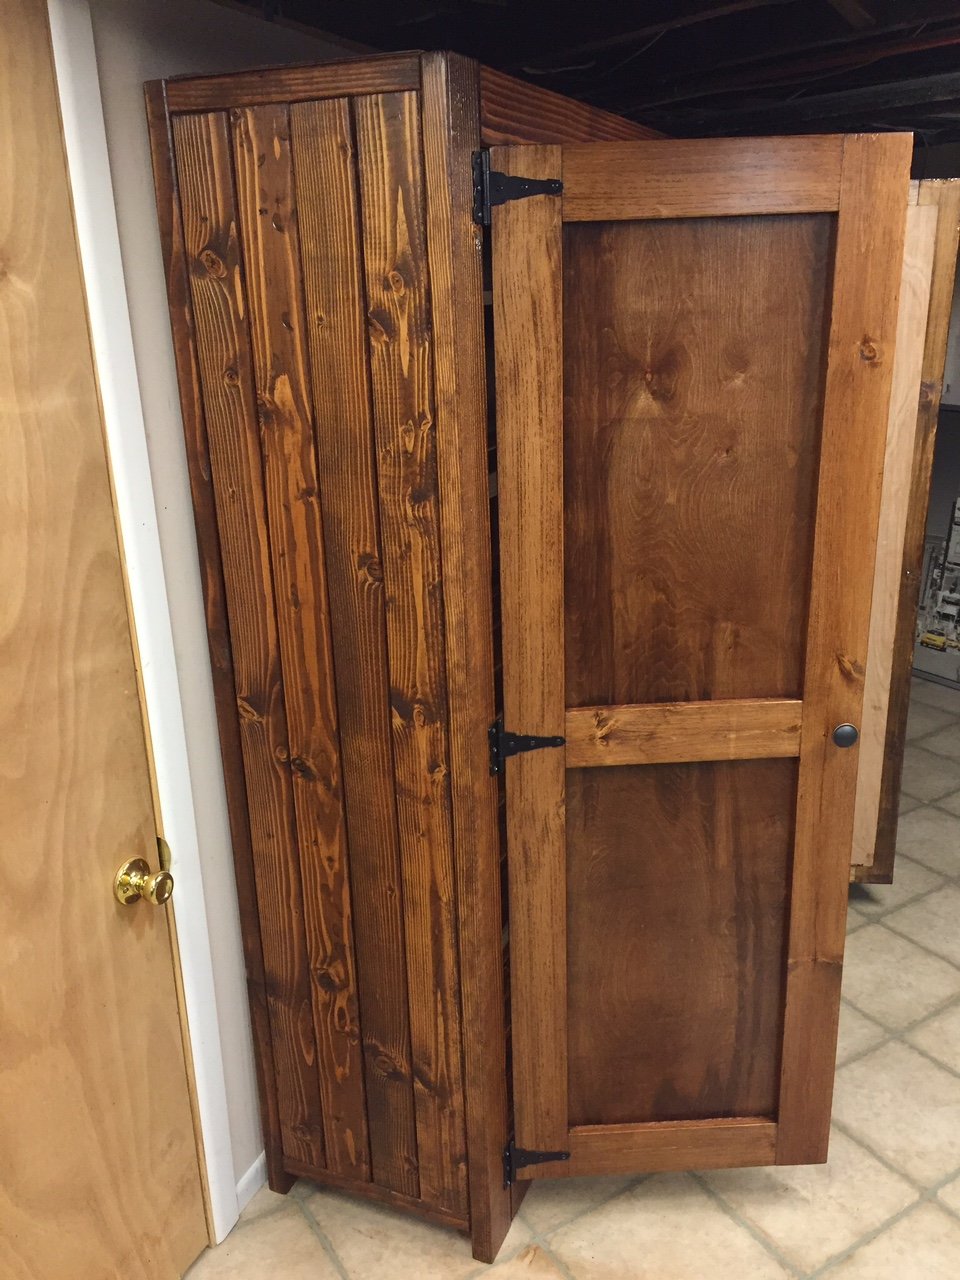
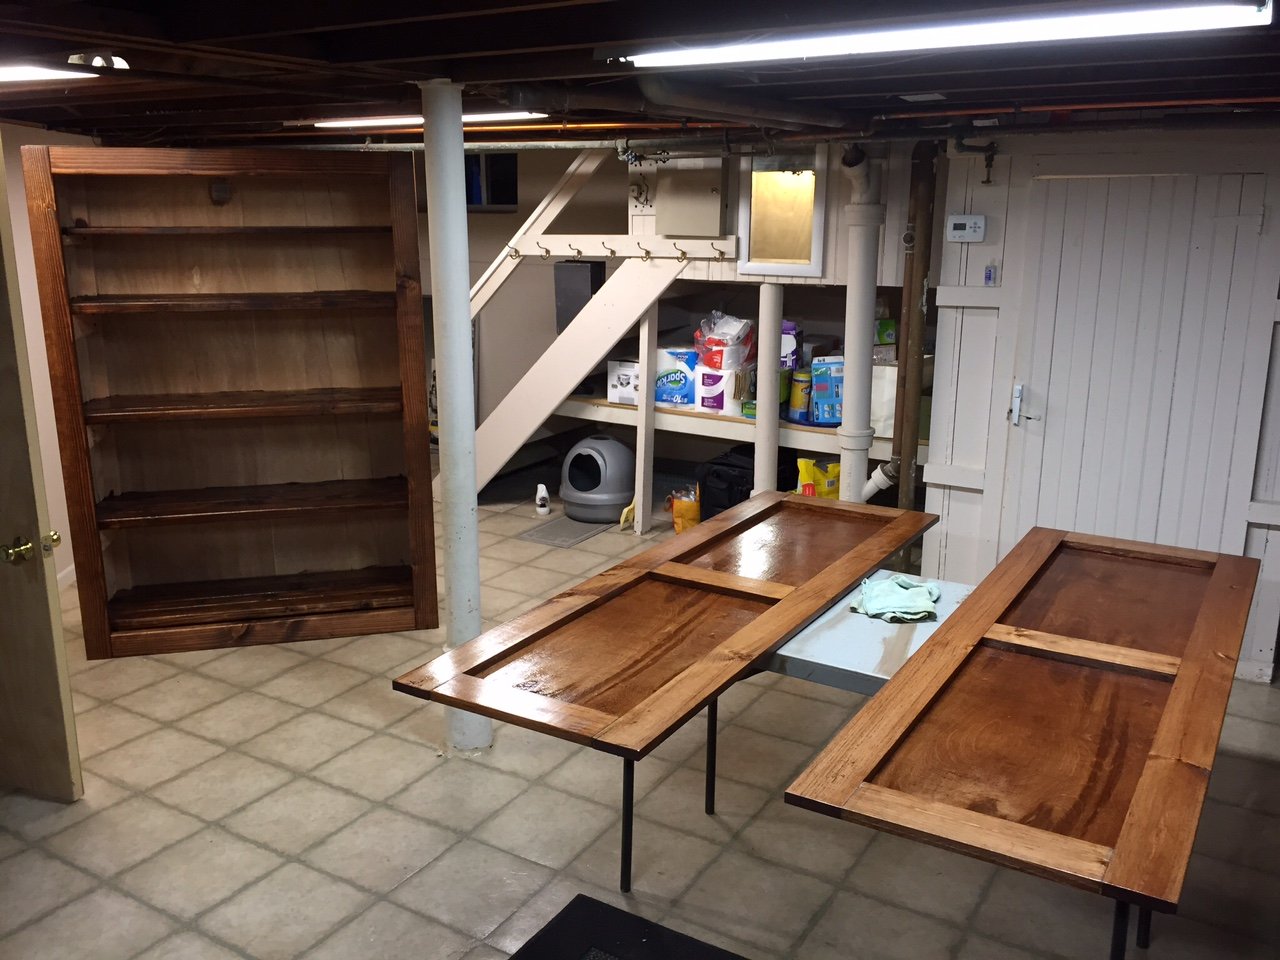
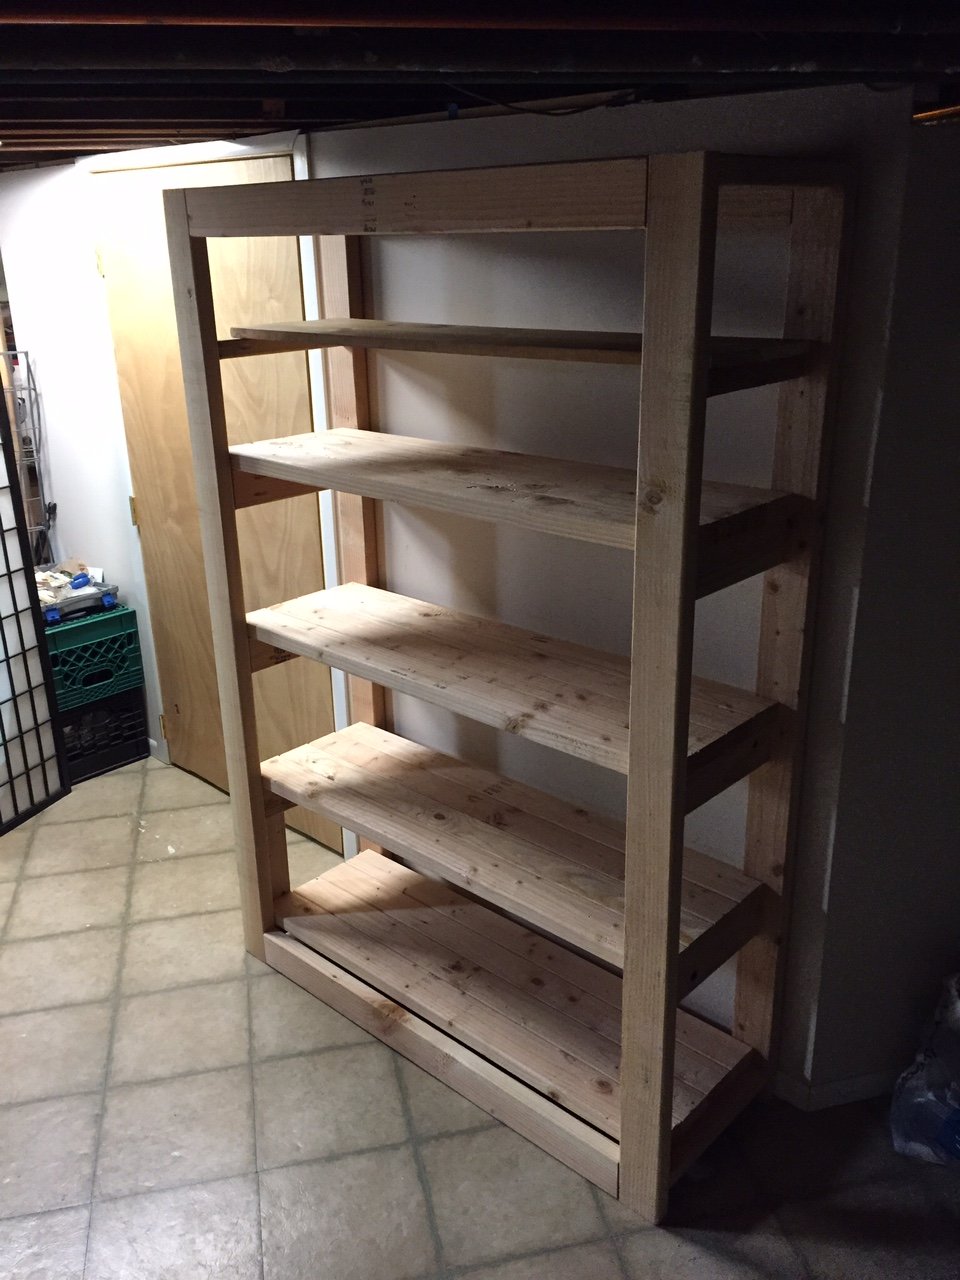
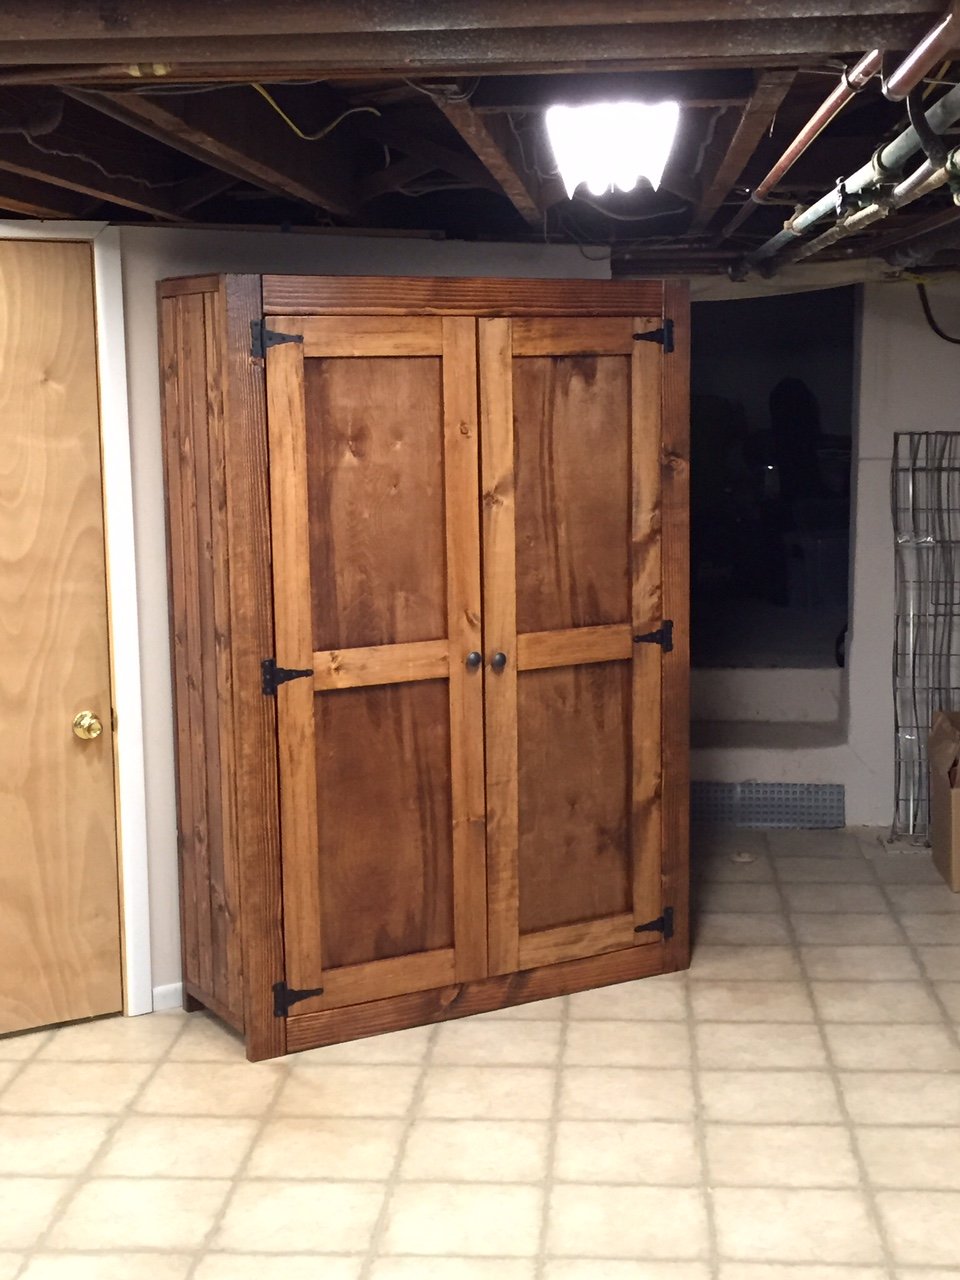
Anything is possible when you put your mind to it. This is my 4th DIY furniture project. First time working on cabinet/doors. Installing them straight was the biggest challenge. The side of the pantry is actually four 2x4's. I measured the frame so tightly that I had to use a hammer to bang in the fourth 2x4 on each wall, also adding a distressed look in the process. The pantry is very large, 48in wide and about 17 inches deep. Our kitchen lacks storage space and we could use a little more space for food and also pots, pans etc. The staircase to our basement is off our kitchen, so I placed the pantry right at the bottom of the staircase for easy access. I am thrilled with how this came out considering the time and effort it took. Very gratifying. Build on!

Thu, 03/05/2015 - 06:24
I really love how the finished turned out. I need to build something like this too! My current pantry just isn't big enough for bulk shopping :)
Thu, 04/16/2020 - 10:55
Building this from your pictures as we speak! What type/thickness of wood did you use for the back panel and door panels??
Sat, 07/23/2016 - 18:21
I am thinking about building one but I am not sure if my skill level is up to this yet. I am going to attempt to build the Kentwood Bookshelf and see how that goes. I am remodeling my office and want real wood shelves instead of that pressed wood junk. Great job on your build. I love this website!
Sat, 01/13/2018 - 18:09
Hey Michael I really love the pantry and would love to make this exact one but there is not enough info on the sizes and what all you used for all the wood. If you have time I would greatly appreciate it if you could give us some more info thank you
Thu, 01/09/2020 - 06:19
Is the top of this a single piece of plywood. Pictures are a bit vague. Trying my hand with this
Wed, 04/28/2021 - 16:38
Love it! I am in need of one too. Can we get the plans for this pantry?
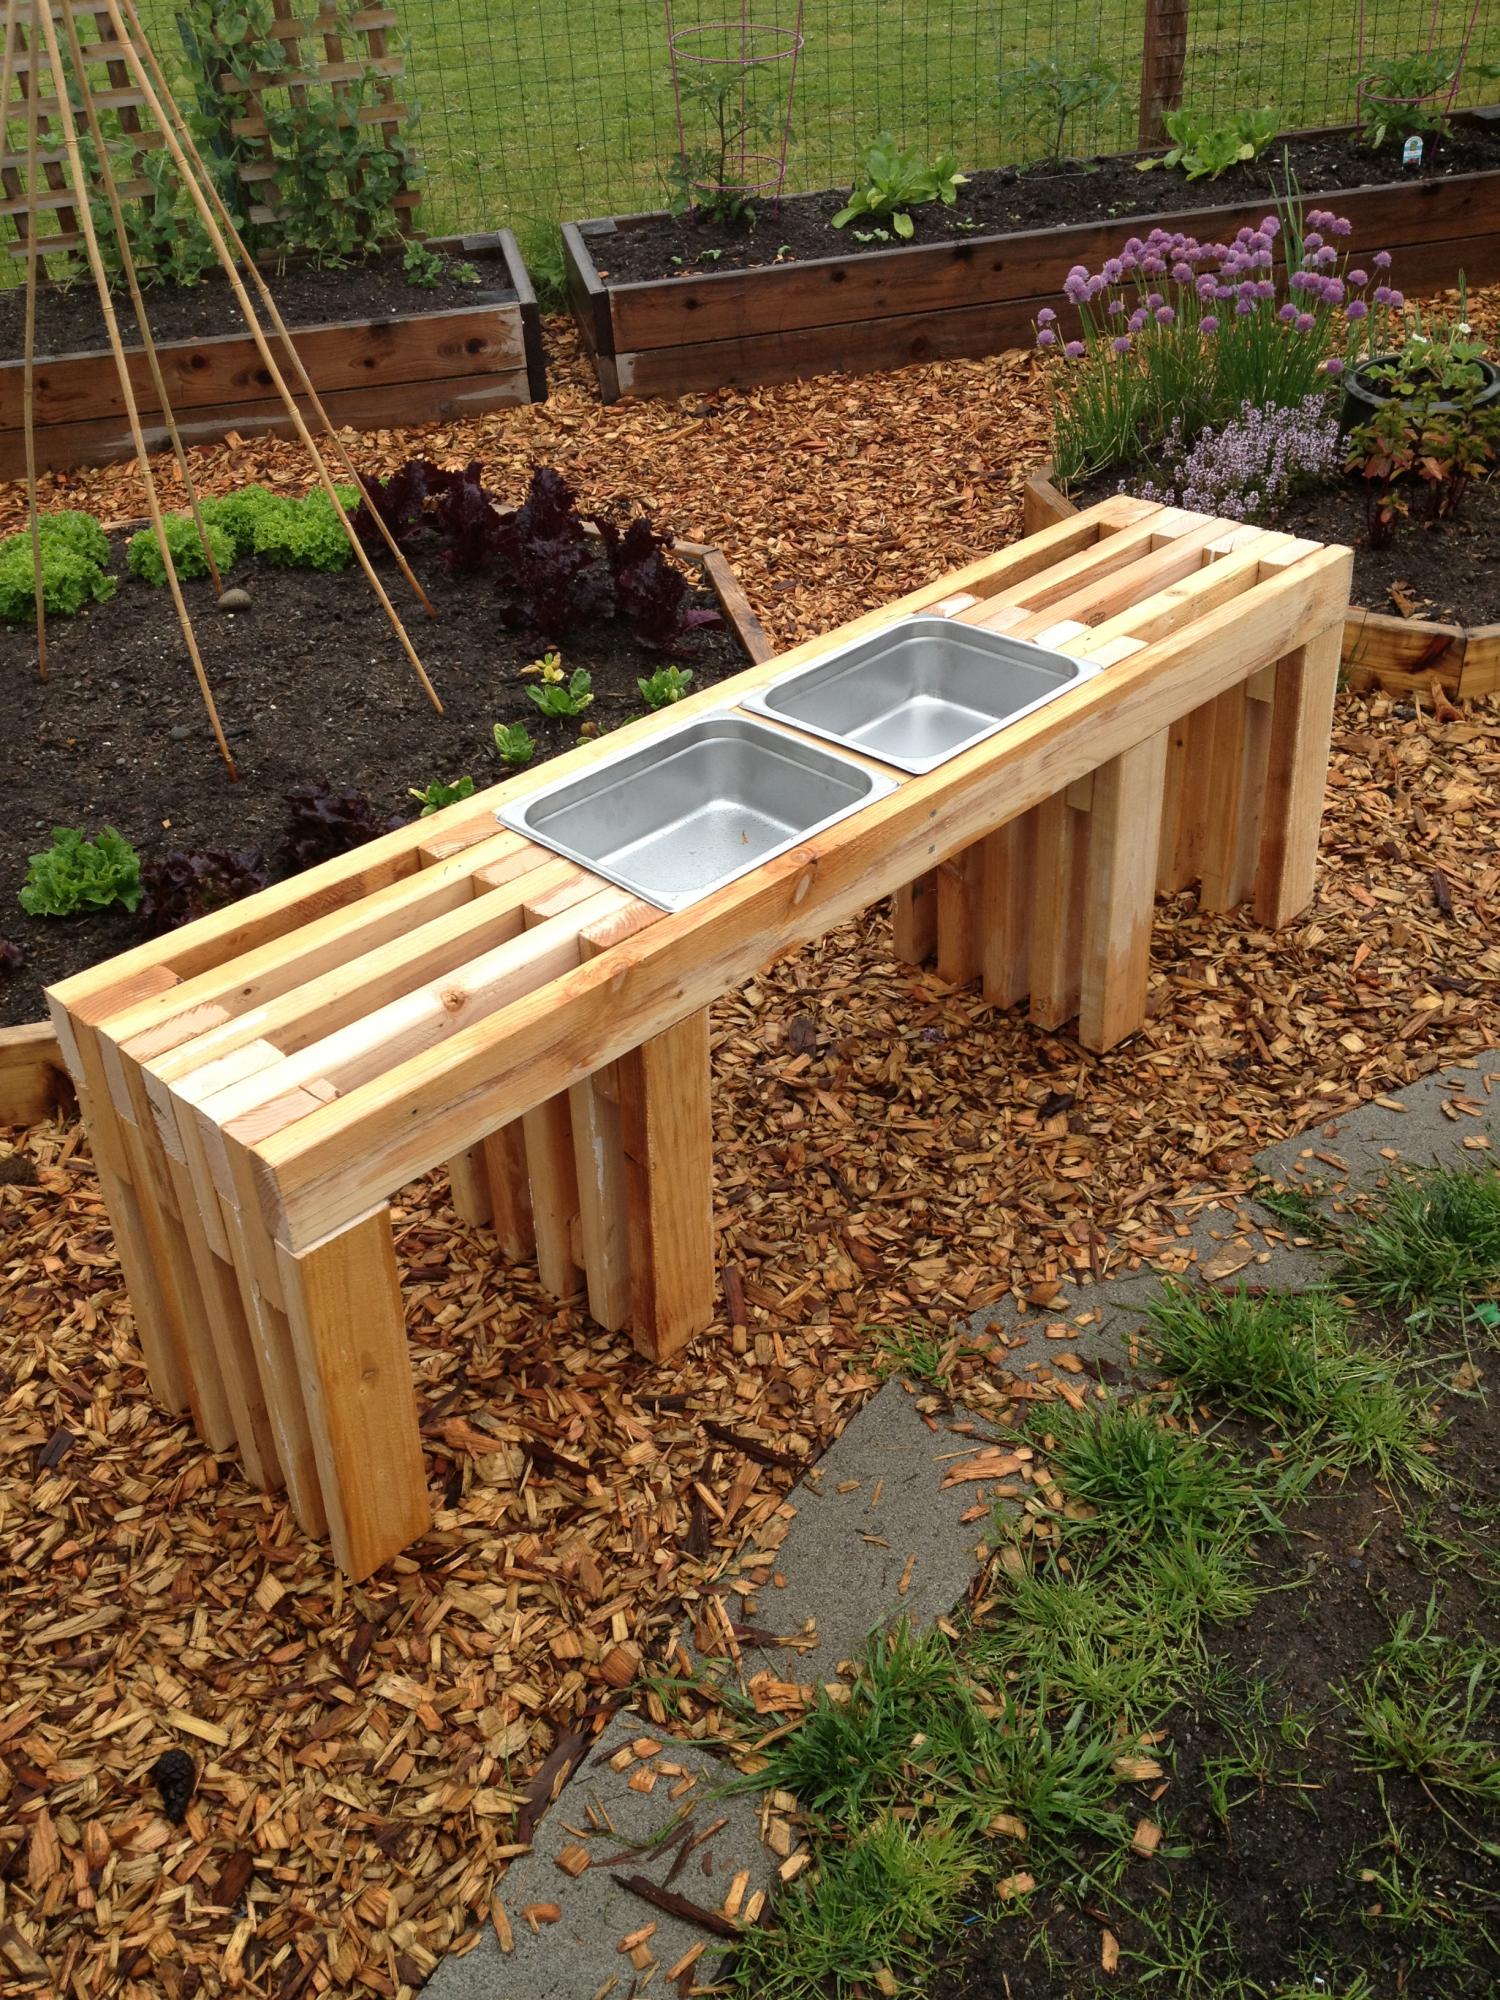
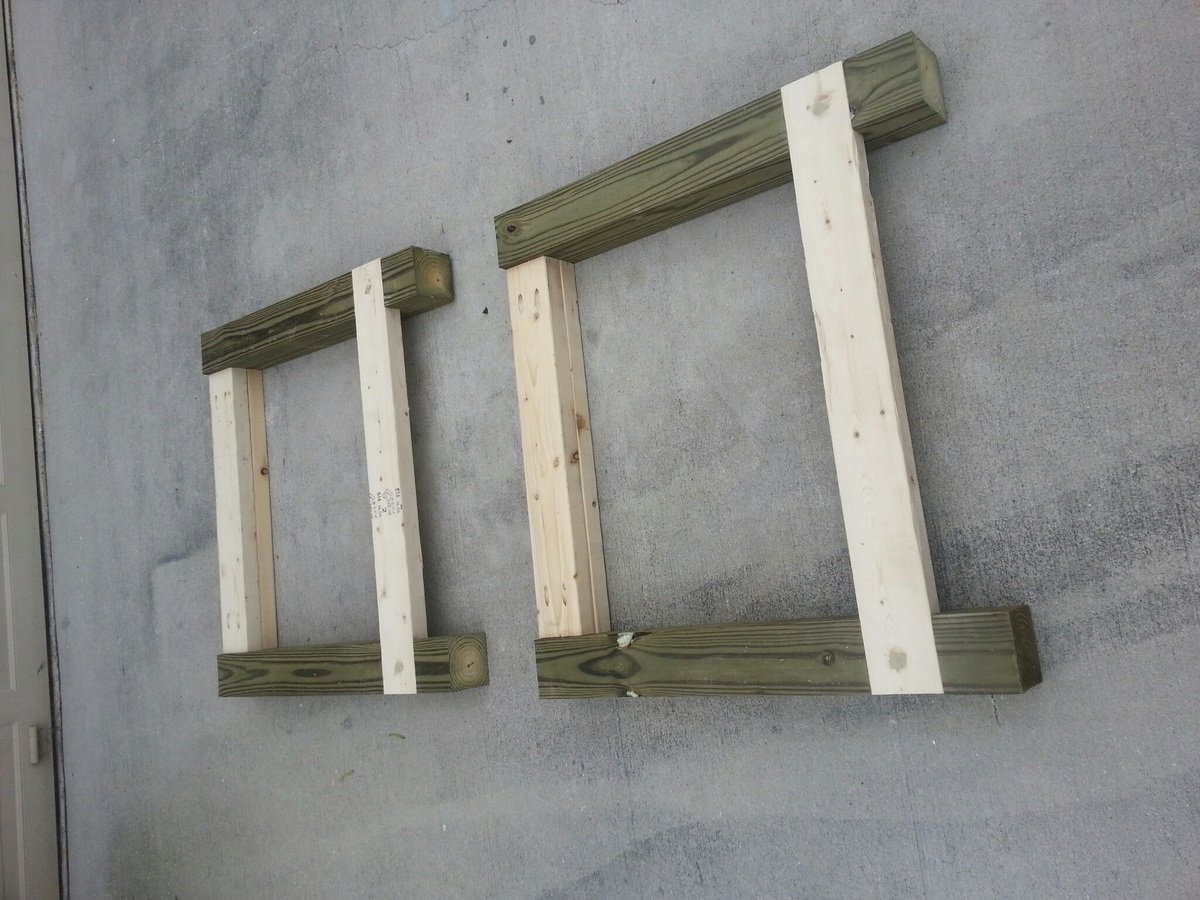
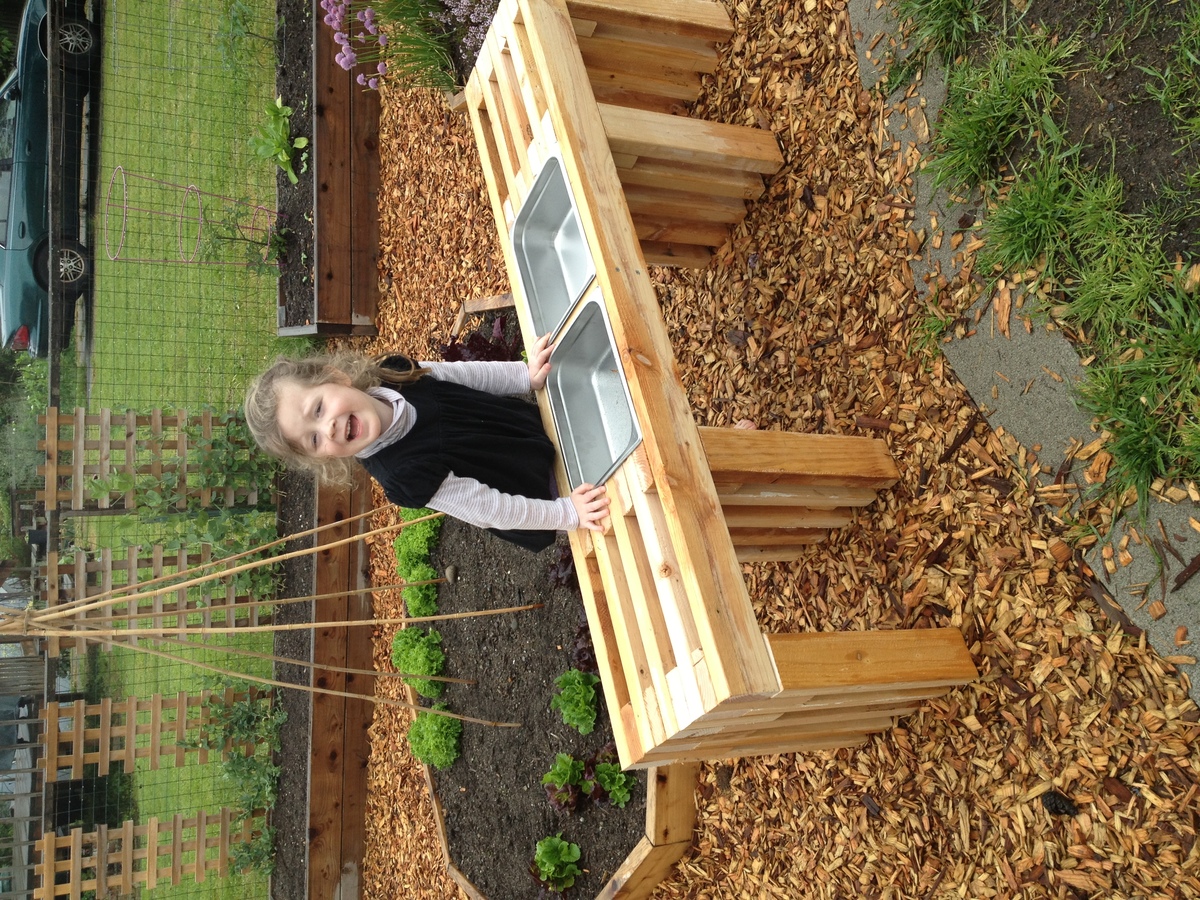
I've been looking for a simple design for a consol table that I could easily modify to fit in my kids' club house. This one fit the bill perfectly! I also happen to have a pile of 2x4s left over from a closet demo, so I wanted to use those up. I basically built 2 of the consol tables, letting the 2 outer-most horizontal beams extend across and 25.5 inch space and connect the two consols. Then I put in a middle beam and that created the perfect space to set some catering pans in it. Also, I only had 2x4s so I used those for all the pieces, making the gaps a little wider than the original design. And lastly, because I didn't quite have enough wood, I shortened the vertical beams. If you look at the picture, all of this will make more sense! Thanks for the inspiration and direction! ps - I have no idea how to rotate the photos. Sorry!

This is my first build! It came together really easily. I modified the dimensions to fit my space. I didn’t add the black pipes, simply because I couldn’t find all the pieces, or the corner brackets, and I think it looks great without them. I added a handle (a towel bar I found on Etsy) to pull it in and out. I used rough cut cedar, and have not finished it. I’m not sure if I will. I wanted to spray paint the wheels, but the person that helped me attach them (a.k.a. my dad) was ready to to help me before I had them painted! But I love it, and it really adds functionality and stoage to this little gap between our washers and dryers.


Comments
Ana White Admin
Sat, 09/03/2022 - 13:28
Fantastic bathroom storage!
This looks amazing, love how it's recessed! Thankyou for sharing.