Community Brag Posts

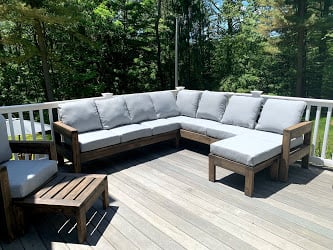
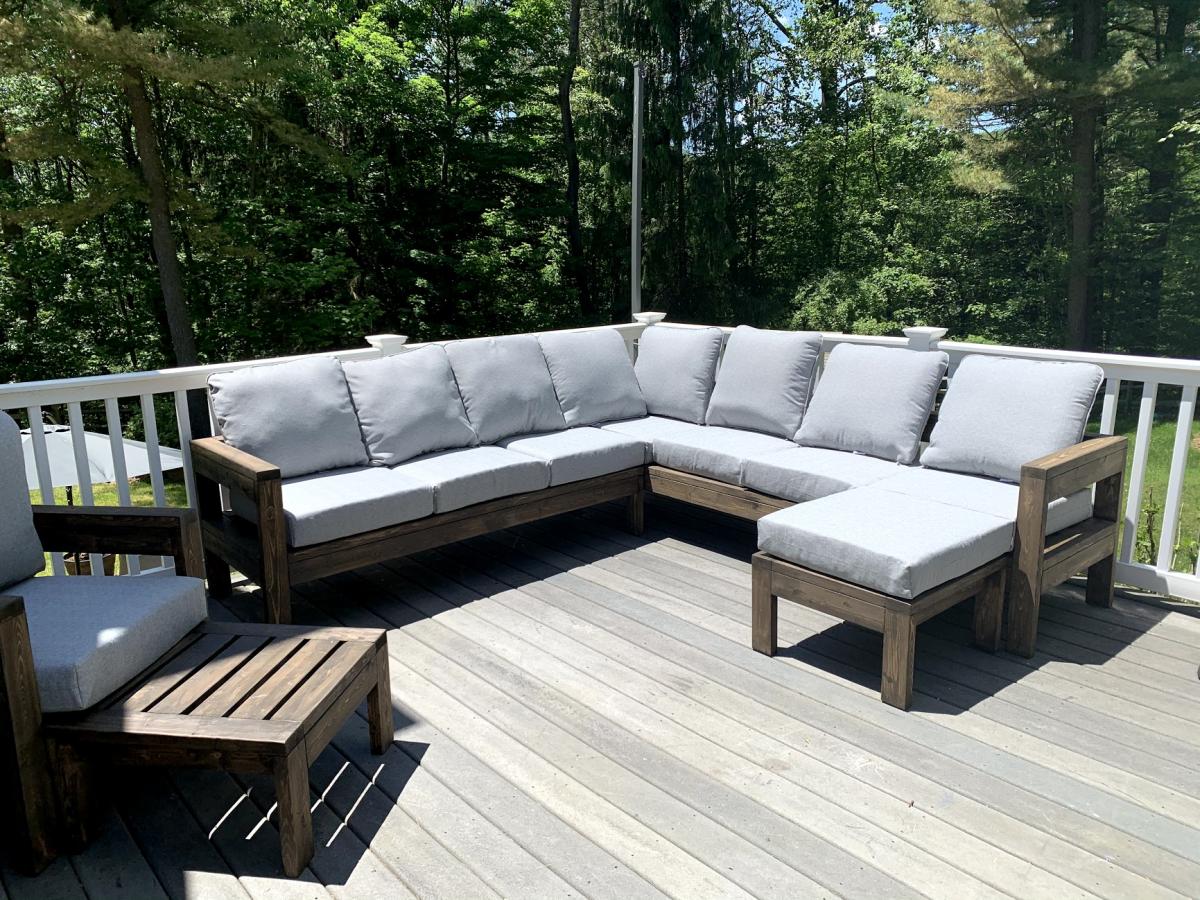
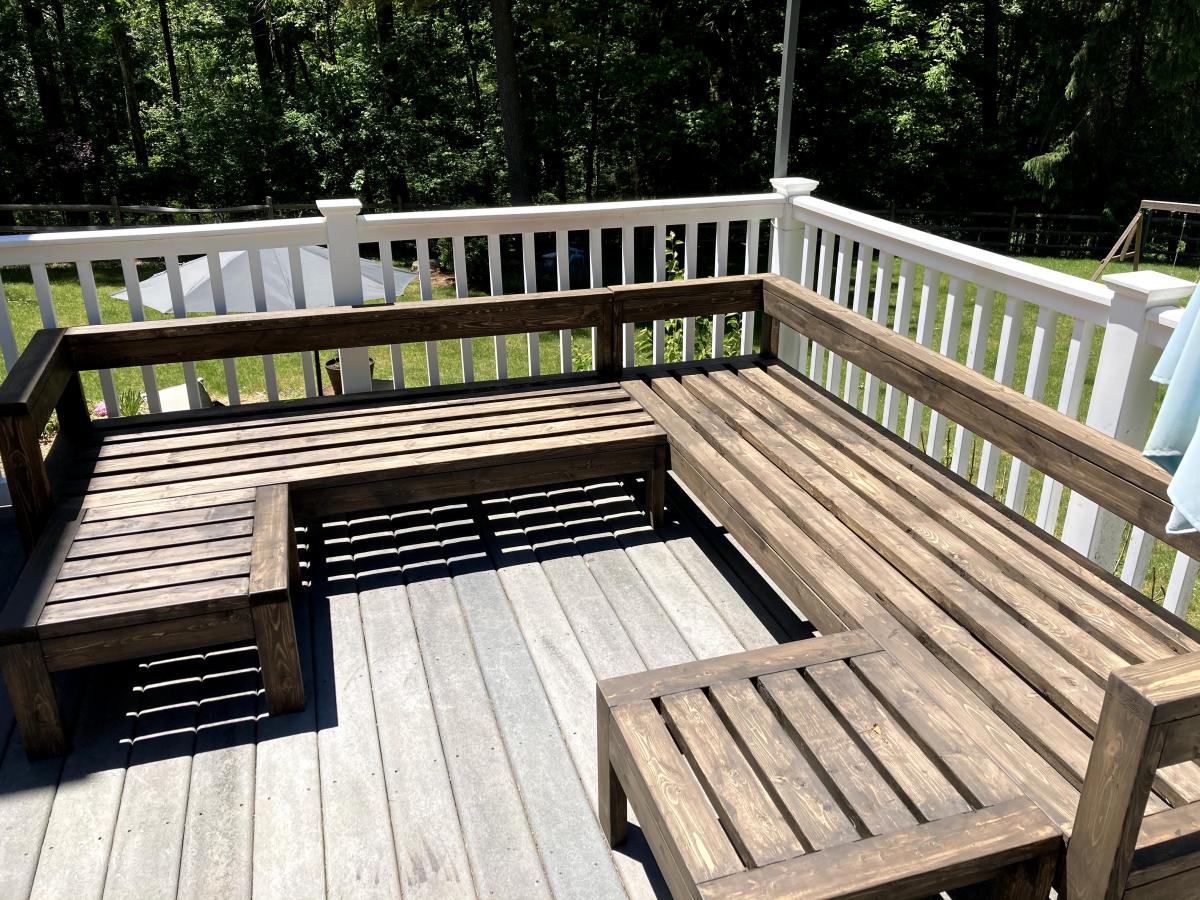
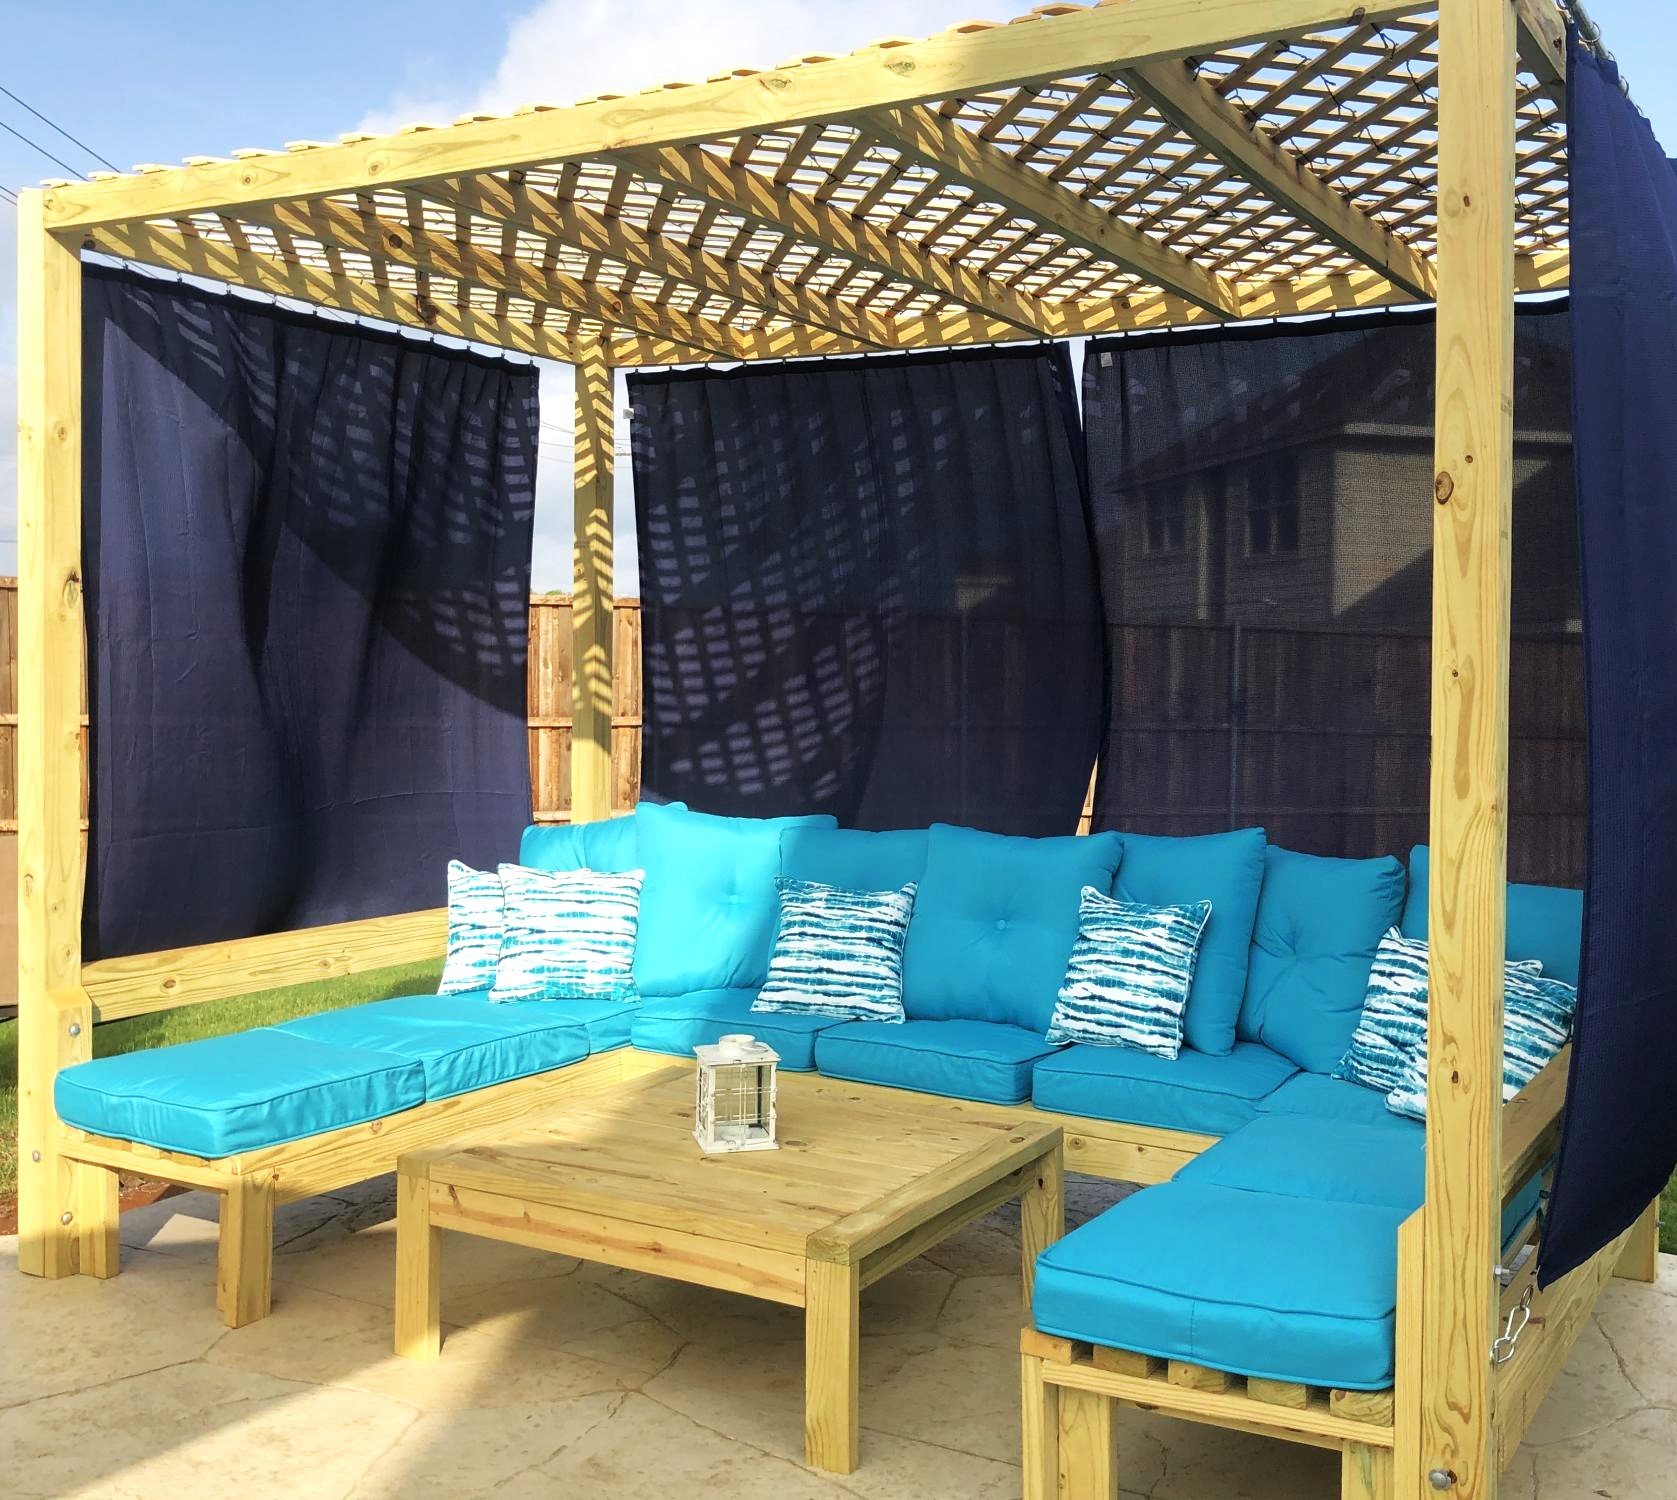
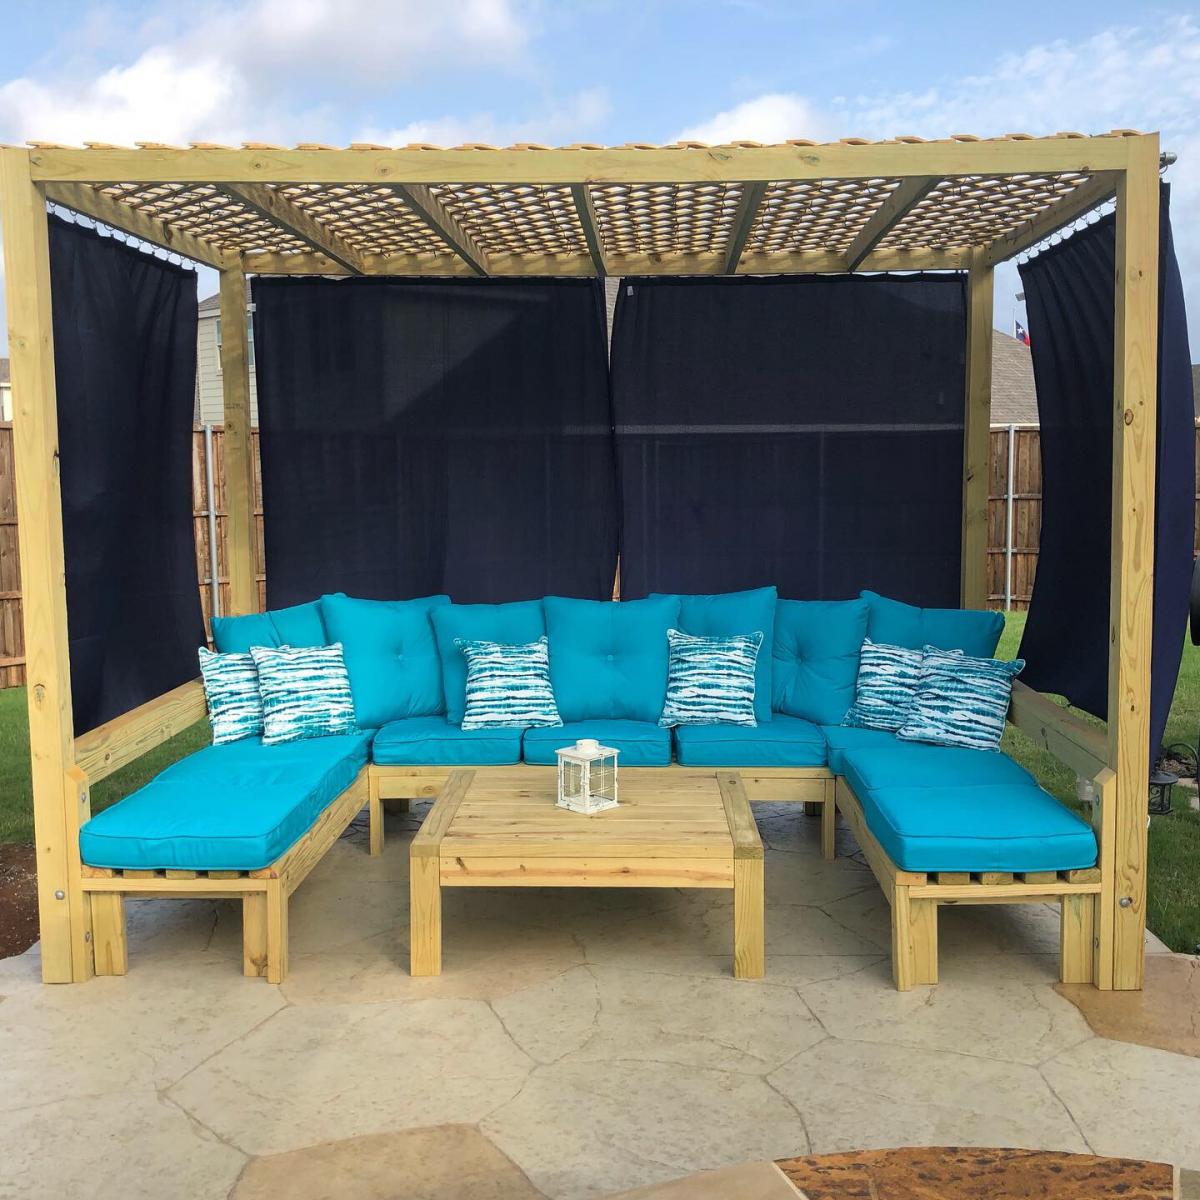
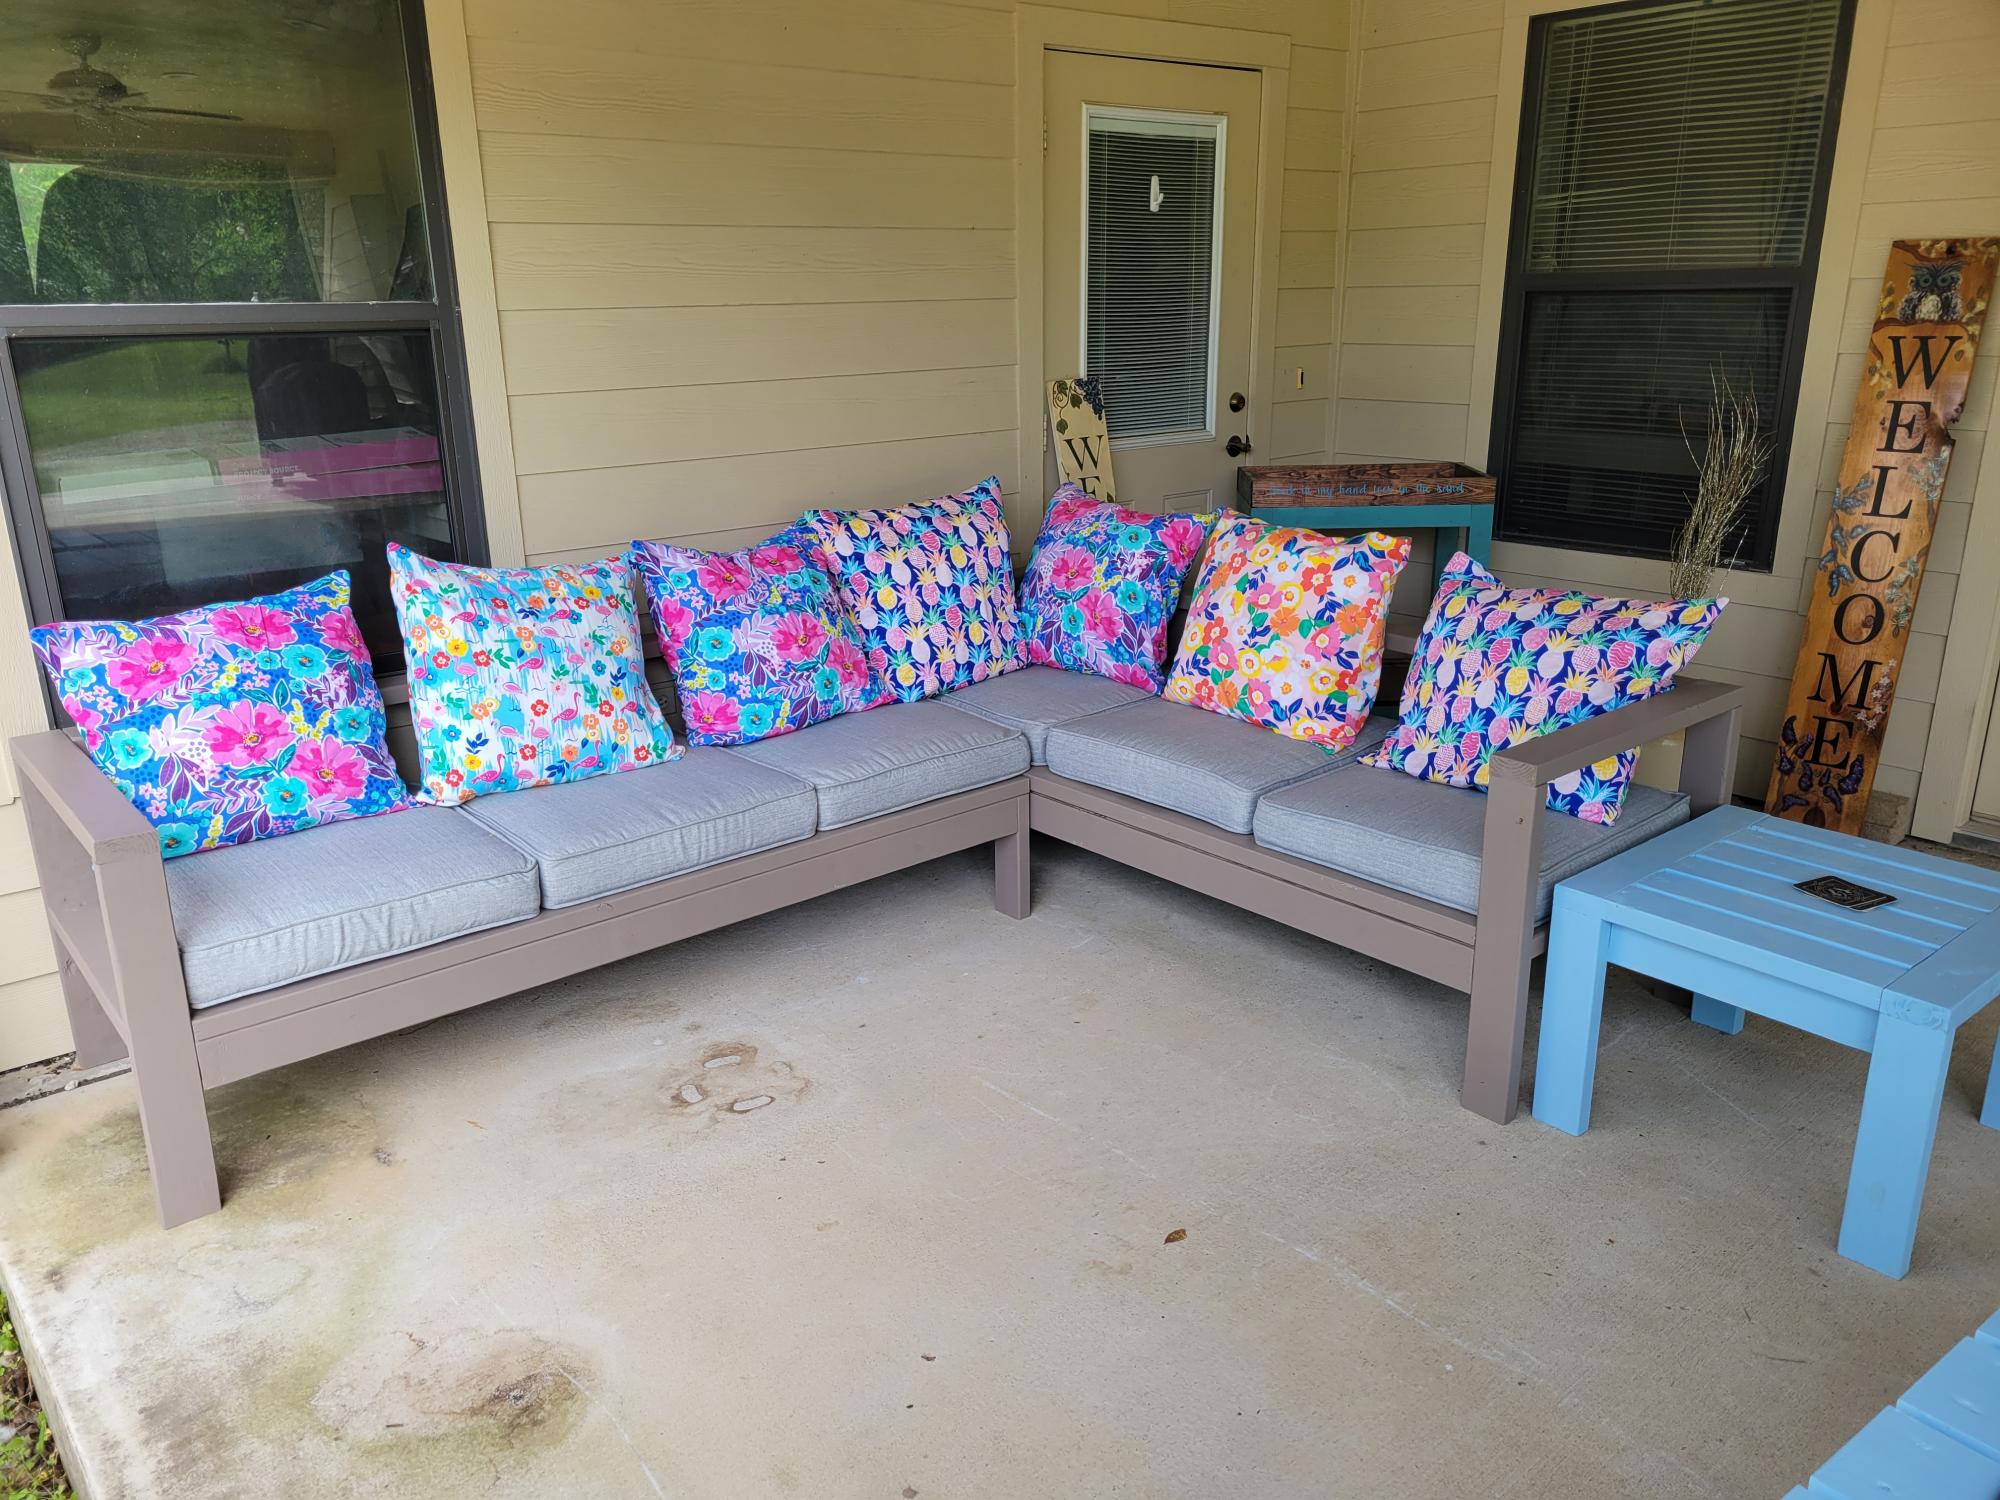
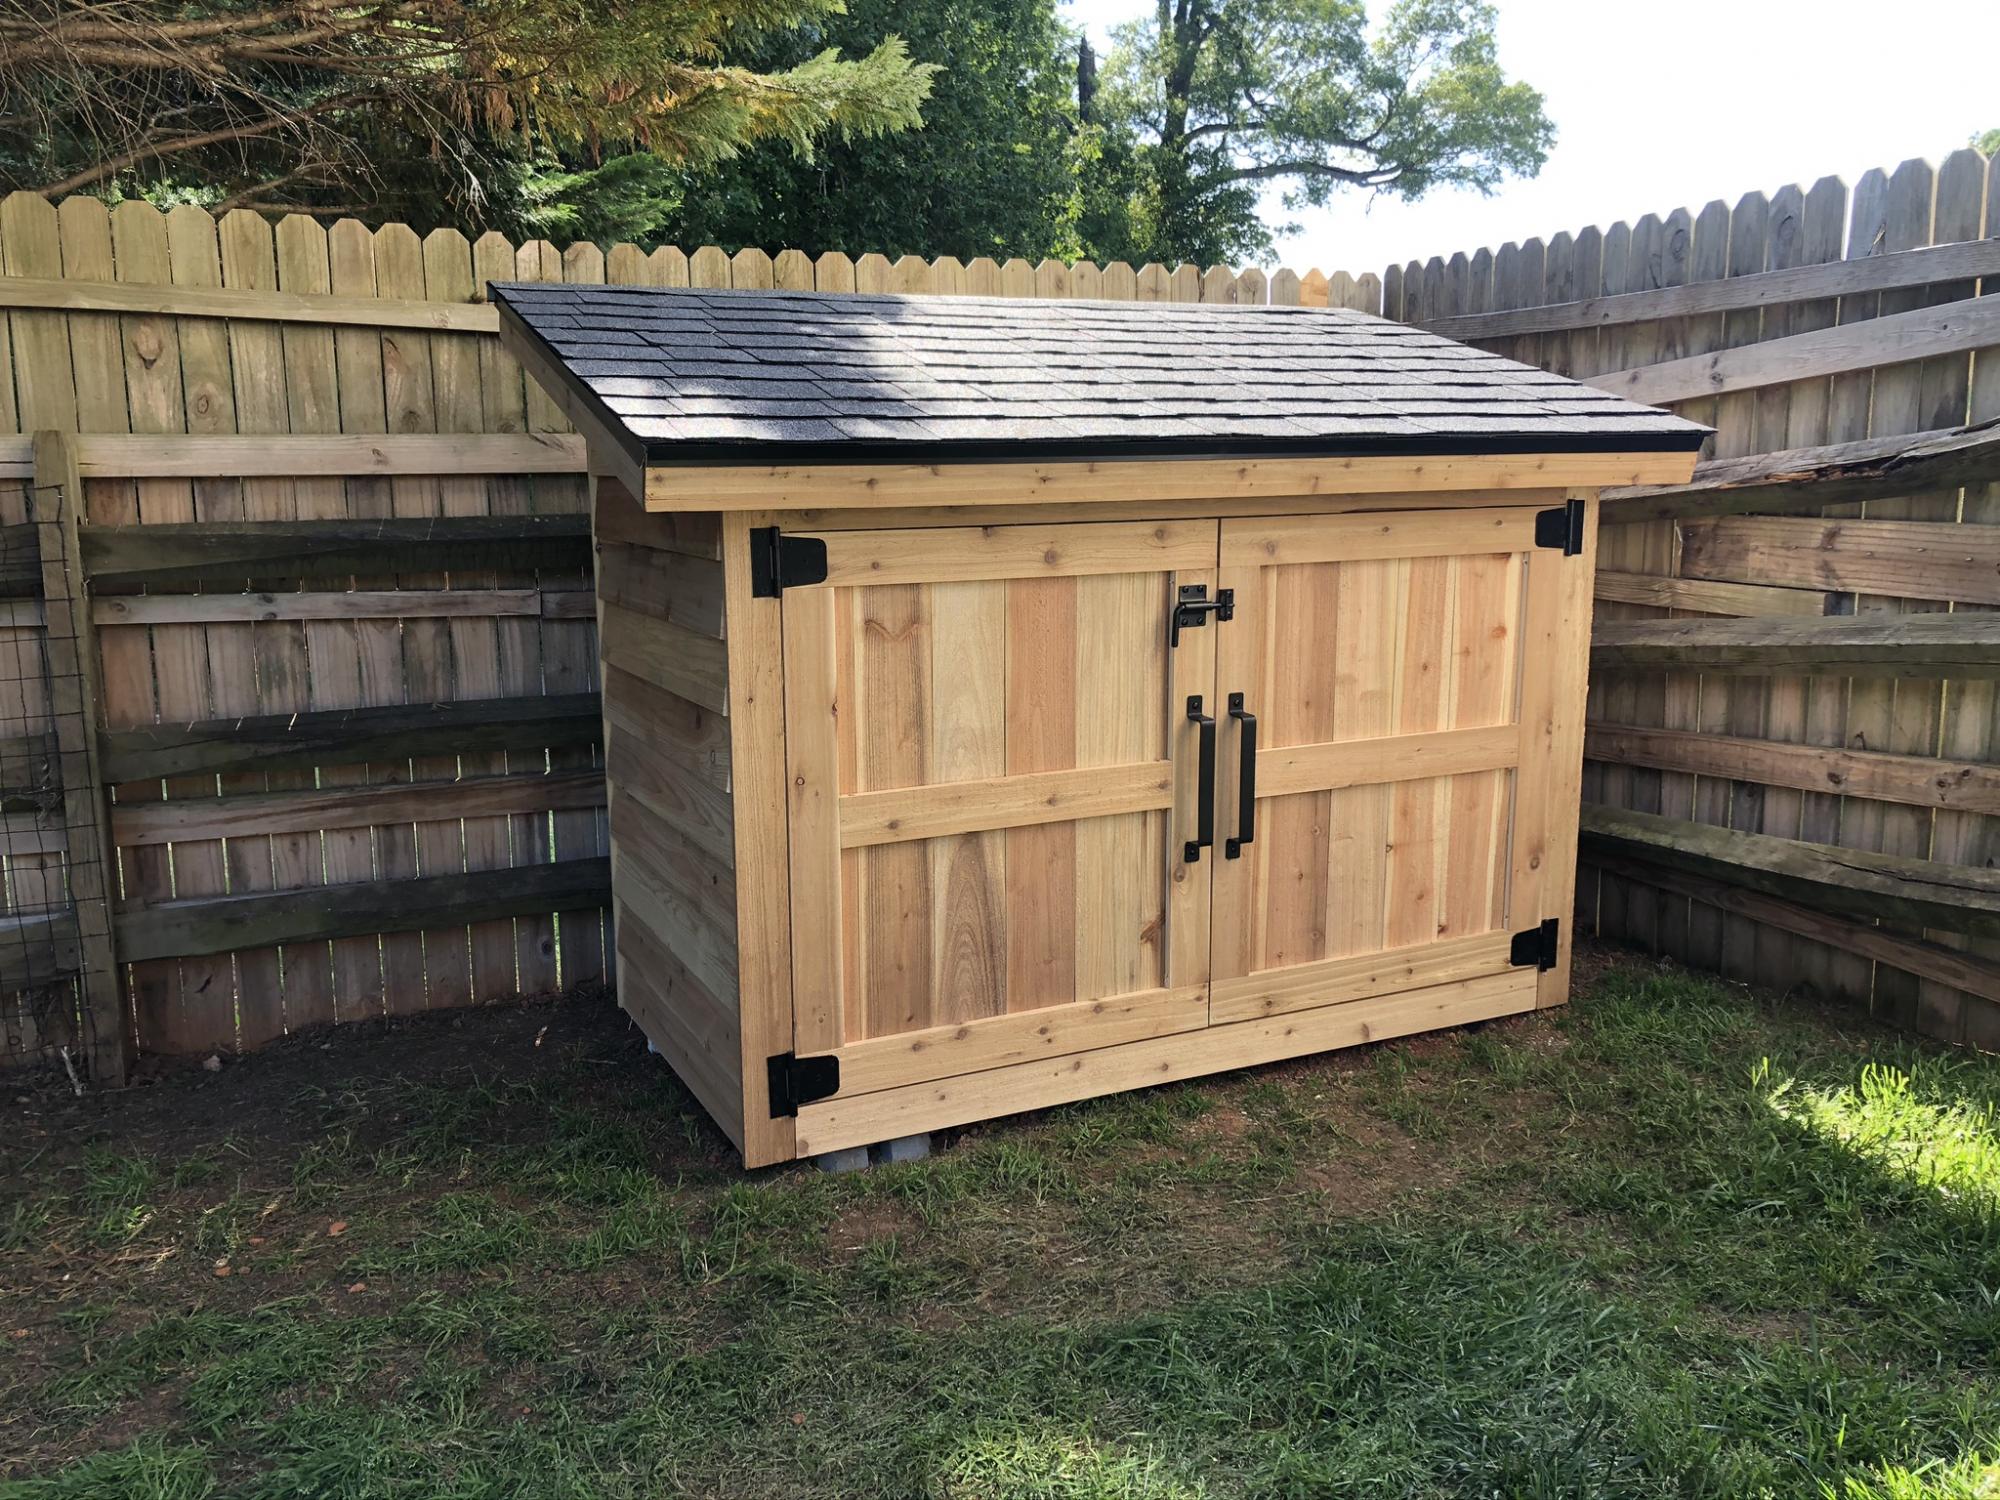
2x4 Outdoor Sectional with Matching Ottomans, Chairs & Table

Submitted by cqueiruga on Fri, 06/12/2020 - 21:01

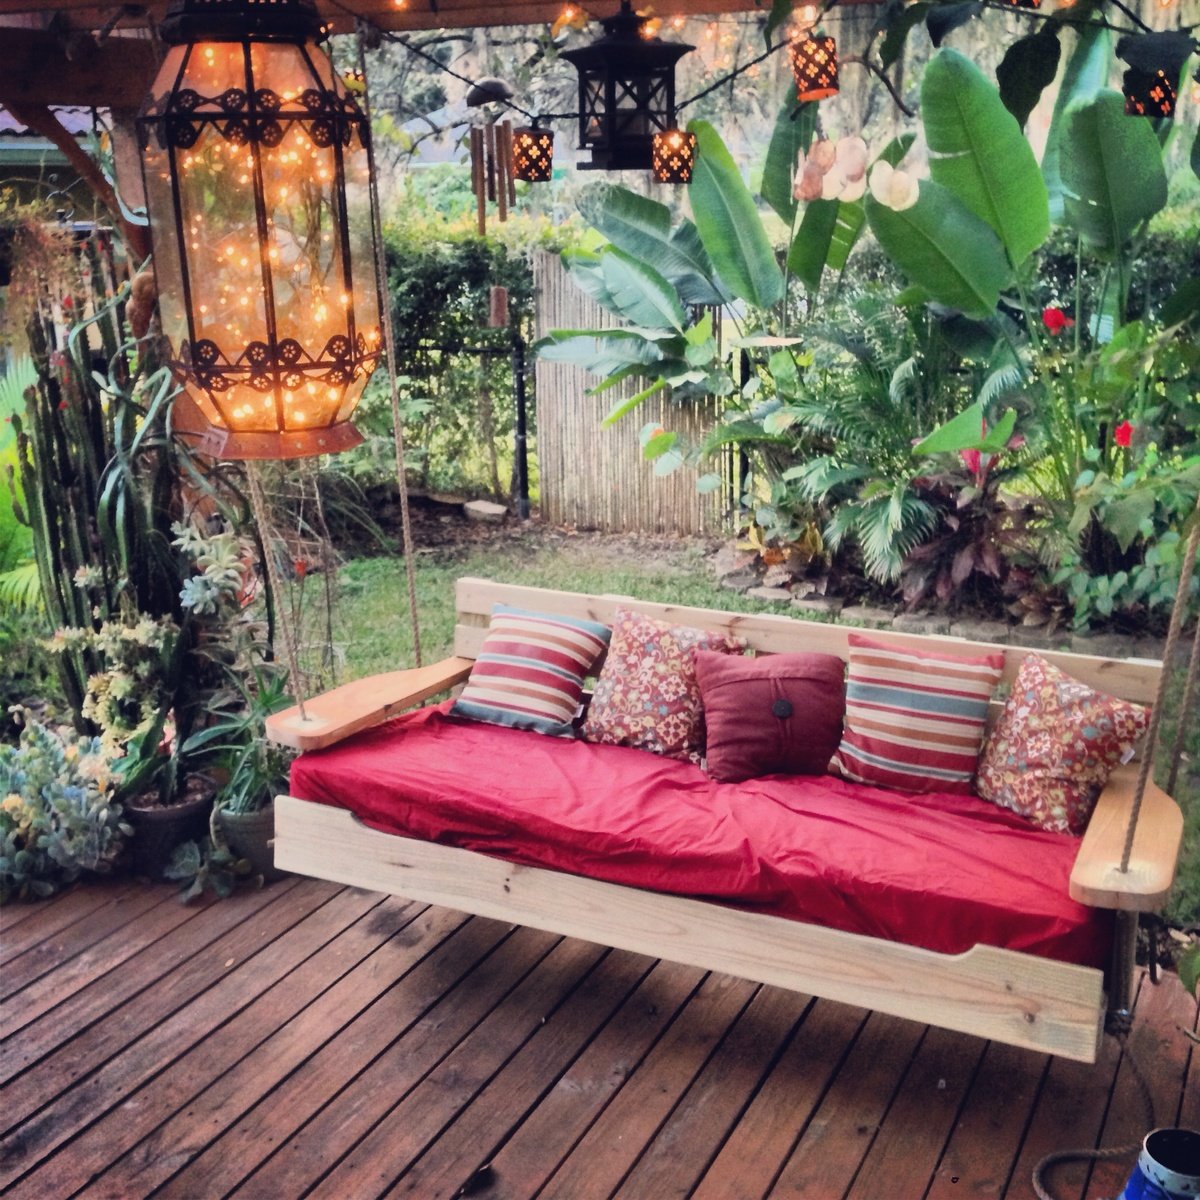
We were looking for outdoor furniture for our deck, and for the size and amount we needed it would have cost us at least $2000. We really like the idea of having an outdoor sectional that we can also use for dining, and we had trouble finding a set we liked. We found Ana's plans for the 2x4 Outdoor Sectional, and i loved the look. After seeing what others have done with the plans, I thought I would be able to modify it to get everything we needed for much less cost than buying a set.

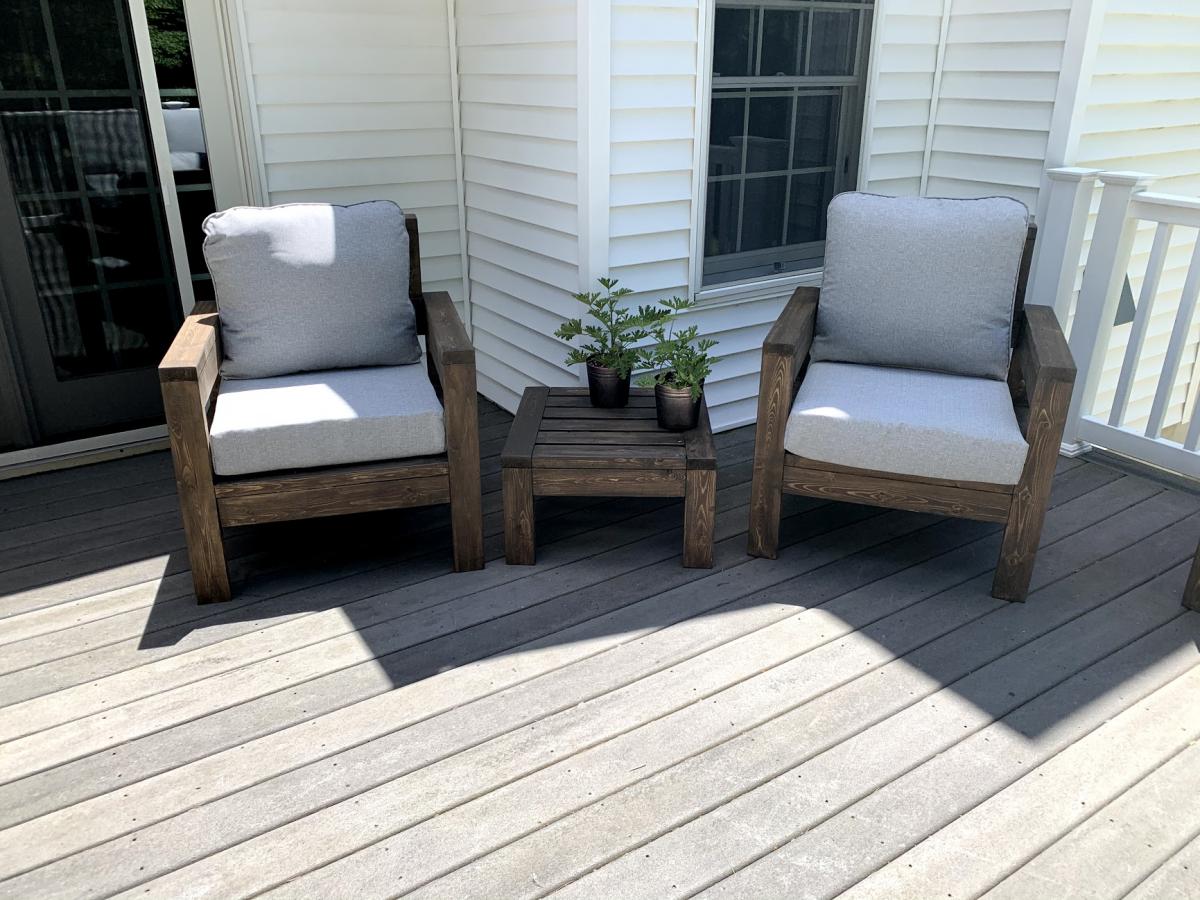
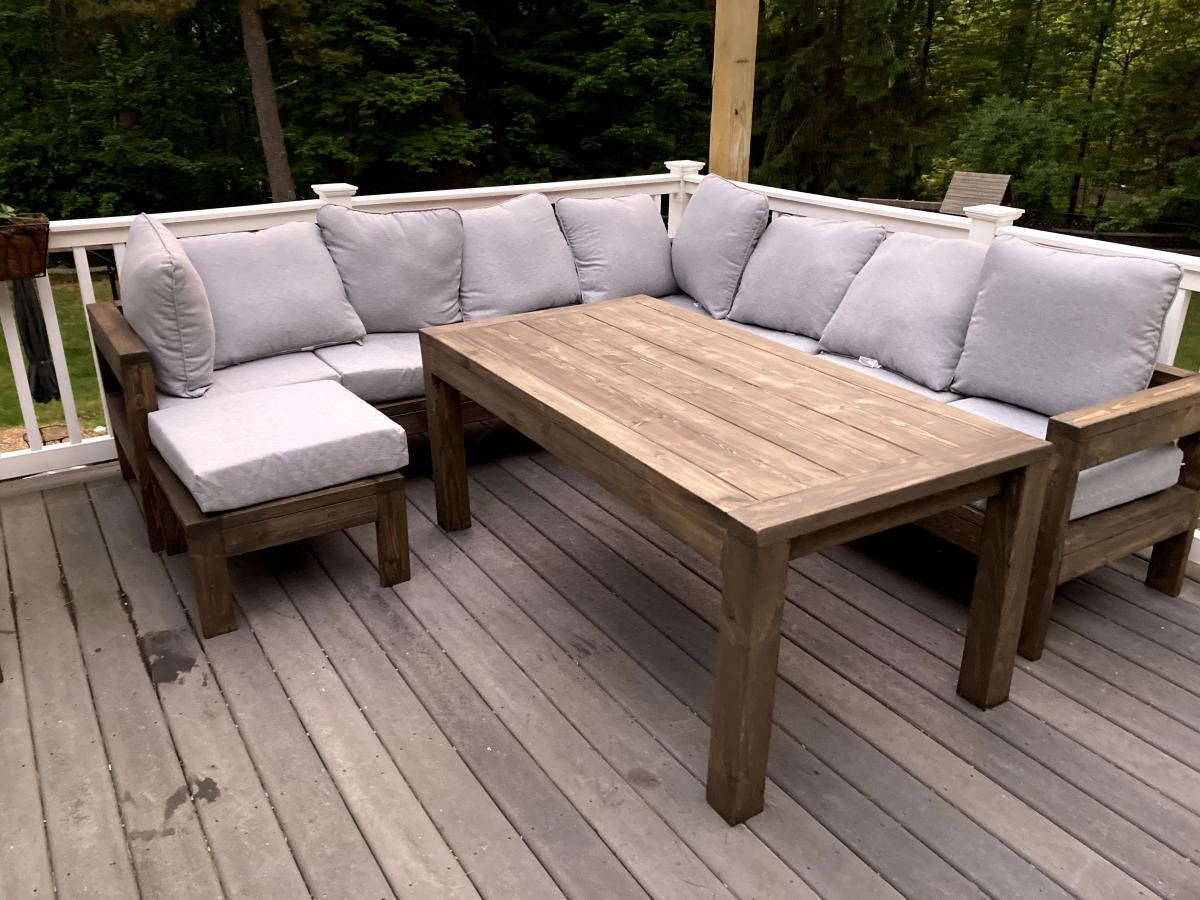
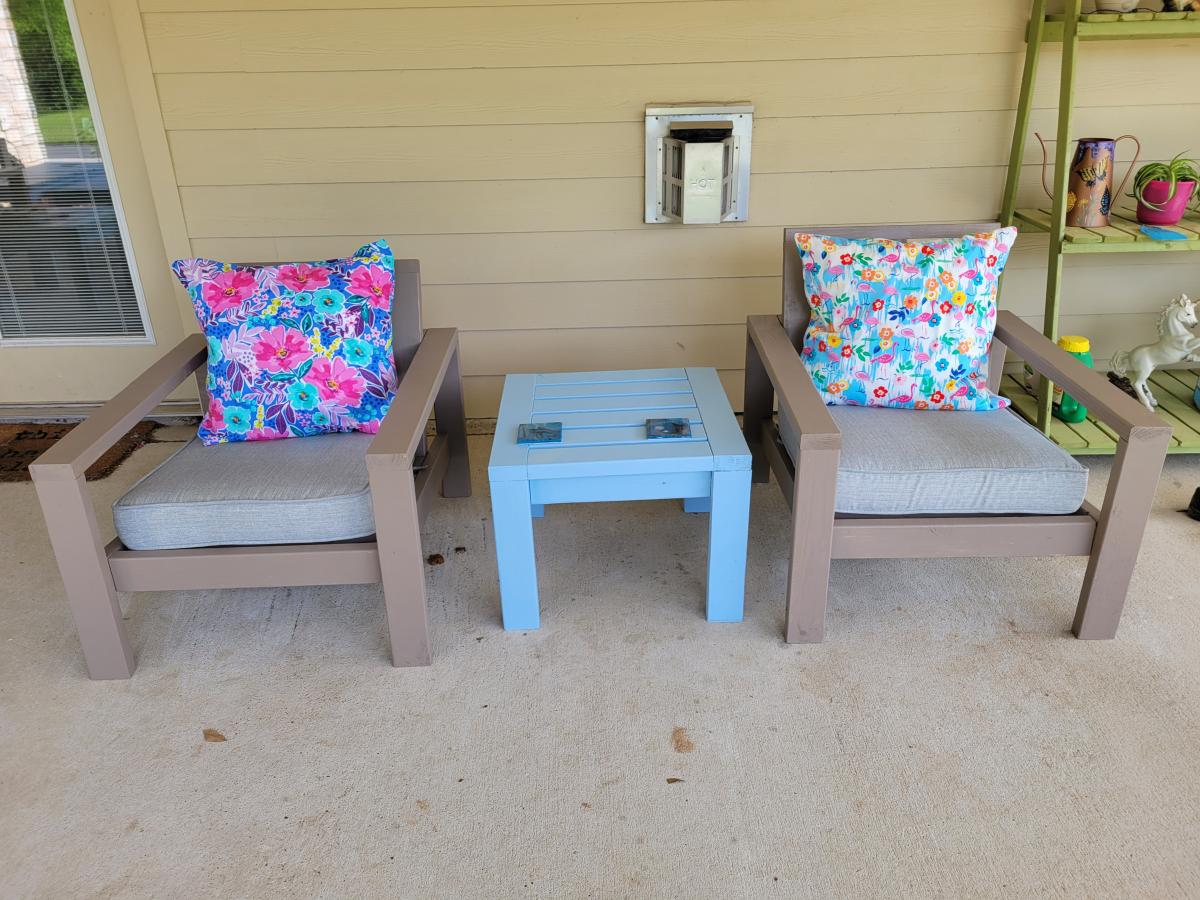
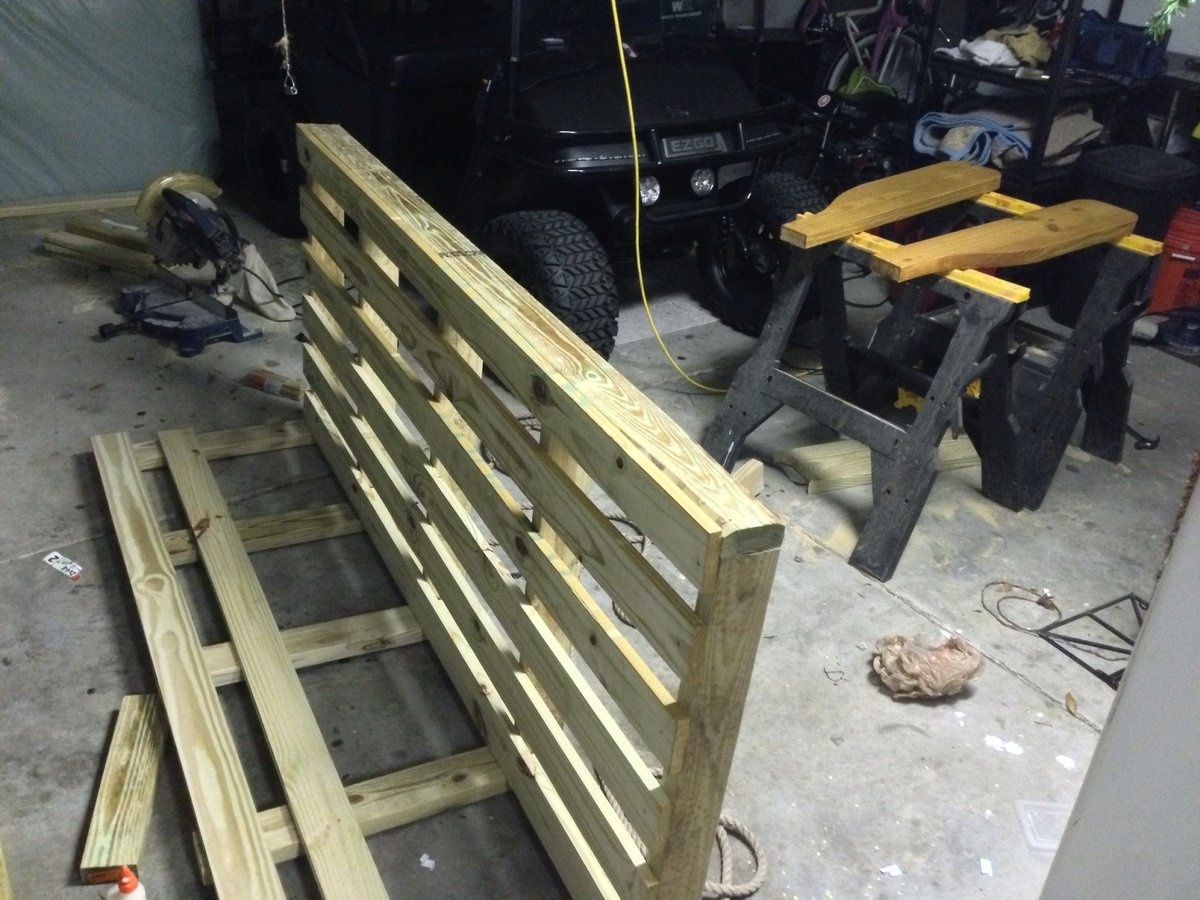
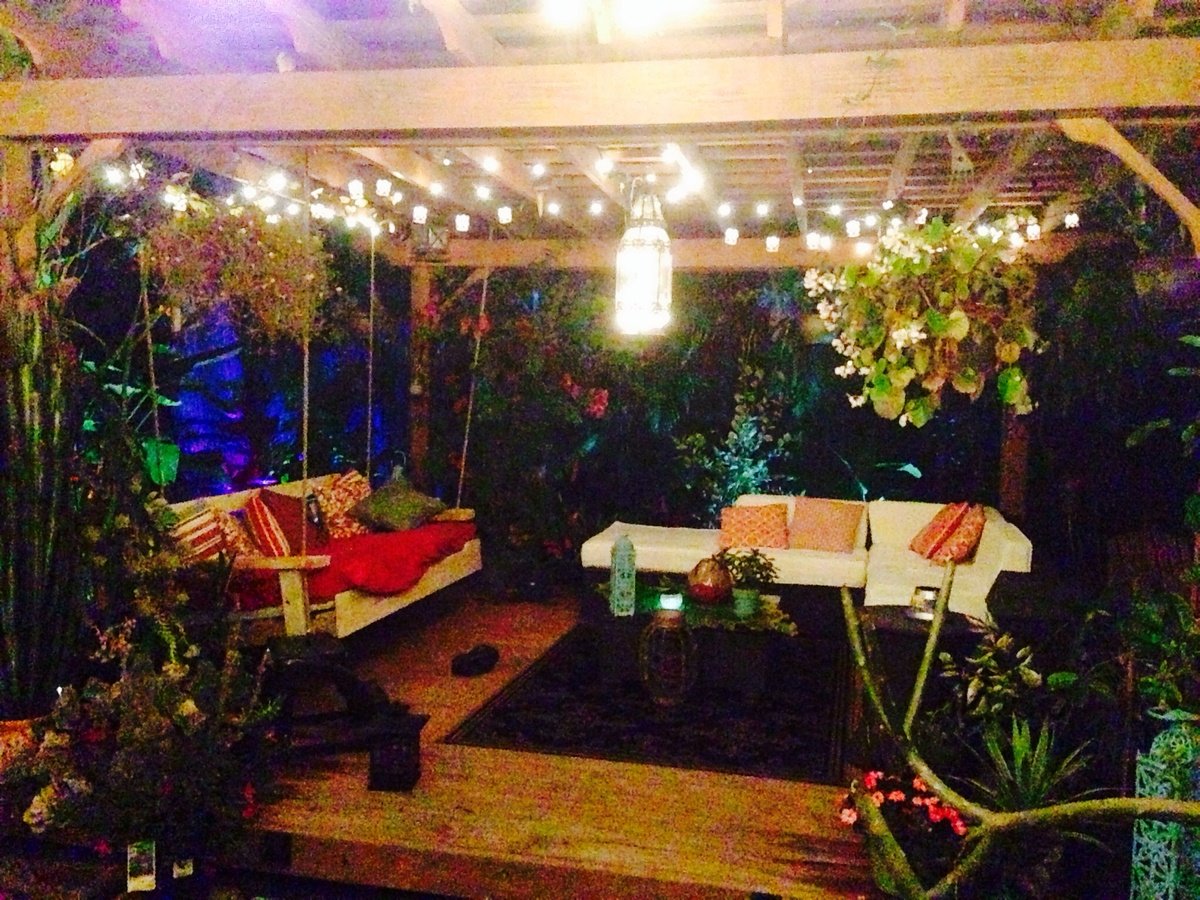
We ended up extending the size of the 2x4 outdoor sofa by one 24" section, for a total length of 96". I then used the same design to make two outdoor chairs, just reduced the length to 24". I modified the 2x4 outdoor coffee table plans to create two ottoman's that can be moved around to make the seating more lounge style Finally, I modified the coffee table plans to make a 5 foot outdoor dining table. All in all, it took about a week and I couldn't be happier with how it turned out!

Estimated Cost
$800 ($200 for wood, $600 for cushions)
Estimated Time Investment
Week Long Project (20 Hours or More)
Finish Used
Valspar Semi-Transparent Antique Oak Stain
Recommended Skill Level
Beginner

Comments

jwood4

Mon, 08/02/2021 - 09:44

Looks amazing! What method did you use (pocket holes, dowels, deck screws, etc) to join the visible portions like the arms?

12 year old built her bed!

Submitted by gmktt on Wed, 07/08/2020 - 20:01

Thanks Ana White for the awesome plans! My daughter decided she wanted a new bed, so I told her I’d help her build one. I am not a carpenter, by any stretch, but I thought it would be some good dad/daughter bonding time. She tweaked your plans, did all the cuts, drilling, sanding, and painting (well, most of the sanding and painting anyway), and tolerated her father with great grace. It turned out pretty well. We couldn’t have done it without your plans! Thanks again! —Gabe

Built from Plan(s)
Estimated Cost
$600.00
Estimated Time Investment
Week Long Project (20 Hours or More)
Finish Used
White semi-gloss interior latex.
Recommended Skill Level
Beginner

Comments

Tilt Out Trash Bin

This was my first project using an Ana White plan....Modified it a bit...quite happy with how it came out...it was very low cost to make and a lot of fun.

Estimated Time Investment
Weekend Project (10-20 Hours)
Finish Used
Varathane Stain....Spring Oak
Recommended Skill Level
Beginner

DIY Pergola

Submitted by Anonymous (not verified) on Fri, 06/30/2023 - 11:15

I built this pergola in 3 days and added mason jar solar lights.

Vonda Jones

Built from Plan(s)

Sandbox with Seats

I built this sandbox for my kiddo's because we have cats! It was great. Easy to build, great plans for it.

Built from Plan(s)
Estimated Cost
$50 CAD
Estimated Time Investment
Afternoon Project (3-6 Hours)
Finish Used
Minwax 2-in-1 in Natural
Recommended Skill Level
Beginner

Double Wide Cedar Fence Picket Storage Shed

Submitted by moosmani on Mon, 11/11/2013 - 03:12

I read and studied every comment and brag post about this shed. I must have read the plans a hundred times before I got up the courage to tackle it. It’s a very attractive and affordable shed design. I thought a double wide version would be perfect for our long, narrow side yard, and it is! I mostly stuck to the plans except for a few things. I made it 10” taller overall so there would be plenty of head clearance under the doorway. That was a very easy modification. I used 2x4s for the walls instead of 2x2s because we have high winds in our area. That modification was a little bit more challenging, but I planned it out and it worked! Also I used 2x6s for the headers instead of 2x4s. I also added 2x4s at the thresholds because I couldn’t image making it stay square without them. I basically made two sheds joined by a common wall in the center. I did not increase the depth, mostly because I was afraid to mess with the angles and how that would change the pitch of the roof. Joining two sheds together meant that I didn’t have to put the exterior pickets on the middle wall. But it also meant that I had to build 4 doors. Yuck. They were difficult to get lined up and level, but I was amazed it actually worked and that all the doors operate properly and smoothly. I was questioning the wisdom of my decision to do 4 doors while I was in the thick of it, but now that all the work is done, I love that I can open all 4 doors and have easy access to absolutely everything in the shed. Very convenient! I told my dad I was building a shed and he recommend that I add cross braces. It seemed sturdy enough without them but it certainly can’t hurt. My dad knows everything about building and I know nothing, so I took his recommendation. If I were to do this again, I would overlap the cedar pickets by 1” instead of ½”. My pickets were not quite wide enough. I could swear they shrunk after I applied the stain/uv protection. I used liquid nails along each lap but it didn’t hold. Where the glue DID hold tight, the wood split lengthwise. Anyway, for whatever reason, gaps appeared and I spent a fortune on clear silicon applied on the interior walls to make it water tight. I had to keep going back for “just one more tube.” So with hind sight I would have been better off just buying a few more pickets and increasing the overlap. Another thing I might do is make it deeper. I decided against it initially because I was worried that increasing the depth would make it flimsy. Now I don’t think that would be a problem. This shed is sturdy. I can’t say thank you enough. Great plans and a great website! I am completely hooked.

Built from Plan(s)
Estimated Time Investment
Week Long Project (20 Hours or More)
Recommended Skill Level
Intermediate

Comments

moosmani

Mon, 11/11/2013 - 14:56

I kept every receipt from caulking gun to stains and brushes. I just now added it up and it came to (cringe) just under $900. But I have lots of left overs for another shed and it's still a huge bargain. Other sheds that are similar to this plan are much smaller and start at $1,999 and up! I think it was well worth it to have a sturdy bargain shed that's also beautiful.

t0mpr1c3

Sat, 01/22/2022 - 23:01

It looks great with the stain. I think your Dad's advice was good. Also I like that the heavier timbers add rigidity to the frame.

Seasonal And Holiday

Outdoor Pool Cabana

Submitted by Anonymous (not verified) on Thu, 10/31/2019 - 20:21

I wanted a huge cabana for my outdoor pool area to have a place guests could kick back and relax if they weren’t swimming. I took the plans from the one arm and armless outdoor sofas and modified the plan to include posts and a lattice top for shade. This inspired plan was finished off with cushions from at home and features seating comfortably for 9. Everyone loves this area in the backyard to kick back! At night we have solar lights twinkle at the top and they complete the project perfectly with a soft twinkle.

Estimated Cost
$250 before cushions
Estimated Time Investment
Weekend Project (10-20 Hours)
Finish Used
Nothing yet. Needed to wait for the pretreated wood to finish drying out.
Recommended Skill Level
Intermediate

Comments

Seasonal And Holiday

Modified Simple Rolling Bar Cart

I honestly think Ana is a mind reader. Whenever I need plans for a particular piece of furniture, they magically appear on her site. Of course if she was a true mind reader, everything will be exactly as I need it requiring no modifications. That's what makes her plans so amazing. I can build bigger and better because I've learned to modify her plans to fit my current needs.

This Cart was no exception. I had to make mine a few inches deeper and change the height of the legs and it was a piece of cake. I put this together in less than 2 hours and finishing was easy too.

I did a blog post all about what I did differently including how I constructed a towel bar instead of the pipe. Check it out at www.thepursuitofhandyness.com

Built from Plan(s)
Estimated Cost
$25 Depending upon the type of casters used
Estimated Time Investment
Afternoon Project (3-6 Hours)
Finish Used
Oil Based Primer & Rustoleum Painters Touch Spray Paint in Paprika Satin
Recommended Skill Level
Starter Project

Sliding "barn" door from reclaimed pallet wood

I saw many different sliding door projects online, so I did my own spin on one. I was able to get several old pallets for free (pine and oak). I went to Lowes and bought a few 2x3s which I used as the frame, and the track hardware which was only $13! Most doors I see are mounted from the wall, but since I have 7' ceilings downstairs I mounted mine from the ceiling. This project only took about 4 hours total and cost about $40 when you figure in costs for screws, stain, etc. The most difficult part was taking apart the pallets. Using a reciprocating saw with a 12'' demolition blade is the best way to take them apart. Thanks for the idea Ana.

Estimated Cost
$40
Estimated Time Investment
Afternoon Project (3-6 Hours)
Finish Used
Minwax Dark Walnut
Recommended Skill Level
Beginner

Comments

BREATHESMILEBE

Mon, 05/13/2013 - 20:00

Hi!!
This looks so awesome! I came across this and was hoping to repeat it. You mention that you found the door hanging hardware at Lowes for $13. I can't seem to find it. Do you happen to remember the name of it? I'm entering "hanging door hardware" into Lowes and Home Depot and can't seem to find any hanging door hardware at all. I'd appreciate the help. Thanks!
Tina

Mudroom Closet Makeover

Submitted by Anonymous (not verified) on Thu, 01/21/2021 - 07:10

The concept of hidden boot storage at the back is genius!!! I knew as soon as I saw your plan that I needed that in this space! Thank you so much for what you do!

Finish Used
Bench seat was wood conditioner, minwax early American, minwax weathered oak. Then finished with shellac. The coat hooks are from Amazon. The ring pull is from Lee Valley.

Comments

Sandbox w/ Built In Seats

Submitted by Anonymous (not verified) on Wed, 06/14/2017 - 07:30

I have built some other stuff before, but not with paint and sanding and such. It was definitely a great learning project. There are imperfections, but it's a toy, so kids will be having fun and that is all that matters.

Built from Plan(s)
Estimated Cost
$100... but, the paint will be used on other projects, and I paid for better boards for on top.
Estimated Time Investment
Weekend Project (10-20 Hours)
Recommended Skill Level
Beginner

Comments

Ladder Back Chair

Submitted by Dlwj27 on Tue, 07/04/2017 - 11:44

I adjusted the plans to make this a chair that would fit under a regular table. The front legs are 19" and the back legs are 40". Then I followed the plans as written.

Built from Plan(s)
Estimated Time Investment
Weekend Project (10-20 Hours)
Finish Used
Stained chair with Mini Wax Wood Finish Stain in Provincial #211. Then dry painted Americana Decor Chalky Finish in Timeless. After paint dried I rubbed Steel Wool over the whole chair to give a distressed look. I applied a coat of Mini Wax Polyurethane Clear Satin to finish.
Recommended Skill Level
Intermediate

sectional and chairs!

Submitted by Anonymous (not verified) on Mon, 04/03/2023 - 13:57

my husband and I used your plans for the sectional, end tables and chairs I made the pillows thanks so much for the designs we love them

Comments

Doggie Daybed

Submitted by MurdaRae on Wed, 06/06/2012 - 10:16

I've thought for a while about building a bed for our dogs, but wasn't sure where to start. We had an extra crib mattress so I set out to find a toddler bed that would work. I decided the Lydia Toddler Bed plan would work best. It doesn't look anything like it, but it was a great starting point.

First, I got rid of the canopy and the decorative side pannels. I also raised the bed 12 inches. (The hope is to add a rug on the floor underneath as sort of a "bottom bunk") The lumber store didn't have 2x2s so I used 2x3s for the legs. I also only used two 1x6s at the head and foot of the bed. They are seperated by 1" because when I got home, I realized they were actually 1x5 (RUDE).

All in all, it turned out exactly as I had hoped and the dogs love it! GOODBYE stinky dogbeds!

**Photo 1: Just finished building--the slats weren't screwed down yet.
**Photo 2: Deacon is testing out his new digs! See the stinky dogbed underneath?YUK!
**Photo 3: Dog Bed Completed! Mac & Deacon love it!

Built from Plan(s)
Estimated Cost
$38
Estimated Time Investment
Day Project (6-9 Hours)
Recommended Skill Level
Beginner

Comments

Garden cutie

Submitted by Anonymous (not verified) on Sun, 04/26/2020 - 16:18

My honey built this farmhouse potting bench in a few hours. I needed it to store all the junk that was laying on the ground. It's so cute!

Built from Plan(s)
Estimated Cost
$100
Estimated Time Investment
Afternoon Project (3-6 Hours)
Finish Used
Early American minwax
Recommended Skill Level
Beginner

Short version of cedar shed

Submitted by Anonymous (not verified) on Sat, 05/16/2020 - 14:35

We wanted a shorter version, so that it would hide behind this fence. I just needed somewhere to store lawnmower, wheelbarrow, and a few yard supplies. I started putting the roof on hinges, but the gas struts couldn't support the 170 pound roof. So it's fixed in place (stronger structure anyway). That's why I went with 2x4's for the framed walls instead of 2x2's.

Built from Plan(s)
Estimated Cost
600
Estimated Time Investment
Weekend Project (10-20 Hours)
Finish Used
Not yet finished, will get to that.
Recommended Skill Level
Intermediate

Comments

New counter height planters in use

Submitted by jrbdmb on Fri, 06/20/2014 - 05:05

Using the counter height planter plans from Janettx. Thanks!

Estimated Time Investment
An Hour or Two (0-2 Hours)
Recommended Skill Level
Beginner

Comments

Janettx

Mon, 09/20/2021 - 13:24

Nice job!!! I'm still using mine. I ended up putting 12"x12" pavers under each leg to extend their life. After the 2nd year now we get bumper crop out of ours each season.

Chicken Shed

I used the chicken shed plans to create the coop, with a modification to include two nesting boxes, one on each side.

I slightly modified the nesting boxes, using a U shaped frame and added hinges for the front to swing down and the pine shavings to be swept out.

For the siding, we found it easiest to do the tack and trace method. We tacked each full sheet of siding in place and traced the cuts for the window, roof line, doors, and nesting boxes. We then took them down, darkened the lines, cut 'em, and re-hung them. It made it a million times easier, IMHO.

For the inside, I designed several roosting bars with poop platforms. The water is a gravity fed chicken nipple/pvc setup, which I found online.

The food stations, also gravity fed, are (new) sewer pipes with wye connectors.

I used the roof and siding scraps to make shelves for storage inside.

By sourcing reclaimed materials, I built the coop, run, interior, feeding stations (5), and waterer for $550. I only bought 27 pieces of new lumber (15 2x4's and the 12 8 foot long 1x3's)

Even the paint was free! (We have a drop and swap at the haz mat recycling center run by the county. We have gotten 100's of dollars of free paint, stain, and varnish there. I even used a can of free spar varnish to seal the inside of the coop)

There are still a few pieces of trim to be cut and painted, but the girls are inside eating, drinking, and merry!

I did find that at the Home Depot, if you buy chicken wire, it costs way more then 150 feet x 36 inch "stucco netting". The stucco netting was $54 for 150 feet, and chicken wire is $76 for the same amount. It is the exact same wire.

I built the run out of resourced 1x2 furring strips. They were a pain to work with, very prone to breaking when not supported, but with the entire run costing $25 for wood and $54 (with half a roll left over) for chicken wire, I can handle some extra time and effort.

If anyone has any questions for me, feel free to contact me! I'd love to help!

Built from Plan(s)
Estimated Cost
550
Estimated Time Investment
Week Long Project (20 Hours or More)
Finish Used
Free paint !

I know several counties in CO have drop and swap places. Maybe your county does, too!

We got three cans of exterior rust colored paint and mixed them all together to make one color. This only works if the colors are pretty similar. It prevents one side from looking different then another.

The trim was a full gallon of blue-grey. Free and never even used.
Recommended Skill Level
Intermediate

Comments

xman1x

Mon, 02/06/2023 - 08:12

Hi! Do you still have this coop? It's been about a decade now and wondering how it has held up, if you have any suggestions, or additional pictures of the inside. Thank you!

Porch swing bed

Submitted by Beaulook on Tue, 01/28/2014 - 16:29

Started off with the original design but enlarged it to fit an oversize single mattress. The mattress cost me $35 from a local faith farm, while the materials came in around $200. I decided to hang under my backyard pergola. Fun and easy project.

Built from Plan(s)
Estimated Cost
$250
Estimated Time Investment
Day Project (6-9 Hours)
Finish Used
Cedar stain
Recommended Skill Level
Beginner

Comments

bhammond

Tue, 01/28/2014 - 21:10

Wow this looks so inviting I might just have to make one too! Nice work-- it looks great!

Shorty

Tue, 01/28/2014 - 21:26

Really great job on your porch swing bed AND an awesome looking patio/yard. Looks amazing all around!

Debbie Perkins

Mon, 07/27/2015 - 22:45

I want this!  I just made a couple of plant stands for my front porch.  My husband asked me what my next project was, why, a swing bed.  (This was only my second project!)  I want to put cup holders in those big ole arms!  We have a house at the beach in South Alabama, so, you gotta "hydrate."  This is an awesome swing.  I can't wait to do mine...pillows to rest on, one foot on the concrete pushing me in a slow swing. Cold beverage in my hand or in my cup holder. Yep, southern girl has a new project.  Love it!

Raised Bed Garden Enclosure

Submitted by Anonymous (not verified) on Tue, 06/21/2016 - 08:07

With lots of deer, rabbits, coyotes, and the occasional bear, garden enclosures are a must in our area (although I am not sure they will really help if a bear decides they're interested in our food). As our old garden enclosure was falling down due to the high winds and a quite a few winters in upstate New York, my mom found a horseshoe shaped garden with rasied beds that she loved. So, after searching around for a good plan, I found Ana White's collaboration with Home Depot for this enclosure.

While the original plan was far too small for our needs, I was able to expand the length of the enclosure creating enough room to add two small beds on either side of the door and a center bed, which is perfect for herbs. The build was not difficult as I was able to do most of it by myself (with the exception of contructing the frame and attaching the door) and I am sure this would go much quicker with an extra set of hands. As I did not have a large chunk of time to devote to this project, it did take me quite some time stretched over a few weeks. Nonetheless, I am very happy with how it turned out.

After construction, my family got a little garden happy and decided we wanted to plant even more vegetables than we had originally planned. So, we created a much simpler but nonetheless less pest-proof enclosure for two more beds to the left of our original project (shown in the photos).

Although this was an expensive project (exact price is unkown), it is quite sturdy and we expect it to last a long time and provide lots of vegetables. We added some hanging baskets for decoration and decided next year we will add some morning glories around the outside corners for some extra shade during the afternoons. Some minor alterations also included a latch that allows us to open and close the door from both sides, we actually picked up a gate latch kit for this part of the project, and using welded wire fencing instead of chicken wire. While the welded wire added to the cost, it will hold up better to the wind and snow and is still protective enough to keep out our main predators.

Thanks so much for the plans Ana! In the begining, our neighbors joked we were building a guest house :). I have included some photos from throughout the build as well.

Built from Plan(s)
Estimated Cost
~$500?, we had to make some adjustments in size and swap out some materials due to the high winds we get, so this could probably be done for cheaper. The cost is also a guess as I am not completely sure what the total came to after many trips to the store. Nonetheless, our garden is twice the size of the enclosure kits Home Depot and other stores sell for what I predict to be more than twice the cost.
Estimated Time Investment
Week Long Project (20 Hours or More)
Finish Used
Unfinished
Recommended Skill Level
Beginner
Back