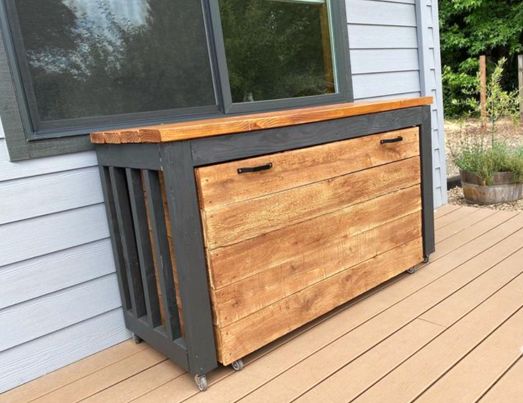
Nesting Grill Station
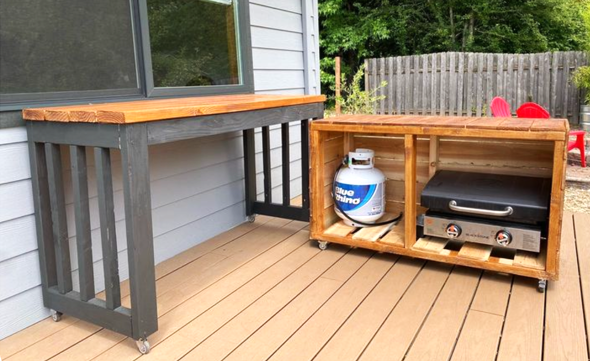
Nesting Grill Station
Built from Plan(s)
Nesting Grill Station
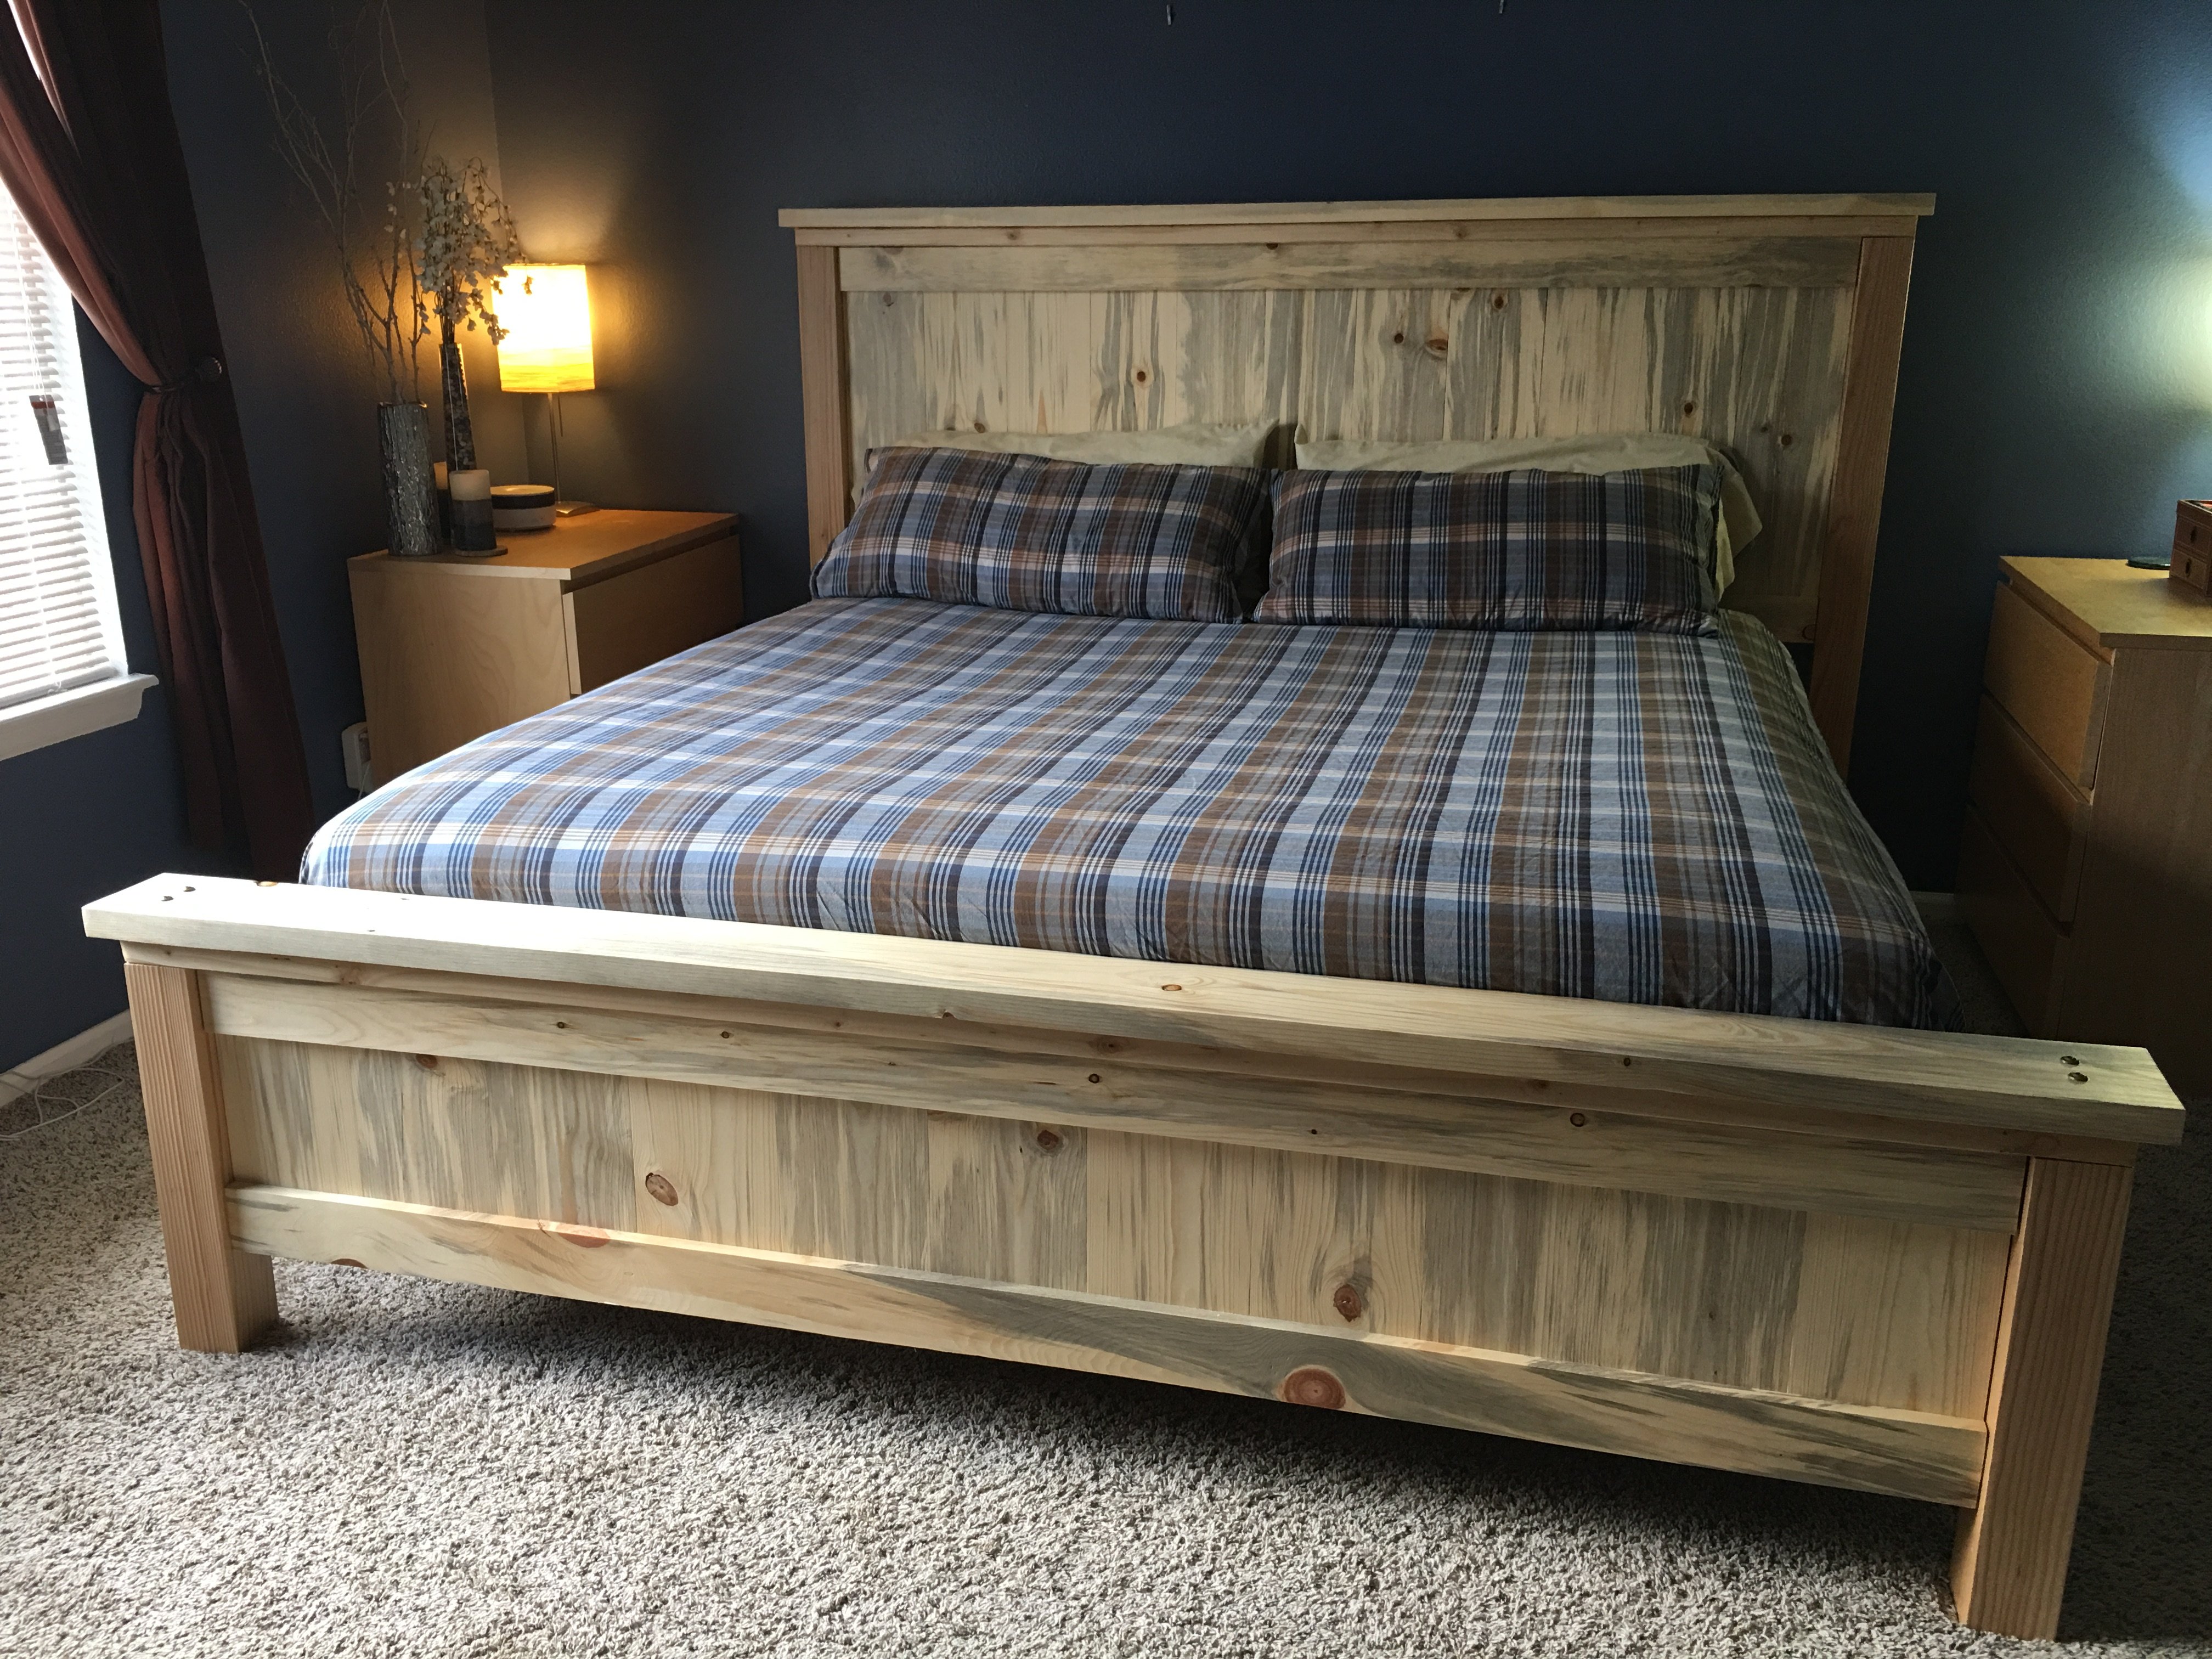
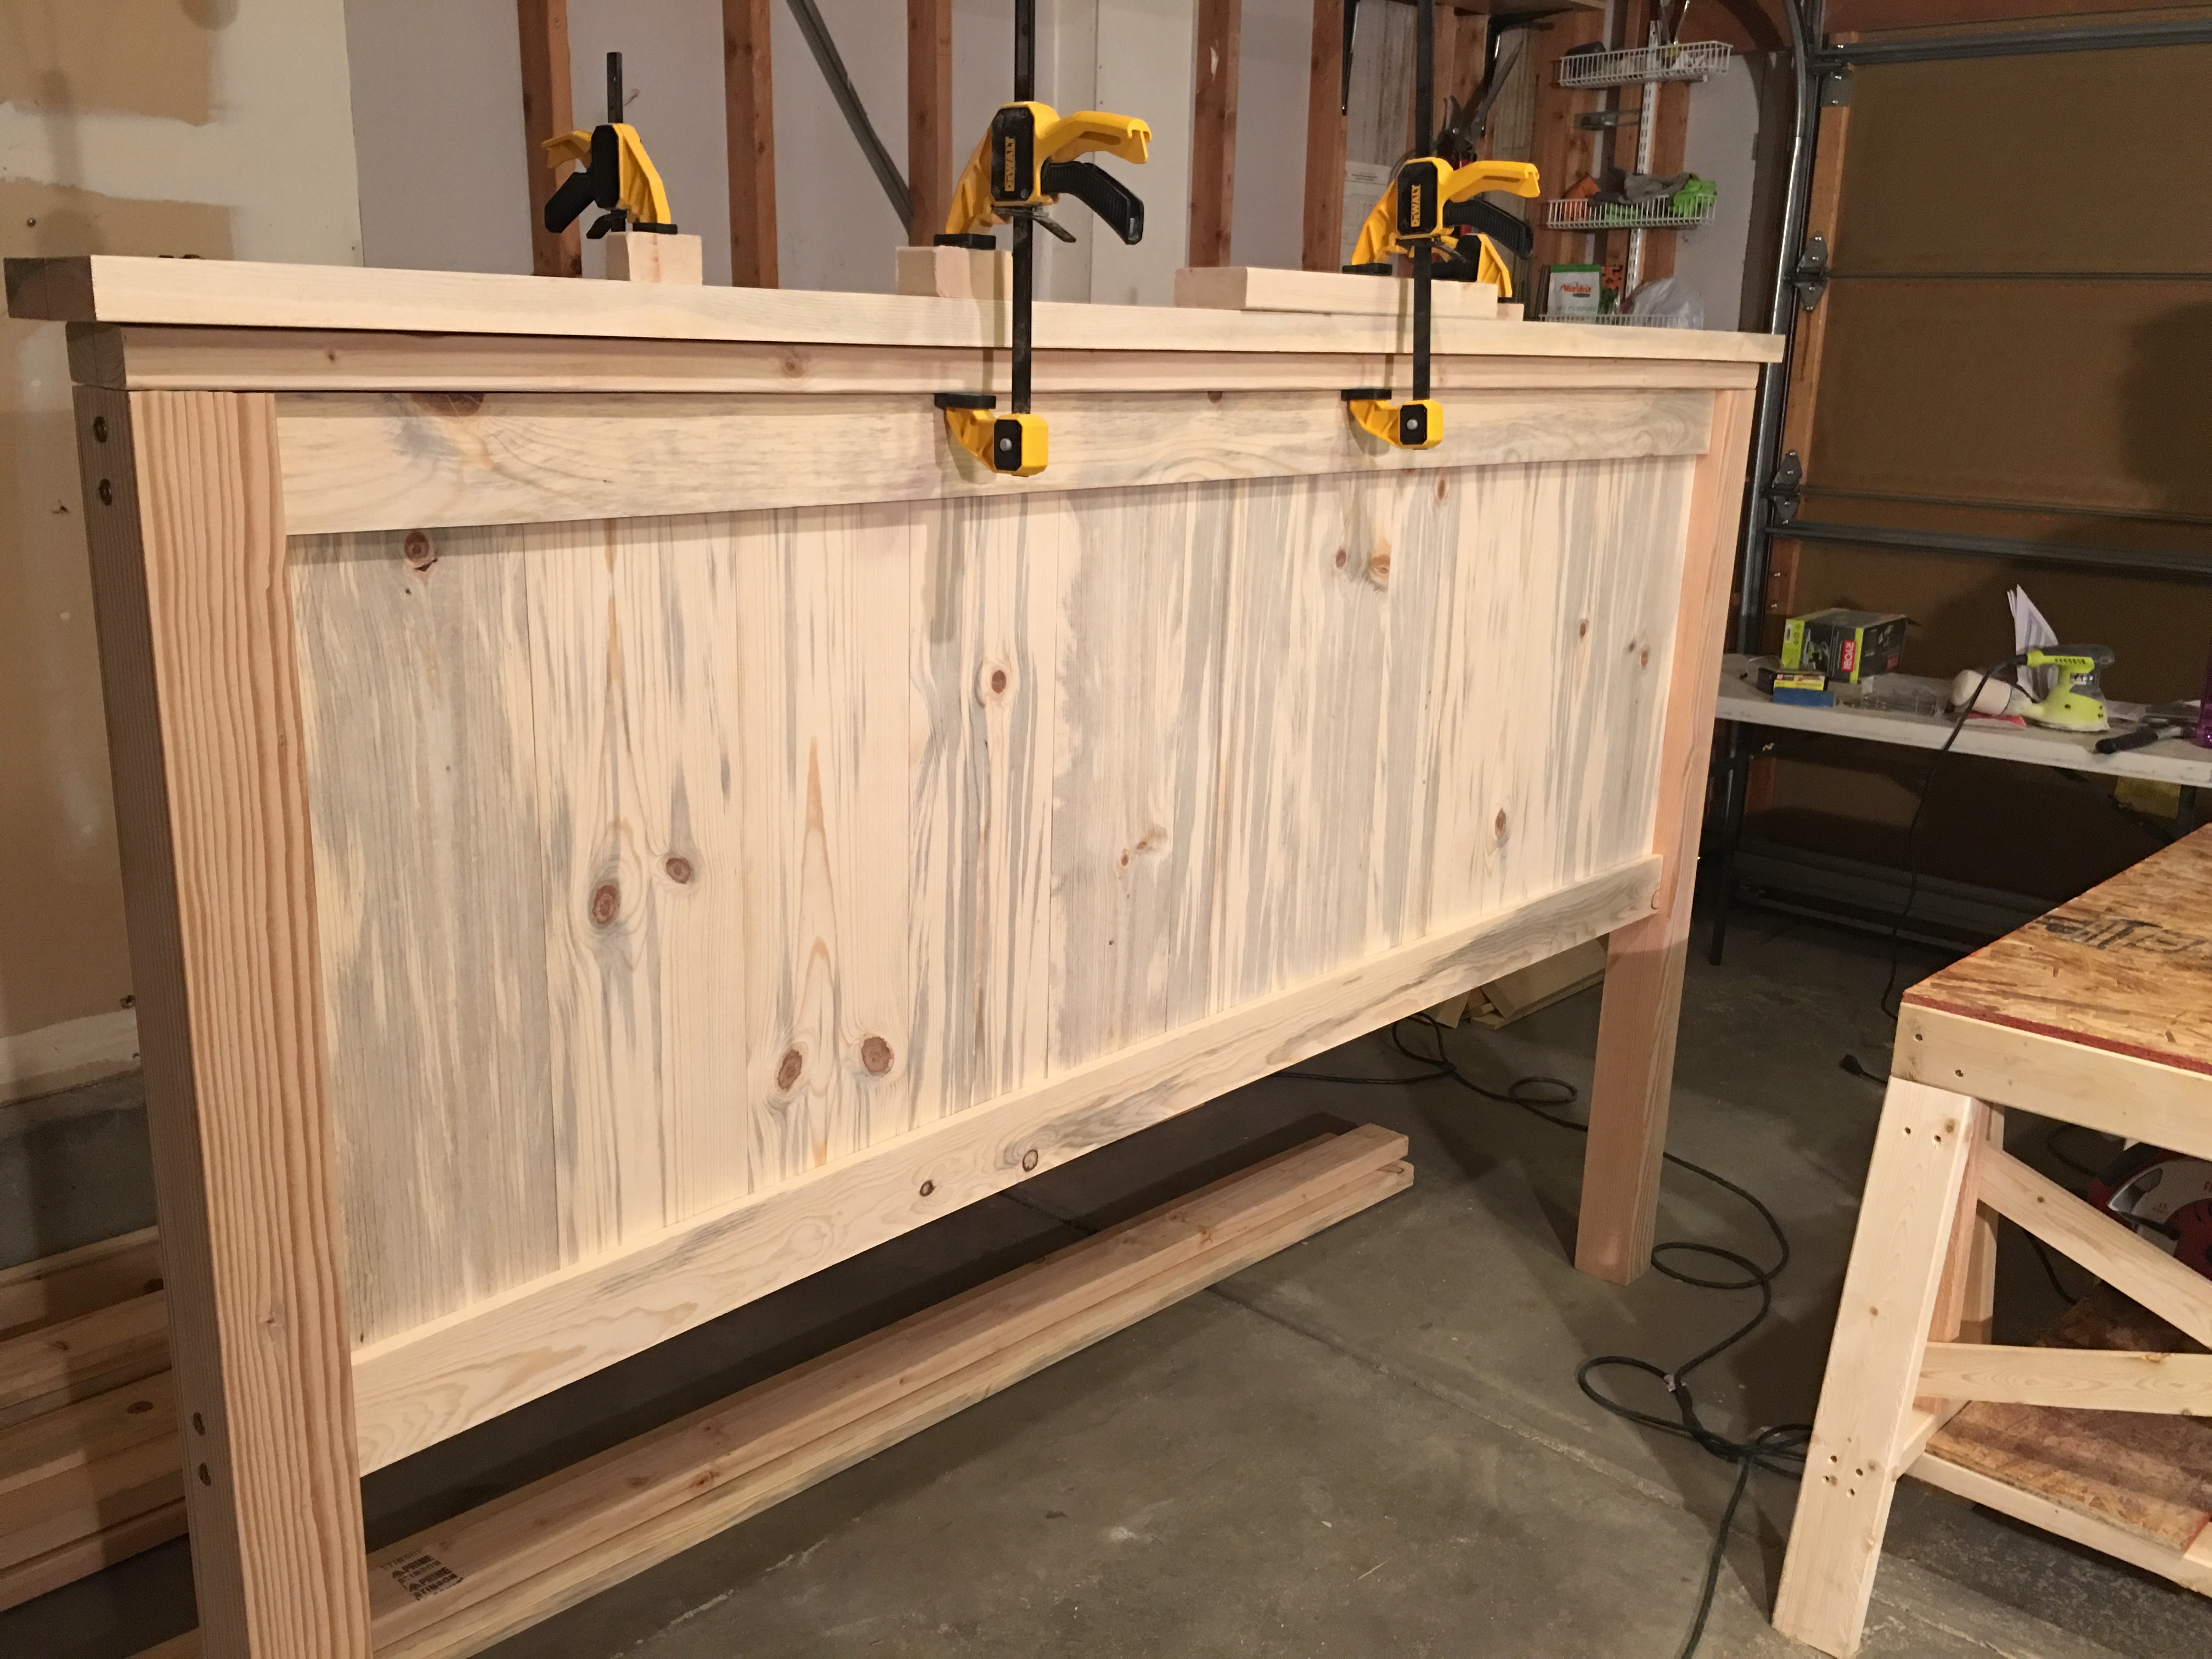
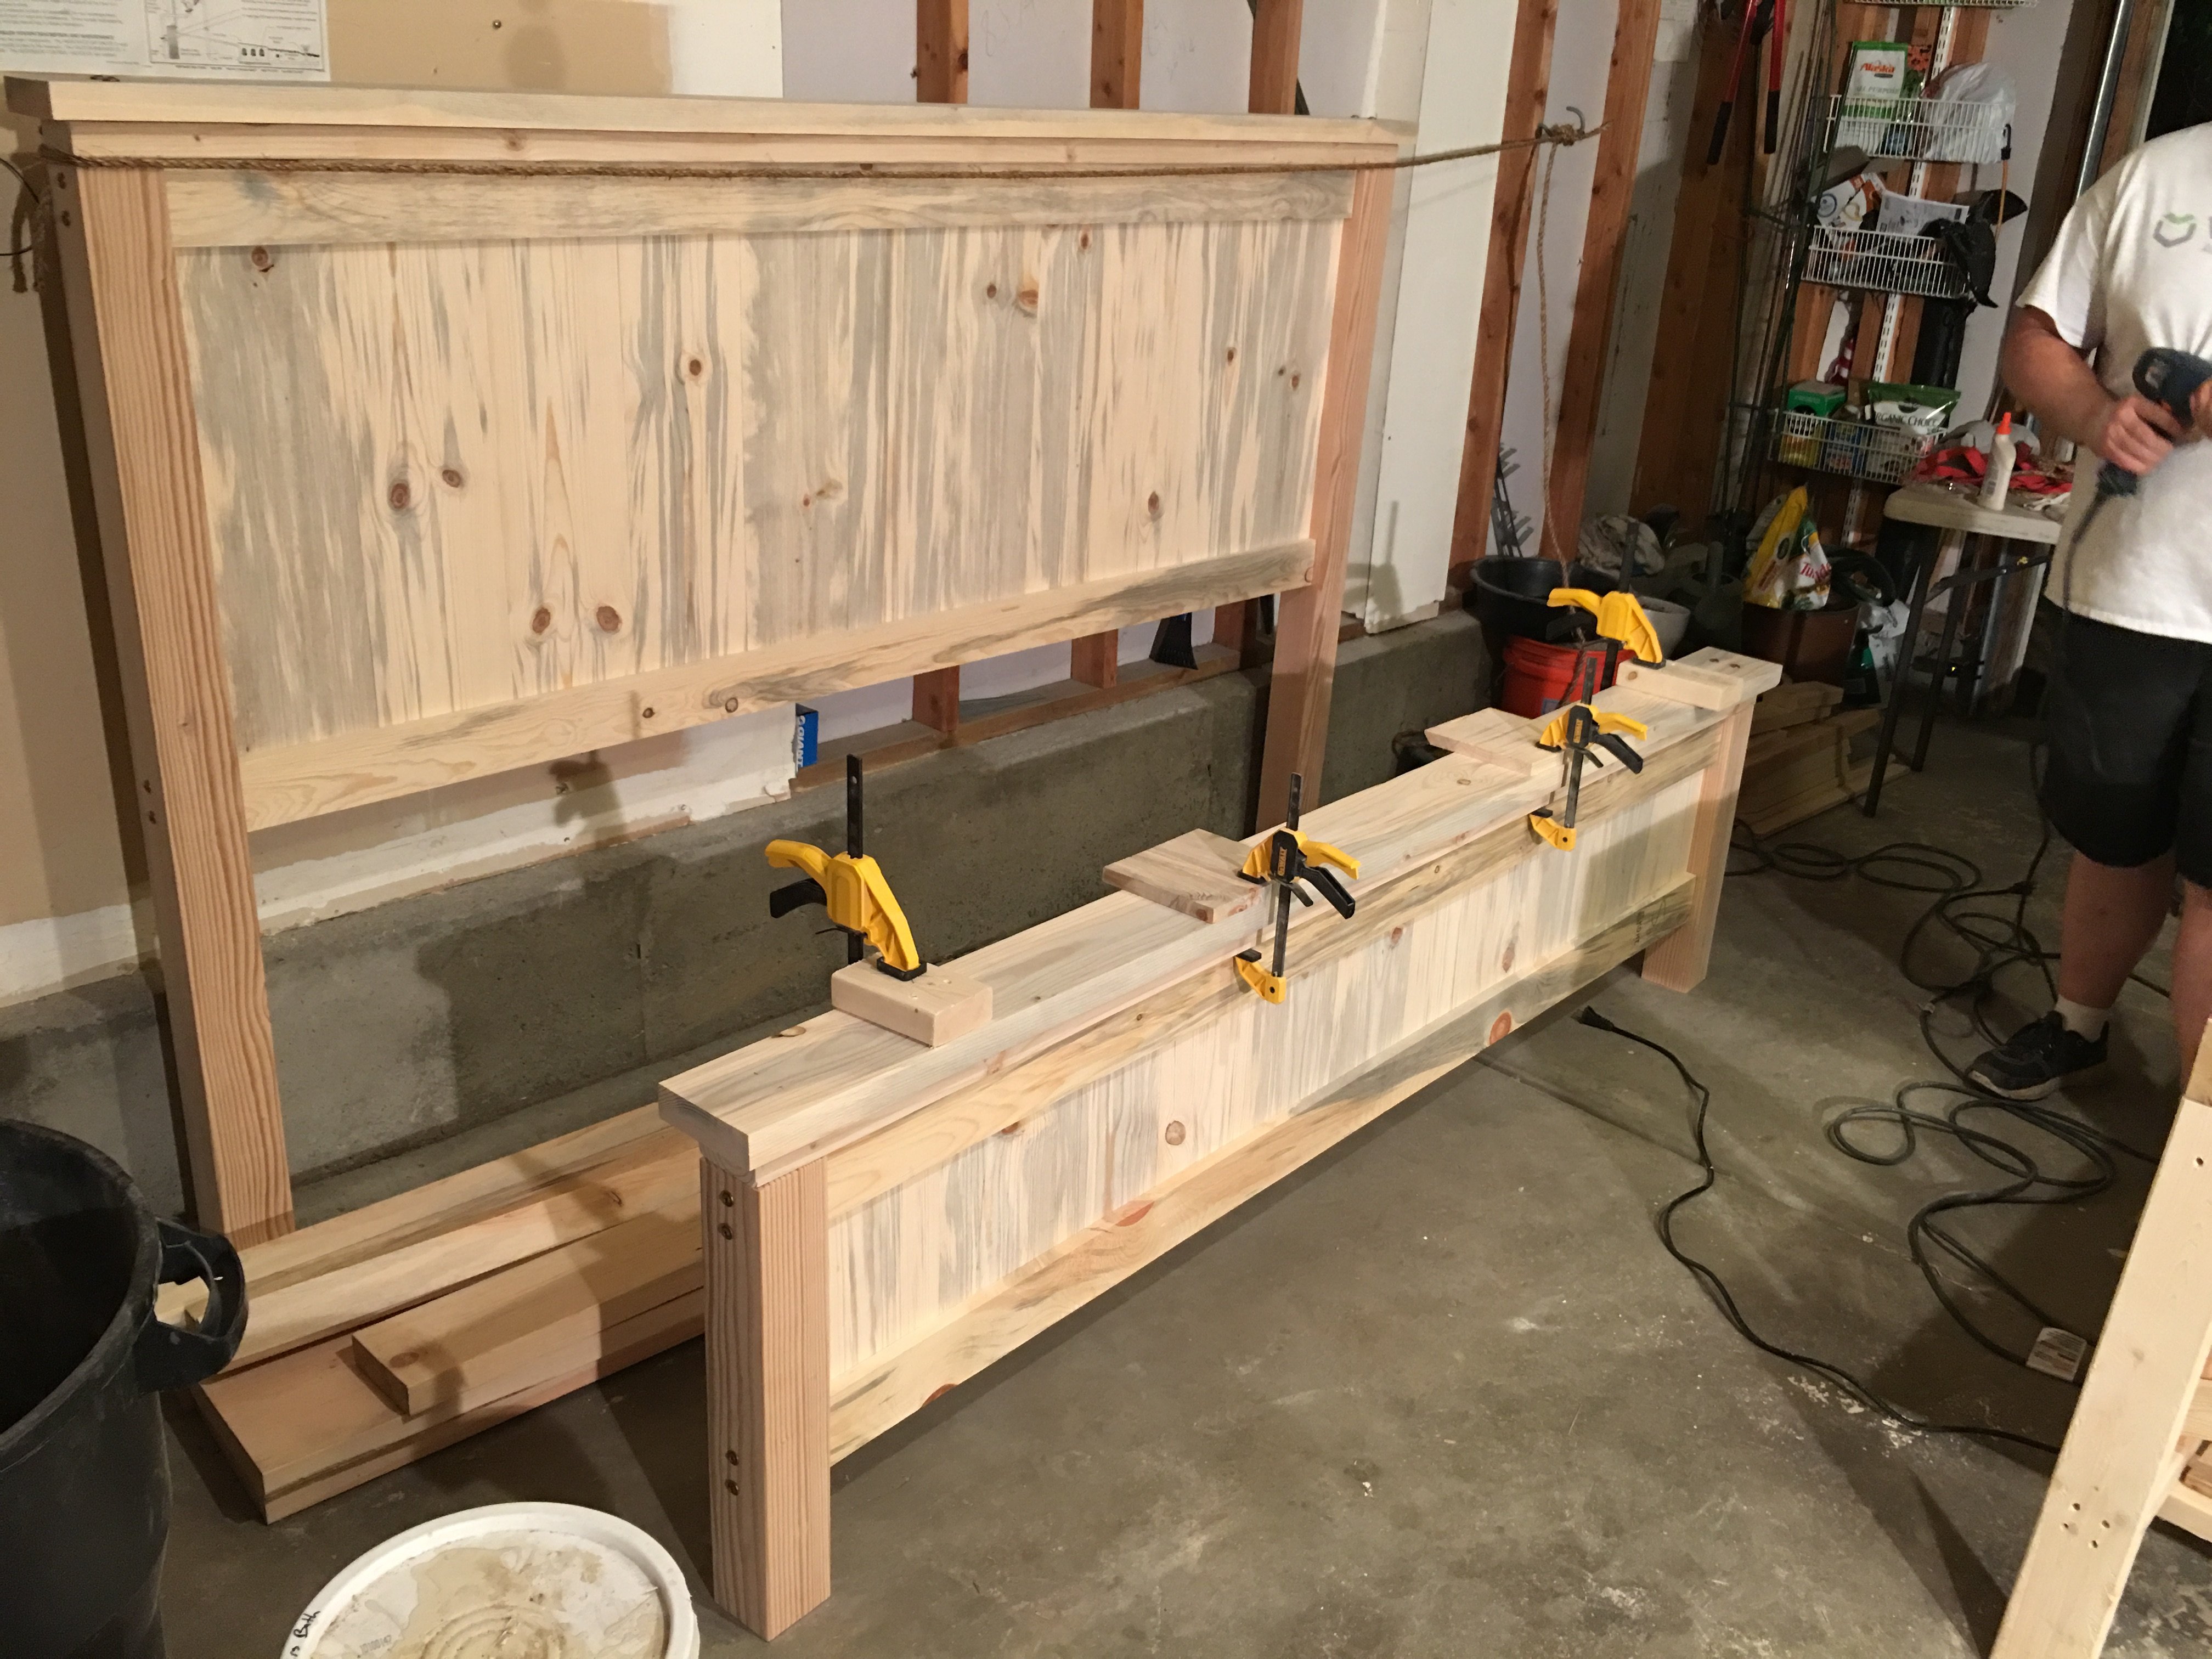
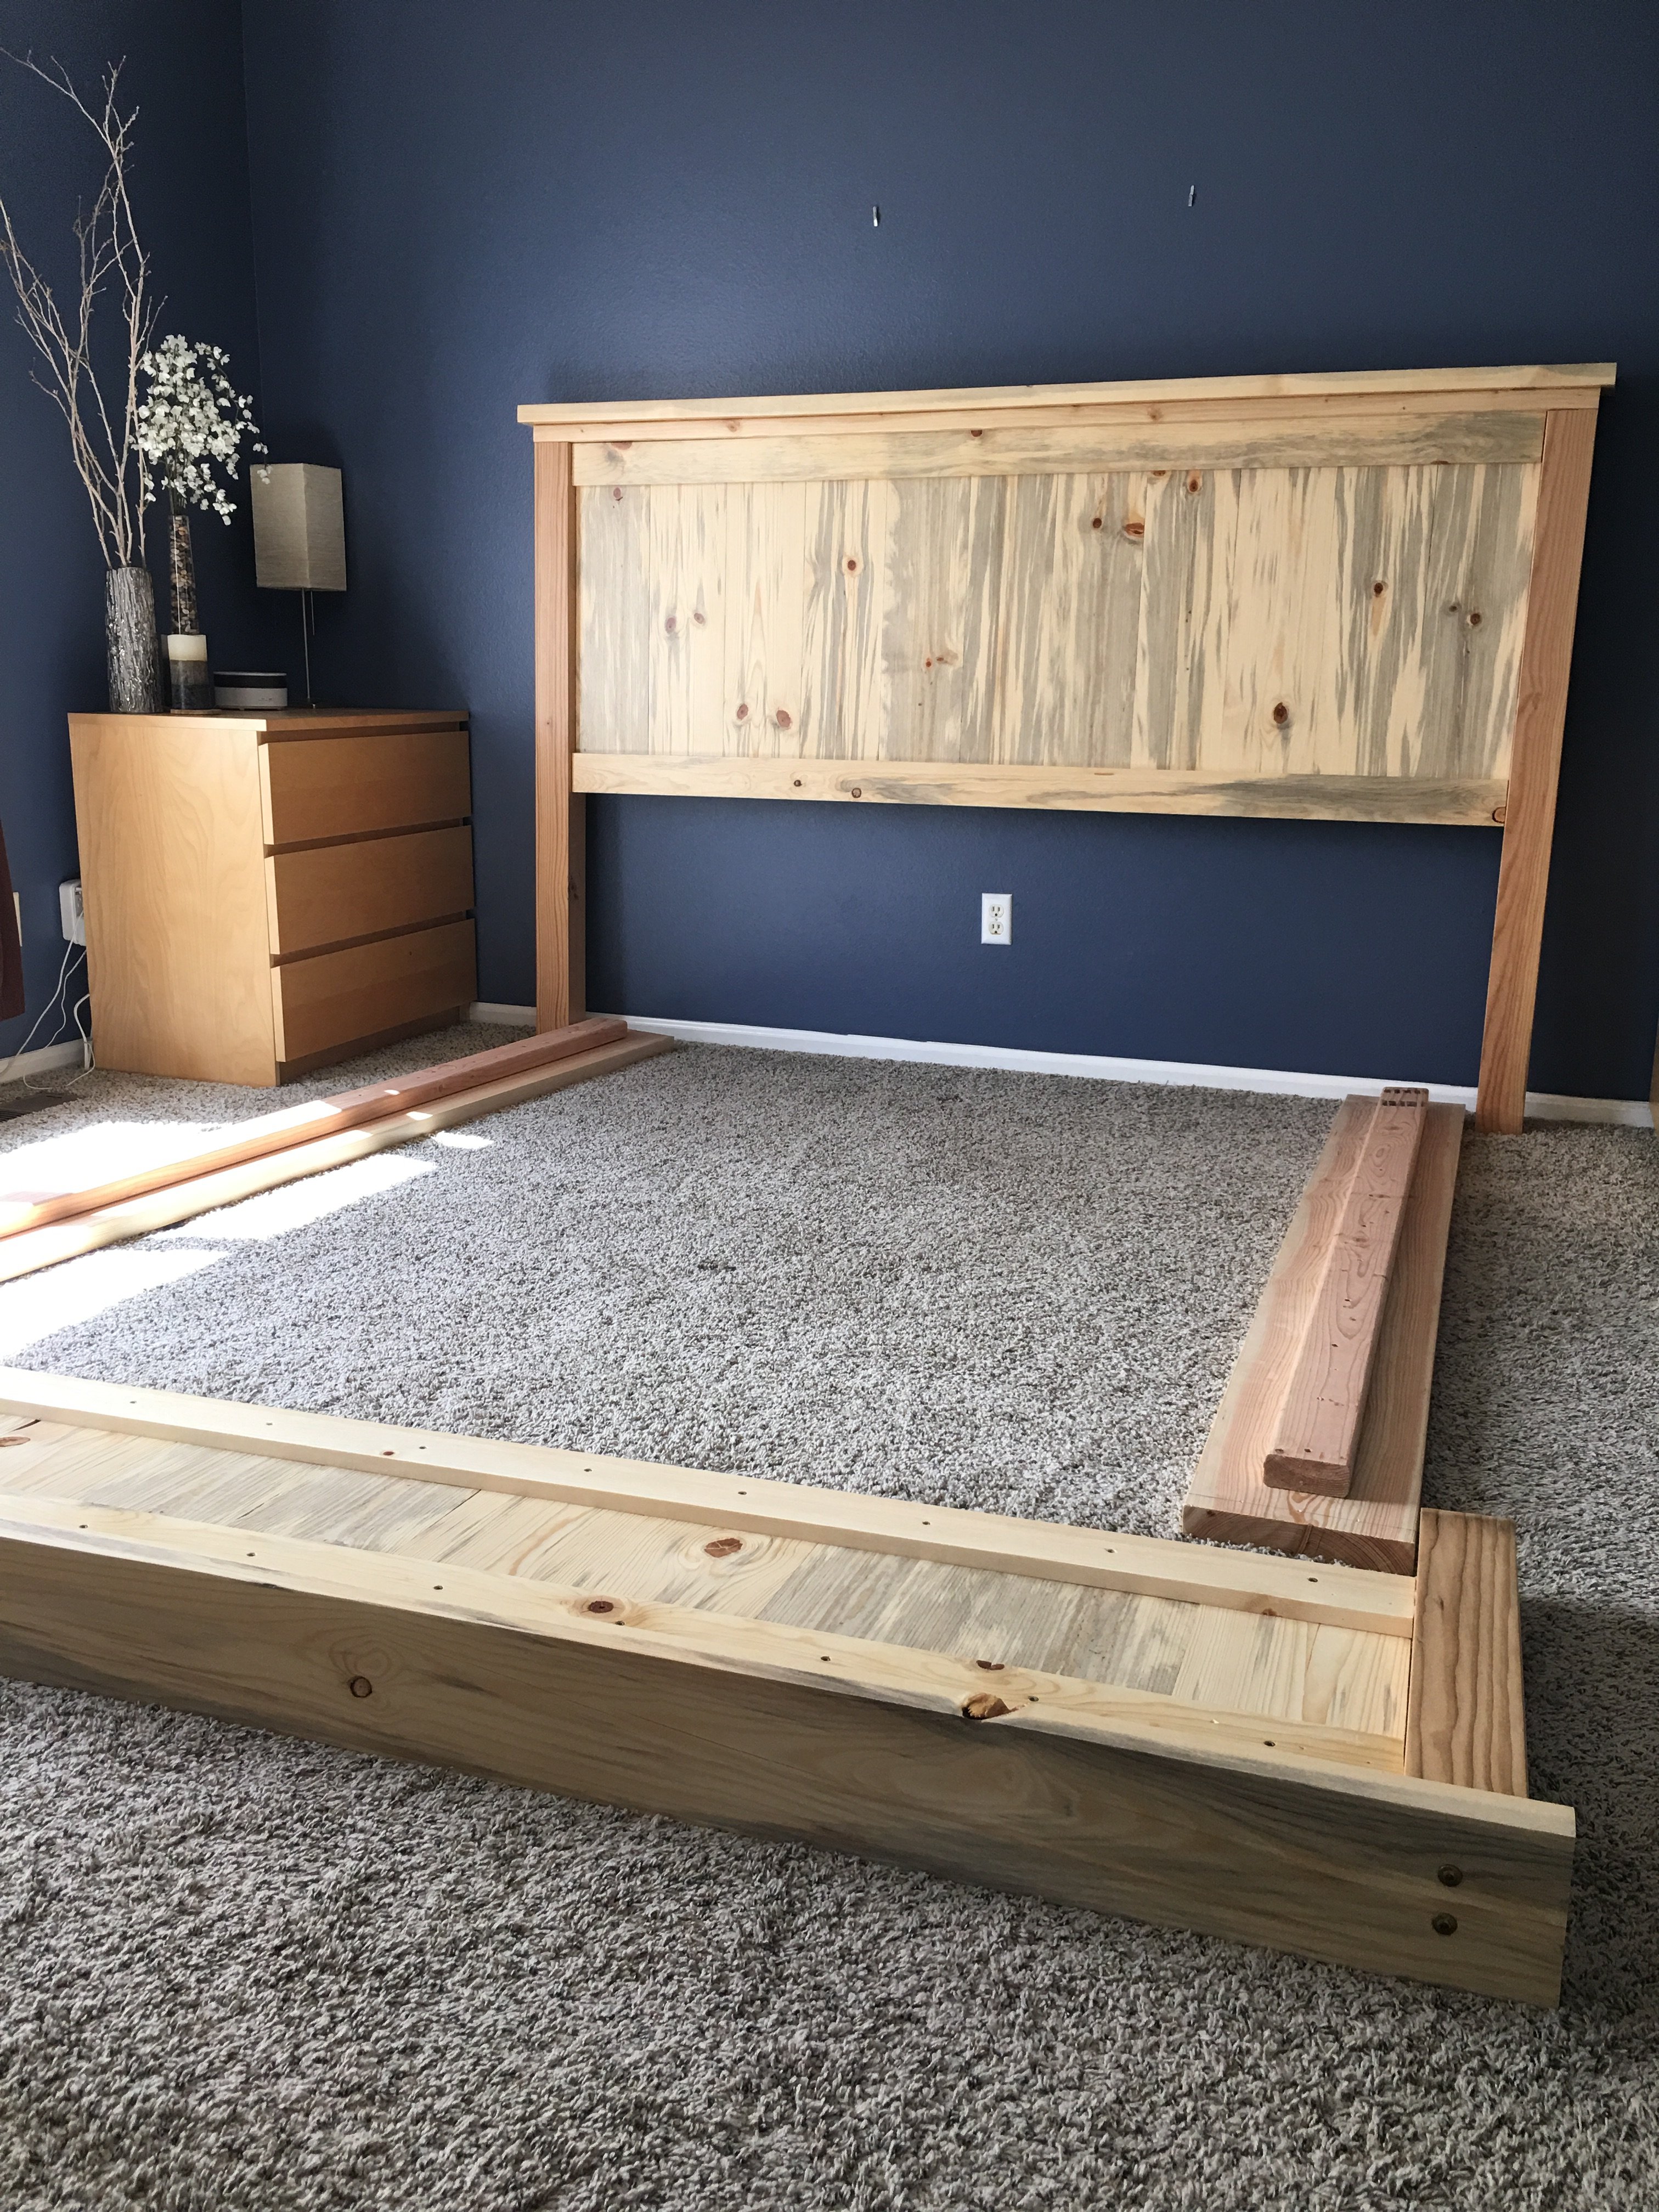
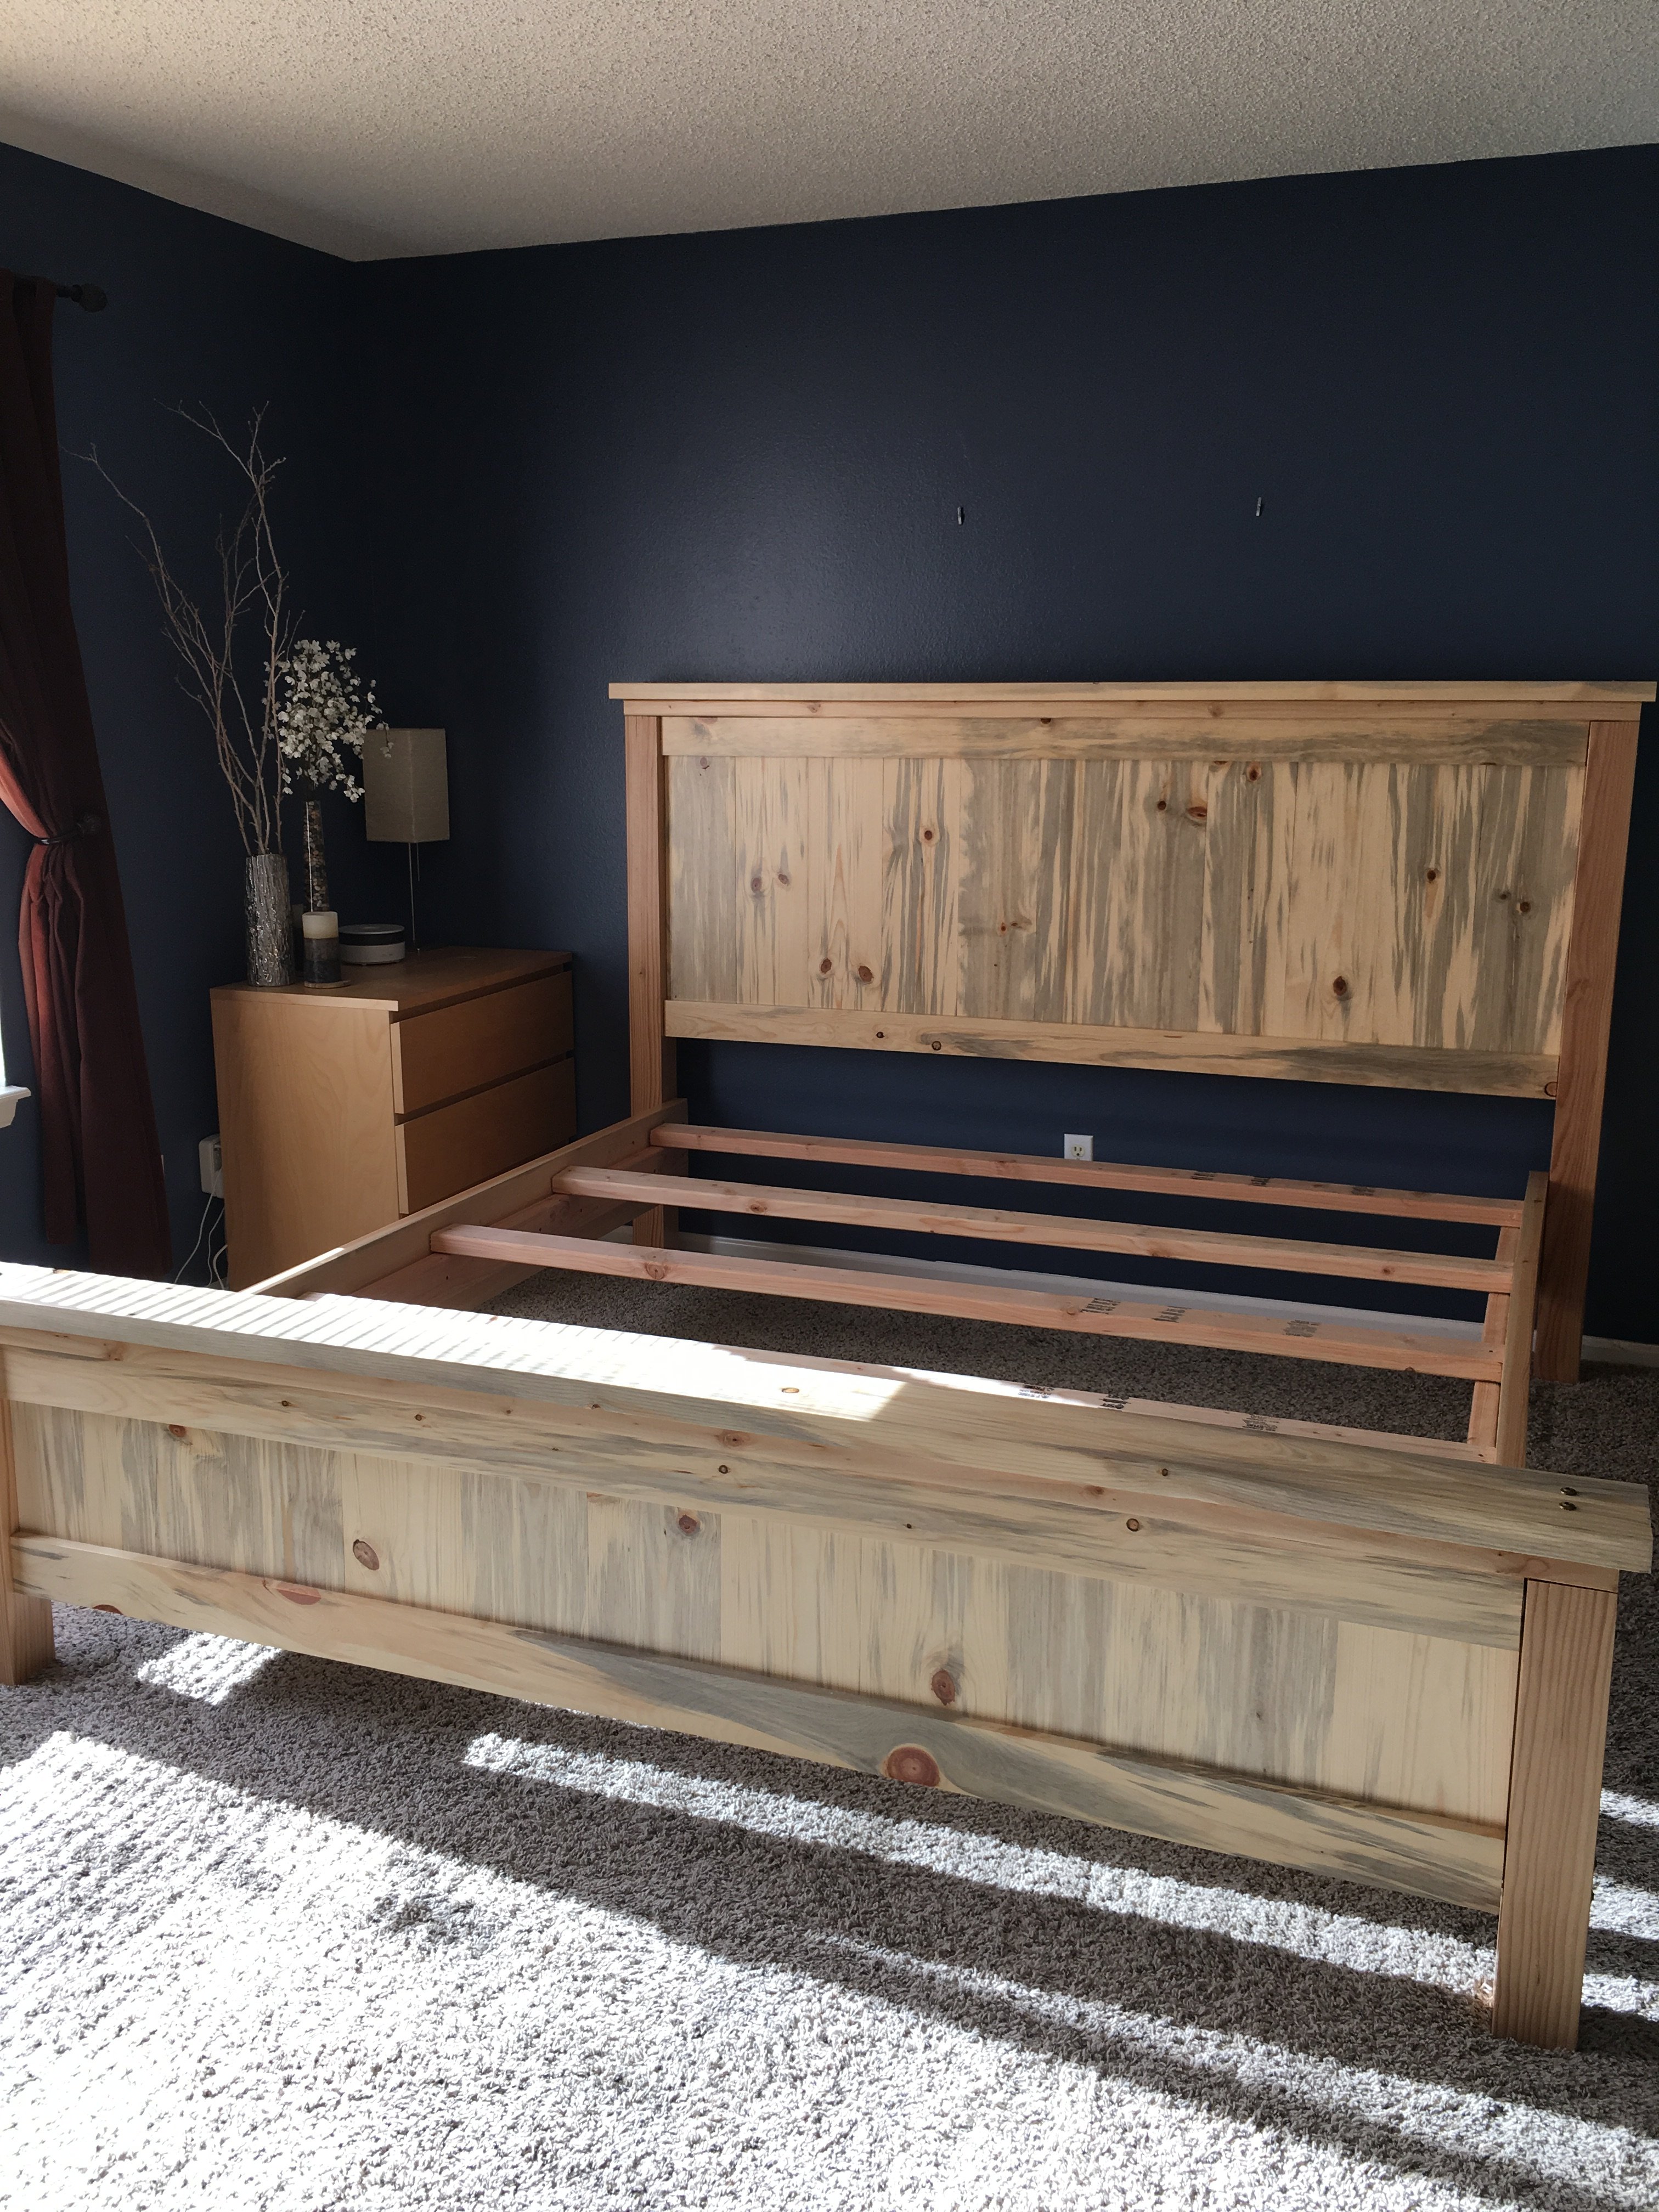
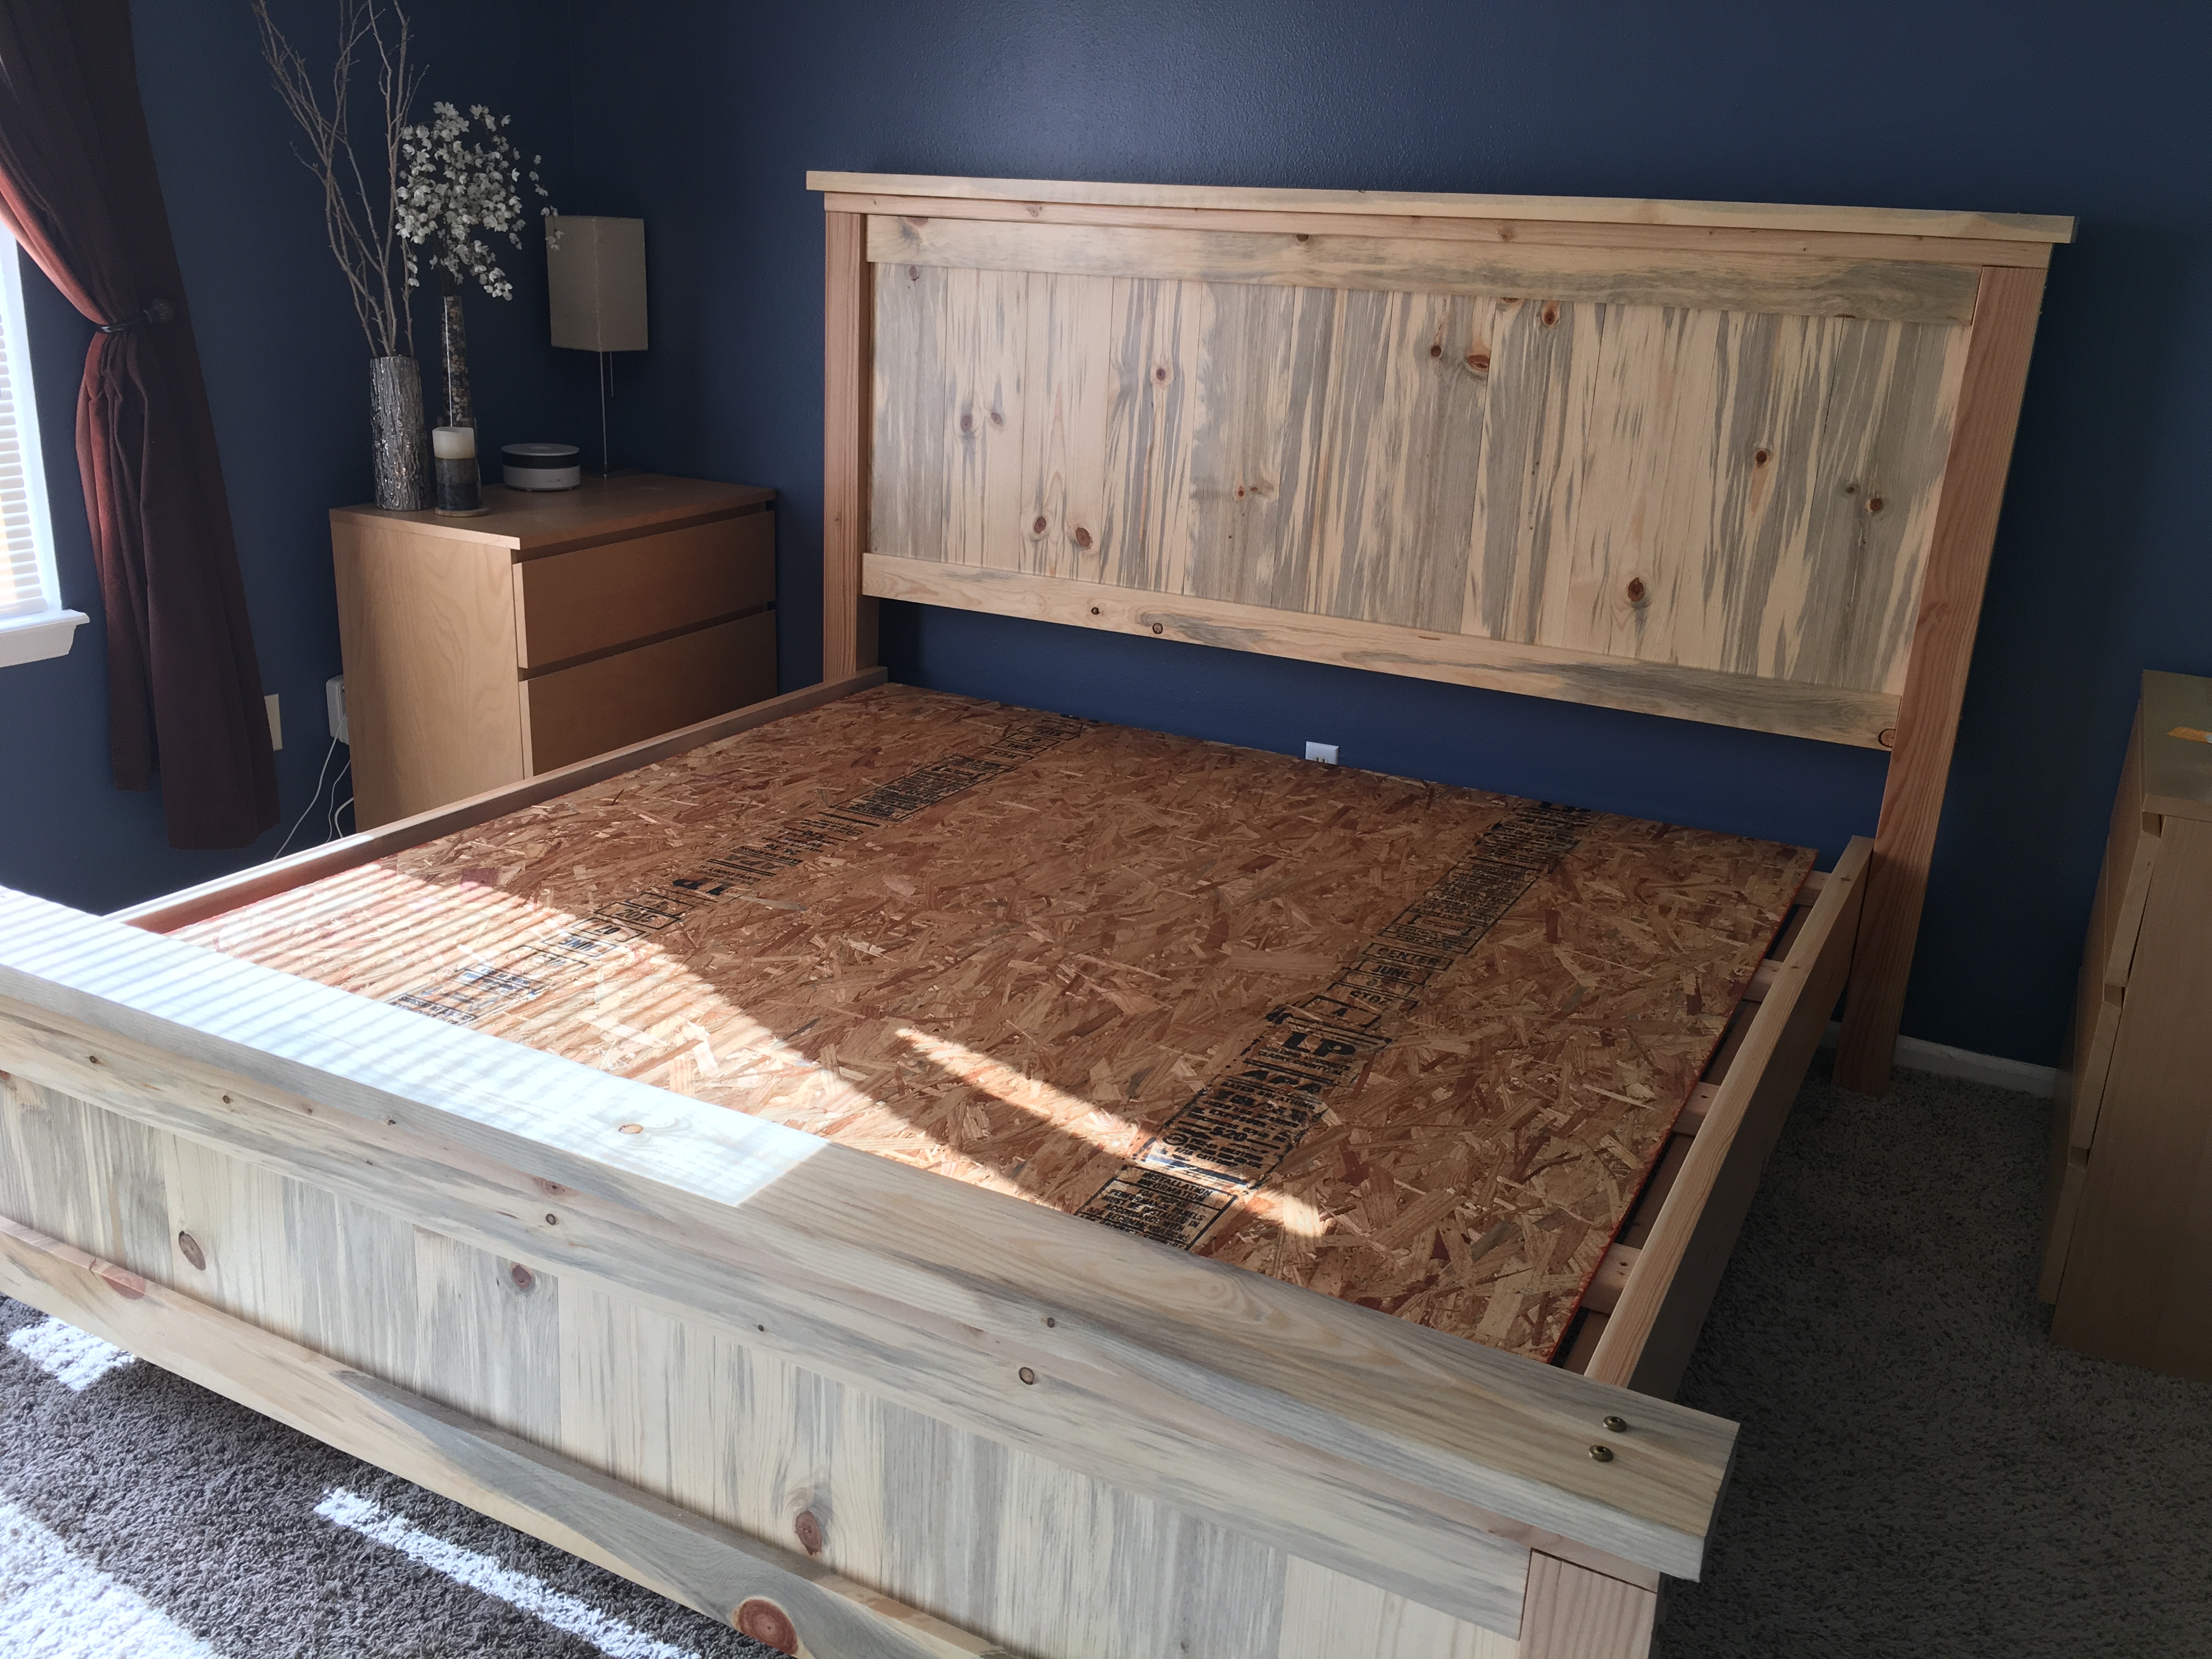
This was our first build and it was quite a big project to take on to start with. We had so much fun and learned so much along the way.
Our biggest lessons were to hand pick our wood and make sure we get the straightest pieces possible. We had to wrestle some wood to make this bed work! Clamp everything especially when using large bolts as the pieces would pull apart from each other. We even used a ratchet strap at one point becuase our small clamps weren't cutting it. I'm sure there's a better way and we'd love to hear about it but we made what we had work. We also had to figure out how to attach the side rails and at what height. We ended up using 3 4-inch screws on each end to screw them into the posts.
We love this bed not only because it was a labor of love but because its such a solid beautiful piece.

Sun, 03/01/2020 - 11:29
Very nice! I love the lighter wood too, but my wife likes the darker stain, so we compromised in the middle for the finish. Why arethe post always so red? I can appreciate the natural tendency of nature to add color, but the 4*4's are always red-er in color. Do they always use a different pine or certain part of the tree for those?
Mon, 01/18/2021 - 11:27
I believe the posts are actually Douglas fir and not pine judging by the look and color of the grains.

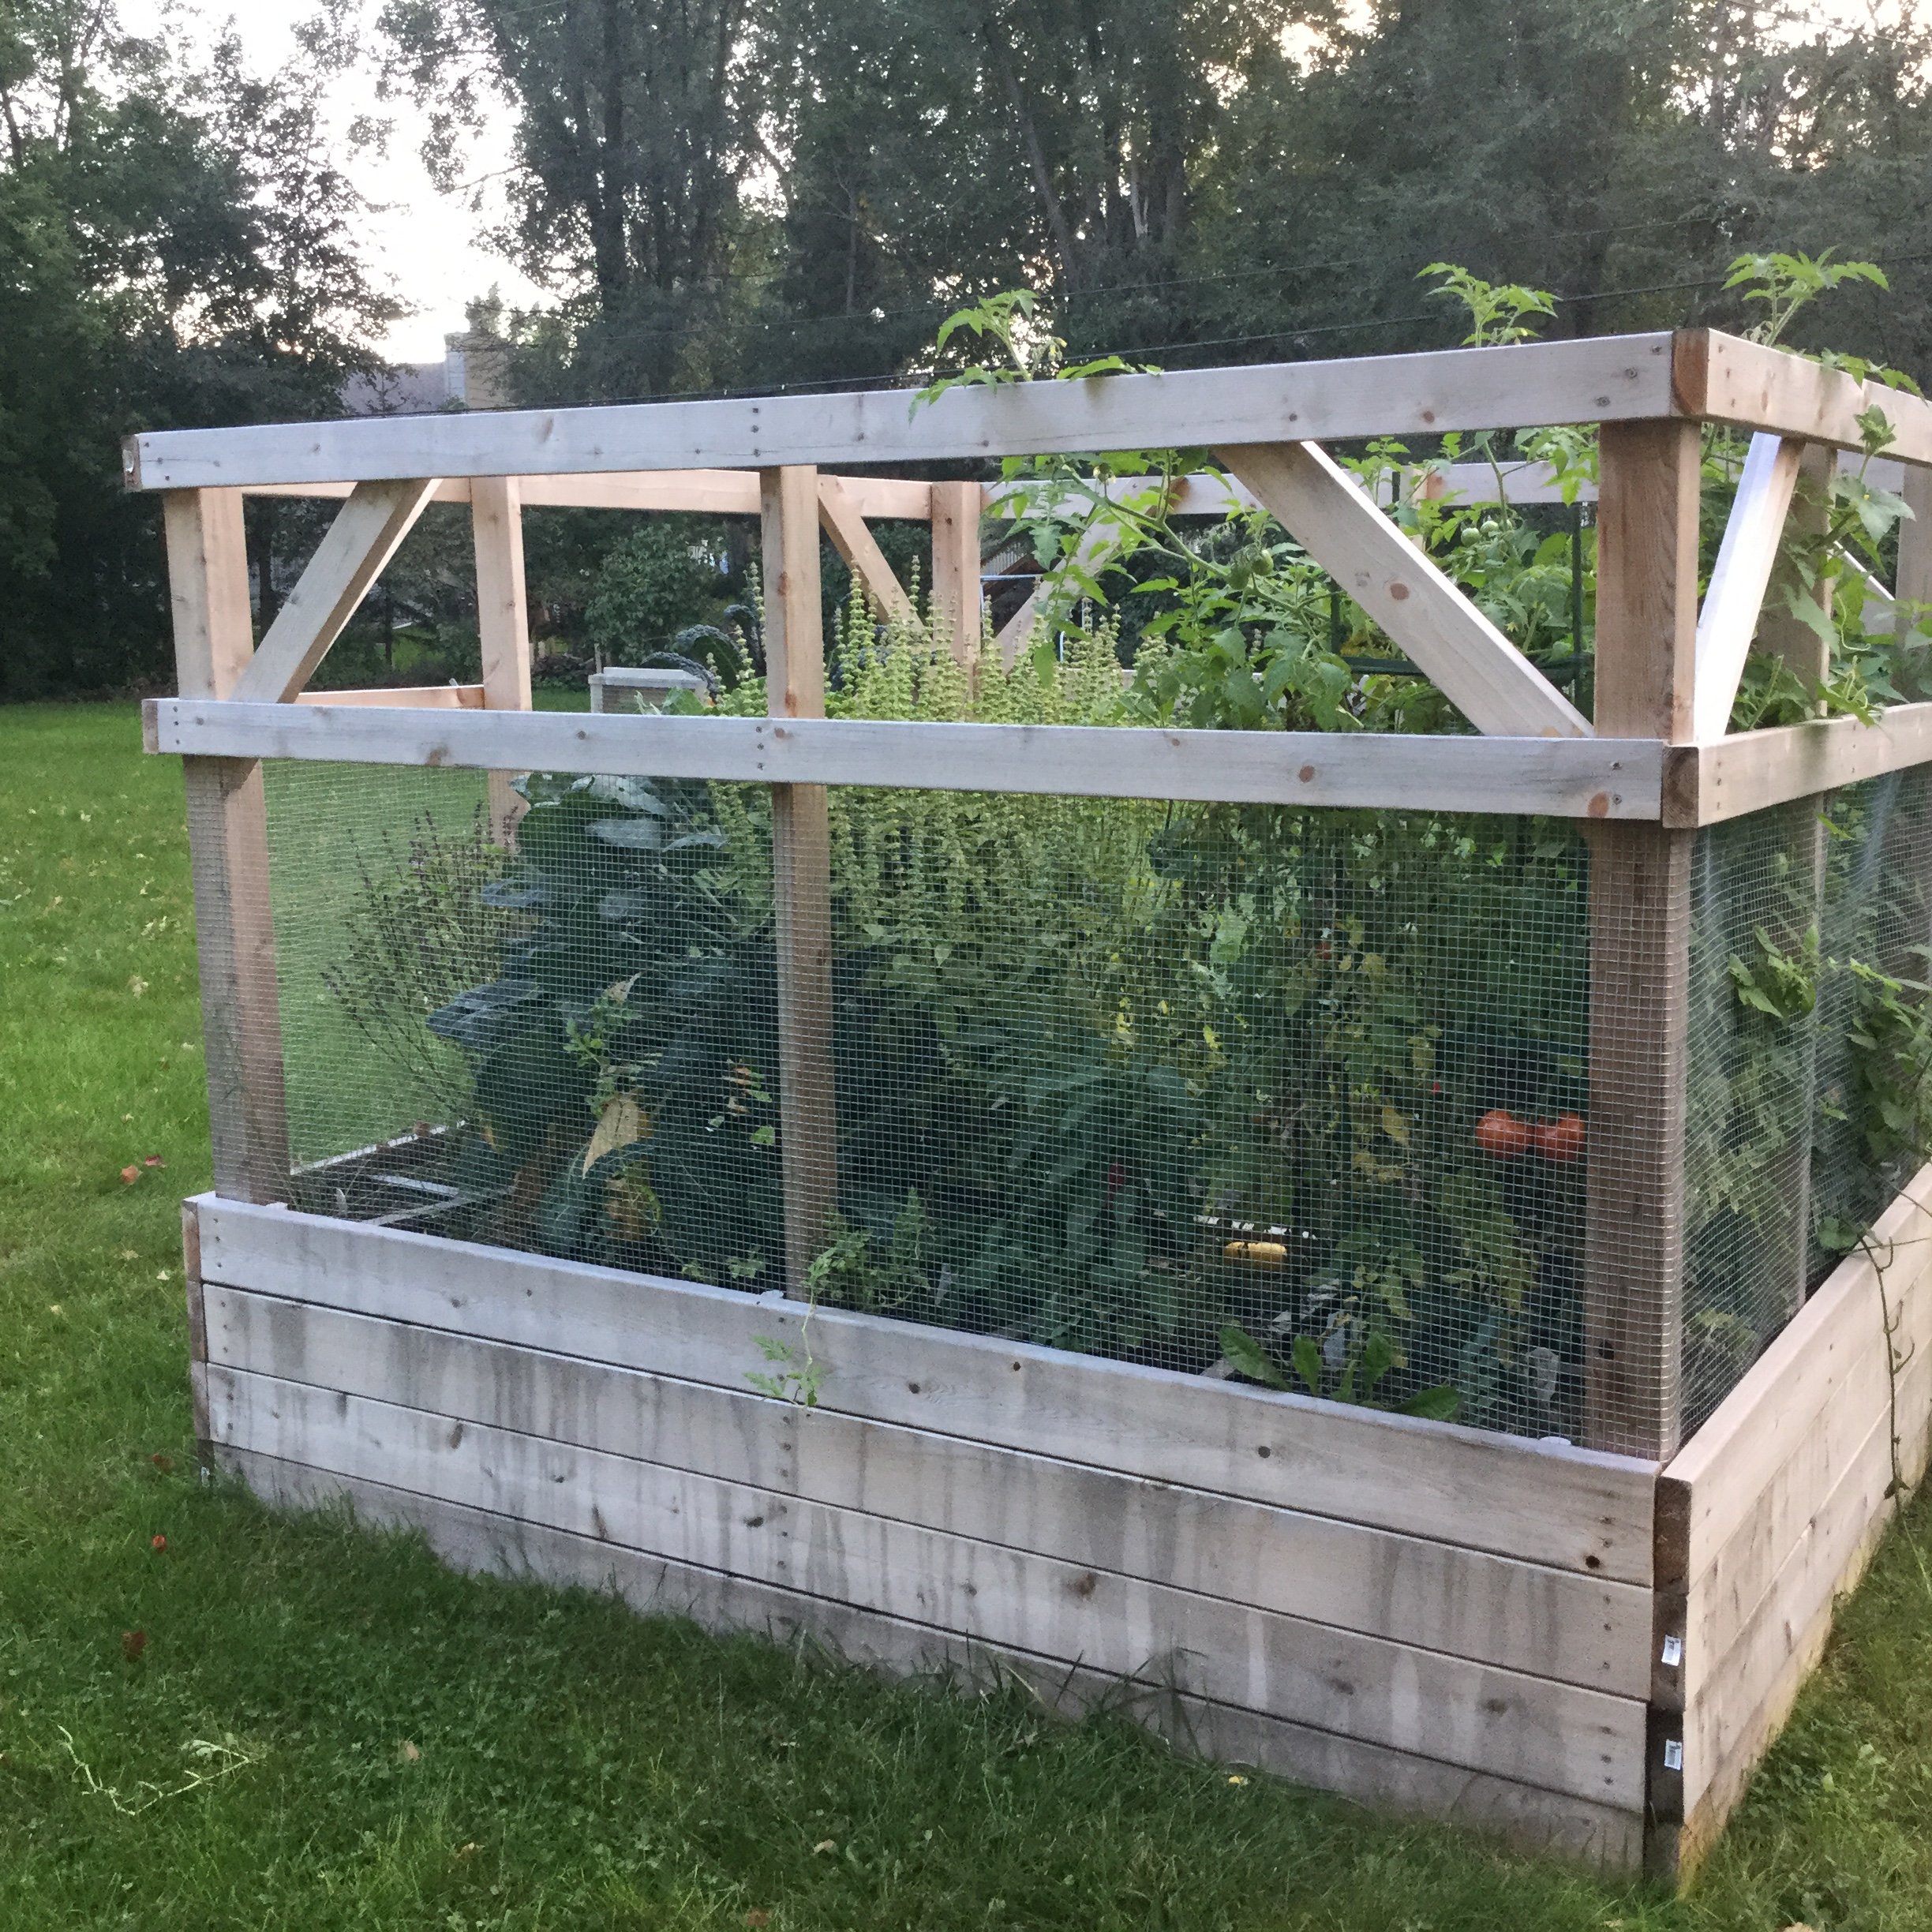
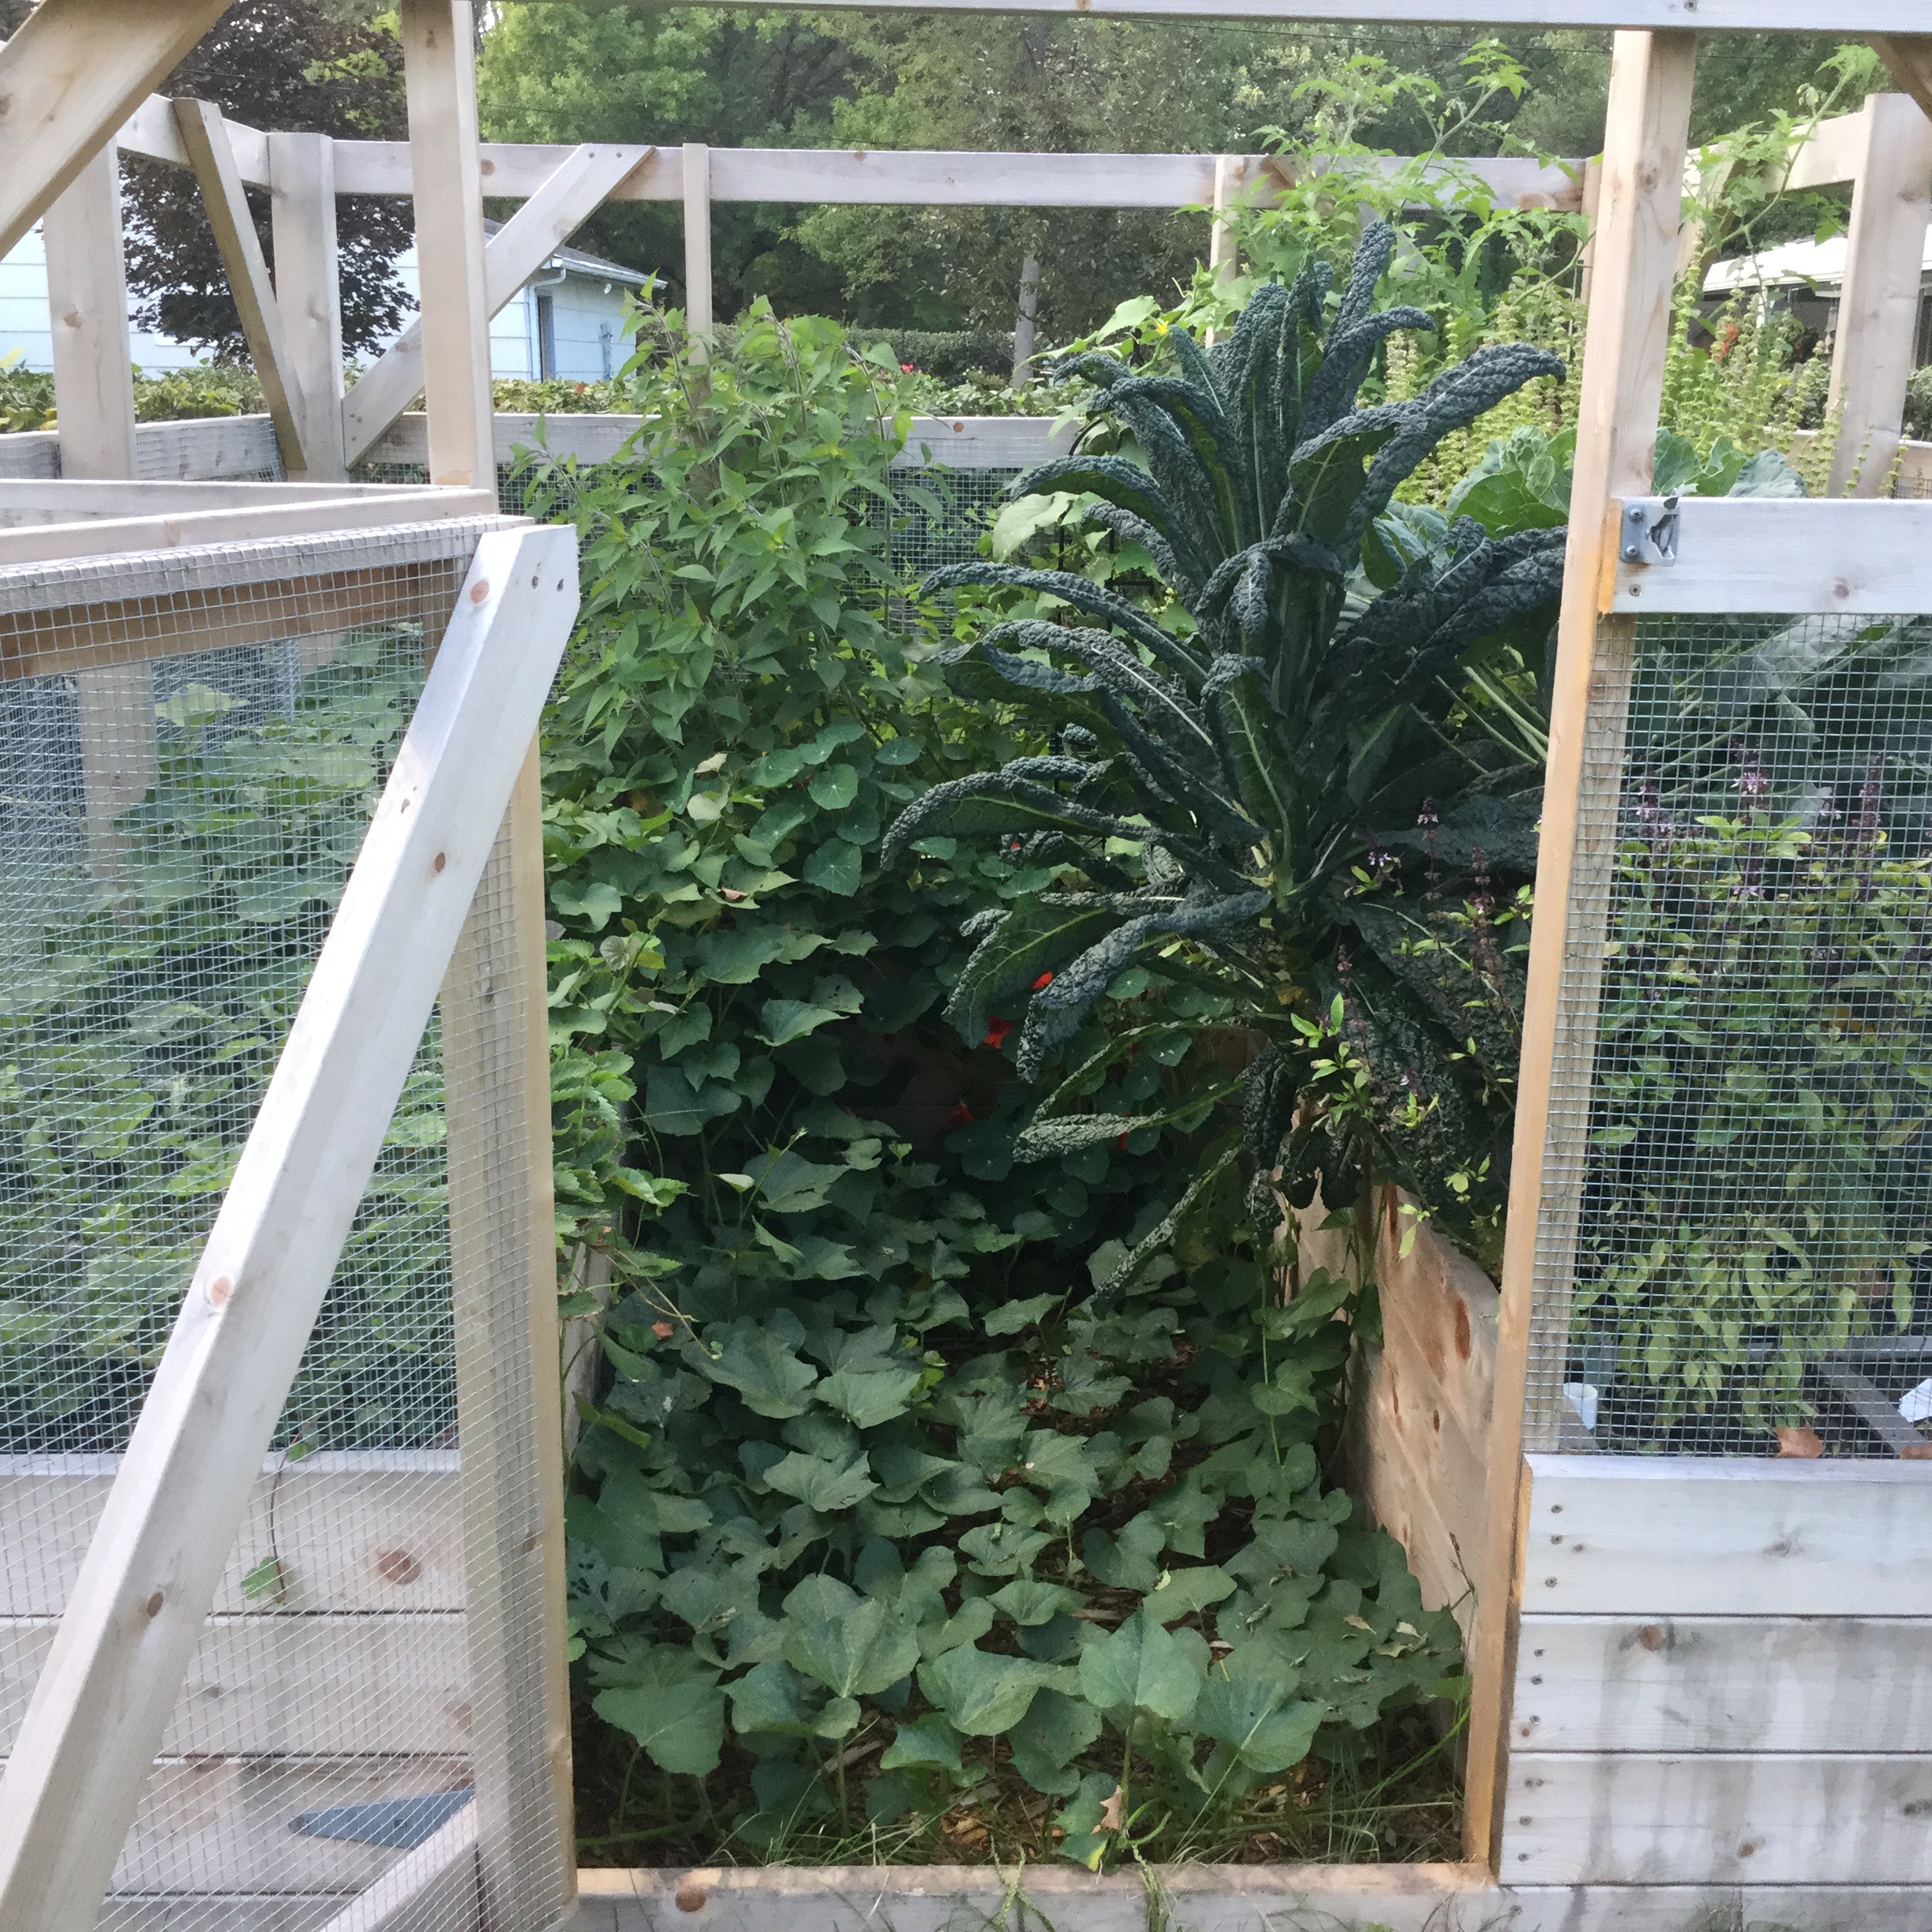
This was a fun project. The plans are written so that many of the boards don't need to be cut. It's made from cedar that (thank goodness) was on sale. I made the raised beds twice as deep as was called for in the plans because I wanted to minimize bending while I garden. That added to the cost of the lumber and the soil. I also like the way it looks.
I found it helpful to measure and cut the boards as I went. This was crucial for fitting the door. The most difficult part for us was working with the hardware cloth and trying to make it as smooth as possible.
It has been effective keeping deer and rabbits out of the garden. Things that can fly in are another issue.
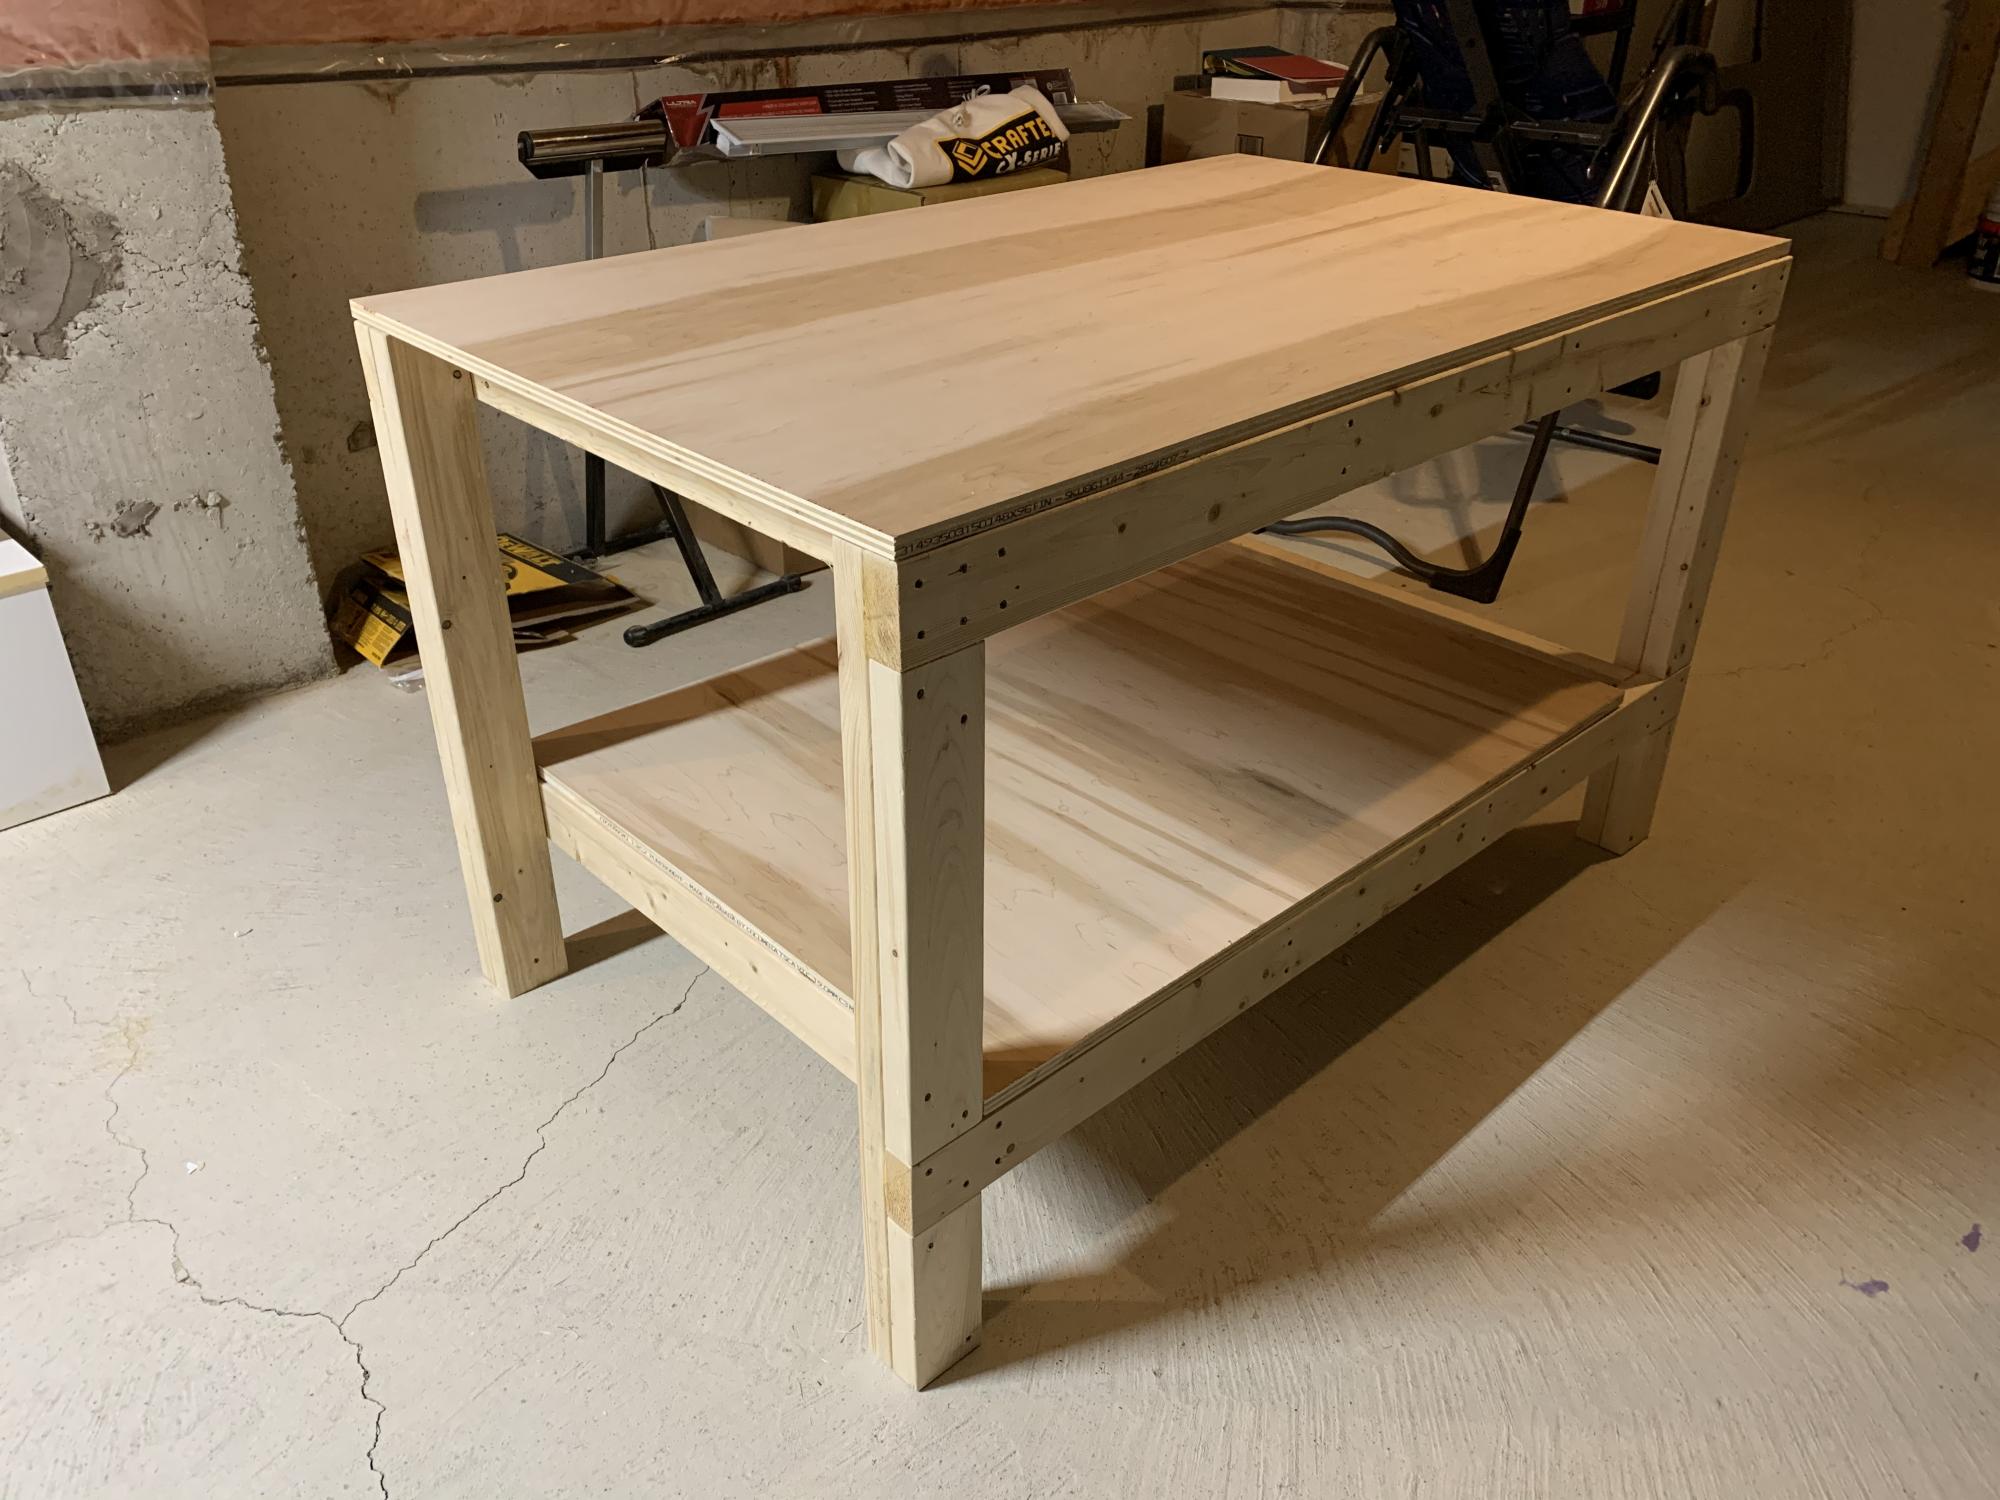
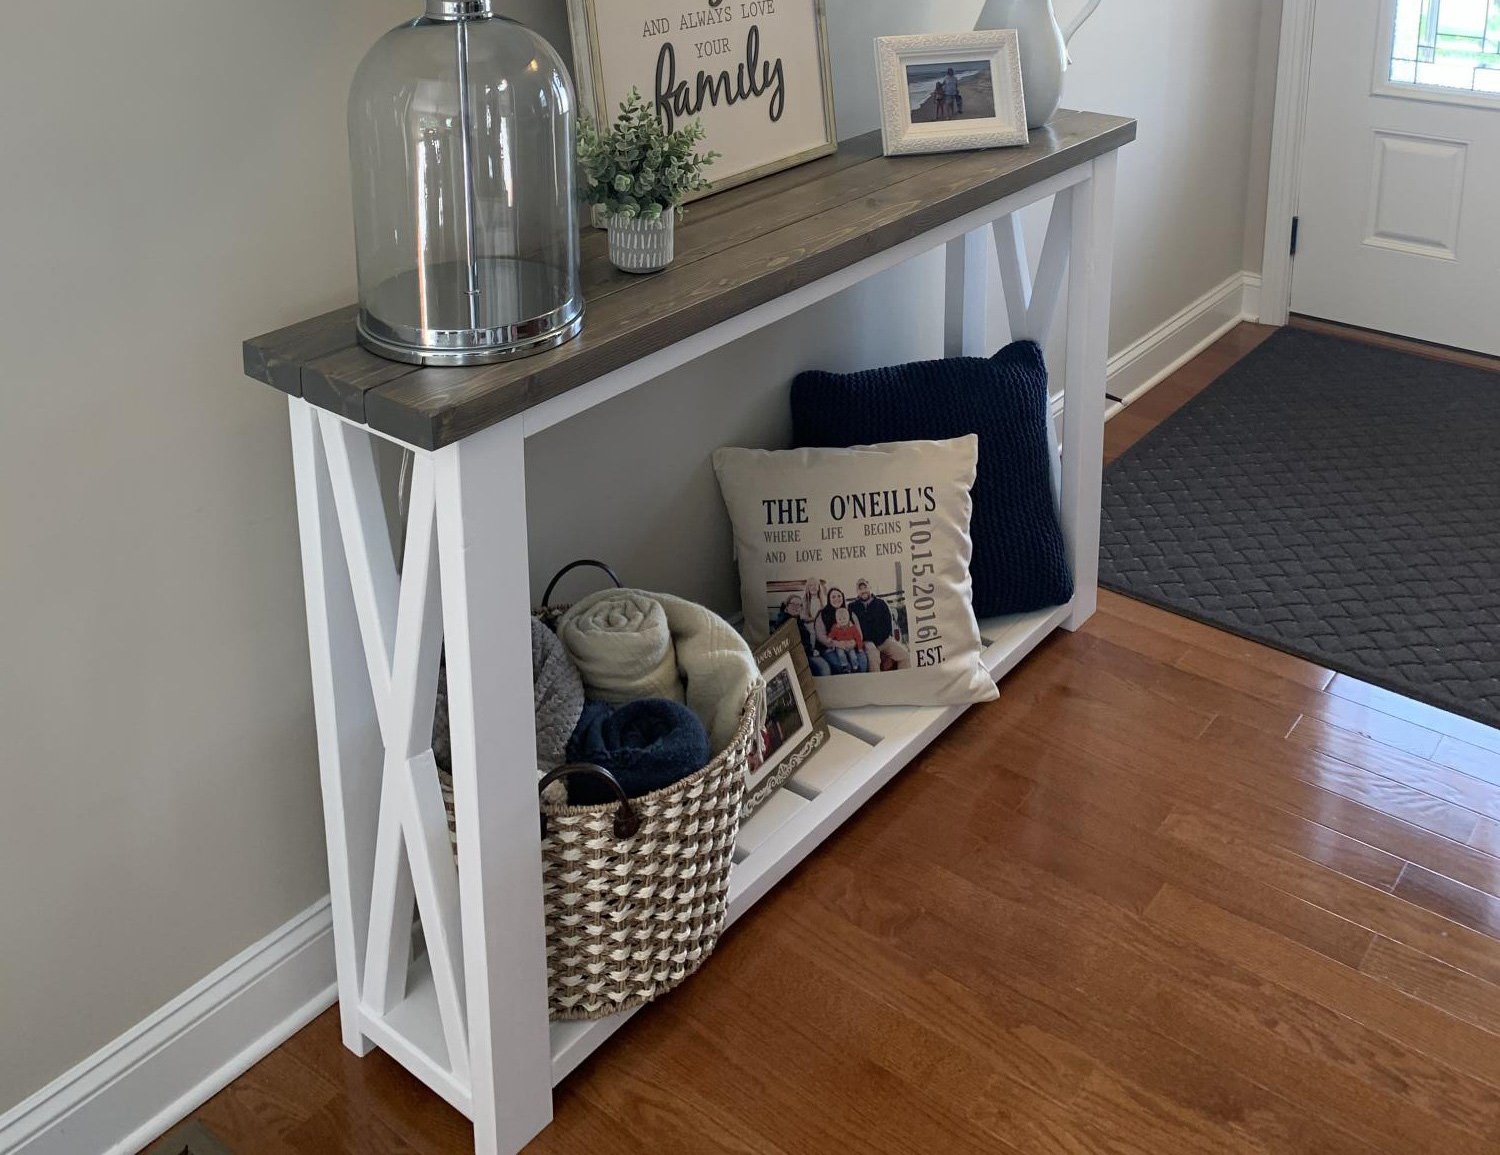
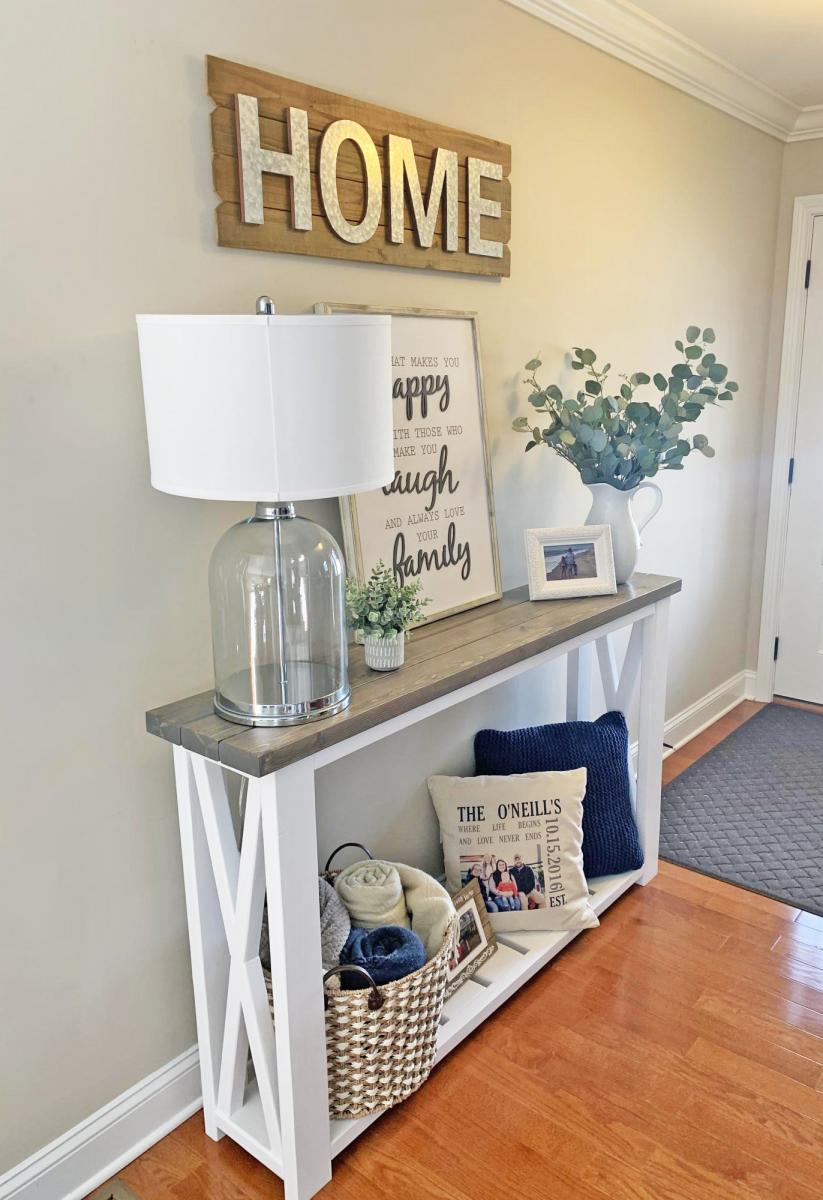
Thanks for the simple plans Anna, they worked out great!. I resized the table to make maximum use of the material, still within the same quantity you specified in your plans. I glued the legs along the lengths of the table, and kept the table top and shelf screwed in, for easy dismantling, if necessary.
Finally I added pop down heavy duty wheels allowing me to move the table (not shown in this pic) easily. When the wheels are not being used they pop up, making the table very stable. The height of the table is about 1/2” lower than the table saw, making it an ideal outfeed table as well.
Great design, and fun build.
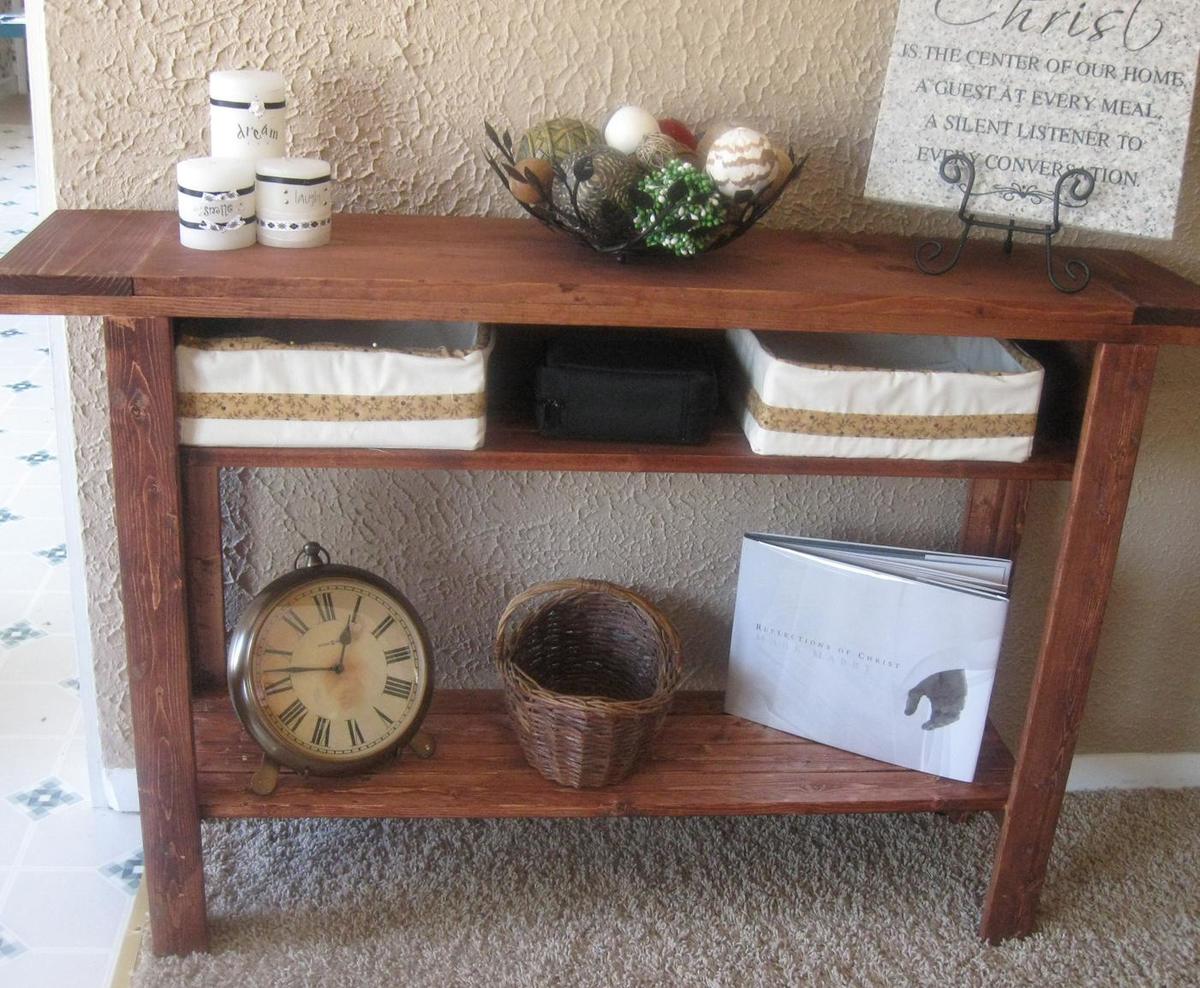
I Modified the plan to eliminate the middle shelf and shortened the length to fit as an entryway table.
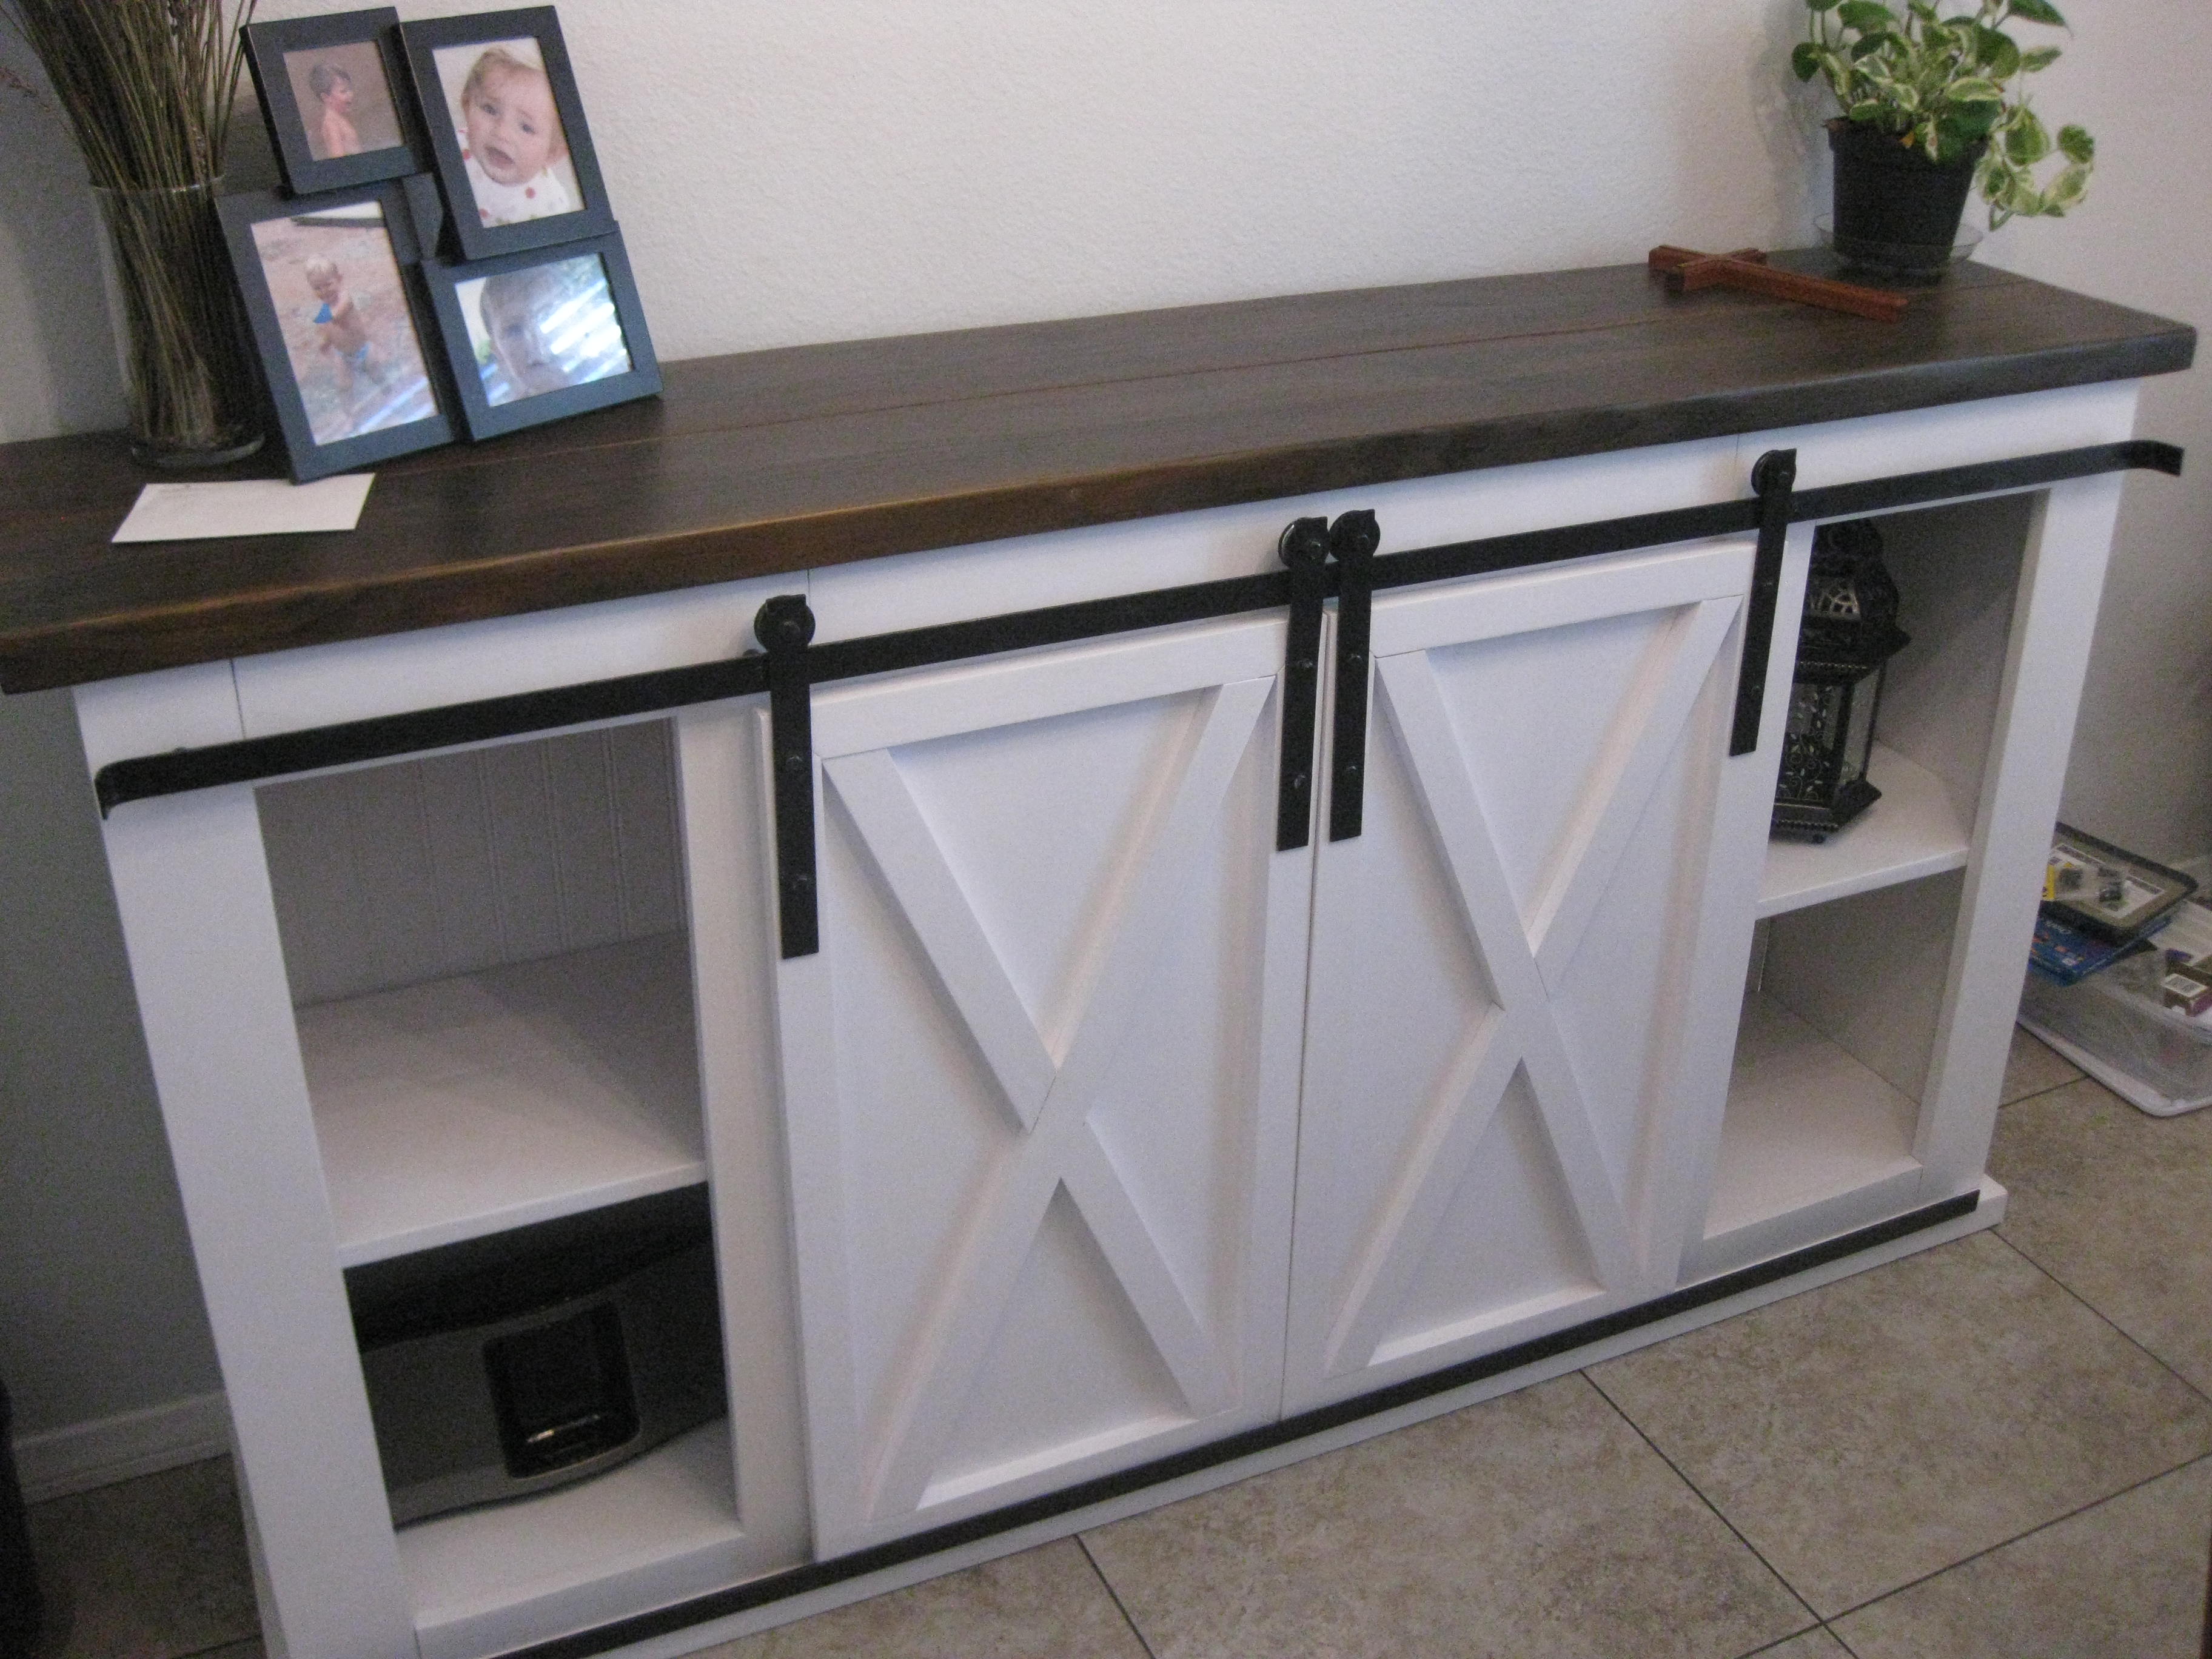
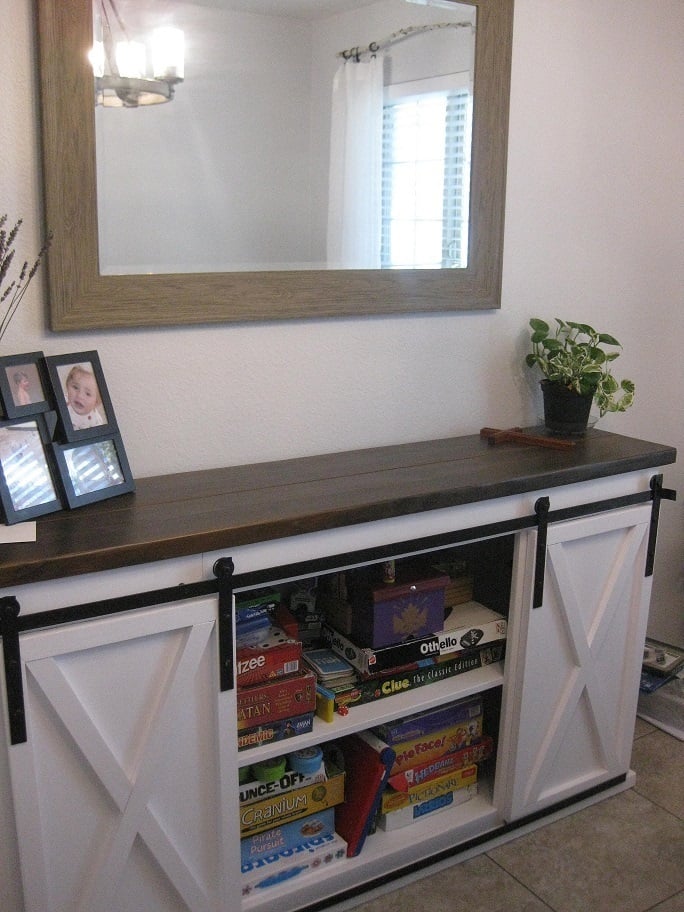
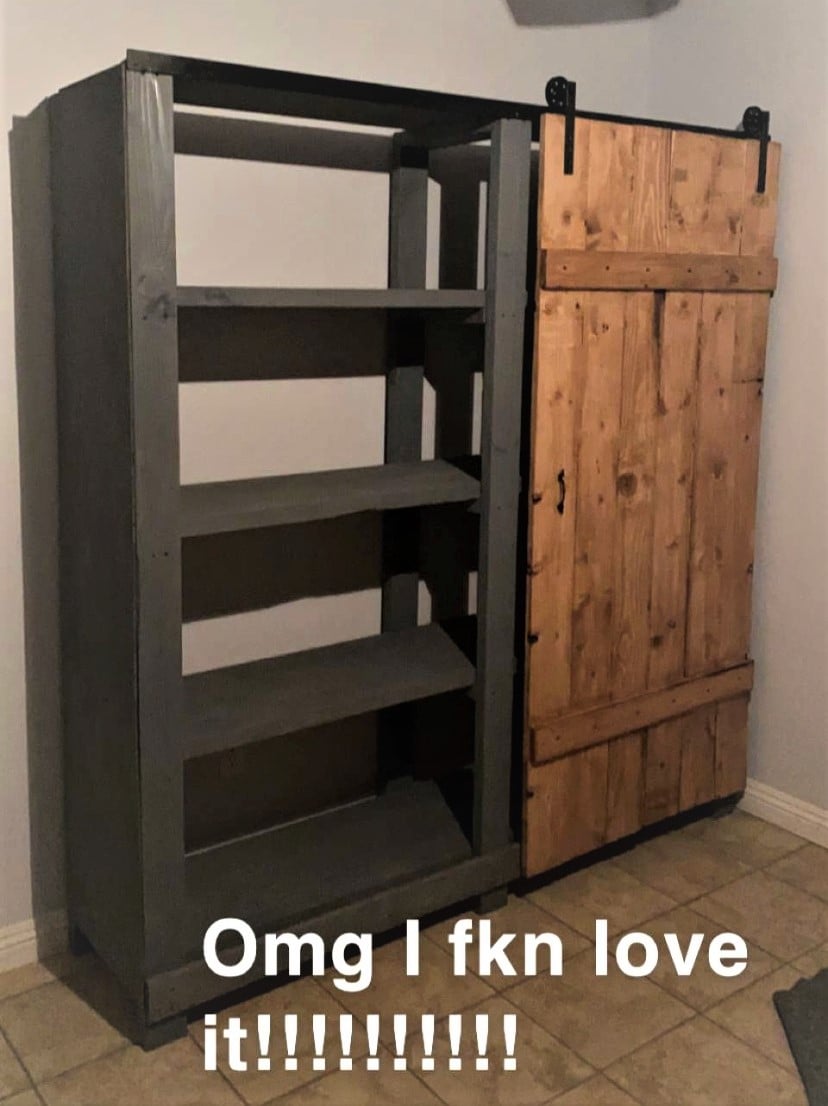
We have very little storage in our house and wanted someplace to store board games. This works great in the dining room. I made the hardware using patio door rollers and used my jigsaw to cut steel and aluminum bars to fit. I hammered the ends of the track in a curve and put a track on the bottom of the cabinet to keep the doors more flush against the cabinet. I spray-painted all the metal and bolts to match. It is 36" high, 13" deep and 63" long. I didn't use the center board in the front because I wanted to accomodate for larger games.

Mon, 04/01/2024 - 01:12
Having a game cabinet is essential for any gaming enthusiast like me. It's where I keep all my favorite board games, card games, and video games neatly organized and ready to play. And if you're into online gaming, check out Duelbits promo codes on http://cs2lords.com/duelbits-promo-codes for some awesome bonuses and rewards. It improved my gaming experience and I recommend it to you!
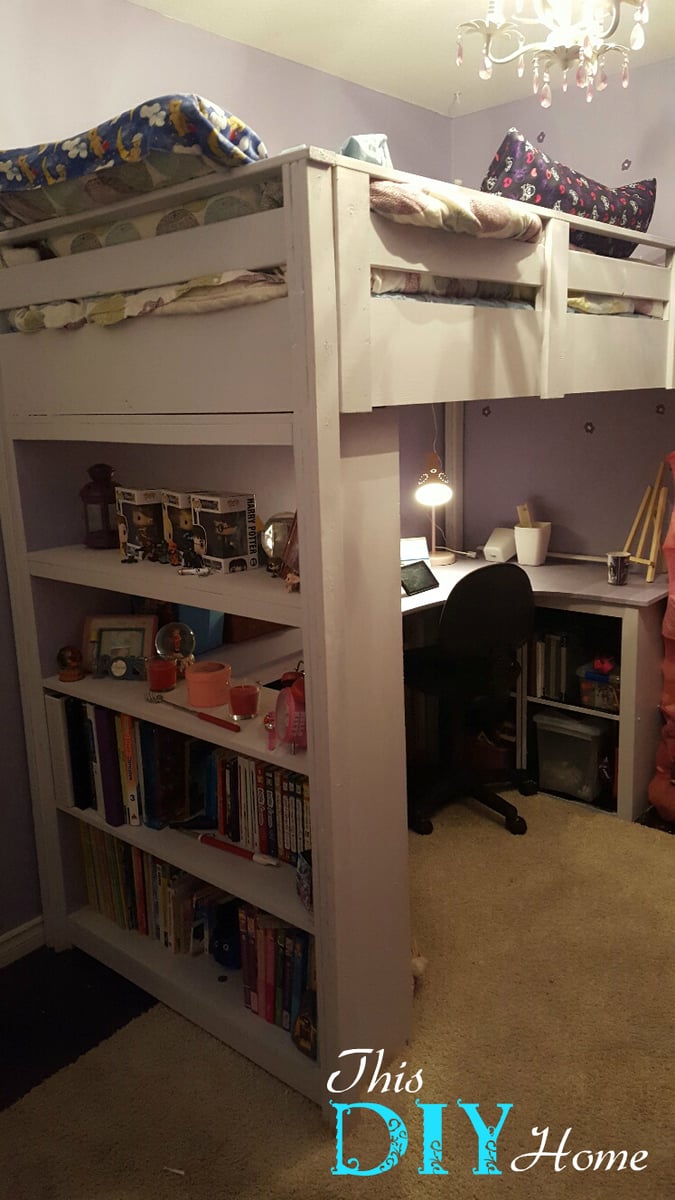
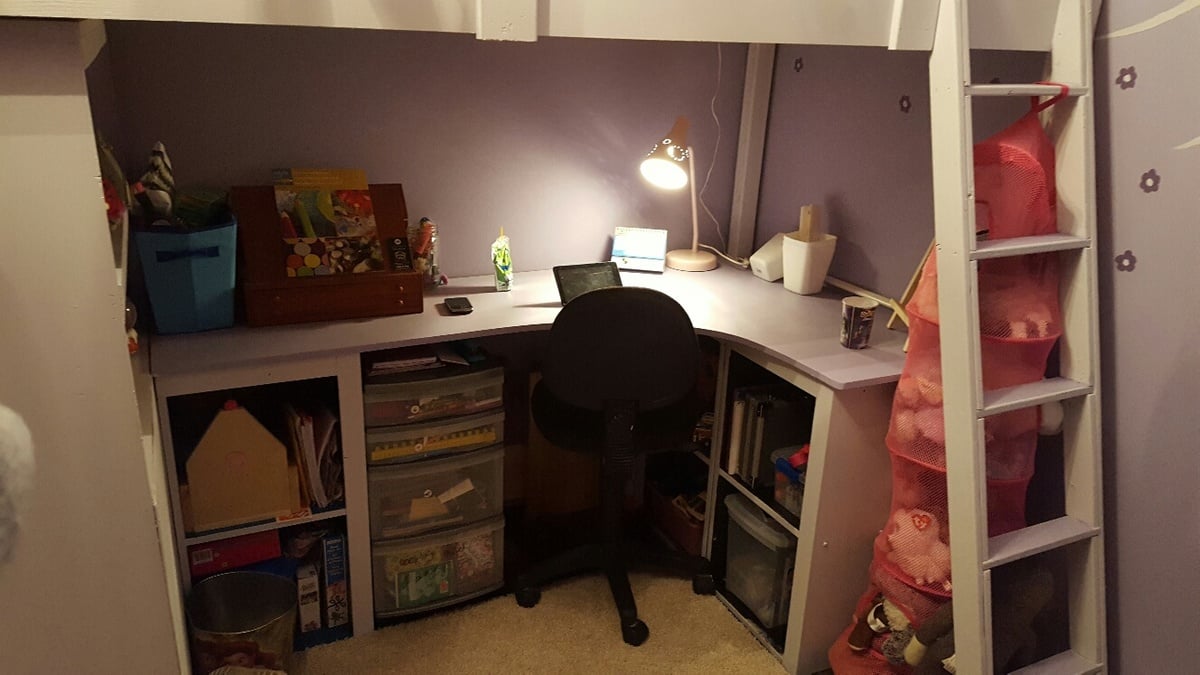
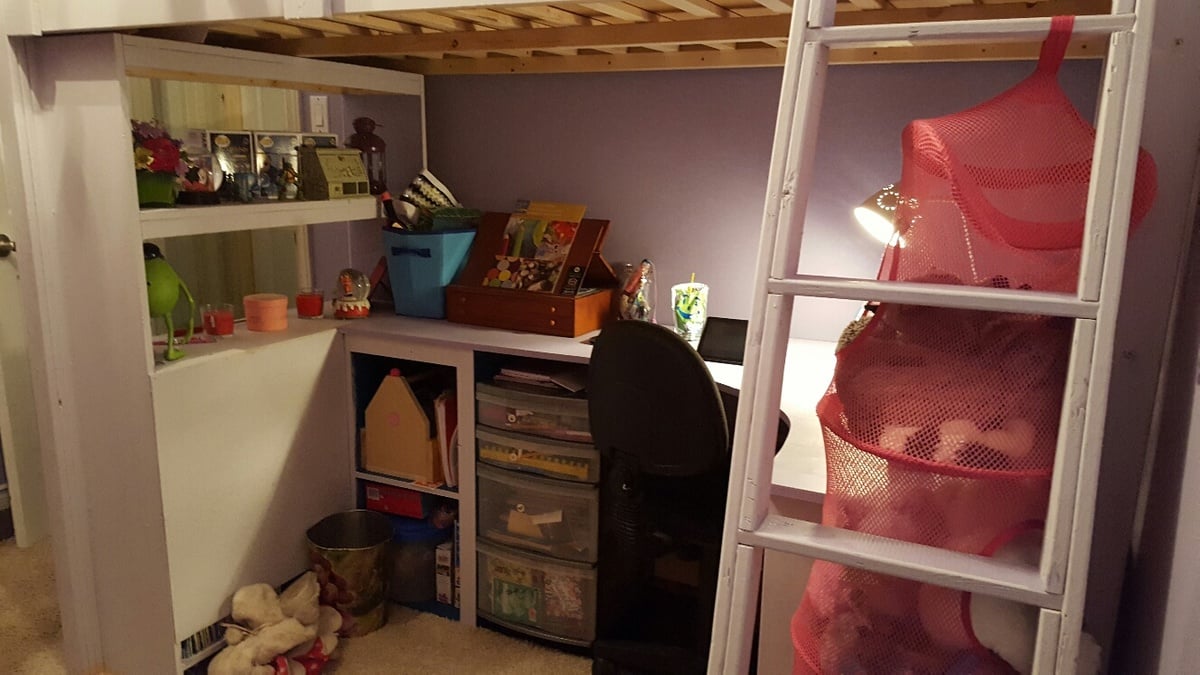
Created but Modified from the plans found on here, my daughter has a great new bed. This bed saved a ton of space in her very small room. PLUS it allowed her to have an area to do her homework and all the art projects she does! Very easy build. Took a day to build and another to paint.
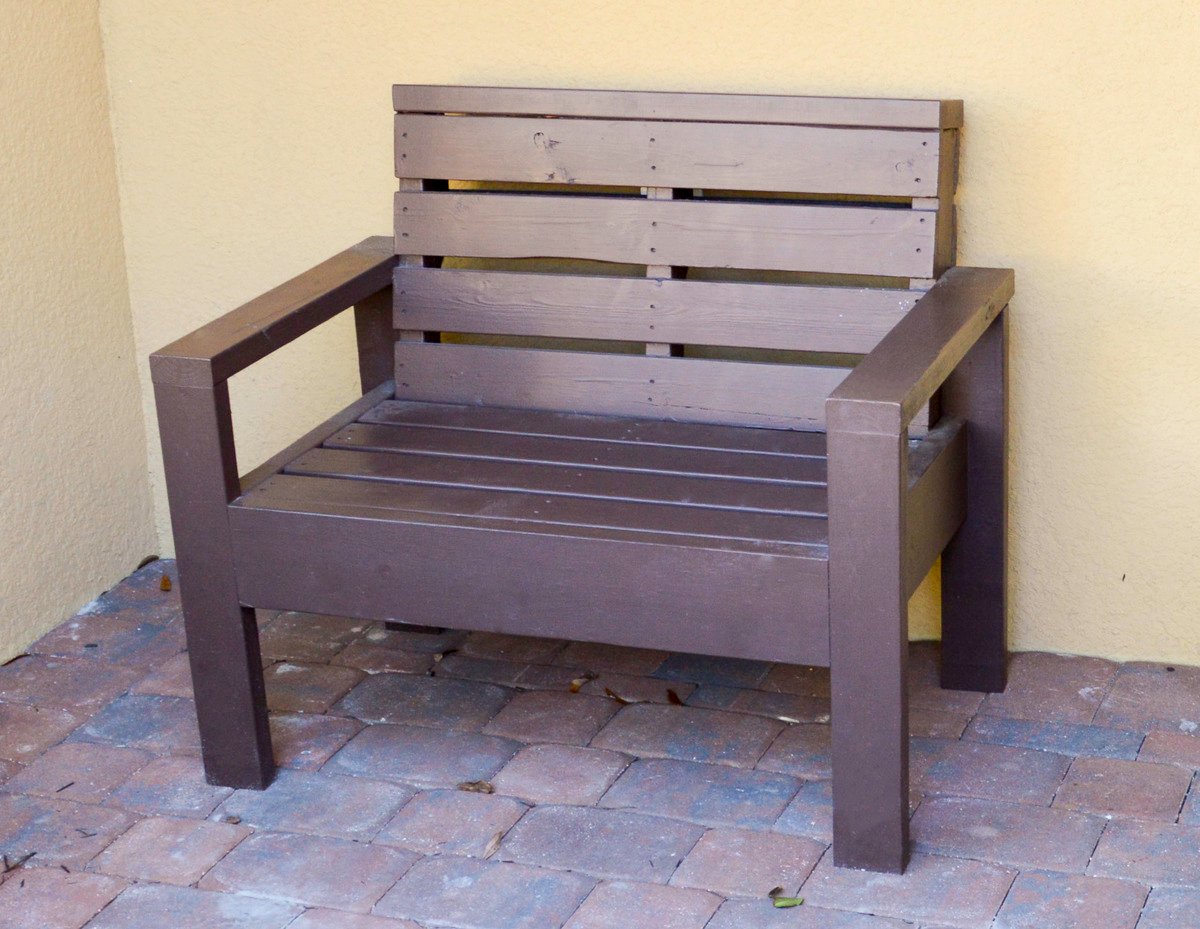
A friend gave me a pallet that I wanted to make into an outdoor bench. I found Ana’s plans for a simple outdoor loveseat and they inspired the frame for the bench. To make the bench I cut the pallet in half and then I adjusted Ana’s plans to make the frame to fit around the pallet.
The pallet was free and I used scrap wood to build the frame so my only cost for this project was paint.

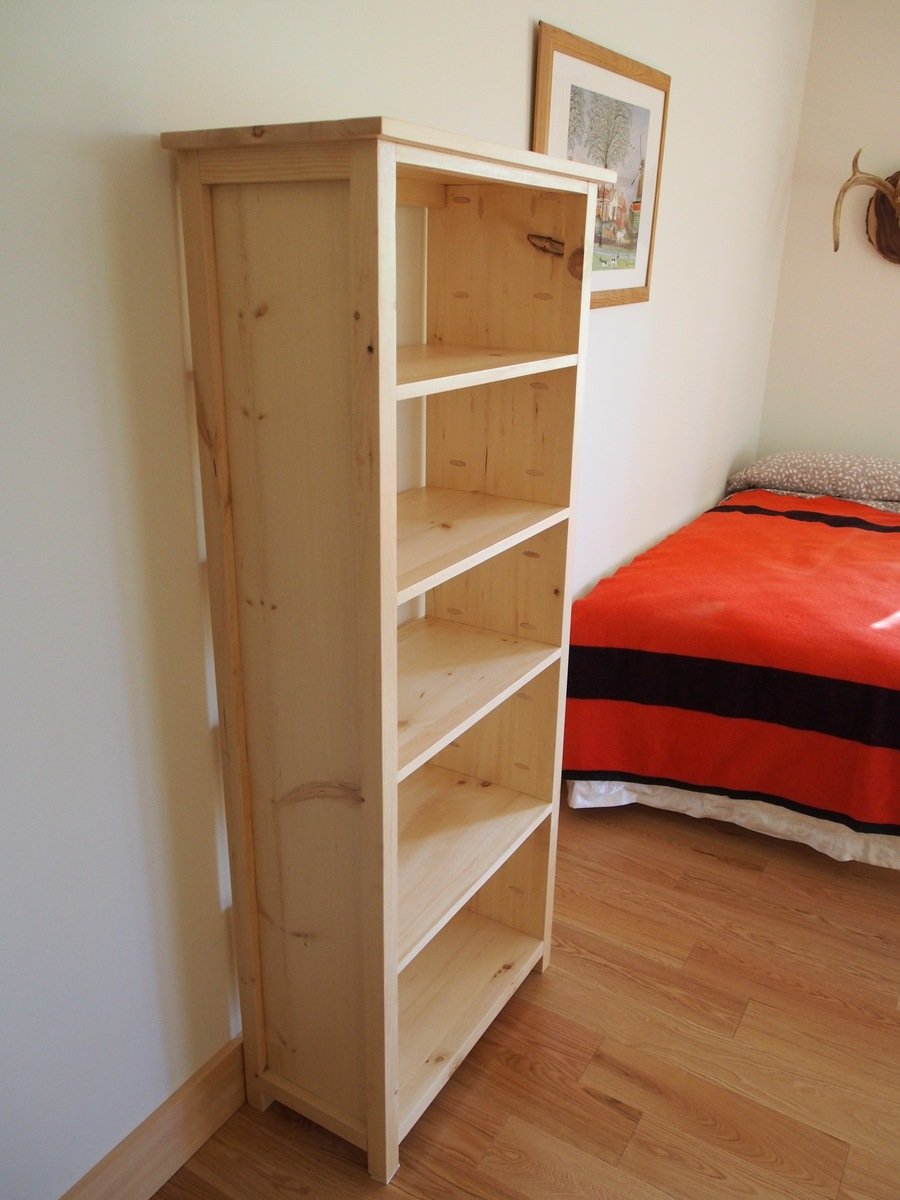
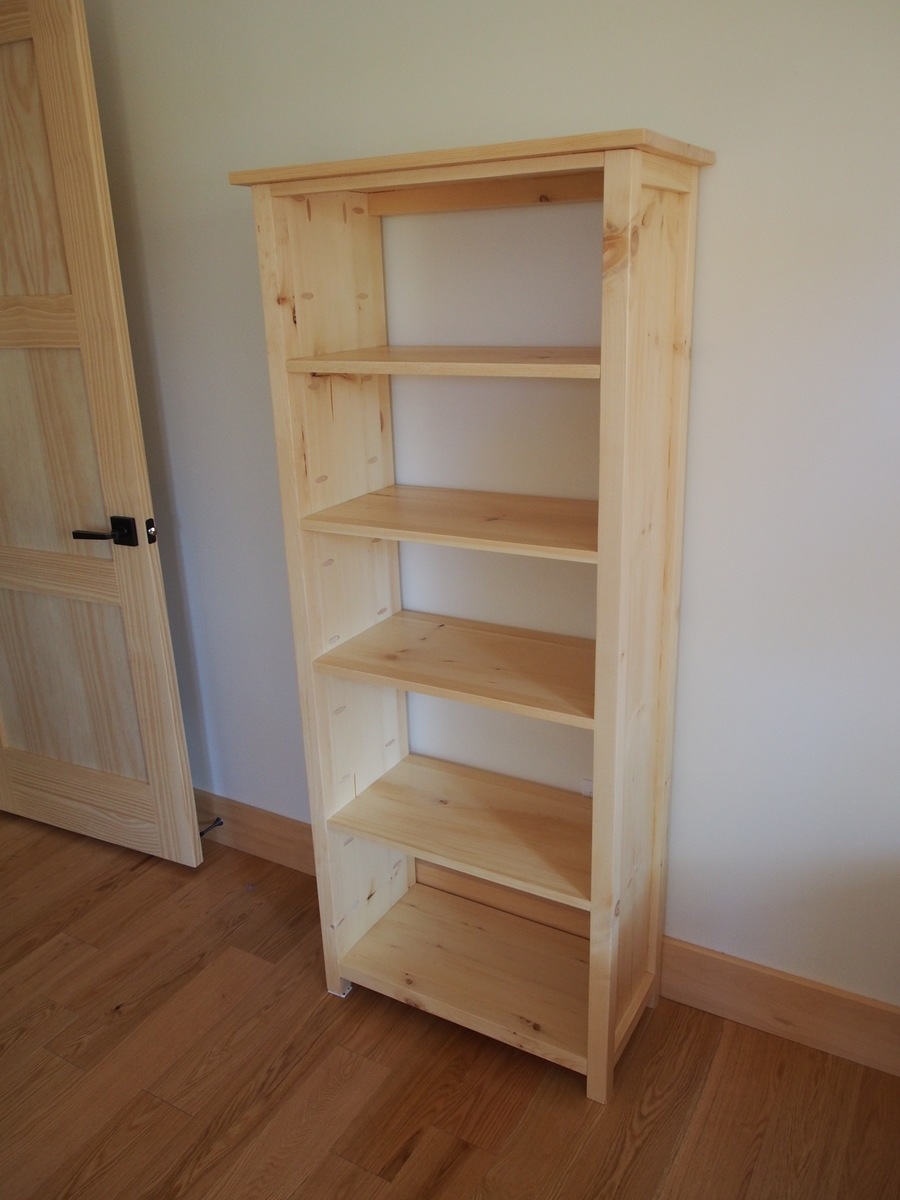
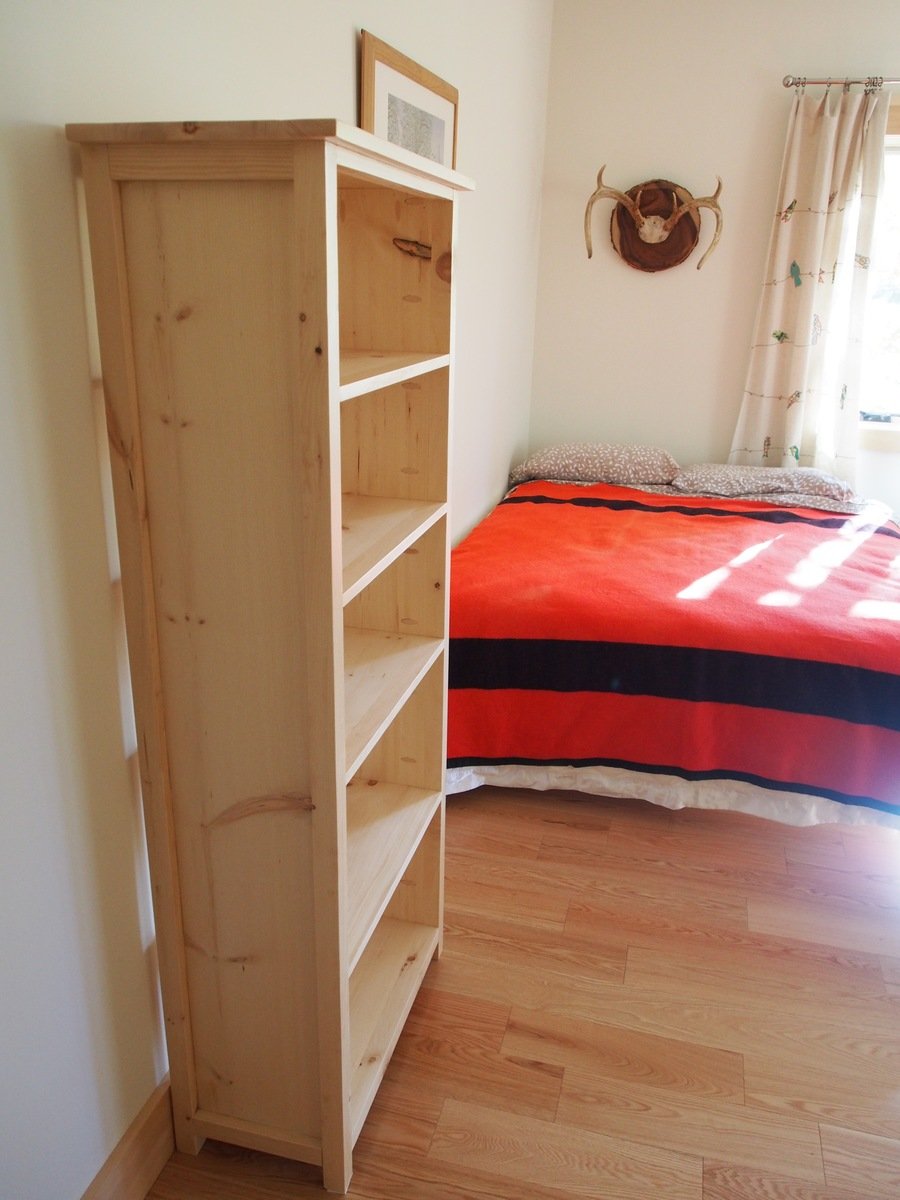
I used 1 x 10s to make the bookcase a little shallower, and left the back open. Thanks for the great plan.
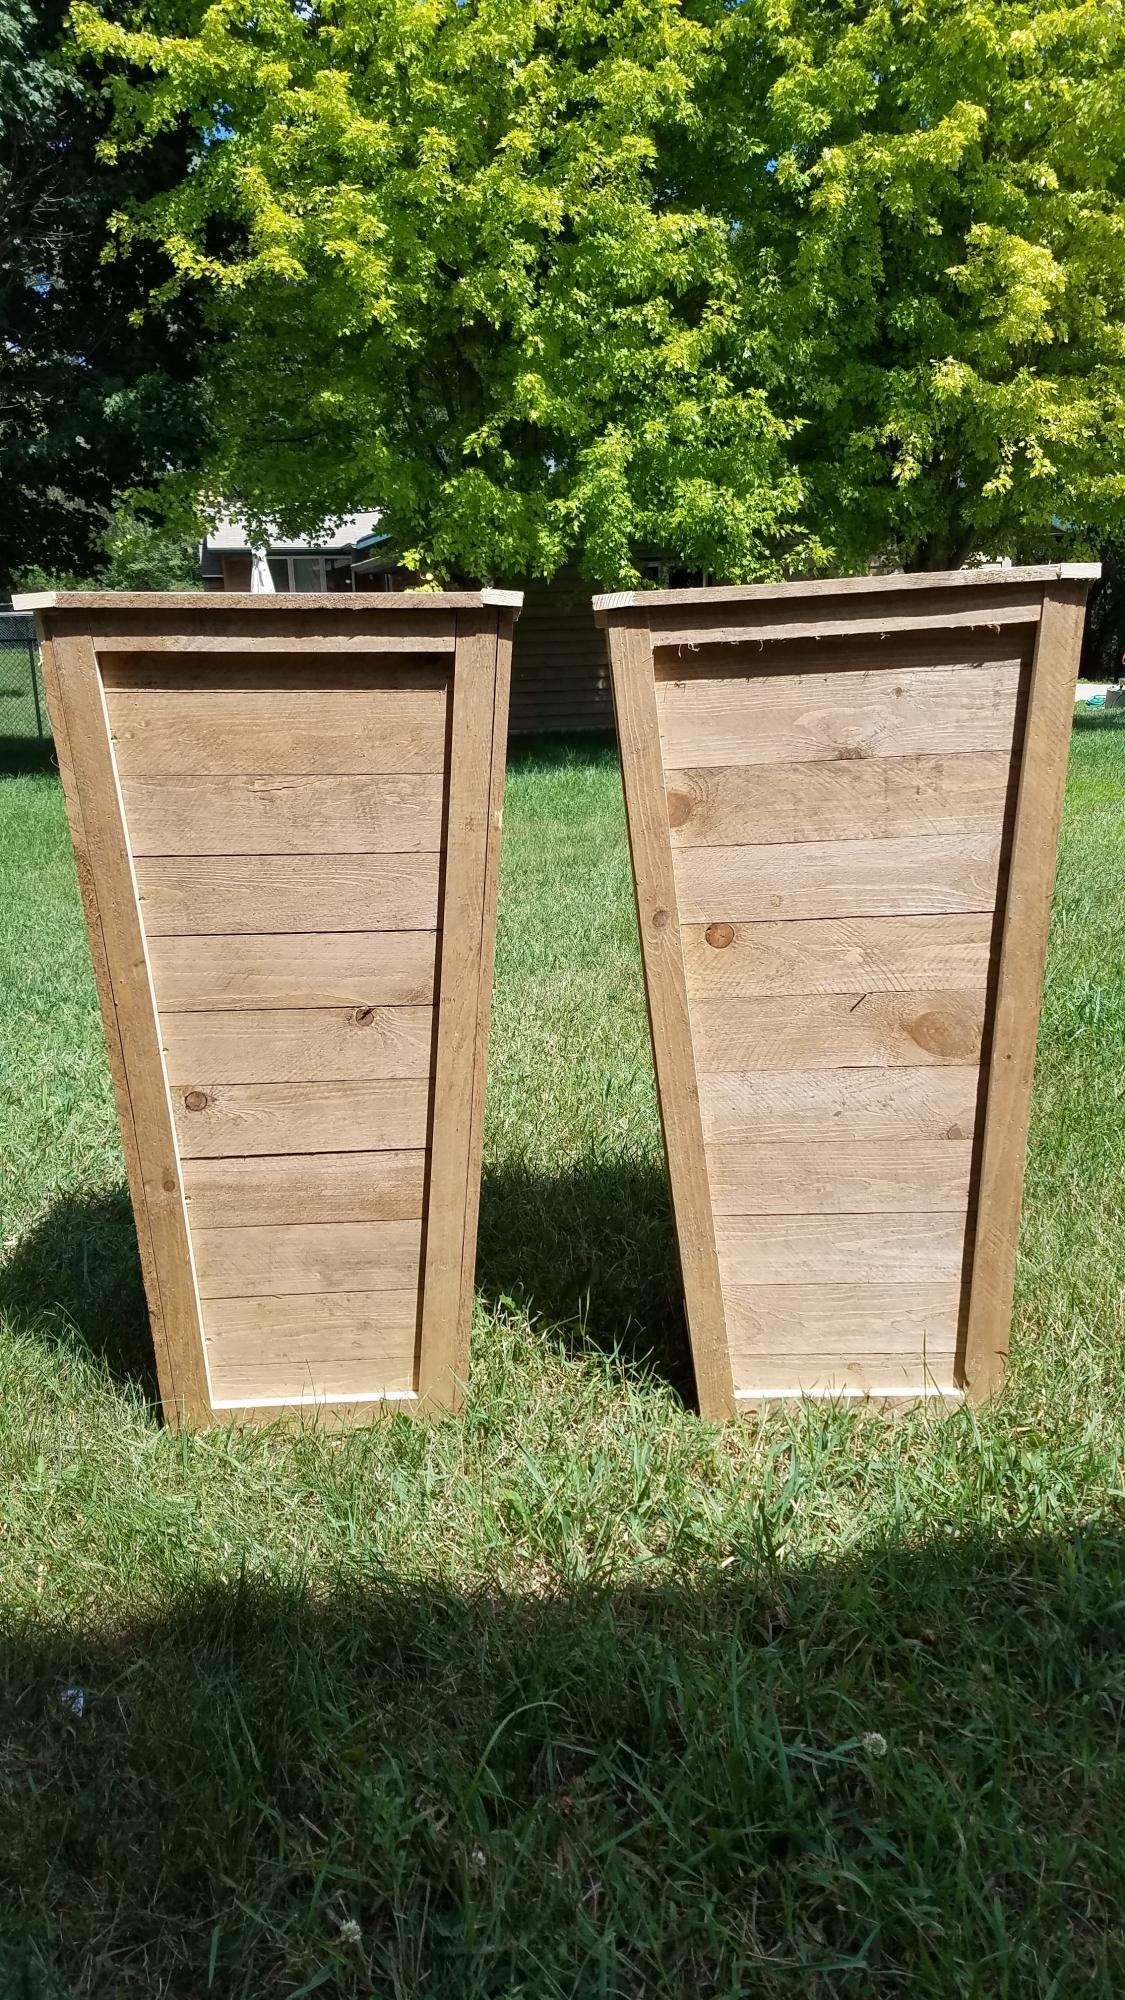
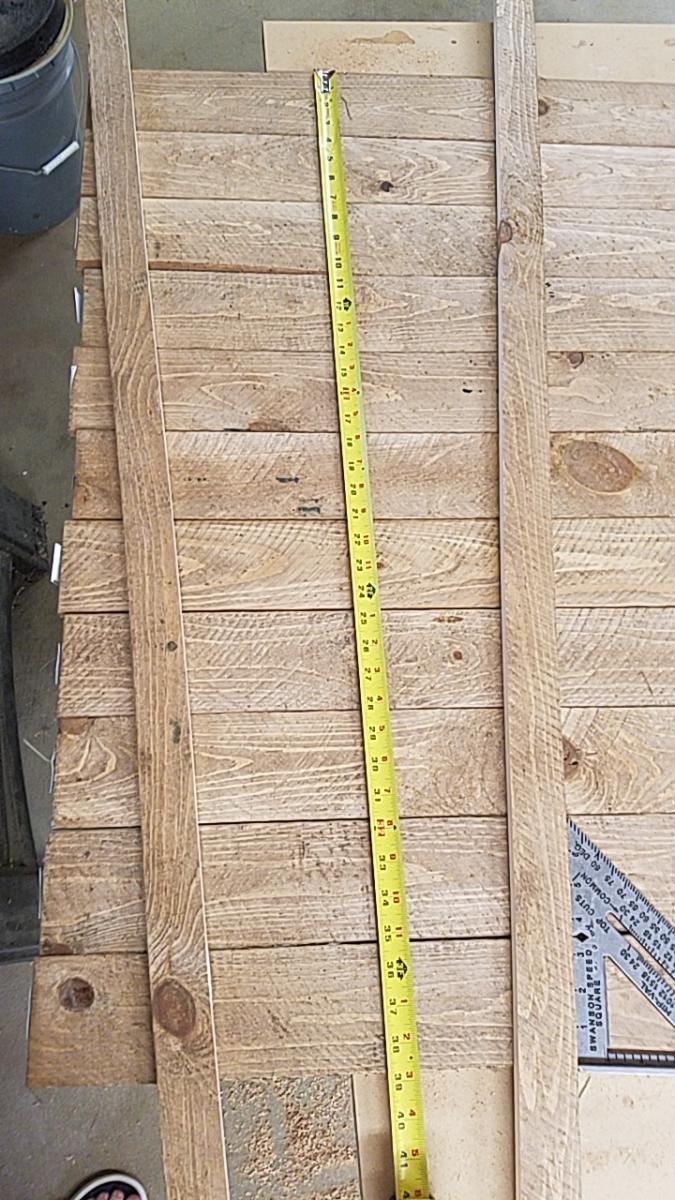
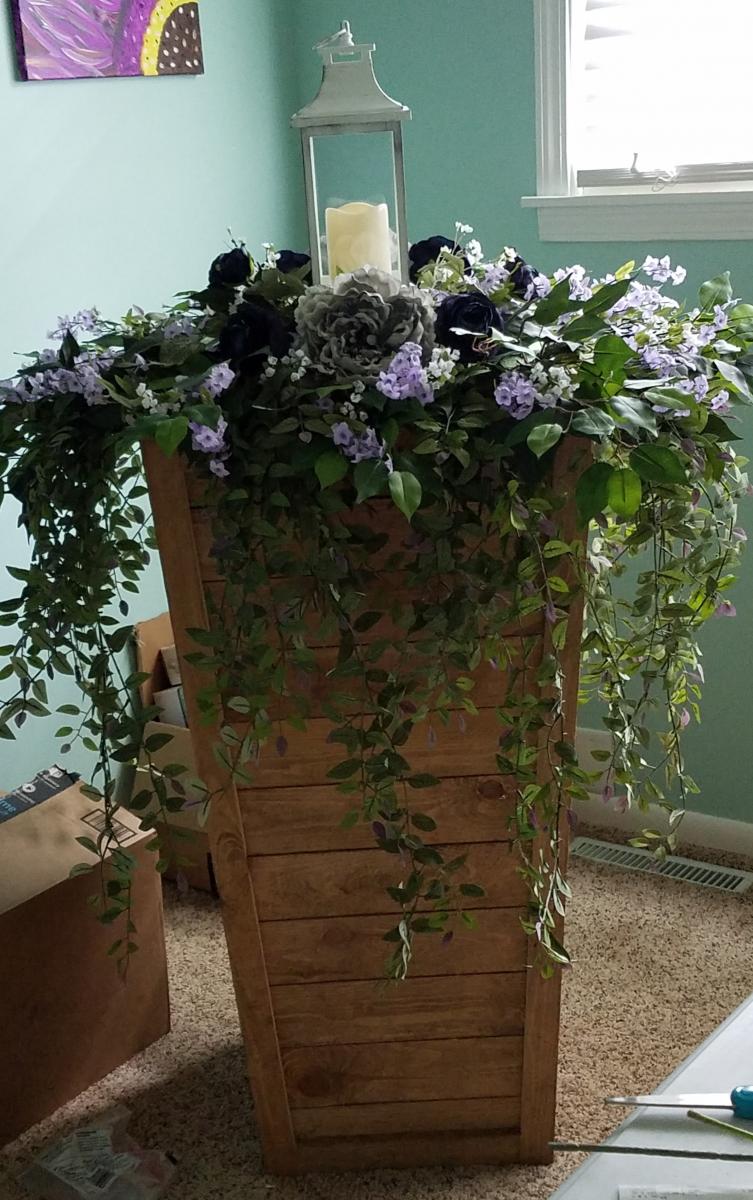
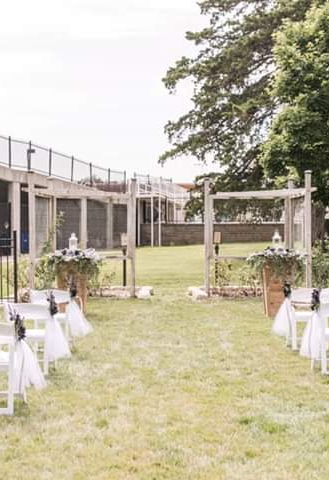
Made the planters to hold flowers for a small garden wedding. Used 3-1/2" wide fence boards as my HD was out of standard 5-1/2" boards. Used 11 boards for finished height of 38" top was 18" wide, bottom 12-1/2" using a 4° angle. Ripped fence boards to size to use in place of 1x2/1x3 boards. Added center trim as on another brag post, as well as, framed the top to finish off the planter.
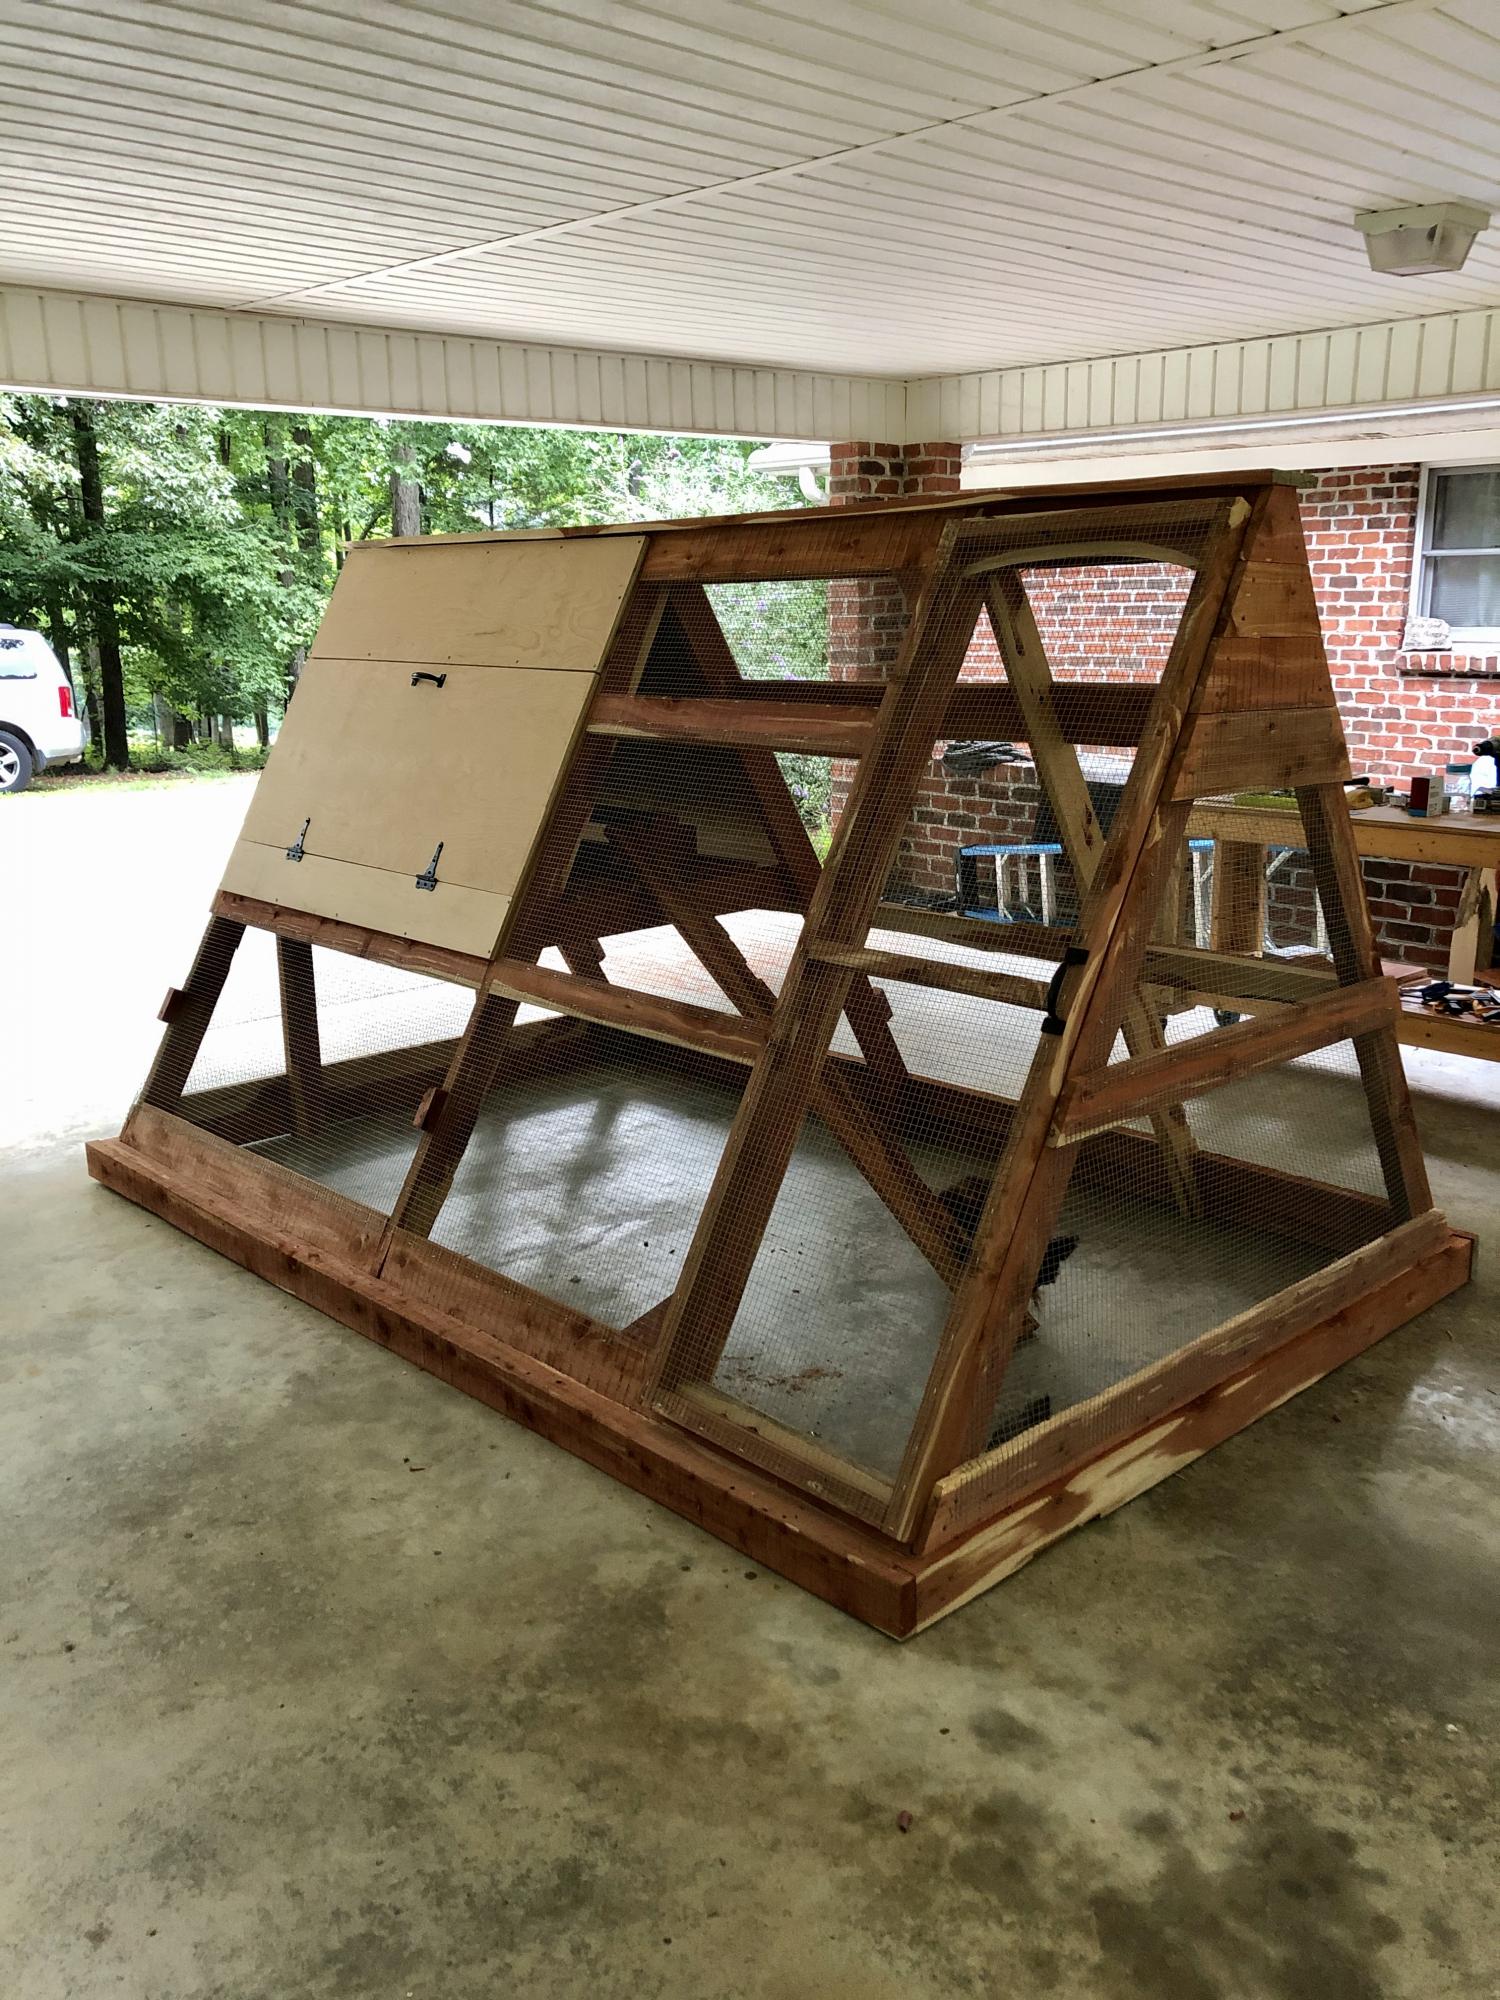
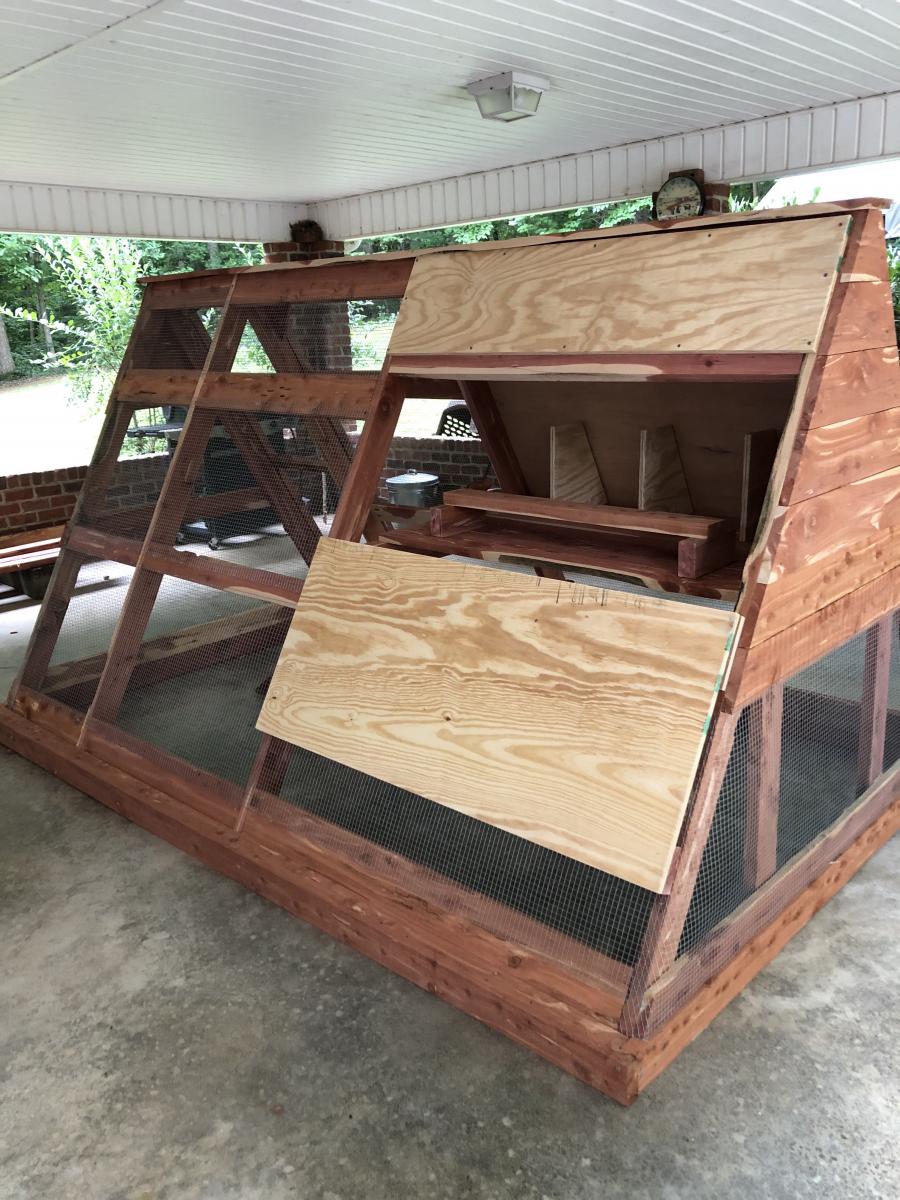
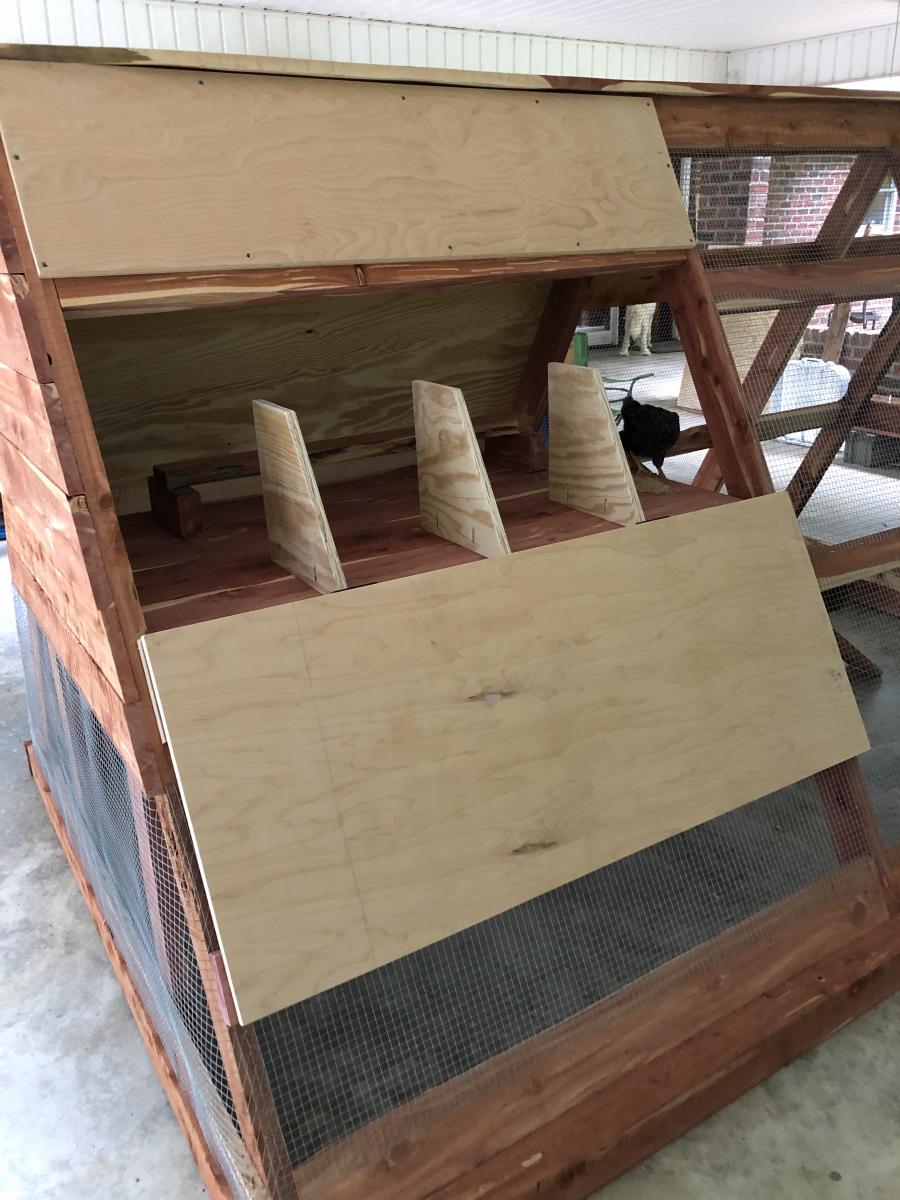
This was my biggest build yet and these plans along with being able to see a few brag posts with modicifactions made this project less intimidating. I extended the coop in order to add a walk in door. The drop down doors on both sides will give plenty of access and help with cleaning. I've added door latches to all the doors since putting it in place. My dad provided the cedar so that greatly reduced my costs. This project took about six days to complete. The fun part was getting it out of my carport : ) This was built for my daughter's chickens and she is thrilled with it. So am I! Thanks for the plans Ana!

Modified the design to allow me to roll lawnmower directly in the end. Fun project.

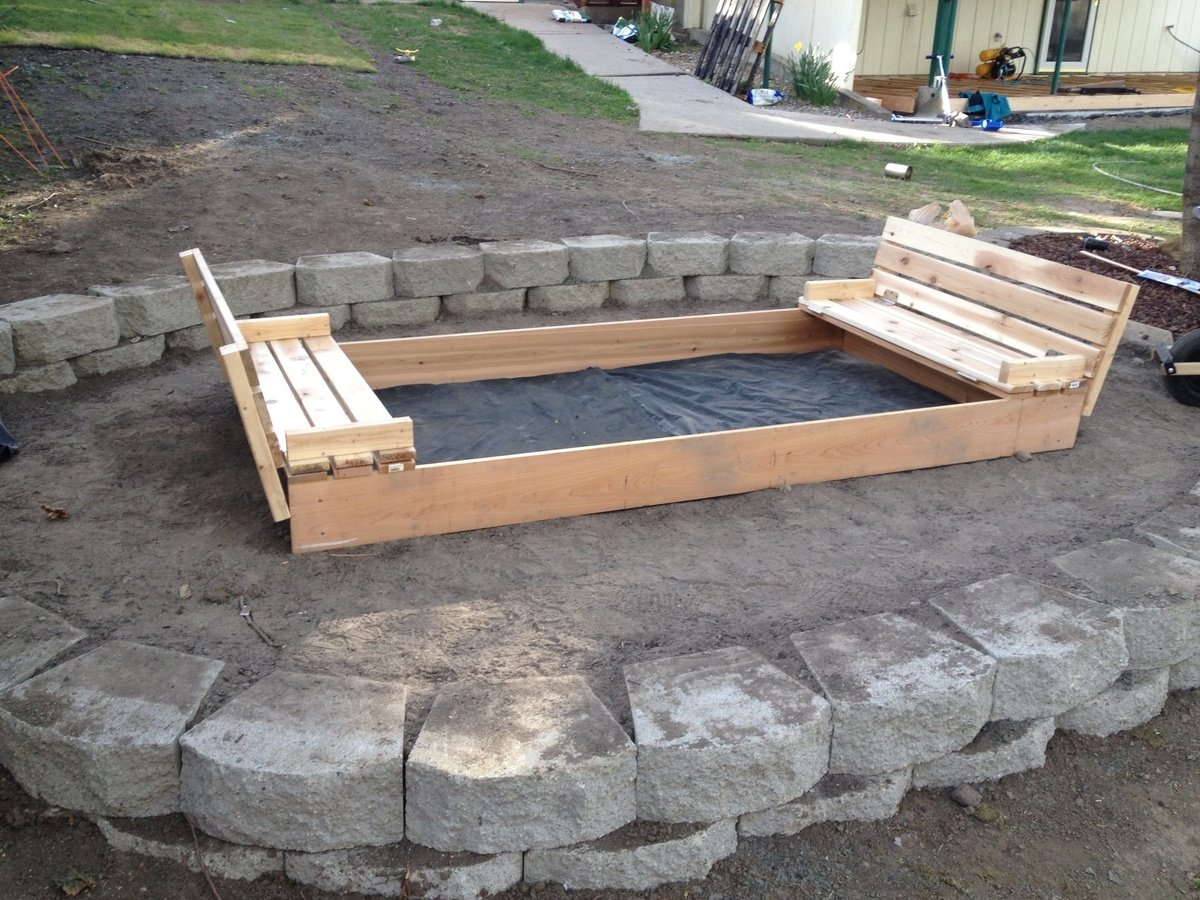
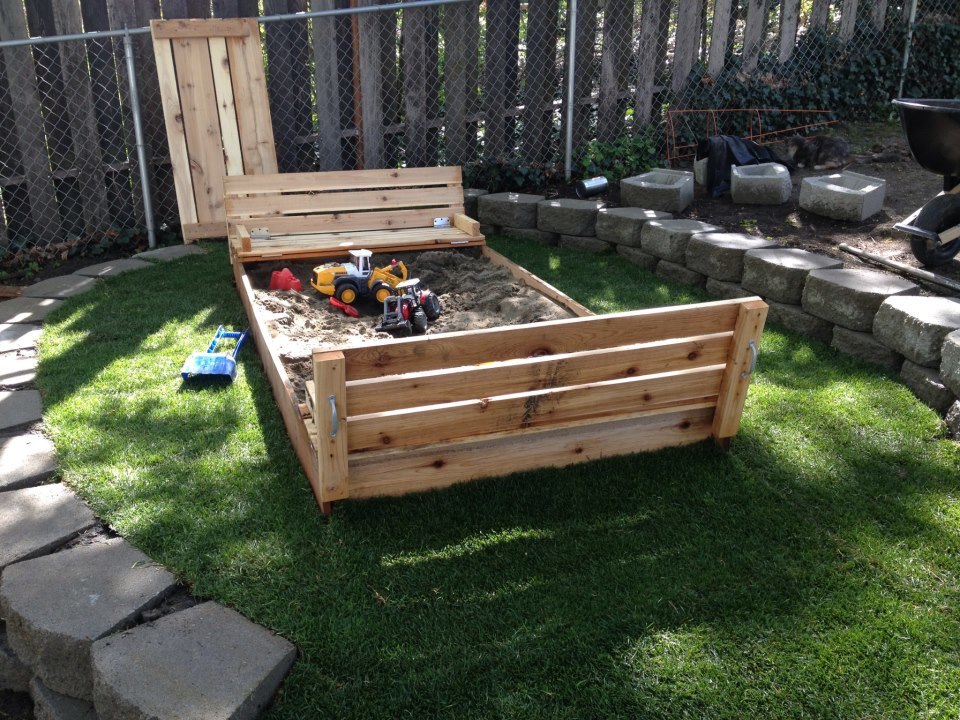
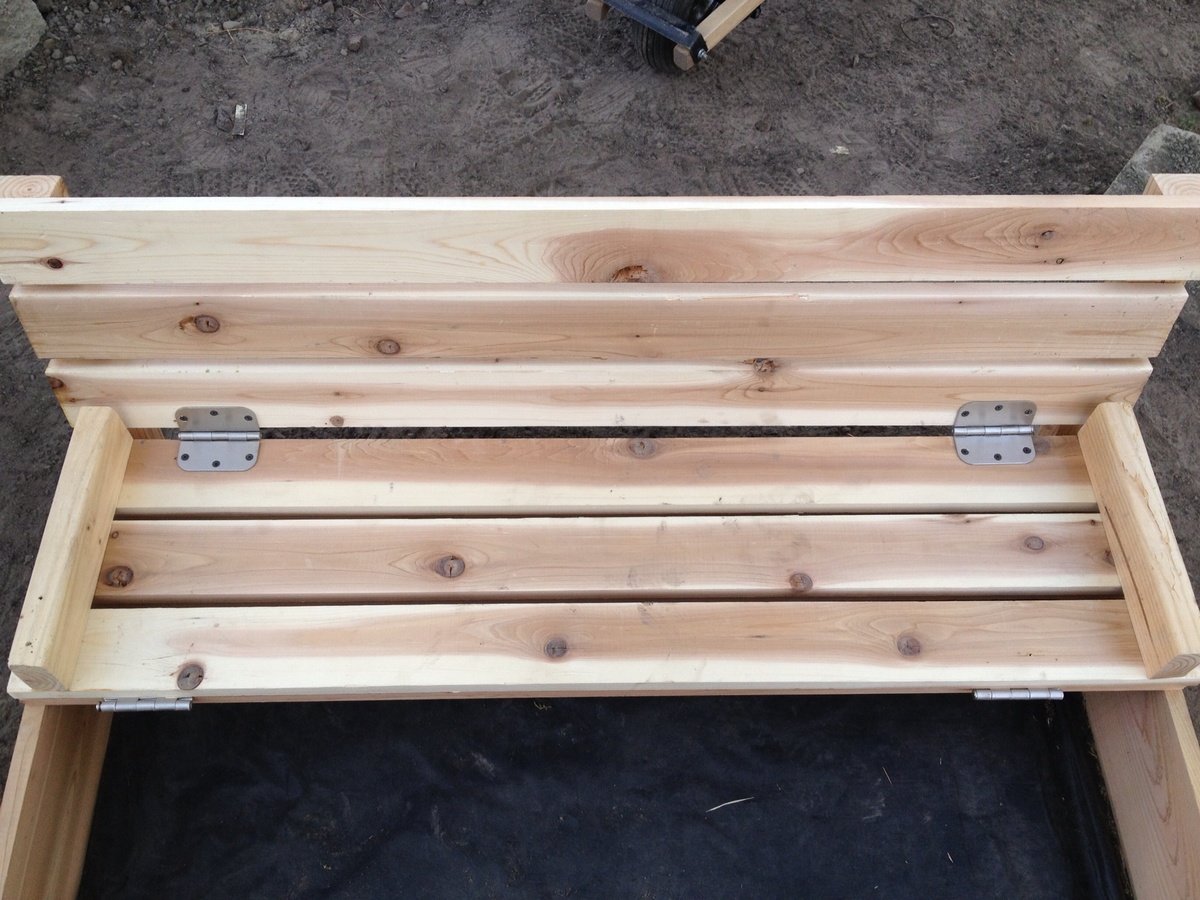
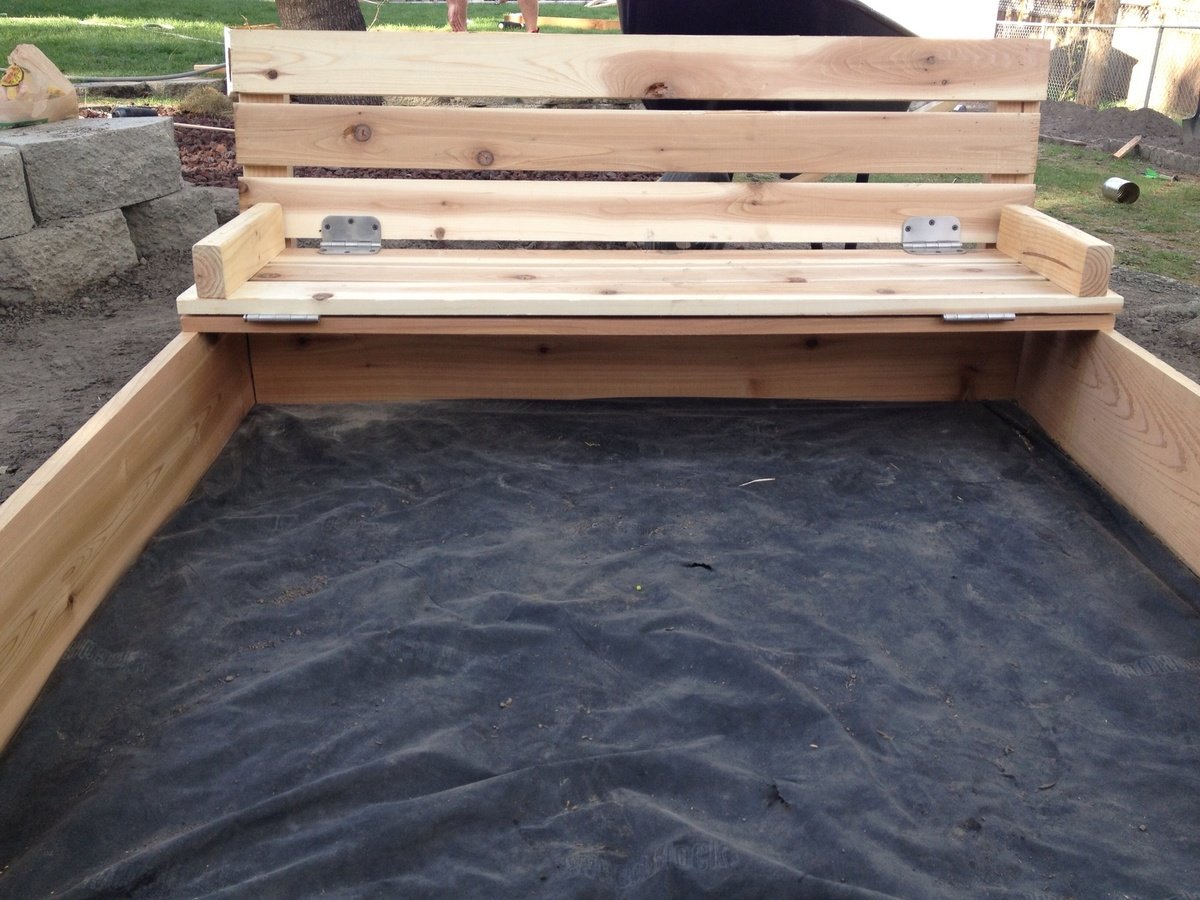
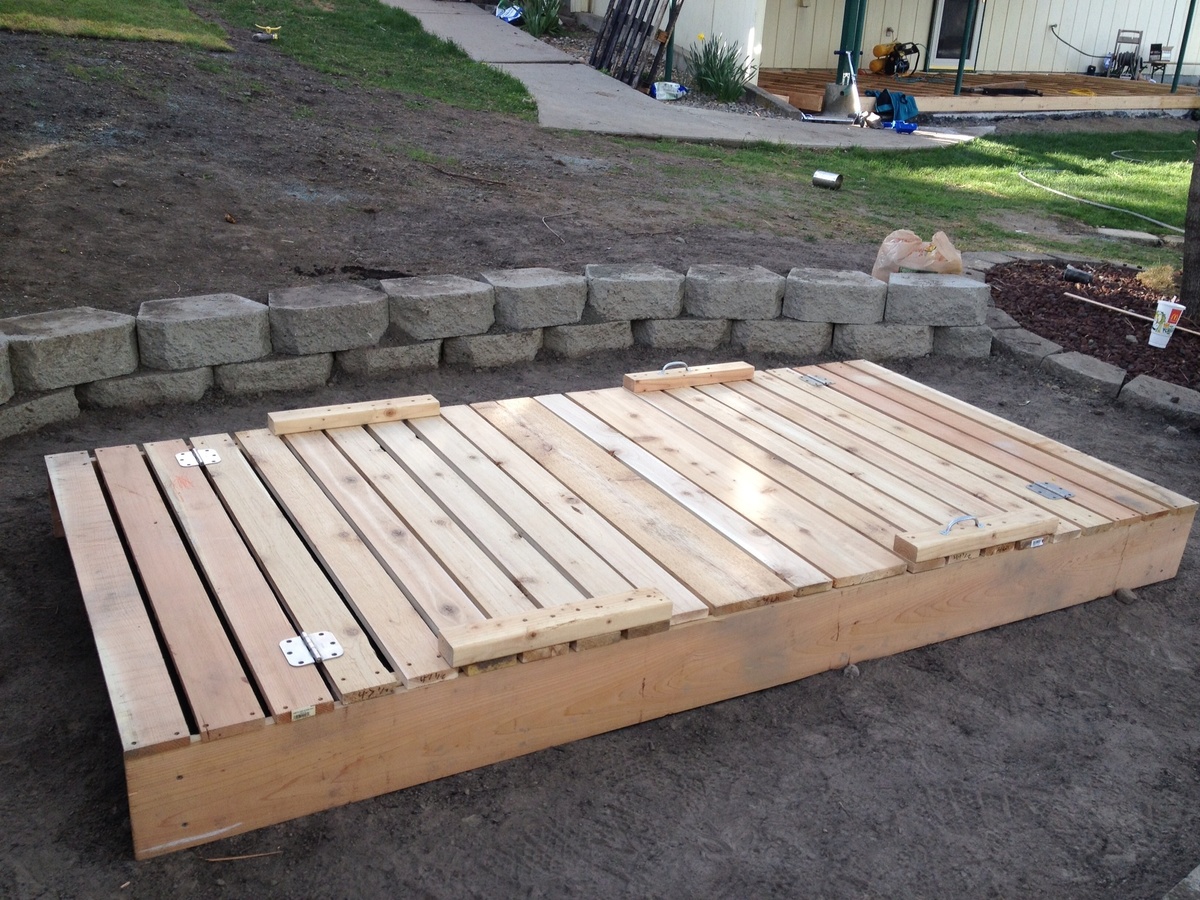
This was my first EVER wood working project.
With that being said, it took me more than just an afternoon.
I used cedar, and all the materials on the cut list had to be sanded , since I didn't like the roughness of the cedar.
I also made the box 4x8. I didn't take into account that that would require a minimum of 48 inches for the top planks. So, some of my top planks are shorter.
I also wished I had a little more instruction from which side to screw the screws in. May sound a little needy for some of you, but I never did anything with wood before. The instructions simply read attach top planks to arm rests (or something int that manner) and I wish it would have told me from which side to screw in (or give me a picture). Looking at some of the brag posts helped a lot.
Because its larger size, I decided to make the seats 3 top planks wide (and also the back rest) and made another middle cover piece to bridge the additional gap when both seats are folded down.
Also, the cedar was VERY expensive, and all the screws, hinges, and handles almost cost me as much as the wood.
The sand to fill the box ran us another $80 (for good plays and), but that was because we made it so big.
All in all, a rather pricey sandbox, but worth it because of the large custom sizes, and the cute little seats.
Pictures show the sandbox without sand, and with some of the handles still missing. I also still need to fill the holes.
Will add a picture of finished box filled with sand when it is available.
I added the bottom shelf by using (4) 1x3's. I also swapped out the 1x4 back for a 1x6 to give the top shelf more height. Lots more details on my blog.
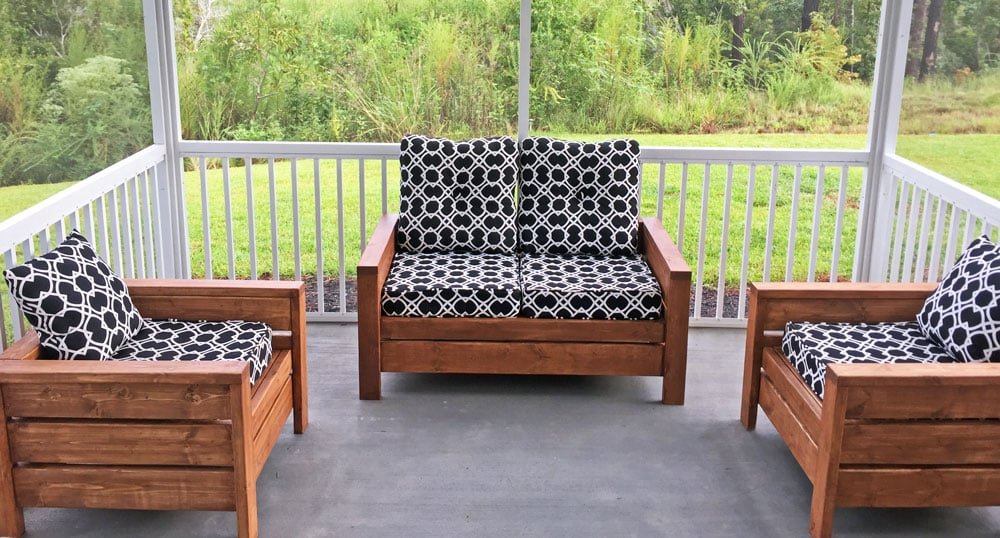
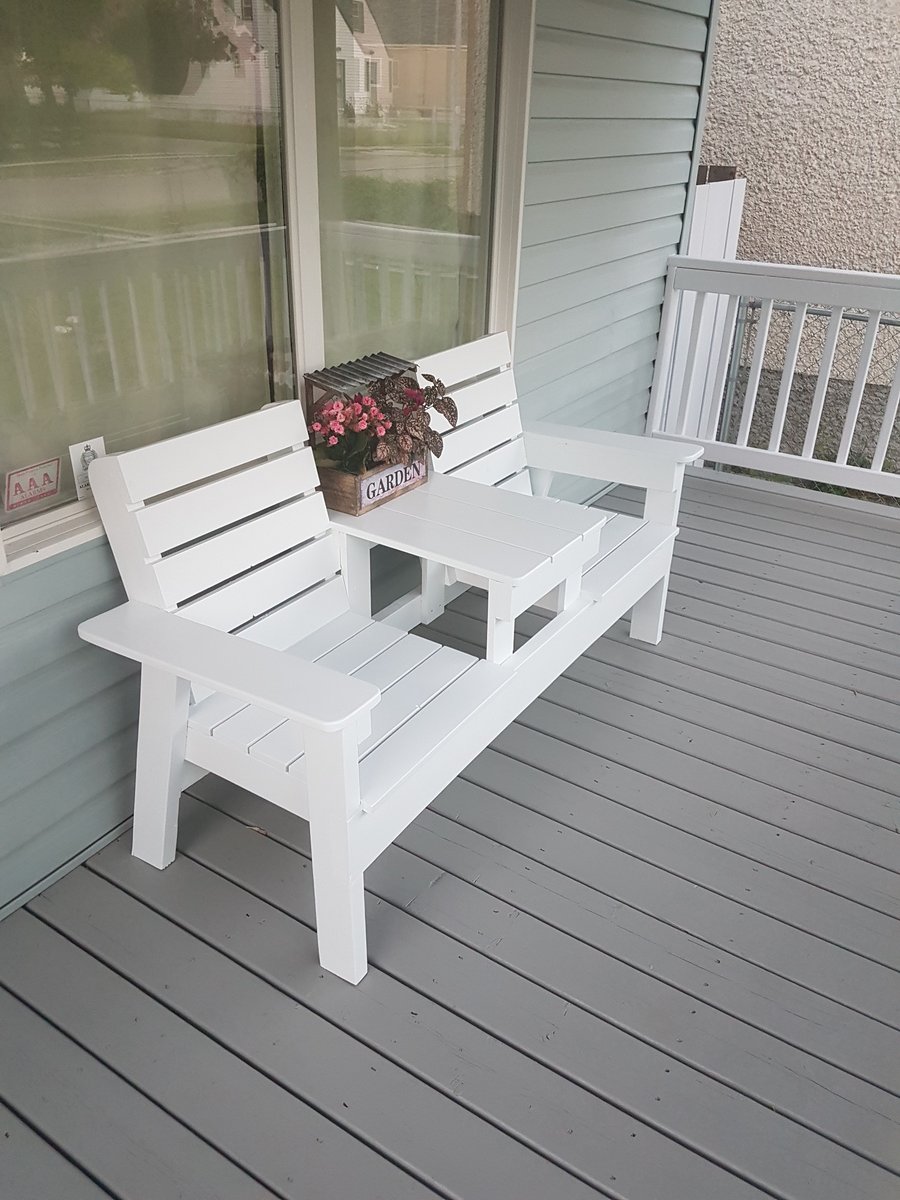
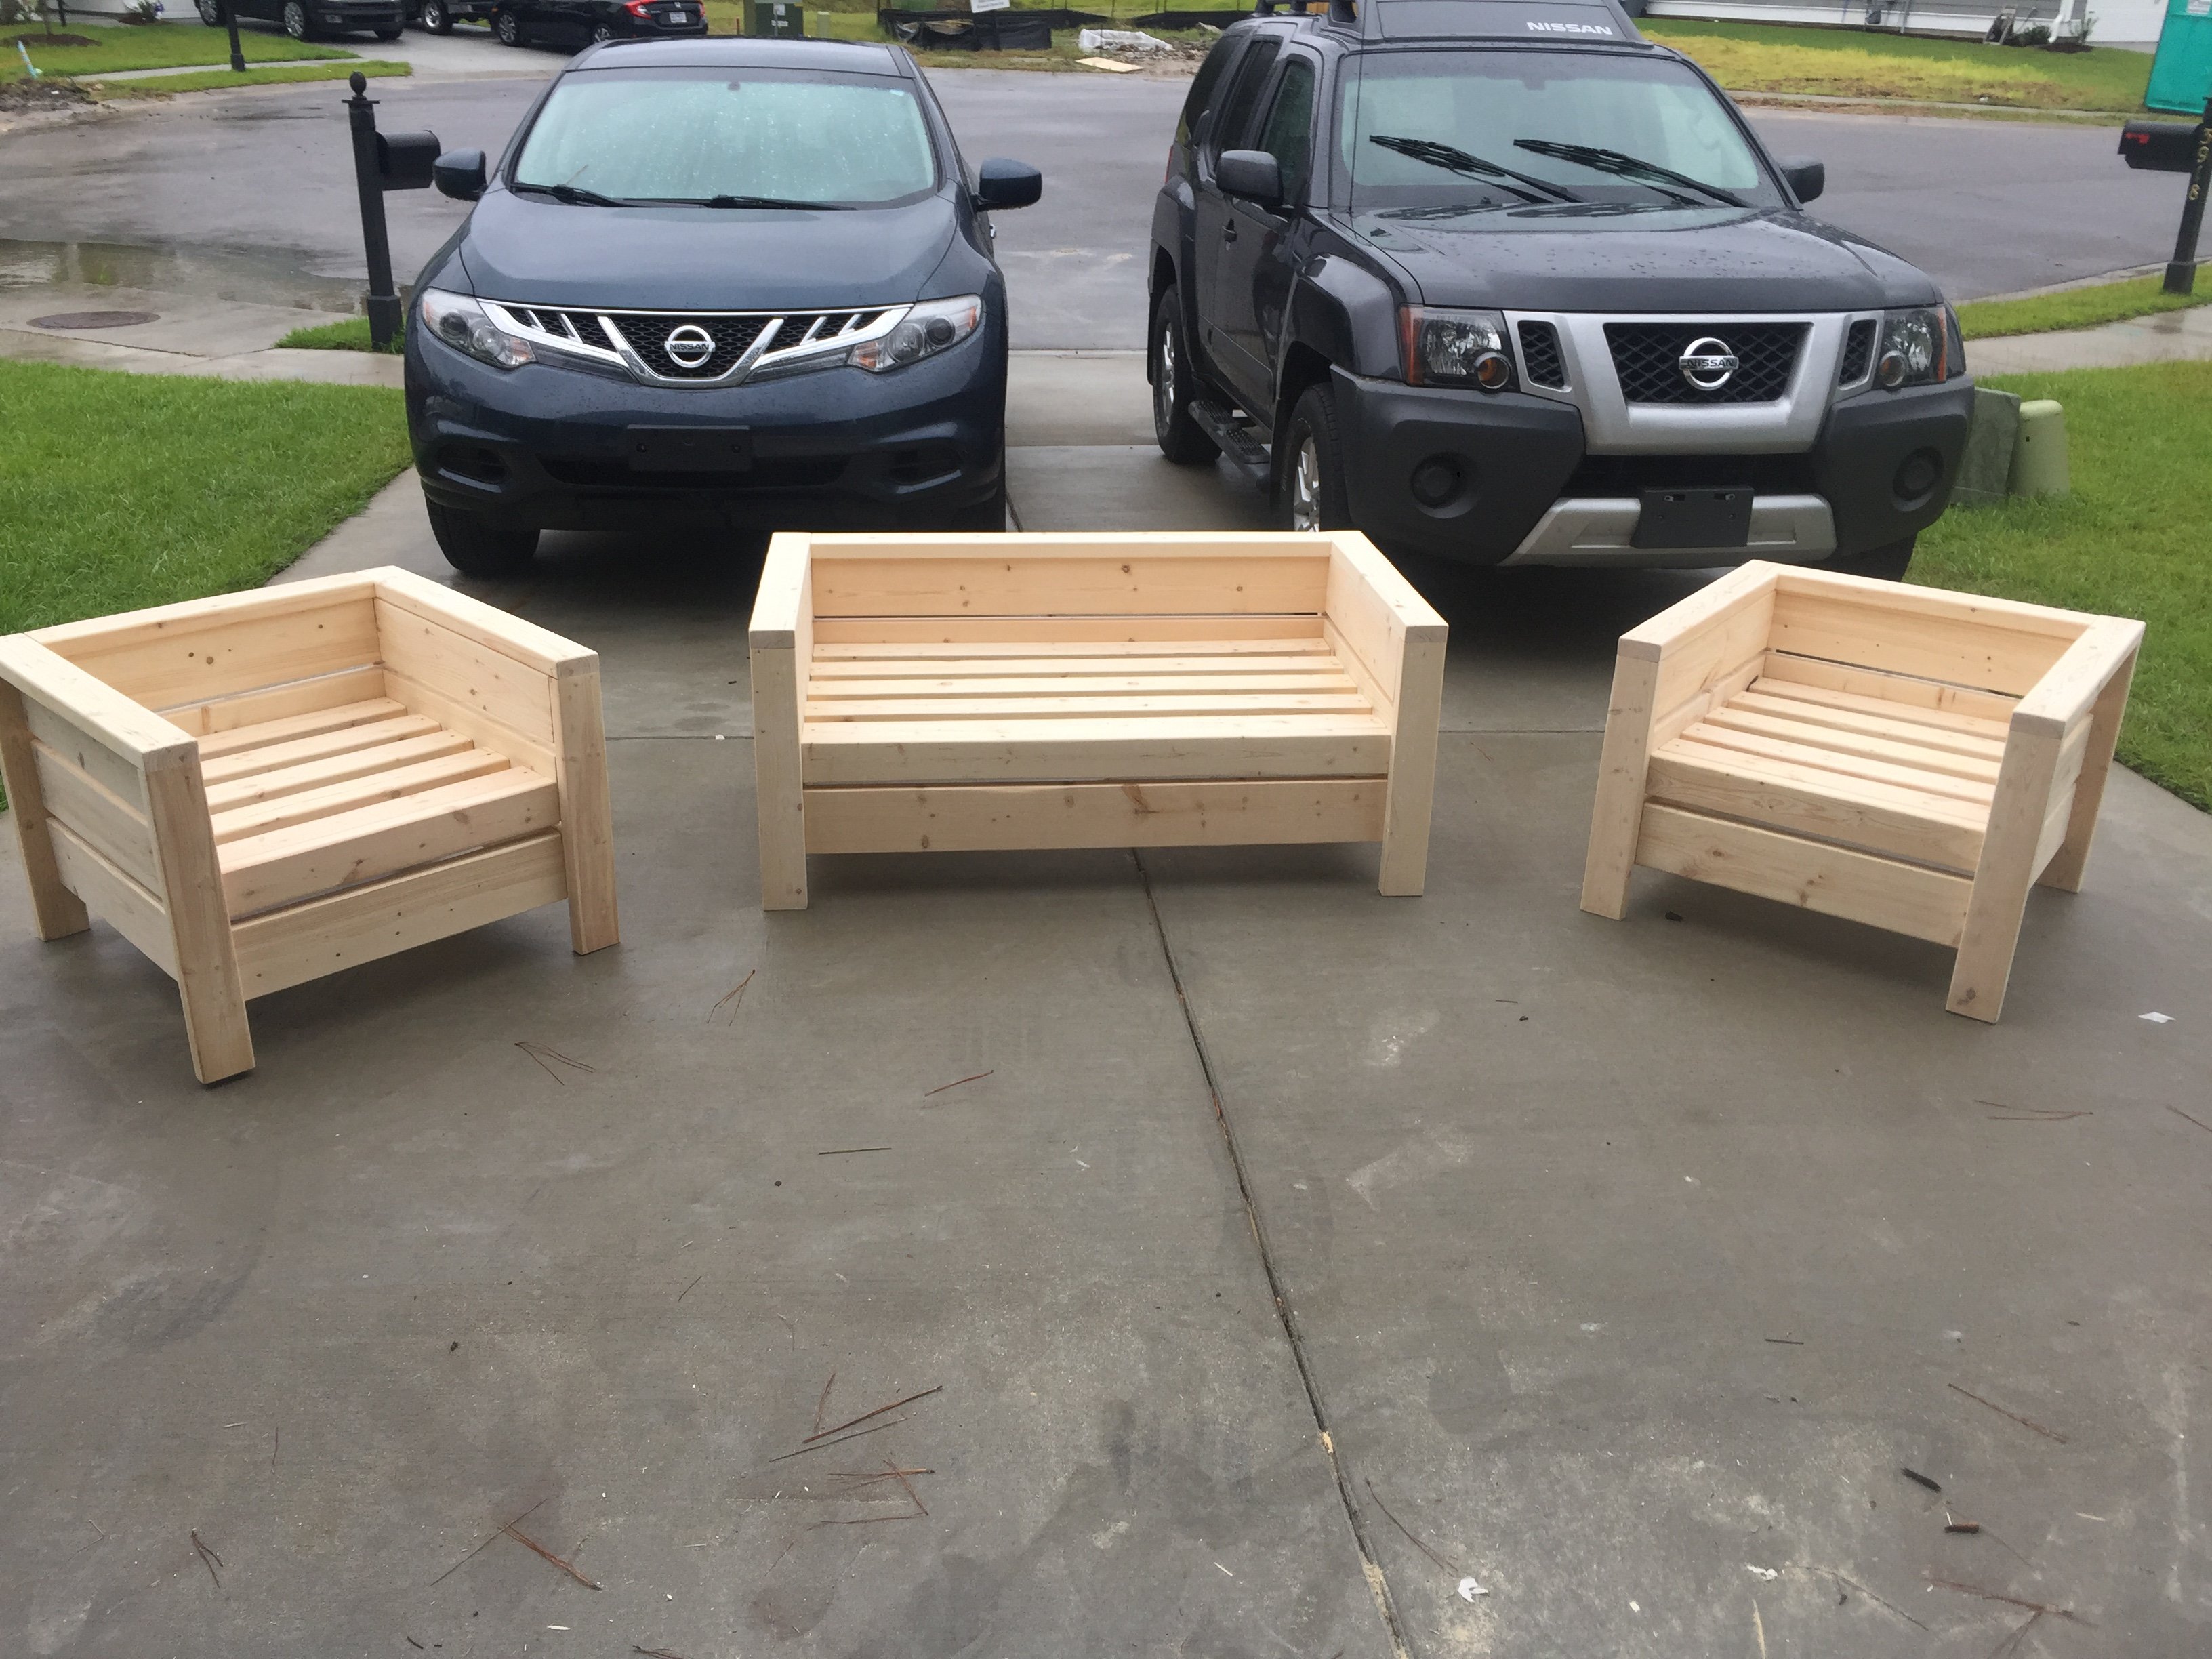
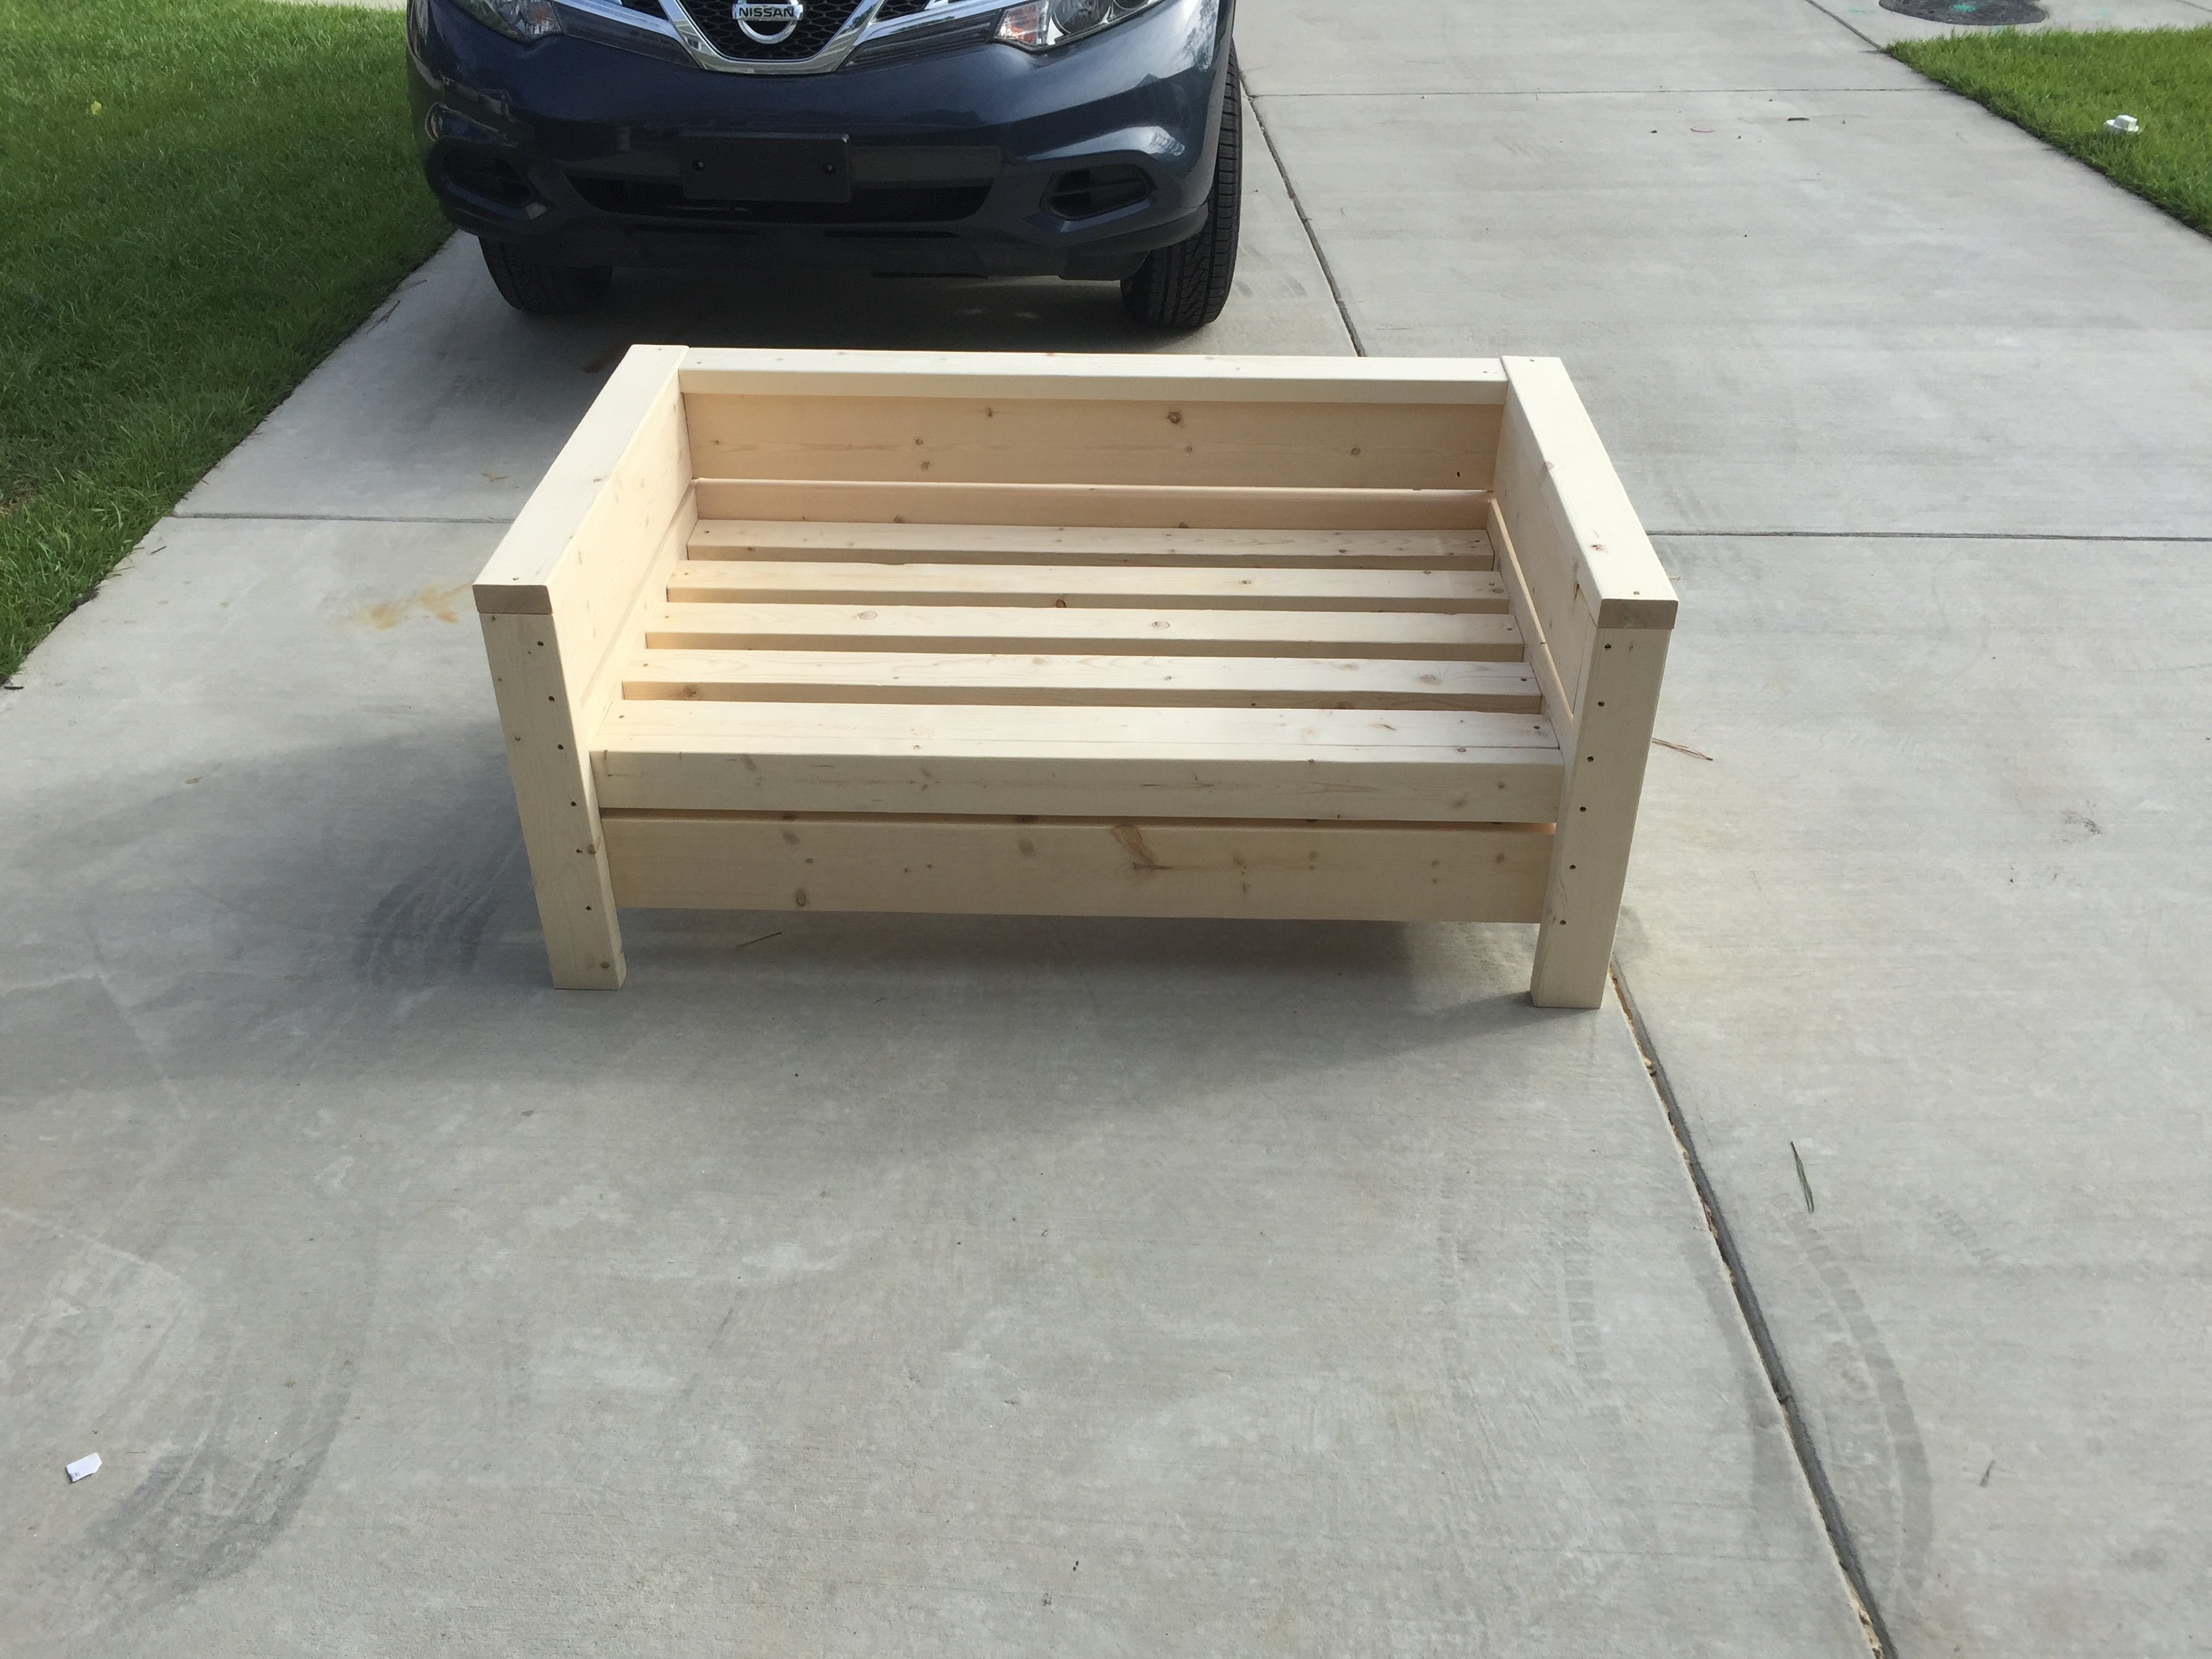
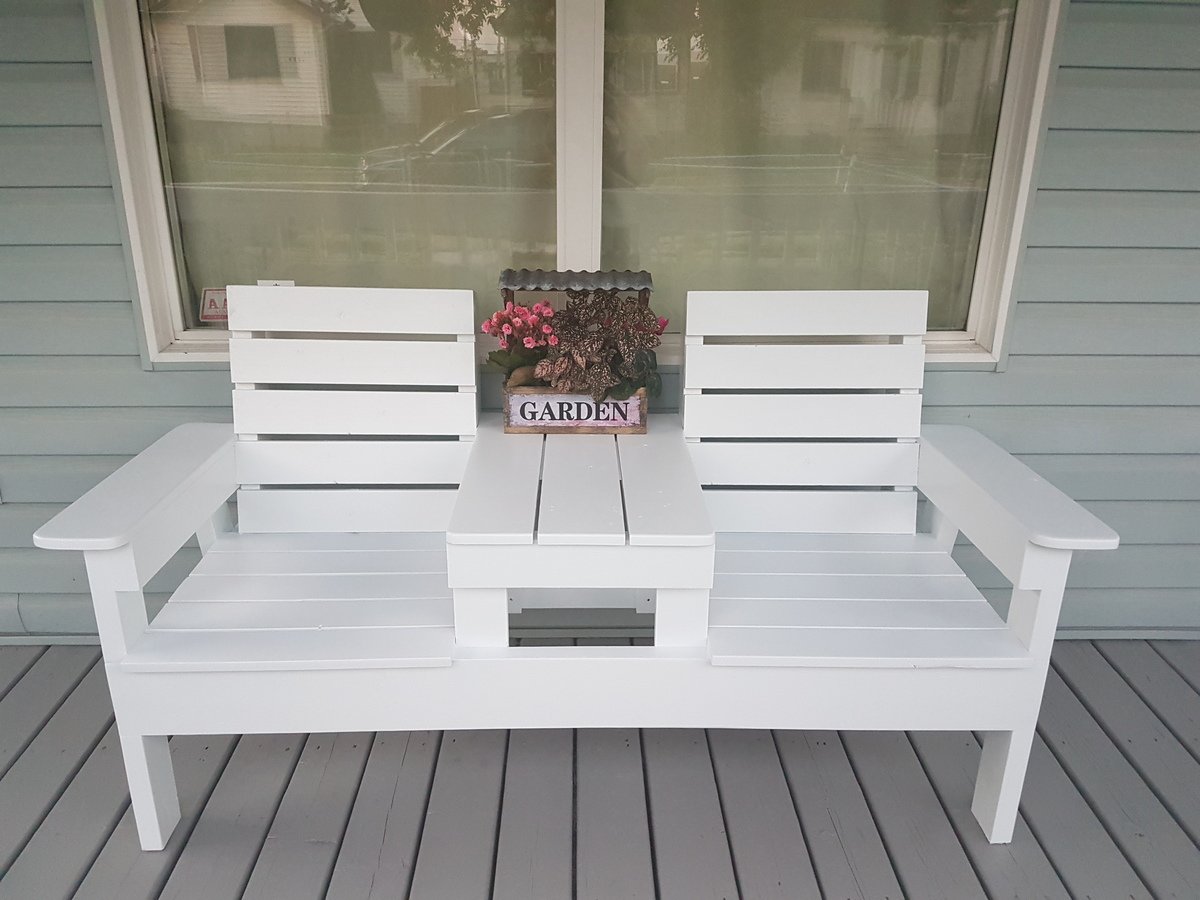
Built the 2 chairs according to the plans, and then modified it for a bench that's 48" (our cushions are 23.5 x 23.5). Worked really well!
We too you’re 2x4 shelving unit with some small tweaking of measurements and added a barn door!
This was a big undertaking for indoor furniture and I learned so much! I slightly adjusted the size to what I had available with some scrap wood from my old stairs so saved a little on costs with lumber!
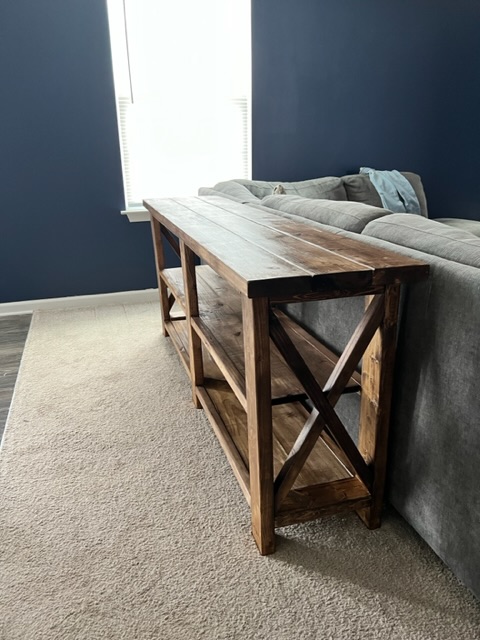

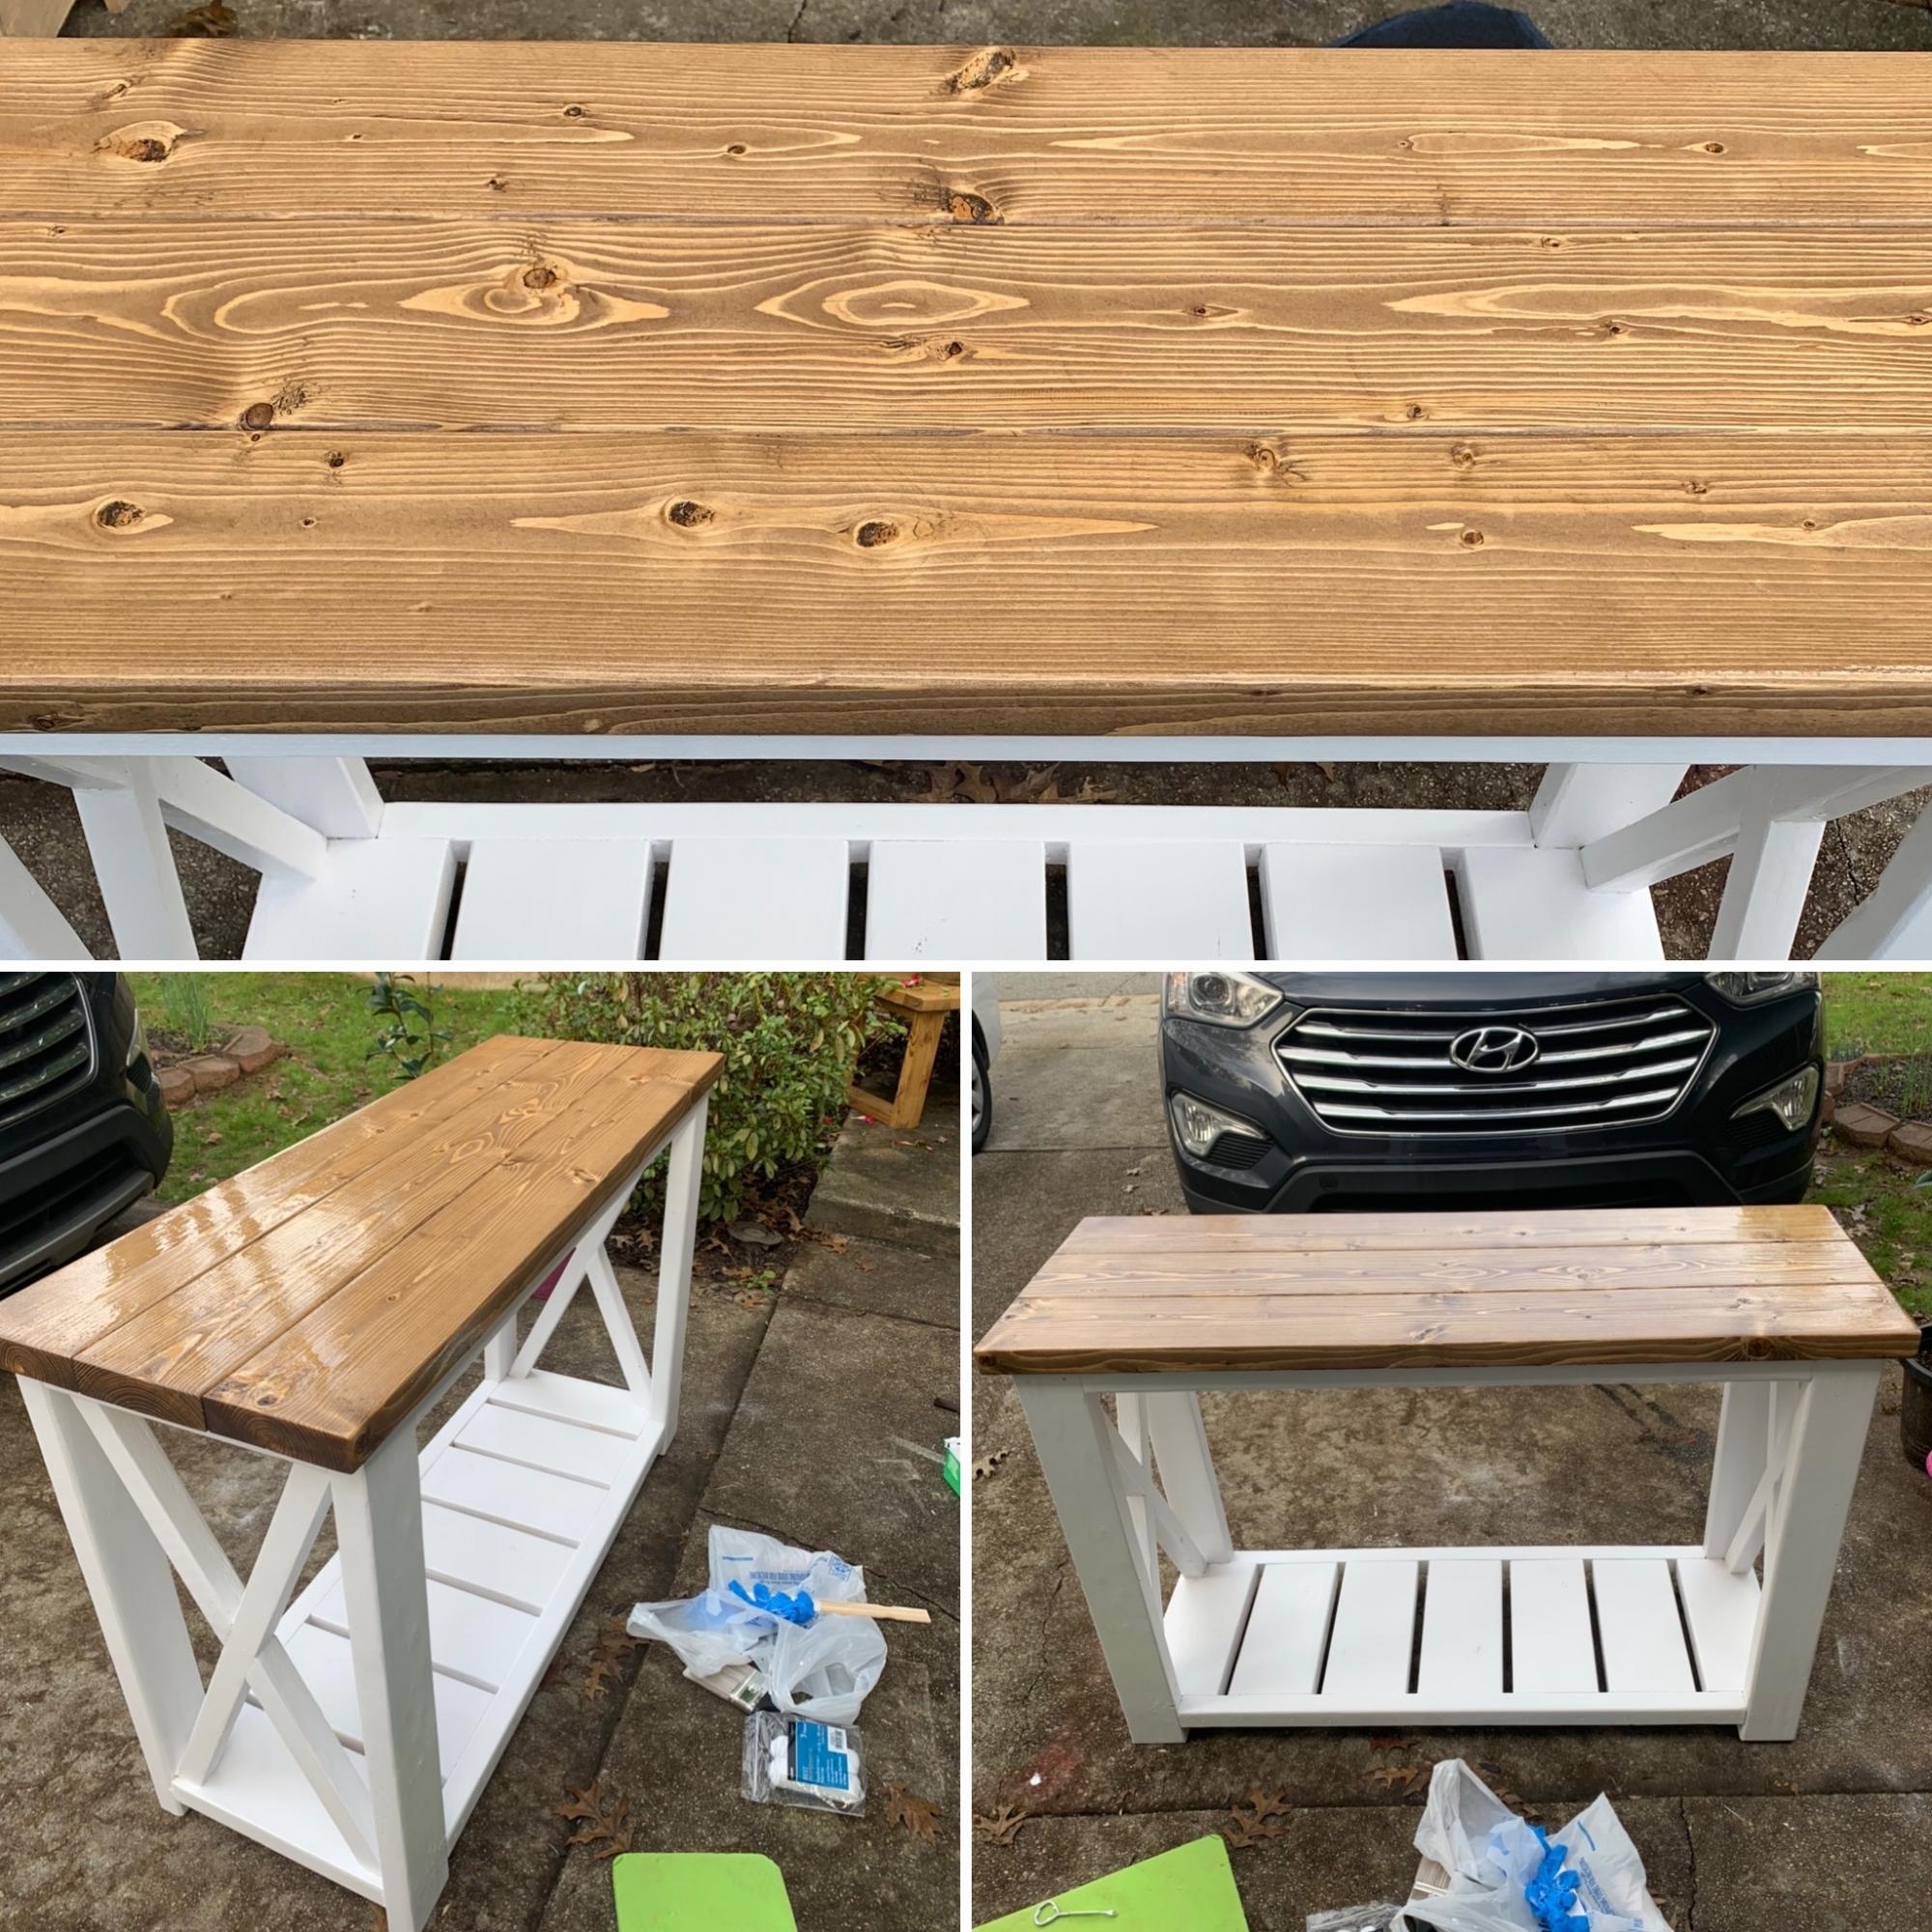
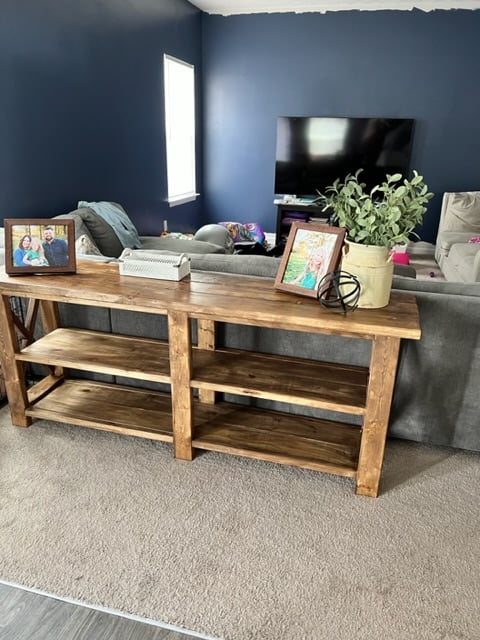
Modified the size to 60” length , 12” depth , 36” height . Went with satin white frame , Minwax classic grey stained top with 3 coats of poly clear coat satin (quick dry).
Mon, 09/07/2020 - 23:07
Do you happen to have a revised shopping/cut list for this table? Thanks!

I wanted to make this porch swing ever since seeing it in the plan catalog (Large Modern Porch Swing). Just a matter of setting aside a weekend to get it done and then to find A frame to support it. I made the A-frame from a combination of this post:
http://www.buildeazy.com/newserve/swing_seat_support_dec07_1.html
and this one:
http://www.hgtv.com/home-improvement/custom-a-frame-childrens-swing-set…
I made the back a bit higher on our swing... and not quite as wide.
Reading several other blogs on this- I chose to attach the chains to the top back of the swing to keep it from tipping backwards...
Now just get to enjoy it!!
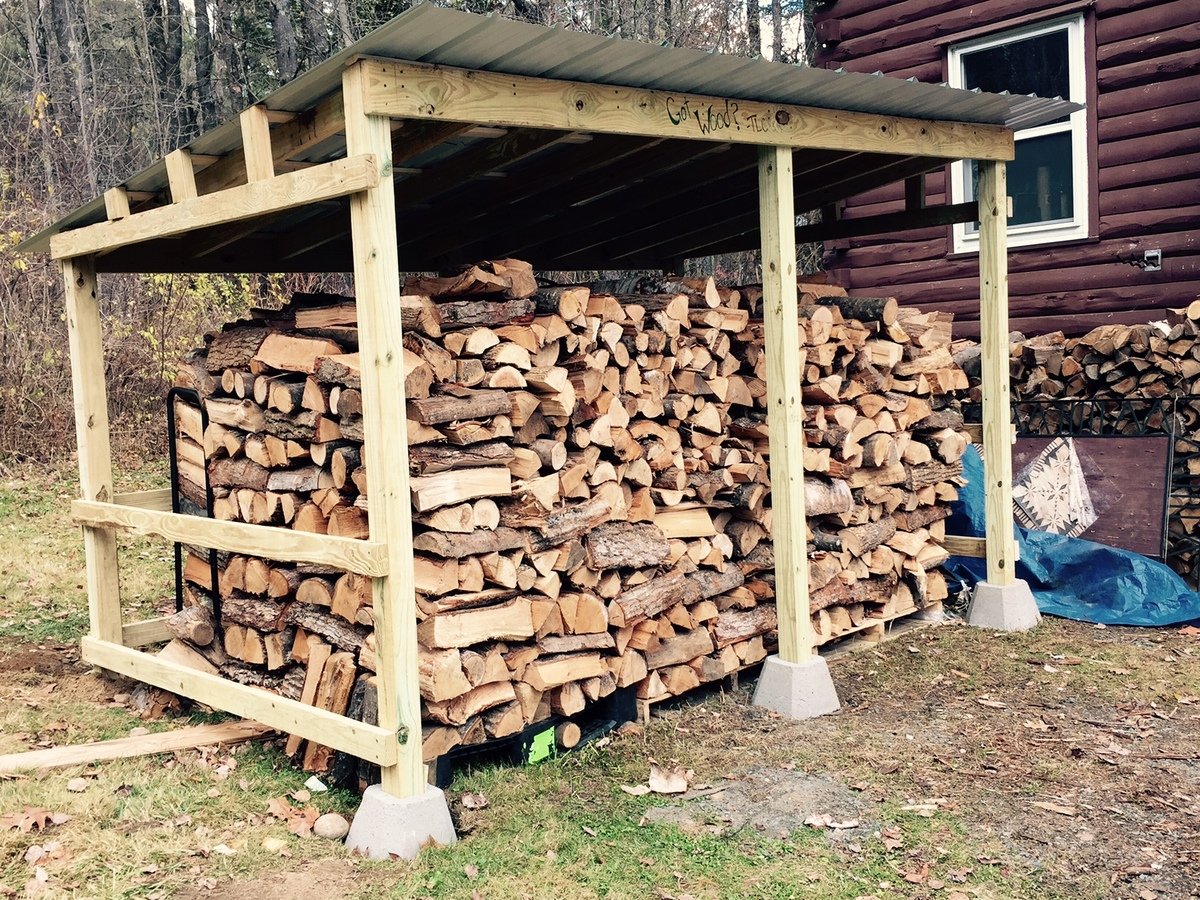
When I decided to build a woodshed I was freaked out because I've never done anything even remotely like this. I struggle with precision and patience, which made this project seem overwhelming as I knew I had to do a lot of prep work to properly level the ground, measure the wood, learn how to operate a saw, calculate angles to cut, etc... I did a lot of research online and found this simple blueprint a great starting point. I made some adjustments since i needed a much bigger shed, it's 11.5' x 7' x 7'. Also, I already had the wood resting on pallets so I just build this shed around the wood with no built in floor. Overall, I'm thrilled with how it turned out!

Fun build. Plans were easy to follow!