Community Brag Posts

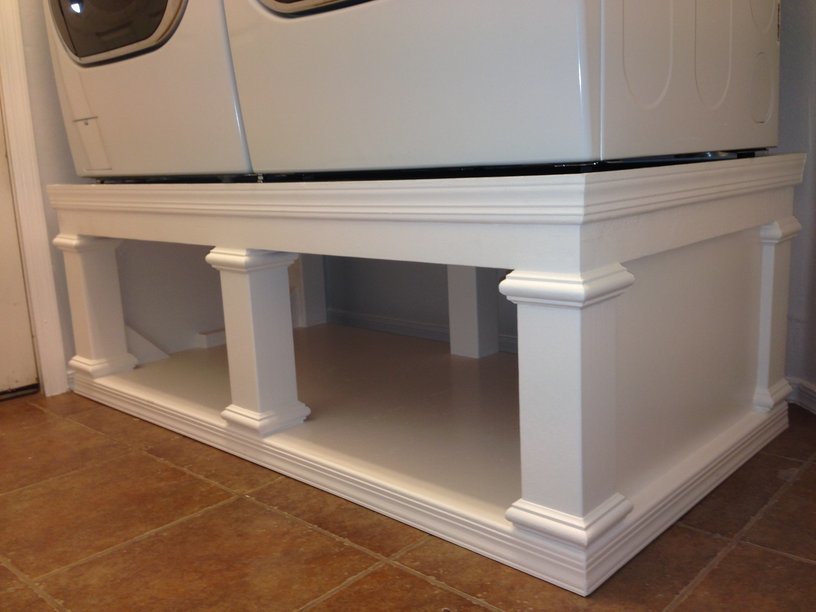
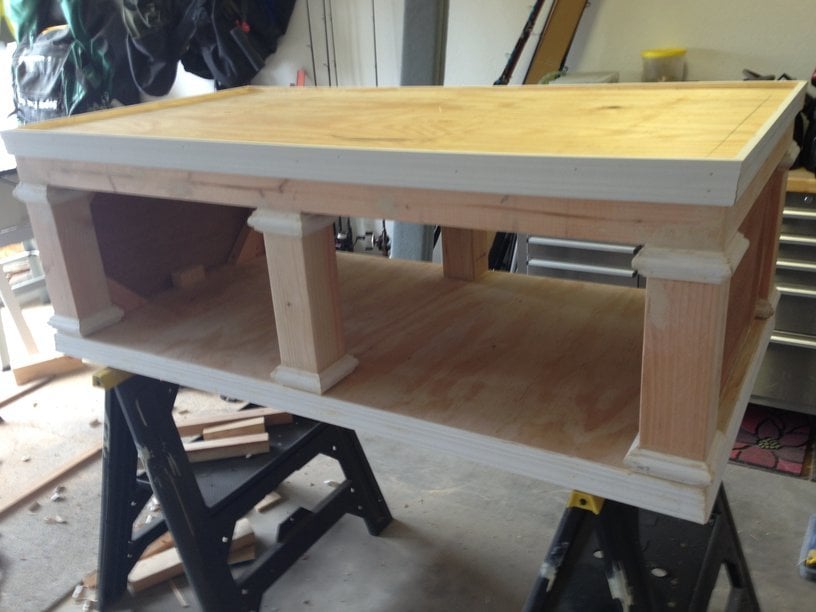
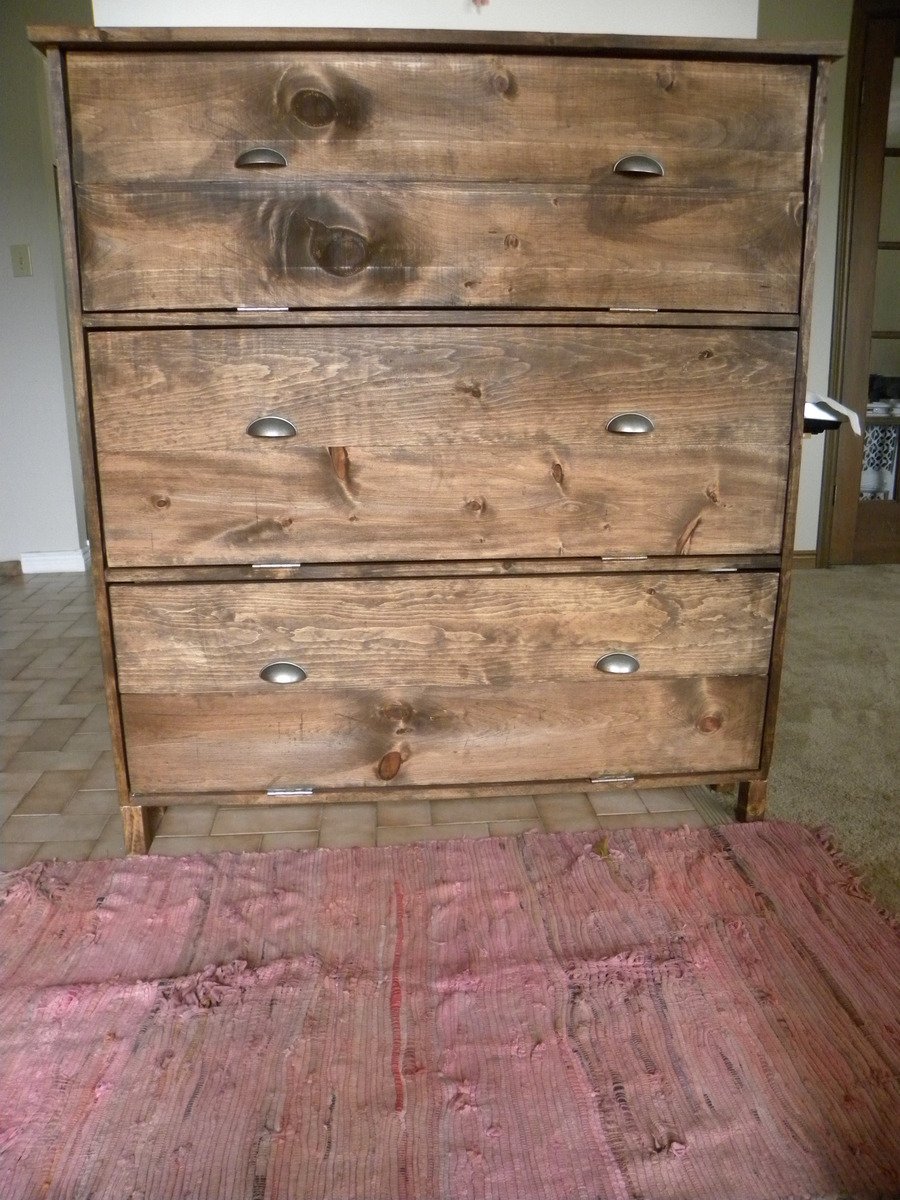
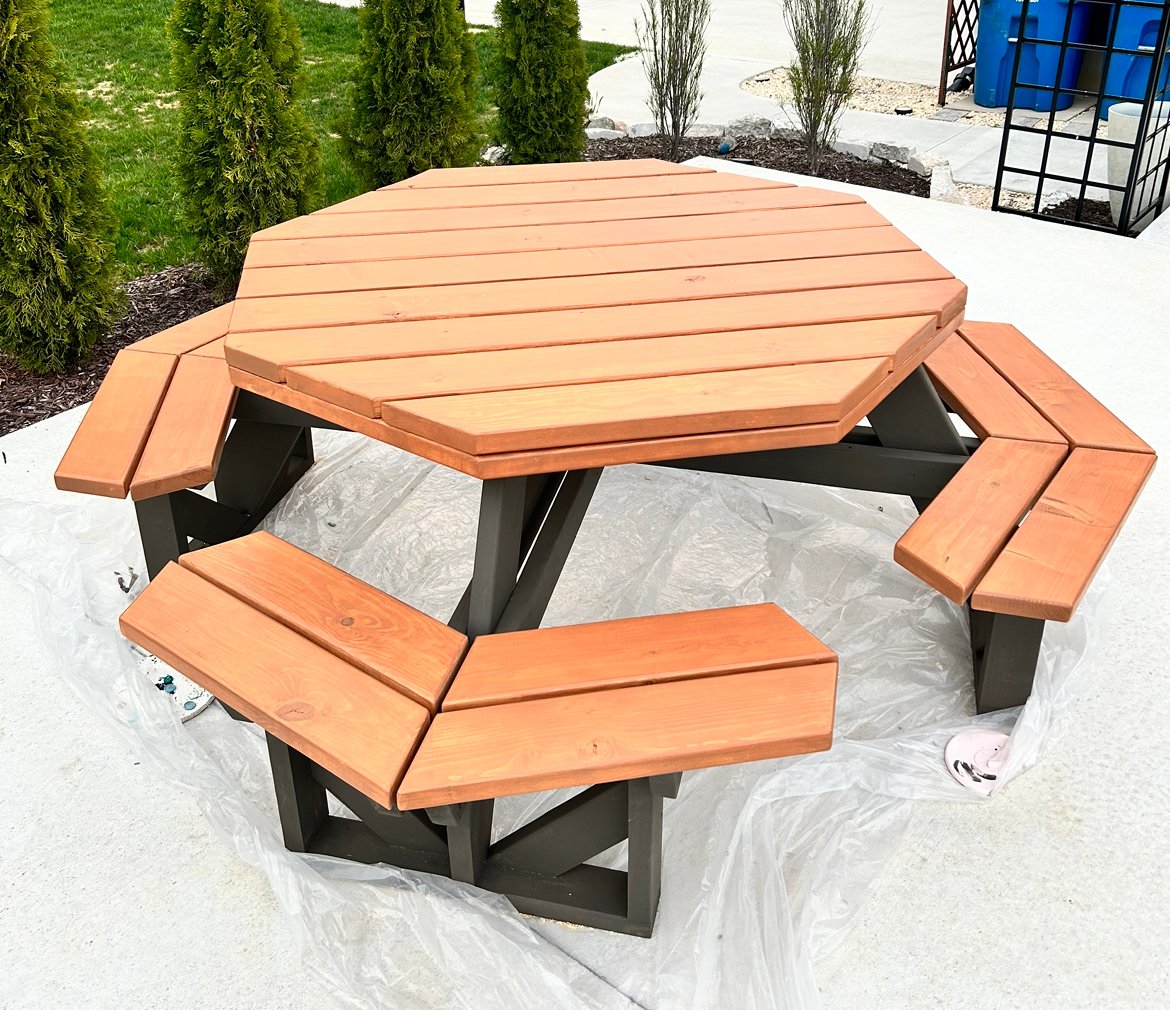
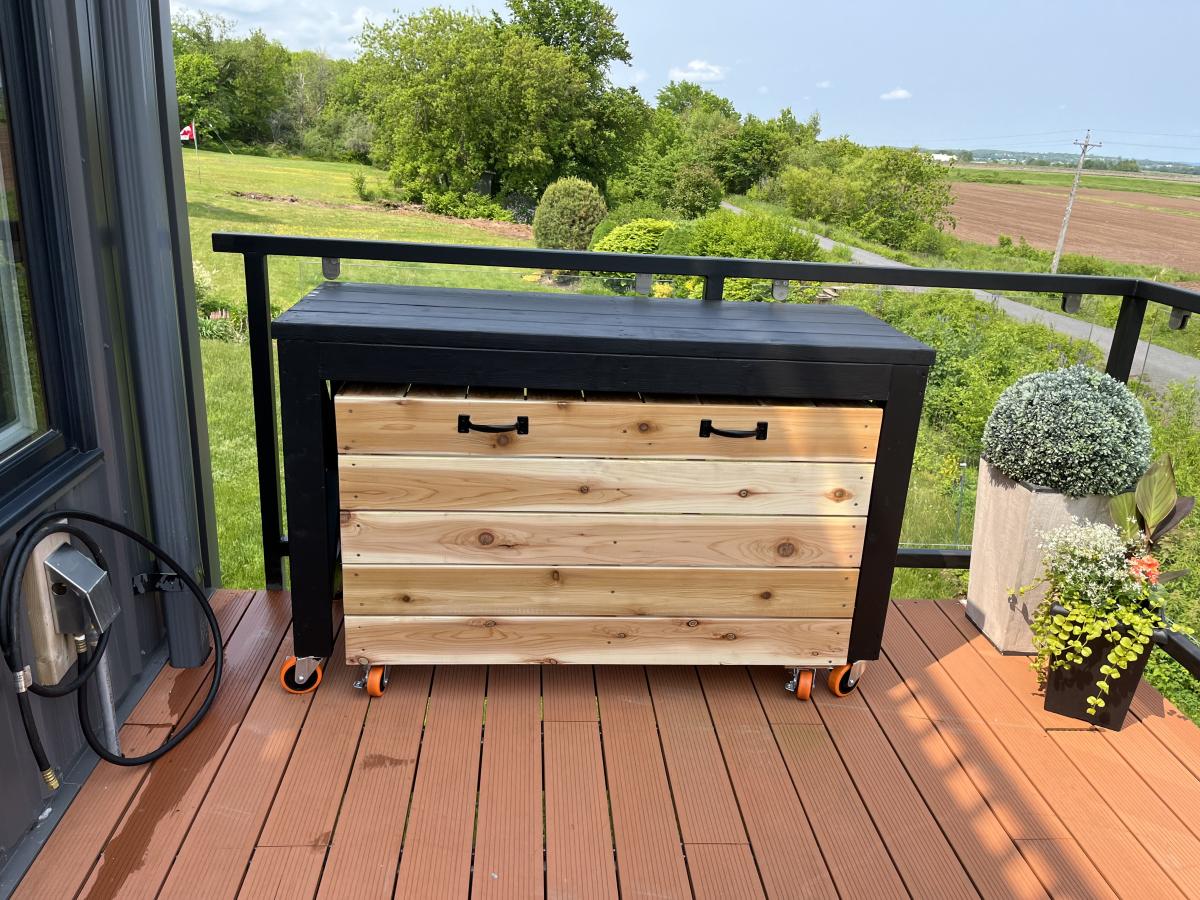
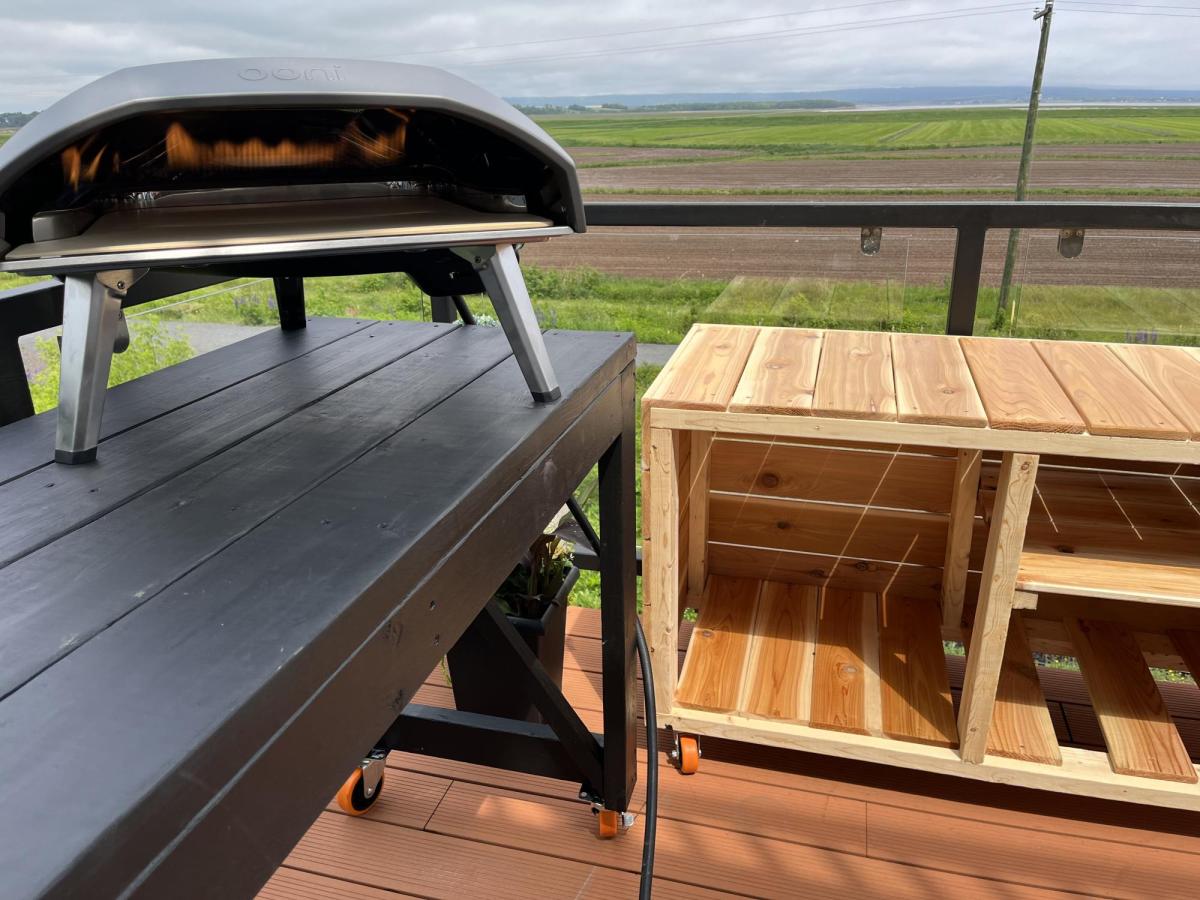
Octagon Picnic Table

Submitted by Anonymous (not verified) on Thu, 06/09/2016 - 04:59

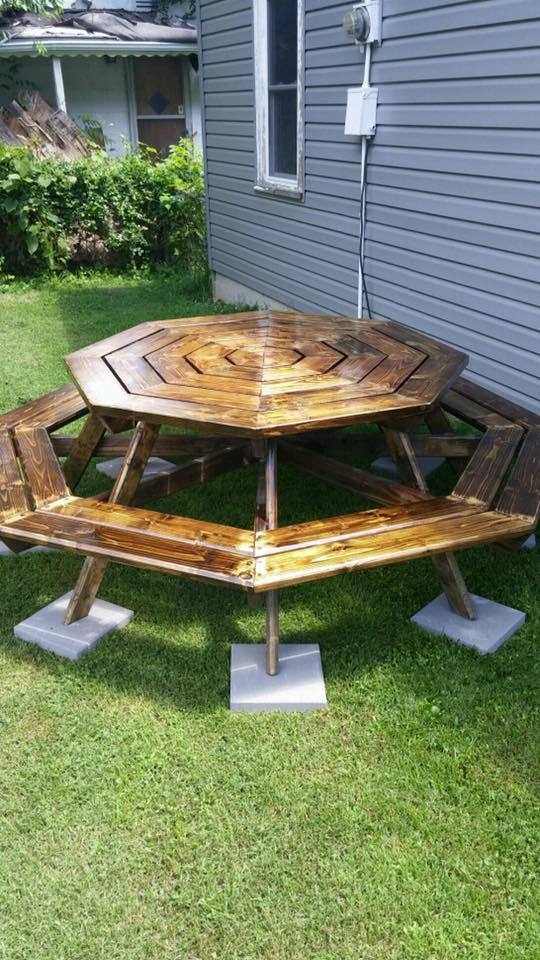
Was a good project that I built for my son's new home.

I found a few errors in the instructions such as:

A) 2 - 2x4 @ 30 1/2 should be 30 1/4

B) 8 - 2x6 @ 32 15/16 both ends at 30 degrees off square, parallel to each other) should be cut at 34 15/16 blank sizes then cut the angles to acheive the finish size of 32 15/16

C) 8 - 2x6 @ 36 3/4 (both ends at 90 degrees off square, parrallel to each other) should be (both ends at 22 1/2 degrees off square, NOT parrrallel to each other)

Built from Plan(s)
Estimated Cost
$120
Estimated Time Investment
Week Long Project (20 Hours or More)
Finish Used
Dark Walnut Stain, Urethane Top Coat
Recommended Skill Level
Intermediate

Ryan's Washer/Dryer Pedestal

Submitted by zoolander on Fri, 12/05/2014 - 17:25

I loved this design.  I couldn't believe that they wanted to charge me almost $600 for the pedestals for the washer/dryer set that I bought on black friday, so I decided to give this project a go.  I basically used the same construction plans from Sausha's project, but I dressed mine up a bit.  First, I chose a bit larger trim for the tops and bottoms of the posts.  Then, I bought some 2" baseboards and did the top and bottom with baseboards.  On the bottom, I had to use my tablesaw to trim off about 1/2" because I used 1x1" boards on the bottom so that I could have more space for baskets.  Then, on the top, I inverted the baseboard and allowed it to overlap a bit so that if it were to vibrate, the washer/dryer could not fall off the edge.  I also added some fabric on the top (stuff that I use to cover the bunk boards on my boat trailer...kind of like a very thick and durable felt material) to cut down on vibration and also keep the units in place.  Finally, I added sides by using wedge trusses on the inside of my side posts and then I put a 1/8" piece of plywood over top and nailed/glued it to the trusses.

It turned out great.  Thanks for the plans Sausha!

Estimated Cost
$125
Estimated Time Investment
Weekend Project (10-20 Hours)
Finish Used
paint
Recommended Skill Level
Intermediate

Comments

Zlk200

Mon, 12/21/2015 - 17:38

Did you use sanded plywood? Did you use any veneers for the exposed 2x4's to get a smooth finish or did you paint right on it?

lastly, what is the name of the trim you put on the 4x4s? I've hard a hard time finding it. Thank you!

In reply to by Zlk200

zoolander

Wed, 06/29/2016 - 13:59

Sorry for the super delayed response.  I didn't realize this question was here.  I did not plane anything.  I did sand the surfaces a bit, but I didn't get too crazy.  I put 3 thick coats of paint on it which made it pretty smooth.  If you look very closely in person, you can still see a bit of wood grain, but it is only noticable if you really get down and look.  I did use a lot of wood putty to fill all of the gaps and crevaces and then I sanded those parts pretty well.  


With regard to the trim, the top literally just standard baseboard material turned upside down, and then the little trim on the tops and bottoms of the 4x4s is just another standard strip of moulding that I got from Lowes.  I think they call it "Chair Rail" moulding.  Its the stuff that you put down if you are doing some sort of paint separation or wainscoting.

http://www.lowes.com/pd/1-625-in-x-12-ft-Mdf-Chair-Rail/3403018

I used woodglue on all of the moulding and tacked it on with a nail gun.  Then I filled all of the nail holes with wood putty and also use the putty to fill gaps where the corners came together to make that look smooth.

I hope that helps...you are probably already done with your project by now, but I figured that I would answer anyway.  :)

Modified Washer/Dryer Pedestal

When Ana hacked Sausha's washer/dryer pedestal, I knew I had to have my own version.

This laundry center measures 34"H x 49-1/2"W x 21"D and provides the perfect place for corralling and sorting Mt. Washmore, and also gives me the perfect height table to fold and stack.

Estimated Cost
$130
Estimated Time Investment
Weekend Project (10-20 Hours)
Finish Used
Kilz latex primer, two coats Behr semi-gloss in Calla Lilly, two coats Minwax Polycrylic on all surfaces except top and basket shelves which got four coats each
Recommended Skill Level
Intermediate

Pallet Bench

Submitted by eralben on Mon, 05/04/2015 - 06:30

A friend gave me a pallet that I wanted to make into an outdoor bench.  I found Ana’s plans for a simple outdoor loveseat and they inspired the frame for the bench.  To make the bench I cut the pallet in half and then I adjusted Ana’s plans to make the frame to fit around the pallet. 

The pallet was free and I used scrap wood to build the frame so my only cost for this project was paint.  

Estimated Cost
$25
Estimated Time Investment
Afternoon Project (3-6 Hours)
Recommended Skill Level
Beginner

Paper Roll Dispenser

Submitted by vendo on Wed, 11/17/2021 - 10:44

This took me about 20 minutes! I love the look of it and that it can just be left out when the kids aren't doing art. A great little item to add to keep the kids busy and inspired. I made a couple of mods from the plan. I used glue and nails instead of pocket holes and I did that bottom board flat instead of on it's side. I also used a little bigger dowel, and bought two rolls of paper on Amazon for $14.I'm giving this to my daughter for her birthday with some fun art supplies, so I think it's a great gift idea for any occasion for those crafty people out there!

Built from Plan(s)

Comments

Monika

Tue, 04/02/2024 - 06:09

Sometimes, when working with papers, you might need to convert file formats, right? So, I recently came across this website https://pdfflex.com/webp-to-png It's super handy for converting. It's been a real time-saver for me, especially when I need to tweak documents for printing or sharing. I'd desided to share in case it helps someone else out there too!

Shoe dresser

Submitted by RoseOfShaz on Thu, 07/04/2013 - 15:26

I didn't build this shoe dresser because I particularly needed one, but it looked so lovely that I couldn't resist.

- I modified the plans by building 3 bins instead of 2 so it could hold more shoes.
- I decided against the dowel stick and opted for hinges instead, which were surprisingly not too difficult to assemble. I found that I didn't even need the magnets after installing the hinges as the doors stay closed.
- I used 7" chains on both sides of each bin instead of a belt to make it extra sturdy.
- I added two back legs.

Et voila! This is the end result. I'm very pleased.

PS. Those flopping bins are a pain when you're trying to build!! An extra pair of hands is definitely recommended.

Built from Plan(s)
Estimated Cost
$150 (with extra bin)
Estimated Time Investment
Weekend Project (10-20 Hours)
Finish Used
Walnut (can't remember the exact name of the stain, but it's the one Shanty 2 Chic always uses!)
Recommended Skill Level
Intermediate

Comments

SoCaliforniaMel

Fri, 07/05/2013 - 22:49

Pretty :) Good Job. Now if I only had the space for one thats 10 rows high :P I like the stain color too. Shanty 2 Chic always uses Rust-o-leum. I think its called dark walnut. Dont quote me though. I love the stain and spray paint combo colors they use.
~Melody

Addison’s room

Submitted by aderosa on Thu, 02/01/2018 - 12:45

It was time for Addison to get a big girl bed. We used the Kentwood design and the trundle bed plans. 

Estimated Cost
140
Estimated Time Investment
Weekend Project (10-20 Hours)
Finish Used
Valspar cabinet paint
Recommended Skill Level
Beginner

Modern Farmhouse Bed

Submitted by Anonymous (not verified) on Sun, 01/15/2023 - 13:37

My husband and I had worked on this bed together, and we are so happy with it! We went with taller side tables that we purchased, and just stained the wood instead of painting it.

Comments

Outdoor Sectional

Submitted by KristenP on Thu, 06/06/2019 - 18:00

We built Ana’s outdoor sectional in a few hours and it’s made a huge impact on our deck! It saved us so much money but looks like a high end piece! Thank you for the simple and structured plans!

Estimated Cost
$200
Estimated Time Investment
Afternoon Project (3-6 Hours)
Finish Used
Cedar Stain
Recommended Skill Level
Beginner

Comments

Octagonal Picnic Table

Submitted by Anonymous (not verified) on Tue, 04/25/2023 - 08:16

Great plans and easy to follow!

Comments

King Farmhouse Storage Bed

Submitted by Anonymous (not verified) on Sun, 08/18/2019 - 15:41

After a successful attempt at Ana’s farmhouse desk I decided to make a bed for my wife... needless to say I think she likes it! Thanks to Ana and Pretty Handy Girl’s plans! (This is my 3rd woodworking project)

Estimated Cost
700
Estimated Time Investment
Week Long Project (20 Hours or More)
Finish Used
Valspar Cabinet Enamel
Minwax Dark Walnut stain
minwax Polycrylic satin polyurethane

I used acetone to transfer the graphic I designed for my inlay. I carved out the inlay with a router. I stained the wood and then painted the surface black.
Recommended Skill Level
Beginner

Comments

Pizza Oven Cart

Not quite big enough for Pizza Oven, but love the plans!

Comments

Small Space Sewing Table

I had so much fun building this and has already proven to be helpful.  Thanks for the wonderful plans! Can't wait to begin my next building project for this small space.

Built from Plan(s)
Estimated Cost
70.00
Estimated Time Investment
Weekend Project (10-20 Hours)
Finish Used
Using for storage of sewing machines and cutting materials and mats.
Recommended Skill Level
Beginner

Twin Farmhouse with Trundle

Submitted by mommaerika on Wed, 04/25/2012 - 09:52

This is the twin farmhouse bed and the matching trundle. We chopped about 8 inches off the headboard since we were not using a boxspring for our mattress. Other than that it's as written. I'm so thrilled to free up space in our girls' room!

Estimated Cost
$200 - 250 give or take for both
Estimated Time Investment
Weekend Project (10-20 Hours)
Finish Used
Primer, 2 coats of basic white semi-gloss paint, and poly.
Recommended Skill Level
Beginner

Comments

t00court

Fri, 08/22/2014 - 16:27

This is exactly what I'm looking for!
My husband and I would like to begin building this ASAP. Could you please clarify for me that the original measurements for the Twin Farmhouse bed and the trundle bed will certainly be able to accommodate one another? I just want to make sure it'll fit! I think I saw someone else comment that they changed some of the measurements to make a trundle bed fit underneath, but they didn't go into detail.

We also won't be using a box spring.

Thank you for your help!

Fireplace Mantle with Drawers and Hidden Storage

Modified plans to include game storage drawers, a flip open mantle for DVD player and hidden charging port, and hidden cupboards on both sides for DVD storage. I scoured the Internet for months before drawing this up to fit my space and tackling all on my own! I love it and all of my other Ana White inspired projects!

Casey O.

Seasonal And Holiday

Wood Storage Mantle

Submitted by Anonymous (not verified) on Fri, 02/23/2024 - 10:26

I had been wanting to build a mantle for quite a while but couldn't decide what I wanted it to look like, then I saw the wood mantle with hidden storage plans on Ana's website. I used a steel wool\vinegar mixture as a stain, 3 coats making sure it dried completely before applying the next coat. I finished it off with a beeswax & orange oil wood polish & conditioner. So far I'm storing the remote for the fireplace, the key to the gas for the fireplace and the tool that helps remove the front of the fireplace in there. I'm not sure what else will find it's way in there. I'm very happy with how it turned out.

Julie V.

Built from Plan(s)

Workbench

Submitted by Anonymous (not verified) on Sun, 11/22/2020 - 05:47

Thanks for the simple plans Anna, they worked out great!. I resized the table to make maximum use of the material, still within the same quantity you specified in your plans. I glued the legs along the lengths of the table, and kept the table top and shelf screwed in, for easy dismantling, if necessary.

Finally I added pop down heavy duty wheels allowing me to move the table (not shown in this pic) easily. When the wheels are not being used they pop up, making the table very stable. The height of the table is about 1/2” lower than the table saw, making it an ideal outfeed table as well.

Great design, and fun build.

Estimated Cost
Cn$148 (went with a finished 3/4” 4x8’ ply board)
Estimated Time Investment
Day Project (6-9 Hours)
Finish Used
None
Recommended Skill Level
Intermediate

Comments

A-Frame Chicken Coop - Easy to Clean

Submitted by Anonymous (not verified) on Mon, 04/24/2017 - 14:25

Thanks for the free plans. I did have to make modifications for the doors. i hid the hinges to give it a clean look. i used cedar for the trim and Plywood Siding Panel T1-11 4 IN OC (Common: 19/32 in. x 4 ft. x 8 ft.; Actual: 0.563 in. x 48 in. x 96 in.) for the doors.  i used a metal flashing for the roof so it will vent.

Built from Plan(s)
Estimated Cost
$250
Estimated Time Investment
Week Long Project (20 Hours or More)
Finish Used
BEHR Transparent waterproofing finish (Cedar Natural Tone) NO 501
Recommended Skill Level
Intermediate
Seasonal And Holiday
Back