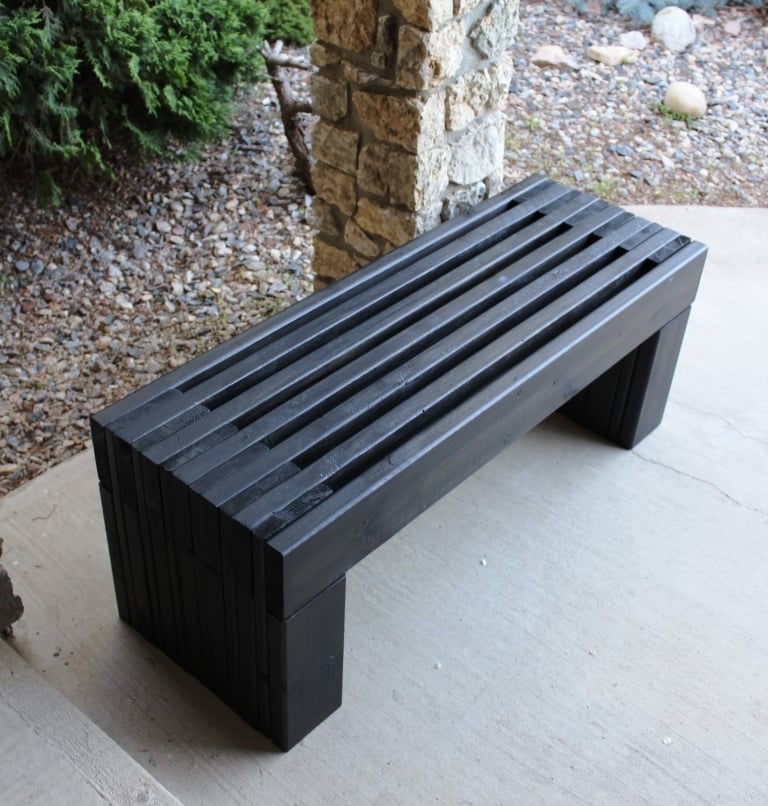
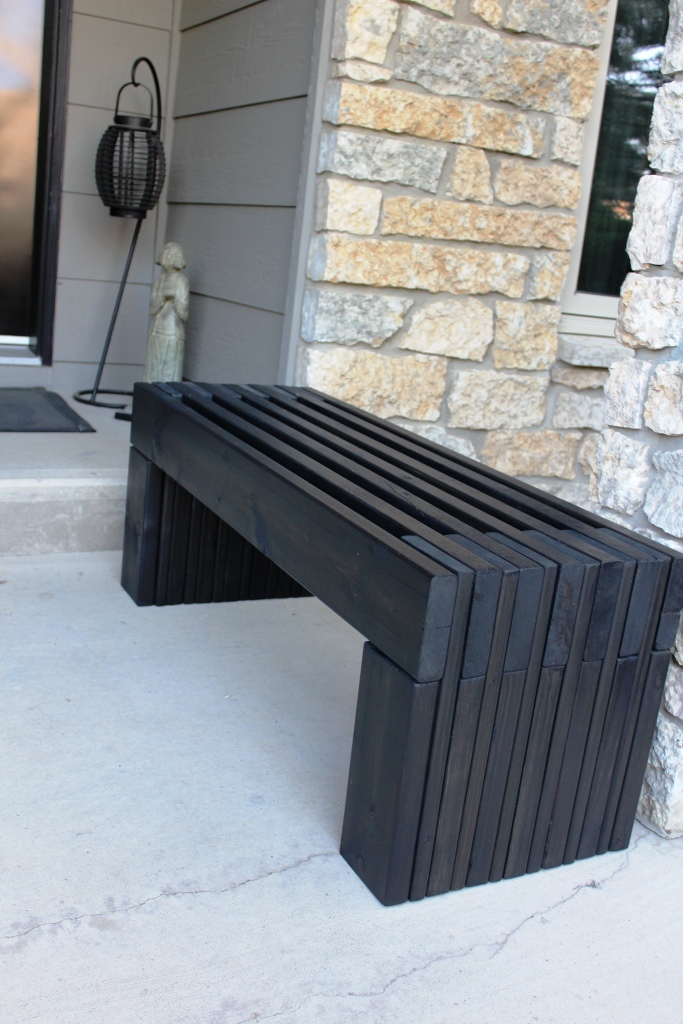
Bench Planter

This build was also a lot of fun! I made an extra brace to hold the wait of two sitting on the bench. Thanks again Ana for your plans!
David Marks
Built from Plan(s)
This build was also a lot of fun! I made an extra brace to hold the wait of two sitting on the bench. Thanks again Ana for your plans!
David Marks
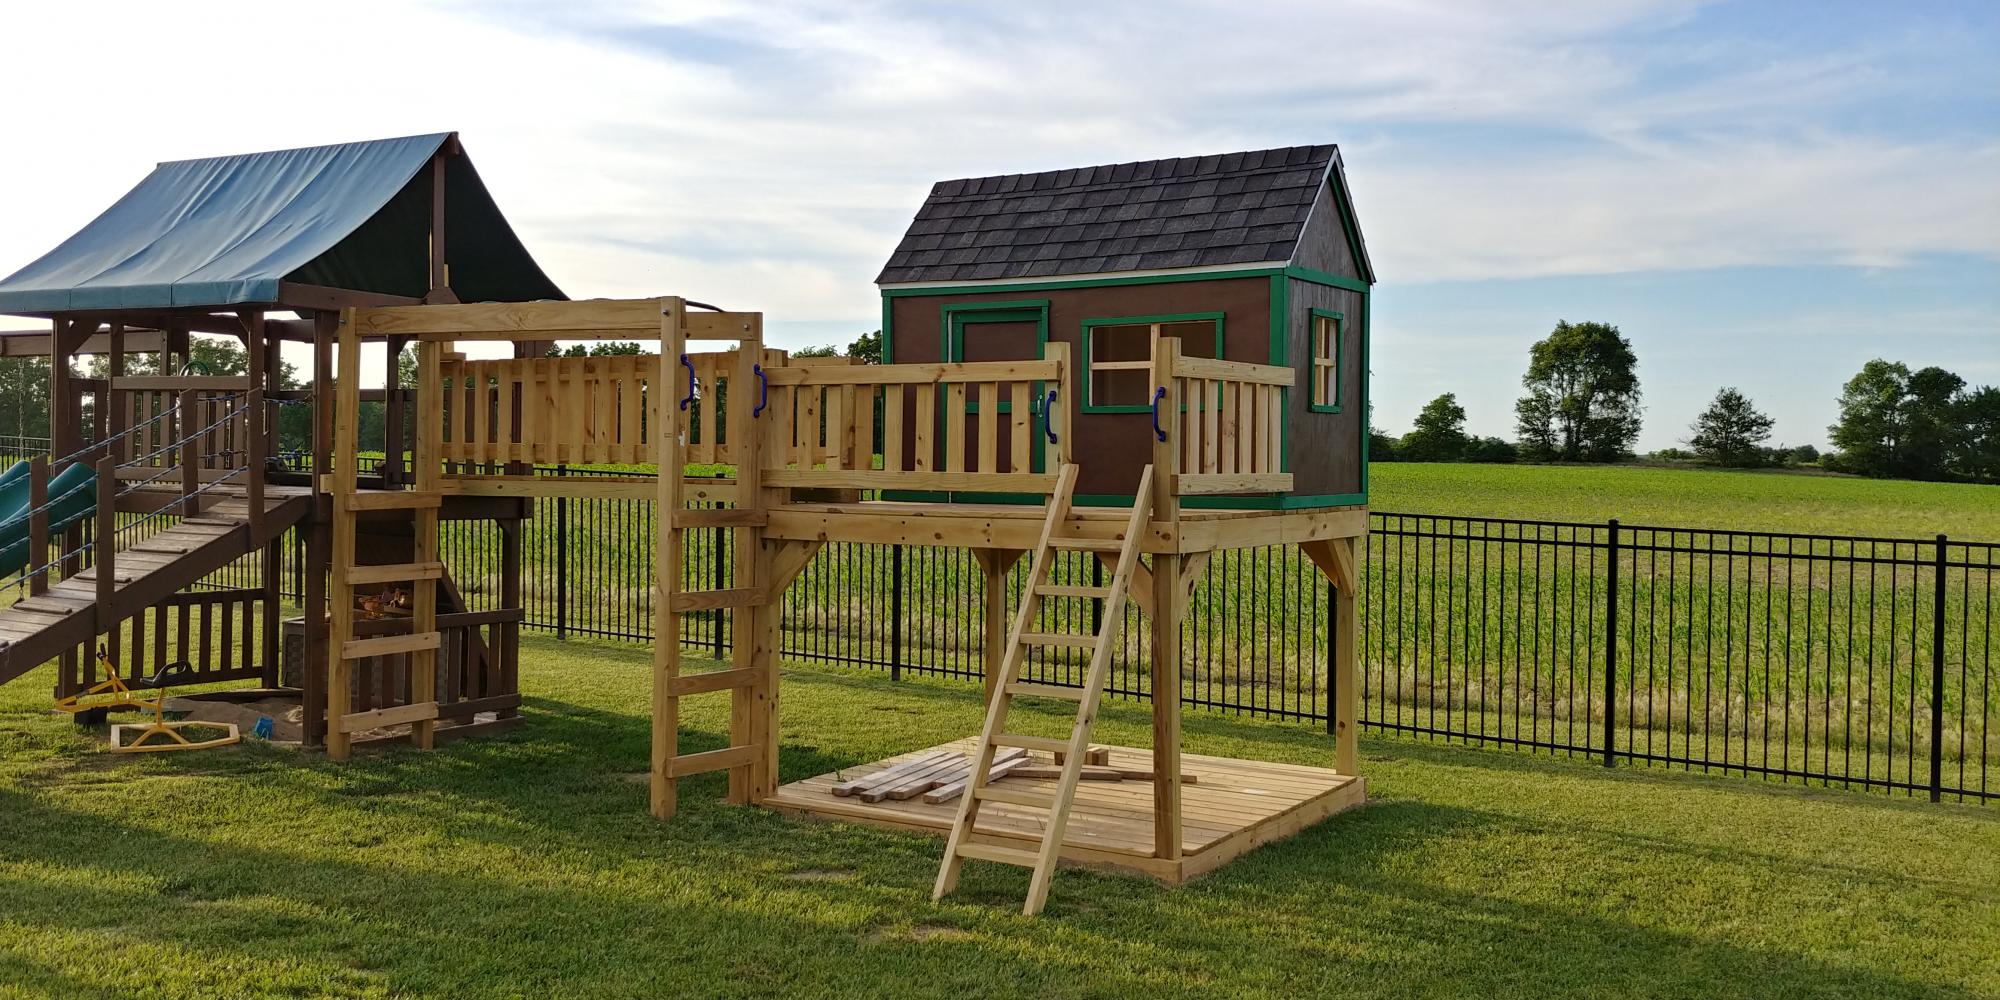
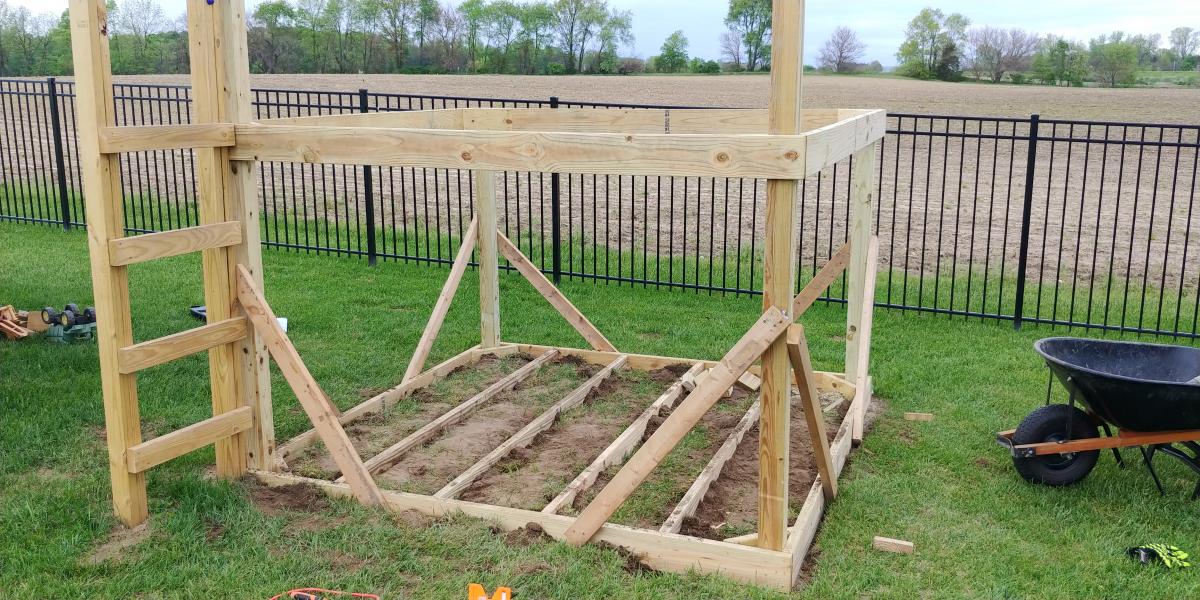
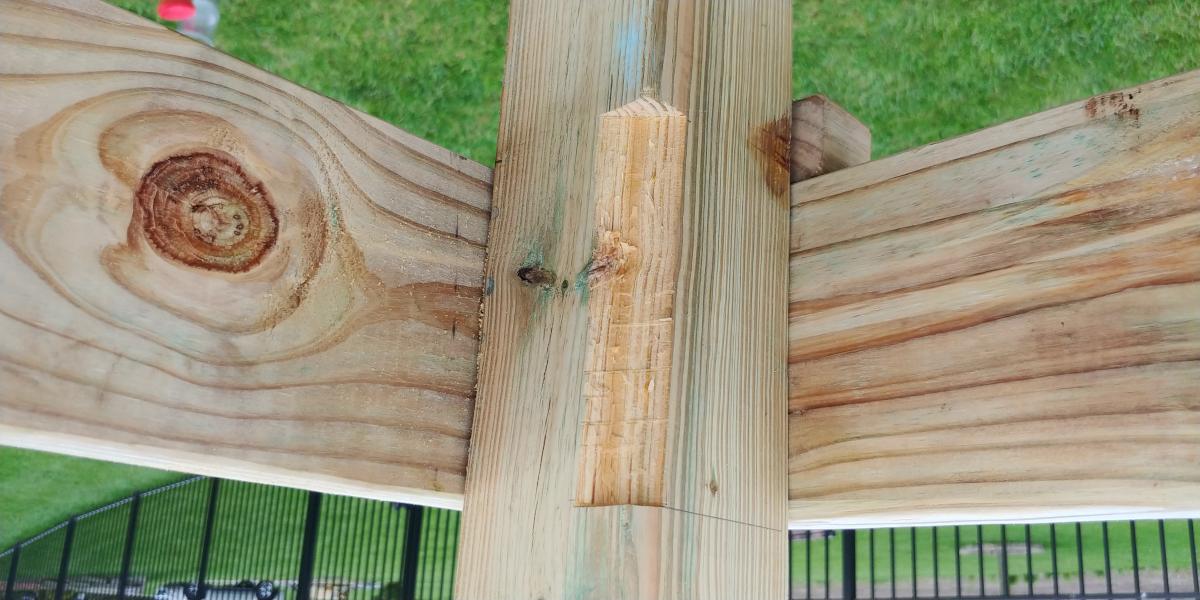
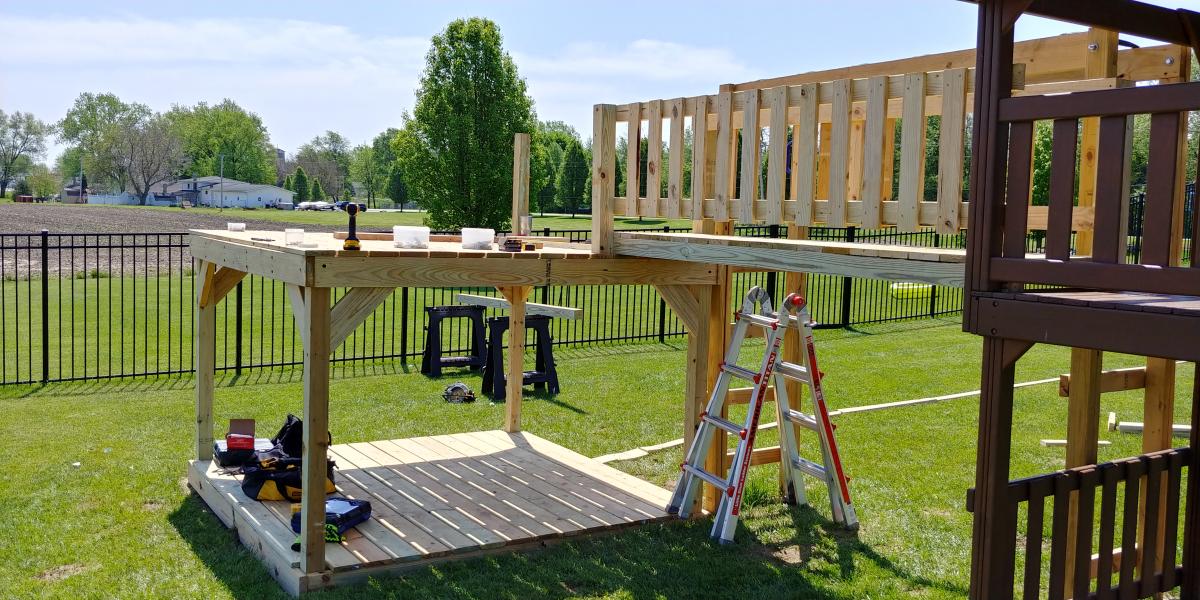
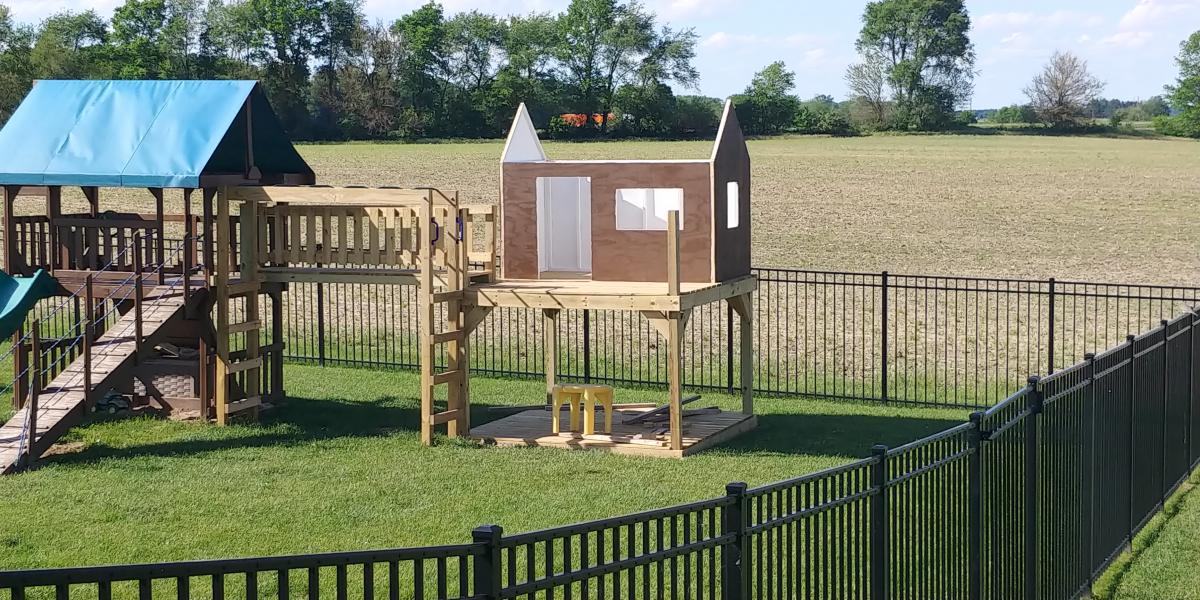
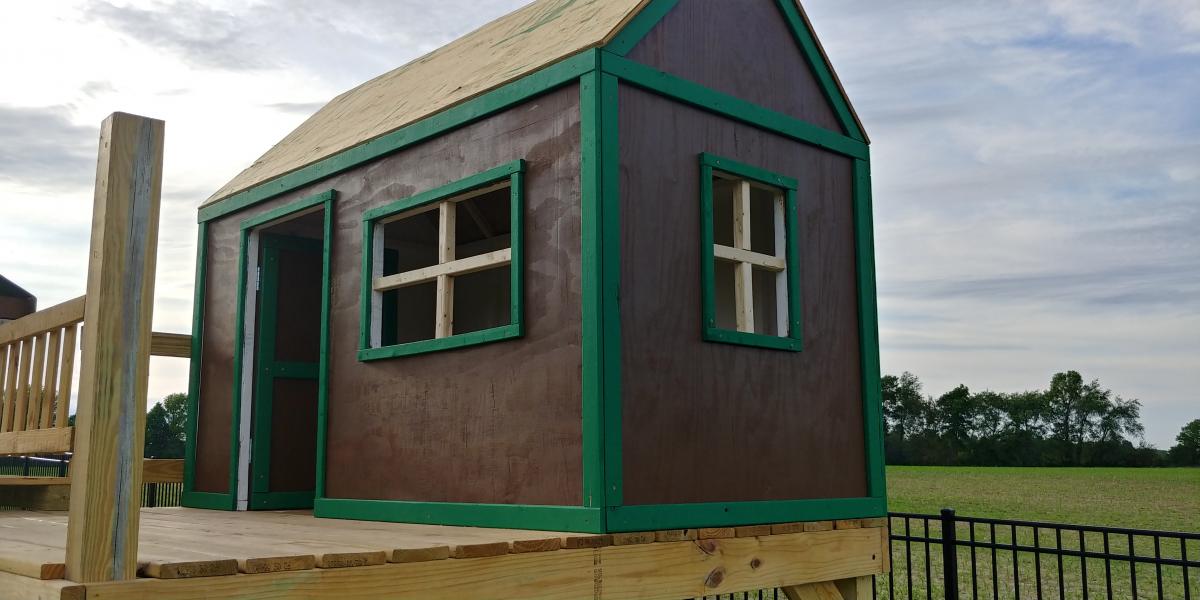
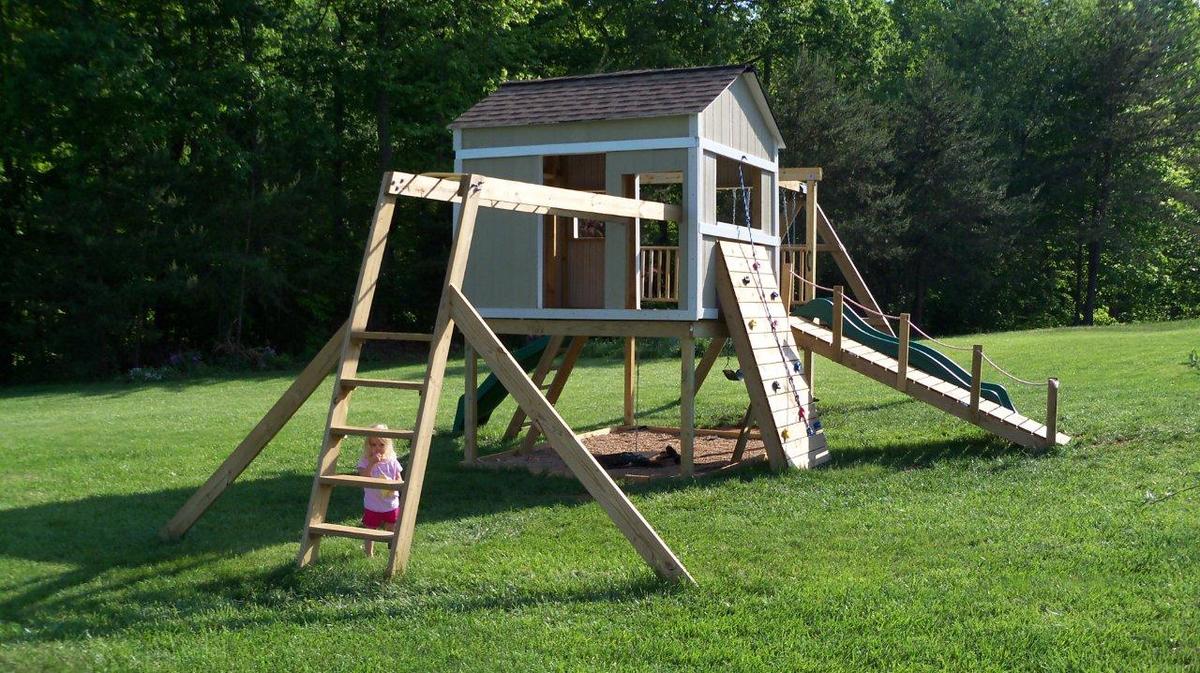
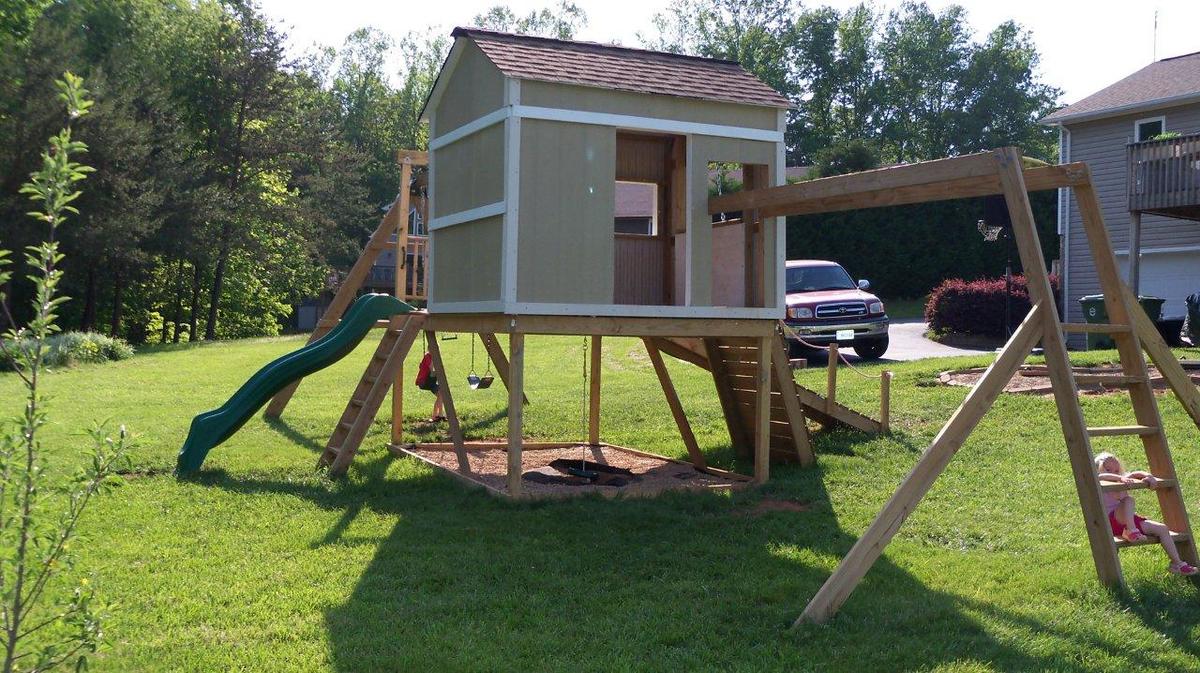
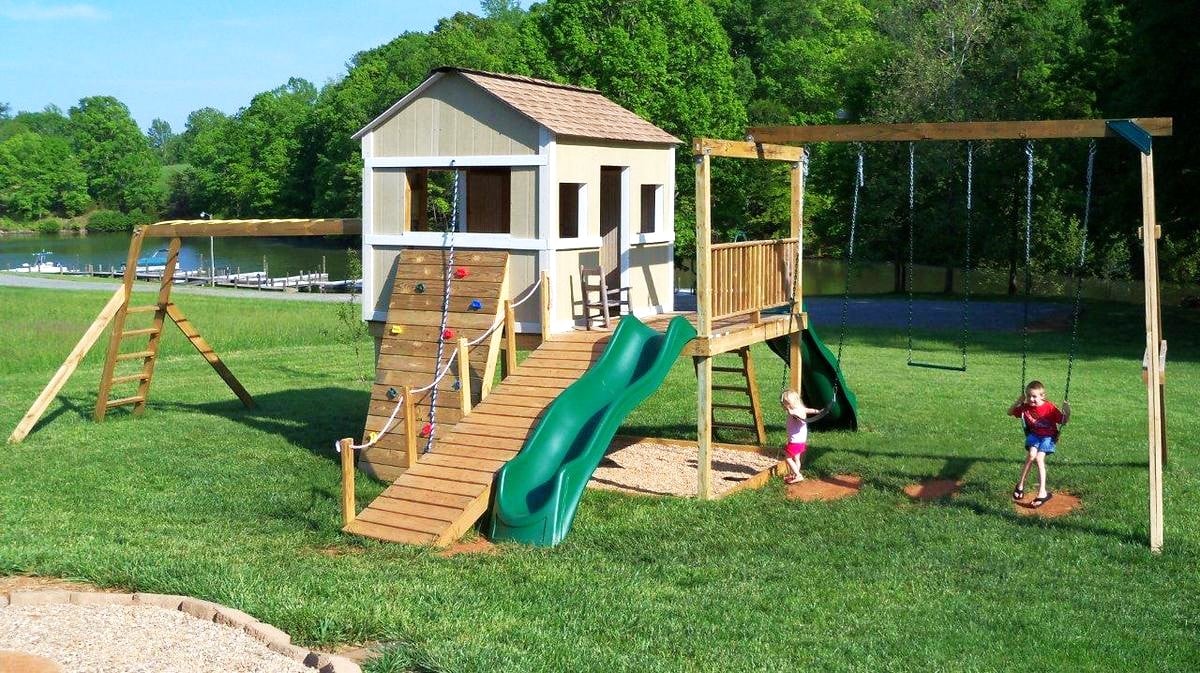
Decided our old play set needed an addition, landed on these plans of Ana's. Sat on them and mulled them over for months. Once the wife said something about adding on to it I made the purchases needed. Connected the two platforms with a bridge. I used 4"x4"x10' for the runners, same boards as the decking for the platform of the bridge(5/4"x6"), 2x4's and 1x4's for the railing. If you look at the 3rd photo, I had to chisel out the 4x4 post to get the 2"x6"x12" support to fit correctly. This should measure 2"x6"x13". Another change I made was to cut the bottom and top trim pieces longer on the front and back sections so that the trim would cover the framing of the gable end walls (see last photo). my son wanted windows so I faked in some windows with scrap 2x2's. I used 2x6's as supports from the 4x4's to the 2x6 framing (see photo 3) I added the monkey bars about a month before deciding to do the platform/deck and playhouse. The ladder is based loosely off of a couple of plans I found online. I was able to do all of this work myself except for the roof. Need my dads help to lift the plywood, he then helped me with the rest of the roof.
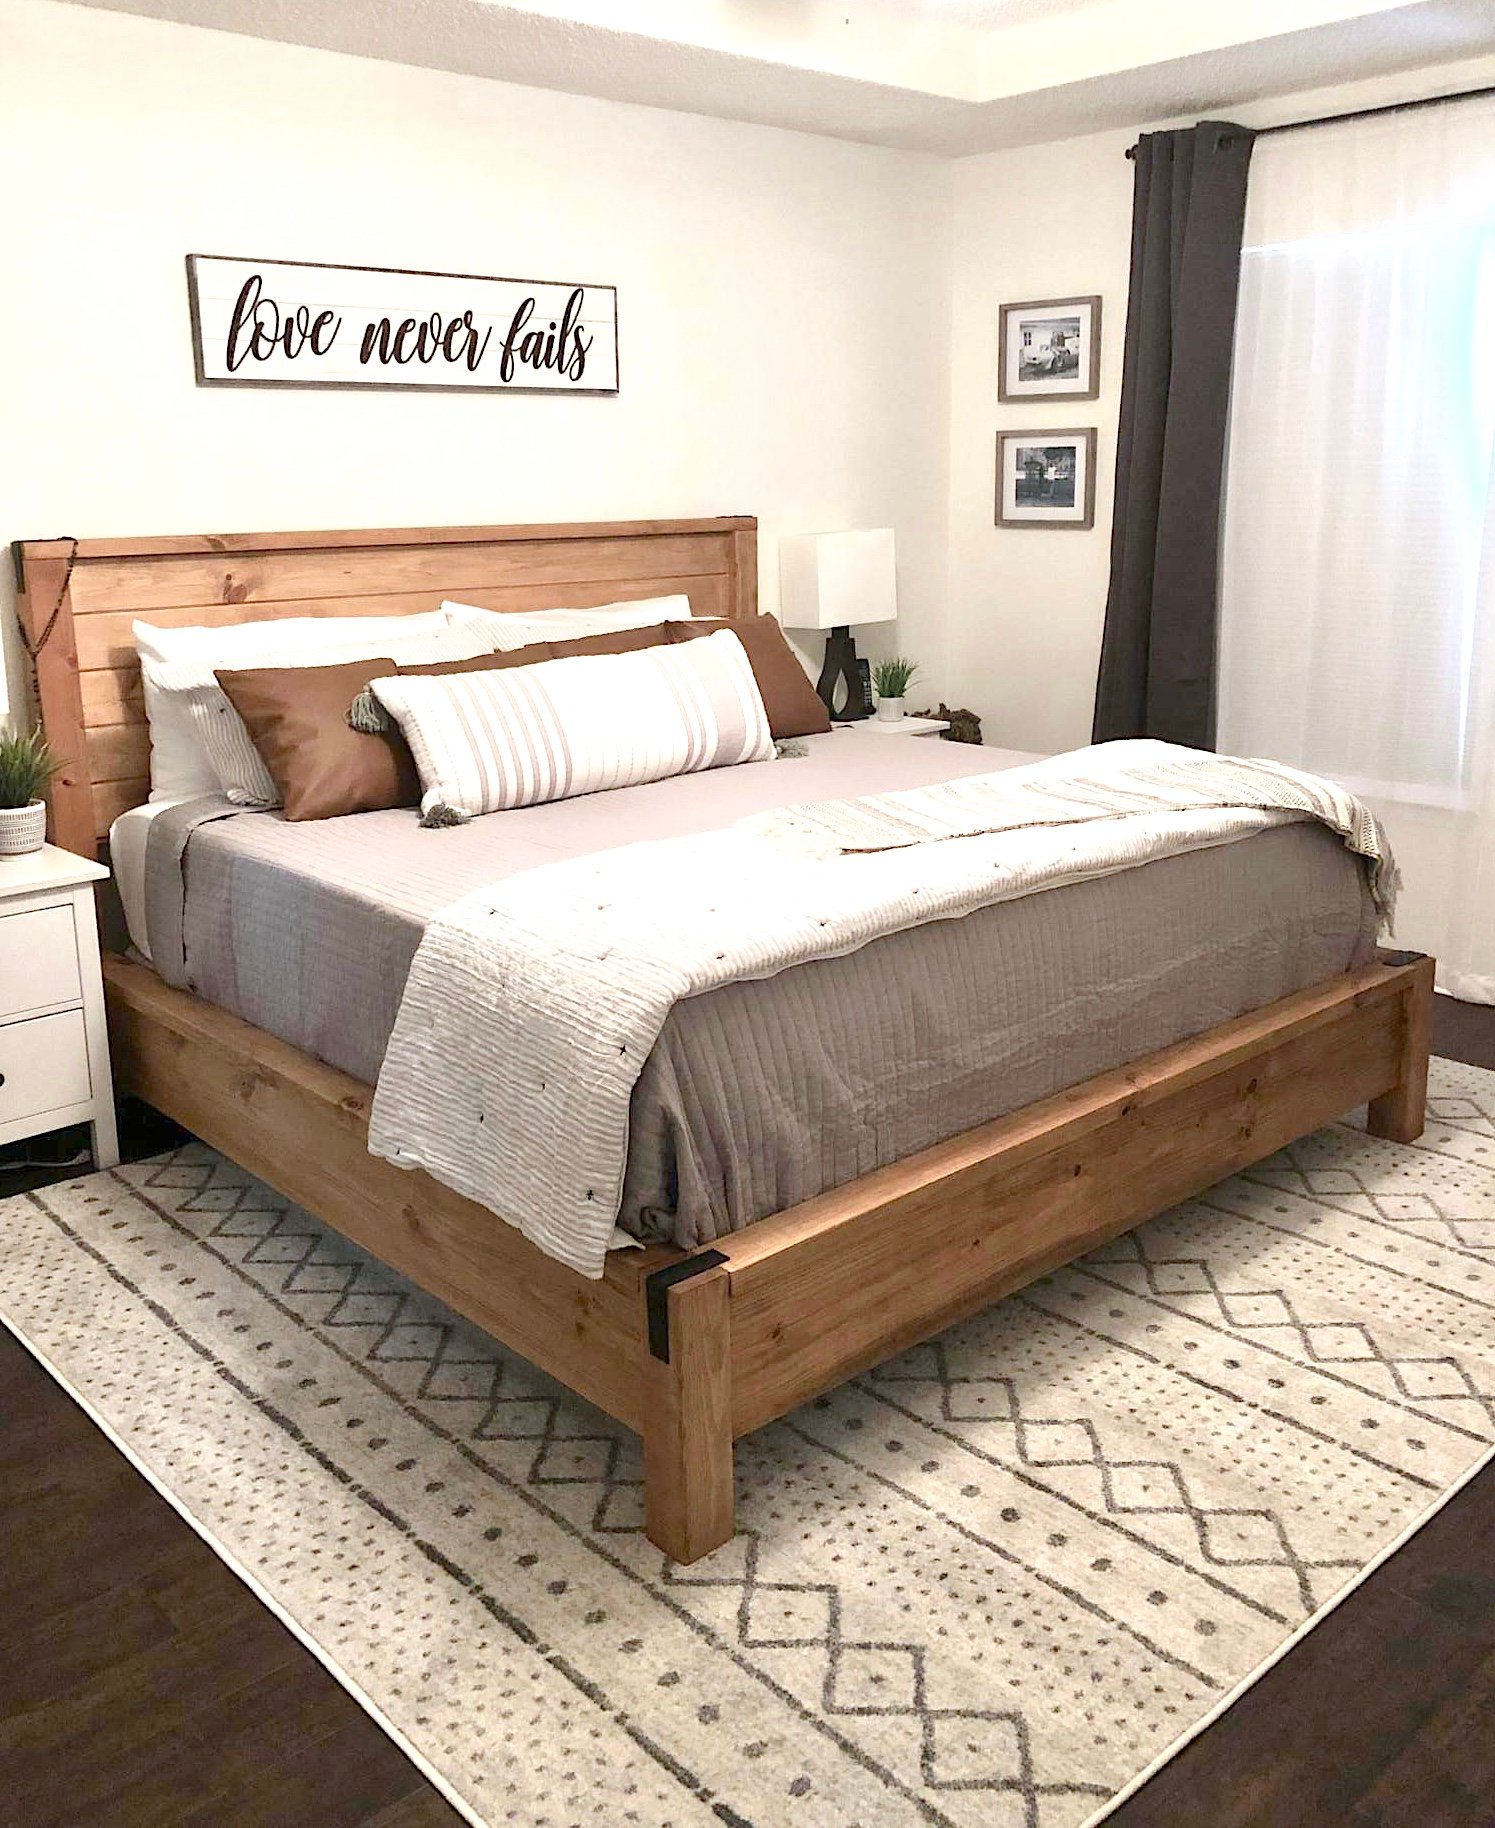
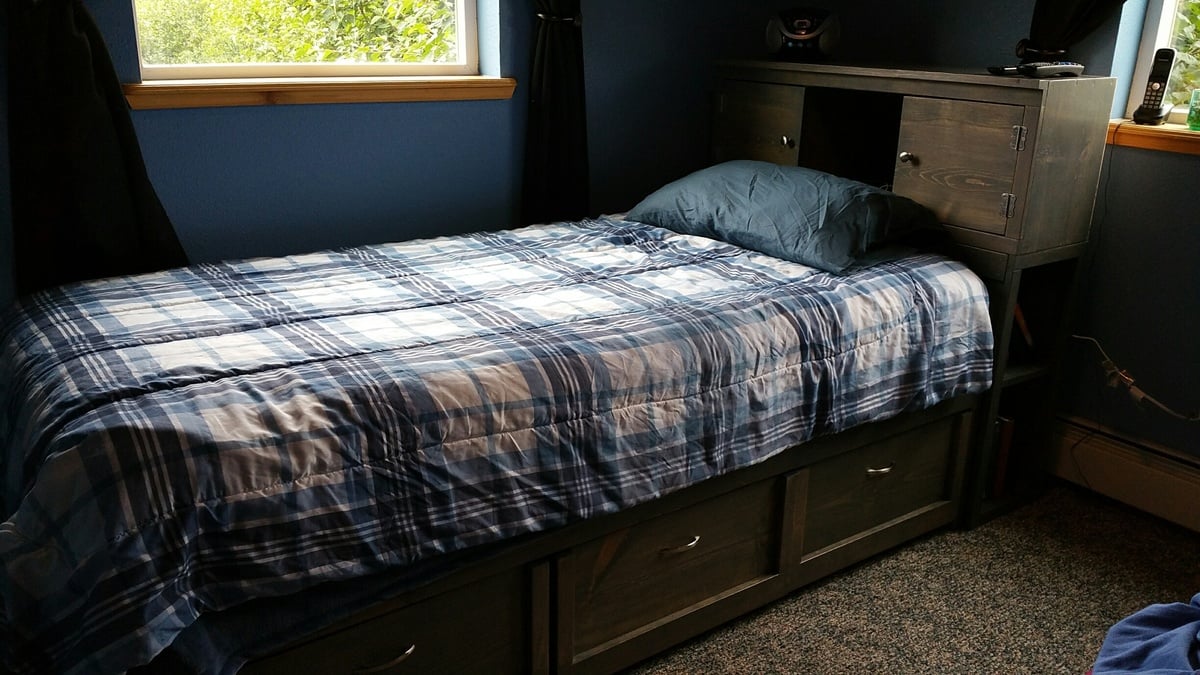
Made this bed from Ana's plans. Modified it with rail so I can add my box spring. Cost was approximately $160 for lumber, screws and stain. Absolutely loved the plans and easy to follow or modify if needed.


Tue, 02/23/2021 - 20:12
This is gorgeous! Is there anyway you could post your modifications? Very nice work!!!
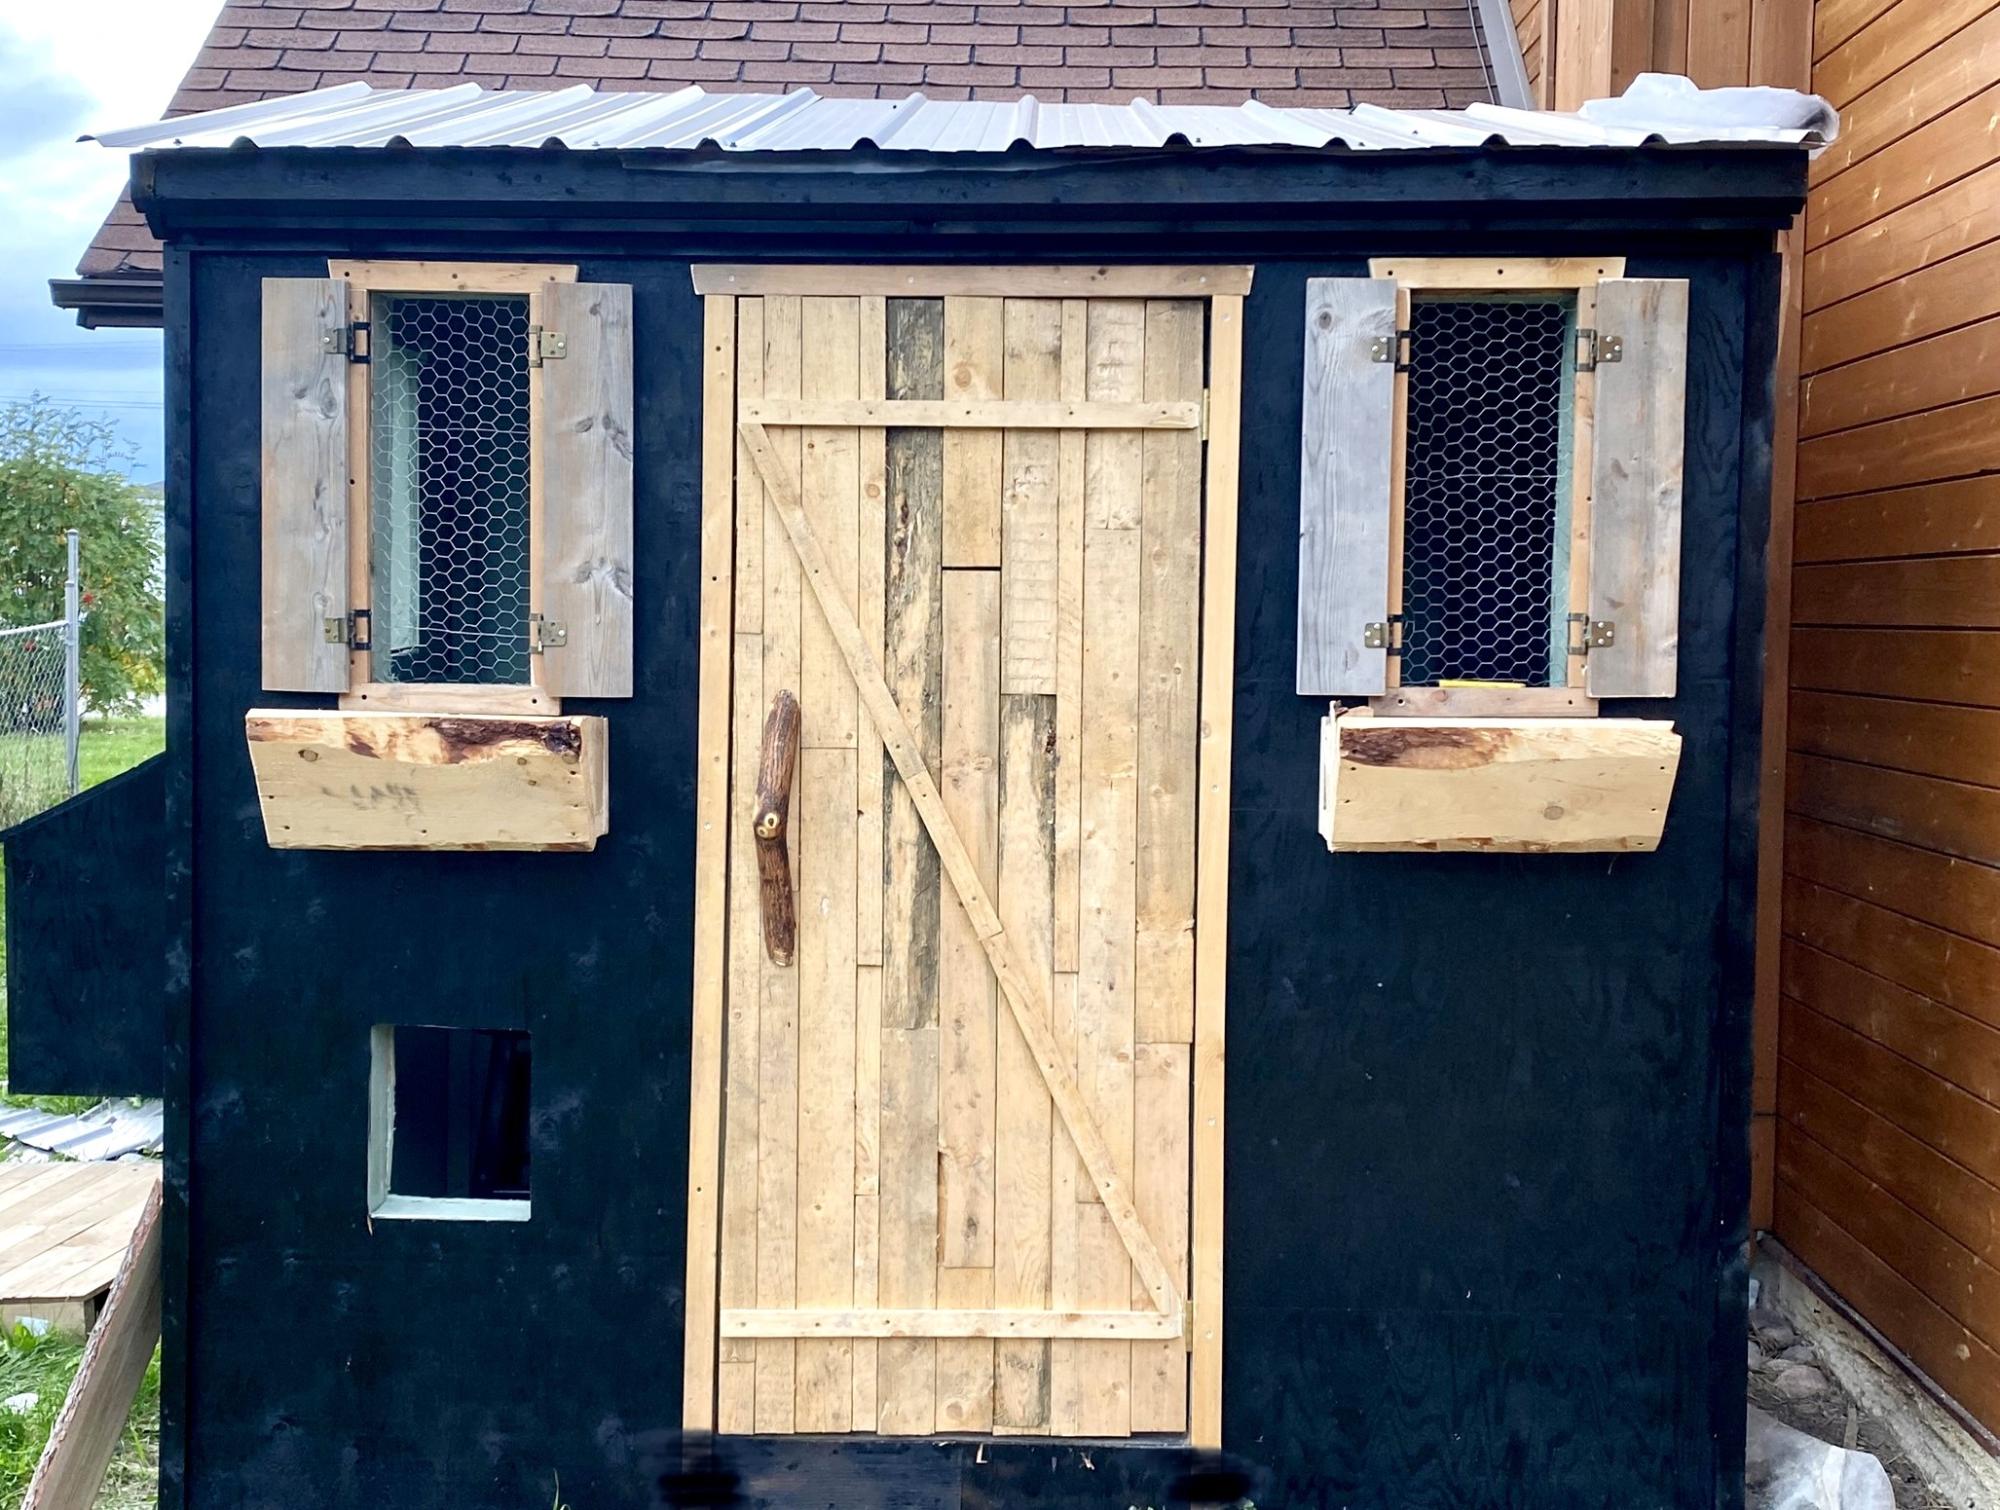
I’ve wanted a chicken coop for a while, and I wanted it cute. I love how it turned out!
Aj
Hey Ana,
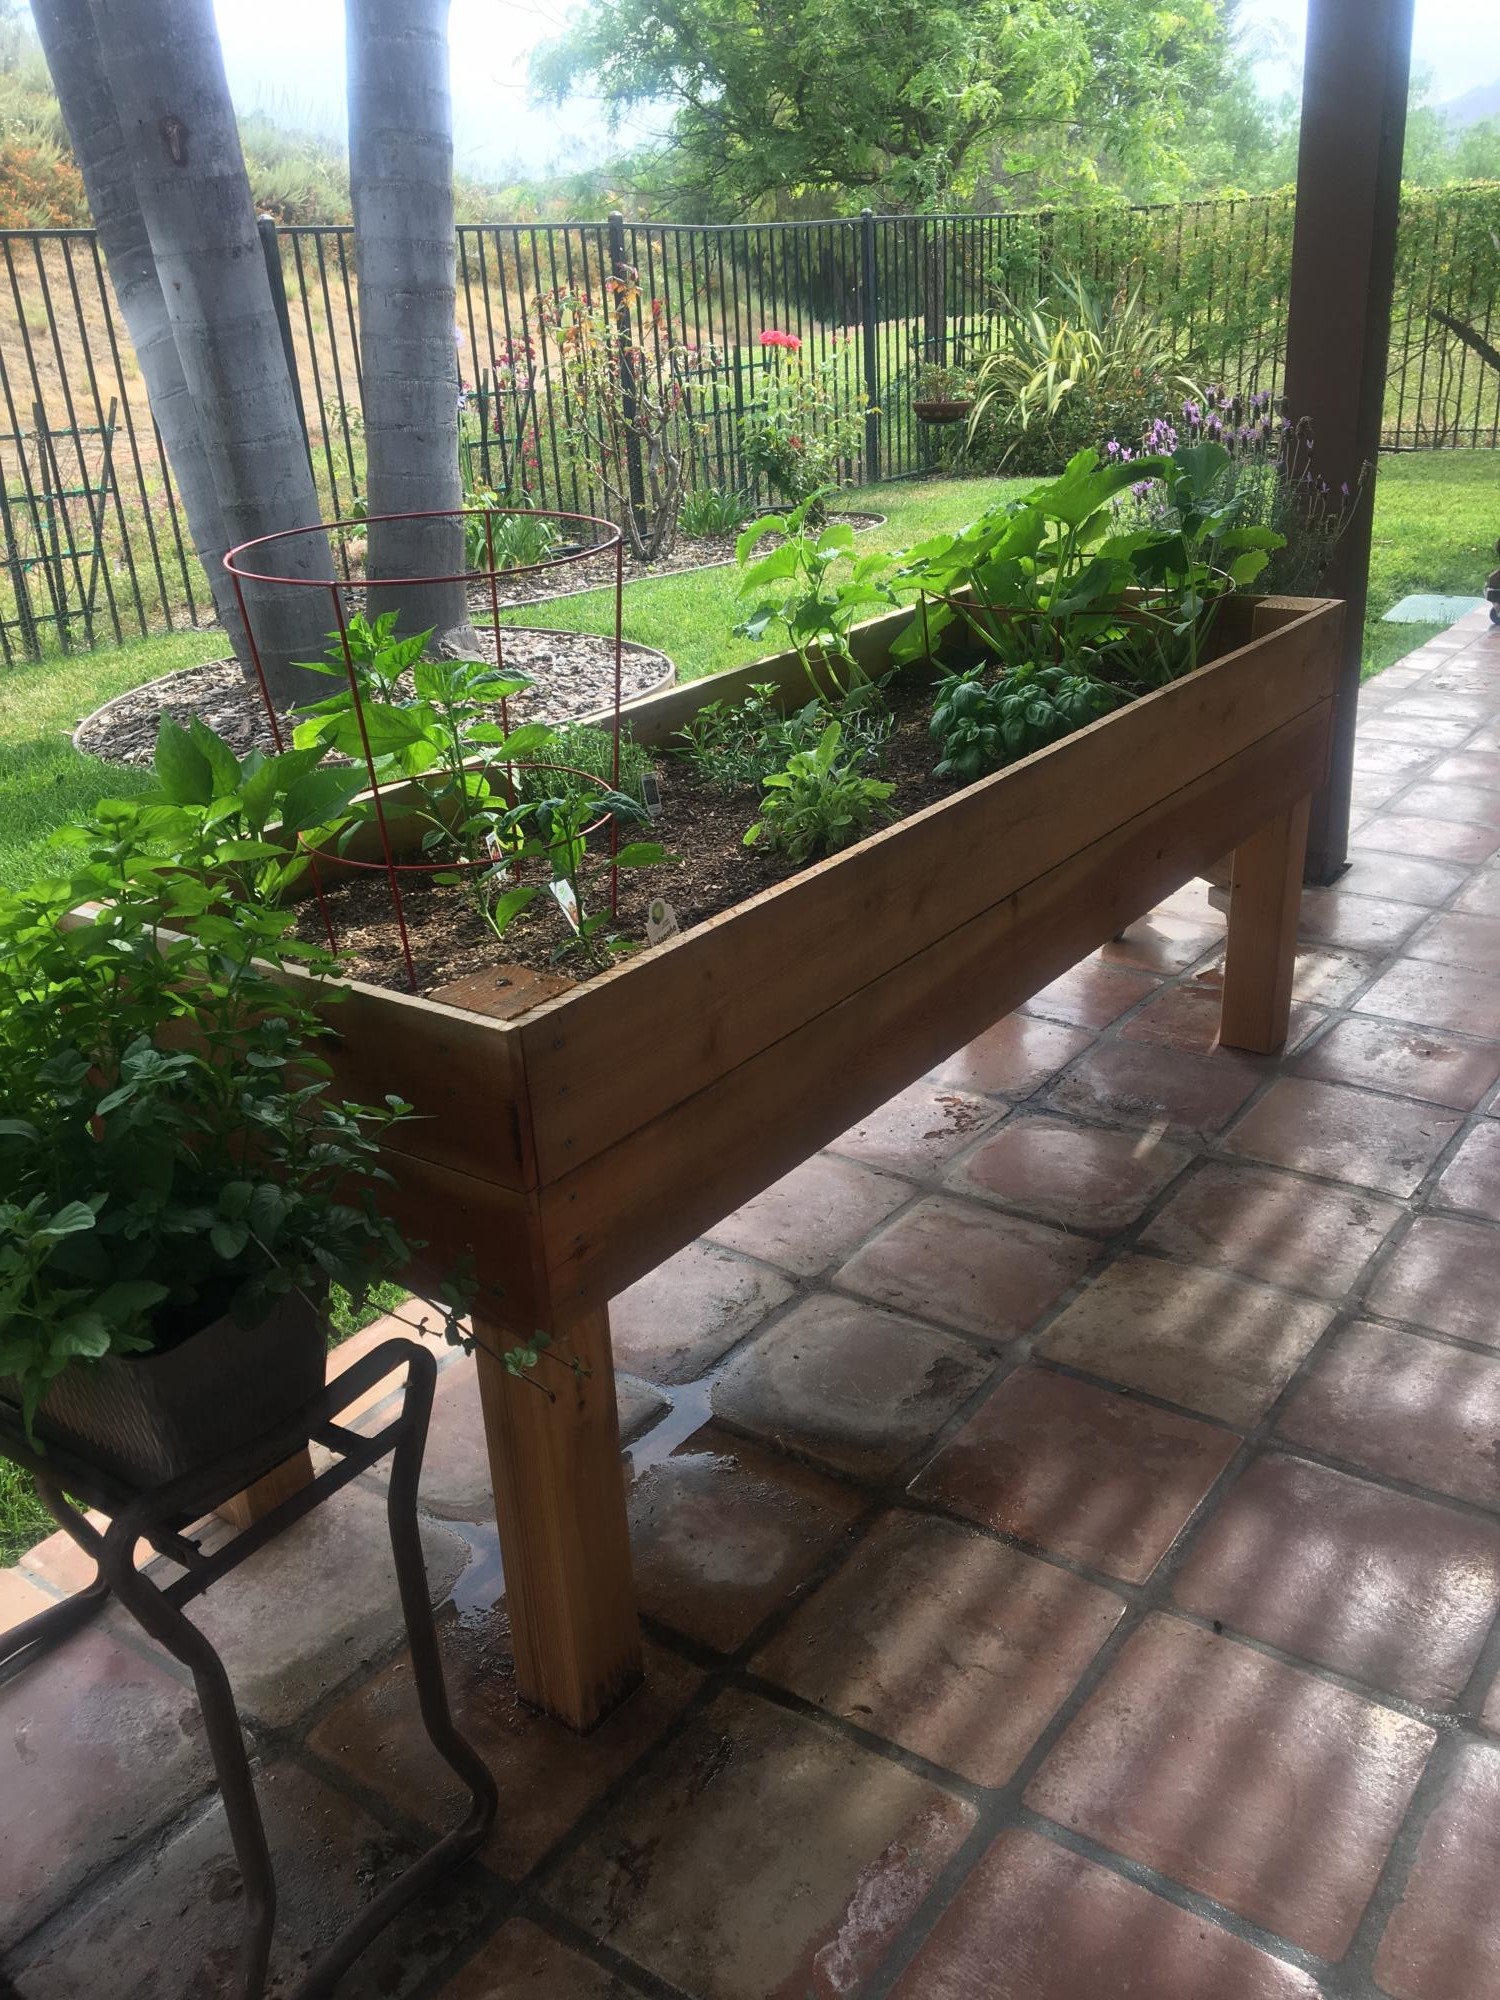
I saw your raised bed planter and decided to tackle it for ourselves. It measures 2'x8' and stands 28" to the bottom of the planter. I used redwood fencing for the sides and bottom at a cost of $1.79 each. I didn't use the wire mesh for the bottom but drilled 1/4" holes in the redwood fencing for drainage.
Thanks for the idea!!
Mike Howell
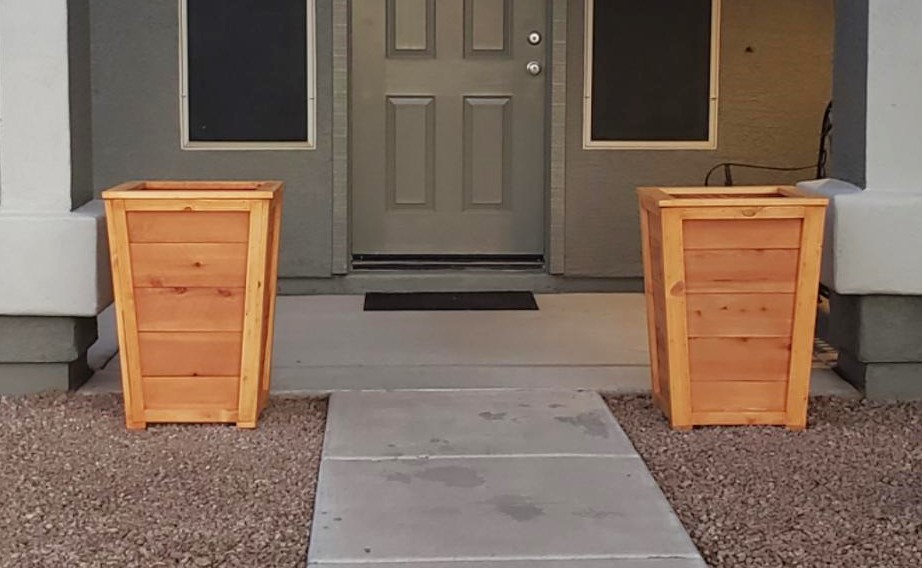
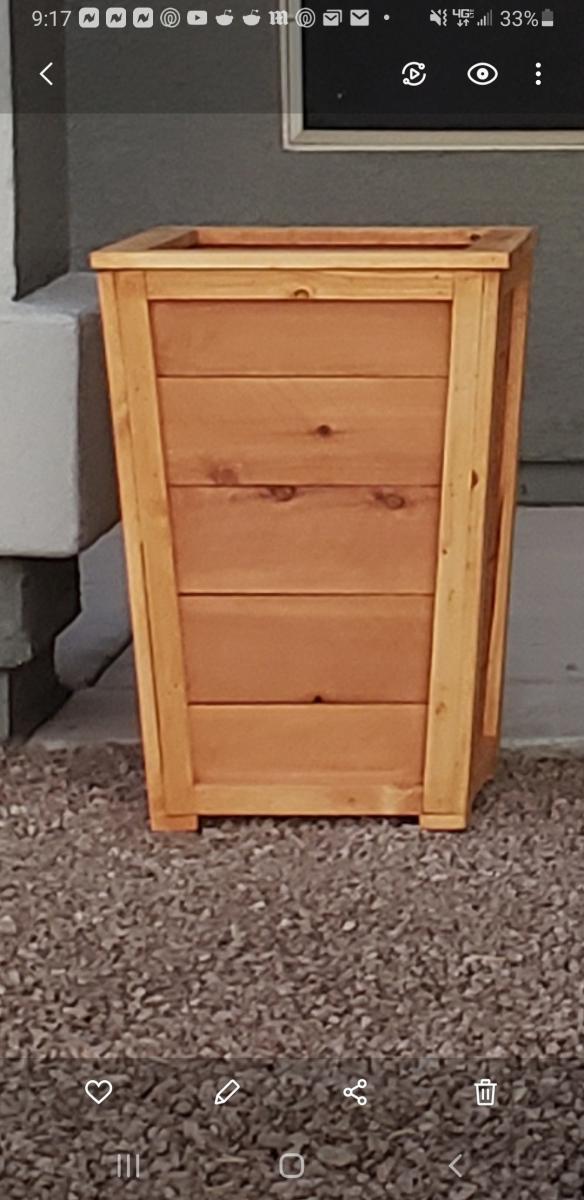
Followed your plan but added extra 1 x 2 trim to the sides, feet made from 1 × 3 and 1x 3 trim around the top

This was my first attempt at building anything....ever. It was so incredibly fun and I certainly learned a lot. My 8 little chickens are loving their new home and I can't wait to build my next project!
Wed, 06/19/2013 - 11:51
Hello! Could you repost the picture / info on your chicken run? I keep getting "page not available" and I've been trying for days :O) I think I want to build that chicken shed (too big for 3 hens?? It's just so cute!) and a run like that to go with it! Thanks! Have a great day!

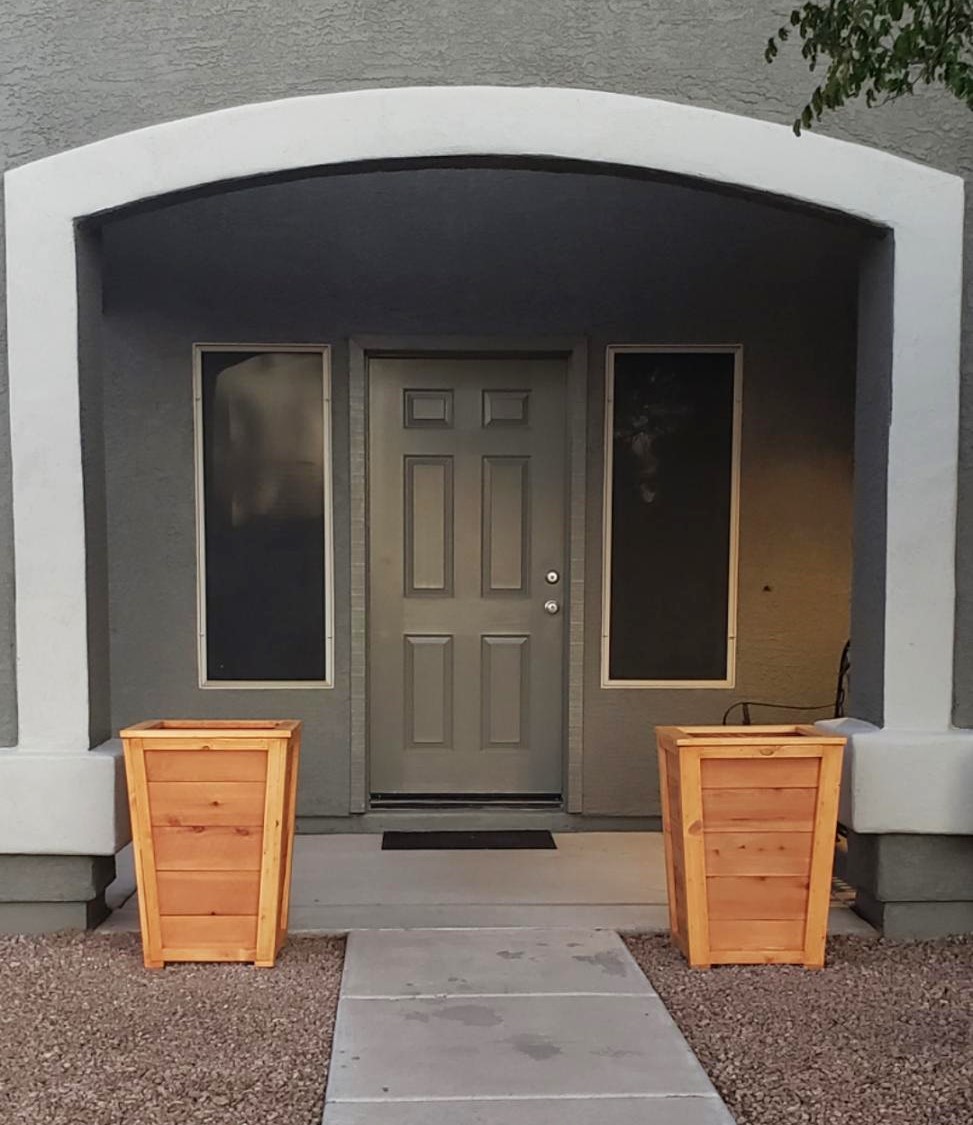
We wanted an outdoor bench for our front entrance way, this one is just what we were looking for! Thank you for the plans.
Wed, 05/04/2016 - 10:01
I am really a novice. The plans say that the 1x4's should be 18-1/2" high? But the measurement of the vertical legs are 14", and the horizontal piece is 4" high, which adds to 18". It all looks flush in the photo. Could you explain what I am missing? Thank you so much!
Wed, 05/04/2016 - 10:01
I am really a novice. The plans say that the 1x4's should be 18-1/2" high? But the measurement of the vertical legs are 14", and the horizontal piece is 4" high, which adds to 18". It all looks flush in the photo. Could you explain what I am missing? Thank you so much!

In reply to quesion by beardjulie
Wed, 05/04/2016 - 11:30
So from what i see in the plans Each 1x4 board is to be cut at 18" and the 2x4 is to be cut at 14-1/2". Cutting the 2x4 at 14-1/2" will insure the 1x4 and 2x4 are fluish for the end product. It doesnt seem to add up given the demensional names of the lumber hahaha however the actual width of a 2x4 (the one the will be going horizontal) is acutally 3-1/2". so then you cut you 2x4 leg piece at 14-1/2" and then lay the horizontal 2x4 on top the total height will be 18" and should be flush with your 1x4 that is cut at 18"
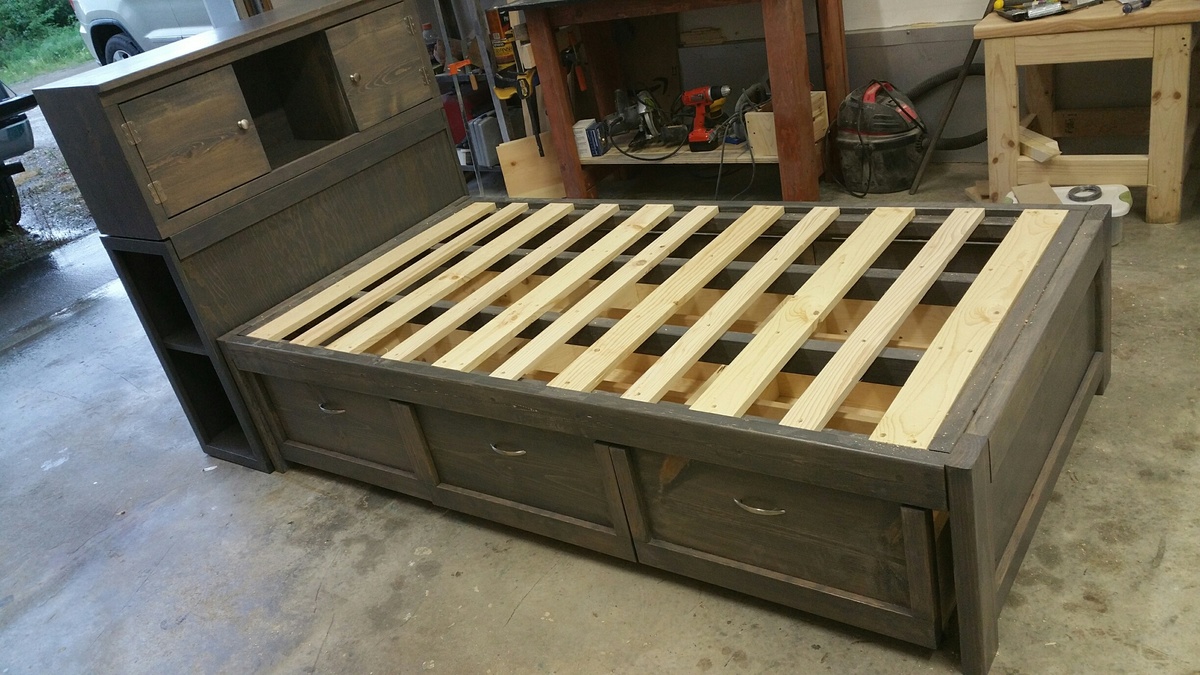
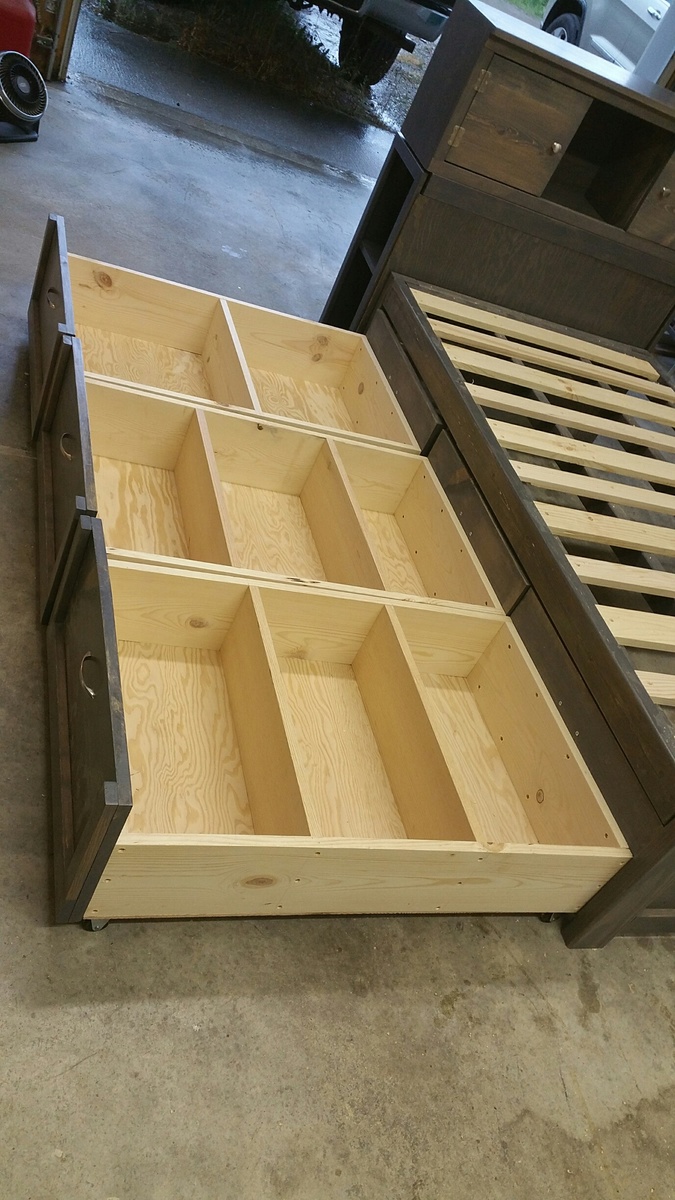
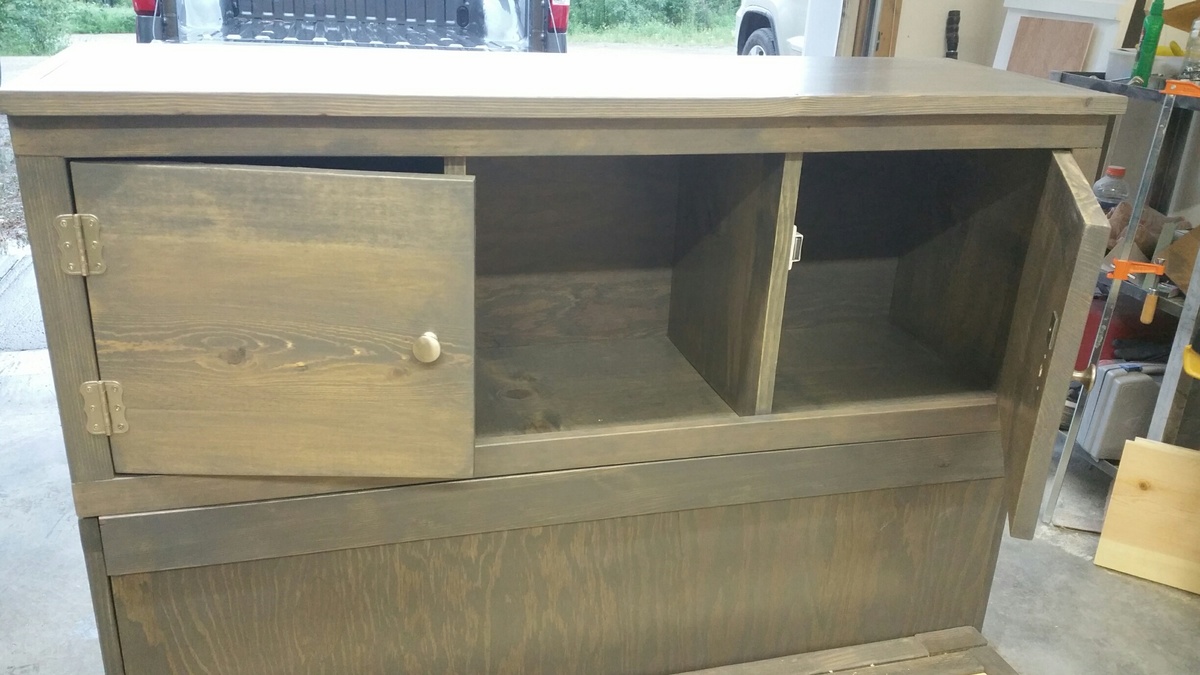
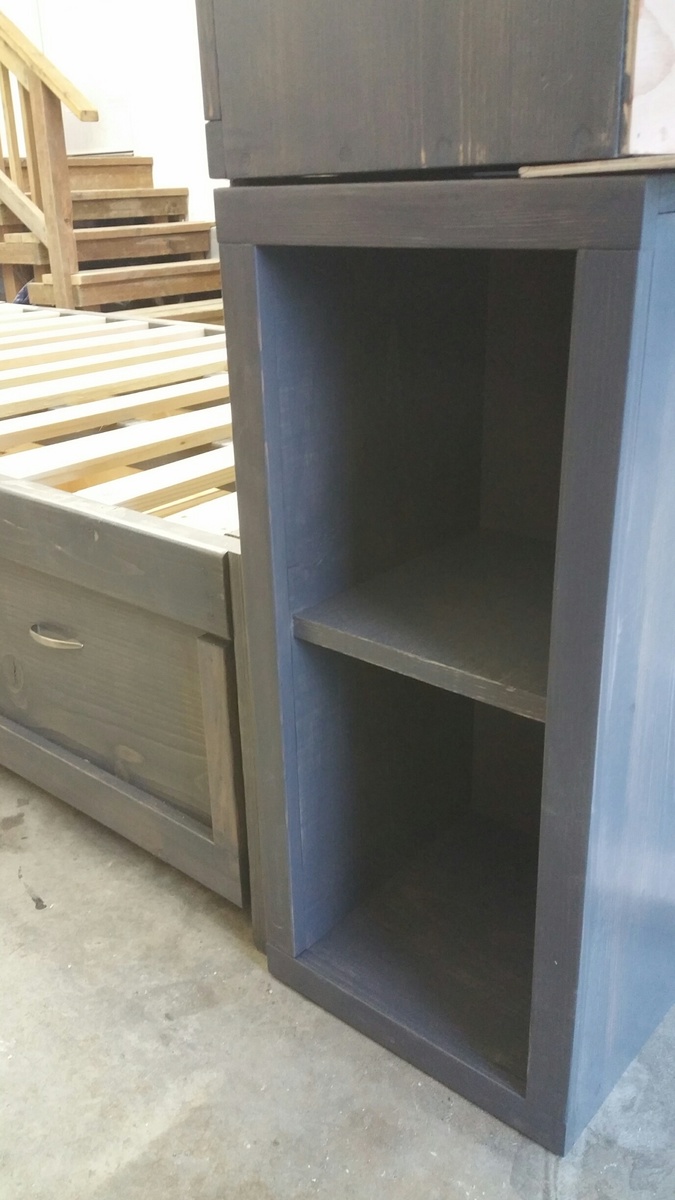
I combined Ana's plans for Daybed with Storage Trundle Drawers and a Storage Headboard with a Small Hutch.
This is my 3rd daybed with storage drawers. It's such an easy build and gives so much extra space. The entire project took about 40 hours. I used Minwax stain in Classic Grey and three coats of polyurethane. For the drawers, I used 1.5" casters. I drilled a hole through the back of the headboard to feed cords through. Then I put the whole thing in the back of my truck and drove 500 miles for the final assembly. :) In the provided photos, some of the pieces are flush because I hadn't permanently attached them.

My father-in-law and I knocked this project out in about 5 hours including the trip to the lumber yard. You've got a great basic design here! A few modifications we made:
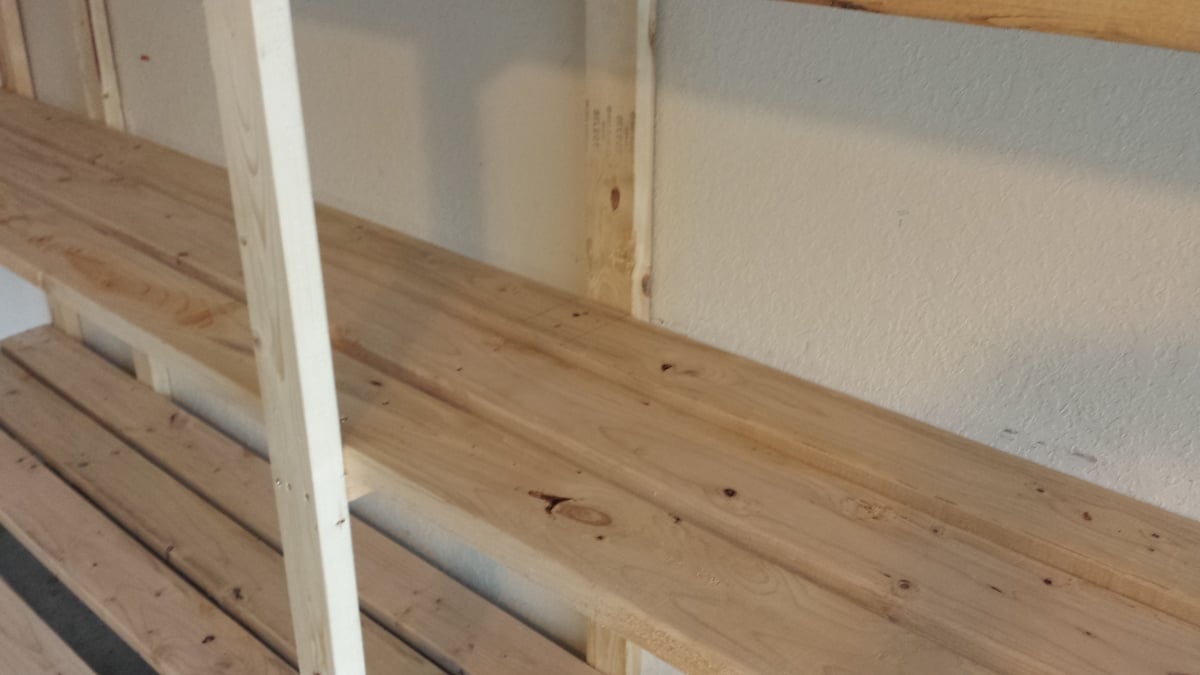
1. I thought the depth of the shelves in the original plan was a little too shallow so I used 3 2"X6"s instead of the 4 2"x4"s. That made the shelves 1 1/2" deeper. Although 2"x6"s are obviously more expensive, the overall cost for the project didn't change much because we only had to use 3 boards per shelf instead of 4. This also reduced the amount of screwing and made it easier to position the shelf boards without taking measurements since we only had one middle board to deal with (instead of 2 with the 2"x4"s). We just eyeballed the spacing of the middle shelf board as we worked.
2. Since our garage has a 10' ceiling, I decided to go 8' tall with the unit. This allowed us to add a 5th shelf.
3. Some oversized tubs can be 18-20" high or more so I varied the height of each shelf -- 24" at the bottom, then 20", 18" and 16". There's approx. 24" available between the top shelf and the ceiling.
4. Due to the position of the garage door track, I had to notch out a couple feet at one side. The end support piece is only 6' high.
5. Since many storage tubs can be 16-18" wide, I made sure that there was at least 54" between 3 of the vertical support structures. This will allow us to store 3 tubs side-by-side and maximize storage. You might notice that I have two vertical supports that appear to be very close together near the back wall. I did this so I would have something on that side to attach more shelving to on that short wall where the garage door opener is.
The only cuts we had to make for this entire project were for the 18 1/2" 'braces' or support pieces on the vertical ladder structures. The shelves are either 14' or 12' (top shelf only) and the vertical 2"x4"s are either 8' or 6'. Most lumber yards will carry these lengths in either 2"x4"s or 2"x6"s.
We didn't use any wood glue, and I admit this may come back to haunt me. However, to get a good fit and eliminate gaps, I used clamps I already owned to squeeze the boards together before adding the screws. Everything feels very solid and sturdy to me.
Because of the extra height compared with the original plan, I was worried about it possibly tipping over (we have a 10-year-old who likes to climb ![]() ) so I made sure that 3 of the supports are lined up with the wall studs. After leveling the entire unit, I plan to anchor it to the wall using 3 1/2" screws.
) so I made sure that 3 of the supports are lined up with the wall studs. After leveling the entire unit, I plan to anchor it to the wall using 3 1/2" screws.
So for about $187 in lumber and maybe $20 in construction screws, I've got 76 feet of STURDY shelving that should accommodate hundreds of pounds! Not a bad investment at all...
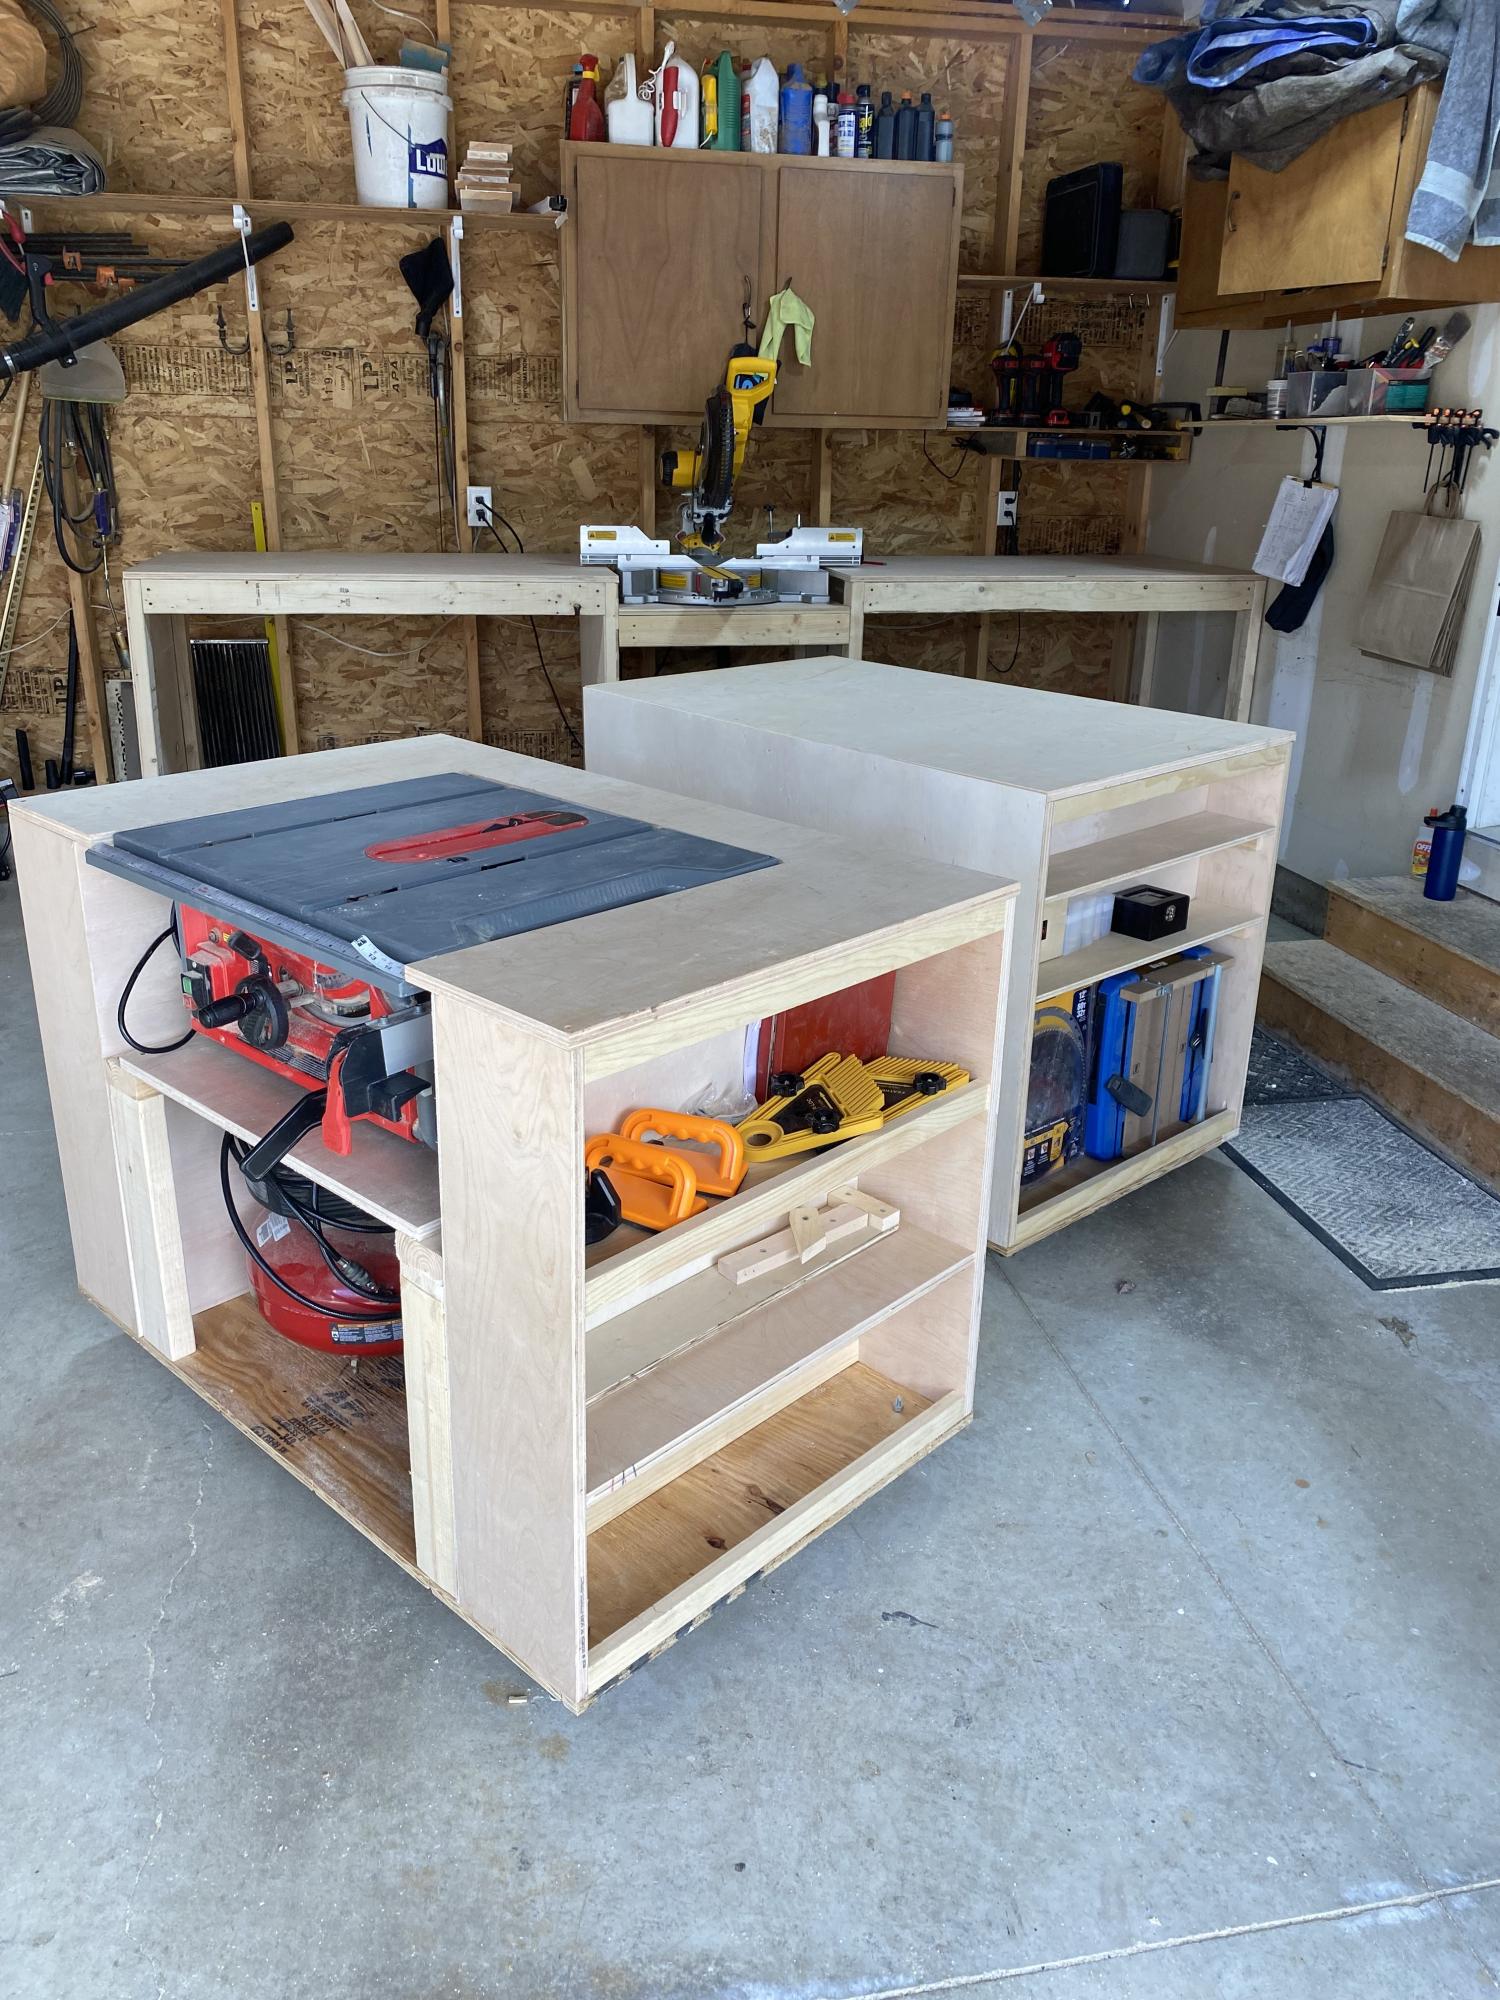
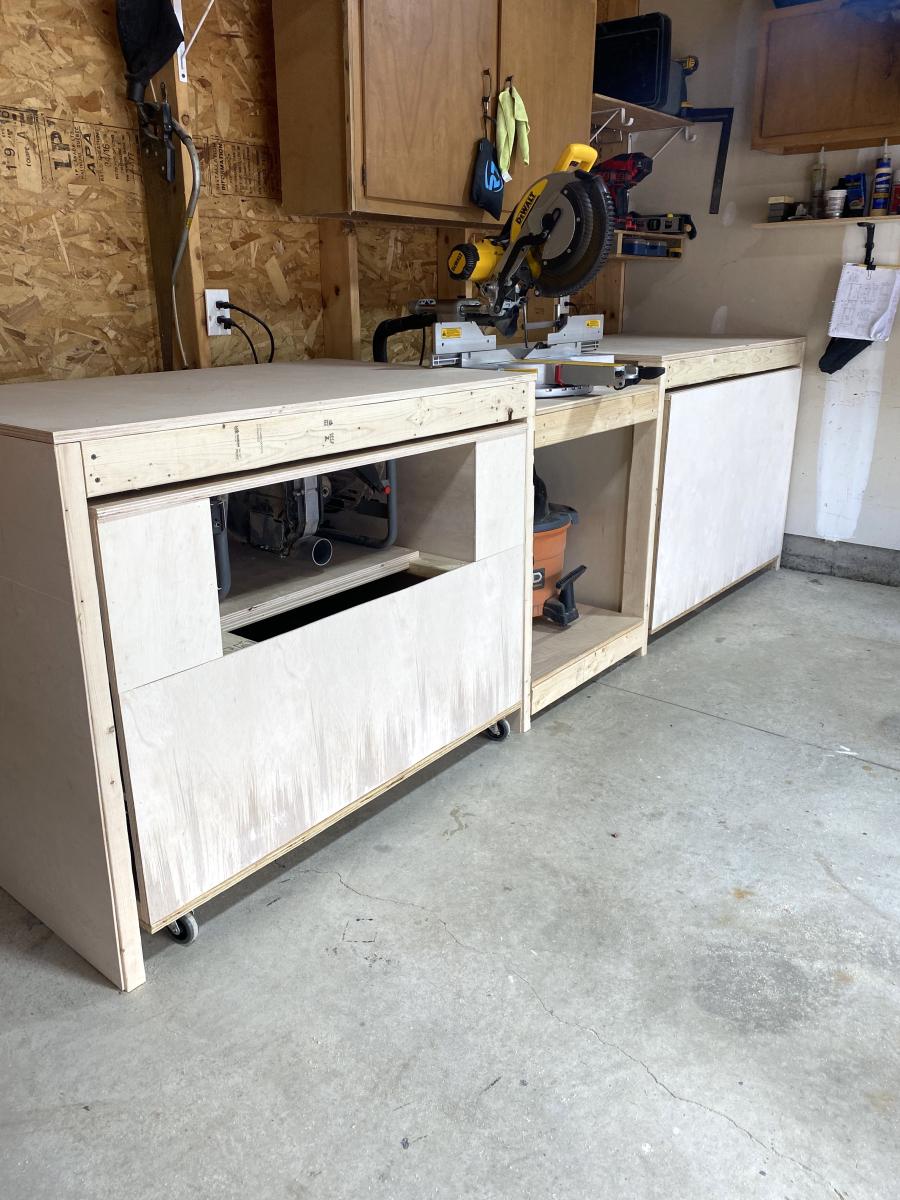
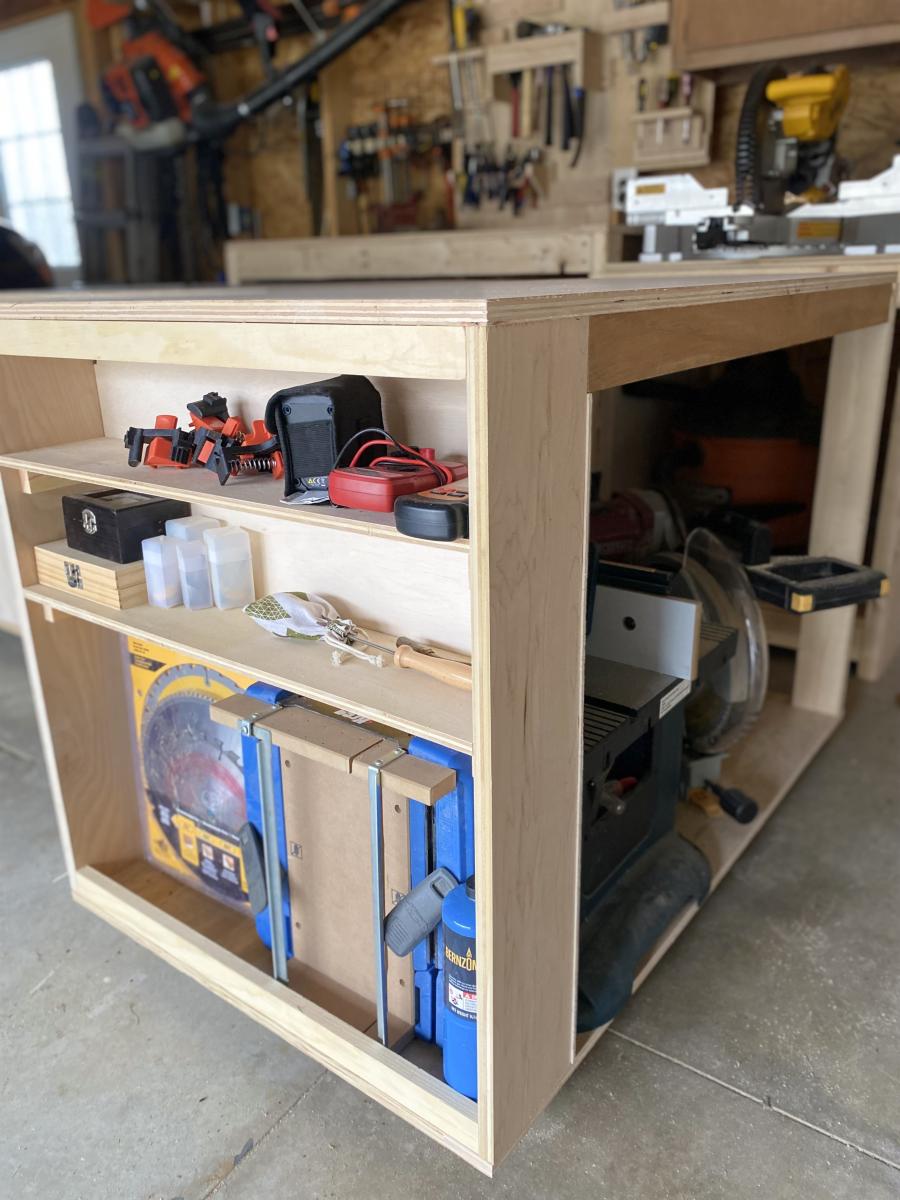
Modified these plans slightly for my needs. I kept the table saw open for easier dust collection and only had one side of shelving on the other bench to allow for storing larger items. I can’t get over how much storage in a small space you get with these and how multi functional they are.
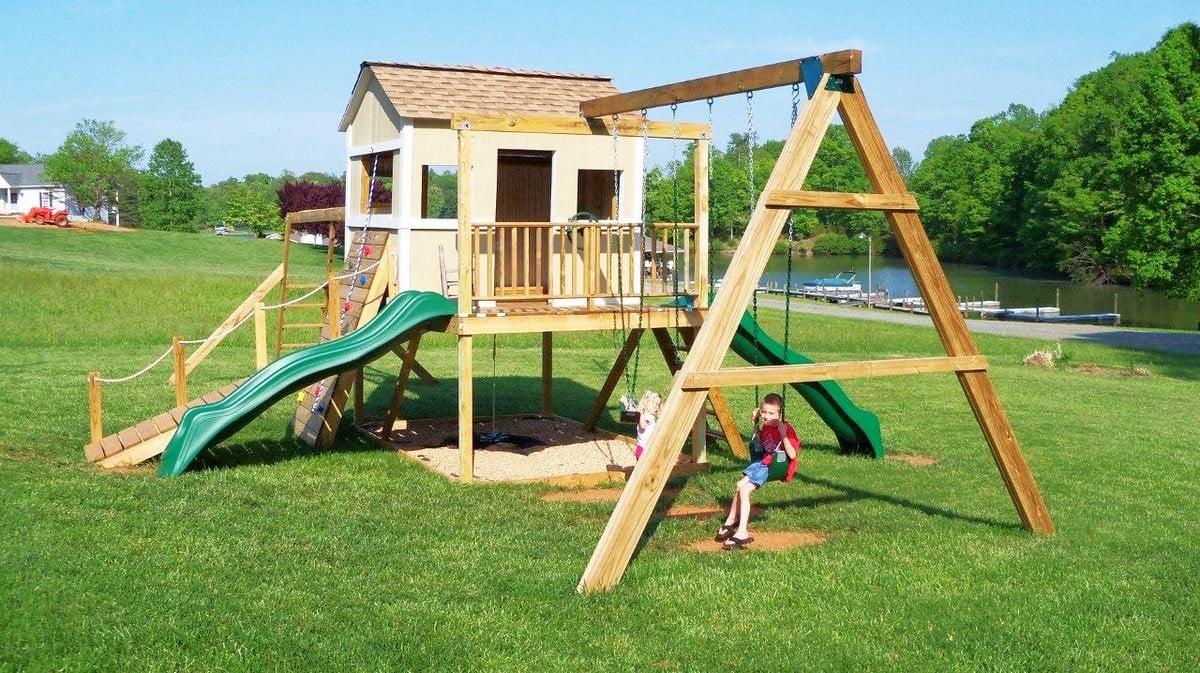
I used Ana's plan as a base.
I changed it from 8x8 to 8x12, made the 4x4x8's to 4x4x10' for a higher main platform and swing platform, and added a 12' long monkey bar set to the other side. Also, an 8' climbing wall and a plank walkway to accompany the two slides.
For the clubhouse, I used Hardiplank 4x8 sheets for the siding and an EZ-Framer kit for the structure itself.
The slides I purchased from Lowes, monkey bars from Amazon, and the swing frame braces from Amazon as well. The swing kits I got from ebay.


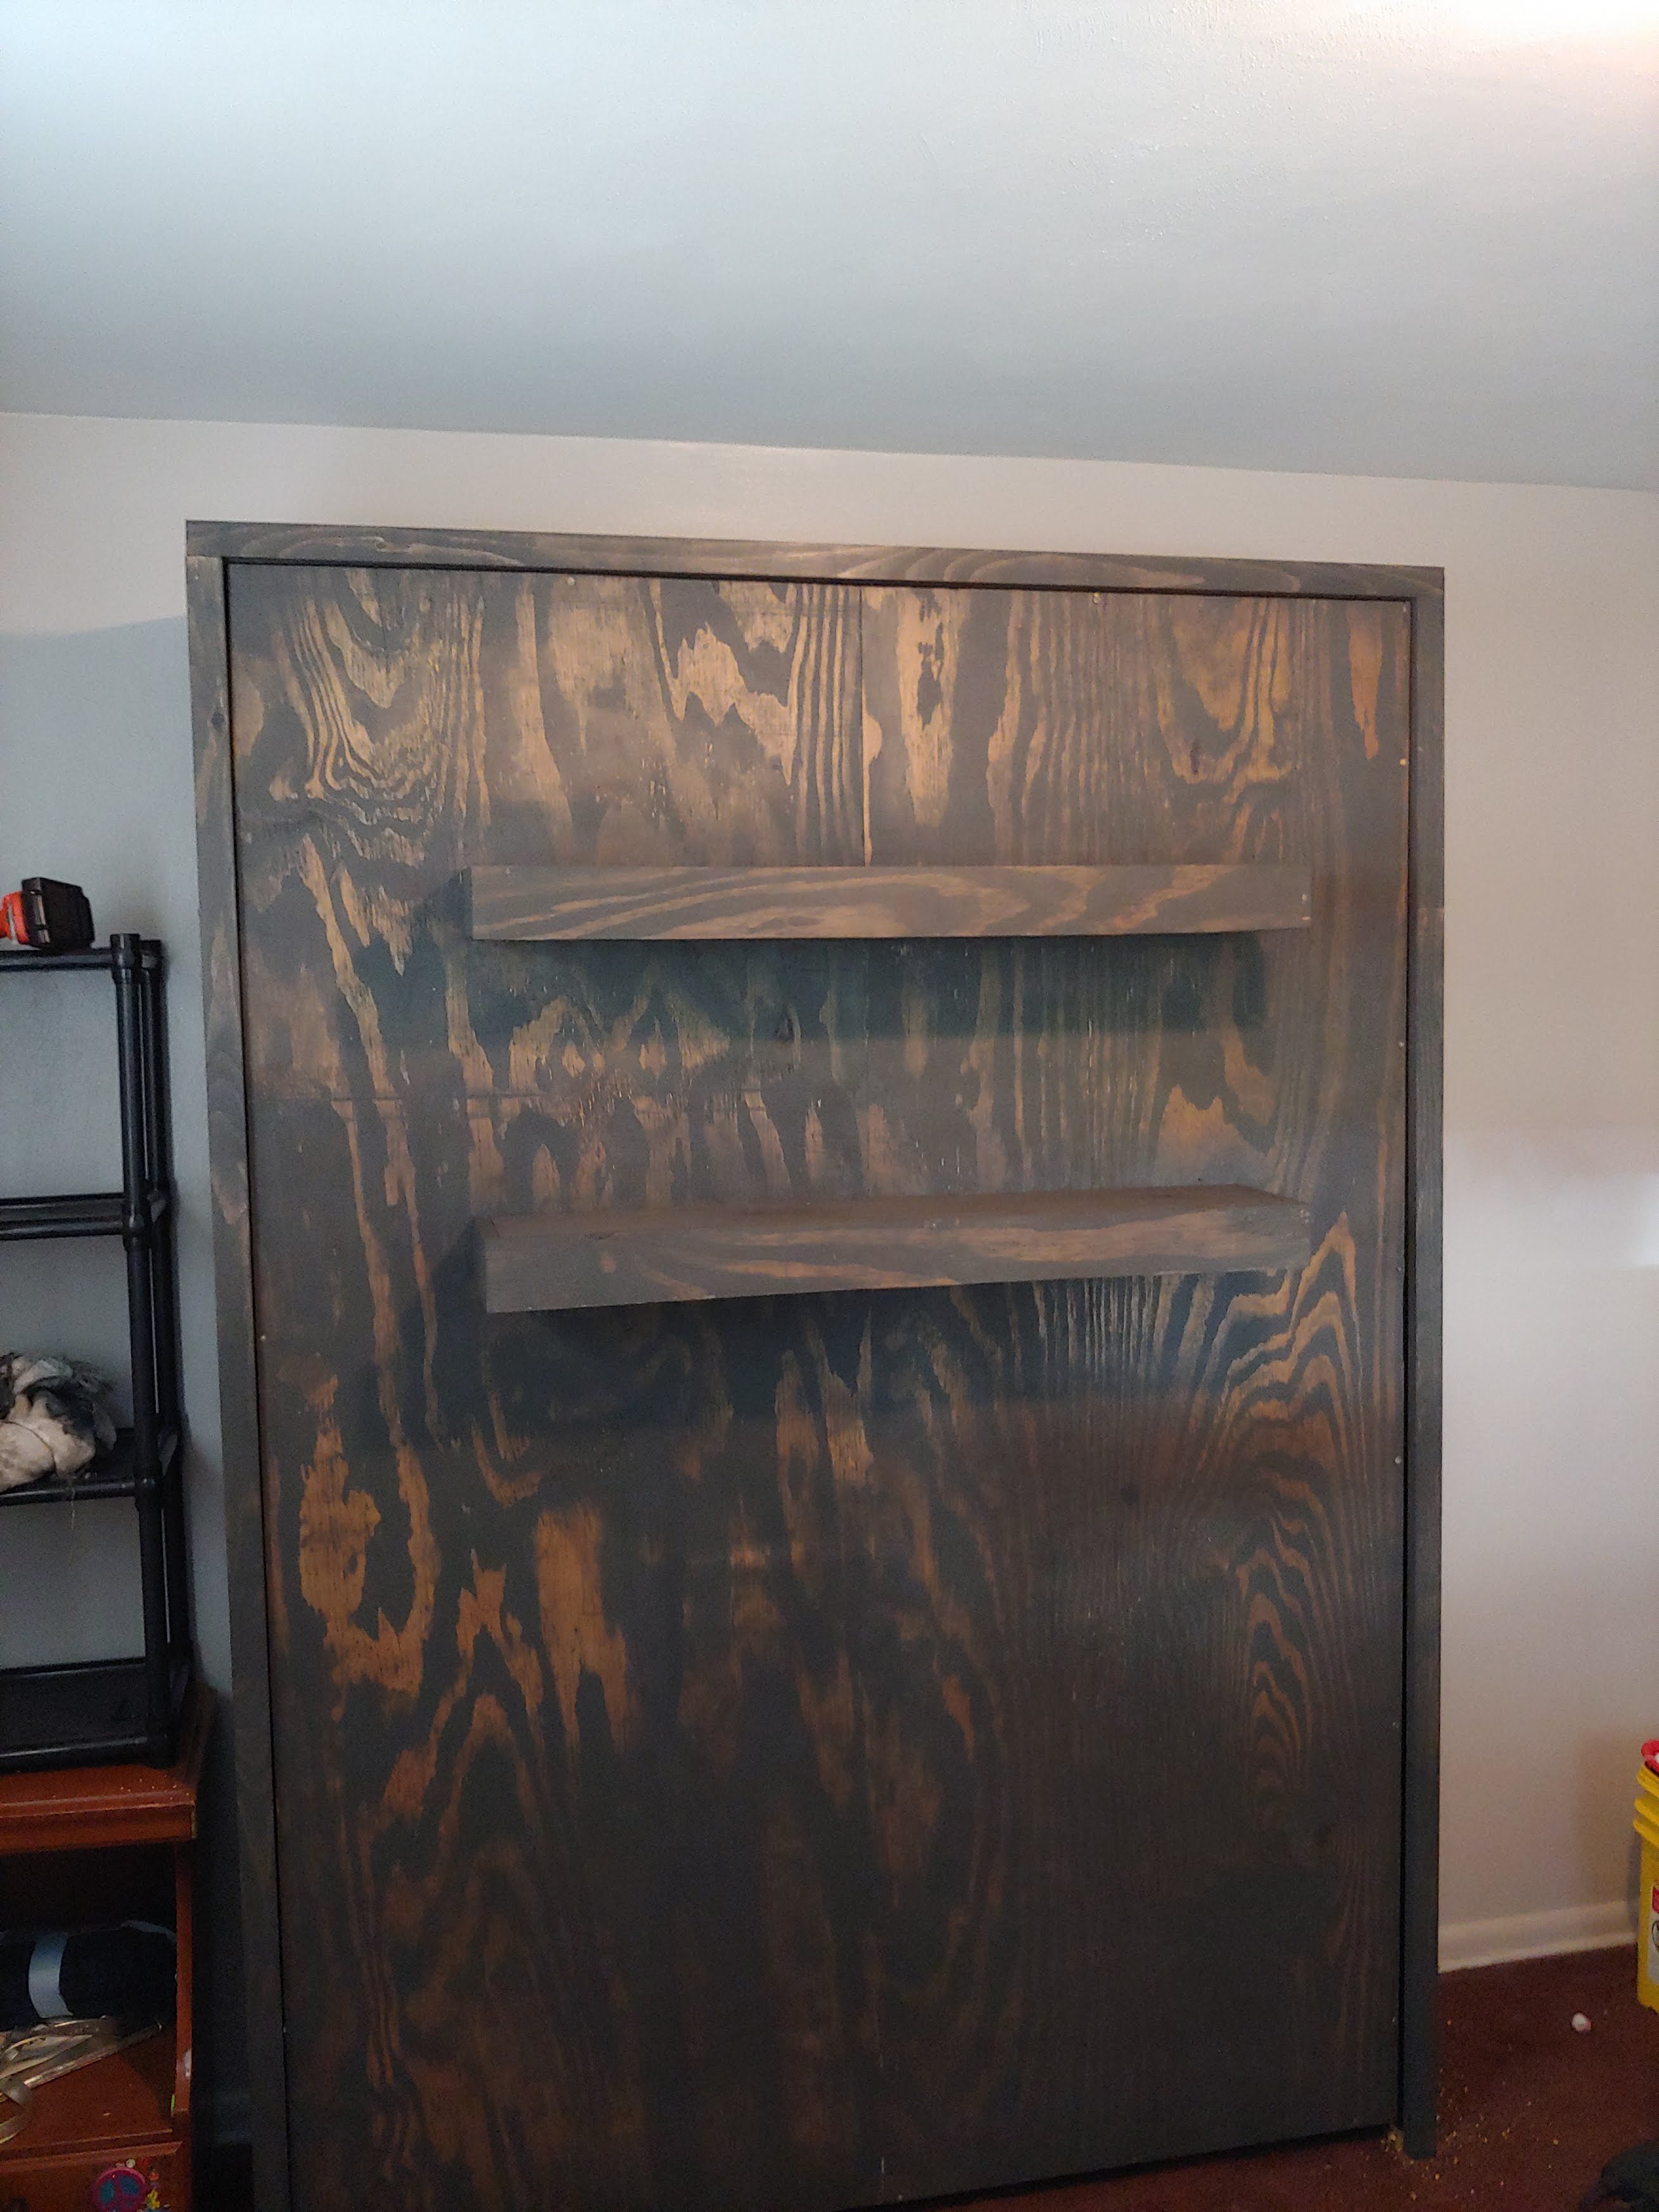
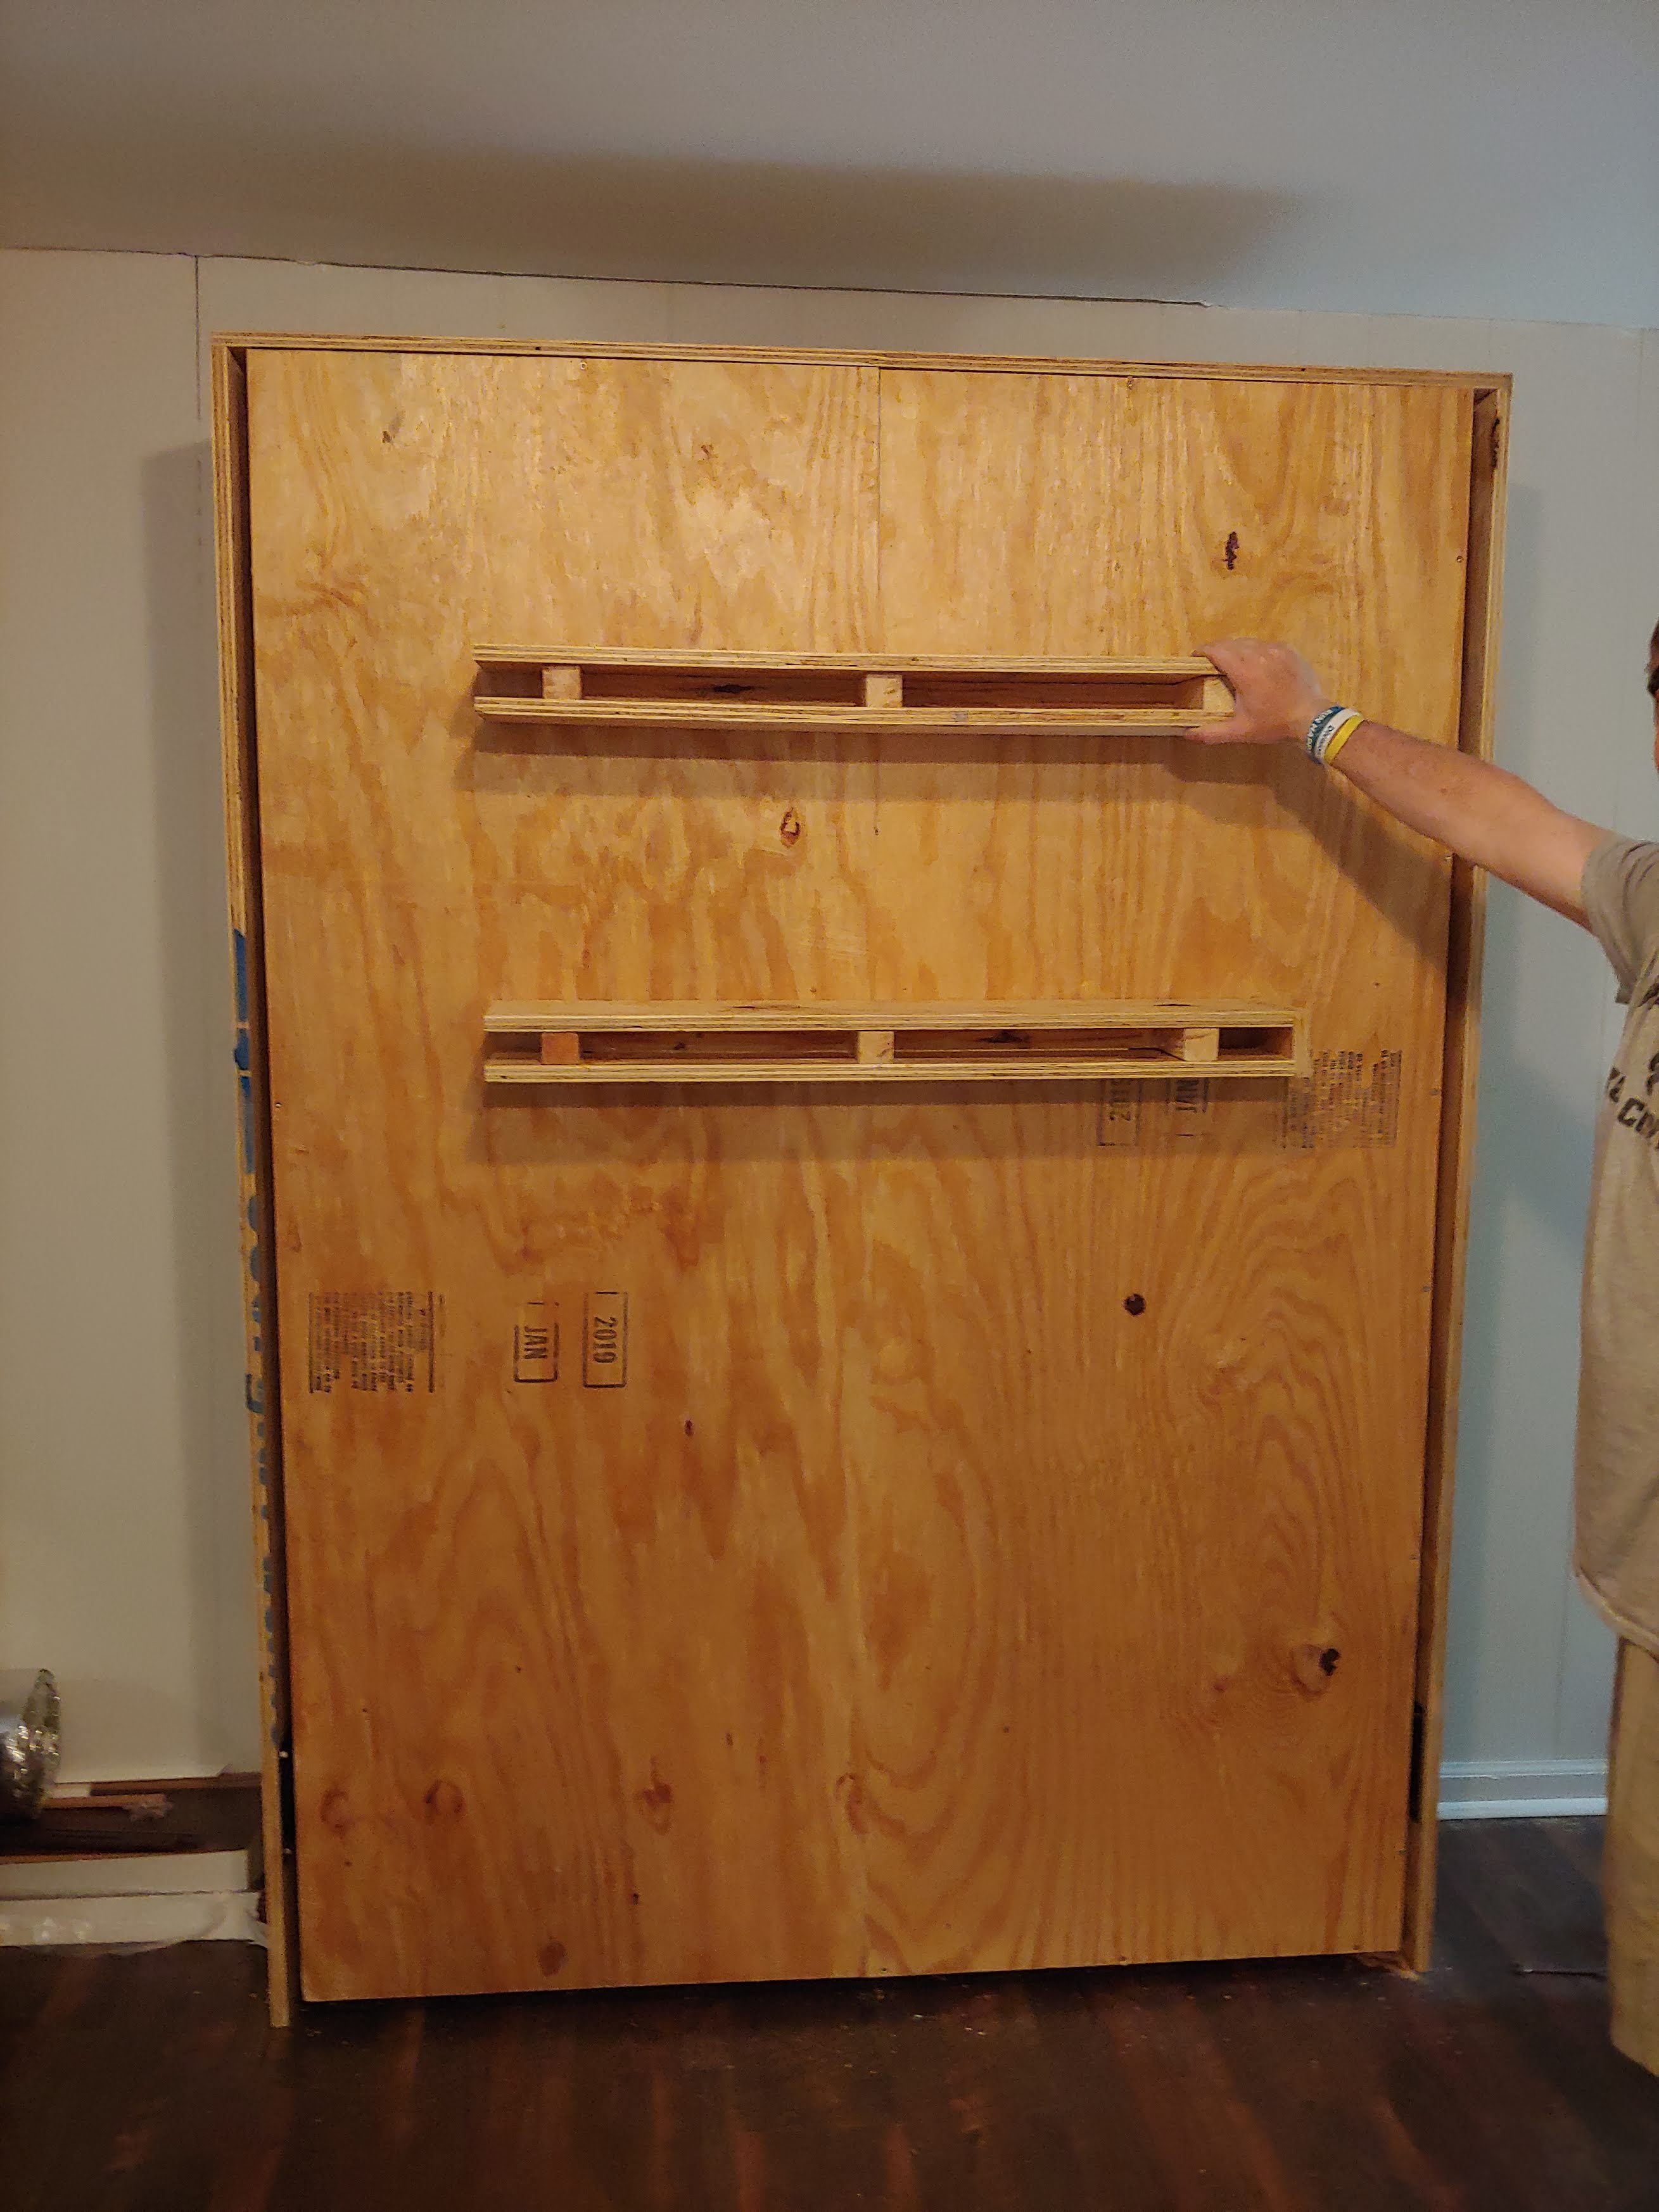
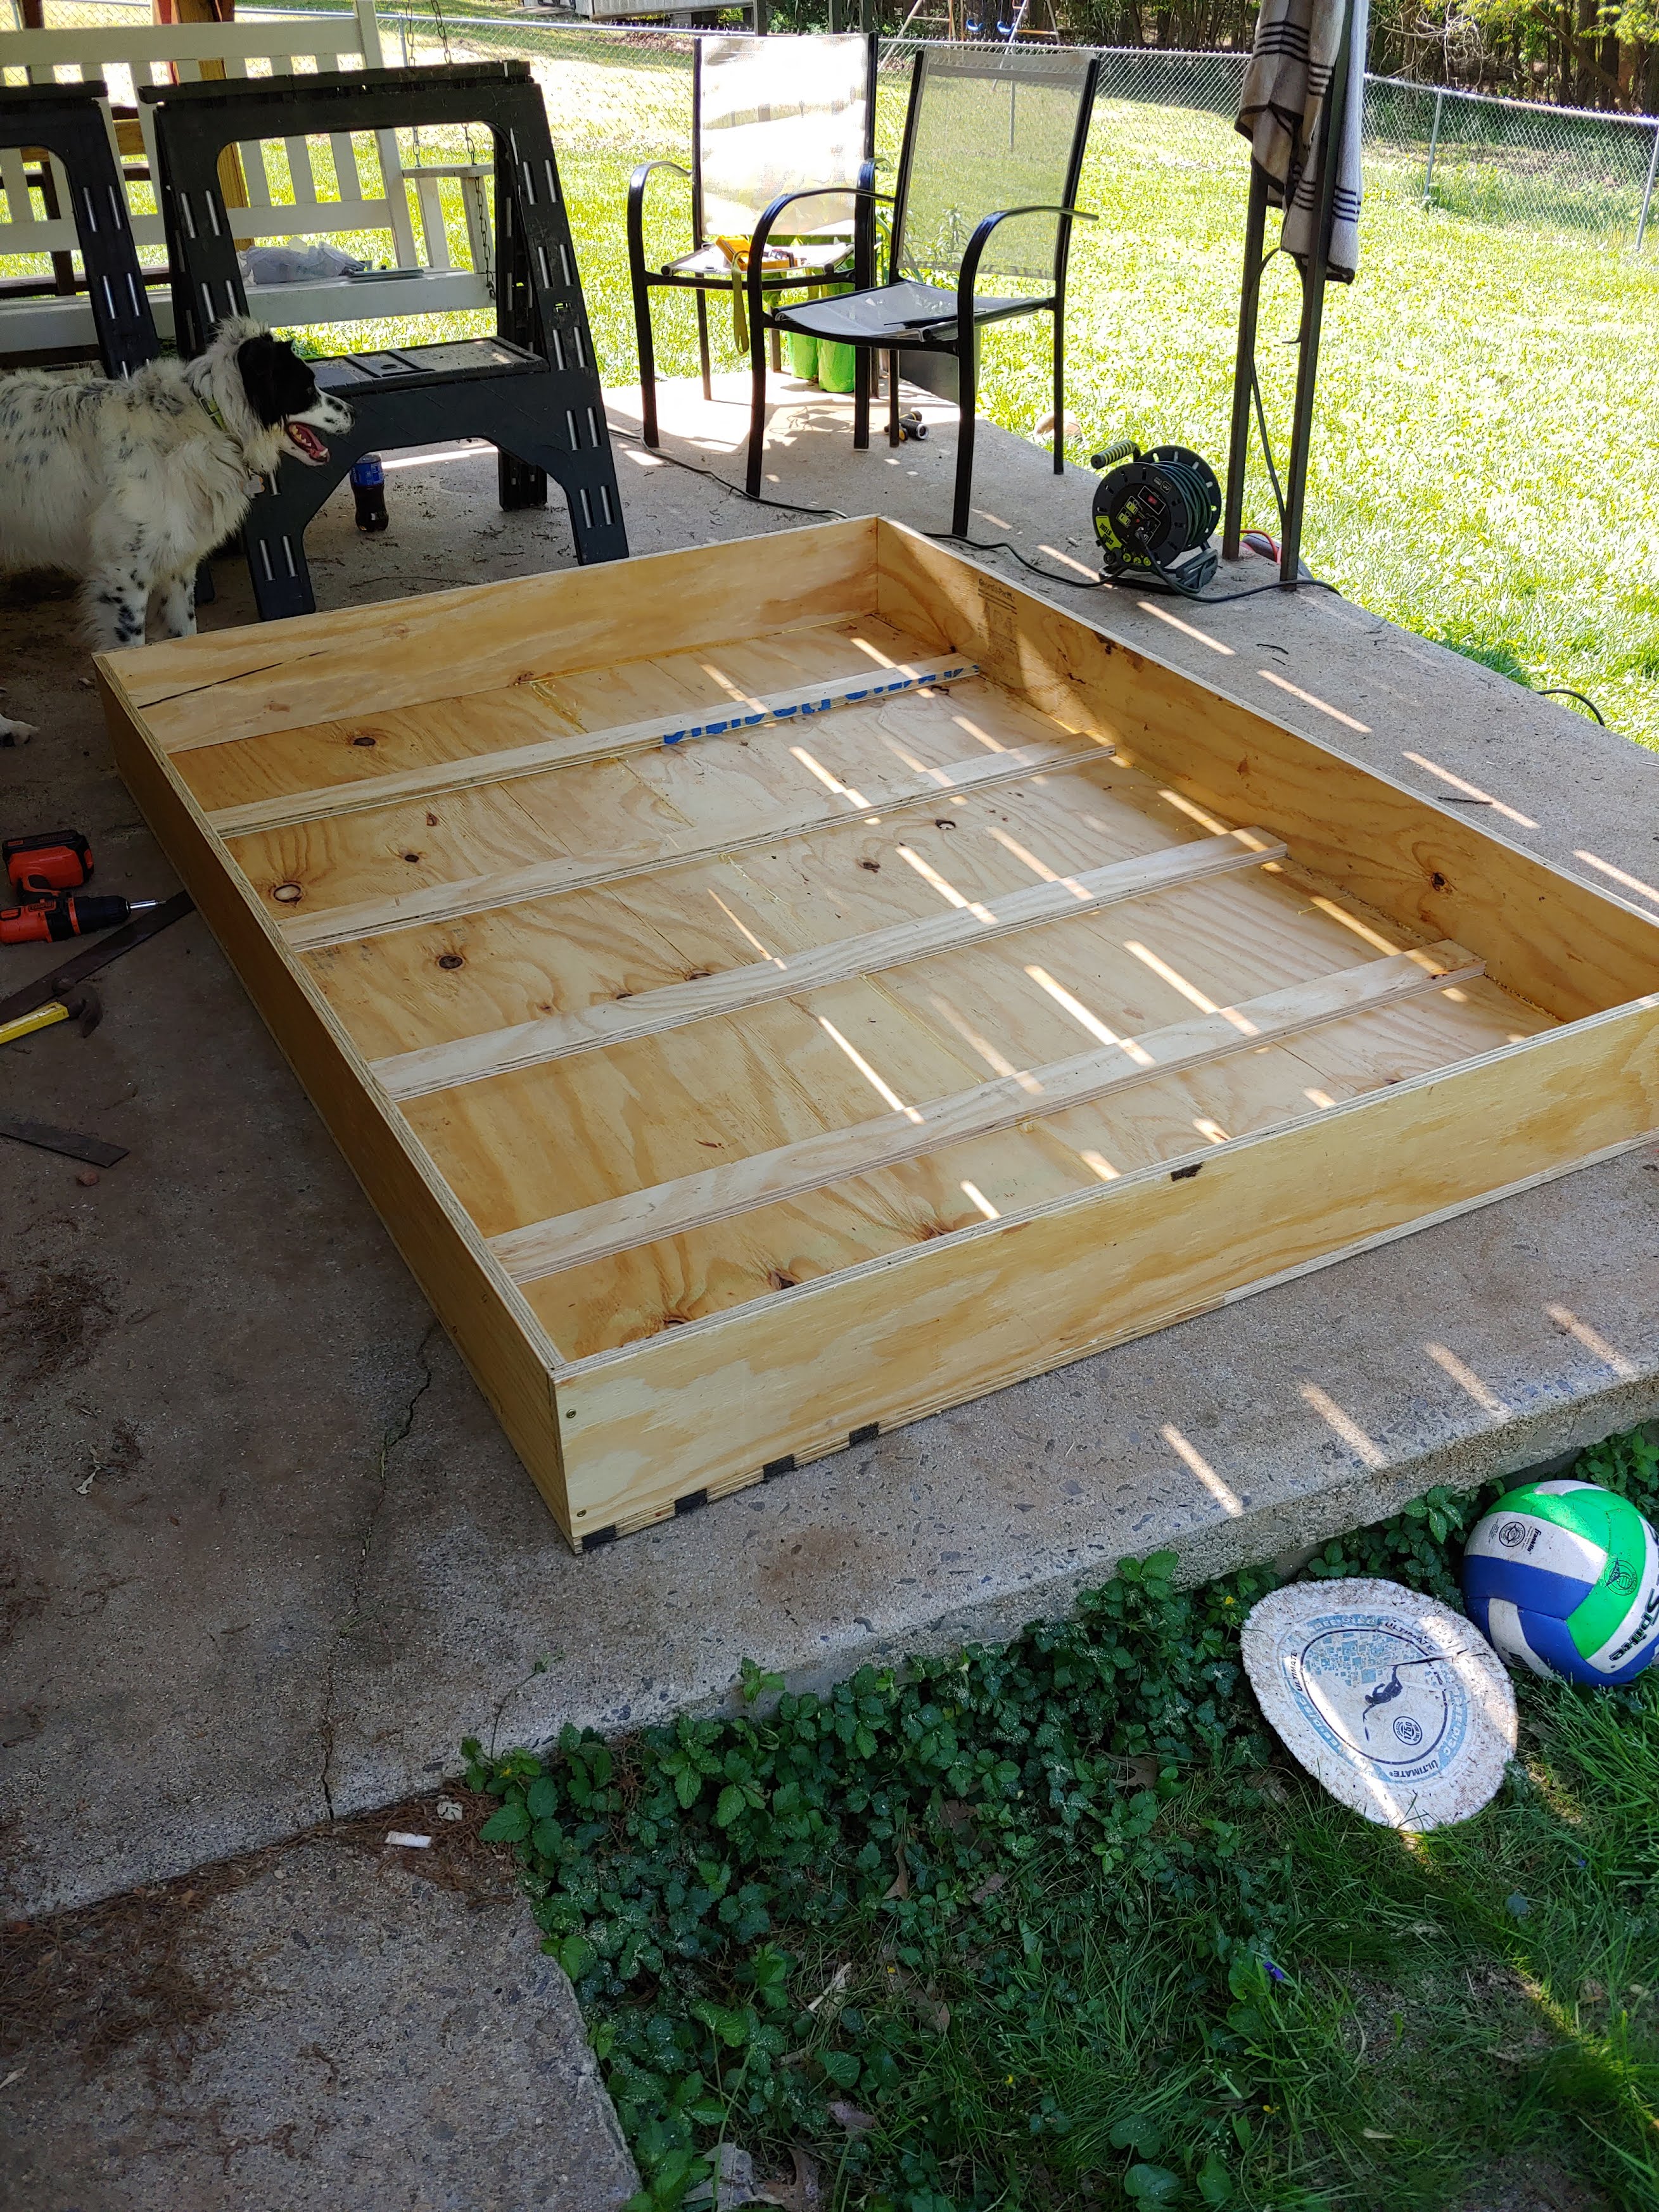
So I've always wanted to build a Murphy bed. And by always I mean since I first came across plans here that made it look so simple. It ended up taking me a while to do because my job has me working 6 days a week so I was only able to work on it for short chunks of time.
I ended up utilizing a few different plans and mashed them together to build a full size murphy bed. The shelves are the support legs when the bed is down. The "hinge" mechanism are heavy duty 360 degree seat swivels.
All-in-all it turned out WAY better than I expected with only some minor issues throughout the construction process.
Next up is a twin xl Murphy bed with a murphy desk attachment that will serve as a craft table when up.

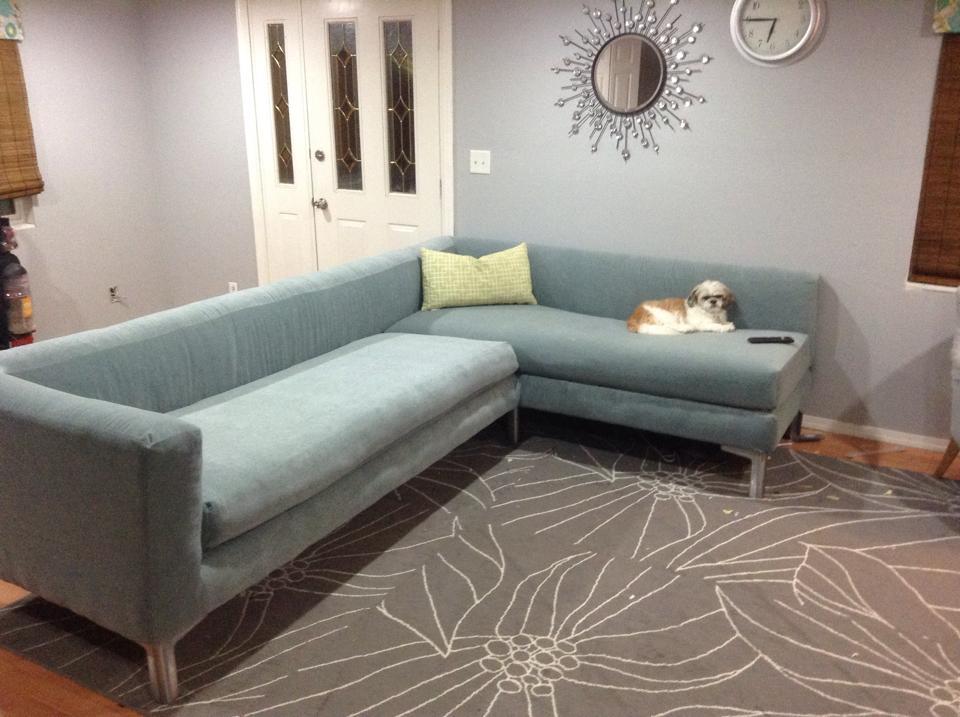
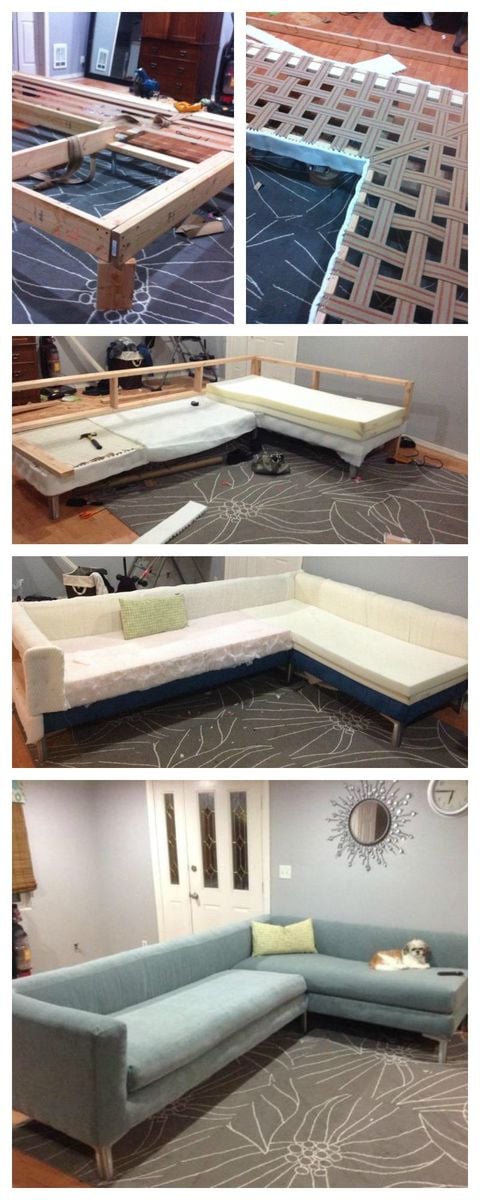
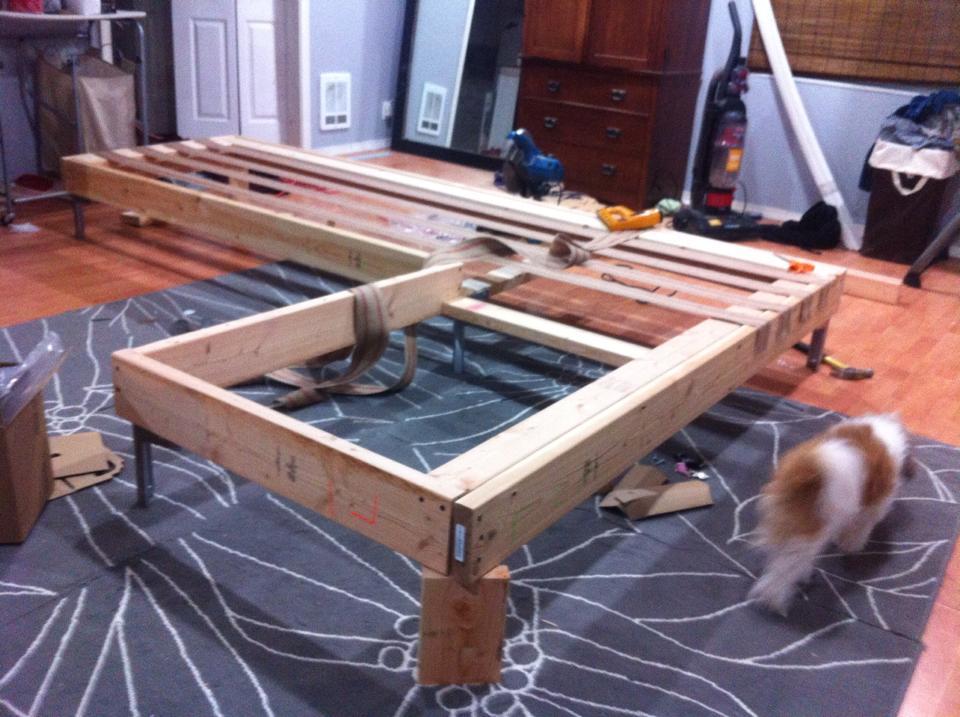
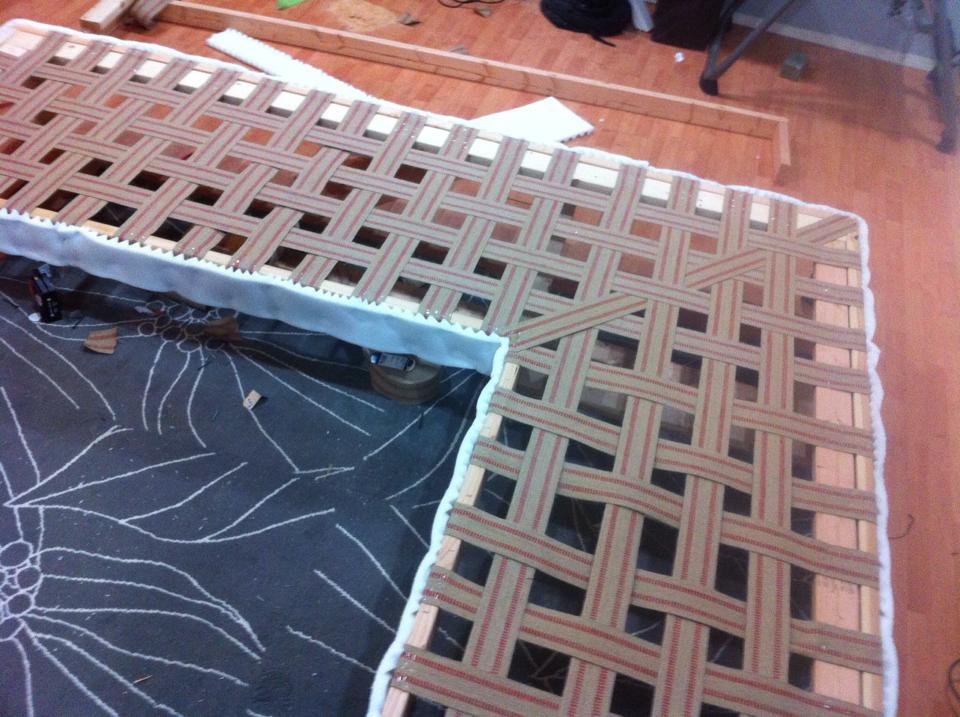
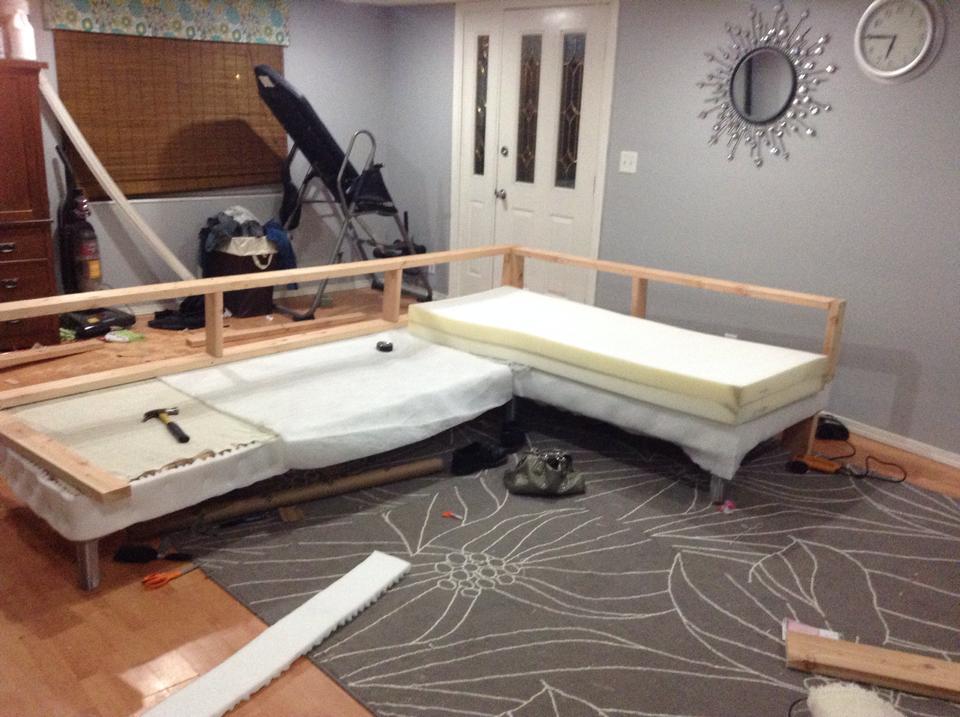
I looked all around my town for a sofa that meet my needs. I wanted something with tall legs, modern lines and fit my living room. I did not have $3,000 to buy one online so I said to myself why not???


Sat, 07/25/2015 - 12:28
You are my hero ! Your modern diy sectional is amazing, love the blue fabric! Thank you so much for sharing! Ana
Mon, 08/03/2015 - 14:52
I've been looking for plans for a big sectional this would be perfect!
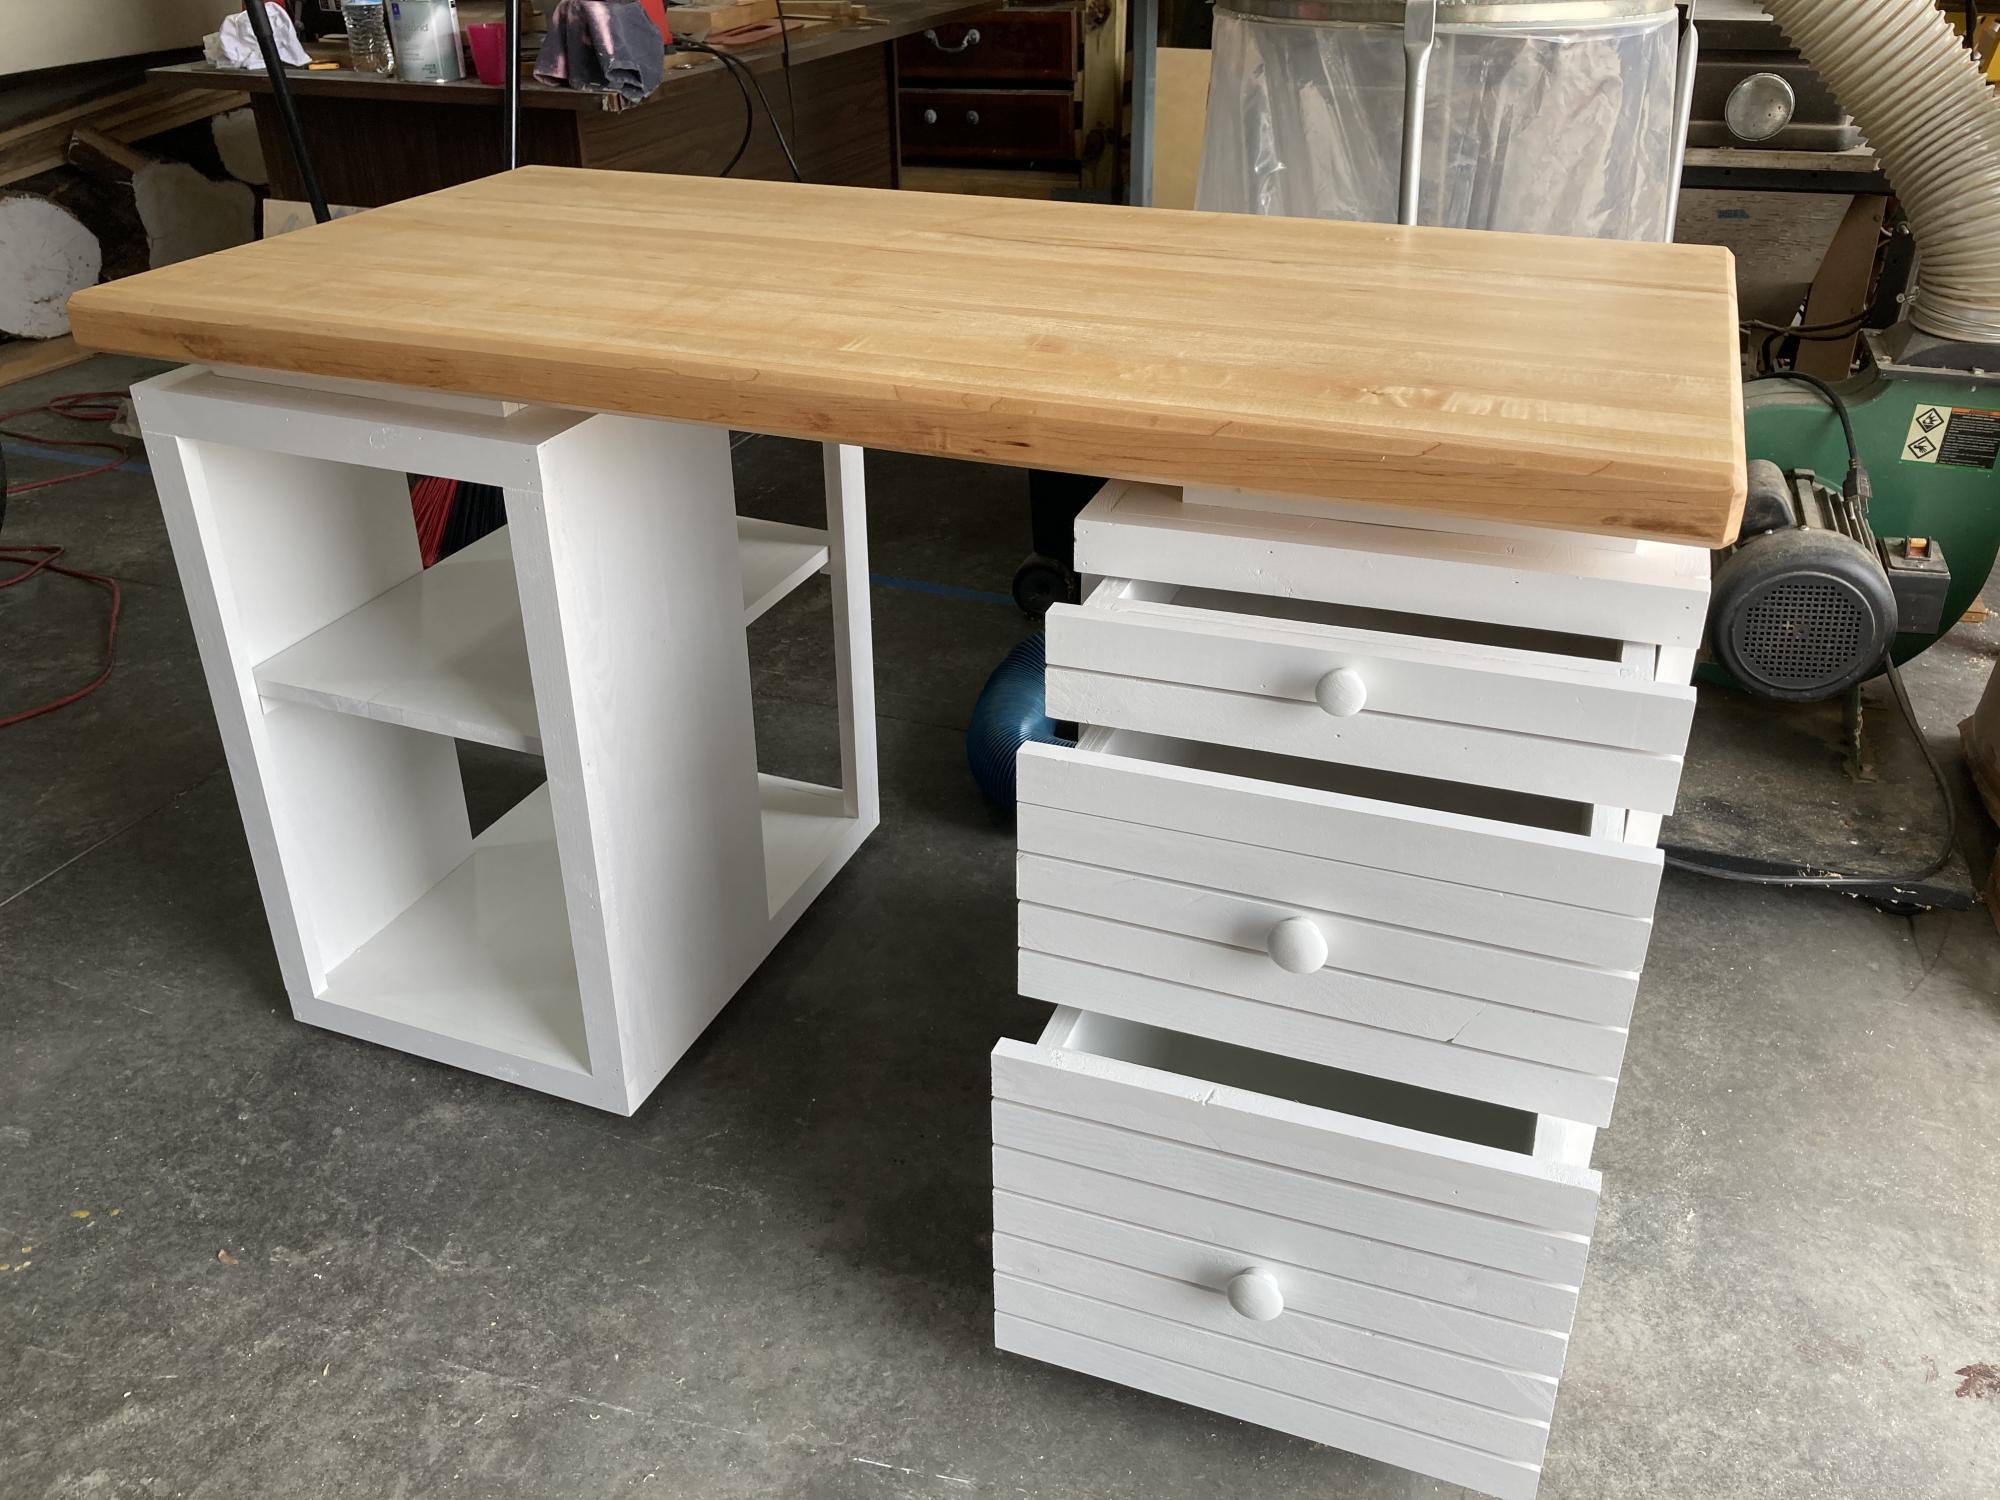
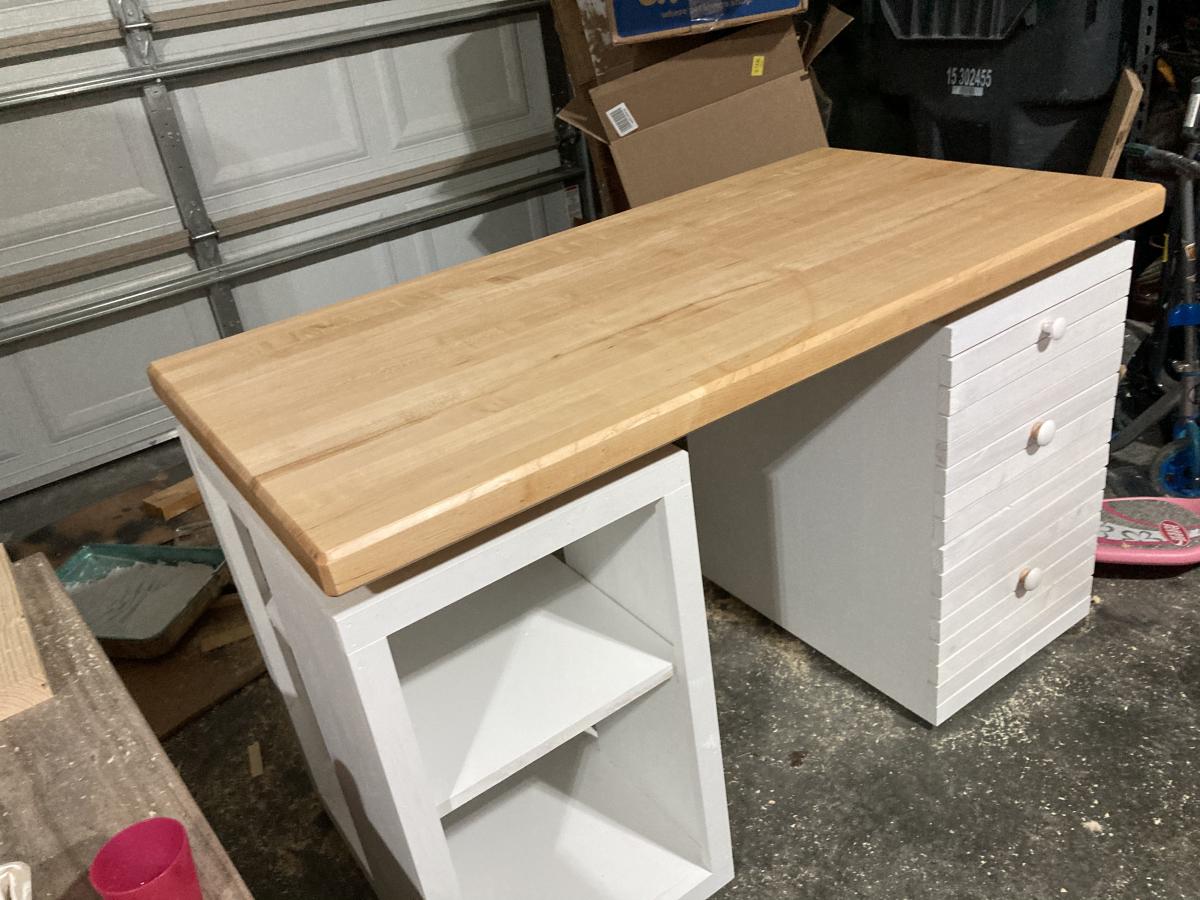
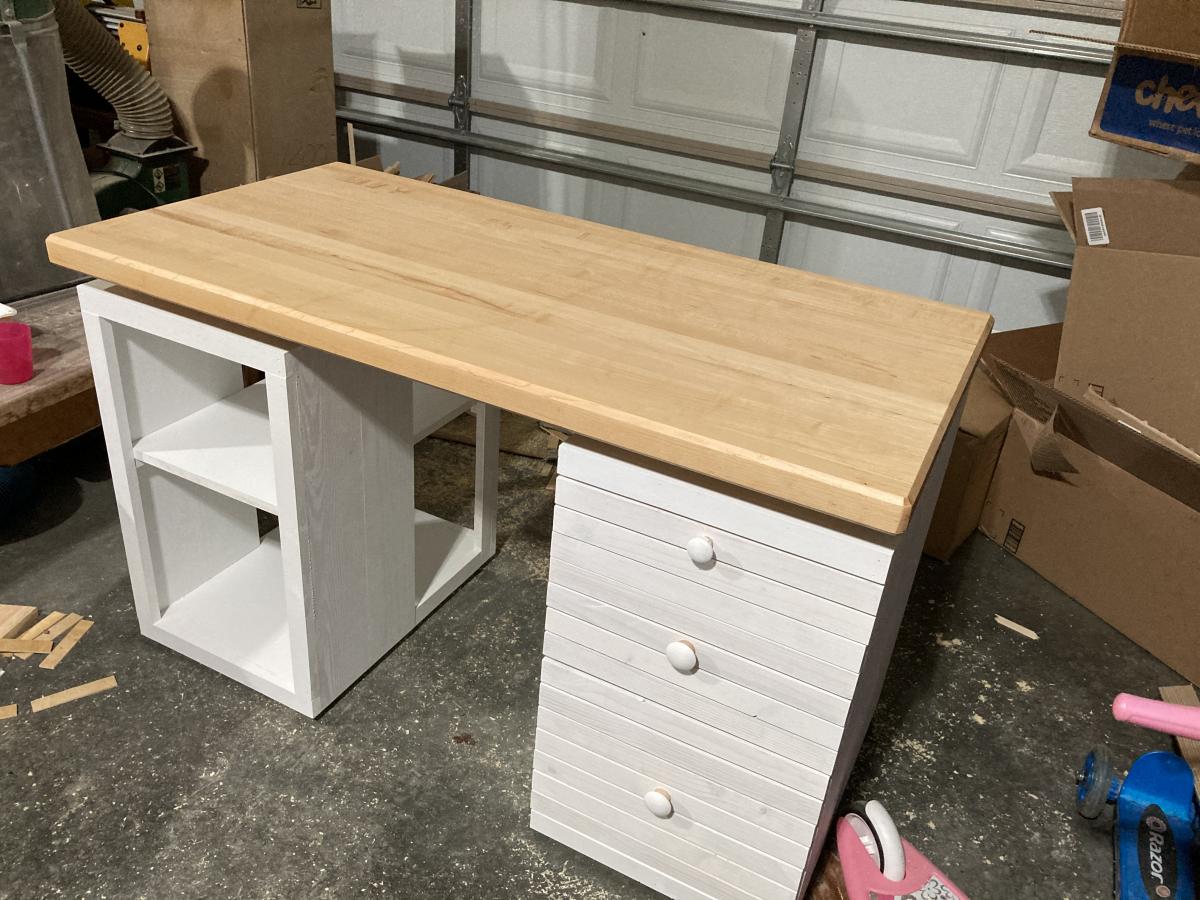
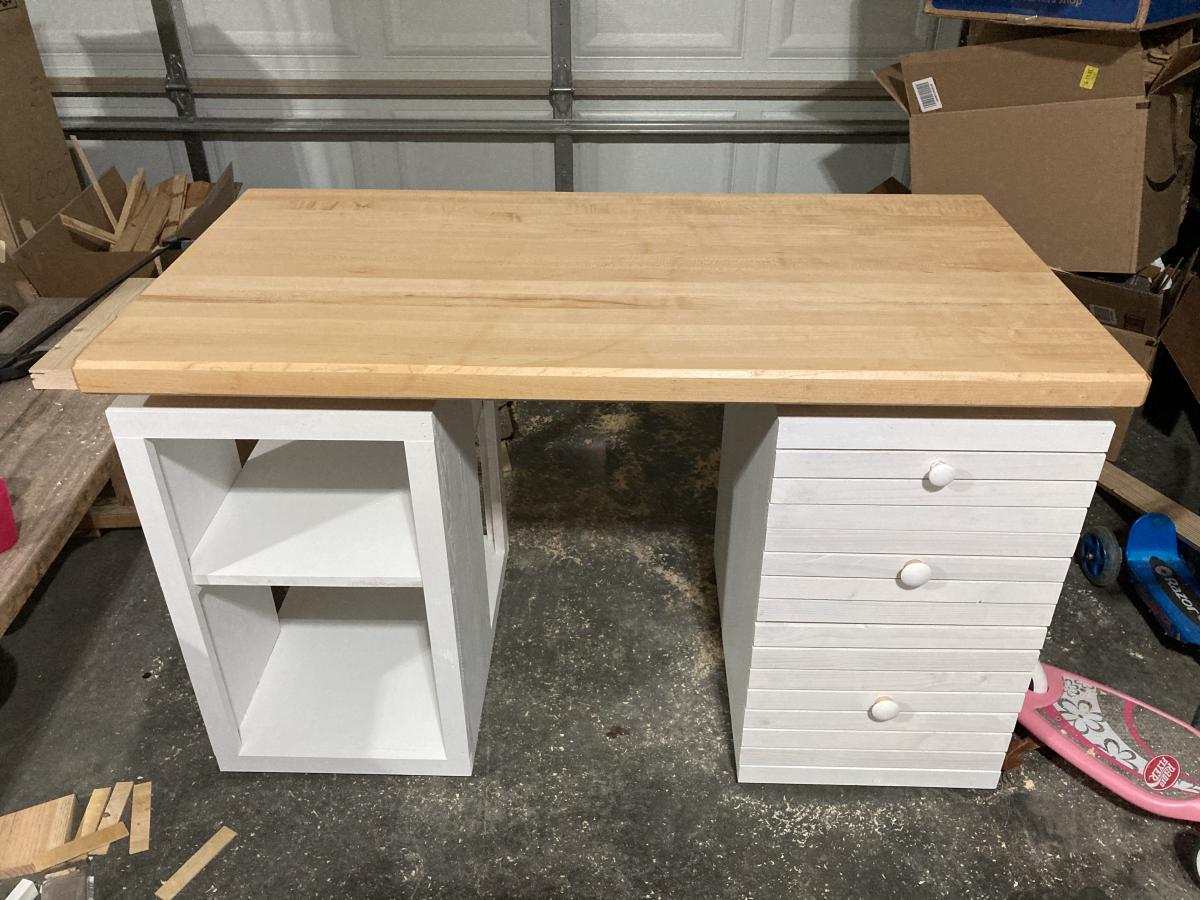
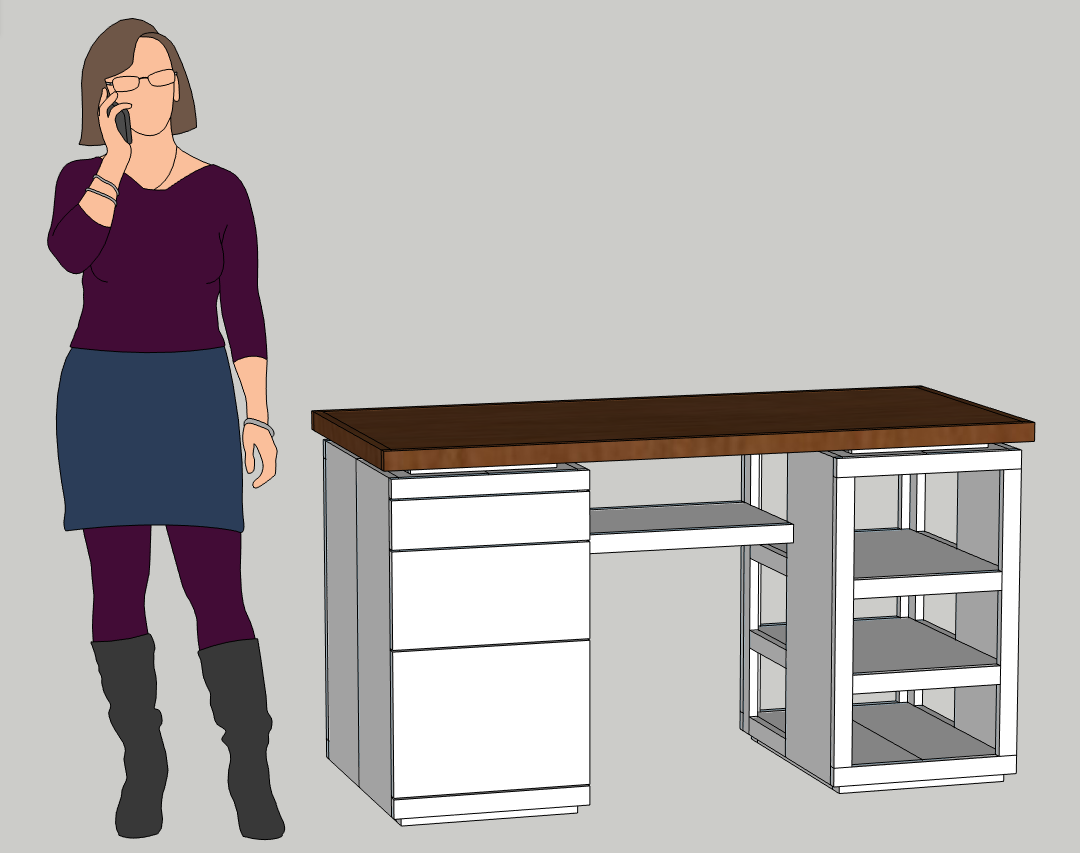
Your craft table was the kicking off point for this desk. Pine cabinets, plywood drawers, maple top.
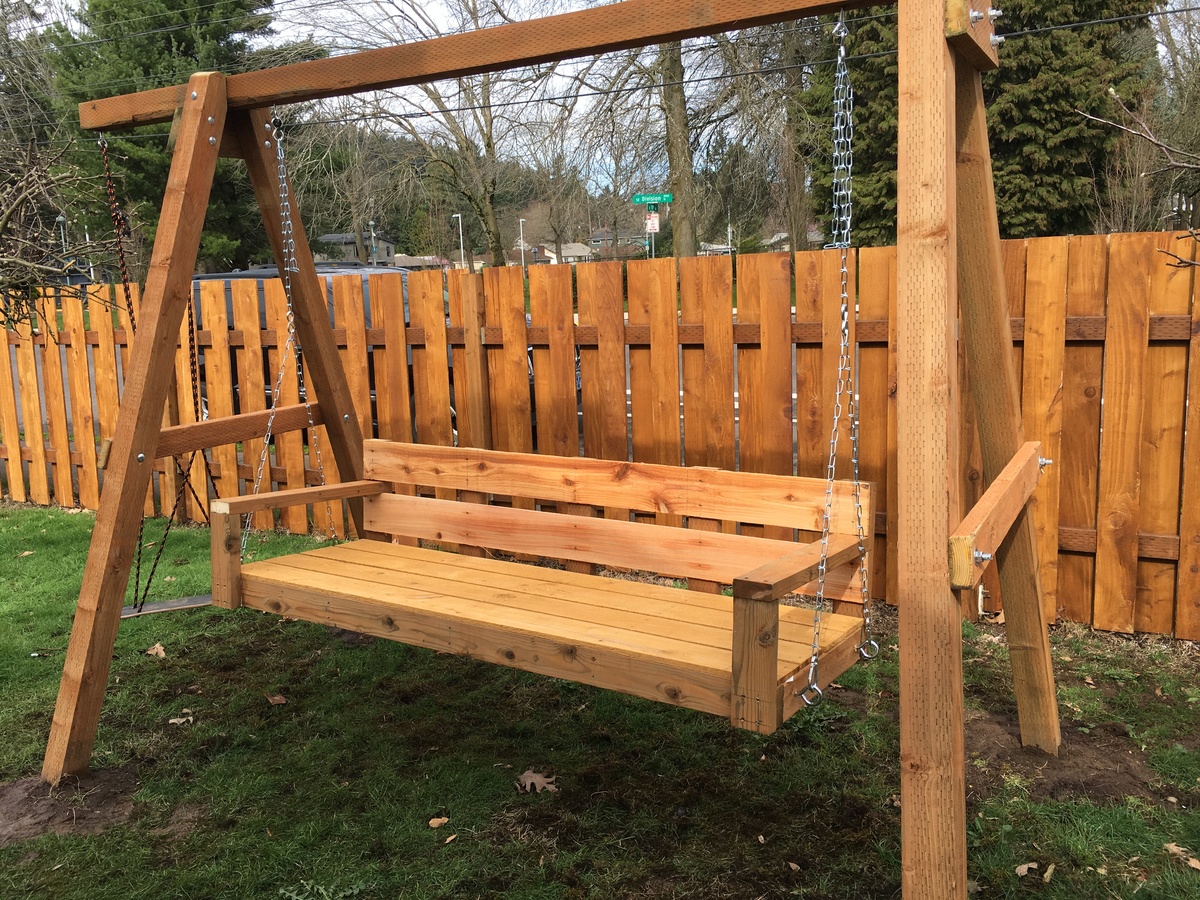
Quick build for the garden swing.

This is such a cute countertop organizer ! The possibilities for this are endless - maybe a tea / coffee bar or a hot chocolate bar - a breakfast bar or a snack bar ..... I may need to make another one...and definitely one for the bathroom !
.
The shelves slide to change the width or turn one and it becomes a corner piece!

Tue, 09/12/2023 - 12:30
So great to see you made this and it turned out awesome! Thank you so much for taking time to share photos.
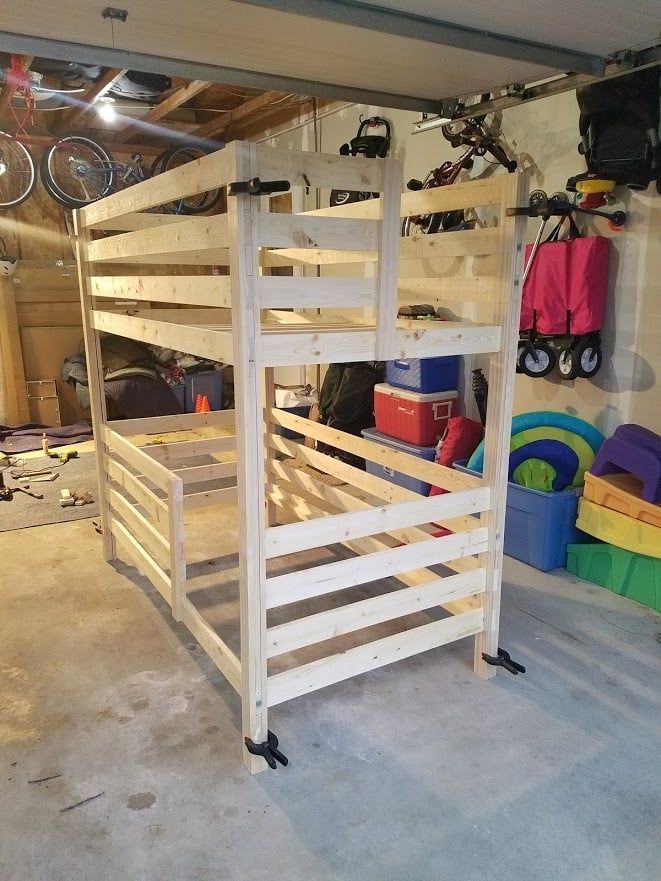
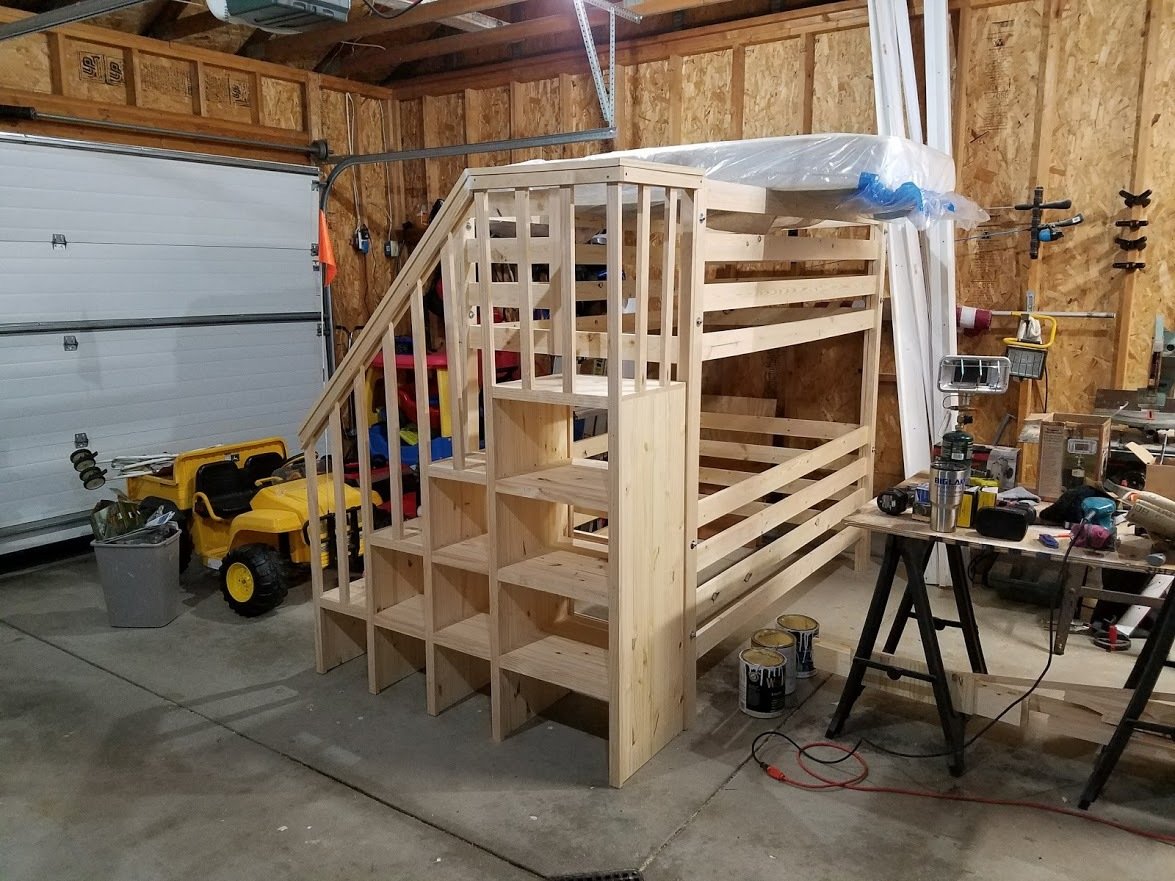
I modified the plans for the Classic Bunk beds by making them 74" tall instead of 63" and added a fourth slat all the way around to add more protection from potential falls. I created one opening in the front for my youngest to get into the bottom bunk, and built slats about 2/3's across the front to act as a gaurd rail. I created another opening on the side for my oldest to get into the top bunk with stairs instead of ladders to again prevent falls. I had to modify the Sweet Pea stairs to accomodate for the extra height in the bunk beds, simplified the railings, and I created each cubby to be big enough to use cloth storage totes that were 11x11x11. Sanded the whole bed and stairs so the corners and edges were all rounded and smooth, and put two coats of white Deck and Porch paint to stand up to the the boys running up and down. I used brackets to secure the stairs to the bed, and sixteen 3" bolts to bind the bed together. Precut and drilled 17 slats for each bed seperated them 2" apart. Spent a few hours every night during the week measuring, cutting, glueing, drilling and assembling the bed and stairs. Spent an entire weekend sanding and painting. Very happy with the way these beds turned out. Overall cost of the project including the paint was around $400.


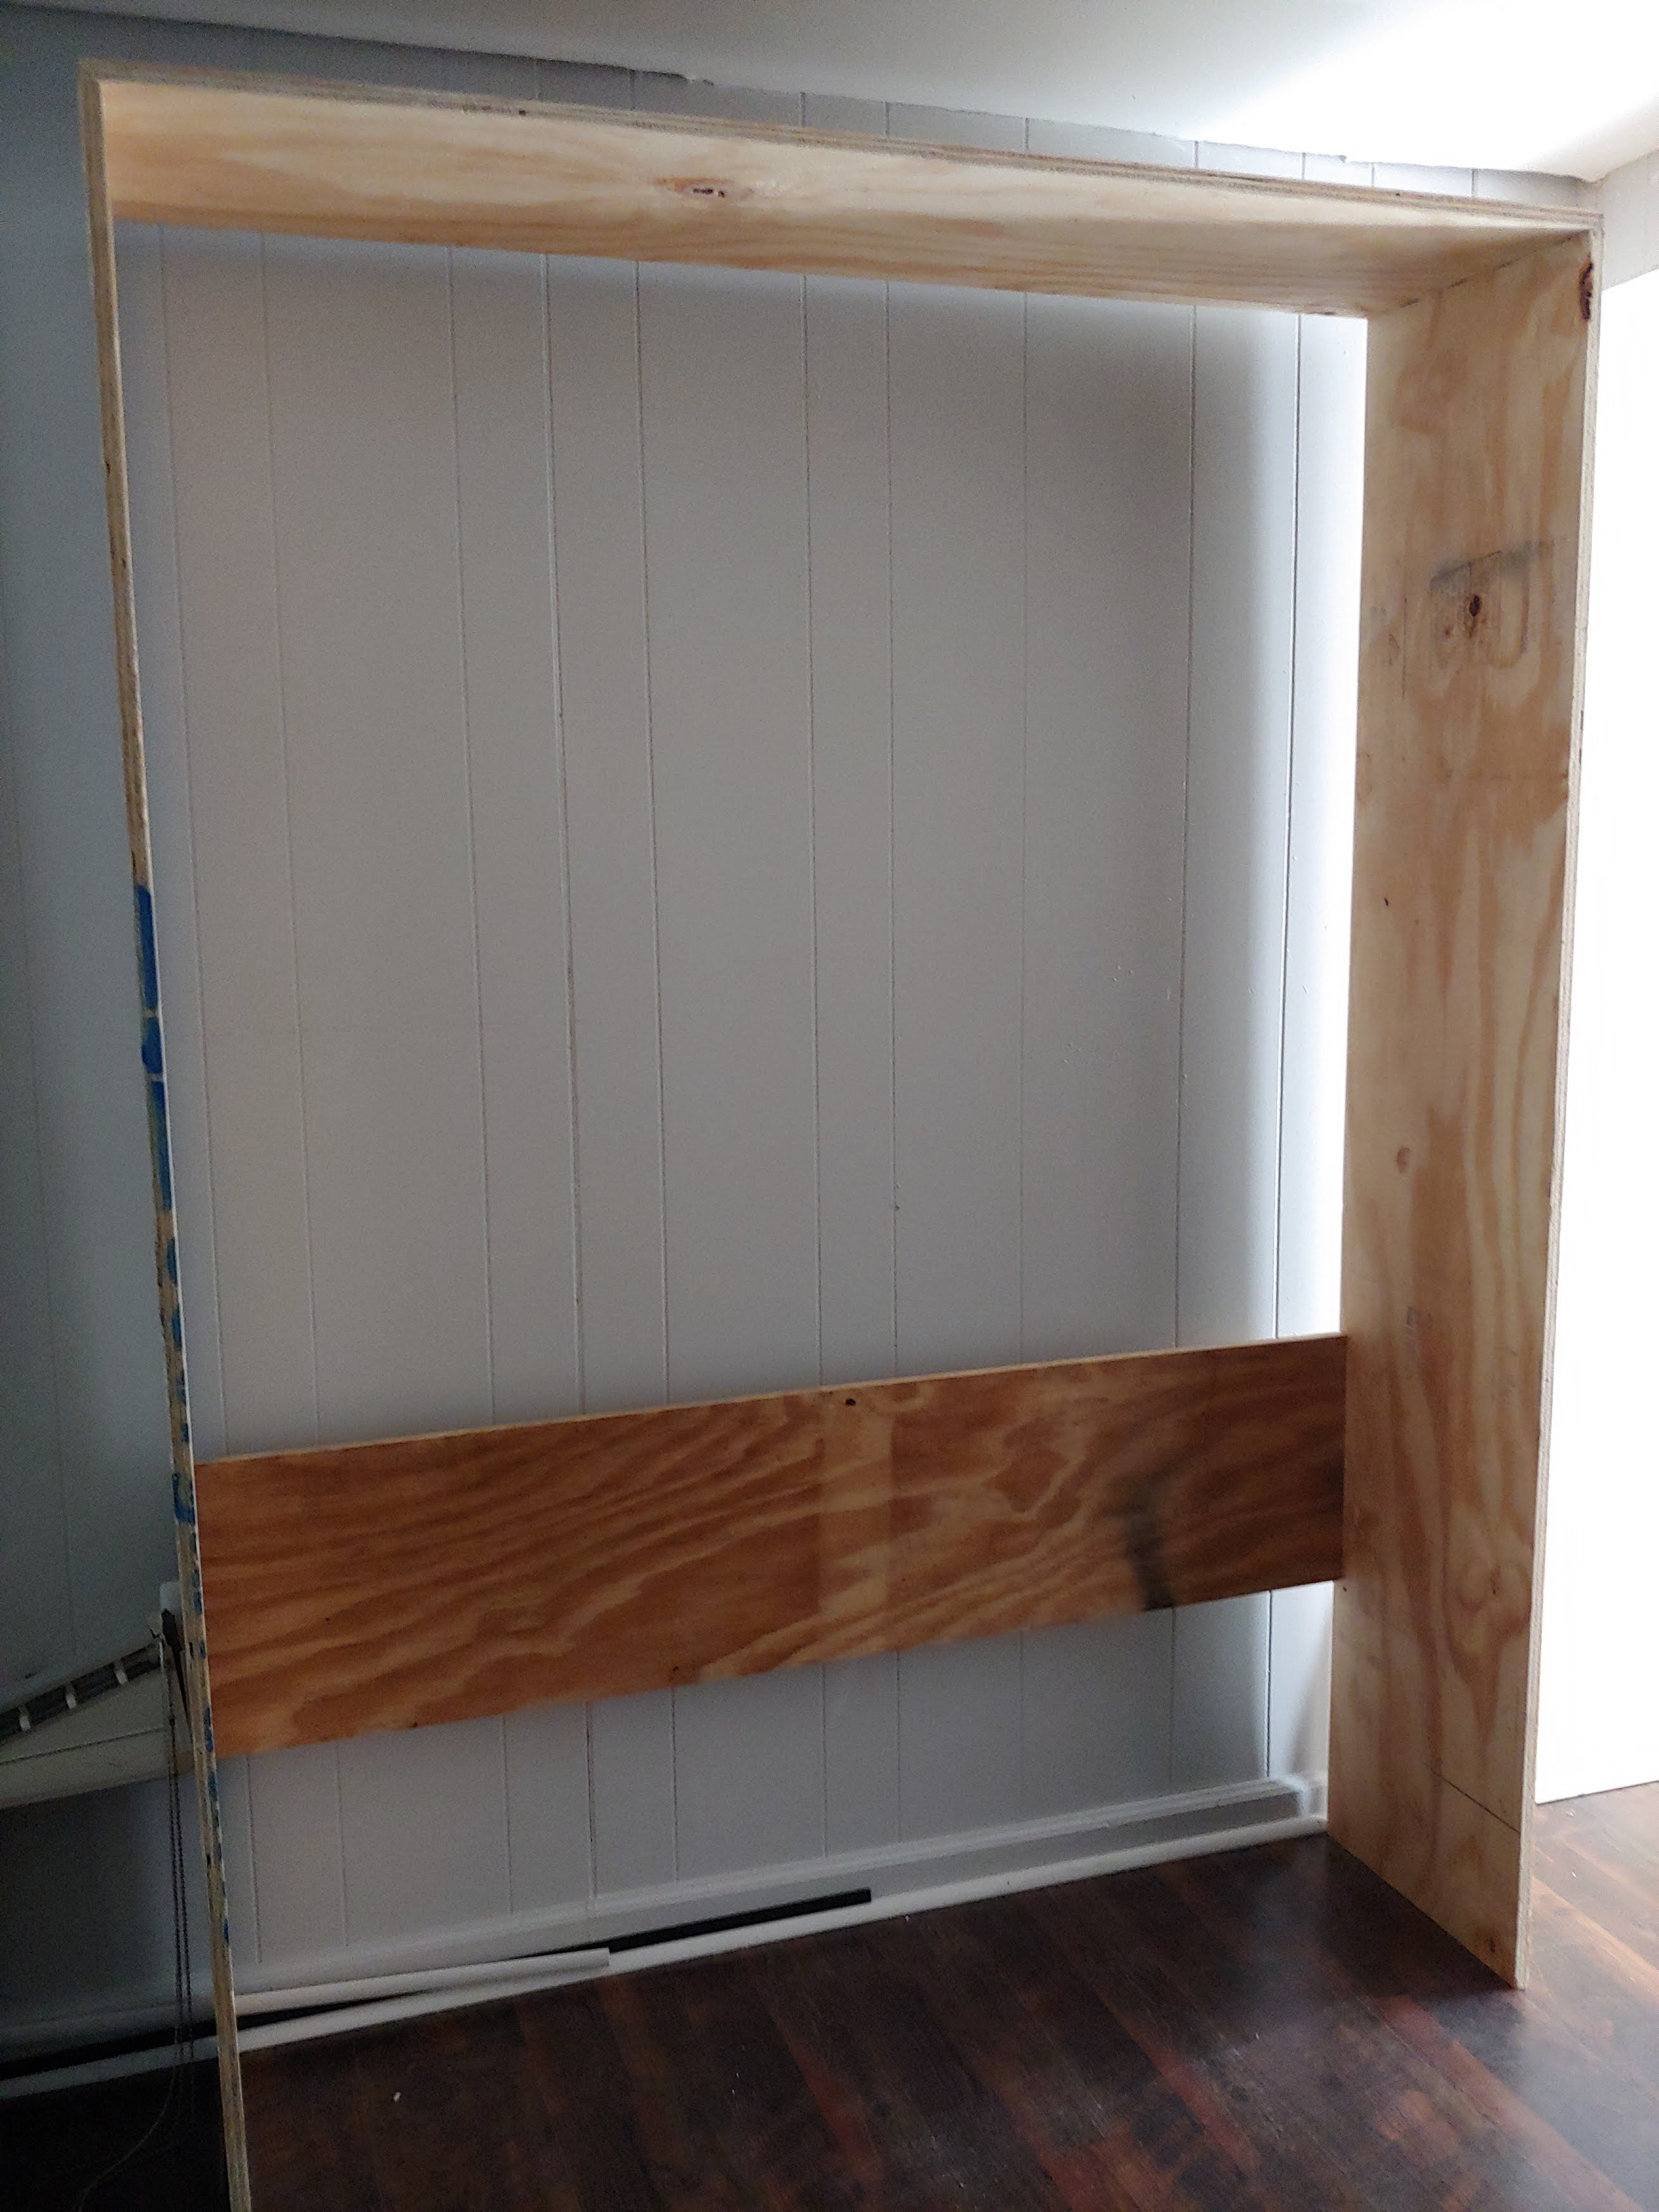
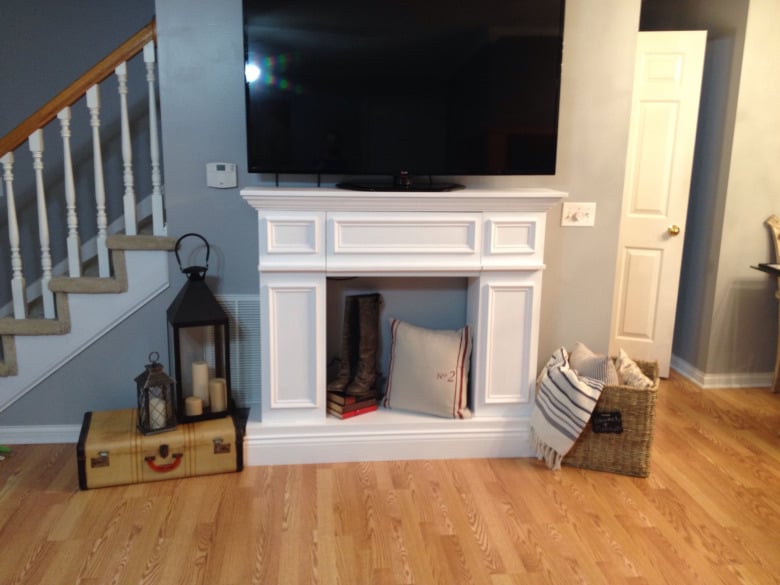
Modified from Ana White's Faux Fireplace with Hidden Storage Plan
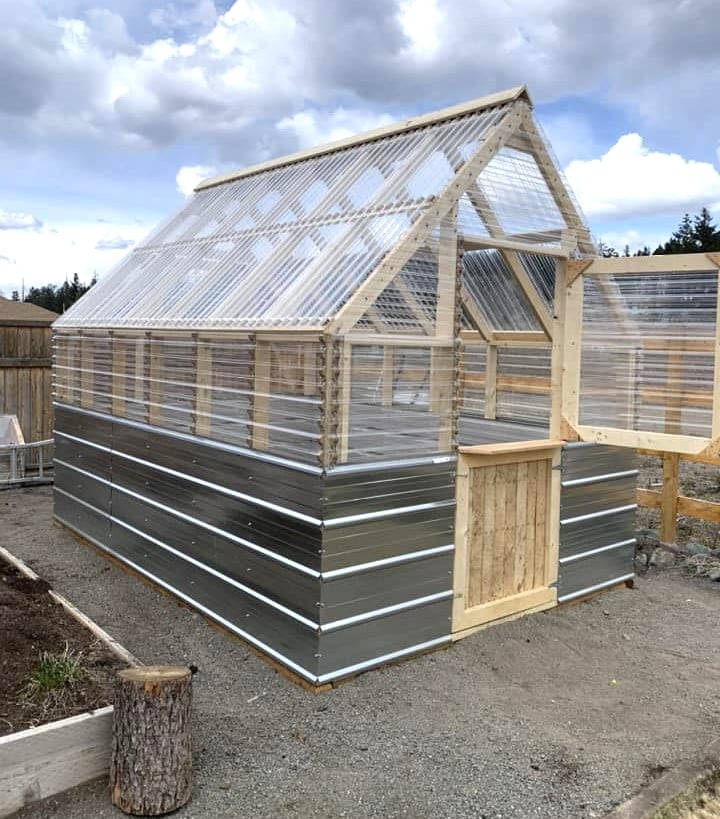
DIY Greenhouse by Trenton Kirby on Facebook!
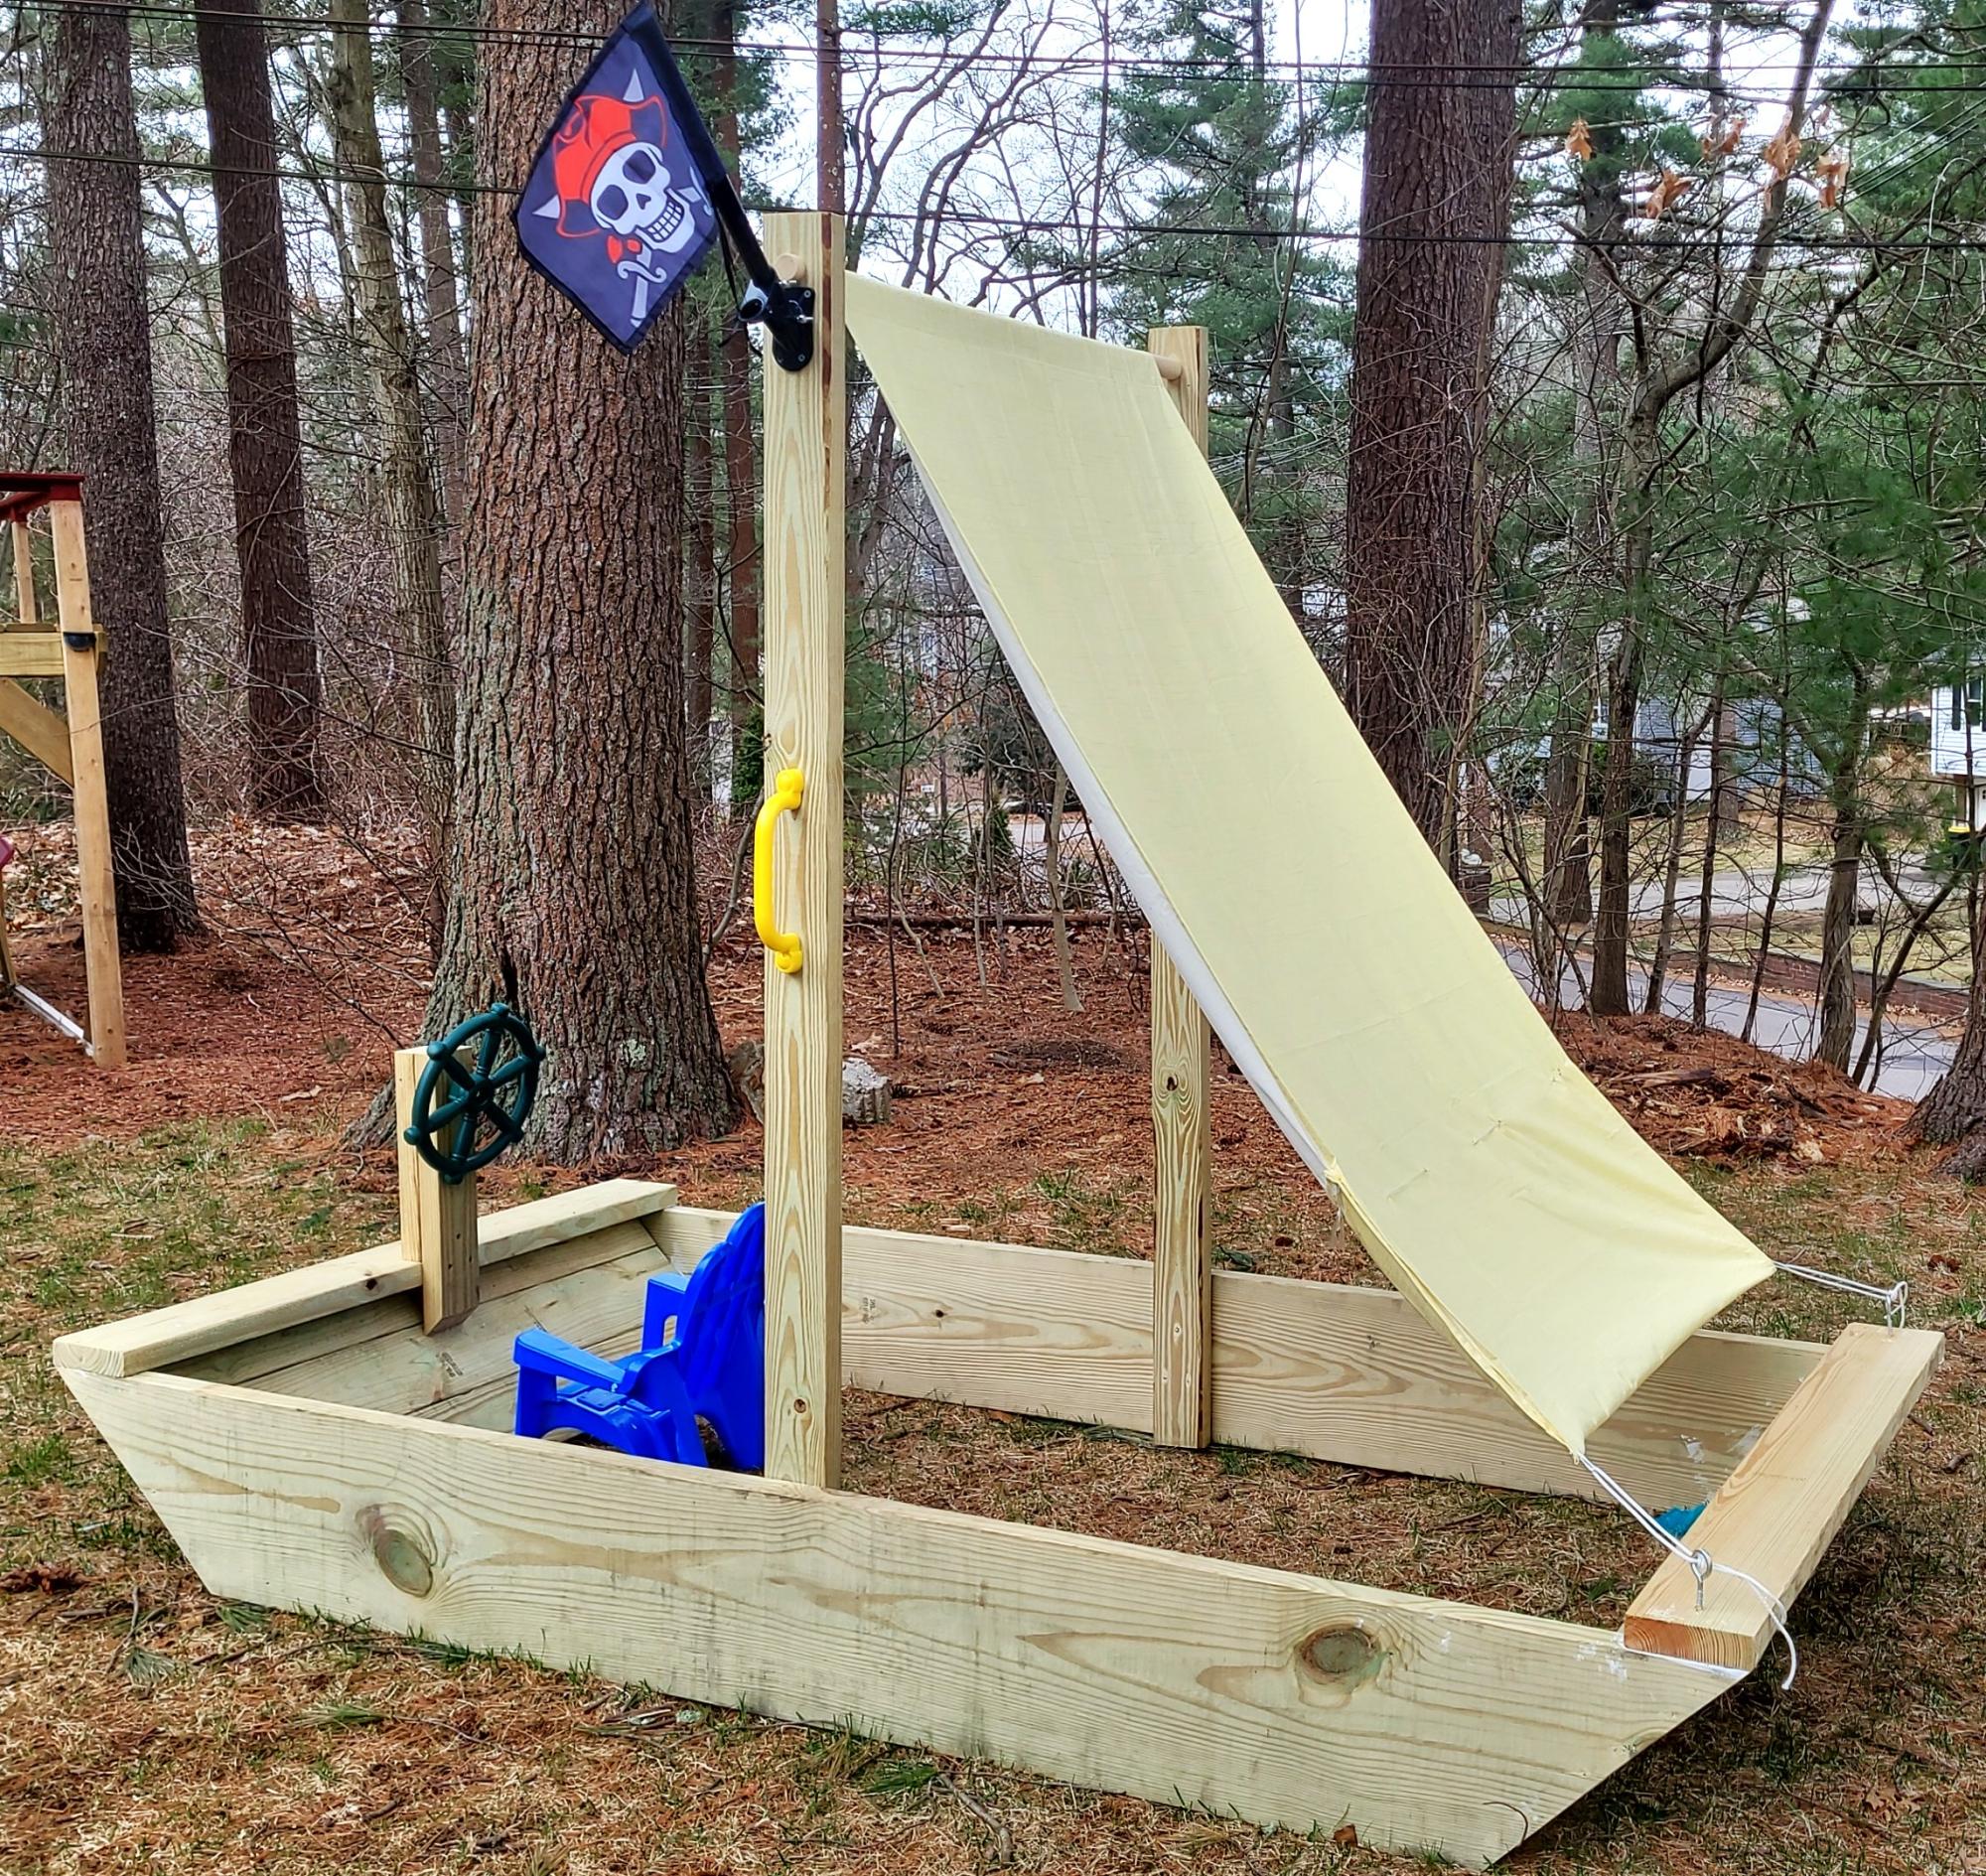
Turned the sandbox into a pirate ship. The kids love it!
Lea B.