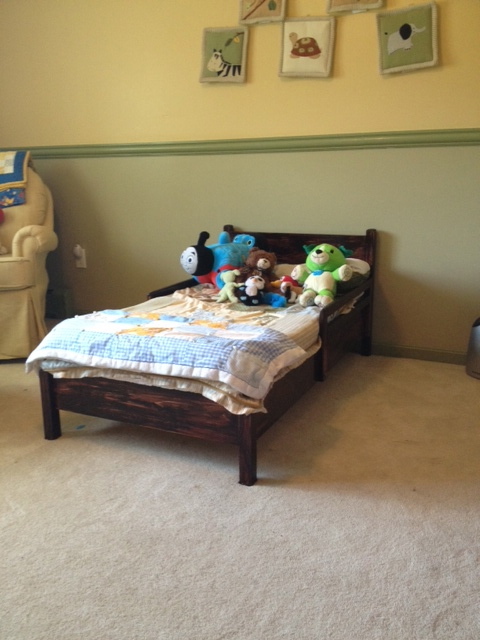
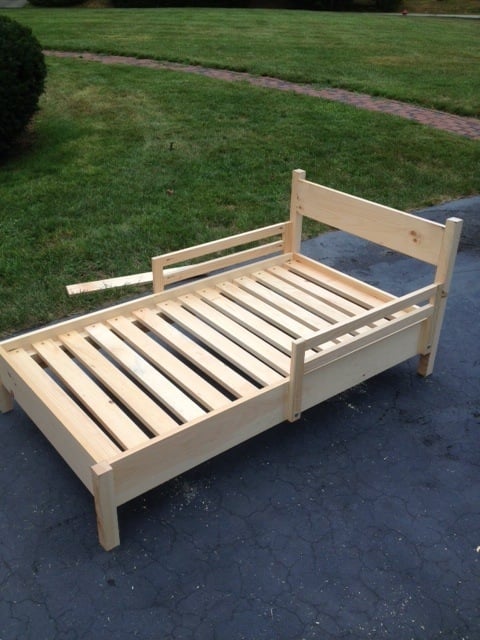
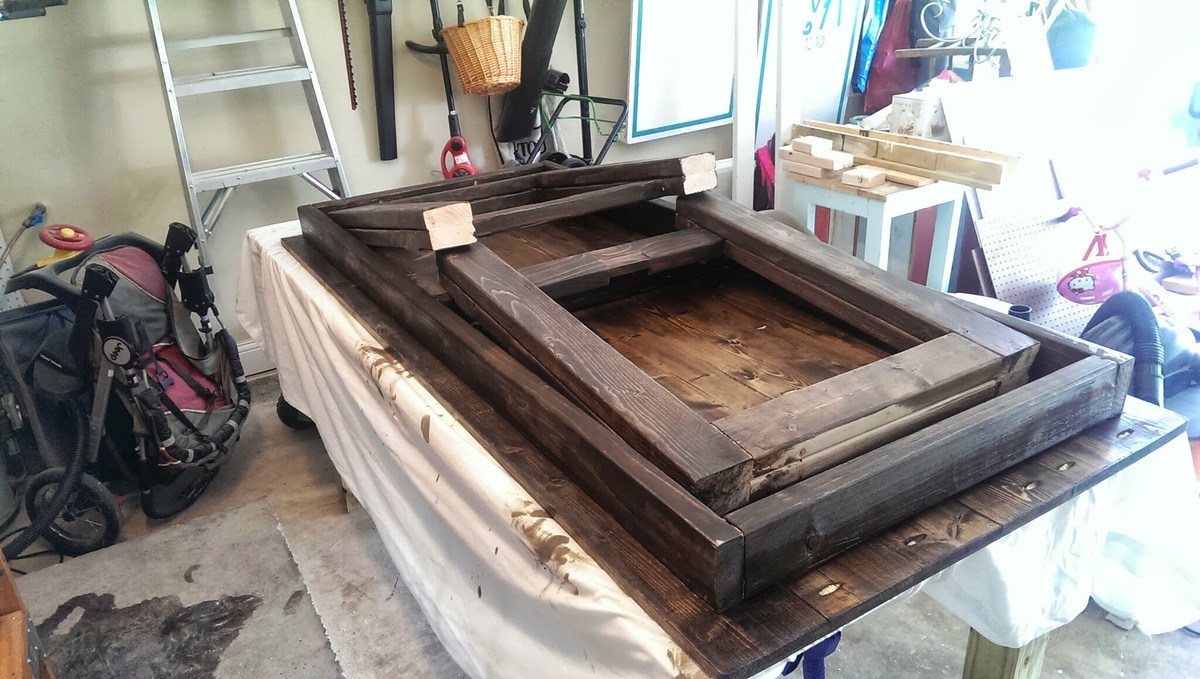
Modern Farmhouse Bed
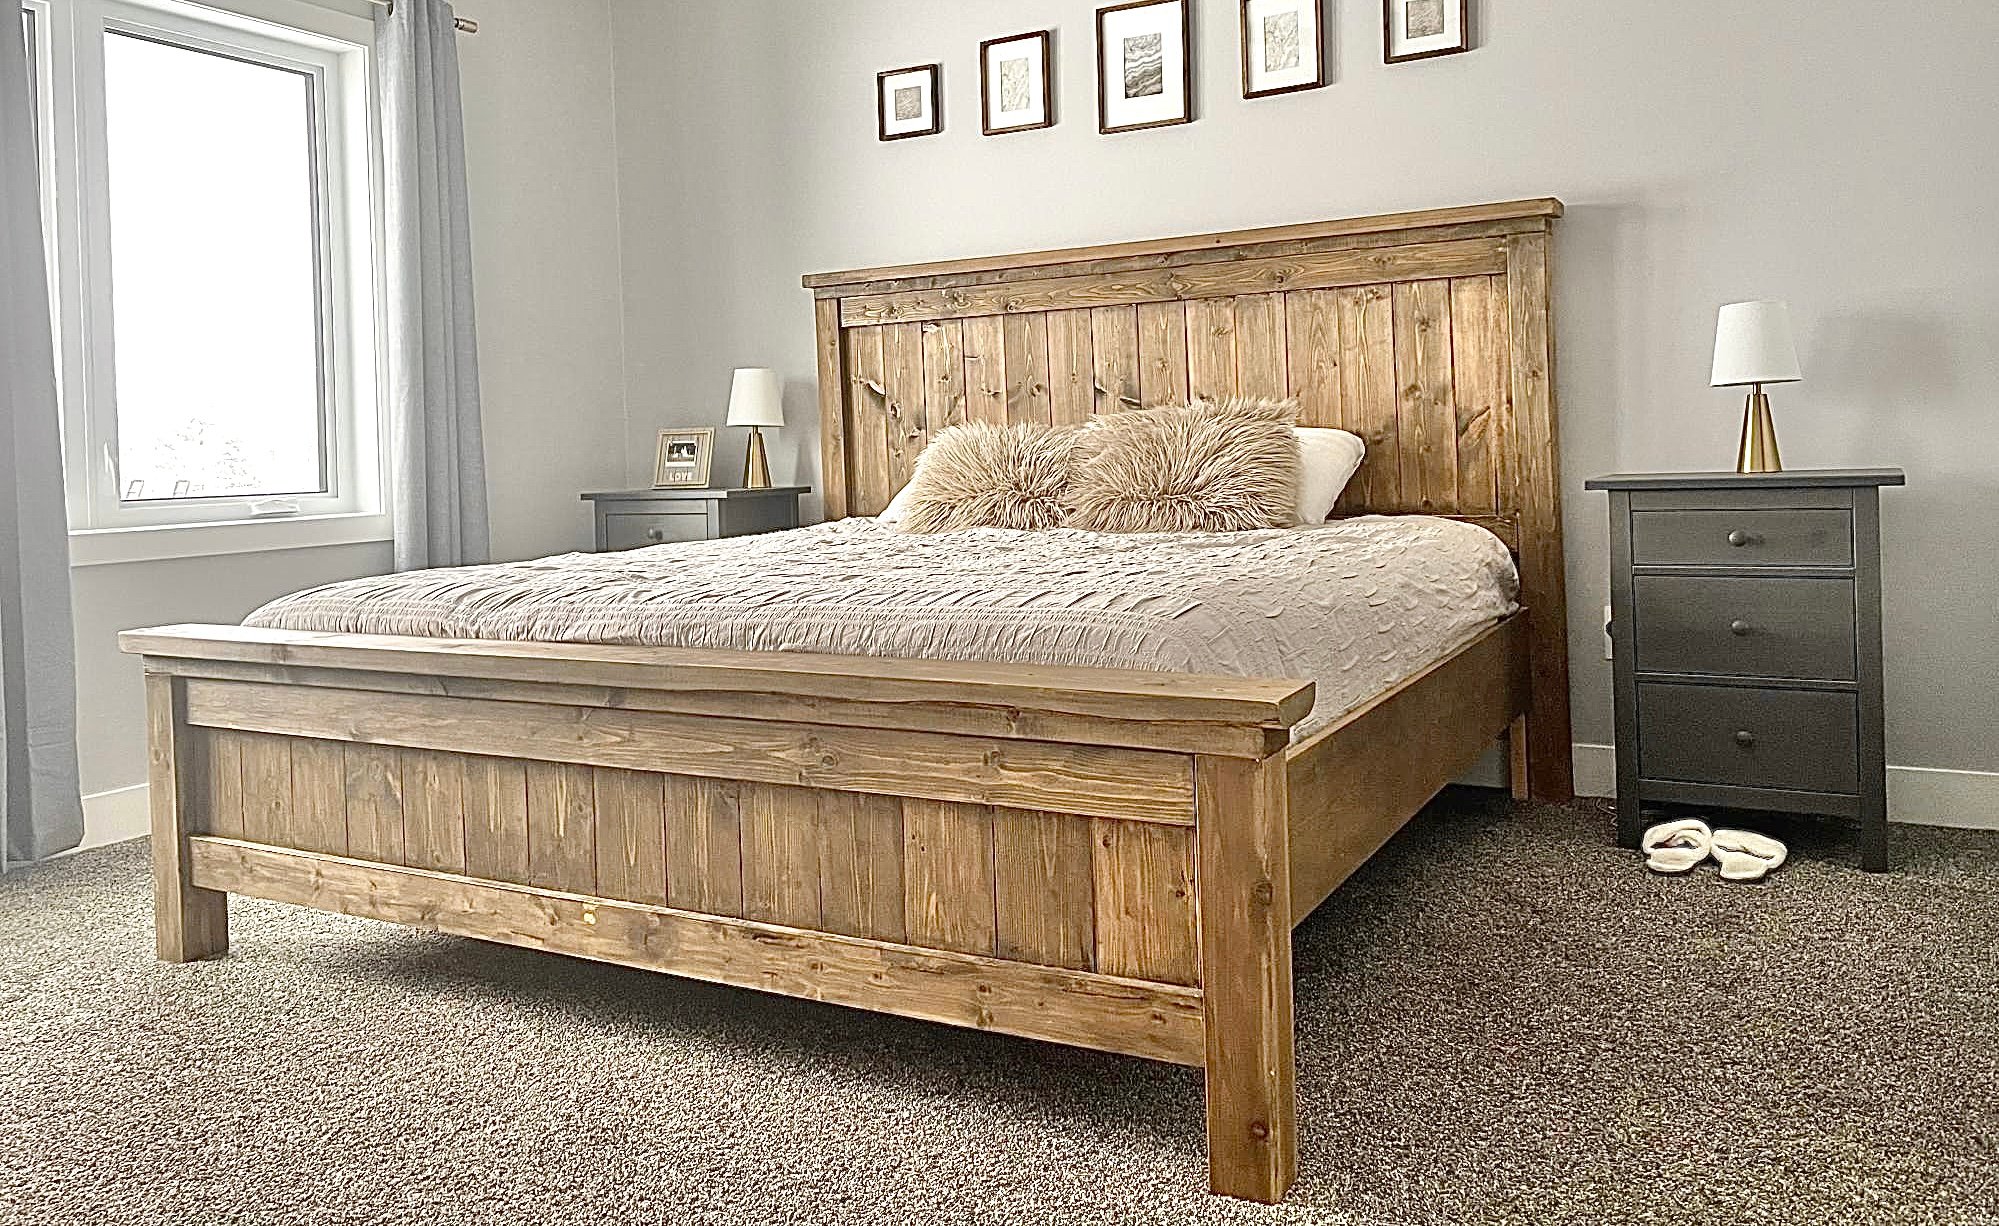
My husband and I had worked on this bed together, and we are so happy with it! We went with taller side tables that we purchased, and just stained the wood instead of painting it.
Built from Plan(s)
My husband and I had worked on this bed together, and we are so happy with it! We went with taller side tables that we purchased, and just stained the wood instead of painting it.
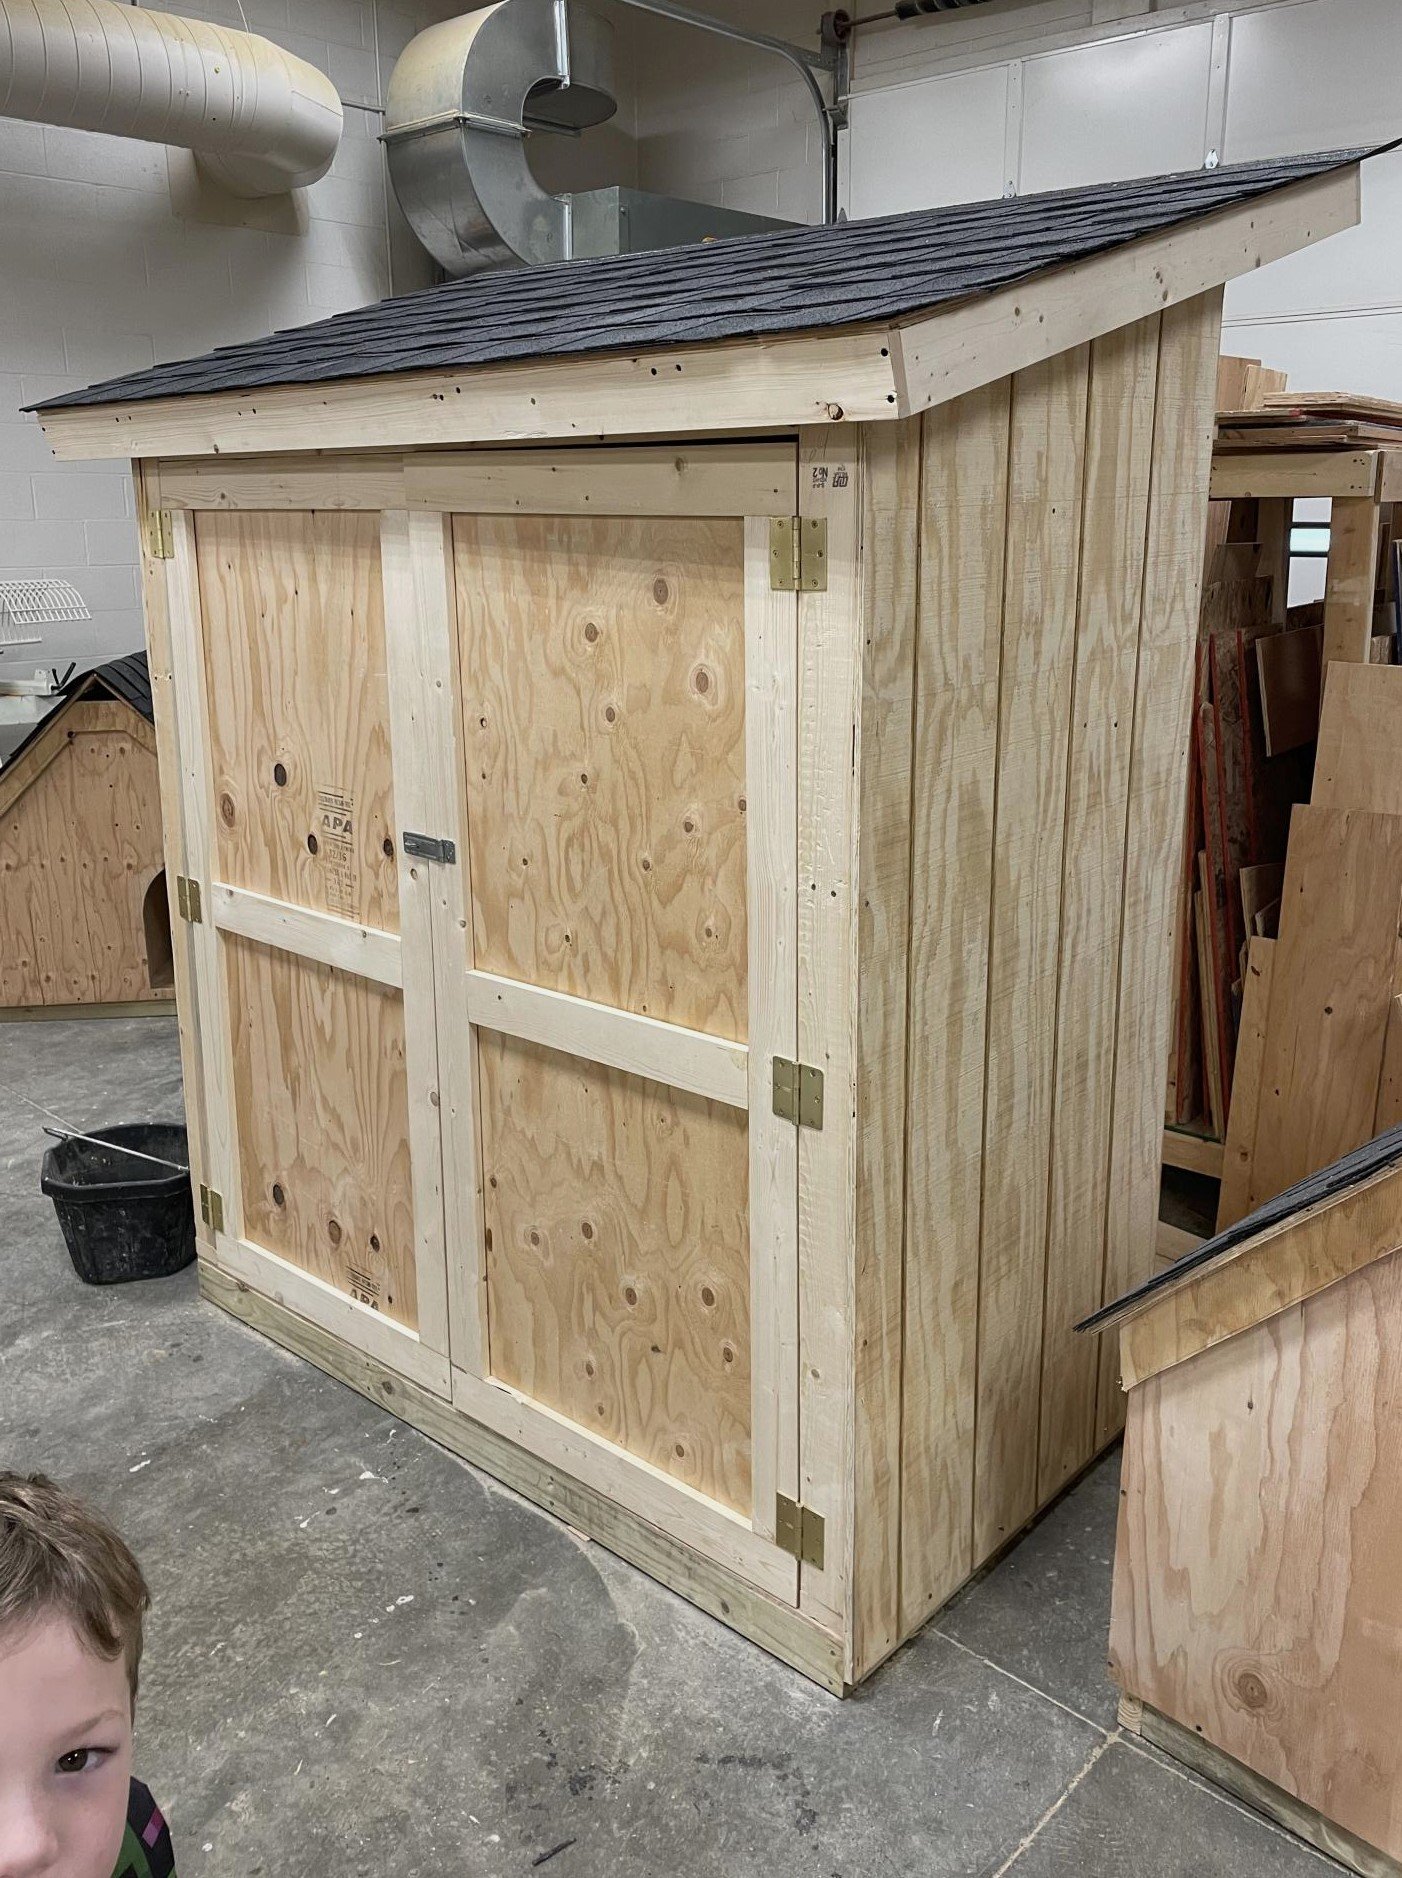
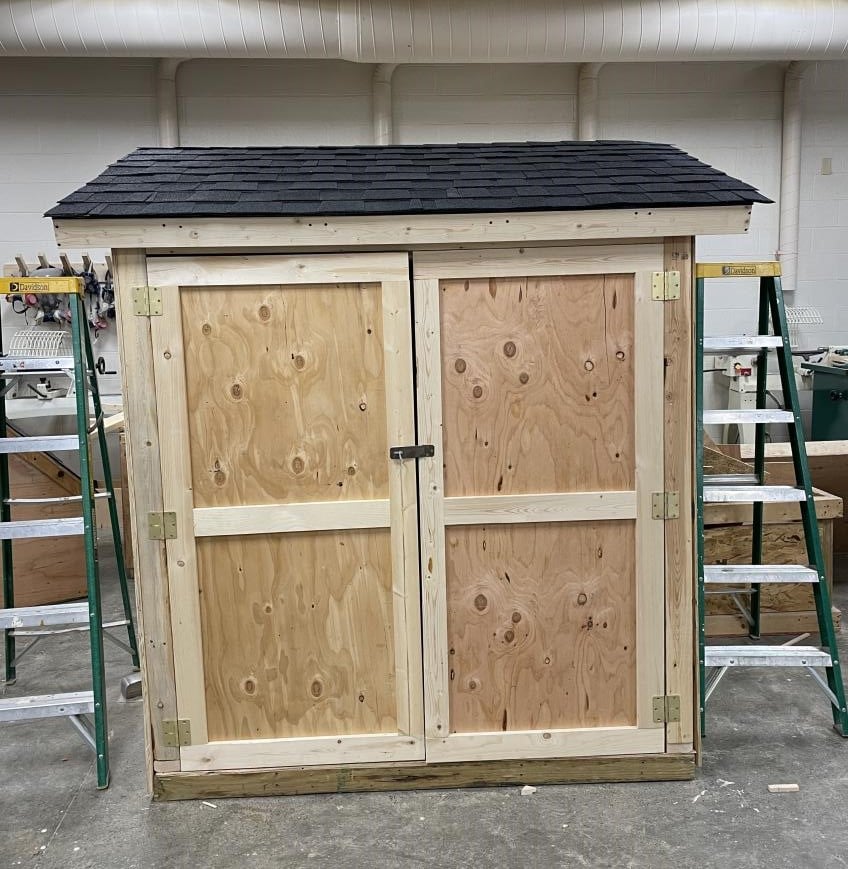
I’m a first year teacher of construction class at Waterloo High School in Illinois. We recently used your Small Cedar shed instructions with some modifications for a class project. It’s a bear getting cedar right now, so we used T1-11 for the outside and 2x4 for the frame.


Sat, 03/25/2023 - 09:14
Very fun and job well done! Thank you for sharing.
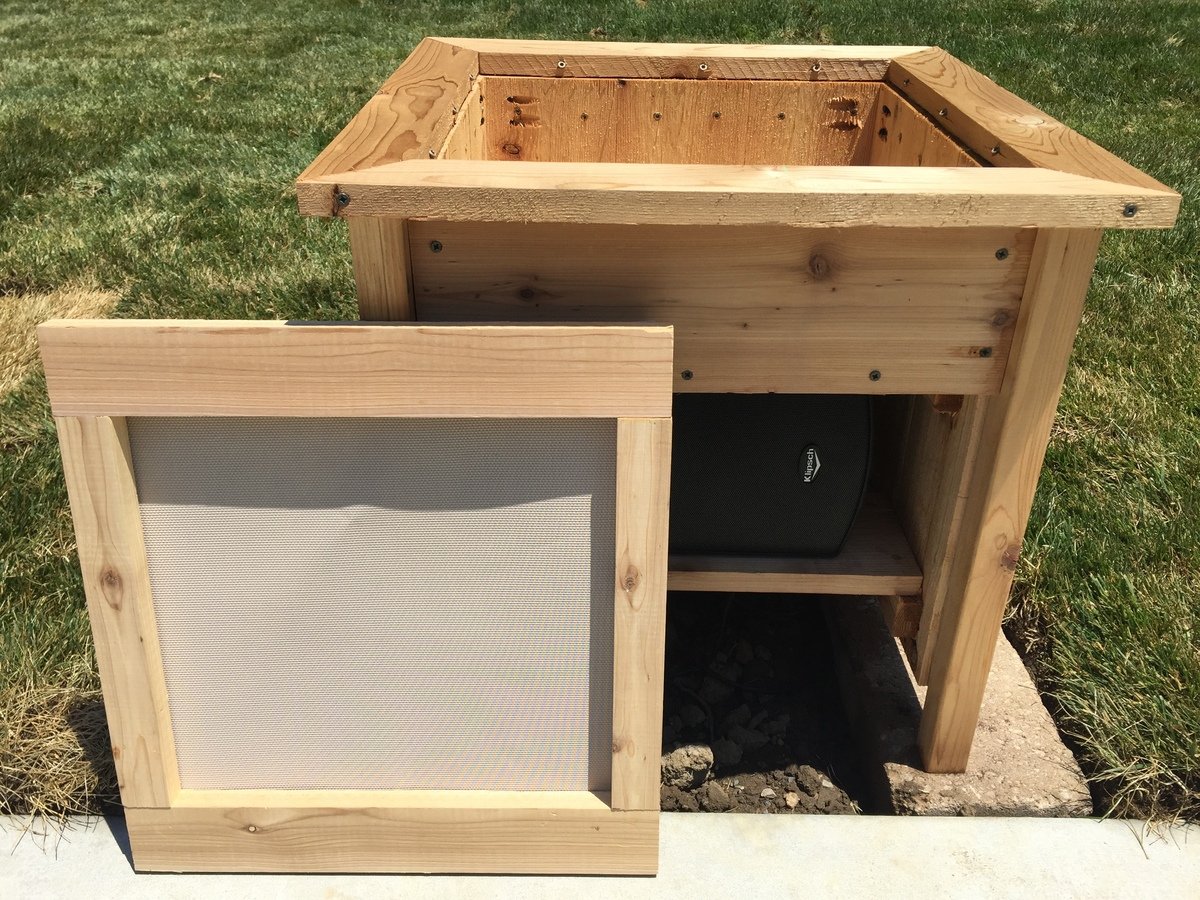
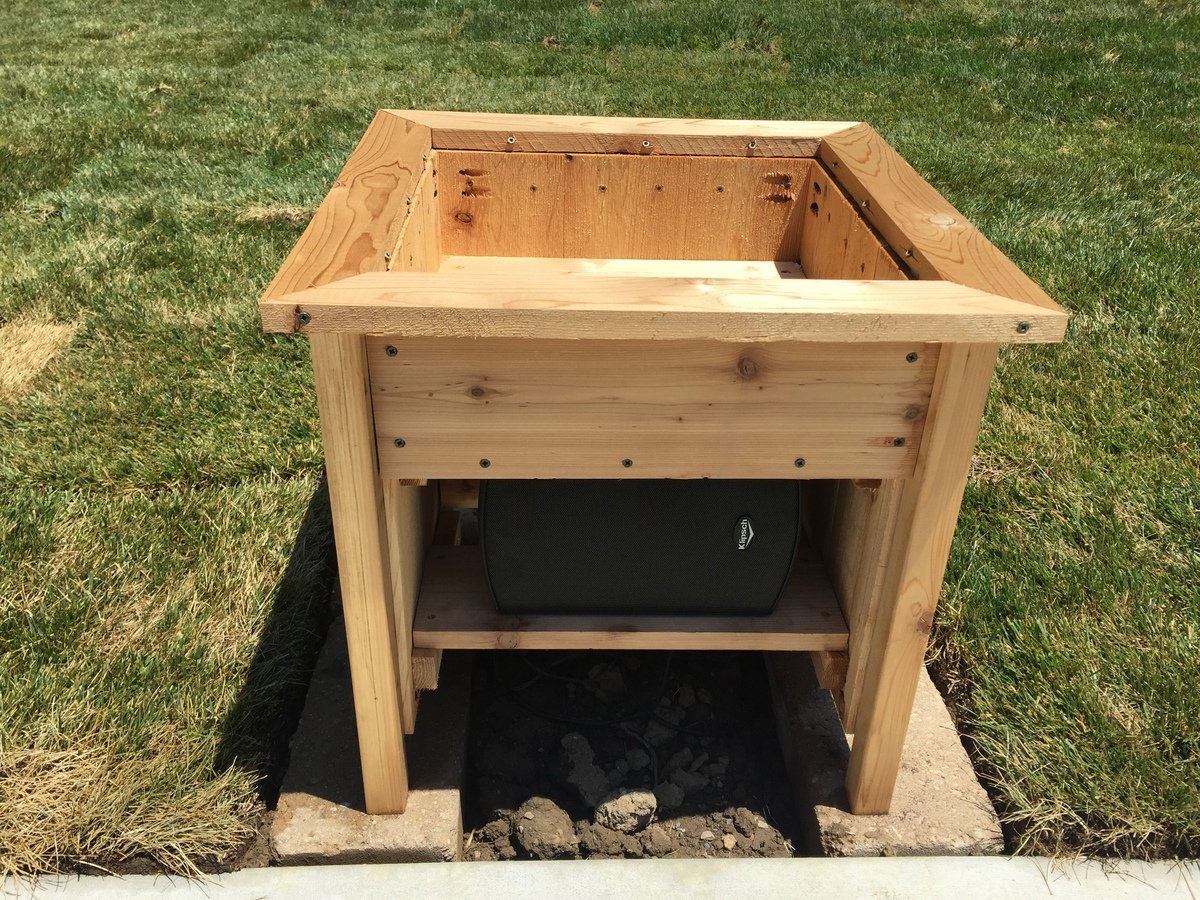
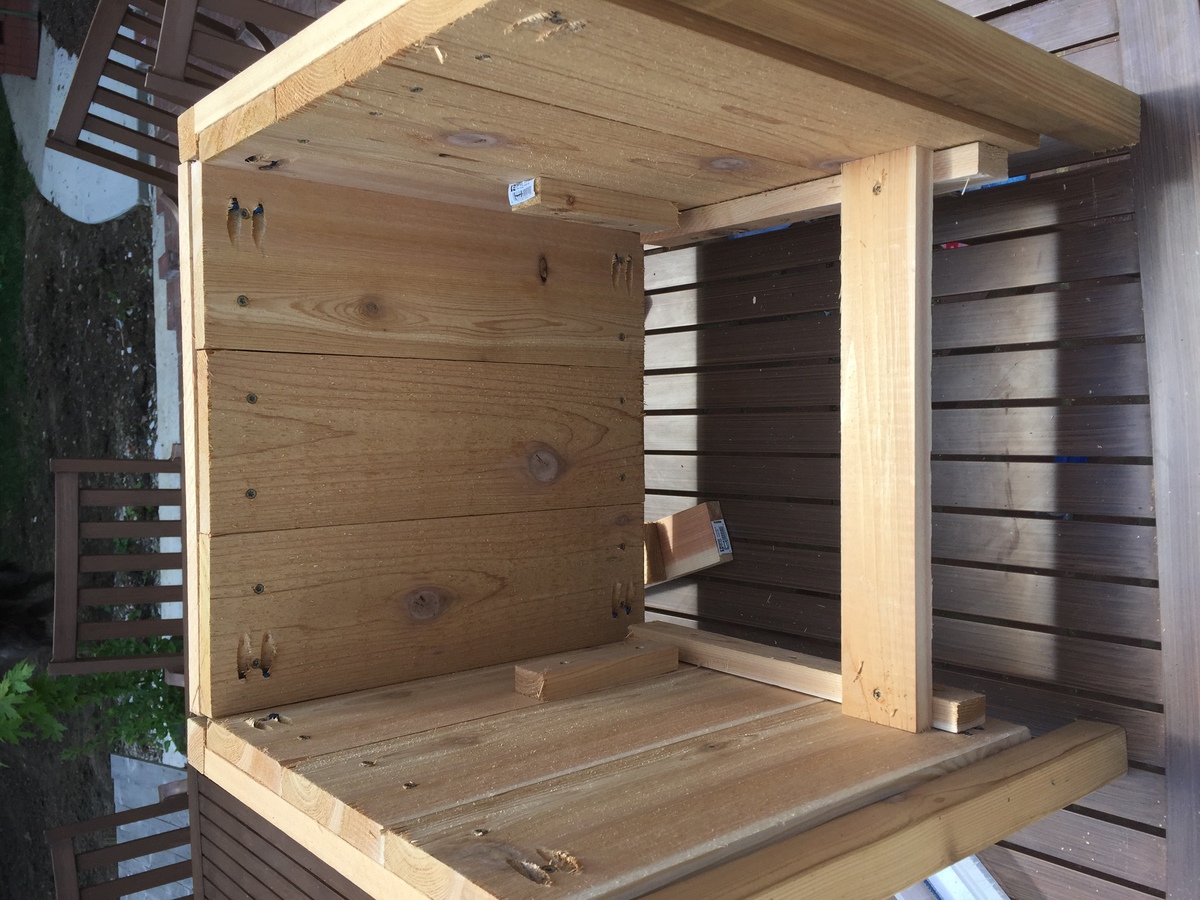
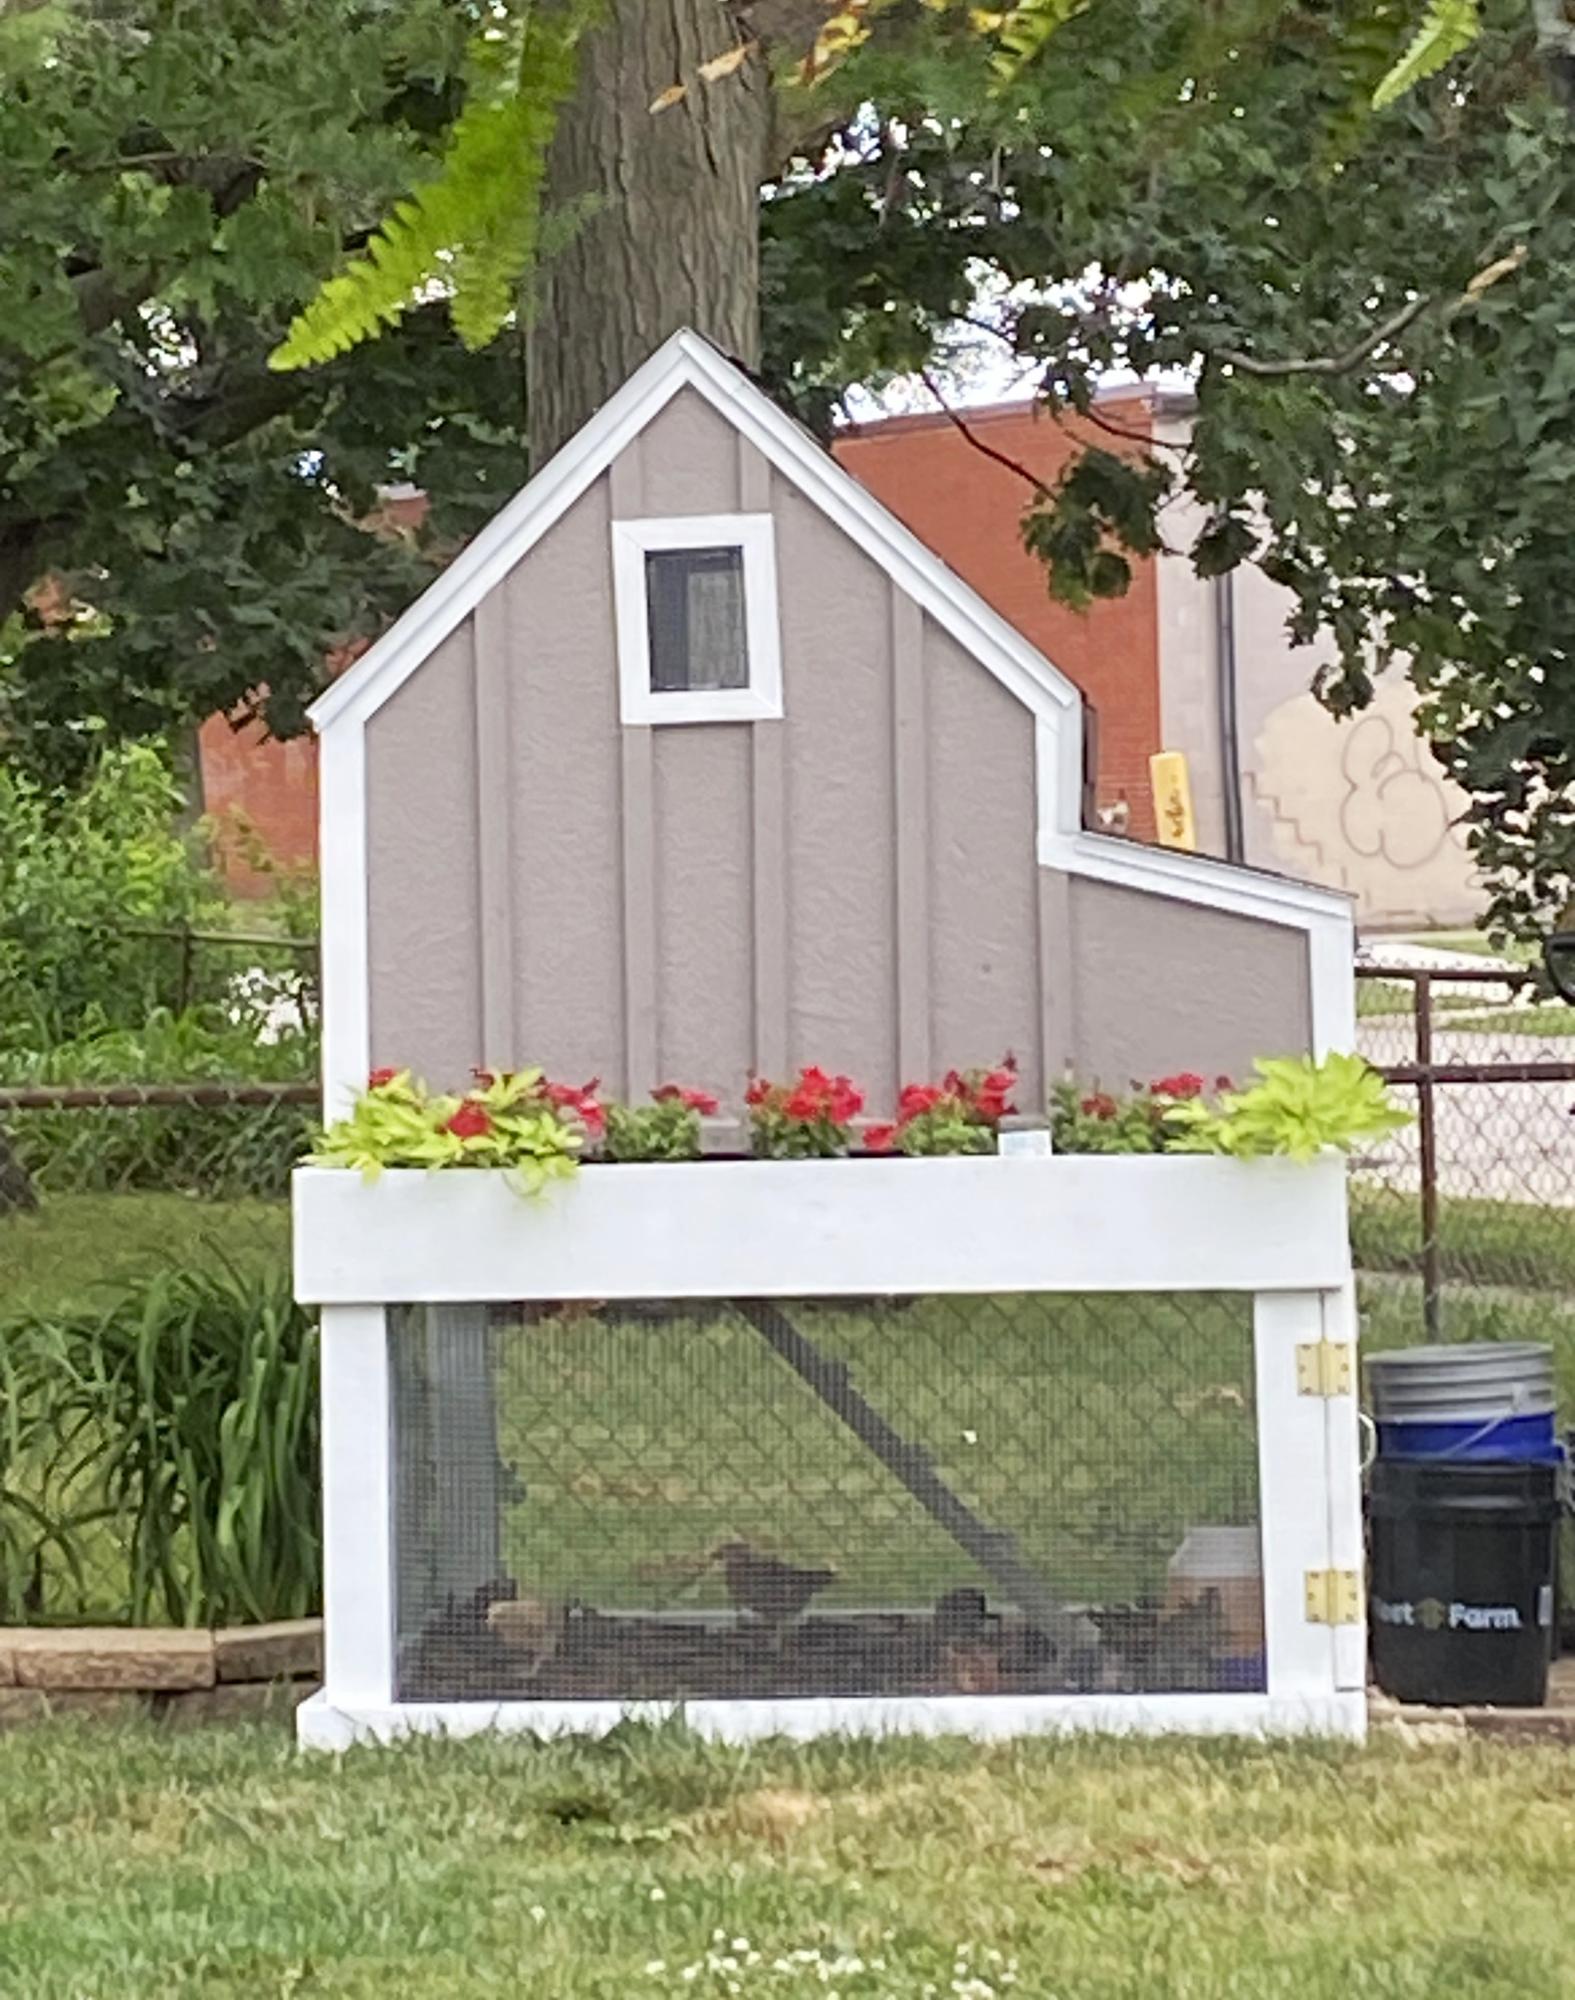
We just put in a pool and I needed something to hide a pair of outdoor speakers. I used Klipsh AW-525 speakers.
Basically I raised the bottom of the planter enough to fit the speaker under and had to add a few framing pieces to secure the speaker mount to. The mount attaches to a vertical board and the weight rests on a horizontal board. The wiring comes up from below.
The front panel uses vinyl mesh from Sailrite.com to hide the speaker but allow sound out. Imm planning to hang it with magnets if it doesn't distort sound too much.

Got the plans on here had a little trouble with the angles on the seat but overall looks good and was easy to follow the plans
I made this without the fancy headboard, but I'm very happy with how it turned out! See my blog for complete details.
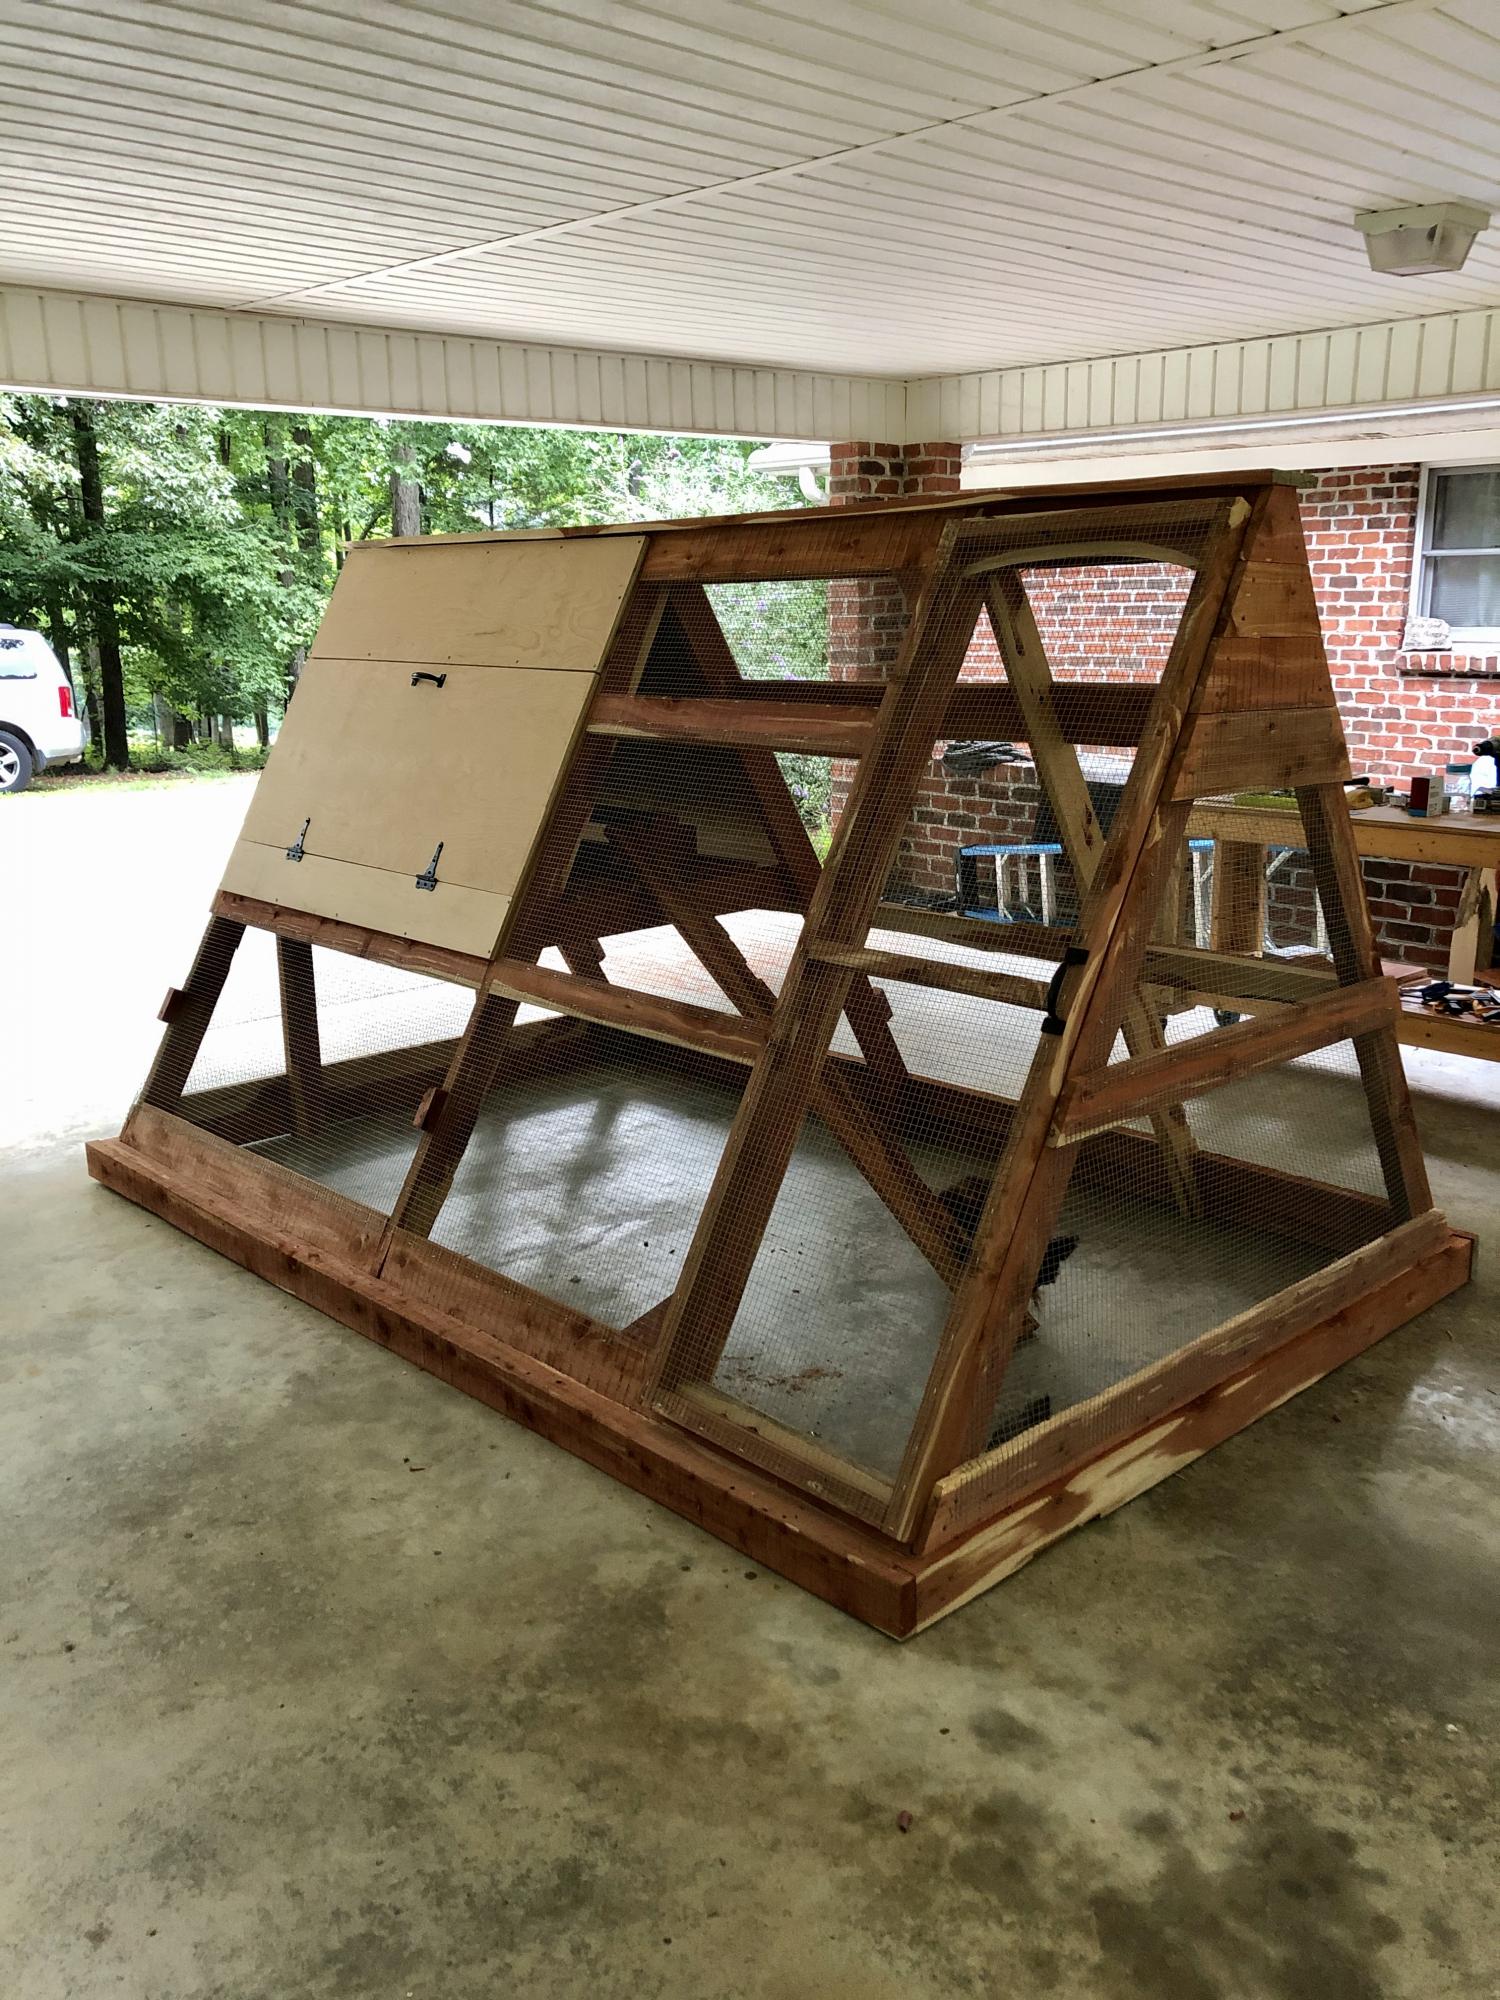
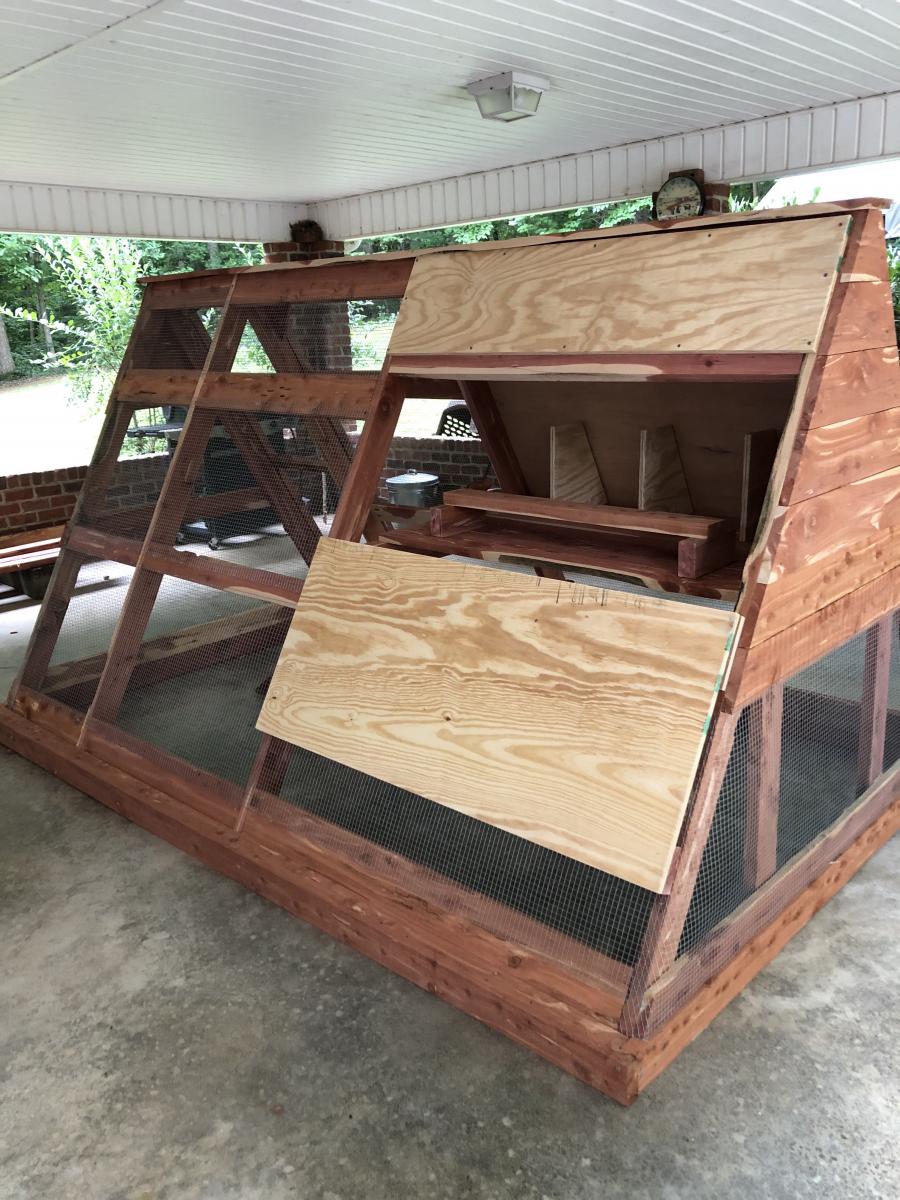
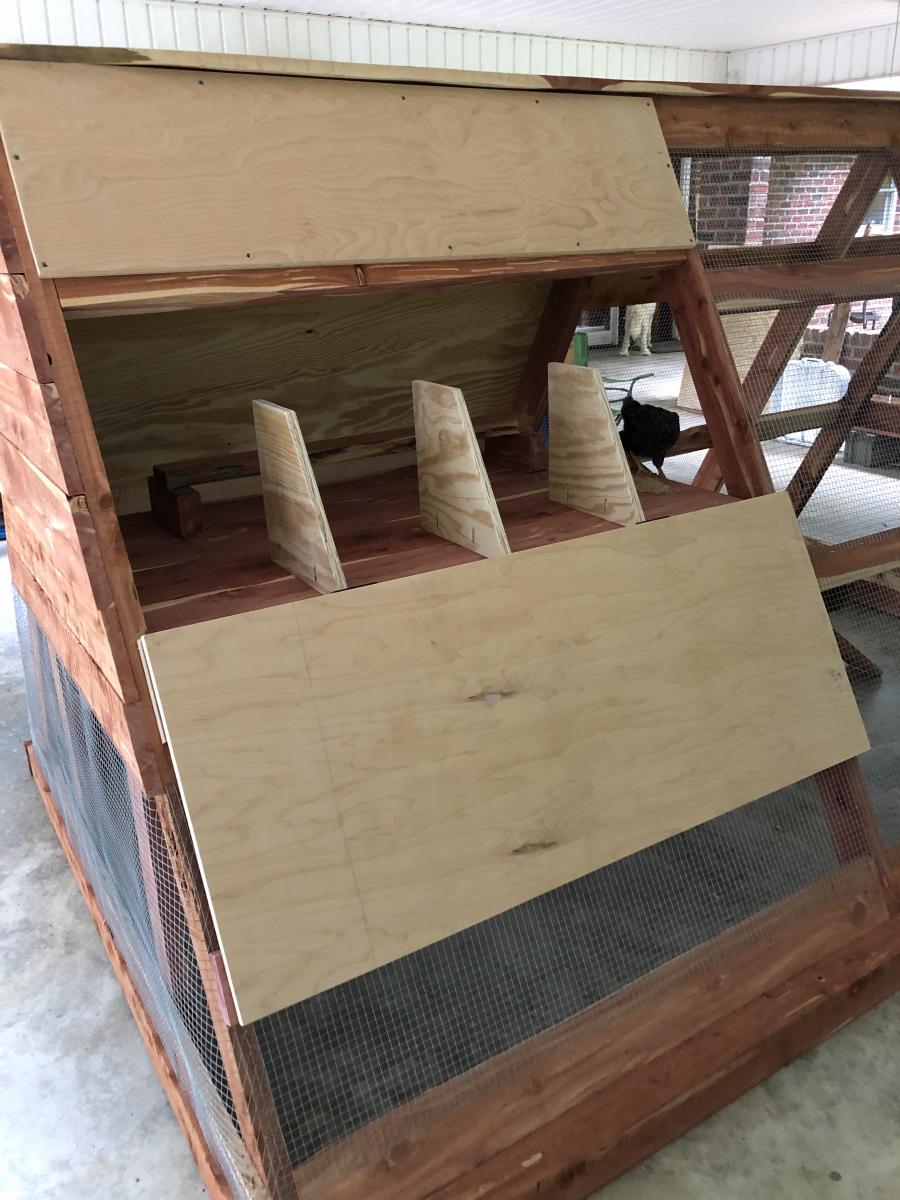
This was my biggest build yet and these plans along with being able to see a few brag posts with modicifactions made this project less intimidating. I extended the coop in order to add a walk in door. The drop down doors on both sides will give plenty of access and help with cleaning. I've added door latches to all the doors since putting it in place. My dad provided the cedar so that greatly reduced my costs. This project took about six days to complete. The fun part was getting it out of my carport : ) This was built for my daughter's chickens and she is thrilled with it. So am I! Thanks for the plans Ana!
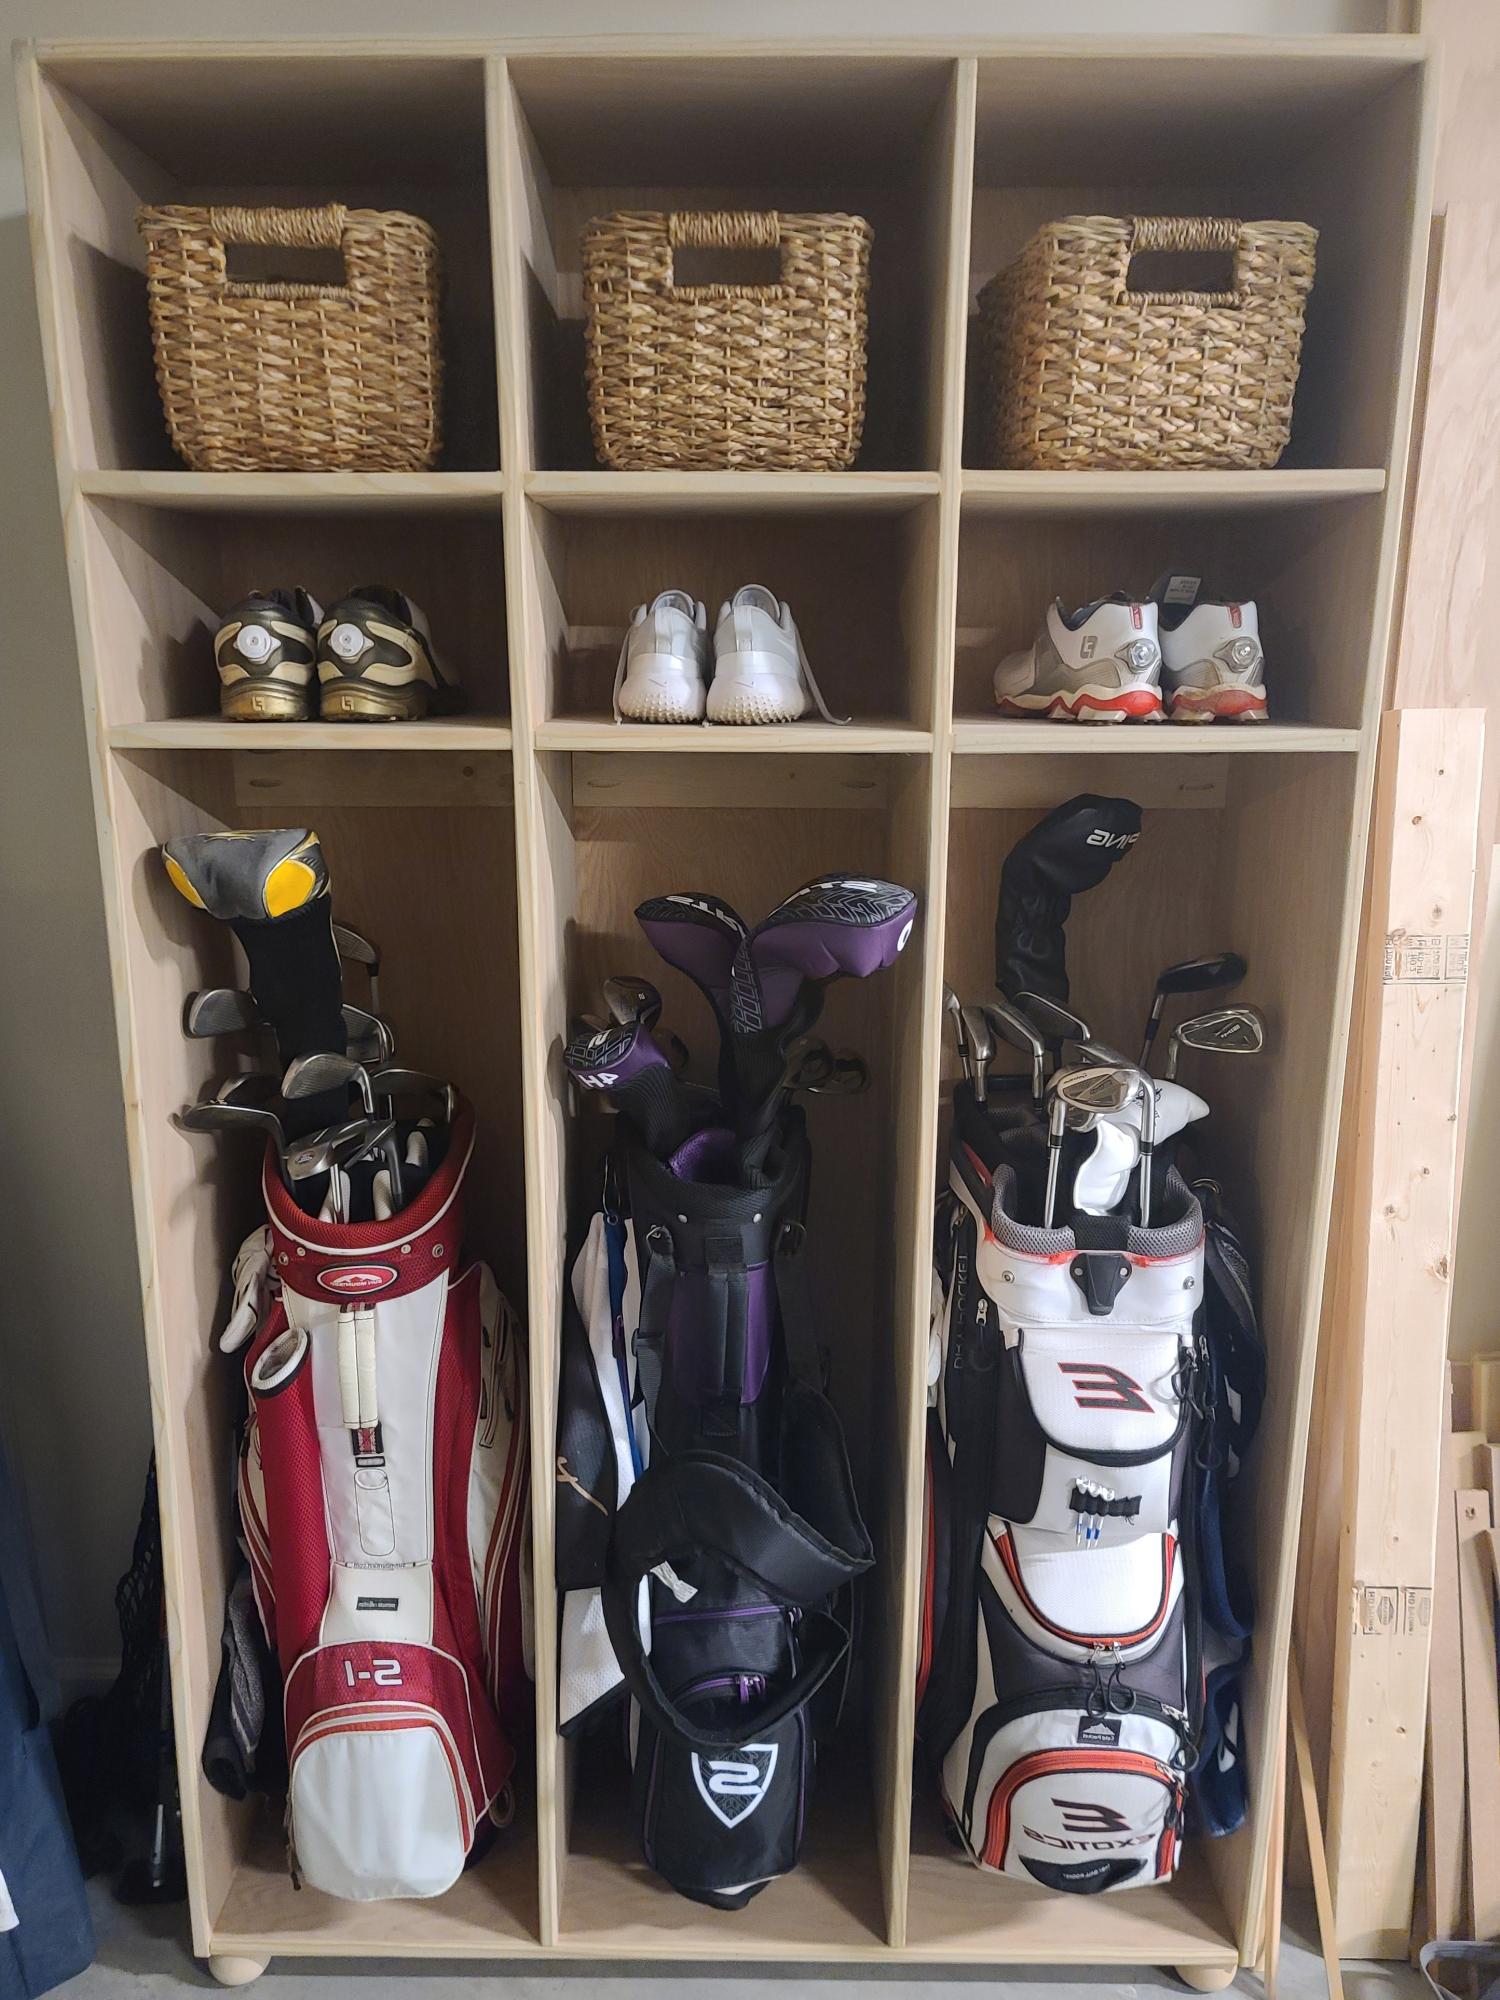
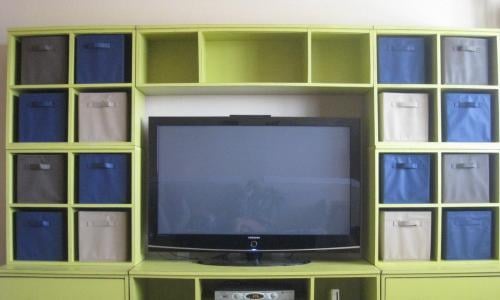
Utilized the plan for the Locker Book Shelf-Full Size and modified it a bit to convert to a golf club locker. Definitely keeps all the clubs, shoes, and accessories organized and eliminates the clutter. My wife loves it, course she added the baskets, which makes it look awesome!
Actually this is how I stumbled upon Ana White's website. I was looking high and low for a plan for golf club lockers, and found Ana's website as part of the process. Best google search I've ever done!
Mon, 04/11/2022 - 14:51
WOW, that looks awesome and is the perfect storage solutions for all the golf gear! Thank you for sharing.:)
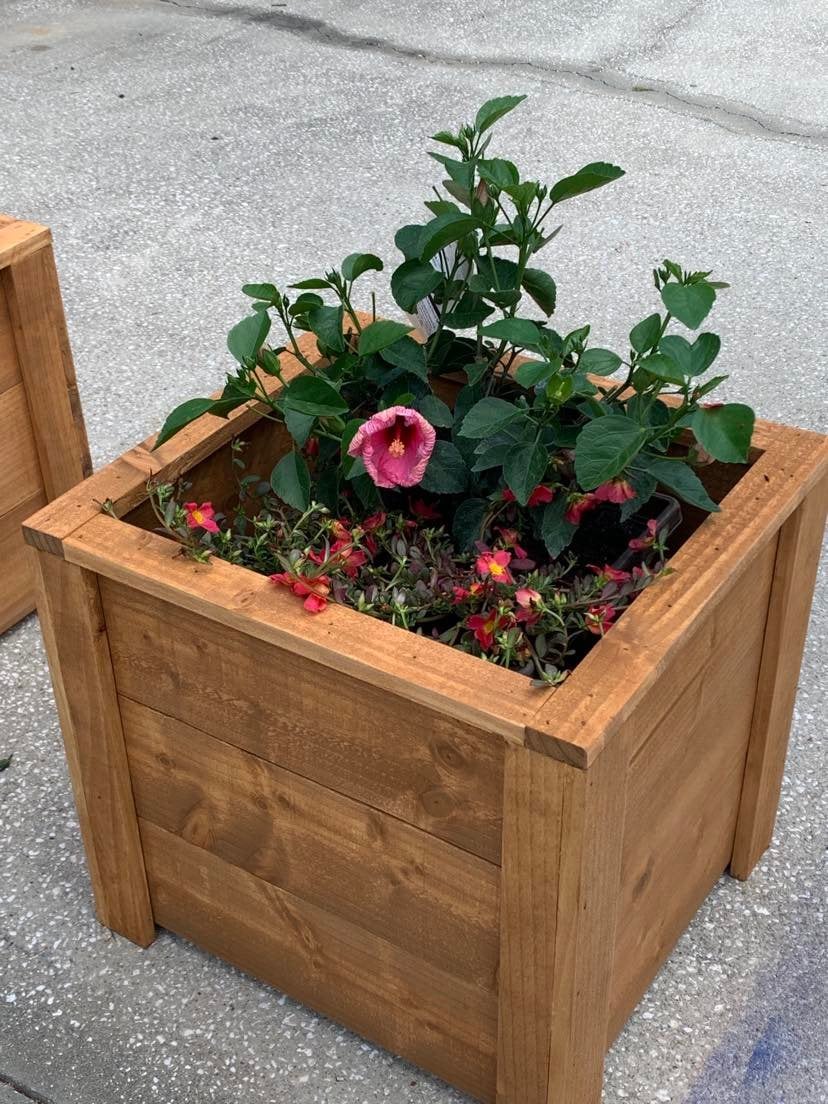
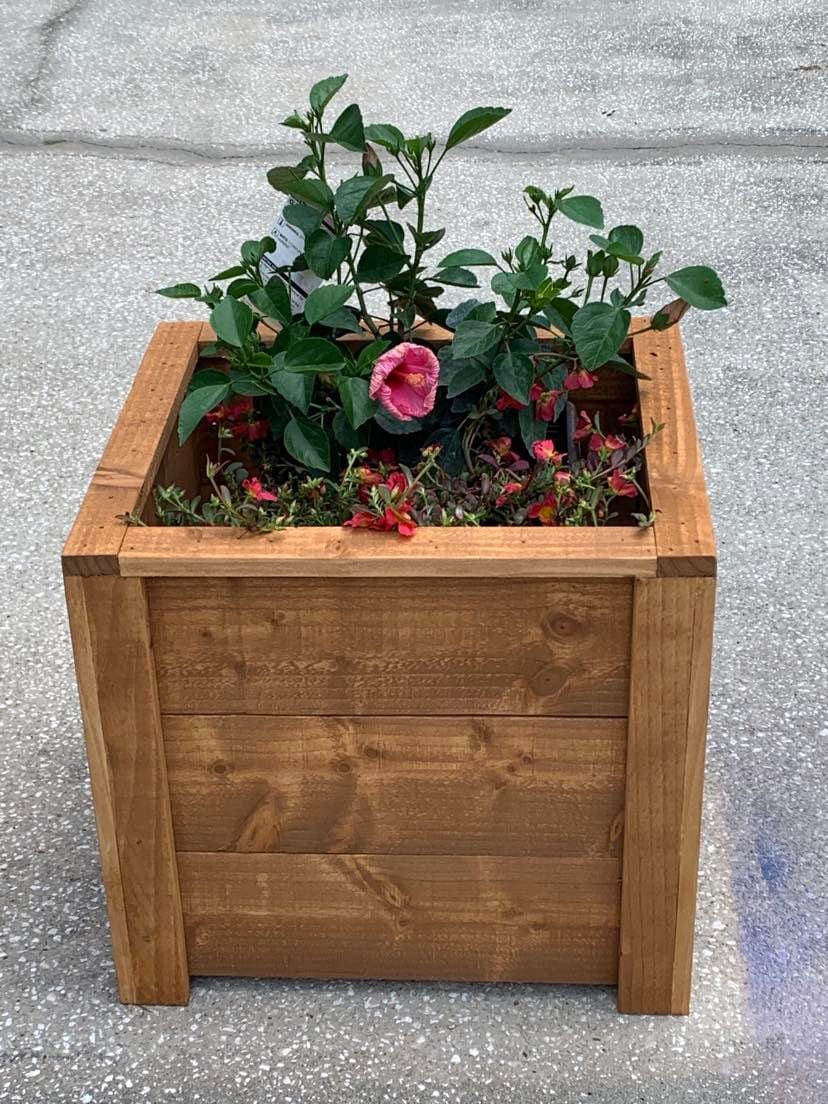
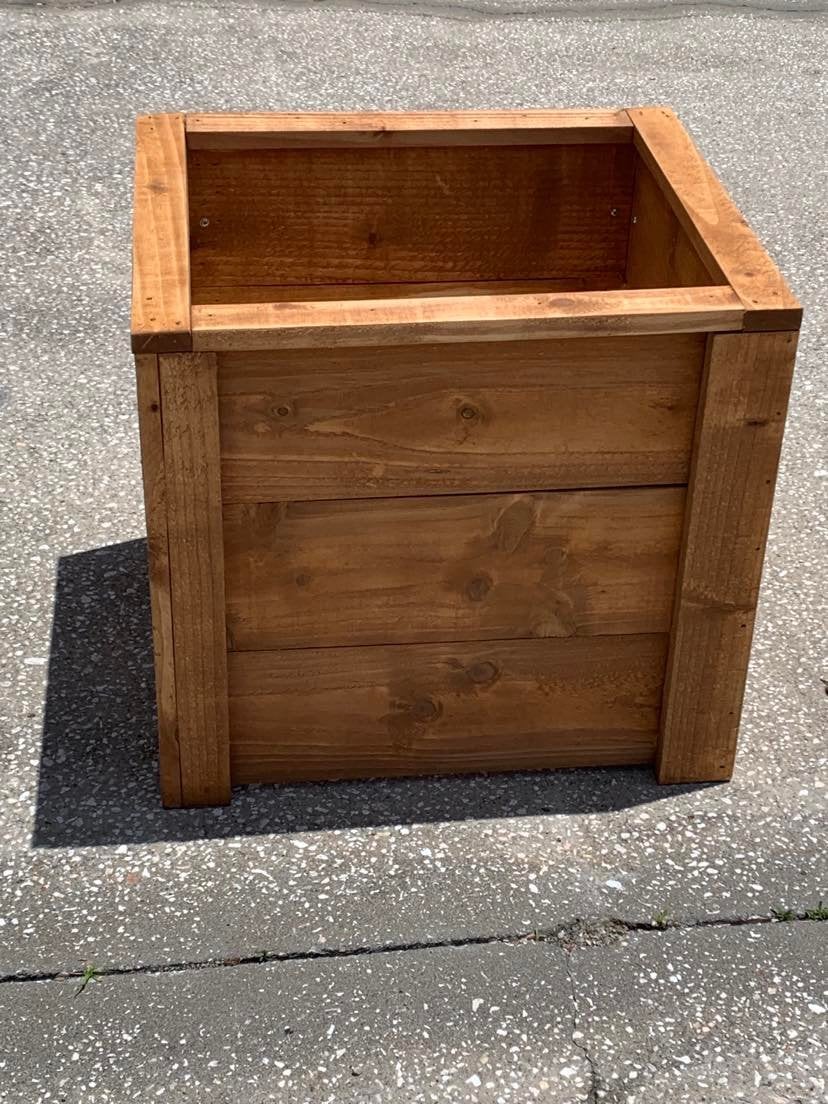
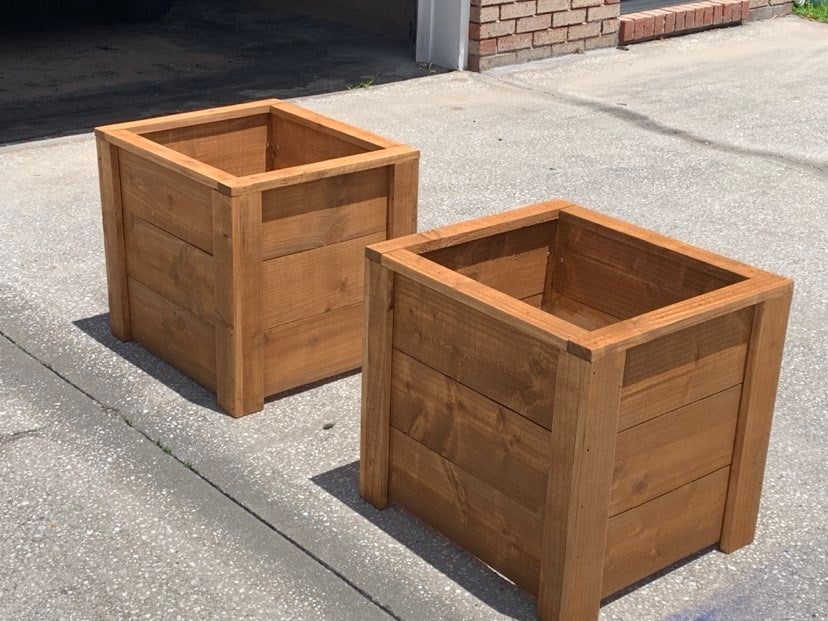
Thanks Ana, I built your planter box, actually built 2 of them, one for each mom. The were a huge hit and I already have people asking me to build them one.
So loved building this planter box. Thanks for all you do for your fellow woodworkers!
Dale G
Callahan, FL
Tue, 05/10/2022 - 07:05
Love these, wonderful idea for a mother's day gift, thank you for sharing!
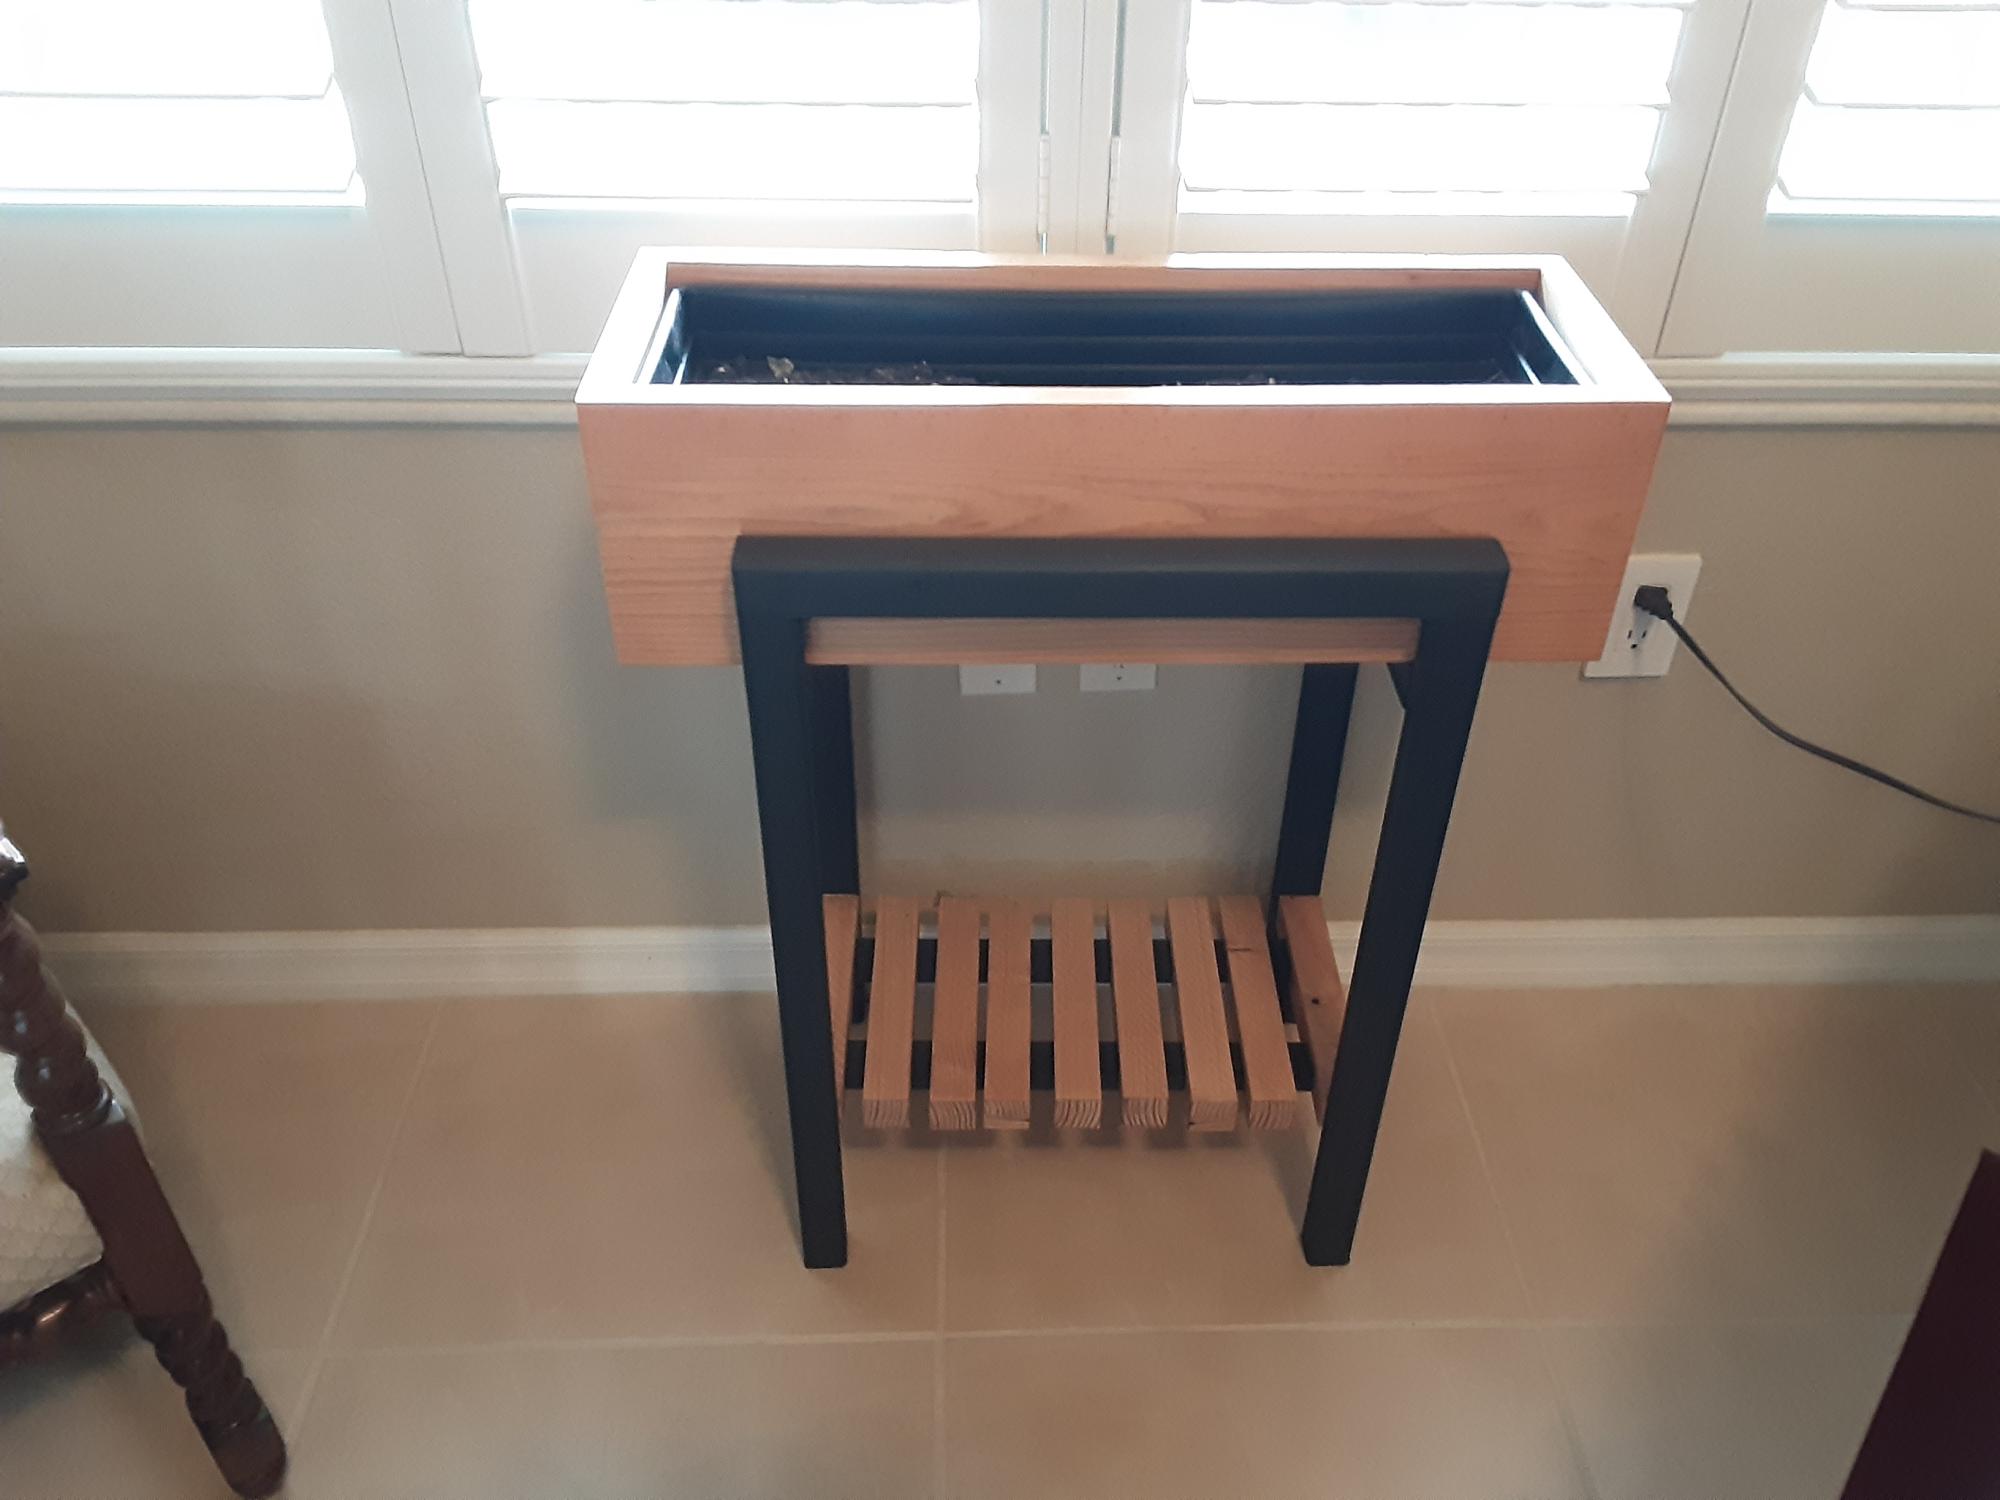
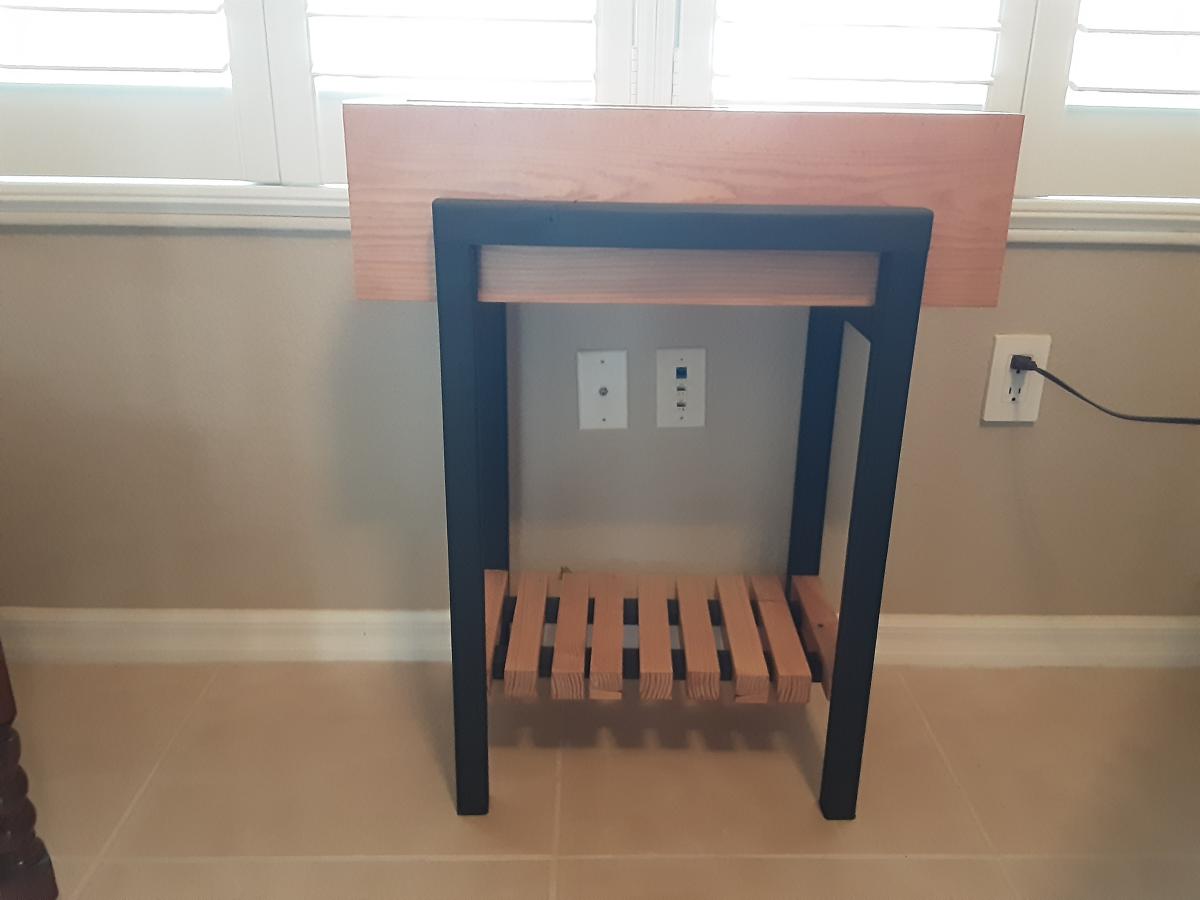
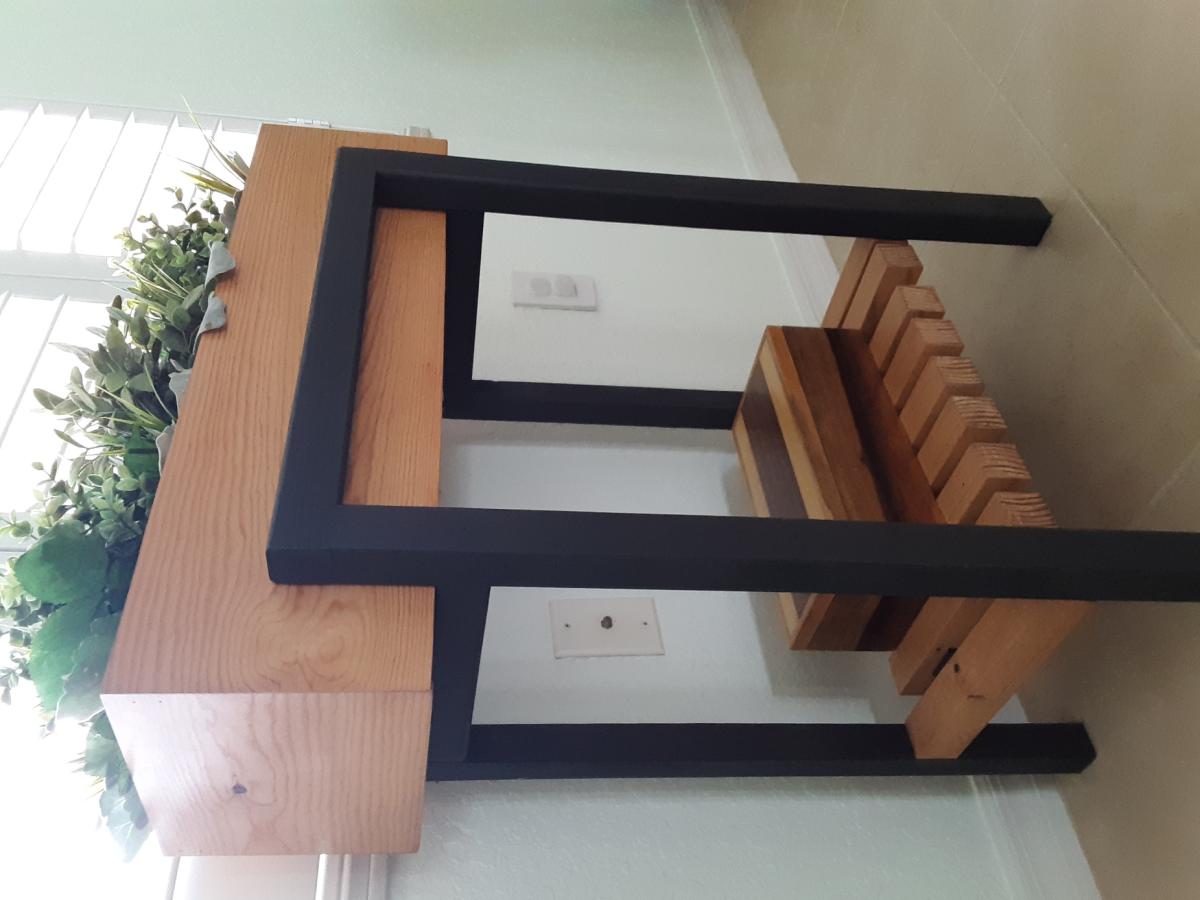
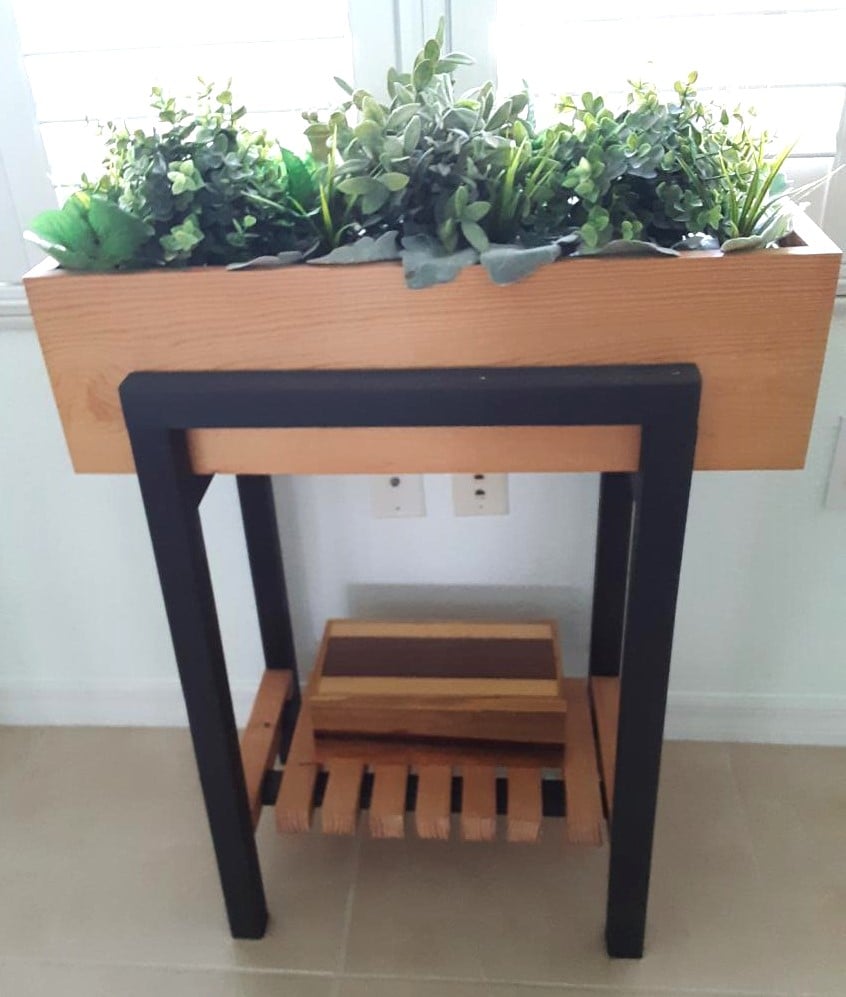
Created the stand for the raised planter using 2X2 assembled using dowels. Painted the stand mixing black with a bit of white to simulate metal. The actually plastic window box fits within a wood open box with mitered corners fir clean log. Bottom of the stand provides a shelf using (9) 2X2s with a dado placed on either end to fit on the runners of the stand.
Mon, 05/01/2023 - 08:24
It looks super high quality, love your take! Thanks for sharing.
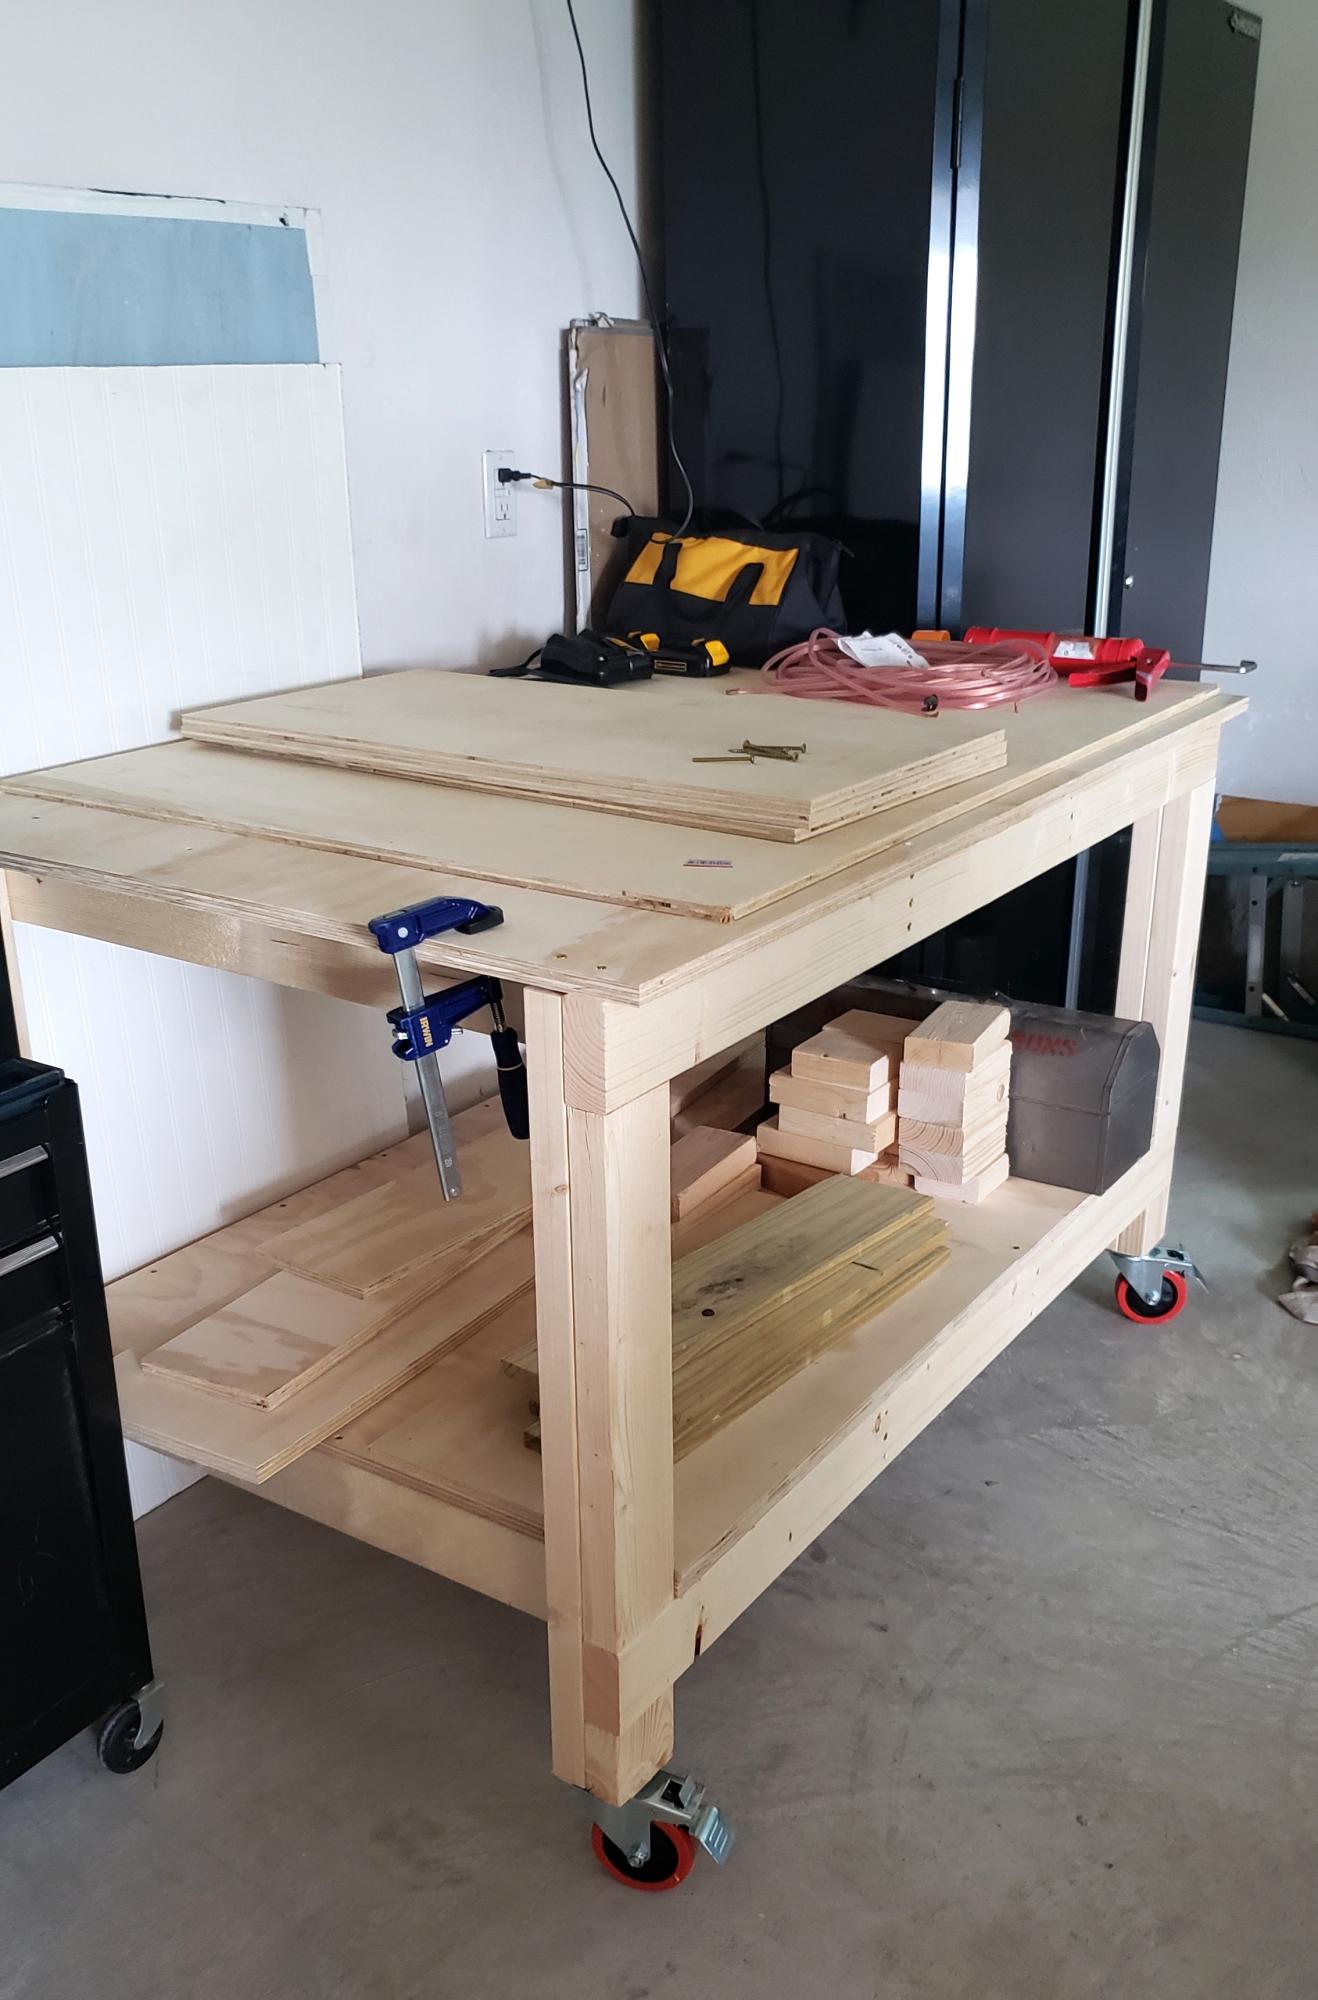
Easy to build workbench. I added an extra 2 1/2 inches (width) to the top plywood cut. This gave me a 1 1/4" lip to the front and back sides. I wanted to be able to clamp on all sides of the bench. Also added casters since I wanted to use this as an outdoor table for entertaining if needed and to simply have mobility with the bench. So far I love it!
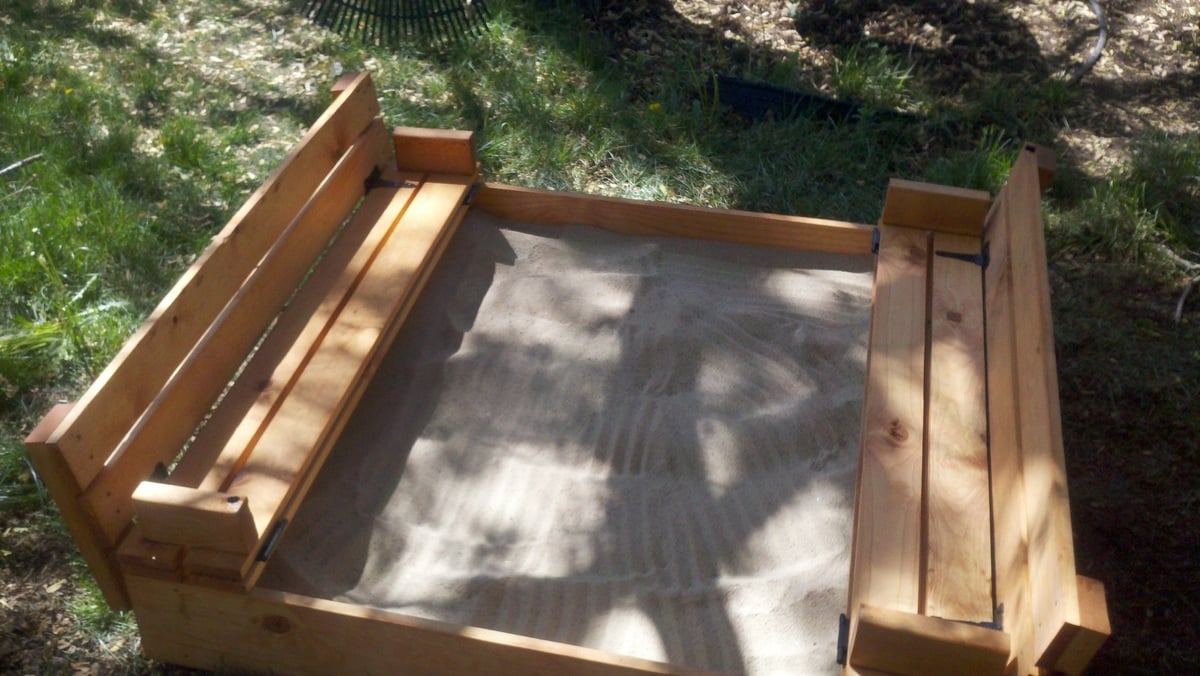
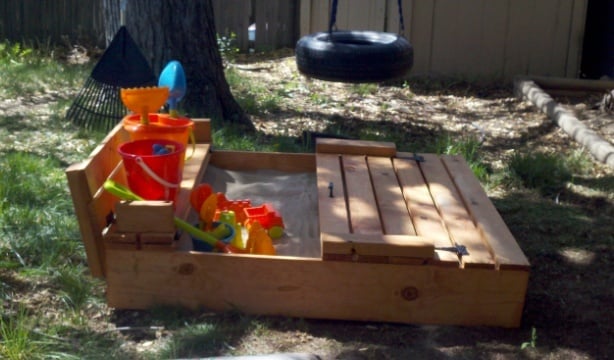
This sand box was very easy to build and it works great. The only thing I would change is cutting the "arm rests" at 7 1/2" instead of 6 1/2". I did that for the second set of arm rests (when I downloaded the plans many weeks ago the cut list was wrong). It made putting that section together a lot easier.
I easily spent more on the hinges (at $5 per hinge x 8 hinges) than I did on the wood itself.
My 1 and 1/2 year old loves playing in it and now I need to build a toy box for him to put all of his sand toys in!

Sun, 04/29/2012 - 00:06
It's been zen-raked! haha.
Those little benches are adorable. I wish I had seen this plan before I built ours.
Mon, 09/17/2012 - 10:29
I just want to say that I asked for my husbands help, and his advice increased the price significantly.
He does not like to paint, and will spend the extra dollar to purchase pressure treated wood. So I sent him with my materials list and the wood he purchsed was $60.00, plus $22.00 for hinges and $10 for a box of deck screws. Actually, I am a artist and had wanted to paint the project to look like a big frog.
As a first time chicken farmer, I have four chickens now fully grown. It was 29 degrees in Iowa this morning, wondering if I should wrap the lower portion of the coop on three sides with visqueen, and should the roost windows be covered? I have straw bales to roost on and add where needed . I don’t plan to heat the coop . Any help will be appreciated.

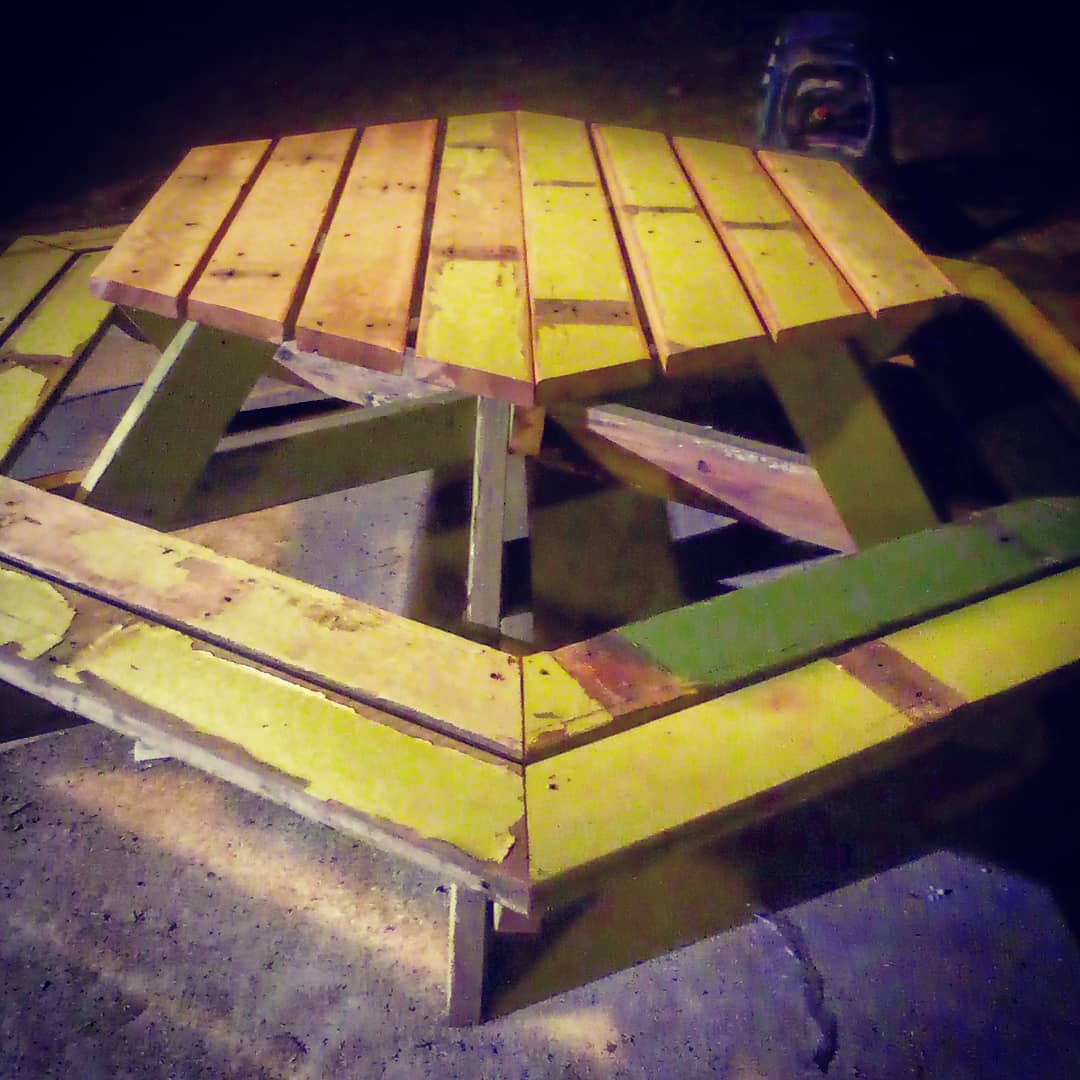
This was our first build from this website and we are so pleased! Having seen very involved plans on an Australian website for a similar sandpit, I was so pleased to come across this version, with its far simpler design!
We wanted a slightly bigger sandpit, so I needed to do some modifications, and while I was enlarging it, I also converted to metric sizes, and designed specifically for the timber I knew I could buy locally (very obscure and inconsistent seeming German sizes). So the end result is a 1.5x1.5m sandpit, that has so far had 6 kids playing happily in it at once!
I've put in the drawings I used, and the cutting list for larger sizes in case anyone else is working in metric, or wants a bigger size!
Our other modification was to offset the shorter sections of the base to run along the front plank of the bench seat - there were two main benefits for this - we need a lot less sand, as there is none wasted under the seat, and the seat is supported and can't bow downwards!
The dimensions and layout we used are in the images.
Supplies
Timber
2 - 200 x 40 x 3000mm
6 - 120 x 24 x 3000mm
1 - 80 x 50 x 3000mm
Hinges
12 - 140mm long (the original design had 8, we went with three per edge to allow for the extra width)
Self tapping decking screws
18 - 5 x 80
48 - 5 x 50
96 - 3 x 20 (or enough for your hinges, depending on the design)
Paint
3 - 375ml PU Acrylic Paint, suitable for exterior use (top planks and seat supports)
1 - 750ml PU Acrylic Paint, suitable for exterior use (base)
Weed matting and staple gun
Sand
I calculated I would need 20 x 25kg bags - in the end we needed 11 - don't ask me where we went so wrong!
Cutting list
2 - 200 x 40 x 1500 (long sides of base)
2 - 200 x 40 x 1415 (short sides of base)
12 - 120 x 24 x 1495 (top slats - just under half a plank, to allow for waste)
4 - 80 x 50 x 245 (armrests / seat braces)
4 - 80 x 50 x 495 (back supports of seats)
I gladly paid 5 Euro for the wood to be cut in Hornbach - it should have been more than this, but the guy was generous!
12 hinges (the original design had 8, we went with three per edge to allow for the extra width)
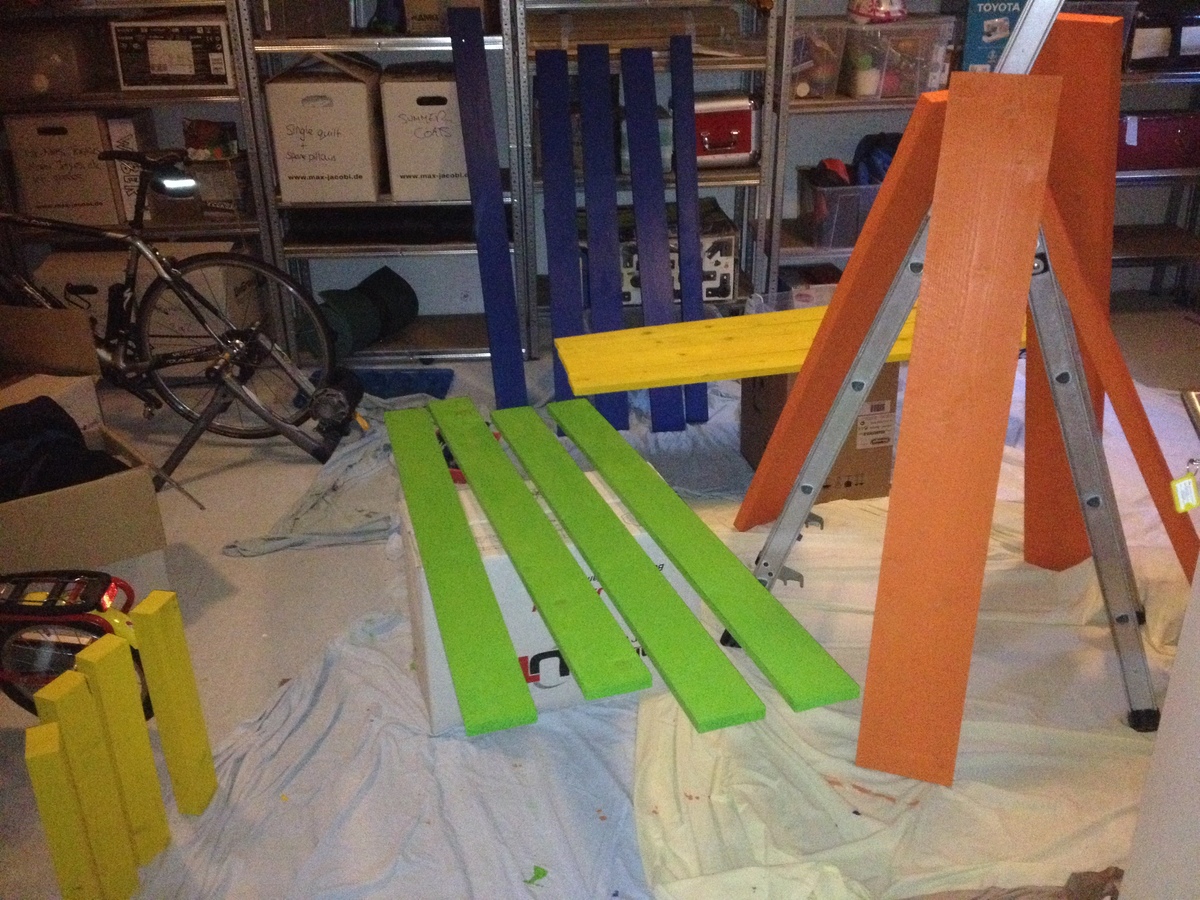
On Sunday we had the idea, on Monday I drew up the plans, on Tuesday I went shopping! Once all our wood was home safely, we sanded it down - most edges weren't badly finished, but there were a few splinters that needed getting rid of!
The next two nights Mr W gallantly set to work with the paint brush. After two nights, the wood all had two good coats of paint and we were ready to start assembling on Friday.
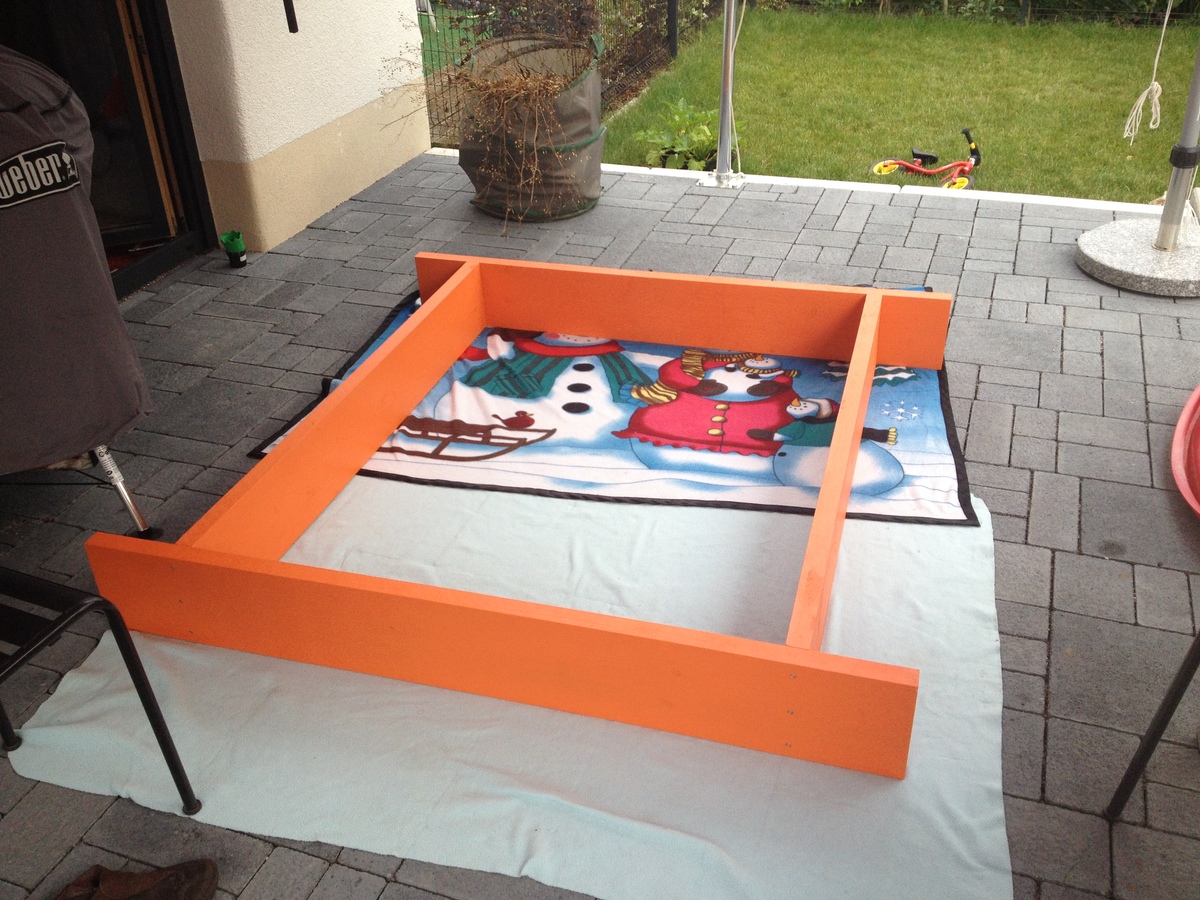
I pre-drilled the base of the bench before the second coat of paint - three holes for each butt joint - with some careful measuring this made screwing the base together really easy!
The top planks were also pre drilled, but there unfortunately my tiredness made me make mistakes, and some had to be re-drilled! Spacing the planks out took a lot of time, but I am glad I made the effort. I used cereal box, and experimented with different numbers of layers - I knew I wanted a theoretical 5.4mm gap, but it took some time to get the right number of layers of carefully creased and concertinaed card!
Having got our spacing wedge sorted, we screwed the blue planks in place at either end of the base. We then assembled the green seat section, and the blue/yellow back rest. Following a tip from the comments section, we added the hinge to the seat/back combo first, as this ends up being on the underside. Once those two hinged sections were made, they were then laid in place on the base (card wedge spacers in place) and then the final hinges added. The final assembly took about 5 hours - but this was partly because we started outside, then had to move everything inside when a huge thunderstorm rolled in!
The next morning we got busy with the staple gun and tacked weed matting over the base, then it was hauled in to position and filled up! For us getting this done and dusted was important, otherwise it could have dragged on a lot, but we are terribly proud that it was done in less than a week from being fist conceived!
I hope the metric/enlarged plans are of use to someone else too. One other idea we had, which we didn't get round to building in, was a support bar to be fitted when you close the pit, so the kids can play on top as a stage when it is not being used for a sandpit!


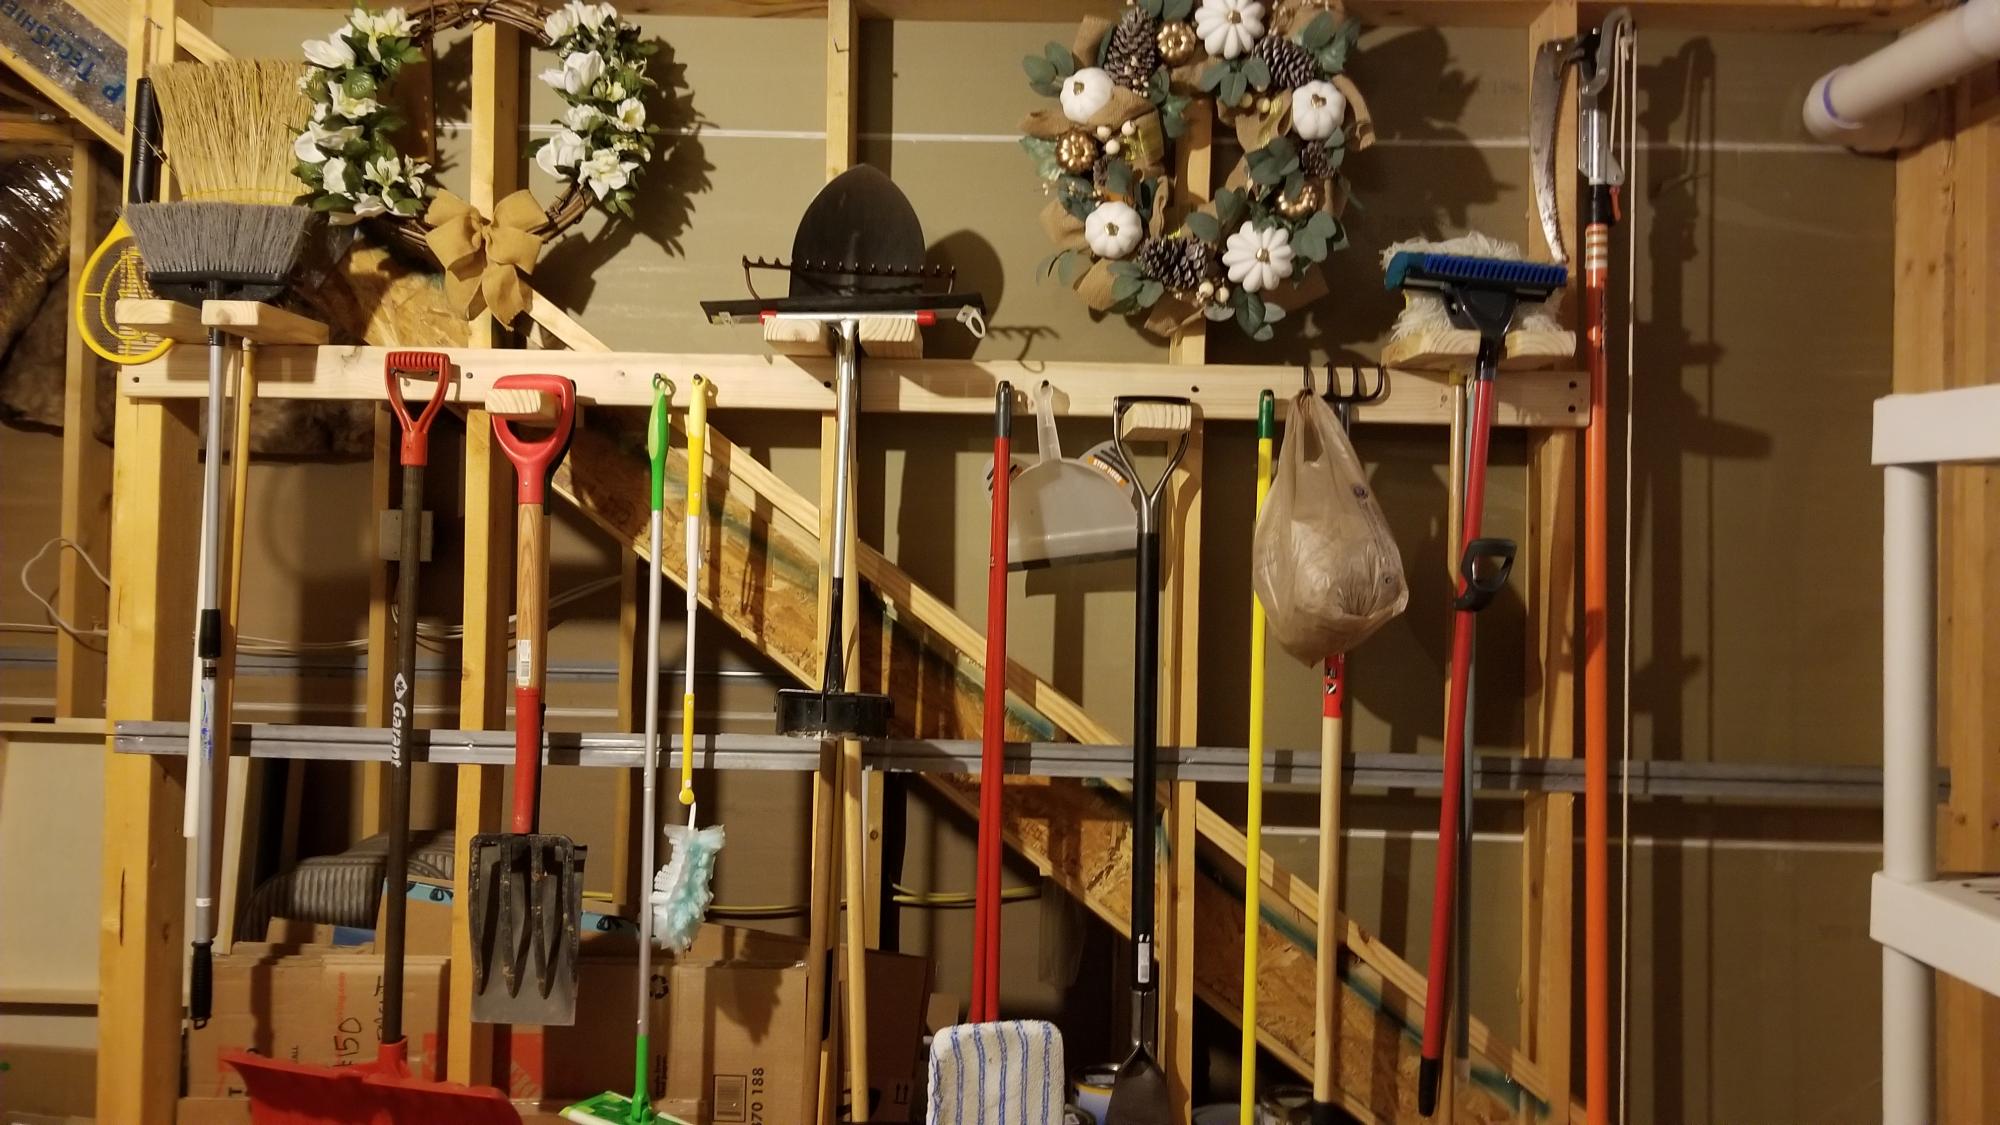
Super easy and useful project. I made mine 8 ft. long because my studs are on 24 in. centers and I had a lot of tools to hang. It was fun building it and even more fun getting all those tools and things off the floor.
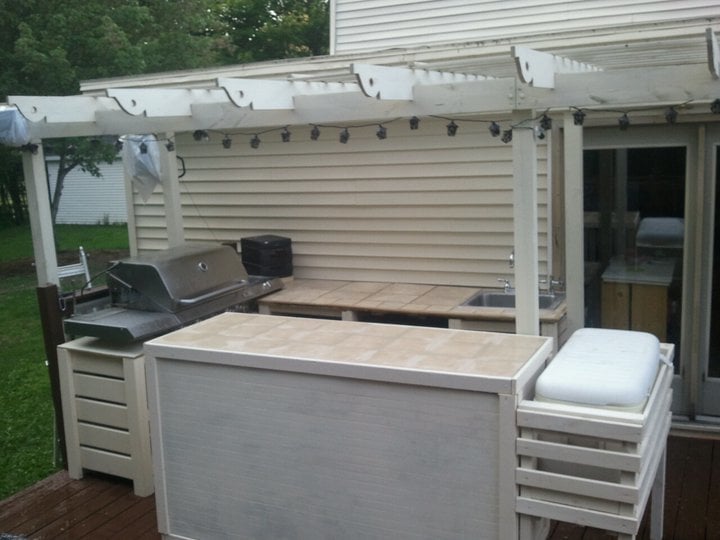
This is the new outdoor kitchen I had been working on - finally finished! It was inspired from the kitchen island plans - I like the slats, and thought they would work well outdoors for air flow and water drainage. I worked around the existing grill, and it is all modular, so it can be moved if necessary (such as painting or treating the deck). It includes cupboards underneath the bar, dorm fridge and sink with storage under the countertop. The cooler stand raises the cooler up to 'user' level (no more bending!). Because I'm an avid recycler - most of the products used were recycled items. All told (not including the already purchased grill) - this kitchen cost me a total of approximately $95.00 (I had a lot of the materials already). This project took me approximately 5 weeks working on it part-time after hours. I built one cabinet at a time, then the countertops.
Wed, 07/06/2011 - 10:12
I would love to see more pictures of of your bbq kitchen. This is just what we need. Thank you for sharing.

Wed, 07/06/2011 - 17:29
This looks really awesome Colleen! I was thinking about putting a sink like that on my deck. What kind of finish did you use for the countertops? Would you please post more pictures of it? Great job!
Thu, 07/07/2011 - 04:42
Thanks Kmatt & Viola...I'll try and get some more pictures up asap. For the bar top and countertop I used tile, and treated the grout lines many times with a waterproofer. Both tile and grout were purchased at our local ReStore - a total of 20 cents a piece for the tile, grout was $3. Not bad for a countertop!
Thu, 07/14/2011 - 16:57
What kind of top did you put under the tile? Plywood, cement board?
Wed, 07/20/2011 - 11:48
Wow, this is really amazing! This is just what we need for our new deck - something modular and not too expensive to build. Do you have any more pics? I'd love to see what the area in front of the grill looks like. Very, very nice work.
Mon, 03/05/2012 - 10:54
Hi, I was wondering if you have the plans for the kitchen around the bbq grill, i would love to make this for my husband for his birthday.
Mon, 04/09/2012 - 18:38
Hi, this is great. Is there anyway you can post pics of the front of the bar where the sink is and especially the bbq, I want to build around my existing bbq grill but dont know how. thank you so much.

It took a while to come together and made several modifications but it is a great coop and was a major selling point of the house when we were relocated. I had added a main tray under the roosts and a door to srape the poop out. This made keeping the coop clean very easy.


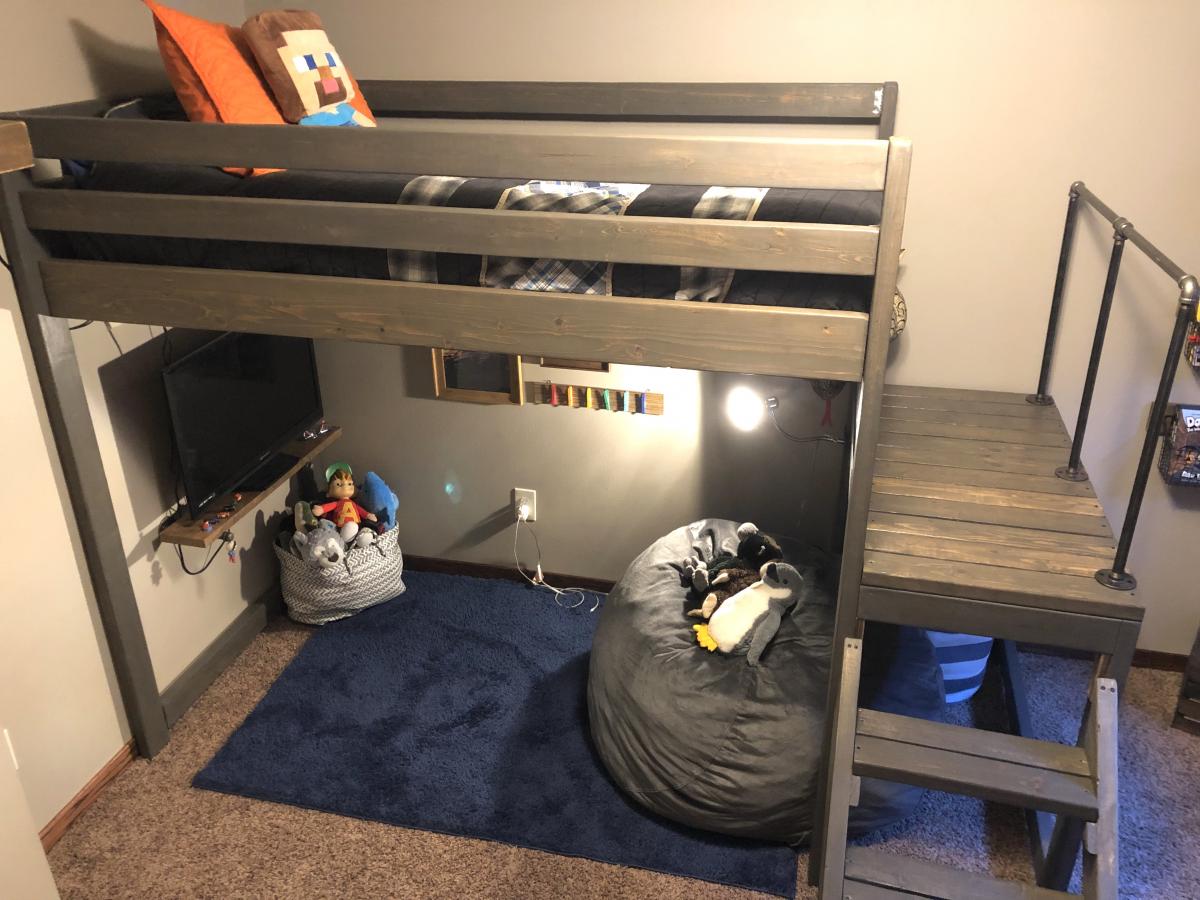
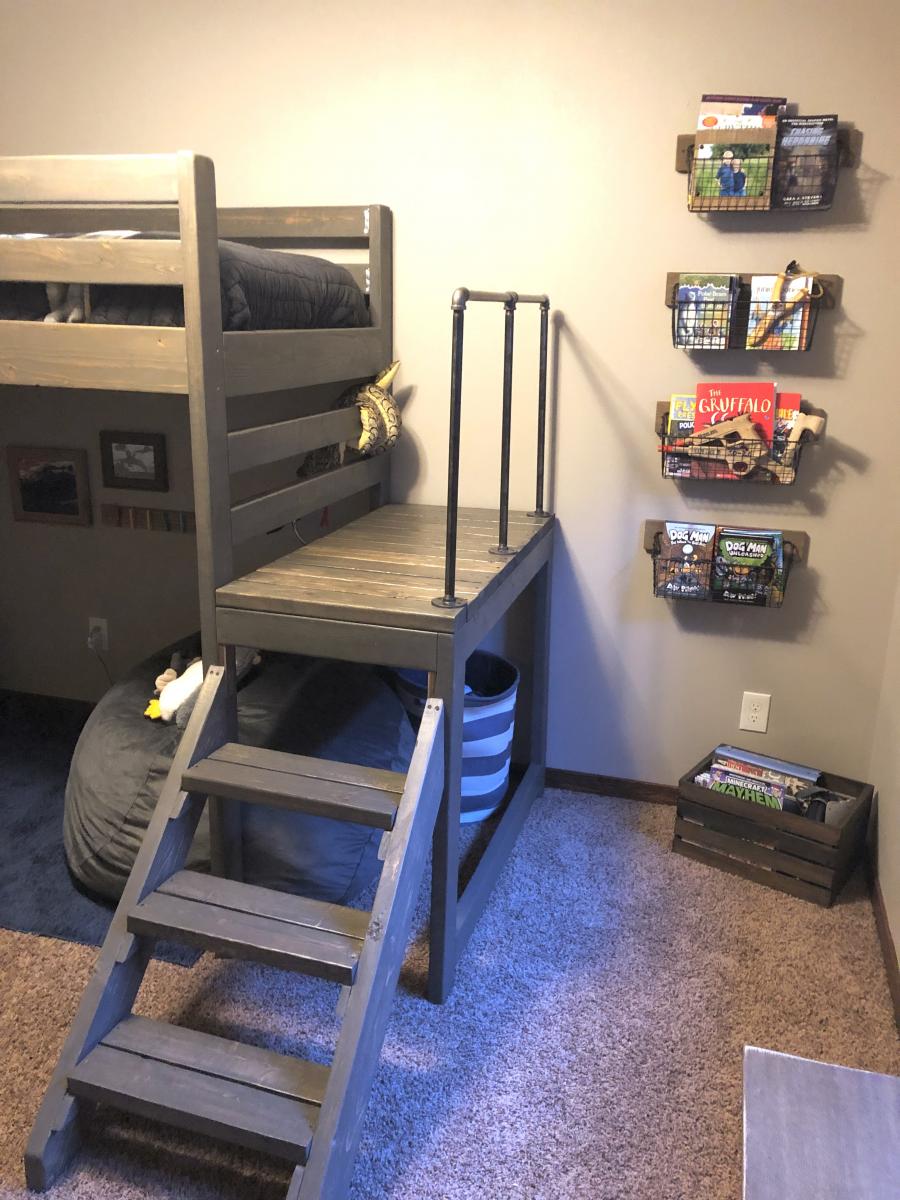
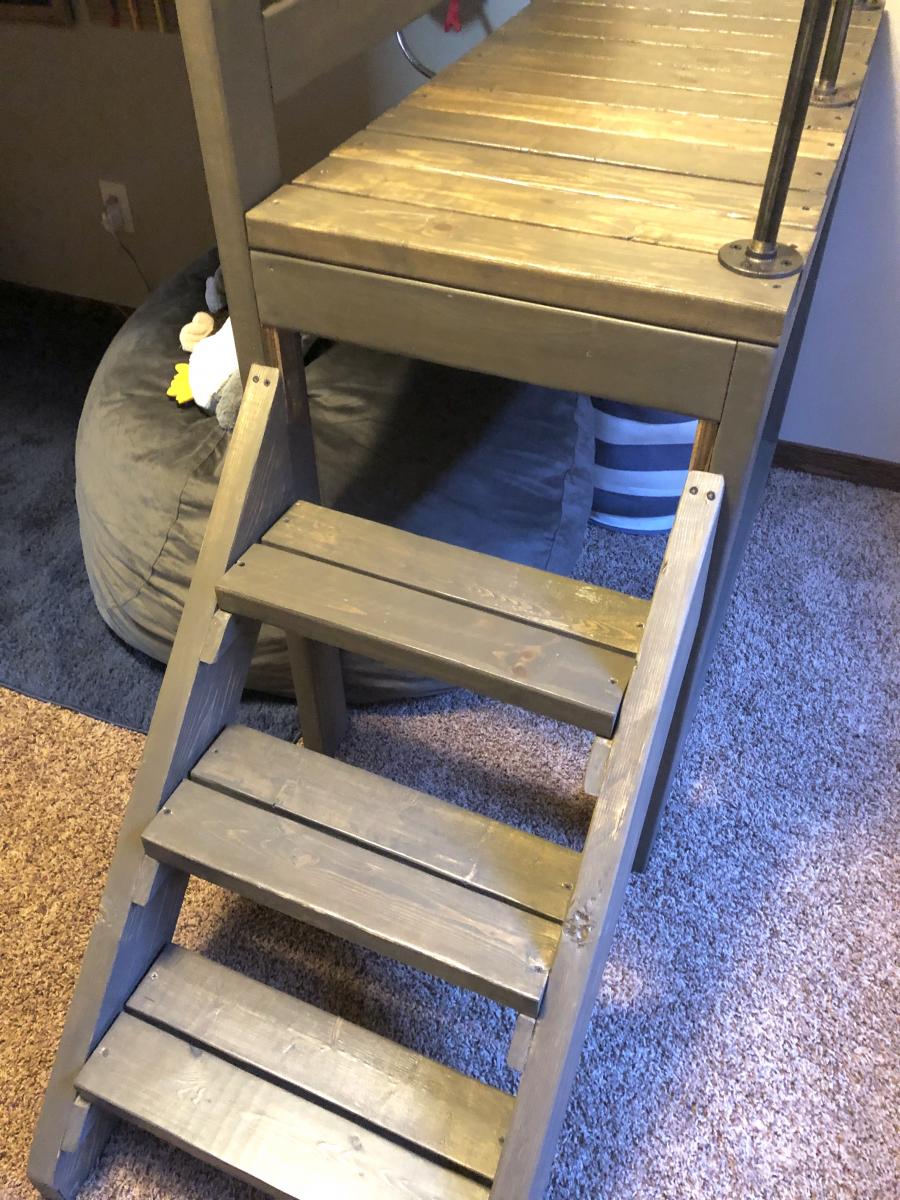
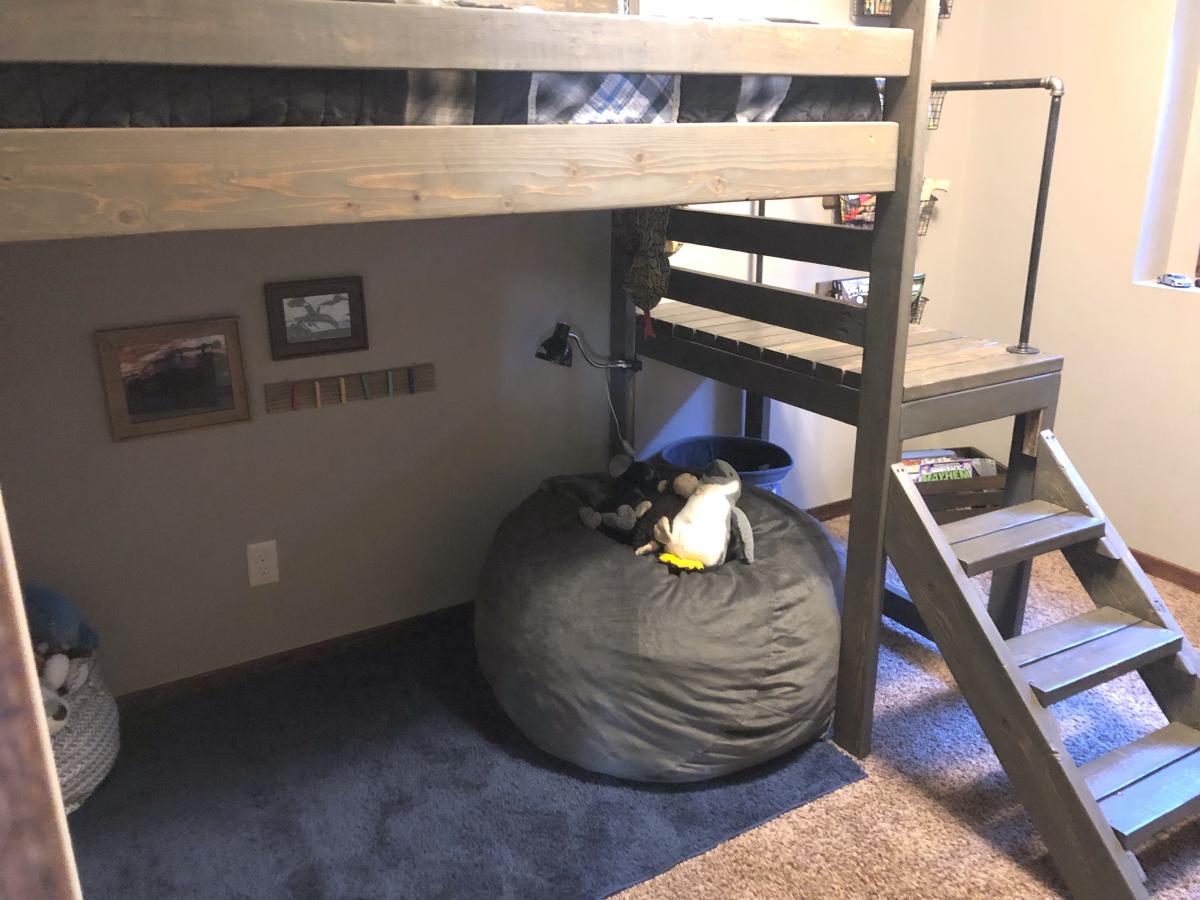
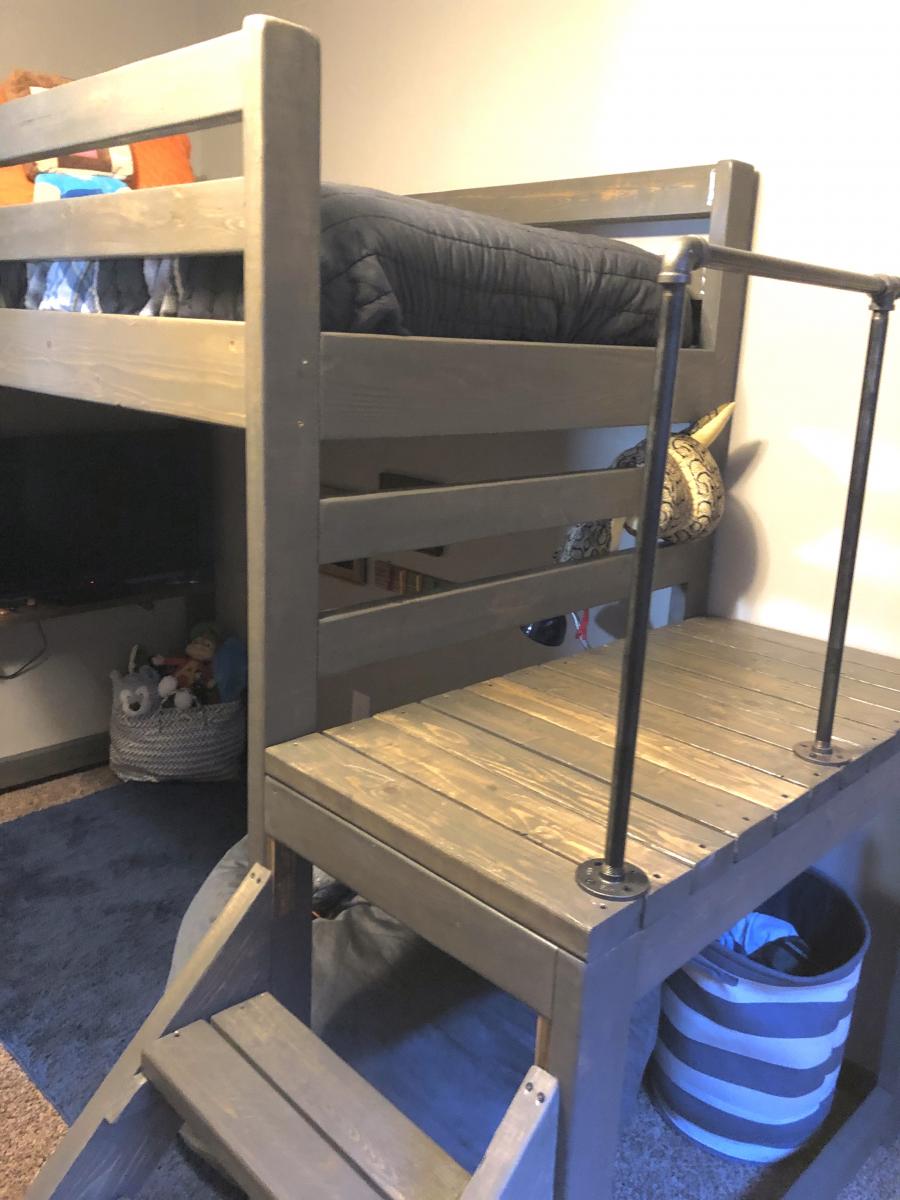
I built this bed for my 8 year old son's room "face lift." His only request was to have a place to hang out, but being his room was so small, that was a struggle! The loft bed allowed us to make a cozy little hangout - the poor guy can't get rid of his siblings now!
I added a few extra inches to the height of the Camp Loft plan, I also added the pipe hand rail for additional safety and give his room a little older boy vibe! It was a very easy build, the staining/sealing took the longest. The stairs make it much easier to change sheets and getting up and down for those of us who aren't 8 year olds :).

Added an outdoor sink to the potting bench.

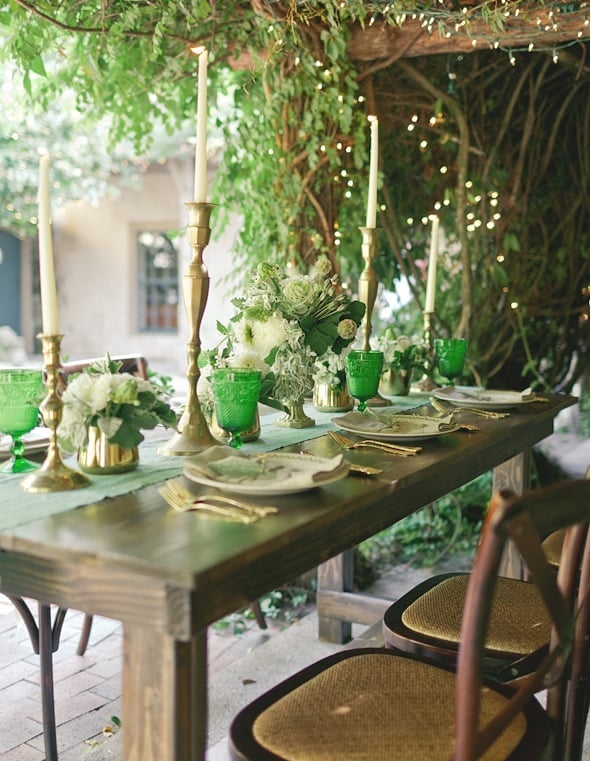
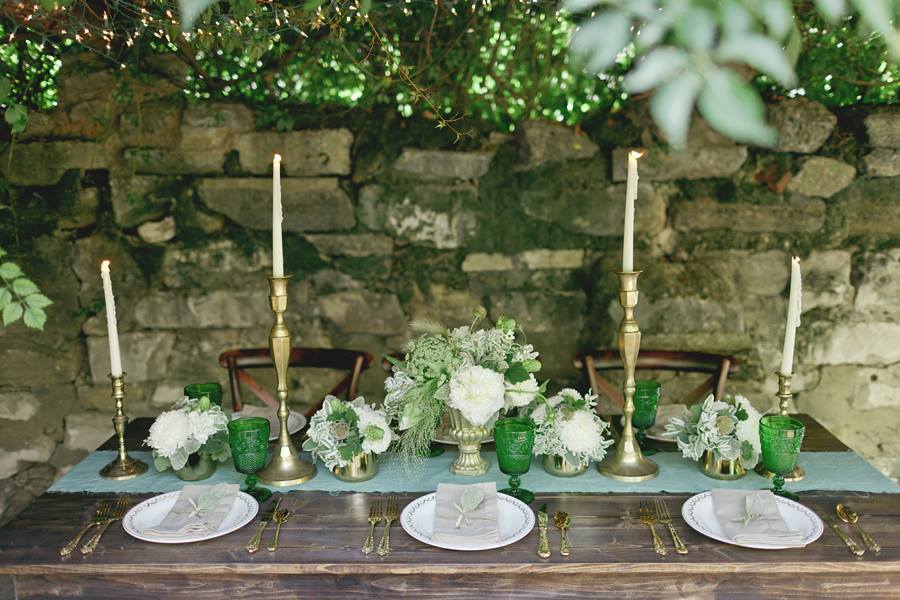
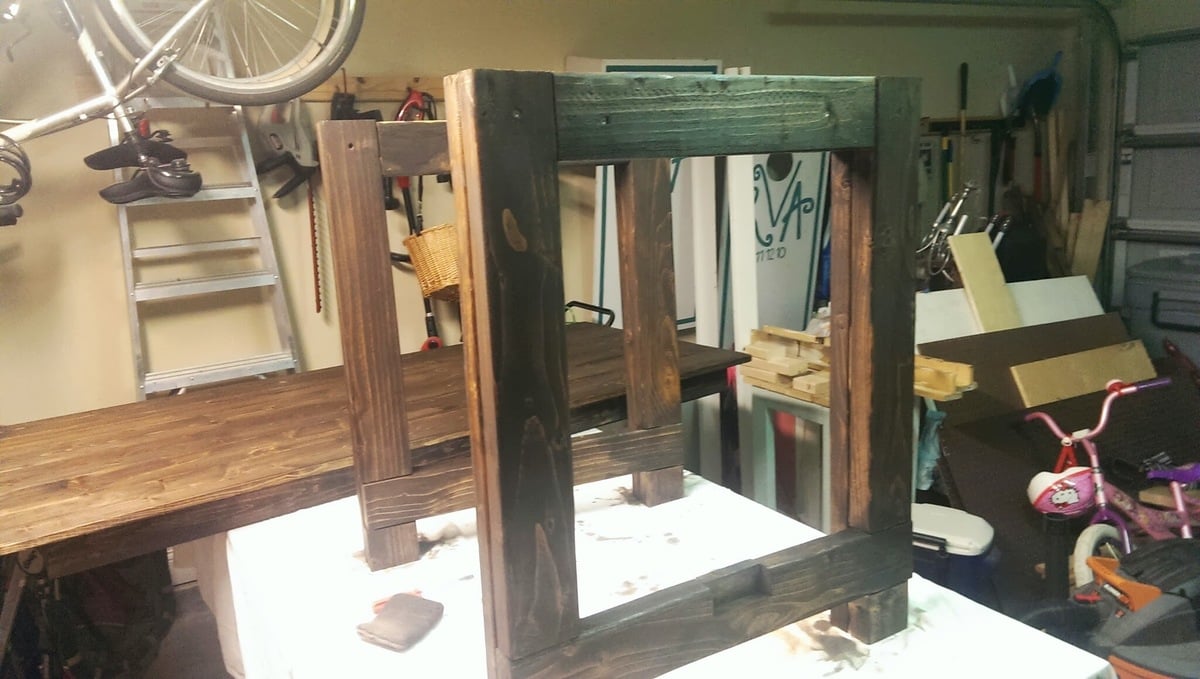
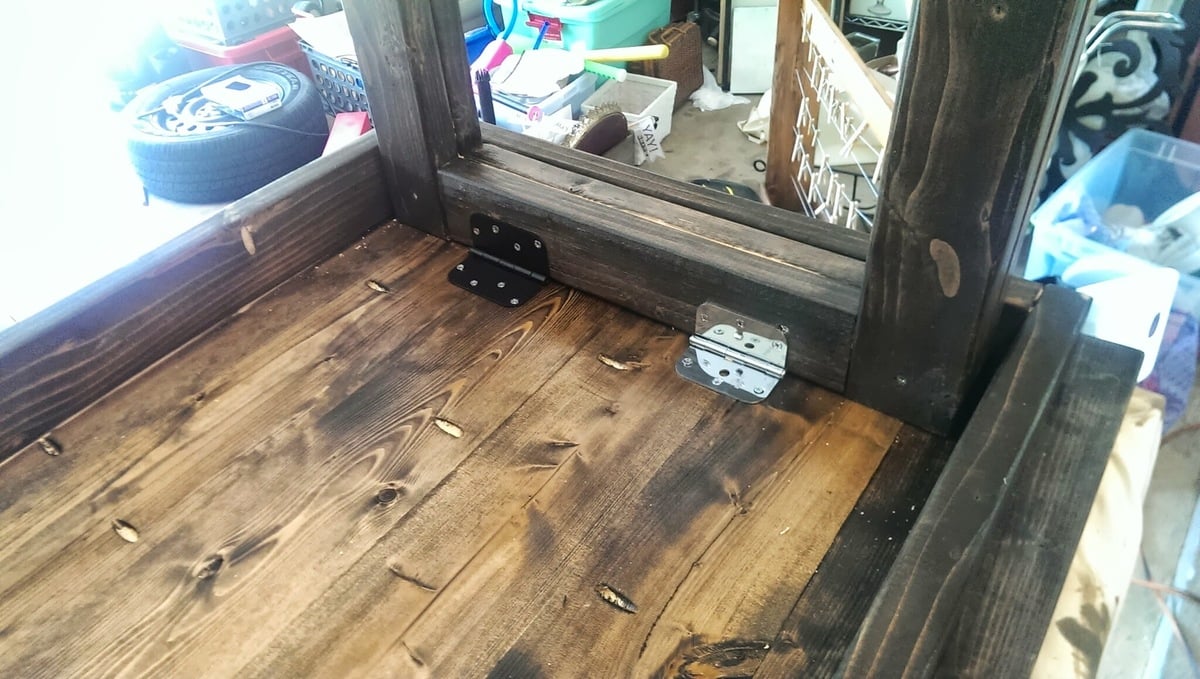
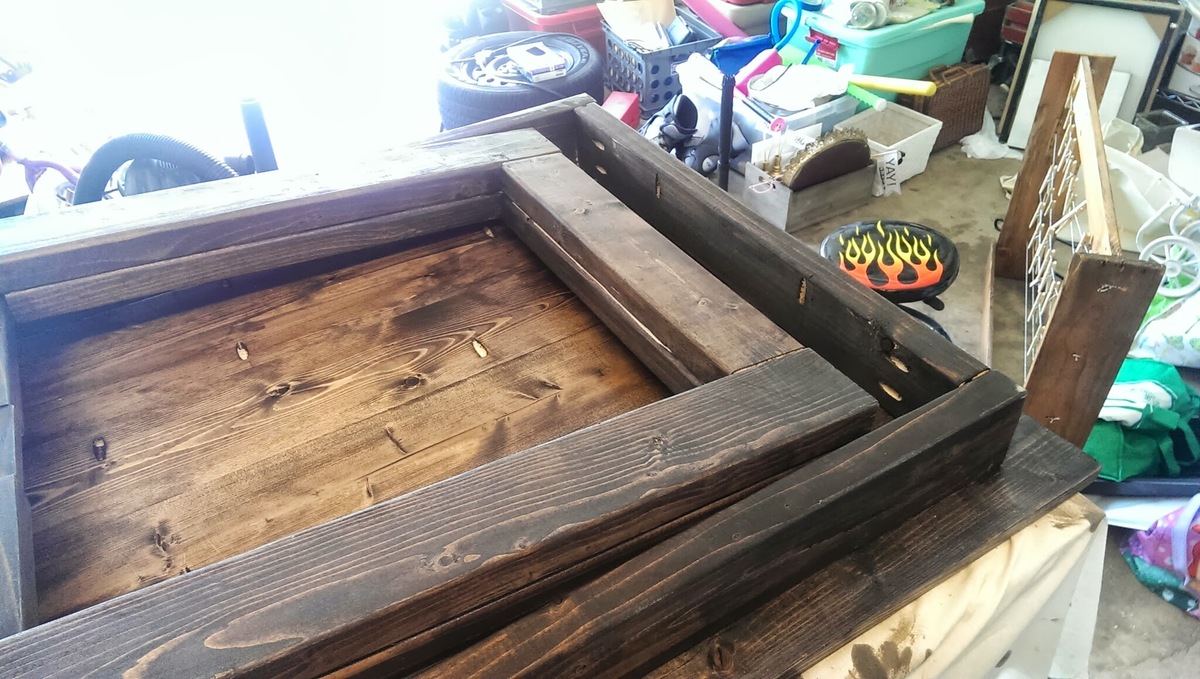
I recently published my first foldable farmhouse table last week here: http://ana-white.com/2013/06/foldable-farmhouse-table The first one I made was very heavy because I used 2x6 tops and 4x4 legs. I decided to make another one that would be lighter and easier to transport. The plans are basically the same just instead I used 1x6 for the top and put 2x4s together for the legs. I also shorted the length by about a foot. The only issue with making the table shorter length is that the legs don't fold completely flush. You could easily make the legs short enough to fold flush, but then the table was a little too short from the ground up for us. The same as before I simply used kreg joints to join the top boards together. I then made a 2x4 frame and attached it to the bottom. I made each of the legs separately by joining 2x4s together and sanding everything down. Everything was stained before putting the legs on using Miniwax Dark walnut stain. I used 2 coats of Miniwax water based clear coat to seal it. A notch was cut out on each of the bottom 2x4 supports on the legs and I glued in a small piece of wood cut to size. These are so I can put in a 2x4 support board under the table so that the legs do not fold in on themselves when it is standing up. The legs are just attached using door hinges you can buy in packs in the hardware section. Be careful when screwing into the 1x6 top not to use too long of screws or else you will over screw and have them come through into your table top. Table design was by Amber Veatch Designs and photographed by Andi Mans Photography
Tue, 07/07/2015 - 06:41
We have built something very similar and we have a good bit of wobble at the top, even though the stretcher down the center of the table is holding solid in there and secred with clasps. Were thinking of some sort of sliding pin into the top of the leg to the apron. Anyone run into this before?
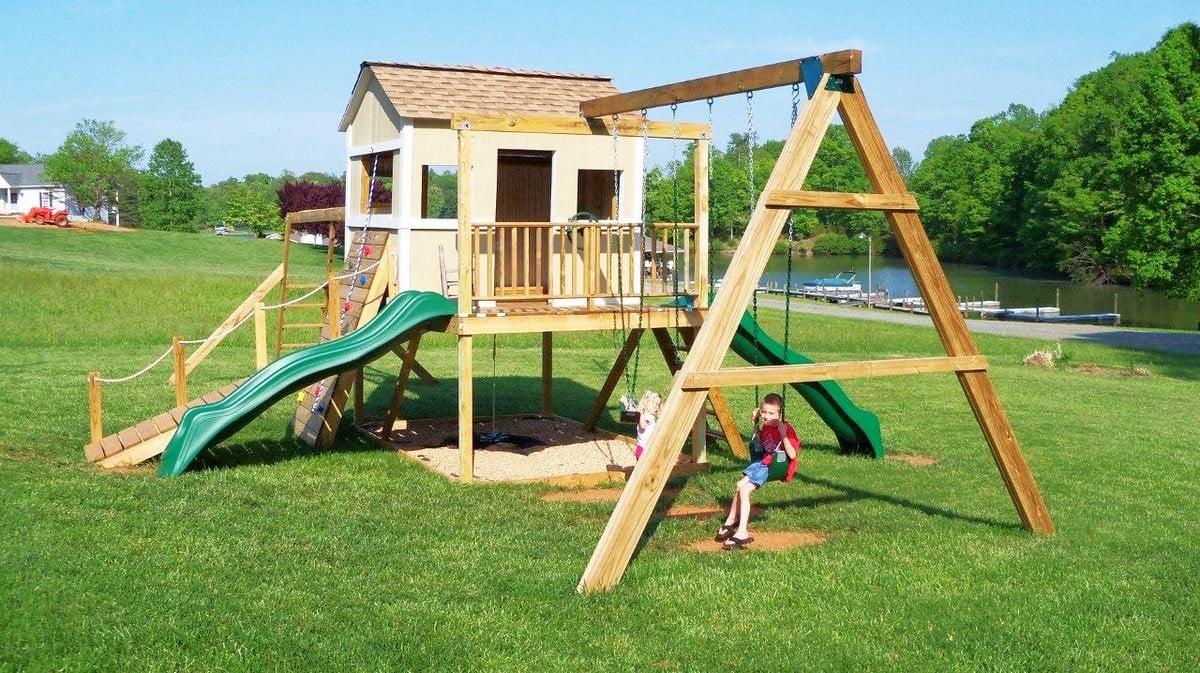
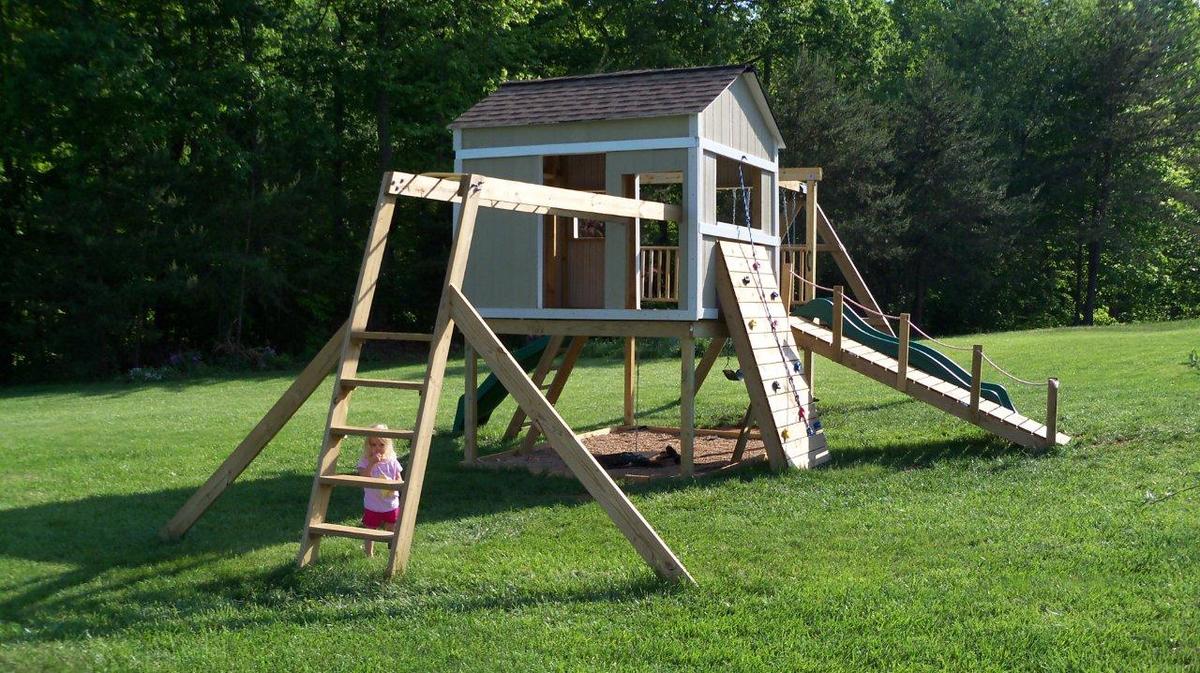
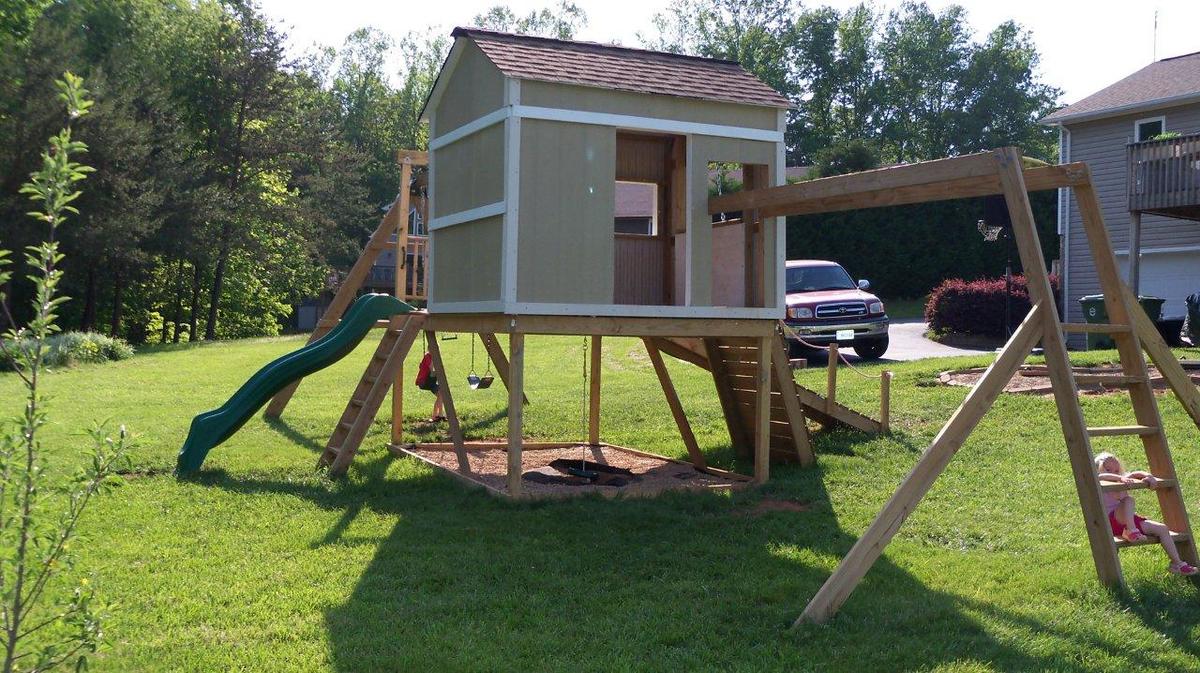
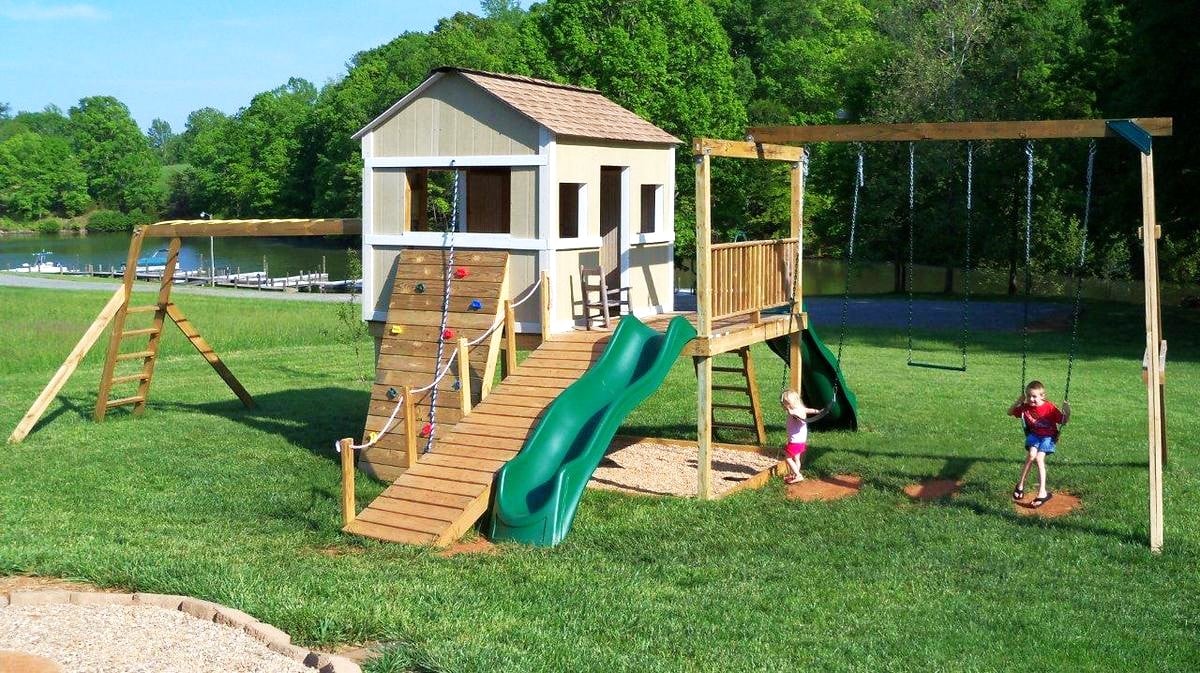
I used Ana's plan as a base.
I changed it from 8x8 to 8x12, made the 4x4x8's to 4x4x10' for a higher main platform and swing platform, and added a 12' long monkey bar set to the other side. Also, an 8' climbing wall and a plank walkway to accompany the two slides.
For the clubhouse, I used Hardiplank 4x8 sheets for the siding and an EZ-Framer kit for the structure itself.
The slides I purchased from Lowes, monkey bars from Amazon, and the swing frame braces from Amazon as well. The swing kits I got from ebay.


Comments
Ana White Admin
Sun, 01/15/2023 - 20:21
Thank you!
Gorgeous, thank you for uploading a brag post!