Timber Cabin Chicken Coop
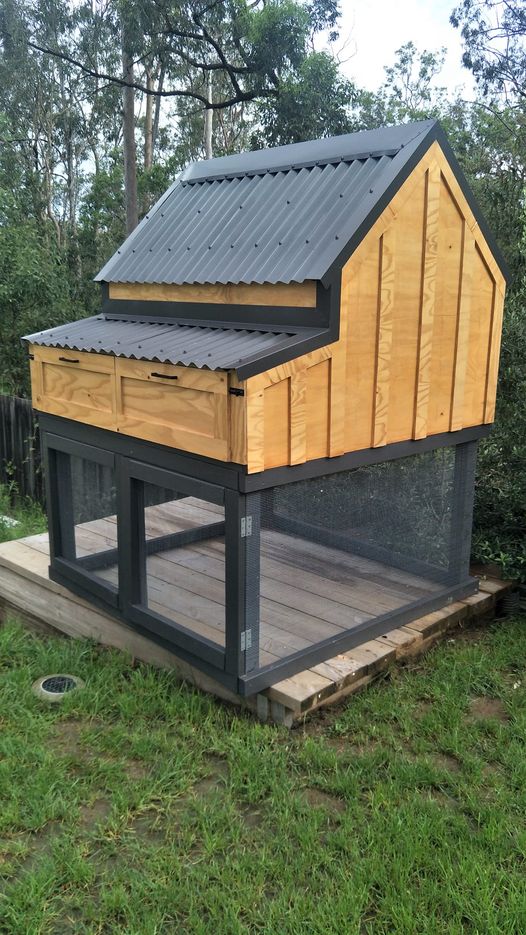
I had to convert all the measurements from inches to mm, but it was worth the brain drain. I didn't add the garden, but extended out the chicken coop. I am thrilled with the results! Thank you!
Built from Plan(s)
I had to convert all the measurements from inches to mm, but it was worth the brain drain. I didn't add the garden, but extended out the chicken coop. I am thrilled with the results! Thank you!
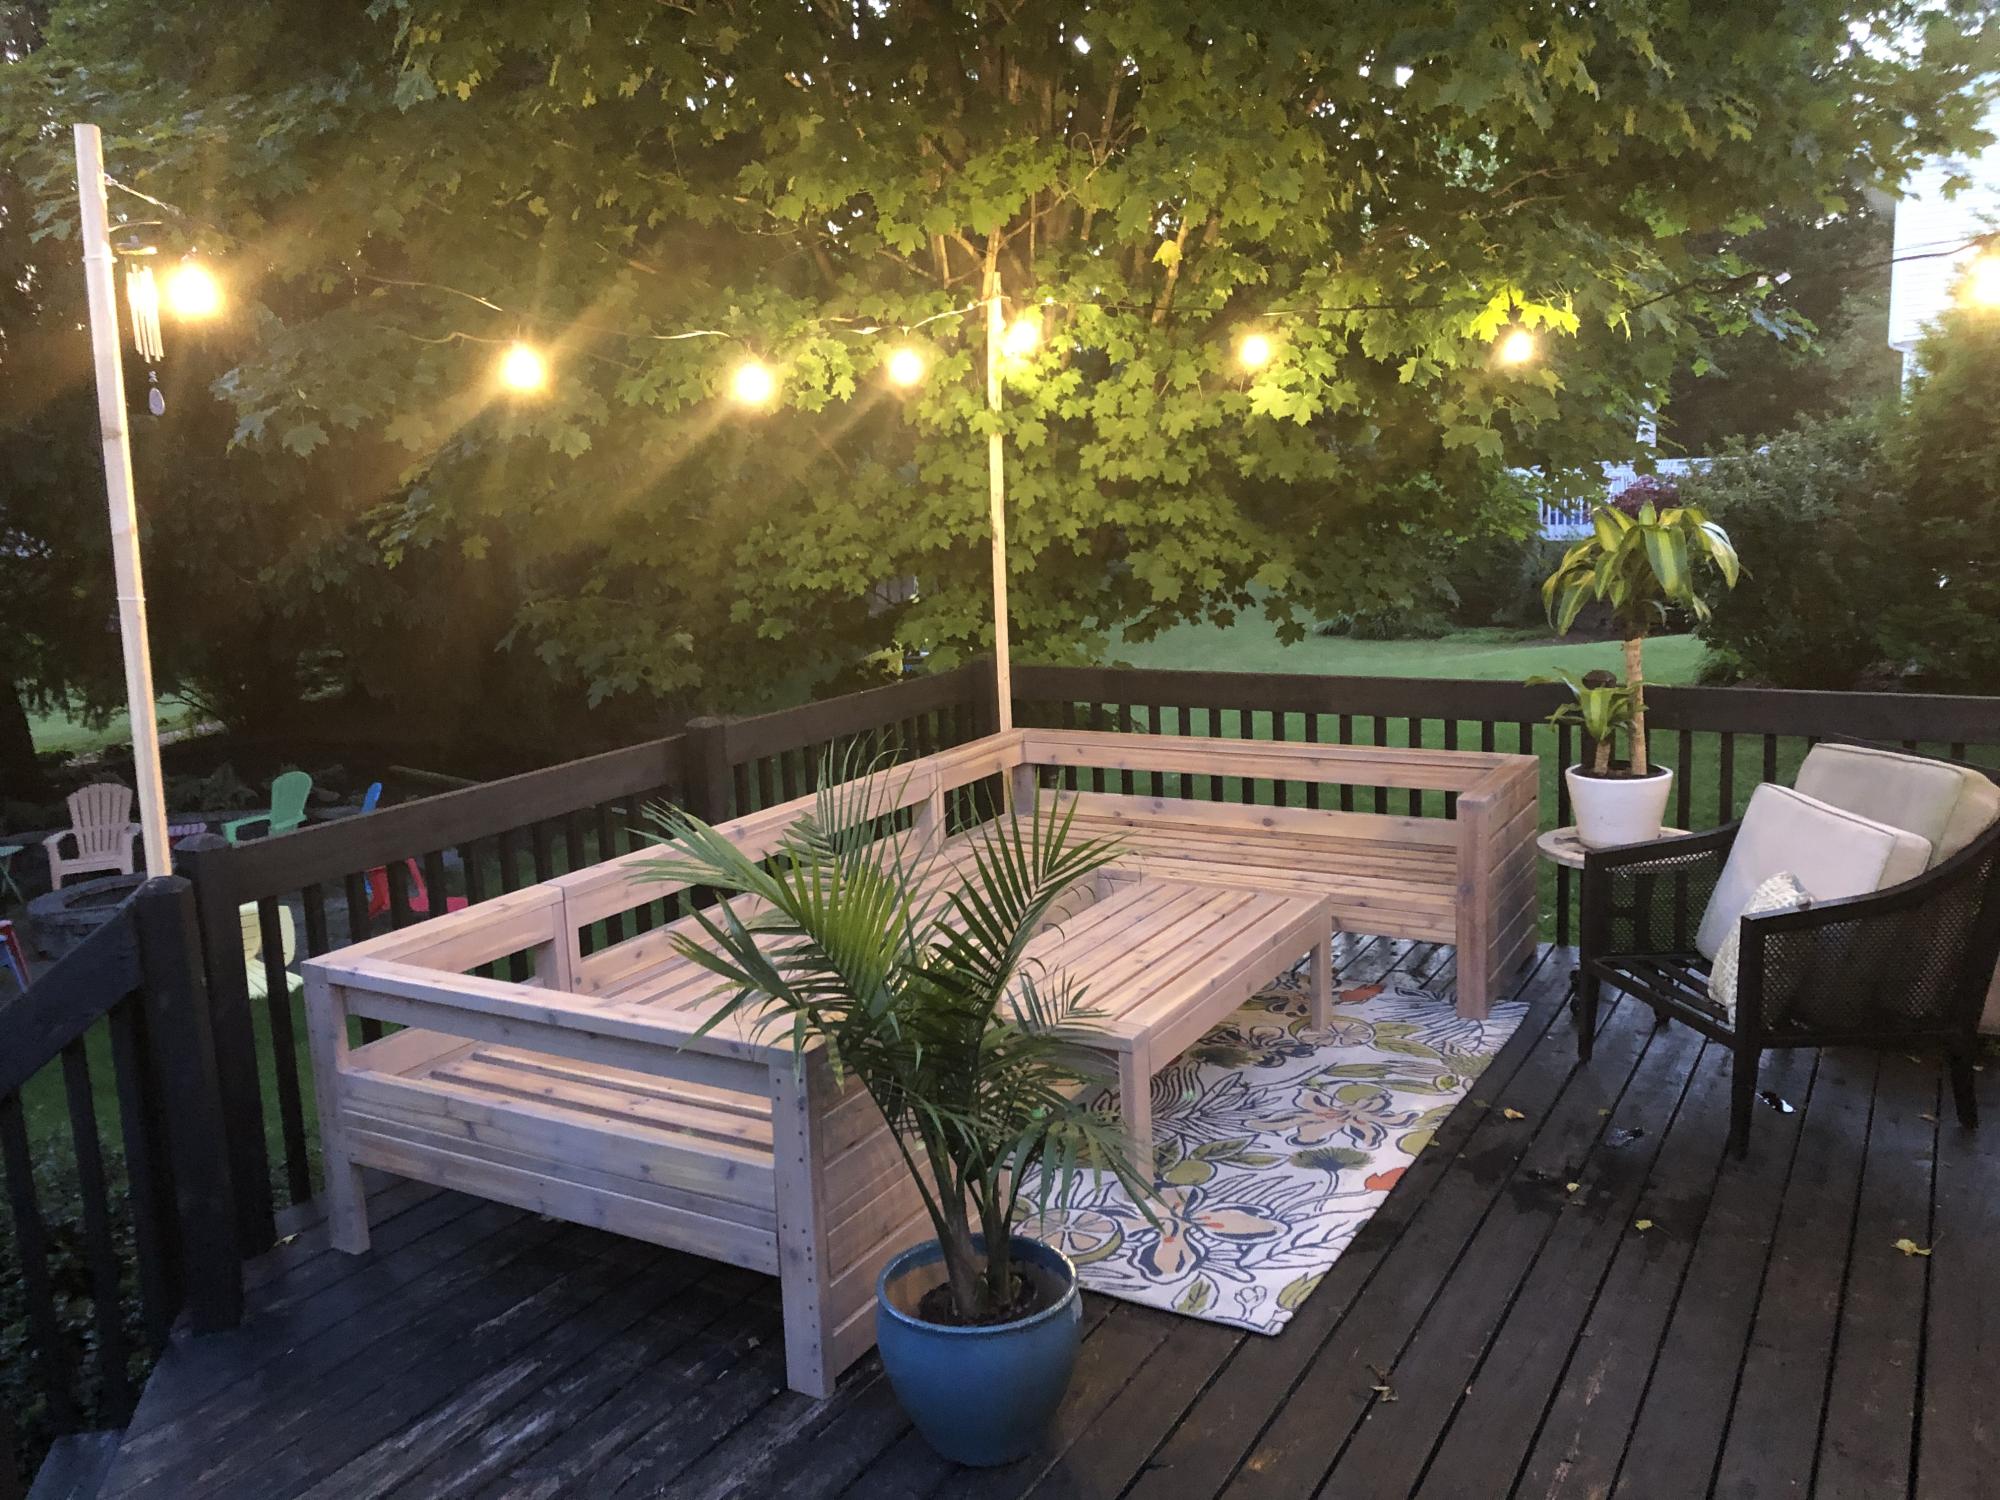
We have wanted nice deck furniture since we moved into our house 22 years ago but just couldn’t justify the cost. I have made several projects from Ana’s website and I love her easy to follow and FREE plans! But this project was my favorite as you can see by the pics. I used cedar and my wife finished the furniture with stain. Thanks to Ana for providing these plans and helping a DIYer to feel proud!
Sat, 01/01/2022 - 12:57
WOW, that is stunning and so inviting, love the outcome! Thank you so much for sharing!
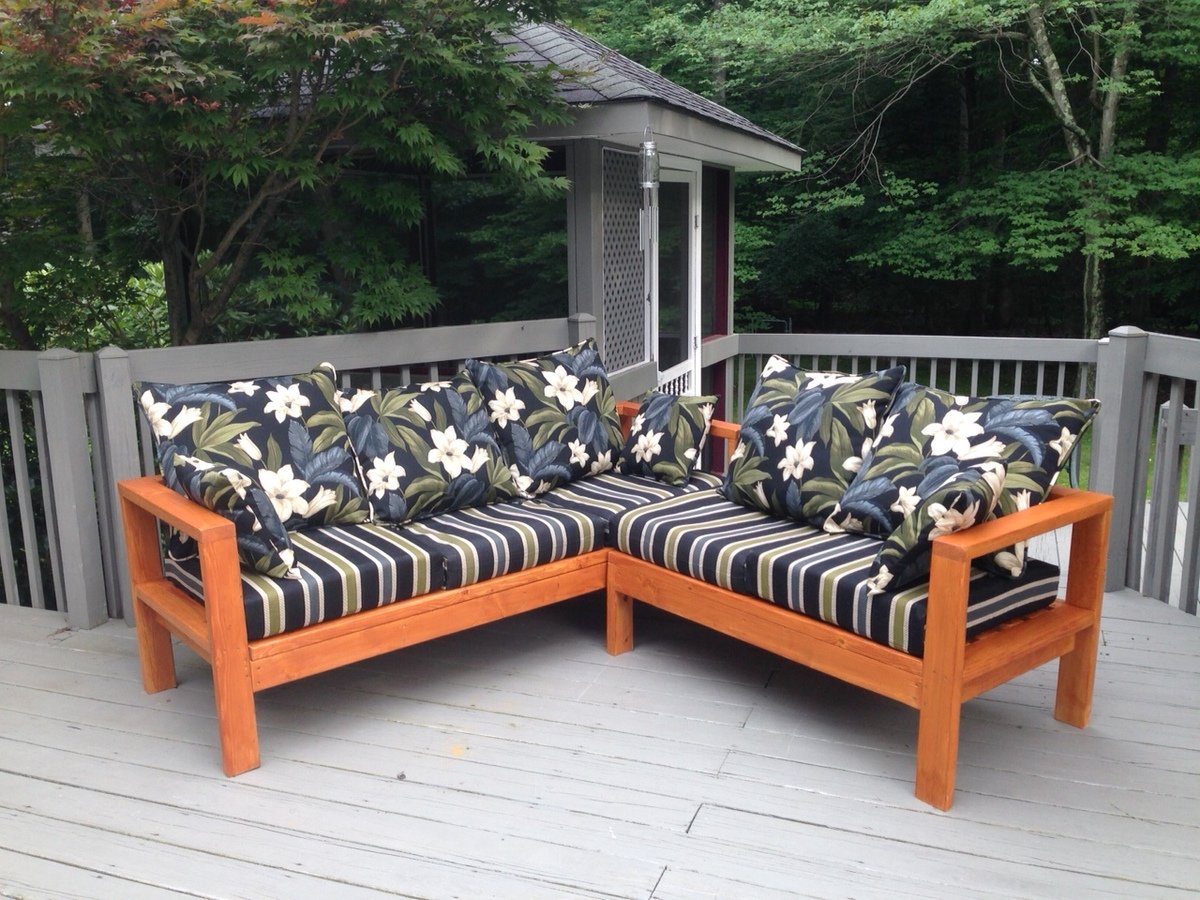
This was my first attempt at making anything. Thank you to Ana for providing such easy plans and the encouragement to try something. I think I'm hooked!
Sun, 05/31/2020 - 13:21
Beautiful! where did you get the cushions from?
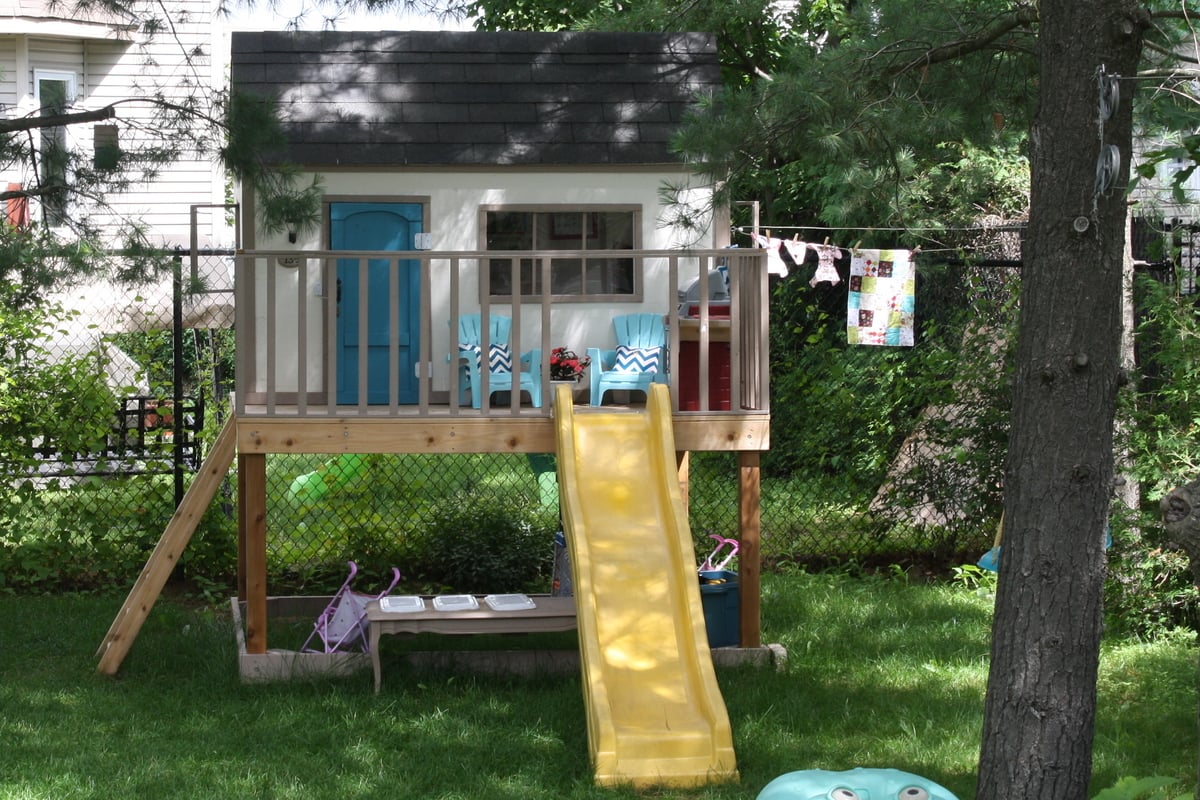
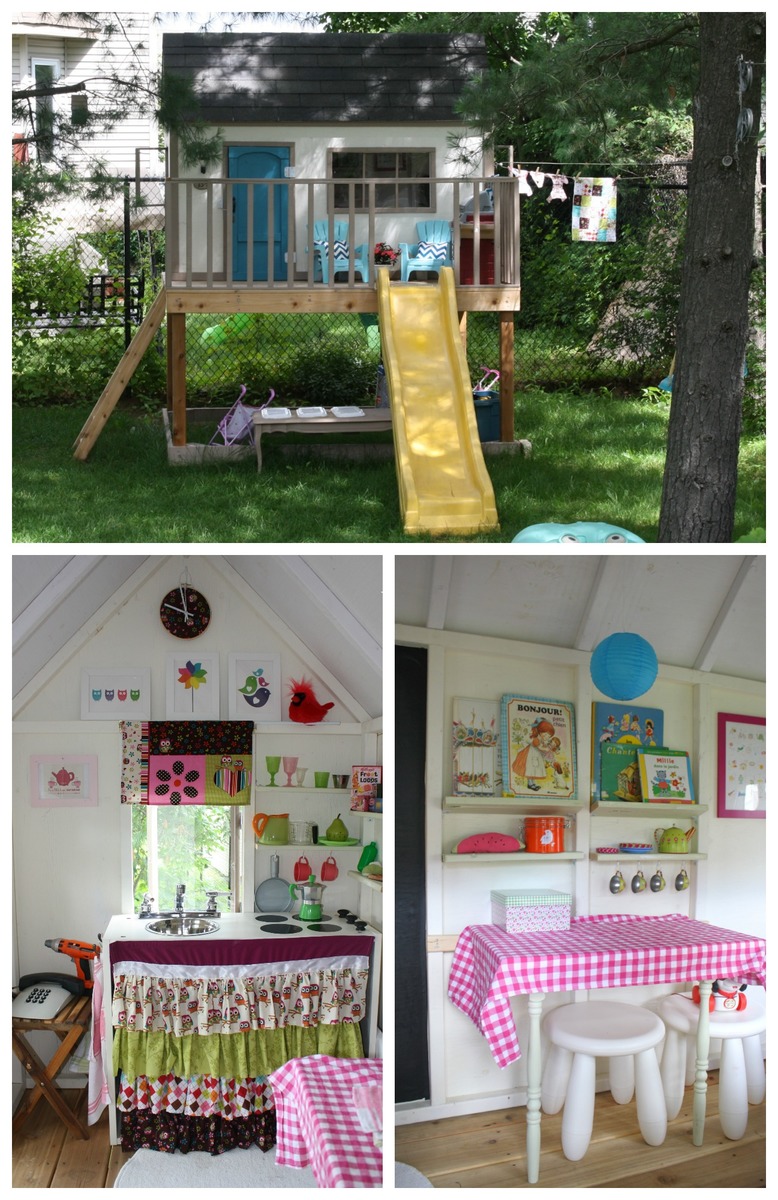
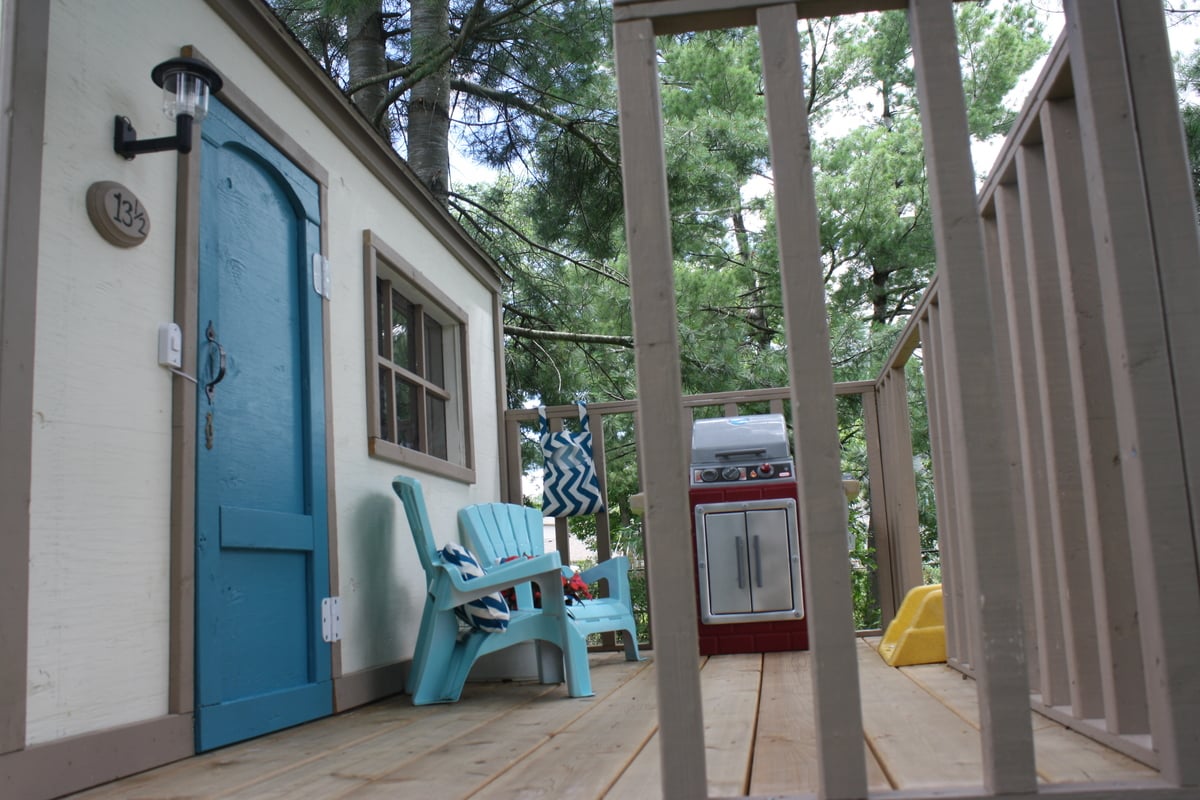
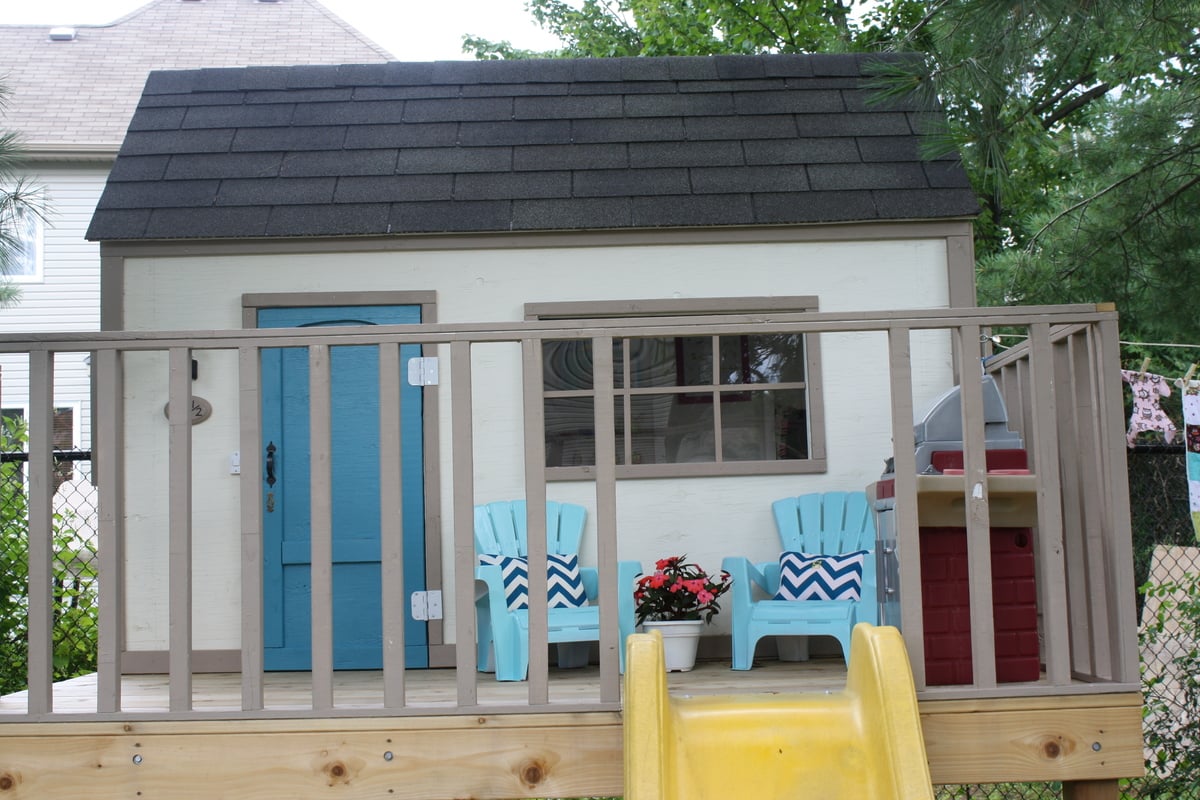
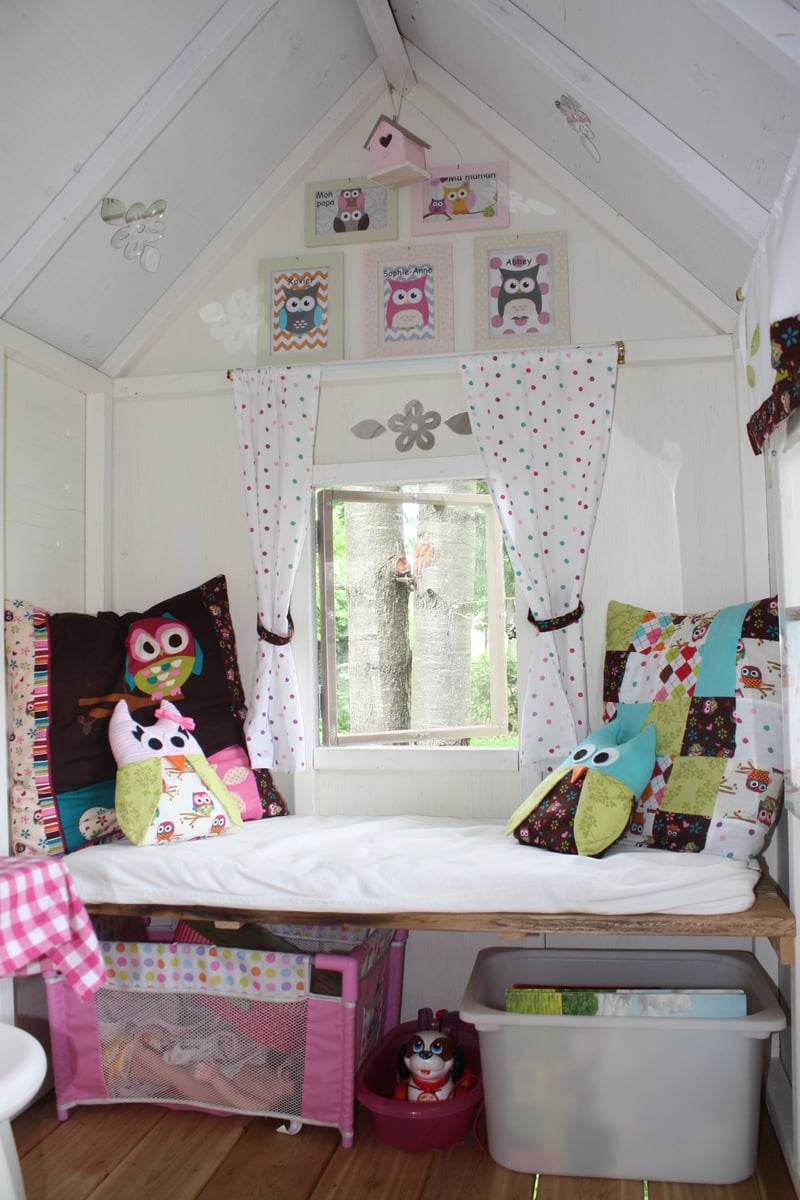
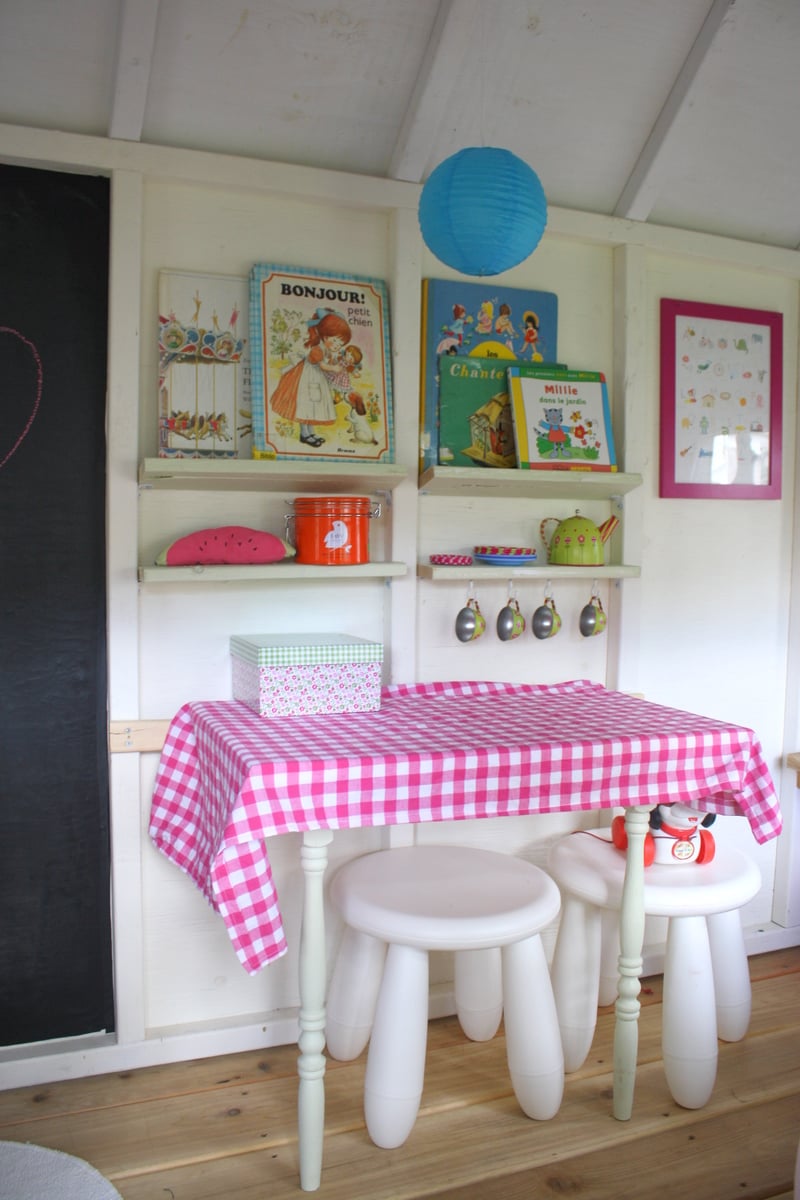
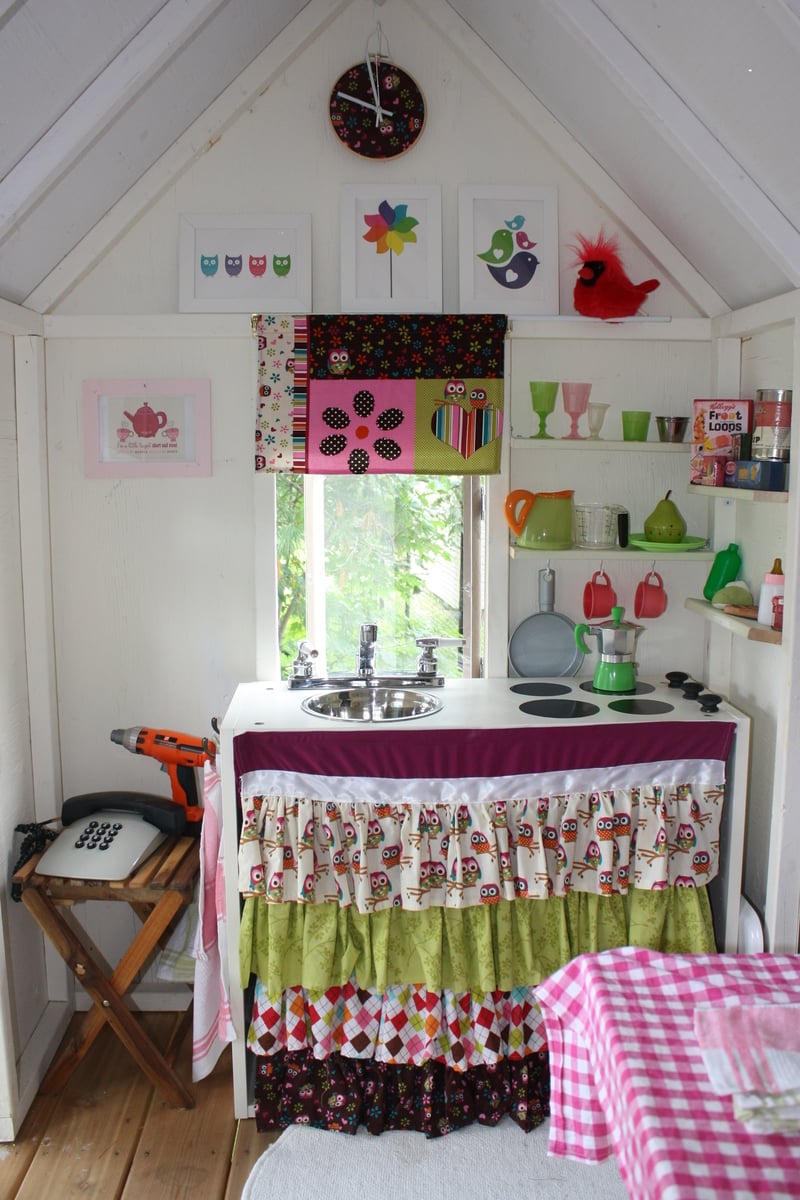
We started this project a few months ago. My husband made most of the construction, and I decorated the inside. We added many little details, including a clothesline, windows with plexiglass, a BBQ, a little kitchen, a doorbell, a solar light, a slide, shelves, a table, a bench, etc. The kids loooooove their new house. The whole project took many many hours, but I am really happy with the results. Thank you so much Ana for the plans!!
Sun, 07/14/2013 - 21:10
Looks like your child has everything they need. Including a phone! I love the bench seat and the pillows with the window. So cool. You put a lot of work into this. Well done.
Thu, 04/03/2014 - 08:23
Love, love it! Couple of questions... how did you attach the walls to the decking and how far apart? How tall is the railing? I'm curious to know the sturdiness of the project overall and my SIL has concerns about the 3/4 roof sheeting over 1/4 walls. Comments please. My son-in-law and I have just started this project.

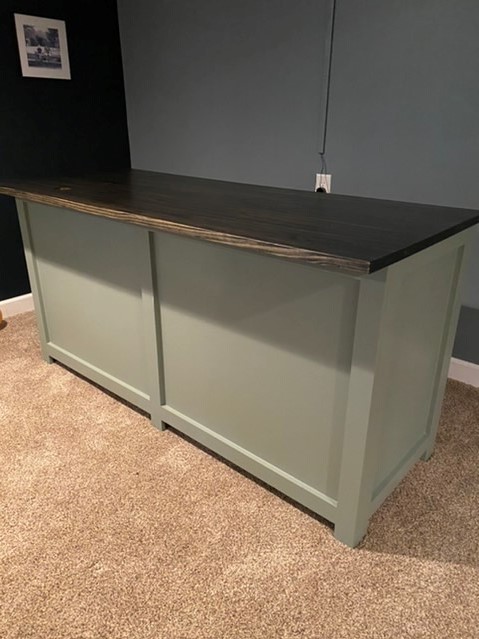
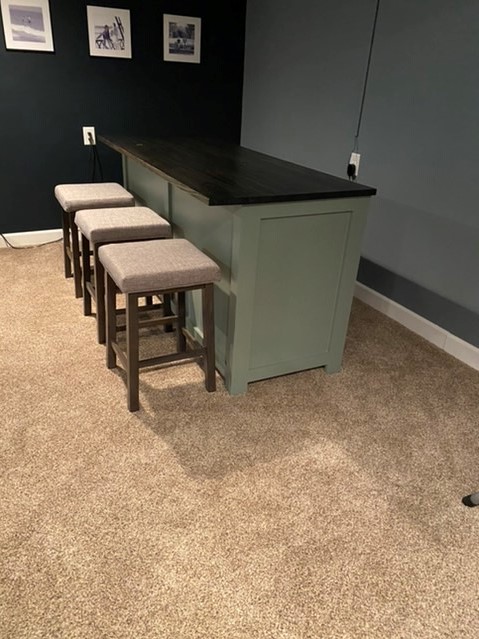
My wife wanted a eat at bar/cabinet for the basement family room. So after several design ideas this is what we come up with. It was a pretty simply build, built the frame using Kreg pocket holes to attach everything together. Love the Kreg pocket hole. Then cut the1/4” panels and attached them to the inside with brad nails. The top is a 1 x 24 glue board from Menards. Then some paint, stain and poly , attach the top and its ready to go. I used a water base poly for the top, it is great if you want to apply several layers quickly. Sand the poly after a couple layers with an 800 grit, then apply a couple more then repeat until you are happy with the finish.


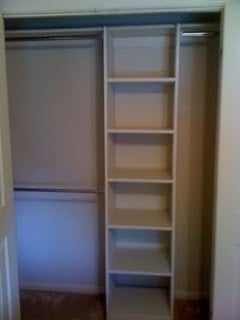
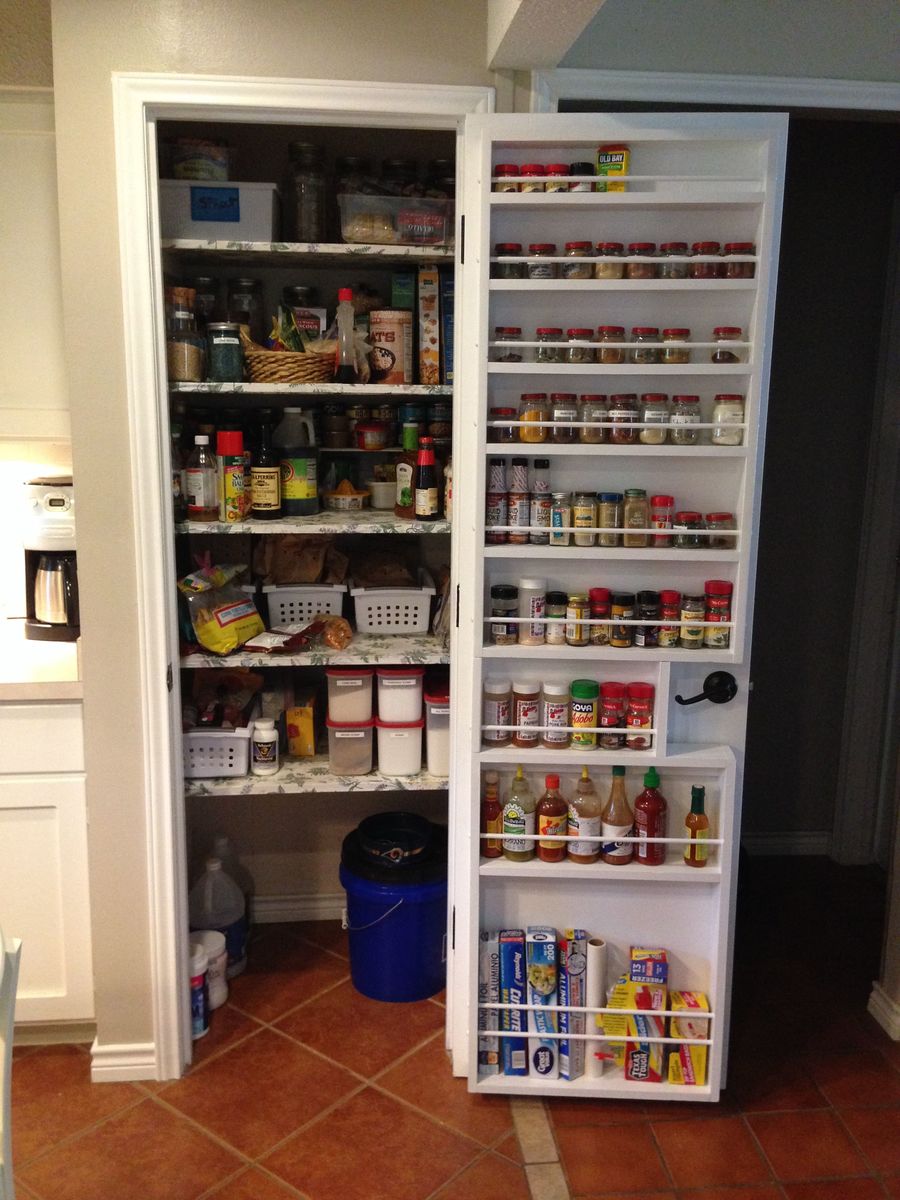
This project is closest to the Simple Closet Organizer, but I wanted to be able to re-use the existing components of the closet. The only purchased materials were one sheet of cabinet grade plywood and dowel rod holders (since I already had paint and screws).
Tue, 07/12/2011 - 09:06
This is on my very soon to do list. I actually drew up a sketch yesterday of my plan and the husband seems ready to start! Thanks for sharing yours!.
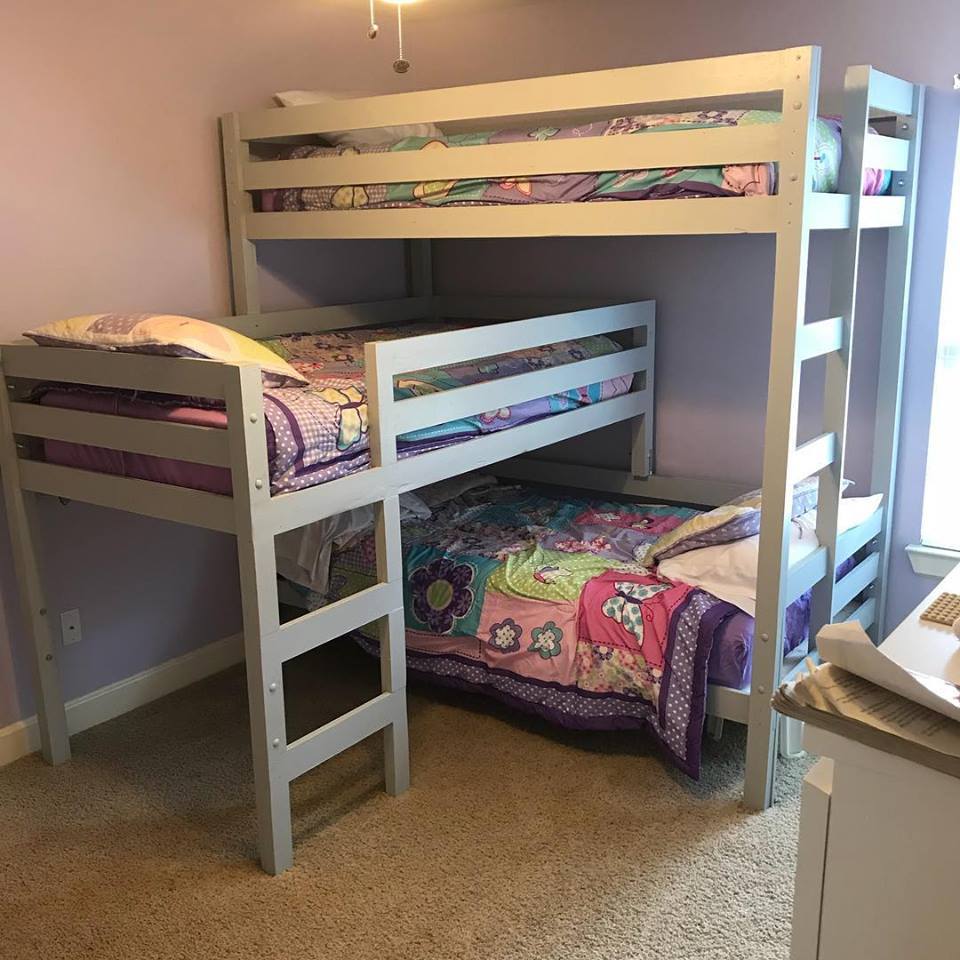
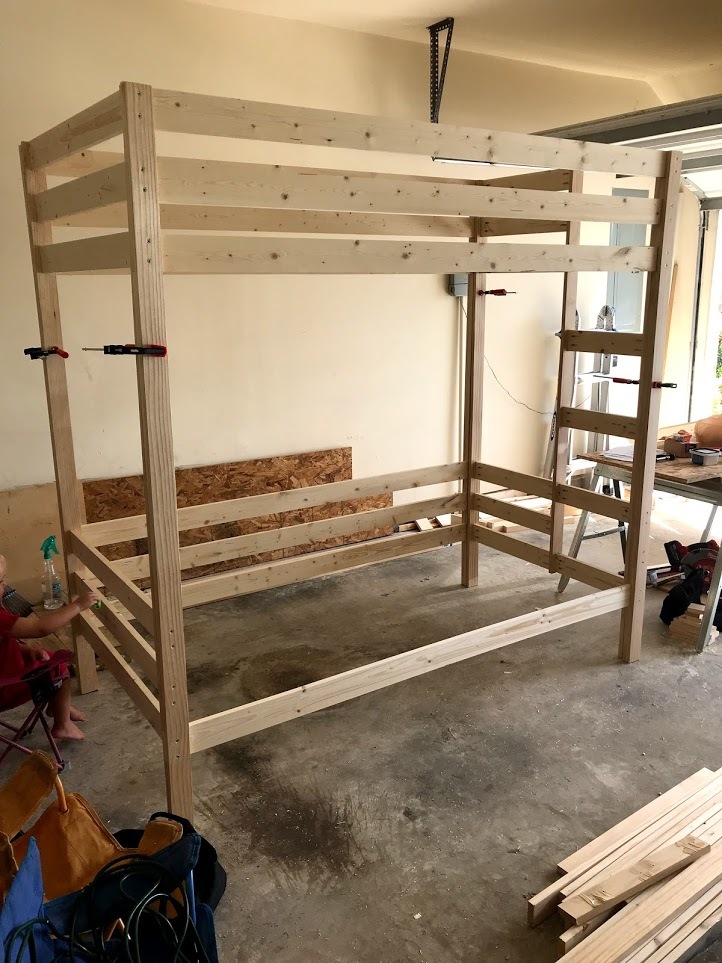
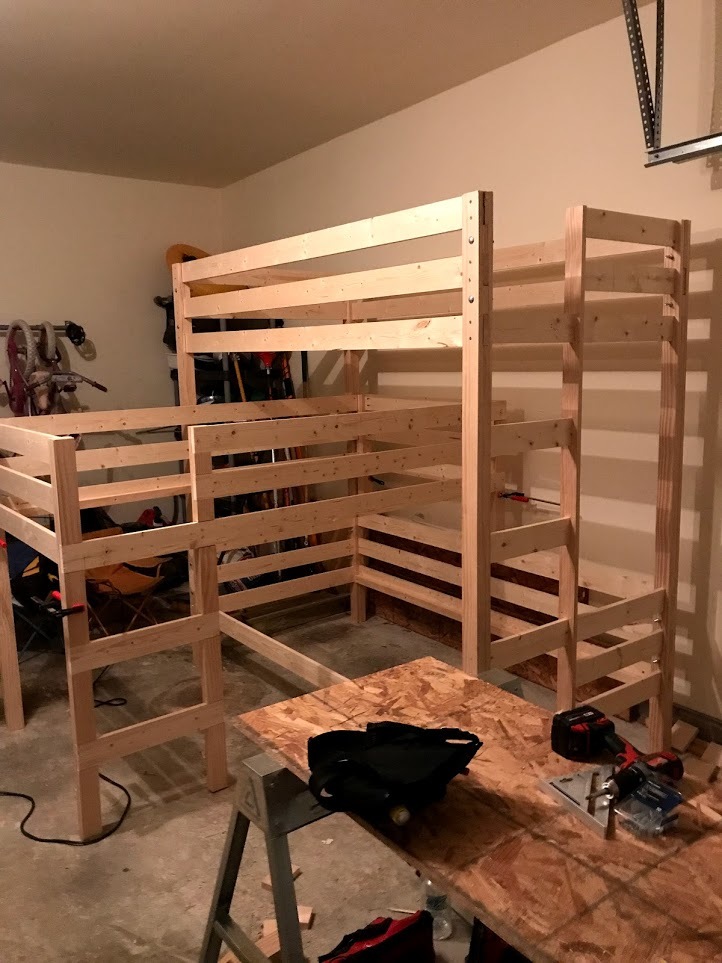
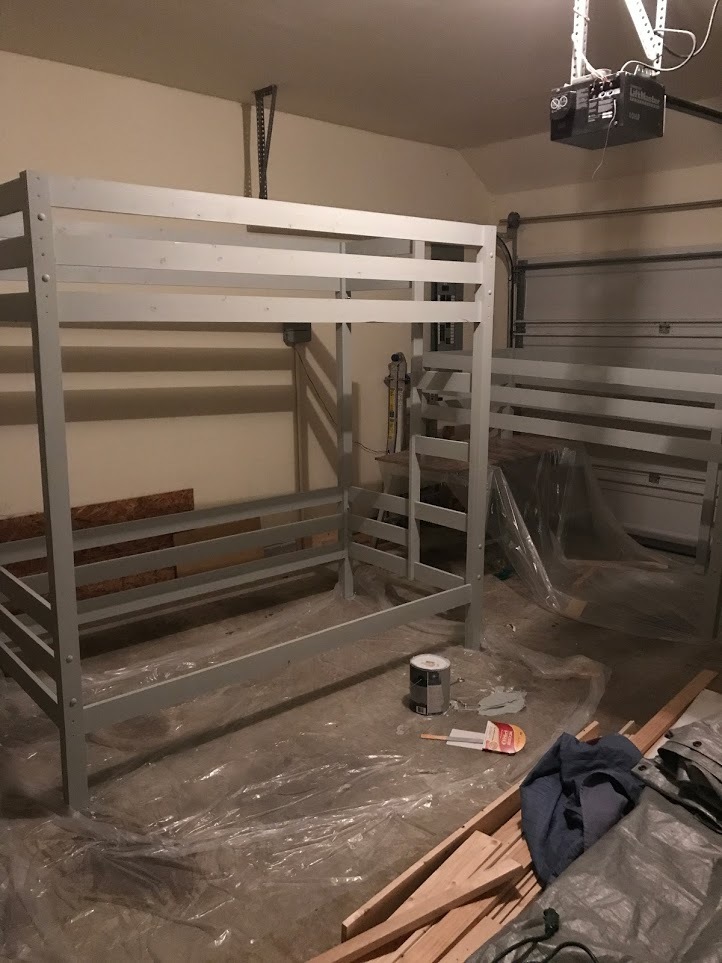
We recently had our 6th child and needed to rearrange our kids' rooms. We decided to put our 3 oldest girls together and wanted a triple bunk. We used the classic bunk plans, but increased the height to allow for a middle bunk. We wanted L-shaped to give each child some headroom. We used pine wood, common board and select pine. We finished it off with two coats of Behr interior latex paint/primer in one, satin finish. Finished dimensions--height from floor to base of bottom bunk, 10 in. from floor to top of top rail, 79.5 in.
Tue, 02/18/2020 - 20:41
This is exactly what my boys need in their room. I'm having a hard time grasping how you did the middle bunk. Is it just the top bunk chopped right before the horizontal slats of the bottom bunk? tia
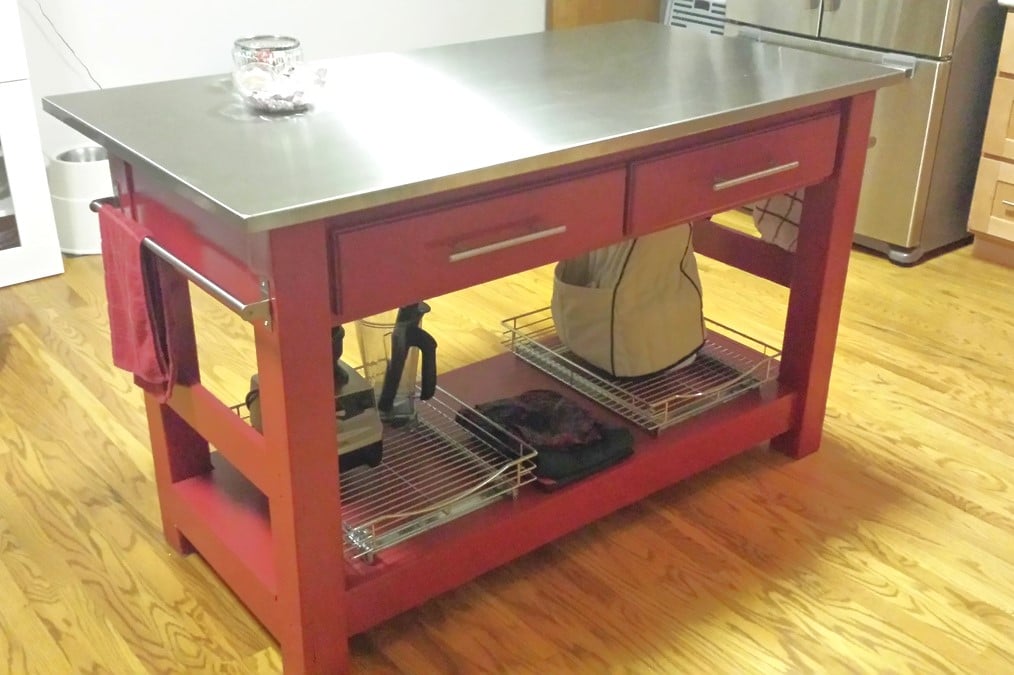
I really do enjoy my island. It has great storage and the added prep space has been wonderful. With the added counter space It has aloud me to make breads and pizzas and with the stainless steel top it is a breeze to clean. I really have enjoyed Ana's website with all the great plans and tips.


Camp Loft Bed modified to fit two twin loft beds in the bedroom with a shared platform step.
Age of boys in bed: 6 and 4
The boys have yet to agree on a stain color...awaiting their decision.
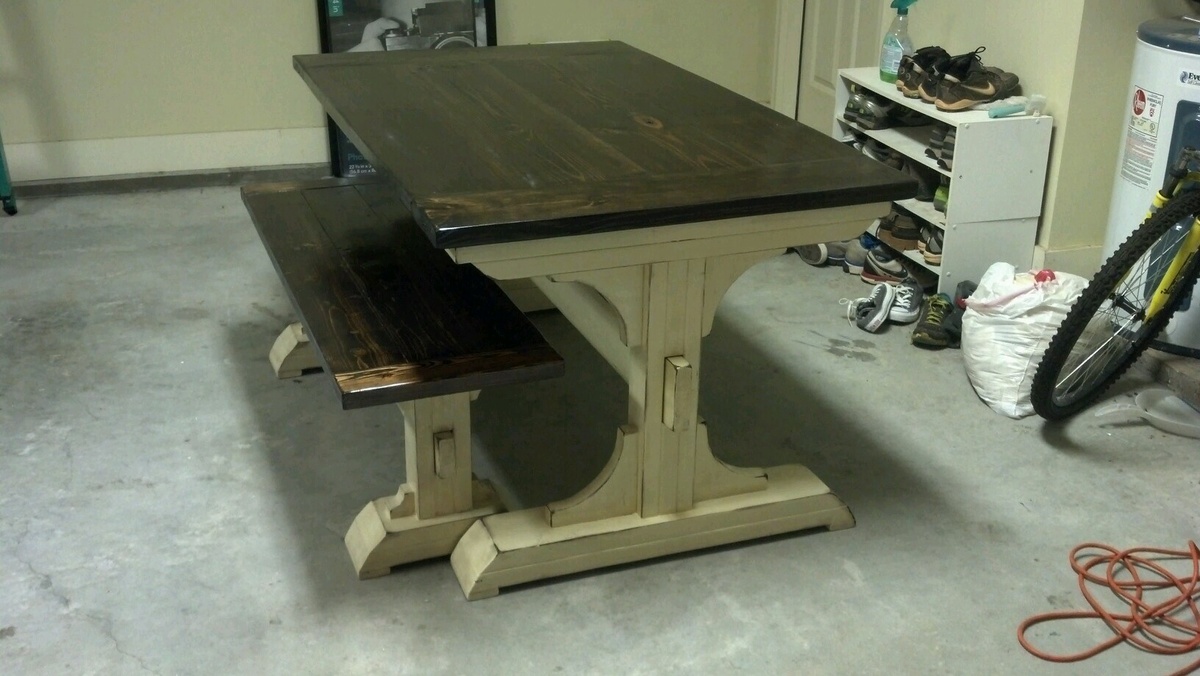
Thank you Ana for yout amazing plans for the triple pedestal table and bench! I modified it to work for the dimensions that I needed which brought it down to a double pedestal table and bench. It ended up as a 3'x5' table. I attempted the antique coffee stain technique but it wasn't taking so I just used the stain that I used on the table top instead of the coffee. I LOVE how it turned out!
Leah


This was the first time I made a piece of furniture since I was in grade 8 shop class and it won't be the last. It was so kuch fun. I modified the plans slightly to have the back a bit higher. Love it!

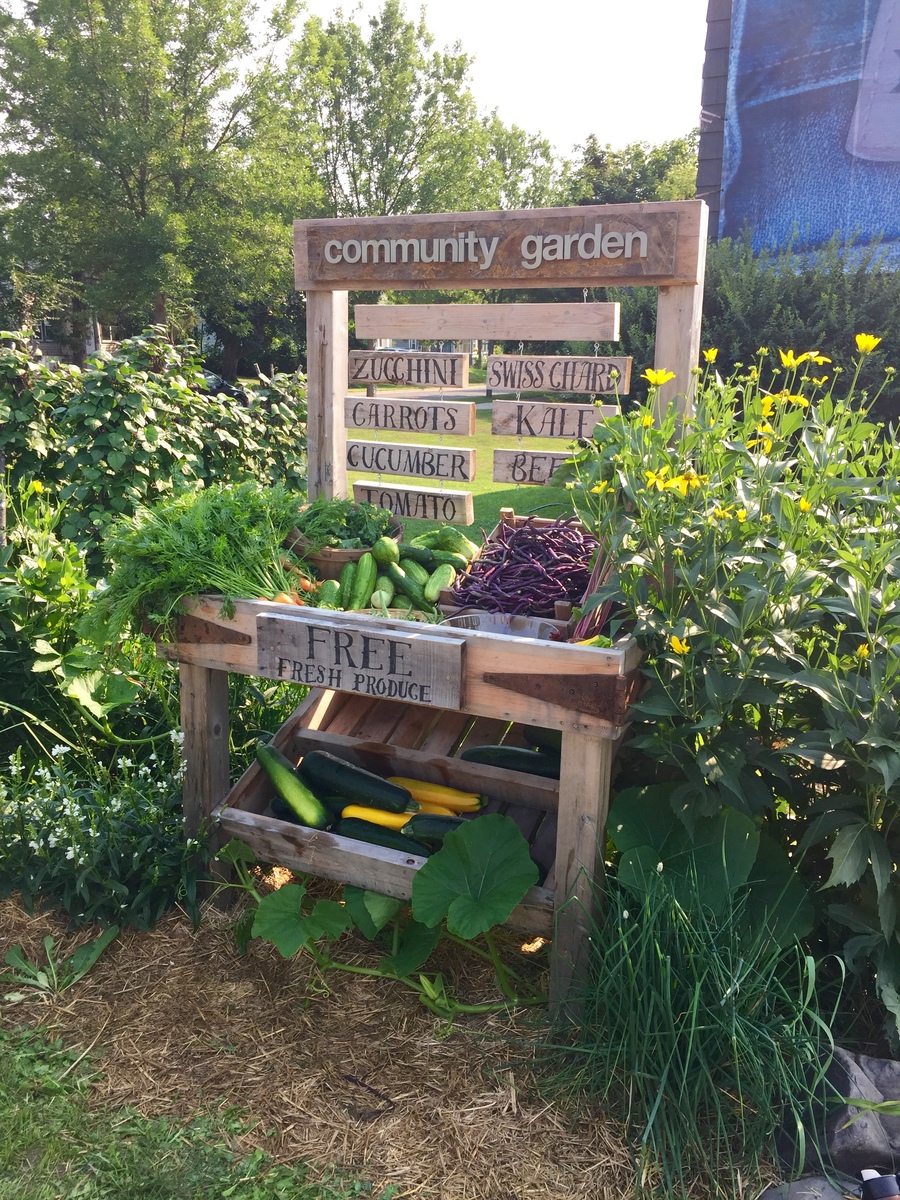
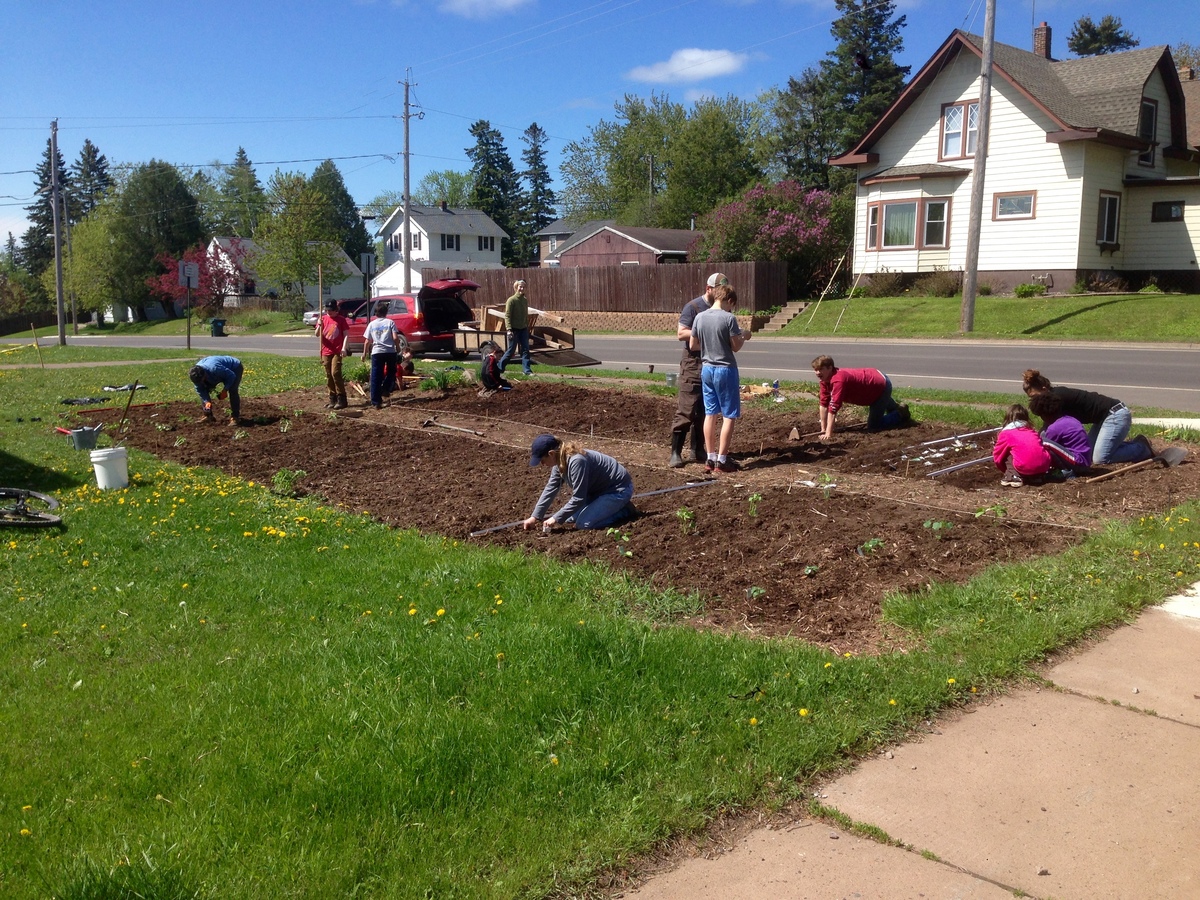
This spring, my neighborhood started a community garden. Five families came together to break ground, sow, tend, and give away our produce. The local church close by allowed us to use their front lawn for the "Lakeside Community Garden," located in Duluth, MN. Every Saturday during harvest season, we gave away our produce to the community. I took on the project of building a farm stand. One of our neighborhood families donated re-claimed lumber to the cause, and I started building. I had research many farm stands on-line, and knew I needed two large boxes to hold the veggies, as well as a sign to indicate what produce we were giving away.


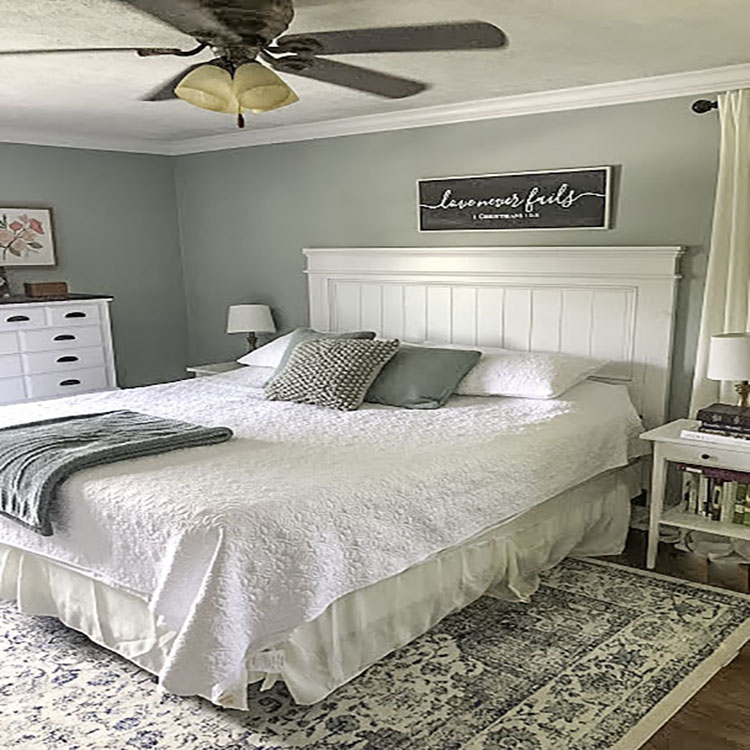
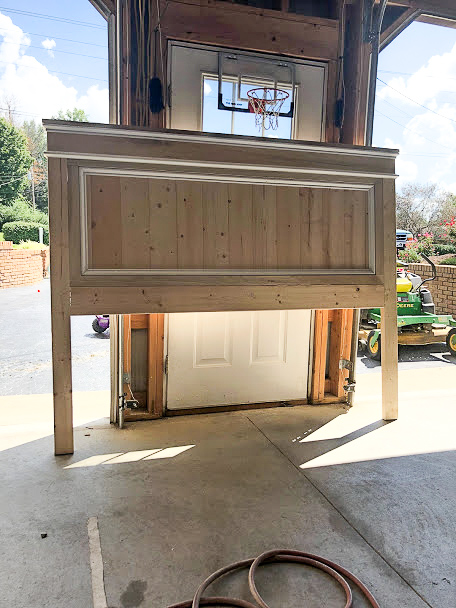
Ever since we moved into our current home, our master bedroom headboard has been at the top of our my project list. I knew I wanted a beautiful farmhouse style headboard. What I didn’t want was the heavy retail price tag. I searched high and low at places like Target, Wayfair, Amazon and even Walmart without finding an affordable option for us.
There is this perfect vantage point of our bedroom from the glider in my son’s room. I remember staring at that empty wall space above our bed for years, it felt like, while rocking our son to sleep. Just willing a headboard to appear. I wanted it so bad I could taste it. Something about looking at that same view, night after night, and waiting, waiting, waiting for it to happen just makes me appreciate it so much more now that it’s here, as so often happens in life.
This project inevitably got put on hold over the years after one thing or another got in the way. Either we didn’t have the time to devote to it, or we always had something else to put our money into. Untilllll I stumbled across Ana White’s Farmhouse Headboard Plans.

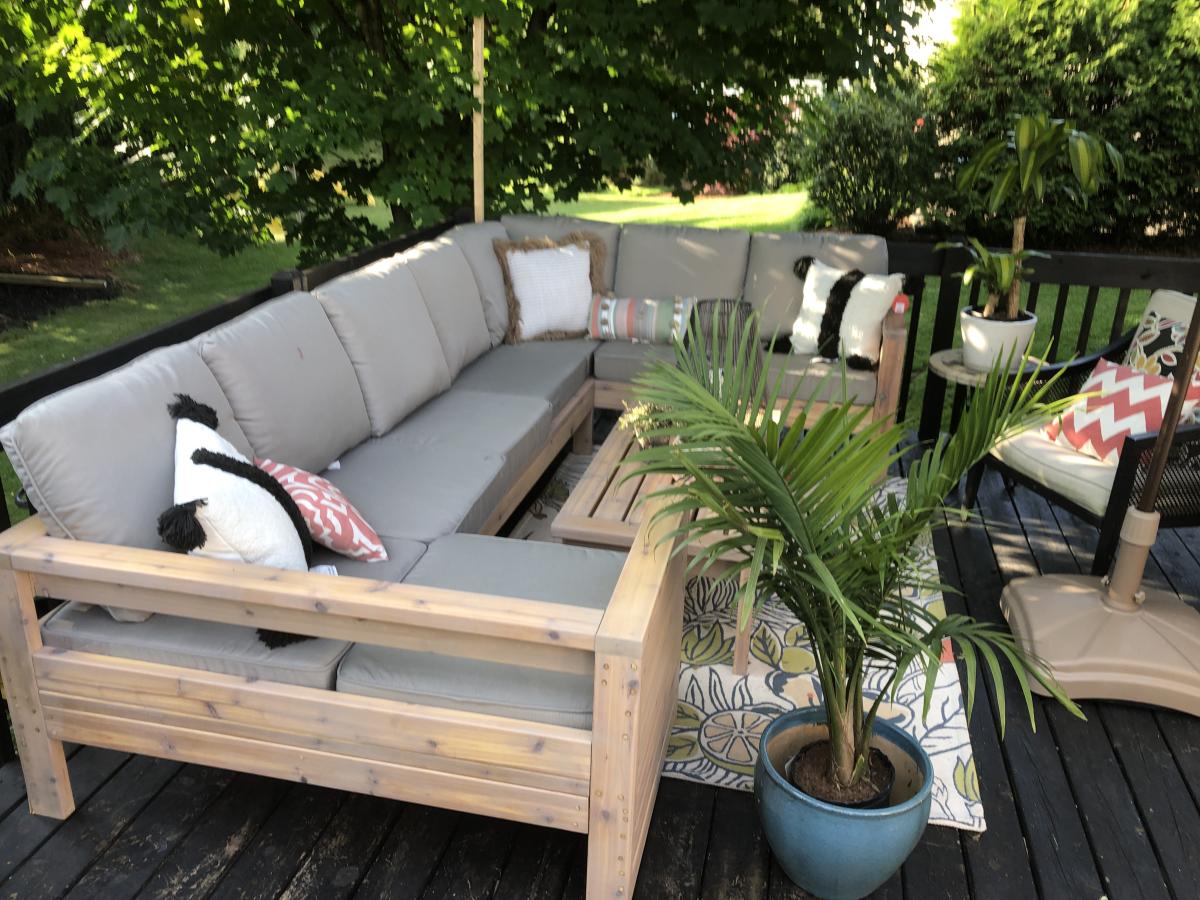
Made the outdoor sectional. The coffee table was made out of left over pieces!

Wed, 10/02/2019 - 09:54
So smart to make the coffee table out of the spare pieces.
Looks amazing!
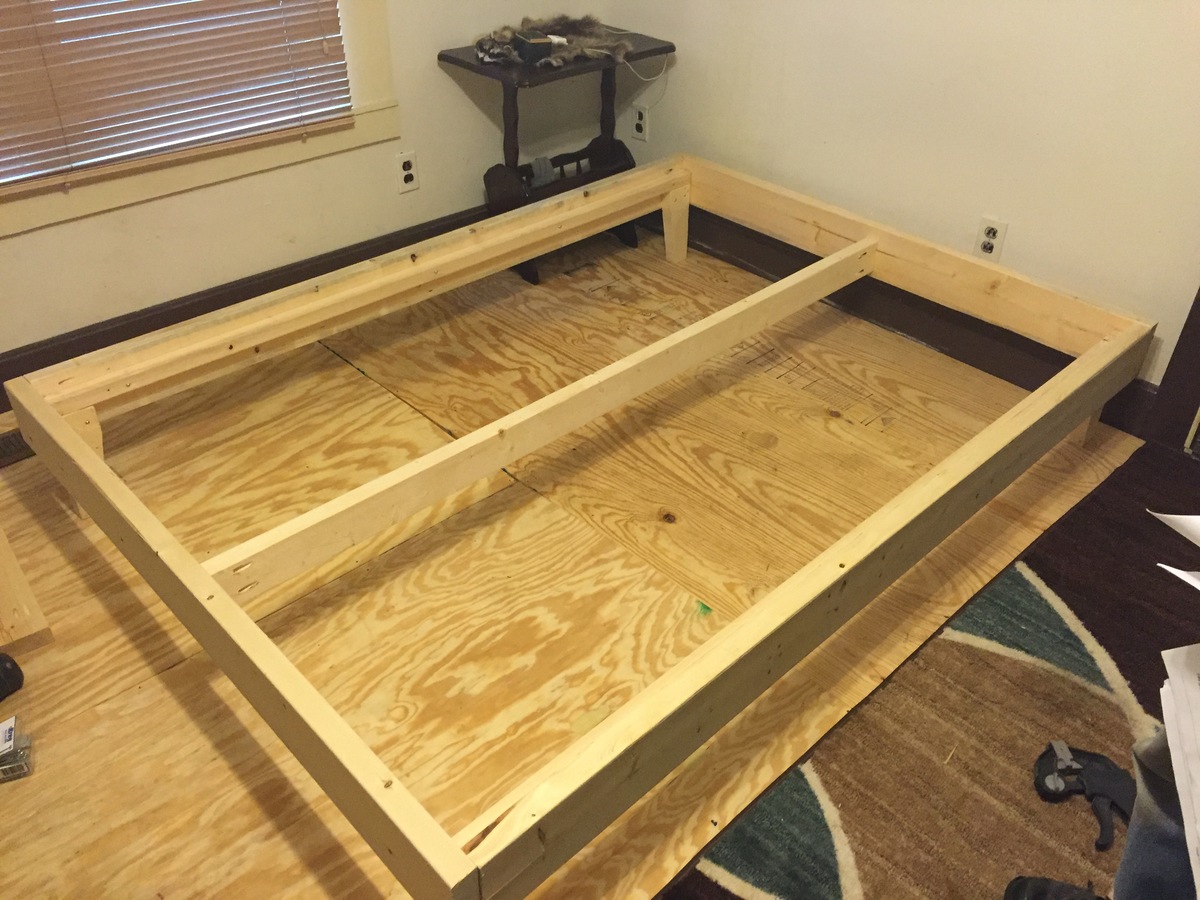
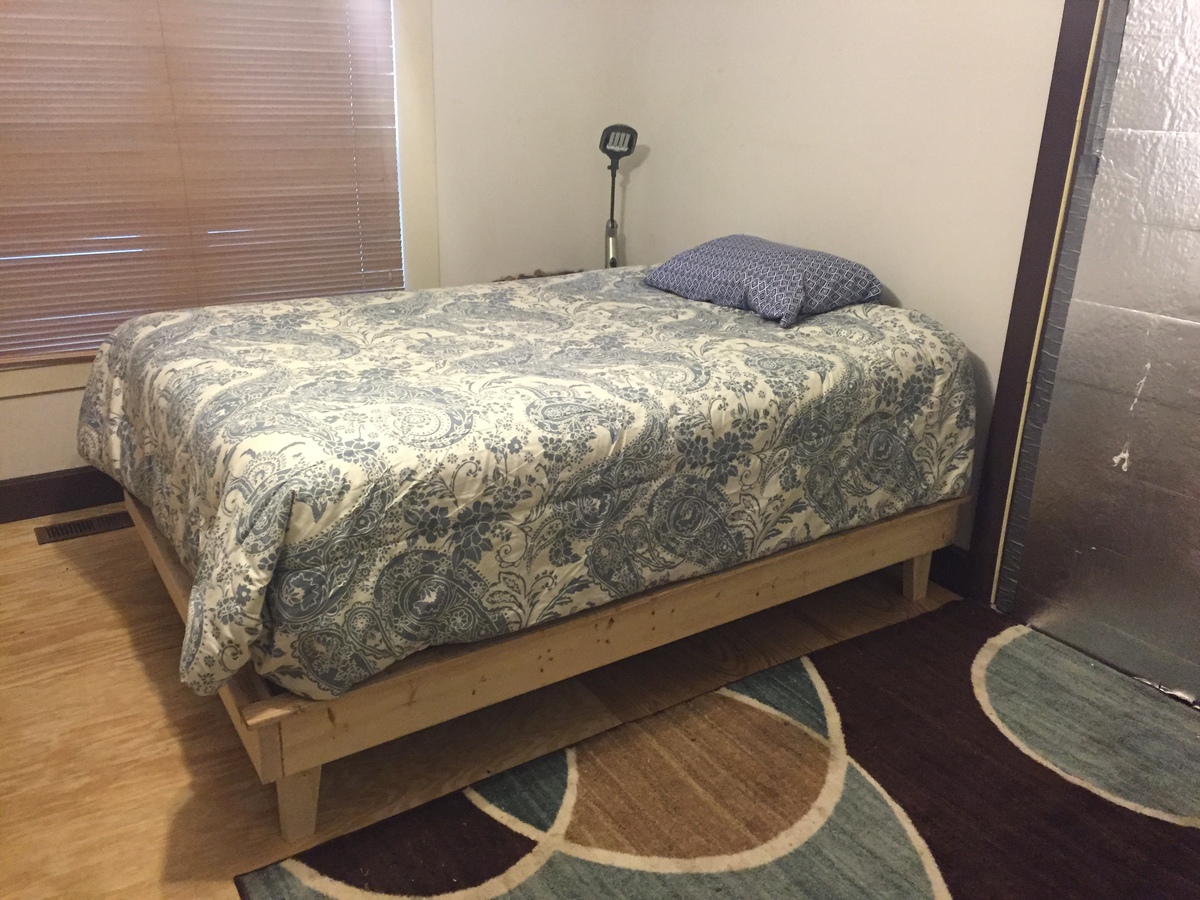
Built this
Thu, 03/03/2016 - 12:18
it's a platform bed, I accidentally typed poster bed

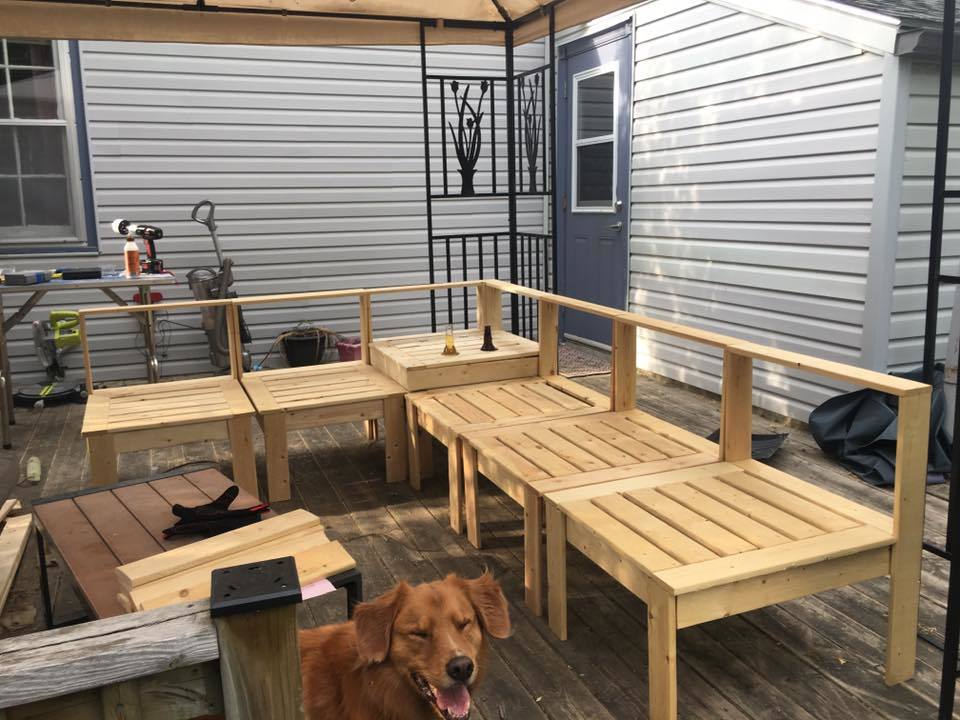
Spring is around the corner and I had no outdoor furniture. My boyfriend had just talked me into a new weber grill, which did not leave much budget for new outdoor furniture. That's when I came across this web site and thought 'I can do that'. So I talked me boyfriend into helping build this Simple Outdoor Conversation Set. We used plans for the Simple Outdoor Lounge Chair and Simple Outdoor Ottoman and then followed the alterations by post for 'My Modern Outdoor Patio Collection' to make the loveseat.
The whole project came together over 5 days.
Day 1: Cut all boards (5 hrs)
Day 2: Sand all boards (5 hrs)
Day 3: Stain all boards (6 hrs)
Day 4 & 5: Assemble furniture (9 - 10 hrs)
The total project took about 25 hrs and cost about $350. Here's the breakdown wood and supplies $204 from Lowe's for pretreated wood. $145 on cushions (NOT ON SALE); $60 for the seat cushions from Home Depot and $80 for the back cushions from Wal-Mart. We were originally planning on only having the seat cushions, but the seats were long when you set in them with your back against the bear wood (I was setting so far back, my feet couldn't reach the floor) so we opted for thick back cushions to make it more comfortable. The project finished up just in time for our first BBQ party! (March 2012)
Sun, 03/18/2012 - 13:16
Oh I love this!!! Love the cushions and the colors too!
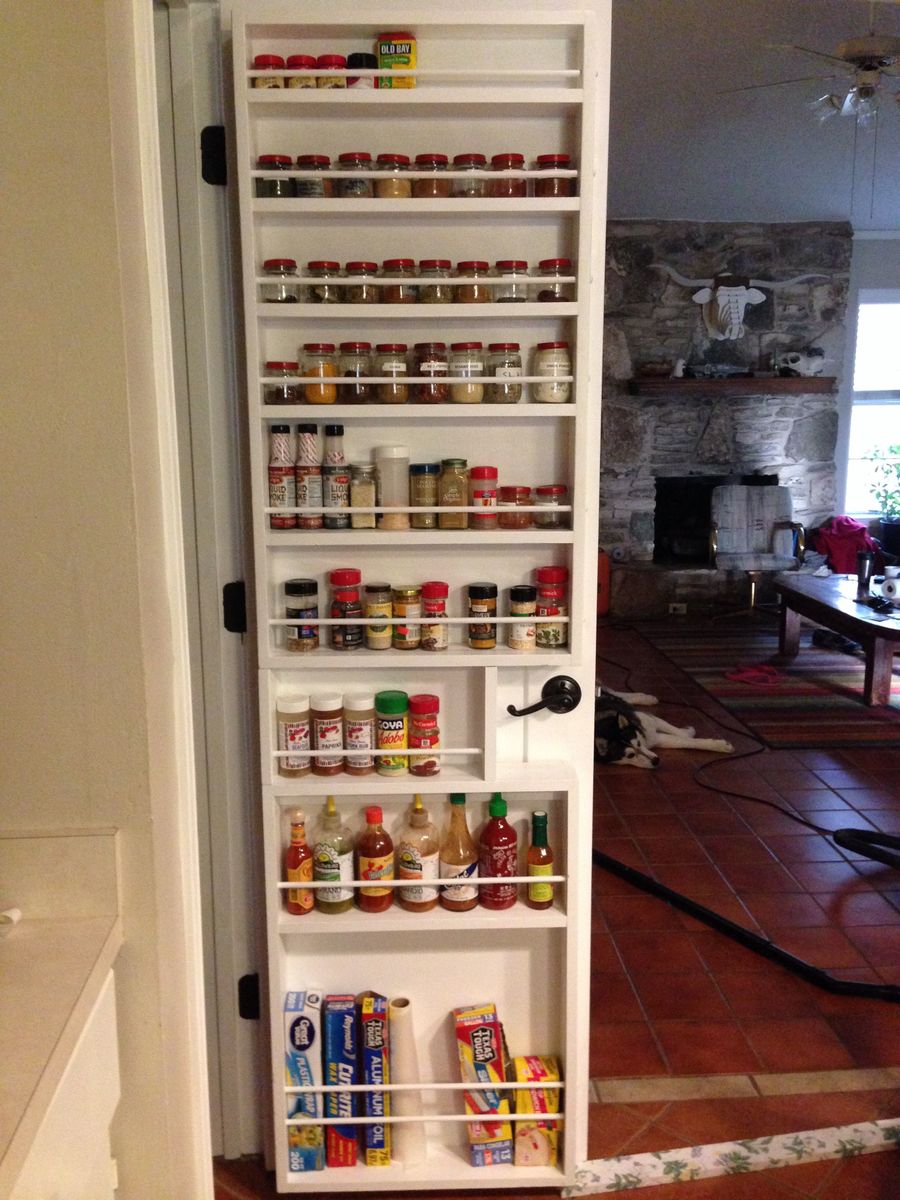
The plan is great, I followed the instructions exactly. Then altered the plan to build a second rack that would fit the bottom of the door, with foil, saran and bag storage at the bottom. Consequently it was heavy and I was very skeptical of the hollow core door anchors, but I installed 3 at the top and 2 at the bottom of both pieces. It's very solid and secure....would probably have worked fine with even less. This door is only 32" wide but has plenty of room for this project. Thank you, looking forward to trying more of your plans.
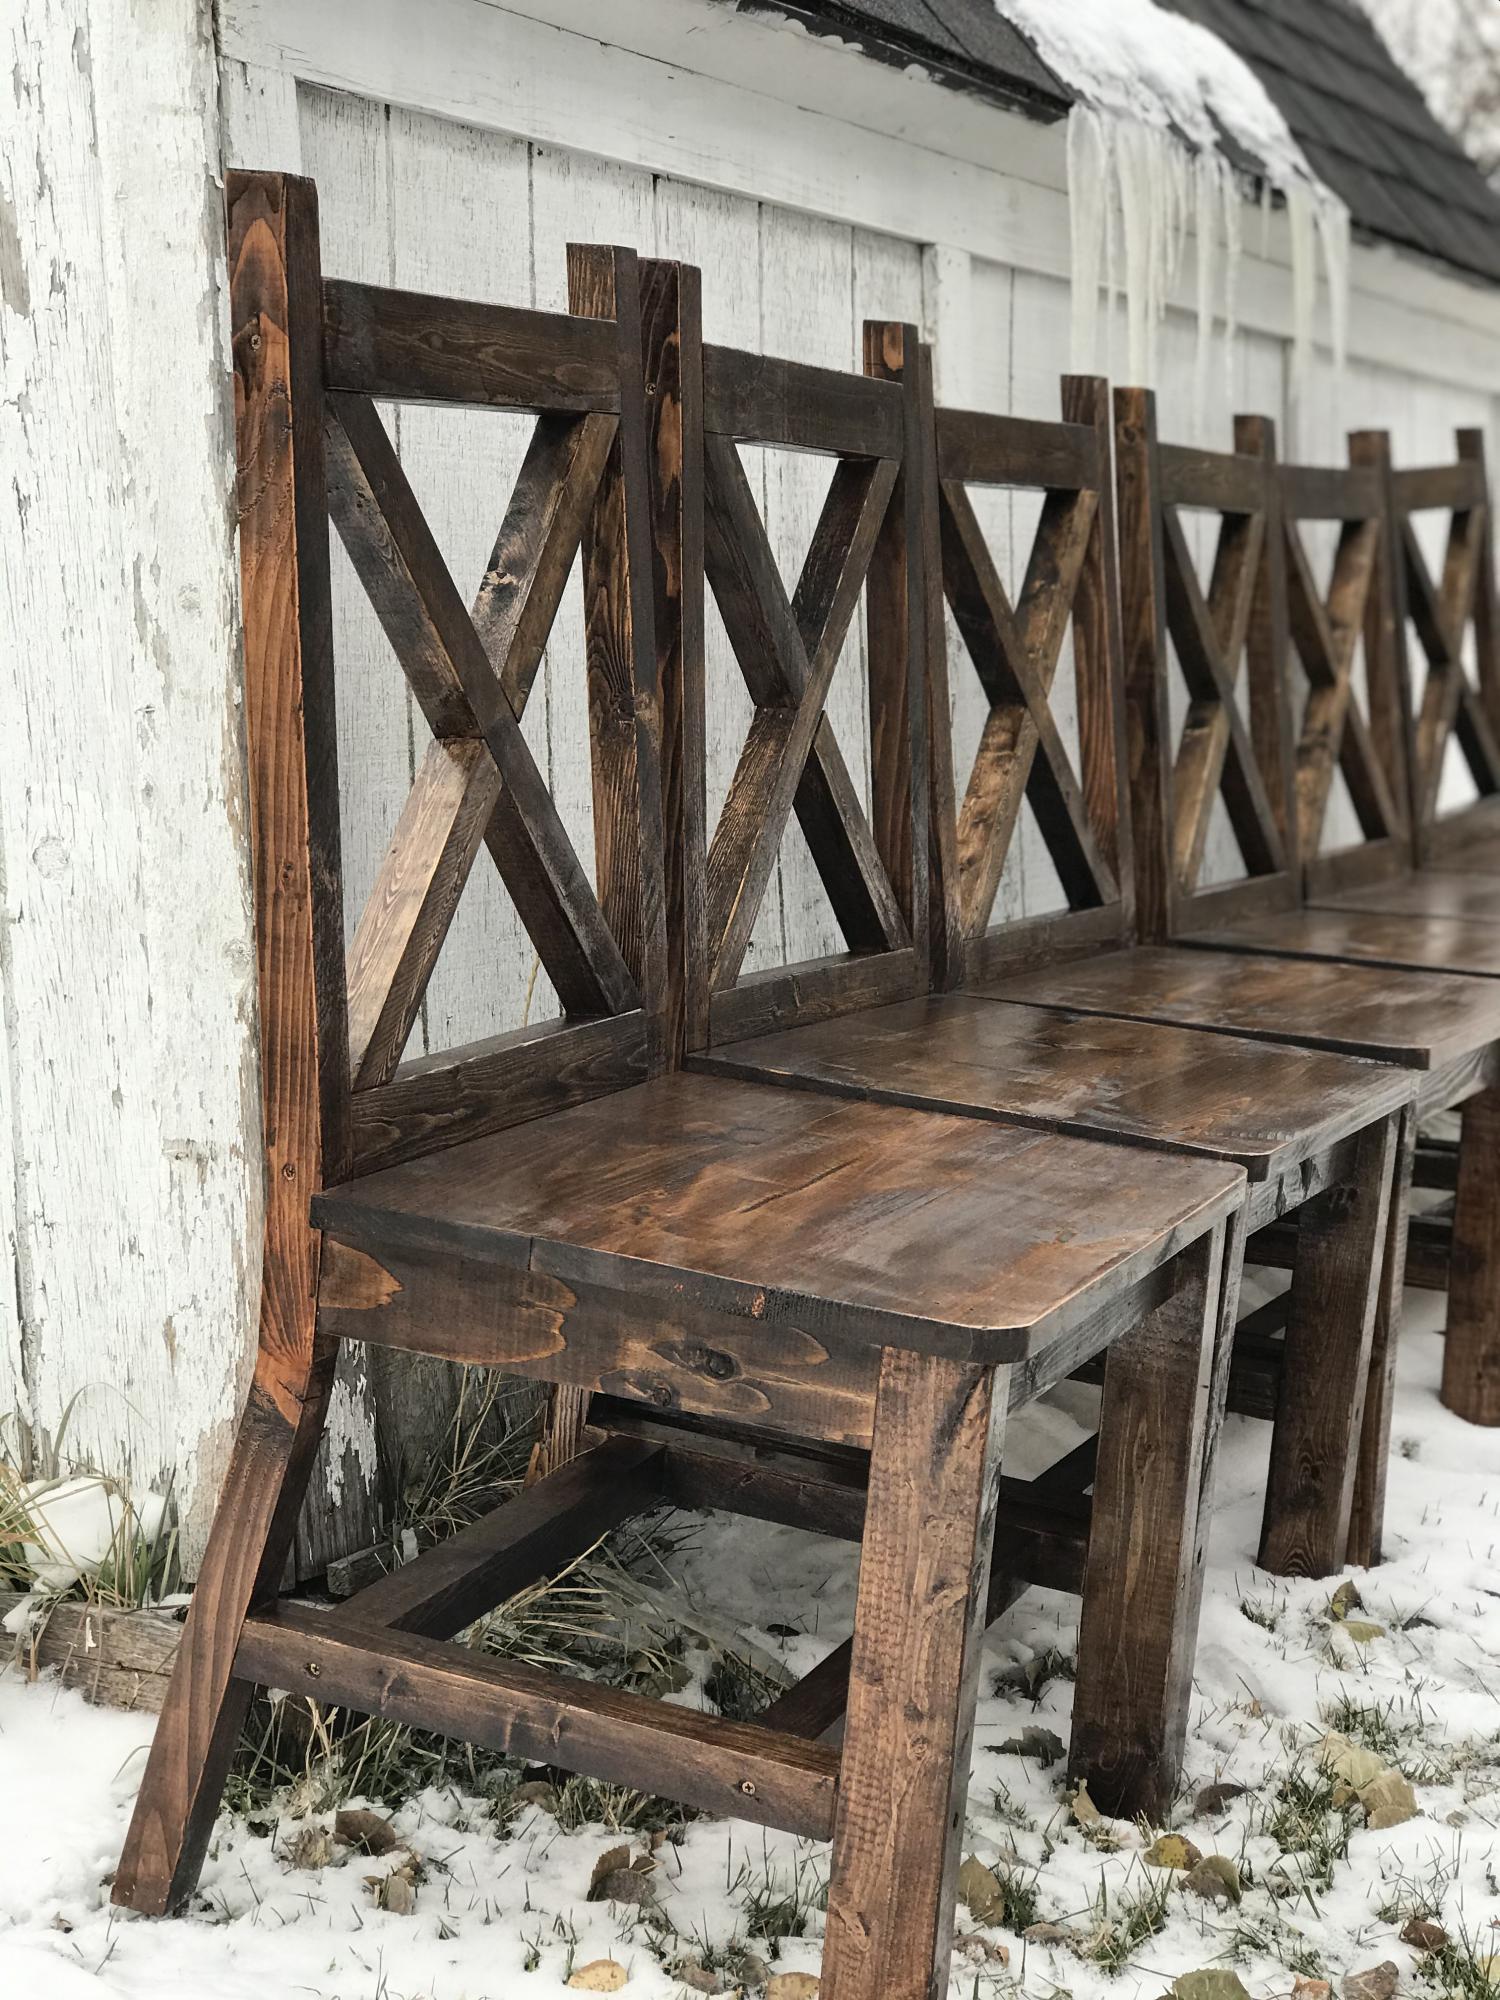
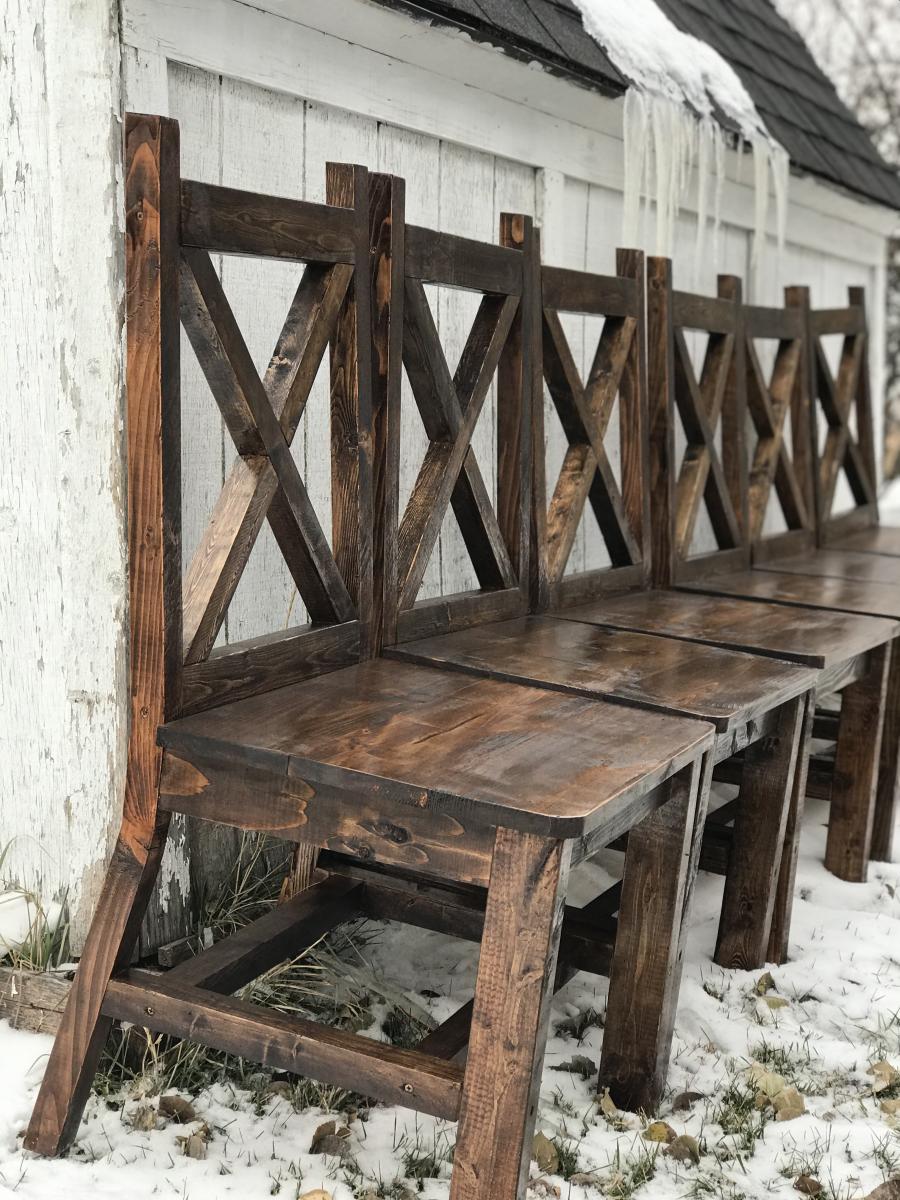
I found a picture of this style of chairs, and I really wanted to make them for my table. I created my own plans and adjusted them until they were perfect. I’ve since made several sets of chairs for other people including this set of 6.
Wed, 12/18/2019 - 07:57
I'd love to make these for my parents, do you have the plans?

Hello Ana, this is my second project that I have done according to your plans and surely not my last. I had bought the wood I needed a few months ago and it wasn't until the day before Mother's day that I realized I didn't have anything for the Mother of my three children. I could have made an excuse and told her I was broke from our trip to Key largo and the Grand Cayman islands in April but then I remembered your plans for a neat potting bench. I went to my home office and printed off your plans. Next I cleaned out enough room in my garage to access my tools and benches, four hours later...Boom! Potting bench with a surprised wife. We are going to allow all of the Grandkids (13) to sign it after she decides what color she wants me to paint it. Thank you so much for posting these great projects. After all it is true "Happy wife, happy life"

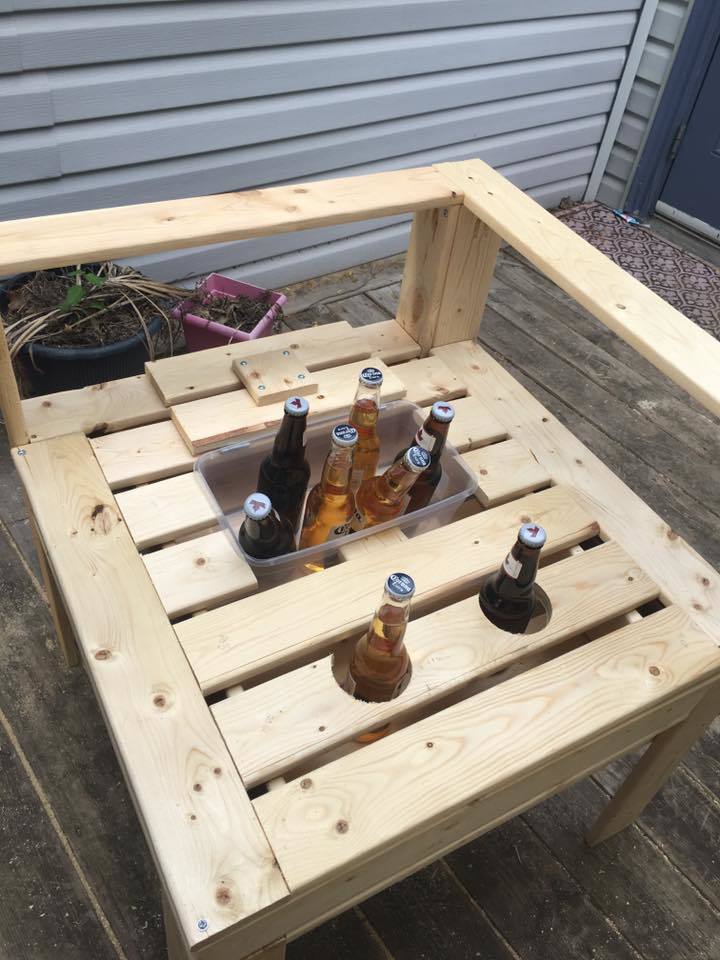
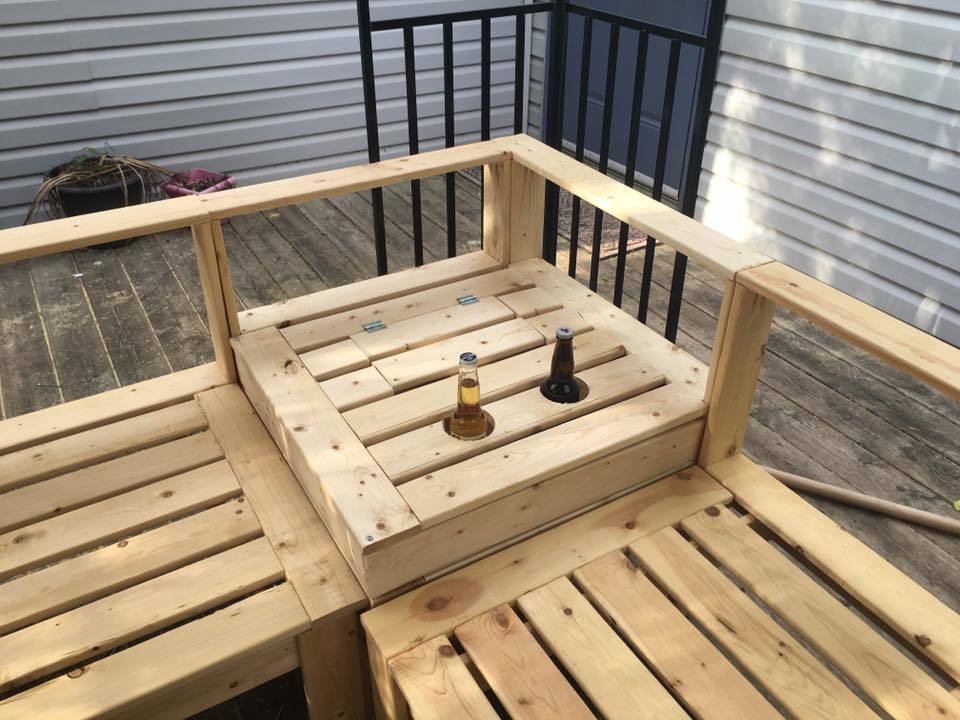
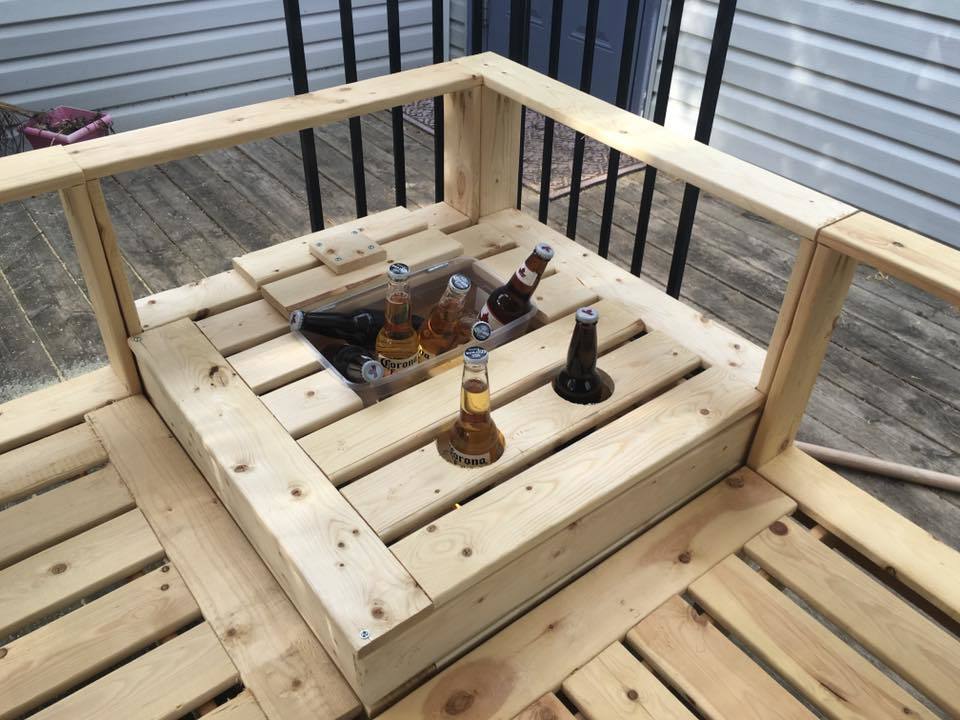
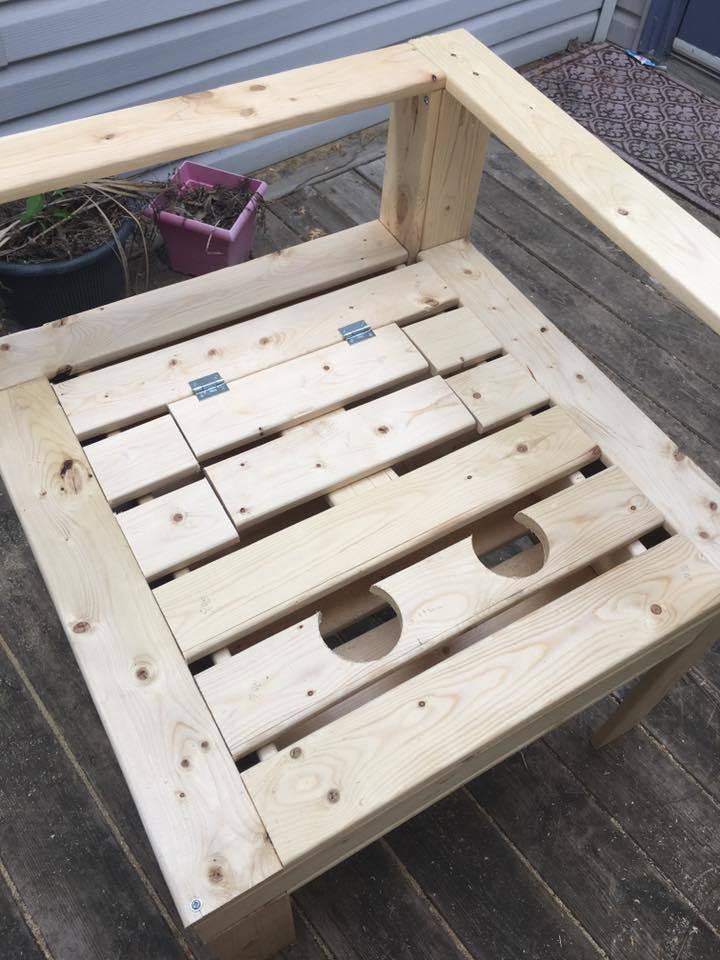
I had so much fun building this! I got a little creative with the corner section and decided to make it a table. I built a small hatch so that I could put in a container for ice and cold beer. When the hatch is not in use, the container can be removed and the hatch can be closed to provide more table space. I also added drink holders!

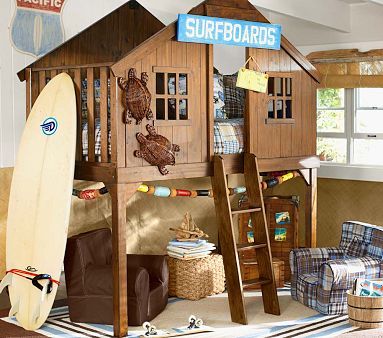
My buddy wanted this bed from Pottery Barn Kids but didn't want to spend $1300. It cost him $250 in materials and i built it for $300. So you DIY'ers could do it for $250. We also adjusted the size to fit a full size mattress.


Sun, 09/23/2012 - 14:42
Both my boys want to sleep up top I have a nice corner window seal that I'd like to put the l shaped loft at mid height double twin any suggestions also would like the entry on both ends so my 9 yr old can descend without waking my middle son would like a detachable slide in the middle

Comments
Ana White Admin
Fri, 12/03/2021 - 07:39
Super nice!
WOW, definitely worth the extra effort, just beautiful! I wish we could offer metric plans, may need to figure that out.
smearedred
Wed, 03/23/2022 - 20:32
Did you change out the 2x4…
Did you change out the 2x4 and 2x6 on the lower half?