Community Brag Posts

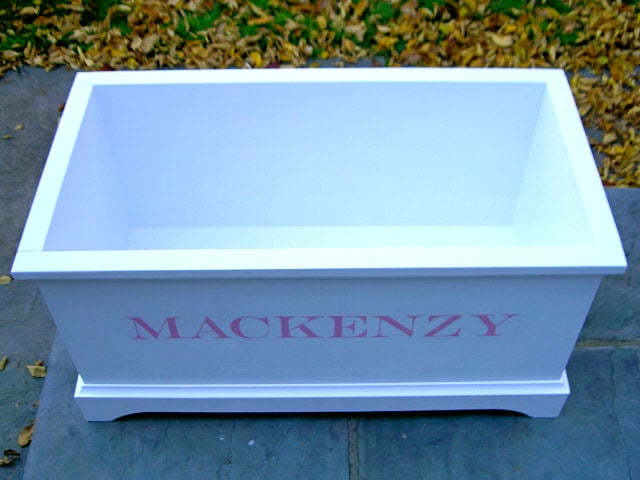
Thread Holder and Photo Scrapbook Holder

Submitted by VelvetSky on Fri, 11/04/2011 - 23:06

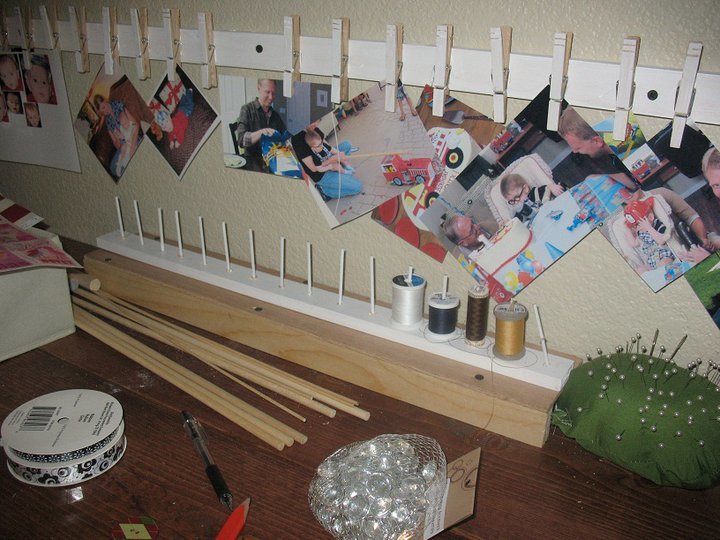
I love this even though I did not take the time to cut the dowels properly. I needed something for my sewing thread. Just a plain board and some dowels thin enough for the spools. Drill some holes in the board and glue in the dowels. I also made the picture holder for scrapbooking. I got the idea from the Ruler Clip Art Rails on this site. Thanks!

Built from Plan(s)
Estimated Time Investment
An Hour or Two (0-2 Hours)
Recommended Skill Level
Starter Project

Chalkboard Shelves!

Submitted by jamie_C on Thu, 10/24/2013 - 20:15

My husband and I built these chalkboard shelves today. We are very happy with the way they turned out! We are donating them to our son's cooperative preschool to be used in their upcoming auction, which is a big money maker for the school. Hopefully they make good money! We added some artistic touches to the tops of the shelves (polka dots and chevron stripes). A fun, easy build!

Estimated Time Investment
Afternoon Project (3-6 Hours)
Finish Used
chalkboard spray paint, and the chevron and polka dot design was applied with acrylic paint.
Recommended Skill Level
Starter Project

Sliding Barn Door Console

Submitted by robinadams on Thu, 01/07/2016 - 19:59

I built this console over about 2 months. I really wanted a barnwood look so I found this lumber place that sells pine that puts it through a machine and roughs it up on one side. I also added my own saw marks to it, screwdriver dents, rake dents, etc. to rough it up some more. Real barnwood is expensive and often isn't straight, etc. and since I was using this in my kitchen as a countertop I didn't want any spaces in my countertop. This was about a third of the price of barnwood. I wasn't sure how the look of it would turn out, but I think it comes pretty close to looking like the real deal! My husband helped me with the sliding door mechanism. We used pulleys for it and cut metal down to size. We discovered that using a nut and bolt on it didn't work, it just loosened and would come off so instead of using a nut and bolt to secure the pulley to the metal, we used a clevis pin and some washers. Works amazing! This was my first big build and I am very happy with how it turned out! Behind the sliding doors there is one shelf each. We have found there is so much room for storage!

Built from Plan(s)
Estimated Cost
$250-$300
Estimated Time Investment
Week Long Project (20 Hours or More)
Finish Used
Dark Walnut wiped on and then immediately wiped off. Then used American Walnut over top. This way the darker colour got into the saw marks and crevices. I then used Minwax matte polyurathane with 1000 grit sandpaper in between coats. I did 3 coats.
Recommended Skill Level
Intermediate

Comments

Toy Storage Box

Submitted by Cannelle on Sun, 05/05/2019 - 16:19

I made this project for a co-worker who is expecting. I was a bit worried about just using nails and glue, so I used pocket holes except for on the front pieces. To add storage capacity on the top cubbies, I trimmed a 1x6 by an inch, as I thought that it would be a good balance. Overall, it turned out well and she loved it.

Built from Plan(s)
Estimated Cost
$30 plus paint and hardware
Estimated Time Investment
Weekend Project (10-20 Hours)
Finish Used
White paint, lacquer
Recommended Skill Level
Beginner

Desk to Bar

Submitted by Anonymous (not verified) on Fri, 03/03/2023 - 05:16

The desk was no longer functional once both of us were working from home and converted other spaces to full offices. We both enjoy fine whiskey and bourbon and wanted a space to entertain and display our collection. This was by far our most challenging but rewarding DIY build yet.

Comments

Your chair plans , my chairs to go with my table?

Submitted by Mike Cook on Sat, 10/26/2013 - 20:24

Used the parsons chair plans and finished it with a wood seat and back. Made them out of an old cedar hot tub and reclaimed wood from a house.
Mad a set of 6 chairs, holding up great over a year! Took me about 40 hours including milling the wood.

Built from Plan(s)
Estimated Cost
All recycled wood $10 for glue
Estimated Time Investment
Week Long Project (20 Hours or More)
Finish Used
Penofin stain and water based poly.
Recommended Skill Level
Intermediate

Farmhouse Queen Bed Hybrid

Submitted by Anonymous (not verified) on Sun, 01/10/2016 - 17:56

My bed frame dimensions were 60 wide by 80 length. So that is the inside demension after assembly. My headboard posts were cut to 54". Headboard panels are 31.5" (11- 6" boards). My posts were made from combining two 2x4s together. I plan on mounting the metal bed frame to the inside of the bed rails.

Estimated Cost
$110
Estimated Time Investment
Day Project (6-9 Hours)
Finish Used
Behr Satin white paint and primer
Recommended Skill Level
Beginner

Work table / desk

Submitted by julkrist on Thu, 05/16/2019 - 13:01

I created this work table by modifying the Beginner Farm Table.  I made it counter height and added a shelf underneath.  It is 5 feet long and the top is five 2x6 boards.  The shelf is 1x6 boards.

I purchased 4@ 2x4s and 3 @ 2x6x10 - I got the store to cut those in half (5' lengths).  I cut the 2x4s on a miter saw.

This is my first project.  It probably took a bit more than 6 hours given I was learning to use the saw and trying to find the tools to do the job.

Estimated Cost
$100 for lumber, screws and Varathane stain & polyurethane.
Estimated Time Investment
Afternoon Project (3-6 Hours)
Finish Used
Varathane Stain and Polyurethane(Mission Oak finish). I sanded the boards by hand and painted the finish with a paintbrush. It was a bit messy and difficult the get an even coat, but that didn't bother me too much as it is meant to be rustic. In future I think I'd prefer a two step process as I think it may be less messy.
Recommended Skill Level
Starter Project

Hidden Puzzle Table

Submitted by Anonymous (not verified) on Fri, 03/10/2023 - 12:02

I wanted a table that would protect my puzzles from puzzle piece eating dogs, so I used this Ana White desk plan and built a frame on top to hold the cover panels. The drawer is perfect for holding puzzle pieces during a build.

Comments

toy box #4

Kids toy box with personalization.

Built from Plan(s)
Estimated Cost
$50
Estimated Time Investment
Afternoon Project (3-6 Hours)
Finish Used
1. One coat primer
2. Two coats semi-gloss white
3. Acrylic for personalization
4. clear acrylic spray
Recommended Skill Level
Intermediate

Rustic X Bench

Submitted by LiMa87 on Mon, 10/28/2013 - 14:26

This was my first build with minimal help from my husband. I'm unsure how long it took to build since I worked on it periodically and forget how much I spent on the wood since this took place several months ago. When I started this project, I did not have a pocket hole jig and since then have learned how invaluable that tool is. It's not perfectly square but it's not as noticeable sitting on carpet as it would be on hard flooring.

Probably a harder first-time project to start with but overall I'm happy with the outcome and looking forward to my next project.

Estimated Time Investment
Weekend Project (10-20 Hours)
Finish Used
Minwax in Cherry topped with Minwax in Dark Walnut. Painted the base white and distressed with the Cherry stain.
Recommended Skill Level
Intermediate

Toddlers new bed

Submitted by Anonymous (not verified) on Thu, 01/14/2016 - 19:32

My husband was able to build this no problem from the provided instructions! We used beadboard over plywood for the headboard and footboard. 

Built from Plan(s)
Estimated Cost
$300
Estimated Time Investment
Weekend Project (10-20 Hours)
Finish Used
Paint- sherwin Williams echelon ecru
Recommended Skill Level
Intermediate

Bench storage

Submitted by Anonymous (not verified) on Fri, 03/17/2023 - 20:43

Built for a game room. The customer wanted it rustic white. With 1/3,2/3 split storage one for toys the other side for storage.

Comments

Pine Coffee Table = Success

Tryde Coffee Table

Used: Pine wood, 2 coats Kona stain, 3 coats gloss poly, 2.5" silver screws.

Lessons Learned: Forgot to use wood glue on joints, use 10" circular saw or table saw for 4x4 posts (I used a 7.25" circular and had to cut all sides and then sand down uneven parts)

This is a heavy duty coffee table, and can easily support up to two people stacked on top of it... which was my main concern. :)

Built from Plan(s)
Estimated Cost
$70
Estimated Time Investment
Day Project (6-9 Hours)
Finish Used
Kona Stain, Gloss Poly
Recommended Skill Level
Starter Project

Comments

FARMHOUSE BEDSIDE TABLE

I have been working on this set of farmhouse nightstands for well over a month now. I have three kids and so I typically did a little here and there whenever I could find some free time. I love them now that they are finished!

I stained the top before I did any painting and then covered it with newspaper while I was painting the bottom. I'm not exactly sure why I choose to do it this way, other than I was just excited to see how it looked.

The knob I purchased from Hobby lobby.

This is the third project I've built from Ana. So I'm just getting started. But I will tell you right now that building anything with drawers is TOUGH!

Thanks Ana!

Here's a link to the plans:
http://ana-white.com/2011/01/farmhouse-bedside-table

Estimated Cost
$60
Estimated Time Investment
Week Long Project (20 Hours or More)
Recommended Skill Level
Intermediate

Comments

They see me rolling, my pedestal (I'm sorry ;) )

I haven't decided yet if I am going to use the under portion as storage or not, so I am leaving it unfinished until then. The plan was perfect for my house as the laundry room is relatively small. In order to make sure I didn't have to lift anything major in case the washer/dryer needed cleaning/repair behind them, I modified the plan to include 2 4" static wheels from the Home Depot. I am going to skirt the pedestal later, but needed it framed and functional for the dleivery of the washer dryer. instead of using 4x4 for the uprights, I laminated 2 2x4's and lapped the joints for additional strength. I also made the pedestal 22" total in hieght as I am 6' tall and wanted to minimize bending (spinal surgery 2 years ago)


Even the delivery men were impressed as I was able to pull the pedestal out for them to easily lift the washer and dryer on top of it and slide it back into place. The pedestal is perfectly stable and doesn't move at all during a wash cycle. I still plan on securing it to the walls once the drywall is completed with a pair of L brackets.

Estimated Cost
$80 to this point. Skirting will add another $30, Prefab drawers cost an additional $200
Estimated Time Investment
Afternoon Project (3-6 Hours)
Finish Used
Gloss white trim paint... eventually
Recommended Skill Level
Intermediate

Red Oak Headboard with Herringbone pattern

Created a headboard for my guest room bed.  Used red oak slats to create the herringbone effect and regular red oak boards for the frame and legs.  Natural shellac and sealer used as the finish.  No real plans used, but can provide the dimensions to anyone who is interested.

Estimated Cost
$250
Estimated Time Investment
Week Long Project (20 Hours or More)
Finish Used
Bullseye Shellac and Sealer (clear)
Recommended Skill Level
Beginner

My fireplace

Submitted by Anonymous (not verified) on Fri, 03/24/2023 - 12:59

My wife wanted a fireplace in our main living room, then we added the shelving on each side

Comments

Little Helper Tower

Submitted by SecondWind on Thu, 12/08/2011 - 16:48

Love this site! I stumbled on Ana's site via Pinterest and have been hooked ever since! I used pocket screws to attach everything (the Kreg Jig is AWESOME!) Thanks for the great plans, and my daughter loves her tower! I stained it to match the cabinets in our kitchen and so our soon-to-be baby boy can use it in the future. The wood is just some cheaper pine from the local HIW.

Built from Plan(s)
Estimated Time Investment
Weekend Project (10-20 Hours)
Finish Used
Bombay Mahogany Minwax Polyshades
Recommended Skill Level
Beginner

4X4 Truss Beam Table and Bench

I have been eyeing many tables on Ana's website for some time now. When she posted the plans for this 4x4 Truss Beam Table, I knew that it was the one that I wanted to build.
The hardest part of the project was actually picking out super straight boards for the table top and bench top. The construction of the table was really easy!
I finished it with Rustoleum American Walnut stain and 3 coats of Rustoleum Semi-gloss polyurethane.
My family loves the table! I am super happy with how it turned out!!

Estimated Time Investment
Weekend Project (10-20 Hours)
Recommended Skill Level
Intermediate

Comments

bclute

Mon, 11/04/2013 - 17:46

Table looks great, I am braving this project at some point, but have procrastinated trying to find the right look and plan. Yours looks great. What grade pine did you use? Did you use the douglas fir for the 4x4's?

brentlbg

Mon, 01/19/2015 - 18:52

did you use the finish Ana recommended or did you do your own version? I like the color of the finish.

Pantry hutch

Submitted by Anonymous (not verified) on Wed, 01/20/2016 - 05:44

I built this pantry cabinet as gift for my son and daughter in law. Their kitchen doesn't have much storage space so this is what we came up with as a solution. I combined features I liked from a couple of Ana's plans. I wanited the piece to look a bit more like a piece of furniture than a cabinet.  It was built in 2 sections so that it is easier to move and position. The finish is an organge tinted stain with several coats of polyurethane for protection.

Estimated Time Investment
Week Long Project (20 Hours or More)
Finish Used
Tinted stain with polyurethane top coat
Recommended Skill Level
Intermediate

Comments