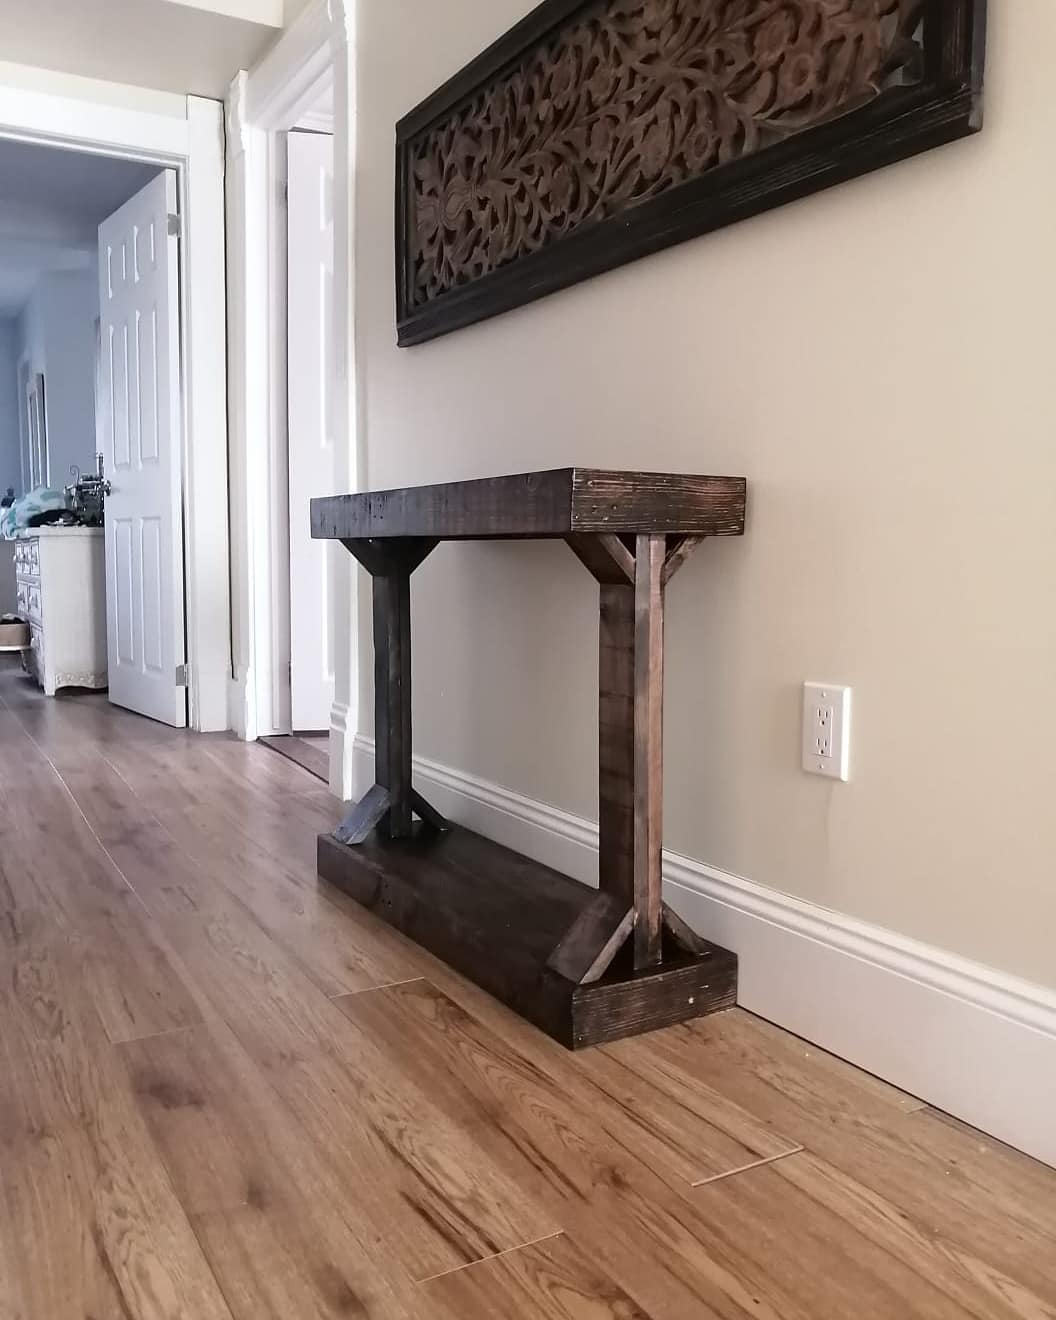
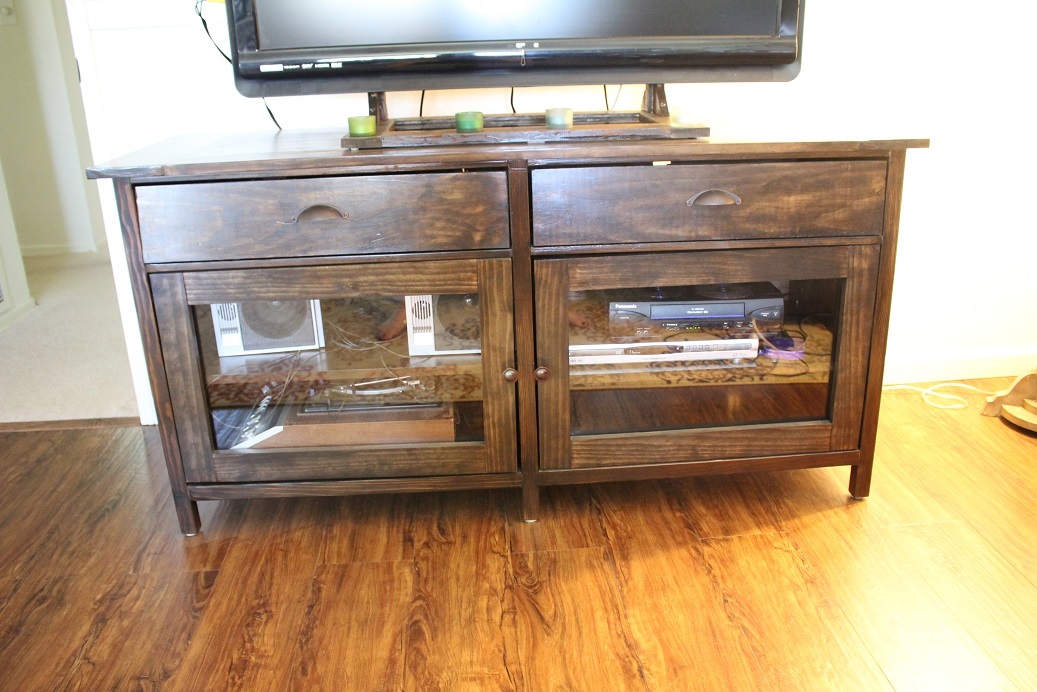
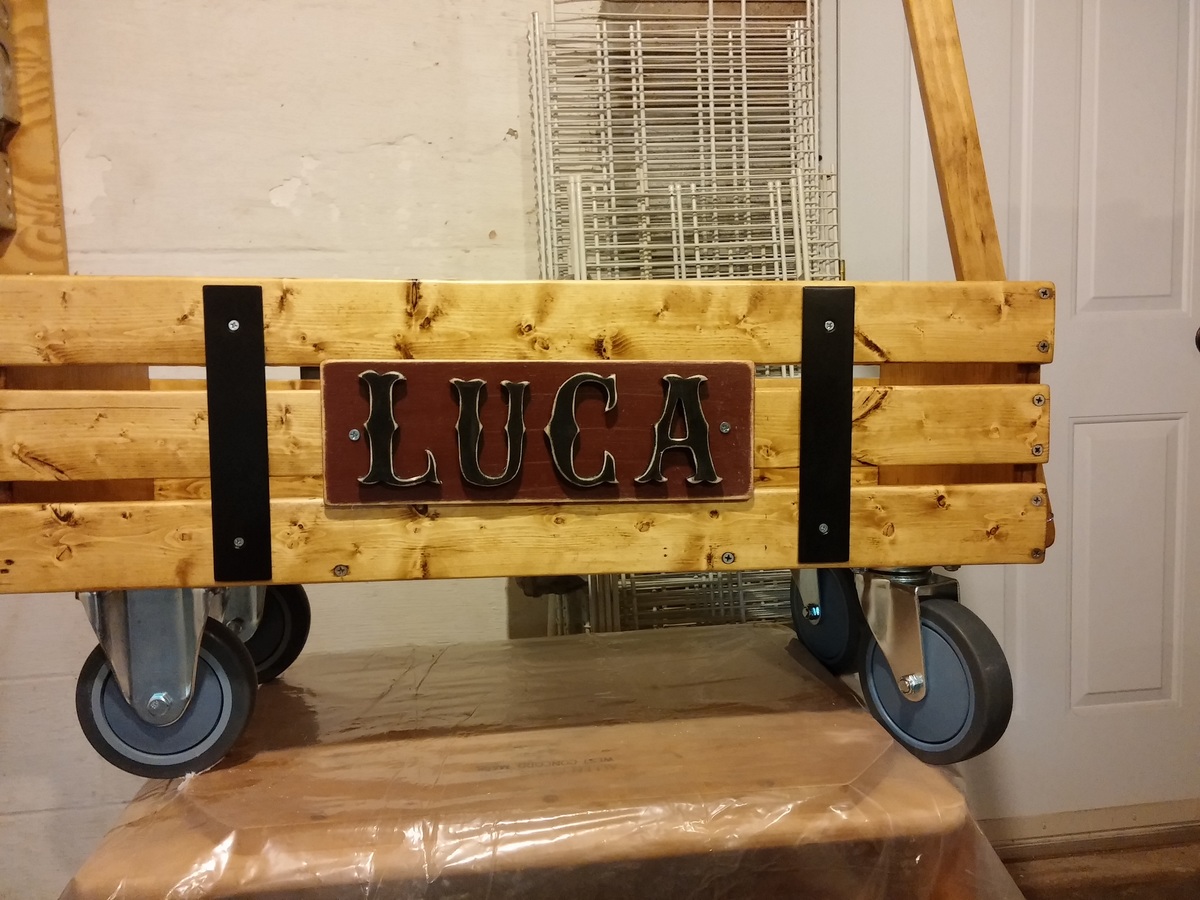
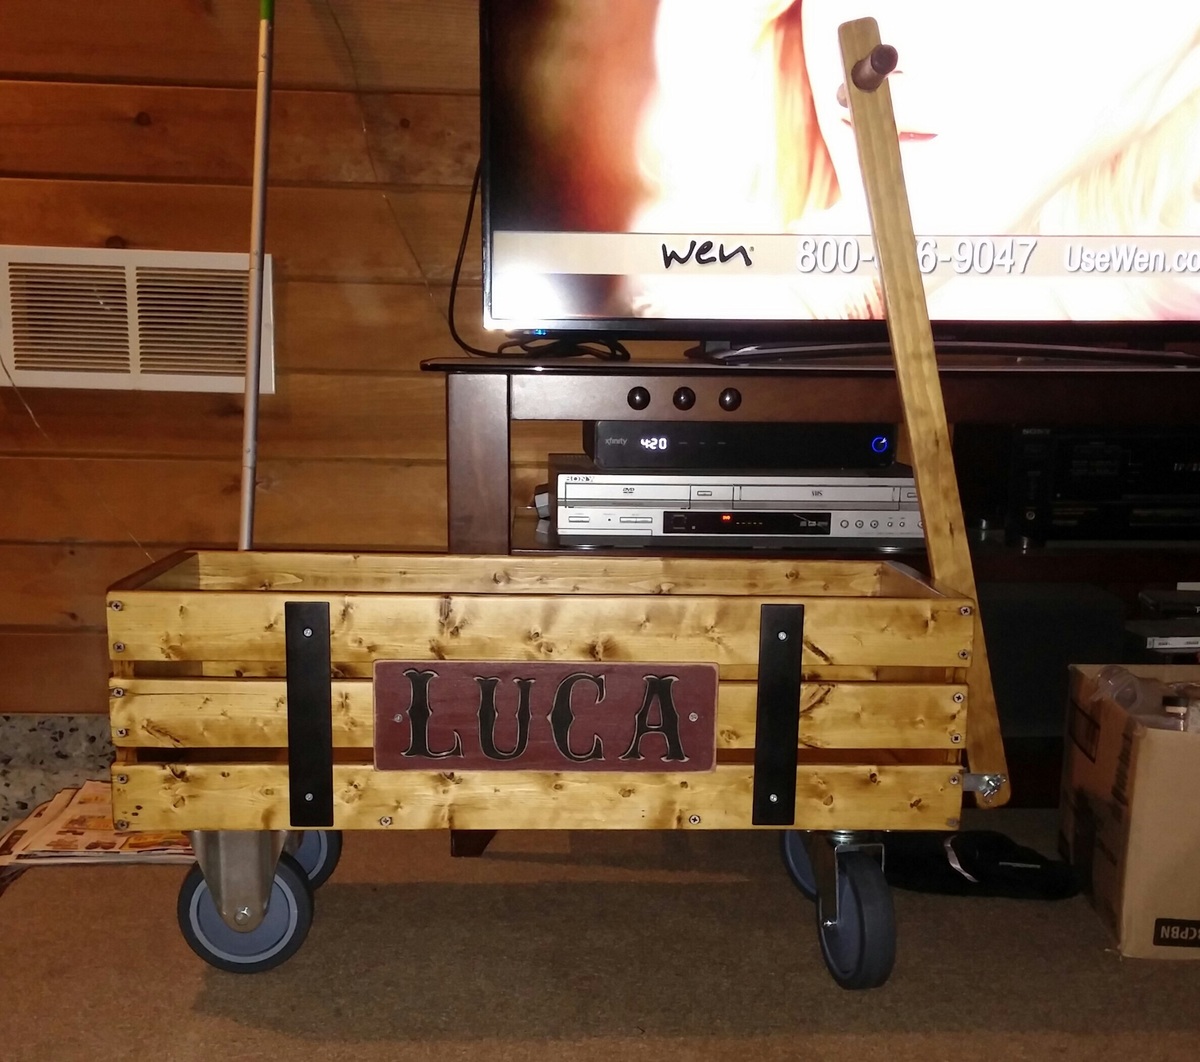
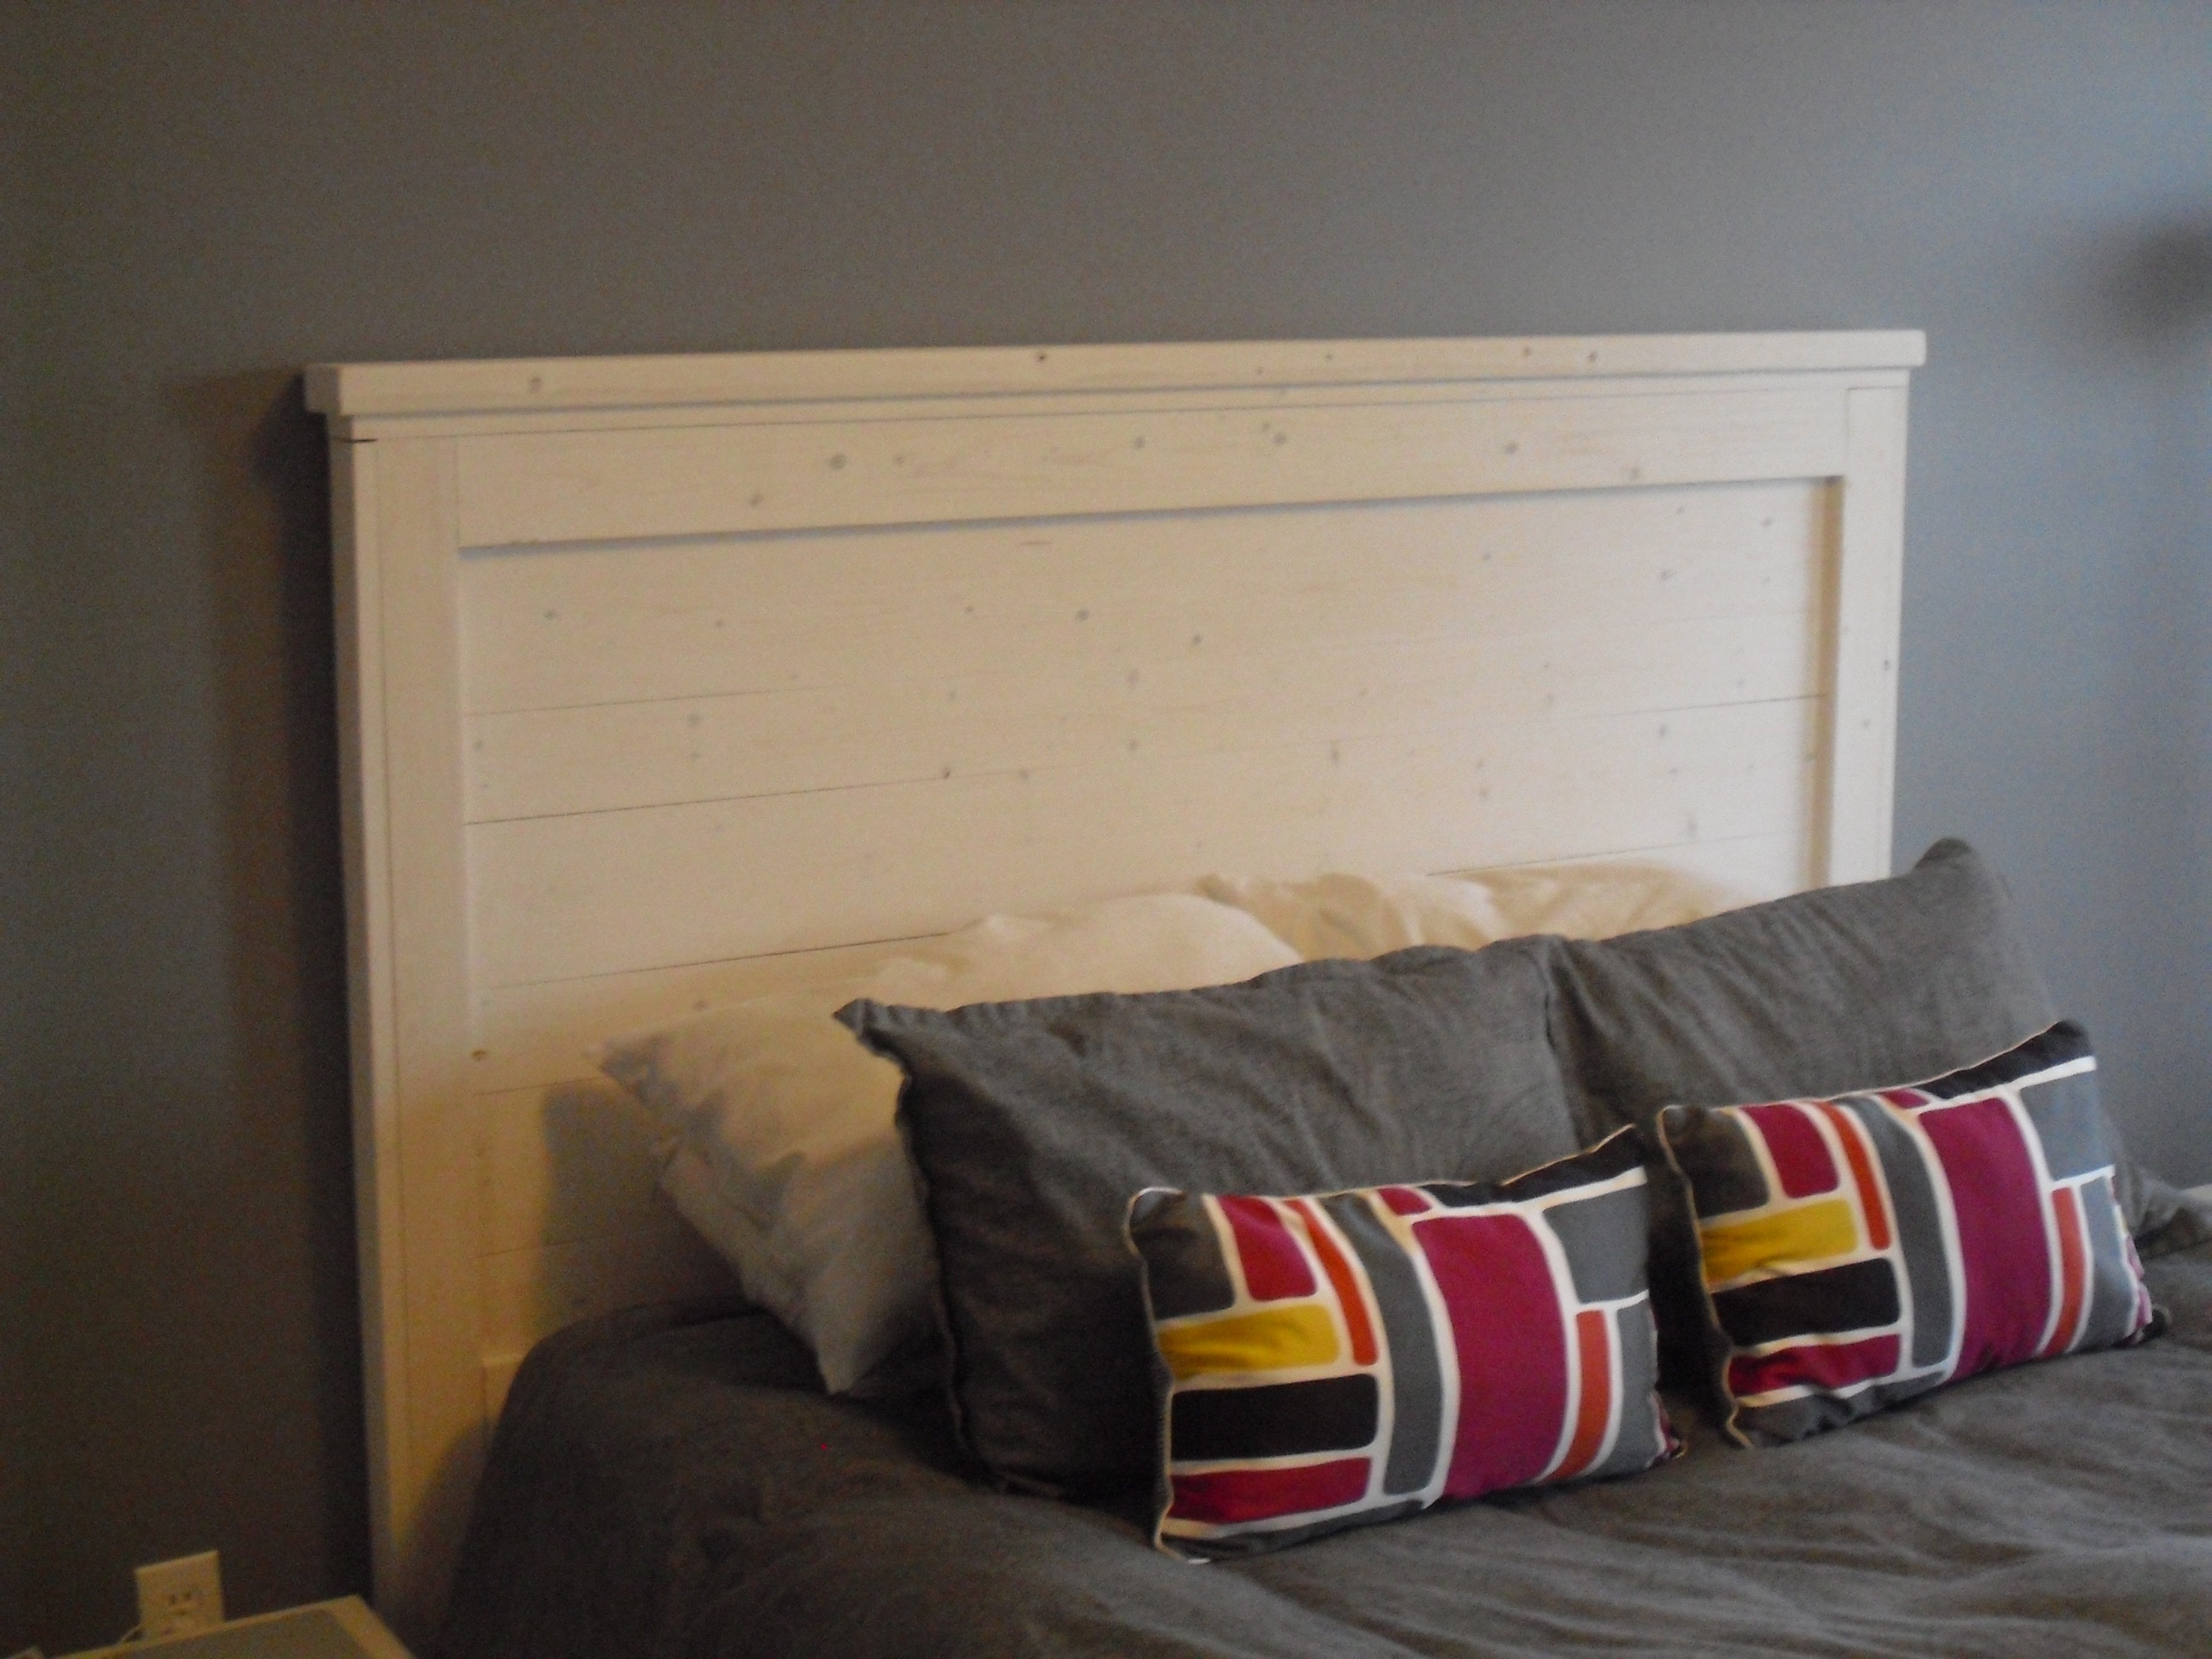
Our Rustic End Table
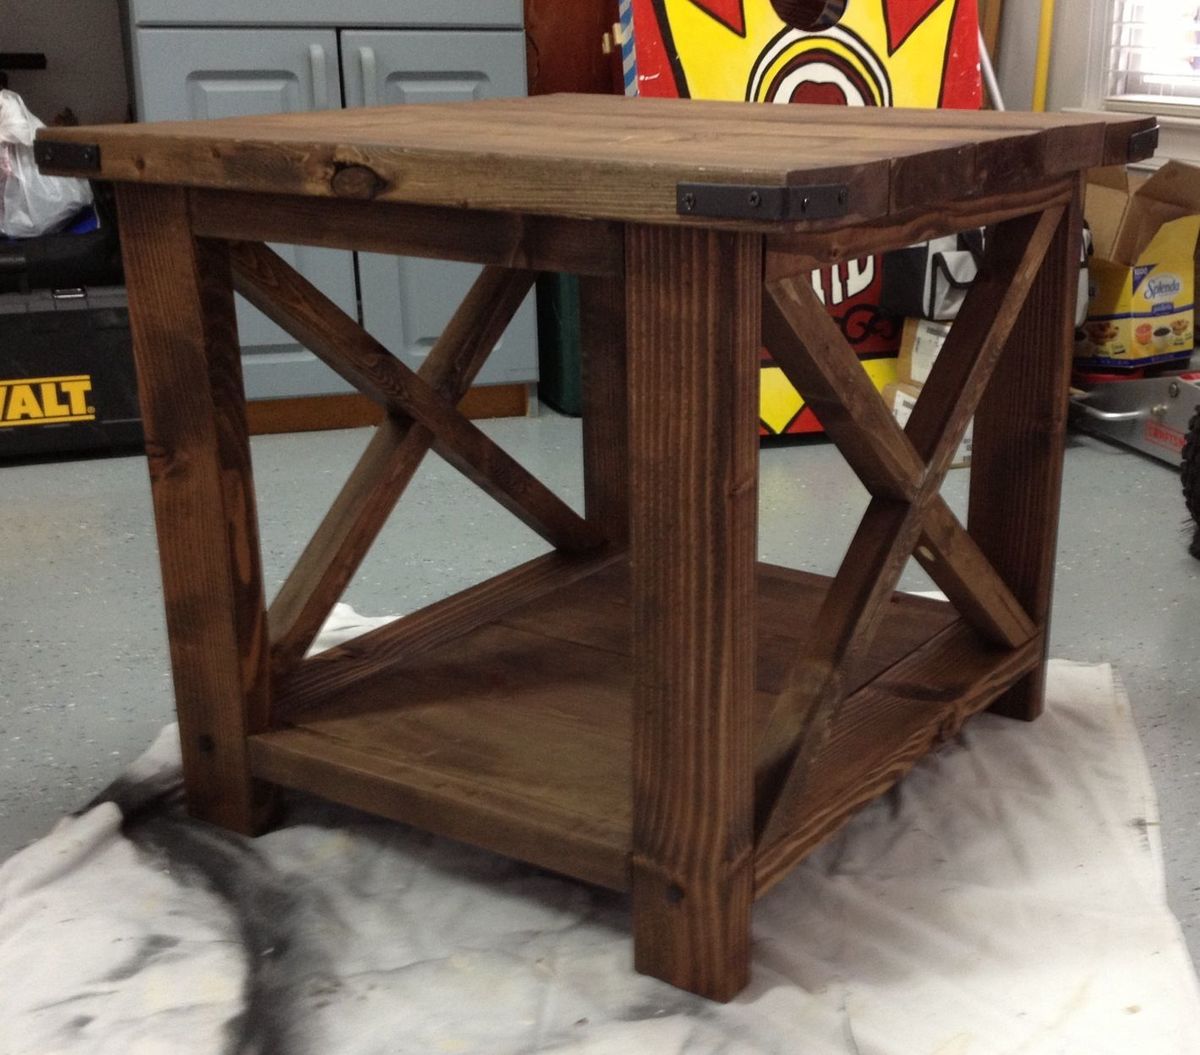
This was our first furniture project together. It was not as simple as we thought it would be, but we are very pleased with how it came out. We are planning on making the sofa table to match next!
Night Stands custom sized and finished per customer building new home based Ana White's Farm House collection #anawhite
Intentional distressing per customer request with guidance from Ana White plans. Finish contains a mix of paint, removing of paint, staining and restraining. Now to move to a purposeful Mud Room Locker for a new home suited for family.
http://ana-white.com/users/pondrider/
#anawhite #Stain #CustomFurniture #Paint
The build was pretty easy. Husband did it in a day. But after the paint dried and we out it in our laundry room and I did some laundry we realized that the washer now shakes the entire pedestal violently to the point where the dryer is being shaken so much that it's banging against the wall. We have brand new LG washer and dryer and this wasn't a problem before our diy pedestal. Do you have any modification suggestions? We really love the project- but we will have to take it out if we can't find a solution for the shaking.
Mon, 07/08/2019 - 10:47
I'm sorry to hear. A quick fix would be to add some cross bracing to the back.
I made this table completely out of pallet wood. We have true 1x4 pallet wood which is hardwood. for the legs, I doubled up 2 pieces of pallet wood for strength. Every piece of wood is a 1x4. It turned out perfectly as I needed a narrow table for our 2nd-floor hallway. This took us a little longer than with cut lumber as there was a lot of planing and sanding since it was pallet wood. If we had used lumber it would have taken a few hours less.
I made the taller version of this plan. 2x2's are my arch nemesis! Never again will I build something primarily using 2x2's because they are SO wonky! I tried to find the straightest boards possible but still it didn't make for a very good bookcase. I would recommend building this if you have a table saw & you can cut your own 2x2's! It will suffice for storage in my craft room, but I am not sure if it will hold up during all of our moves, because my husband is in the Army!
I have an Amish made oak bedroom set but needed a pair of bedside tables. Due to my limited space, the plans were what I was looking for with size and appearance. I bought a pair of drawer handles to match the rest of my bedroom set. Oak is expensive but it's worth it to me. I used poplar as the secondary wood for the inside of the drawers.
Took me about 16 hours to do his on and off. I think it would of been faster if I had a miter saw and a paint sprayer. My Wife and I are happy on the outcome!
I built this table after seeing a similar one on your site. Mine is built with 2x2 legs, a shelf, and just one piece of 1x12 for the top. I was wanting something for in front of my window but this one is to small so I will eventually build a bigger one for in front of my window and move this one. Thanks for the inspiration!!
Mon, 01/31/2022 - 03:53
Would you have the plans/dimensions you used to build this table? It looks just the right size I need. Thank you!
Made this media center for a DIY TV show at my home and I think I'm proudest of this project! It turned out so beautifully. Shelf pin jig was used for movable shelves inside, ORB handles and knobs, a very smooth poly'd top, and plenty of room for our components. The doors were the hardest part. Being inset, they just didn't want to fit and would scrape the frame. Lots of repositioning of the hinges. The thick acrylic for the doors was a little difficult as well- it cut easily enough in the table saw, but screwing in threatened breakage. It was also hard to fit them where their fasteners didn't compete with the knobs or shelves. I also made the TV stand to match the media center (and because I didn't want to buy one!) Love this project!
Wed, 01/21/2015 - 14:37
This turned out nice. I did notice that you are showing the pocket holes on the inside. In the future you can get the Kreg pocket hole plugs to fill these holes. You glue them in the holes and you can then sand them down even and you will not see any of the holes.
Great job.
In reply to Media Center by DIYER_MD
Thu, 06/04/2015 - 09:49
Thanks! I've used the plugs before, and most of the time, I just don't mind the holes. Call me low maintenance : )
Garden Shed out of douglas wood
i added wooden floor .
Thu, 06/15/2017 - 12:48
Greetings, I like your workmanship - It looks great! I have a couple questions if you would be so kind as to answer them. I like how you turned the studs sideways. How did you attach the studs to the 2x4 plate that you have turned on its 1 1/2" edge both top and bottom. I am thinking of toenailing or driving 3 1/4" GRK screws through the 1 1/2" sides of the 2x4's and into the 1 1/2" edge of the top and bottom plate. I know that Kreg has a jig out that uses oversize screws-it is specifically designed for 1 1/2" and larger (up to 3 1/2").
How did you secure the bottom plate to the wooden floor. I am thinking that you may have used 1/4" or 5/16" lag bolts down through the 2x4 and on into the frame of your wooden floor.
Thanks for your reply,
Cliveous (Reggie) Ogg
Made this from the side table plan. I had to adjust sizes as i'm from Belgium. 2x4's aren't here. First project ever. It came out great with some modifications and such. I made the larger one, way too big so we use it as a storage in our hallway.
It costed me around 40 euros. All materials included, i had to buy everything. It took me a whole day to finish this. If your a total beginner like me, it will take some time.
Would I make it again? Yes, provided i have better equipment and better plan it up front.
I rated it intermediate because that is how it felt for me personally.
Totally enjoyed making this for my very first brand new step-grandson Luca. Learned a few new tricks along the way and had a blast!
Added a fourth seat to the sectional peice. This way it fills the space on my deck much better. Plans worked great. Both peices
completed in under 3 hours.
Built this headboard for my fiancee as her valentines day gift.
Tue, 03/19/2013 - 21:36
The headboard is nice. But what I want to know is where she got those colorblock pillowcases???
This is my version of the pallet inspired coat rack. I didn't have the room for the 8-foot version in the original plans so I cut it down to 5 feet. Otherwise it follows the plans as listed, just with shorter cuts.
Stain is dark walnut.
We have a very small laundry room that does triple duty as a dog kennel and mud room. This riser is a perfect storage solution! The fact that I can see directly to the back of the Washer, and transfer clothes without bending over, is an added bonus! The building plans are sturdy and easy to follow!
Really enjoyed making this 2x4 sofa. Decided it wasn't long enough so added 12 inches so it's now really nice and big! I needed to add a semi hidden supporting in the middle but that was pretty easy.
Took Ana's advice and got the cushions made first. I found a local person here in the UK. I found waterproof canvas online.
I agree with several other posters, it's unclear at the point the arms are added onto the bench part and there's no way the 6 screws advised would have been enough to hold the weight of 3 people.. I added supporting extra legs at the front and one leg in the centre. This has made it super-stable.
Overall very happy..my wife and I can stretch out at either end! It took a weekend to make then some time in tween coats of varnish.
My Brother and I have always wanted to craft furniture and this piece was our first project. We took our time and really payed attention to details. We're pretty proud of how it turned out. It was a challenge but a whole lot of fun.
Mon, 02/02/2015 - 18:18
Congrats on an awesome first project! It's a very professional looking piece, you did a beautiful job. The stain colors you chose are beautiful!
did a few changes to match the decor of our house but really happy with how it turned out. thanks for the awesome and easy to follow plans. hooks are from dollar tree. top row of hooks are metal hooks wrapped in twine for a more farmhouse look.
Comments
jbayer80
Fri, 03/08/2013 - 14:46
Hardware
Nice work!
Can I ask where you got the hardware for the edges? I plan on building this too once the time is right.
In reply to Hardware by jbayer80
erik99703
Fri, 03/08/2013 - 14:51
Hey jbayer80 - you could just
Hey jbayer80 - you could just go to your local orange or other hardware store and get braces and paint them whatever color you like. It would probably be a cheaper alternative to buying painted decorator hardware. Here is a link to some on orange.
http://www.homedepot.com/p/t/202033908?catalogId=10053&langId=-1&storeI…
Erik
Court_Jared
Sat, 03/09/2013 - 09:52
Hardware
Erik is exactly right...we just bought silver metal brackets and spray painted them black (it took two coats to cover them completely).