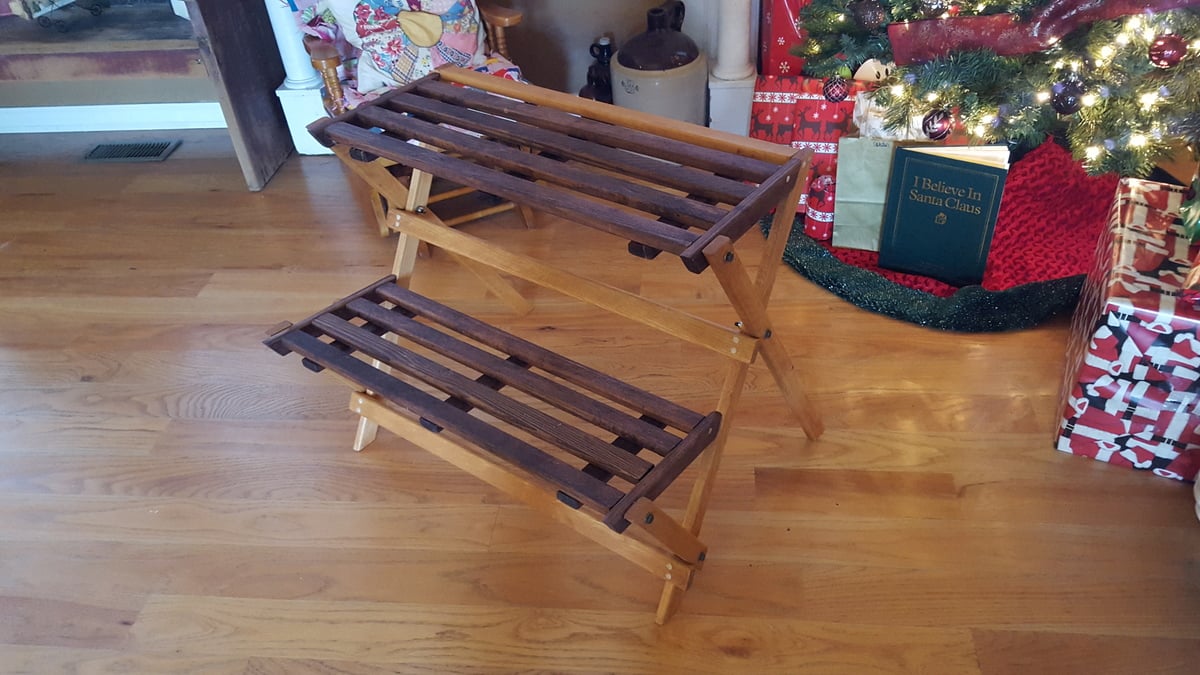
Christmas Stocking stand
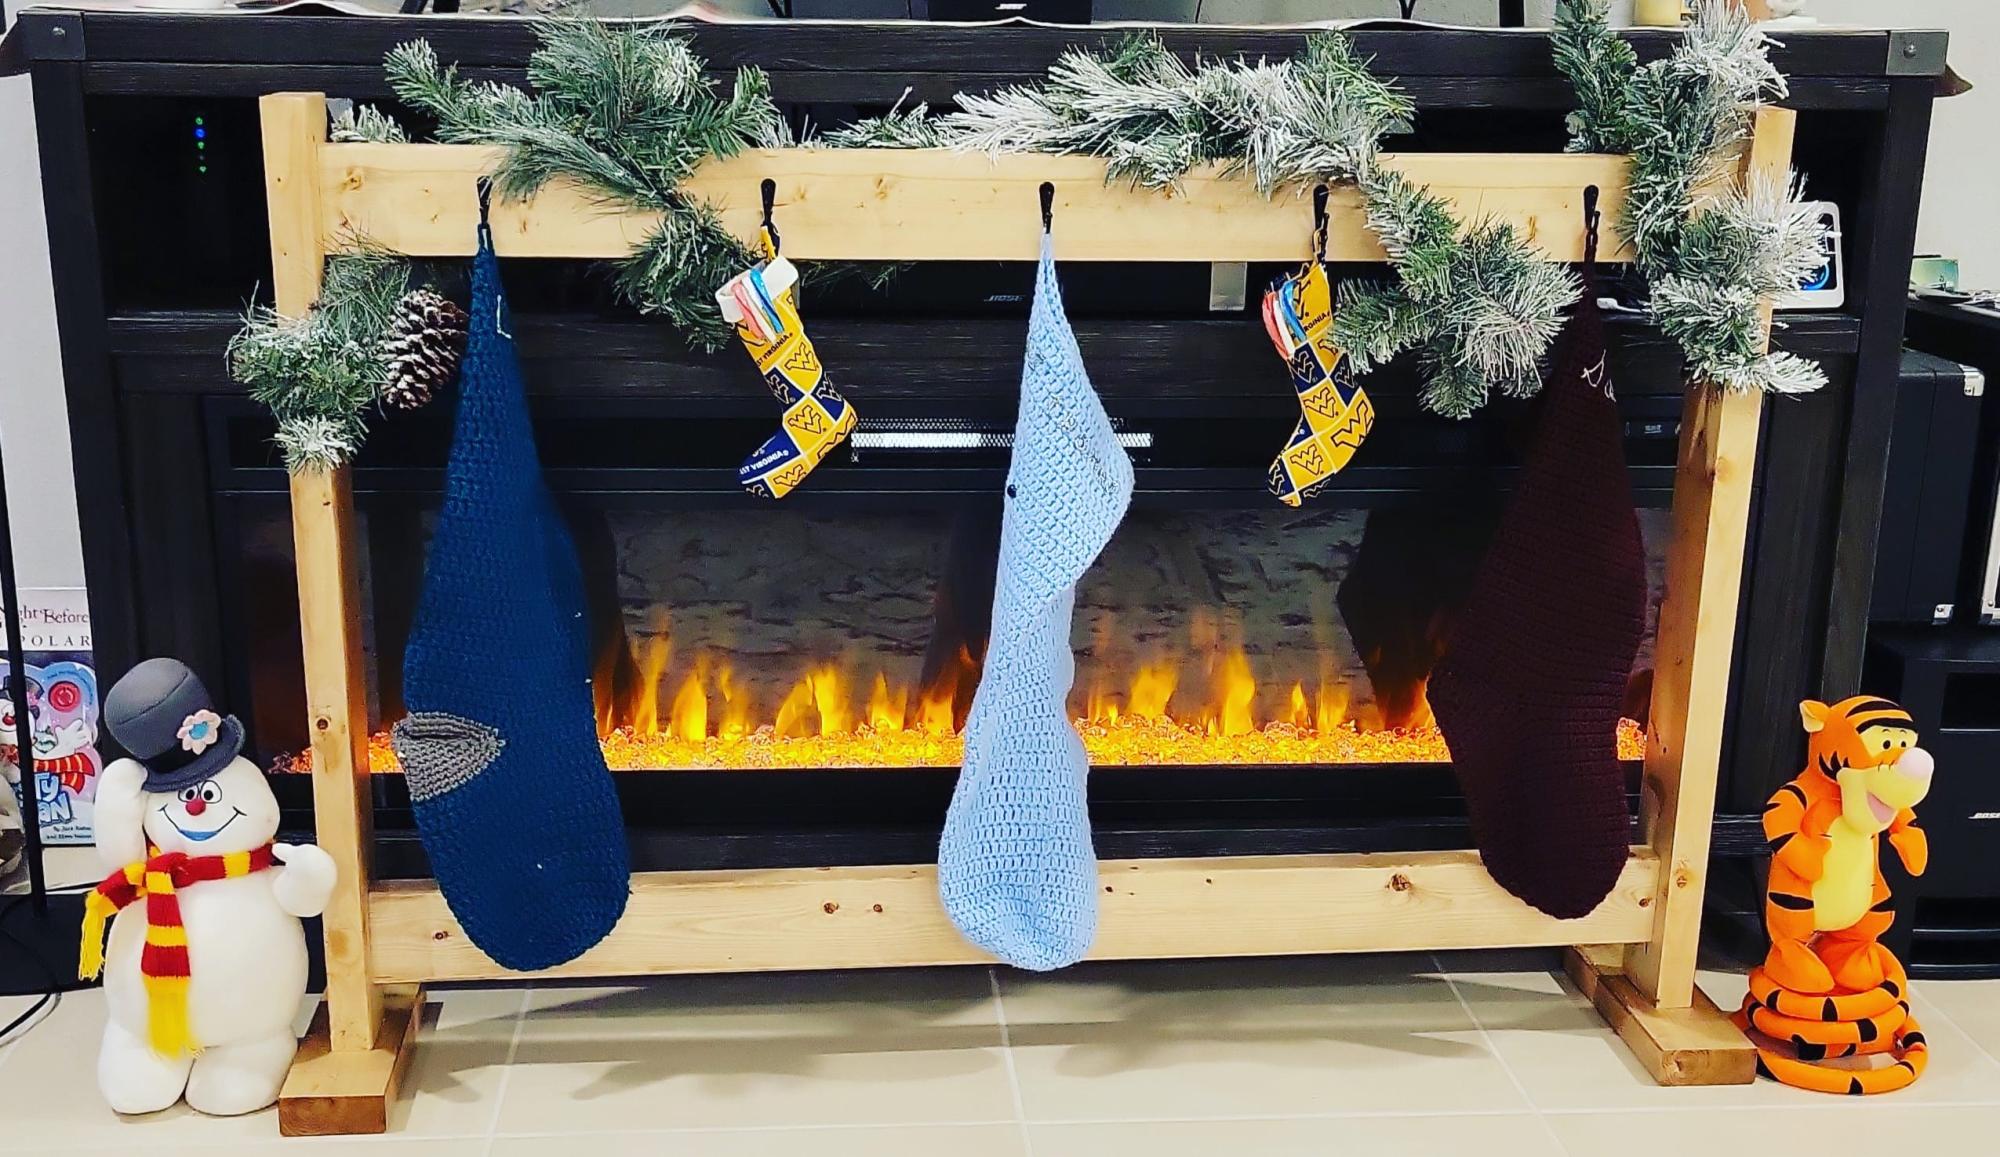
I enjoyed making this. The kids love it and it goes great in front of the fireplace.
#Todays_Spare_Time
Built from Plan(s)
I enjoyed making this. The kids love it and it goes great in front of the fireplace.
#Todays_Spare_Time
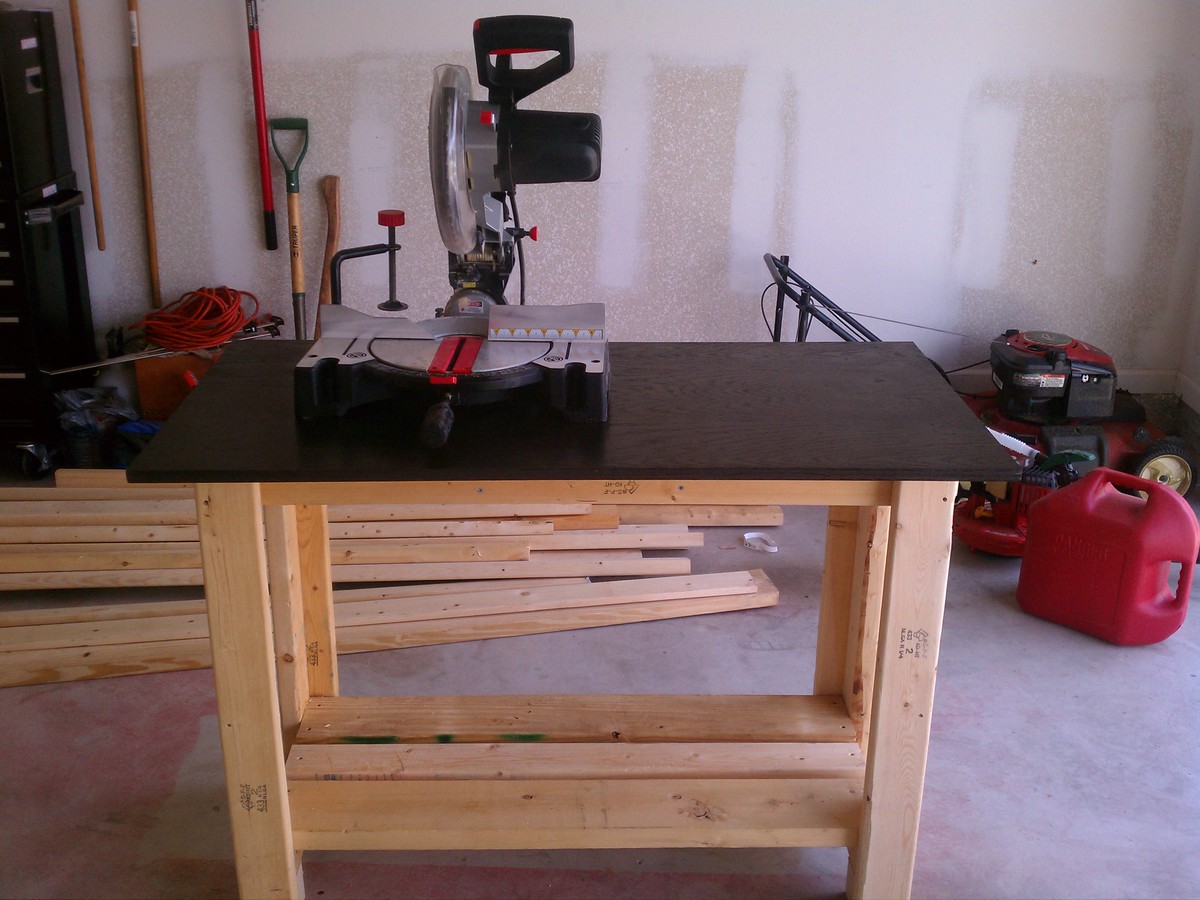
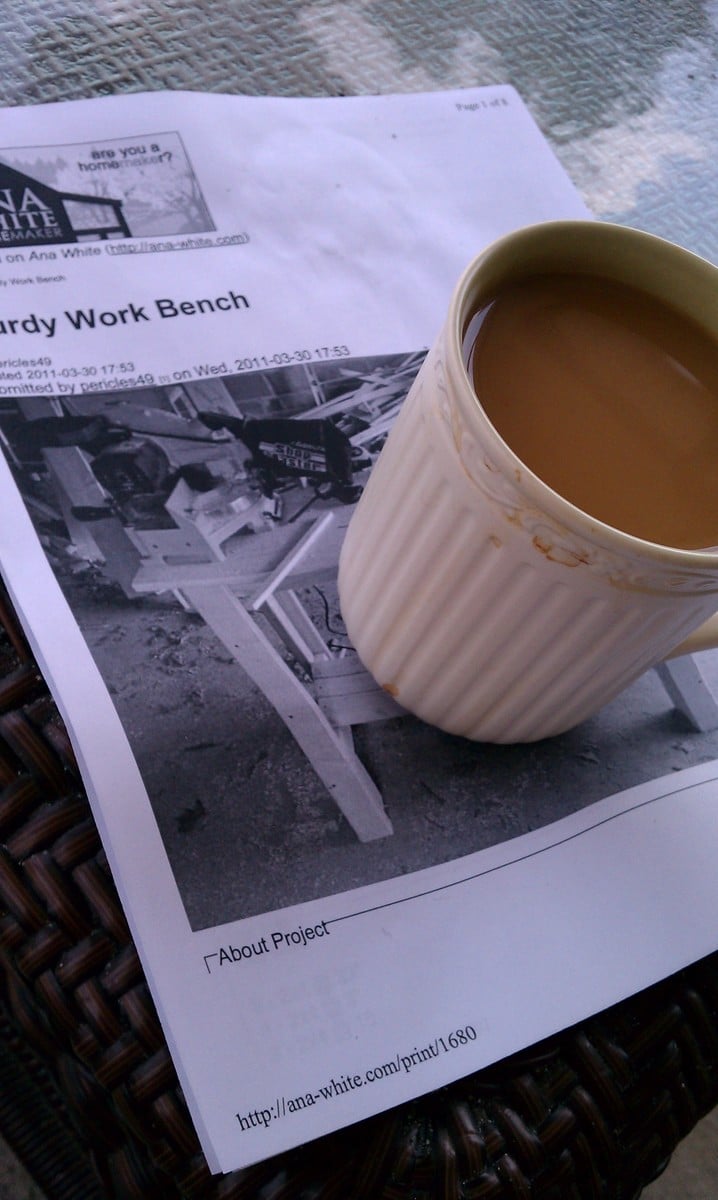
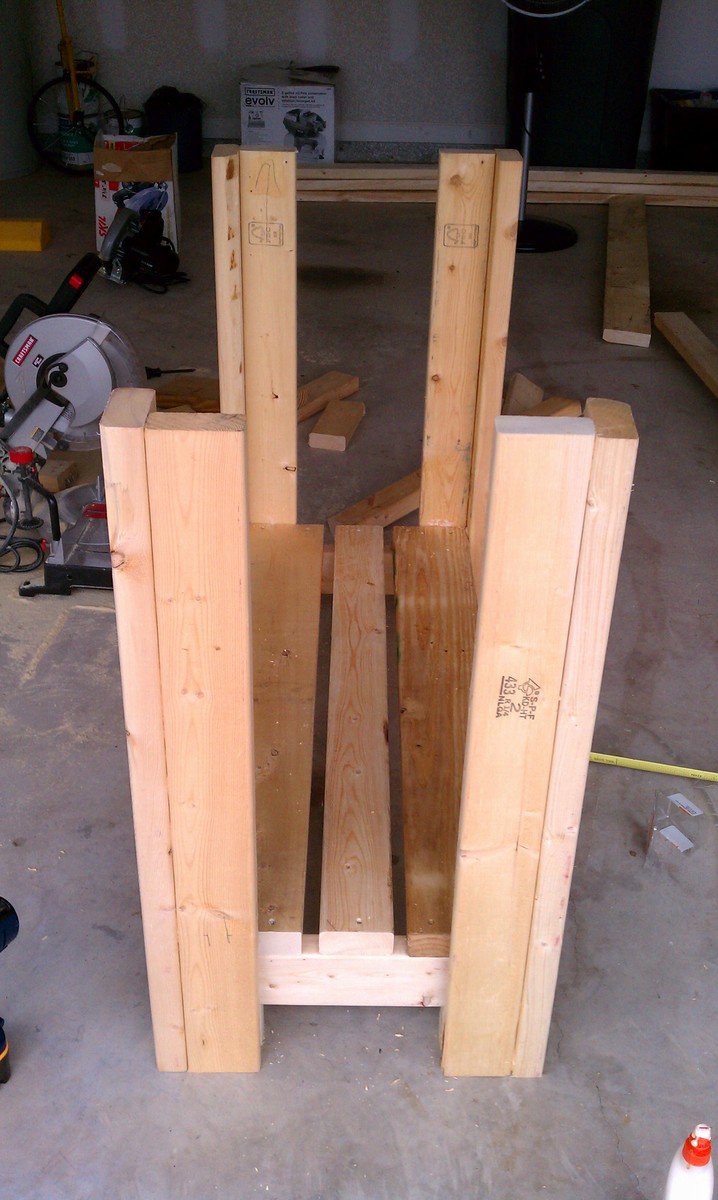
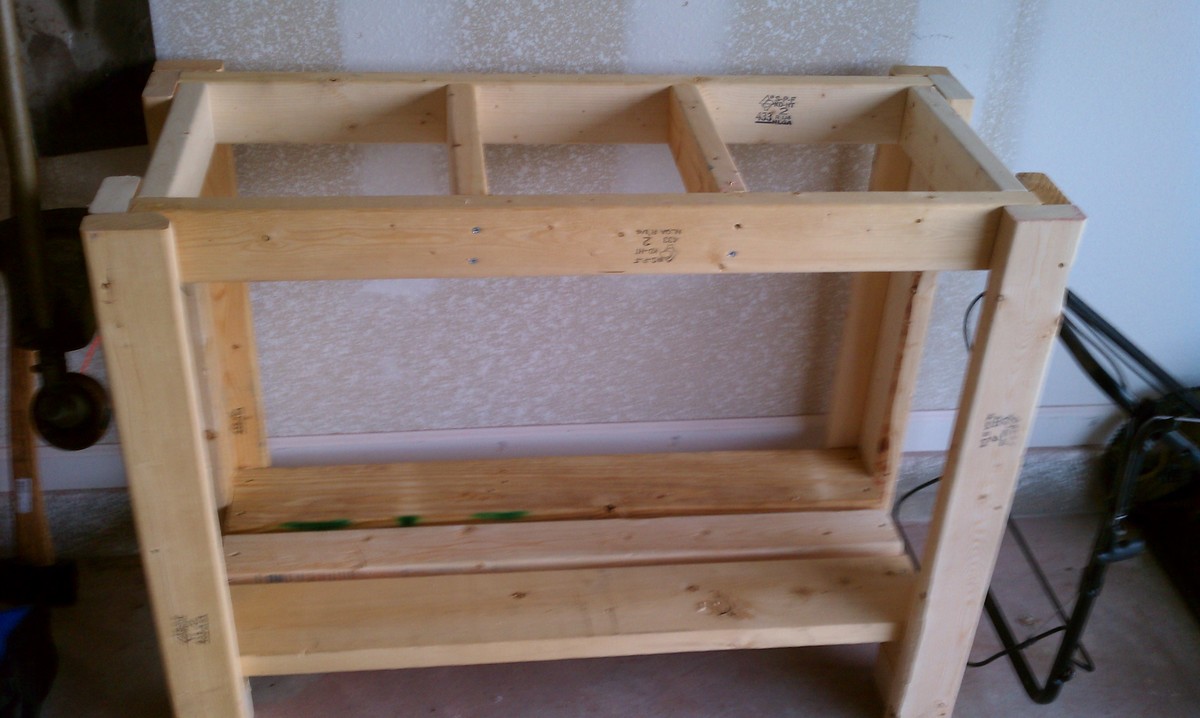
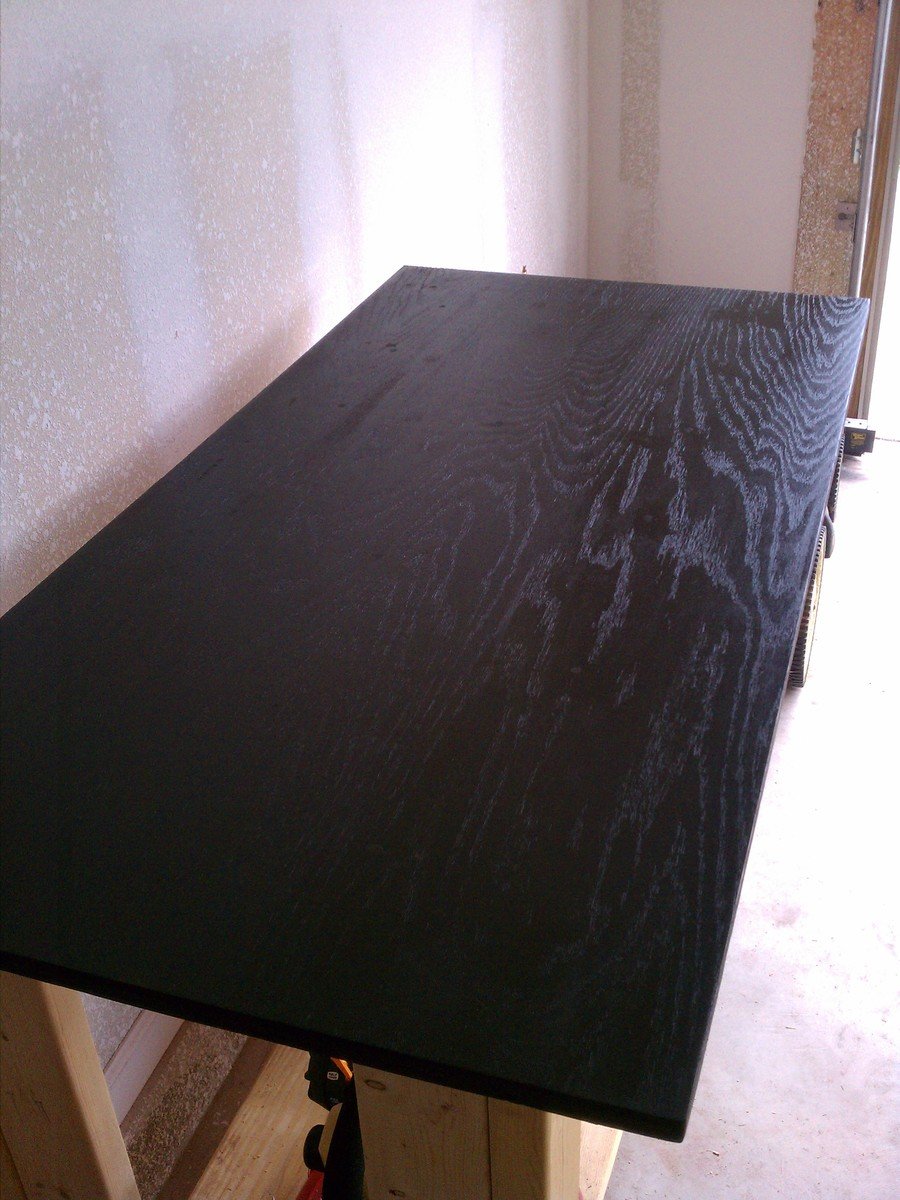
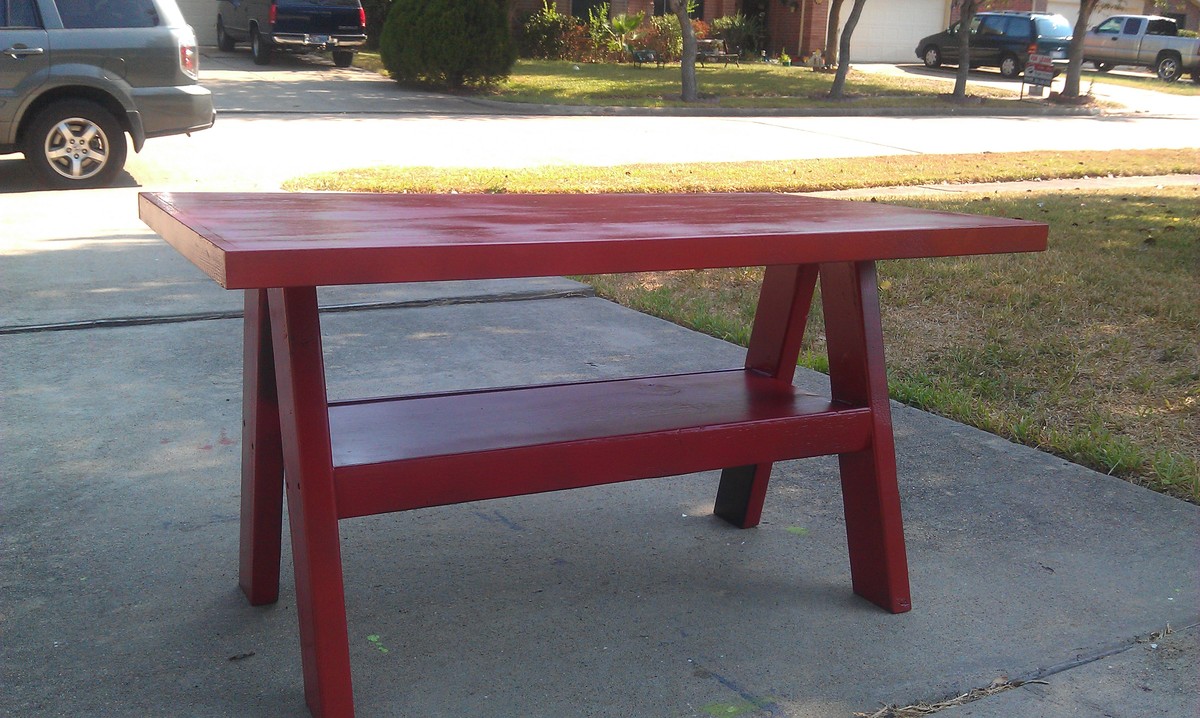
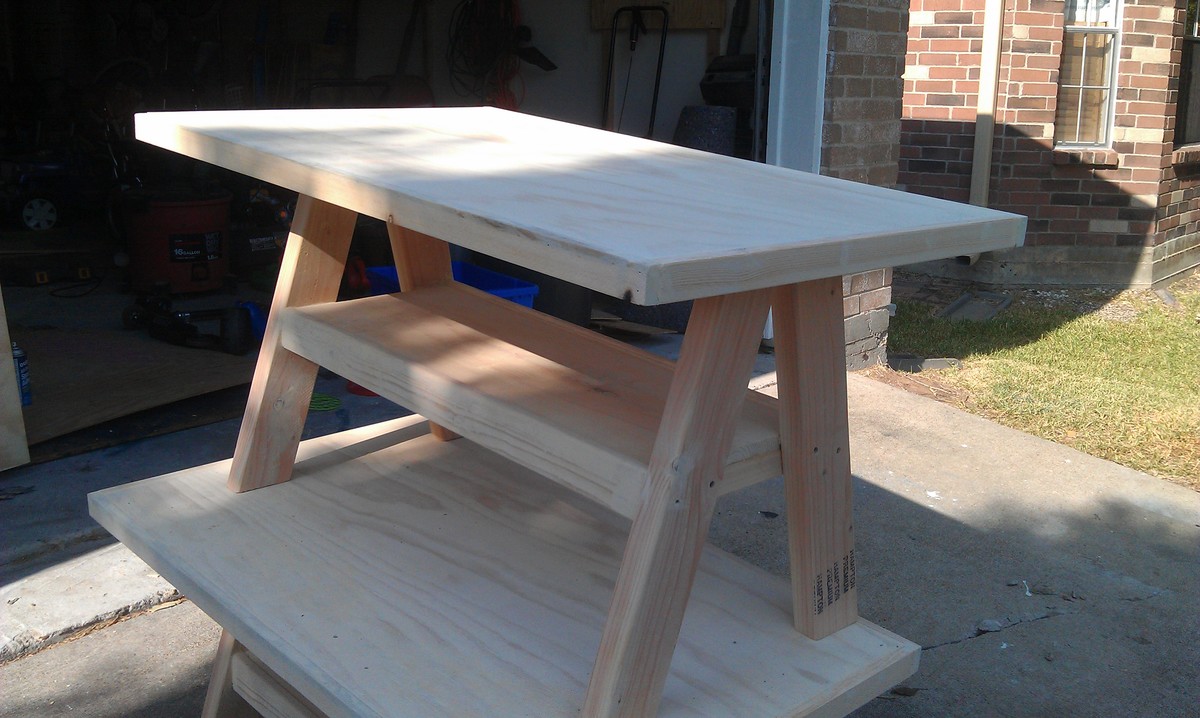
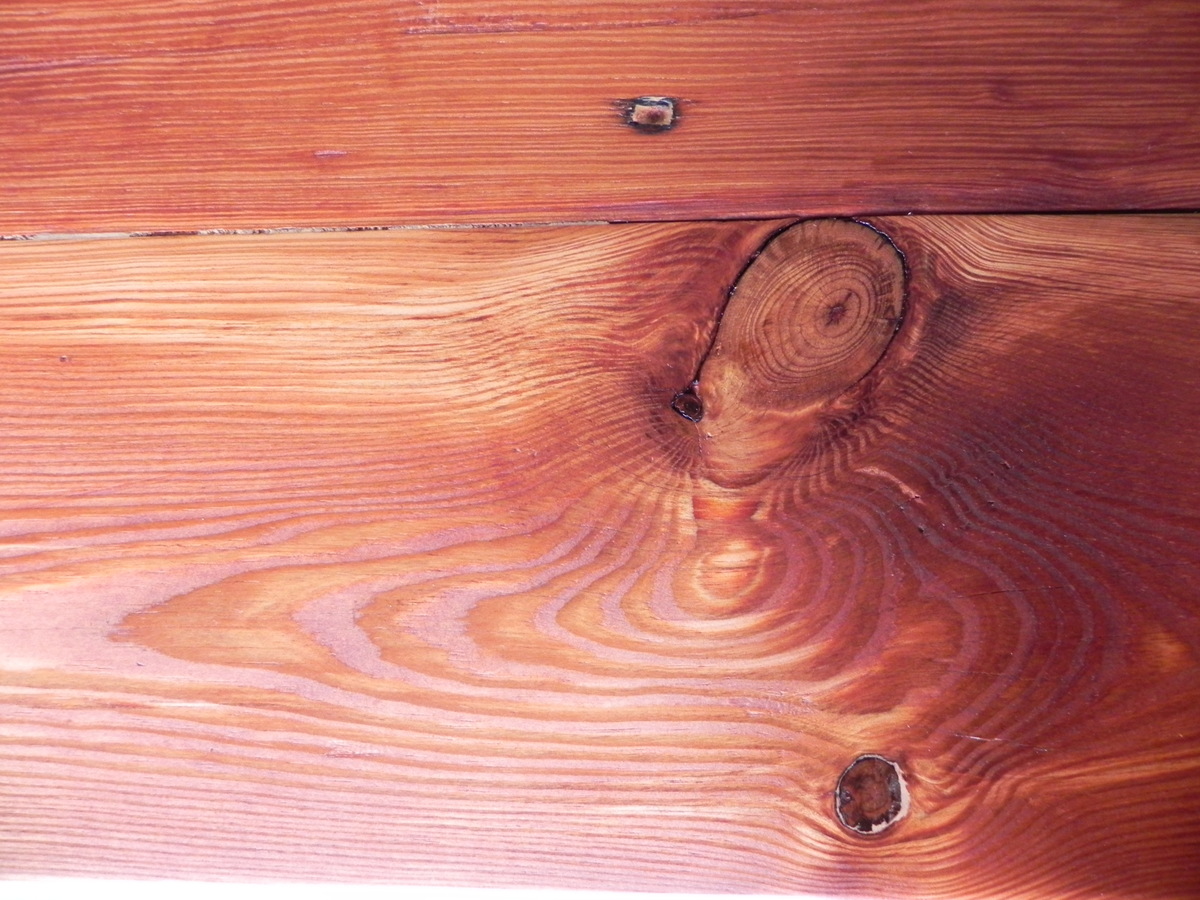
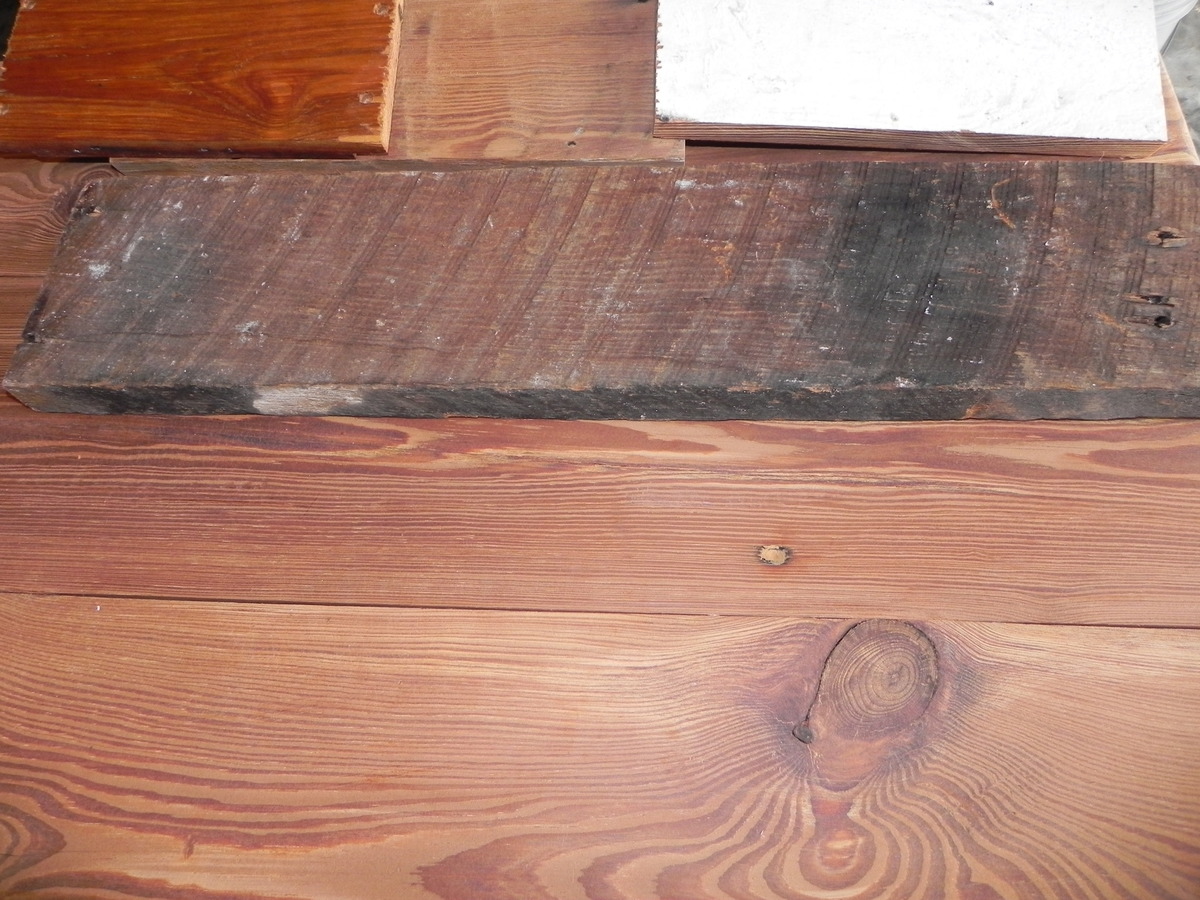
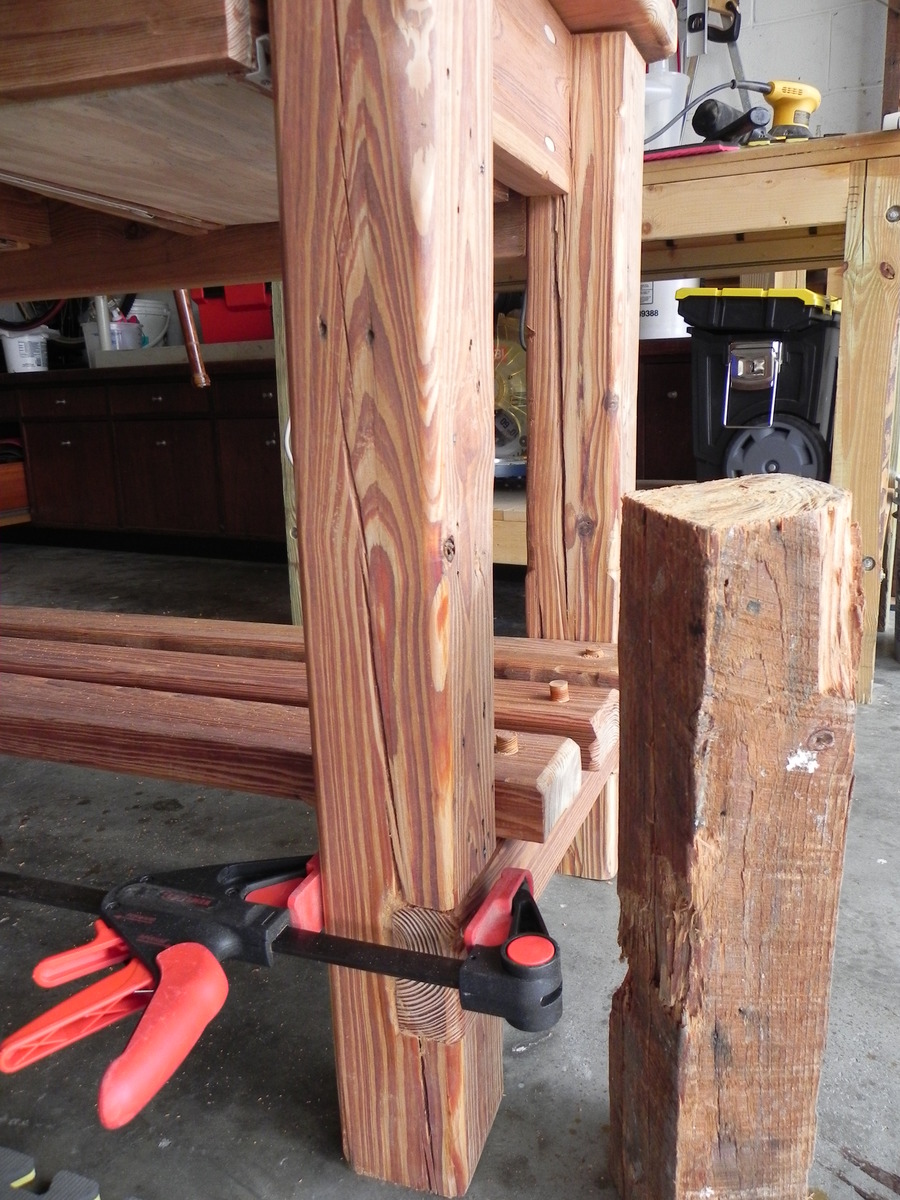
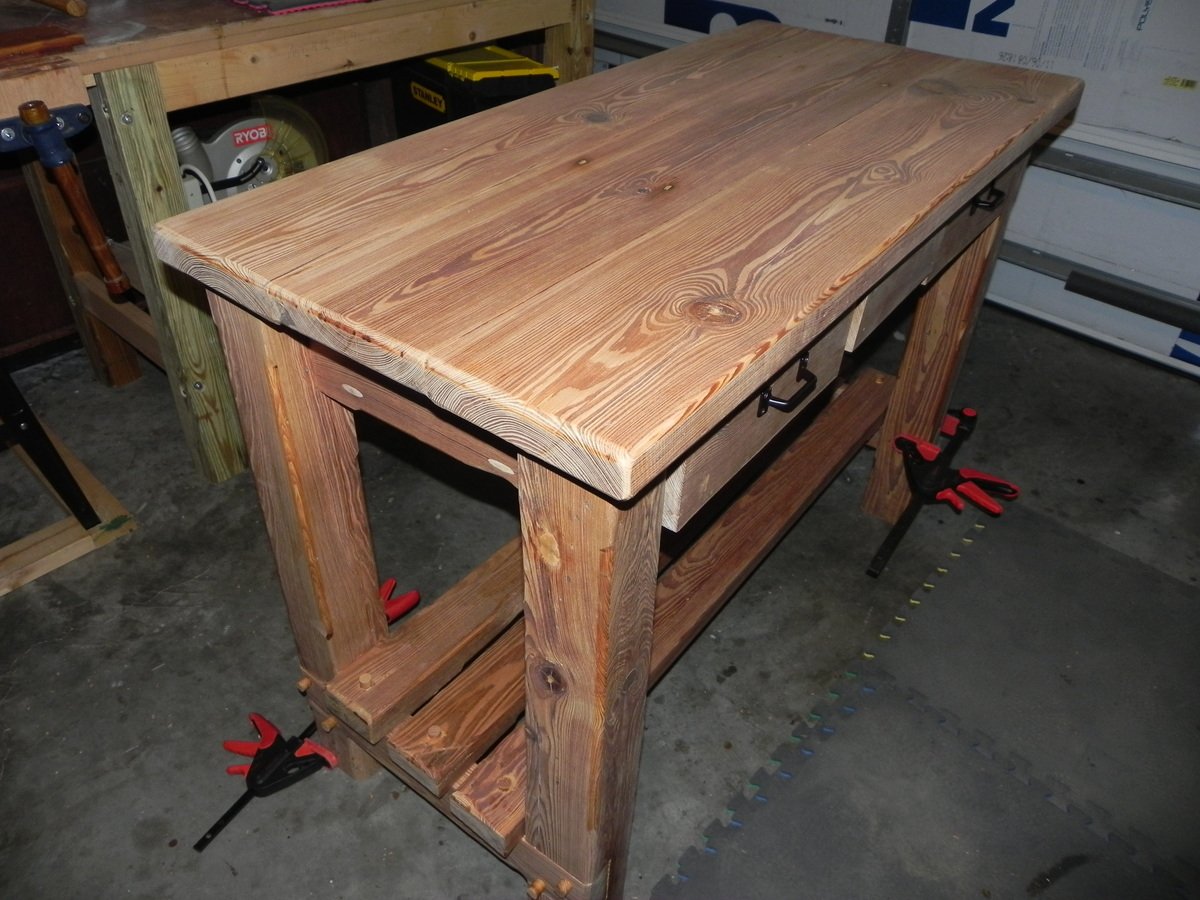
Built two of these workbenches using 2x4's I found in the dumpsters around my neighborhood. Tested out rustoleum stain for the tops. Covered really well in just one coat.

Fri, 09/09/2011 - 20:45
Looks great, I like the look of the dark top, but it might make it harder to see small objects.
Tue, 02/21/2012 - 18:52
I love how you took it one step further and stained the top. So beautiful!
Mon, 05/06/2013 - 06:49
Wow. Thank you for those unbelievably kind words. I am not an architect though. My main profession was a service manager and now I'm unemployed and partially disabled. I just love to be creative and use my hands. I also love photography. I did all my work on nights and weekends. Again, thank you for the kind words.
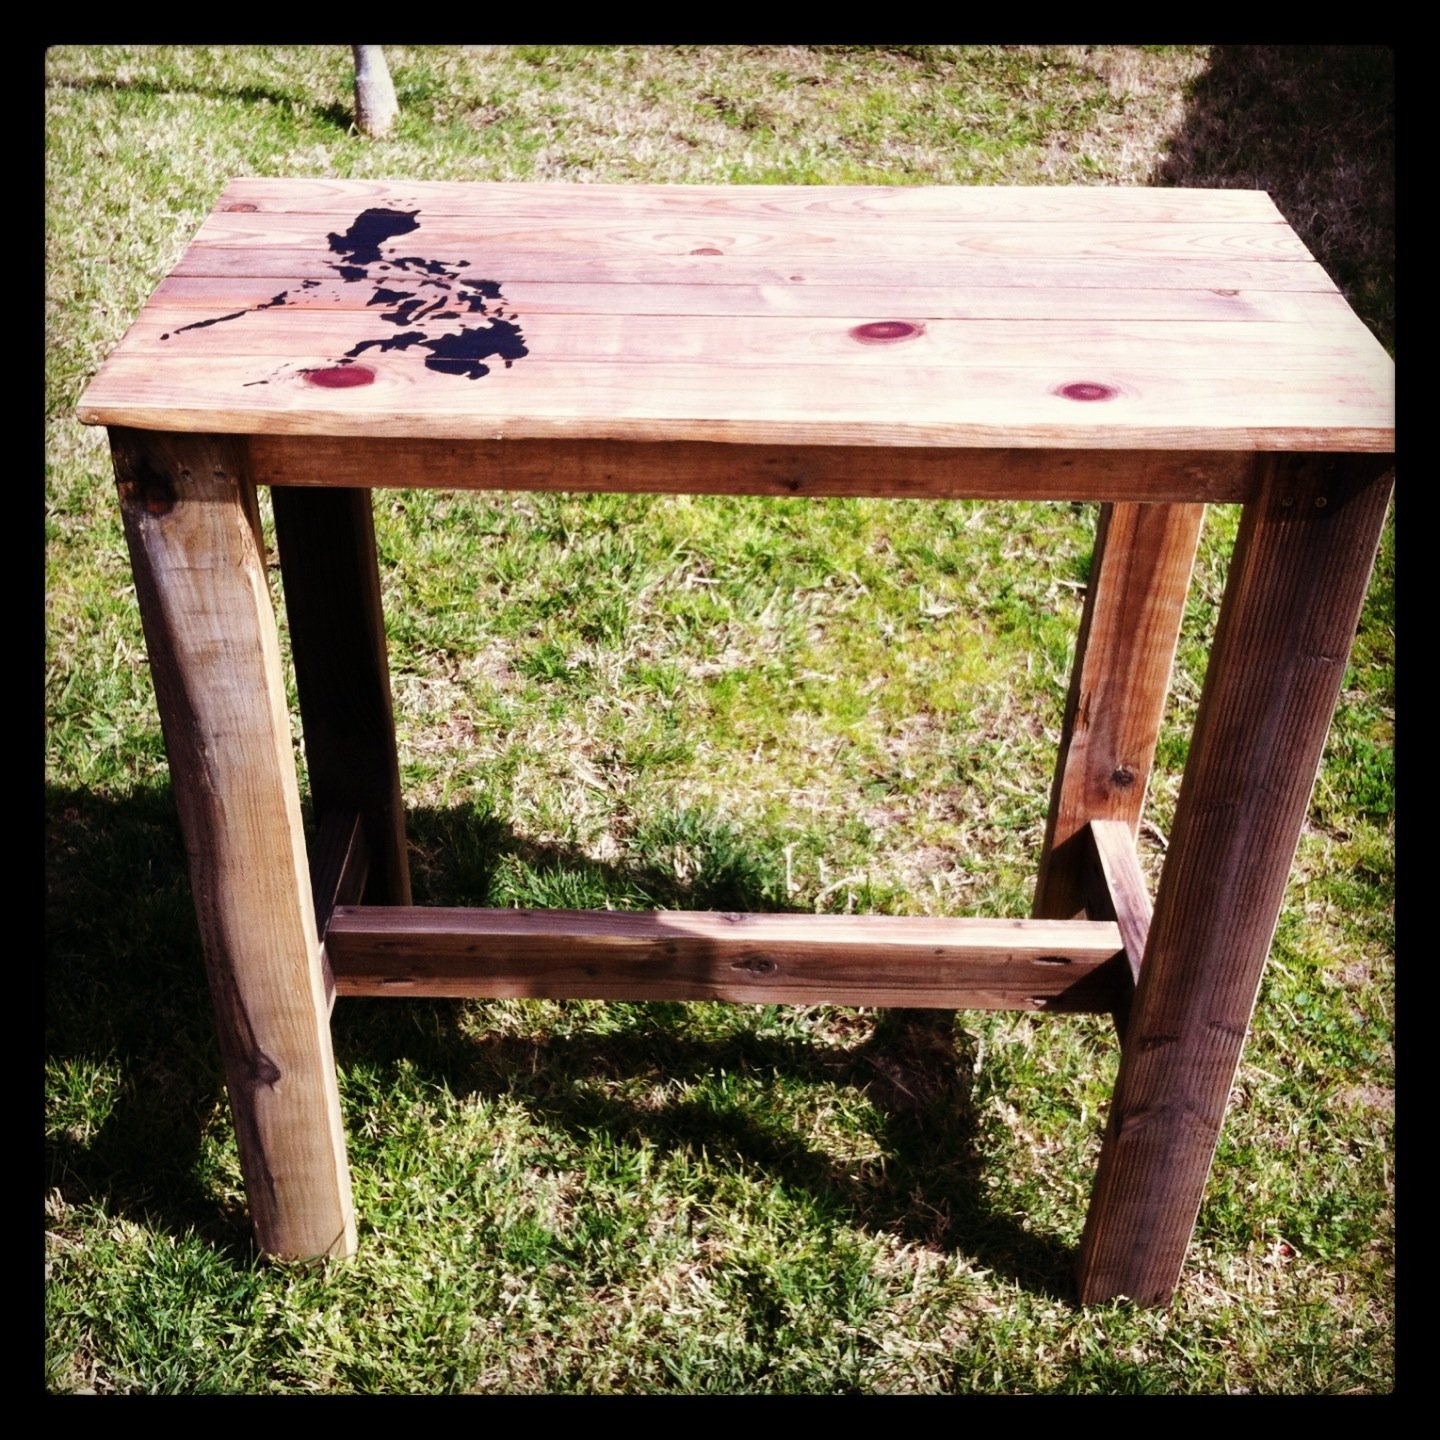
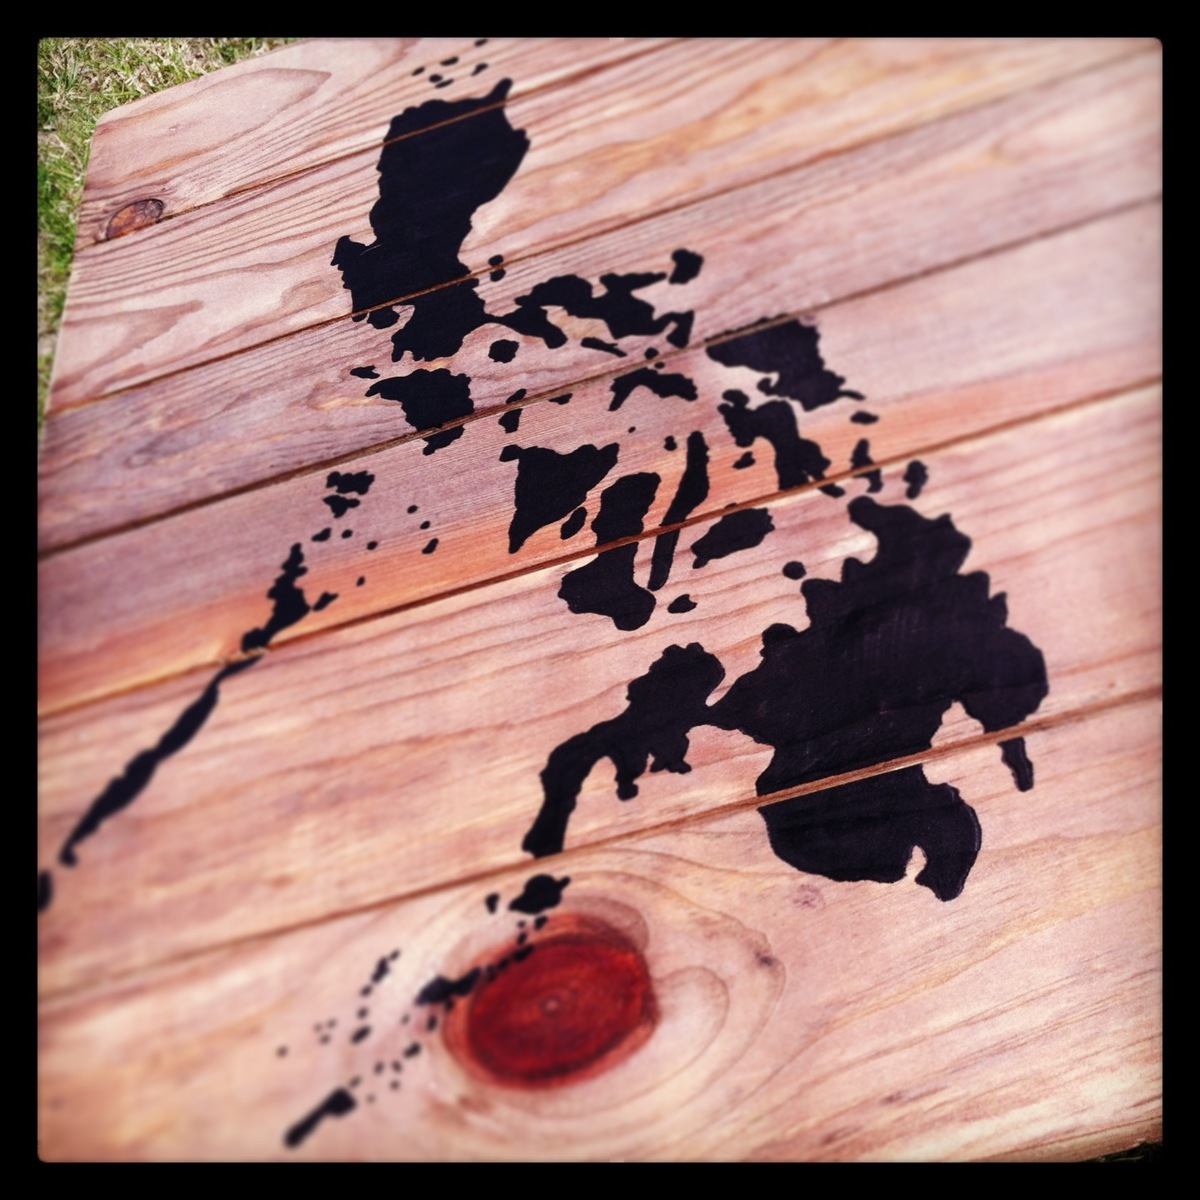
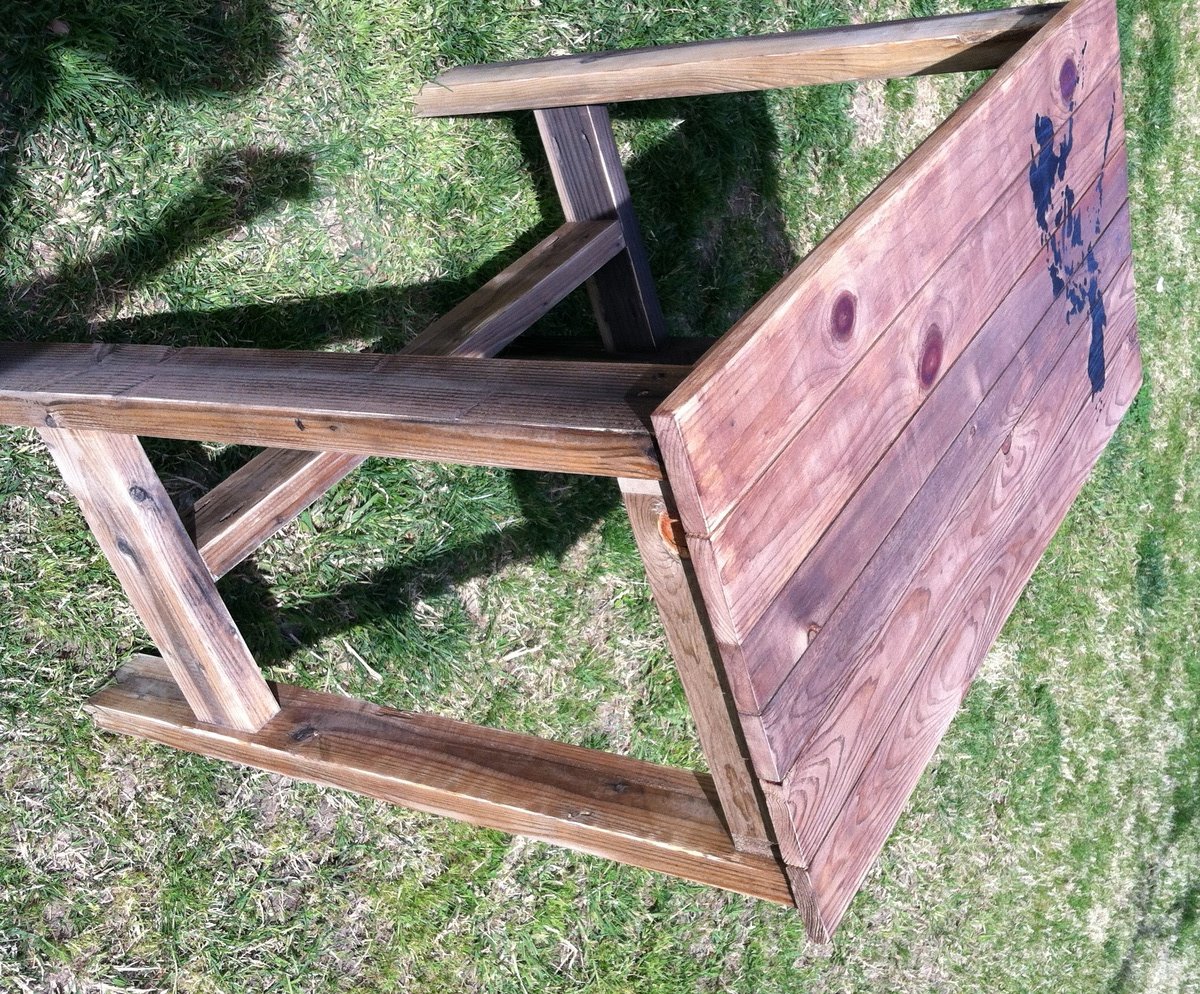
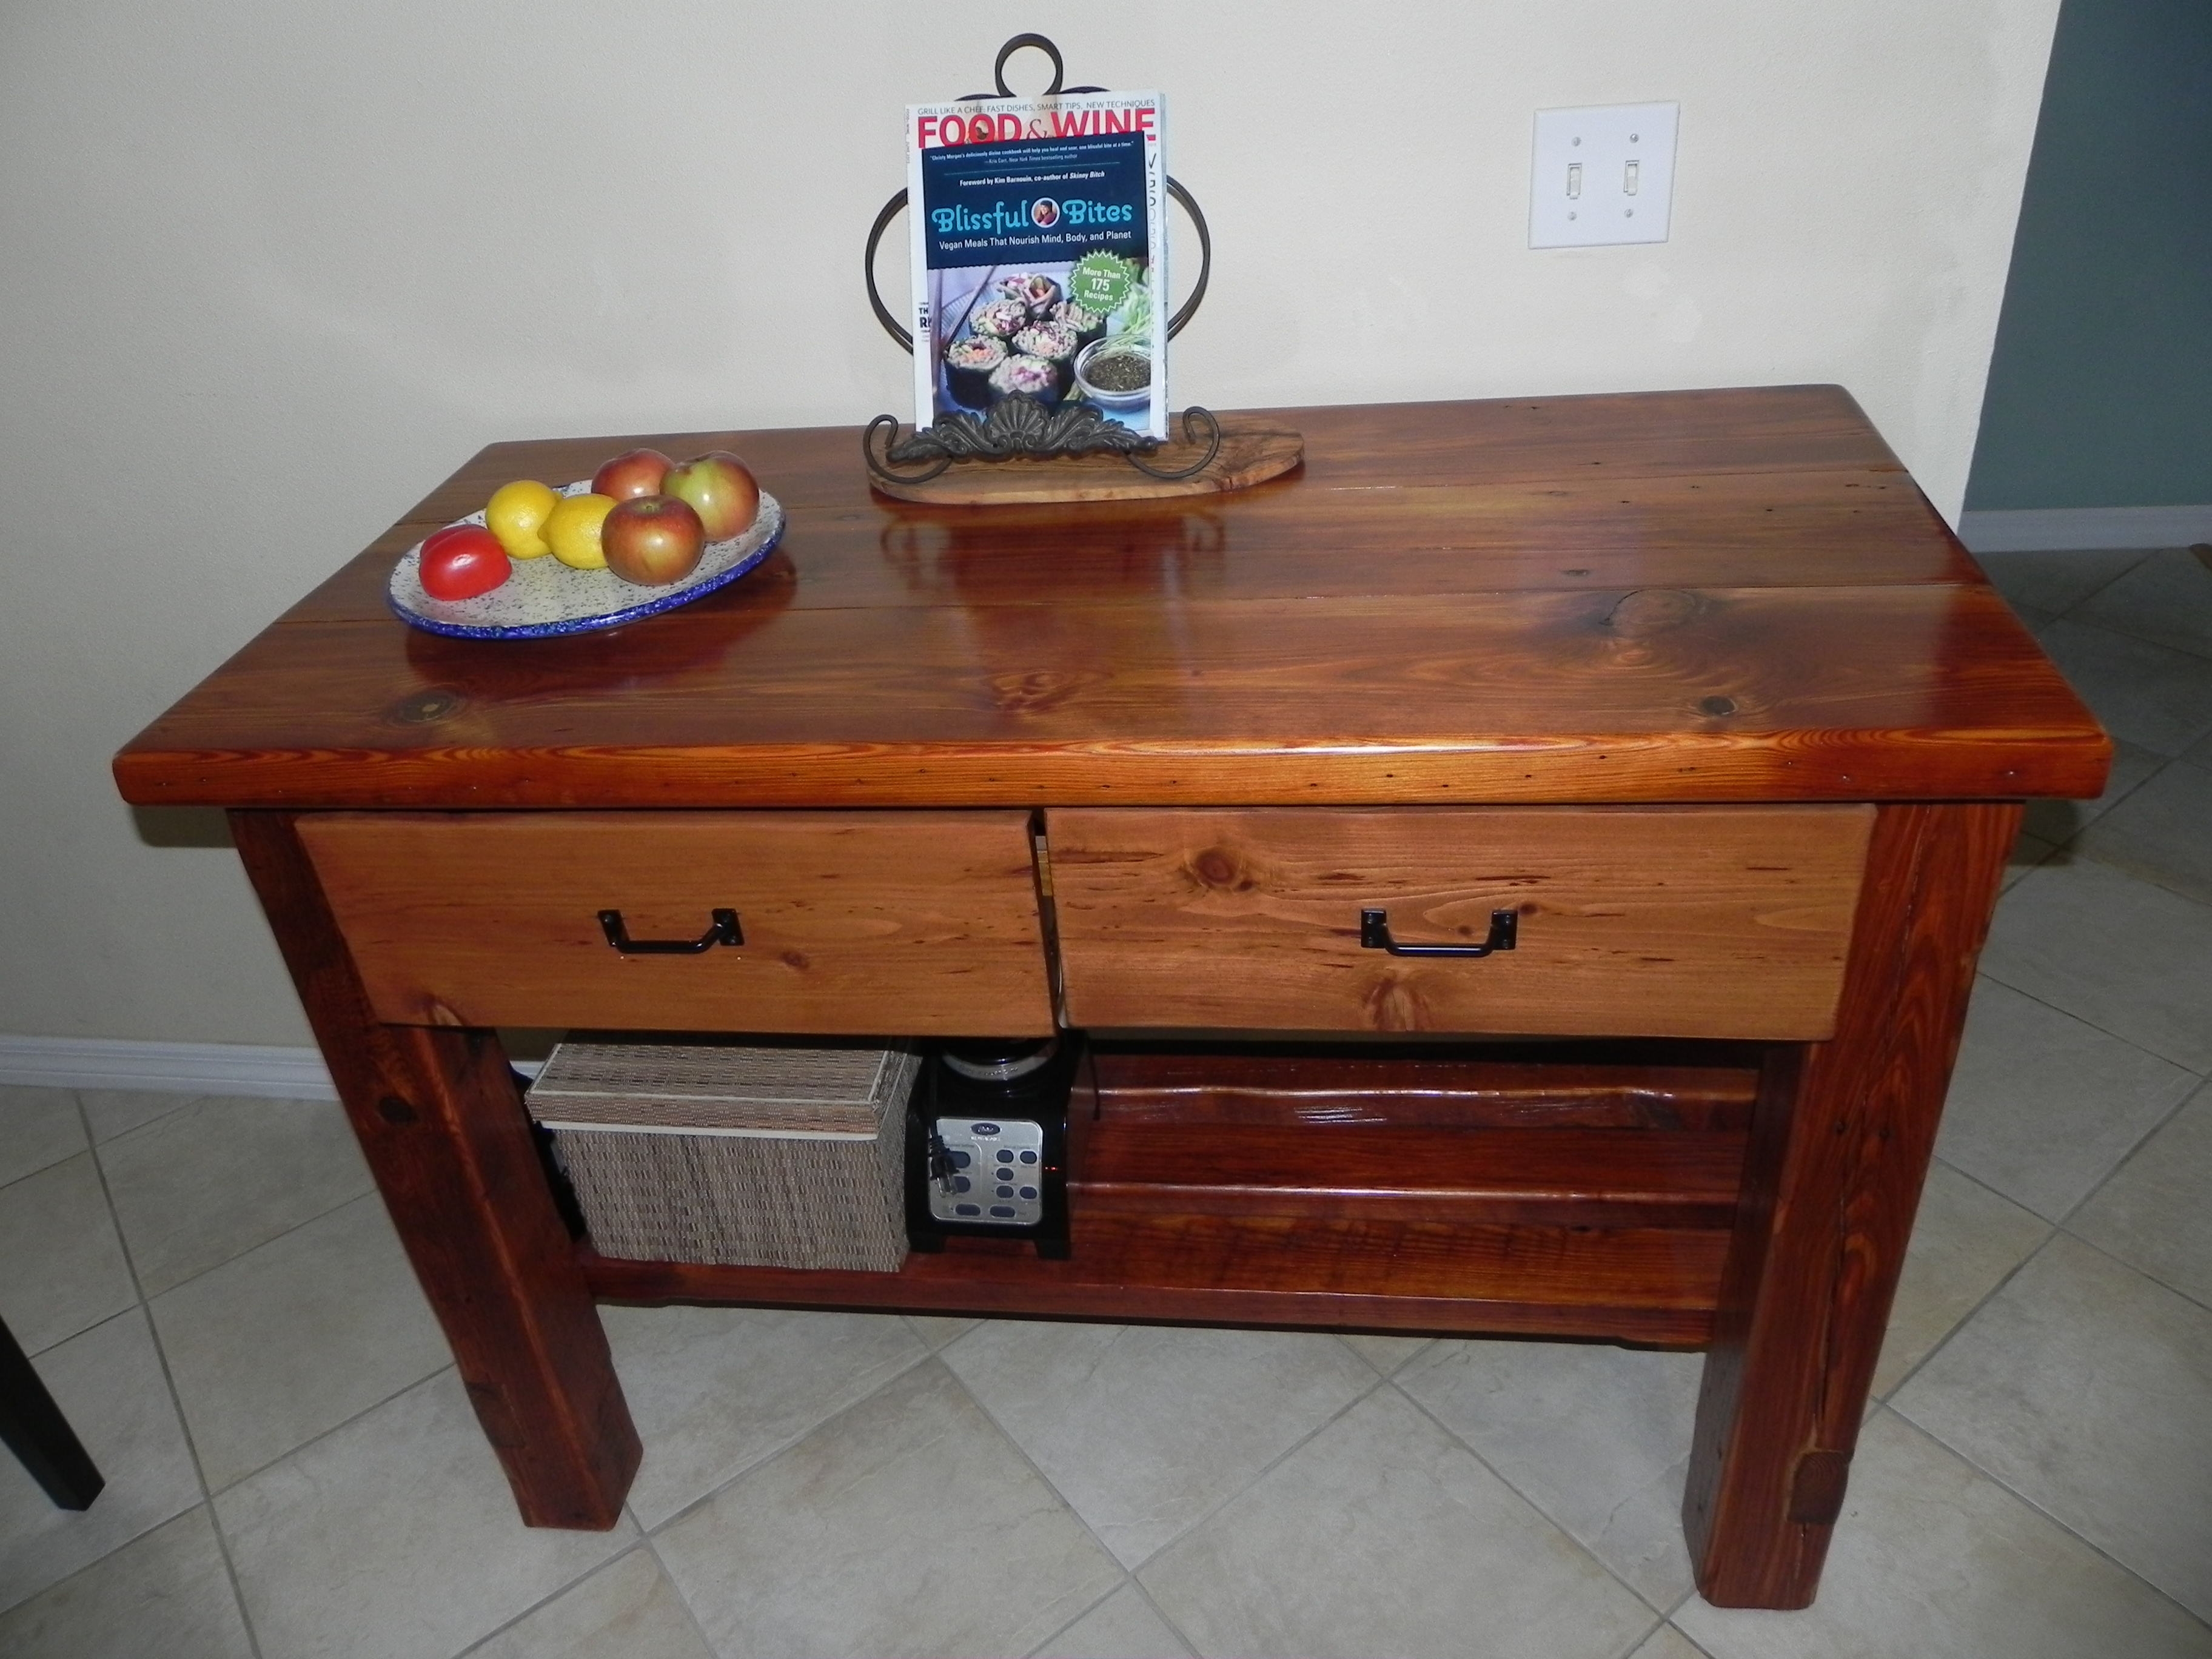
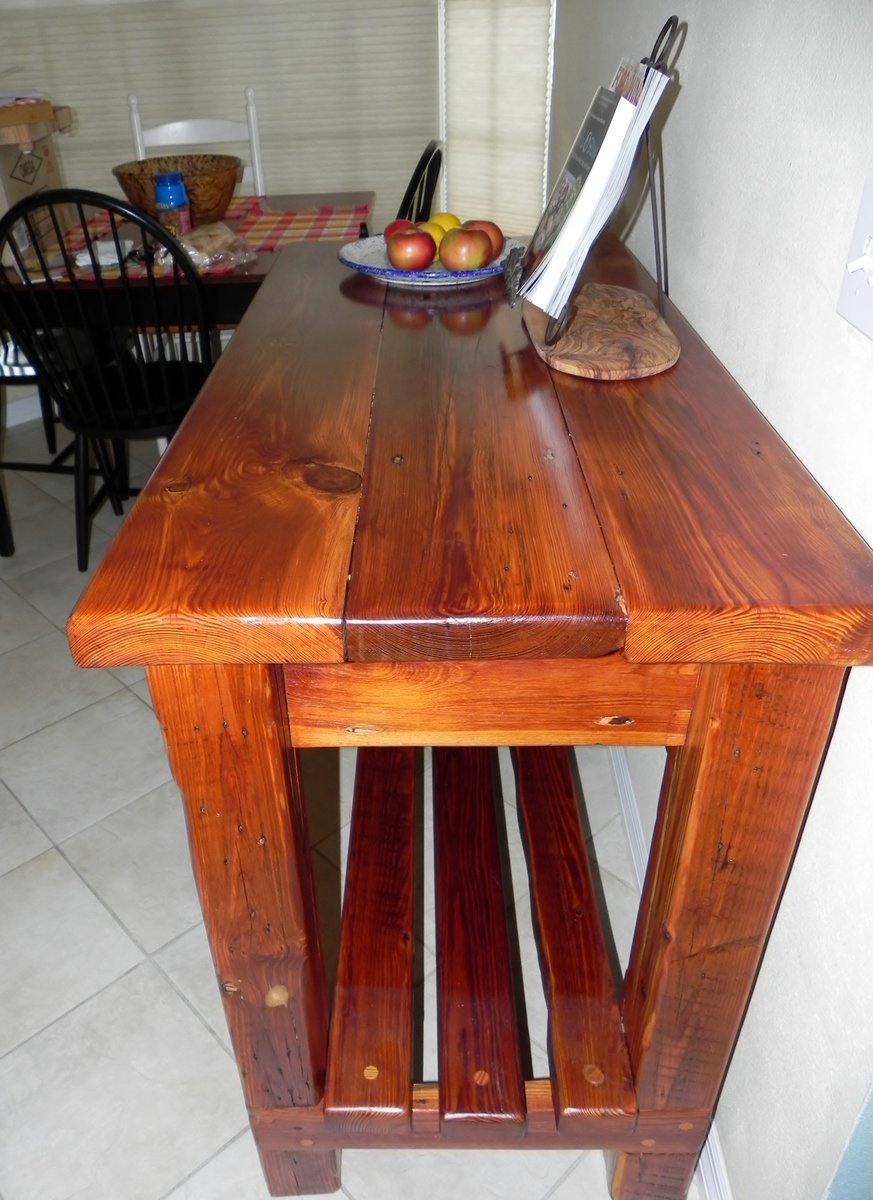
I call this the fish fry table because I built it for my mom to fry her fish on outside rather than in the kitchen. :) I did the old barn wood finish on it (vinegar and steel wool) and used a sharpie to draw the Philippine Islands on it. Conveniently, there was even a knot in the wood to emulate a tropical storm. Then sealed it with a clear gloss poly.
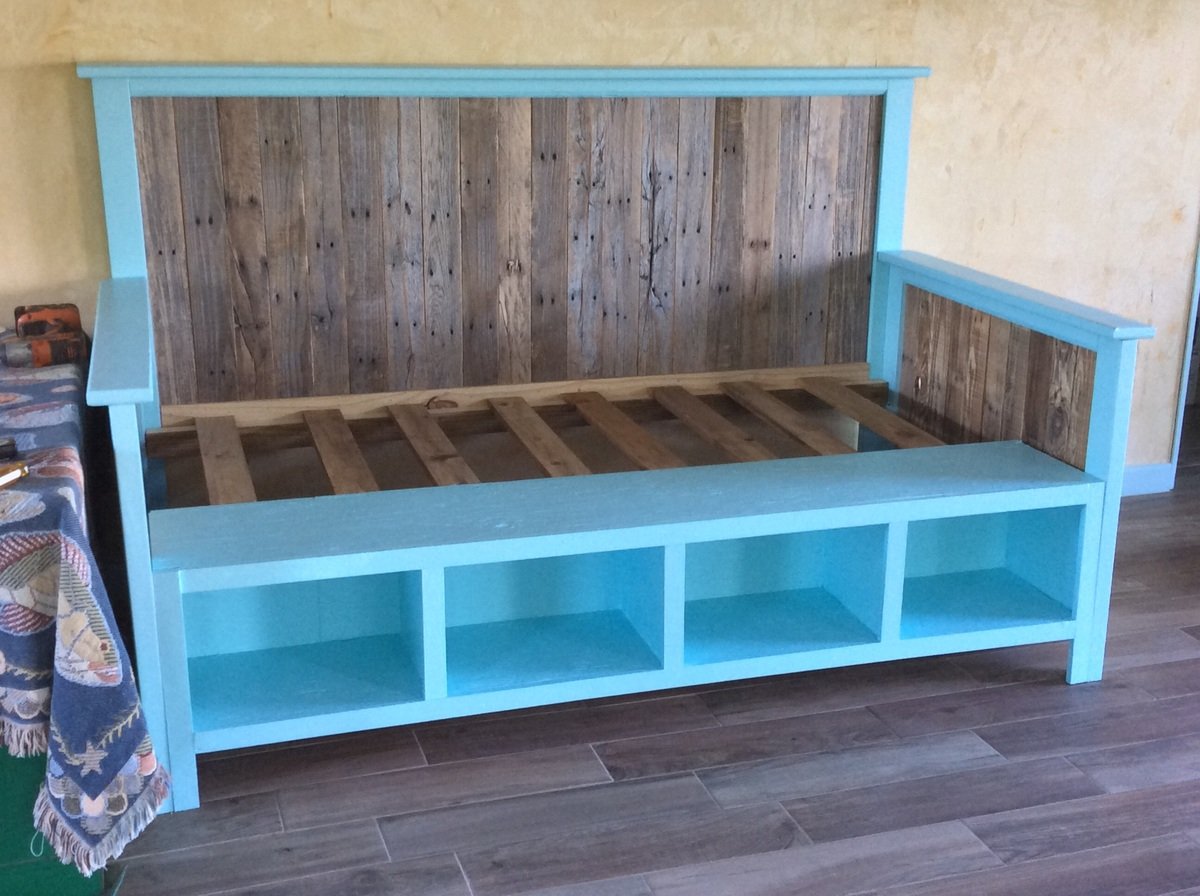
I used silvered pallet wood that was constructed using the method outlined in the farmhouse bed headboard plans. In addition, I rabbeted the edges of the boards and glued them together. I took a cue from another builder and put the rear "box" legs more towards the center. It's a little high, but I love it! Thanks, Ana!
This was my first woodworking project, so it’s very easy to build. I made a huge Parsons bookcase, anchored to the wall, and affixed plywood and Ikea kitchen cover panels to the front to create a headboard with storage. Thanks, Ana, for the easy plans!
photos sent in via email from Leanne
I was just about to sketchup this plan and Ana beat me to it! YEAH! I made two yesterday afternoon.

Wed, 09/14/2011 - 11:31
Oh yeah! I love this - turned out so well! Please share painted photos too - just too cute for words!
Wed, 09/14/2011 - 11:51
So glad you built this. I totally have it on my to-do list. Looks great!
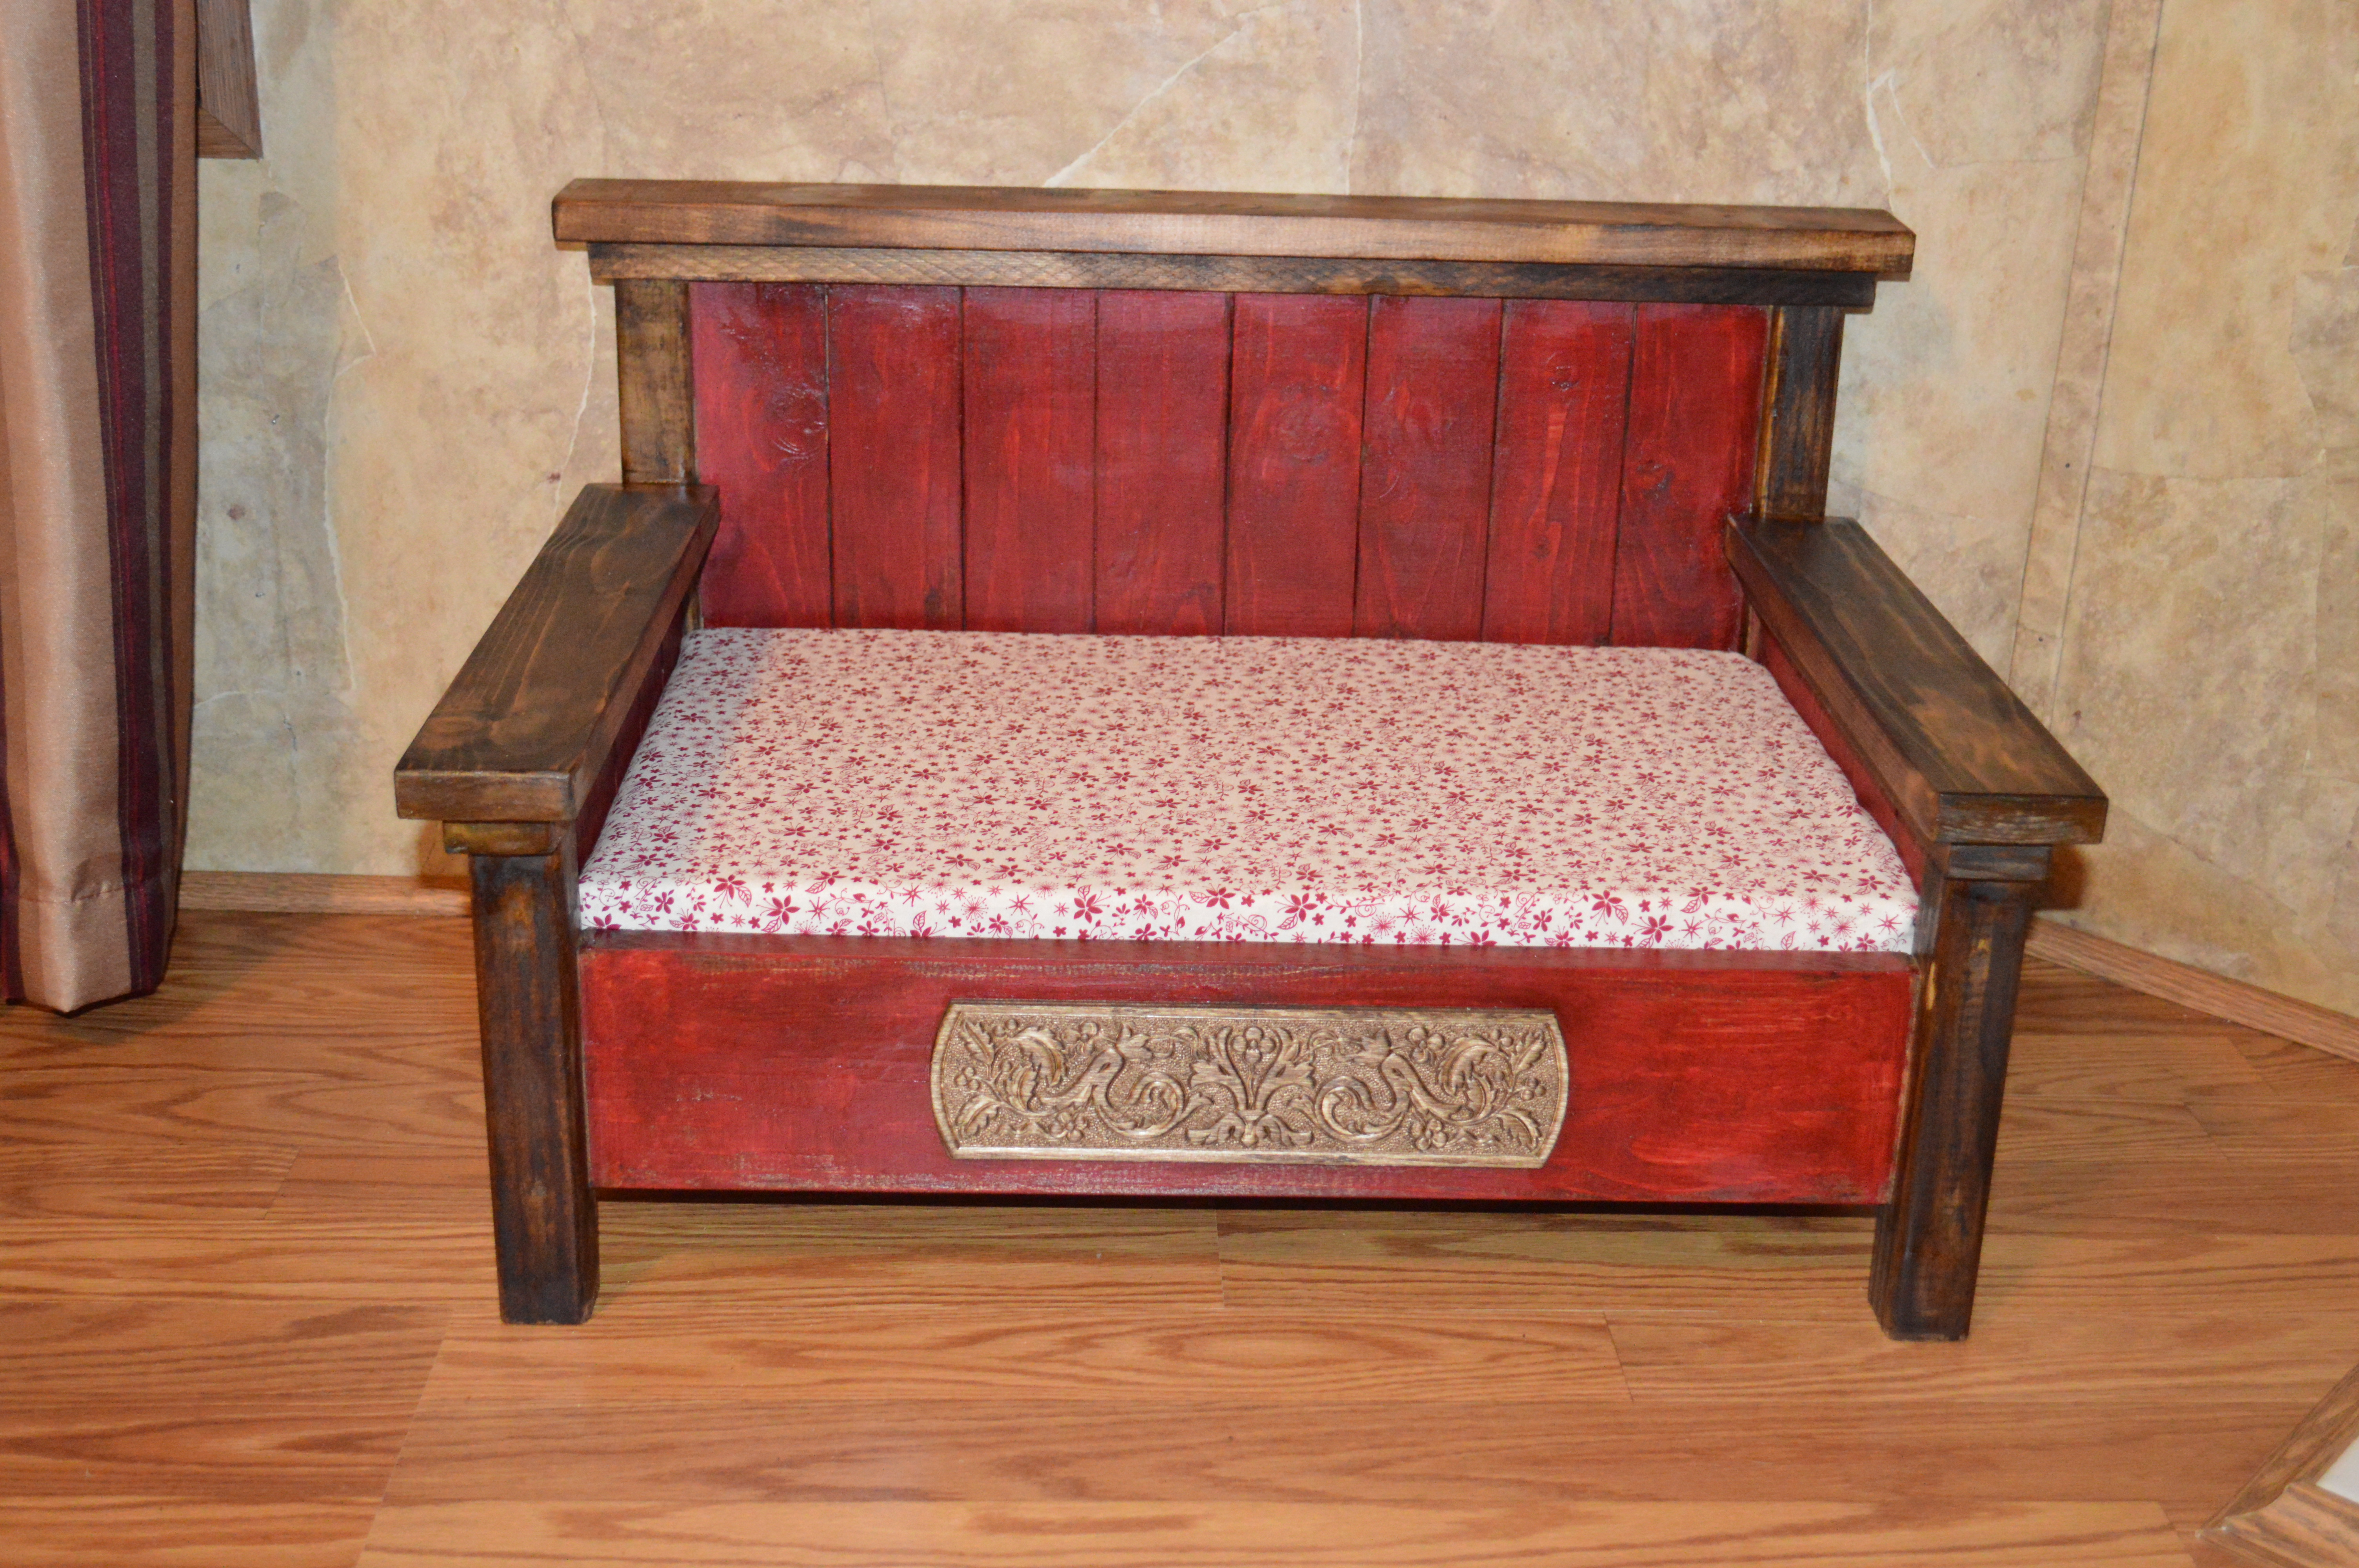
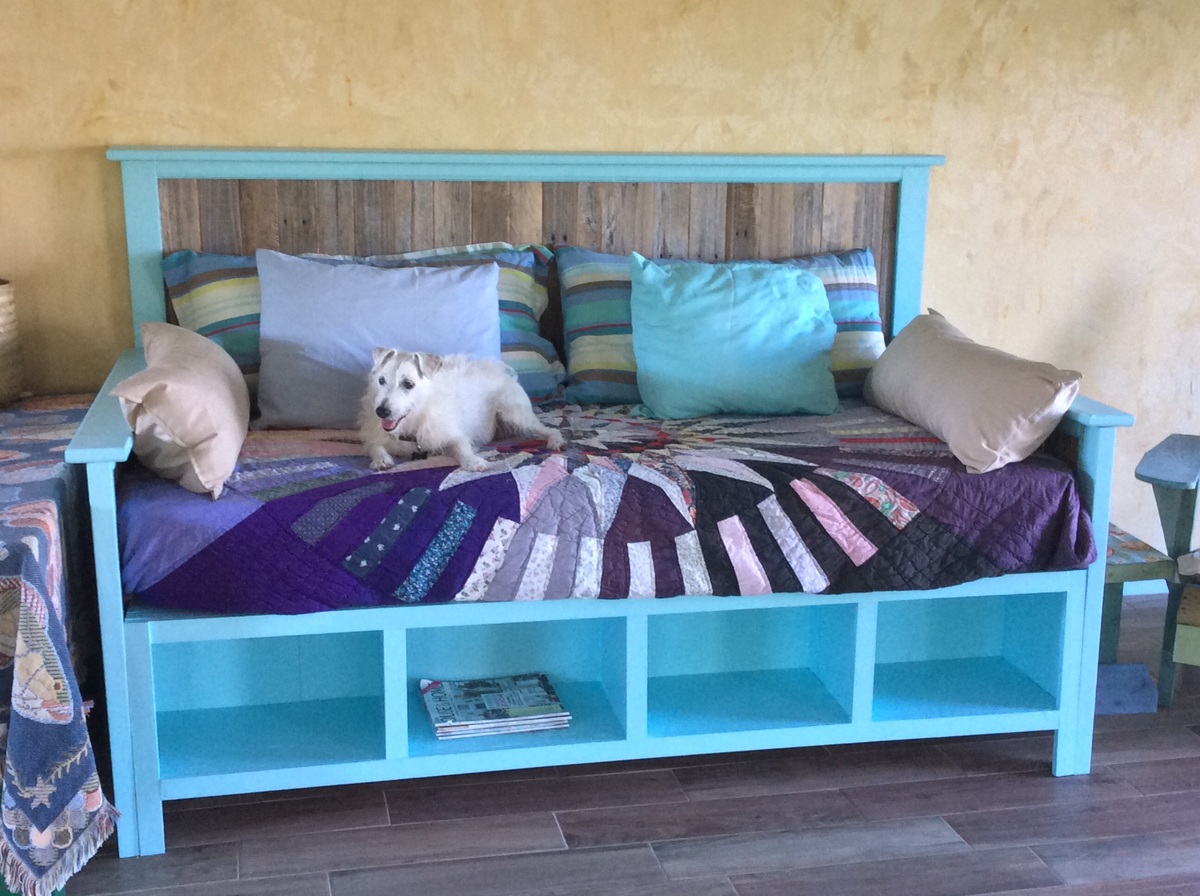
Primitive Doggie Daybed


What a beautiful bench to build. Will build the matching table soon.
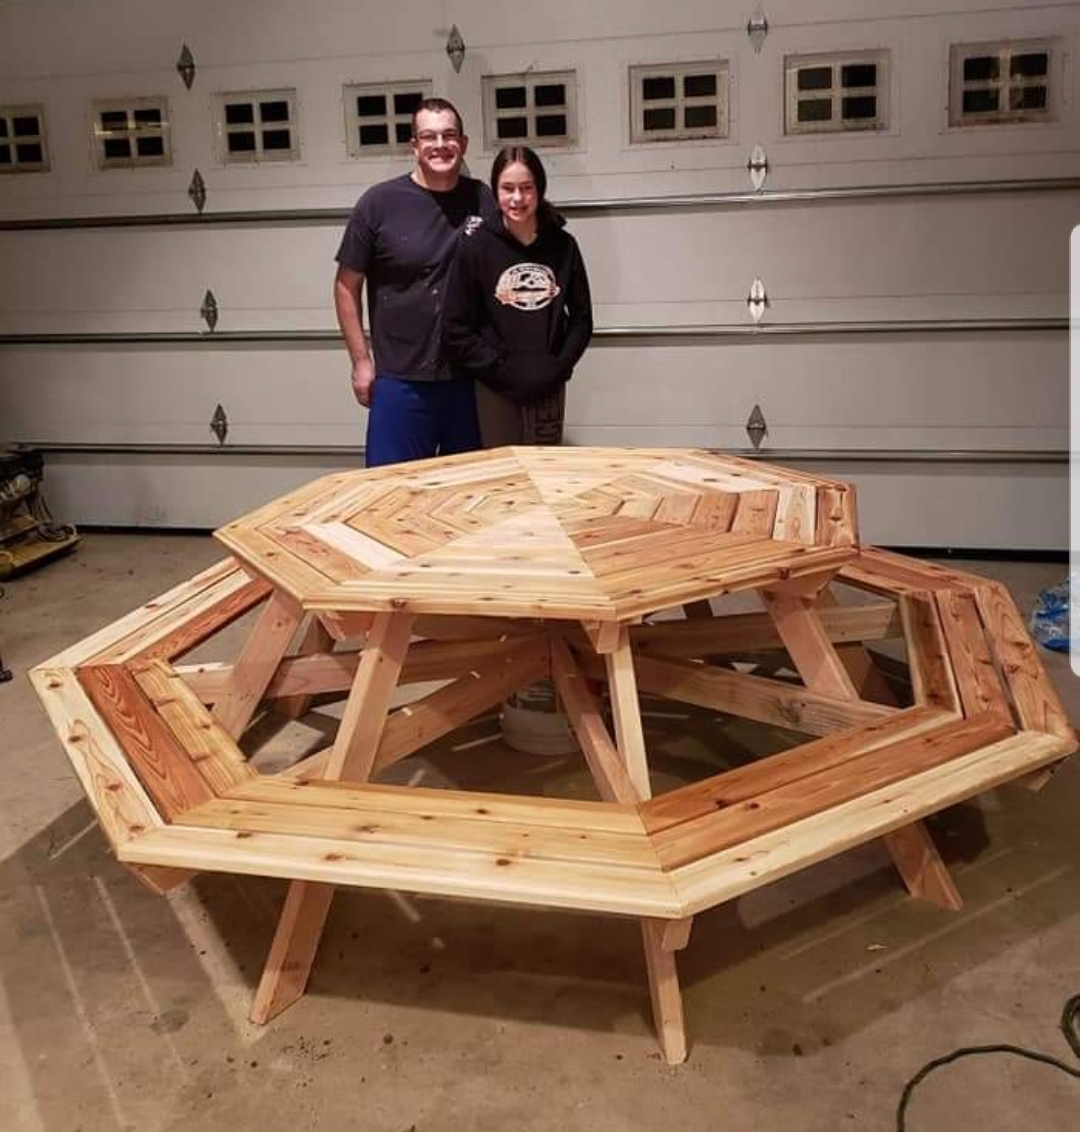
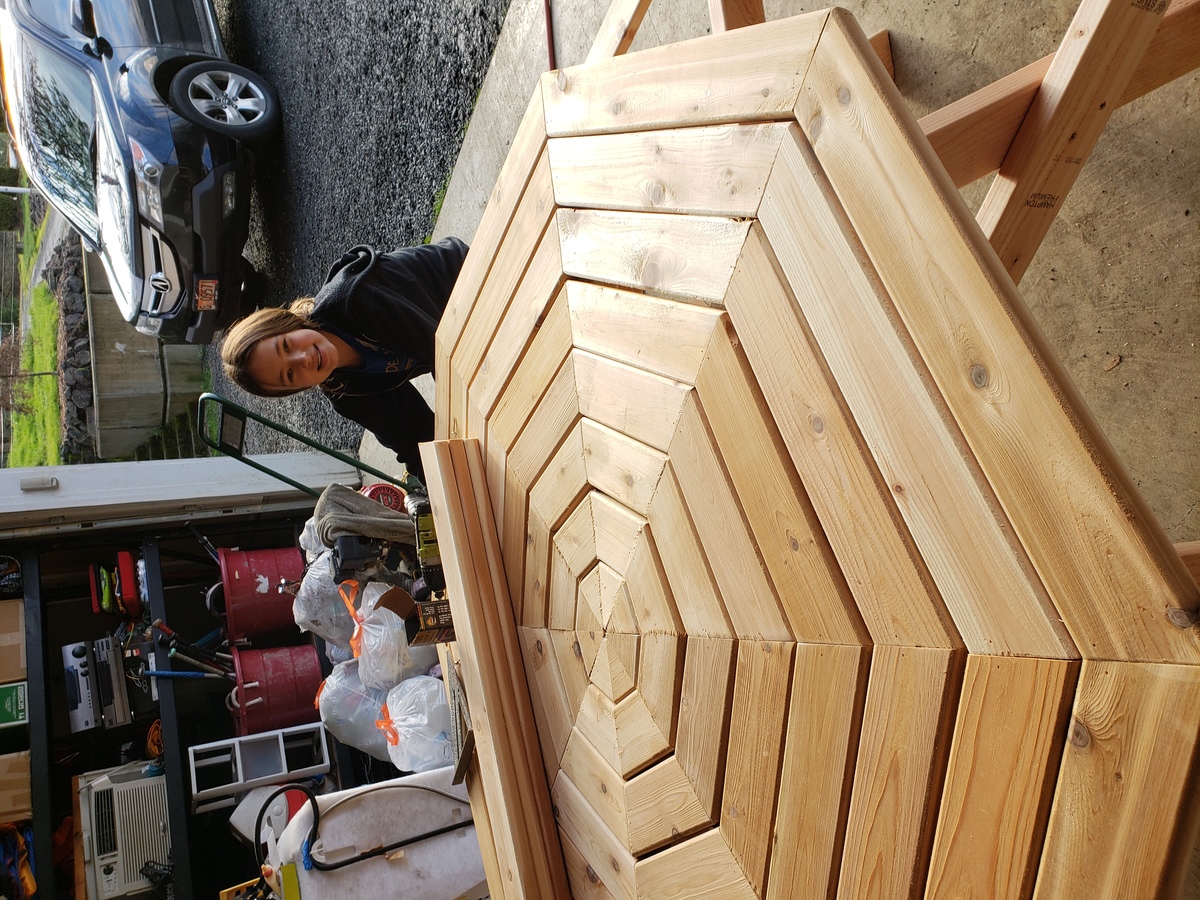
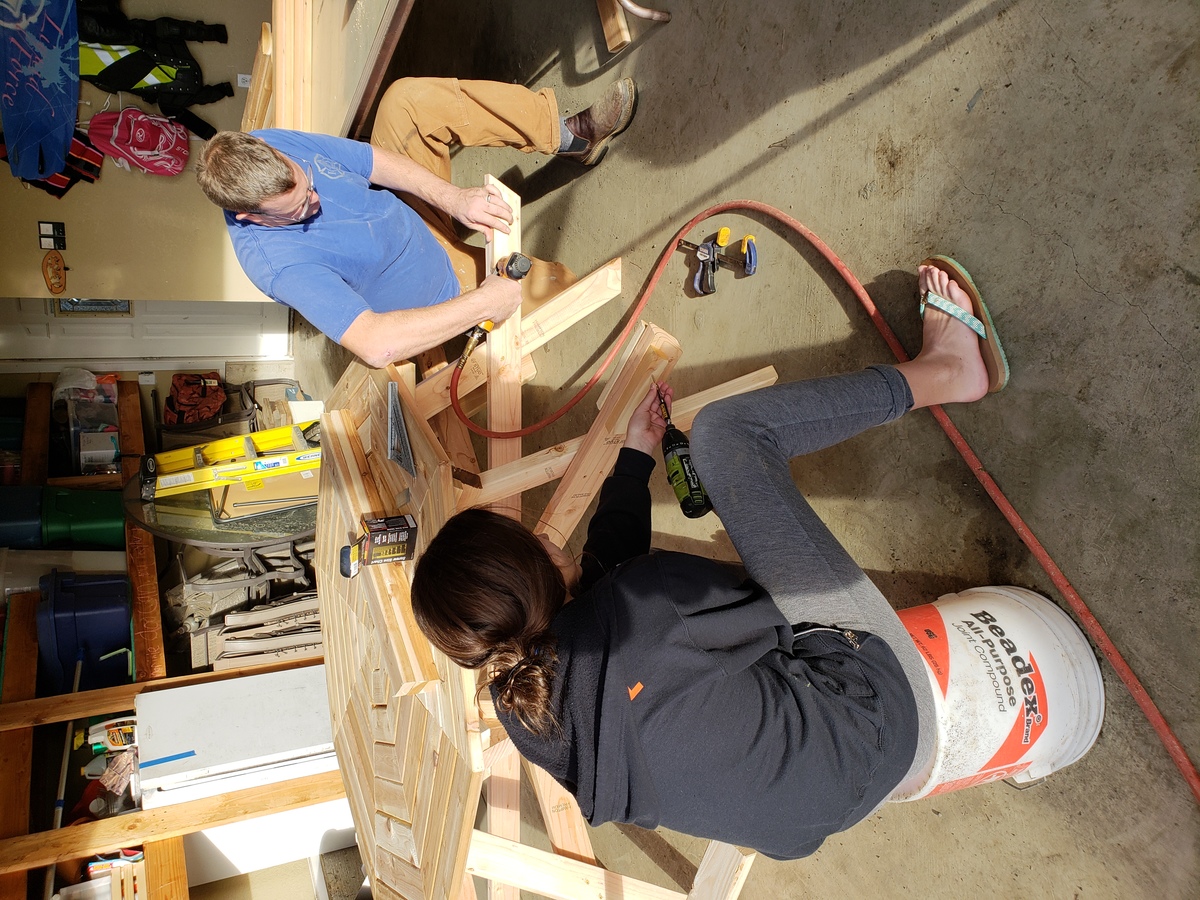
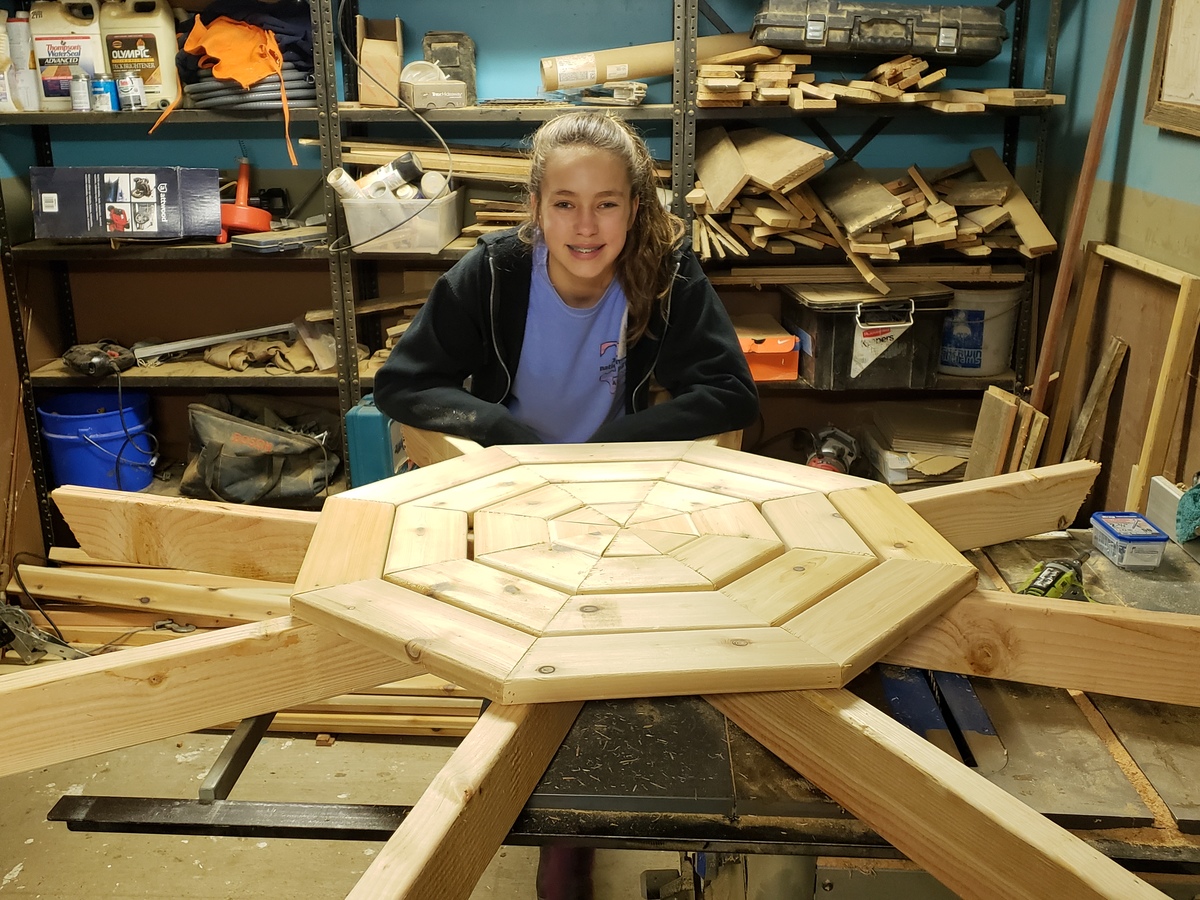
My 11 year old daughter and I built this table in a weekend for a fundraising auction for her school. We changed out 2x6 for 5/4x4 Cedar. We also fixed nailers on the underside so no screws show. The table was a fun project to work together on and for Taylar to learn to use power tools. BTW the table raised $700.00 for her school, I would say that is awesome. Thanks Anna for the plans!!
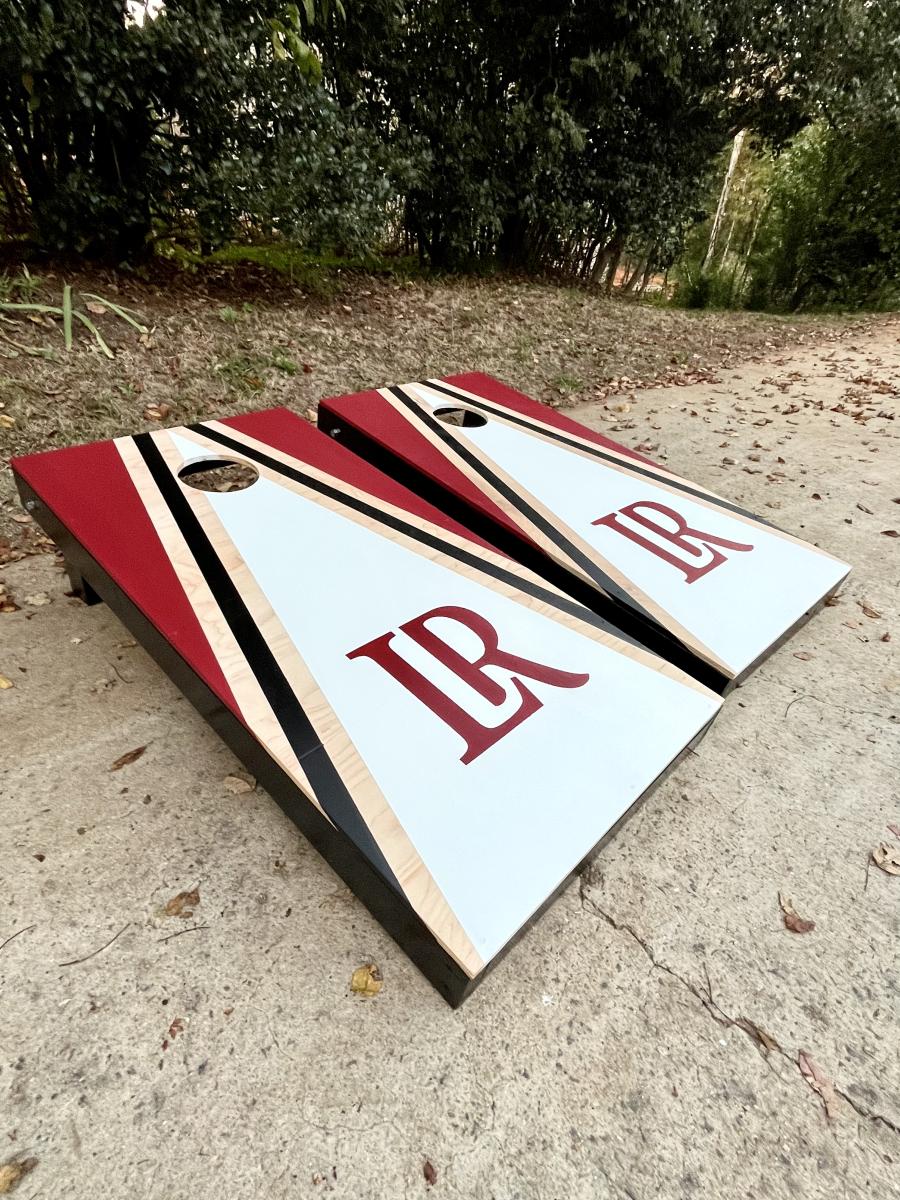
Thank you for helping me make my first set of cornhole boards! Super easy steps to follow and I love how they turned out!!!


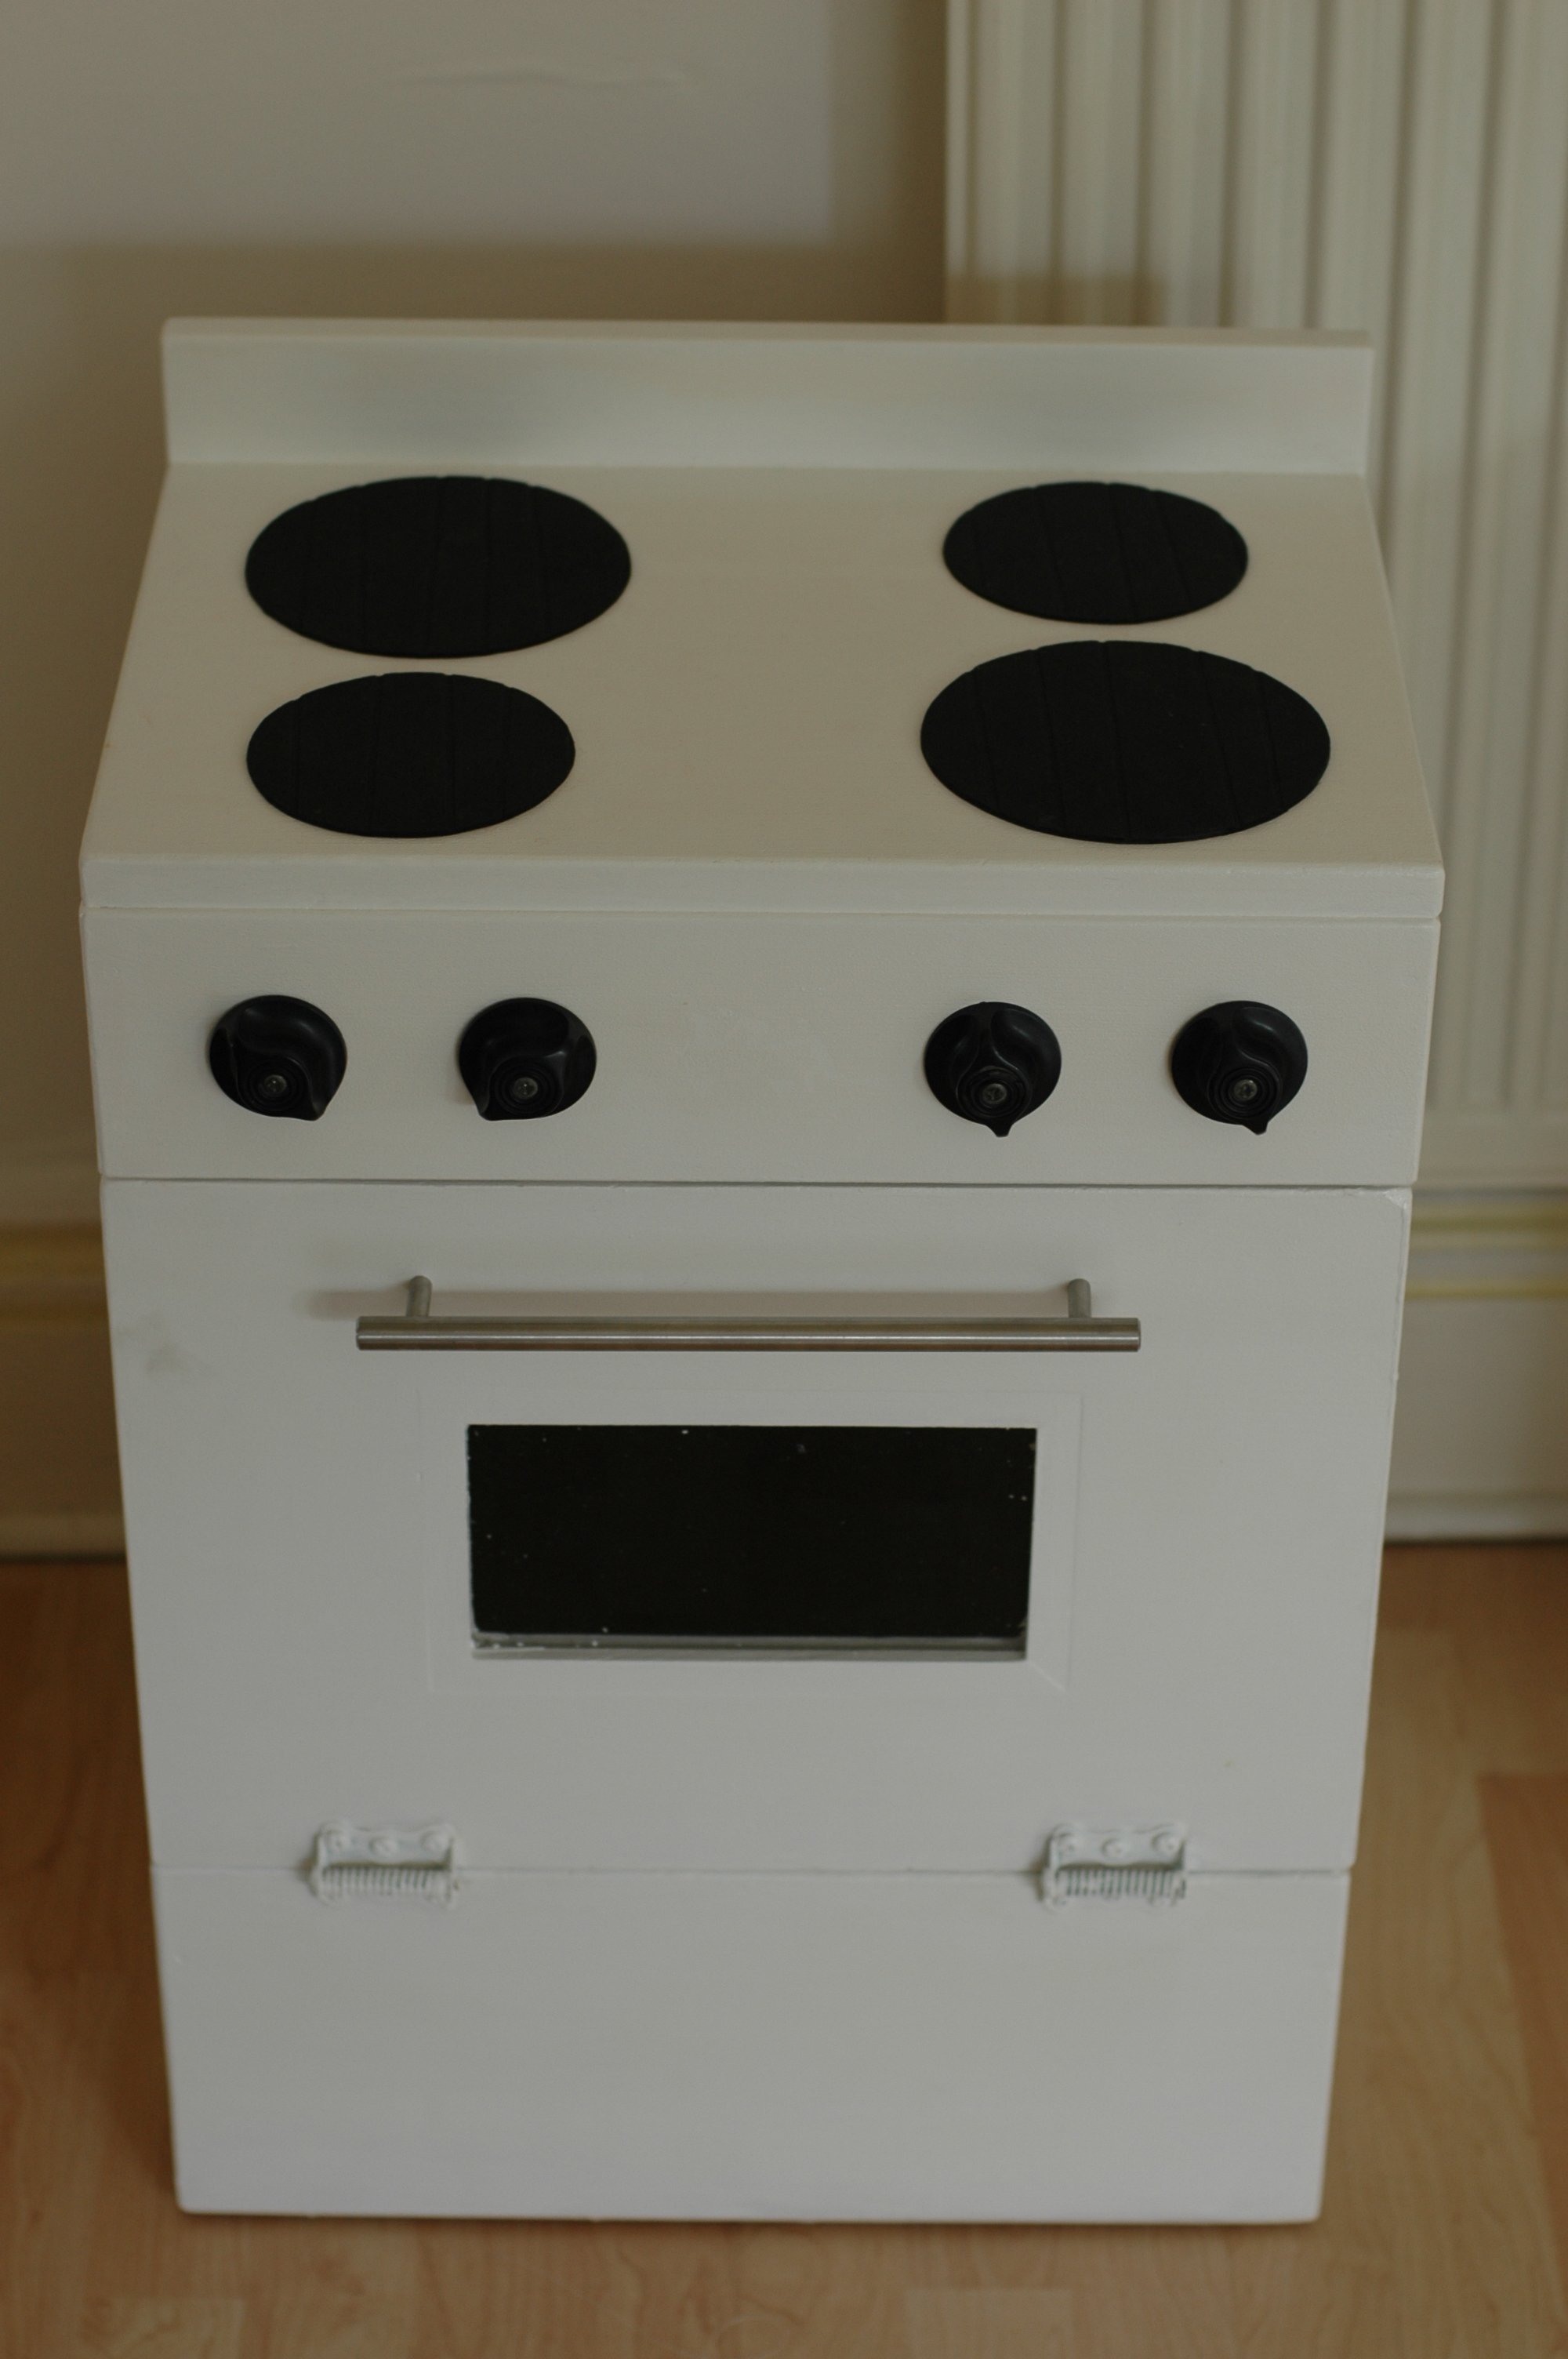
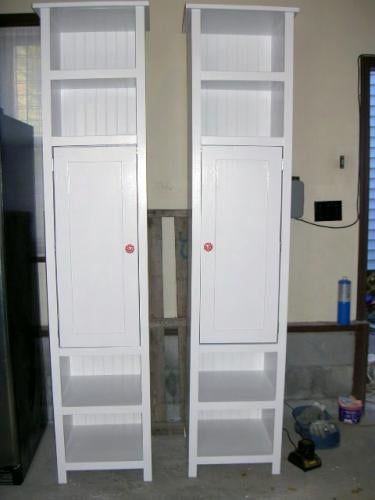
I spent lots of time looking at all the photos posted on this site of people's amazing renditions of "Grace's Play Kitchen." I was so inspired by everyone's creativity! I found an old wooden play stove at a flea market and decided to make a matching sink. I took Ana's plans to the carpenter at the wood shop on the military base where I am stationed and asked if he could help me build a matching piece. We spent about 4 hours one Saturday building the sink. The carpenter had so much fun helping me, he suggested I build a matching refrigerator. So that was created in another couple hours the following Saturday. I did as much of the building as I could, but definitely had some help from the carpenter as I'm a novice. (Thanks, John!) I made the curtain and matching towels, but found the apron and chef's hat on Etsy. (Thanks, "SweetApronzNCupcakes"!). The play kitchen is in my kitchen, so my two year old daughter can pretend play while I'm working on meal preparation. Thanks again, Ana and all the creative folks who contributed ideas! I foresee many hours of play enjoyed by this play kitchen, and hope it can be passed on to future generations!


Sat, 09/24/2011 - 15:49
I really like the fridge and the knobs on the stove. They look great!

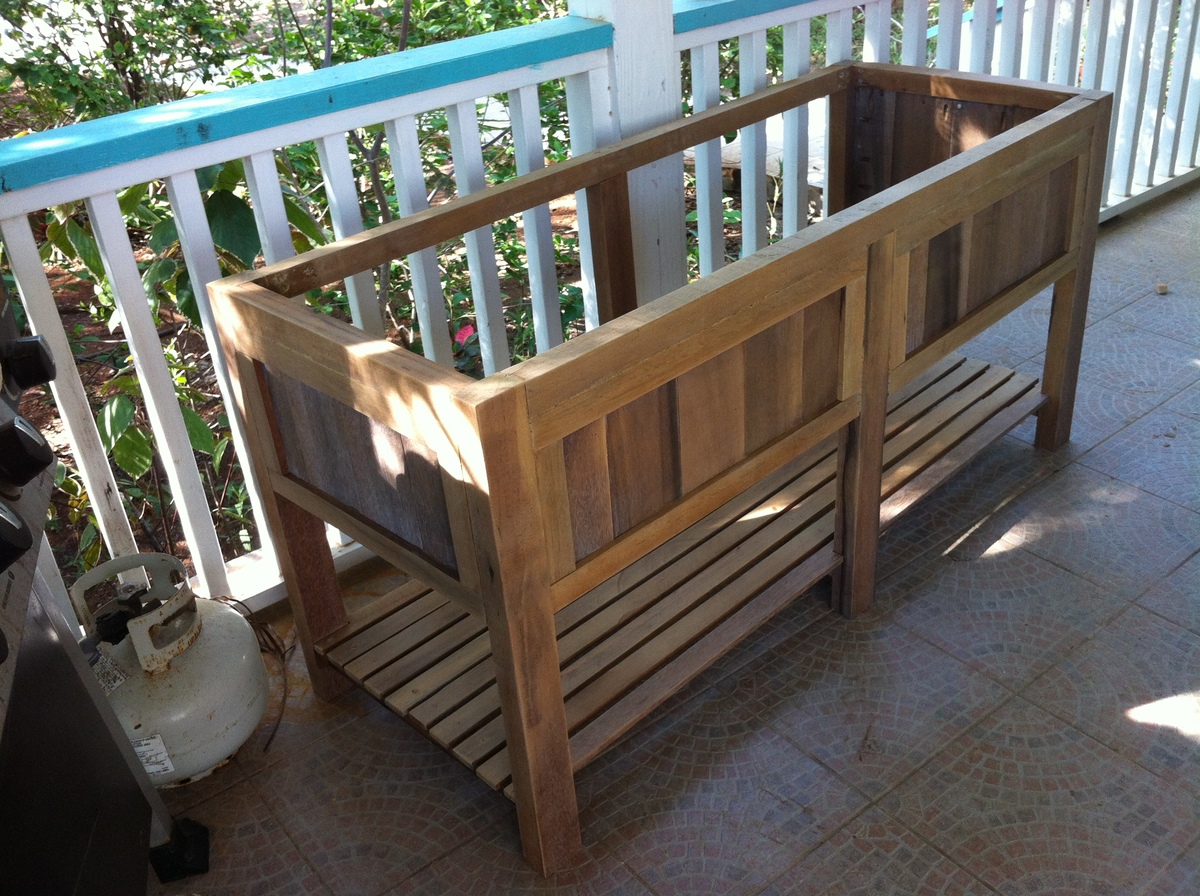
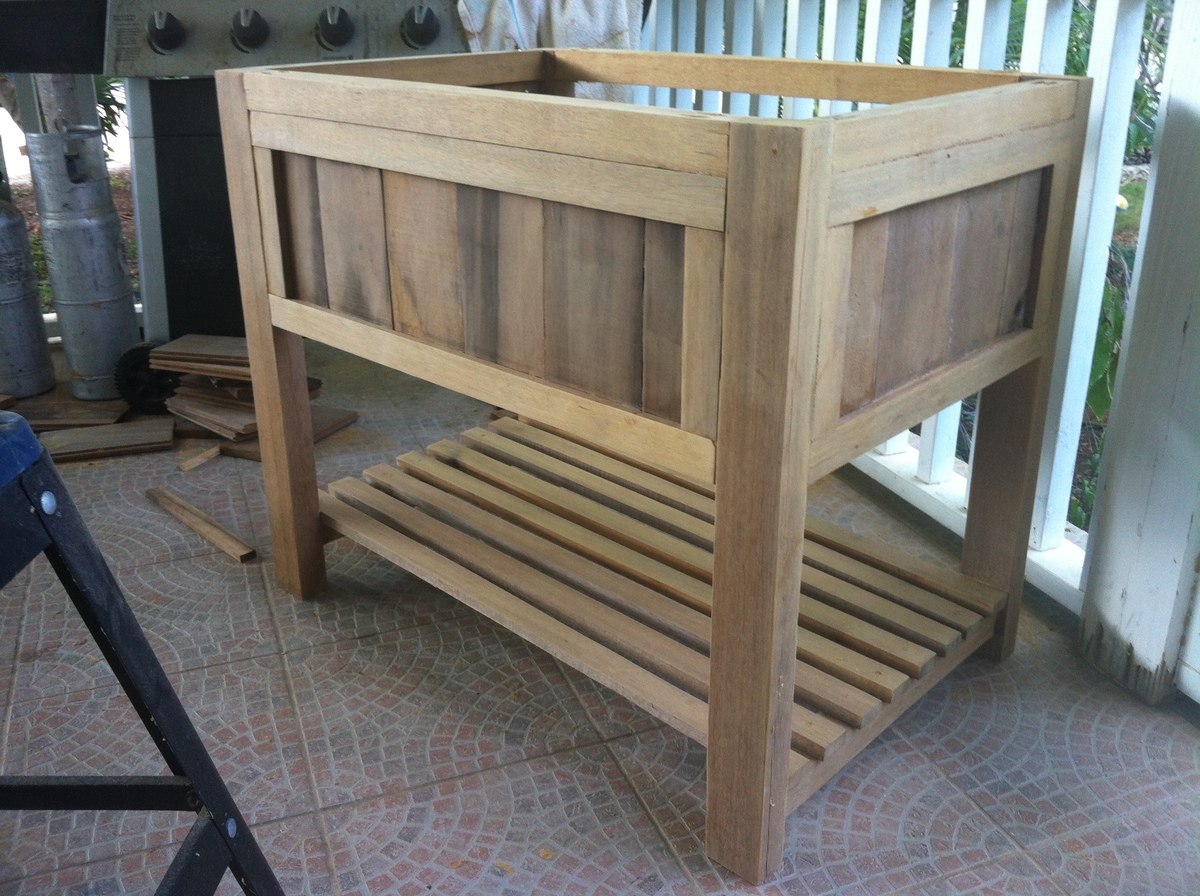
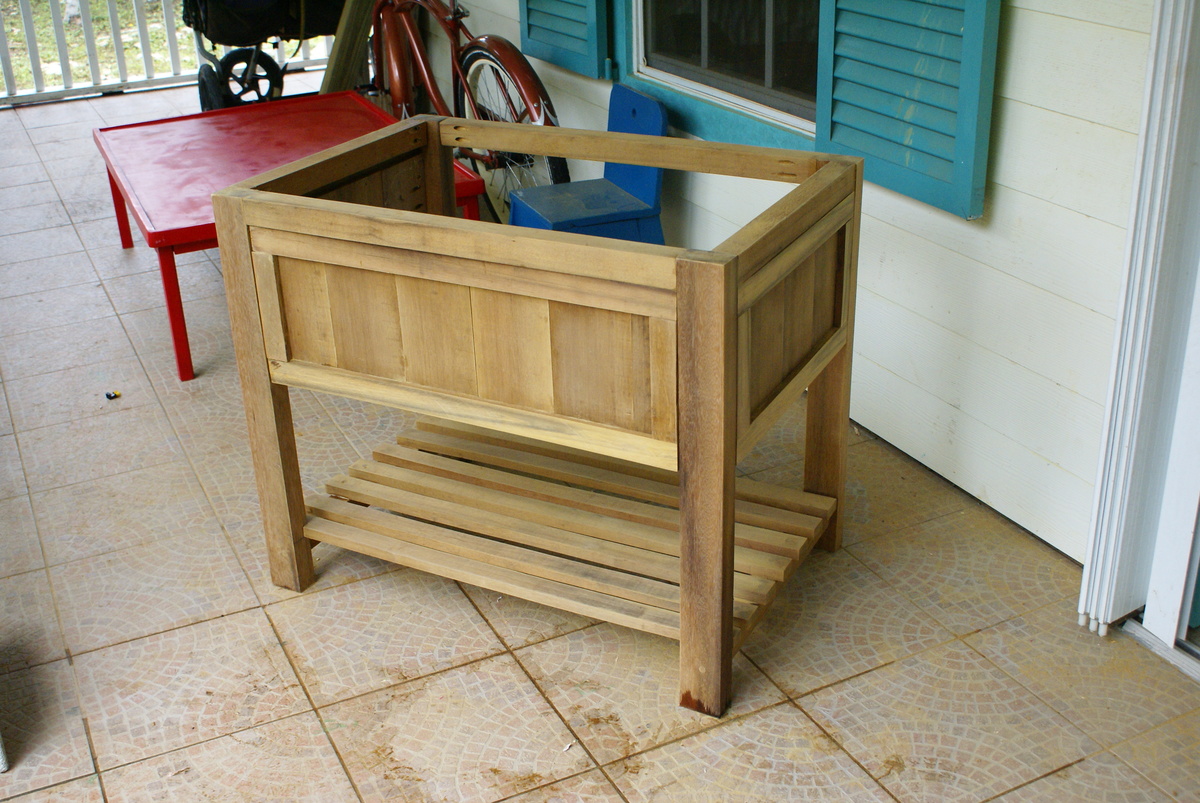
I've been working on these bathroom vanities for a family building a home. These are made of gorgeous Greenheart lumber. I have only worked with pine and spruce up to this point, but this wood is truly stunning. It has been quite the adjustment to work with, and I've broken my share of bits and screws :)
All of these together took me about a week to complete. Had I been working with a softer wood it would have taken no time hardly, but the hardwood....that's a whole other ballgame to me!
They will be adding 2'' thick concrete counter-tops on these when they get installed. I love the simplicity of their look!
Tue, 10/01/2013 - 07:35
These vanities are beautiful. It would be really neat if you could add pictures when they are installed with the counter tops! I am contemplating replacing a vanity with a DIY one, and I love seeing how other people have made things beautiful with their own 2 hands.
In reply to They are beautiful! by NimbleShopper
Tue, 10/01/2013 - 14:35
I will most definitely add the pics with the counters. I can't wait to see them myself :)
Lesson learned....... Drilling straight holes is critical.
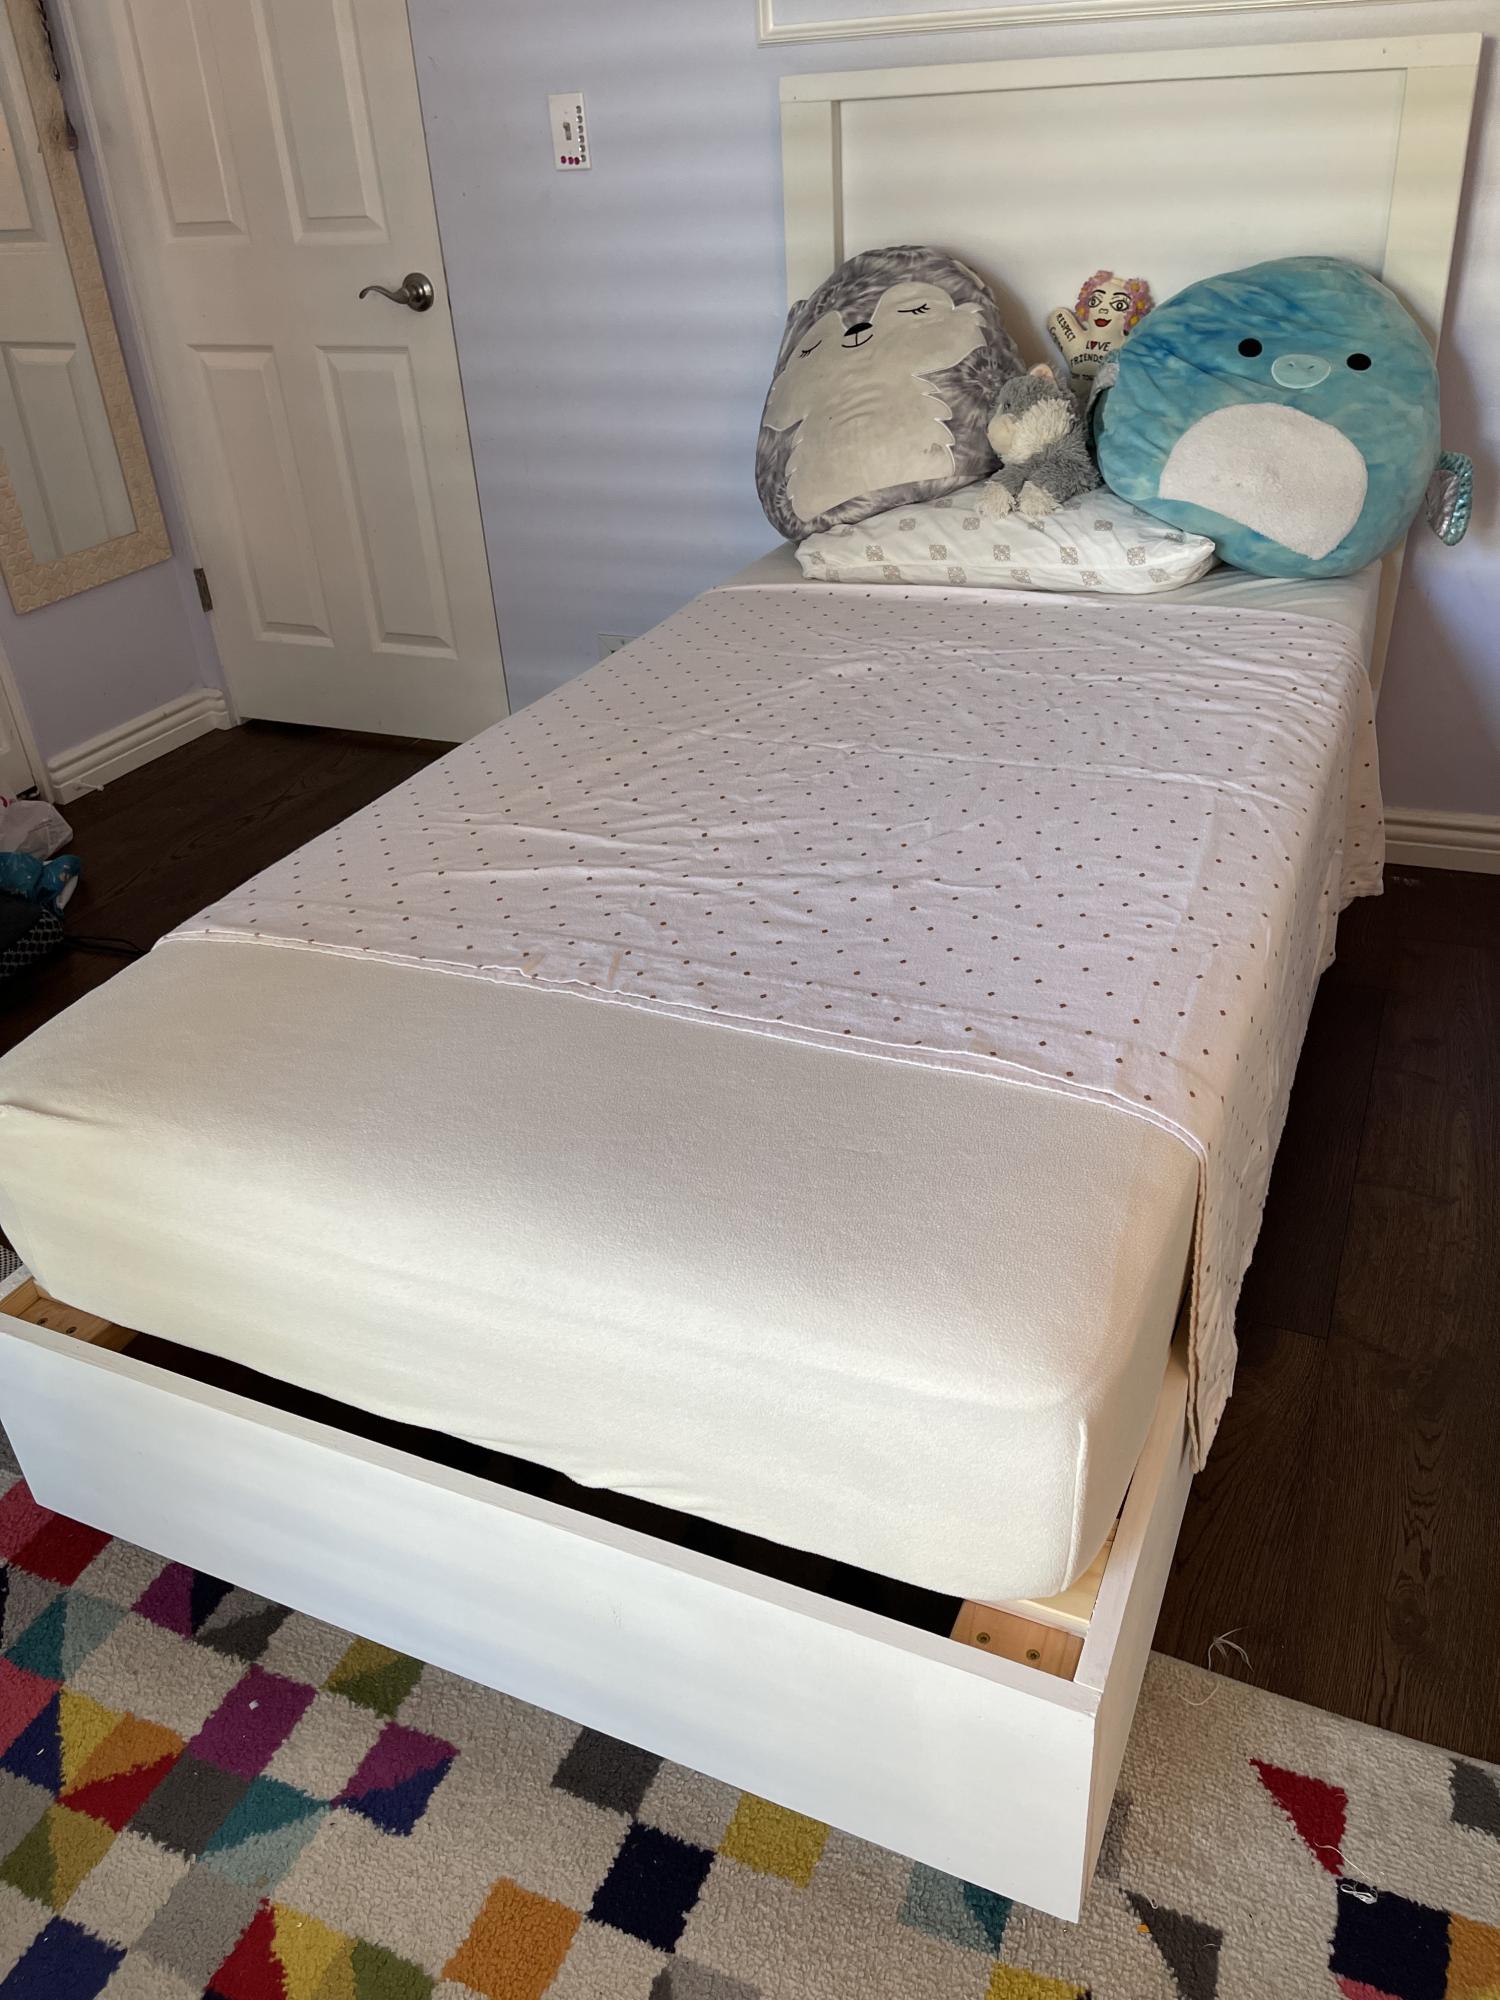
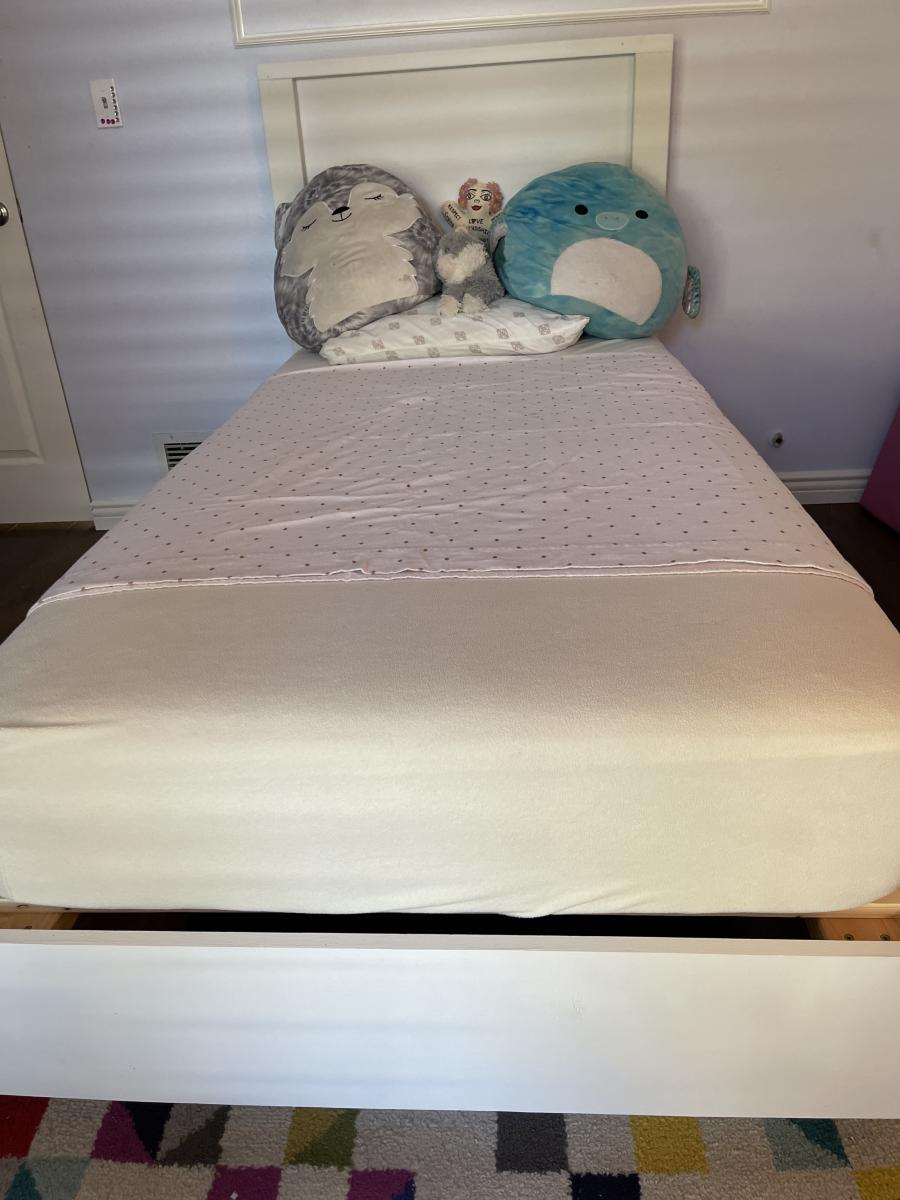
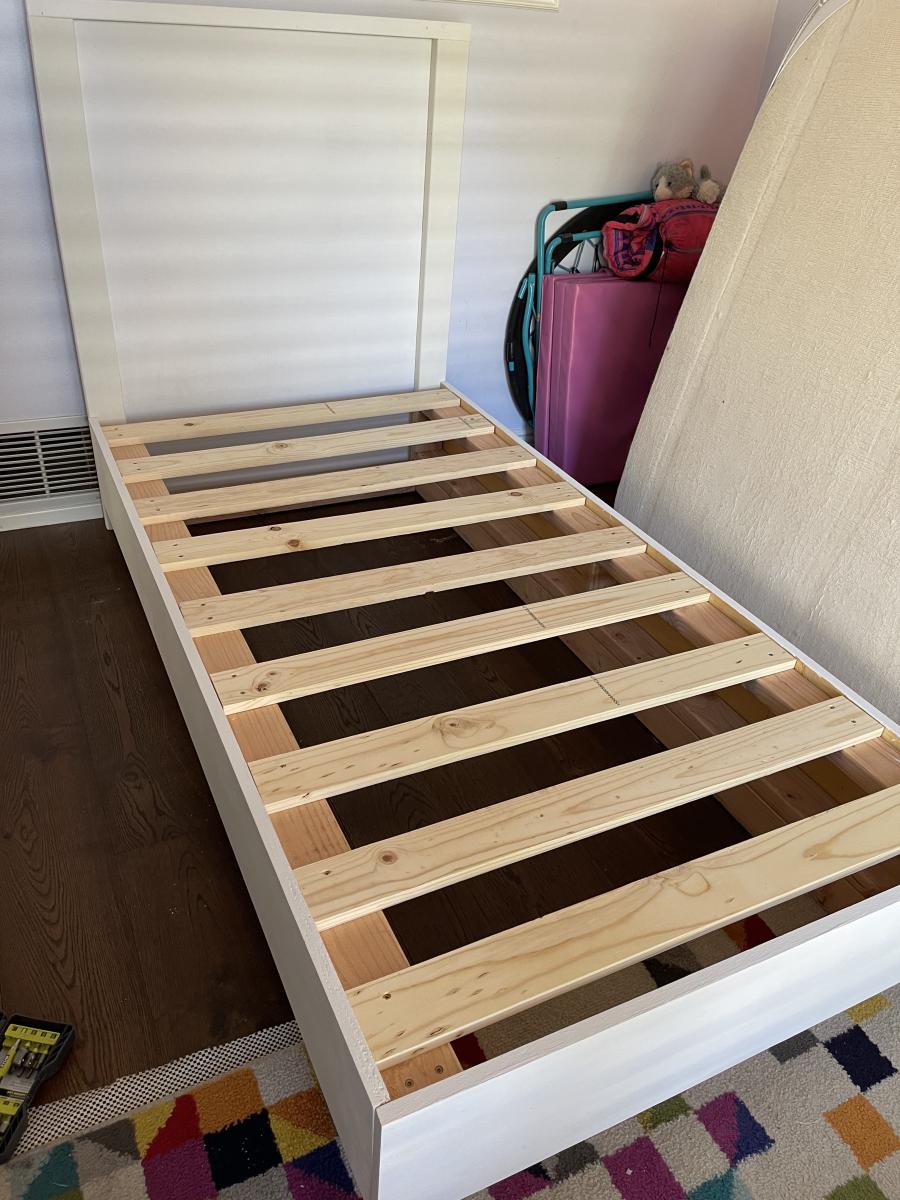
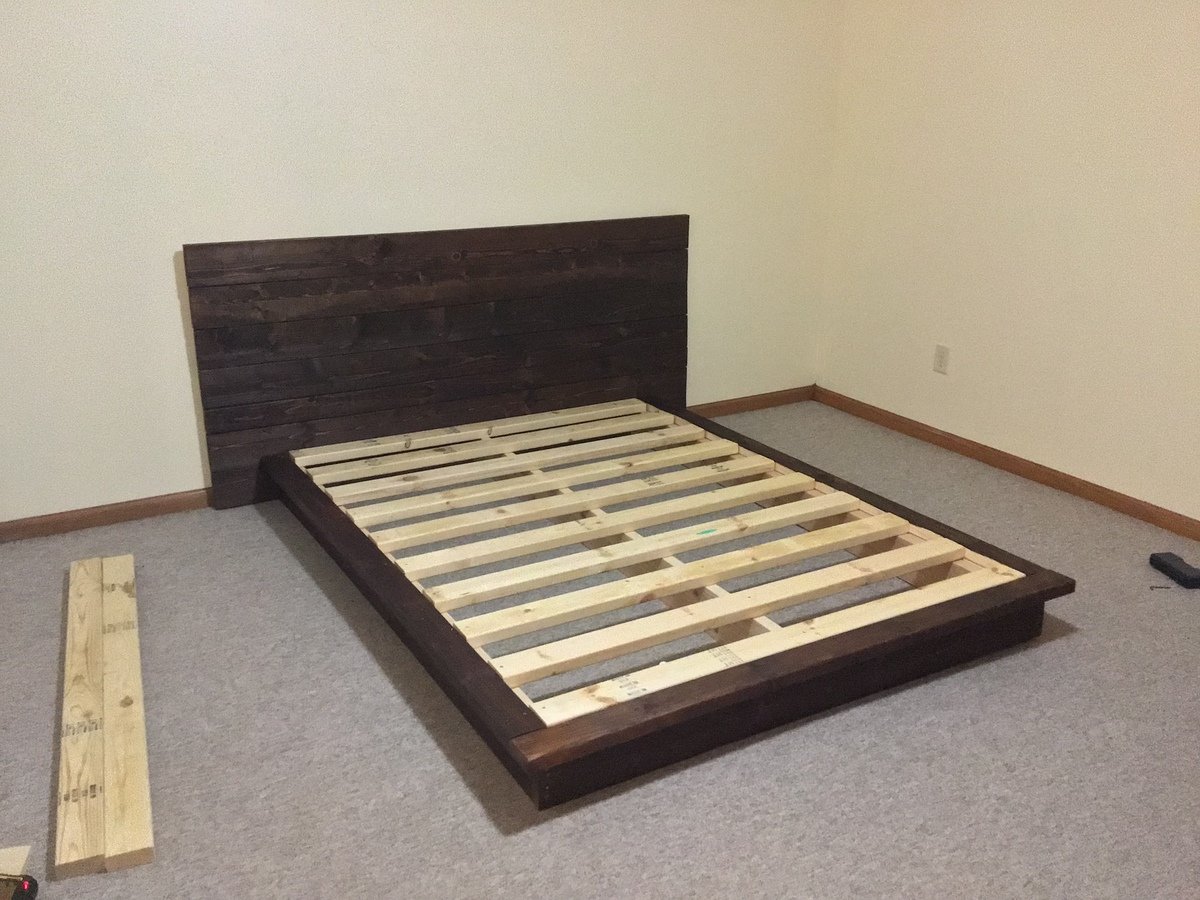
I built a floating bed using Ana's plans. In my case, I built a twin size bed which now my daughter enjoys every night. The bed turned out beautiful and very sturdy.

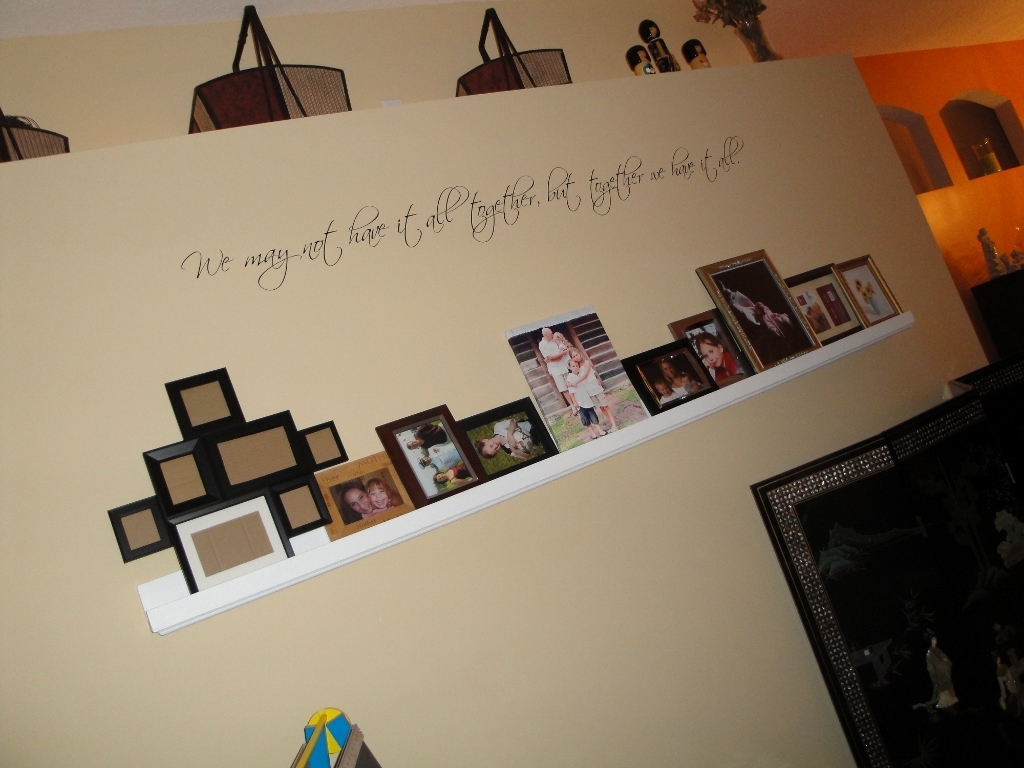
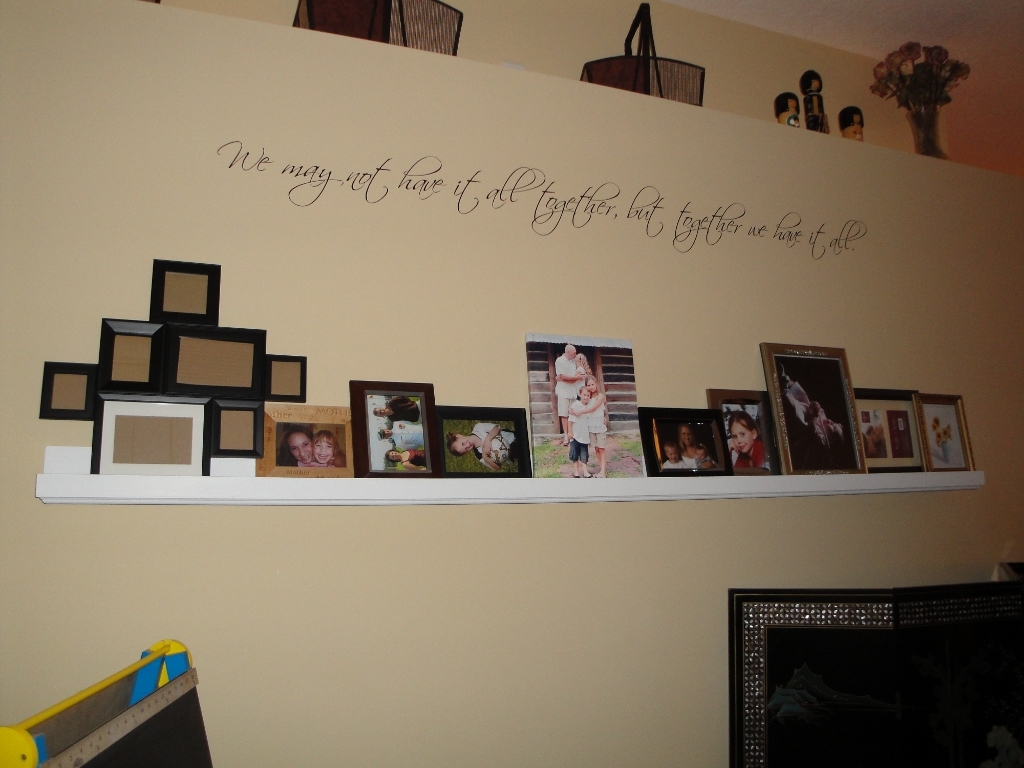
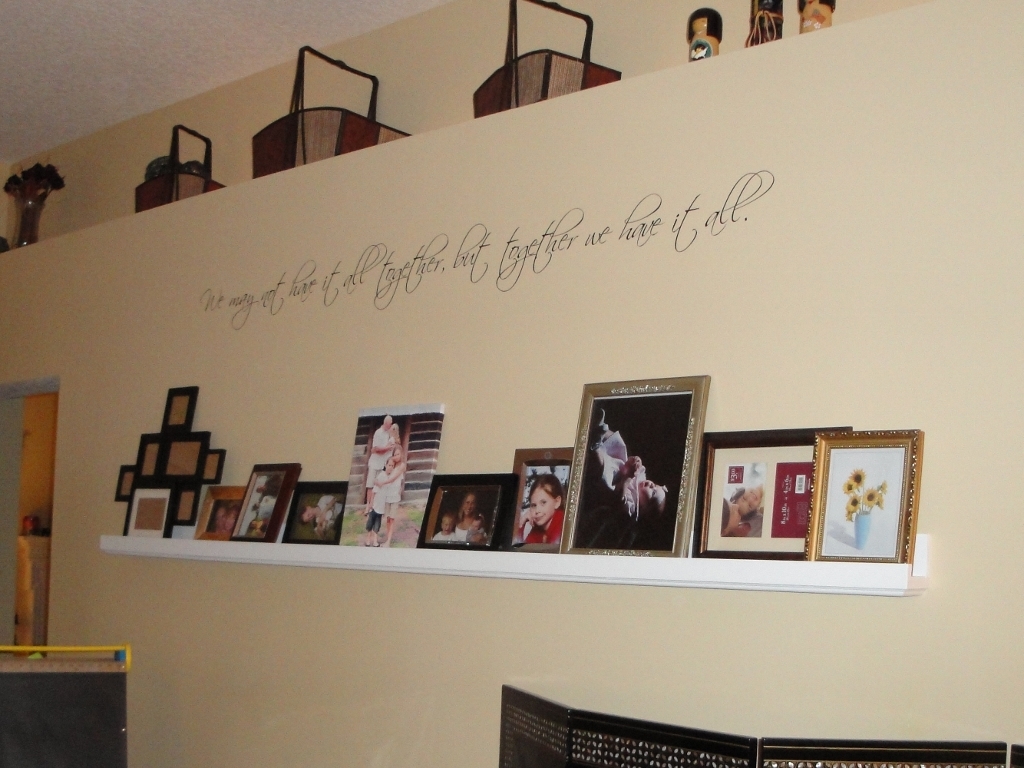
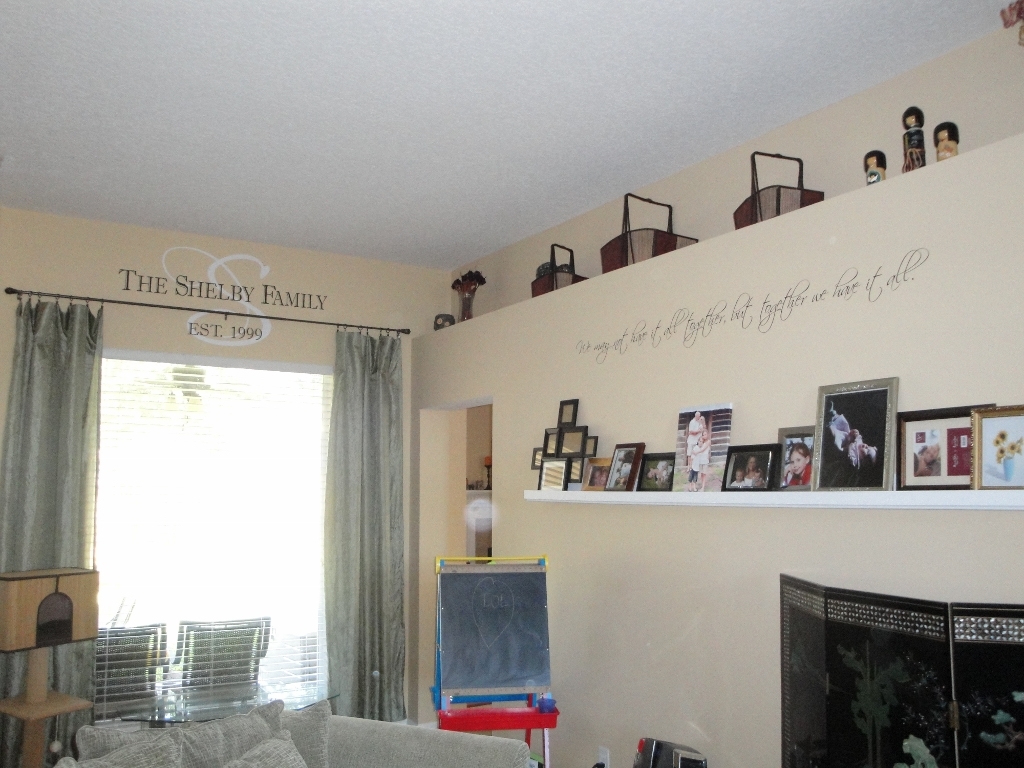
8 foot long photo ledge inspired by $10 ledges project plan, http://ana-white.com/2010/10/ten-dollar-ledges.html
I used a 1x4, 1x3, and a 1x2 and added some crown molding to the bottom for a little something extra.
I was so excited to see this plan and knew what to do with the wood I had recently acquired when an old home was being destroyed near my house.
Love the site and the projects are too much fun!
Thu, 10/03/2013 - 07:29
The heart of pine is more dense than red oak and heavy!!
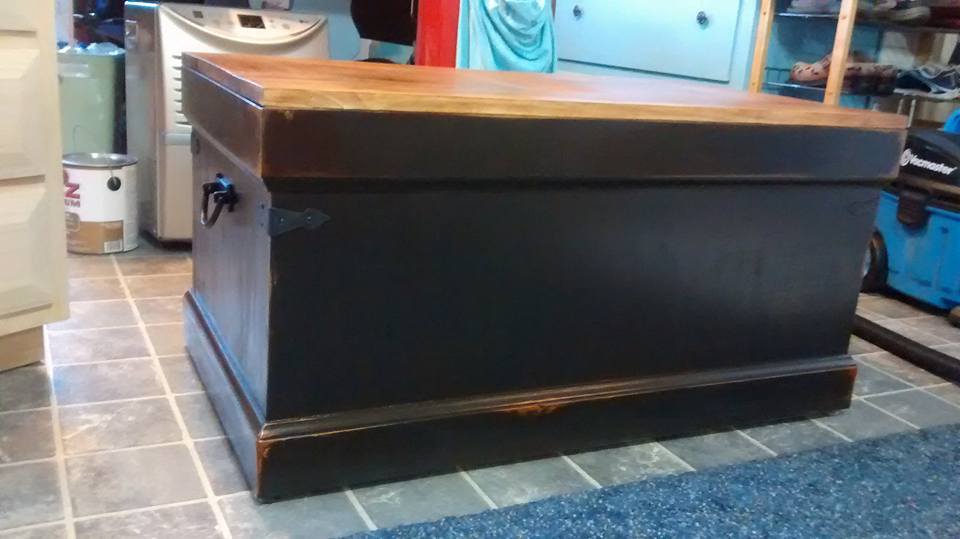
I painted mine black and distressed it. Stained the top and distressed parts with MinWax American Walnut poly stain. Hardware from Van Dykes Restores. Used piano spring loaded lid supports for lid.
Took awhile but had others projects going.
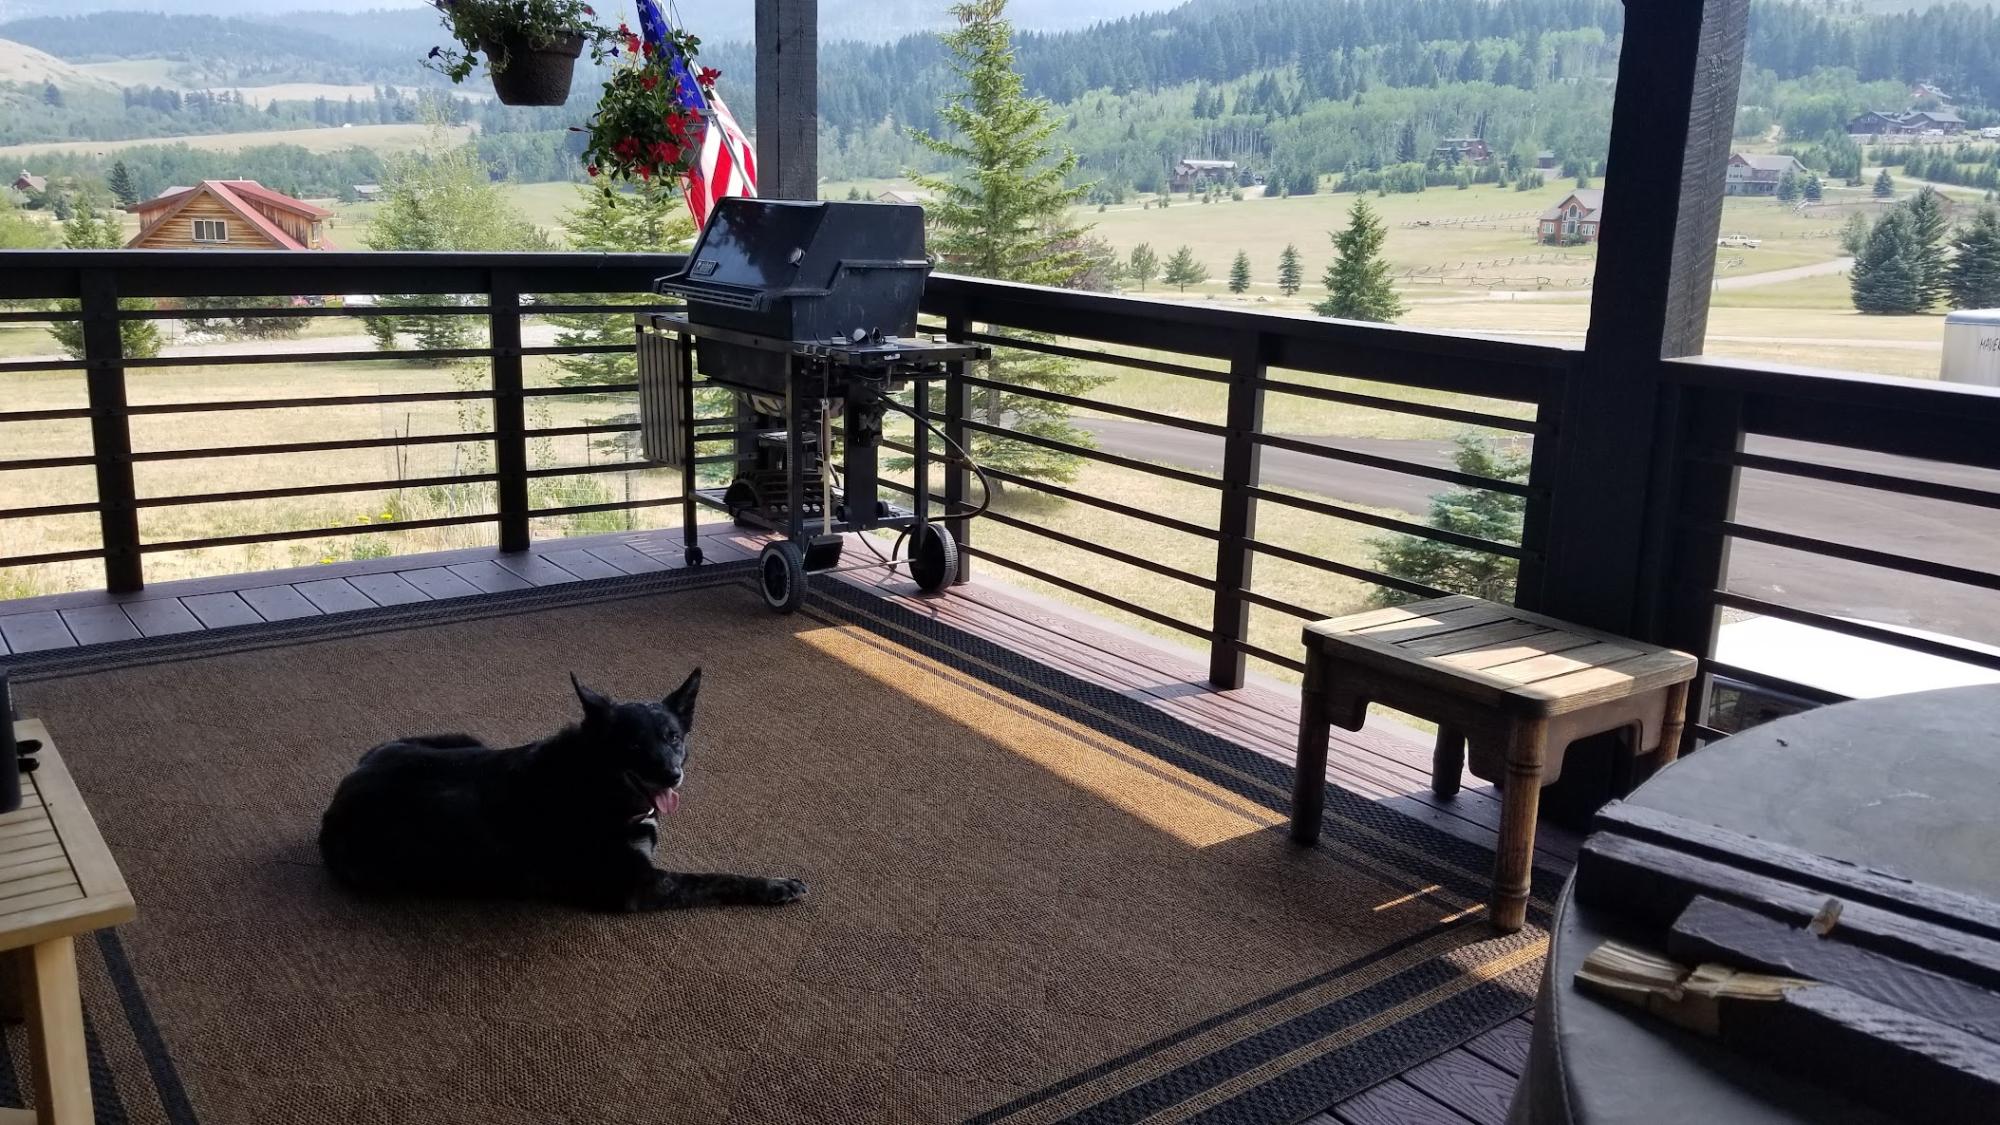
Inspired by the modern farmhouse railing we decided to install the same style on our deck. Our old railing was aged an deteriorated. The project took about two weekends, one to treat the metal with black magic, another to build the actual railing. We love how it looks!

I made this for my daughter for Christmas last year. Well, actually Santa did, or at least that's what she tells people. I had one of the big companies cut the lumber for me, but a few boards were cut incorrectly. I live about 25 minutes from a local hardware store and needed to have them re-cut. Luckily for me, my father-in-law is handy and he brought out his circular saw and helped me even out my boards. Then, for Christmas I got a gift too - a table saw.
Comments
Ana White Admin
Fri, 12/09/2022 - 22:32
So Festive!
Thank you for sharing, it looks amazing!