Community Brag Posts

Kitchen pantry cabinet

Submitted by Anonymous (not verified) on Sat, 05/13/2017 - 18:28

Some added storage for small kitchen appliances

Built from Plan(s)
Estimated Cost
$100
Estimated Time Investment
Week Long Project (20 Hours or More)
Finish Used
Painted antique white with a reddish undercoat peeking through distressed areas
Recommended Skill Level
Beginner

Rolling Bar Cart

Submitted by Anonymous (not verified) on Tue, 05/18/2021 - 10:24

I wanted a BBQ cart for my deck when I am cooking food. Had a lot of left over redwood 2 x 3 and 4 x 4 from various projects. Butcher block was from Ikea.

(My blog is about helping readers find financial independence while owning real estate. Owning homes has helped me become great at DIY projects like this. I found this exact cart at Pottery Barn selling for $400 but I made it for less than $100.)

Estimated Cost
100
Estimated Time Investment
Afternoon Project (3-6 Hours)
Finish Used
Dark stain with clear coat polyurethane
Recommended Skill Level
Intermediate

Comments

Sawhorse Desk

I added my own unique twist to this desk by building it from reclaimed pallets. I made a frame to support the desk top pieces, then sized the pallet pieces to fit on top. I also used pallets for the shelves. Full details at the blog in the link.

Built from Plan(s)
Estimated Cost
$30
Estimated Time Investment
Day Project (6-9 Hours)
Finish Used
Minwax Special Walnut and Minwax Natural, finished with General Finishes Arm-R-Seal Urethane Topcoat.
Recommended Skill Level
Beginner

Butchers Block Cabinet

Submitted by cbrick57 on Tue, 02/17/2015 - 10:05

I built this for some friends who are having a remodel done in their house to get their washer and dryer out of the kitchen.  The new area was a perfect size for a cool piece of furniture and because of how well my other projects turned out they asked if I would make something for them.  My friend is a great cook and has some really nice cookware that needed housing so we used the "planked wood sideboard plans" as the bones for the project.  I saw some cool things from Pinterest (Glideware) that I wanted to incorporate and we drew up some plans.  All in all it took me about 36 hours to complete. Two weekends and some work at night after work.   I used my miter saw, table saw, circular saw, power drills, wood clamps, Kreg pocket hole jig, and my electric sander to knock this one out.  

Built from Plan(s)
Estimated Cost
The cherry butcher block was $280 from Floor and Decor and the rest of the materials from lumber to finishes was about $300 all together a total of $580.00
Estimated Time Investment
Week Long Project (20 Hours or More)
Finish Used
Gray latex paint and water based poly (it dries clear). Also, a butcher block conditioner.
Recommended Skill Level
Intermediate

Comments

yasky9

Sun, 02/22/2015 - 16:49

I love this project. Awesome Job!!! Where do you find the hook/slides for the pans?

Thank you!

In reply to by yasky9

cbrick57

Mon, 03/02/2015 - 20:25

Hi thank you! I actually made them from 2x4's and 20 inch ball bearing drawer hardware. I mounted them to 1x4's then mounted the whole system to a 1/4 inch thick ply and attached it to the underside of the butcher block. The hooks were just 3 inch hooks from Home Depot screwed in the 2x4.

2x4 Sofa, X Fancy Farmhouse Table Bench, and Bar w Stools.

Submitted by Anonymous (not verified) on Tue, 05/16/2017 - 10:07

Started with building the 2x4 sectional sofa and the armless sectional.  Liked the plans so much starting building the bar from my own design.  Than completed the patio renovation with the fancy X farmhouse table and benches.  Thank you Ana White for all the inspirations to redo my backyard patio.


Estimated Cost
Farmhouse Table $100
Farmhouse Bench $60 for both
2x4 Sofa and Armless Sectional $300 (used Cedar 2x4)
Bar and Stools $250
Estimated Time Investment
Week Long Project (20 Hours or More)
Finish Used
Cabot Mahogany Outdoor Sealer and Stain
Recommended Skill Level
Intermediate

Built some Cedar flowerbeds!!

We live in a ground level 3 bedroom apartment, and I desperately wanted somewhere to plant some veggies and pretty flowers. When I found the plans for the $10 cedar garden beds we went to town! Cedar fence posts were more expensive than had been used in the plan, and we chose not to finish the tops, so lumber cost us $36 to build two. Still pretty good considering the plastic snap together ones run about $40 a piece and are smaller than the ones we built. We're really proud of them and can't wait to get some stuff planted!

Estimated Time Investment
Afternoon Project (3-6 Hours)
Recommended Skill Level
Beginner

Comments

JuliaLovesTiffany

Sat, 04/06/2013 - 19:28

Hi! I saw these cedar beds and was excited to make them as well, but I was unable to find any cedar plans or fence posts are our local home depot. Any suggestions on where you found your wood?

Modified Rebecca Media Side Hutch

Submitted by Radcrafter on Fri, 02/20/2015 - 20:42

I used the Rebecca Side Hutch and Side Base plans to create a slightly wider version to fit the TV in our master bedroom.  The building took one whole weekend and then it took another week to finish it up like filling holes, sanding, painting and then reassembling.  My final cabinet is 36.75" wide at the top and I changed the doors to overlay instead of inset.  I love the finished cabinet!

Estimated Cost
$150-200 - including all wood, hardware and paint
Estimated Time Investment
Week Long Project (20 Hours or More)
Finish Used
Black Onyx Behr Primer/Paint All in One, Wax Topcoat
Recommended Skill Level
Intermediate

Comments

DIY Double chair bench with table

Submitted by Anonymous (not verified) on Sun, 05/21/2017 - 11:27

Built from DIY Pete's plans. I'm in Hawaii so lumber here is a lot, and I do mean A LOT more expensive here. I wanted to use cedar but that would have cost me close to $450 just for the lumber here in Hawaii. Spent an entire day running around between local lumber yard, Home Depot, Lowe's, and a recylce lumber yard called Re-Use Hawaii trying to figure out how to cut costs down. Ended up going with redwood as it was a nice wood that was more affordable. I ended up putting 5 coats of Minwax Helmsman spar urethane clear gloss, sanding with 150 then 220 grit sandpaper to get a nice thick and smooth finish. This is my very first build ever and it took me the weekend (about 20 hours) to build. DIY Pete's instructions are pretty good but I have to watch his video a few times which was extremely helpful. The video made this an easy project as it was like having a pro right there with you. Love your website. Can't wait to start on the next project. David M. 

Estimated Cost
$300-$350
Estimated Time Investment
Weekend Project (10-20 Hours)
Finish Used
Minwax clear (green can, same one Pete recommended).
Recommended Skill Level
Beginner

Modern Adirondacks

Submitted by ae1ret99 on Wed, 06/02/2021 - 09:15

First of all I want to thank Ana for these awesome plans. It wasn't quite as easy as she made it look, but I learned as I went, and the chairs look awesome! Lumber now days is probably 2-3 times more expensive, but good quality chairs like these would probably be around $300 plus if buying!

Estimated Cost
$70 for lumber...and another $10 - $20 for hardware
Estimated Time Investment
Weekend Project (10-20 Hours)
Finish Used
Valspar Cedar toned Stain from Lowe's
Recommended Skill Level
Intermediate

Comments

West Elm Inspired Upholstered Outdoor Sofa

My husband and I built this modern upholstered outdoor sofa for our back porch. As it was going outdoors we used treated lumber, a painters drop cloth (dyed with Rit dye), and coated deck screws. We are so proud of the way it came out! Please see my blog for more details on the build.

Estimated Cost
$300-350
Estimated Time Investment
Weekend Project (10-20 Hours)
Recommended Skill Level
Intermediate

Console Table

Submitted by Anonymous (not verified) on Wed, 05/24/2017 - 08:28

I really enjoyed this project. Really happy with how it turned out! I ended up using a thin flexible panel board in a nickelboard pattern for the back to help make it lighter. Easier to transport. 

Built from Plan(s)
Estimated Cost
50$
Estimated Time Investment
Weekend Project (10-20 Hours)
Finish Used
I had a left over cedar wood top that I left unfinished.
Spray painted the metal in oil rubbed bronze
White paint for the rest
Recommended Skill Level
Beginner

pipe/wood bookcase

Submitted by ltodd on Thu, 04/11/2013 - 18:26

1/2 ' x 18" black pipe was used along with 1/2 ' flanges. The wood was re-purposed 2x6' pine lumber that had been used for pallets, that would have been thrown away. The boards were joined with a Kreg Jig, It will house my stereo components.

Estimated Cost
$150 pipe/flange costs
Estimated Time Investment
Weekend Project (10-20 Hours)
Recommended Skill Level
Beginner

Truss Shelves

Went a slightly different route, since I'm not a fan of furniture built using 2x4's. I opted to use 1x3"s for the supports. Still more than sturdy, and I think it adds a little to the look.

Built from Plan(s)
Estimated Cost
$58.87
Estimated Time Investment
Afternoon Project (3-6 Hours)
Finish Used
Rustoleum "Kona" stain, valspar semi gloss poly.
Recommended Skill Level
Beginner

Finally Organizing My Garage - Shelving First

Submitted by bsohl214 on Thu, 06/17/2021 - 17:41

Took every pre-existing bit of rough, thrown up shelving the previous wonder tossed up and the garage walls. Moved the prior owner’s workbench build out of the corner, reinforced it, and relocated it to the center of the back wall. Spent the day building this unit in this corner of the space. Used modified version of plans below. Center gap is for a future build…rolling miter saw cart.

Estimated Time Investment
Day Project (6-9 Hours)
Recommended Skill Level
Beginner

Comments

Storage Bed Turned Dresser

This project wasn't really a 'planned one', but just turned into something I could do fairly easily with the stuff I had on hand and some of the leg work I had already done. I did the original green bed in the Fillman Storage Bed with Drawers post. I had originally planned to do one of those beds for each of my boys in the room they share so we would have plenty of storage. We also homeschool and were in need of more room space, so we went a different route (you can see the messy picture that shows our new bed (double loft bed). WE LOVE the loft bed, but we also really love this dresser. The size is perfect and fits our needs. Thanks for checking it out. I have more specific photos showing what I did on the blog link I have on here.

Happy Building!!

Estimated Cost
$30 for paint supplies (used up scraps and pieces already built)
Estimated Time Investment
Weekend Project (10-20 Hours)
Finish Used
light gray latex paint with a polycrylic finish on top
Recommended Skill Level
Intermediate

Jilly and Mia Workbench Console

Submitted by lmwst36 on Mon, 03/02/2015 - 14:49

This was my first wood working project from Ana White. I am in love with how it turned out.

I ended up making the console narrow and long to fit in the living room area. 

Built from Plan(s)
Estimated Cost
$100
Estimated Time Investment
Week Long Project (20 Hours or More)
Recommended Skill Level
Intermediate

Comments

Simple Bunk Bed

Submitted by jmartell10 on Sun, 06/27/2021 - 09:34

I searched high and low for the perfect bunk beds to buy for my four-year-old son and two-year-old daughter when our third child was on the way. We wanted something that had enough clearance between the top and bottom bunks so my husband and I could comfortably sit on the bottom bunk with our kids to read books before bed and it was nearly impossible to find a pre-made bed that fit that requirement in our price range. I was excited to find this plan because it looked like the perfect fit and we could modify it to meet our needs.

I built and stained most of the parts of the bed (while six months pregnant :P) and my husband did the final assembly. It took us about two weeks from start to finish since we could really only work during naptime and bedtime. We stained them with Behr water-based stain in Classic Gray. I love the way they turned out and they are super solid and heavy. My kids love them too.

Estimated Cost
$500
Estimated Time Investment
Week Long Project (20 Hours or More)
Finish Used
Behr water-based stain in Classic Gray
Recommended Skill Level
Beginner

Comments

Anthropologie inspired Fancy X Farmhouse Table & Benches Part 1

This project was super easy, my husband and I did this together while I was 9 months pregnant with our other 2 kids and dog running around the whole time! We made the table and 2 benches for $250 including lumber and finishing supplies. Check out my blog for details.

Estimated Cost
$250
Estimated Time Investment
Weekend Project (10-20 Hours)
Finish Used
Grey Stain
Recommended Skill Level
Beginner

White Oak Farmhouse Table

Submitted by Anonymous (not verified) on Sun, 06/04/2017 - 15:27

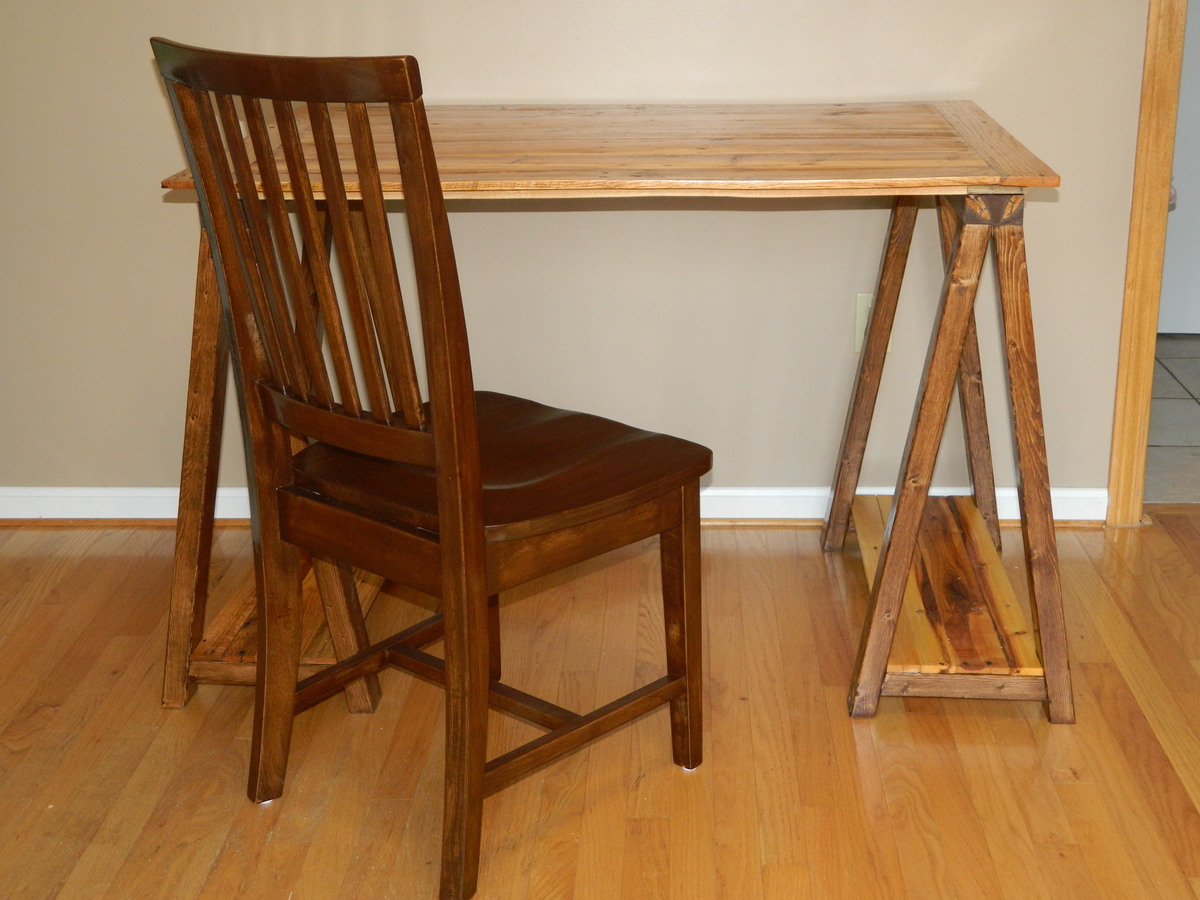
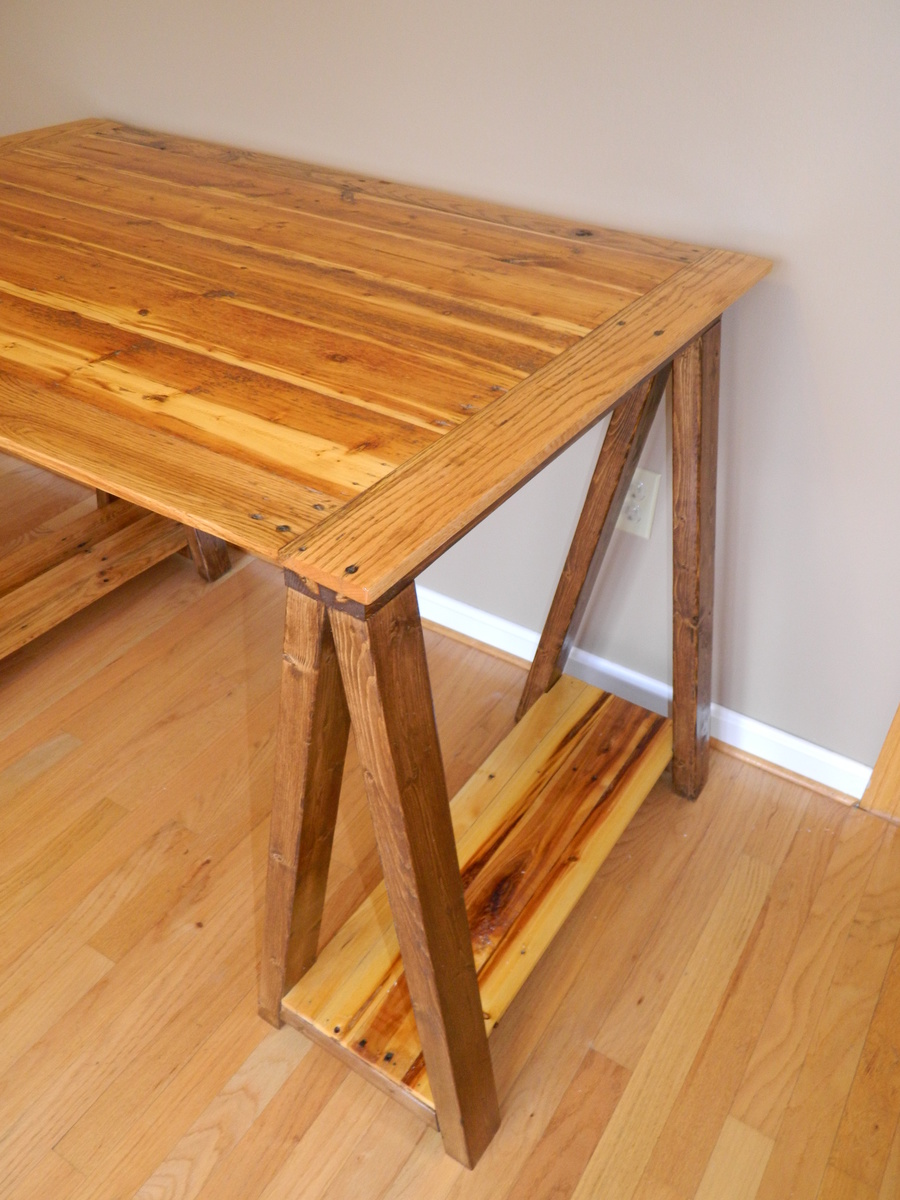
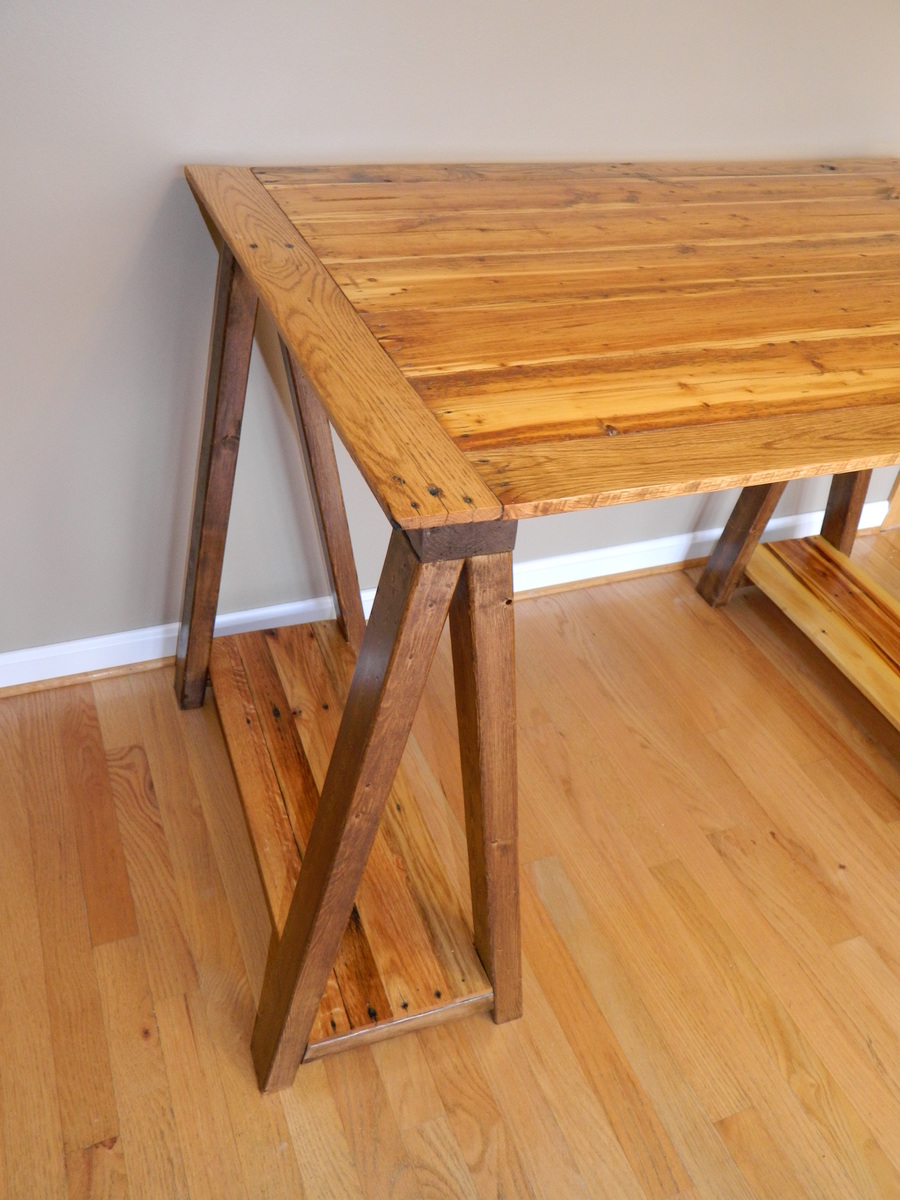
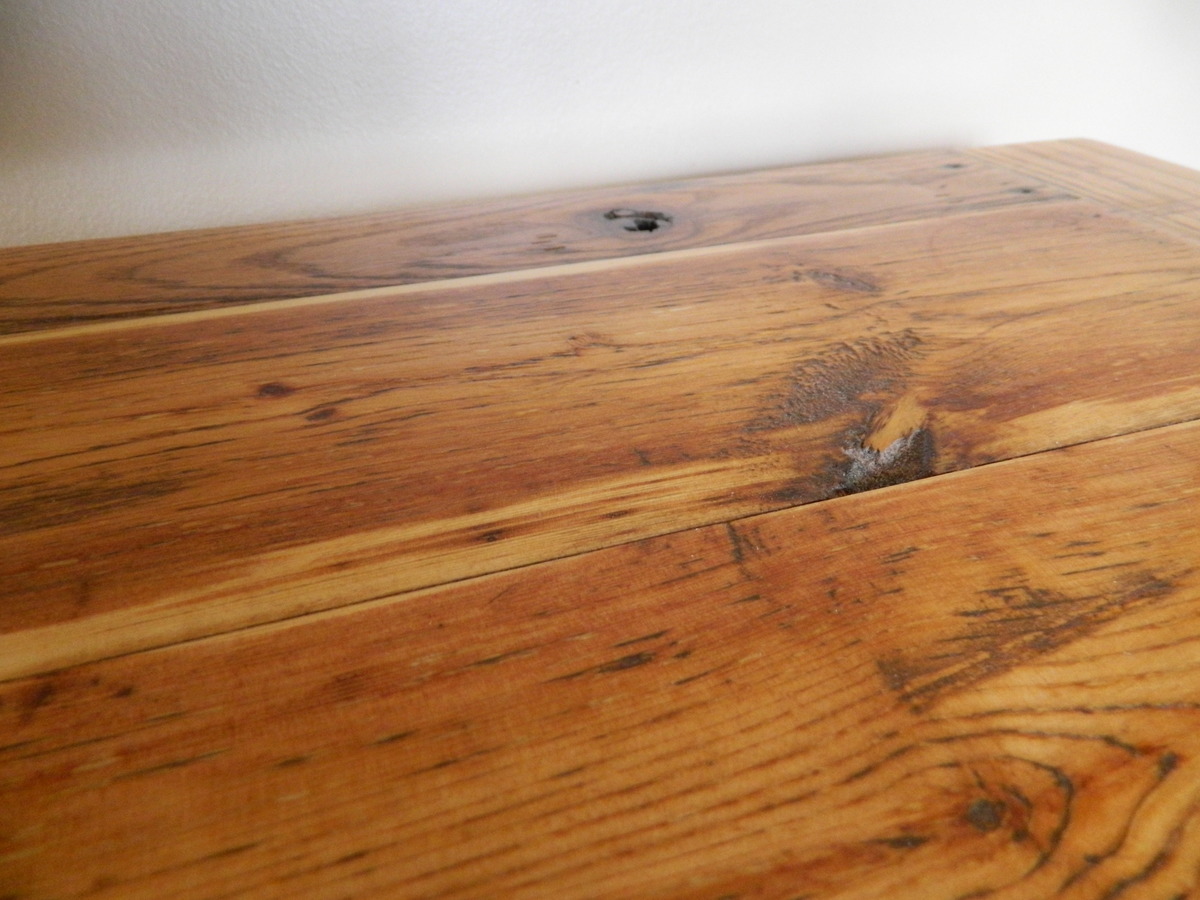
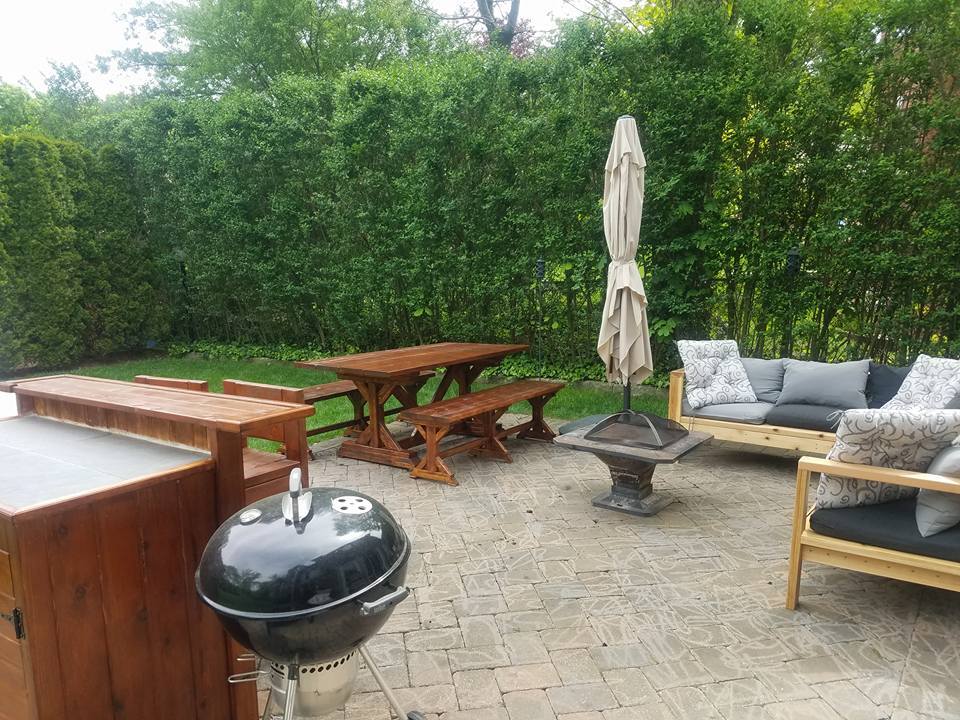
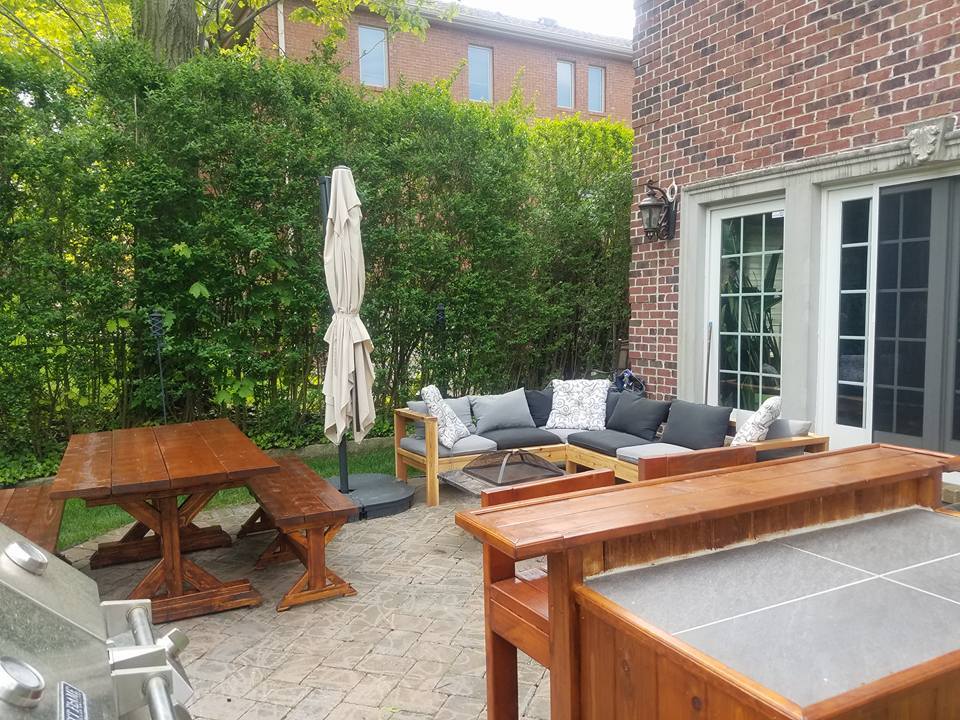
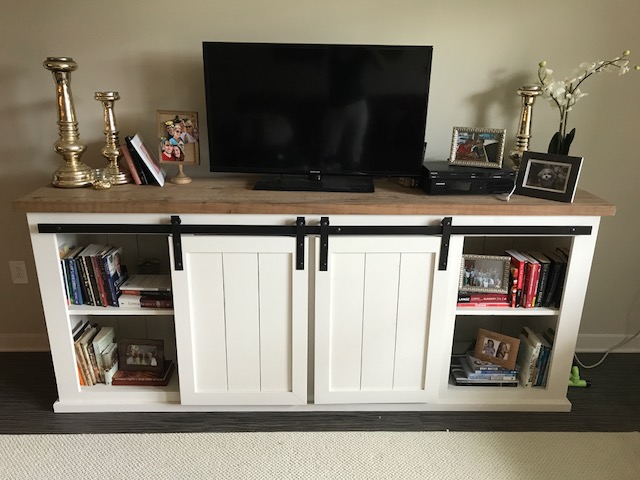
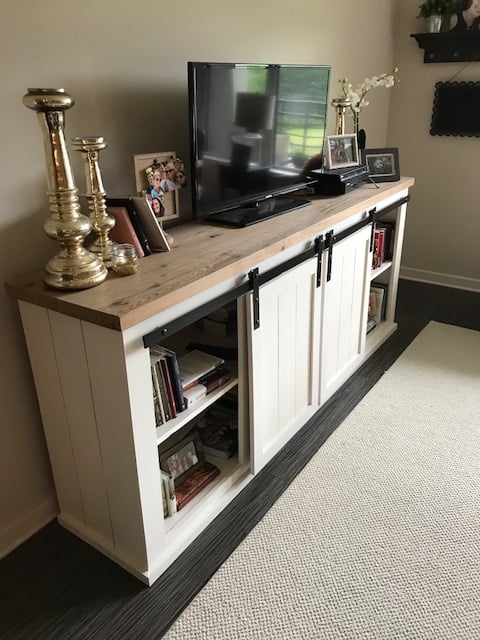
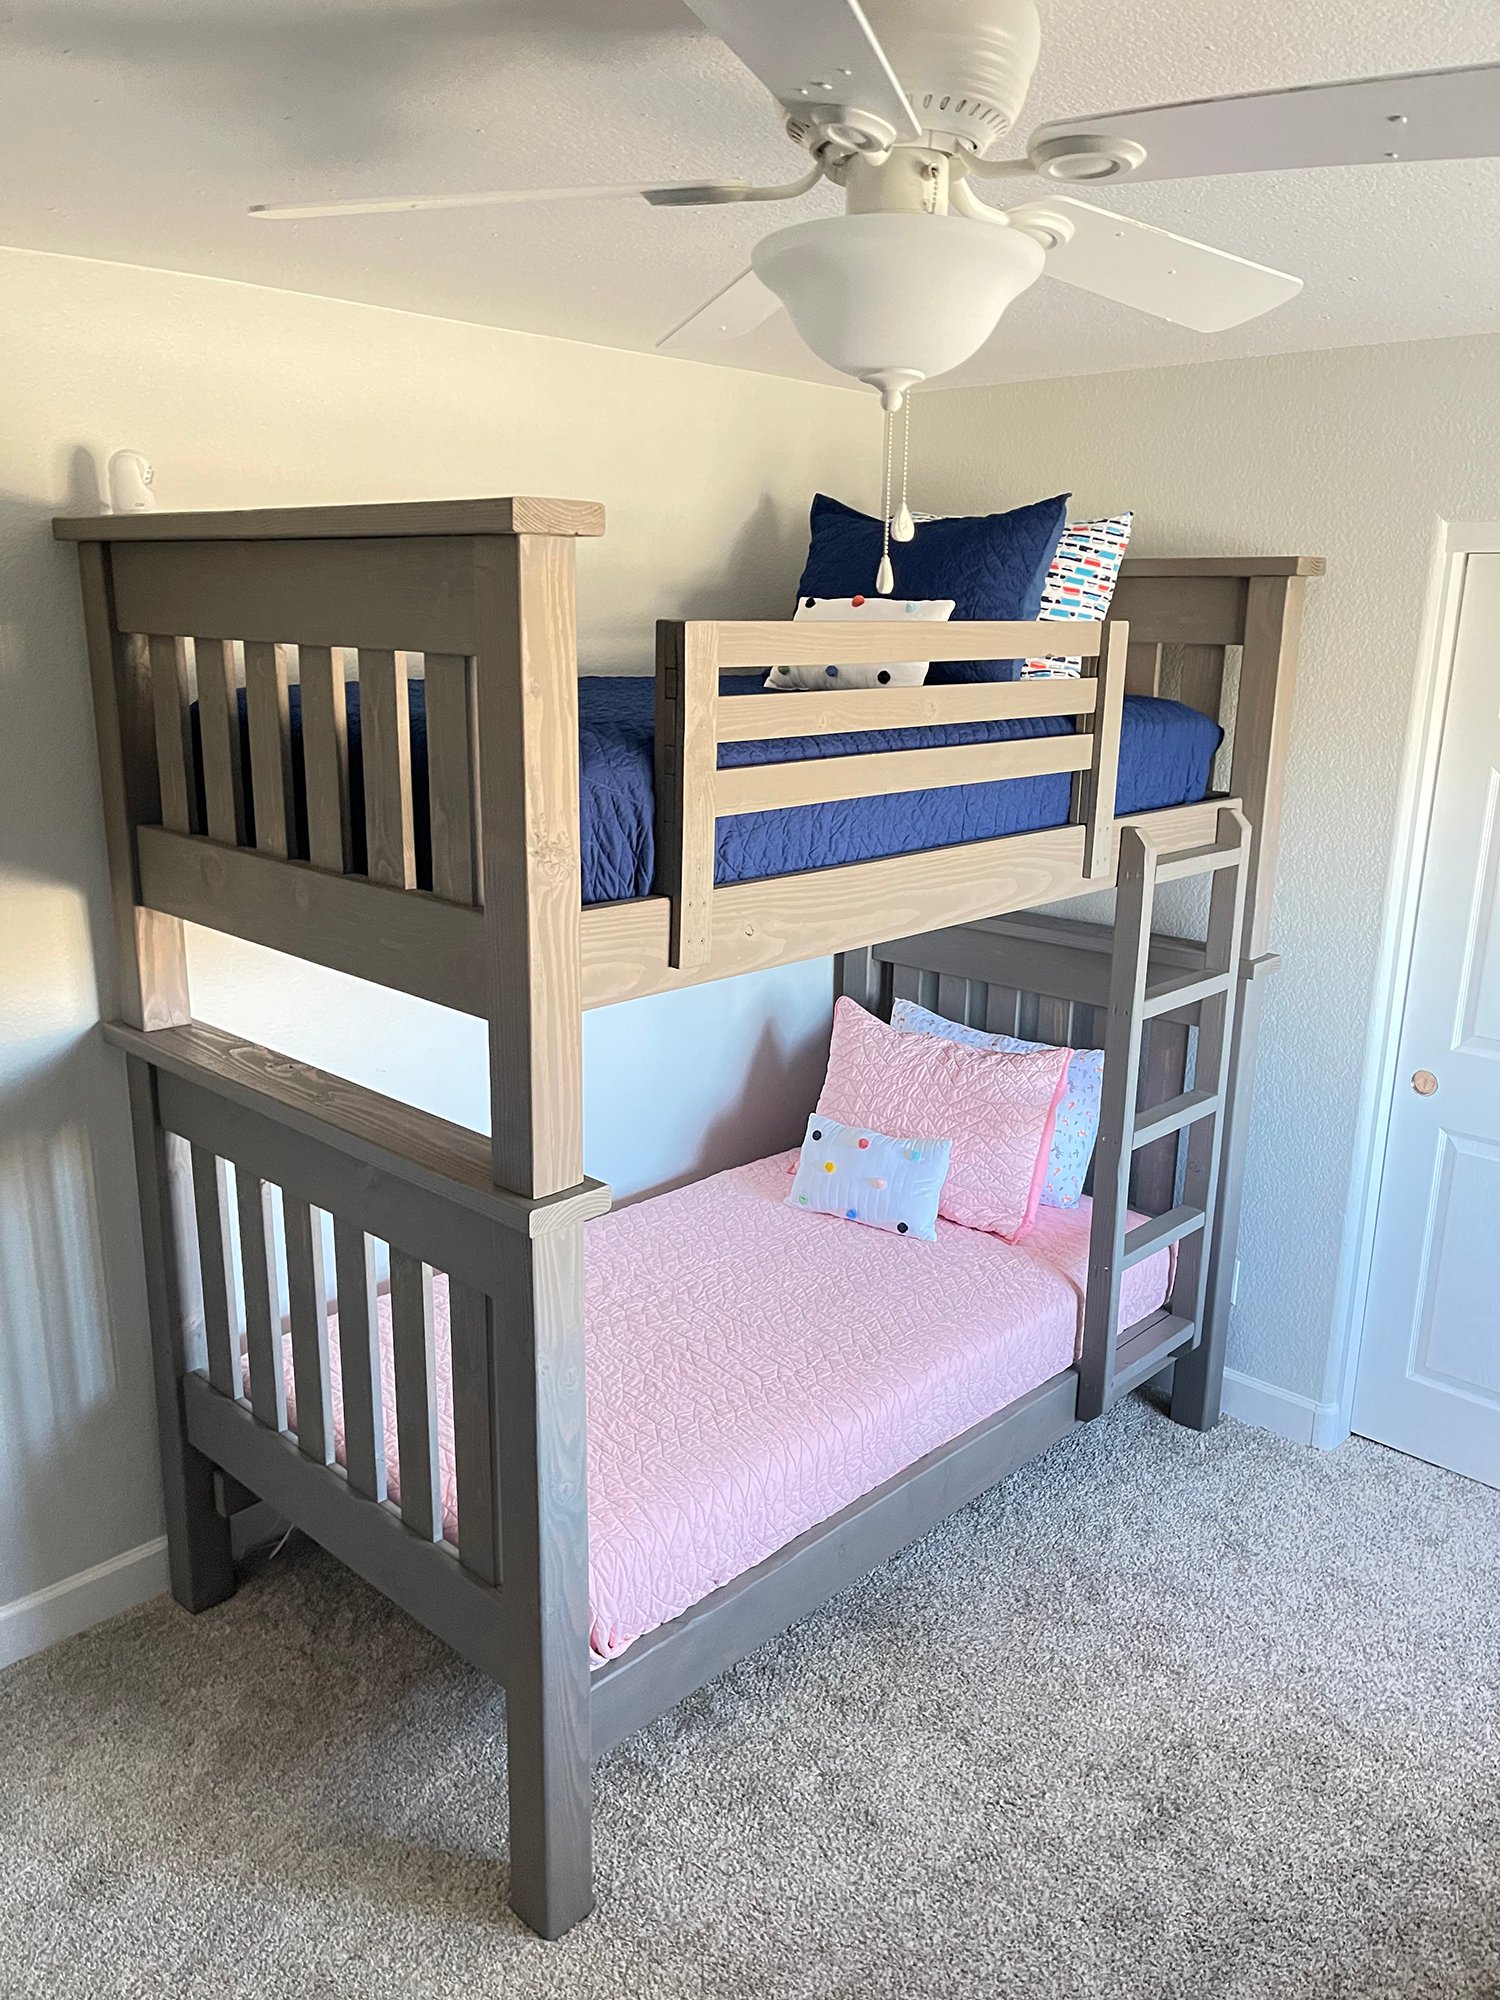
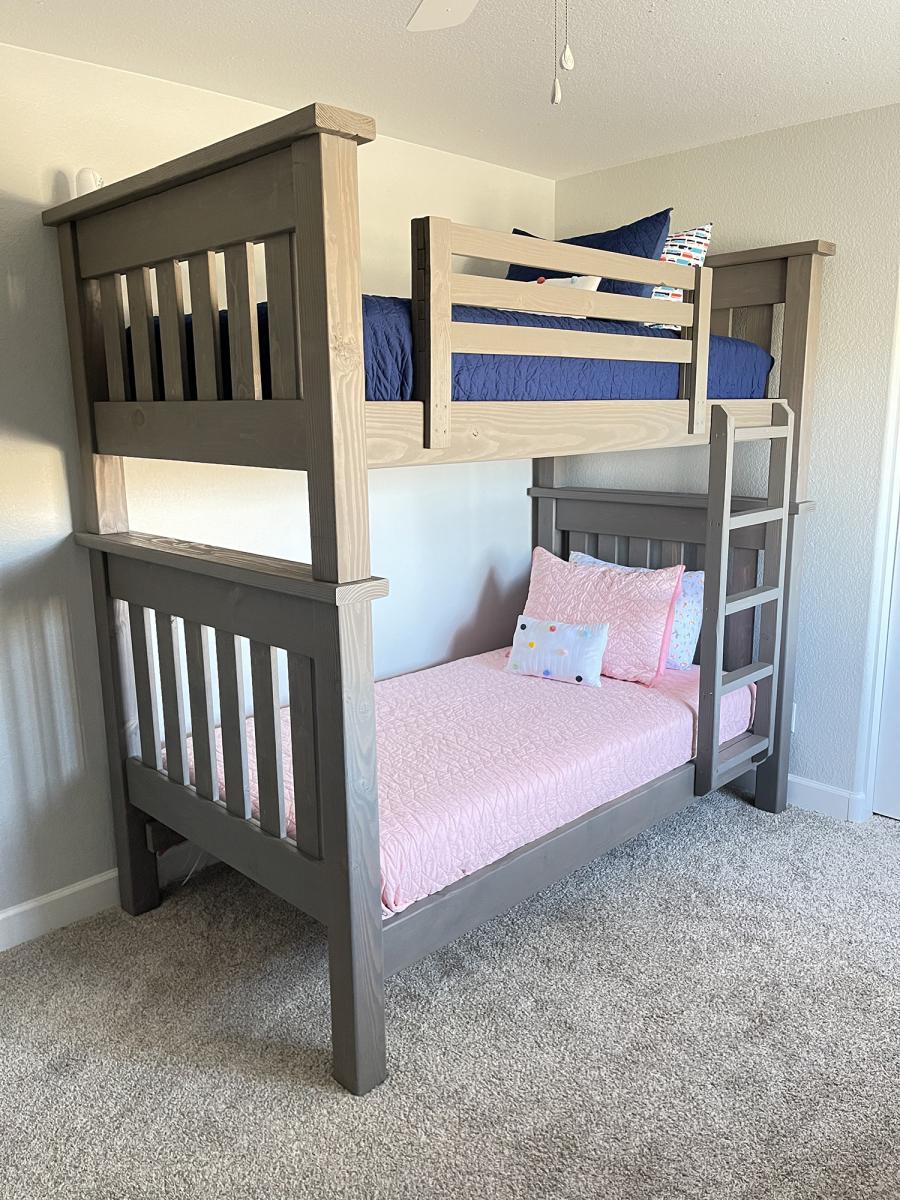
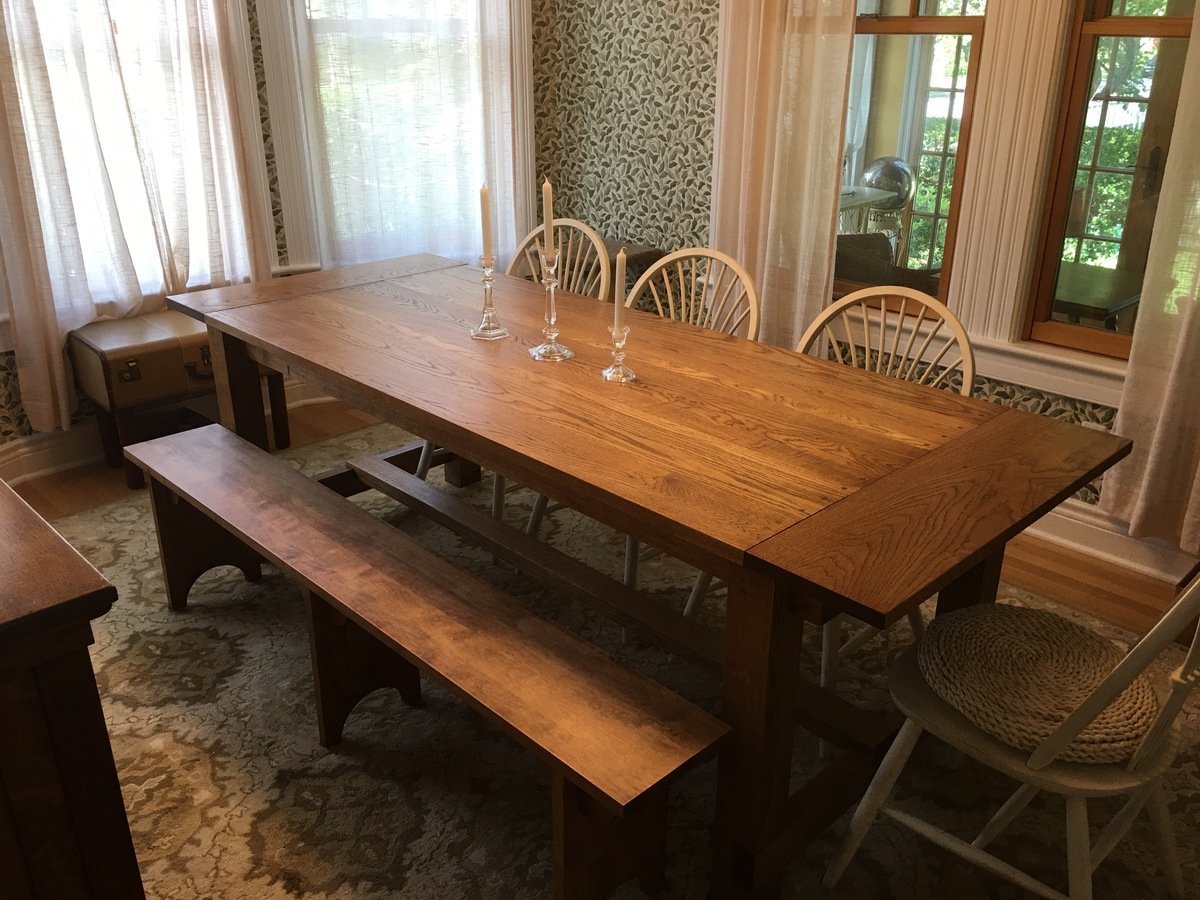
I built this using the Farmhouse Table plans, and we're thrilled with the results. My modifications included making the table longer and narrower to fit our dining room, and building it from some fantastic white oak from a local lumberyard called Boards & Beams in Fairfield, NJ. I used 5/4" thick boards of varying widths for the top, and created deeper overhangs at the ends by making the breadboard ends 10" deep. Unlike a more rustic version using pine, the lumber was extremely expensive, and the oak makes an already heavy table even heavier. Still, it is orders of magnitude less expensive than purchasing a custom table like this, and I only needed to "ship it" from my garage. 

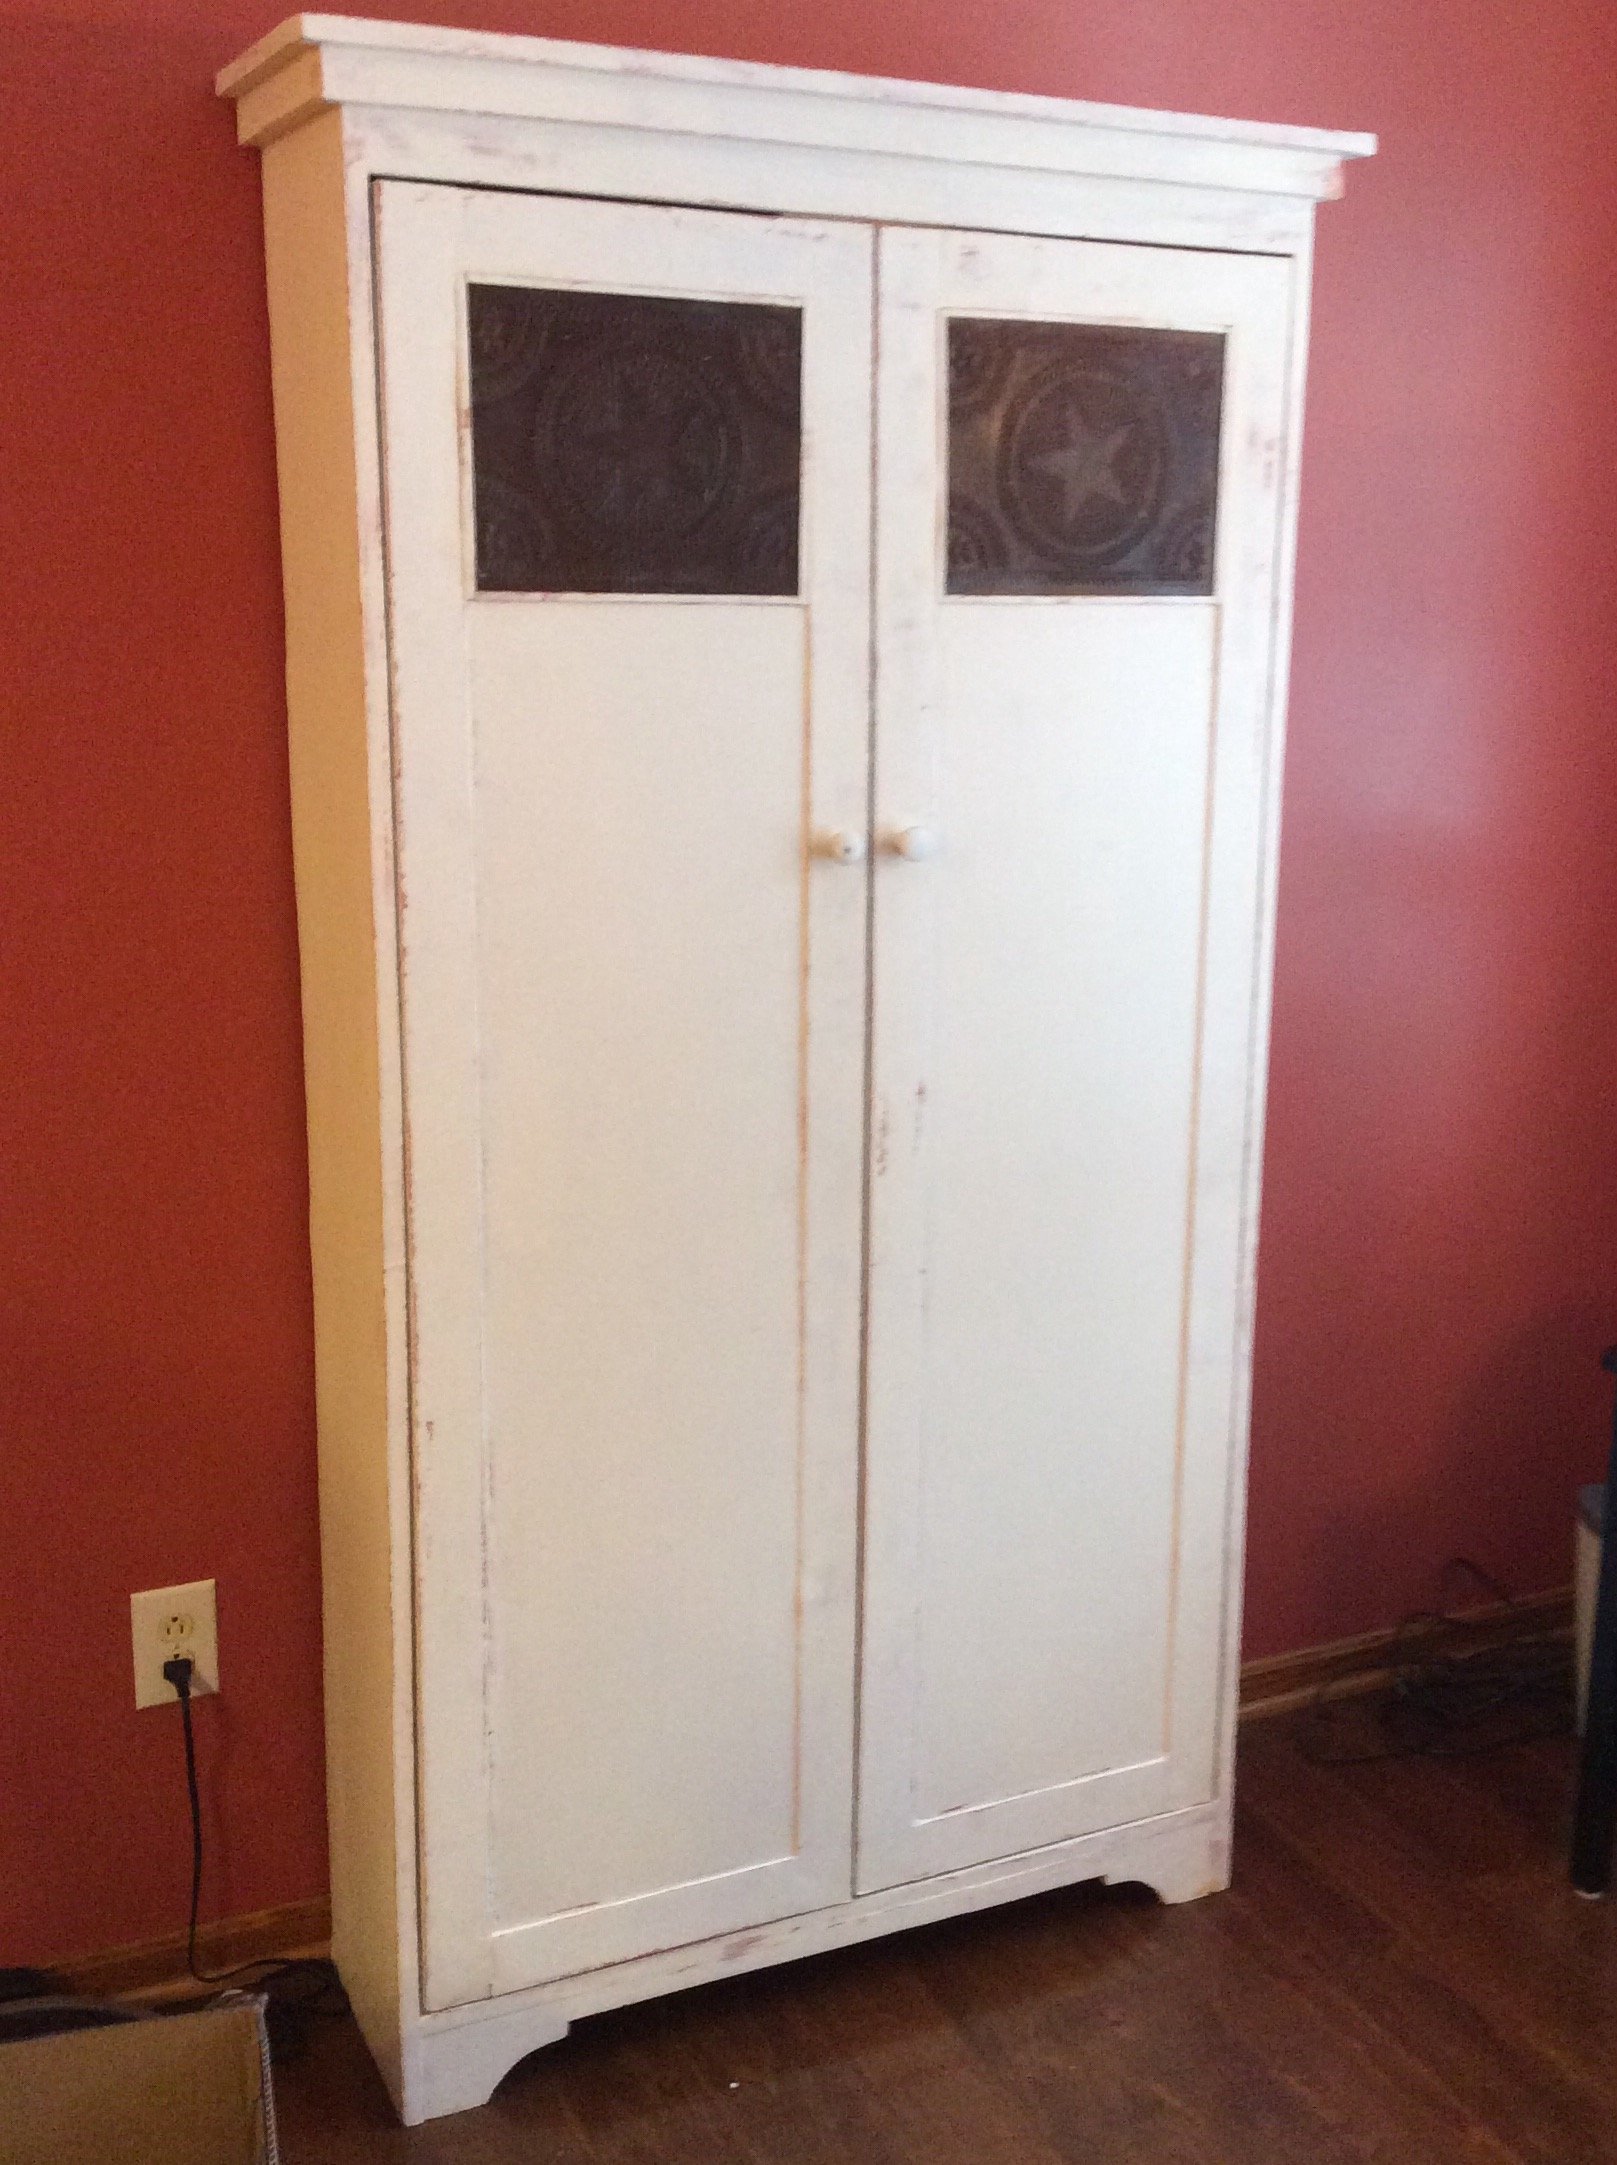
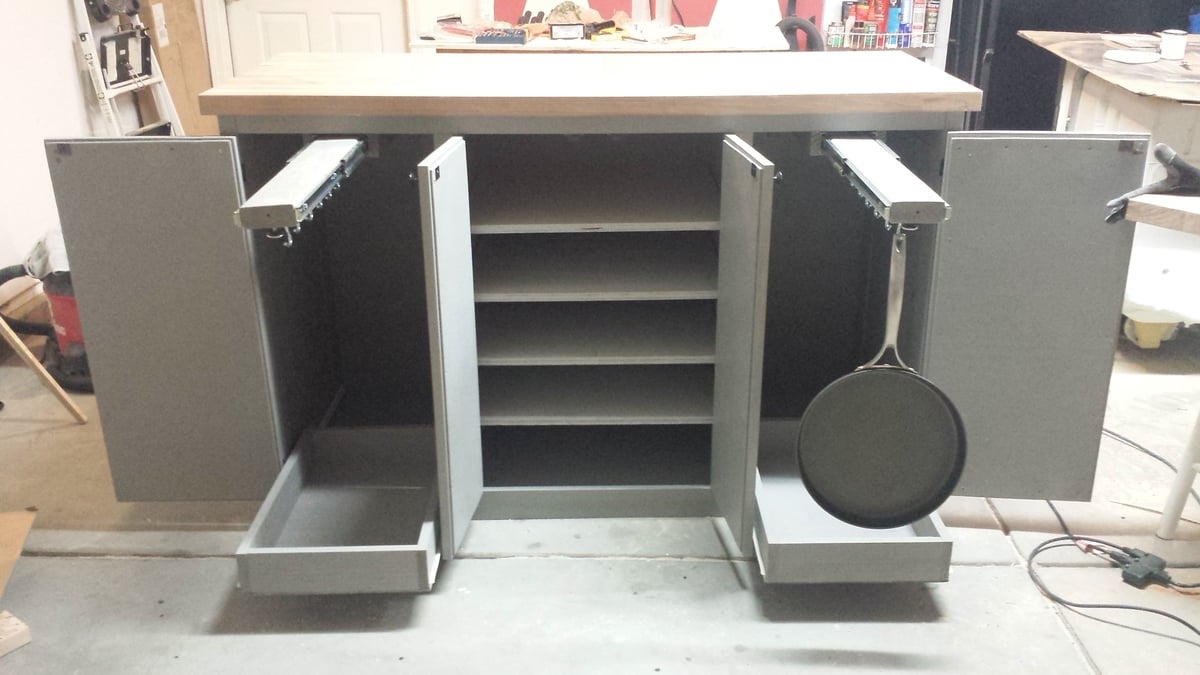
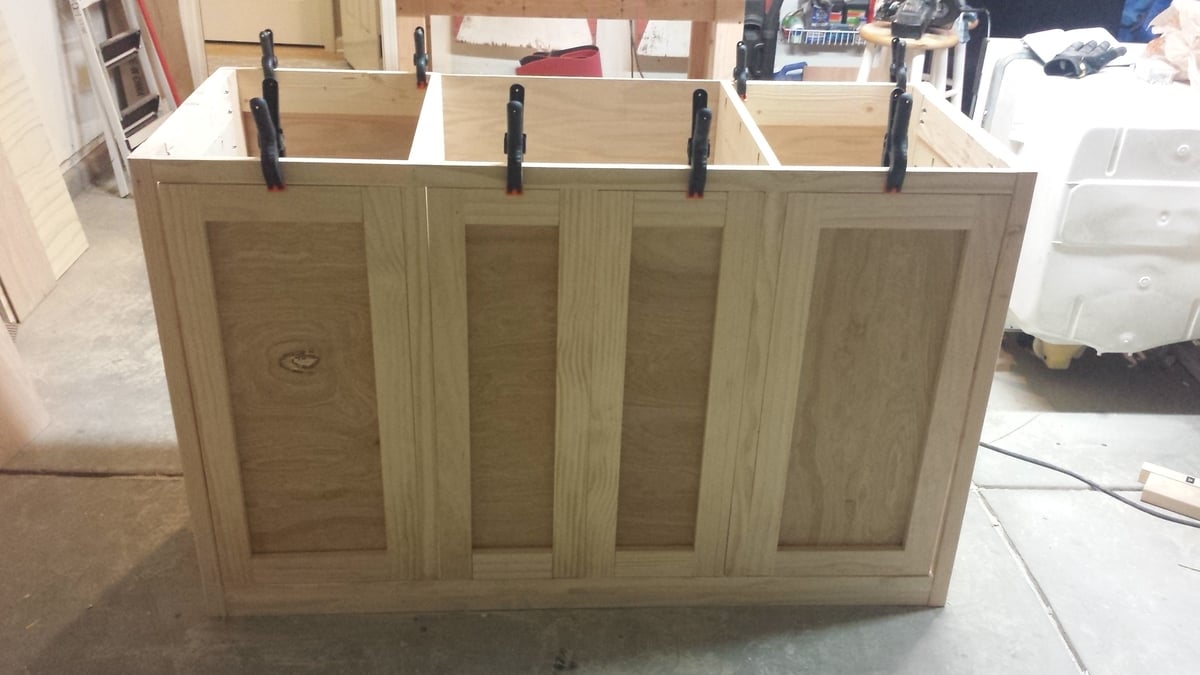
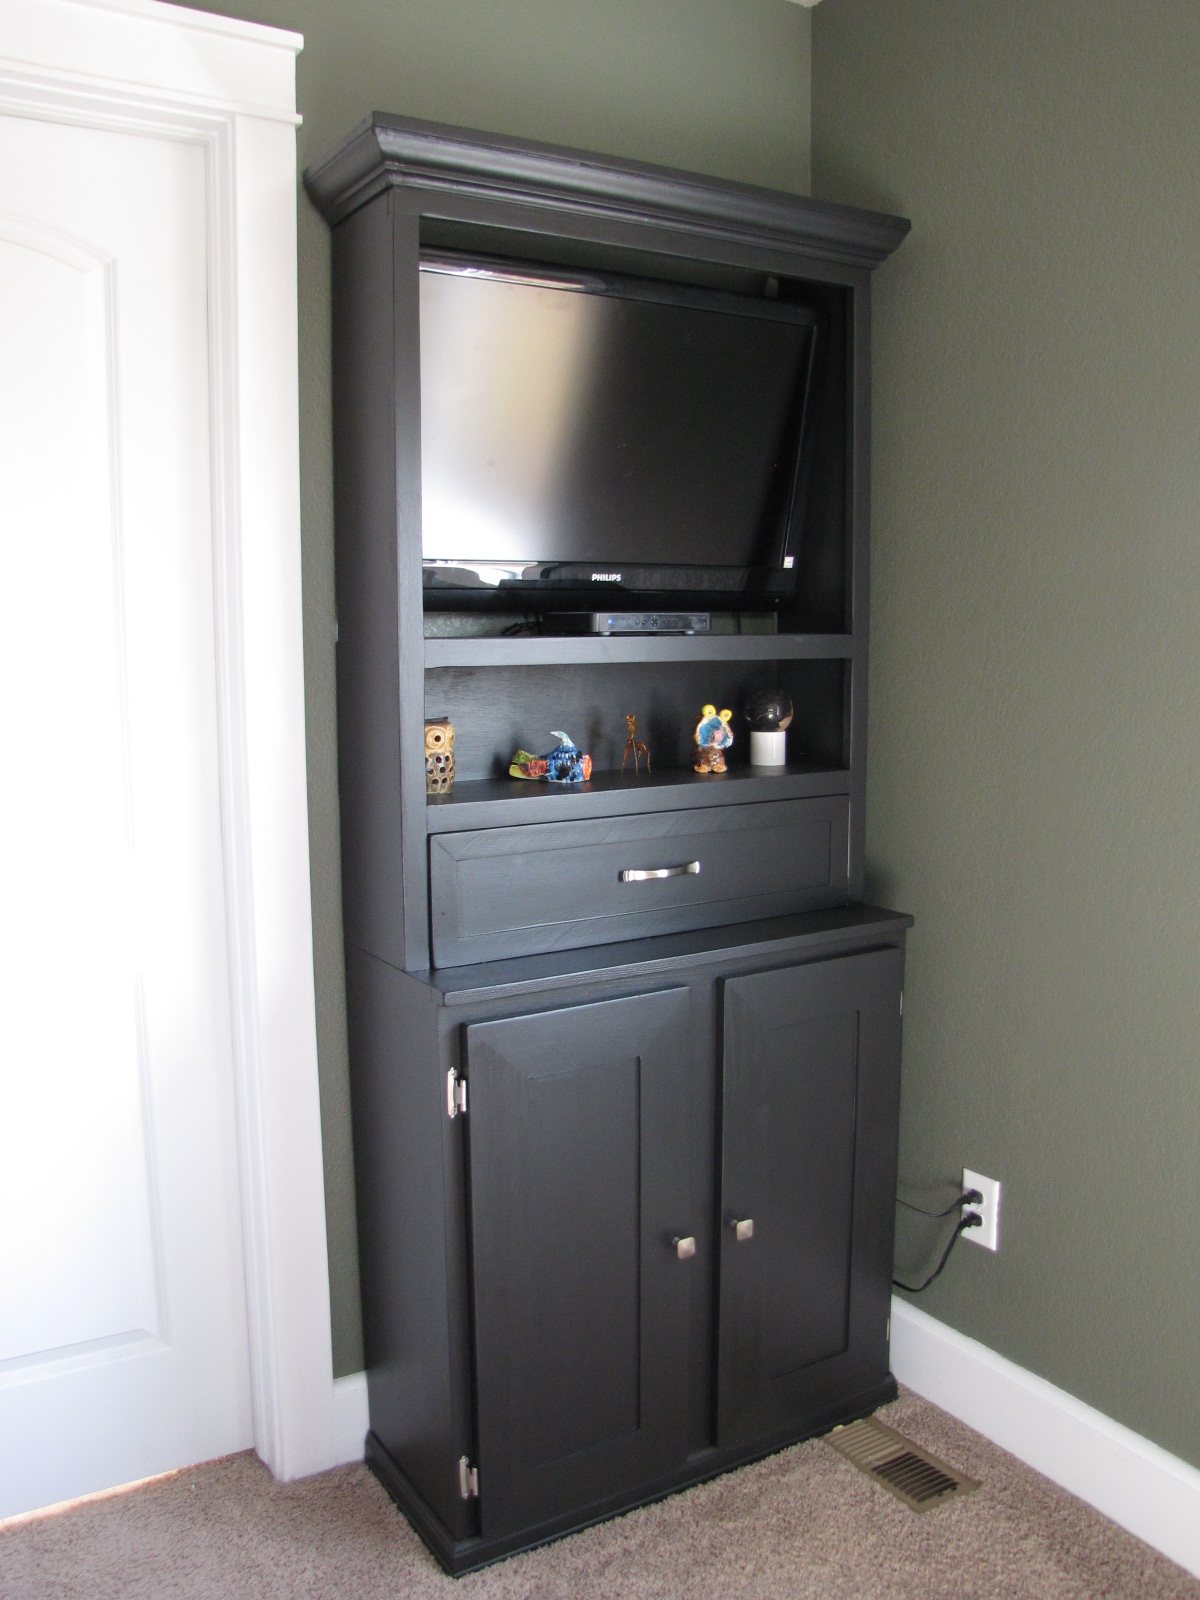
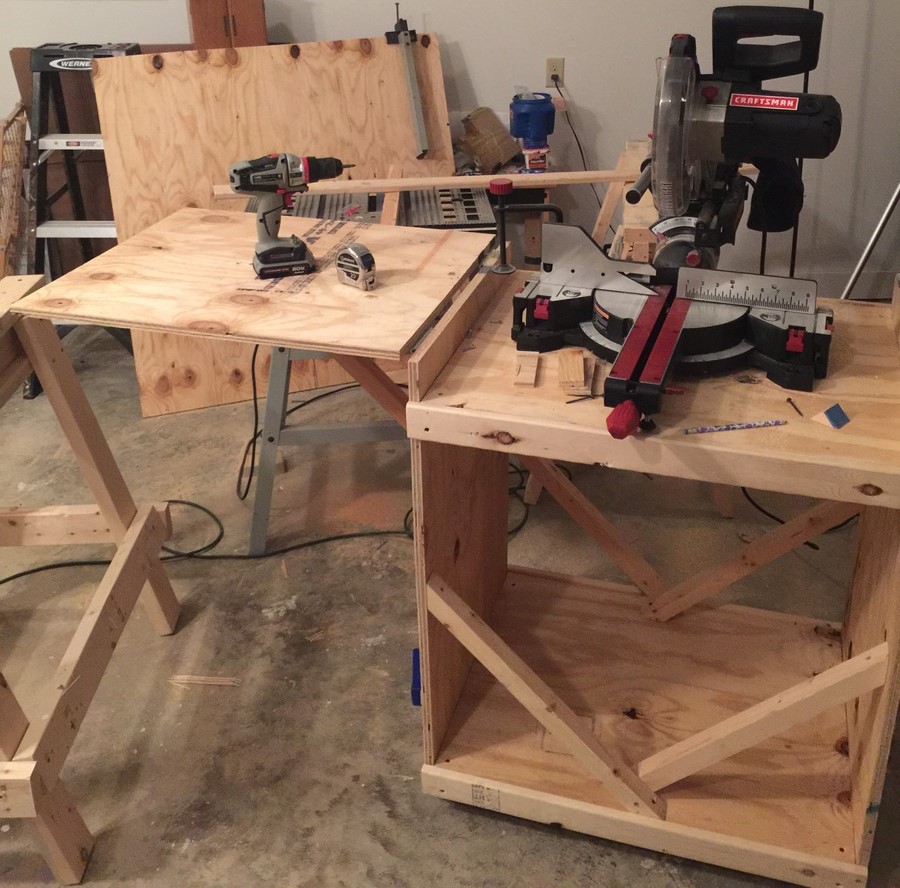
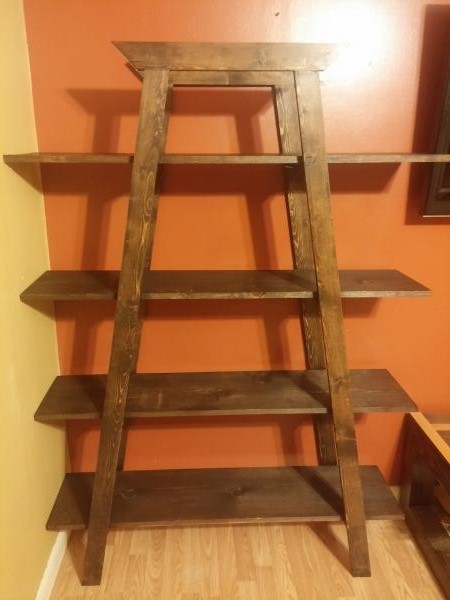
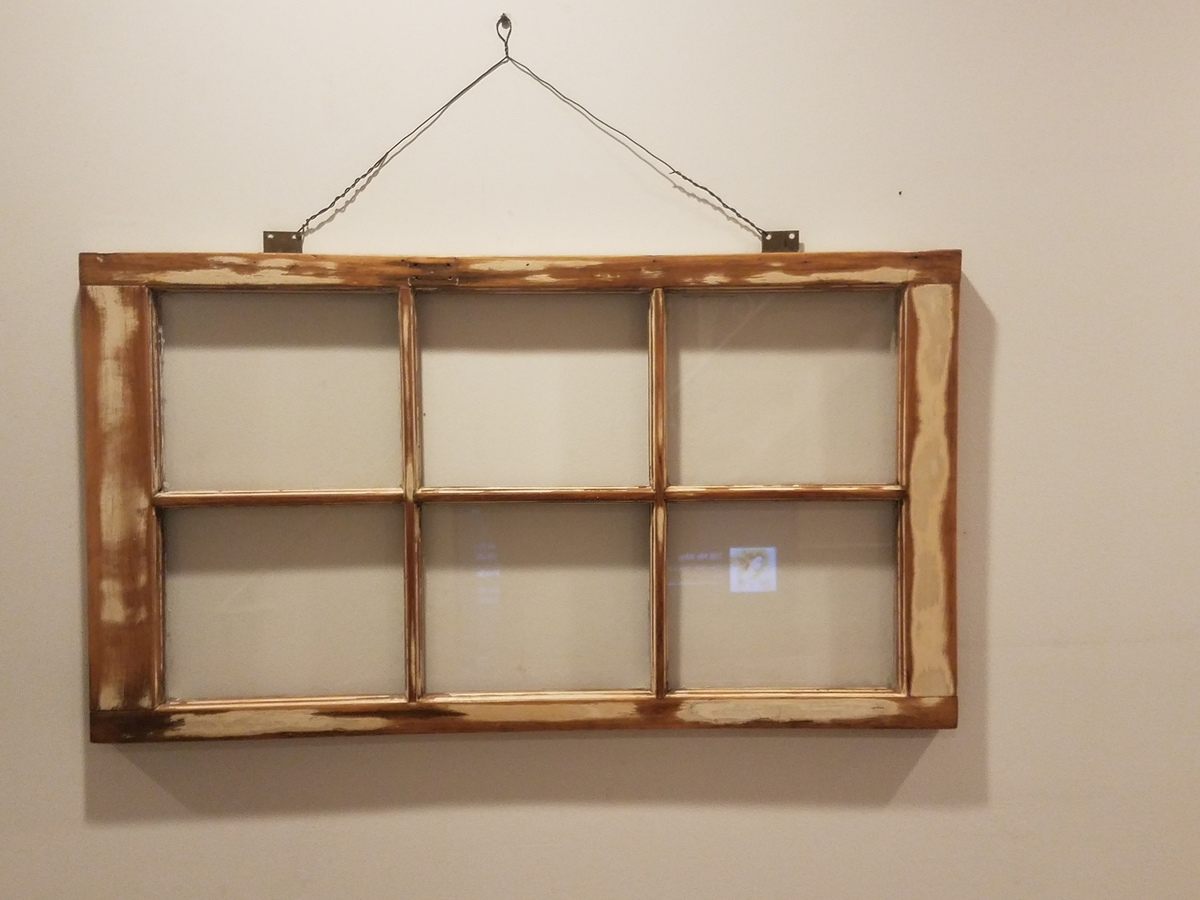
My idea was to match, as closely as my skills would allow, the antique buffet in the photo next to the table. Or at least to build something that would look good next to the buffet. My prior woodworking experience is limited to DIY carpentry and building plywood shelves and radiator covers. I am not a "mortise and tenon" woodworker (although I'd like to learn). The plans are excellent because this was the first "real" furniture I've ever attempted, and it is literally as solid as if it were carved from a single piece of wood. I rented a 12" compound miter saw from Home Depot to make most of the cuts in one day, which worked out extremely well. The visible screw holes I plugged with oak dowls. 

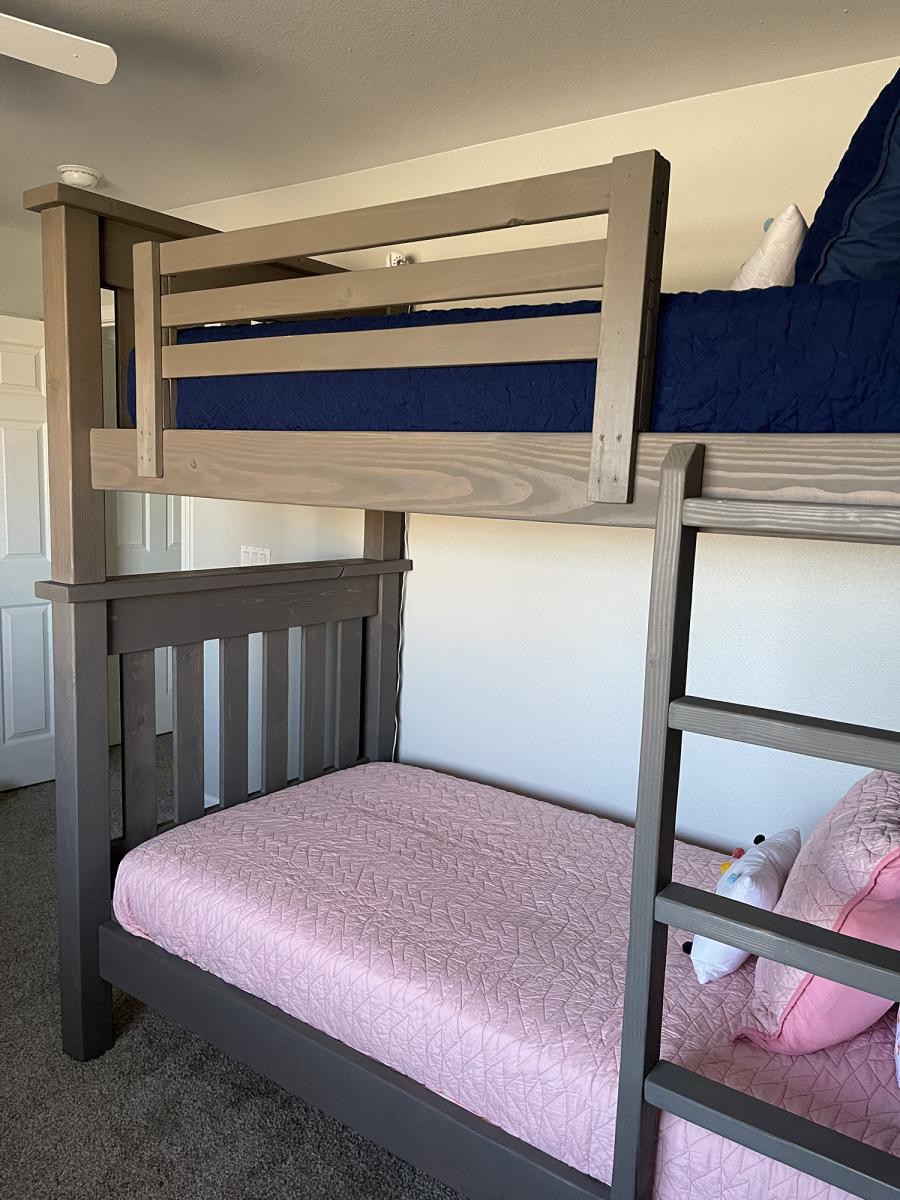
If you decide to build this (or anything) from a hardwood, here are a couple mistakes I made early on that you don't want to repeat. First, EVERY screw into every piece needs a pilot hole. If you have even the slightest thought that your screw is about to strip or break, it is. Second, higher-quality wood is often cut larger than what you find in a big box store. A 2 x 4, which might be 1.5 x 3.5 from Home Depot, can be 1.75 x 3.75. This really matters a lot, and so you have to measure your actual wood and re-calculate every measurement accordingly. The upsides, for me, included fewer warped pieces, less splintering, and greater ease of sanding and finishing.

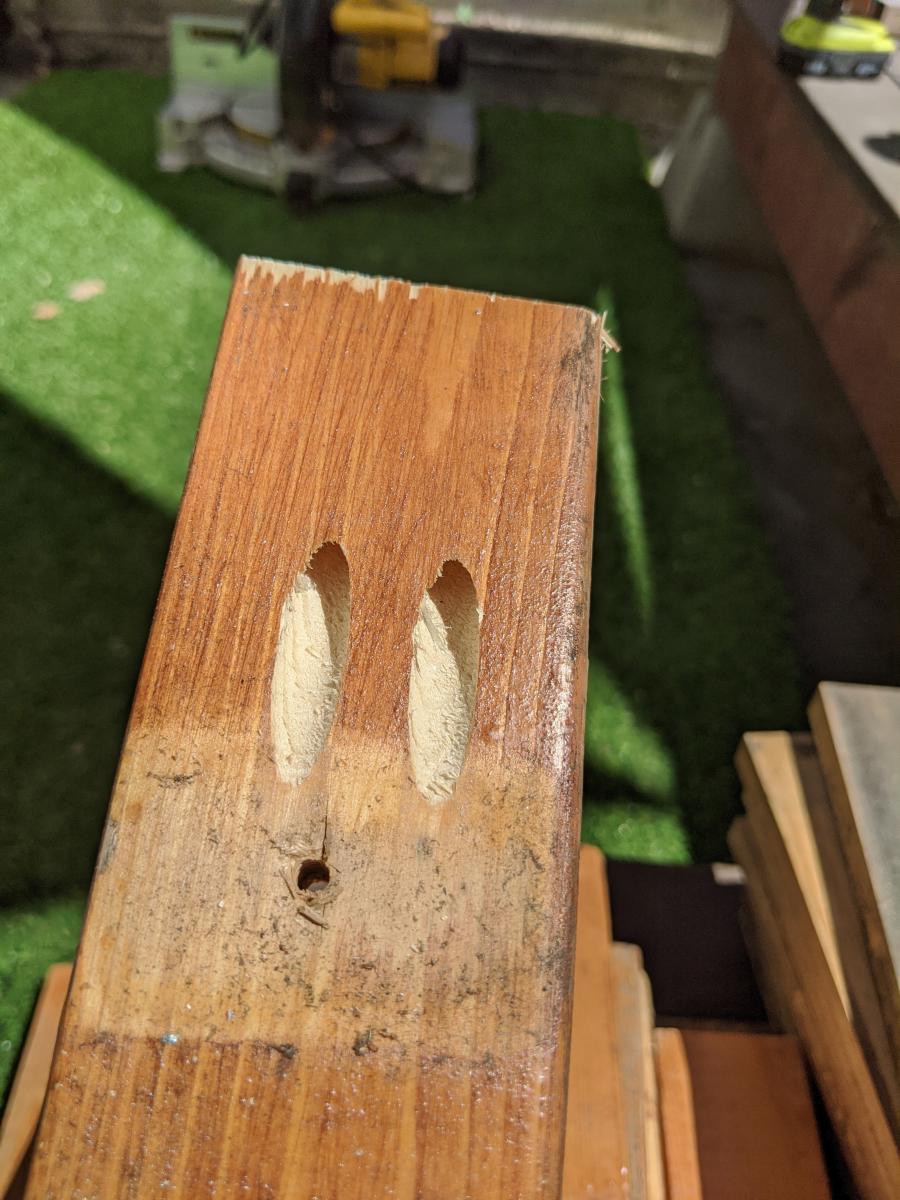
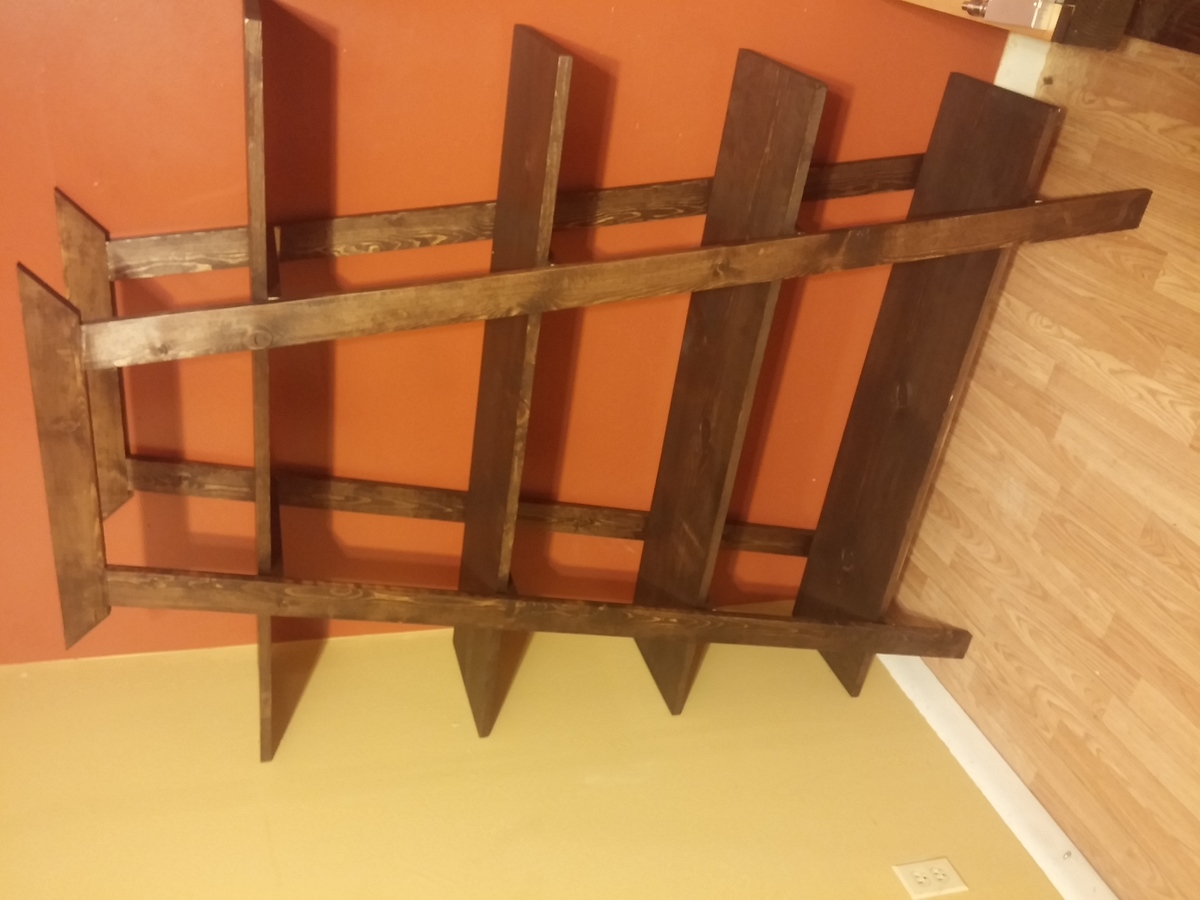
Thank you very much for posting these plans and for your excellent "how-to" on cutting out the notches. 


Estimated Cost
$900 worth of wood and screws, $50 for saw rental, $15 worth of stain and poly.
Estimated Time Investment
Week Long Project (20 Hours or More)
Finish Used
Varithane "Provincial" stain, applied with a rag, followed by three coats of Minwax Wipe-on Polyurethane applied with a rag. I used less than 1 pint of stain for the whole table. The Wipe-on is less glossy than a brush-on. It really wants to go on in VERY thin coats. I may have done 4 coats on the top. In between coats, I sanded with wet-dry grits of 800-1000. The result is a very even finish (but not as even as a professionally applied finish) that you can still feel the grain through, and there are no brush strokes to deal with.
Recommended Skill Level
Intermediate