Community Brag Posts
Version of the Rustic Desk
I’ve built 2 of these and on my 3rd now. This is the 2nd one and isn’t a desk obviously but a bench for my Weber BBQ and storage underneath
Built from Plan(s)
Comments
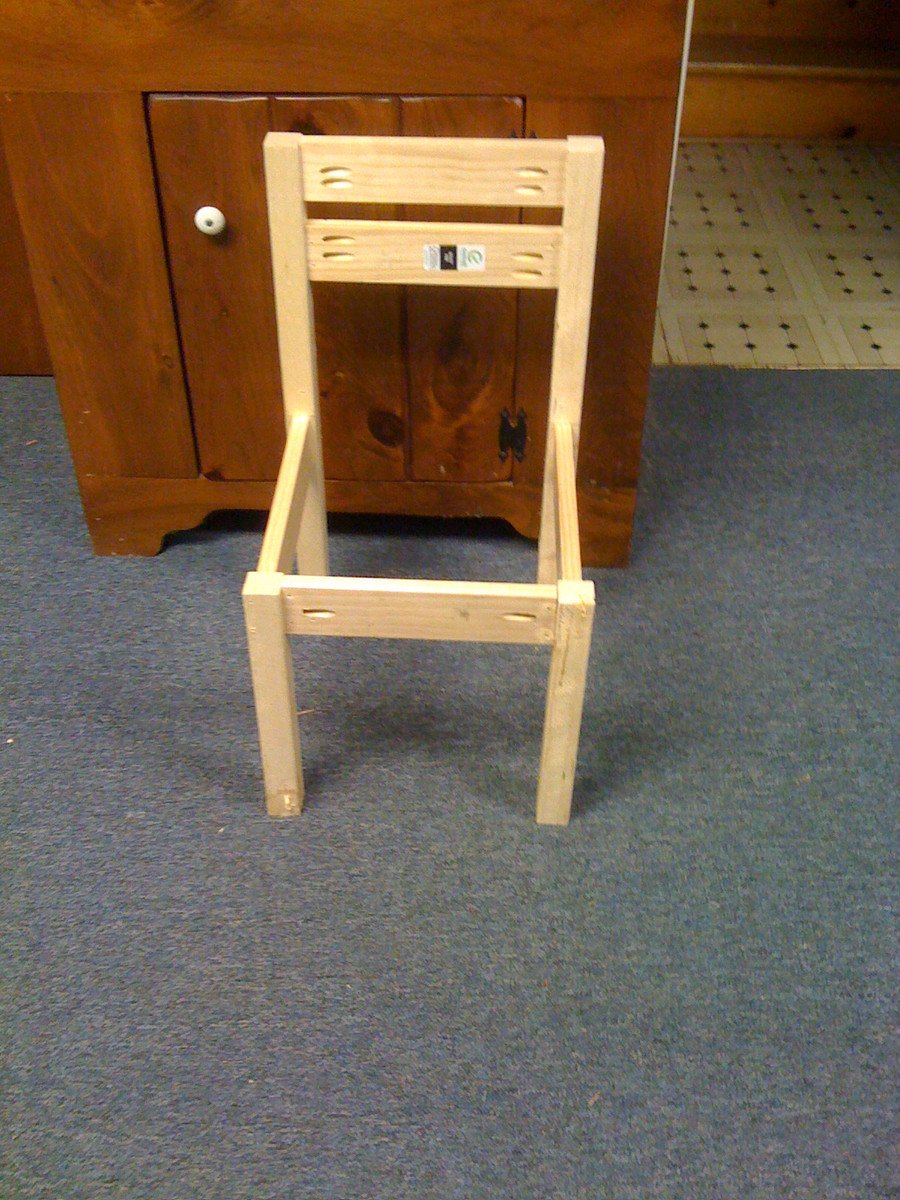
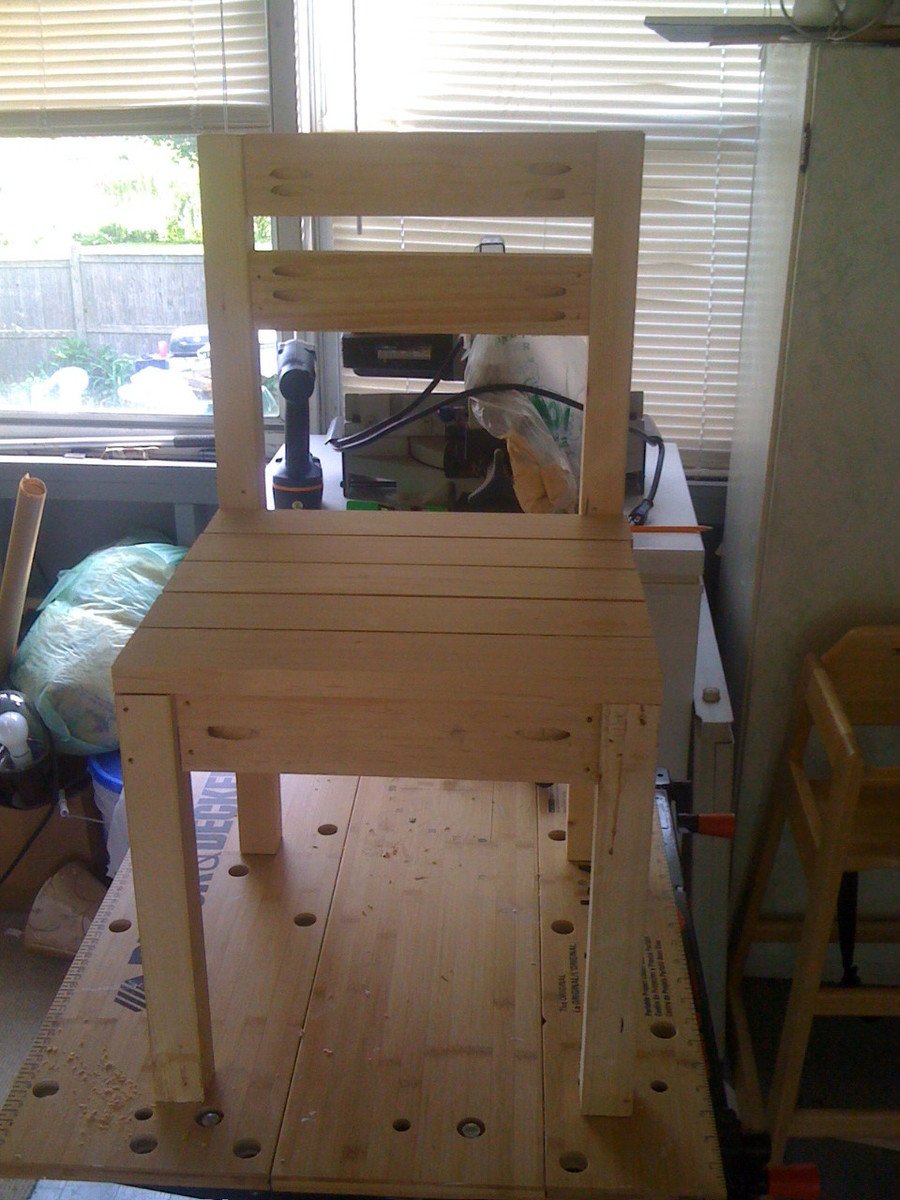
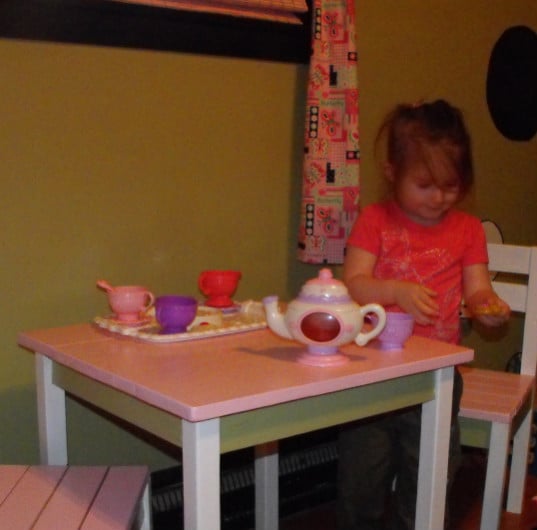
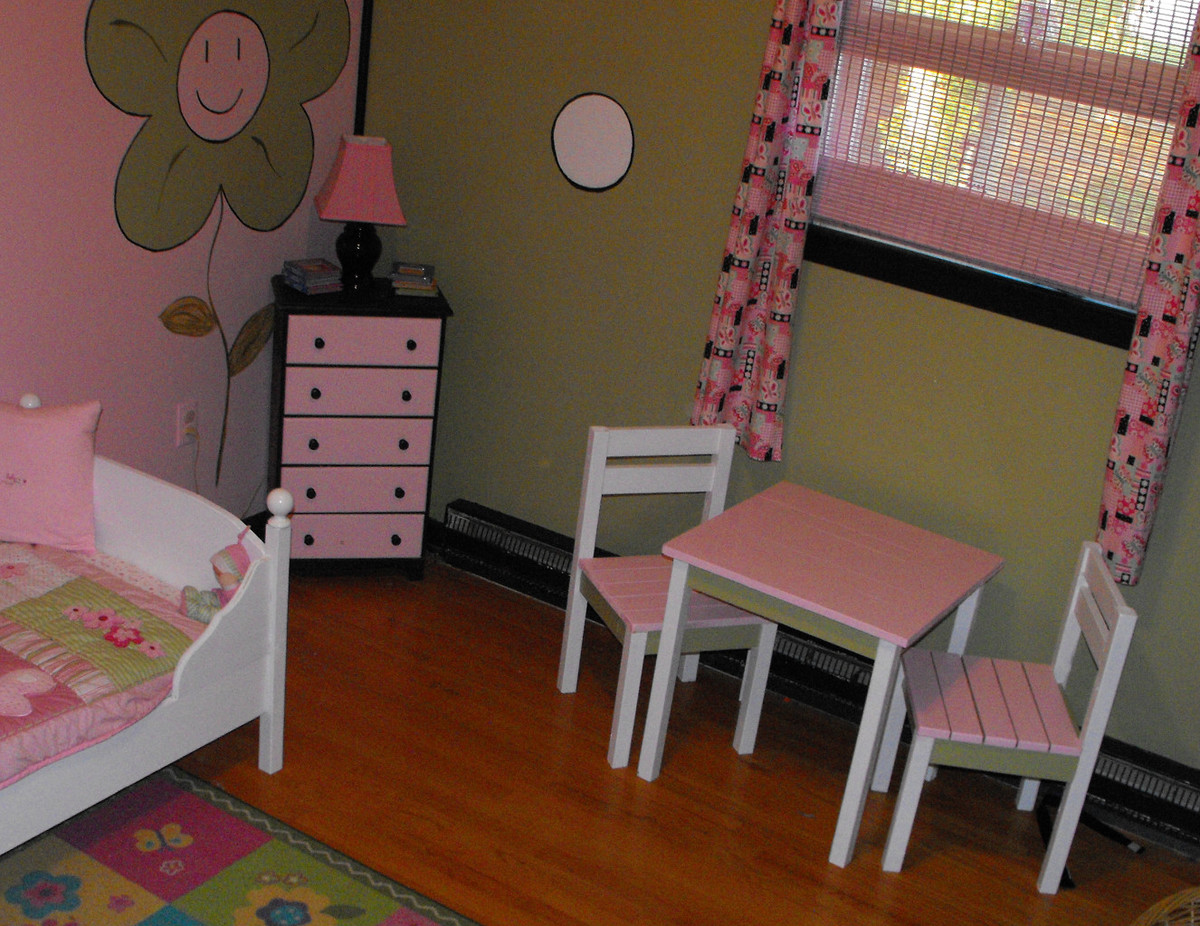
Marlee's Table and Chairs
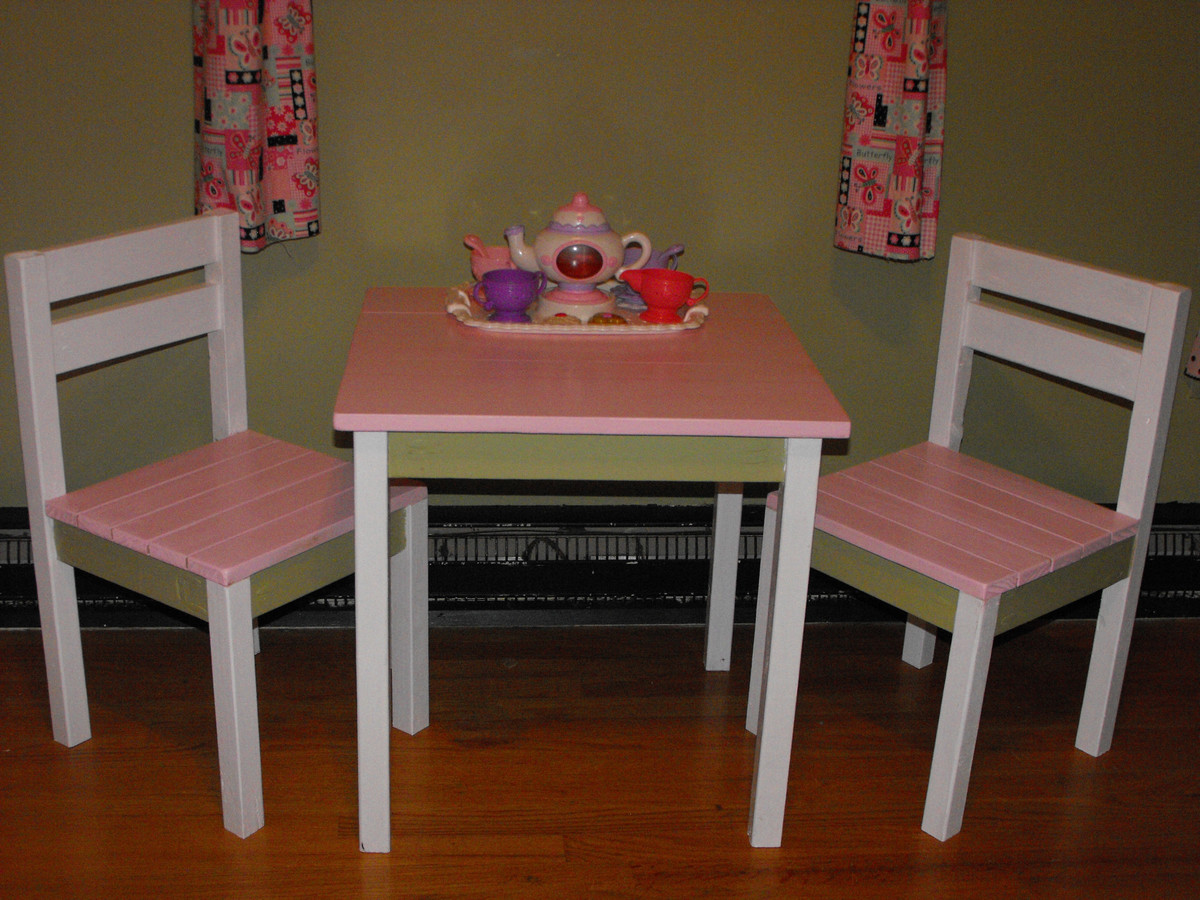
I modified the Clara table and a few of the chair plans to come up with Marlee's new set. I had scrap 2x2s, 1x6s and 1x3s from the Lydia Toddler Bed and so I modified the dimensions a bit and used 3 boards 1x6 and 2 1x3 to make up the table top. The chairs are a combination of the Four Dollar Stackable Chair and the Classic Chairs Made Simple. I kept splitting the wood on the legs for the Four Dollar chair, so I modified the plan to have the legs 2x2 like the table and bed. It was a lot of trial and error but I finally got it right... The only thing was I had already cut the seat slats to size so I used them as the seat supports and so I only had to purchase two 2x3x6, other wise every thing else was scrap.
She was so excited to see it... we already had 3 tea parties!! Thanks to you Ana for your inspiration. I so can't wait to start the doll high chair for Marlee's next surprise!!!
Built from Plan(s)
Estimated Cost
Only spent $12.
Finish Used
3 coats of paint and 3 coats of poly. Pink is Sherwin Williams Azalea Flower, Green is Sherwin Williams Rye Grass. The same colors on her walls.
Recommended Skill Level
Beginner
Comments
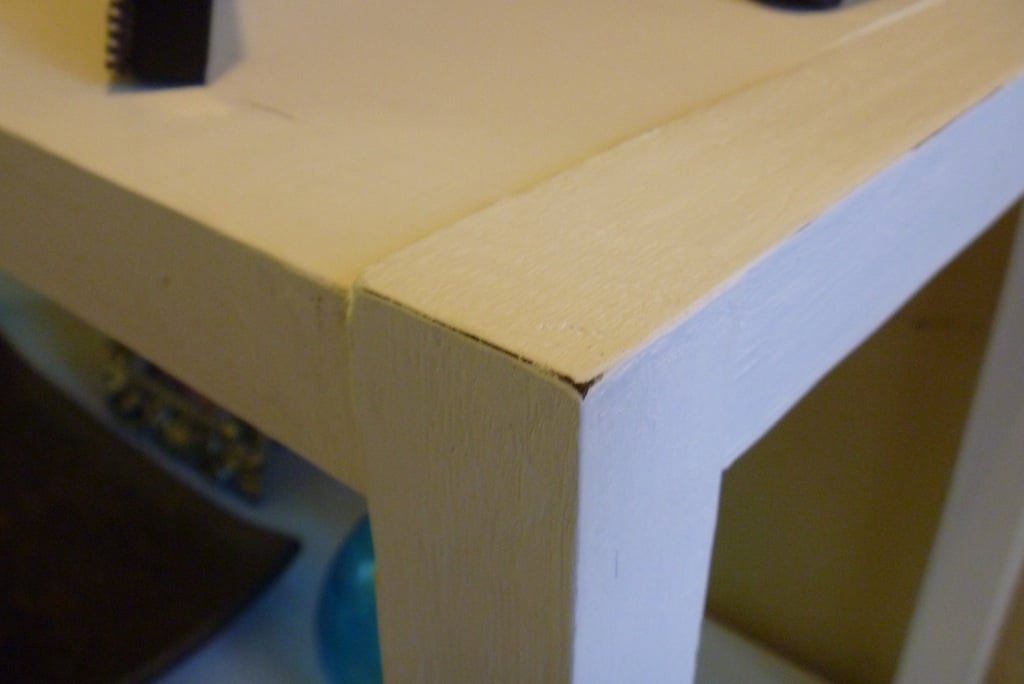
Modified Benchmark media console

The plans were totally wonderful!
This was the first major build since building the clara table and chair. So I am pretty much a novice. Toughest part was keeping things square. Even though it is far from perfect, we just totally love it.
I left the top shelf open for media requiring remotes and changed the doors to look like apothecary doors.
I ended up having to make the doors twice because the first time I used 3/4" plywood with 1/2" strips for the faux doors. The door was so thick - I couldn't find hinges anywhere that would work. So I redid the doors with 1/2" plywood and 1/4" strips. Used the same hinges Ana suggests.


Built from Plan(s)
Estimated Cost
$250 including paint
Estimated Time Investment
Week Long Project (20 Hours or More)
Finish Used
Home made chalk paint from Behr Baked earth, Glaze using Martha Stewart tintable glaze mixed with black acrylic paint, Johnson's paste wax.
Table top - Rustoleum Kona with Minwax poly in semi gloss.
Knobs are from Hobby lobby.
Table top - Rustoleum Kona with Minwax poly in semi gloss.
Knobs are from Hobby lobby.
Recommended Skill Level
Beginner
Comments

Sun, 07/28/2013 - 17:03
Great looking project!
Looks awesome, love the finish and the apothecary doors!
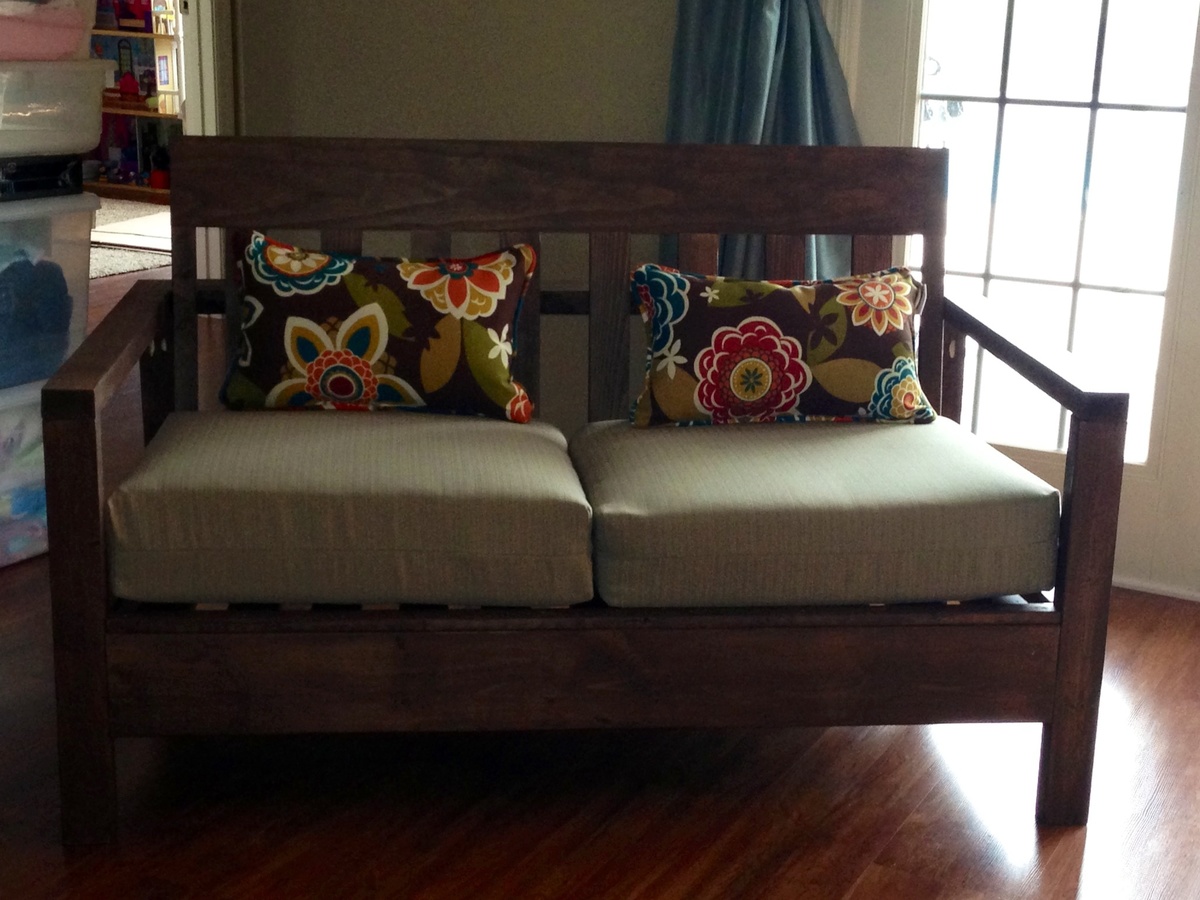
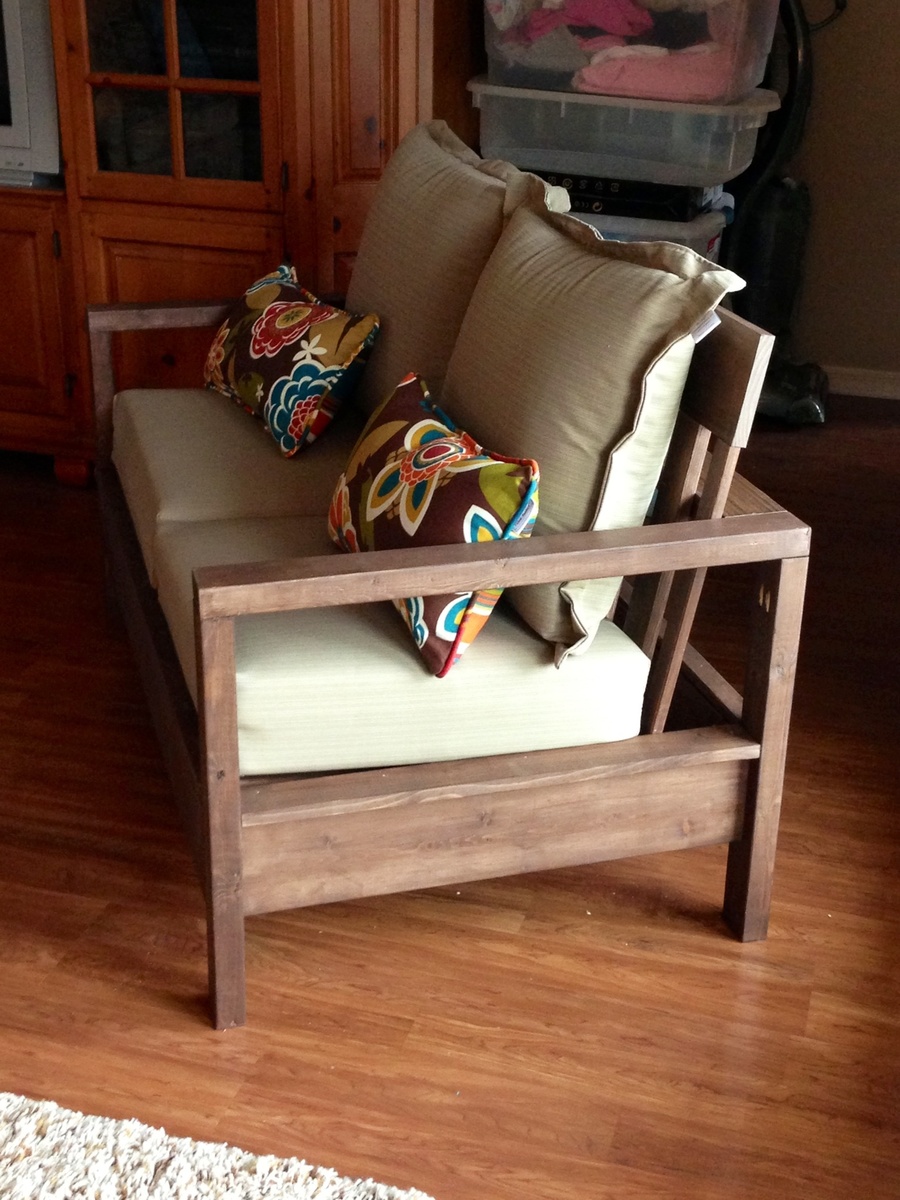
Outdoor sofa
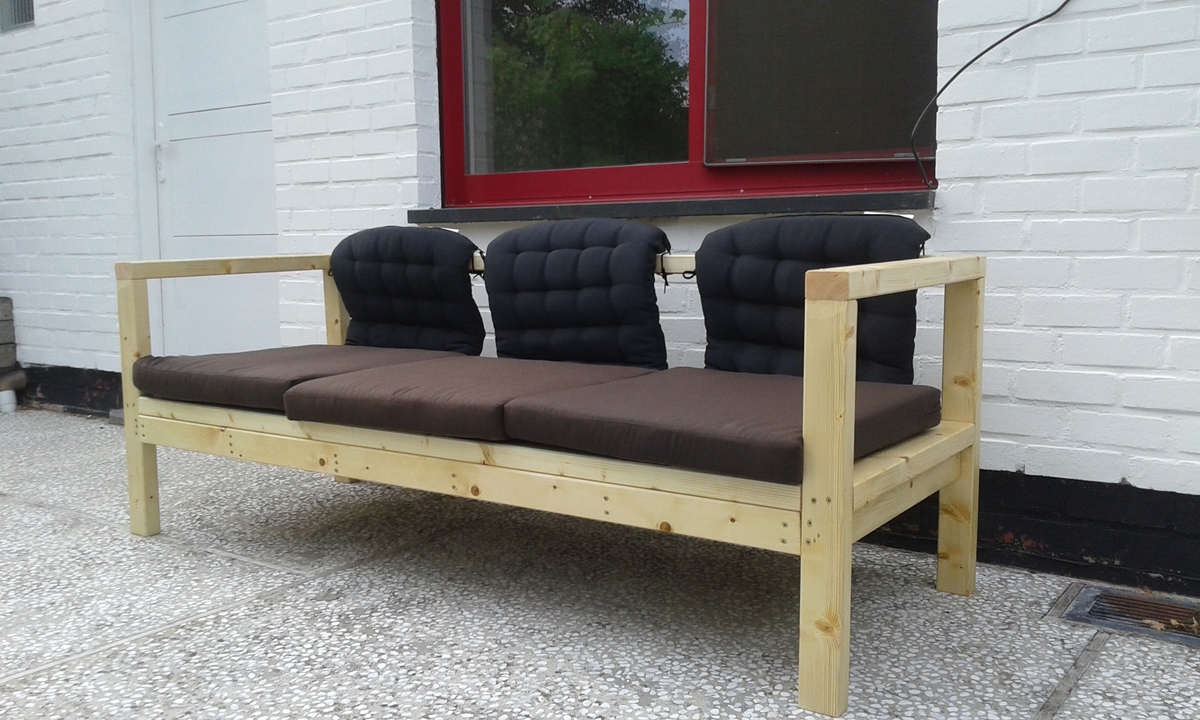
sofa
Estimated Time Investment
Afternoon Project (3-6 Hours)
Finish Used
Teak oil
Recommended Skill Level
Beginner
Comments
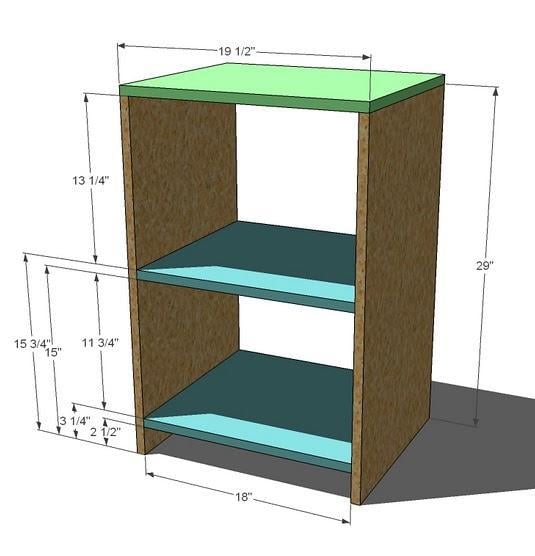
Farmhouse Nightstands
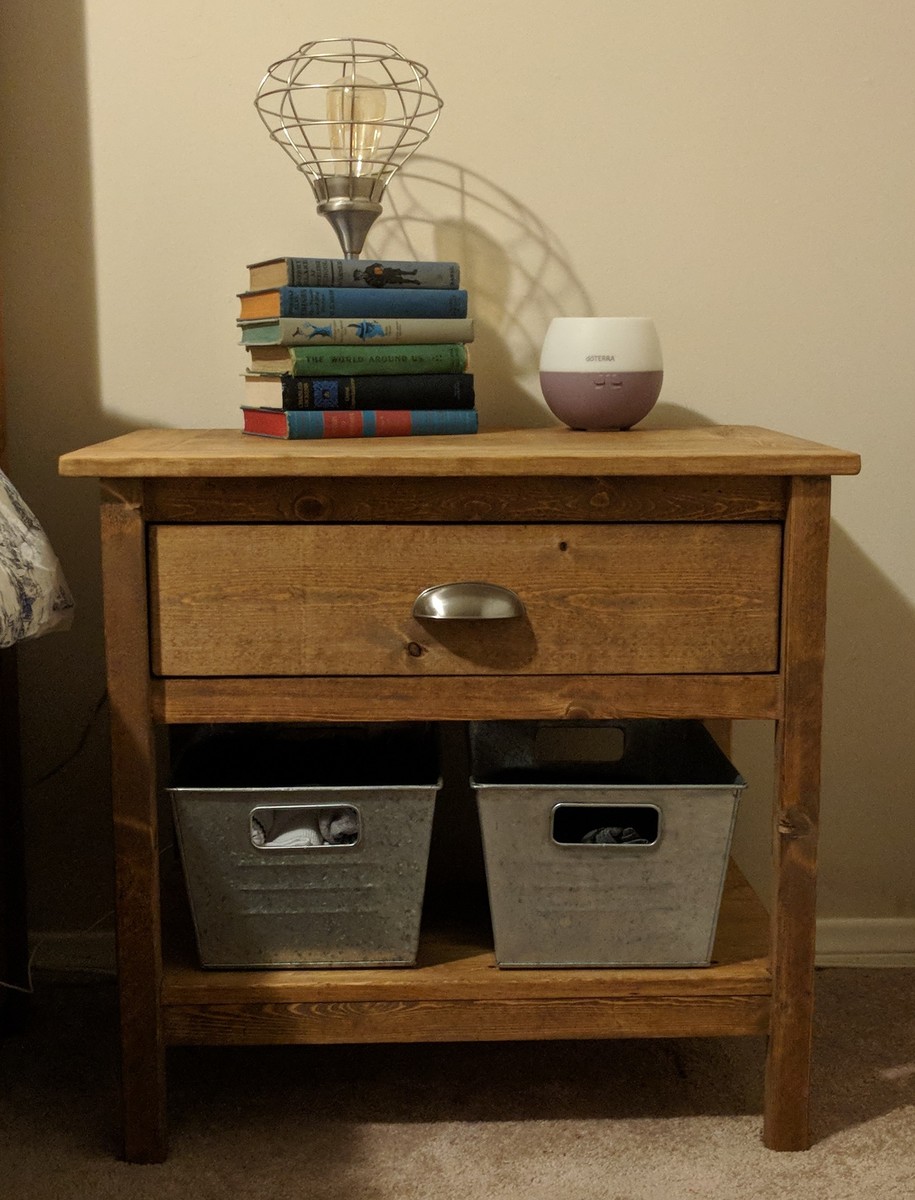
I had made the farmhouse bed from Ana a while ago and finally got around to building a pair of these bedside tables to match. I love how much bigger the top is than my previous nightstand's top. The bins on the bottom shelf are relatively cheap from Walmart, and I like the galvanized look with the wood.


Built from Plan(s)
Estimated Cost
About $120 for a pair
Estimated Time Investment
Day Project (6-9 Hours)
Finish Used
I wiped on two coats of dark walnut Danish oil; I love how quick and easy Danish oil goes on. Being that they are only bedside tables, I don't foresee much wear and tear and thus I didn't need a more durable finish.
Recommended Skill Level
Beginner
Raised Garden Bed Planters and French Tuteur
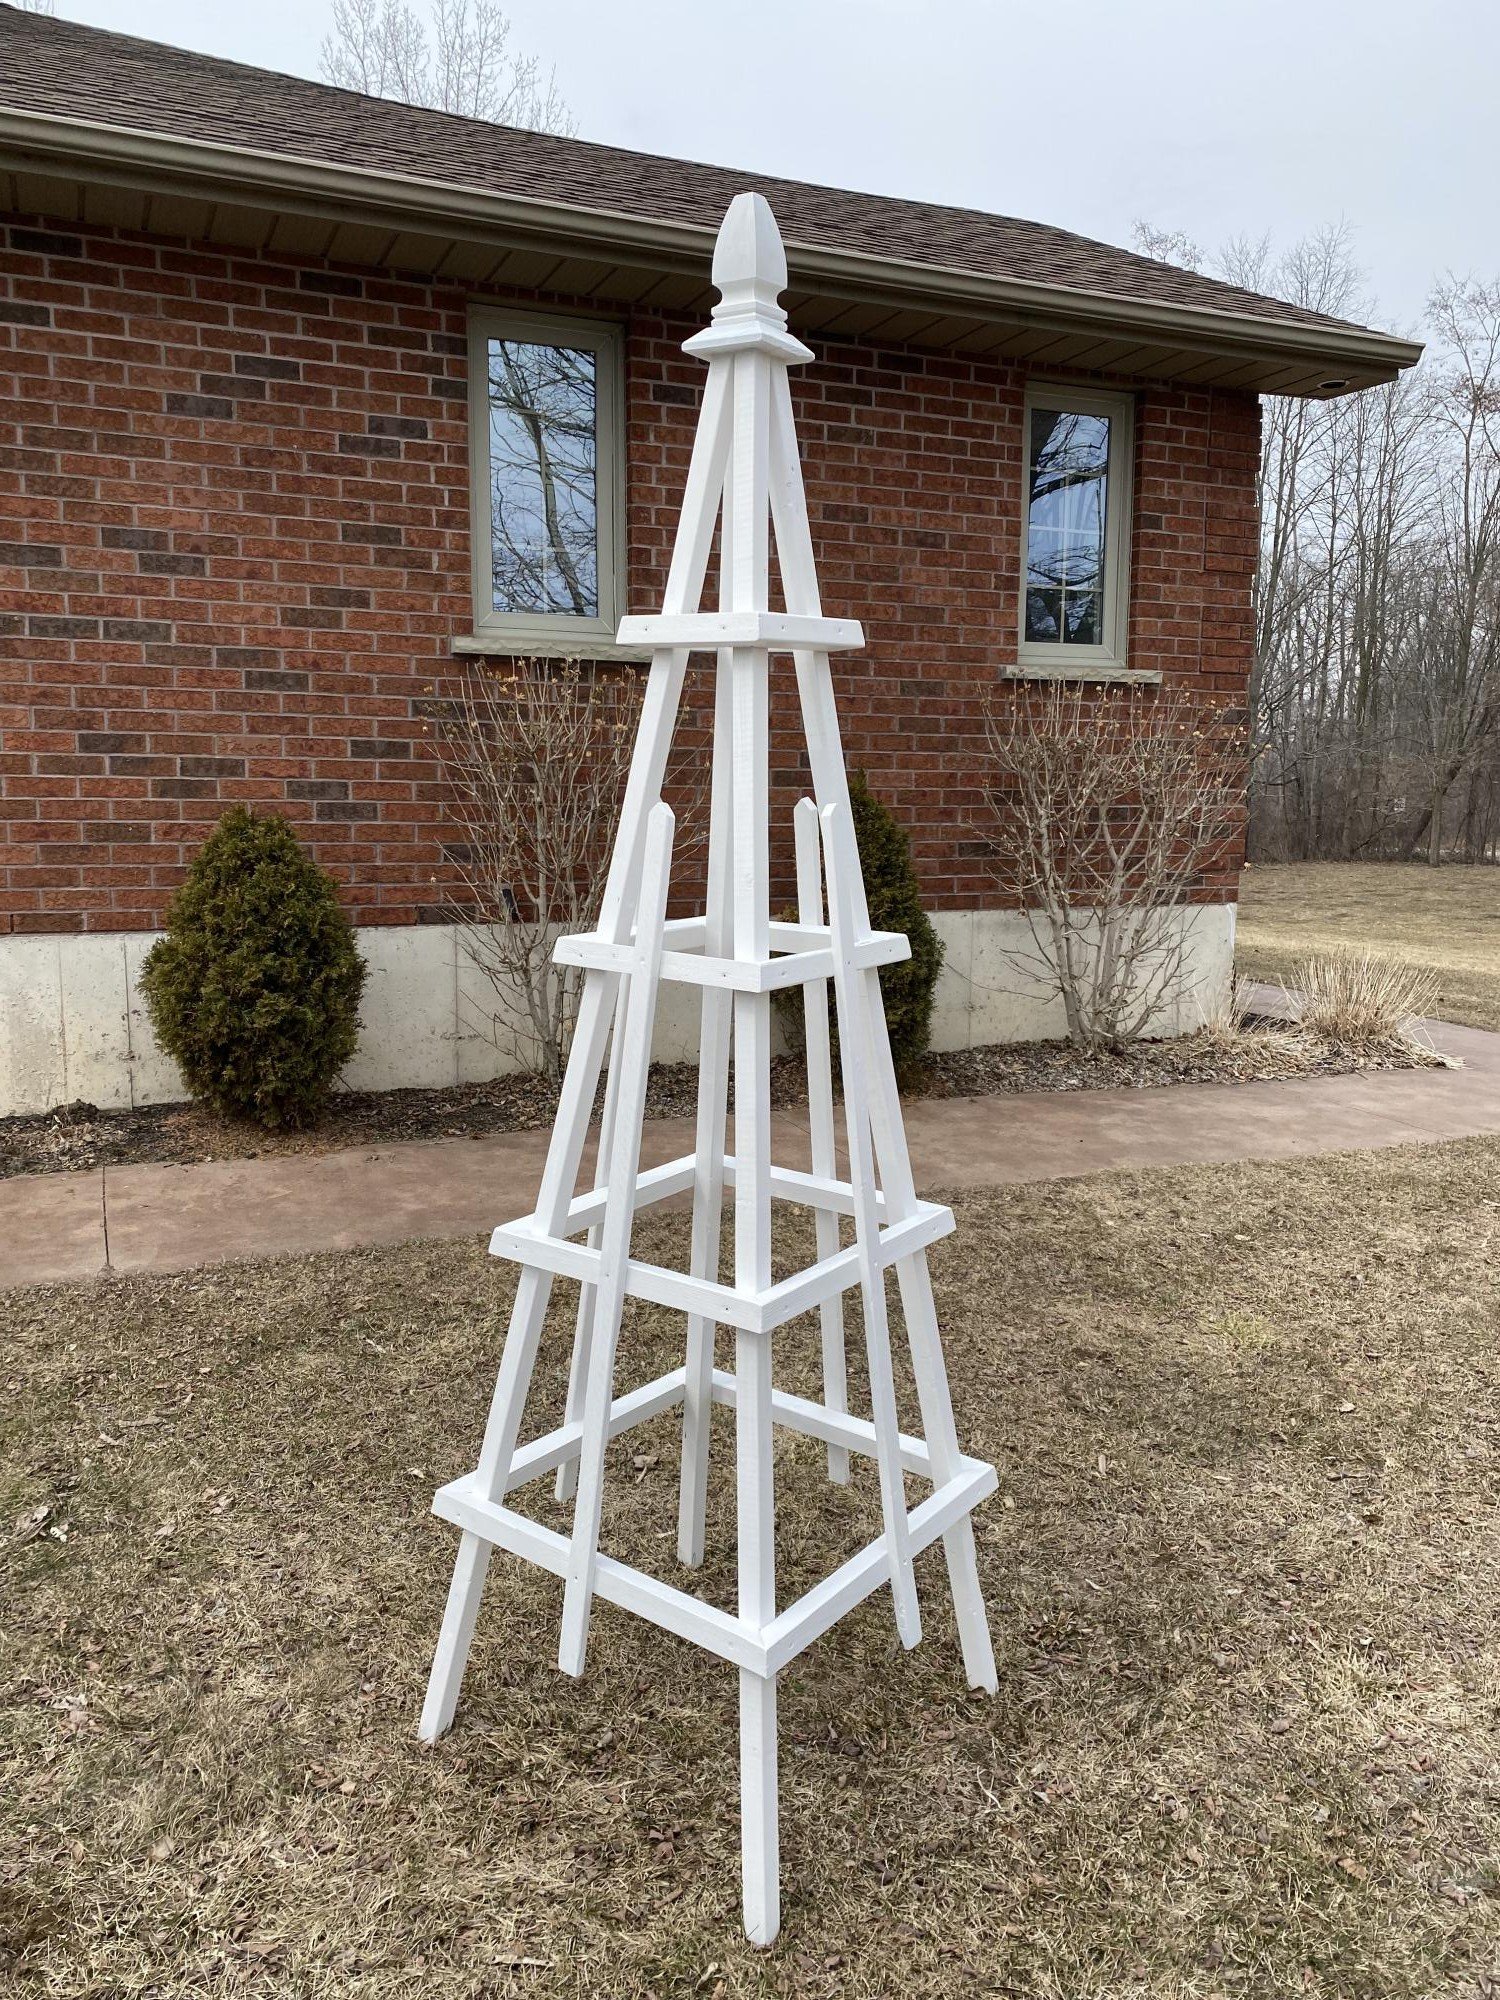
I built some French Tuteur’s for the garden.
Fresh and ready for my new raised beds.
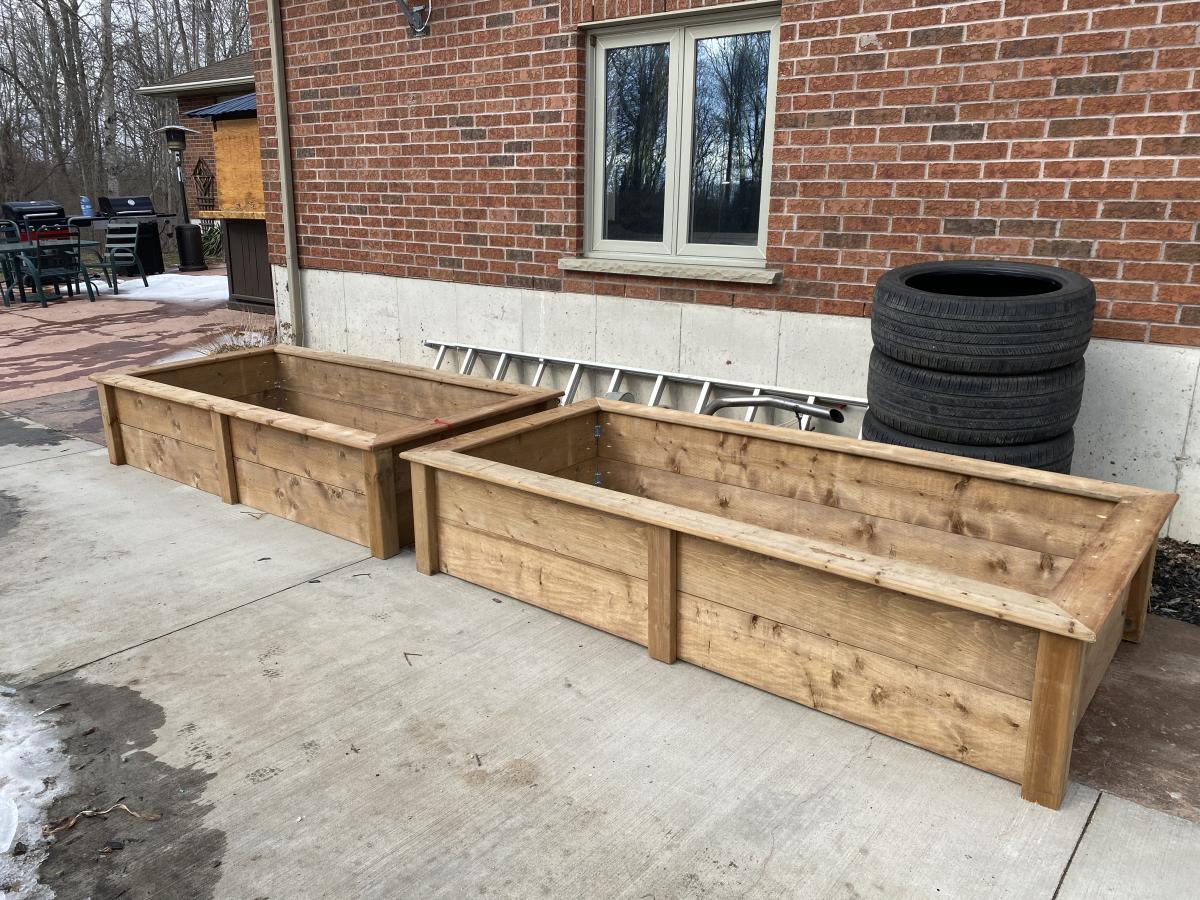
Built from Plan(s)
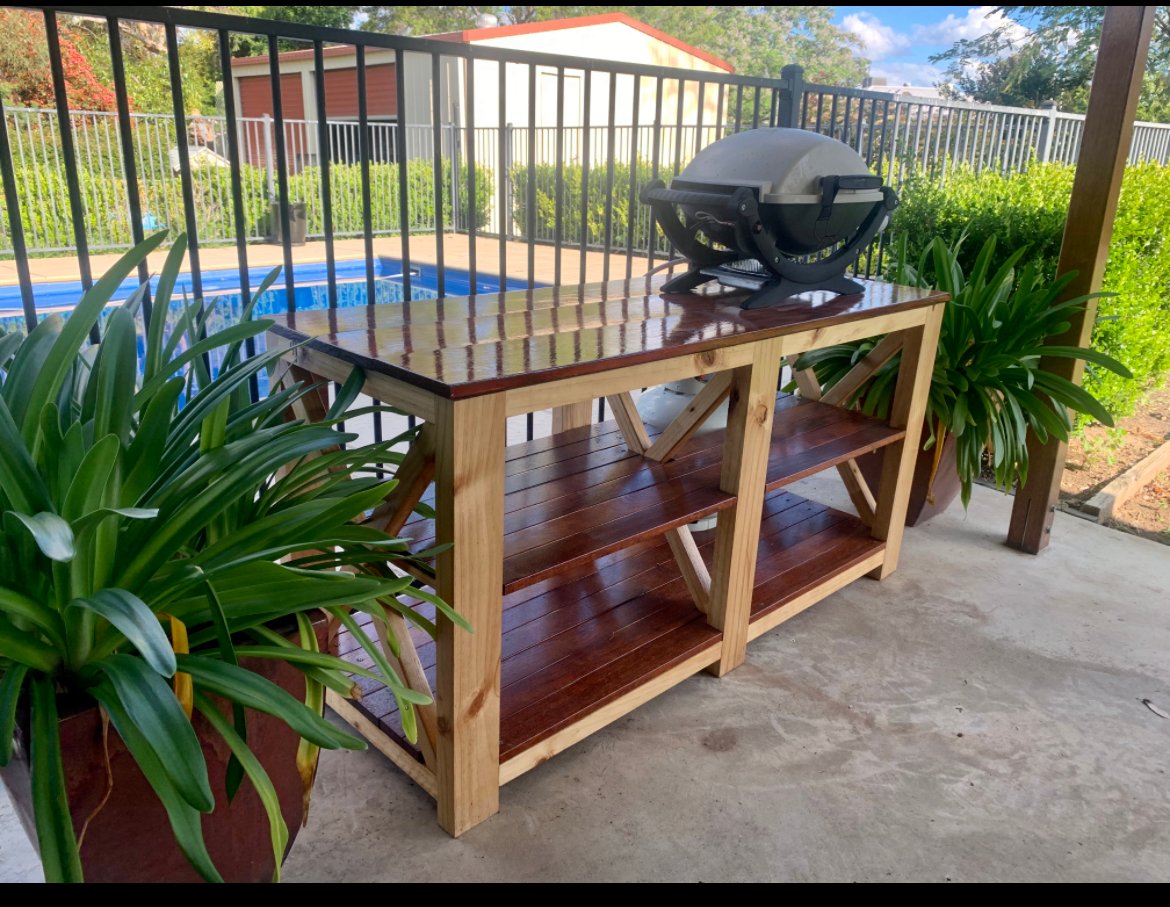
A "Kitchen Island" For our Deck
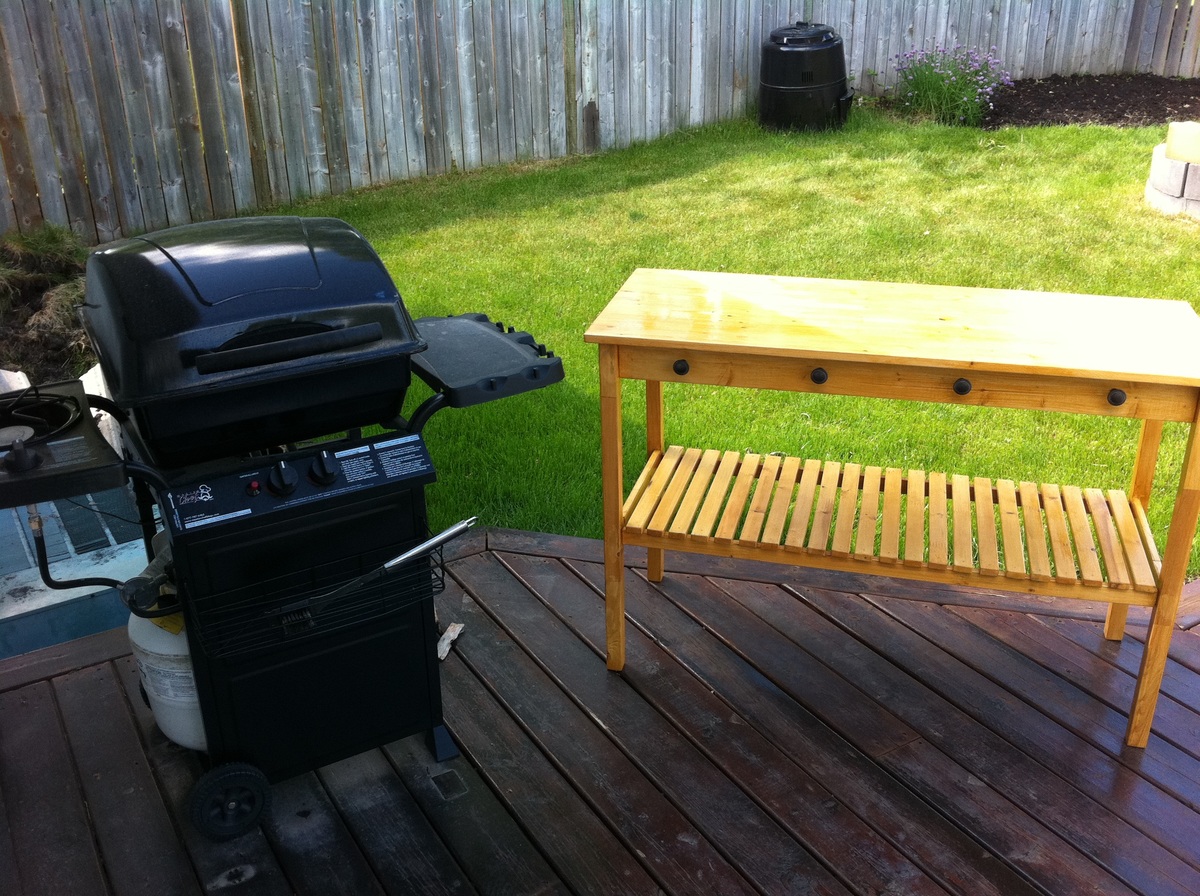
We needed a prep area for our BBQ, so I decided to use the plans for the Simple Kitchen Island. I made it a little bit narrower (20 inches rather than 24), and added drawer pulls to hang up our BBQ tools. It's coming in very handy!
Built from Plan(s)
Estimated Time Investment
Weekend Project (10-20 Hours)
Finish Used
Mildew resistant stain (natural colour), and 3 coats of polyurethane
Recommended Skill Level
Beginner
Comments

Wed, 06/15/2011 - 19:01
So Exciting!
Love how you used the plan! It looks great, and I bet it's a great prep-station and buffet area.
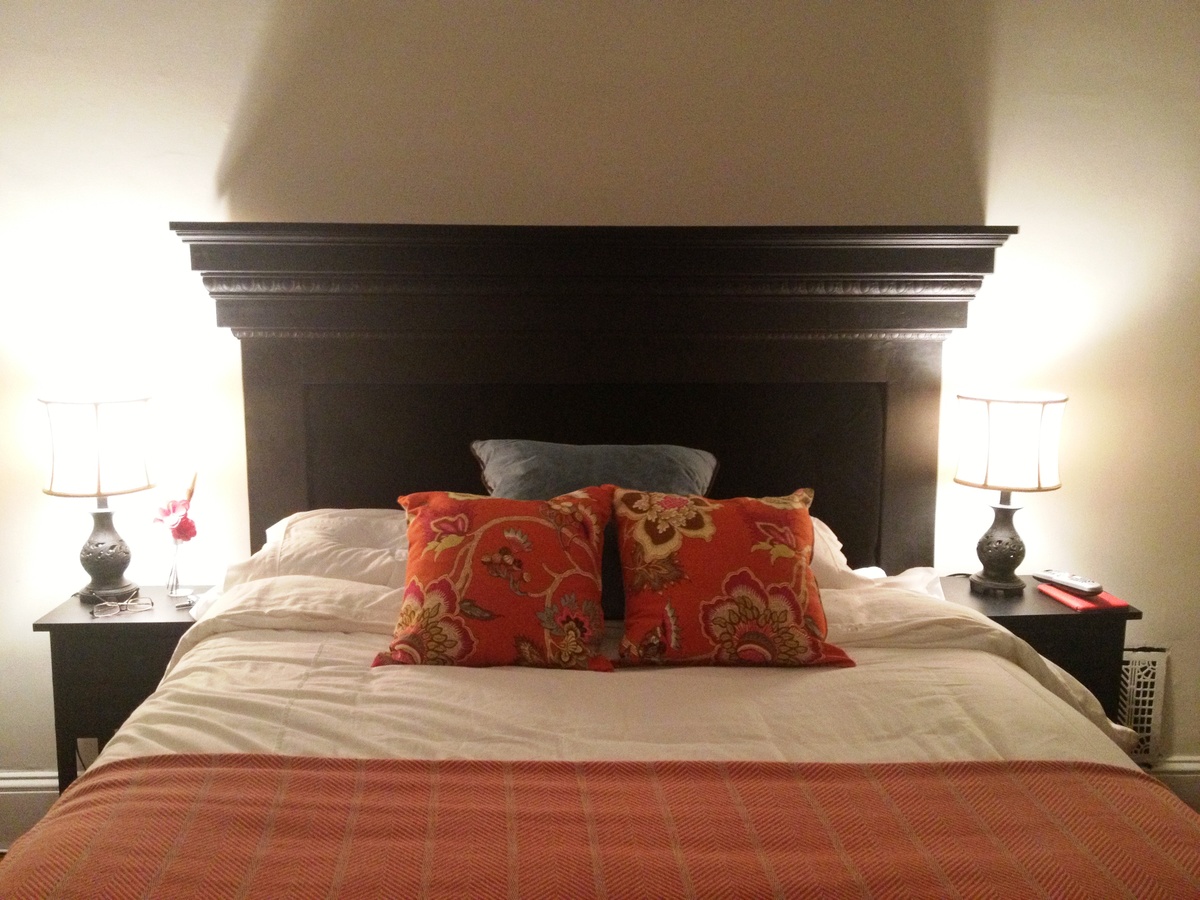
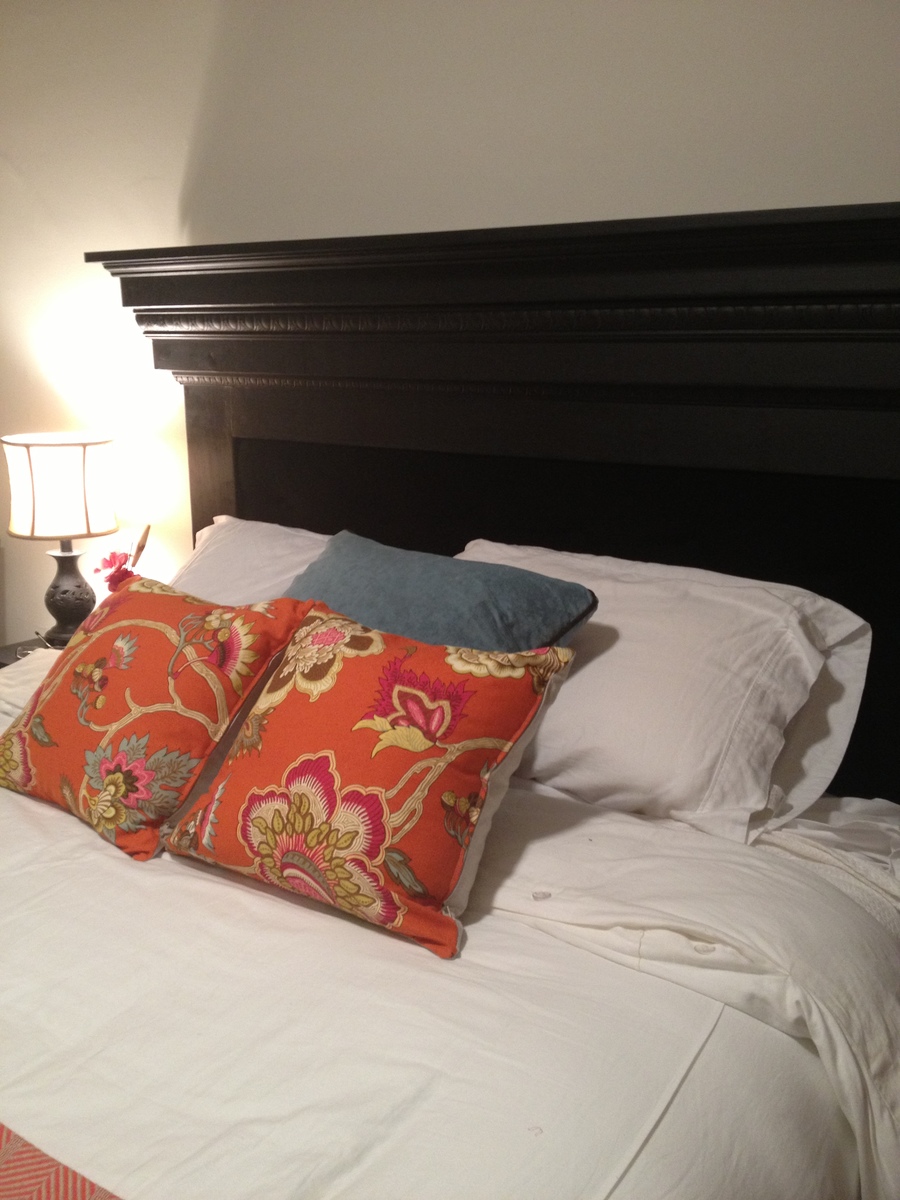
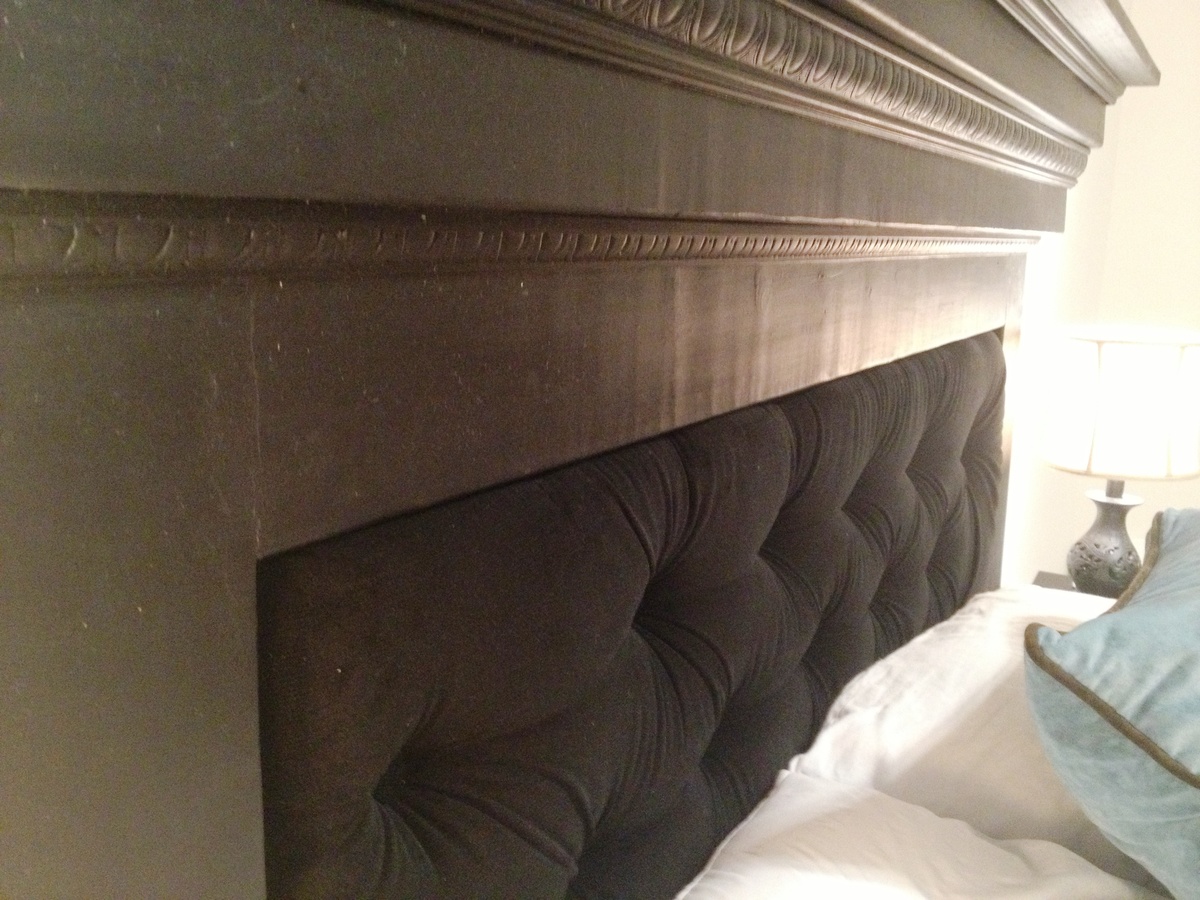
Mantel Headboard - Annie Sloan Chalk Paint and DIY Tufting
I love this headboard :)
We finally completed the tufting portion of the mantel headboard tonight and it looks great! Anna's design was easy to follow and the tufting part was easier than I thought...I followed http://www.cape27blog.com/2013/03/tufted-headboard-tutorial/ for the tufting portion.
Can't wait for the next project!
Finish Used
Annie Sloan Chalk Paint with Annie Sloan Dark Wax Finish
Recommended Skill Level
Beginner
Comments

Laundry Pedestal
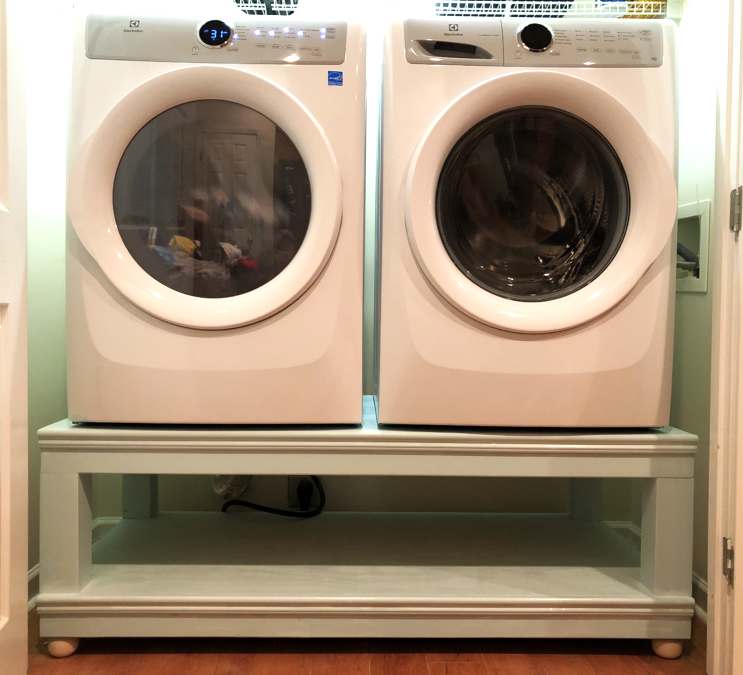
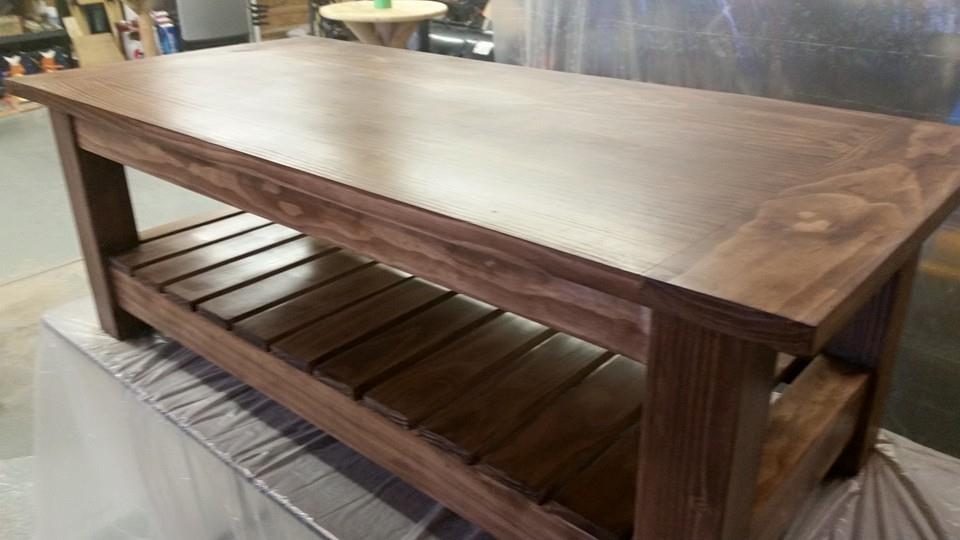
I took this plan from www.Ana-White.com Home Depot cut my wood and I was off and running. I added a few ball feet on the bottom to give it a little pizzaz. I felt so accomplished after my first project... especially after the install guys told me it wouldn’t fit and it DID and it was level. I’m getting ready to make a coffee table now. Thanks for the inspiration, confidence and help!!
Built from Plan(s)
Estimated Cost
$150
Estimated Time Investment
Afternoon Project (3-6 Hours)
Finish Used
Satin Furniture paint
Recommended Skill Level
Beginner
Convertible Picnic Bench
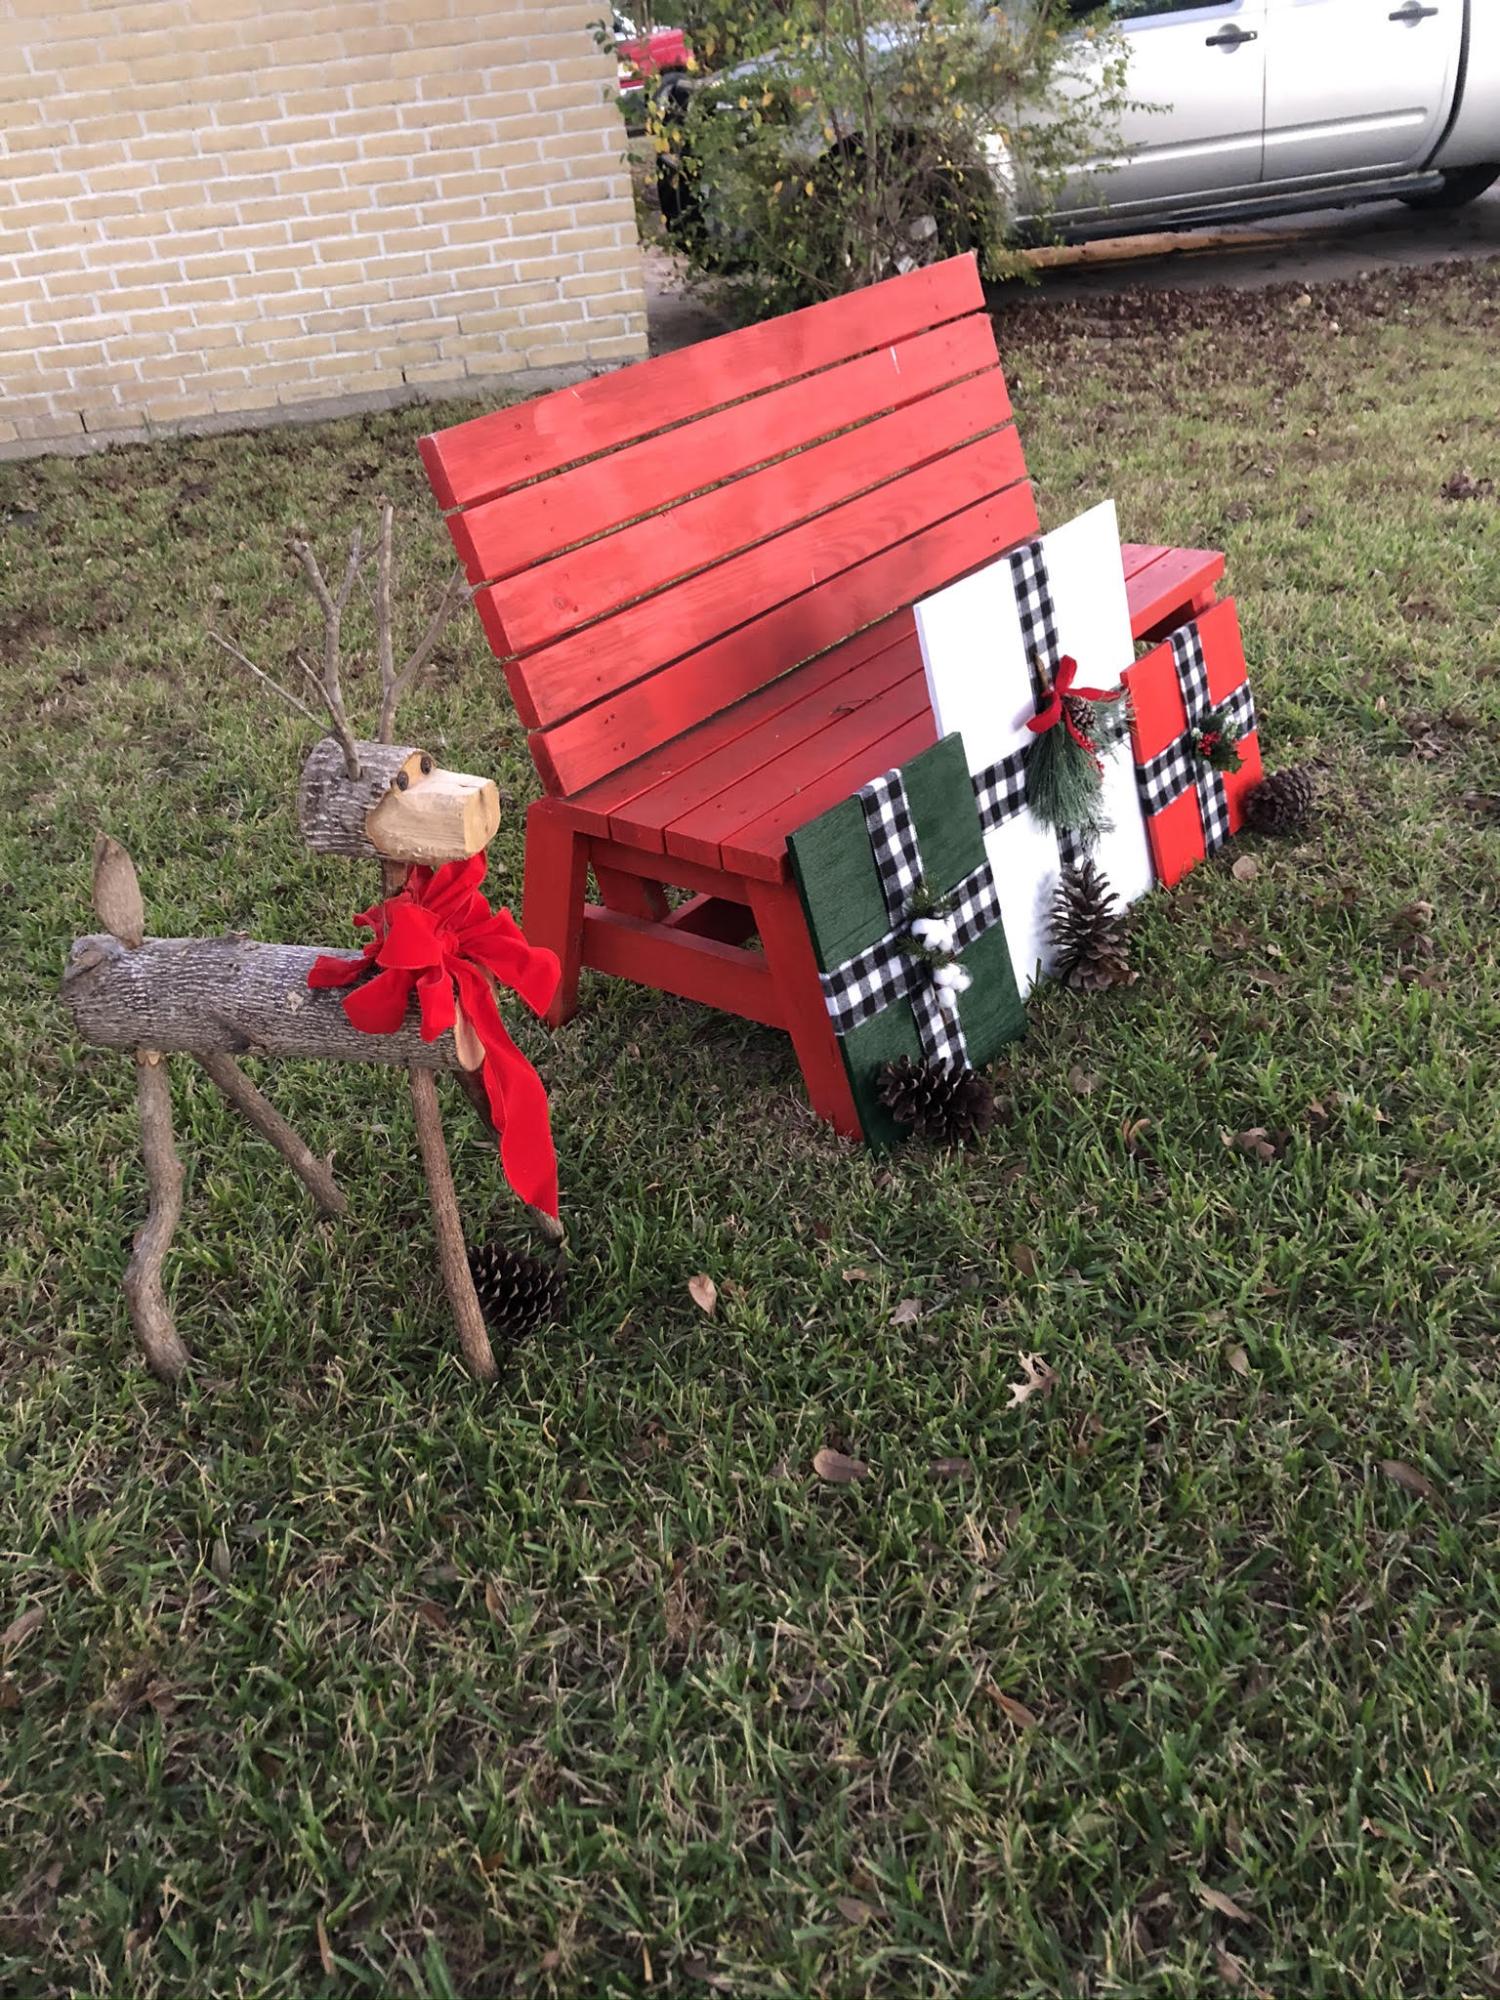
Picnic table that converts to bench.
by Larry
Built from Plan(s)
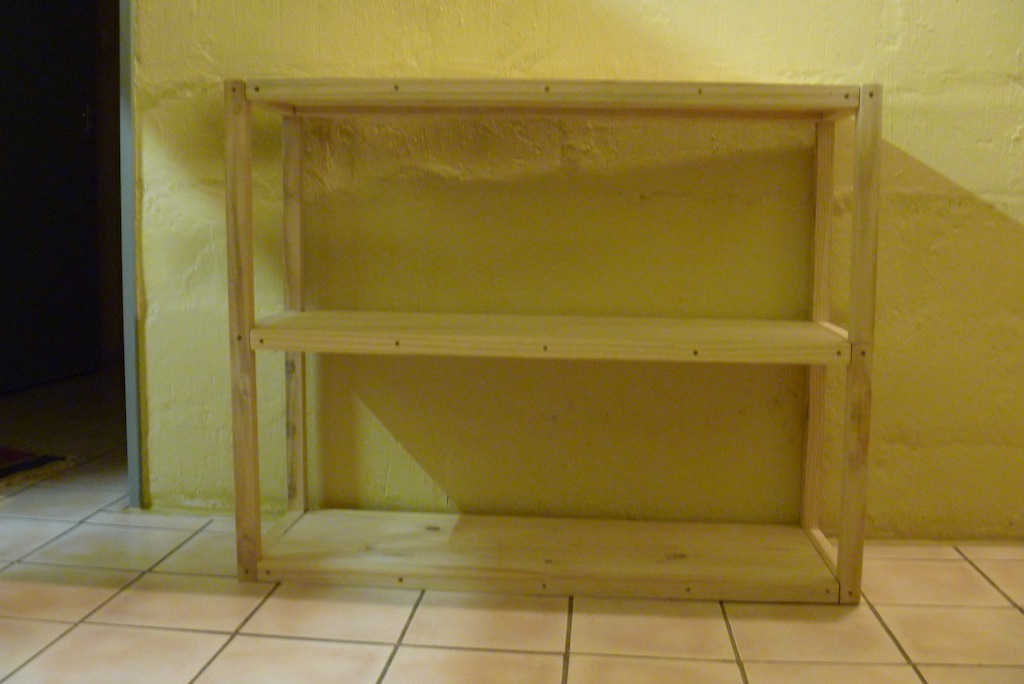
Parson's bookshelves in white
This is our first project! My Husband did most of the work but was a team effort in places. We wanted shelves that we could easily make with the very limited selection of cuts available in Botswana (really only construction lumber around). We modified the width of the shelves to what was available, increased the height a bit so more of a console and shortened it to get the best use of timber. I did not want it looking too modern so went with white and distressed edges to keep it comfortable. Construction did not take very long but finishing took a while due to 3 coats needed.

Built from Plan(s)
Estimated Cost
$60
Estimated Time Investment
Weekend Project (10-20 Hours)
Finish Used
We started by staining whole shelves but then decided it coloured paint too much so applied stain to edges of shelves and legs only. Painted with pure white acrylic water based paint (3 coats) and then lightly sanded edges of legs and shelves to distress.
Recommended Skill Level
Starter Project
Comments
The Magic Tree House
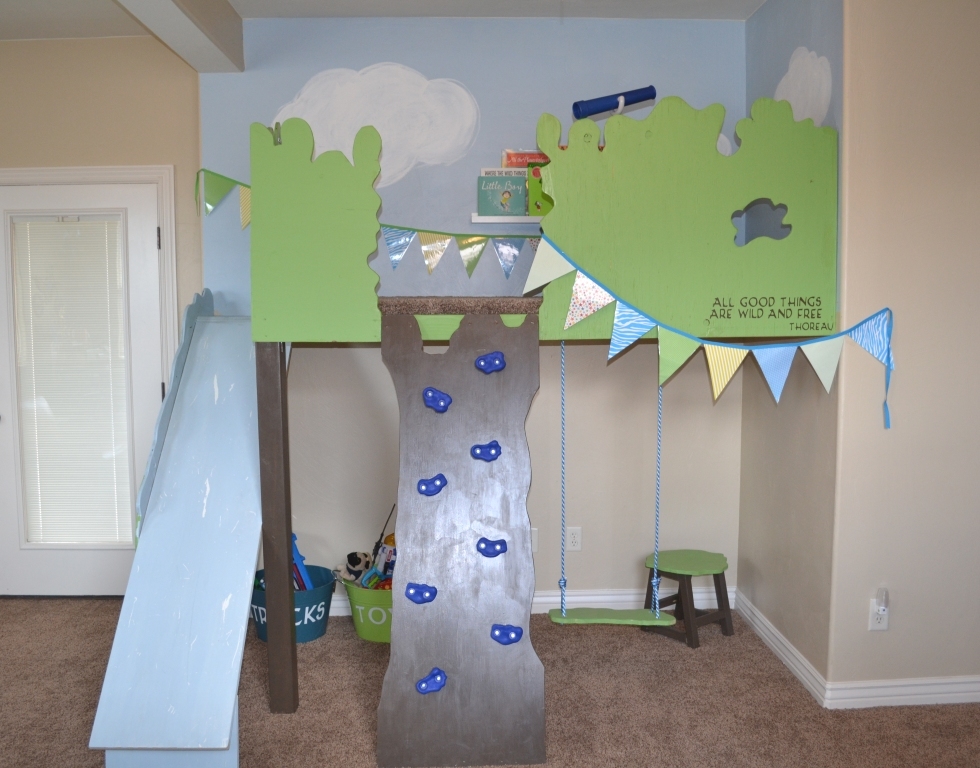
We adapted these plans to build our treehouse, I hope it's not too much of a stretch for brag posts! Every kid seems to have two wishes: a fort or tree house and a secret passage way. Or is it just my kids? Turns out we live in the desert and trees are hard to come by. Our solution? Build a tree house in the house. Why not!? Our magic tree house is well used and well loved. This is one of those projects that simmered and in my mind trying to think of the perfect way to build the thing. The stuff our parents built and played in was a hodge podge of left over wood and their own creations, crooked construction and messy paint. So, I set the perfect aside and dove in. The only things our tree house really needs to be is safe and fun. Most families try to find indoor activities for the winter, but in the desert it is so blazing hot we need indoor retreats in the summer. This tree house is the solution a gagillion times over! Thank you Ana!

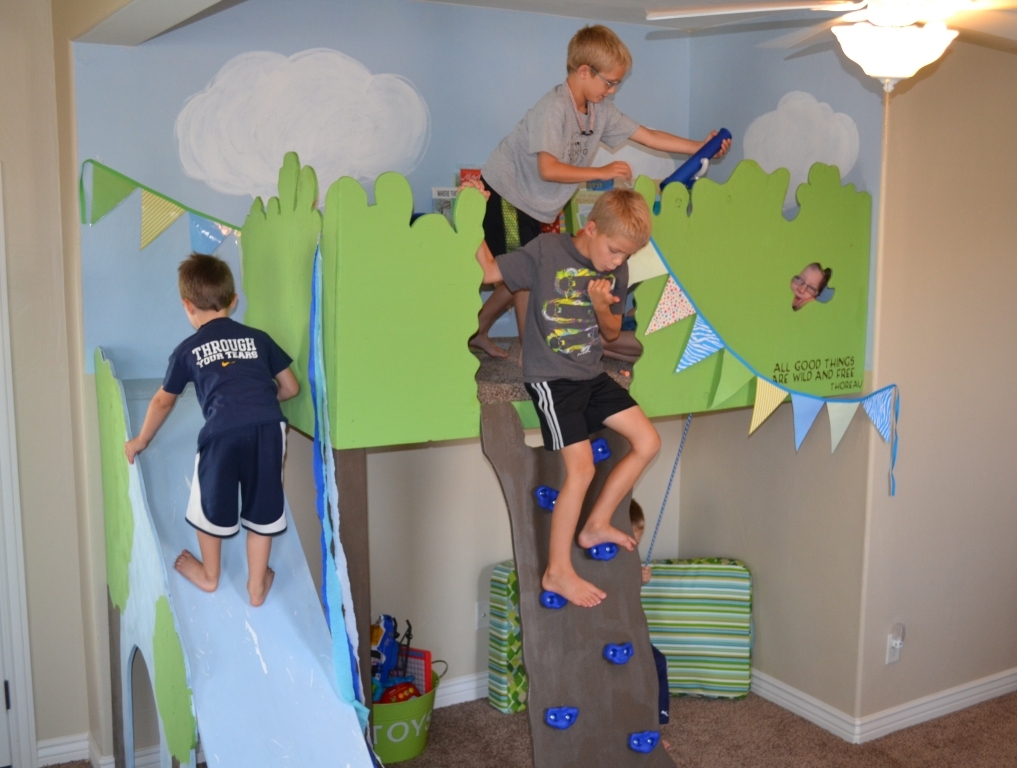
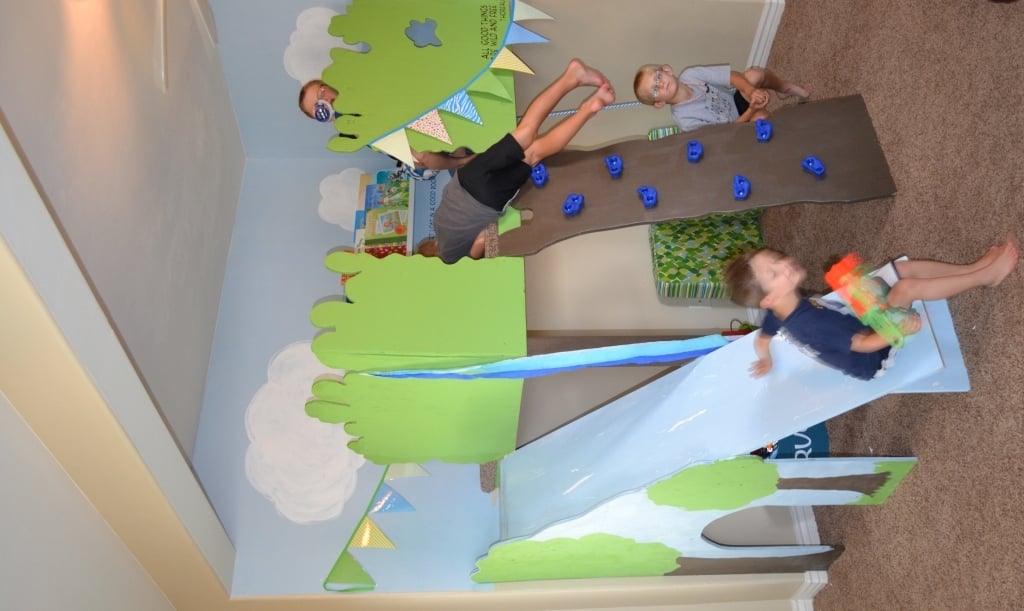
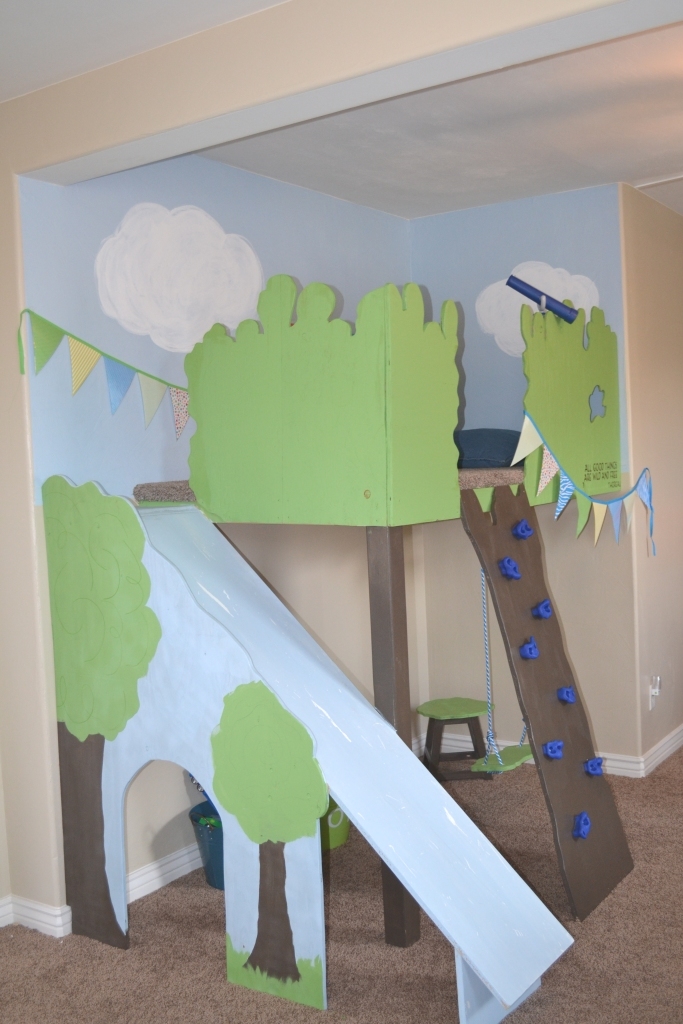
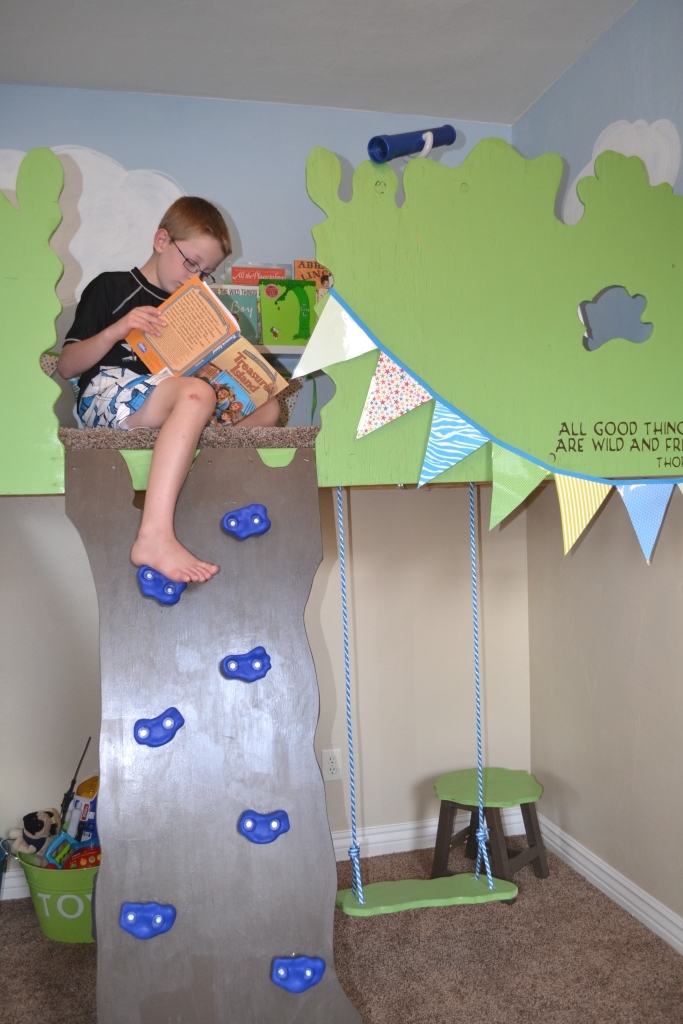
Estimated Cost
$150
Estimated Time Investment
Week Long Project (20 Hours or More)
Finish Used
Paint and Plyurathane
Recommended Skill Level
Intermediate
Comments

Sat, 08/03/2013 - 07:40
This is great! What a fun
This is great! What a fun escape and it looks like those boys are loving it!
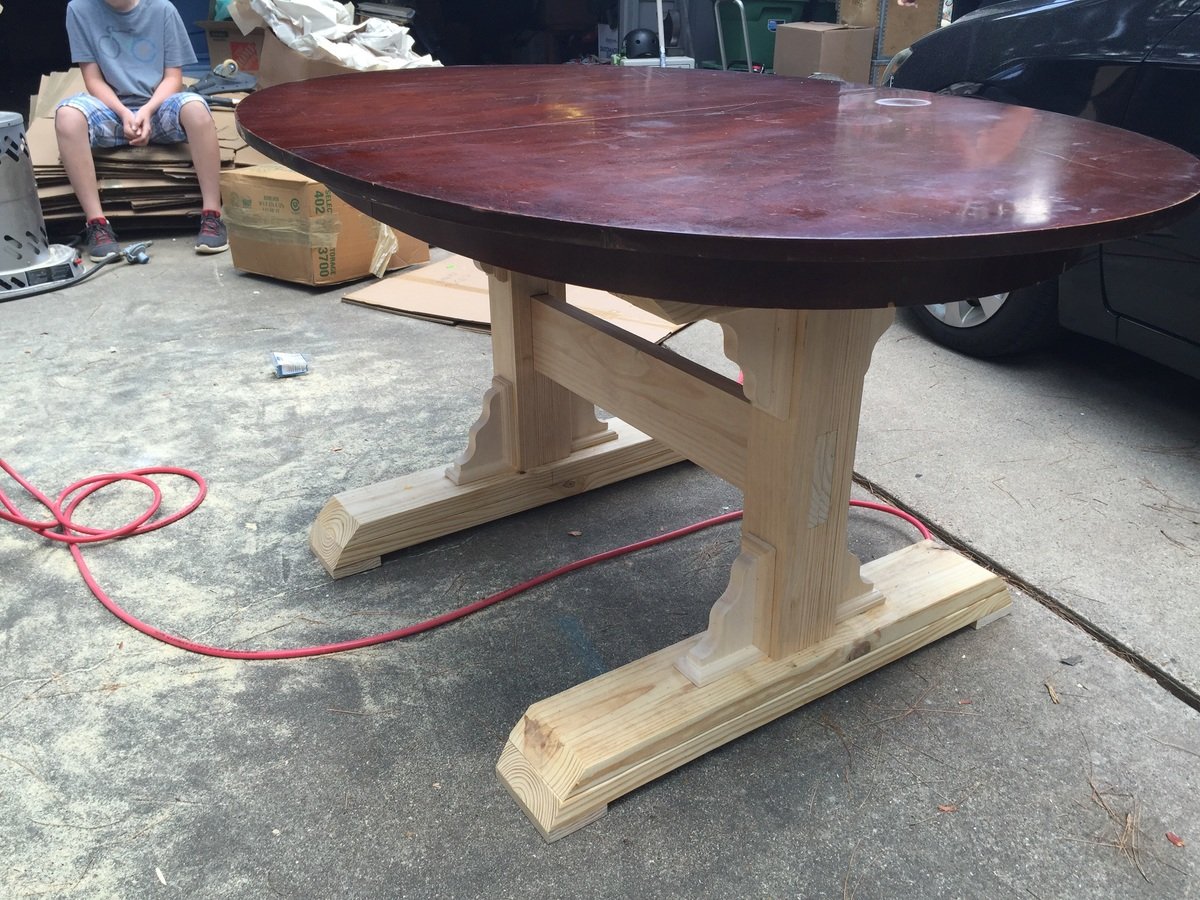
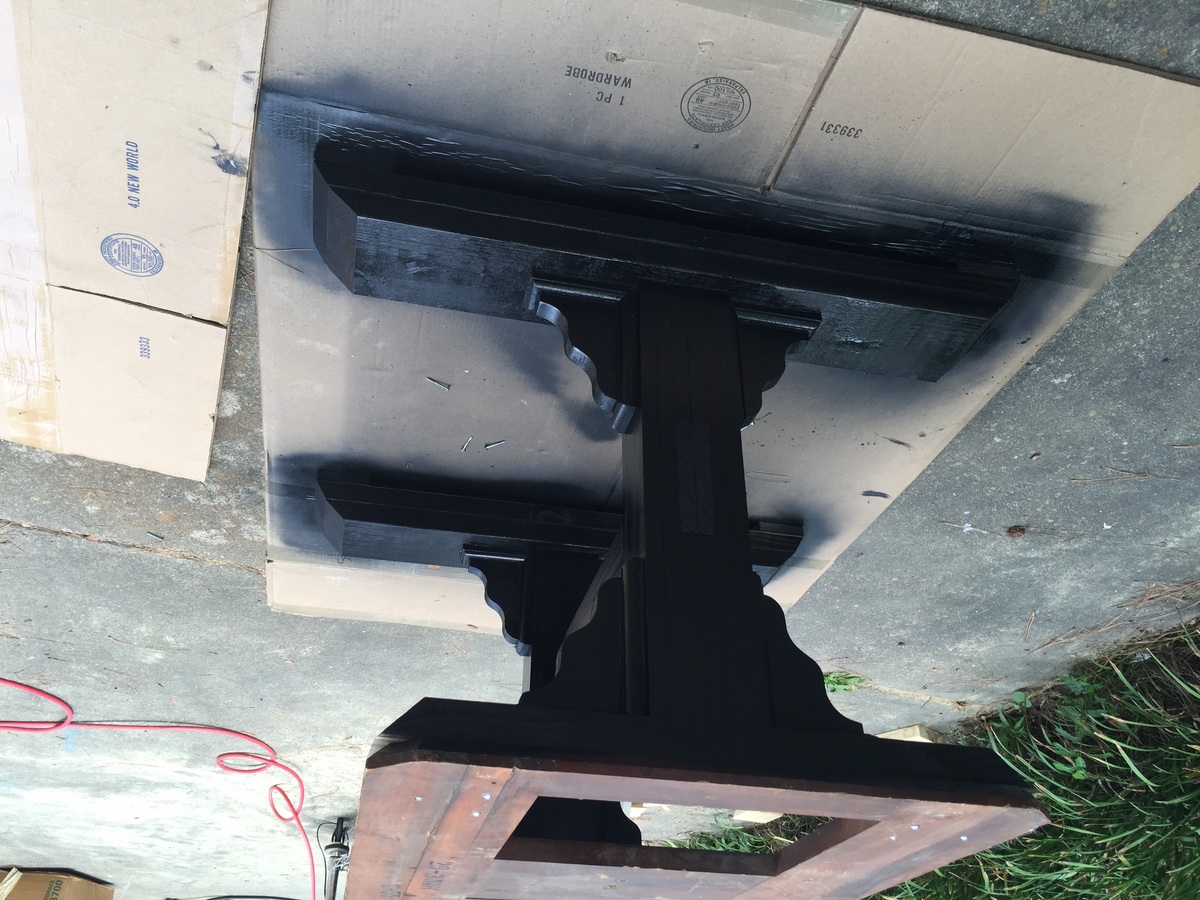
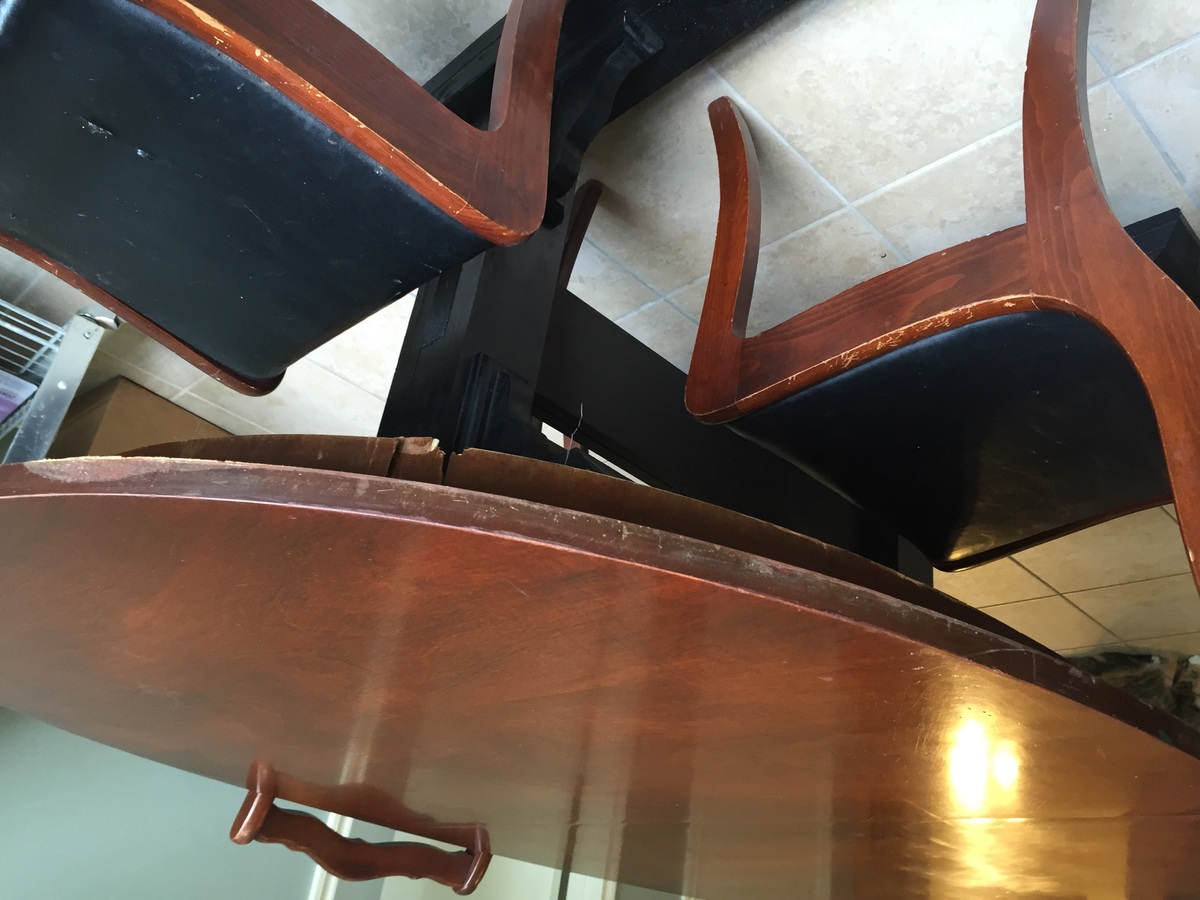
A variation on the theme - double pedestal breakfast table.
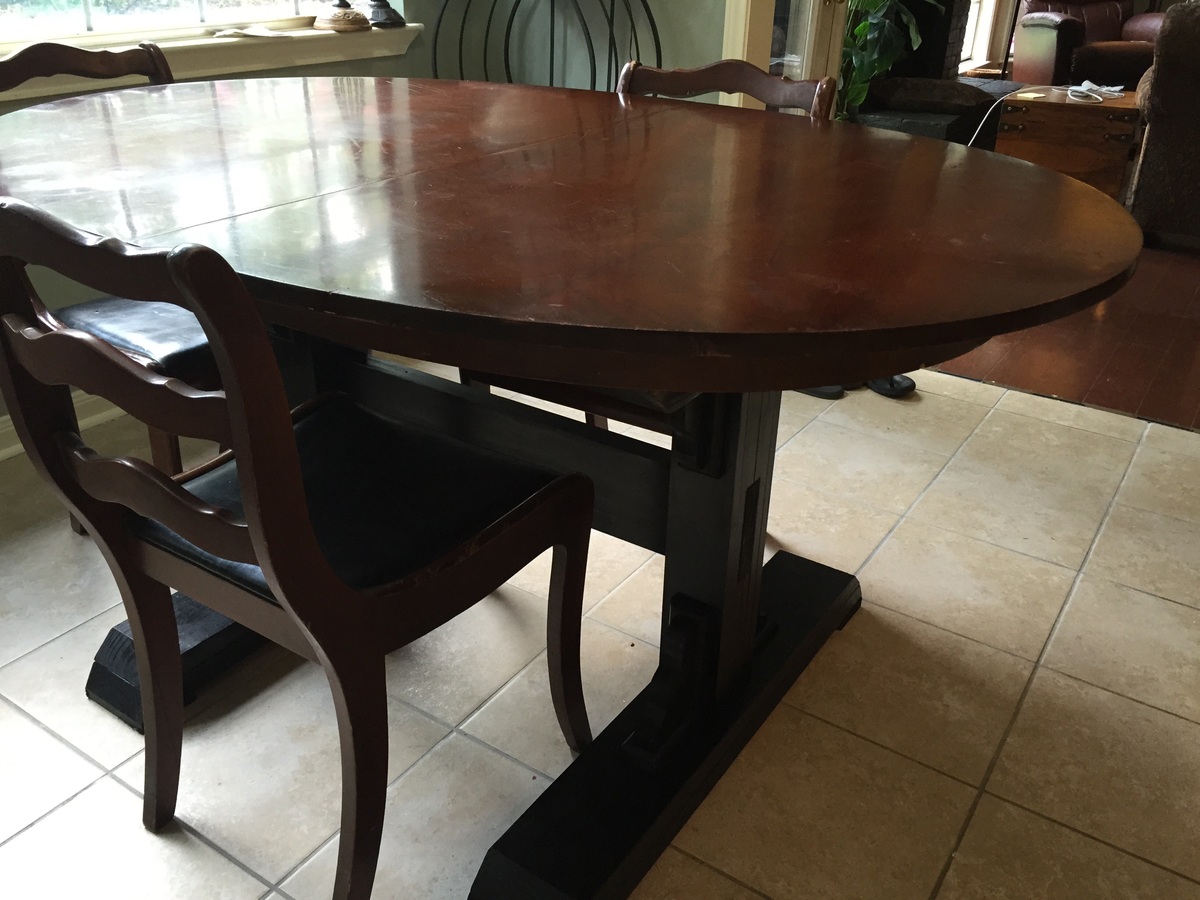
We needed a smaller breakfast area table and I found this mid century Drexel oval table top resting in my garage. Variations include - used 1x4 select pine instead of 2x4's for a tighter more finished fit. Used 5x7 pre-made shelf brackets for supports. Nice elegant trim pieces and saved much time rather than shaping 2x8's.
Very happy with with the results. Thanks Ana for the plans.
Built from Plan(s)
Estimated Cost
95$
Estimated Time Investment
Afternoon Project (3-6 Hours)
Finish Used
Satin black spray paint
Recommended Skill Level
Intermediate
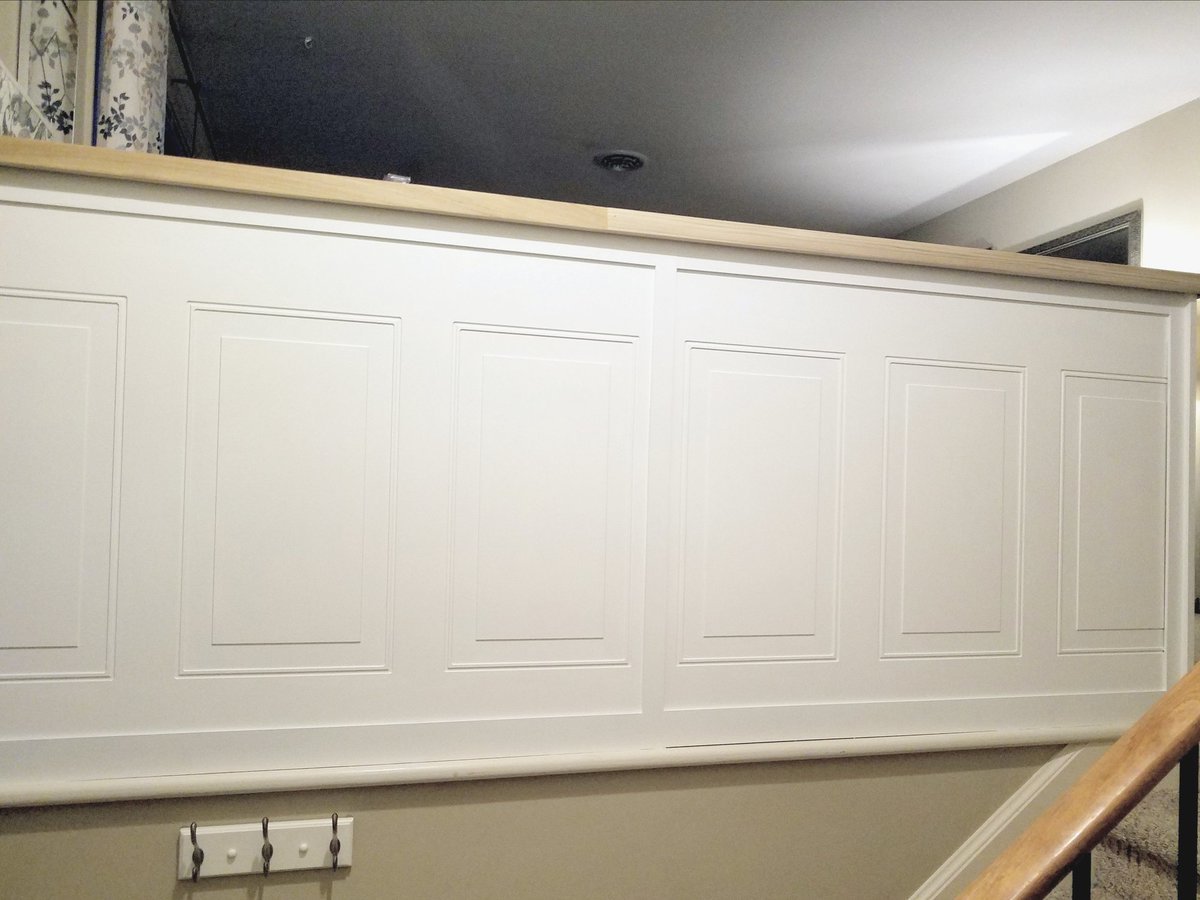
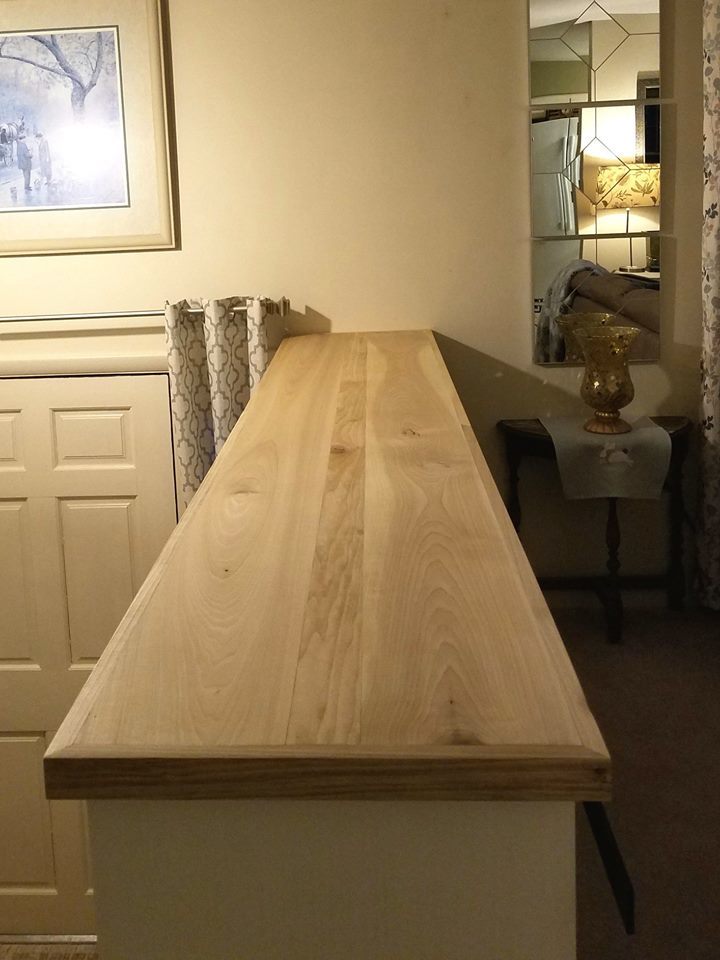
Sliding Door Console to replace split level railing
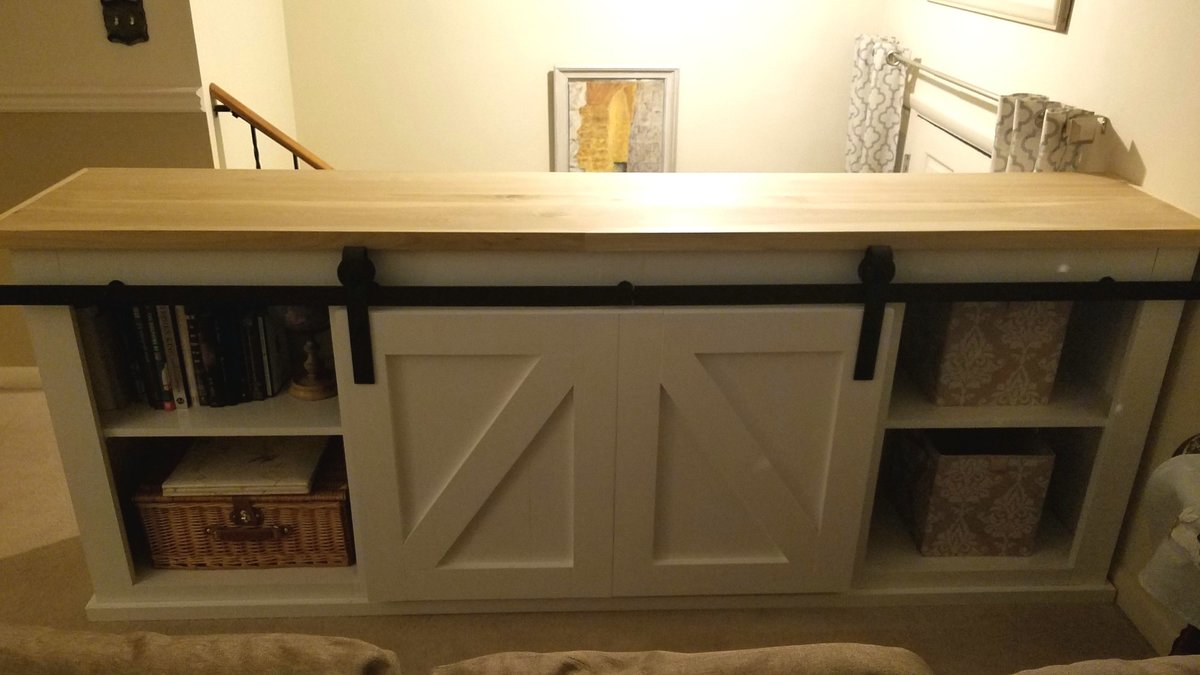
My wife wanted to get rid of a railing above our steps and wanted some additional storage. I had this plan saved but though about doing something smaller. Once I realized that wasn't going to work, I decided to go with this plan. It worked great.
Estimated Time Investment
Weekend Project (10-20 Hours)
Finish Used
Natural Danish Oil for the top and white paint for everything else
Recommended Skill Level
Intermediate
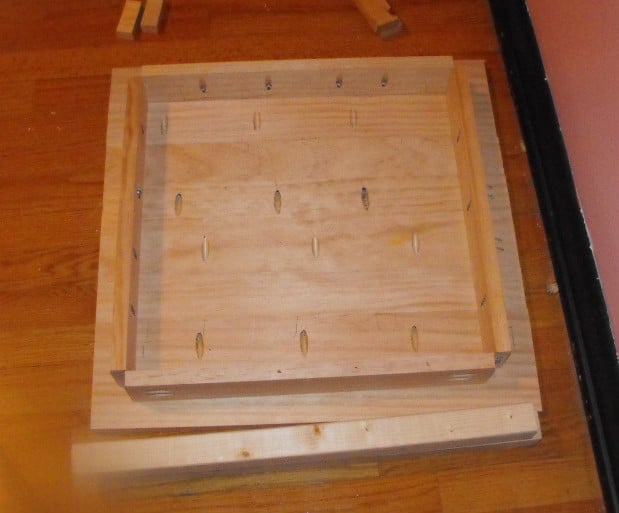
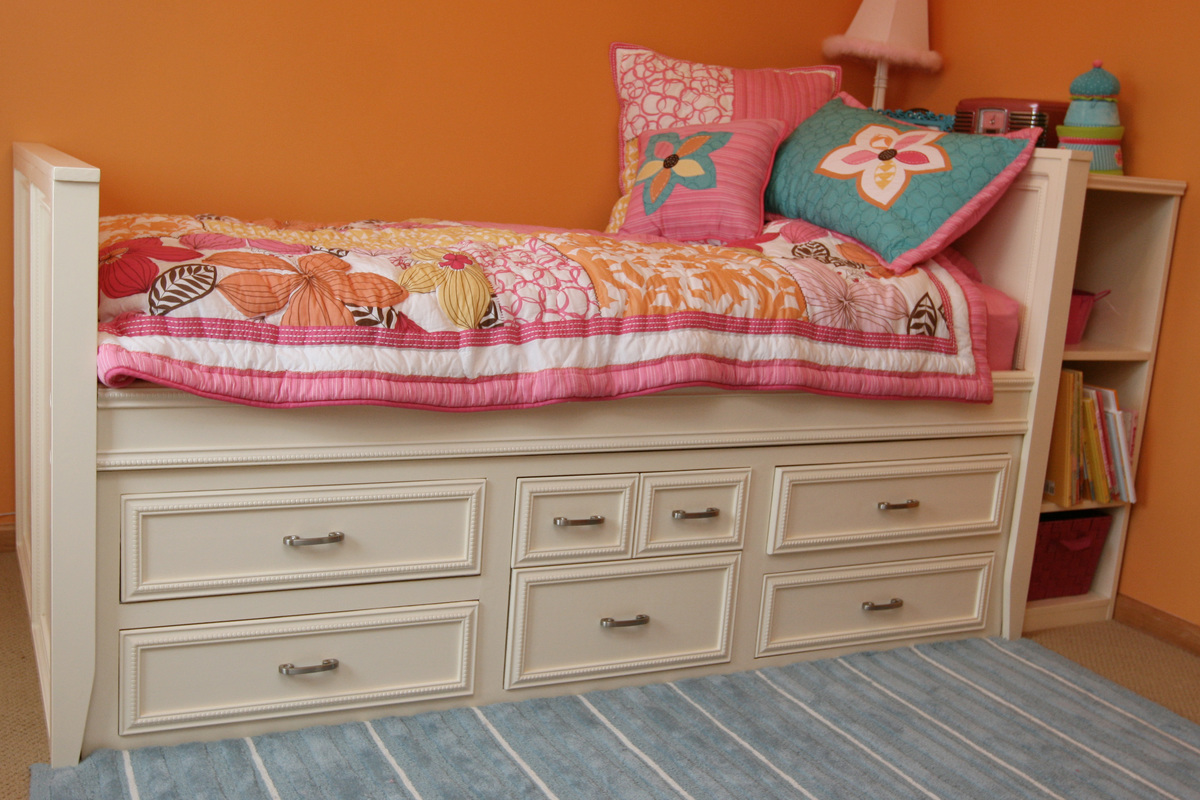
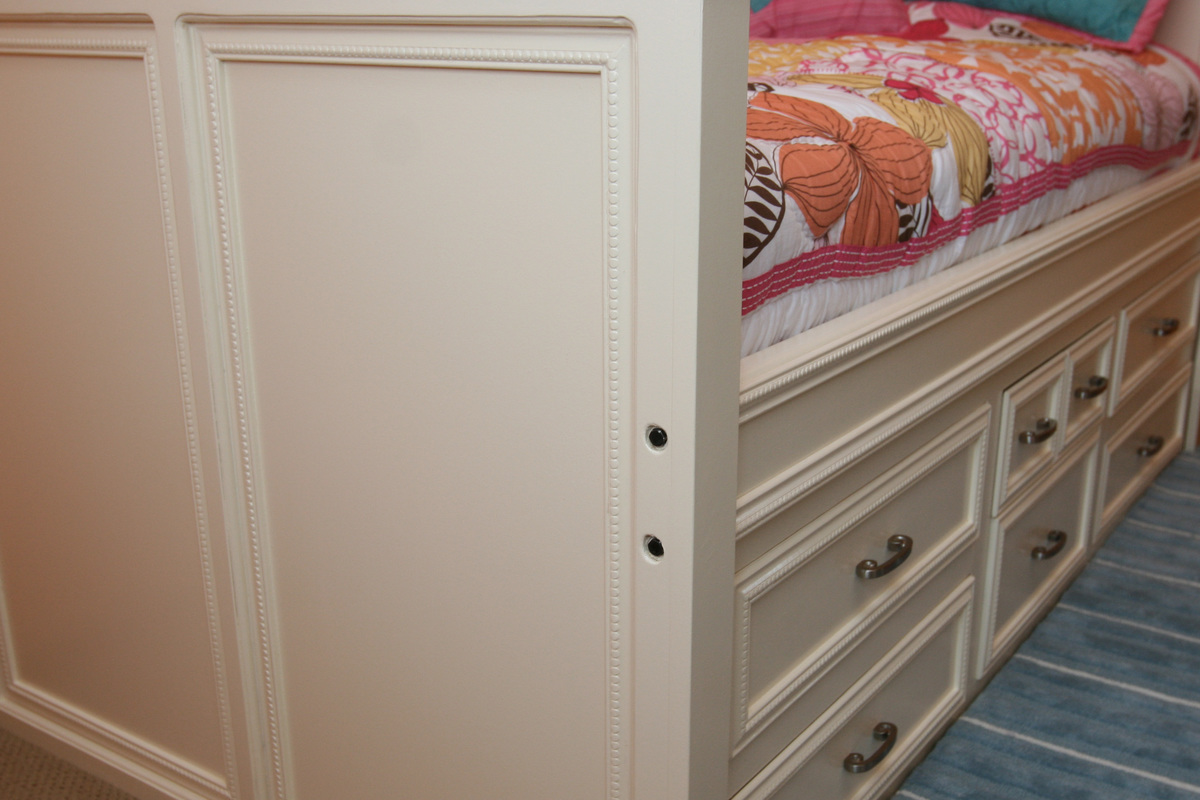
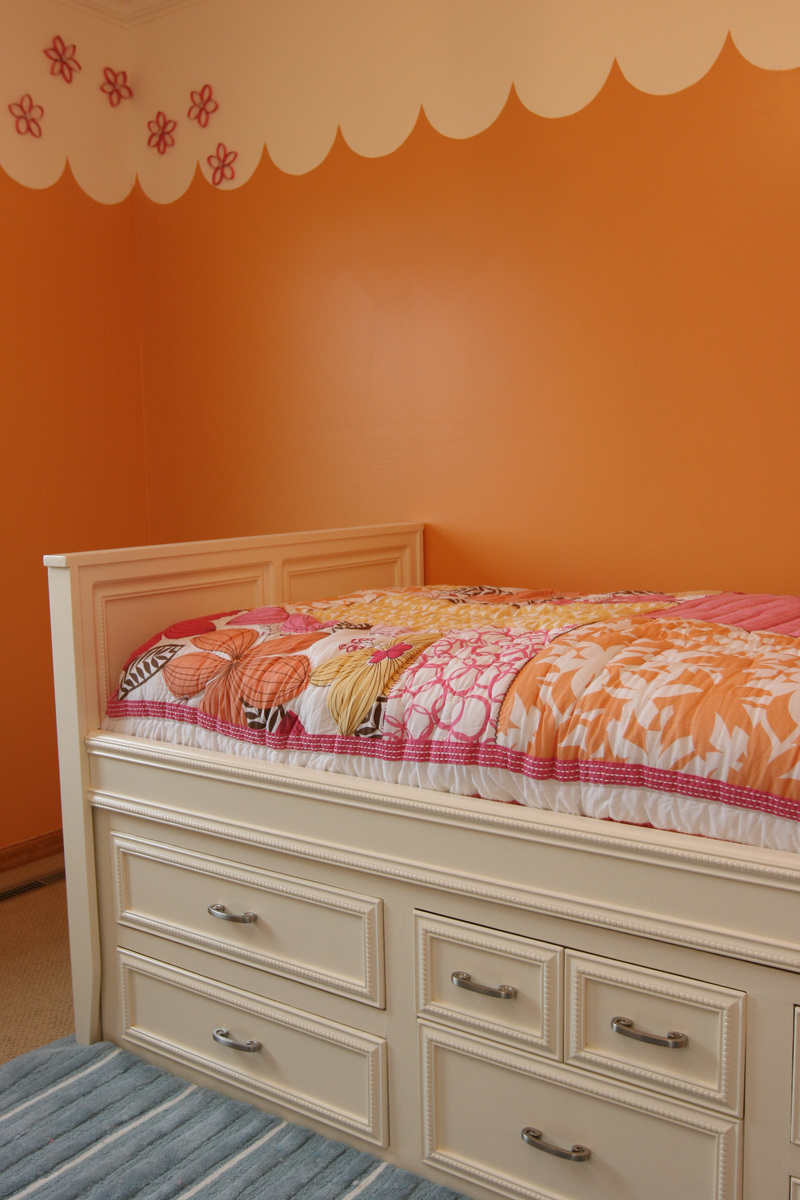
Laundry Sorter
My overly ambitious first project, a laundry sorter! (Modified from Shanty2Chic plan: https://www.shanty-2-

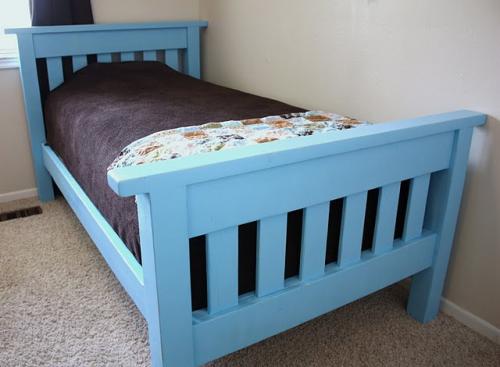
Captain Lydia!
Bed based of Ana's Lydia plan.
Built from Plan(s)
Estimated Time Investment
Week Long Project (20 Hours or More)
Finish Used
Satin paint with 3 coats of poly.
Recommended Skill Level
Intermediate
Comments
Fri, 06/24/2011 - 06:32
wonderful!
What a great job! Did you build the drawer unit as a separate piece? I was recently asked to build a big girl bed for my niece who has a storage limited bedroom, so this could be a great solution for her...
In reply to wonderful! by ohiomomma
Sat, 06/25/2011 - 08:27
I actually bought the under
I actually bought the under bed storage unit on craigslist as I didn't want to mess up all the places I could have not getting it square. But, yes, it is a complete separate unit that then I build the head/foot boards.
Fri, 12/16/2011 - 07:02
DIY, Recycled and Repurposed. Perfect!
You've done a fabulous job on this. Well done!
Simple Not-so-white Outdoor Loveseat

Simple not-so-white sofa. This is the nicest piece I've done yet, but also very time consuming. These plans ways take me waaaaay longer to complete than they suggest. But I am meticulous and stain everything ahead of time before assembling. This plan was great, but beware that the 1x4x8 and 1x6x8 for the back rest are not listed in the materials list! Also, I modified the process for attaching the back rest by adding some 1x2 pieces flush to the bottom back side of the 2x4 base support for the bottom of the back rest to sit on. I just wasn't comfortable screwing in the back when it wasn't flush. That being said, I would have attached the 1x2 pieces earlier before attaching the 2x4 base support. It's hard to get to in the end because of the back piece (2x6). I then just used the nailer to attached back rest to the upper 2x4. Now onto two matching chairs. Then we will be ready for a fire pit!
Built from Plan(s)
Estimated Cost
$55 lumber and $125 for cushions and pillows
Estimated Time Investment
Week Long Project (20 Hours or More)
Finish Used
Behr premium weatherproof wood stain in Padre Brown, two coats.
Recommended Skill Level
Intermediate
Comments
Sat, 08/03/2013 - 22:31
shes beautiful
I love the stain. It makes it look like a completely different sofa. I love the decor pillows too, so cute. :)
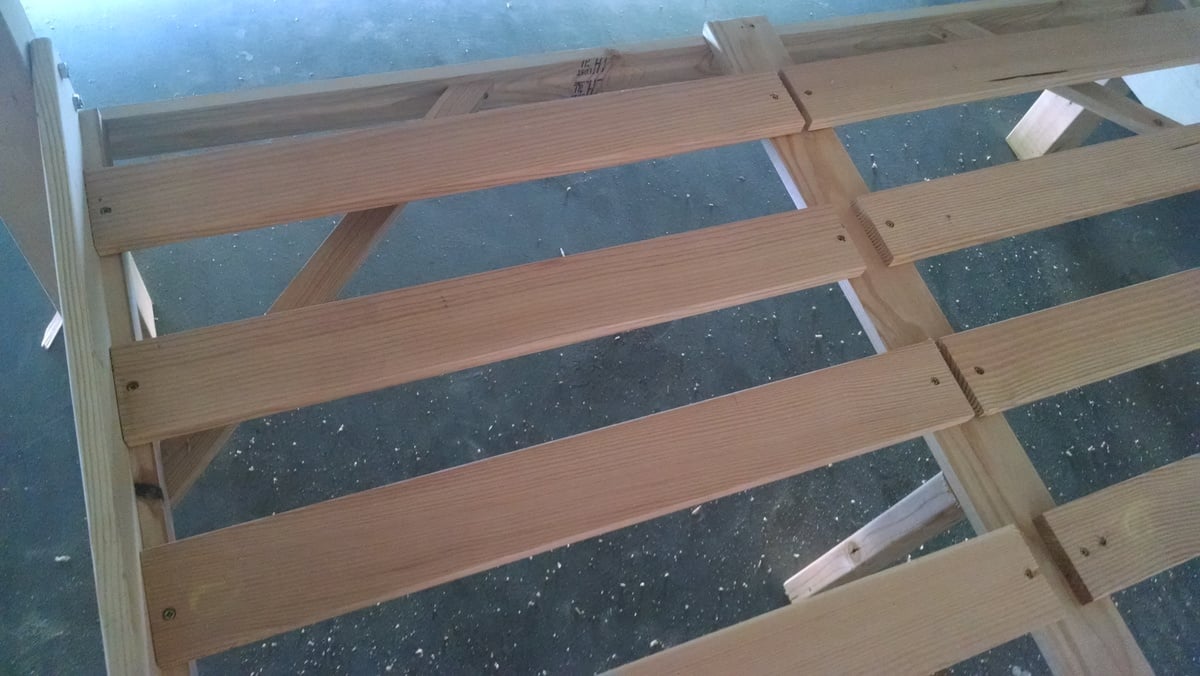
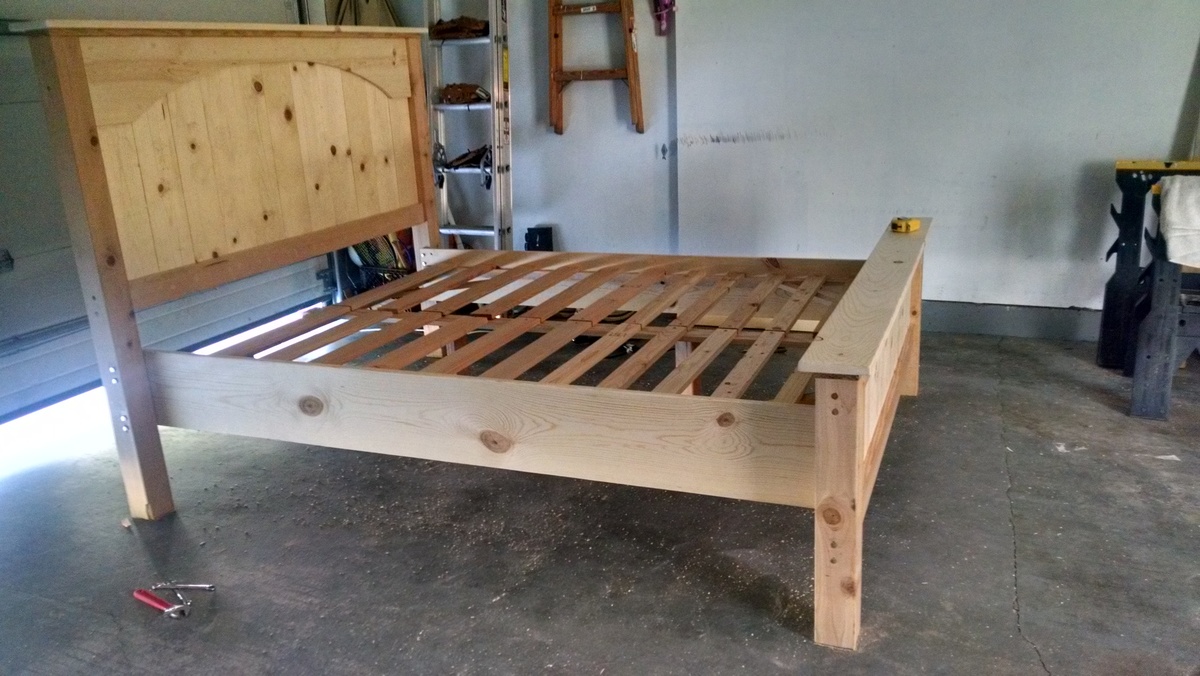
Queen Farmhouse Bed
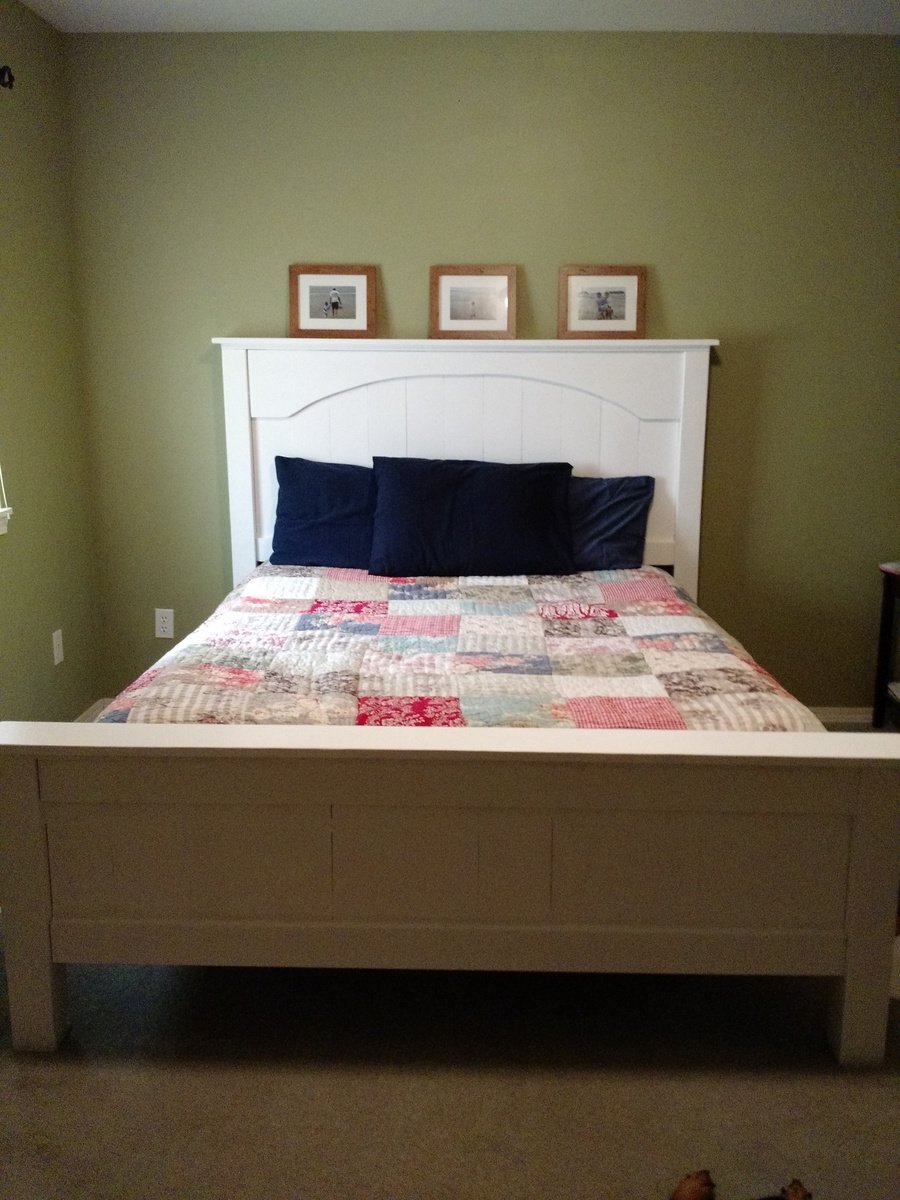
This bed took me just about 2 weeks as I only worked on it roughly 2 hours a day. I had to convert the plans to work with platforms because we needed a platform bed. I used whatever wood was around the garage to make the platforms so they are a mix of different woods and sizes. I originally was going to have the platforms detach but I wanted the bed to come apart in as few pieces as possible, so I made the platforms part of the main box. So there are only 3 main pieces. Although I do have 2 pieces of wood for support under the bed, beneath the center beam. I also used bolts instead of screws so I could take it apart more easily. I did end up putting the arch in using my handheld jigsaw.
We love the bed and think it turned out great! Love this website!!

Built from Plan(s)
Estimated Cost
$250.00 including paint
Estimated Time Investment
Week Long Project (20 Hours or More)
Finish Used
Home Depot white semi-gloss. 2 coats
Recommended Skill Level
Beginner
Open Face Cabinet Desk
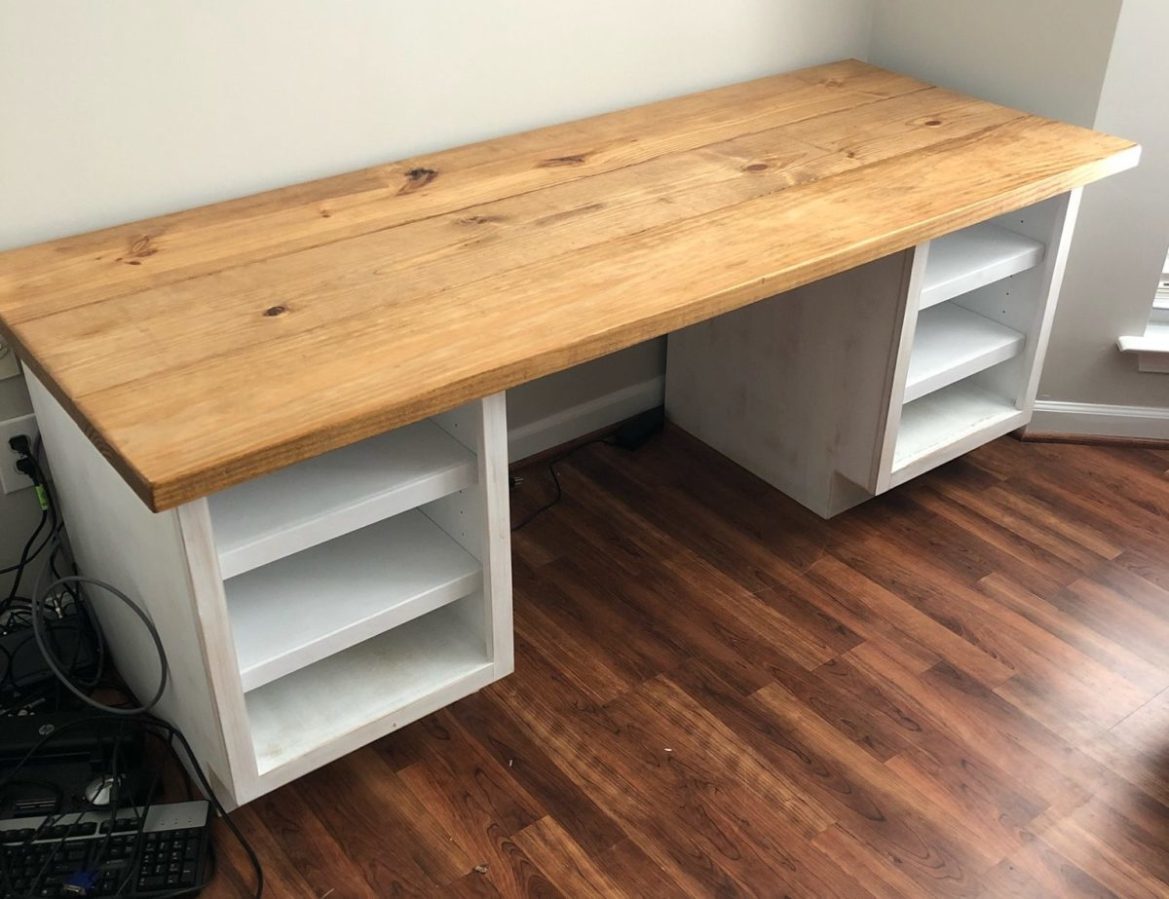
This is a project where we built the cabinets for our friends, and they added their own top to the desk.
These cabinets are each 18″ wide x 24″ deep x 26″ high, with the overall desk size being 72″ wide x 27″ deep x 27.5″ high.
These are constructed out of 3/4″ and 1/2″ plywood, with poplar face frames and shelf fronts. The finish on the cabinets is a distressed white latex paint, finished with a few coats of clear Valspar Sealing Wax to give the cabinets a nice, soft feel.
You can see more pictures on our post on our site, or even get the plans if you want to build your own.
Estimated Cost
$150
Estimated Time Investment
Weekend Project (10-20 Hours)
Finish Used
White latex paint, clear sealing wax, and stain.
Recommended Skill Level
Intermediate
Coffee Mug Rack
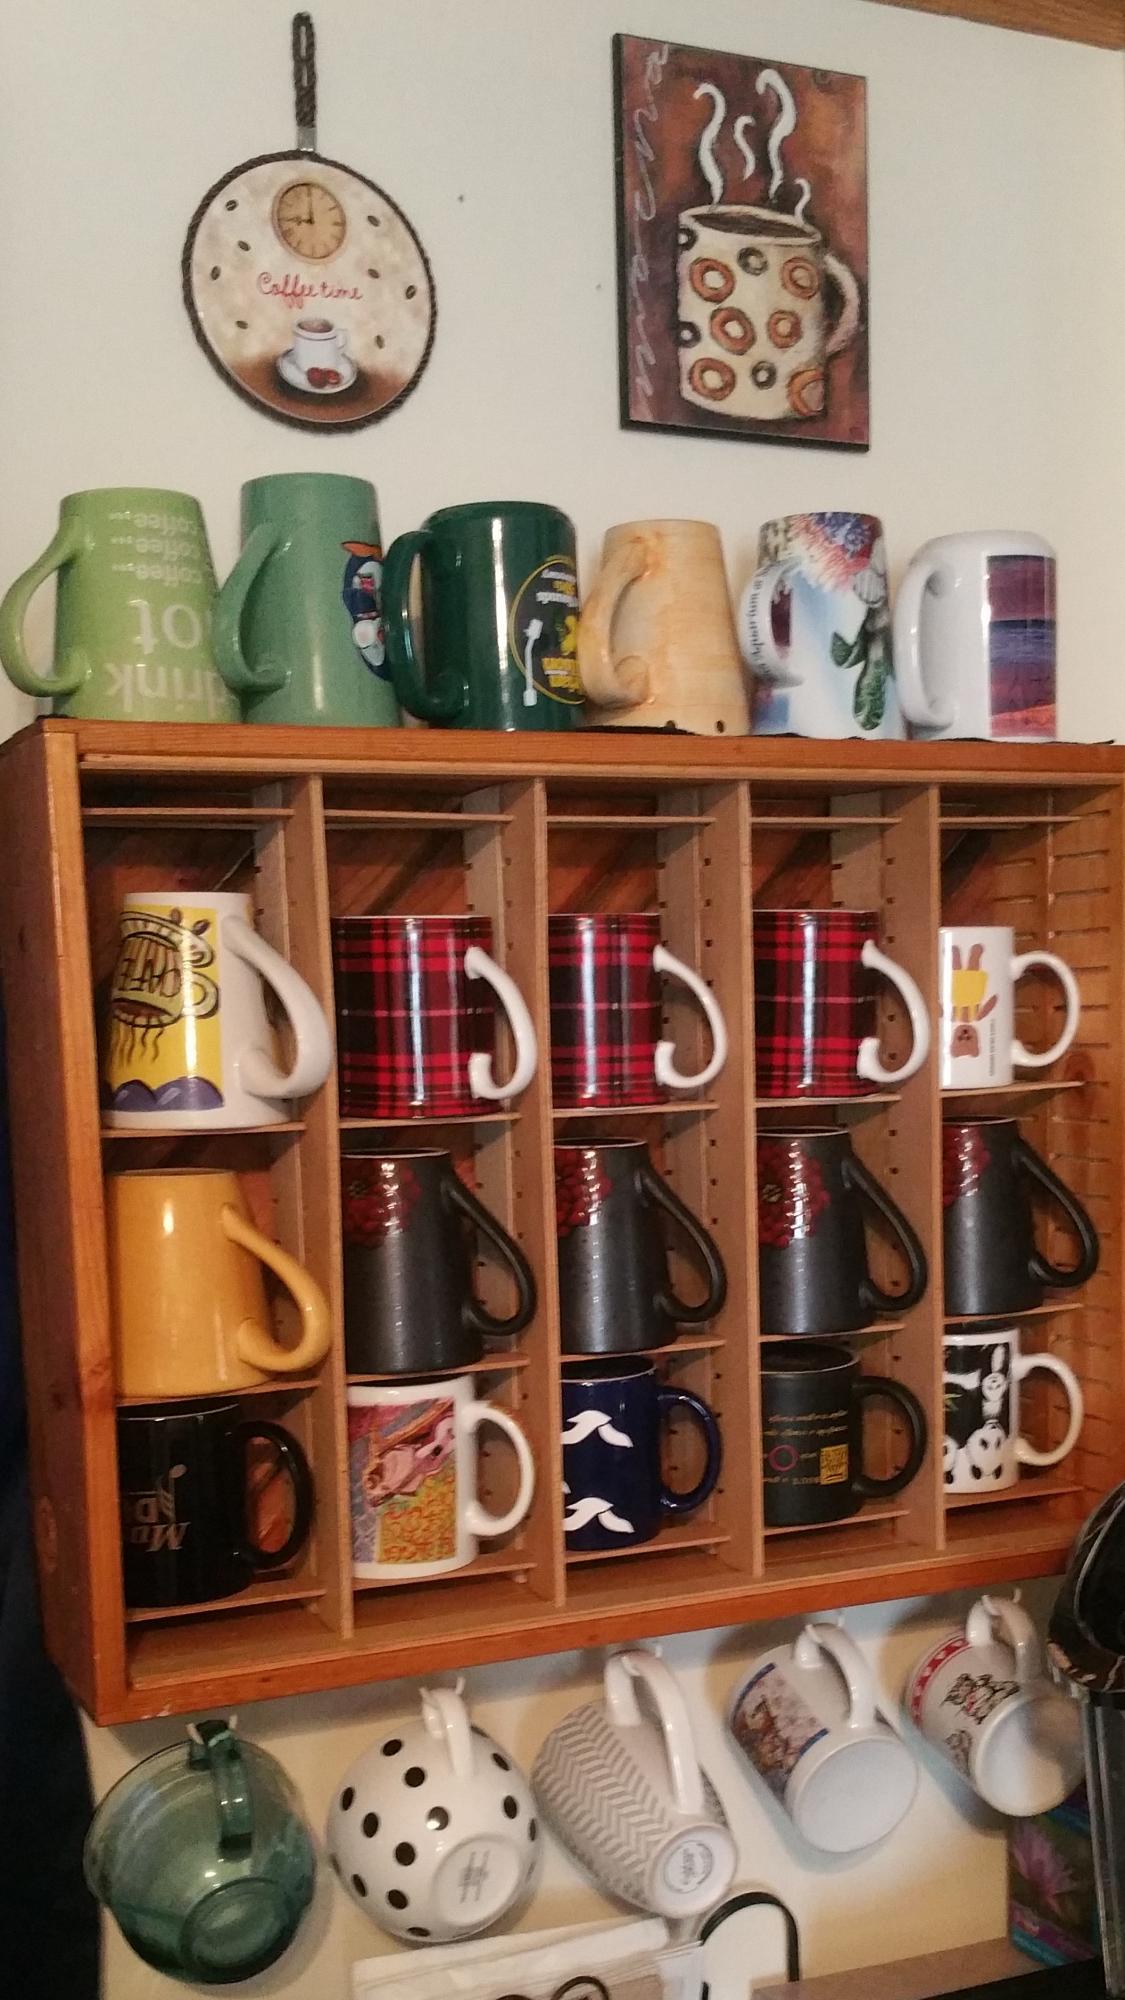
We had too many disorganized coffee mugs and needed a better storage solution. I took a couple of old cassette (remember those?) storage crates, did a chevron style back from old pallet wood, added shelves from the former dividers, and added a lot of clear coat. It functions well for us and was completely upcycled materials.
by Kevin