After getting our two weeks notice in the form of a white slip of snow on Donnelly Dome, we decided to take some extra steps in preparation for a very unwanted visitor who will be staying a long time. Think of him like bad in-laws from the movies ... you know you have to get along, but you really don't want to (not you Mom-who-likes-to-sew).

We have a ramp on a side door to make hauling materials inside the Momplex much easier. We just back the truck or trailer up to the ramp and start unloading.
BTW unloading isn't the most fun experience ... imagine that someone is going to haul an entire house up that ramp on their back - and quite often, that someone is none other than Moi.
Today I found some scraps and screwed them to the tops of the ramp. Although Grace has been enjoying the "slide" I'm just too old to think slipping on this ramp with an armful of materials would be fun ... or safe. Wheeeee .... oh ... uh ... somebody help me up! Not happening.

Then we got the openings for the stairs. One we will need to keep open to access the basement. But the other is just an accident waiting to happen - especially if we've got snow making everything slippery.

So we attached some Simpson Strong Ties for 2x6s to the insides of the opening.

And then just dropped some 2x6 boards in the brackets.

Plywood please ...

Thank you.
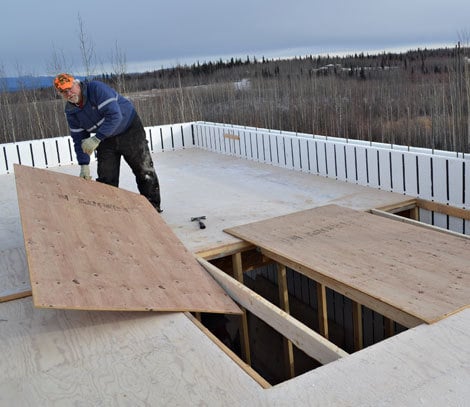
And we've got the second stair opening covered.<div><br></div><div>Guess what time it is now?
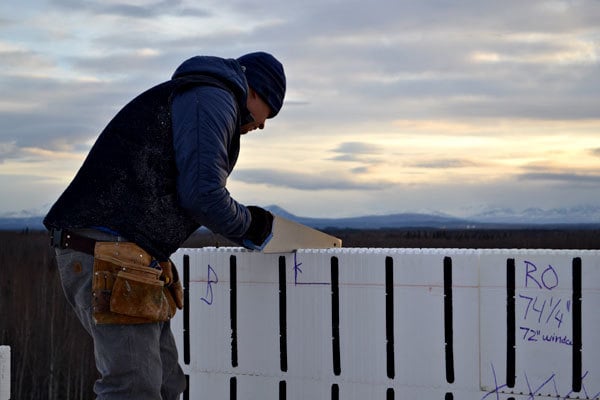
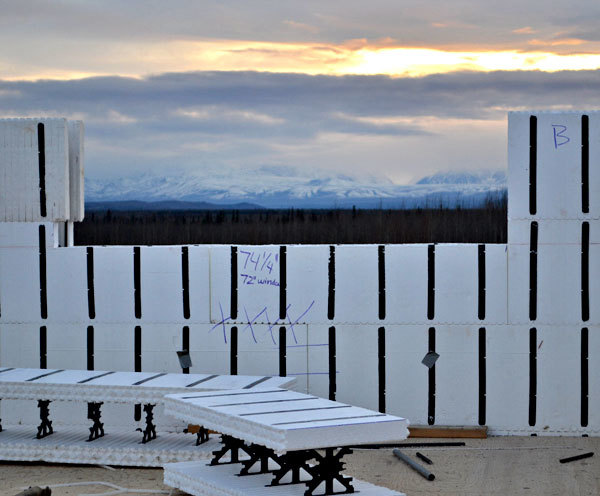
</div><div><br></div><div><img src="http://ana-white.com/sites/default/files/upper-level-blocks-14_0.jpg " alt="" align="none"></div><div><br></div><div>Hooray, it's <a href="http://ana-white.com/2011/08/momplex/starting-walls" title="" target="_blank">block time</a>!!! Yes, we are happy to be at this stage!</div><div><br></div><div><br></div>

It's time to build the second story exterior walls! Who-hoo! Been looking forward to this day for so looooooong! We will once again be using <a href="http://arxx.com" title="" target="_blank">ARXX blocks</a> to build the exterior walls. As a refresher,<a href="http://ana-white.com/2011/08/momplex/and-we-choose-walls" title="" target="_blank"> we choose to build this way because of the superior insulation value and the solid poured in place concrete walls</a>.

We start on the corners and work our way toward the centers of each wall. That's Uncle Bill helping out. I can't tell you how much we have appreciated his help and wisdom during this process. Family is the difference between possible and impossible for us.<div><br></div><div>Notice the braces in this photo? That's what I'm doing, hauling them up one by one. Think of it as the stairmaster with serious resistance. </div><div><br></div><div><img src="http://ana-white.com/sites/default/files/upper-level-blocks-8.jpg " width="470px" alt="" align="none"></div><div><br></div><div>At least that's how I get through it :)</div><div><br></div><div><img src="http://ana-white.com/sites/default/files/upper-level-blocks-13.jpg " alt="" align="none">
</div><div><br></div><div>After the second row of blocks went up, I sat on a bench in a likely location for a couch. I took this photo while sitting on the bench. This is what Mom will see when she drinks a cup of coffee every morning from her couch.</div><div><br></div><div>I've held off on placing the windows in a plan because I want the windows to frame the mountains. I had considered starting the windows at the lower block, but with property for sale all around the Momplex, I thought starting the windows a little higher would cover any roofs that might pop up. Not to mention railing on the deck out front, and OF COURSE we will be building deck furniture, so the higher sill height will allow room for a comfy outdoor sofa or adirondack chairs.</div><div><br></div><div>Another note on window height - up here on the Momplex hill, wind can blow to hurricane levels. By placing the windows higher, we are protecting them from say a adirondack chair being blown through the window.</div>

The first two rows went up fast because of the windows being at the third level, we haven't had to do much cutting so far. Notice this time we start with an alternating corner so the corners interlock.

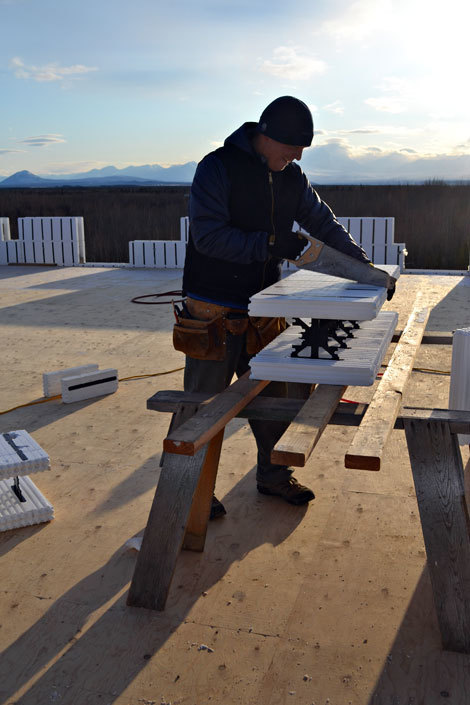
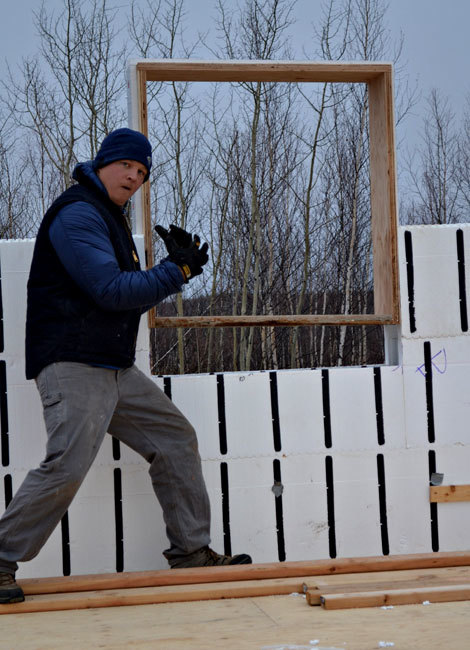
We've already <a href="http://ana-white.com/2011/08/momplex/come" title="" target="_blank">built the window bucks</a>, exactly as we did on the lower level. I'm pretty excited about these windows going in upstairs. That's why I'm propping them up, drinking my coffee, imagining we've got walls and a roof, a sofa and I'm still in my pajamas and my mom is making me breakfast ... maybe she'll make these rice pancakes with homemade garlic sauce ... Mom are you reading this?

Nothing like the thought of Mom cooking to get us going! We end up with a slight change of plans - the windows will need to be cut into the lower level of blocks to account for the window buck size.
Girls, let me tell you this. If you are building a house out of ARXX blocks, you are going to be using a handsaw quite a bit, and your fitted shirts might start getting a little tight through the arms. Unless of course you are used to carrying around say a 40 pound toddler - in that case, this is a day off for you!
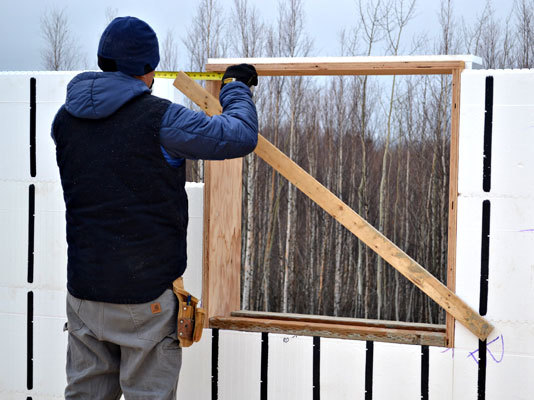
Once the windows sills are cut just right - loving the height!

The sides are cut fit around the windows. We use scraps to fill in partial blocks. Every little bit adds up.

Windows get slid in the openings


Comments
Guest (not verified)
Tue, 11/01/2011 - 10:27
Awesome!
emmarosemc
Tue, 11/01/2011 - 10:36
I can picture a moose walking
oldpaintdesign
Tue, 11/01/2011 - 11:12
Beautiful!
kendikat
Tue, 11/01/2011 - 12:46
Do you guys cover the tops of
loniwolfe
Tue, 11/01/2011 - 13:17
Oh those views! So glad to
RW (not verified)
Tue, 11/01/2011 - 13:30
I am in Awe!
playschooldiy
Tue, 11/01/2011 - 13:51
AMAZING
In reply to AMAZING by playschooldiy
emmarosemc
Tue, 11/01/2011 - 15:26
Im sure they will find
Brenna Hornbaker (not verified)
Tue, 11/01/2011 - 15:48
Talented!
FrontierTater (not verified)
Tue, 11/01/2011 - 18:06
Oh, I am so hoping that you
ferbit
Tue, 11/01/2011 - 21:13
OMG FrontierTater is freaking me out!
ohiomomma
Wed, 11/02/2011 - 06:33
Love the window height!
Guest (not verified)
Wed, 11/02/2011 - 10:33
Yes there is Snow by Ana
Guest (not verified)
Wed, 11/02/2011 - 10:38
Yes there is Snow by Ana
birdsandsoap
Thu, 11/03/2011 - 11:16
I love seeing the progress!