
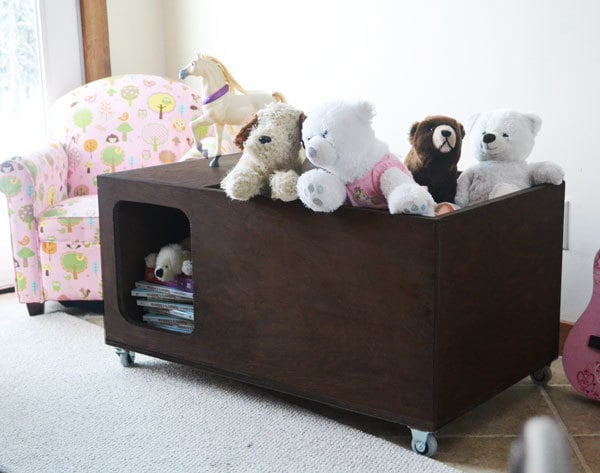

Build a modern style toy box with free step by step plans from Ana-White.com
Preparation
1 Sheet 3/4” thick PureBond Plywood (shown in Oak)
4 Caster wheels (and screws to attach)
1 1/4” Pocket hole screws
2” finish nails or 2” screws (can be used instead of pocket hole screws)
Edge banding if desired
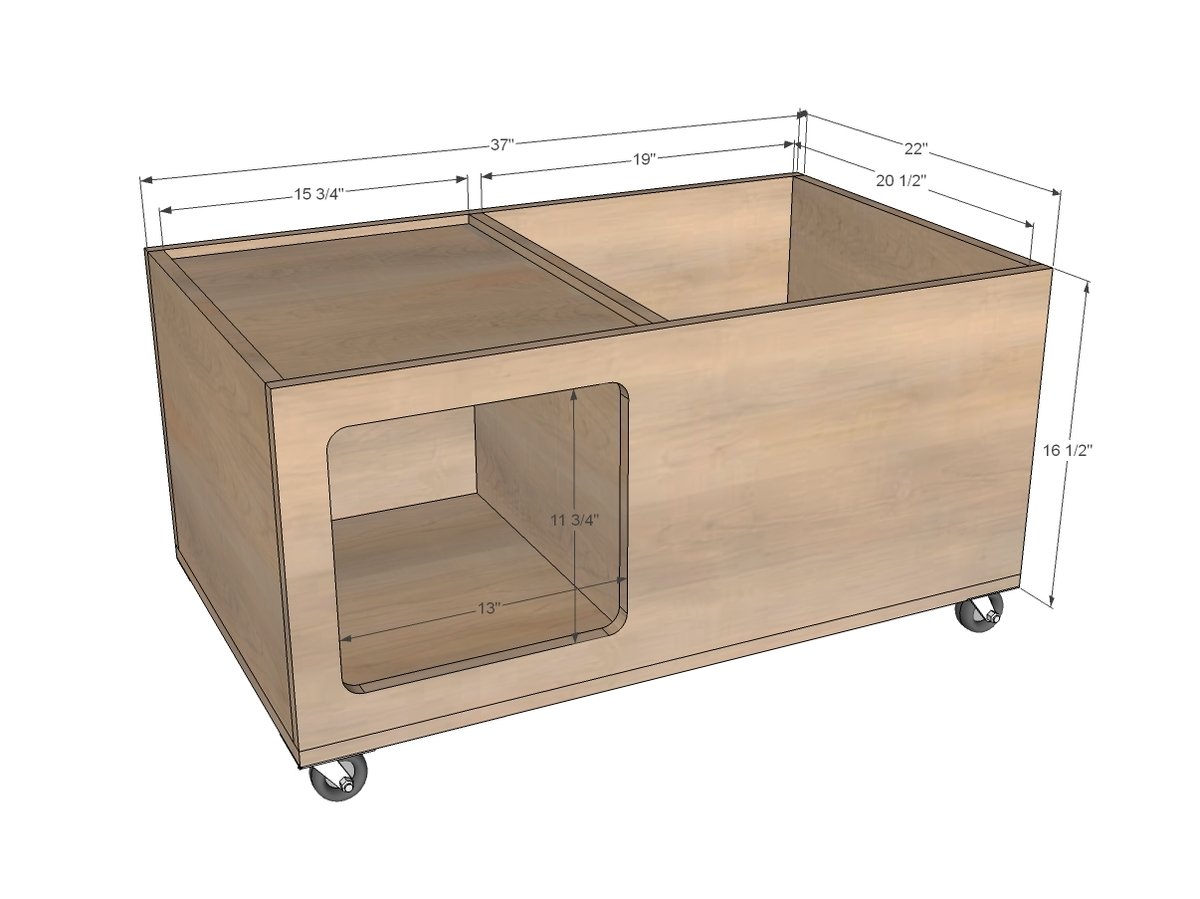
- 4 - 3/4” PureBond Plywood 15 3/4” x 20 1/2”
- 2 - 3/4” PureBond Plywood 15 3/4” x 37”
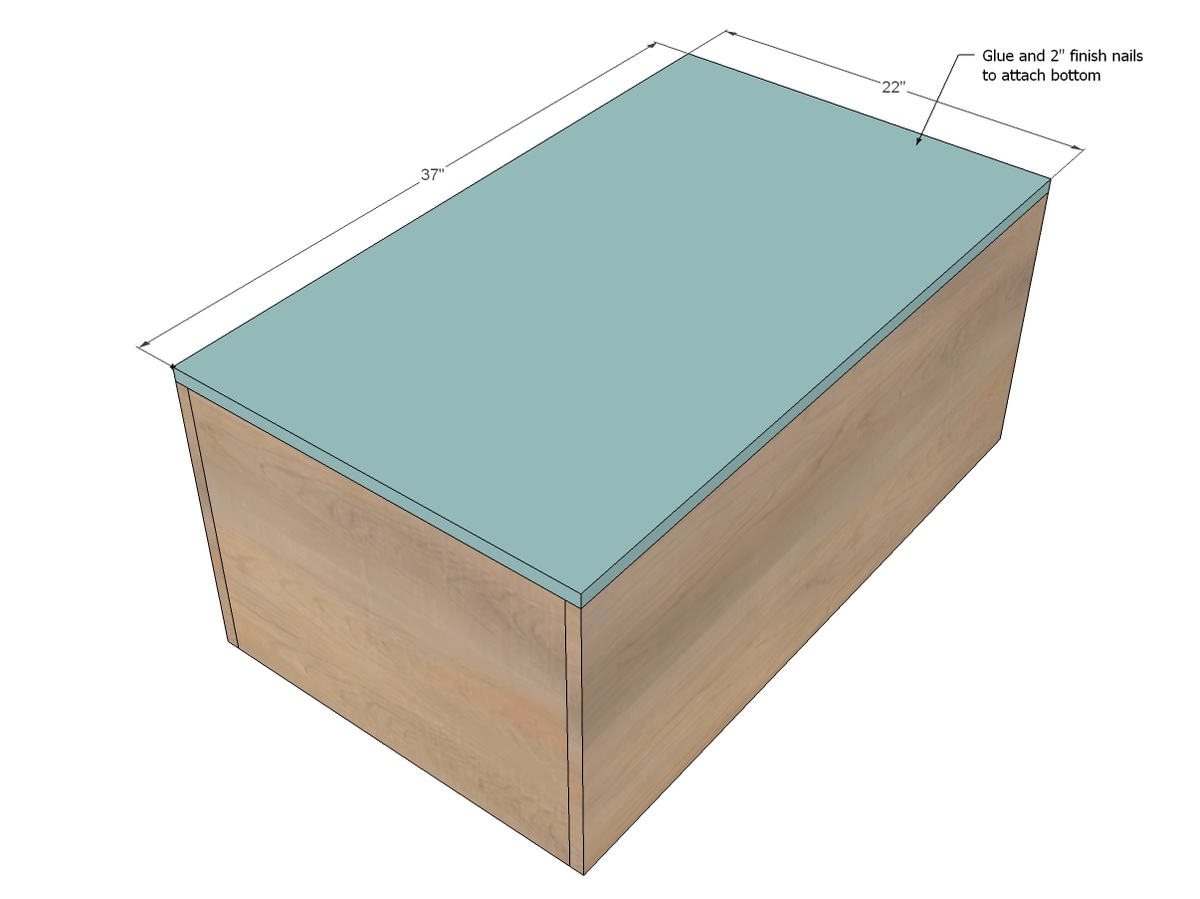
- 1 - 3/4” PureBond Plywood 22” x 37”


Please read through the entire plan and all comments before beginning this project. It is also advisable to review the Getting Started Section. Take all necessary precautions to build safely and smartly. Work on a clean level surface, free of imperfections or debris. Always use straight boards. Check for square after each step. Always predrill holes before attaching with screws. Use glue with finish nails for a stronger hold. Wipe excess glue off bare wood for stained projects, as dried glue will not take stain. Be safe, have fun, and ask for help if you need it. Good luck!
Instructions
Step 1
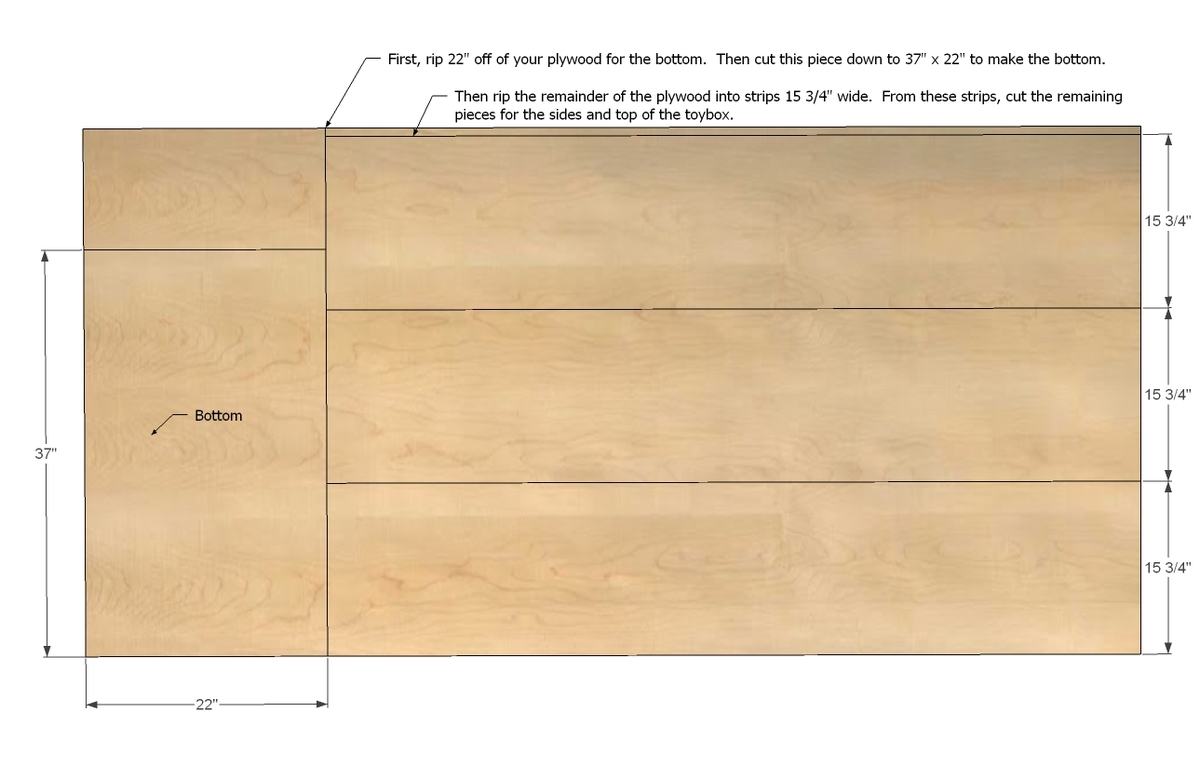
Don't be intimidated by a big sheet of plywood! You can have it cut down to manageable sizes at your Home Depot. My suggestion is to ask for the plywood to be cut as shown above. Be very specific about the cut sizes and make sure your 15 3/4" cuts are consistent. The best way to do this is to have the track saw set horizontally and the plywood run through three times without moving the saw to get consistent rips.
Once you have your plywood in the four main pieces, you can use a circular saw to cut from there.
Here's how I cut plywood with a circular saw:
NOTE: If you are using edge banding ( I did not) you can add it here or in later steps - it's up to you.
Step 2
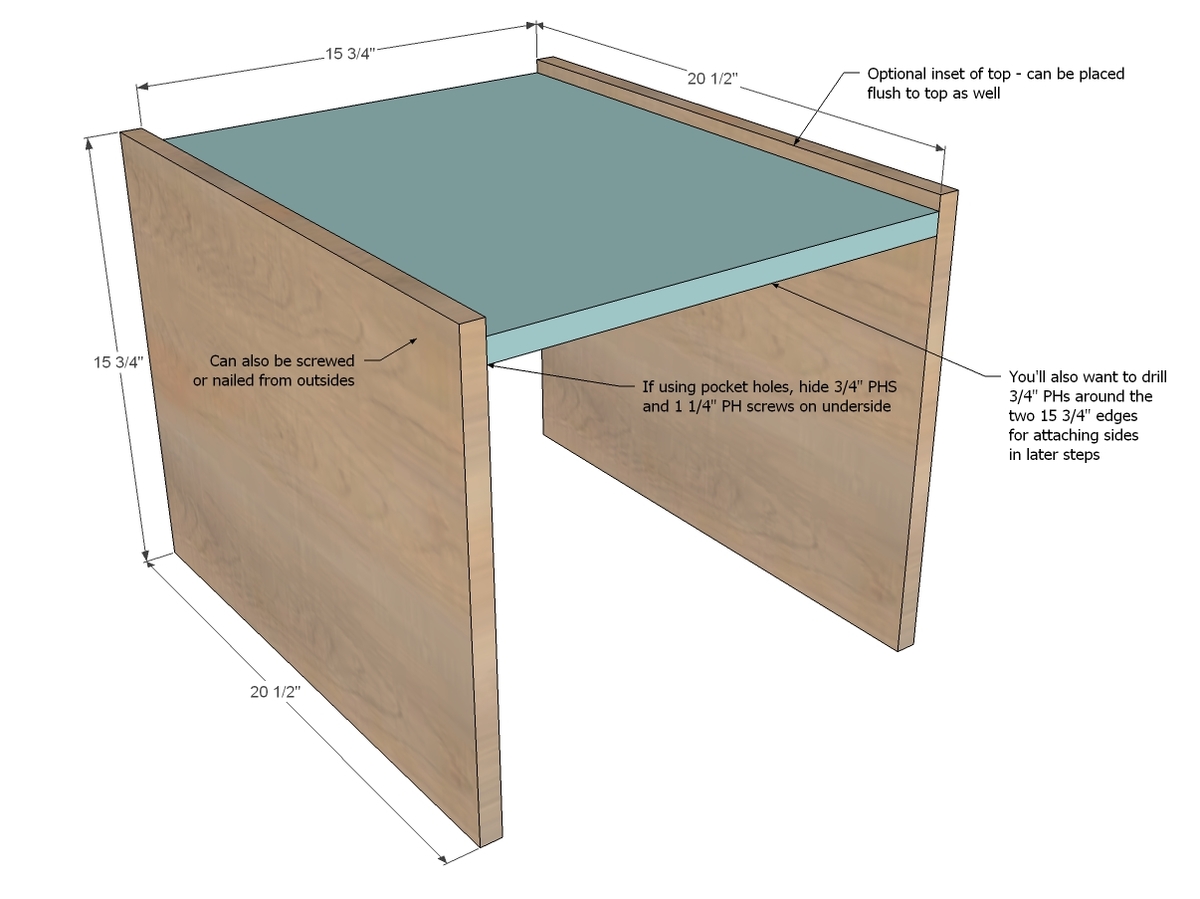
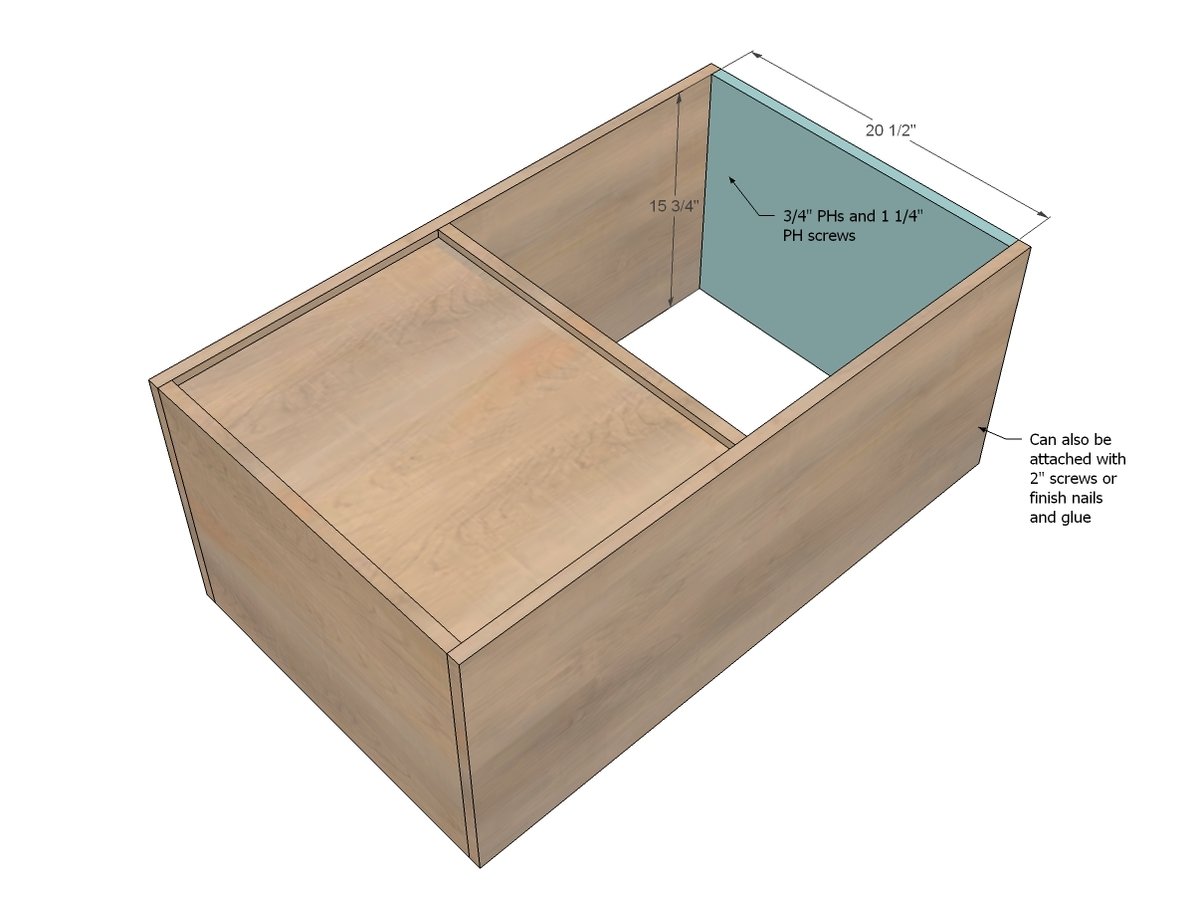
Cubby Top
Trust me on this one, you want to attach the cubby top now, and not later If you are attaching with screws or nails, use 2” fasteners and glue. For pocket hole users, drill 3/4” pocket holes around all sides of the cubby top (one of the 15 3/4” x 20 1/2” pieces). Then drill 3/4” pocket holes on the 15 3/4” sides of the remaining 20 1/2” long pieces. 3 per board side is plenty - one on each end and one in the middle. NOTE: If you inset the top, keep top pocket holes down enough for the inset. Then attach cubby top to sides, keeping all pocket holes to inside.
Step 3

Now attach the front and back through those predrilled pocket holes with 1 1/4” pocket hole screws. You can also screw or nail. Take care to keep the center board lined up and square as you attach.
Step 4
Now add the remaining side board.
Step 5
Step 6

Now the fun part - cutting out the cubby hole! Draw out the opening using the diagram above. Then drill a hole the size of your jigsaw bit in the middle to start your jigsaw bit. Make sure you have the right jigsaw bit in for hardwood plywood and then slowly cut. You’ll want to sand edges when you are done to make sure they are smooth and even.
TIP: I drew out a square, then took a jar and used it to round the corners. The larger the rounding, the easier the jigsawing. As you jigsaw around the arch, make sure your jigsaw blade isn’t beveling.
Step 7
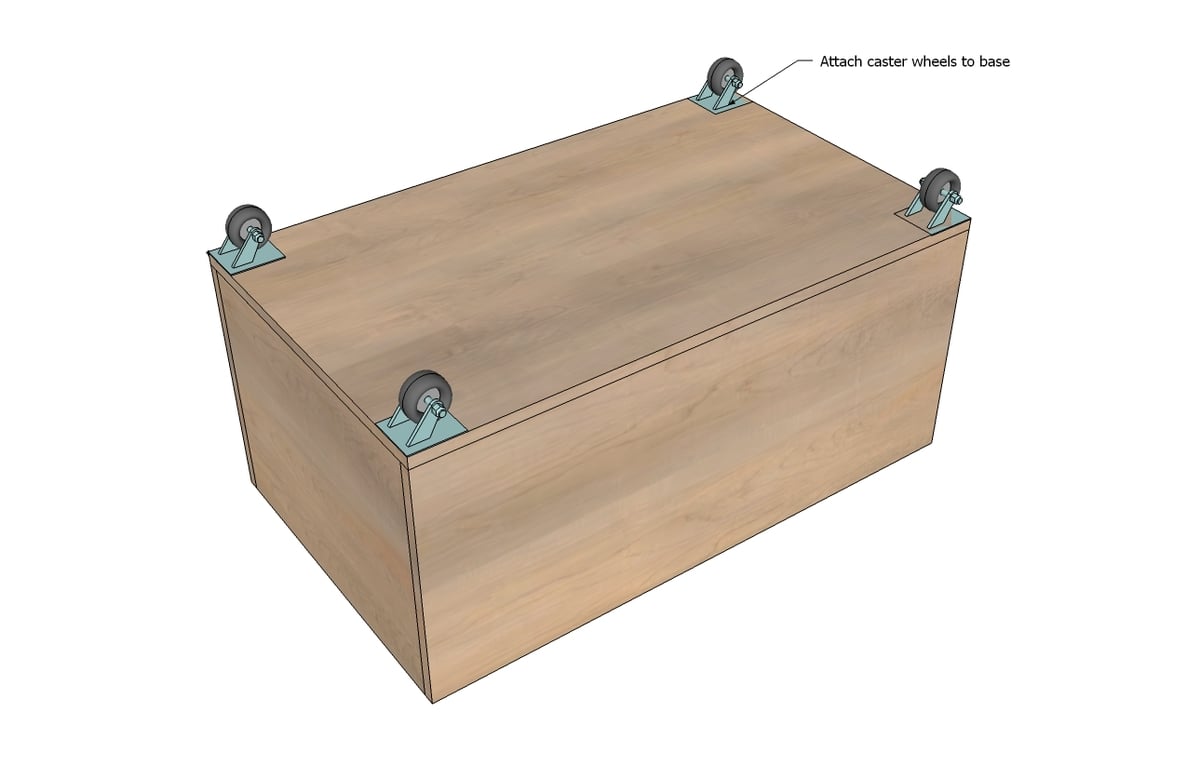
Okay, this is really the fun part - attach the caster wheels to the bottom with screws.
You can apply edge banding to exposed plywood edges if desired.
Special thanks to the folks at PureBond for the awesome plywood and bringing you this post!
It is always recommended to apply a test coat on a hidden area or scrap piece to ensure color evenness and adhesion. Use primer or wood conditioner as needed.

Comments
Jarrah
Thu, 11/29/2012 - 12:57
Love it! With some minor
Love it! With some minor changes it could also work as a bunny hutch or small chick pen.
Kev (not verified)
Sat, 12/01/2012 - 23:14
I think you have got the
I think you have got the wrong video should be cutting plywood. With the Kreg I would use a T-Bar handled allen key far easier on the hands. More so us older woodworkers.
Sara L. (not verified)
Thu, 12/13/2012 - 17:16
Love this!
I've never commented before, but this is lovely! I always thought your plans were nice, but just not quite my style. This is perfect, and looks simple enough that I might even give it a try. Thanks for all that you do!
cfiorse
Tue, 01/23/2018 - 16:05
Plywood sheet dimensions
That's a great project. How are the dimensions of the plywood sheet?
cfiorse
Tue, 01/23/2018 - 16:07
Plywood sheet dimensions
I love this project! How are the dimensions of the plywood sheet?