
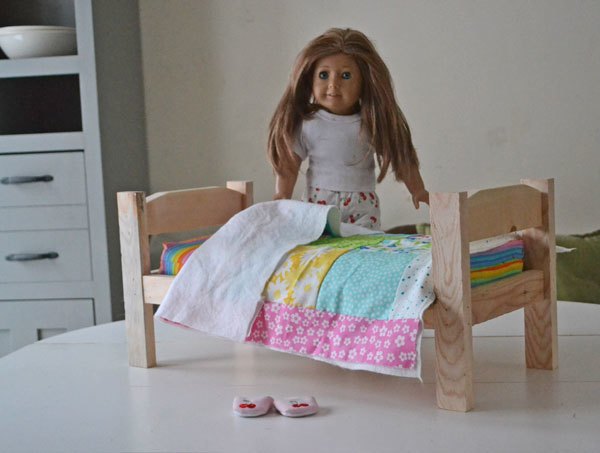

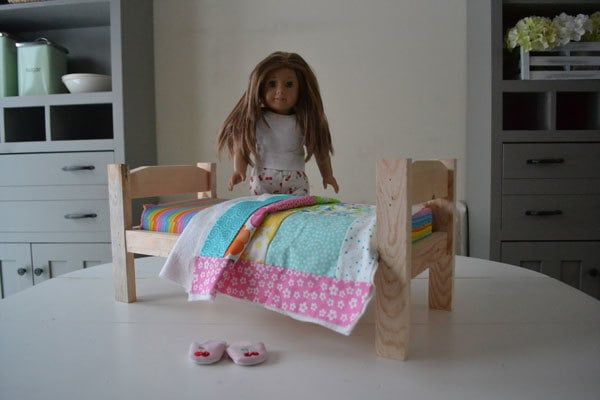
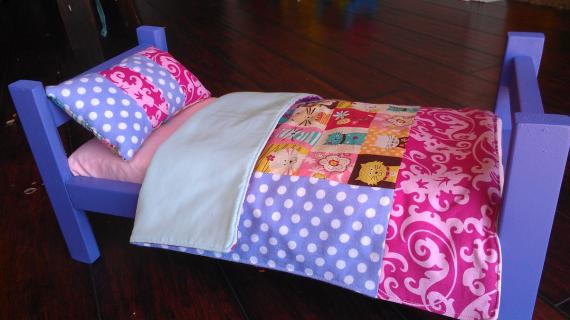
Make a kit for your kids to build their own doll bed! Free tutorial and video from Ana-White.com

One Saturday on a building supply shopping trip for the Momplex, we noticed a different energy in the Home Depot. The store was abuzz with energy and laughter and little voices - like a busy playground on a sunny day.
My little girl grabbed my hand and said, Mom, let's go see what is going on! So we followed the happiest sound on earth to discover the Home Depot Kids Building workshop.

She does look good in orange, doesn't she?

They gave her a kit to make a Turkey Napkin Holder.

The pieces were all cut out and she was given glue and a screw driver to assemble.

Of course, Grace is no stranger to building. But this was new to her - to have her own project, made easy for her to build all by herself.
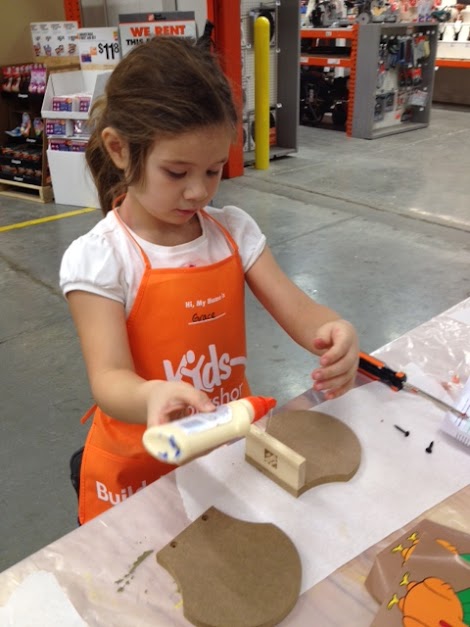
Don't forget the glue!

Then she got to paint it how she wanted to.
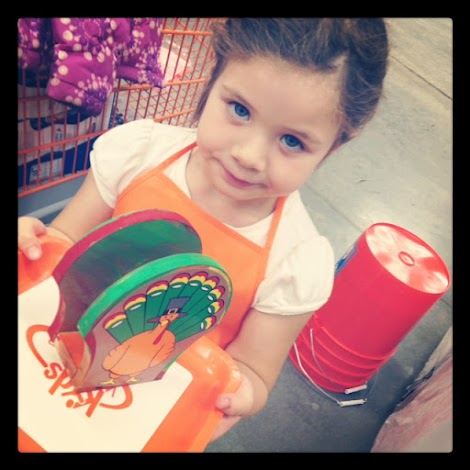
And of course they had sticker too.
At the end, Home Depot gave her a little badge for her apron, and Grace was begging to come back for the next Home Depot Kids Workshop. We certainly are going to try, but we live 100 miles from Home Depot, and can't always make the workshops, so I started thinking ... what if I made her some kits at home? Kits that I could share with you for your kids too?

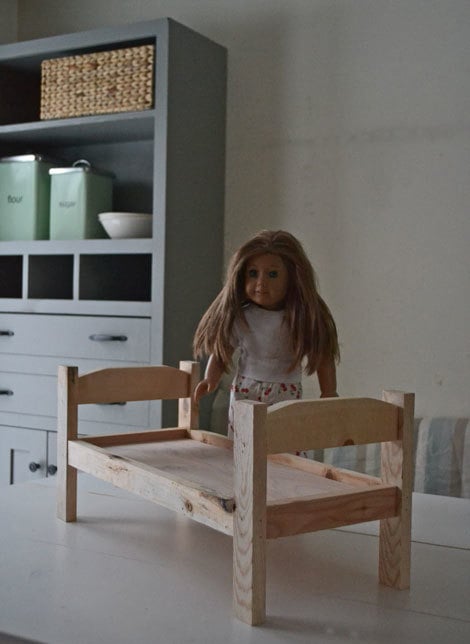
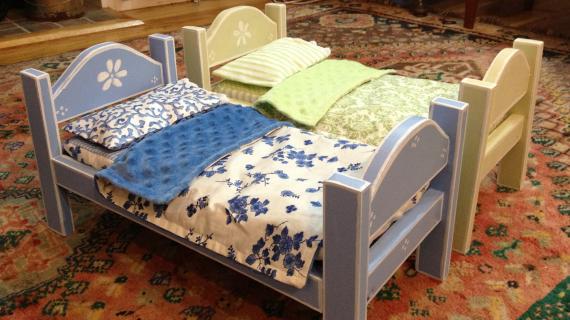
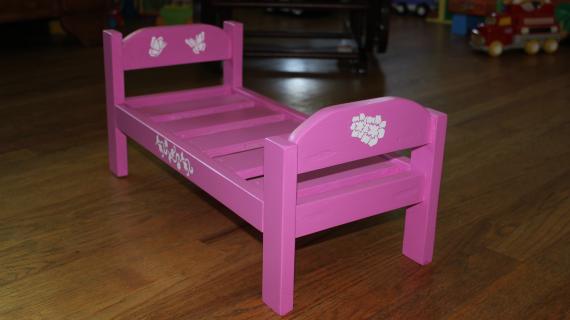
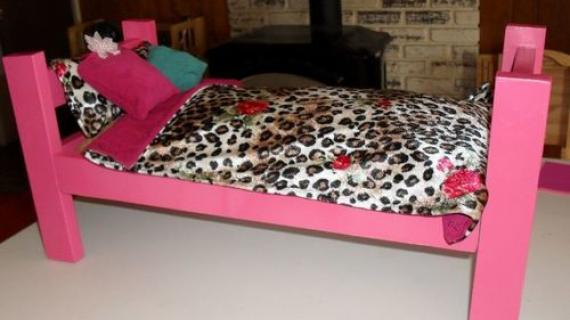
Grace's birthday is right around the corner, and I thought, maybe the birthday guests are old enough to make and paint their own doll bed at the birthday party? So I designed this Kid's Doll Bed Kit (see plans below) out of 1x2s and 1x3s, the cheapest possible wood because when you multiply the kits by 10 things can add up fast! This kit cost about $2 for the bed, so you can afford to let her "make it her own" or a dozen kits for parties. Or if you had multiple kids to buy for, or say you wanted to make up a bunch of kits for Christmas gifts.
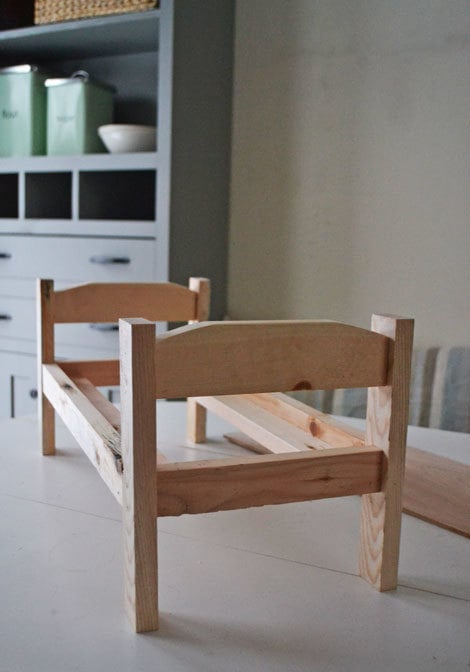
We cut the pieces and opted to pre-assemble the kit to step 2 but if you have an older child, they may be able to build from the cut pieces.
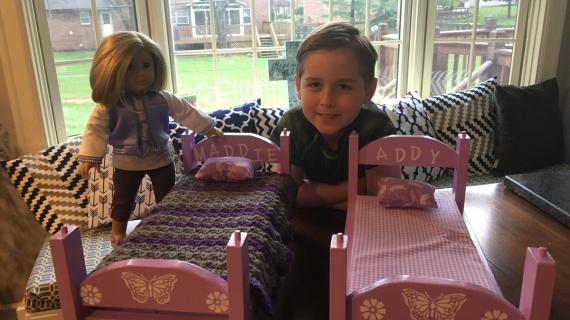
And then we decided to see if she could build it. Here's what happened:
Yes! She can and loved building the doll bed!
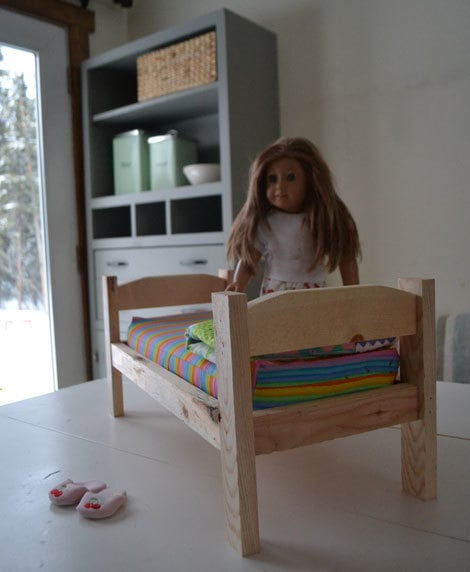
I do apologize for the poor light quality - we are just a week away from the darkest day of the year and it's pretty much dark or dusky all the time up here in Alaska. Also, ignore my current project in the background there ... it's almost done!
So what do you think? Should I put together more plans for kits that you could put together to inspire DIY in your kids? I can just see a tool caddy kit under the tree with a drill!
PS - This post is not affiliated with or sponsored by the Home Depot. They looked at me like I was just another crazy mom taking zillions of pictures of her kid. Which I am.
PSS - Want a tutorial on the doll quilt? Let me know!
PS - Want to convert singles to a bunk?
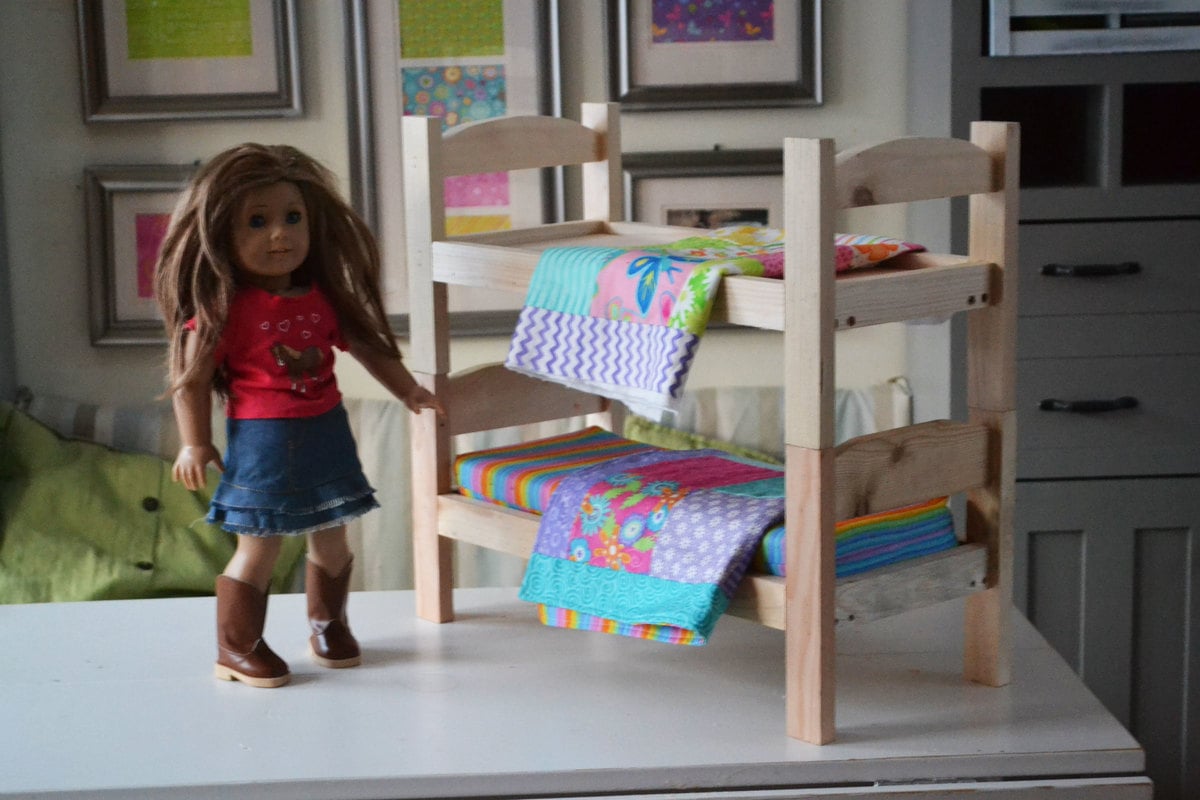
Here's a quick tutorial on how to do that:
Or you could just make the legs twice as long for fixed bunks!
Preparation
12 feet lof 1x2 boards (the furring strips were used in this plan/video)
16" of 1x3 (can substitute 1x2s here)
8" 2" screws
Hot glue or 1 1/4" finish nails and glue
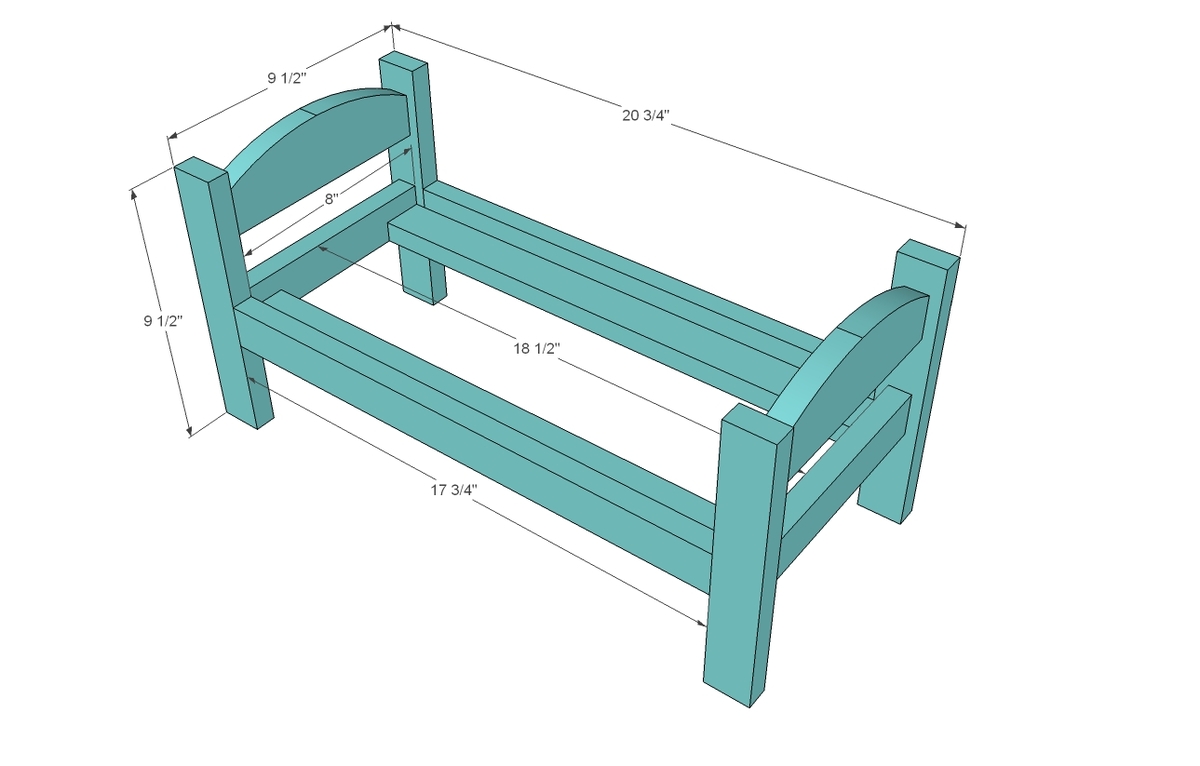
HEADBOARD/FOOTBOARD
4 - 1x2 @ 9 1/2"
2 - 1x3 @ 8" (can use 1x2s here)
2 - 1x2 @ 8"
RAILS
2 - 1x2 @ 18 1/2"
2 - 1x2 @ 17 3/4"
1/4" plywood or sturdy cardboard for the mattress support
Use a jigsaw to round the 1x3 top corners down if desired. I just grabbed a large jar and traced it as a pattern on the corners.


Please read through the entire plan and all comments before beginning this project. It is also advisable to review the Getting Started Section. Take all necessary precautions to build safely and smartly. Work on a clean level surface, free of imperfections or debris. Always use straight boards. Check for square after each step. Always predrill holes before attaching with screws. Use glue with finish nails for a stronger hold. Wipe excess glue off bare wood for stained projects, as dried glue will not take stain. Be safe, have fun, and ask for help if you need it. Good luck!
Instructions
Step 1
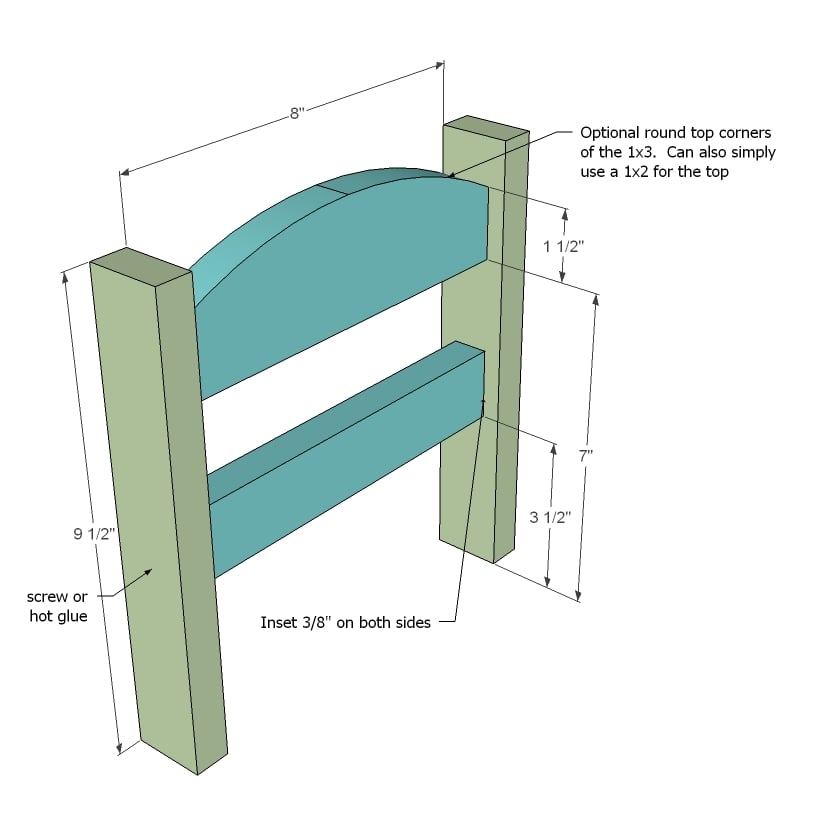
We went ahead and build the headboards first. You can screw or nail, or if you have a hot glue gun, that works really well too. Build two headboards.
Of course an easier way would be to just use a wider width board for the headboard (for example 1x8 or 1x6 - but this adds to the overall cost and I was trying to keep costs as low as possible).
Step 2

Now attach the bed base support to the siderails. Again, nails, screws or hotglue does the trick.
Step 3
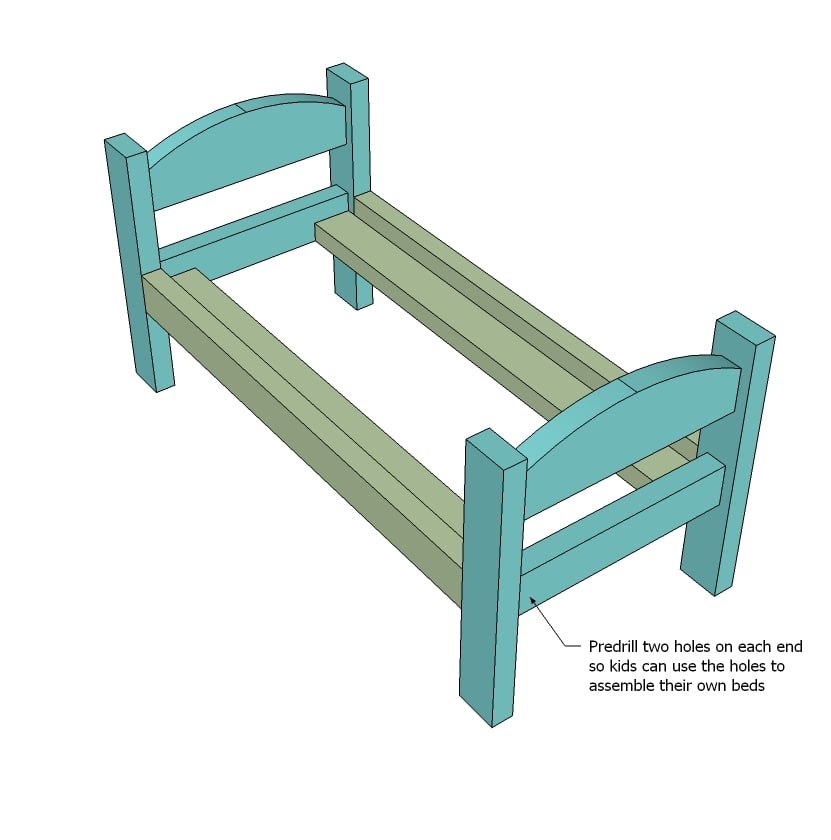
You can let your kids then assemble the pieces. Then have them measure and cut from sturdy cardboard a platform for the mattress and place in the bed.
It is always recommended to apply a test coat on a hidden area or scrap piece to ensure color evenness and adhesion. Use primer or wood conditioner as needed.


Comments
whitney_smith
Thu, 12/13/2012 - 10:57
Oh my gosh that was the
Oh my gosh that was the cutest thing! I love her excitement! And it was nice to see Jacob in a video too!
And I LOVE what you have going on in the background!!! :)
Andrea B. (not verified)
Thu, 12/13/2012 - 11:00
I love this! DD already has
I love this! DD already has a bed for her AG doll that I purchased at Ikea but, with a second doll coming, she'll need another. What a great project for her to work on during Christmas break. I'd also love a quilt tutorial. I know I could wing it on my own but I'm so much happier when I have a pattern to spell out what to do.
Regina @ Chalk… (not verified)
Thu, 12/13/2012 - 11:08
LOVE the idea of kits for kids!
Ana -- I love your site and this is my first time commenting. I would jump at the opportunity for wood kits to enjoy with my daughter. There are so many great projects for little hands to build: birdhouses, pencil holders, cars ect. I used to give my second grade students some wood scraps and nails and they'd create some amazing sculptures. I hope to see some more children's build projects, I think it's a fantastic idea!
Jenny Lisk (not verified)
Thu, 12/13/2012 - 11:32
kids kits!!!
Hi Ana - I would *love* to see some more kids kits. I'm a scout leader (3rd grade cub scouts, and kindergarten girl scouts) and struggle to find / adapt projects to be kid-friendly. I'm planning to have the boys build toolboxes as a first project in January...any chance of whipping out a simple plan for that? :) Otherwise I'll stick with the plan in the cub scout book.
In addition to scout projects, my kids would love to do such projects at home :)
PS - thanks for coming to Seattle! My kids and all all loved seeing you and talking to you there :)
Katie Keys (not verified)
Thu, 12/13/2012 - 12:05
SO CUTE!!
Ana,
This is just beautiful!! Not only Grace - but the way you're empowering Grace to build and help her achieve!! Just beautiful!!!
Katie
Garett_h (not verified)
Thu, 12/13/2012 - 12:10
Totally doing this at my daughter's party
So my oldest has been wanting an American Doll craft party for her birthday theme this year. This is going to be a hit with all the girls! I had know idea something like this could be possible on our budget. Amazing! Thanks so much! I'm also going to have to get her that drill!
Anonymous Coward (not verified)
Thu, 12/13/2012 - 12:24
More kits!
Definitely like the idea of kits for various things.
Many of your kid'sn projects are kit-friendly already. Those who want can finish the project, those who want to "kit-i-fy it can package it with the printed instructions and hardware.
Lady Goats
Thu, 12/13/2012 - 12:24
LOVED watching Gracie put the bed together.
She totally seemed to enjoy it.
Um. Am I the only kinda obsessing over the shelves flanking the bench? Will we see plans for those soon?!
Melissa G (not verified)
Thu, 12/13/2012 - 12:49
Fantastic!
I love it! Where did you get that cute little drill?? My 4 year old boy needs something just like that! I'd love to see more kid kits, he loves to "build projects" with me, I'd love to let him "do his own"!
dmcarwin
Thu, 12/13/2012 - 13:12
So Awesome!
OK, for one I love how Grace was giggling when she was drilling, my little five year old girl does the same thing when she is very excited...so cute!
Second, I have six kids and have been taking them to the home depot workshops and they love them! So of course I would love kit plans for kids, I want them to learn the love of building too!
And Third, I can't wait to see the finished project you are working on....!
Ute (not verified)
Thu, 12/13/2012 - 13:17
I love the idea of kits for
I love the idea of kits for kids.
Yes on the quilt tutorial!
I love your site and only wish I had the time to learn to build all the things that inspire me. Thank you!
bhoppy
Thu, 12/13/2012 - 16:04
Great job Grace!
You did such a beautiful job!! My 5 y. o. daughter loved watching you make the bed with your dad! And she also said she wants a pink drill now too:-) We live over an hour away from a home depot so the kid kit is a wonderful idea!
Andera (not verified)
Thu, 12/13/2012 - 19:33
Totally Love this bed!!!! I
Totally Love this bed!!!! I would love a quilt tutorial & more kids kit projects. You are A-MAZING!!!
timandmeg.net (not verified)
Thu, 12/13/2012 - 20:21
So perfect! I can't wait for
So perfect! I can't wait for my little girl to be old enough to host an American Girl Party! I love the idea of kits!
Our nephews and our kids would love to work on projects like this.
I second the earlier comment- Where did you get that little drill?!!!
Great job Ana. Thank you for all you do. Our home is FILLED with Ana projects and we are now tackling things we never would have before because of you. The kids need a desk? We build one in stead of going to IKEA.
Thank you.
Alli (not verified)
Thu, 12/13/2012 - 22:29
Love it
Love the kit ideas for kids. My daughter loves the Lowes and Home Depot workshops and it would be great to do some of these at home.
Scott A. Breau… (not verified)
Fri, 12/14/2012 - 10:35
Great Blog!
I stumbled across your blog on Pinterest and I have to say that I have really enjoyed reading it and look forward to trying some of your projects.
Keep up the good work.
Rachel Knowles (not verified)
Fri, 12/14/2012 - 11:07
AWESOME
Keep the kit ideas coming. I LOVE it. And I have now found the theme for my daughter's bday party. The girls will be SOOOOOOOOO excited to make their own AG bed.
Jena (not verified)
Fri, 12/14/2012 - 18:09
Super cute!
Grace was just too cute!! My 9 y/o would love to make this for her AG and so would her friends-keep the kid ideas/kits coming!! Thanks!
Rebecca SPF (not verified)
Fri, 12/14/2012 - 19:52
I wish this was here just a
I wish this was here just a week or so ago....I had a family member make doll beds for my kids (for Christmas gifts) that started with one of your plans and ended up something entirely different, and over double the intended price range. I could have done these on my own for a fraction of the cost. Live and learn. Thanks for your amazingly easy to do, and simple instructions for everyone to do! :)
Tami Peterson (not verified)
Sat, 12/15/2012 - 18:16
Awesome
My girls do the Lowe's Build and Grow all the time. We live 55 miles from Home Depot but I want to check them out too. They love to build :-) My husband and I bought the wood today and they are getting these 'kits' for Christmas! I can't wait. Thank you so much for the awesome plans!!!!
Leigh (not verified)
Mon, 12/17/2012 - 08:31
This is WONDERFUL! Thank you!
This is WONDERFUL! Thank you! And yes, please design more kits. We can't always make it to the workshops, and when we do I am usually alone with 3 little ones. So having the ability to prep these kits here for them to build during the baby's naptime would be fabulous. Thanks again! This one will become my oldest son's Christmas gift to his younger sister. :)
Ana White
Mon, 12/17/2012 - 12:51
Thanks everyone for the
Thanks everyone for the lovely comments! So glad you like the kit idea, I am pretty excited about it myself! Grace really loved "building" this bed and I'm so glad to be able to share this with you and your children as well!
The drill is a SKIL IXO and is the real deal. It comes with a right angle attachment for reaching in tiny spots too - so I might be borrowing it!
Can't wait to put more kits together!
Ana
timandmeg.net (not verified)
Tue, 12/18/2012 - 07:29
Thanks for the tip on the
Thanks for the tip on the drill!
timandmeg.net (not verified)
Tue, 12/18/2012 - 07:48
Drill Link
Here it is on Amazon for 39.99
http://www.amazon.com/2354-04-Compact-Lithium-Ion-Driver-Combo/dp/B0089…
Tami S. (not verified)
Thu, 12/20/2012 - 22:50
OMG! I love this! My 9 year
OMG! I love this! My 9 year old son wants building stuff for Christmas so he is getting a hammer, screw drivers, sanding paper and wood glue along with a couple of kits (butterfly house and bird feeder). We were looking for kids building kits everywhere! The only ones that Lowes or Home Depot had were really pricey for what you got. I would LOVE to have kits designed by you! He actually wanted to give his sisters beds for their 18" dolls for Christmas but there was no way that I would have been able to get them done. This plan looks SO easy!! I wish I would have seen this when it was posted!
Desiree (not verified)
Sun, 12/23/2012 - 17:52
Love this!!
My 7 year old daughter is getting an AG doll for christmas and we are hoping to bulid her the bed between now and christmas!! These are absolutley adorable and look easy enough for me as im a little tool challenged! ;) you dont happen to have the bedding/quilt plans posted anywhere do you?? Hoping to do this tomorrow!!
Jody N (not verified)
Wed, 01/02/2013 - 13:32
Hi Ana, Just want to say, you
Hi Ana,
Just want to say, you are awesome! Just found your site through pintrest and have been browsing all afternoon. My 6 year old daughter really wants to make the American Doll beds at her party, thanks so much for this great idea, And it is so easy and inexpensive! I would also love the pattern to the bedding. Now back to my neglected laundry.
Jody Navratil (not verified)
Wed, 01/02/2013 - 13:33
Hi Ana, Just want to say, you
Hi Ana,
Just want to say, you are awesome! Just found your site through pintrest and have been browsing all afternoon. My 6 year old daughter really wants to make the American Doll beds at her party, thanks so much for this great idea, And it is so easy and inexpensive! I would also love the pattern to the bedding. Now back to my neglected laundry.
Carrie M (not verified)
Fri, 01/04/2013 - 18:09
Great bed kit, now I need a idea for the 2 boys
I love this bed kit idea and want to use it for my daughter's 7th birthday. Anyone have any ideas of an easy plan or decoration idea for the 2 boys coming to the party? I plan on painting them white and letting the girls decorate them. Target had stamper in the $ section, so I'm all set.
missypoo1974
Fri, 07/19/2013 - 12:40
First ever
I have wanted to start doing wood working for a while, but was always a little intimidated. Thank you for introducing it in a way that was possible for me to follow. I made this bed as my first ever "100% all by myself" project. It is FAR from perfect, but I did it!!
Marisa.Anderson
Wed, 11/06/2013 - 12:48
Love it!
I am making these for my 3 kids for Christmas this year. I'm going to make them into bunk beds though and cut the legs 19" instead of 9.5". Can't wait to see them when they are done. Thanks so much for the great plans!
ZiggyStardust07
Wed, 05/14/2014 - 18:15
This is beautiful! You have
This is beautiful! You have quiet a lot of talent! Please continue with your wonderful post, I wanna try all of your projects! http://www.3dprinter-com.webnode.com/
cdahlgren
Thu, 10/02/2014 - 21:28
Can't Wait!
I can't wait to make this for my Granddaughter. She's only 3, so I don't think she can make this yet, but give her a year or two. I'm sure she'll get more dolls that will need beds, and I quilt, so I can teach her how to make quilts for her new beds. So excited!
Calmly
Tue, 01/13/2015 - 04:51
Recommended age
What do you think is the youngest recommended age for this project or kits in general?
Ana White Admin
Wed, 01/14/2015 - 10:43
Age
Really depends on the child but any age child could help and the adult could give more or less help depending on the child's level of skill. Grace was 5 when she did this project.
kine97
Sat, 04/07/2018 - 06:39
AG Doll bed
I LOVE this! My granddaughter just got her first AG doll & wanted the beds. I'm going to surprise her with a couple of them (to stack). Thanks so much for the plans!