
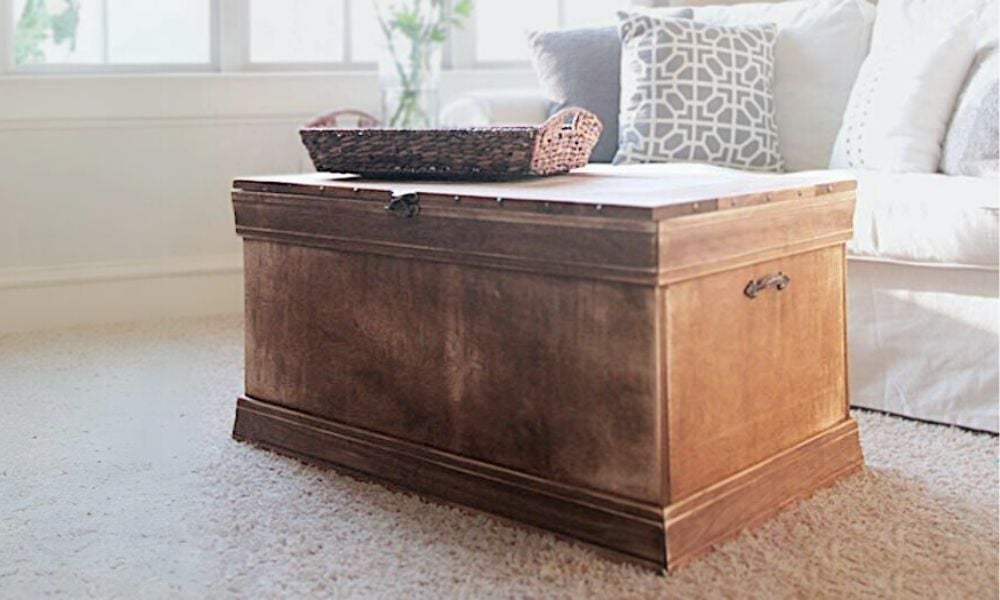

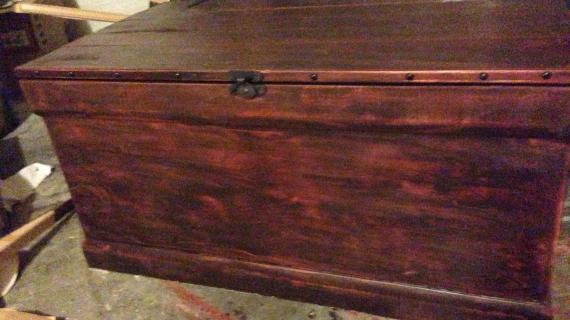
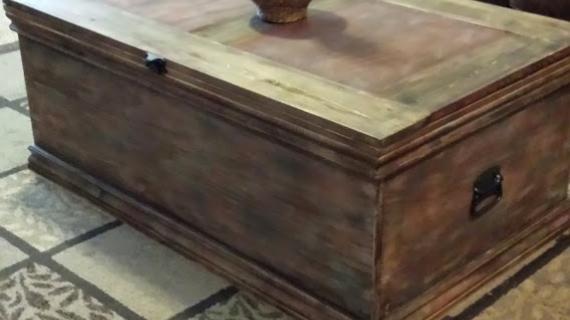
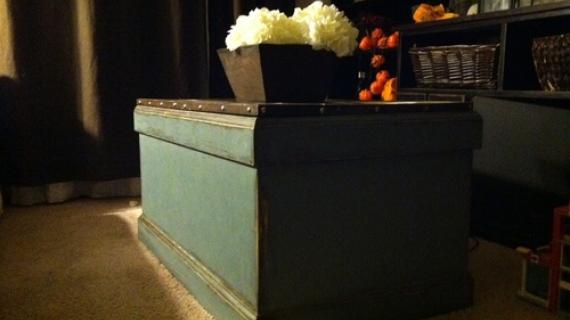
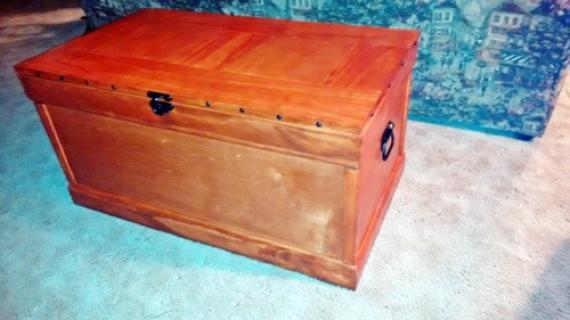
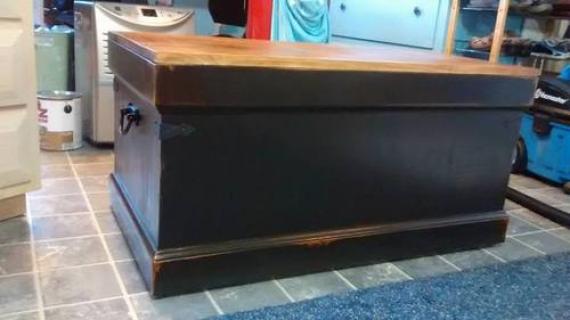
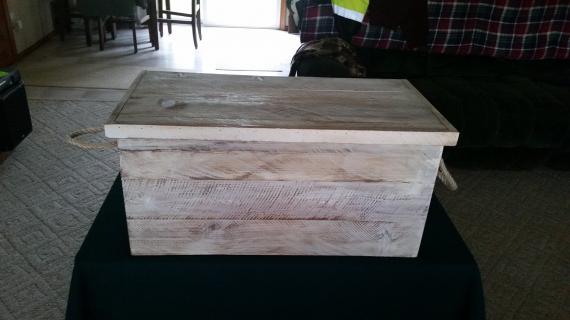
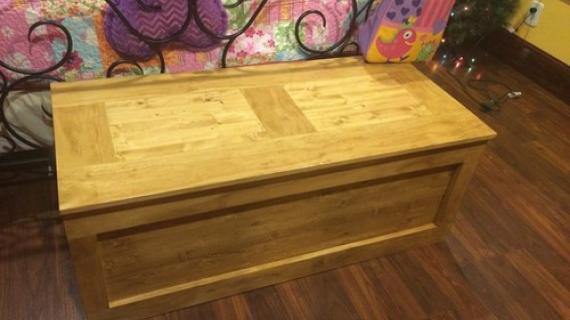
Free plans to build a vintage style chest or trunk from plywood and whitewood boards! This beautiful trunk is perfect for a coffee table or a bench in the entryway. We love it throughout the home.
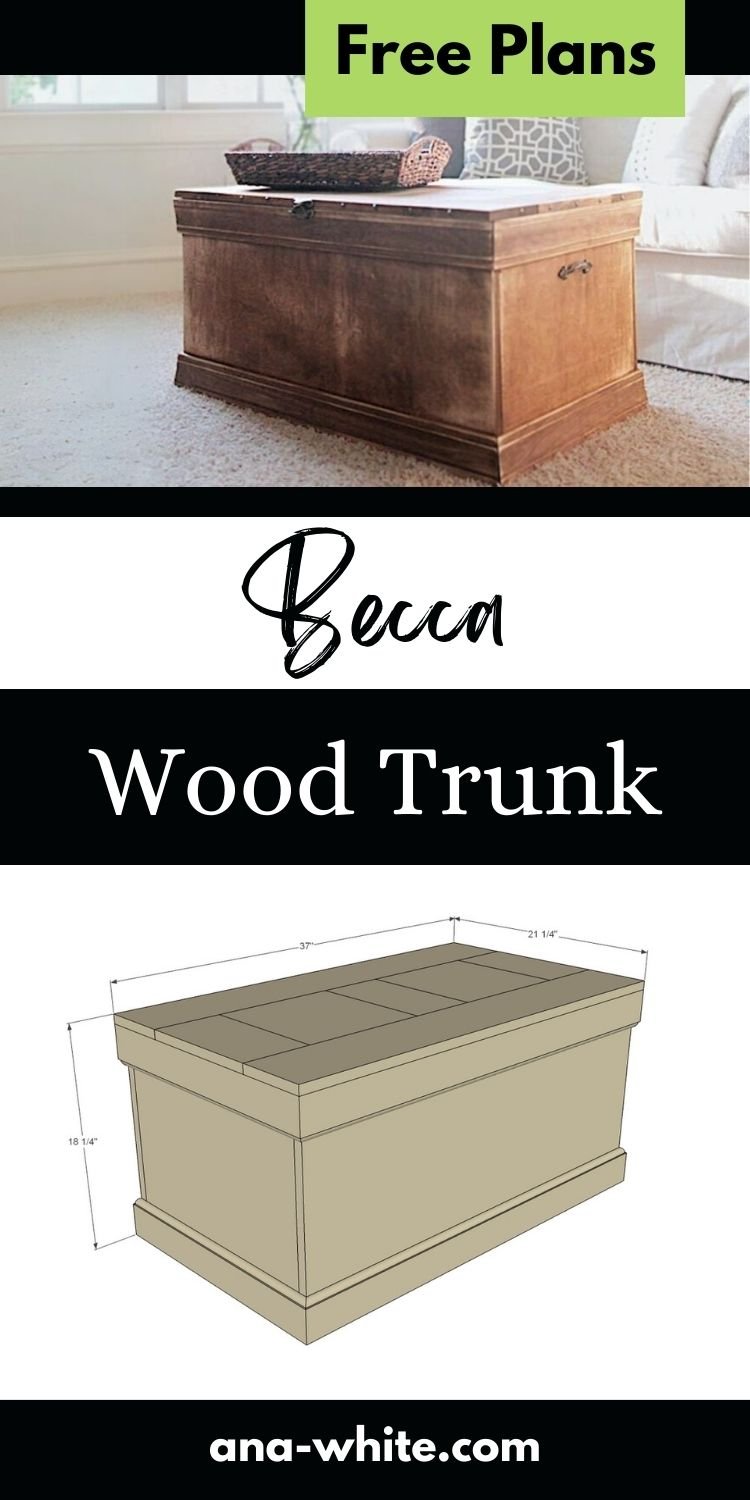
Our step by step plans and include detailed diagrams, shopping list and cut list.
Why We Made this Wood Trunk
Look what you can make with a 1/2 sheet of plywood!
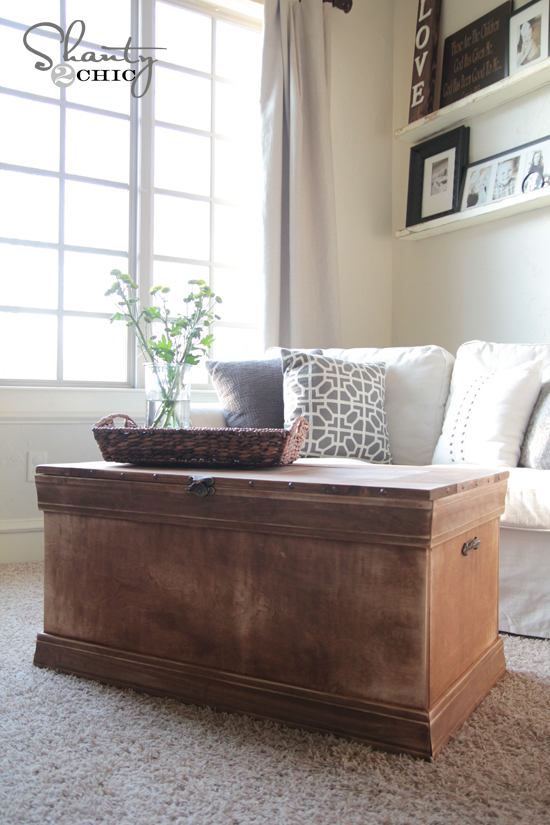
My friend Whitney at Shanty2Chic wrote me about taking on a vintage styel chest or trunk build. I can't believe we haven't posted one already. We worked on plans together and came up with this beautiful trunk!
You'll need a 1/2 sheet of plywood (Whitney used PureBond for the beauty and because it's formaldehyde free) and then some base moulding, 1/4" plywood for the base, a few 1x6 boards for the top, and of course pretty hardware. I love that you can make it your own by using different moulding, hardware or a different finish!
Reader Testimony - Why This Trunk is a Must Build!
From Whitney:
I love this new chest we created! It's so pretty and functional at the same time! You can easily change up the hardware or throw a coat of paint on it and you give it a whole new look. I think this is a great beginner Kreg Jig project for those of you still looking at yours in the box ;-) Thanks so much for teaming up with me on this one Ana!!
Build Post and More Photos of this Wood Trunk
Please take just a second to stop over and check out more details and photos from Whitney. It's always nice to see construction details!
Thank you Whitney!
Pin For Later!
Preparation
- 4x4 (half) sheet 3/4" plywood cut into 15 3/4" wide strips x 4 feet long
- 4x4 (half) sheet 1/4" plywood or other hardboard
- 1 - 2x2 @ 8 feet long (furring strips are fine)
- 20 feet of 3 1/4" base moulding
- 10 feet of 1x6 whitewood boards or similar
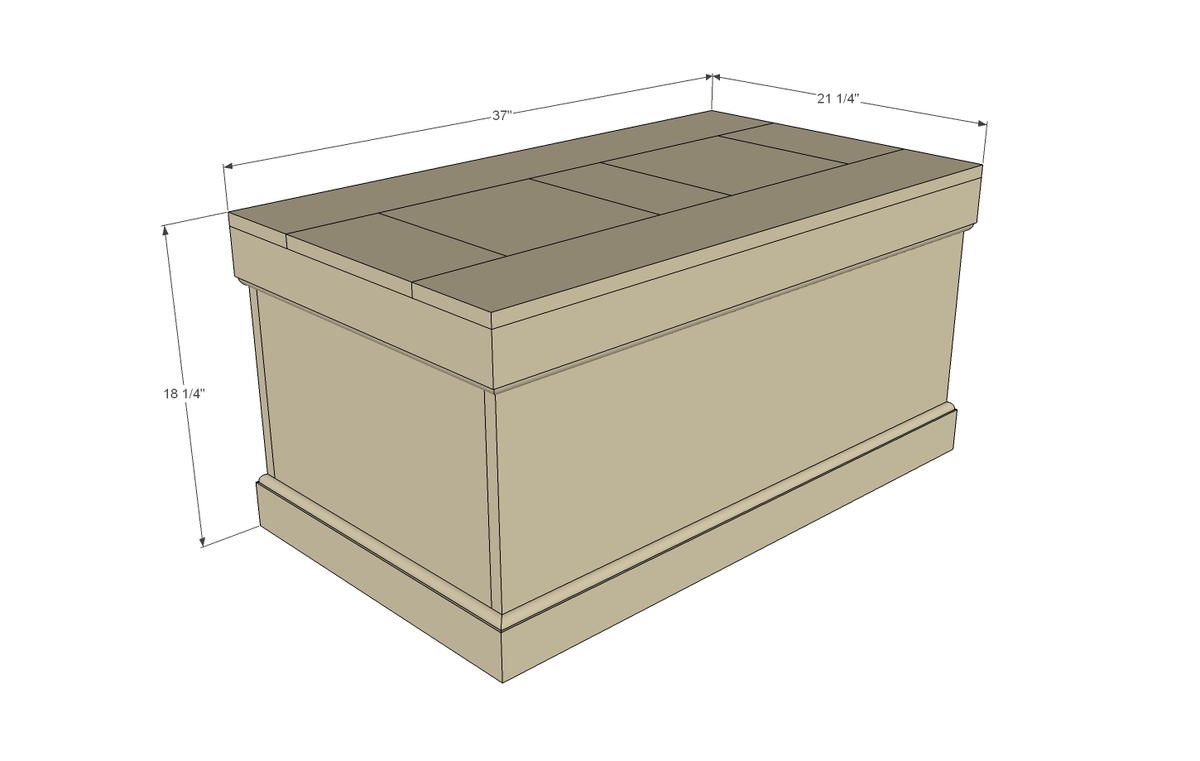
- 1 - 1/4" plywood @ 36" x 20 1/4"
- 3 - 2x2 @ 20 1/4"
- 2 - 3/4" plywood 15 3/4" x 18 3/4"
- 2 - 3/4" plywood 15 3/4" x 36"
- 4 - 3 1/4" base moulding @ 36" (both ends cut NOT parallel at 45 degree bevels, short point to short point measurement)
- 4 - 3 1/4" base moulding @ 20 1/4" (both ends cut NOT parallel at 45 degree bevels, short point to short point)
- 3 - 1x6 @ 10 1/4"
- 2 - 1x6 @ 37"
- 2 - 3/4" plywood @ 10 1/4" x 10 1/4"


Please read through the entire plan and all comments before beginning this project. It is also advisable to review the Getting Started Section. Take all necessary precautions to build safely and smartly. Work on a clean level surface, free of imperfections or debris. Always use straight boards. Check for square after each step. Always predrill holes before attaching with screws. Use glue with finish nails for a stronger hold. Wipe excess glue off bare wood for stained projects, as dried glue will not take stain. Be safe, have fun, and ask for help if you need it. Good luck!
Instructions
Step 1
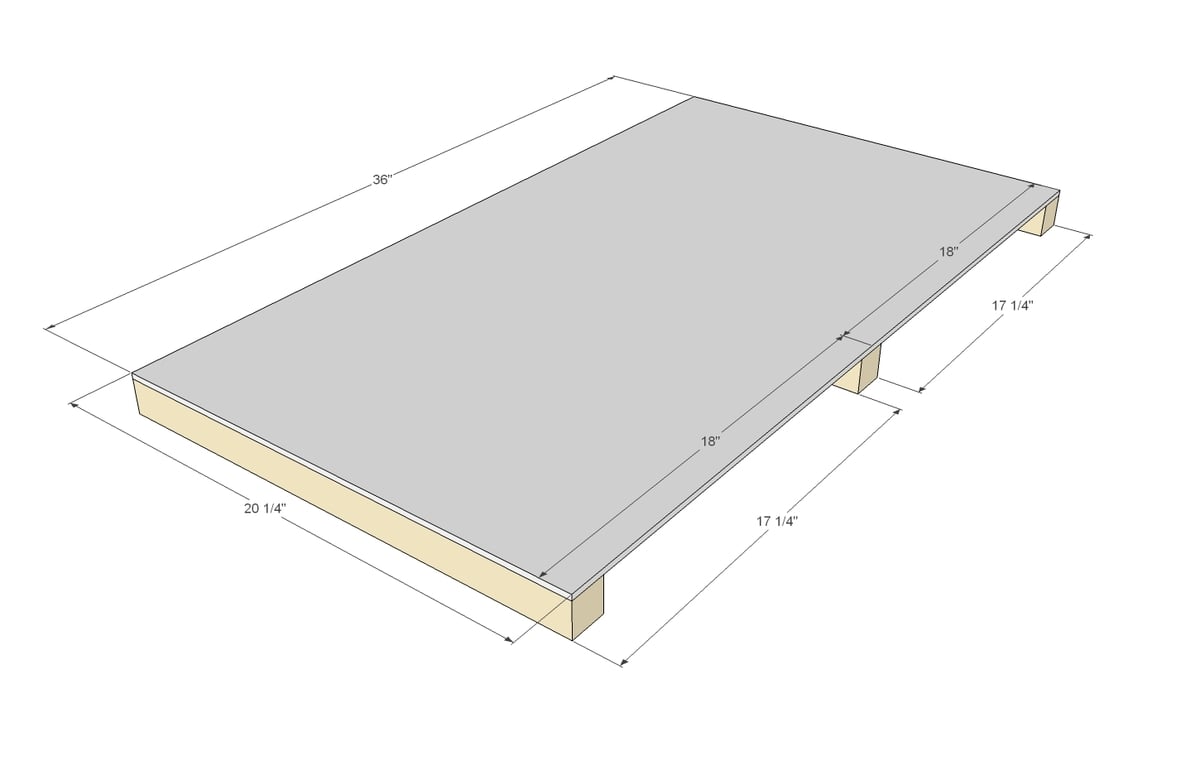
I chose to make the base like this to cut down on weight and cost in the project, and also to elevate the base from the floor. That way if there's water spilled, it won't rot the bottom out on your trunk. But by adding the 2x2s underneath, we create a system where the weight rests on top of the joints, resulting in a stronger bottom. You can just nail and glue the base to the 2x2s - nothing special here!
Step 2
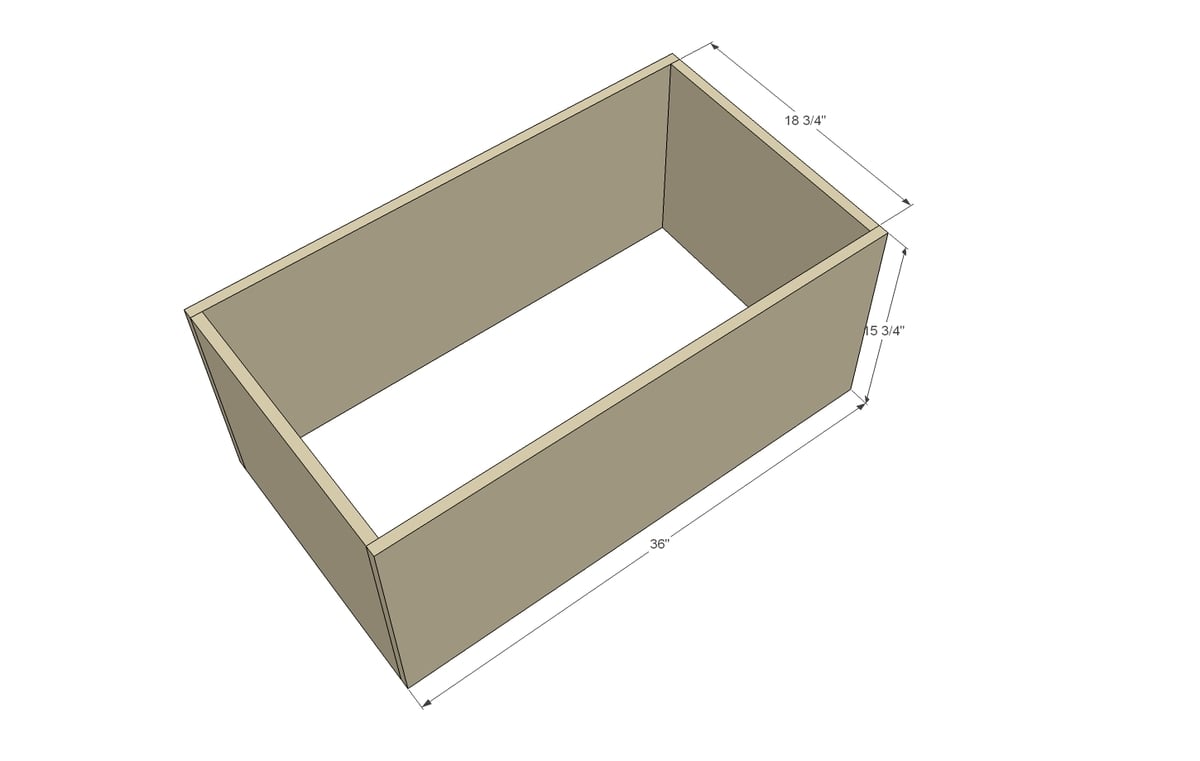
Now construct the main box out of the plywood pieces as shown above.
Step 3
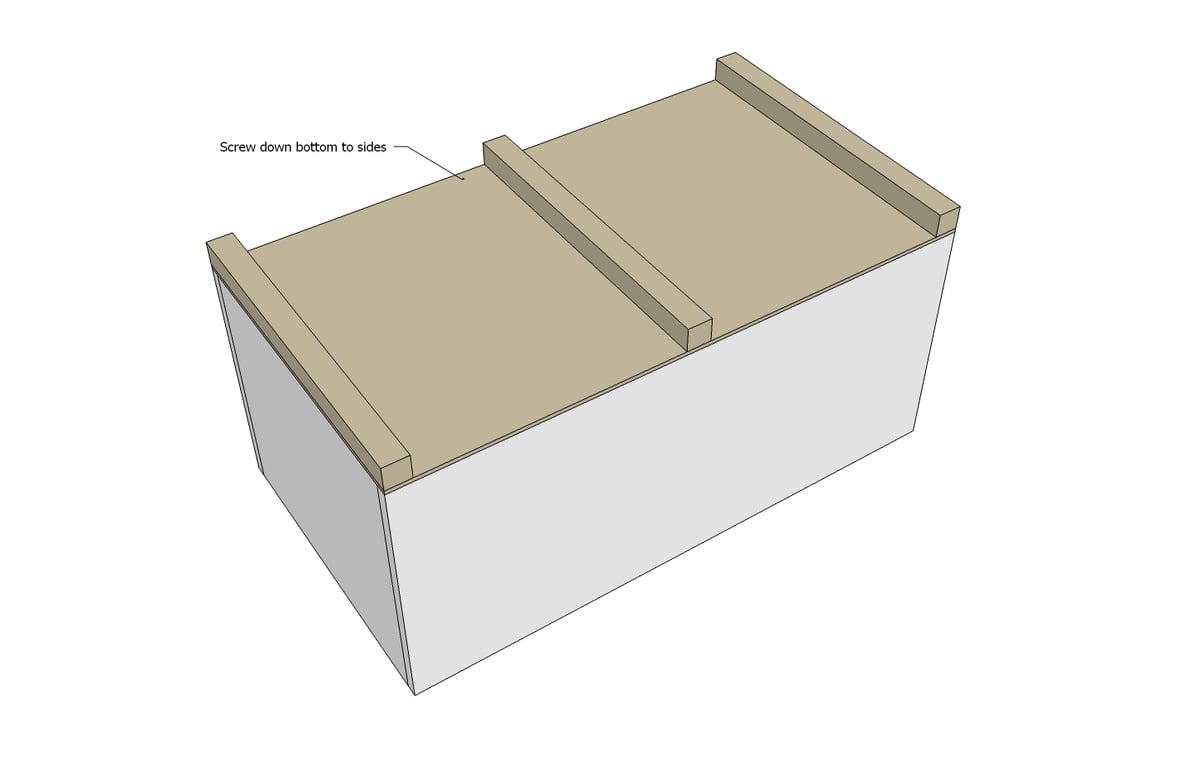
And then attach the base to the bottom. You can just screw and glue or nail - remember, the weight of the trunk pushes down on the base, keeping everything together. We'll also be hiding the joint with base moulding.
Step 4
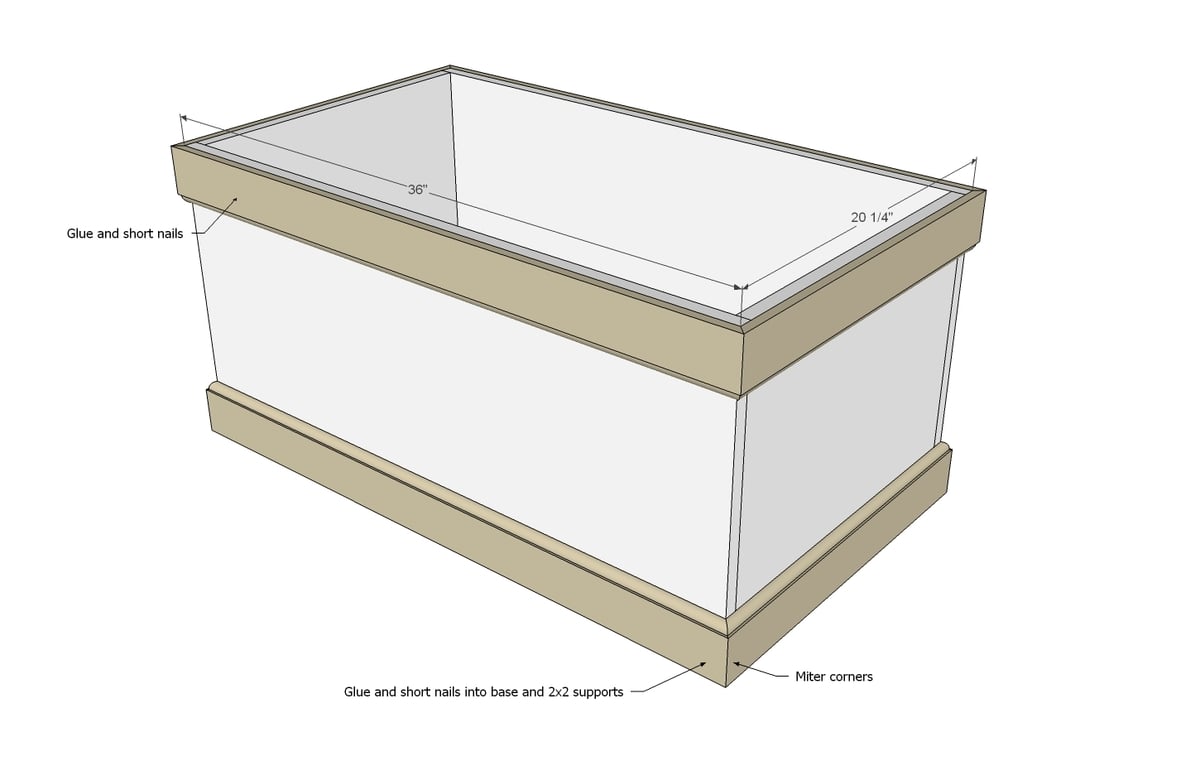
Cut base moulding to fit with your miter saw set at a 45 degree bevel. I tend to cut my pieces just a tiny bit long and then trim them down to get a perfect fit. Nail on. Be careful here to select a nail size that fits your moulding thickness plus the 3/4" thickness of the plywood. Use glue too. NOTE: You can use a wider base moulding too!
Step 5
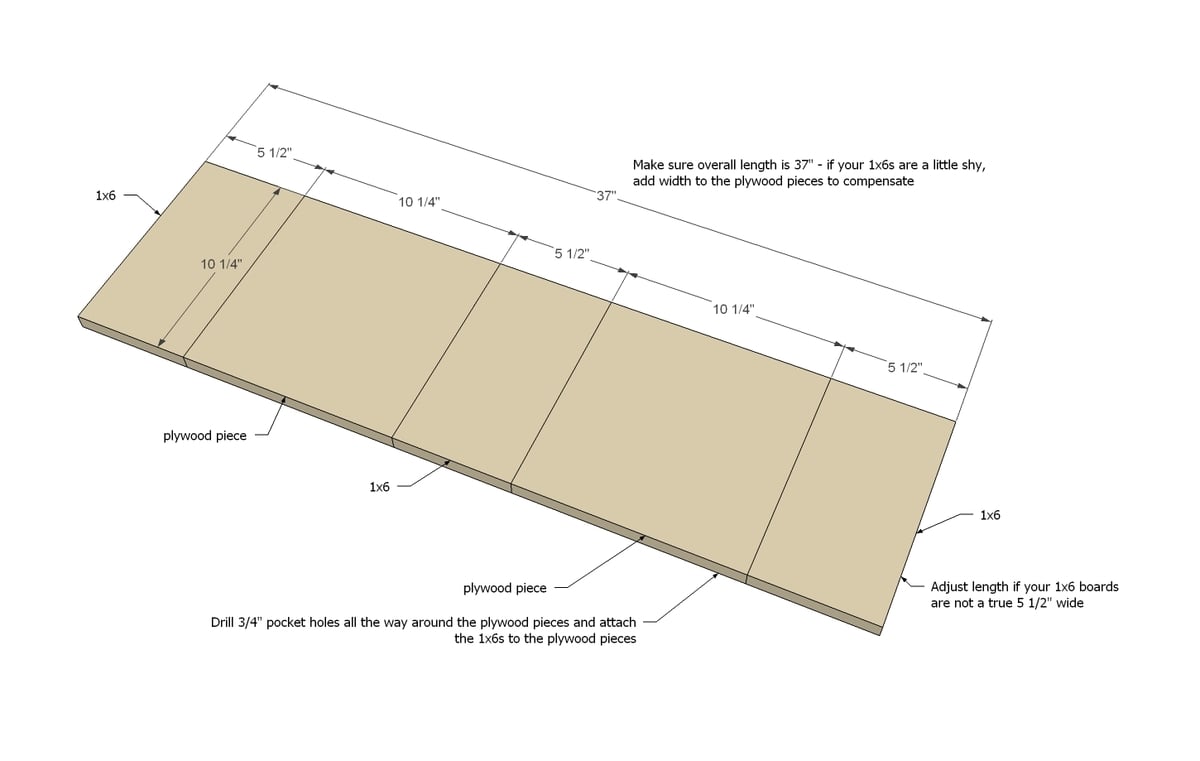
Step 6
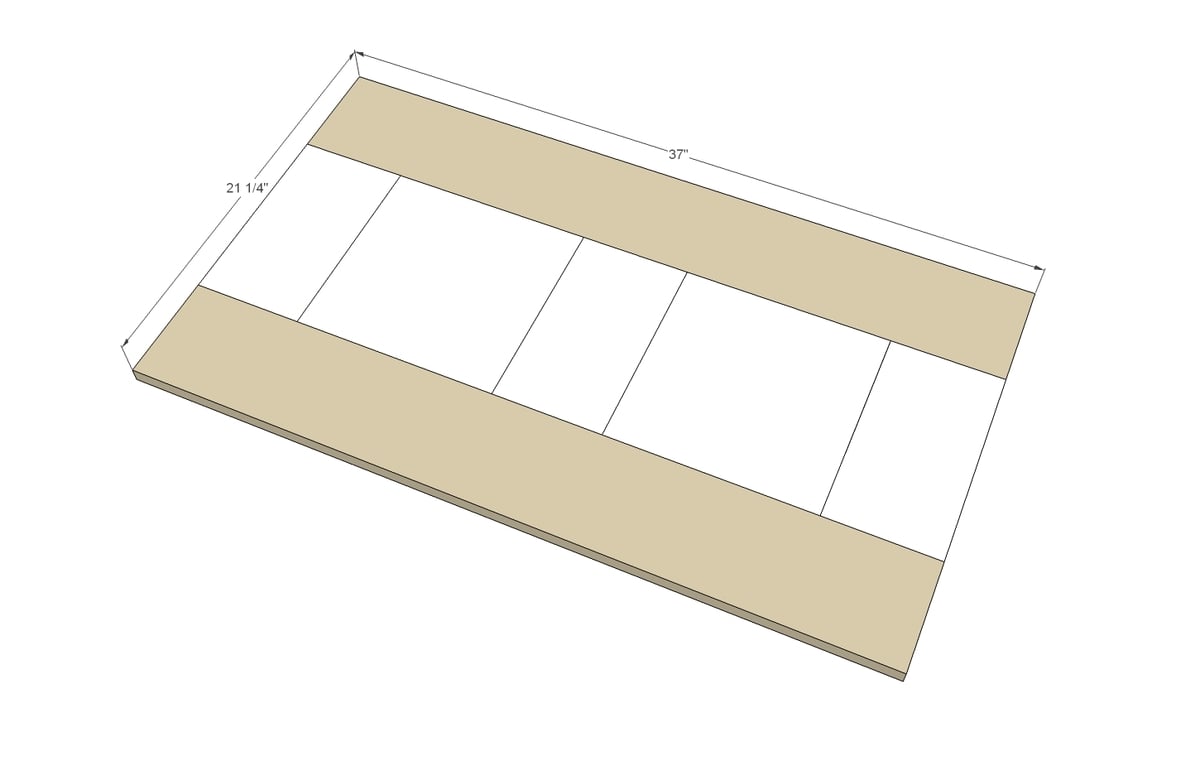
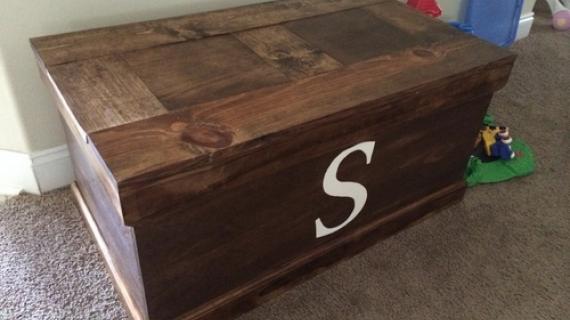
Then add the end 1x6s to finish off the top. Having a planked top will add more character and all the plywood edges are covered too!
Step 7
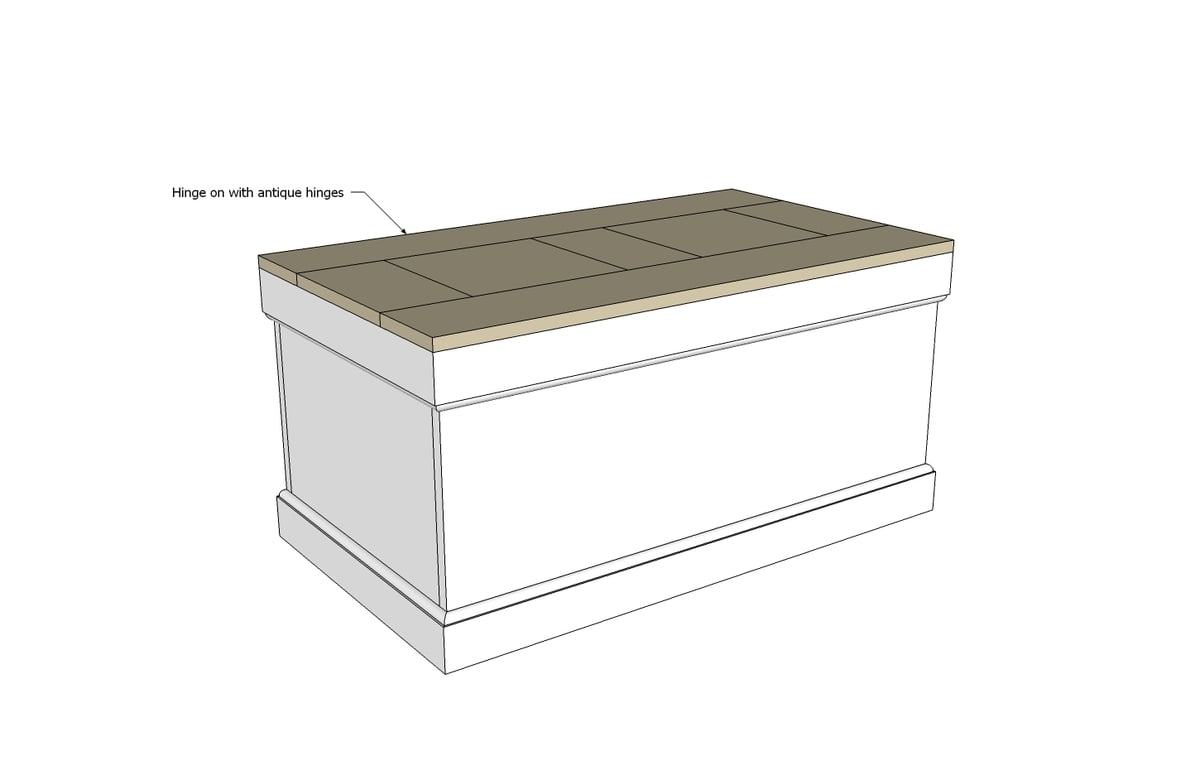
Use exterior mount hinges to attach trunk top. If you have kids, you may consider adding a hinge top support to keep the top from slamming little fingers.
It is always recommended to apply a test coat on a hidden area or scrap piece to ensure color evenness and adhesion. Use primer or wood conditioner as needed.

Comments
ajaninaimasafi
Wed, 04/10/2013 - 19:49
Just 1/2 sheet?
I want to rush out and buy plywood to build this. But can someone explain how I can make all of these cuts with just 1/2 sheet of plywood before I run to HD? Is 1/2 sheet 2x4 or is that a quarter sheet?
audsh
Mon, 02/24/2014 - 11:25
Dowels instead of pocket holes???
HI
as i said in my other comment above, i dont have a pocket hole jig. Not easy to come by where i am. I have made the trunk and am about to start the lid but was wondering if i can join the lid with dowels instead?
In reply to Dowels instead of pocket holes??? by audsh
mattmasulis
Sat, 09/27/2014 - 22:52
Can't see why not
The Kreg Jig is $40.00 at Lowes but if that isn't doable I can't see why you couldn't use dowels and plenty of glue. You will want to make sure your boards have had time to expand or contract in the temperature you keep your house for a few days though to avoid contraction later.
bzhayes
Thu, 04/16/2015 - 08:26
safety hinges for the inside
Did you install any soft down stay type hinges on the inside of your trunk? I ordered some from Rockler and was not able to make it work. I believe it is because of the angle of the lid (3/4" thick) and the perimeter of the actual trunk (1 1/2 "). Any suggestions on what you used? Thank you!
Linda7
Wed, 04/29/2015 - 14:10
Trunk stay hinges
Hi...I am in the process of building this trunk, too. I ordered the toy box lid support from Rockler (item #26179), and I see that I'm going to have to cut out a space in the moulding for this and the type of hinges I also purchased. I'll check back in a few days to see if you figured out something. (I always end up making things harder than they should be. lol)
rntogo
Wed, 11/18/2015 - 07:16
would these work? http://www
would these work? http://www.vandykes.com/spring-loaded-lid-support/p/205546/
Brandon55
Wed, 12/16/2015 - 20:22
Help, staining question
So I'm building this as a storage trunk that will be used for blankets and clothes. I like the look of the stain I'm using by itself, it is not a 2 in one stain and poly. I am curious if the stain wil transfer to the things I'm storing in the trunk?
jendon
Sun, 05/15/2022 - 20:07
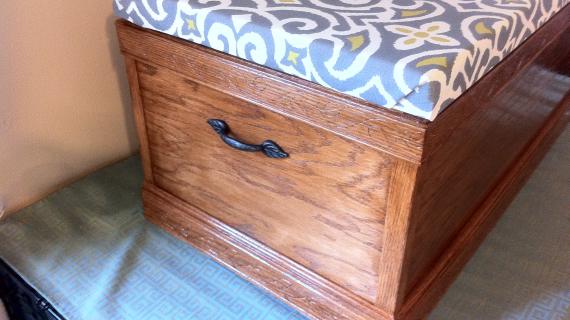
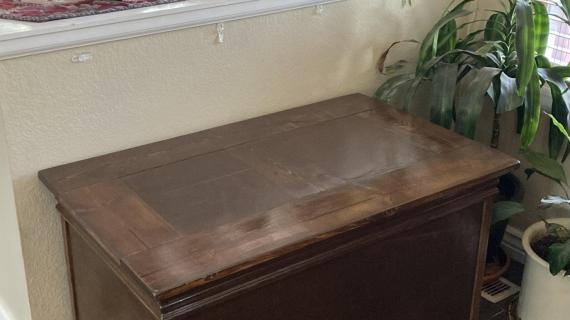
More Than a Trunk!
This project held two purposes: Father’s Day and my husband’s shoes/backpack. This was the perfect way to get them off of the floor and into something beautiful!
Both of my teenage kids help with different aspects of the build.
I will list what hinges and handles I used after reading all the other posts on this Becca Trunk.
I did make my carcass taller and longer than the plans to hold my husband’s items plus some couch blankets. I have 4 supports on the bottom instead of three. I only used 3/4” hard plywood. I added an inch to each side of the lid, so it was easier to open. There are 2 coats of stain and 2 coats of 3x interior gloss poly made by Varthane on this trunk. I sanded with 320 sandpaper in between each coat of poly.
After reading all the posts about hinges, soft closing and looking at each picture, I came up with Torsion Hinges by Rockler. These hold up the lid at all different angles and give a soft close once lowered to a certain point.
I installed 2 sixty pound bronze torsion hinges with the assistance of their Hinge Jig. That helped me to make my lines and pre drill marks without guessing. Rockler has several videos on them and how to install, plus several on YouTube. I bought them on Amazon for less than the site and sold by Rockler. I did chisel out a small rectangle of the molding and it was easier than I thought. I was so nervous after building it all and now cutting some out of it, but it worked! I did one and my son the other one. The Rockler Jig was very helpful lining all this up. My hinges are 6” in from each side of the trunk. I set the lid in the right spot and drew lines where the hinge jig rest in my chiseled spots. Then flipped it over and lined up the jig again on the lid and knew where my holes were going.
I have just received my 3 set of handles. The others were not chunky enough for the size and the proper look.
Adonai Hardware "Phebe" Antique Iron Drop Pull (Supplied as 2 Pieces per Pack) - Black Powder Coated. I also got these on Amazon.
This trunk took time, but it was well worth it. So beautiful and worth it. My husband was so surprised and also knew it was for his shoes/backpack. He appreciated all the detail that went into it and lived that the three of us built it together for him.
Thank you Ana and Shanty 2 Chic for the plans and pictures. They are always so helpful. I have made many of your builds and I am learning from each one. Thank you again.
Blessings,
Jennifer