


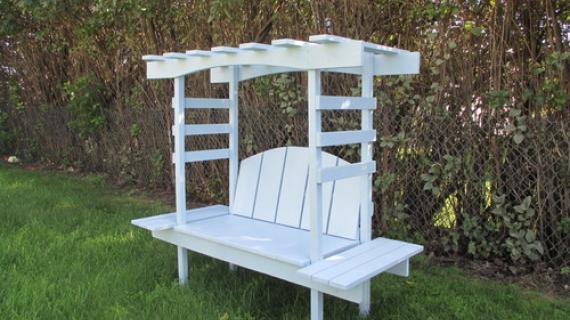
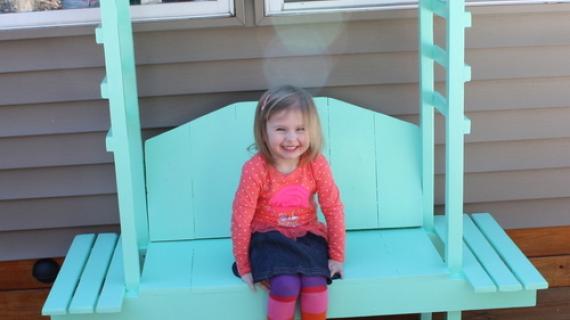
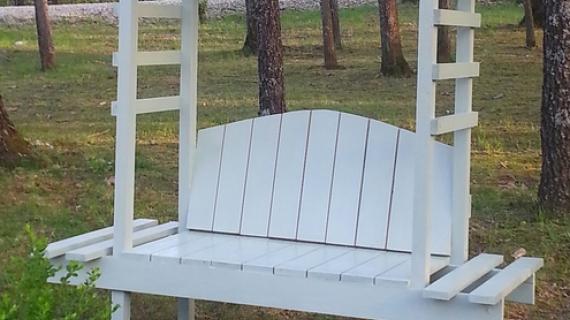
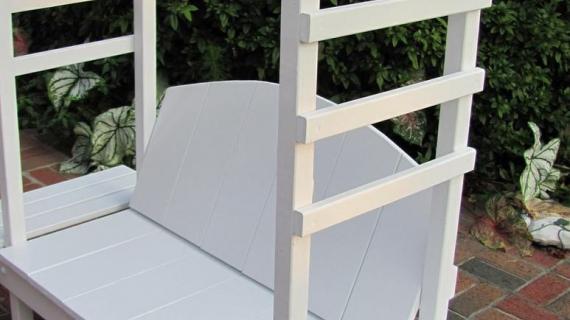
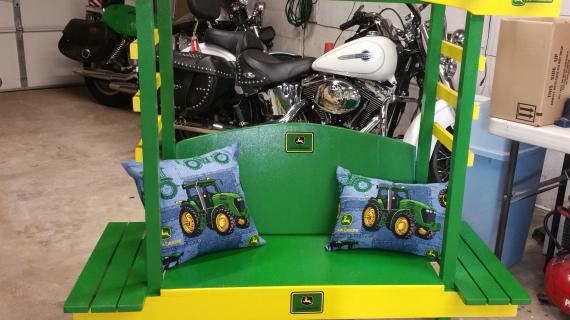
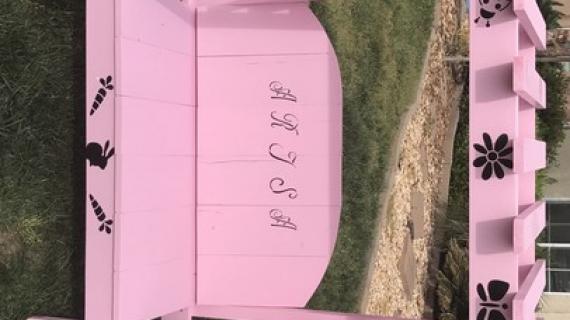
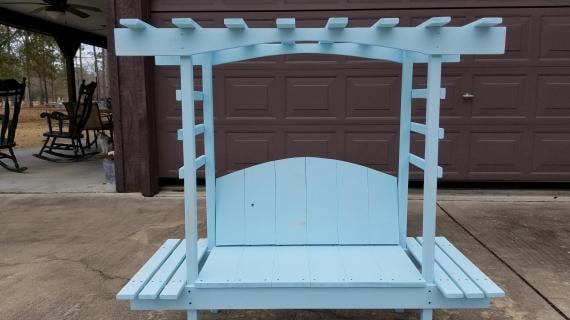
Free plans to DIY a kids arbor bench!
Hi everyone! Are you ready for another dose of DIY?
A little while back, my dear friend Kirsten from the Crafting Chicks - who built this amazing play kitchen -

and I teamed up, this time on a Child's Garden Arbor bench!
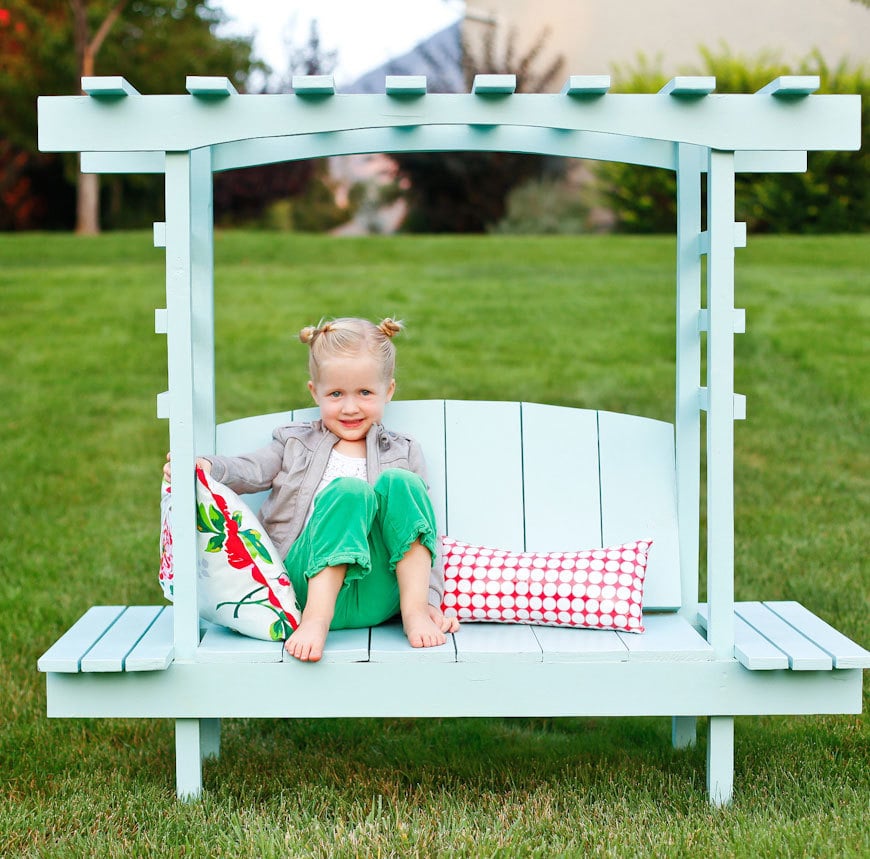
How stinking cute is that????
Believe it or not, this one's actually pretty easy to build! We've of course got you covered with the free step by step plans below.
But want to see lots more photos of this bench? And more details on those pillows and construction photos? Please take a second to stop over and check out Kirsten's building post here.
Thanks Kirsten!
XO Ana
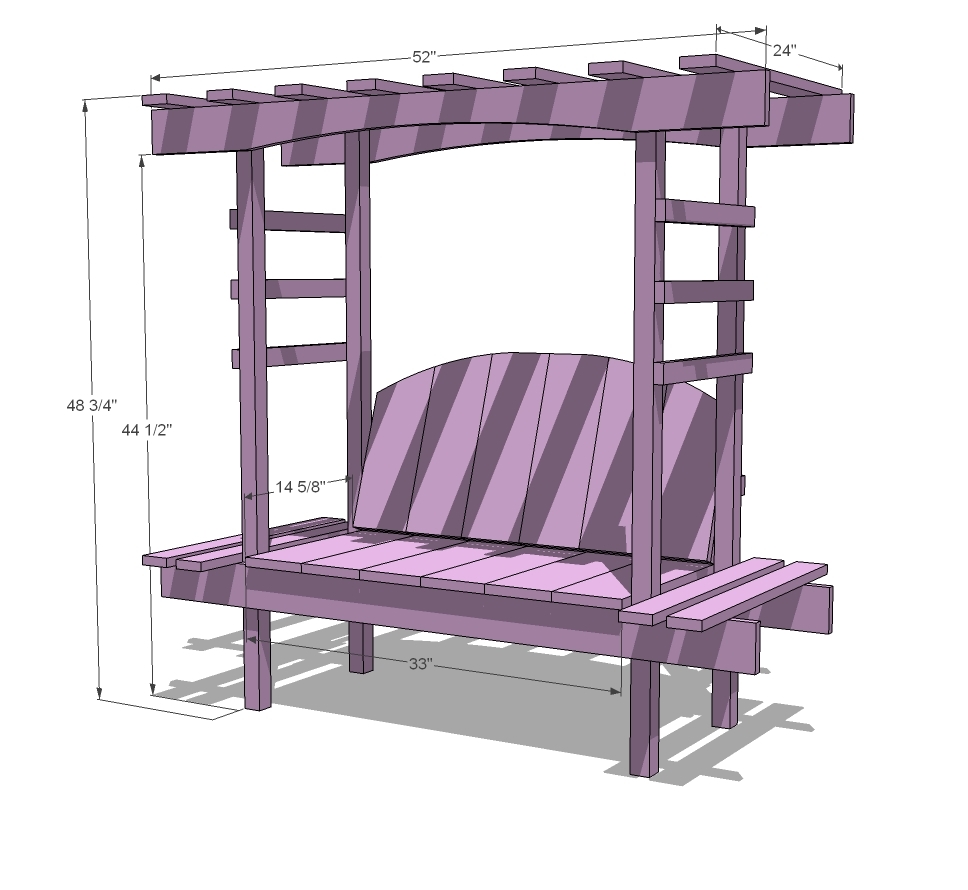
Preparation
2 – 1x6 @ 8 feet long
1 – 2x2 @ 8 feet long
2 – 1x2 @ 8 feet long
2 – 1x4 @ 10 feet long
4 – 1x3 @ 8 feet long
1 ¼” galvanized screws
2” galvanized screws
3” galvanized screws (just need a couple)
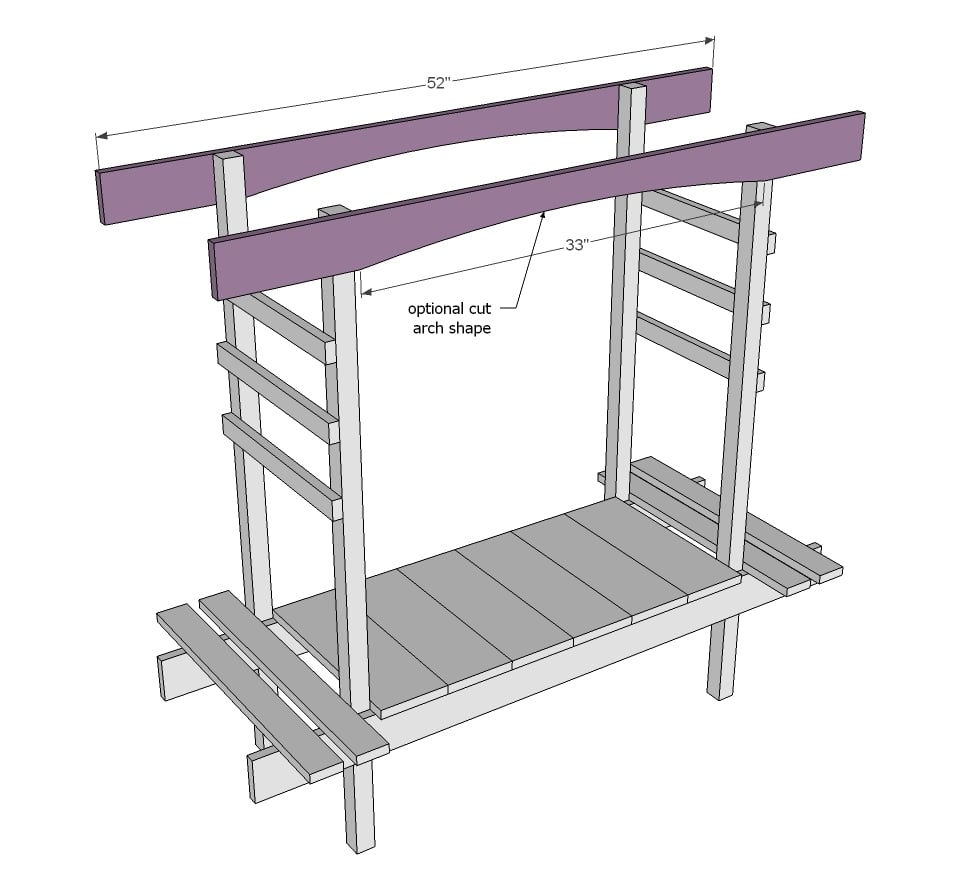
4 – 2x2 @ 48” (Legs)
6 – 1x2 @ 16” (Side trellis rails)
4 – 1x4 @ 52” (seat supports and top)
12 – 1x6 @ 16” (seat and backrest)*
12 – 1x3 @ 24” (Flower pot base) (top trellis)
1 – 1x3 @ 36” (Seat back support)
1 – 2x2 @ 33” (seat back base)
1 – 1x2 @ 33” (seat back top)
*for the 1x6 @ 8 feet long, cut 5 – 16” long and then the remaining will be approximately 15 ½” long. Leave this shorter piece for the ends of the seat back that are slightly shorter to conserve boards.


Please read through the entire plan and all comments before beginning this project. It is also advisable to review the Getting Started Section. Take all necessary precautions to build safely and smartly. Work on a clean level surface, free of imperfections or debris. Always use straight boards. Check for square after each step. Always predrill holes before attaching with screws. Use glue with finish nails for a stronger hold. Wipe excess glue off bare wood for stained projects, as dried glue will not take stain. Be safe, have fun, and ask for help if you need it. Good luck!
Instructions
Step 1
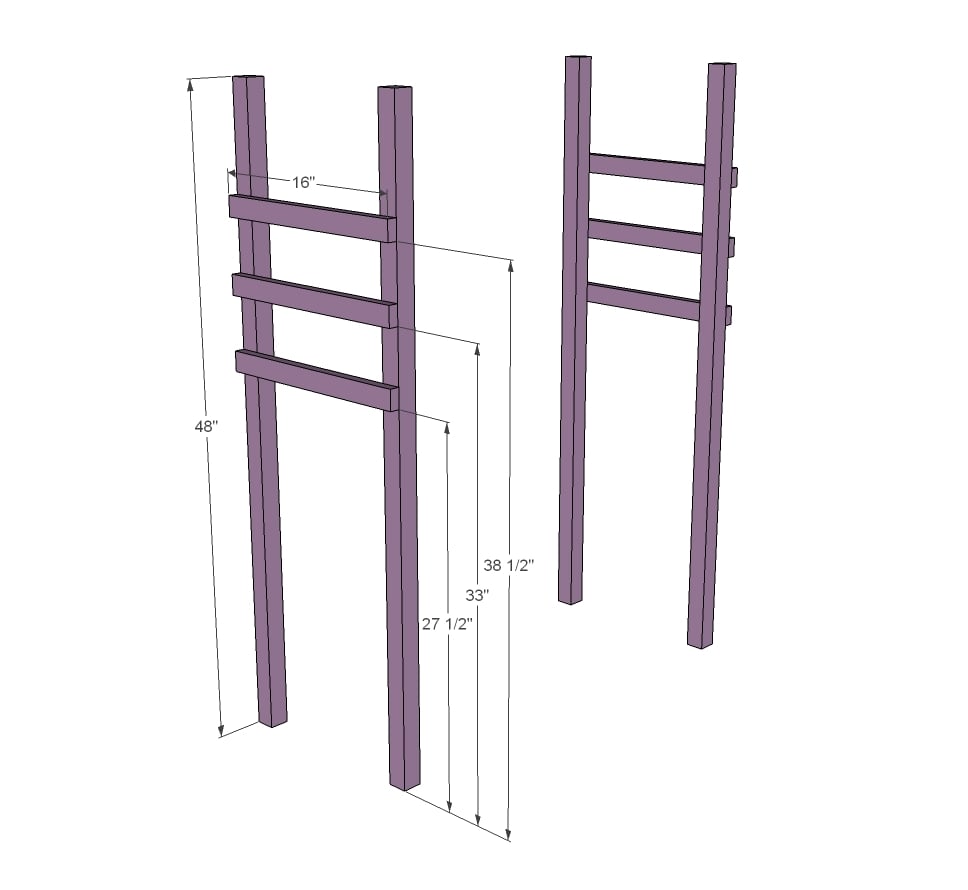
Attach with 2” screws and glue. Check for square.
Step 2
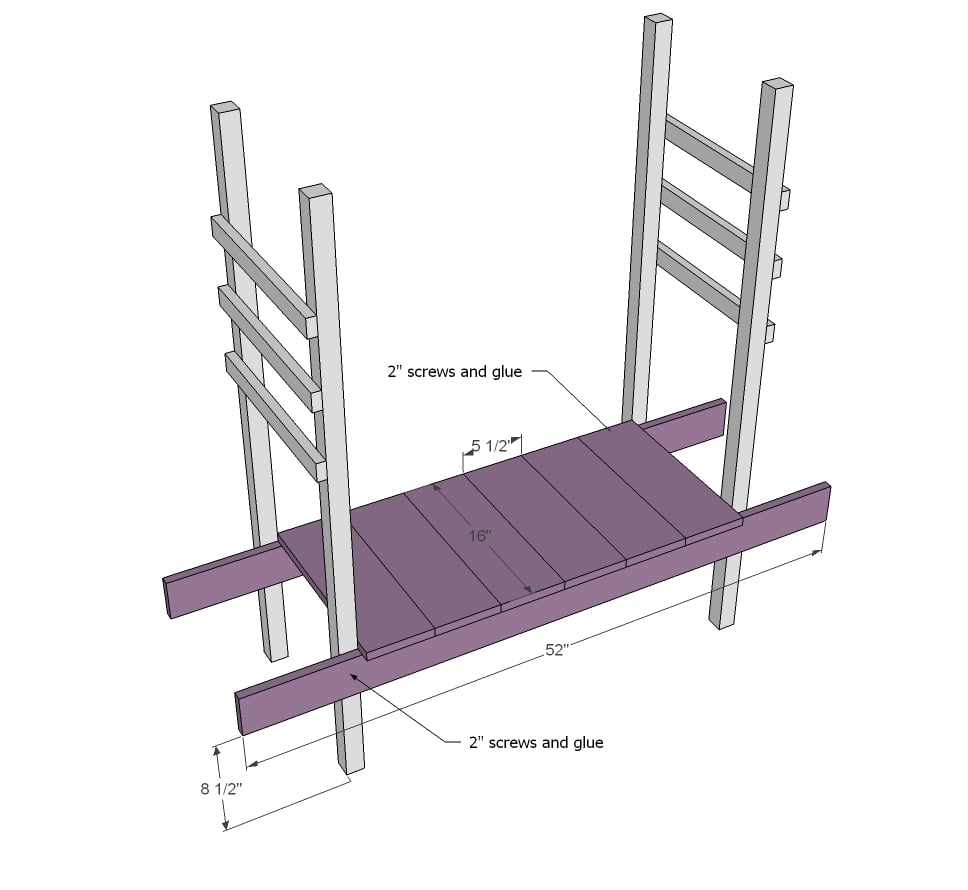
Build seat, then attach legs. Note - seat can be attached higher for older children as well.
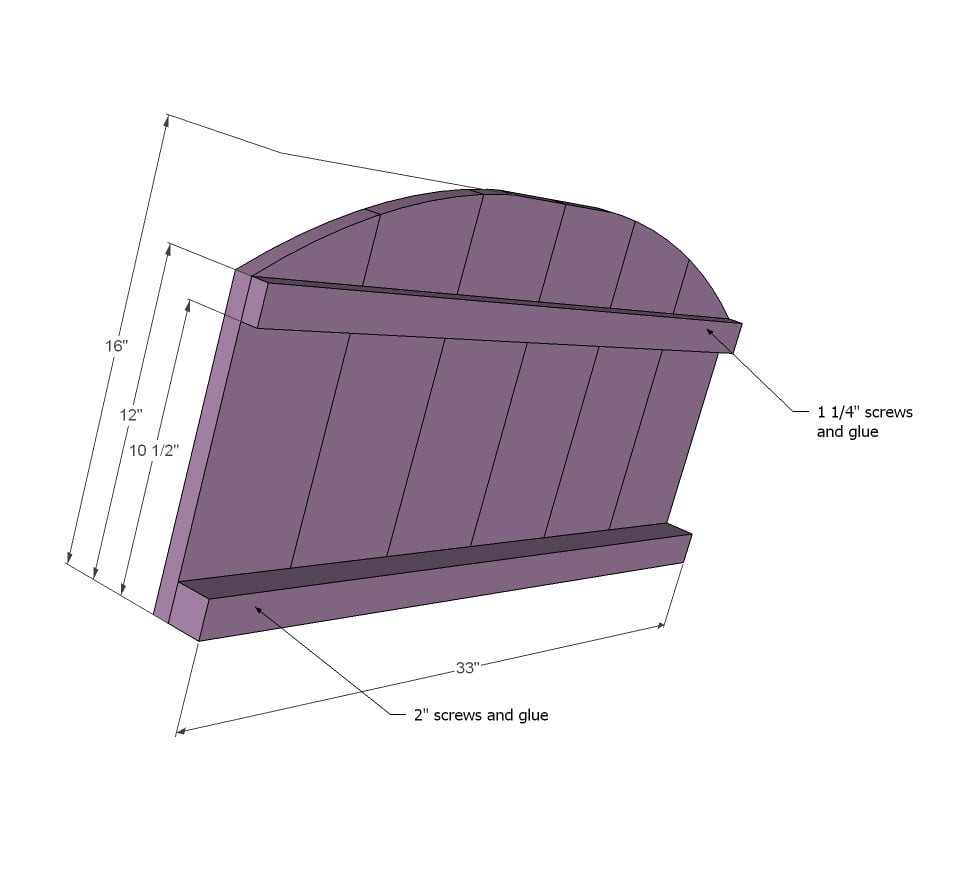
Step 3

These are for the flower pots. You can space as you like.
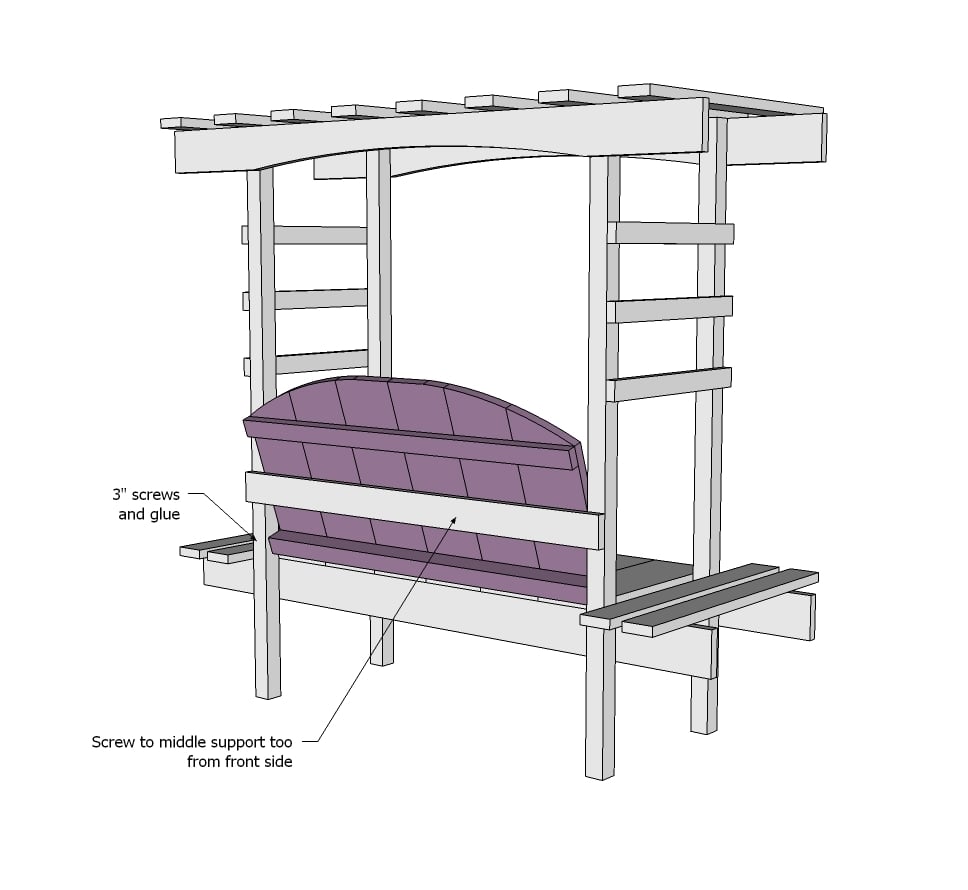
Step 4
Make sure the distance between the 2x2 is the same at the top as at the seat. Screw on with 2” screws and glue.
Step 5

Step 6

Step 7
Step 8
It is always recommended to apply a test coat on a hidden area or scrap piece to ensure color evenness and adhesion. Use primer or wood conditioner as needed.

Comments
Pam the Goatherd
Wed, 08/28/2013 - 12:08
Please do an adult sized
Please do an adult sized version of this. I have the perfect spot in my yard (next to a stream that flows across my property) for this. I have been looking for just the right seat to build for that spot and this would be it.
In reply to Please do an adult sized by Pam the Goatherd
Lady Goats
Wed, 08/28/2013 - 12:50
I second that!
Oh my gosh, I am so giddy upon finding this! So cute!!
momofour09
Wed, 08/28/2013 - 12:35
This is adorable!
I was torn about my next project, but as long as this stays within budget I'm sure I now know what I'm making. My kids would love one of these and I agree with Pam, we need an adult version! Great plans as usual :)
birvine
Wed, 08/28/2013 - 18:22
Another pallette wood project!
This past weekend I finished cutting up the last of 30+ pallettes. Every time I walk into my workshop garage I wonder what I can make next with all of this nice wood. Thanks for this share, Ana. I will convert the plans to use palette wood. So many plans with palettes look like, well, palettes. Nof mine - this nice little project will be a perfect fit!
B
Joline
Fri, 08/30/2013 - 18:14
Correction
The shopping list says you only need 1 2x2, but you'll need 2 of them.
birvine
Sun, 09/01/2013 - 10:49
2x2
As well as another piece of 2x2 for the back of the seat.
momofour09
Tue, 09/03/2013 - 19:31
Screws!!
I am planning on building this over the weekend and am hoping someone can help me. I don't know what type of screws to buy, there are quite a few different types of galvanized screws. If I can't figure it out will regular wood screws work?
Thanks in advance :)
In reply to Screws!! by momofour09
Juriathe
Fri, 09/20/2013 - 08:45
screws
Hi ! I built this bench using regular wood screws. I know they will rust if left out over time, but if you are going to paint your bench or seal it, that will slow the rust down. My problem was finding screws that were short enough to not go all the way through both layers of wood, like when I attached the slats of the seat backrest to the support board.
I hope your's turned out nice ! Will you post a photo of it?
momofour09
Thu, 09/26/2013 - 12:16
Thank you!
I was planning on keeping it on the lanai so it wouldn't be directly exposed to the elements, it may get wet ocassionally but not much. So I'll just use the wood screws since they're easier to find. I haven't gotten around to making it yet but I will post a picture as soon as I do.
Tinaakers
Wed, 11/06/2013 - 11:06
First project we completed.
First project we completed. Our daughter loves to set in it. Hasn't made its way out of the garage just yet, still contemplating paint color.
spinkowsky
Tue, 05/20/2014 - 20:48
About to tackle this
I'm really wanting to build this. It will be my "second" project. My first was just a quilt ladder.
I'm nervous that it's going to be more difficult to tackle than I think. I have read the instructions a few times already and it seems like some things are missing. maybe because each piece isn't labeled "A", "B", etc. Will the instructions make a little more sense when I have each piece of cut wood in my hand? Thanks!
Ericad
Fri, 11/14/2014 - 02:40
European sizes
Can someone help me with converting the sizes to centimeters? For example; I don't how much 48 3/4, 441/2 or 14 5/8 is.
This is what I already found (am I right?):
33 inch: 83,82 cm
24 inc: 60,96 cm
52 inch: 132,08 cm
Greetings, Erica
U1021me
Mon, 07/20/2015 - 11:02
You times it by 2.54 so 48 3
You times it by 2.54 so 48 3/4 is 48.75x2.54=123.825
44 1/2=113.03
14 5/8=37.1475