
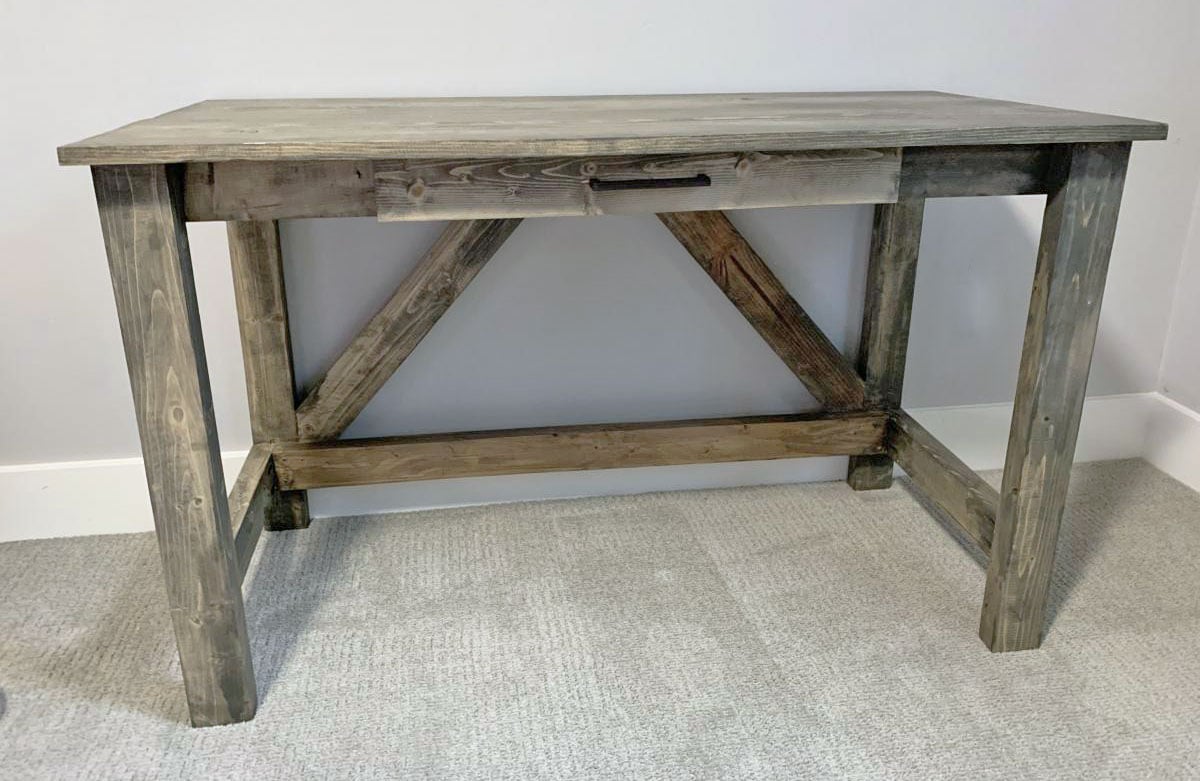

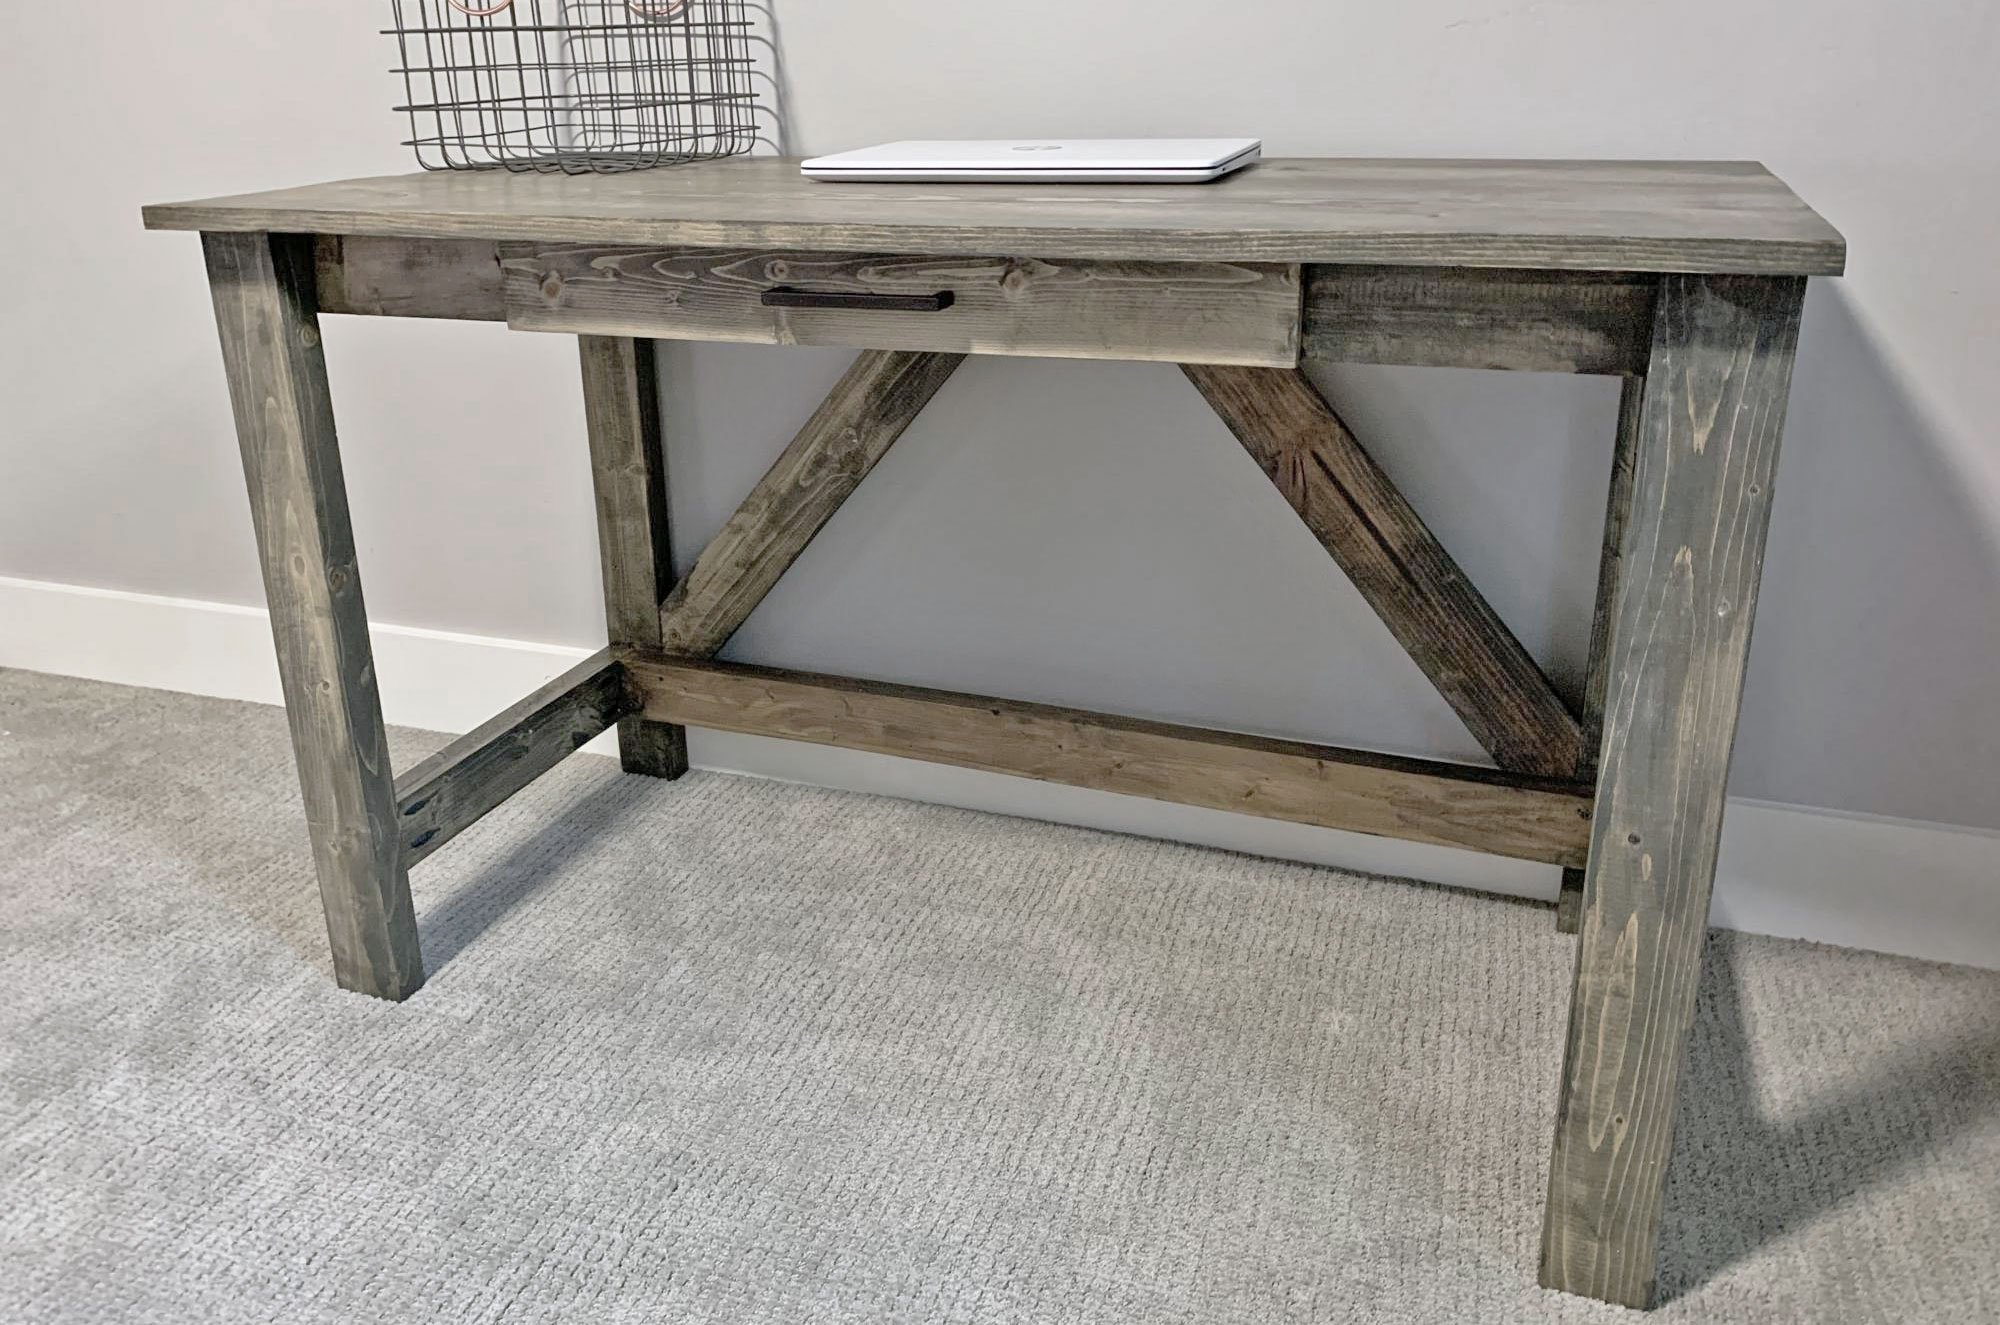
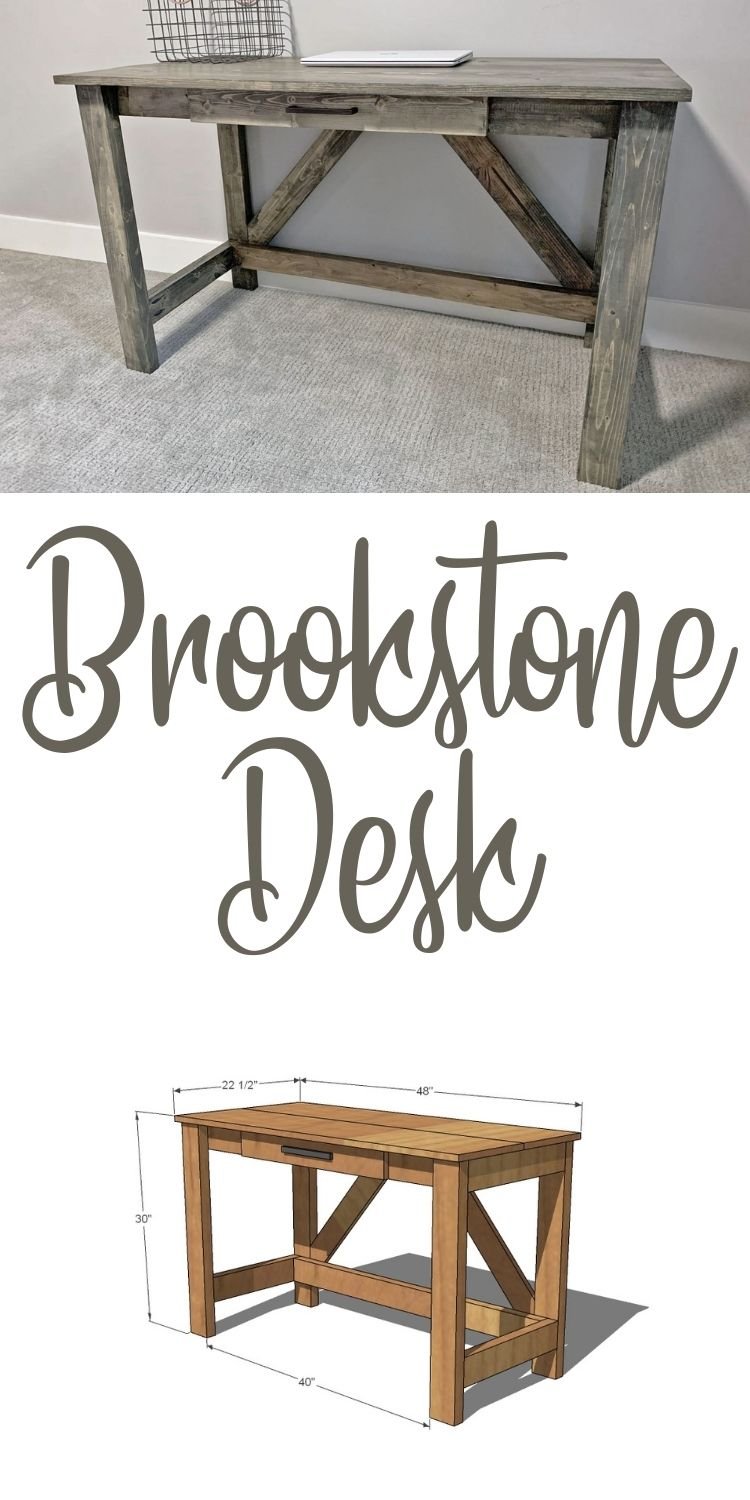
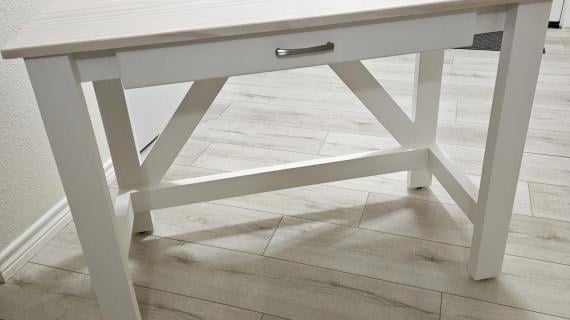
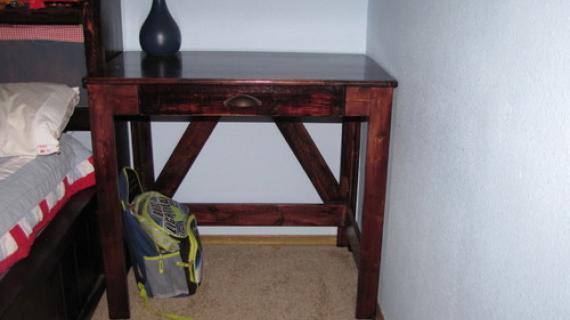
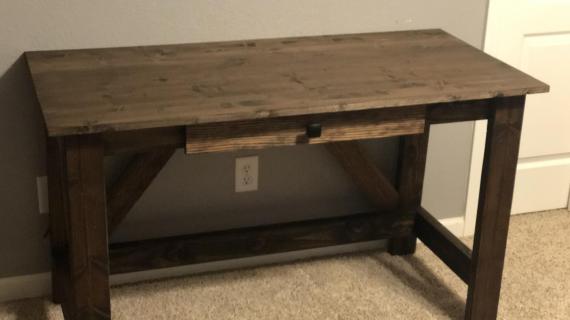
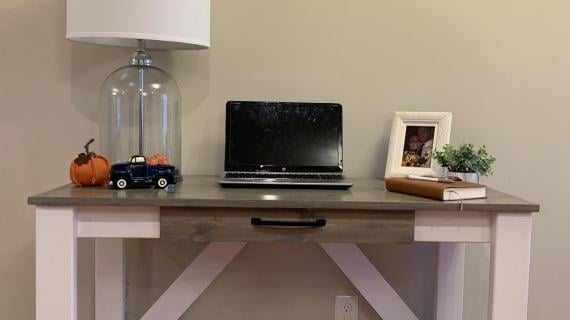
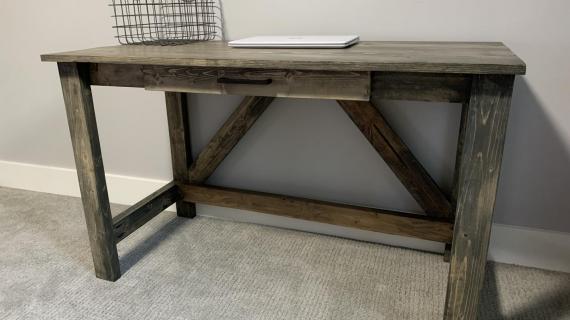
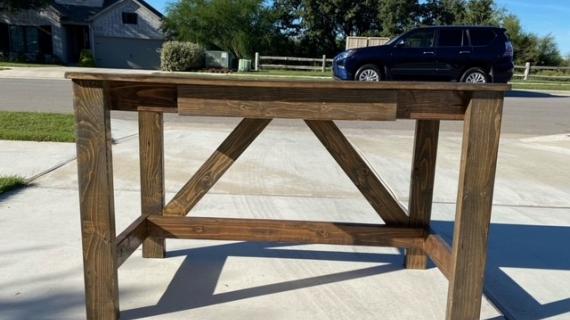
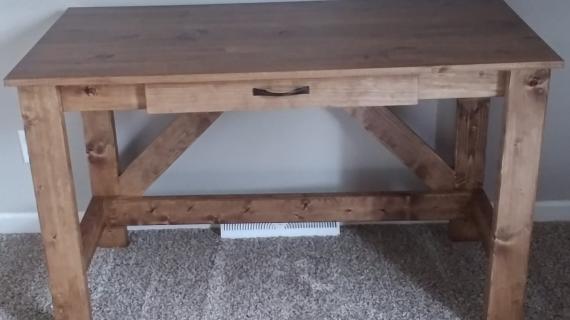
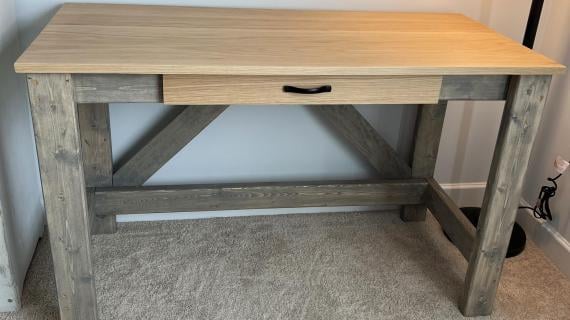
Build your own farmhouse style desk with our free plans! Uses off the shelf lumber and easy building techniques. Matching hutch plans also available here.
Pin For Later!
Preparation
- 4 - 2x4 @ 8 feet long or stud length
- 1 - 1x4 @ 8 feet long
- 1 - 1x3 @ 8 feet long
- 1 - 1x12 @ 8 feet long
- 1 - 1/4" plywood piece @ 16" x 22-1/2"
- 1 set of 16" drawer slides
- About 30 - 2-1/2" long star bit self tapping screws
- 1 - 1/4" brad nails and wood glue
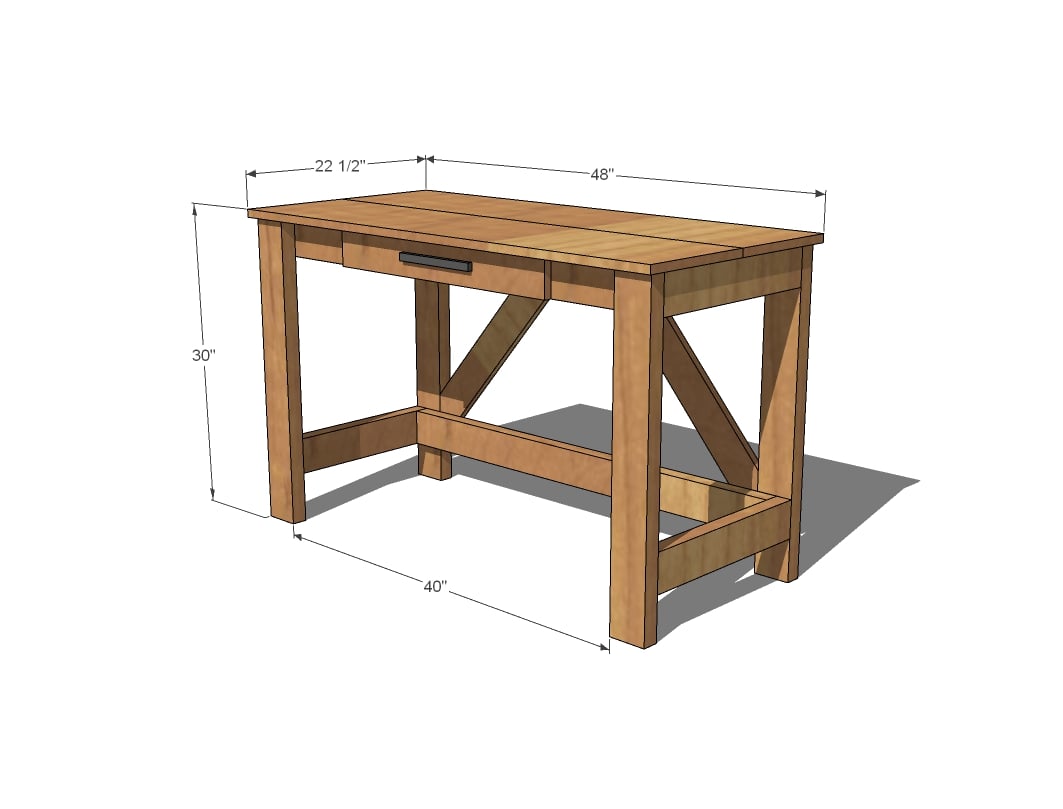
4 - 2x4 @ 29-1/4" - legs
4 - 2x4 @ 18" - supports
2 - 2x4 @ 44" - back support
4 - 2x4 @ 10-1/4" - drawer supports
2 - 1x4 cross supports for back - scribe to fit
2 - 1x12 @ 48" long - top
2 - 1x3 @ 16" - drawer sides
2 - 1x3 @ 21" - drawer front and back
1 - 1/4" plywood piece @ 22-1/2" x 16" - drawer bottom
1 - 1x4 @ 24-1/2" - drawer face


Instructions
Step 1
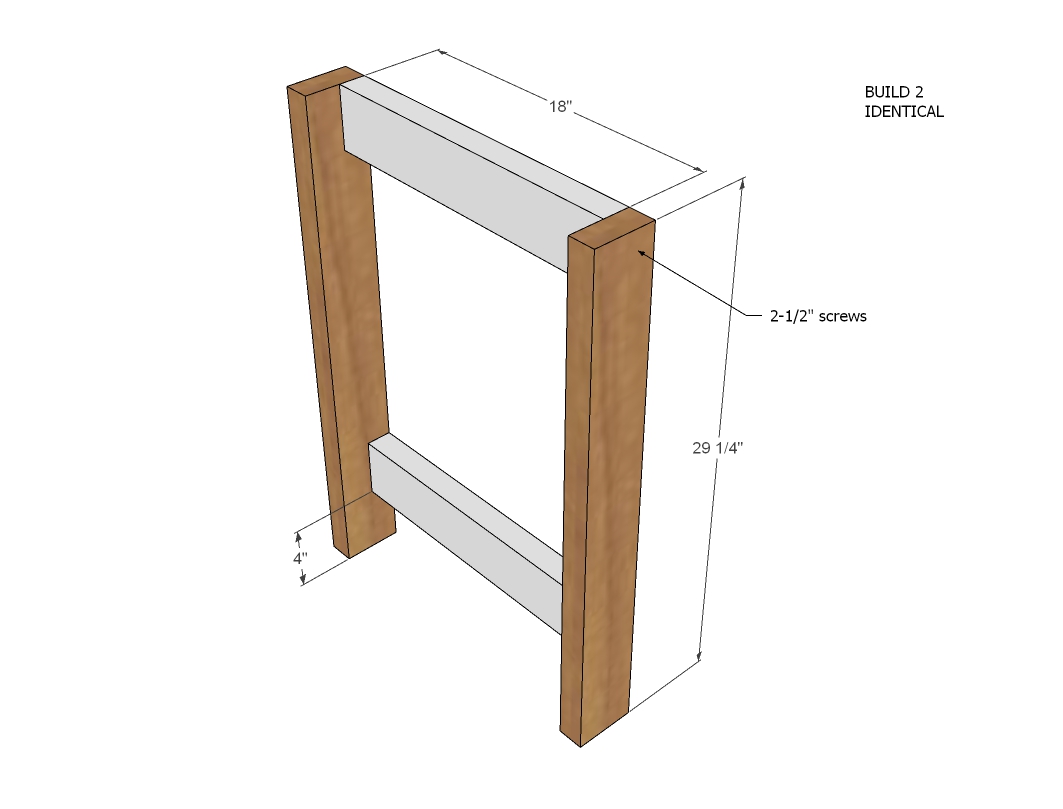
Build two leg sets using the self tapping screws.
Step 2

Attach leg sets together with the back supports.
Step 3

Reserve 24-1/2" of the 1x4 for the desk drawer face.
Using the remaining 1x4, scribe the back cross support pieces and cut.
Attach with 1-1/4" brad nails and glue.
Step 4

If you have a Kreg Jig, join the top pieces together first.
Otherwise, attach with glue and 1-1/4" brad nails to the top of the desk, keeping outside overhangs even.
Step 5

Add drawer framing supports under the desktop. These supports also help keep the desktop from sagging in the middle. Use glue and 2-1/2" screws to attach.
Step 6
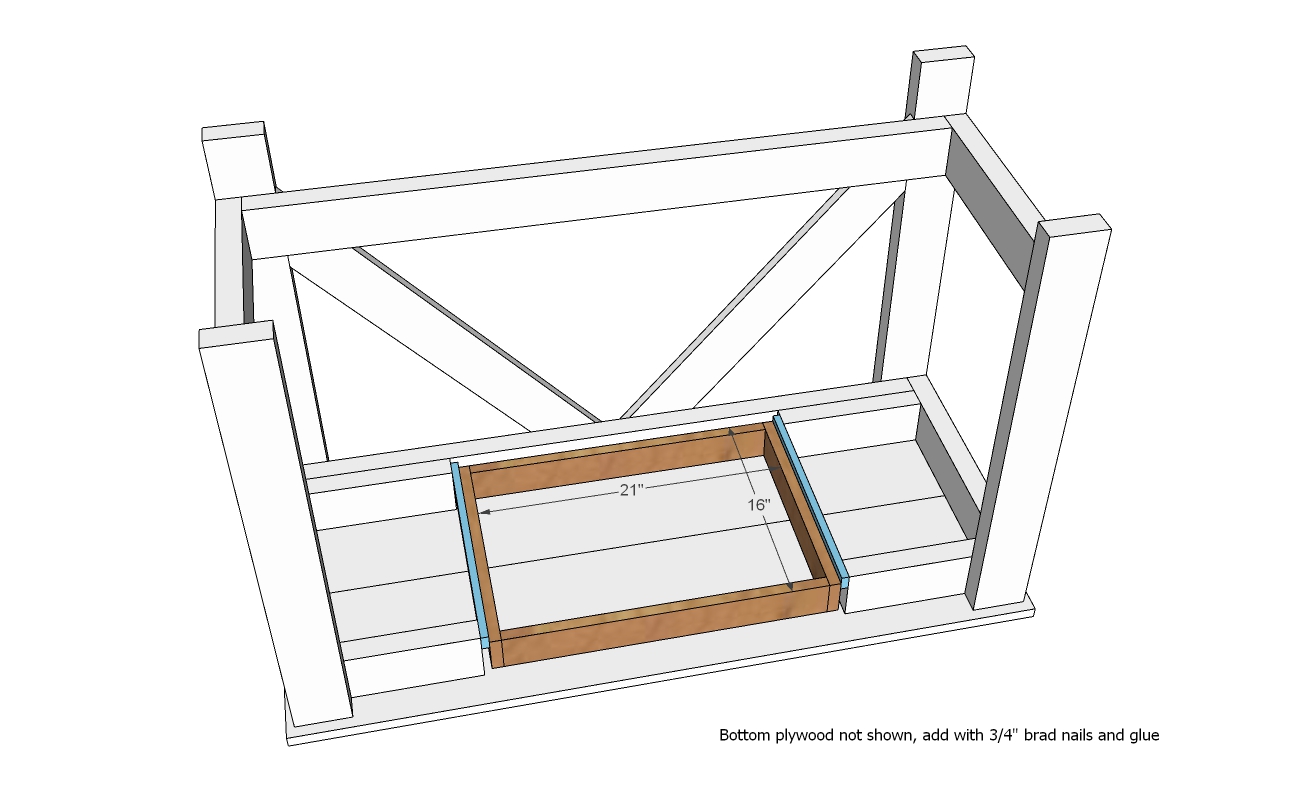
Build the drawer box to fit in the opening and attach with the drawer slides as shown. You can use pocket holes (best option) or 1-1/4" brad nails to build the drawer box. The bottom is attach with 3/4" brad nails and glue.
Step 7
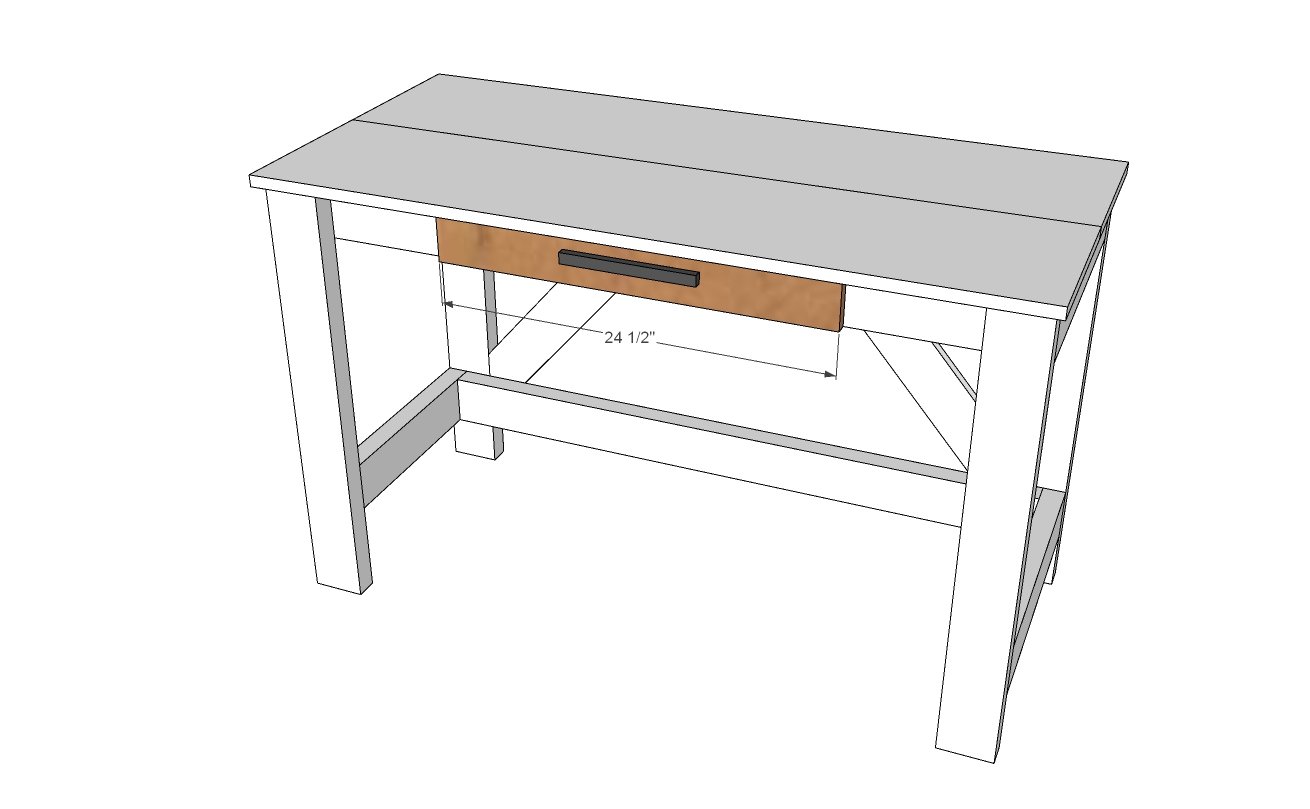
Attach drawer face to front of project, holding down about an 1/8" to allow the drawer face to open and close under the desktop. Attach with 1-1/4" brad nails and wood glue, avoiding the handle location.


Comments
Heather - Doll… (not verified)
Mon, 08/09/2010 - 20:10
My son just turned 4, and he
My son just turned 4, and he didn't go to preschool last year... still up in the air this year. That to say, hey, you still have a year or 2 if you want it. :)
Thanks for always providing such great plans and personal posts. :)
Heather
Heather (not verified)
Mon, 08/09/2010 - 21:08
We're planning to homeschool,
We're planning to homeschool, so we're not worried about sending kids to preschool. My girlie turned 3 in May, and, frankly, she's already got most of the preschool stuff down--and she taught herself to read already. Just google for a kindergarten readiness checklist & make sure Grace knows all the stuff on it by the time she needs to--not difficult.
Kristin (not verified)
Tue, 08/10/2010 - 00:59
My daughter just turned six
My daughter just turned six and will start first grade in a few weeks. First grade means homework; even though it won't be a lot I would love for her to have her own space. Your timing is perfect and the desk is beautiful.
Thanks Ana!
(Oh, and my son is 3 and he LOVES pre-school.) :)
Cheri (not verified)
Tue, 08/10/2010 - 03:18
Thanks, Ana! Our little girl
Thanks, Ana! Our little girl starts first grade in a few weeks, and we've been thinking she'll need a desk soon. This may be the one!
Alycia (not verified)
Tue, 08/10/2010 - 03:56
Beautiful desk. I'm going to
Beautiful desk. I'm going to change the top just a little and make it a scrap booking desk, which I need desperately. My little one is 3 and is about to start school because she's special needs. I'm SO not ready :( She's still my little baby.
D (not verified)
Tue, 08/10/2010 - 08:45
My Son turned 4 in feb so we
My Son turned 4 in feb so we are going to send him to preschool just 2 days a week. He didn't go last year. The two days a week should be just enough to get him used to the idea of school and the crowd of kids but not so much that I am losing my baby already!
Carissa Rasmussen (not verified)
Tue, 08/10/2010 - 12:19
i think sending kids to
i think sending kids to school at 3 is just a glorified excuse of daycare...what can they really learn in preschool that you can't teach them yourself? don't send your kids away until you have to because once they start school, you'll never have those days back when they were at home with you.
if you want social exposure...get a play group together...if you want a couple hours to yourself...do a babysitting swap with a friend. that way you can accomplish the real goal (having some solo time) for free:)
Momma Button (not verified)
Tue, 08/10/2010 - 13:58
Ana, I'd say keep her home
Ana, I'd say keep her home another year. She'll be in school soon enough. We're at the other end of the spectrum this year, our baby is a senior. If I had it to do over....he would have missed a year of preschool.
And the desk is beautiful.
Karen (not verified)
Tue, 08/10/2010 - 15:34
They grow up fast! My baby
They grow up fast! My baby is 20. :-) Do you have any tips on installing the drawer slides? I've never installed them before but they look a bit scarey. Also, I'm toying with a drawer unit to hold 12x12 scrapbooking paper. Do you know where I'd find the metal pieces that go in the top of the drawer for hanging folders to slide on? Thanks for sharing all your hard work.
Dena (not verified)
Fri, 08/13/2010 - 05:22
I hope you don't send her to
I hope you don't send her to preschool. Studies have shown there is no benefit in the long run for sending kids to preschool at 3 as compared to kids who just go to kindergarten. Like someone else said, it's like a glorified daycare at that age. They absolutely do not need it.
You could get a playgroup together and it would do just what it needed for your daughter-social skills with Mom right with her.
Angie (not verified)
Thu, 09/02/2010 - 09:52
Any easy way to build in a
Any easy way to build in a keyboard tray in place of the drawers? Possibly with faux drawer fronts when closed? I'd love to make this for my computer desk, but keyboard tray is a necessity.
Ana White (not verified)
Thu, 09/02/2010 - 11:26
Hi Angie, check out my desk
Hi Angie, check out my desk here - that's what I use for a keyboard tray. The front just flips down and I pull my keyboard out. works amazing!
Preschool Comp… (not verified)
Mon, 10/18/2010 - 11:53
[...] Build A Beautiful Cross
[...] Build A Beautiful Cross Brace Desk — Ana White [...]
Omar (not verified)
Thu, 08/09/2012 - 01:25
Question about measurements
Hey! I'm very interested in building this desk, but there's something that's confusing me about the measurements that I see on the plan. For example, in the first step, it looks as if you attach two of the 1x4's flush to the 1x3, which would make the total width 5" (1" from each side, plus the 3" from the cleat). However, it looks as if the 1x4 front apron is supposed to fit perfectly on the sides of the box. I'm seeing this similar thing in several other places throughout the plan. Is there something I'm missing?
jmarchjr
Mon, 09/16/2013 - 08:16
L Shaped
I'm trying to tweak the plans to make this an L shaped desk with a drawer off to the side. Any suggestions?
Peter Stewart
Tue, 08/18/2020 - 20:49
looks so nice!
looks so nice!
rkwaialeale
Mon, 09/14/2020 - 10:16
Built this but adjusted the…
Built this but adjusted the dimensions to fit my space. Great plan!