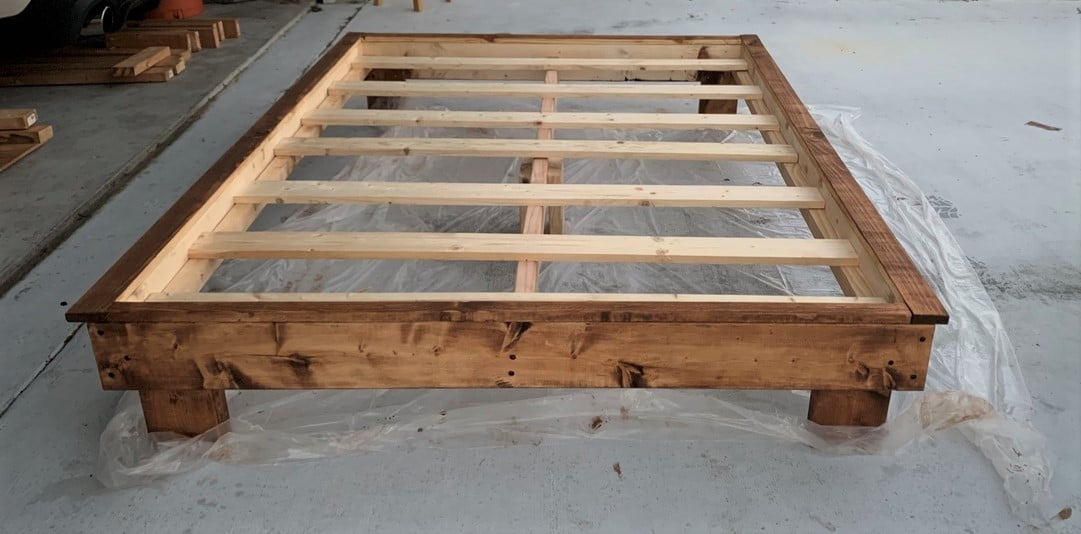
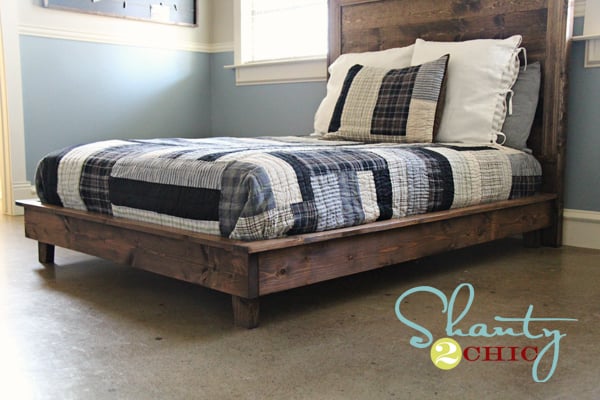
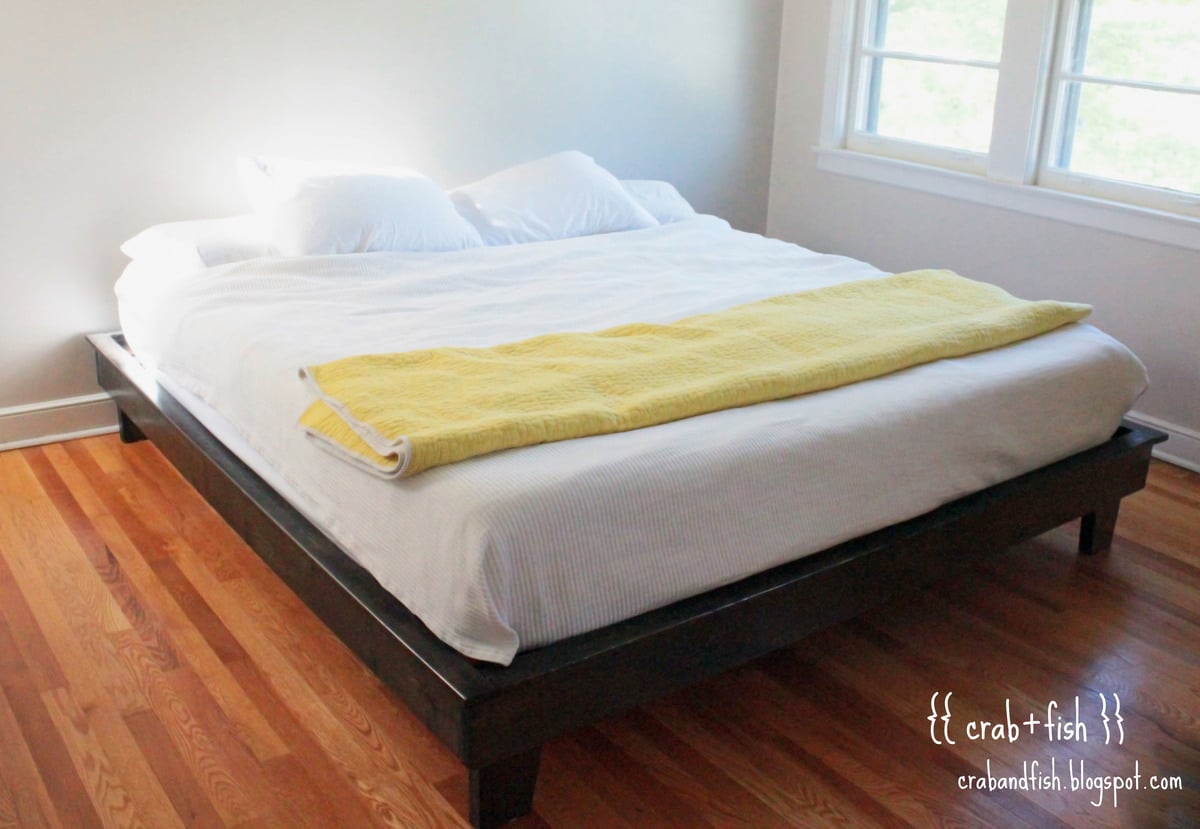
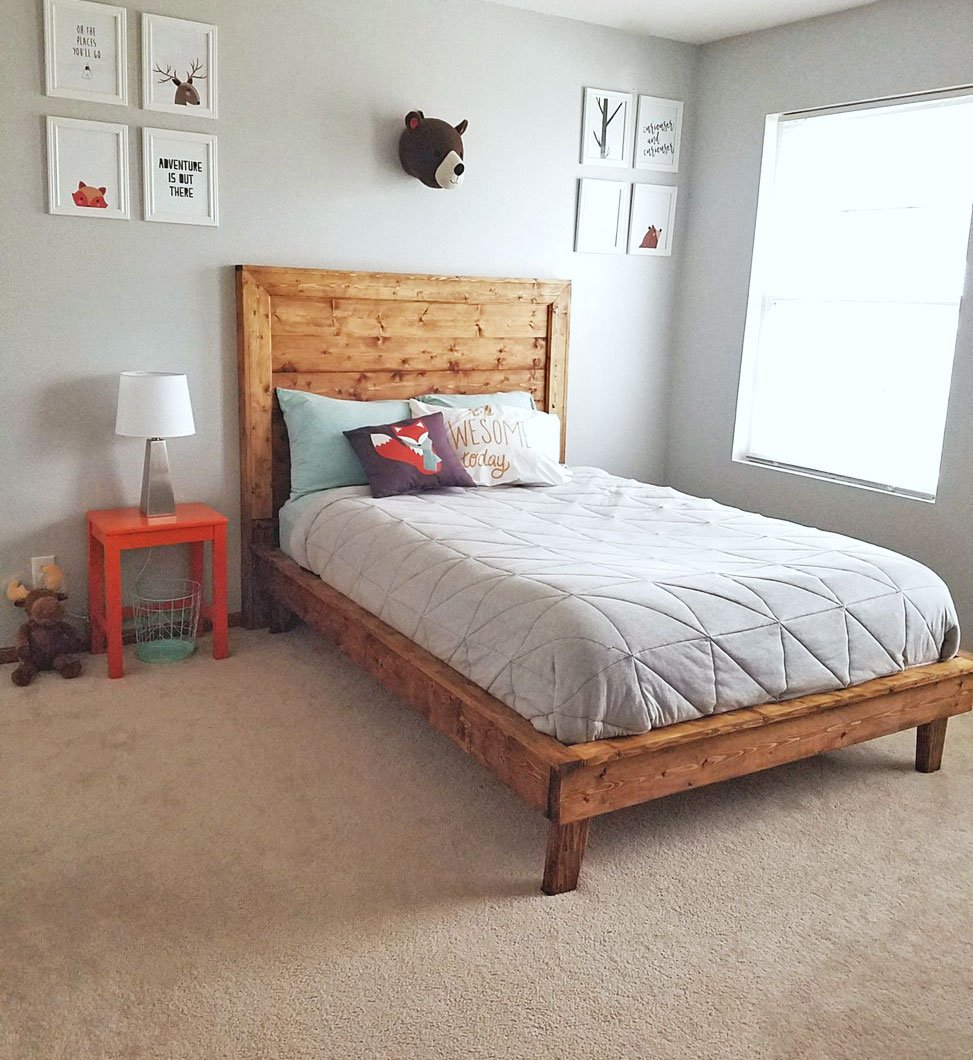
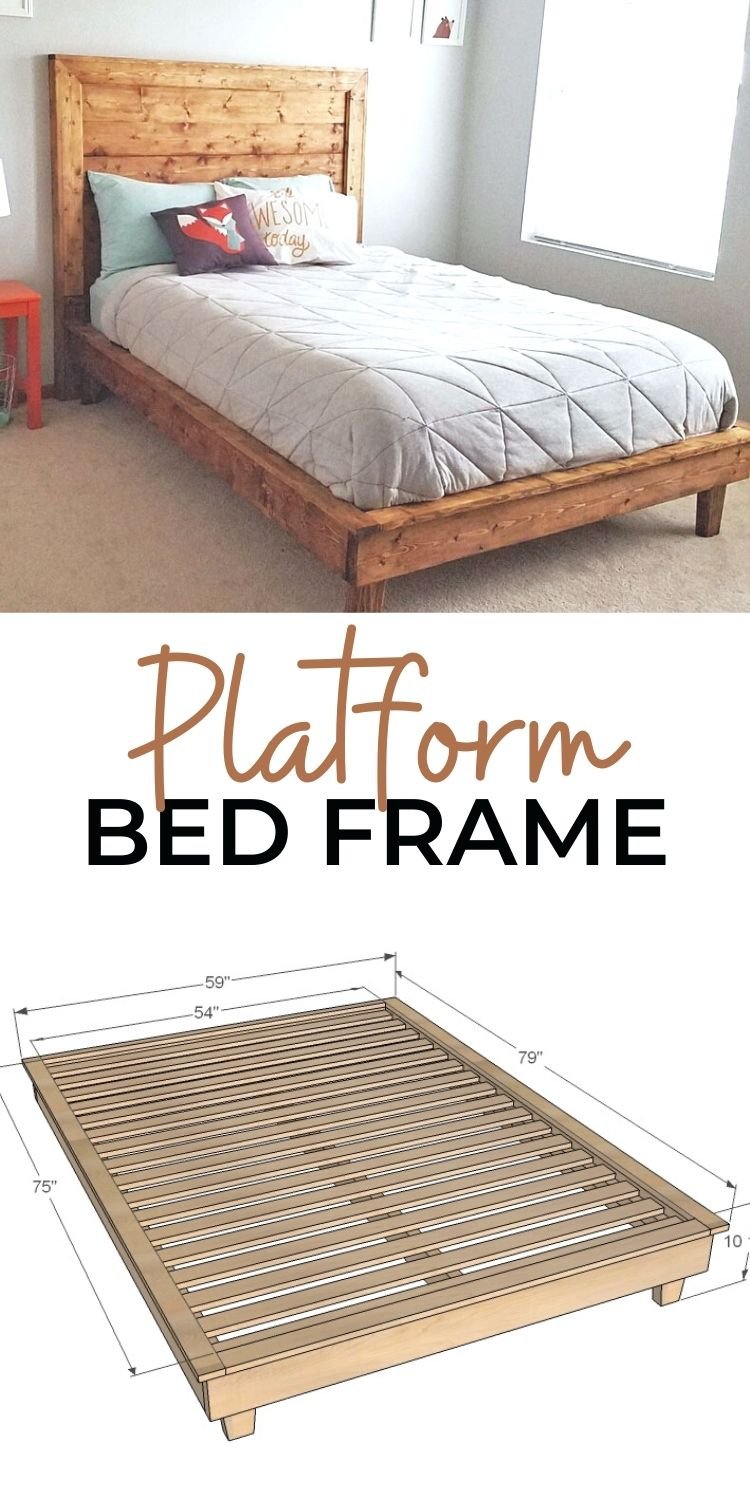
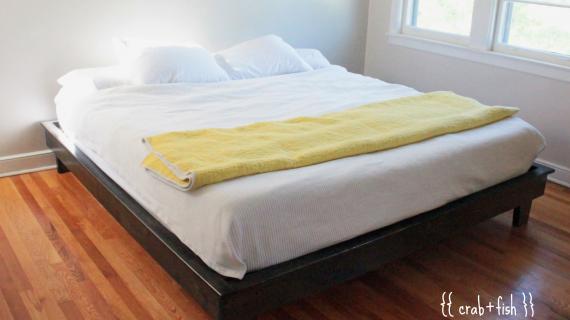
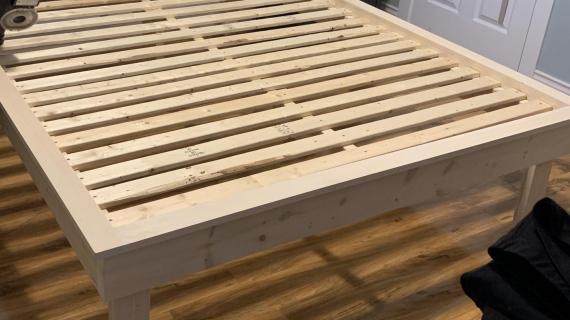
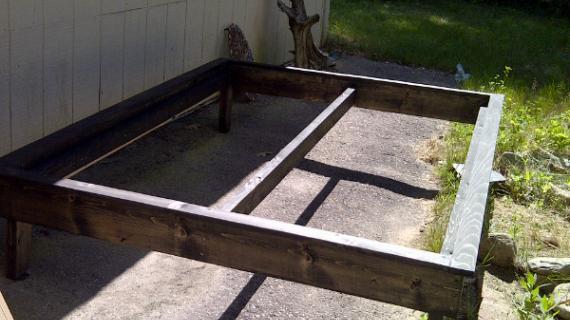
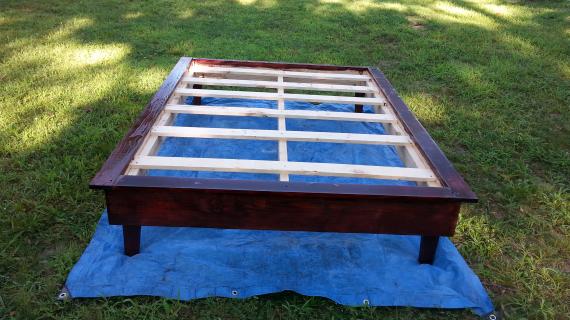
Build your own bed frame! This platform style bed frame is easy to build with off the shelf lumber and basic construction. Stain or paint to match your style or decor. Our free plans include step by step diagrams, shopping lists and cut list.
Related: Pair with our matching headboard plans.
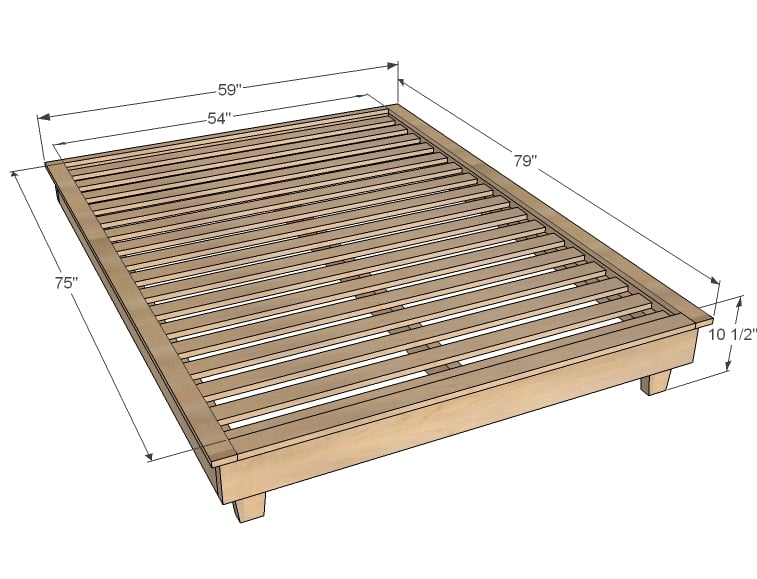
Preparation
TWIN SIZE SHOPPING LIST (38x75)
- 3 – 2x6 @ 8' long
- 2 – 2x2 @ 8' long
- 2 – 1x3 @ 8' long
- 1 – 1x2 @ 4' long
- 1 – 1x3 @ 4' long
- 5– 1x3 or 1x4 furring strips @ 8' long - bed slats
- 32 - 2-1/2" to 3" long self tapping star bit construction screws (SPAX or GRK brand or similar)
- 50 - 1-1/2" to 2" long self tapping star bit construction screws (SPAX or GRK brand or similar)
- wood glue
- sand paper
- 1-1/2" long brad nails can be used as a substitute for the shorter screws
FULL SIZE SHOPPING LIST (54x75)
- 2 – 2x6 @ 12' long
- 1 - 2x4 @ 8 feet long
- Additional 2x4 or 2x6 needed for the bed legs
- 2 – 2x2 @ 8' long
- 3 – 1x3 @ 8' long
- 1 – 1x2 @ 8' long
- 7 – 1x3 or 1x4 furring strips @ 8' long - bed slats
- 40 - 2-1/2" to 3" long self tapping star bit construction screws (SPAX or GRK brand or similar)
- 60 - 1-1/2" to 2" long self tapping star bit construction screws (SPAX or GRK brand or similar)
- wood glue
- sand paper
- 1-1/2" long brad nails can be used as a substitute for the shorter screws
QUEEN SIZE SHOPPING LIST (60x80)
- 2 – 2x6 @ 12' long
- 1 - 2x4 @ 8 feet long
- Additional 2x4 or 2x6 needed for the bed legs
- 2 – 2x2 @ 8' long
- 3 – 1x3 @ 8' long
- 1 – 1x2 @ 8' long
- 7 – 1x3 or 1x4 furring strips @ 8' long - bed slats
- 40 - 2-1/2" to 3" long self tapping star bit construction screws (SPAX or GRK brand or similar)
- 60 - 1-1/2" to 2" long self tapping star bit construction screws (SPAX or GRK brand or similar)
- wood glue
- sand paper
- 1-1/2" long brad nails can be used as a substitute for the shorter screws
STANDARD KING SIZE CUT LIST (76x80)
- 4 – 2x6 @ 8' long
- 1 - 2x4 @ 8 feet long
- 2 – 2x2 @ 8' long
- 3 – 1x3 @ 8' long
- 1 – 1x2 @ 8' long
- 10 – 1x3 or 1x4 furring strips @ 8' long - bed slats
- 40 - 2-1/2" to 3" long self tapping star bit construction screws (SPAX or GRK brand or similar)
- 60 - 1-1/2" to 2" long self tapping star bit construction screws (SPAX or GRK brand or similar)
- wood glue
- sand paper
- 1-1/2" long brad nails can be used as a substitute for the shorter screws
CALIFORNIA KING SIZE CUT LIST (72x84)
- 4 – 2x6 @ 8' long
- 1 - 2x4 @ 8 feet long
- 2 – 2x2 @ 8' long
- 3 – 1x3 @ 8' long
- 1 – 1x2 @ 8' long
- 10 – 1x3 or 1x4 furring strips @ 8' long - bed slats
- 40 - 2-1/2" to 3" long self tapping star bit construction screws (SPAX or GRK brand or similar)
- 60 - 1-1/2" to 2" long self tapping star bit construction screws (SPAX or GRK brand or similar)
- wood glue
- sand paper
- 1-1/2" long brad nails can be used as a substitute for the shorter screws
TWIN SIZE CUT LIST (38x75)
- 2 – 2x6 @ 75” - side rails
- 2 – 2x6 @ 41” - top and bottom rails
- 2 – 2x2 @ 75” - inside cleat
- 2 – 1x3 @ 79” - side trim
- 1 – 1x2 @ 38” - top trim
- 1 – 1x3 @ 38” - bottom trim
- 4 – 2x4 or 2x6 @ 7” (can be cut longer for longer legs, use a 2x6 for a more modern look) - bed legs
- 10– 1x3 @ 38" - bed slats
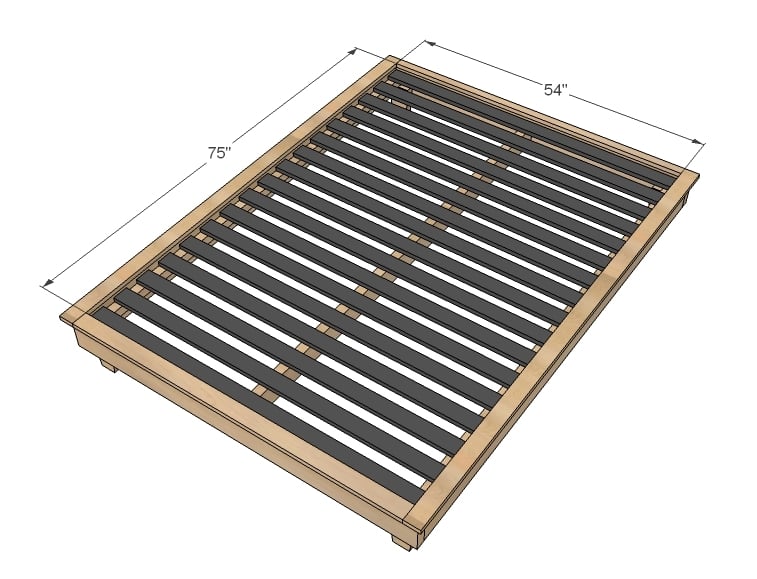
FULL SIZE CUT LIST (54x75)
- 2 – 2x6 @ 75” - side rails
- 2 – 2x6 @ 57” - top and bottom rails
- 2 – 2x2 @ 75” - inside cleat
- 1 – 2x4 @ 75” - center support
- 2 – 1x3 @ 79” - side trim
- 1 – 1x2 @ 54” - top trim
- 1 – 1x3 @ 54” - bottom trim
- 4 – 2x4 or 2x6 @ 7” (can be cut longer for longer legs, use a 2x6 for a more modern look) - bed legs
- 21 – 1x3 @ 27" slats are cut in half to maximize materials of an 8' long board or 10 - 1x3 @ 54" - bed slats
QUEEN SIZE CUT LIST (60x80)
- 2 – 2x6 @ 80” - side rails
- 2 – 2x6 @ 63” - top and bottom rails
- 2 – 2x2 @ 80” - inside cleat
- 1 – 2x4 @ 80” - center support
- 2 – 1x3 @ 84” - side trim
- 1 – 1x2 @ 60” - top trim
- 1 – 1x3 @ 60” - bottom trim
- 4 – 2x4 or 2x6 @ 7” (can be cut longer for longer legs, use a 2x6 for a more modern look) - bed legs
- 21 – 1x3 @ 30" slats are cut in half to maximize materials of an 8' long board or 10 - 1x3 @ 60" - bed slats
STANDARD KING SIZE CUT LIST (76x80)
- 2 – 2x6 @ 80” - side rails
- 2 – 2x6 @ 79” - top and bottom rails
- 2 – 2x2 @ 80” - inside cleat
- 1 – 2x4 @ 80” - center support
- 2 – 1x3 @ 84” - side trim
- 1 – 1x2 @ 76” - top trim
- 1 – 1x3 @ 76” - bottom trim
- 4 – 2x4 or 2x6 @ 7” (can be cut longer for longer legs, use a 2x6 for a more modern look) - bed legs
- 10 – 1x3 @ 76" - bed slats
CALIFORNIA KING SIZE CUT LIST (72x84)
- 2 – 2x6 @ 84” - side rails
- 2 – 2x6 @ 75” - top and bottom rails
- 2 – 2x2 @ 84” - inside cleat
- 1 – 2x4 @ 84” - center support
- 2 – 1x3 @ 88” - side trim
- 1 – 1x2 @ 72” - top trim
- 1 – 1x3 @ 72” - bottom trim
- 4 – 2x4 or 2x6 @ 7” (can be cut longer for longer legs, use a 2x6 for a more modern look) - bed legs
- 10 – 1x3 @ 72" - bed slats
Precise cuts are very important to the success of this project.
I recommend cutting with a compound miter saw or chop saw.
Alternatively, cutting with a circular saw using a cutting guide or straight edge will work, but it is difficult to get precise cuts this way, even for experienced carpenters.
For larger beds, it may become difficult to move into the room after final assembly. You can prefinish pieces first, and build inside the room. Prefinish all 2x6s, the 1x2 and 1x3 top trim boards, and the legs.
Instructions
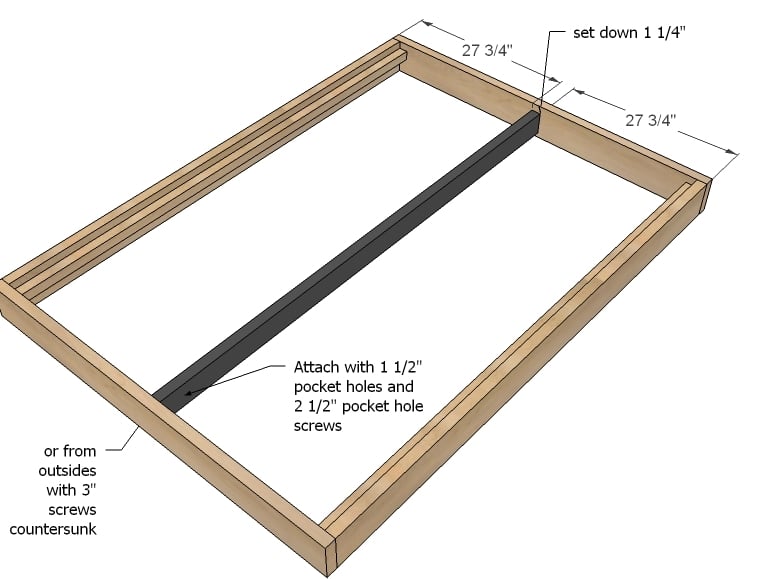
Step 1
Step 2
Step 3
Step 4
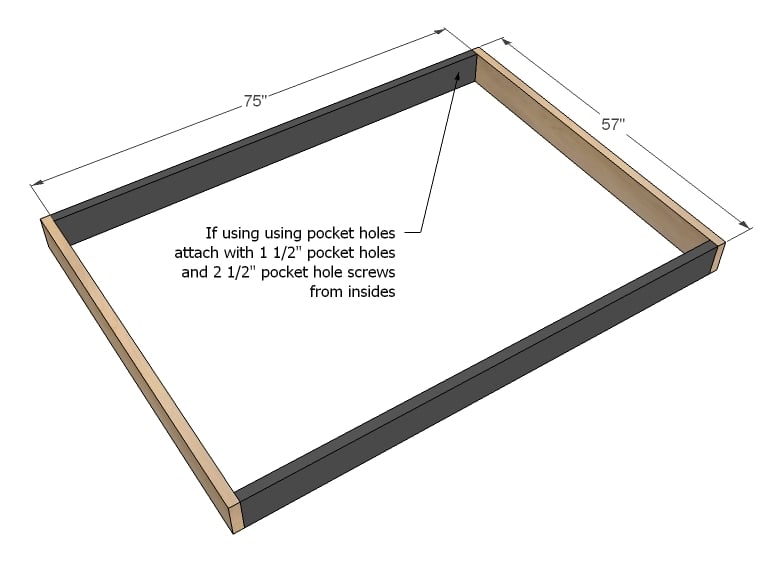
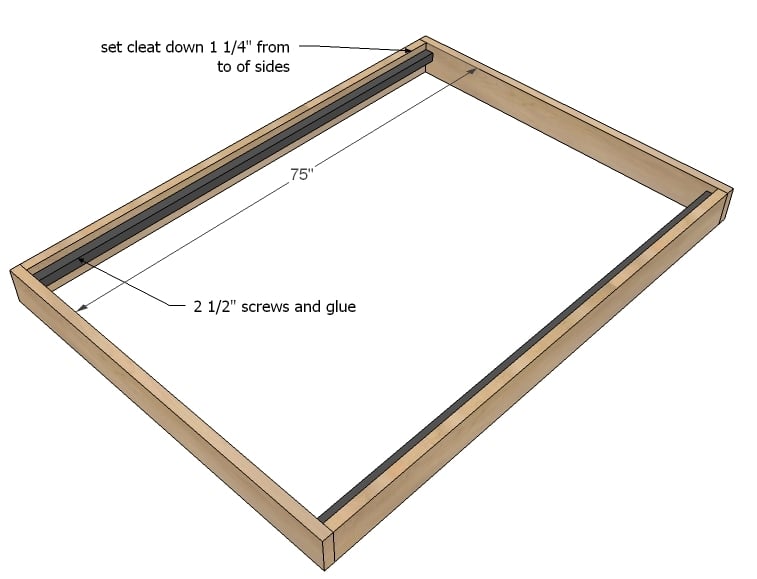
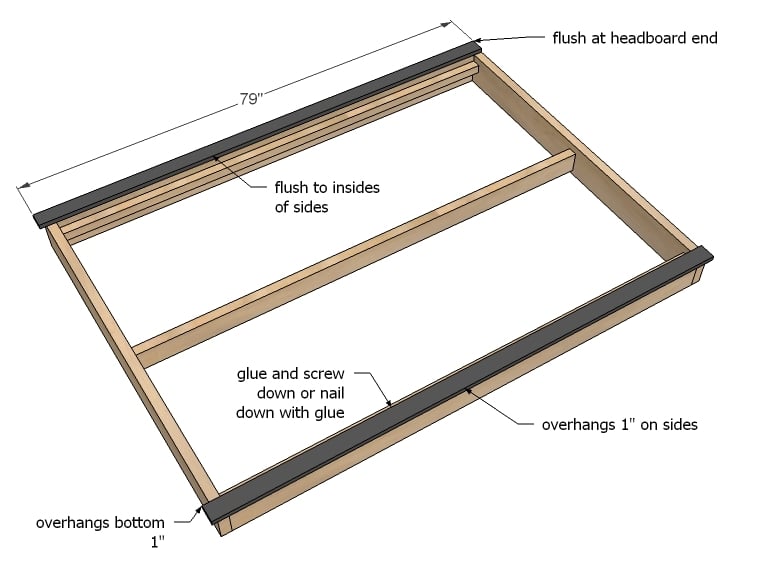
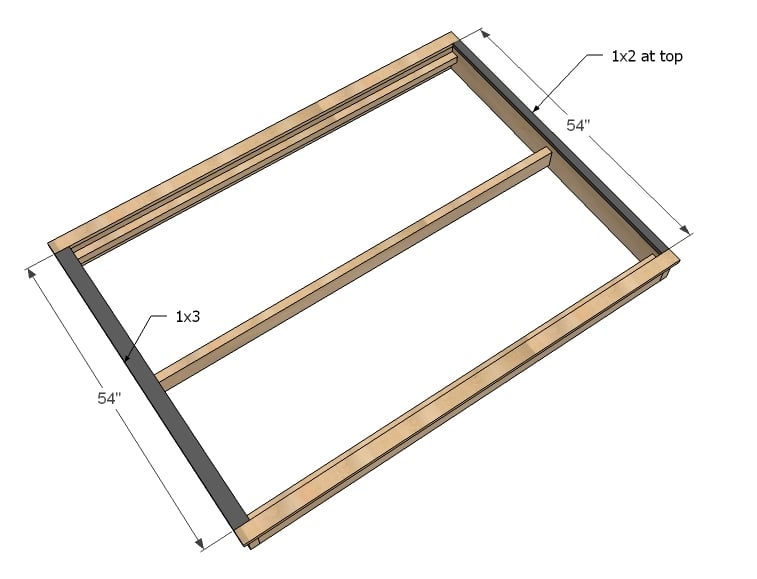
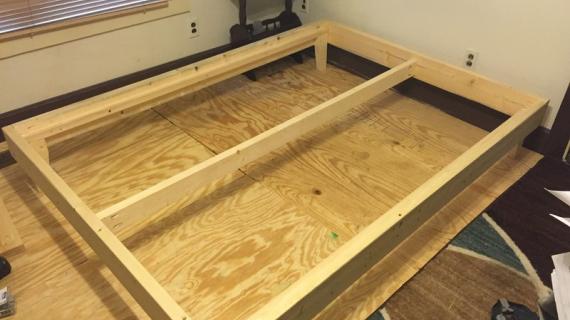
Now we can start trim out. Add trim so it's flush on insides and at head of bed. Attach with either 1-1/2" long self tapping screws or brad nails and glue.
TIP: If you have a Kreg Jig, building the frame first with 3/4" pocket holes and 1-1/4" pocket hole screws, will result in a nicer overall finished bed.
Step 5
Step 6
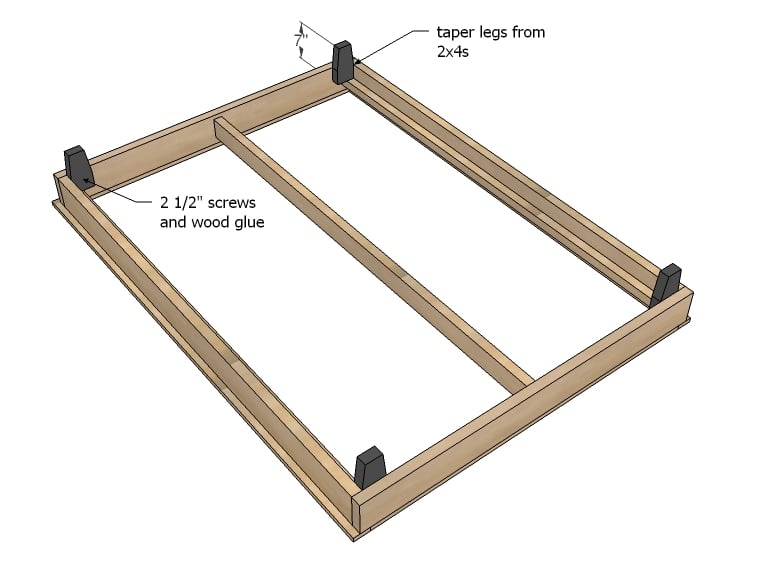
For the bed legs, cut the legs from either 2x4 or 2x6. The 2x6 will result in a stronger bed leg.
You can taper the legs, or even use store bought metal bed feet.
Attach to base of bed, use 3 screws per leg, with glue.
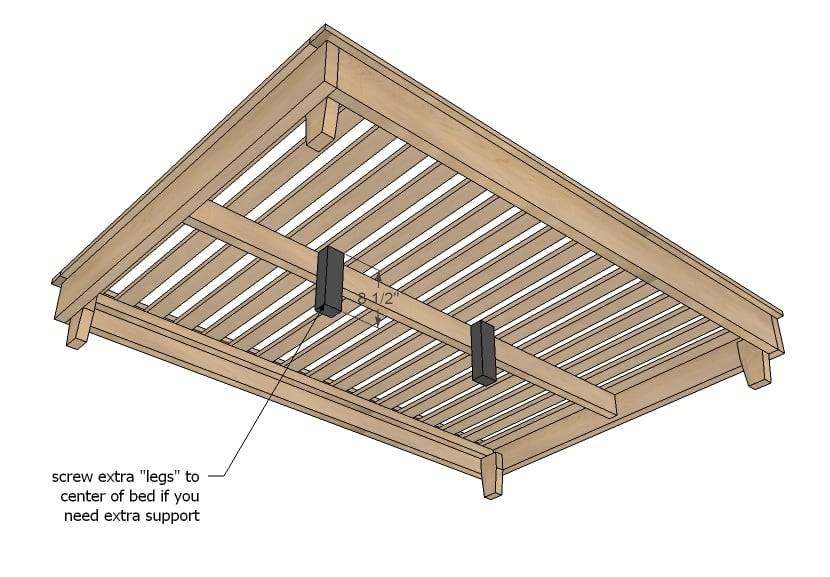
For full size and larger, flip the bed over and measure and cut center legs to support the center 2x4 and attach. (see step 8)
Step 7
It is always recommended to apply a test coat on a hidden area or scrap piece to ensure color evenness and adhesion. Use primer or wood conditioner as needed.





Comments
Richard r
Tue, 06/09/2015 - 06:18
What type of wood did you use
What type of wood did you use, and what other types would you recommend?
bmccormick18608
Wed, 10/21/2015 - 06:39
King Size Dimensions
I see you porivded a twin size option, is there anyway you could provide me with a king size option!?
THANK YOU!
travis.j.lynch
Sun, 12/13/2015 - 15:17
Deconstructable
I really like this, but I move alot. How can I make it easy to take it apart to move it and then put it back together without too much trouble?
travis.j.lynch
Sun, 12/13/2015 - 15:17
Deconstructable
I really like this, but I move alot. How can I make it easy to take it apart to move it and then put it back together without too much trouble?
travis.j.lynch
Wed, 02/03/2016 - 03:29
Mobile
Great looking bed. Thanks for the plans, I plan on building two.... I move alot though, what do I need to do in order to make it be able to break down easily into smaller pieces? Thanks!
Aussydog
Sat, 06/04/2016 - 16:14
My plan, need advice
I've got a small house and space is at a premium. So my plan is to take this general bed design and elevate it so that i can fit a front loading washer and dryer under it. Do you have any suggestions? Thx!
ilcjbrcs
Sun, 11/27/2016 - 20:54
No feet
Can this bed be made without the feet? If so, does it need any extra reinforcement? If not, do you have any designs that the bed sits directly on the floor? My pet peeve is cleaning under beds, and would like to have beds that don't have that requirement.
bickes
Thu, 01/25/2018 - 13:14
Convert Hailey Bed to a Loft bed
I built two of the Hailey beds and they are great. I want to convert one of them to a loft bed. Any tips would be appreciated.
scotpiperMom
Wed, 01/01/2020 - 18:00
Type of wood & finish?
I love this bed!! Can you tell me what type of wood was used in the bed pictured at the top of this page? What kind of finish on the wood?
justinsane
Tue, 03/24/2020 - 11:18
Plan is hard to follow…
Plan is hard to follow because the board sizes are not included in the steps.
JTW
Fri, 05/14/2021 - 13:09
Once completed, would this…
Once completed, would this fit through the door, or would you need to build in the bedroom?
jaycobkramer
Wed, 01/26/2022 - 20:53
Any suggestions on how best…
Any suggestions on how best to connect the head board to the platform frame?