
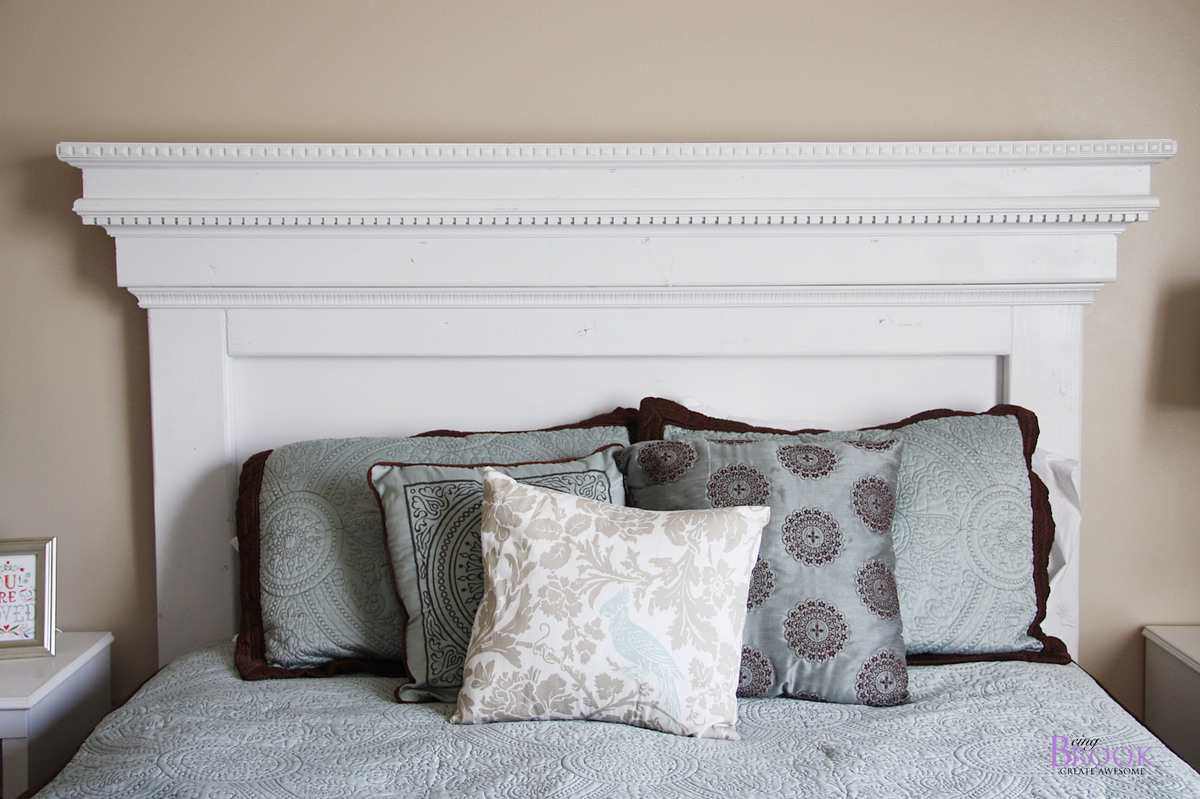

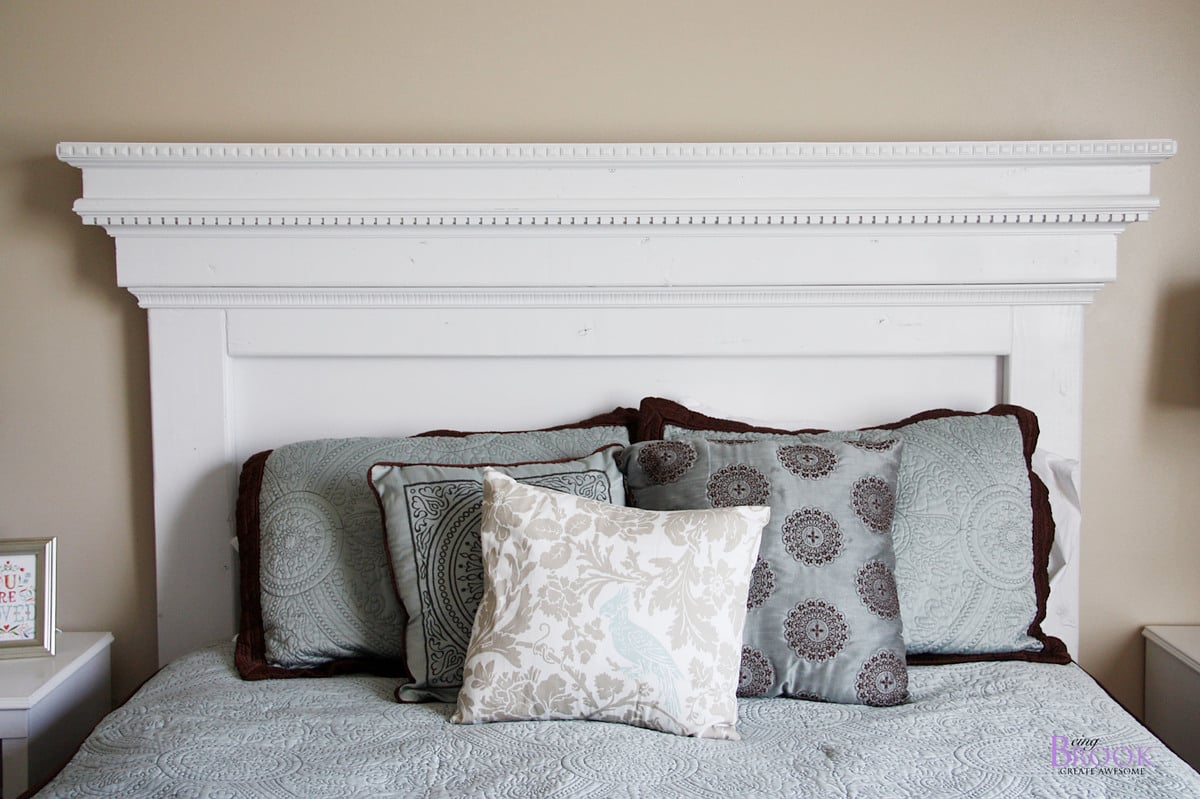
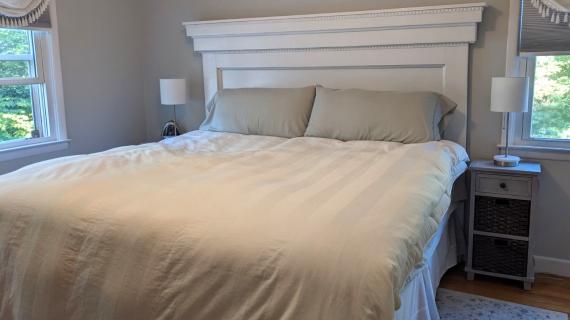
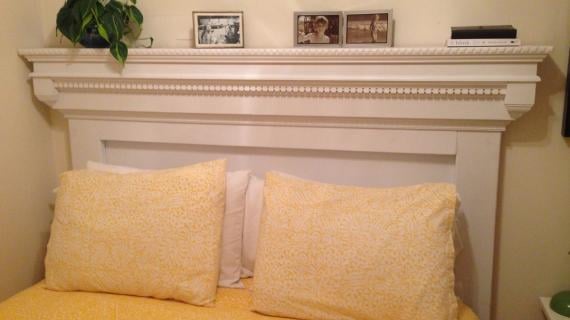
Make a headboard with lots of moulding! Inspired by Pottery Barn Addison Headboard, features dentil moulding and crown moulding. Free easy plans from Ana-White.com

Hi everyone and Happy Monday!!!
We have been working hard up at the Momplex last weekend. Did you spend your weekend DIY-ing too? I hope so - there's nothing like a good dose of Vitamin DIY!
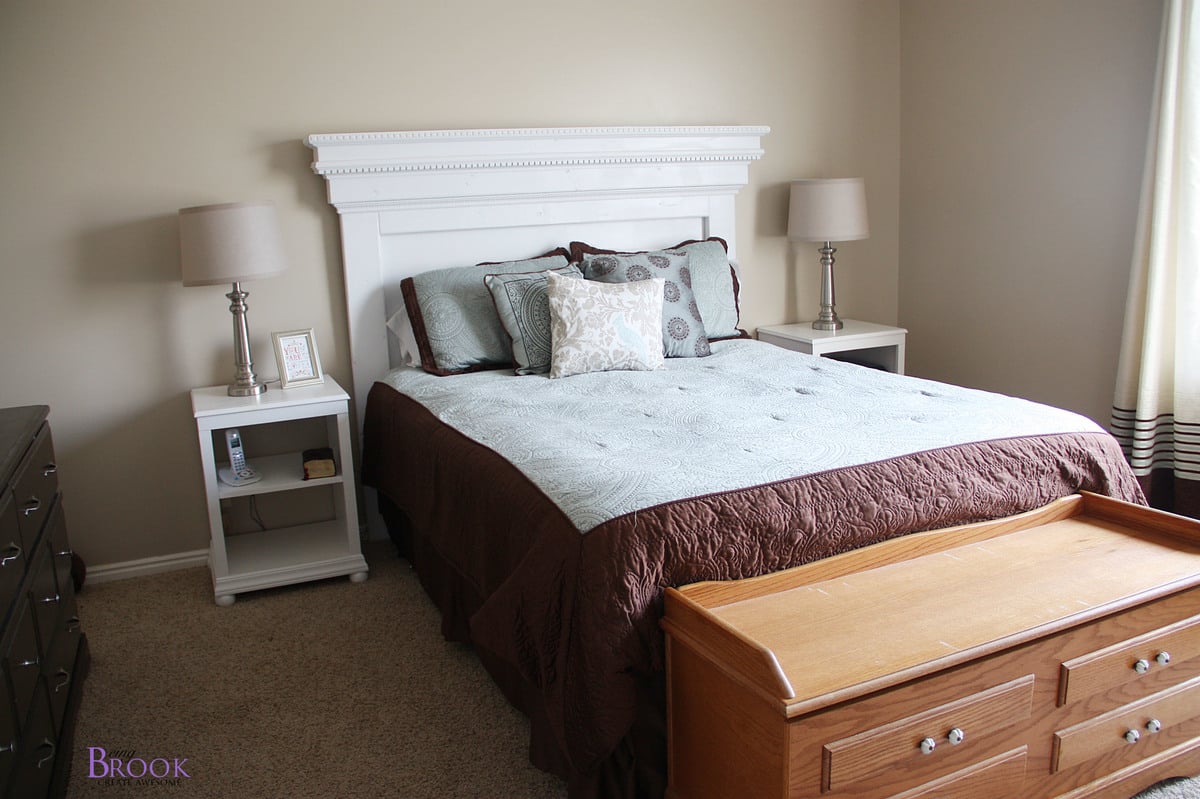
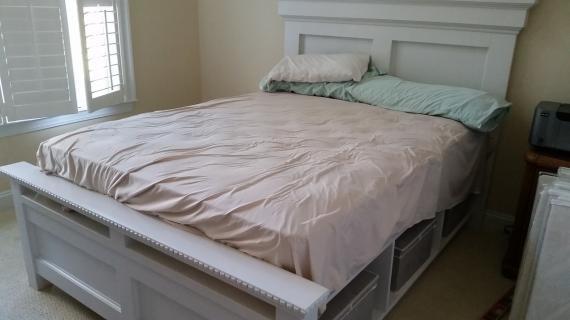
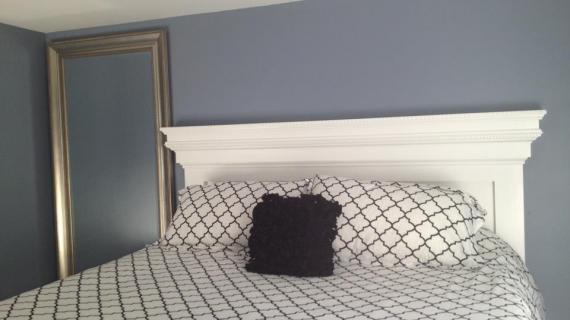
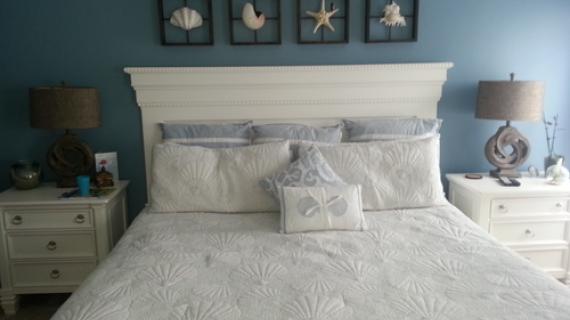
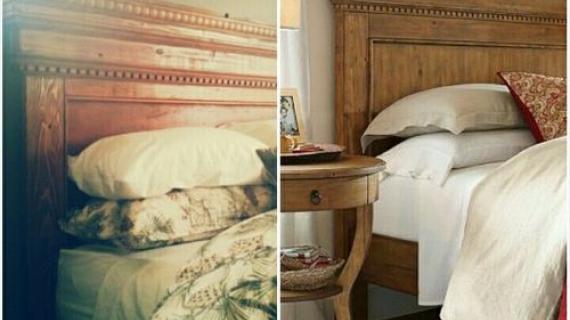
A while back, my dear friend Brook of Being Brook (I'm sure you already know her and follow her and adore her too - you'd be crazy not too) wrote me asking if I could assist with plans for a headboard resembling a mantel, with lots of moulding. Her inspiration came from the Pottery Barn Addison Headboard.
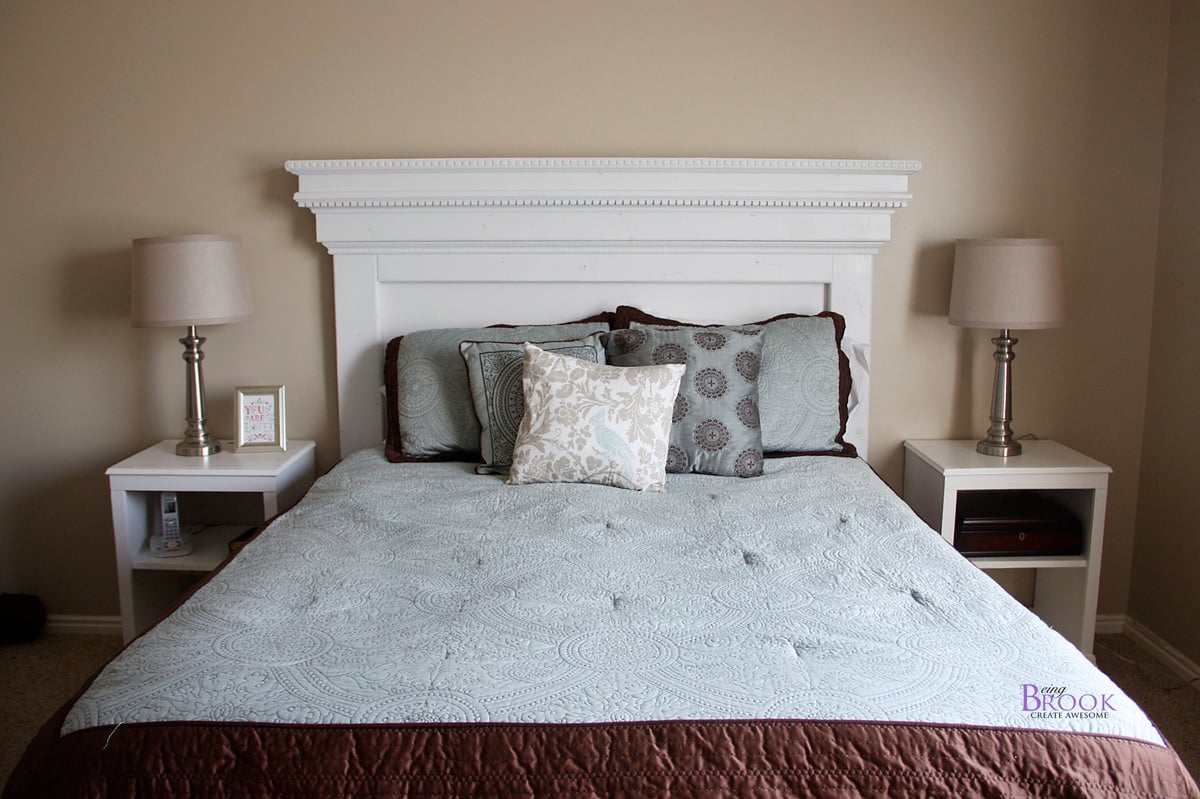
For about 1/5 of the price of the Pottery Barn version, Brook made this!!!
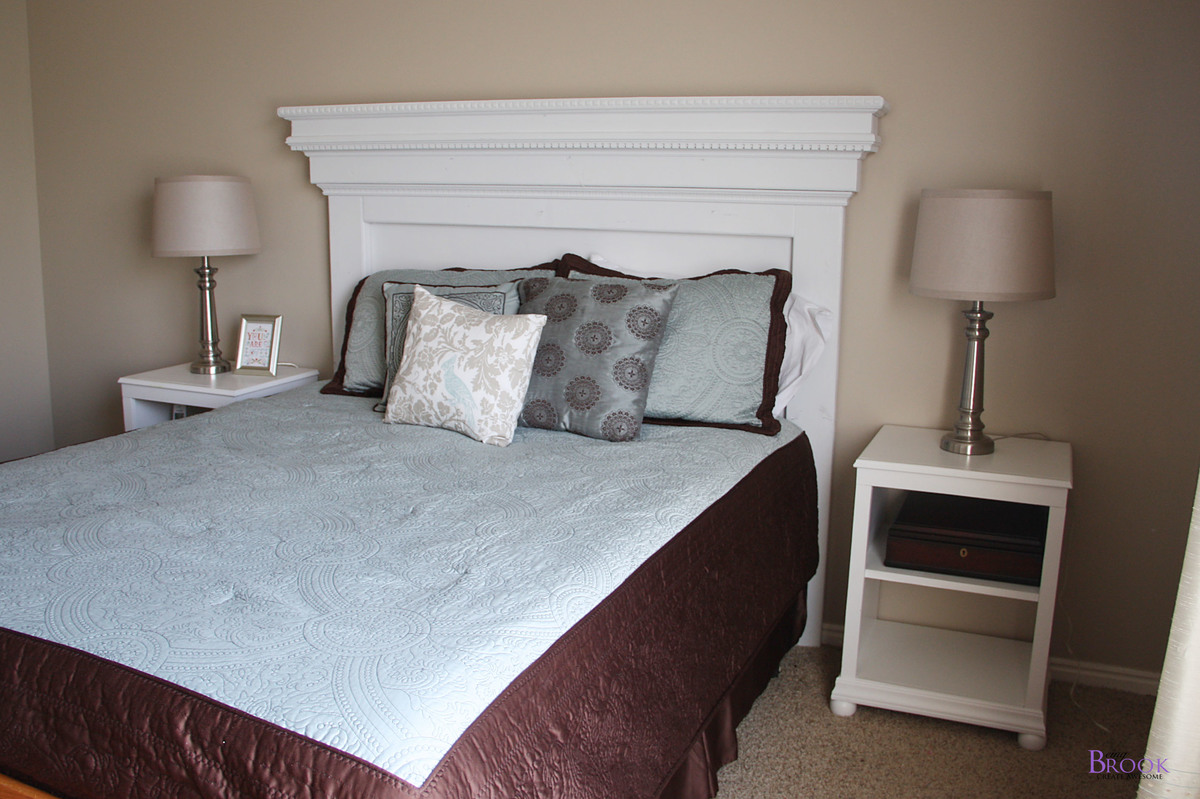
Are you wowed? I am!!!
We've put the plans together below, but please, take a second first to stop over and read Brook's post on building this bed.
And yes, the nightstands are DIY too - plans coming soon!
Thanks Brook!!!
Preparation
5 – 2x6 @ 8 feet or stud length
1 – 2x2 @ 8 feet long
1 – 2x4 @ 8 feet long
1 – 1x6 @ 8 feet long
1 sheet of ¼” plywood
3 – 7’ sticks of moulding in sizes (see last step)
Optional moulding on center panel (2 8’ sticks)
2 ½” PH screws
2” and 1 ¼” finish nails
2 – 2x6 @ 59 ¼”
2 – 2x6 @ 54”
2 – 2x2 @ 8 ½”
1 – 2x2 @ 68”
1 – 2x6 @ 68”
2 – 2x4 @ 3”
1 – 2x4 @ 71”
1 – 1x6 @ 73”
1 – ¼” plywood @ 56” x 22 ¾”


Please read through the entire plan and all comments before beginning this project. It is also advisable to review the Getting Started Section. Take all necessary precautions to build safely and smartly. Work on a clean level surface, free of imperfections or debris. Always use straight boards. Check for square after each step. Always predrill holes before attaching with screws. Use glue with finish nails for a stronger hold. Wipe excess glue off bare wood for stained projects, as dried glue will not take stain. Be safe, have fun, and ask for help if you need it. Good luck!
Instructions
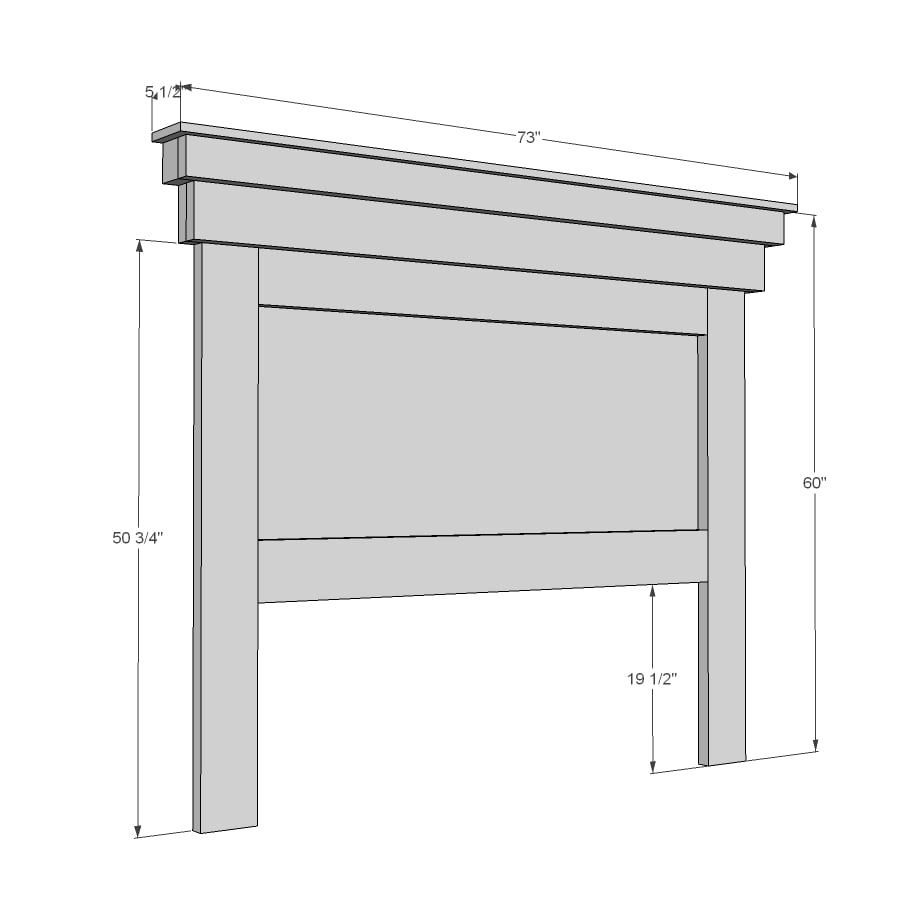
Step 1
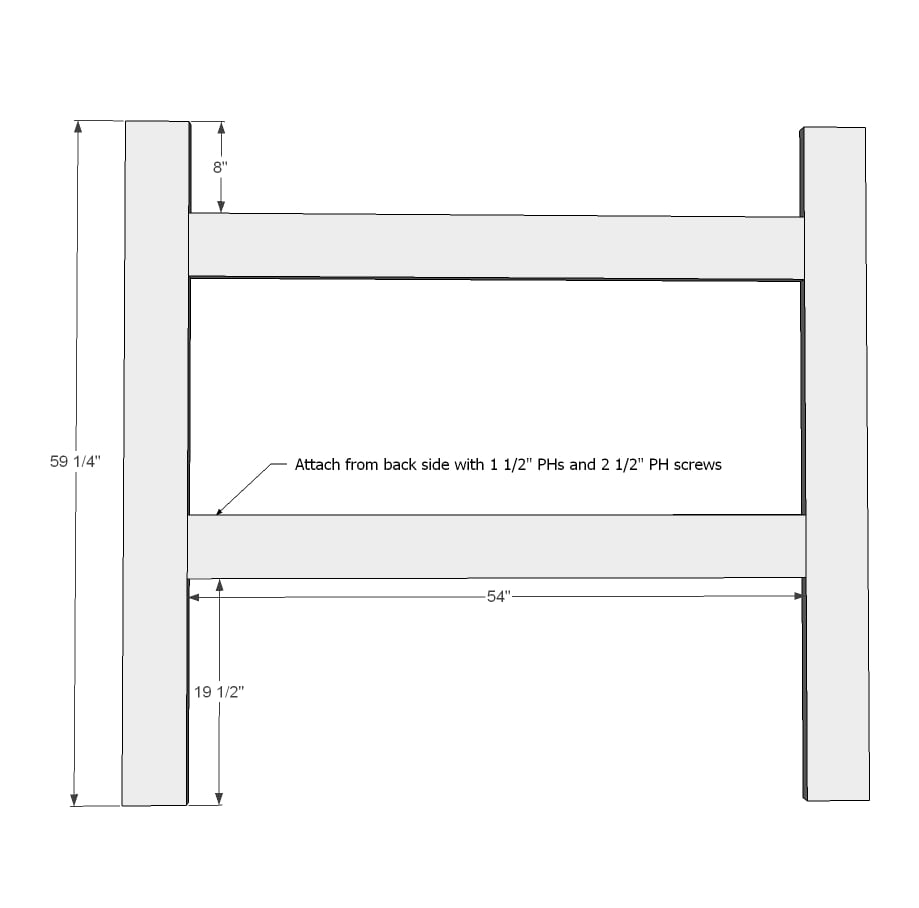
Start by building a basic frame. This headboard is designed for a queen size. You can alter the size by adding to the width for king, or subtracting from the width for twin and full sizes.
Step 2
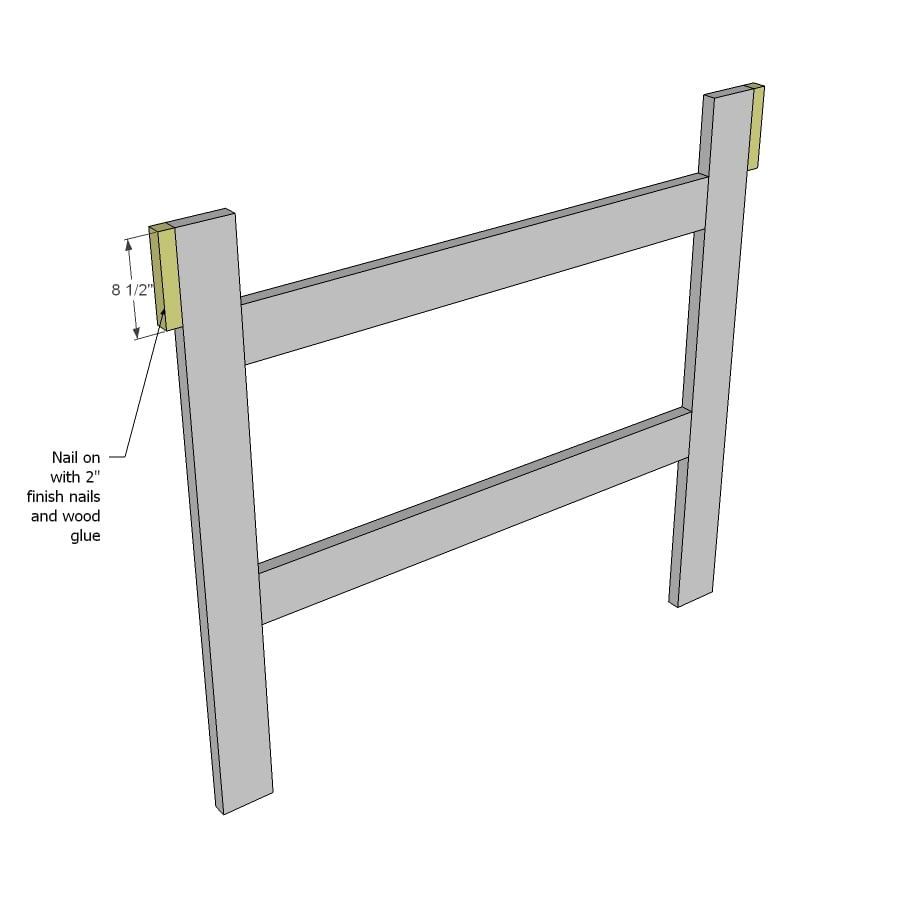
Now attach cleats to sides.
Step 3
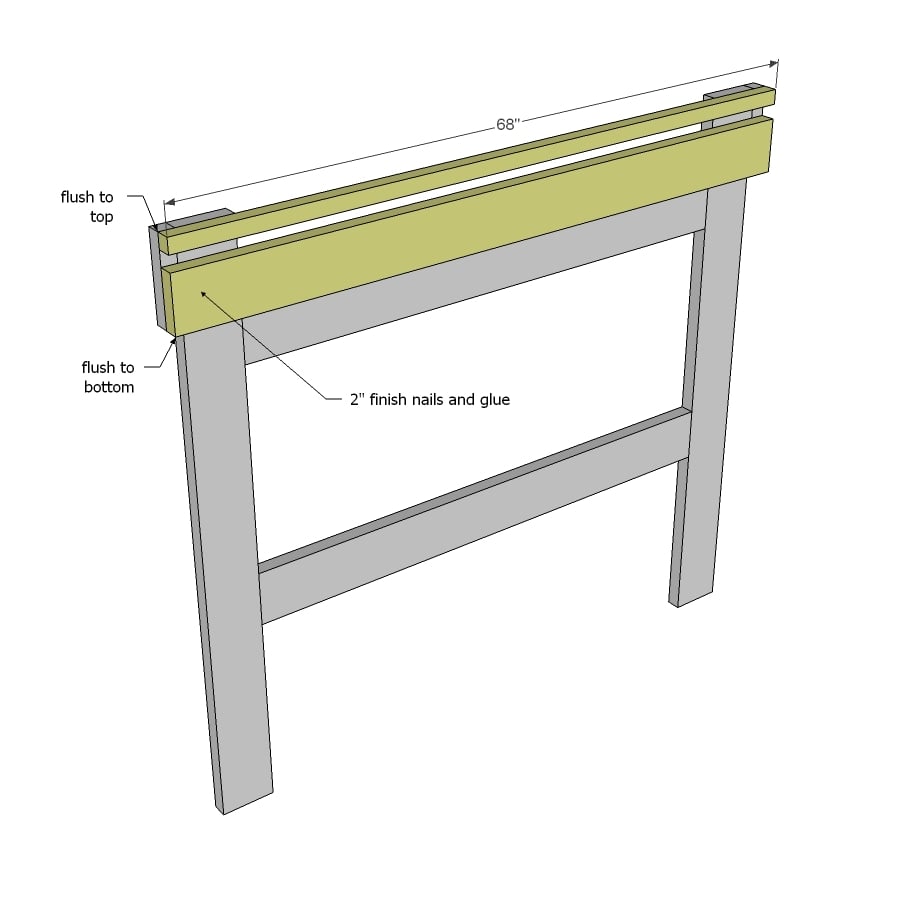
And then to front, attach additional boards. Take your time to make sure the ends match up perfectly.
Step 4
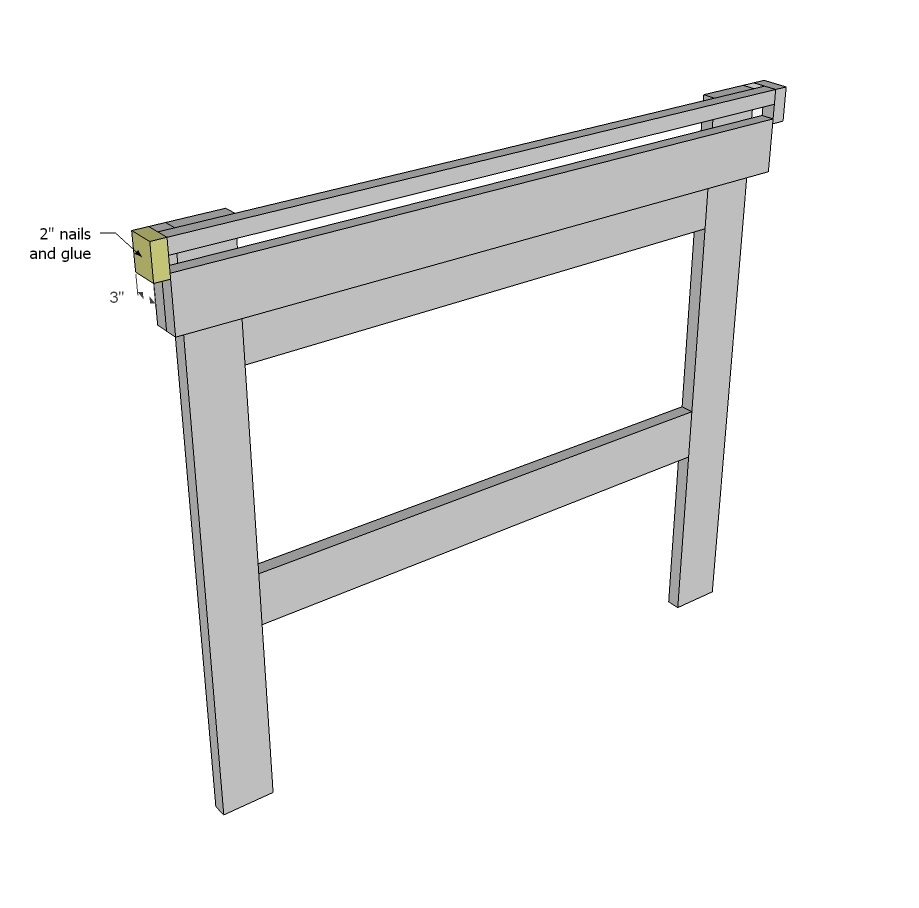
Finish off the end with some blocking ....
Step 5
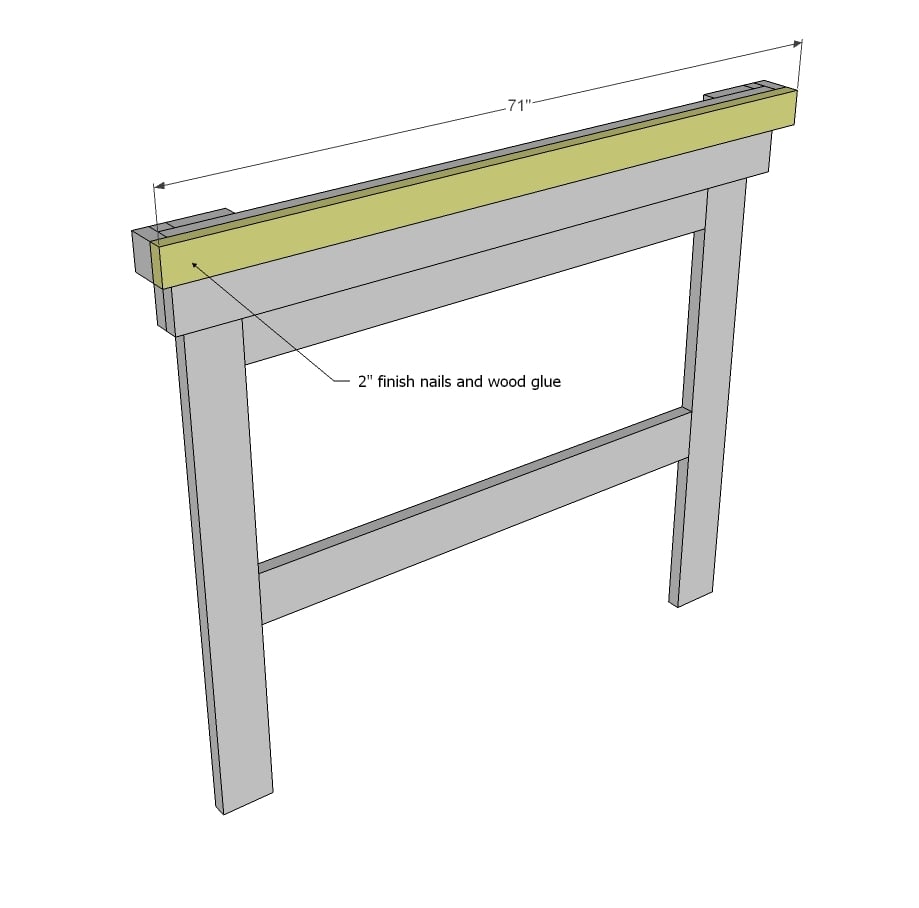
Step 6
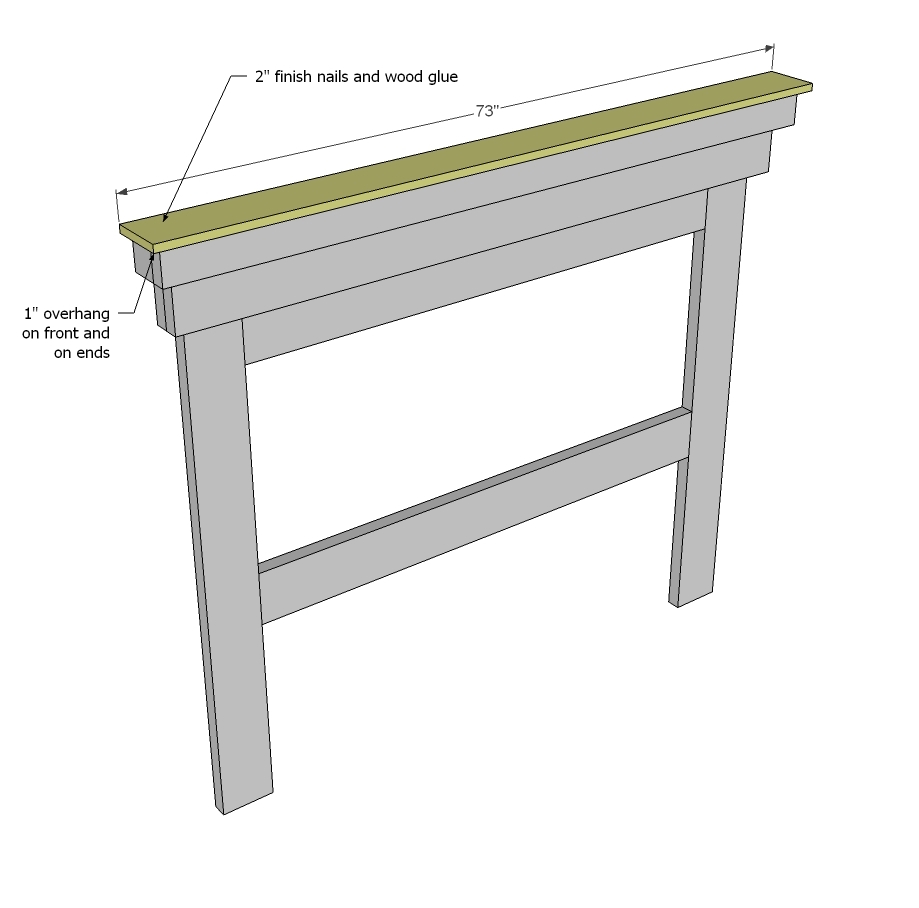
And now the header. You can also use screws here.
Step 7
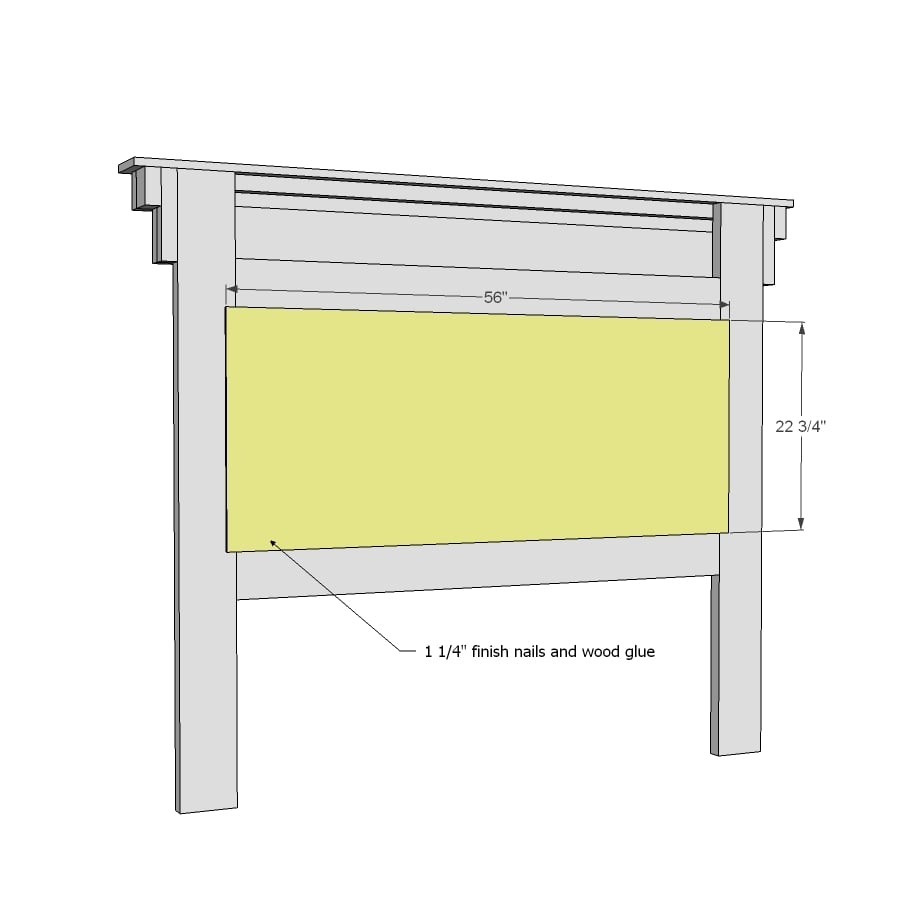
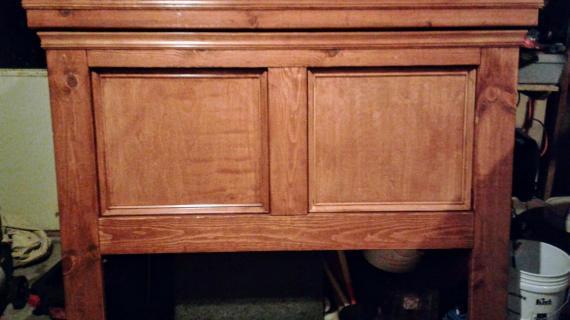
Fill in the back panel. You could also fill in with an upholstered panel!
Step 8
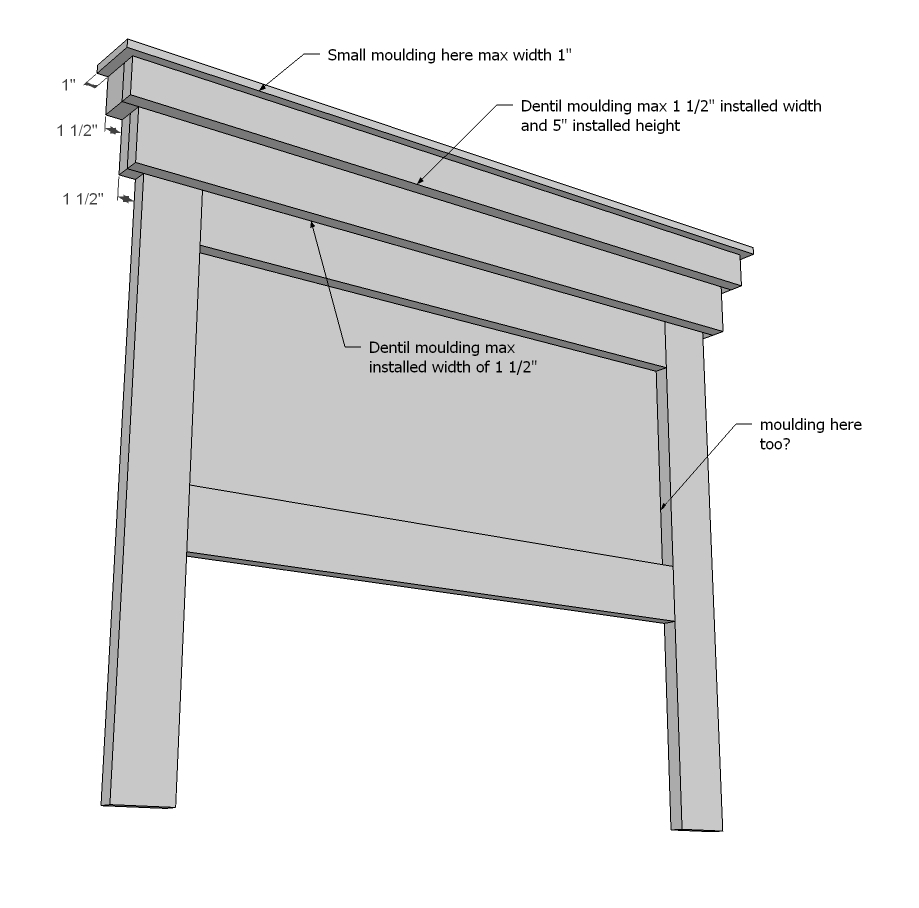
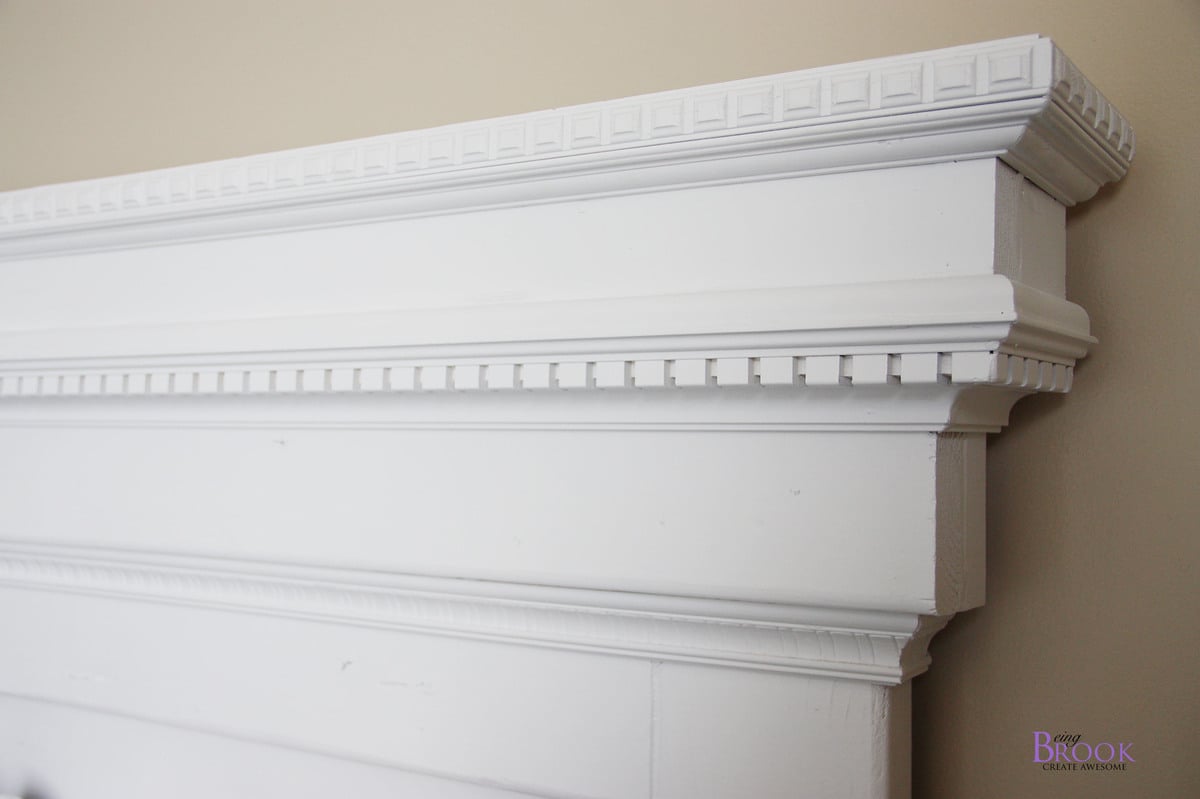
Now add moulding! There's alot of flexibility in the type of moulding you choose.
Step 9
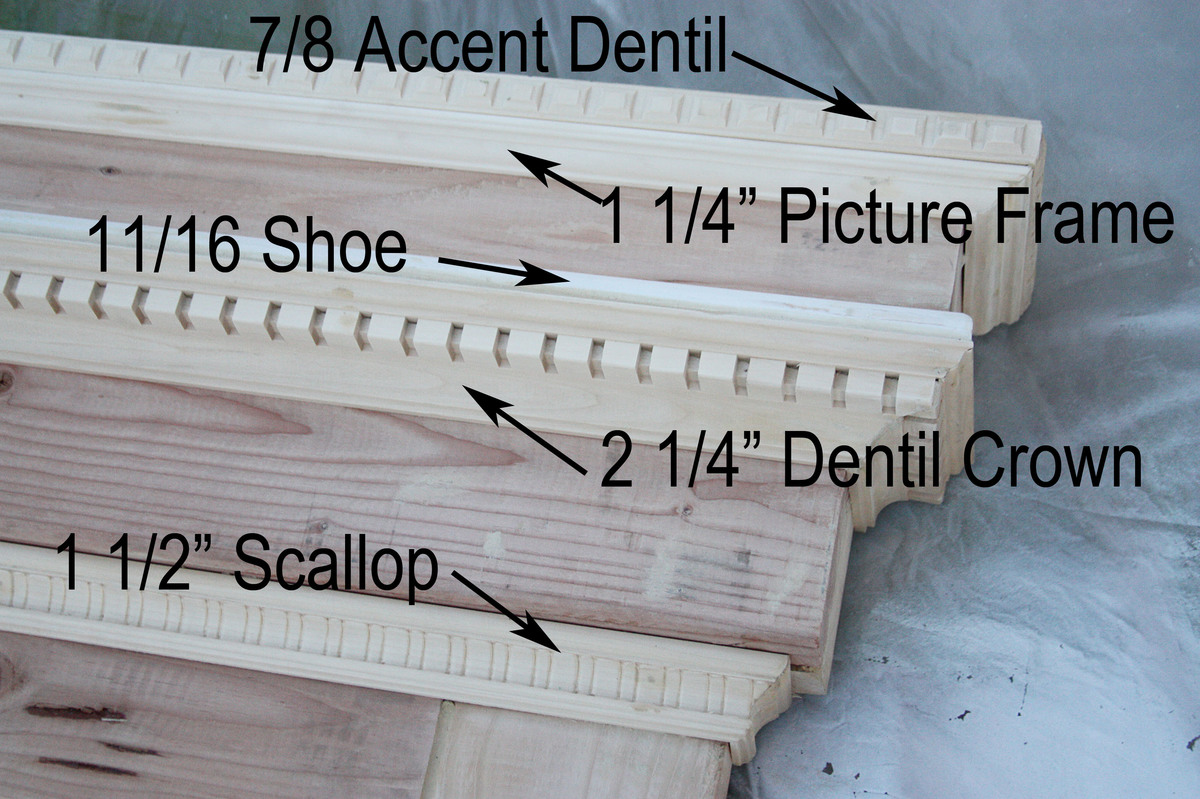
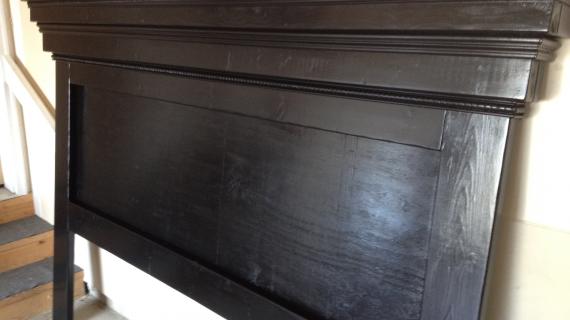
Here is a close up of the moulding Brook used.
Step 10

And a close up of the finished moulding Brook used. Please stop over and read Brook's post here for more details.
It is always recommended to apply a test coat on a hidden area or scrap piece to ensure color evenness and adhesion. Use primer or wood conditioner as needed.


Comments
l3bo
Mon, 07/23/2012 - 13:21
Video's
Hi Ana,
Love this head board. I would love it if you could take any one of your bed plans and make it into a 'How to Video'.
Thoughts?
Woodworking Chemist (not verified)
Tue, 07/24/2012 - 05:29
Do you have measurements for
Do you have measurements for a king sized bed? That would be awesome if you do! Great project to follow on the half loft from earlier this week.
lydiamatt
Fri, 01/29/2021 - 13:36
https://www.ana-white.com…
https://www.ana-white.com/community-projects/mantel-moulding-headboard-…
Whitney G (not verified)
Mon, 07/30/2012 - 11:44
Kingsize
I, too, would love king size measurements! These are great:) And when your daughter starts school, maybe you will have a chance to make a how-to video as suggested above. Your readers have such great ideas, don't we! It only takes a second to type out a request that will take you hours to perform:) Thanks for all you do!
Whitney
Cortney (not verified)
Tue, 08/07/2012 - 14:49
I absolutely love this
I absolutely love this tutorial! I have been looking at DIY headboards for a few days now (as I am determined to include this in our bedroom makeover), trying to decided what kind of look and headboard I want to go with. Today I saw the mantel idea on Pinterest and fell in love. My mind was made up and I began my search for instructions. Originally, I looked at the prices of actual mantels and quickly decided that was not the route I wanted to go. The other plans and tutorials I found weren't as detailed, nor did they produce something as beautiful. Thank you so much for making my day with this!! I'm super excited to get started on this!
P.S. King size measurements would be great for me as well!
Nelligator (not verified)
Fri, 08/31/2012 - 12:09
Begging...
Love this site!
I am BEGGING for plans for a King sized bed! My brother-in-law is excited to start this project for me and I told him I'd look around and see if anyone had any plans.
Thanks in advance!
Danielle
Nelligator (not verified)
Fri, 08/31/2012 - 12:13
Begging ...
I am BEGGING for plans for this bed in a king size.
My brother-in-law is excited to start this project for me and it would be PERFECT to my new bedroom.
Thank you!
Danielle
Kokonut Kids (not verified)
Mon, 09/03/2012 - 10:00
King Size!!
I LOVE this...I am new to your site and this is the project my Husband and I want to make...we just need the plans in King size. We will post photos of the finished project..please, please, please do the plans in King size!! :)
Aaron (not verified)
Thu, 09/06/2012 - 13:36
PDF
What about creating a link so people could easily download a PDF file of each plan?
Sonia Sisto (not verified)
Tue, 10/16/2012 - 09:13
There is a pdf download at
There is a pdf download at the top of the page for those of you asking for it. :)
Can't wait to make this! :)
Carrie McCarthy (not verified)
Sun, 10/21/2012 - 16:47
Love IT!!!
Hi Ana,
Spent the weekend on this headboard. My uncle provided some extra muscle, tools (and most importantly) know-how. I finished it and it looks just as promised. We had a little trouble with mitering the crown so if you have a tutorial on that, that would be helpful. But other than that, it's perfection! I'm now hooked on woodworking and may spend all of my time on redoing the rest of my house! You're the best!
Amy G d (not verified)
Tue, 10/23/2012 - 13:09
King size please
I just found your site and love it! This headboard is exactly what I'd like, but I need the plans with measurements for a king sized bed. We're they ever created/posted?
Amy Good (not verified)
Tue, 10/23/2012 - 13:11
King size please
I just found your site and love it! This headboard is exactly what I'd like, but I need the plans with measurements for a king sized bed. We're they ever created/posted?
Tucker (not verified)
Mon, 12/03/2012 - 16:47
King size
Do you have the measurements for a king size in the headboard bed? If so I love to be able to make this bed.
Thank you!
Gloria (not verified)
Thu, 01/10/2013 - 12:04
King measurements
May I have measurements for king size headboard?
Lindsey (Newpo… (not verified)
Tue, 01/22/2013 - 18:29
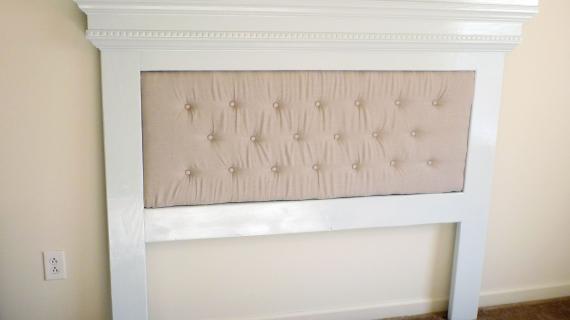
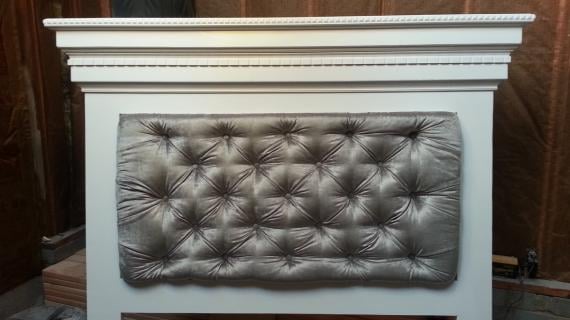
Love this headboard and added my one personal touch!
Love this headboard. We were able to start and finish ours in a three day weekend. However, we did make a few changes. We added about 6 inches in height and created an upholstered tufted headboard in the center. It turned out amazing and looks very luxurious! The tufting was a lot easier than you think! We did paint the bed white as shown and the fabric is a amazing silvery grey velvet.
http://i1088.photobucket.com/albums/i331/Lukeslove6/20130121_145835_zps…
http://i1088.photobucket.com/albums/i331/Lukeslove6/20130121_145845_zps…
daviskj
Wed, 07/17/2013 - 15:34
King size?
I see all the requests for King size, but no responses. Are these sent directly to those who request? If so, I would like to have the King size measurements as well. :)
Mommaofun
Wed, 02/26/2014 - 13:14
Does anyone have measurements
Does anyone have measurements for the king size bed?
Iamdankimball
Fri, 05/02/2014 - 10:47
King size?
Are there measurements for a king size?
bhakeman
Mon, 05/19/2014 - 20:48
Great project
Thanks for posting these plans. I modified the design with a slightly larger insert area and shortened the overall height to 54". I plan on building the mini-farmhouse bedside tables as nightstands to go with the headboard.
As the headboard is coming together, the weight of the headboard makes me wonder just how am I going to attach this to the bed frame? Should I mount it directly to the wall, or are the 2x6's strong enough to drill through and mount directly to the metal bedframe rails?
Mrshalbrook
Tue, 03/22/2016 - 15:06
Would like to make for king bed... Please!
Is there any way to get this plan for a king bed! Would love to make this!
Thanks.
Nguyenxduc
Mon, 06/27/2016 - 23:05
King size plan
Hi
I love this headboard design! Can someone send me plan for a king size please?
Thanks
AlyssaW
Mon, 01/30/2017 - 20:24
King sized headboard
This headboard is so beautiful! Were king sized instructions ever created? I imagine I could figure it out, but I am new to this DIY stuff and it makes me a bit nervous to stray from the plans! Thanks!
ehrobson13
Thu, 01/11/2018 - 10:46
This was a blast to build!!!
The instructions were well written, pictures were great and although we made a few design changes (slightly different moulding and went for the "mission" look, instead of upholstered look), it was easy to do an turned out BEAUTIFULLY. I checked the Pottery Barn website and even on sale, the similar king-sized headboard would have been over $800 with shipping. I built this for less than $100 (gotta love Home Depot coupons!)
lydiamatt
Tue, 02/25/2020 - 16:54
King size!!!
Hello fellow builders! We tackled this headboard designed and made it Craftsman Style...aka no trim. And I redesigned it for a king size bed
I will get together my dimensions and repost here in a few days!
Enjoy
-matt
P.S. how do I add pictures on this comment??? Am I missing something? (Posting from my phone)
seitzkelly@hot…
Sun, 09/27/2020 - 13:17
Can I get the King Size…
Can I get the King Size Directions for this bed? Than you!!!!
Kelly
lydiamatt
Fri, 01/29/2021 - 13:37
https://www.ana-white.com…
https://www.ana-white.com/community-projects/mantel-moulding-headboard-…
seitzkelly@hot…
Sun, 09/27/2020 - 13:18
KING SIZE
I get the King Size Directions for this bed?
Thank you!
Kelly
lydiamatt
Mon, 01/04/2021 - 18:41
Kelly, What is an email…
Kelly,
What is an email address and I will send them to you. I do not know how to post them on this thread.
Thanks
Matt
lydiamatt
Fri, 01/29/2021 - 13:36
https://www.ana-white.com…
https://www.ana-white.com/community-projects/mantel-moulding-headboard-…
lydiamatt
Tue, 01/12/2021 - 17:08
King Size Plans
Hello!
Anyone needing king-size plans please email me at [email protected]. Thanks
Matt