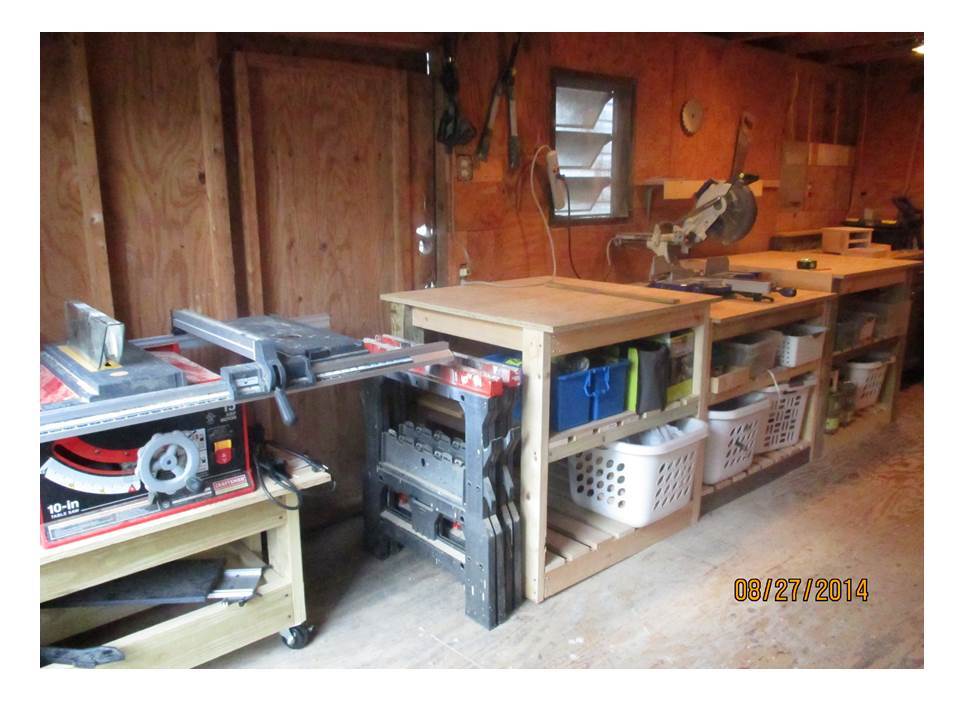
Built a whole wall of work benches for my garage! Instead of one giant bench this is made as 3 separate benches, plus a rolling bench for the table saw. They are a combination of elements from 3 plans - - the Sturdy Work Bench, the Workbench to Get the Job Done, and the Simple Rolling Bar Cart.
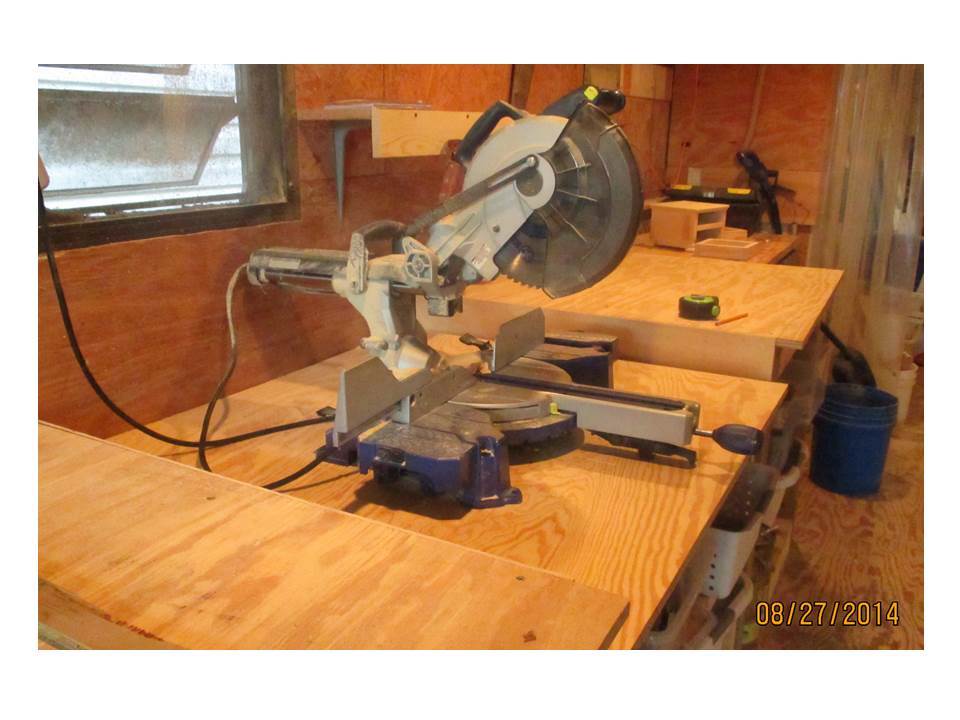
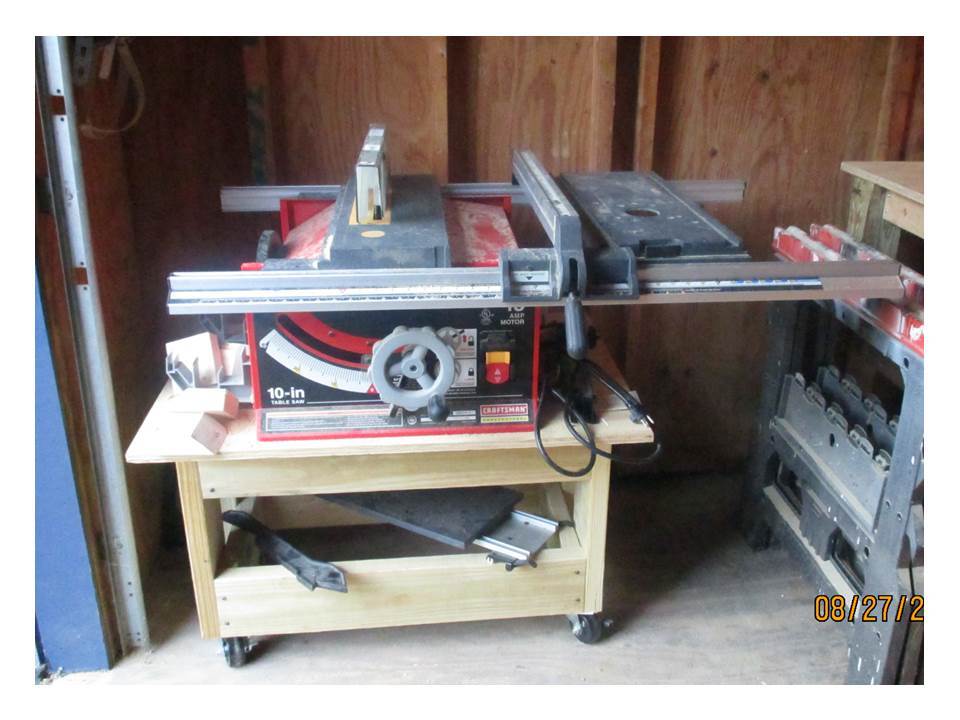
The heights allow for the long pieces cut with the miter saw to rest on the side tables, and when using the table saw (it’s on wheels) the tables can catch the pieces as they push off from the back of the table saw. The bench top surfaces are at 36 ½” tall, which is the height of the “deck” of the table saw, and the miter saw table is 3 ½” shorter. The side table widths are sized to fit the wood on hand (one at 36” and one at 40”), and the center lower one is 40” wide to allow plenty of elbow room for cutting miters on the sliding miter saw. The table tops are 36” deep, which allows plenty of working room and space for the sliding miter saw. The table tops overhang 2” on the front and back.
The leg assemblies are made from scrap and left over wood from multiple projects we’ve done over the last couple of years, which includes regular and treated lumber (1x, 2x, and 4x4 pieces, and even some reclaimed 5/4 decking boards ripped down). The legs are a mixture of 2x4’s and 4x4 posts. The only lumber that wasn’t already on hand was some more 1x4’s for the shelf slats and the plywood for the tops. Since this is a work bench, the finish will remain au naturale. It does need some additional sanding on the sharp/pointy edges on the table tops though.
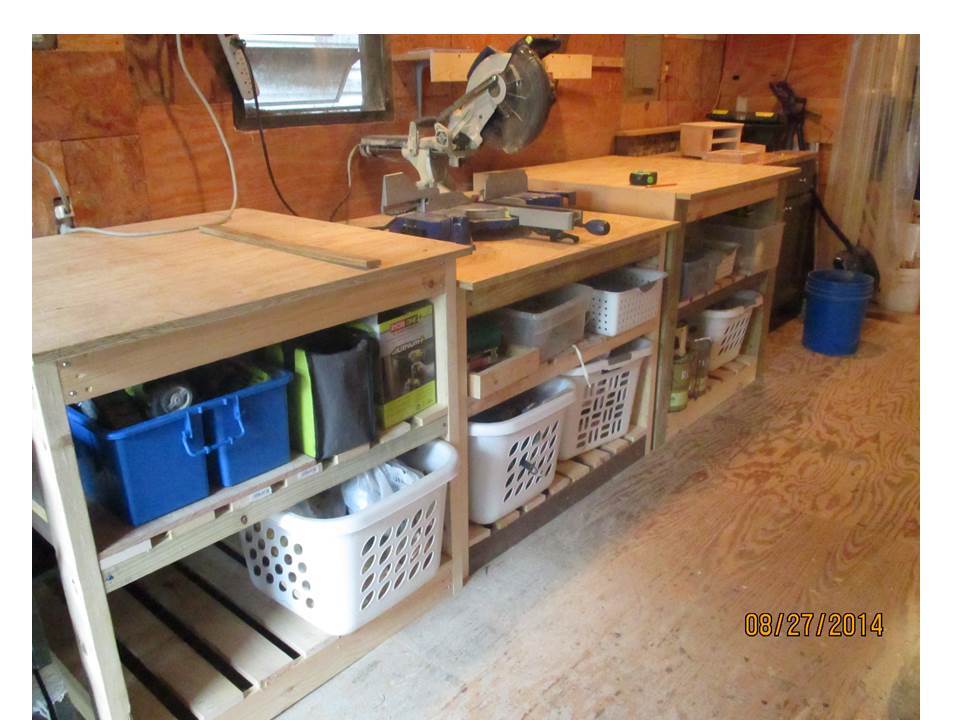
The blue caddy at the end of the left shelf holds my newest power tools – Ryobi One Plus 18V Airstrike nailer and compact drill/driver, with extra batteries. Woot!! Those came in really handy on this build!
For now the shelves have open bins and baskets, but the plan is to get closed (clear) bins with lids for all the things on the shelves, to protect everything from the sawdust.
The shelves are slatted so they wouldn’t gather such big piles of sawdust since the tables are open. I can just vacuum or use the blower at the bottom to remove the sawdust that falls through.
The table saw bench was an afternoon project, and the 3 benches took several hours spread out over 3 weekends. I'm delighted with how these turned out, and can't wait to use them for more projects!

Comments
HD
Thu, 08/28/2014 - 11:35
I love when people share their workshops
If you go to lumberjocks.com or any woodworker website, you can find shop tours by the hundreds. Of course, most of these shops are used by really dedicated amateur or professional woodworkers. It's been great to see inside the shops of "average jolene" woodworkers like me.
I have a garage that can maybe accommodate a shovel or a rake (but not both) so this workshop layout wouldn't work for me. BUT it's a great use of some of the designs on Ana's website and would be excellent for a double car garage or a "garage and a half" layout.
JoanneS
Thu, 08/28/2014 - 13:26
Thanks HD!
Thanks HD! Our garage quickly morphed right into a workshop shortly after we moved into our house. It's a single car width. Since we don't park vehicles in there, we use the whole front of it as a workshop. It started out with old tables and repurposed furniture pieces from the house as our workstations. My DIY dream would be to have the folks from that show "Garage Mahal" come over and do an awesome climate controlled space with a mega dust collection system, *sigh* :)
MrBroctoon
Thu, 12/27/2018 - 14:52
Well Done!
This great! I'm going to try to replicate 3 of those pieces. Thanks for the inspiration - awesome!