
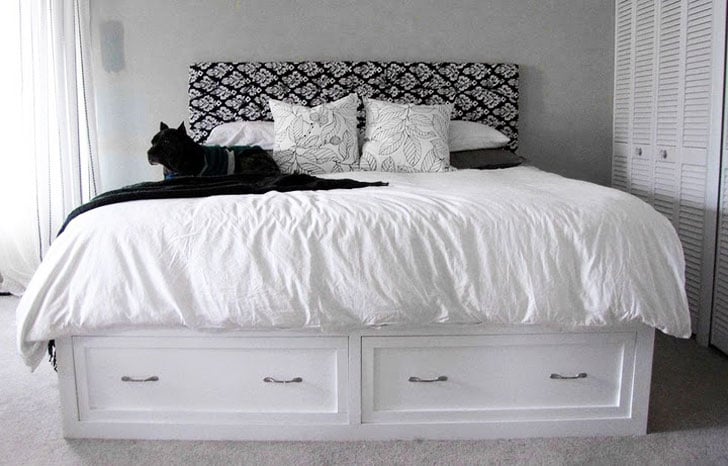

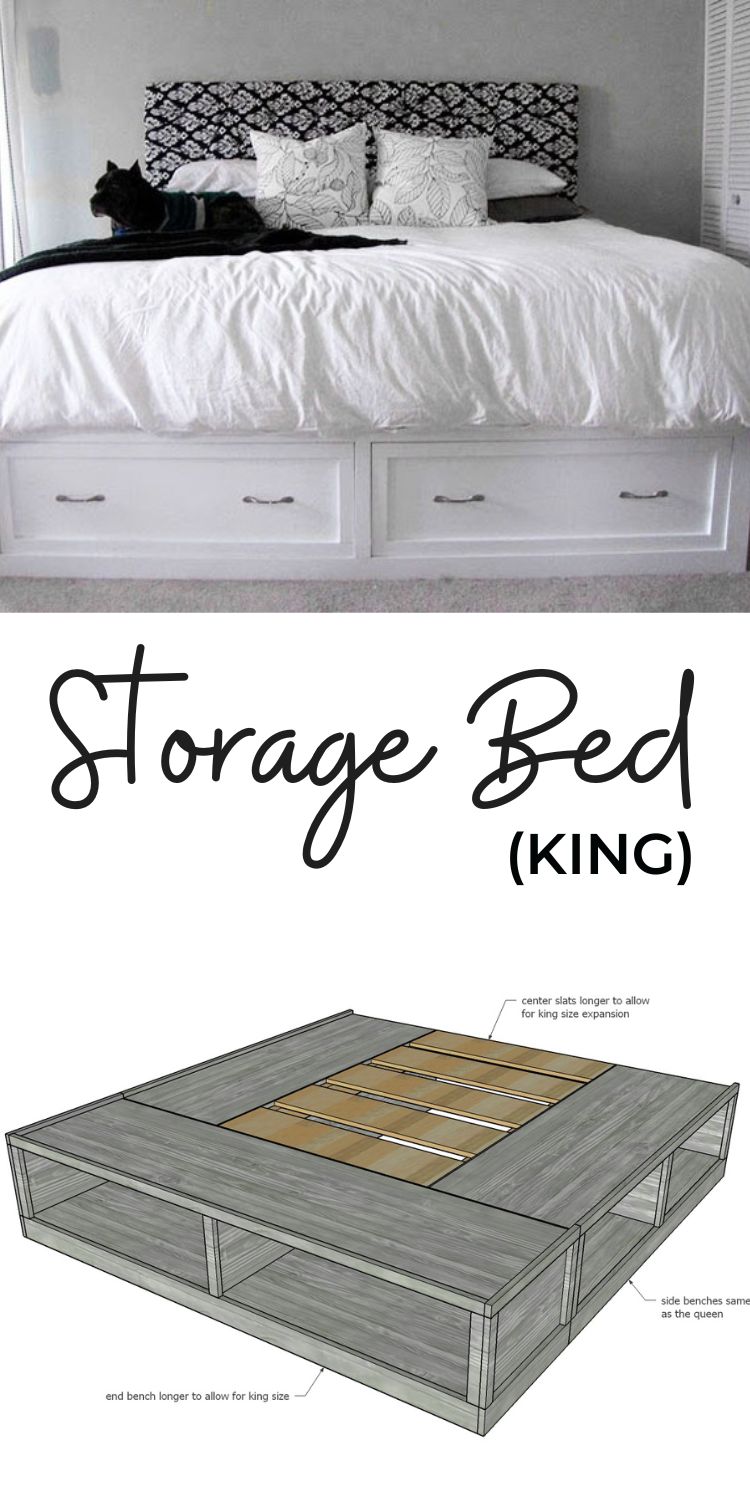
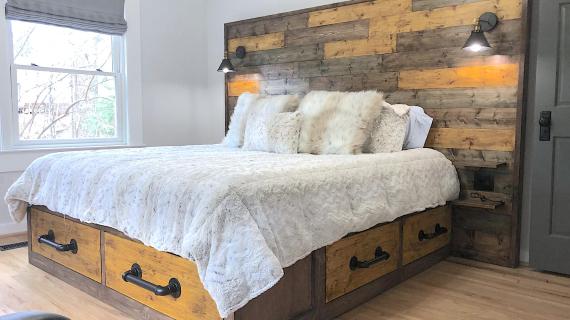
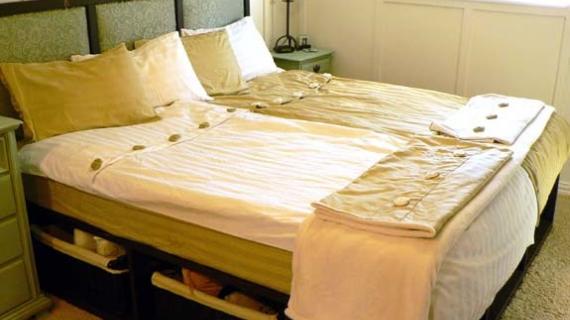
If you can build a bench, you can build this storage bed. It's simply three benches! Optional drawers can add functionality. Features six oversized cubbies, no box spring is required. Our step by step plans are easy to follow and include a full shopping list and cut list.
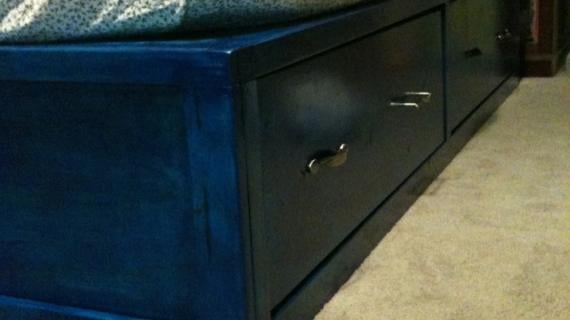
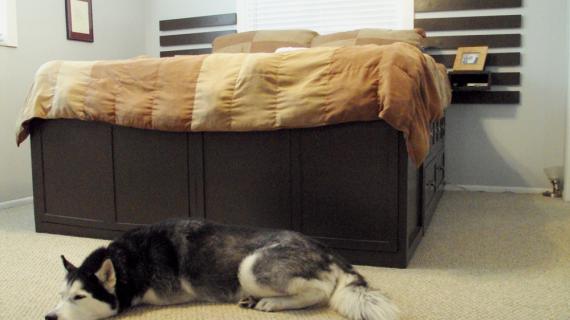
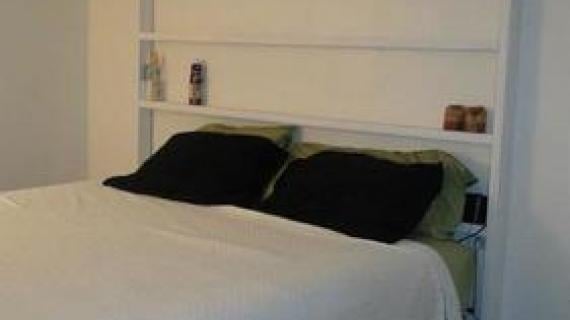
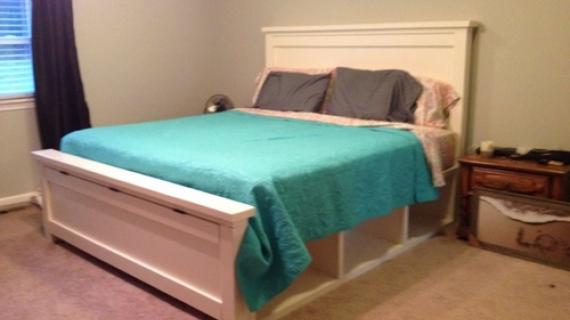
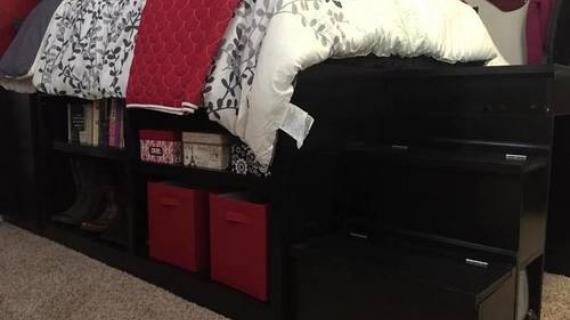
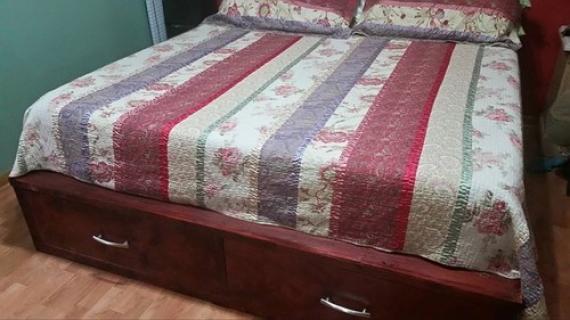
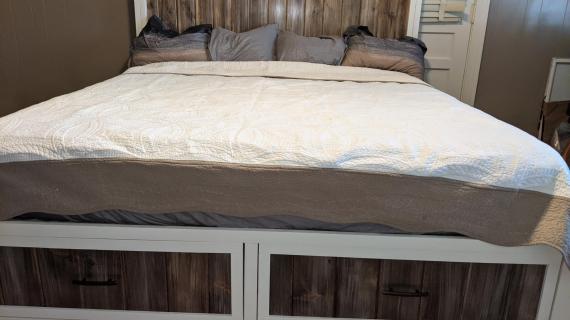
Reader submitted photo by Twenty Six 2 Life
Pin For Later!

Preparation
- 2 - sheets of 3/4" thick cabinet grade plywood, you can also use MDF or AC plywood for painted finishes
- 1 - 4x8 sheet of 1/4" thick plywood
- 5 - 1x2 @ 8 feet long
- 3 - 1x4 @ 8 feet long
*For a stained finish, cabinet grade plywood is recommended. For a painted finish you can use MDF (not fun to work with but inexpensive) or AC Plywood (will need more sanding but also less expensive)
OPTIONAL DRAWERS SHOPPING LIST
- 3 - 1x4 @ 8 feet long
- 6 - 1x6 @ 8 feet long
- 1 - sheet of 1/4" thick plywood
- 6 - 18" drawer slides
- 2 - 1x12 @ 8 feet long - cut two drawer shorter and one longer drawer face from each board to fit everything on the boards
SIDE BENCHES (BUILD 2 - Follow Queen Plans)
- 2 - 3/4" plywood @ 19-3/4" x 60"
- 6 - 3/4" plywood @ 19-3/4" x 14-3/4"
- 4 - 3/4" plywood @ 19-3/4" x 28-7/8"
- 2 - 1/4" plywood @ 15-1/2" x 60"
- 2 - 1x2 @ 60"
- 2 - 1x4 @ 60"
- 9 - 1x2 @ 11-1/4"
- 2 - 1x4 @ 60" - back cleats
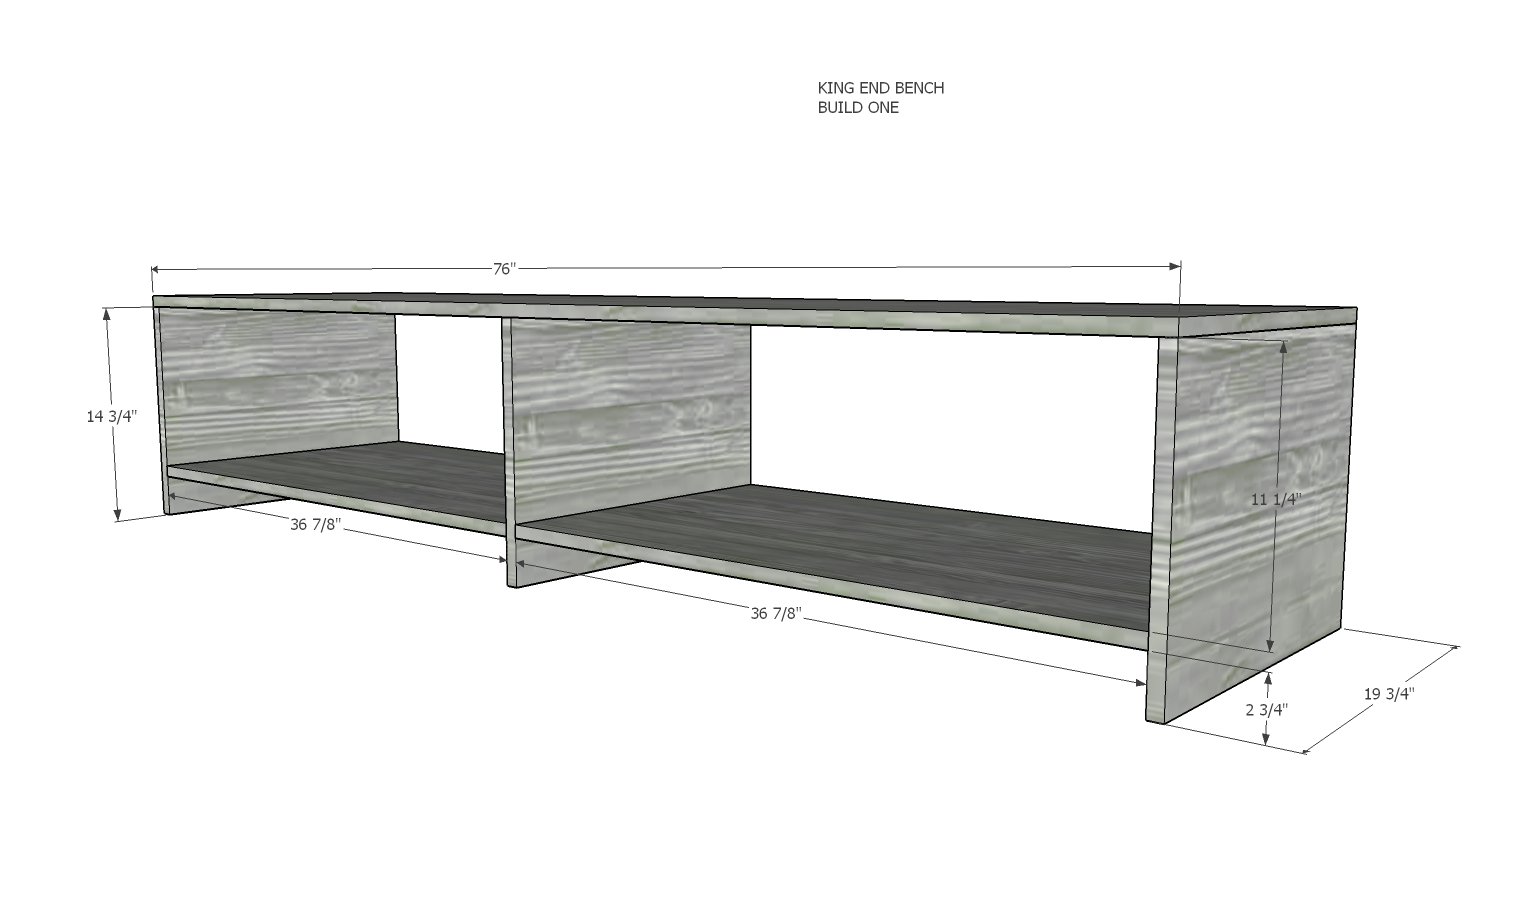
END BENCH (BUILD 1)
- 1 - 3/4" plywood @ 19-3/4" x 76"
- 3 - 3/4" plywood @ 19-3/4" x 14-3/4"
- 2 - 3/4" plywood @ 19-3/4" x 36-7/8"
- 1 - 1/4" plywood @ 15-1/2" x 76"
- 1 - 1x2 @ 76"
- 3 - 1x2 @ 11-1/4"
- 1 - 1x4 @ 76"
- 2 - 1x2 @ 20-3/4"
- 2 - 1x4 @ 20-3/4"
- 4 - 1x2 @ 11-1/4"
OPTIONAL DRAWERS FOR KING END BENCH - measure and cut drawers to fit openings and drawer slides
- 4 - 1x4 @ 18"
- 4 - 1x6 @ 18"
- 4 - 1x6 @ 32-7/8"
- 2 - 1/4" plywood @ 34-3/8" x 18"
- 2 - 1x12 @ ~35-1/2"
OPTIONAL DRAWERS FOR QUEEN SIDE BENCHES - measure and cut to fit openings and drawer slides
- 8 - 1x4 @ 18"
- 8 - 1x6 @ 18"
- 8 - 1x6 @ 24-7/8"
- 4 - 1/4" plywood @ 36-3/8" x 18"
For three sheets of 3/4" plywood:
- Rip lengthwise into 6 strips, 8 feet long by 19-3/4" wide
- From these strips, first cut the 60" long pieces
- From scraps, cut remaining pieces
- There will be three scraps, 8 feet long by about 7-1/2" wide. Save this scrap piece and use as the cleat at the back of the side benches
For the 1/4" plywood
- Rip plywood into strips, 8 feet long x 15-1/2" wide
- From these strips, cut the backs for the three benches
For the trim and face frame pieces, a compound miter saw is recommended for nice cuts.


Instructions
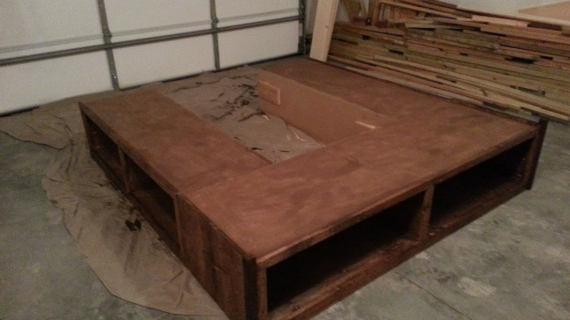
Step 1

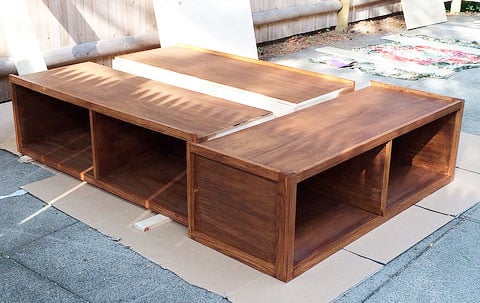
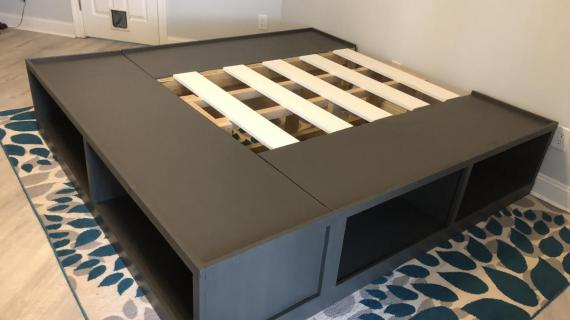
This bed is made up of three benches.
The two side benches are identical to the queen bed. Follow the instructions in the queen bed to build two side benches. Add the cleats for the mattress slats to the backs of the side benches.
The end bench for the king only differs in overall length from the queen. The steps are listed below for your convenience.
Step 2
Build the end bench with 3/4" pocket holes and 1-1/4" pocket hole screws. Three screws per joint is sufficient.
Step 3
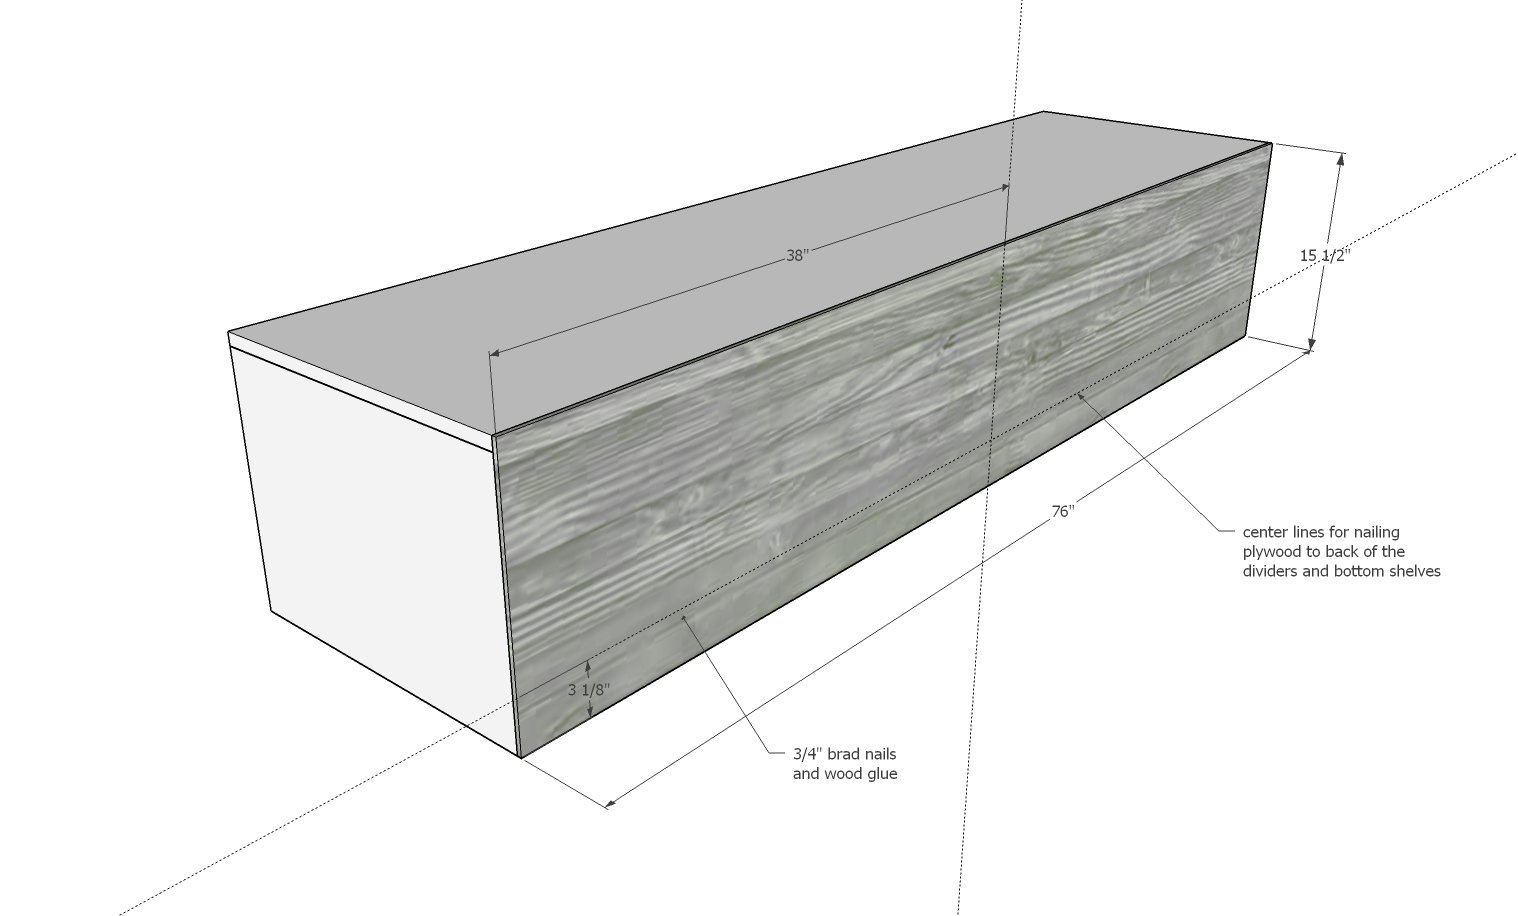
Attach back with 3/4" brad nails and glue.
Step 4
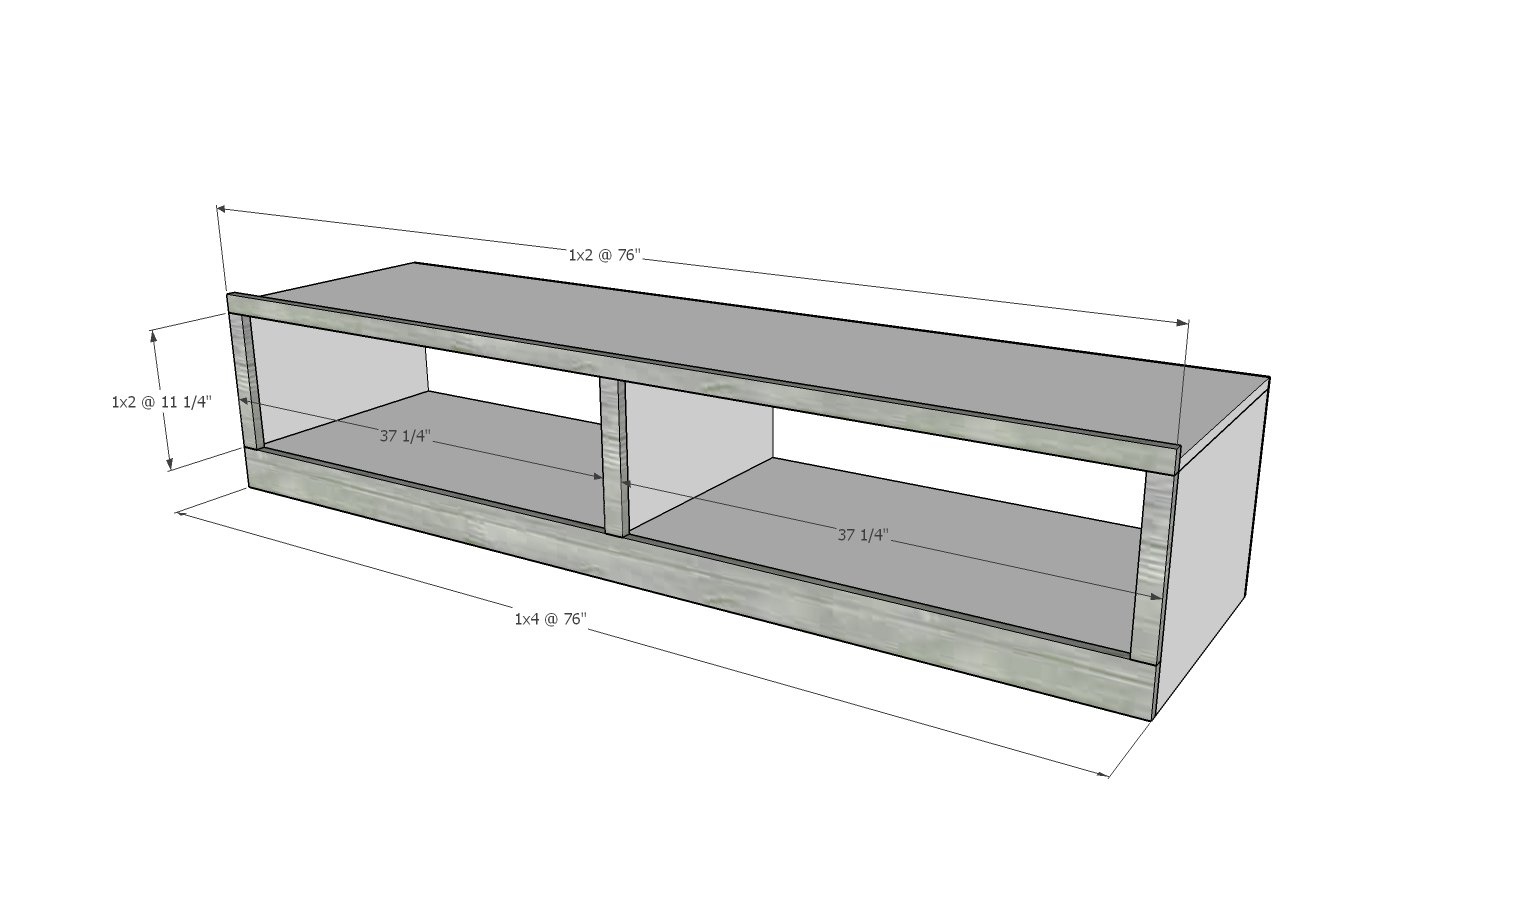
Build the face frame first with 3/4" pocket holes and 1-1/4" pocket hole screws.
Nail completed face frame to front of bench with 1-1/4" brad nails.
Step 5
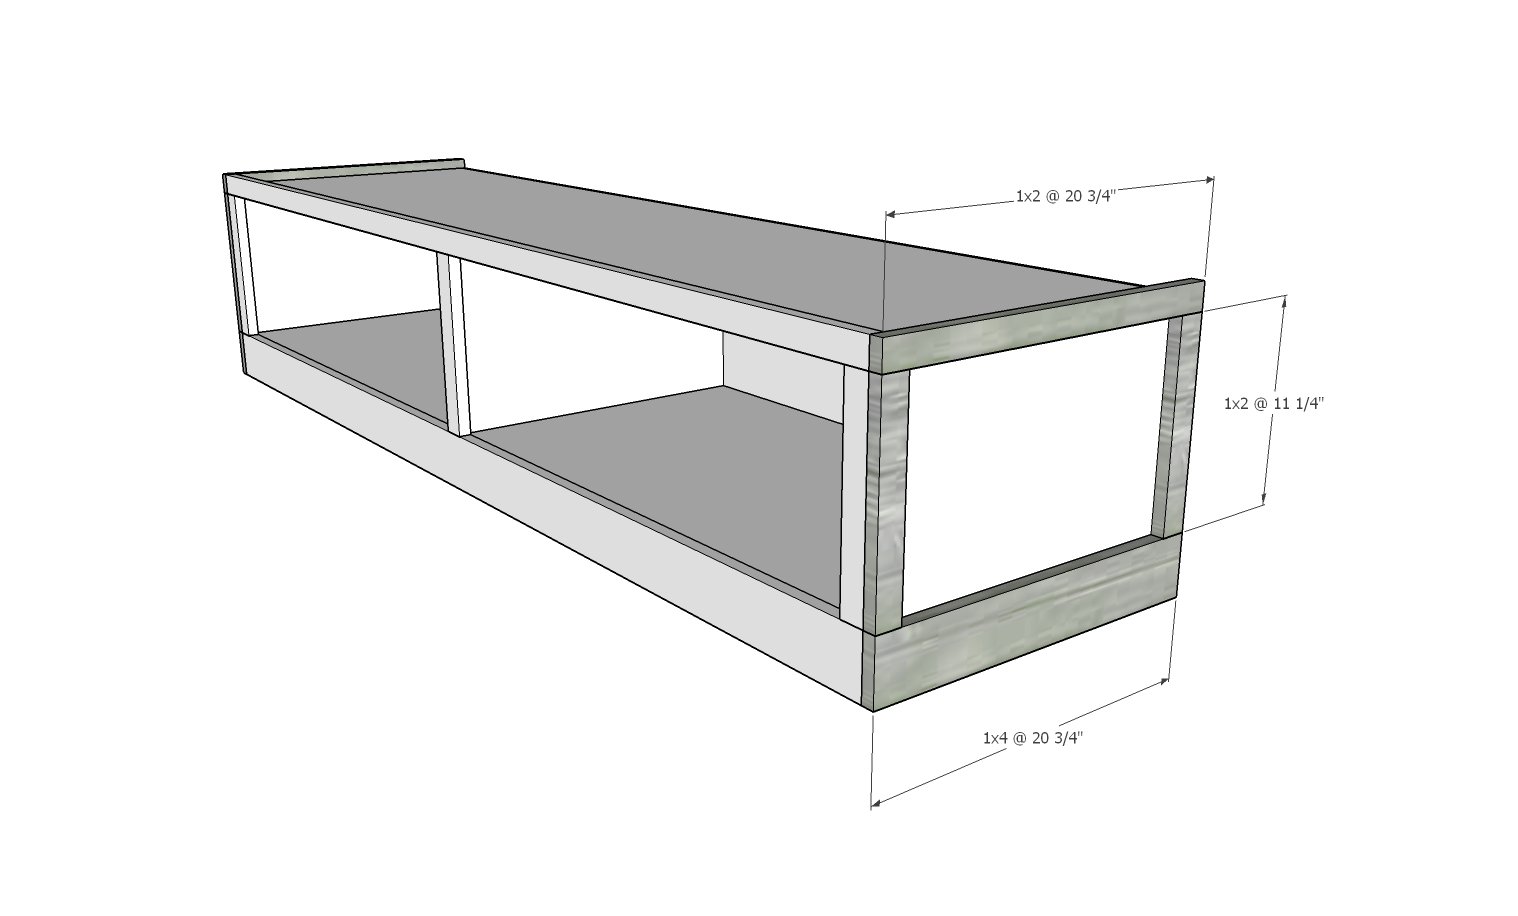
Build the end bench trim face frame first with 3/4" pocket holes and 1-1/4" pocket hole screws.
Attach with 1-1/4" brad nails to sides of end bench.
Step 6

Assemble the three benches in the room. You can screw benches together if necessary.
Cut scrap plywood pieces to fit in cavity and screw to slats on backs of side benches.
Step 7
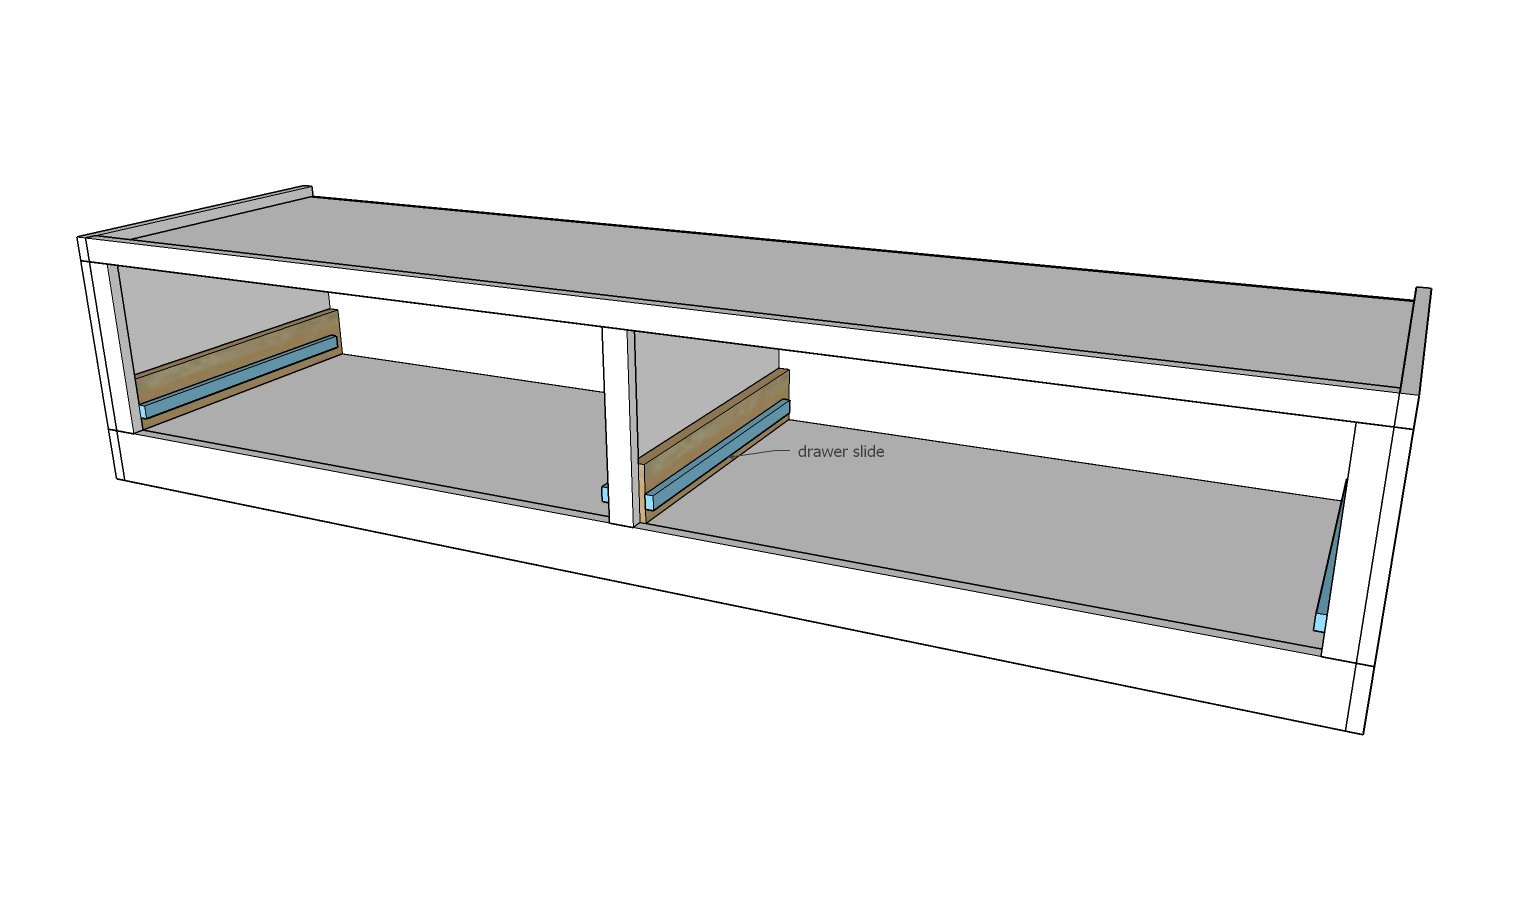
OPTIONAL DRAWERS:
Drawers are optional.
Draw a line on 1x4s, 1" up from bottom edge of 1x4.
Attach drawer slides to the 1x4, with front edge of drawer slide cabinet member flush with front edge of 1x4.
The holes in the center of the drawer slide should line up with your pencil mark, 1" up from bottom edge of 1x4 - so you know your slides are being installed level.
Remember that the opposing drawer slide needs to be installed in mirror.
Set the 1x4s inside the cubbies and nail to the sides of the cubbies with 1-1/4" brad nails. The front edge should be lined up with the front edge of your plywood carcasses.
Step 8
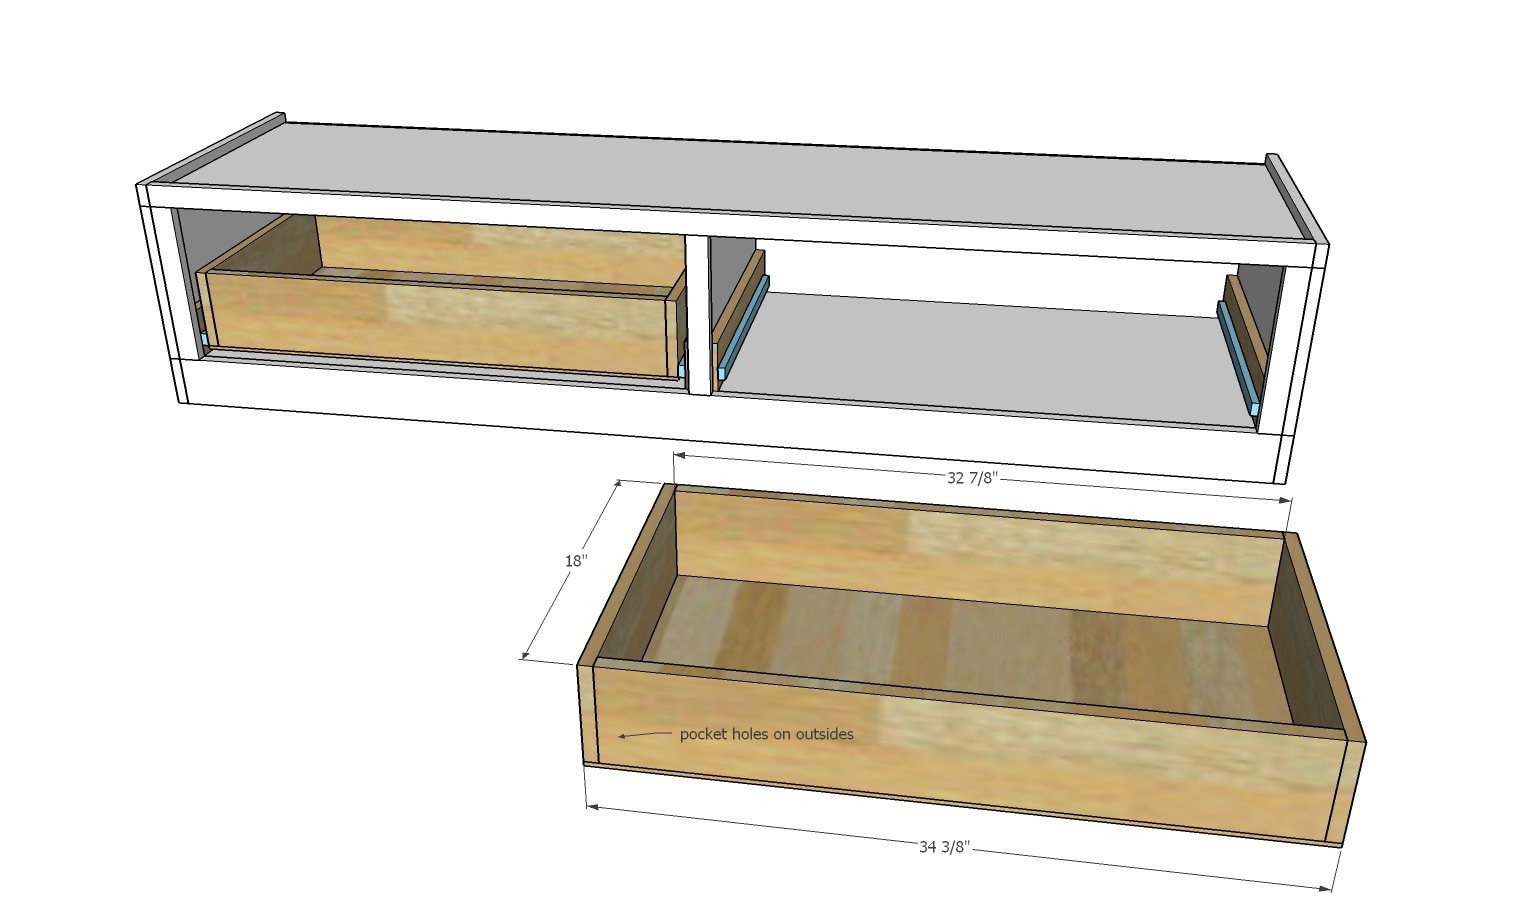
Build drawer boxes to fit drawer slide width. Measure the distance between the 1x4s, subtract the drawer slide clearances (usually 1" for 1/2" on each drawer slide) and build drawers to this size.
If your opening is true - 35-3/8" - AND your drawer slides require 1/2" clearance (1" overall) AND your drawer box material is 3/4" thick, you can follow the dimensions shown.
Step 9
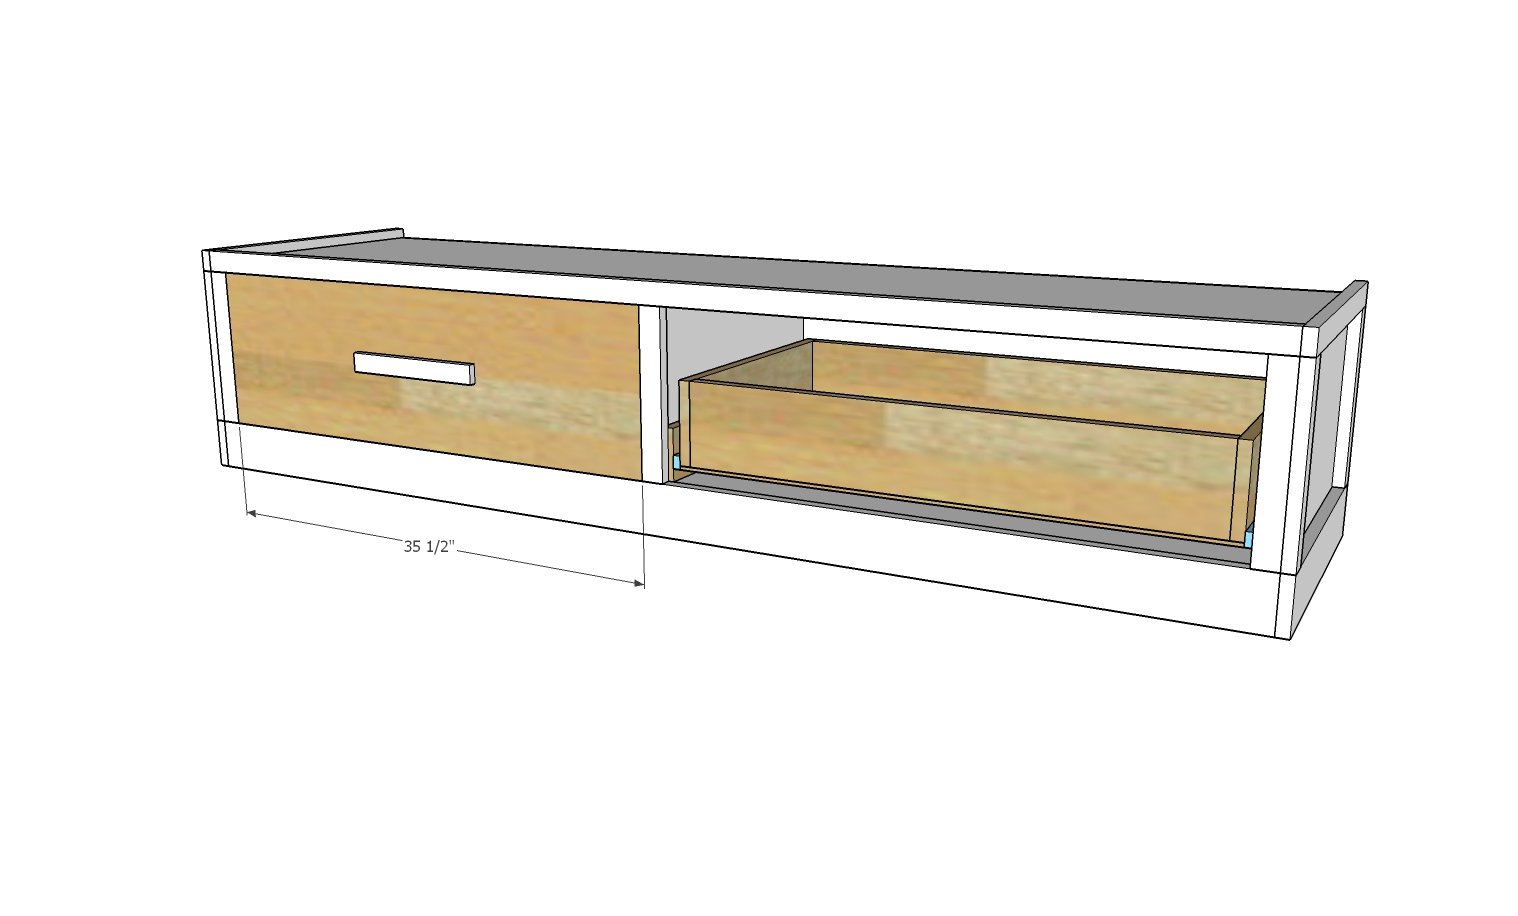
Install drawers into the slides.
Cut 1x12 faces and adjust to fit. You may need to sand down edges for a perfect fit, or cut drawer faces down with a table saw. There should be an even gap around all edges, about 1/8" on all sides.


Comments
Darlene - Our … (not verified)
Mon, 01/04/2010 - 12:37
If you know of where to buy
If you know of where to buy the baskets that would fit the spaces in the queen size bed...please let me know.
cottagewish (not verified)
Mon, 01/04/2010 - 17:26
So very excited to have found
So very excited to have found your site. You ROCK! I just spent the last couple years installing all new trim in my home and now am ready to tackle more...can't wait to hone in on a project and mirror your plans.
ScrappinAway (not verified)
Fri, 01/08/2010 - 05:43
I am sooo excited to try
I am sooo excited to try this, I have been wanting new bedroom furniture but didn't think I could afford what I wanted but this looks like a great solution!!!
Wow, that was a really long sentence, lol!
Celina (not verified)
Sat, 01/09/2010 - 14:43
I have wanted this bed for so
I have wanted this bed for so long and couldn't bring myself to splurge. I am dying to get started on this project! Love,Love,Love your site!
Jeanne (not verified)
Sat, 01/16/2010 - 02:38
I just discovered your blog
I just discovered your blog and am doing the happy dance!!
I have wanted a copy of the stratton bed for 2-3 years and hubby refuses to help me build anything without a detailed set of plans. However, After reviewing your plans it looks like you have plans for every size except a full size bed. We have a full size bed in our guest room and don't have any room for anything larger. Can you tell me what the best way to modify one of your sets of plans for a full sized bed would be? Or send a link to point me in the right direction if you have already posted it and I have missed it.
Thank you so much for posting the plans that you work on free for us to use on your blog!
Abone
Thu, 08/20/2020 - 23:06
This ab old bed questions…
This ab old bed questions but hopefully just Google bed frame size then any diy adjust measurement to fit
Ana White (not verified)
Sat, 01/16/2010 - 20:23
Hi Jeanne, I'm so happy you
Hi Jeanne, I'm so happy you stopped by! BUT I'm so sorry to let you know that there most likely will not be plans posted for the full size Stratton anytime soon. This is because the differenc in mattress sizes is only 5" on the height and 6" on the width. Pottery Barn does not sell a full sized Stratton because of the similarity in size. They actually consider the queen a full/queen.
The easiest way to modify the plans for a full size would be to make the daybed version, but wider. If you made the Daybed version you would just need to make each of the benches 15" wider.
Melissa Padgett (not verified)
Tue, 01/19/2010 - 18:03
My husband and I are getting
My husband and I are getting ready to build this bed. I'm contemplating doing drawers or baskets. I was reading through the plans for the building the drawers(flipping between these plans and the plans for the drawers for the queen size bed) - You use 1x10s in the construction of each but in the queen size bed drawer plans you say 1x10s measure 9.5 inches wide - but in the plans to make the drawers for the king size bed your measurement for the 1x10s are 10.5 inches wide...I might be reading the plans wrong...can you tell me which is correct for the king bed drawers?
Hope this makes sense! And we absolutely LOVE your blog. I've shared it with everyone that will listen :) :)
Ana White (not verified)
Tue, 01/19/2010 - 20:13
DRAWER SIDES are made of
DRAWER SIDES are made of 1x10s that measure 9 1/2" high, not 10 1/2" high as shown in the diagrams.
The king drawers are the same as the queen, just a little wider to accomodated the longer bench on the bottom.
Sorry for the typo in the diagrams - too many late nights!
BigKahunaFSU
Sun, 05/01/2016 - 17:49
Question
Hey, for your cut list. D & E for the king size end bench correct?
Retorical i guess. Shouldn't it be
D) 1 - 3/4" Plywood @ 22" x 74 1/2"
E) 1 - 3/4" Plywood @22" x 12 1/2"
I'm making my bed and had to fix those.
Callie (not verified)
Tue, 01/26/2010 - 12:01
I love your Blog! Amazing
I love your Blog! Amazing notes. I was looking at the picture for the stratton bed and there are some hutches to the left and right of the bed. Do you have plans for those hutches? I think they are awesome--I would love to use them in my place :)!
Thanks!
Sophia Almejo (not verified)
Mon, 02/15/2010 - 17:07
oh and I found the baskets
oh and I found the baskets for a really good deal at pier ones, but the right size, like the ones in the pics are at bed bath and beyond, cheaper at MICHAELS craft store.
Sophia Almejo (not verified)
Mon, 02/15/2010 - 17:08
Ok, so i built this bed, and
Ok, so i built this bed, and i will post pics soon, as for the baskets michael has some and so does bed, bath, and beyond.
Jenni (not verified)
Mon, 03/01/2010 - 16:31
I have already tackled my
I have already tackled my first project and would like to add this down the line but don't know if it will work with our cal king mattress.
I was reading on Potterybarn's site and they have thier king listed as king/calking with the mesurements almost the same as yours. I am most concerned about the length as the mattress is 84inches long and the boxes are 84 1/4. I am sure you probobly don't have a cal king bed but do you think this would work for a cal king? Thanks.
Trisha (not verified)
Sun, 03/14/2010 - 16:51
We're working on this and
We're working on this and noticed a problem. The sides are showing 22 3/4" x 15" in the diagram where you attach the sides to the back and they should be 23 1/2" x 15".
Thanks!
Jewels1223 (not verified)
Sat, 03/20/2010 - 11:05
I just found your site and
I just found your site and LOVE it! I am looking forward to making this!!
My question is whether or not you've received any feedback on these about the bed staying in place? I was surprised to see that there wasn't a lip or anything to secure the bed...
Jeff P (not verified)
Wed, 04/28/2010 - 11:17
I can backup what Trisha
I can backup what Trisha said: The dimensions for the 2 side pieces of the footbench need to be 23 1/2 x 15.
Thanks
brinarae (not verified)
Tue, 05/04/2010 - 08:39
Do you by chance know of an
Do you by chance know of an easy way to modify the plans to include smaller drawers at the end, and build something like this?:
http://www.ultimatebed.com/
I just hate to waste the extra space under the bed :(
Joshua (not verified)
Sat, 05/29/2010 - 05:12
We also discovered the sides
We also discovered the sides of the foot bench need to be 23 1/2 inch.
"I cut it twice and it's STILL too short...."
Luckily my wife noticed it prior to actually cutting.
Emily (not verified)
Wed, 06/02/2010 - 18:53
Hi Ana!I would like to build
Hi Ana!
I would like to build this California king size (A Little bit longer). Where would I lengthen to adjust?
Thanks!
boettg33
Fri, 01/01/2016 - 20:35
I am getting ready to build
I am getting ready to build this bed as a California King, and I don't see a reply to this question.
Natalia (not verified)
Sat, 07/17/2010 - 08:28
RE: BASKETSDarlene and others
RE: BASKETS
Darlene and others re: baskets.....I came here from a blog where the writer made this bed and instead of baskets which would have cost more than the bed had, she used banker's boxes, and painted them. To see, look here: http://dollarstorecrafts.com/2010/07/2-storage-and-knock-off-wood-inter…
$2 Storage and… (not verified)
Wed, 09/15/2010 - 19:27
[...] like Pottery Barn and
[...] like Pottery Barn and West Elm. I discovered the site in February, and a week later, we built a king-sized storage bed! [...]
lizzieg (not verified)
Sun, 10/03/2010 - 05:38
We love this bed and are
We love this bed and are planning on building it, but we want to use our box spring with it (no place to store them) will the extra weight be an issue? Obviously, we realize the bed will be higher. Thanks!
Malinda meyer (not verified)
Thu, 12/16/2010 - 06:39
I want this exact bed but
I want this exact bed but with full size dimensions and drawer sizes any links out their that can help me?
Thanks,
Malinda
Stratton Bed W… (not verified)
Wed, 02/16/2011 - 03:01
[...] from Twenty-Six To Life
[...] from Twenty-Six To Life built this gorgeous bed from plans from the knock off plan girl herself Ana White. I love this design because I love under bed storage. After all, who couldn’t use a few more [...]
Hilary @ Katri… (not verified)
Mon, 03/14/2011 - 20:11
box spring?
What do you do with the box spring? Is it an optional part of the bed?
rgenzer
Tue, 03/22/2011 - 08:34
King or Cal King?
The finished length on this bed is 84 1/4 inches. A king mattress is only 80 inches long. Is that right? Or do I need to shorten the end box?
Sojojo
Mon, 04/04/2011 - 04:58
THESE DIMENSIONS WILL FIT ANY SIZE KING MATTRESS!
I've been reading all the posts and just wanted to let you ladies know - based on the dimensions of the finished bed it fits a regular (Eastern) King Mattress, the standard dimensions for which are 80" long x 76" wide. It will also fit a California King Mattress, the standard dimensions for which are 84" long x 72" wide. The bed as shown, says it fits a mattress up to 84" long and 78" wide. So no adjustments other than correcting the length from 22 3/4" to 23 1/2" long for the sides of the foot bench as stated earlier no matter what king size mattress. This also means the bed will leave you with a little lip either lengthwise for a regular king mattress or in the width for a California King, which I like. That lip will also come in handy should you use a box spring, which we will, because it makes the bed high. If you don't want a lip you should adjust accordingly- that's the glory of making your own bed. Remember the Pottery Barn Stratton bed is made to accommodate both King sizes, and as this bed is mirroring that design so will it. One last thing I'd like to mention is to keep in mind what kind of headboard, if any, you are adding. If you have a regular king mattress and want no lip at the end then creating or buying an upholstered headboard that the mattress sits up against and will push the mattress forward a little may solve your problem. If you have a California King mattress it might be best to add a headboard that attaches flat behind the head of the bed and doesn't push forward much at all or create an upholstered headboard that fits just above your mattress. These are just my suggestions. LOVE THIS BED!
Daniela D (not verified)
Mon, 04/25/2011 - 23:36
dimensions of the plywood sheets?
Plywood sheets come in lots of different dimensions, what are the dimensions of the ones noted in the shopping list? Can anybody help me with this?
Tsu Dho Nimh
Tue, 04/26/2011 - 06:51
Standard USA plywood sheets
Standard USA plywood sheets are 4ft x 8 ft
Moreysr312
Wed, 06/15/2011 - 07:45
Box spring?
do you use a box spring with these plans?
Jeff P (not verified)
Wed, 08/03/2011 - 15:38
Undermount Drawer SLides
Can anyone suggest some drawer slides to use?
Thanks.
In reply to Undermount Drawer SLides by Jeff P (not verified)
kendikat
Sat, 10/22/2011 - 23:24
Re: Undermount Drawer Slides
Jeff, any luck on figuring out the undermount drawer slides? I just spent far too many hours scouring the internet learning all about drawer slides (my head hurts! omg there is so much info and so many options and so many little idiosyncrasies amongst all the different ones...it was so confusing, so all I could do was read read read read more...and hope they weren't all SOOO expensive). What it seems to come down to is that all the hassle with this particular set of drawers comes from the trim on the front making the drawer so far from the side panels (so it's difficult to side-mount your slides) AND because the drawers are inset (aka flush with the frame, as opposed to an overlay, where the drawer face is on the outside of the frame). I narrowed it down to three undermount slides that were within my budget - one claimed it was for overlay drawers (mounts to the inside of the frame), one for inset drawers (was unclear what that mounted to), and the other for overlay drawer (but mounting to the side wall this time). I ended up just buying the frame-mounting slides for overlay drawers because it was a superrrr deal ($18 for 10 pairs, including S&H). I have no idea if they will work, but I can post back here if I find a way to do it. Otherwise, you could just fiddle with the design a bit to be able to use more common (and cheaper) drawer slides - i.e. make the drawers an overlay design instead of inset, and/or add some wood blocking inside the drawer box behind the face trim to have something to mount the slides to. I will have to play with it once I start building and see if I have any other suggestions :)
In reply to Re: Undermount Drawer Slides by kendikat
kendikat
Sat, 10/22/2011 - 23:59
You know what...after giving
You know what...after giving my mind a few minutes away from the computer to rest, it suddenly occurred to me... Most of the applications I was seeing undermount slides used in were for kitchen cabinets, where there is no bottom "floor" in the cabinet. So, the slides have to attach to *something* in the cabinet...thus the side-mount, face-mount, rear-mount brackets, etc that were out there. Now that I think of it, none of them mentioned how the application could possibly change if there were in fact a floor that you could mount the brackets to. So, I'm hoping that it's just as simple as that...the brackets I ordered will just be able to mount to the floor and I can be done with it and happy that I got a great deal :)
Also, you could probably get away with using some center-mount slides (which are technically also in the category of undermount). With drawers this big though, I would make sure to put at least a couple of them on there. And try to use metal and wood guides and slides where possible. Those crappy plastic guides are guaranteed to break with any normal usage of the drawers. (But hey, they're super cheap, so if you don't mind the work of repairing them every so often and are not afraid of your drawers getting dinged up a bit when they fall off the slide, then go for it!)
Anyway, like I said, I'll update once I actually get the slides I ordered and start actually building my drawer boxes :)
Guest (not verified)
Fri, 11/25/2011 - 12:55
Just Finished this project
Someone was asking about undercount drawer slides. I got mine from Rockler Woodworking. Low-Tec Hardwood sliders for about $11.00 each. But I also put support on the bottom of the drawer openings so the drawers wouldn't tilt from side to side when open. They work pretty well and were super easy to mount.
Here's my version of the bed.
http://www.schooloffishswimandscuba.com/deanstuff/Sbed.jpg
http://www.schooloffishswimandscuba.com/deanstuff/Sbed2.jpg
Michelle McDonald (not verified)
Mon, 07/09/2012 - 20:53
your pics
thanks for sharing your pics..love your bed. would you mind sharing an approx cost of the project? i am wanting to get this started and would like to budget it out. I think it would be a great weekend project. thanks
Guest (not verified)
Thu, 12/15/2011 - 02:44
Is there anyway of getting a
Is there anyway of getting a double bed version?
Thanks
Guest (not verified)
Sat, 01/07/2012 - 15:14
911 Storage Bed Advice!
I am about to embark on making this KING bed! I have some spare time on my hands before my baby is due in April. I just need some conformation on a couple things I'm confused about. I see this it has been addressed in an earlier blog but I want to dbl check. This is my first time building anything and I have little help. My husband thinks I cant nor shouldn't do this but Im out to set him straight;)
1. Will the adjustment measurement of 23 1/ 2 for the foot/end bench(I assume these are the same) be reflected in the measurement of B) 4 - 3/4" Plywood @ 20" x 15 of the first cut list,("Cutting List for 2 Benches Same as Queen") or does this measurement stay as is?
2. As mentioned above the king drawer measurement is the same as the queen drawer measurements.
So am I to cut the width of the king drawers to the size of the box measurement once they are created? Is that why there is no precise measurement?
Im confused about this bc in an earlier blog its stated they are the same measurements of the queen but need to be adjusted a little wider for the King meaning this can only be determined by me for my bed once I'm at that point.
I hope this isnt too wordy, Ive tried to be as clear and concise about my questions as possible.
Thank you very much for any input you have on these issues and any warnings you wish to share.
kristen
Sat, 01/07/2012 - 20:44
Well...
I am the last person to discourage someone from taking on a project, but if you have never built anything before, this might not be the best plan to start with. Any project with drawers must be pretty square to work properly and as a first time builder, that might be frustrating. Any chance you'd like to use baskets in the drawer openings instead? That would change the plan to more of a beginner project...
Best of luck whatever you decide to do!! Sorry I can't help more with your specific questions--I built this bed, but it was in a twin :)
stuck in el paso (not verified)
Thu, 01/12/2012 - 20:43
dimensions
Can you please please post dimensions for a cal king bed!!! I'm sooo happy that I found your site tonight! I'm flippin excited to share with everyone else too. So much to browse through.
Thanks again!
Guest (not verified)
Thu, 03/15/2012 - 07:42
protecting floors
I'm about to embark on this project this weekend, but we have wood floors. I'm worried this is going to damage the floors. Any ideas on how/what to put non-damaging footing on this?
Jaclyn (not verified)
Thu, 04/26/2012 - 11:21
Box Springs??
I see a few people have asked about the Box Springs, has any one attempted it? My bed definitely requires them, and it was EXPENSIVE! I have a King, any suggestions??
I love this site!
Cara Mulfinger
Thu, 04/26/2012 - 16:09
Stratton-Mason King Bed Plans
Can I please have the plans for this bed emailed to me? Minus the headboard? Im having trouble finding the material list and directions. We would love to make this bed!
[email protected]
Thanks!
Kristin B (not verified)
Sat, 07/28/2012 - 23:27
figuring out how to cut the plywood
I'm struggling to figure out how to optimize my cuts per plywood piece. How do you know which pieces to cut from which plywood board? I'm about to get some graph paper and start cutting that to make little models before I shred my plywood. There are no websites or apps that help you figure this out either. I found a few expensive software programs, but I'm not willing to shell out the dough for something I won't use much. Am I missing something? Should this be easier than I'm making it?
Palma van Westrhenen (not verified)
Sun, 07/29/2012 - 01:00
Software
This is freeware and works perfect .. ;-)
http://delphiforfun.org/programs/cutlist.htm
Palma1904 (not verified)
Sun, 07/29/2012 - 01:06
Freeware
This is freeware and works great!!!
http://delphiforfun.org/programs/cutlist.htm
abrahamsen (not verified)
Fri, 01/11/2013 - 01:23
Storage beds
Living Storage manufactures best quality storage beds with drawers which provide enough storage spaces which can give your bedroom an elegant look.
Tosha (not verified)
Fri, 01/11/2013 - 15:48
Shelf for the end bench problem
The end bench says 19 1/4 x74 1/2 and the 191/4 part is way too short for the sides?? What did I do wrong??
Alicatunh (not verified)
Mon, 01/14/2013 - 13:20
Shelf for End of bench..
I also had the shelf for end of bench problem. The cut list has one at 19 1/4 x 74 1/2 but the diagram shows the shelf to be 22 3/4 x 74 1/2. I think the actual measurement should be 22 x 74 1/2 because the 3/4" plywood is on the back. So now my piece is 2 3/4" short. If I attach it at the front and have a 2 3/4" gap at the back, will that work?