
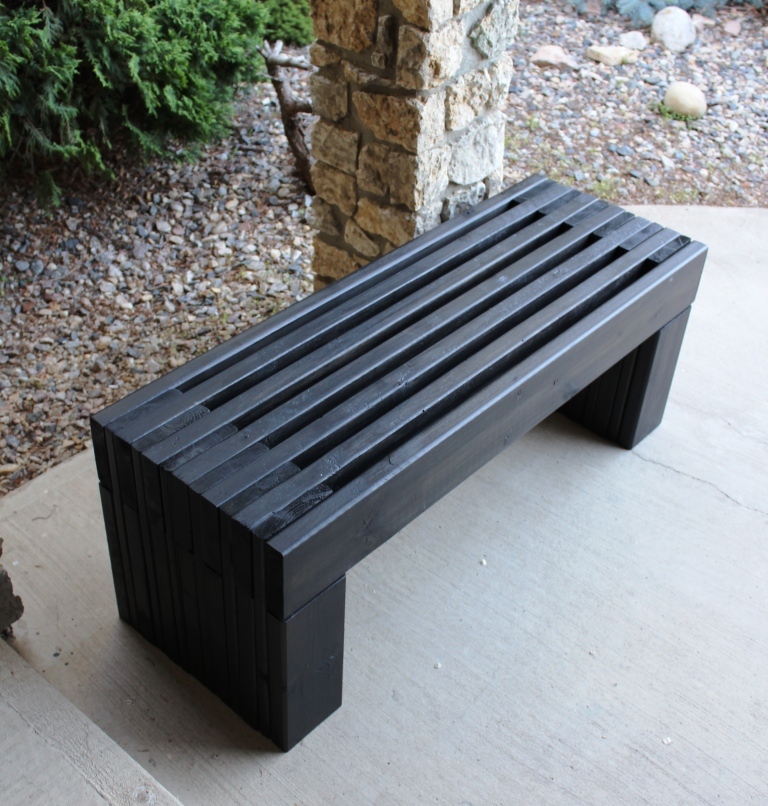

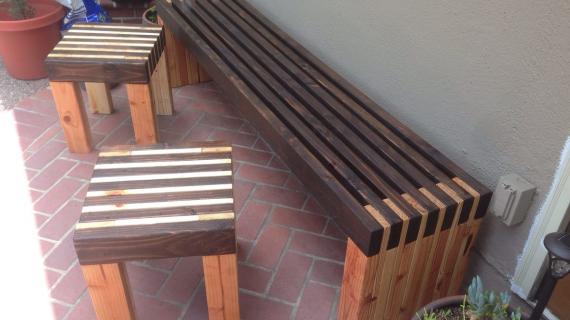
This easy to build bench makes a statement! We love how it drains water and is very sturdy. This is a beginner friendly project plan suitable for a new builder!
Free plans to build a modern slatted bench for your outdoor space include step by step diagrams and shopping lists.
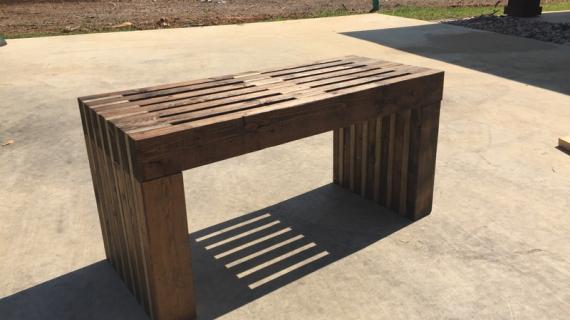
Reader submitted photo by CKAYE is modified in length
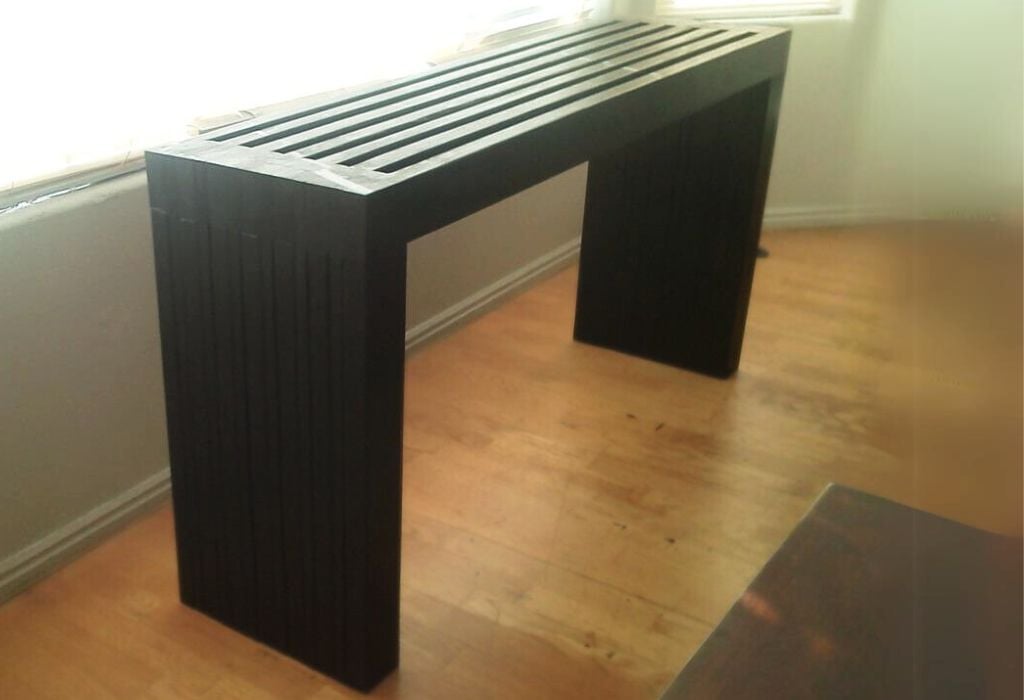
Matching Slat Top Console
We loved this project so much, we had to make the matching console table. Free plans for modern slat top console table are here.
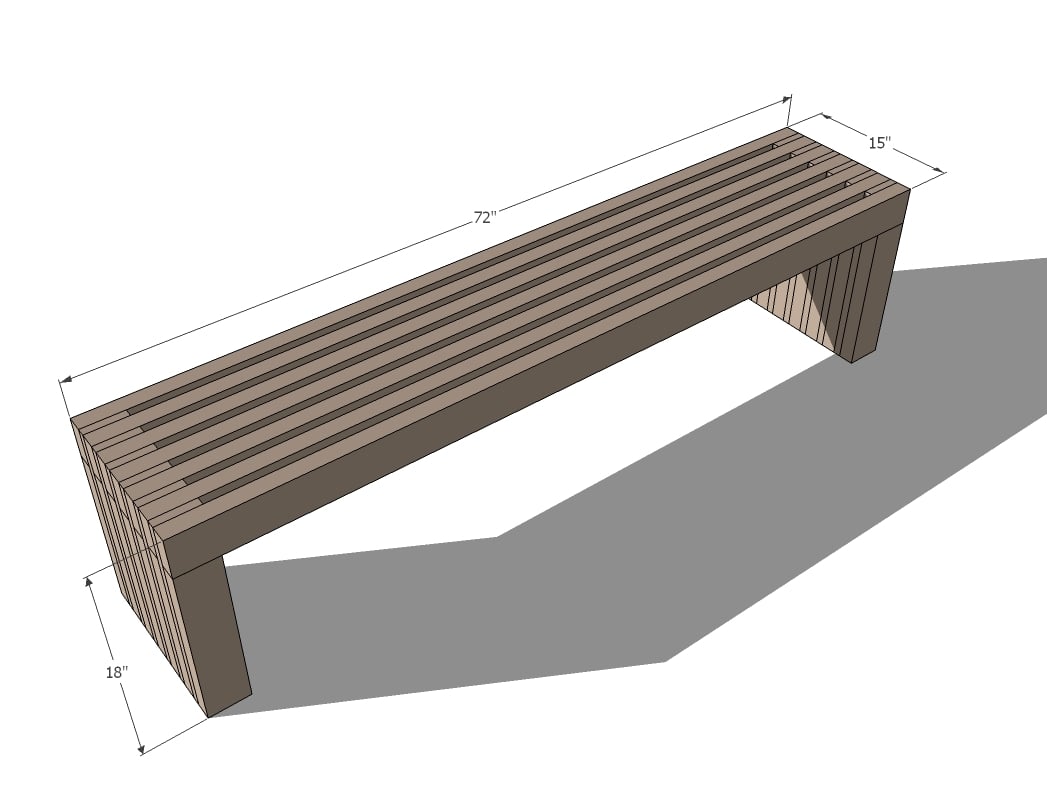
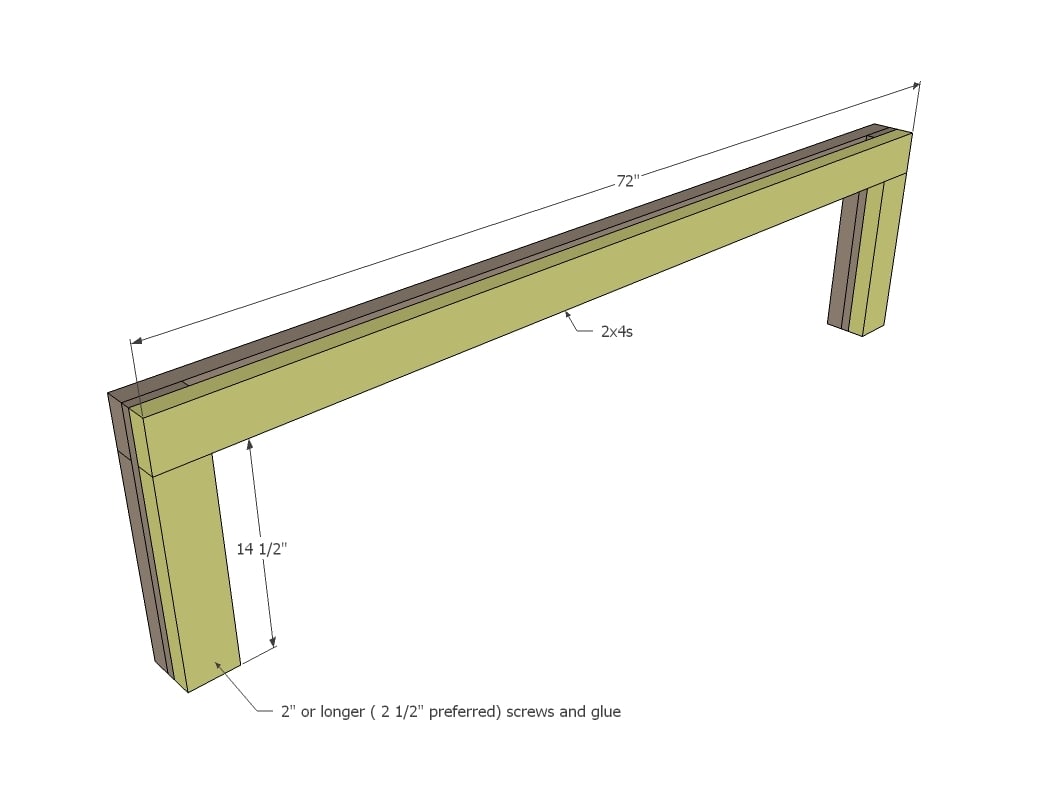
Free plans for Modern Slat Bench in 72" Length
The modern slat bench plans follow, note the plans are for a 72" length, but this can be altered shorter as done in the main photo.
Preparation
- 9 - 2x4 @ of feet long or stud length
- 3 - 1x4 @ 8 feet long
- 2" self tapping wood screws or finish nails
- wood glue
- Optional 1 1/4" and 2 1/2" pocket hole screws if desired
- 7 - 2x4 @ 72"
- 14 - 2x4 @ 14 1/2"
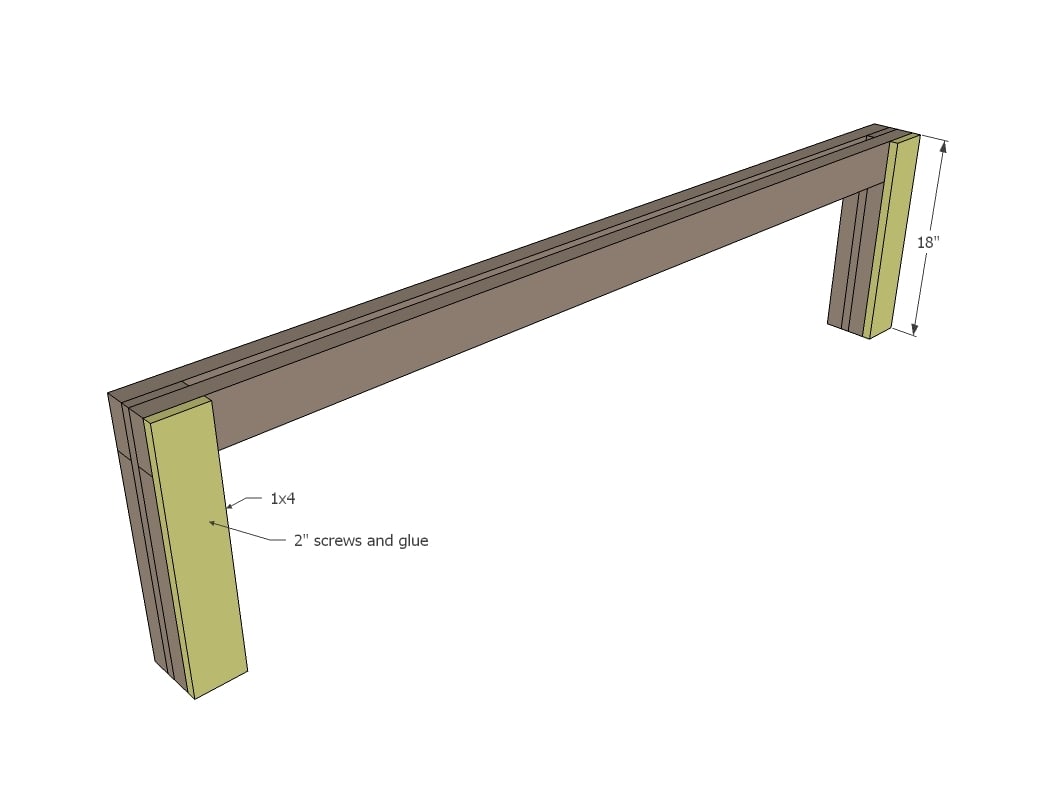
- 12 - 1x4 @ 18"


Please read through the entire plan and all comments before beginning this project. It is also advisable to review the Getting Started Section. Take all necessary precautions to build safely and smartly. Work on a clean level surface, free of imperfections or debris. Always use straight boards. Check for square after each step. Always predrill holes before attaching with screws. Use glue with finish nails for a stronger hold. Wipe excess glue off bare wood for stained projects, as dried glue will not take stain. Be safe, have fun, and ask for help if you need it. Good luck!
Instructions
Step 1
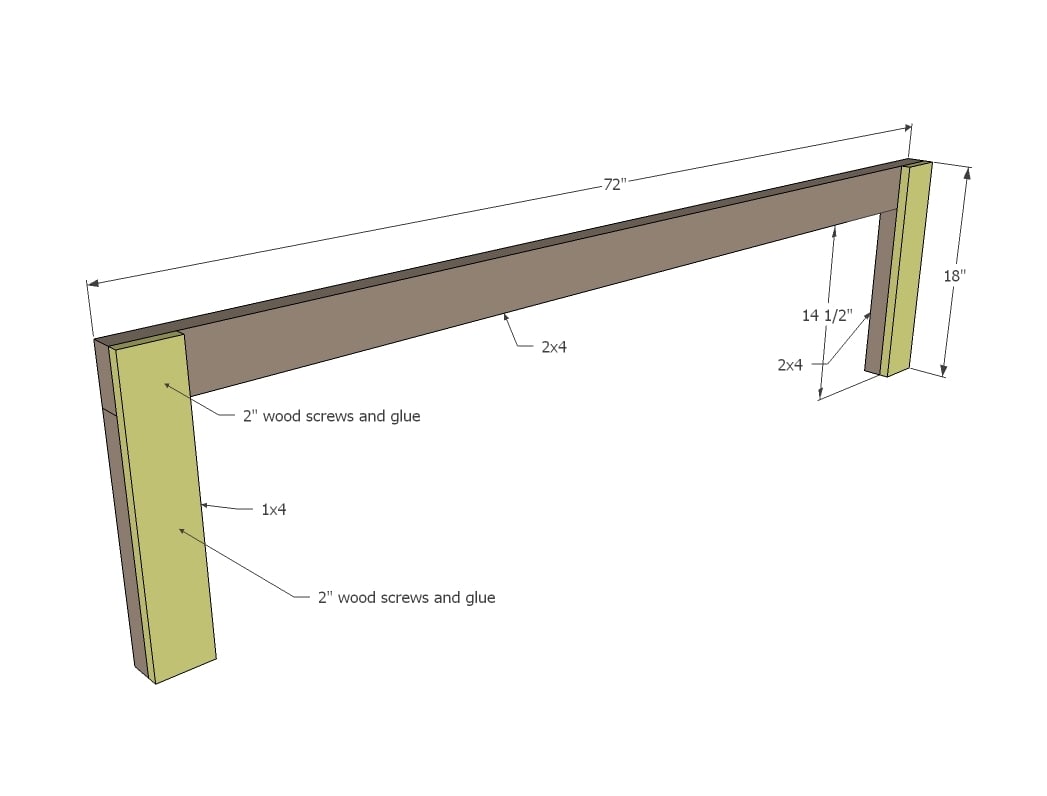
TIP: Unless you are spray painting, it may be difficult to paint between slats. You may wish to paint or stain all of your 2x4 @ 72" long first. Leg boards you will not have this issue.
Choose your best looking 2x4 top board and leg boards. Set them best looking side down on the table. We'll be working from the front backwards.
Lay out 1 long 2x4 and 2 short 2x4s. Position the 1x4 on top, apply glue and nail or screw down, to both the top and leg 2x4s.
Step 2
Add a layer of 2x4s on top of the 1x4s.
Step 3
Next, repeat with a layer of 1x4s, nailing or screwing into both the top and leg 2x4s.
Step 4
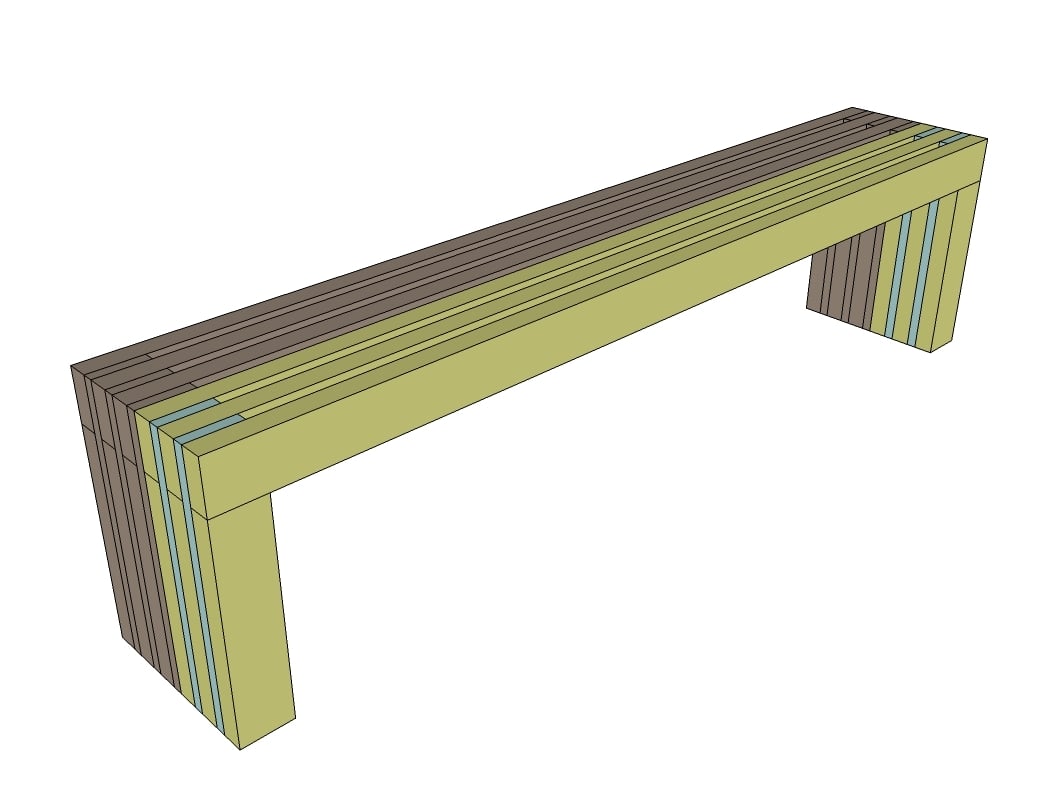
Continue until you run out of boards :)
It is always recommended to apply a test coat on a hidden area or scrap piece to ensure color evenness and adhesion. Use primer or wood conditioner as needed.


Comments
ישראל
Sat, 11/16/2013 - 22:05
Screws
Hi Ana,
Thanks for the plan. I built the bench over weekend and enjoyed every minute of it.
One correction to the plan above - except of the 2" screws, you also need 2.5" screws for attaching the 2" leg board to the 1" leg board.
The 2" screws are too short and will not last for the 2" to 1".
alwayscreating…
Sat, 05/15/2021 - 20:38
The 2" screws are just right…
The 2" screws are just right for this project. Let me explain.
Remember that standard American 2x4s (the nominal size) are actually 1.5" by 3.5" (the actual size) and 1x4s are actually 0.75" by 3.5" inches. This means that the 2" screws here are holding together 2.25" of materials, which is perfect considering that with electric drills and drivers, we often slightly countersink screws (and this is desirable to make sure that your boards are flush).
yariv
Tue, 06/02/2015 - 02:39
Making a dinning table
Hi Ana,
What are your thought about building the smae way a dinning table of 75X100X200 cm with two sitting benchs of 45X40x180.
My main concern is the top plate strength, I do not want it to bend downwards after some years.
Yariv
460 st.andrew
Sun, 10/16/2016 - 07:41
Cedar instead of Pine.
i am wondering g if I could make this out of cedar instead of pine,etc and then not put a stain finish on it....thoughts?
RHgaijin2
Sun, 04/14/2019 - 07:55
My video of the build
https://youtu.be/lI5d3r2-41o