
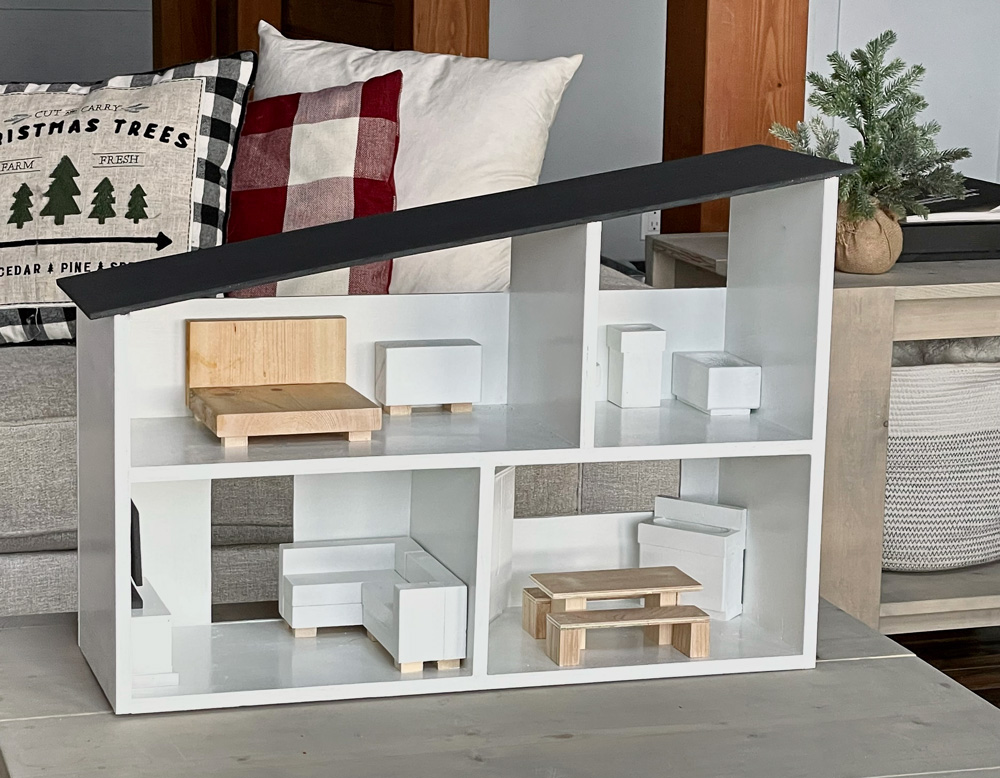

Build your own modern dollhouse with free plans from Ana-White.com Cost was about $30 for materials. It's a joy to build and a joy to give!
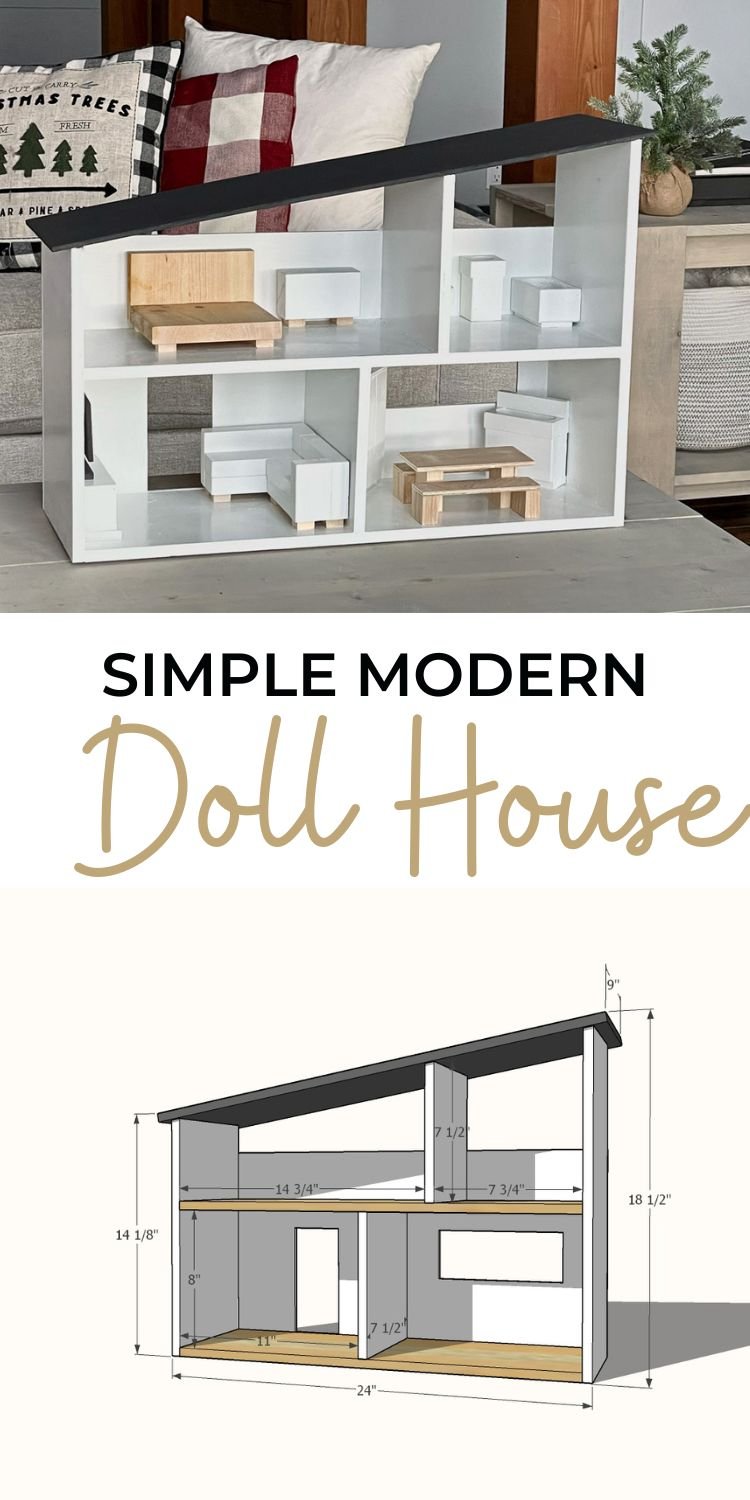
Pin For Later!
Preparation
1 - 1/2" plywood panel, 2 feet x 4 feet in dimension
1 - 1/4" plywood panel, 1 foot x 2 feet in dimension
1-1/4" and 5/8" brad nails


Instructions
Step 1
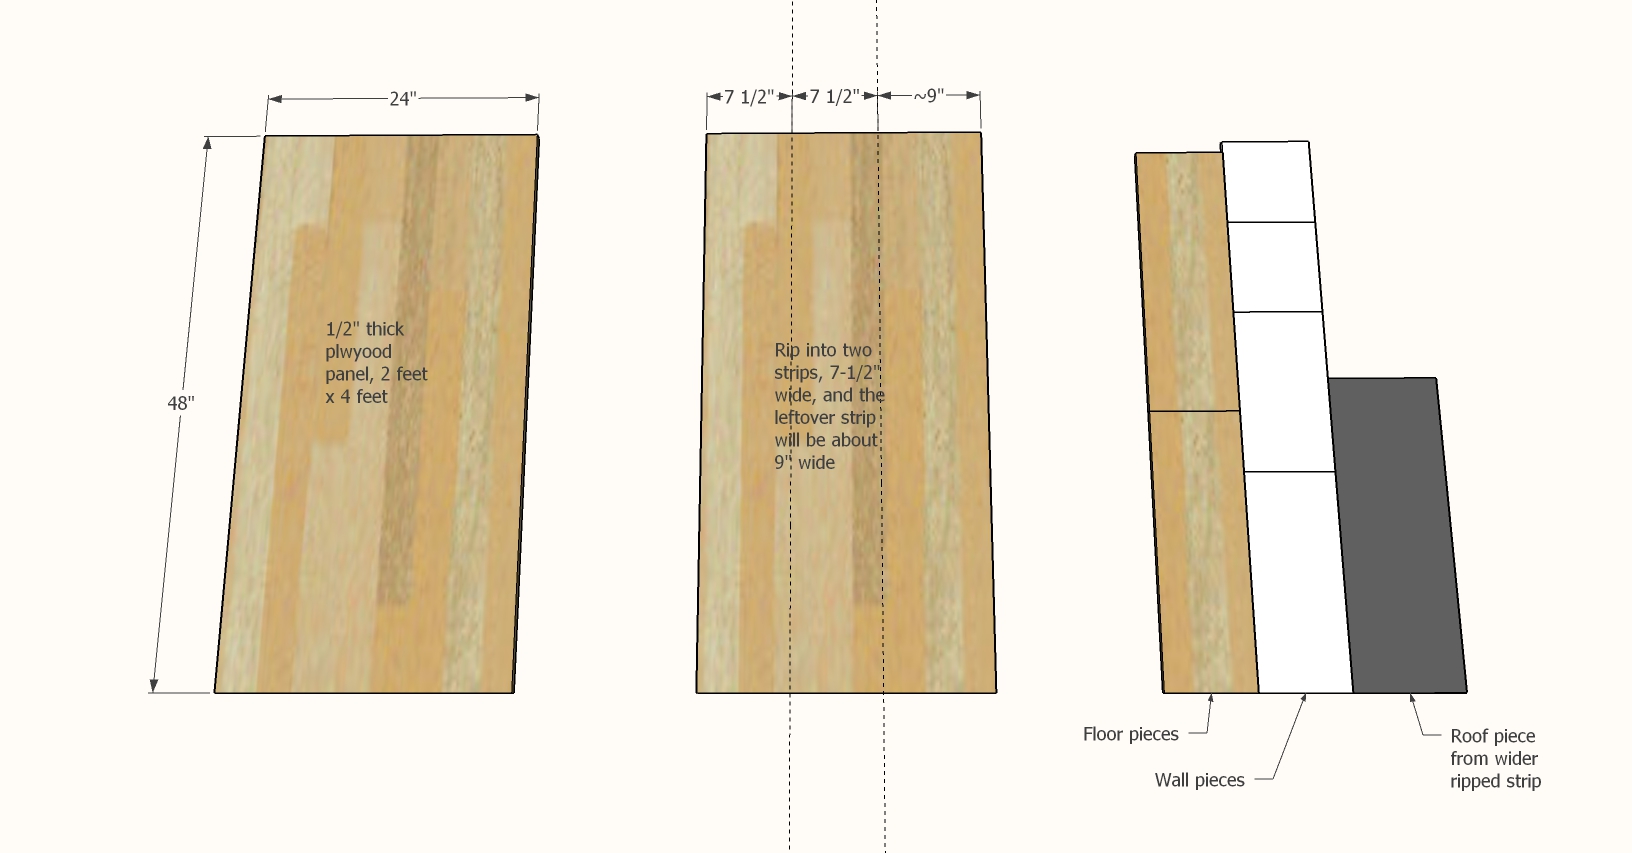
From the 1/2" piece of plywood measuring 2 feet x 4 feet, rip into two strips that are each 7-1/2" wide x 48" long. Save the remaining strips (about 9" wide) for the roof panel. Rip using either a table saw, a circular saw with a straight edge, or have your home improvement store make the cuts for you.
Then cut from those pieces the following:
From the 7-1/2" wide rips:
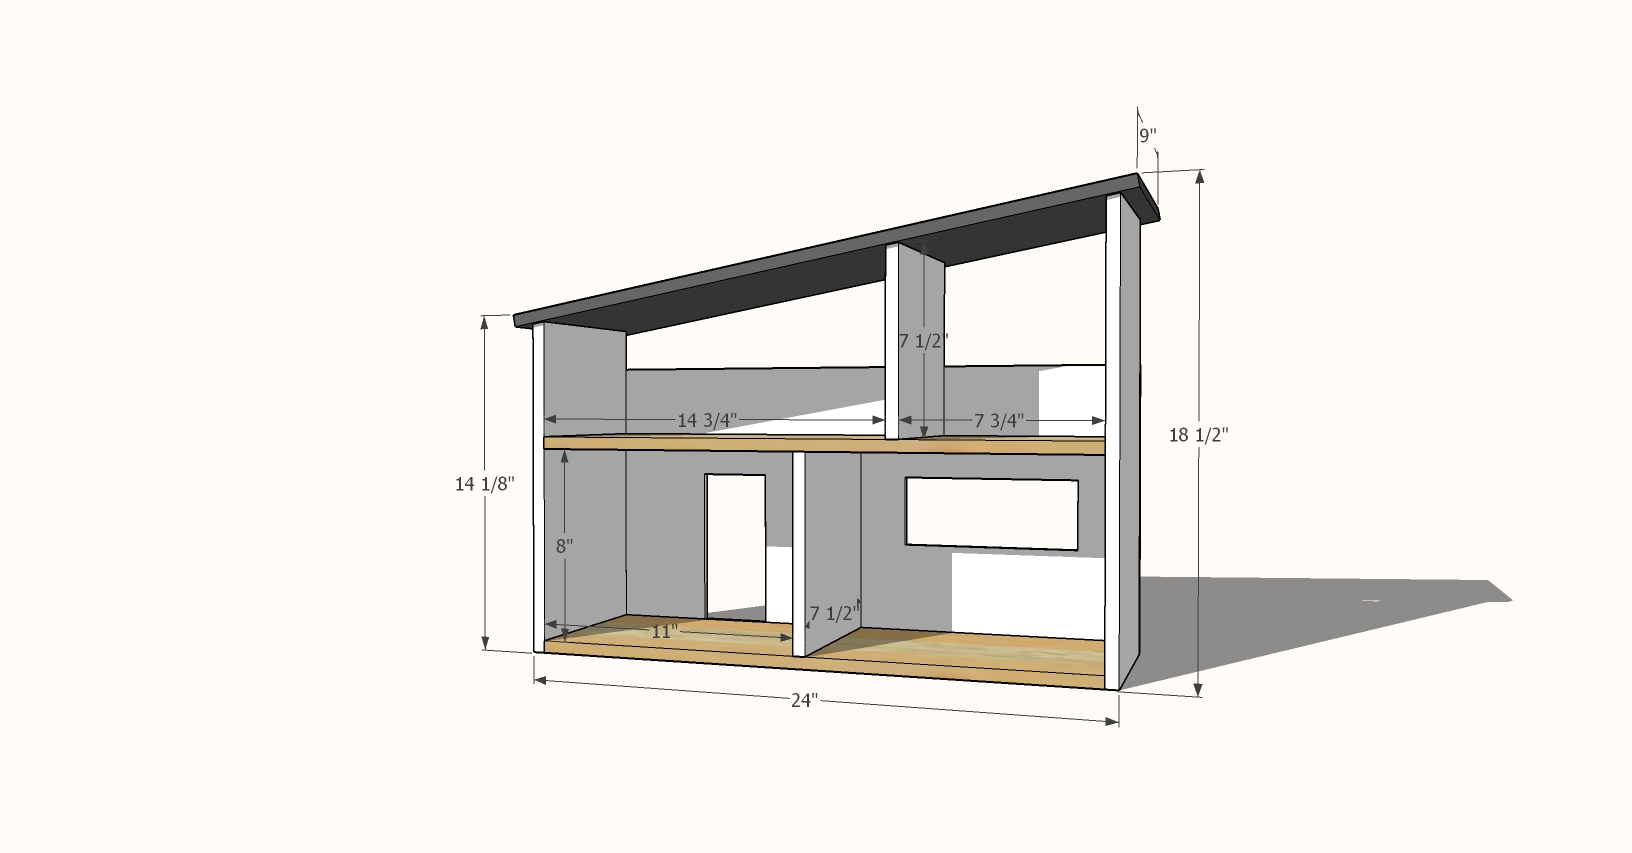
- 2 @ 23" - floors
- 1 @ 8" - bottom floor interior wall
- 1 @ 13-3/4" - top end cut at 10 degrees off square, long point measurement (short outside wall)
- 1 @ 18" - top end cut at 10 degrees off square, long point measurement (long outside wall)
- 1 @ 7-1/2" - top end cut at 10 degrees off square, long point measurement (upper floor interior wall)
From the 9" wide strip
- 1 @ 25-3/4" - roof
For the back
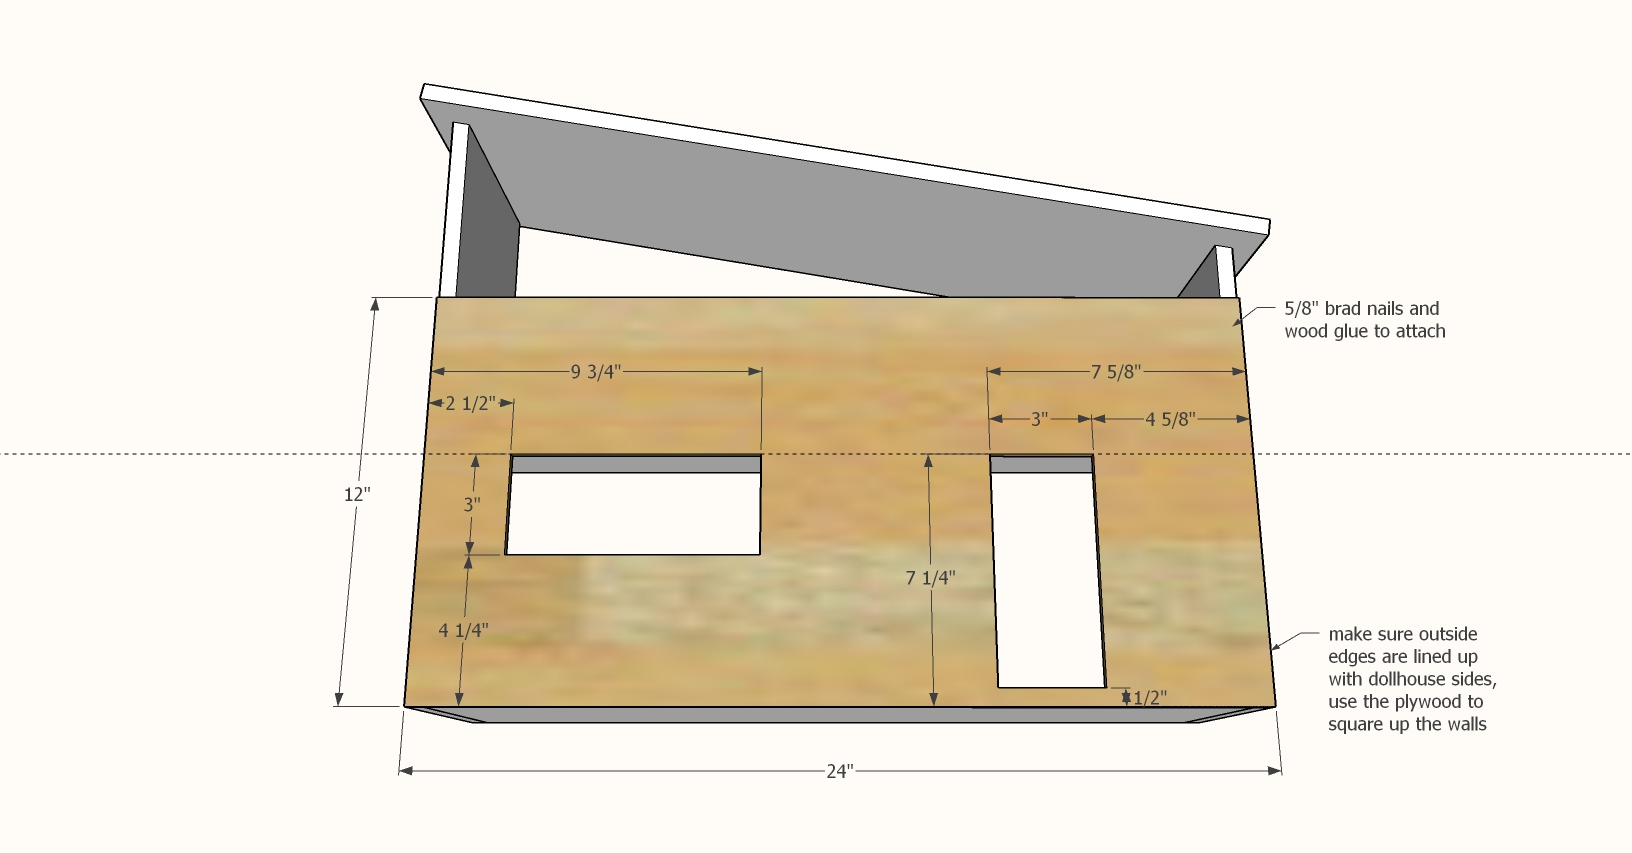
- 1/4" plywood @ 12" x 24" (may not need to cut at all)
Step 2
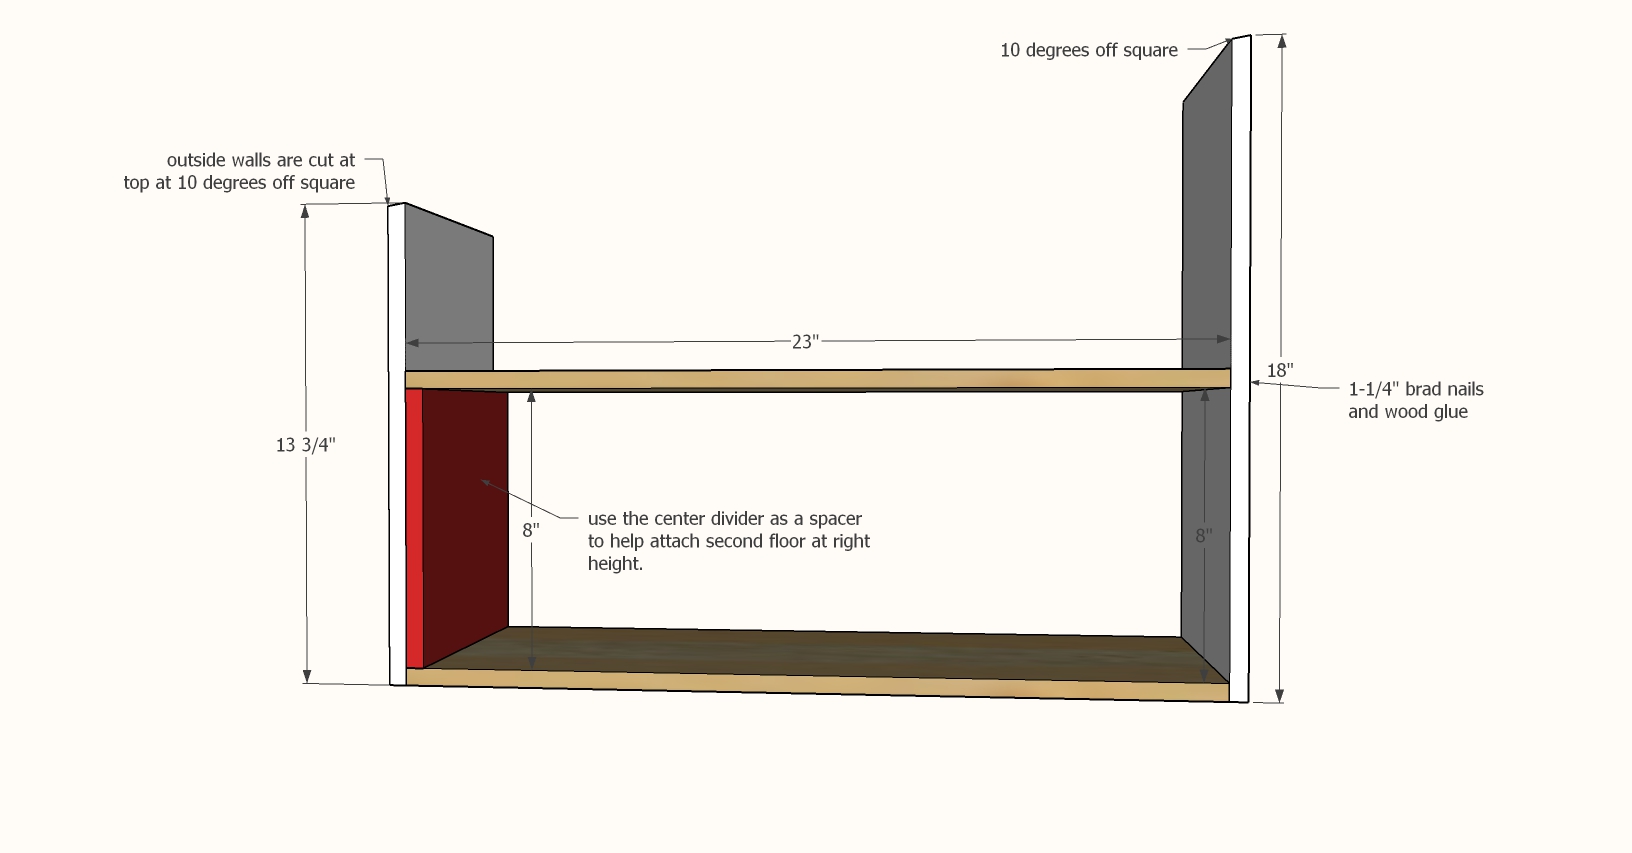
Attach the bottom floor to the side walls, making sure the side walls are orientated correctly, so the top angles angle in the same direction.
Use 1-1/4" brad nails and wood glue.
Then set the bottom floor interior wall (shown in red in the diagram) inside the dollhouse and place the middle floor on top.
Attach with 1-1/4" brad nails. Repeat for the second side of the middle floor.
Step 3

Attach bottom floor interior wall centered on the two floors with 1-1/4" brad nails and wood glue.
Step 4
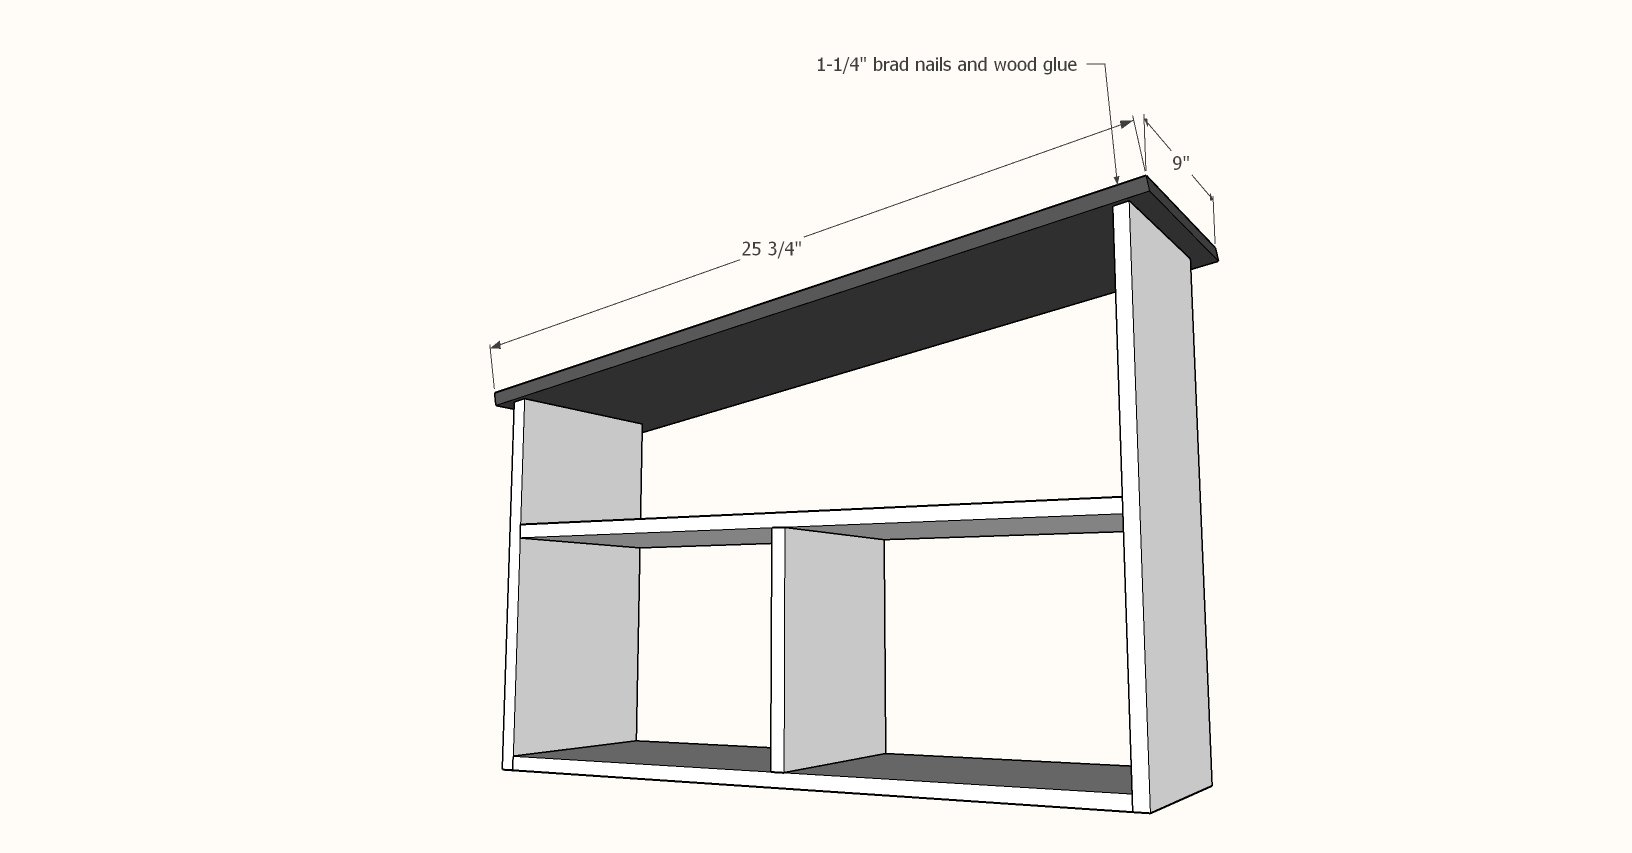
Center the roof on the exterior walls and attach with 1-1/4" brad nails and wood glue.
Step 5
Switch nails to 5/8" nails.
Apply glue to the back edges and place the 1/4" plywood on top.
Force the dollhouse walls square to the 1/4" plywood panel and nail on.
Cut holes out with a jigsaw. You'll need to use a drill and drill bit to start the jigsaw in the centers of the windows/doors. I used a Kreg Jig bit.
Step 6

Place the upstairs interior wall and nail and glue in place.
Vacuum off sanding residue before finishing.
Clear coat over top is recommended for longer durability.


Comments
Sb1212
Tue, 11/23/2021 - 19:37
Love!
Hi, love this! Any plans for the furniture? 😊