

DIY Ladder Bookshelf - free plans from ANA-WHITE.com
This sturdy ladder bookshelf is easy to build and costs about $25 in wood - or if you have scraps, might even be free.

The tiered shelves are perfect for storing different sized items. I love the enclosed bins that keep your things inside the shelf. This small ladder bookshelf could be used throughout the home - from the craft room, to the entryway, or even in the kitchen to hold produce.

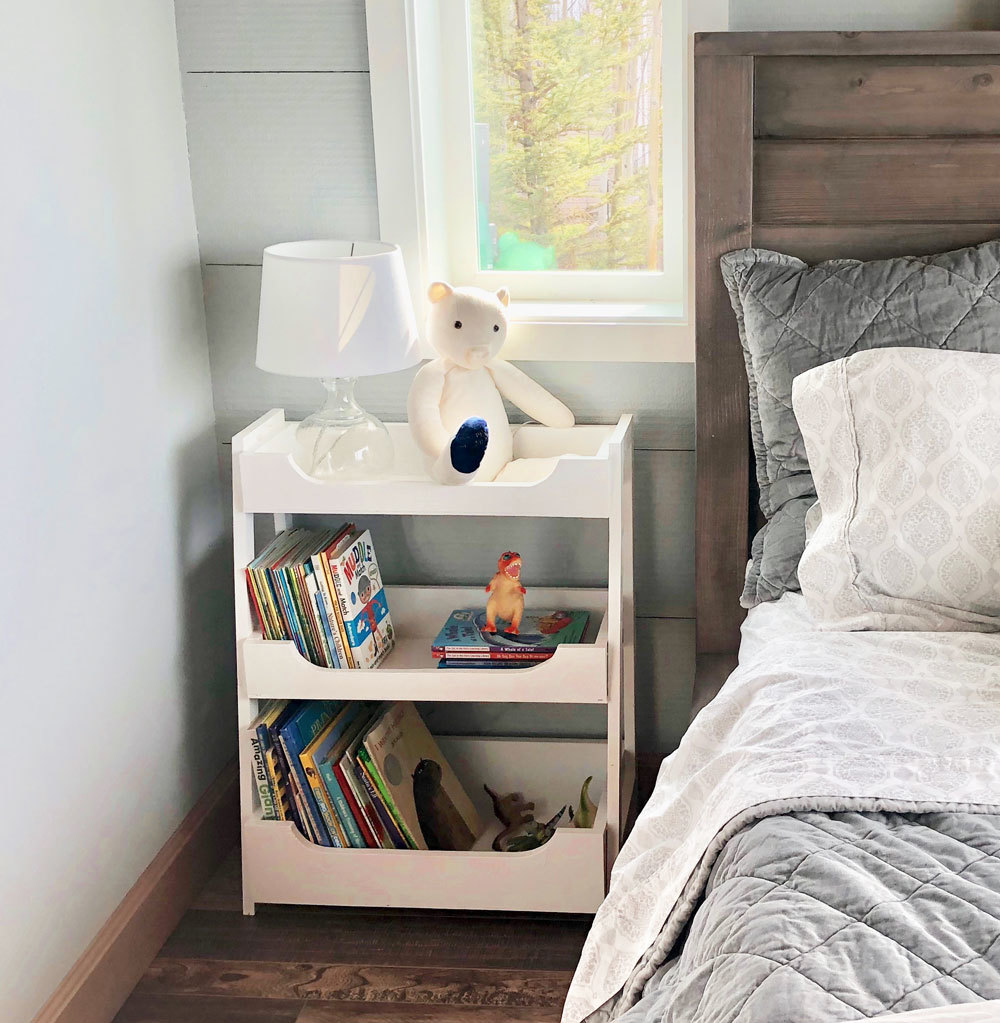
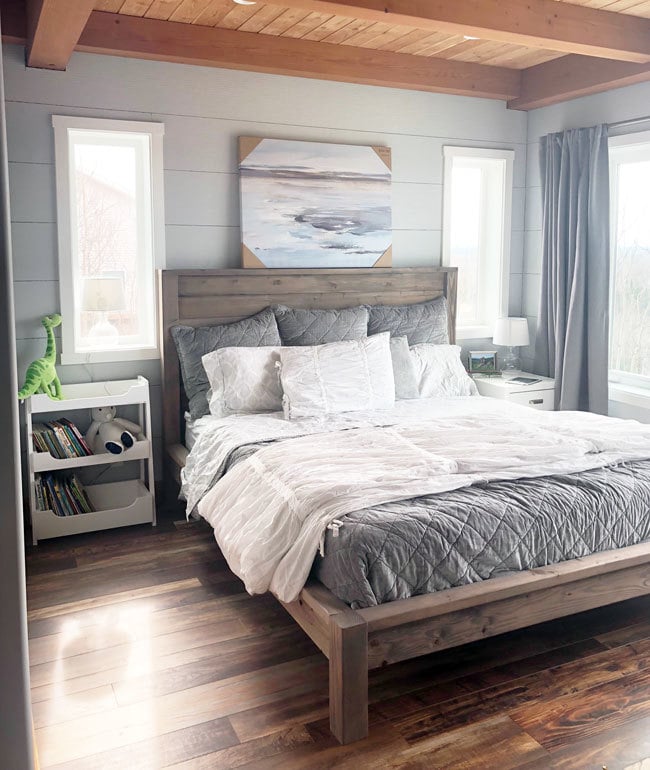
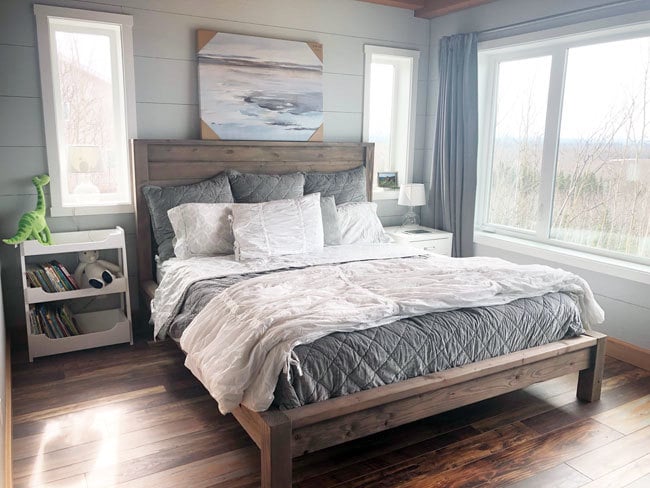
We are currently using the ladder bookshelf as a nightstand for our children's books in our main bedroom. I love that it is so functional, but still looks great - even in a decorated bedroom.
We are excited to share with you the plans below. We go through all the build steps in this video -
Do watch for little tips and tricks.

Also, we are here to help you build this bed! Click here for Modern Farmhouse Bed Plans.
Please share, brag, post photos if you build - we can't wait to see how your project turns out too!
XO Ana
Preparation
1x4 - 12 board feet
1x6 - 8 board feet
1x2 - 16 board feet
1/4" plywood panel - 24" x 48"
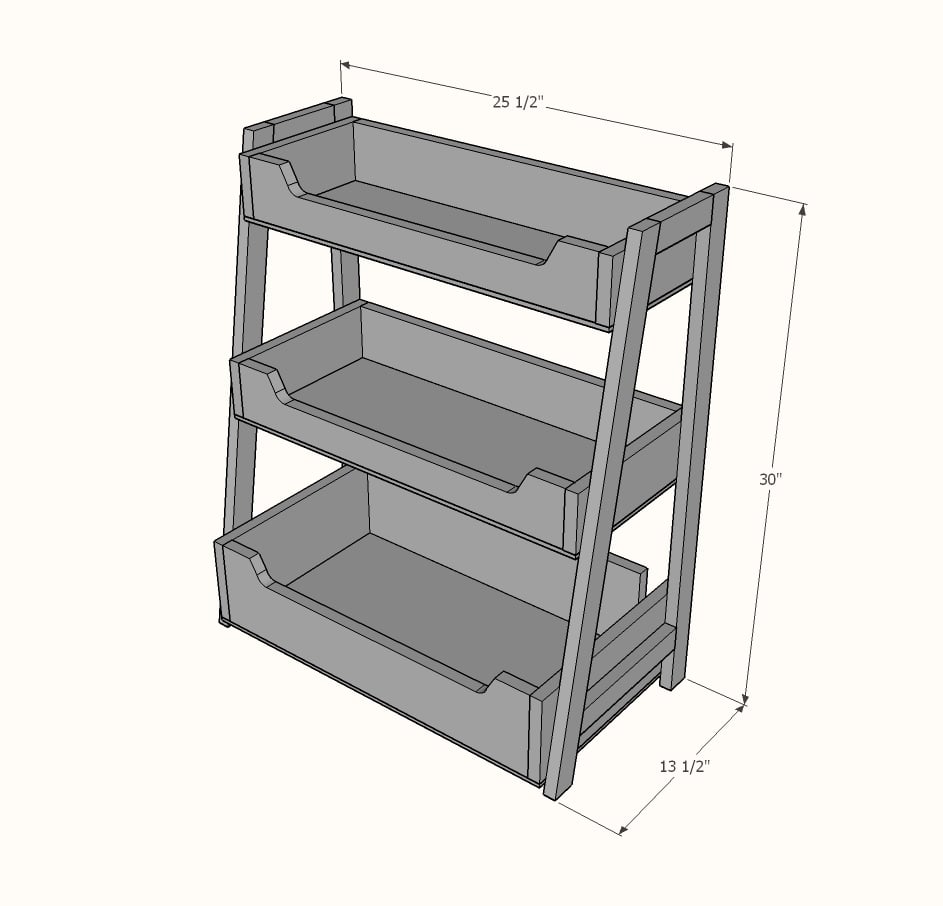
4 - 1x4 @ 22-1/2"
2 - 1x4 @ 9"
2 - 1x4 @ 11"
2 - 1x6 @ 22-1/2"
2 - 1x6 @ 13-1/2"
1 - 1/4" plywood 24" x 9"
1 - 1/4" plywood 24" x 11"
1 - 1/4" plywood 24" x 13-1/2"
2 - 1x2 @ 30"
2 - 1x2 @ 30-1/2" - both ends cut at 10 degrees off square, long point to short point measurement, ends ARE parallel
2 - 1x2 @ 9-1/2" - one end cut at 10 degrees off square, longest point measurement
2 - 1x2 @ 5-1/2" - one end cut at 10 degrees off square, longest point measurement


Instructions
Step 1
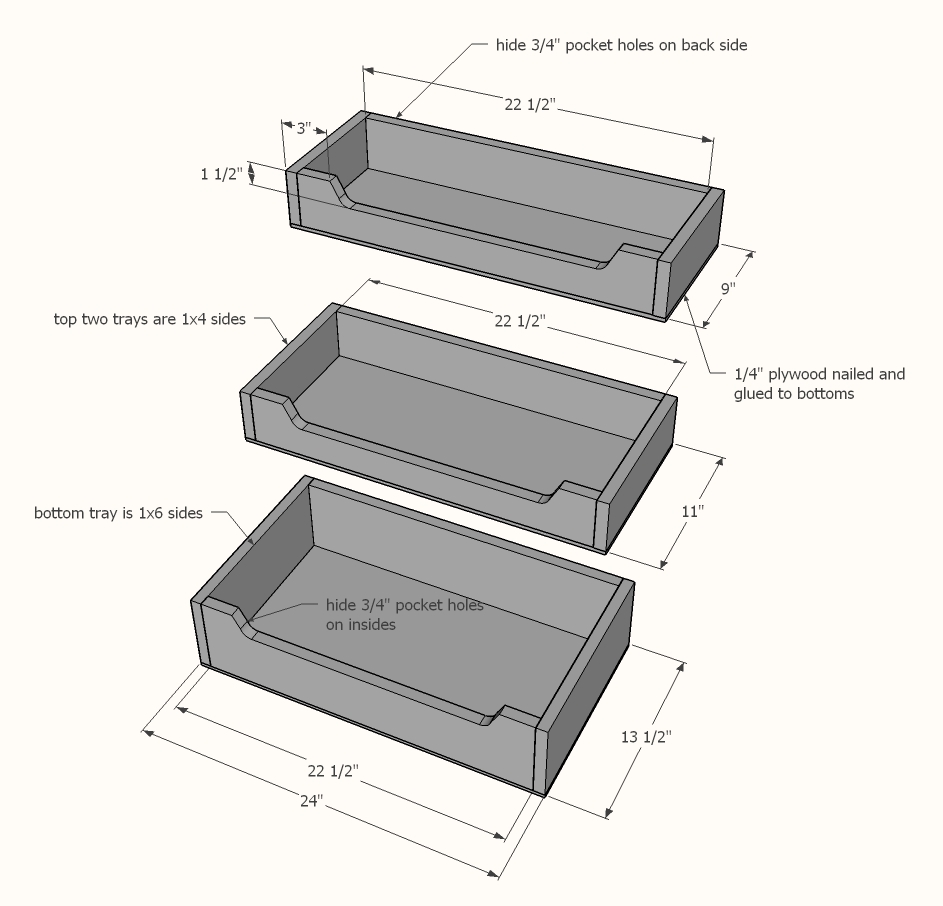
Build the three trays using 3/4" pocket holes and 1-1/4" pocket hole screws. Attach 1/4" plywood bottoms to bottom of trays with glue and 3/4" nails or staples.
Step 2
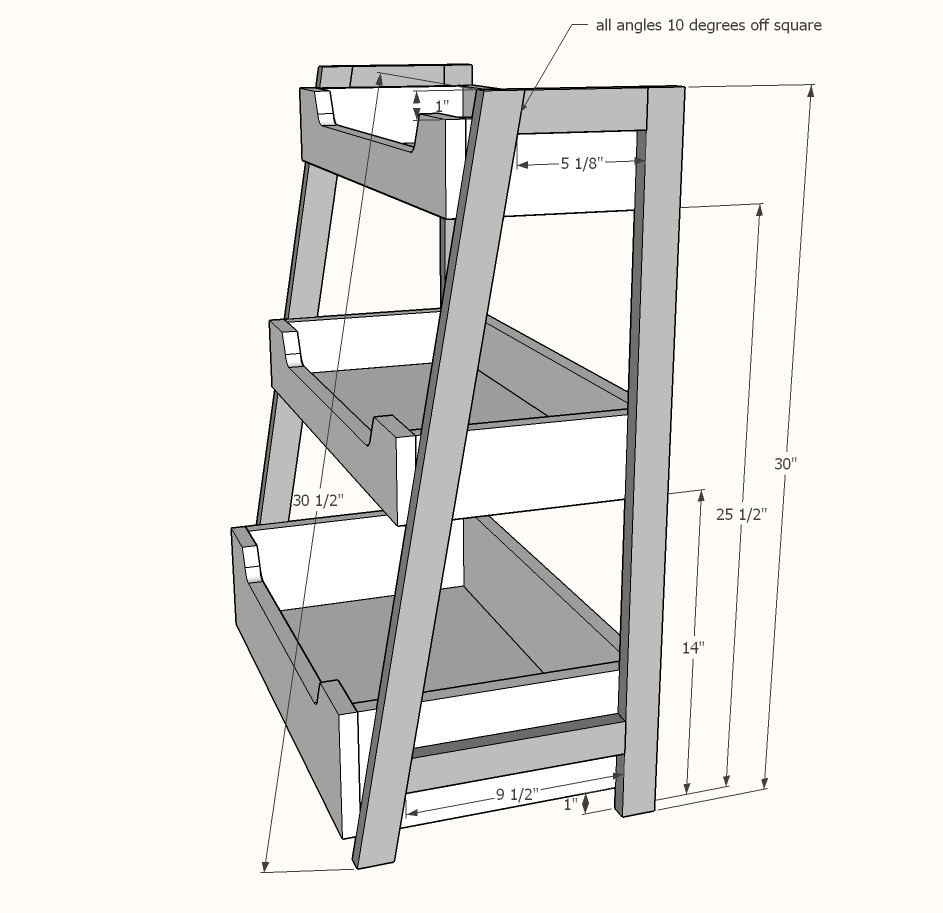
Build legs with 3/4" pocket holes and 1-1/4" pocket hole screws. Remember to build and drill pocket holes in mirror so the pocket holes can be hidden on insides of legs. Mark location of shelves with a square on inside of legs. Attach with 1-1/4" screws (you can use pocket hole screws).

Comments
MCN
Mon, 06/17/2019 - 08:27
My skill level is not yet…
My skill level is not yet intermediate, but after watching the video and reading the plans, I thought this was a project I could handle. There are a few places where I got hung up - the biggest being that the illustrations do not match the finished product or the video. One of the pictures shows the sides of the trays on the outside of the fronts, but your finished nightstand and another illustration show the sides tucked into the fronts. This obviously changes the size of the plywood bottoms, as well as where the pocket holes should be placed (short or long side of trays) I found some of the other instructions a bit vague as well but that could be because of my skill level. Thank you for the free plans!