


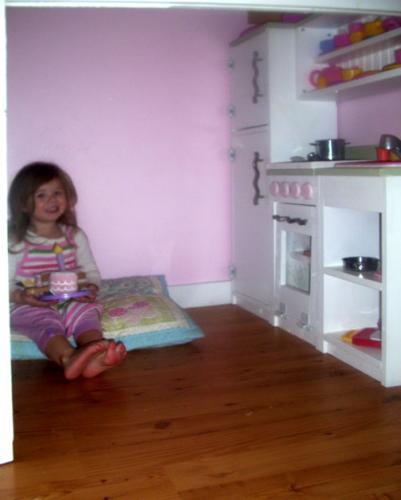
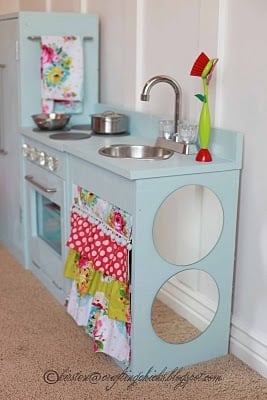
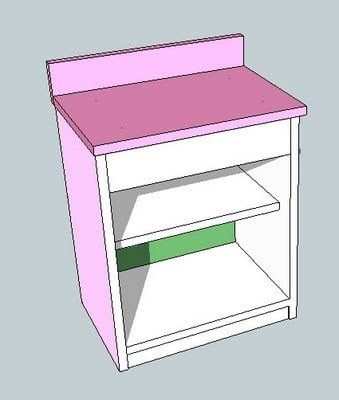
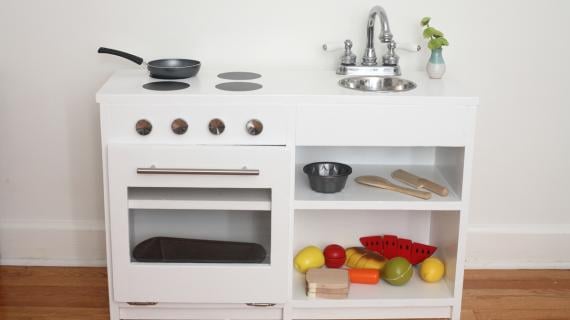
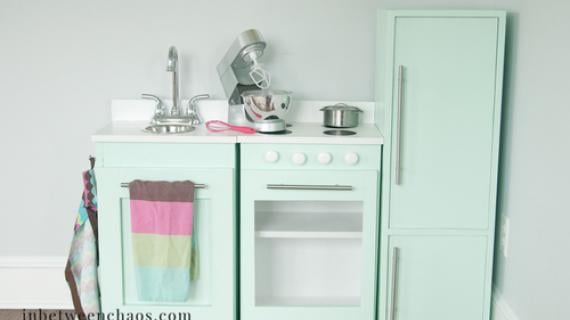
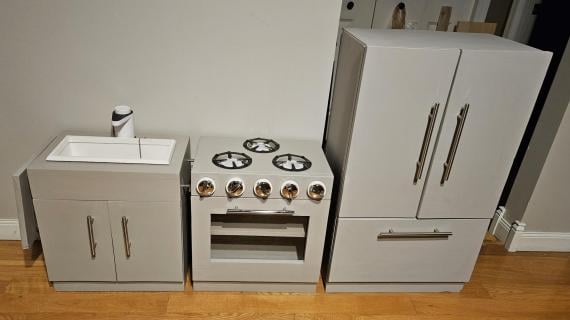
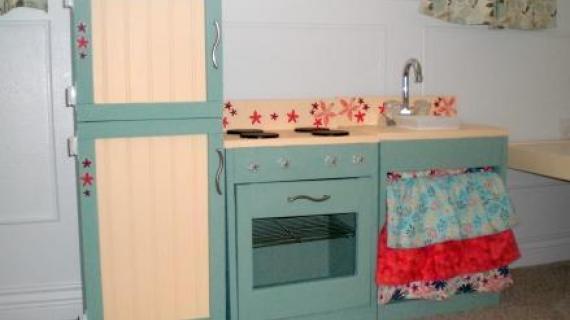
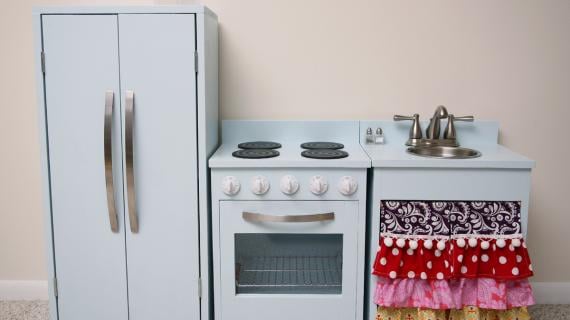
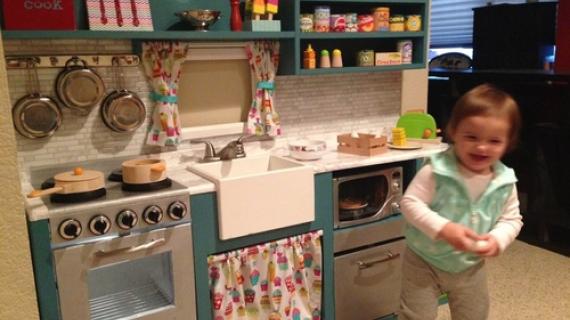
This cute little stove is easy to make and will thrill little ones for years to come. Solid wood. Can also be used as a nightstand or a play dishwasher.
Preparation
In addition to the supplies you need for the sink, also pick up:
- 1x4
- 1x2
- 4 - 2" to 3" wooden discs (found at Joanns or Michaels for wooden wheels on toy trucks in the wood section)
- 1 - 10" bar pull
- 1 - 10 x 12 piece of plexiglass, used for picture frames (found at Home Depot and Lowes with the plexiglass sheets, should be under $1)
- 1 - set of self closing hinges (should be about $2 at Home Depot)
2 - 1x2 @ 14"


Instructions
Step 1

Build the sink.
Step 2
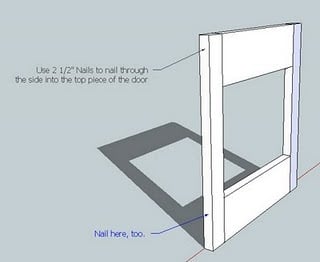
Use 2 1/2" nails to nail through the sides of the 1x2 into the edge of the 1x4, as shown above. Nail on all four sides. You can also use pocket hole screws (recommended) or carefully predrill a pilot hole with a countersink bit and attach. Not comfortable with that? A few cheap brackets could do the trick too.
Step 3
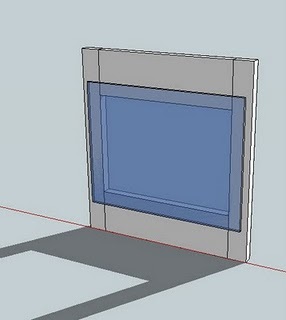
Drill a hole in the plexigalss where each screw will go to prevent the plexiglass from cracking. Then use 3/4" screws to screw the plexiglass to the door frame as shown above.
Many of our brilliant readers use mirror clips to hold the plexiglass in place.
Step 4
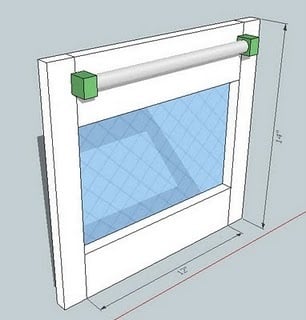
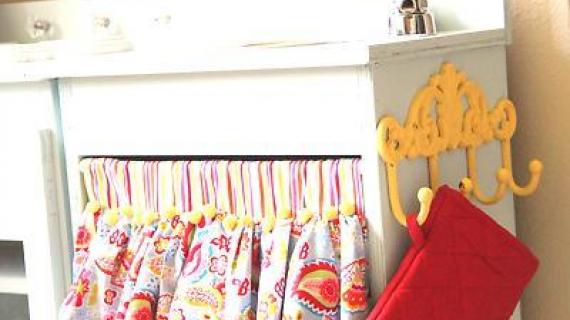
Add the handle as shown above. Be creative!
Step 5


Comments
Charlene (not verified)
Tue, 06/01/2010 - 06:29
Hi Ana! Your website is
Hi Ana! Your website is great! I am determined for my daughters to have a play kitchen of their own, but do not want to spend an arm and a leg for a quality one. Thanks for posting these plans. I noticed that in this post, you mentioned posting plans for a larger kitchen set, but I didn't see any while I was browsing through the list of posted plans. Have you just not gotten around to it? Thanks so much for all your time and effort! I love it!
lopez1542
Sat, 07/08/2017 - 16:42
Plans for Larger kitchen
Ana,
My daughter is 8 and is wanting a kitchen set. Do you have plans for a larger set?
Links Worth Sh… (not verified)
Sat, 10/09/2010 - 03:02
[...] Build Grace’s Play
[...] Build Grace’s Play Stove - how to build a cute play stove! [...]
Lomax Sawyer (not verified)
Thu, 10/21/2010 - 18:07
was wondering what the
was wondering what the dimensions were for the sink , stove and refrigerator sets . thanks Lomax Sawyer
Kelly Ryan (not verified)
Thu, 10/28/2010 - 11:44
Just wanted to thank you so
Just wanted to thank you so much for the plans. We are currently building this set for our daughter as a Christmas Present and it is adorable! We have come across one discrepancy in the plans though. For the cut list you have listed to use a 1x12 for the top, bottom, and shelf. This is fine for the sink but if you do this for the stove then your door won't be able to close. I'm guessing the shelf should read as a 1x10? We're just planning on cutting it down about a inch or so to accommodate the door. But hopefully this will save someone else that extra step:) Thanks again...I'm already looking forward to starting some more projects once this one is finished.
kelley (not verified)
Wed, 12/08/2010 - 07:05
I had the same problem with
I had the same problem with the shelf for the stove. Thankfully I thought about it before nailing it into the frame.
Build your tod… (not verified)
Thu, 12/09/2010 - 00:32
[...] More power to you.
[...] More power to you. Chloe’s folks from Rambling Renovators followed the instructions from Grace’s Play Stove at Ana-White.com and embellished with a magnetic hinge for the oven door and a little LED light to glow when food is [...]
RookieMom Heather (not verified)
Thu, 12/09/2010 - 07:56
I blogged about your
I blogged about your fantastic tutorial on RookieMoms today. Love it! Thanks for sharing. http://www.rookiemoms.com/build-your-toddler-a-play-kitchen/
Cupcake oven —… (not verified)
Sat, 01/22/2011 - 18:46
[...] in Brag Blog Put on
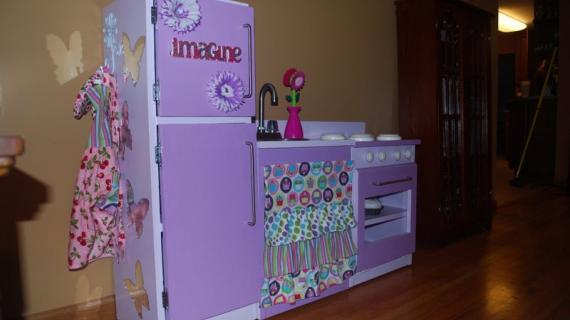
[...] in Brag Blog Put on my TO-DO List Save as PDF Print this PostShare/Bookmark Builder: Heather Blog or Website:http://heatherannmelzer.typepad.com/ Experience Level: Intermediate Builder Estimated Cost: Under $100 Estimated Time Investment: 3 days From Plan: http://ana-white.com/2009/11/plan-graces-playhouse-kitchen-stove.html [...]
rookgirl
Mon, 04/18/2011 - 10:53
I made this play kitchen!
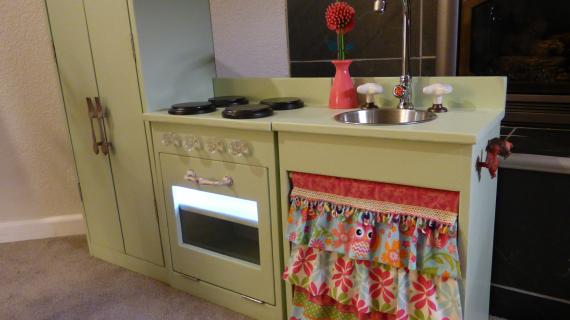
Hey Ana! great plans! My husband made this play kitchen for my daughter for Christmas, I blogged about it here: http://www.rookblog.com/2011/04/hollys-play-kitchen.html
Guest (not verified)
Wed, 05/18/2011 - 11:57
I love your site and it has
I love your site and it has inspired to tackle many projects. Before you converted over to this site you had many other pictures from other readers kitchens. One in particular was a pink retro style kitchen. Do you still have that info. I love these plans and would like to modify to be similar to that kitchen but now have no way to find it again! Thank you so much for being such an inspiration!
Faith (not verified)
Thu, 08/18/2011 - 01:31
Wow! I am so inspired!
Thanks so much Anna for these amazing plans, and especially for posting them for free! I bet these could be built at even less cost using old nightstands, bookshelves or cupboards, which often can be picked up for free.
Jessi C. (not verified)
Sat, 08/27/2011 - 23:39
Need help asap!!
I followed all of the directions to a T but for some reason my oven door is too large to fit inside the opening for the cabinet (followed the sink plans). It is almost exactly an inch too wide. The opening is 14 & 5/8" and my door is 15.5". Any suggestions on what I can do? I don't understand what happened!
Crystal A (not verified)
Sat, 09/24/2011 - 21:07
I am having the same problem
I am having the same problem with the oven door... It is to small to be full overlay, but too large to fit insie the oven frame opening. This is the second door that I have made because I thought I did something wrong the first time.
Guest (not verified)
Mon, 12/12/2011 - 11:42
Same problem with door
We are having the same problem with the door - too big to fit inside but not big enough to completely cover... Did anyone figure this out?
claydowling
Mon, 12/12/2011 - 11:57
Door sizing
You can fix the door sizing problem by ripping a small amount off the width of the door on each side. Easiest to do on a table saw, but if you don't have one and don't have a friend with one, you can pull it off with a circular saw and a straight edge, or ideally a circular saw jig.
This might also be a good time to pick up a block plane and learn how to use it. Professional cabinet makers usually have to adjust inset doors slightly with a block plane after they install them. The good news is that they're cheap and don't take a lot of skill to use.
leslieborunda
Tue, 12/13/2011 - 14:48
Paint Color?
I love this kind of paint you used,What kind is it? Name?
Guest (not verified)
Wed, 12/14/2011 - 22:34
Problem with the dimensions
Ana,
We just made the sink and stove and didn't realize until we were attaching the oven door that the dimensions are all wrong. The set is already painted and we don't have enough time to build another one. Please change the dimensions listed so more people don't have the same problem. Thanks.
~kat (not verified)
Sun, 12/18/2011 - 14:49
Thank you!!
We didn't have a lot of extra wood laying around but we had two old tall dressers that we had no use for as they had small drawers. One we gutted and turned into your locker cubby for my grandkids. The other we cut the top two drawer sections off and made it a small toy chest. The remaining section was just high enough to turn into a combined sink/stove for this play kitchen. I can't wait to finish it up and give it to my grandkids for xmas. Thanks for sharing these ideas. I didn't follow any plan but I made it work. Thank gosh hubby is a carpenter and can go with the flow. :)
Guest (not verified)
Wed, 01/18/2012 - 13:29
Hi! I Just built this kitchen
Hi! I Just built this kitchen for my daughter and i love it! I'm almost finished, just working on painting it, but i can't seem to find the correct hinges anywhere. Where can i get some like in yours? All the most i've seen mount on the outside aren't to go flush....does that makes sense? ANyway, i'm going to have to order them online since i live in the middle of nowhere so if you know of a place, or site that i can get them from, i'd greatly appreciate it, thanks so much! And thanks for the awesome plans, can't wait for my kids to enjoy this
makeitwork (not verified)
Thu, 03/15/2012 - 04:52
Stove Door
If you happen to build the stove door without insetting the shelf or adjusting the width of your cross pieces so that it will inset, there is an easy work around. There is no reason the door has to inset into the frame (in fact for little fingers it may be better that it doesn't?). Anyway, line the door up on the outside of the frame and install hinges. At the dimensions given there will be a small gap at the top of the door. Go to the hardware and get a piece of 3/4 x 5/8 quarter round molding, cut it to the width of the door, and glue/nail it in place. Sand, prime, paint as usual. Hope this helps someone. We did it and it looks great after I paint I will post a brag picture.
AddieG (not verified)
Sun, 06/10/2012 - 11:06
Oven door
I built the play kitchen and it looks amazing! I had issues with the oven door, but what worked for me was an old kitchen cabinet that I bought at Habitat Restore for $2.50. the size and detail were perfect! I also picked up hinges for $1.00.
Shanda B (not verified)
Thu, 11/08/2012 - 21:25
I just built, sanded and
I just built, sanded and primed it only to see that the oven door doesn't work. So frustrating!! The shelf in the middle is not like the sink, use a 1x10 instead. I also think it would be wise to cut your oven door to fit after the cabinet is built. I guess I will be taking this apart and making another trip to the hardware store.
sarahcarioca (not verified)
Tue, 12/18/2012 - 22:49
oven door issues
Every single brag post as well as the diagrams show an inset oven door and a recessed shelf. But the dimensions for the cuts do not allow for this! Can you please explain what we're supposed to do here?
murtina567
Sun, 10/05/2014 - 07:45
Kitchen Stuff
so cute i wish i could own this stove i think this good reference and all the display you provide i want really want it
rizwankhan87
Mon, 03/23/2015 - 22:41
I had the same issue with the
I had the same issue with the rack for the stove. Thankfully I pondered it before nailing it into the edge.