
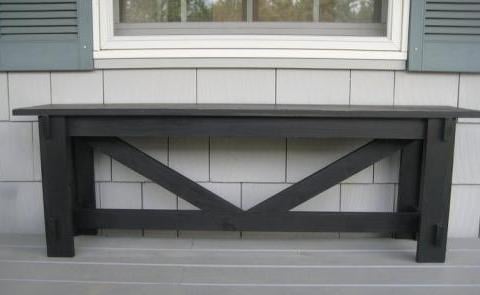

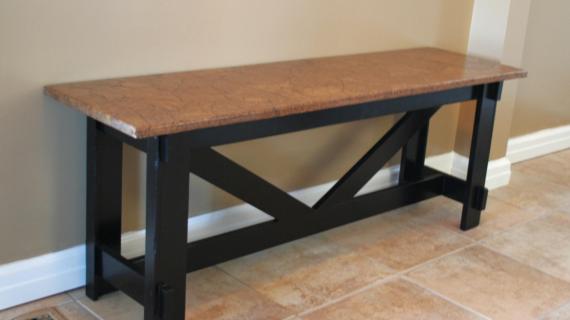
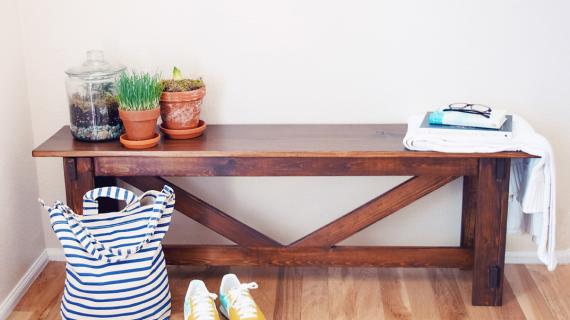
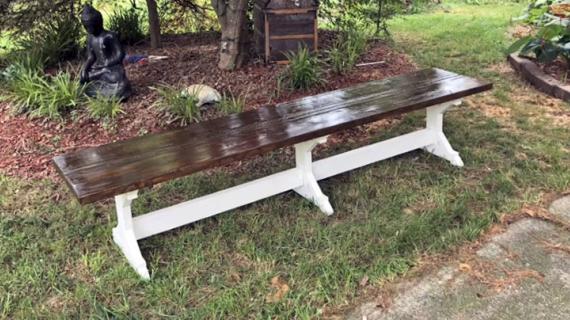
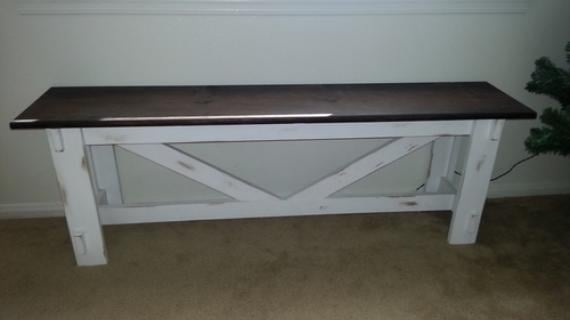
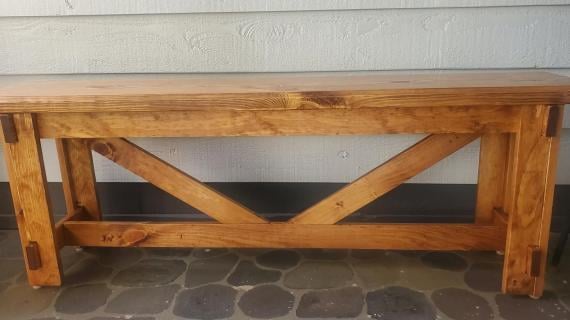
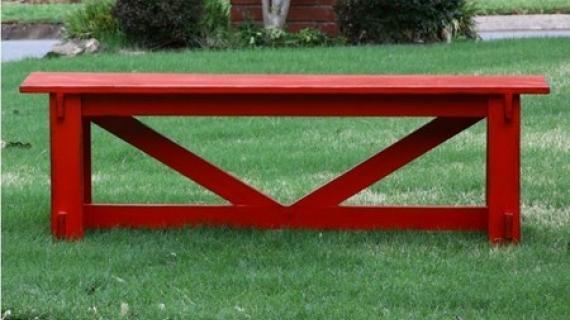
A simple bench gets stylish with some clever cross bracing and false notching. We love the easy nail and glue joinery. It's perfect for the entryway, end of the bed, or anywhere you might need ocassional seating.
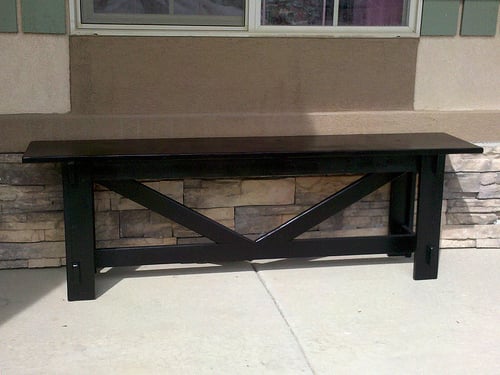
See why so many have built this bench already! Special thanks to our readers for sharing their photos.
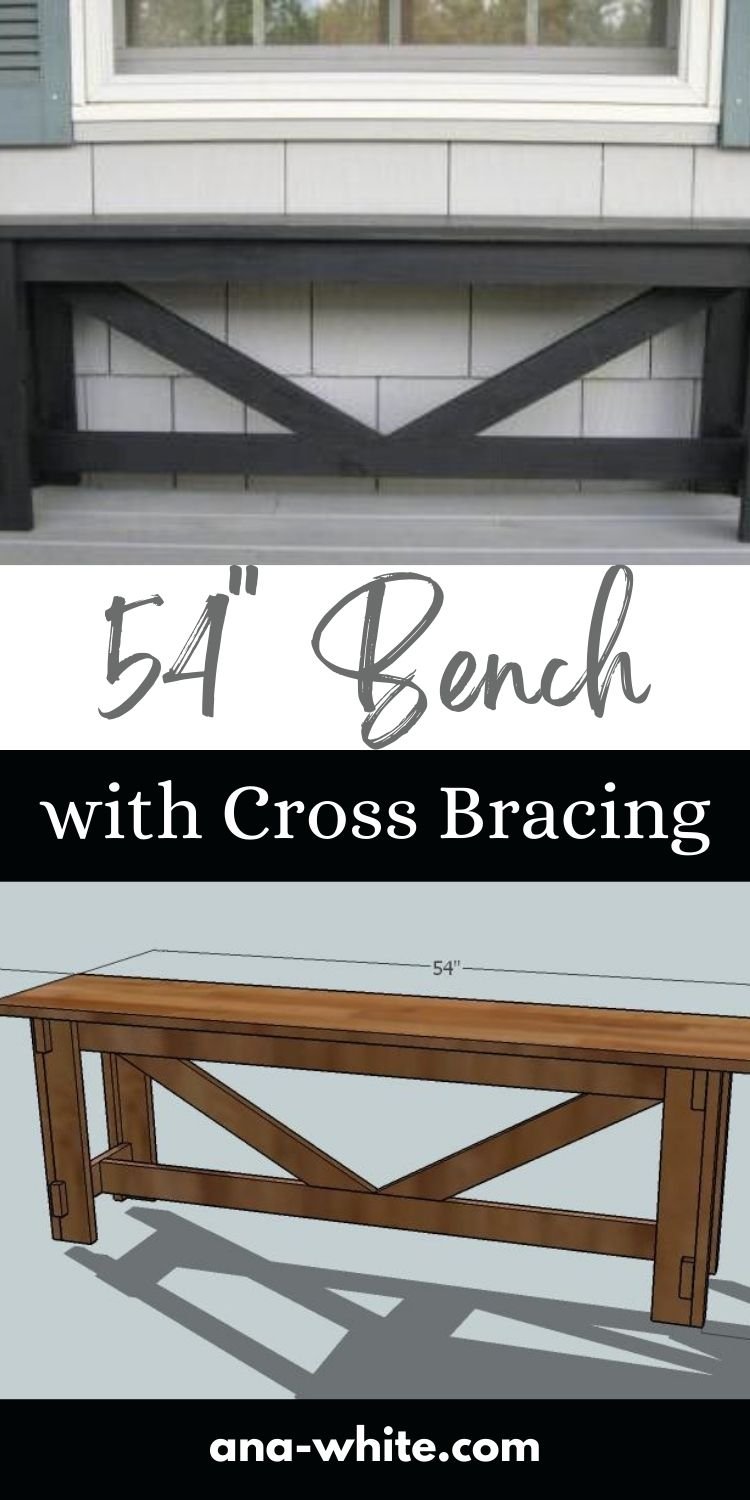
Pin For Later!
Preparation
- 4 – 1×3 8′ boards
- 1 – 1×2 8′ board
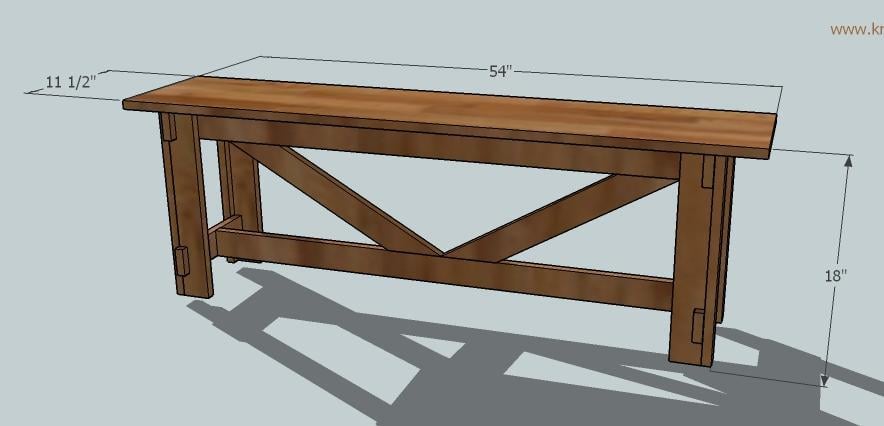
- 1 – 1×12, at least 54″ long
- A) 4 – 1×3 @ 17 1/4″ (Leg Pieces, notch out in step 1)
- B) 4 – 1×3 @ 11 1/2″ (End Aprons and Side Stretchers)
- C) 4 – 1×2 @ 17 1/4″ (Leg Pieces to complete the legs)
- D) 3 – 1×3 @ 45″ (Aprons and stretcher)
- E) 2 – 1×3 @ 25 3/4″ (Cross Supports)
- F) 1- 1×12 @ 54″ (Top)


Work on a clean level surface. Use good boards. Cut all of your boards first. Check for square after each step. Because this is a bench, I recommend using screws instead of nails. Always use glue. Predrill and countersink your screw heads. Have fun and be safe.
Instructions
Step 1

Notch out the Legs. Mark the 1×3 parts of the legs as shown above. With a jigsaw, cut out as shown above.
Step 2
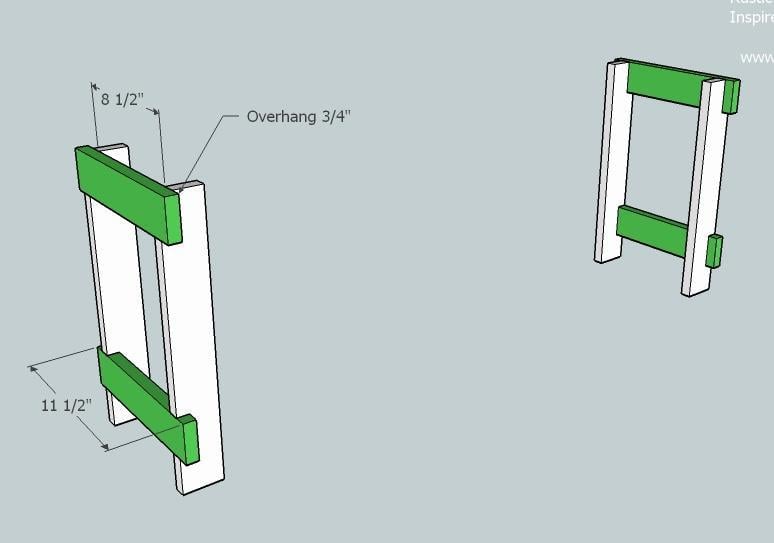
Attach the End Aprons/Stretcher. Attatch the end aprons, B, to the 1×3 legs pieces, A, as shown above.
Step 3

Complete the Legs. Fasten C, the 1×2 part of the legs, to the rest of the leg. Keep the outside corner flush.
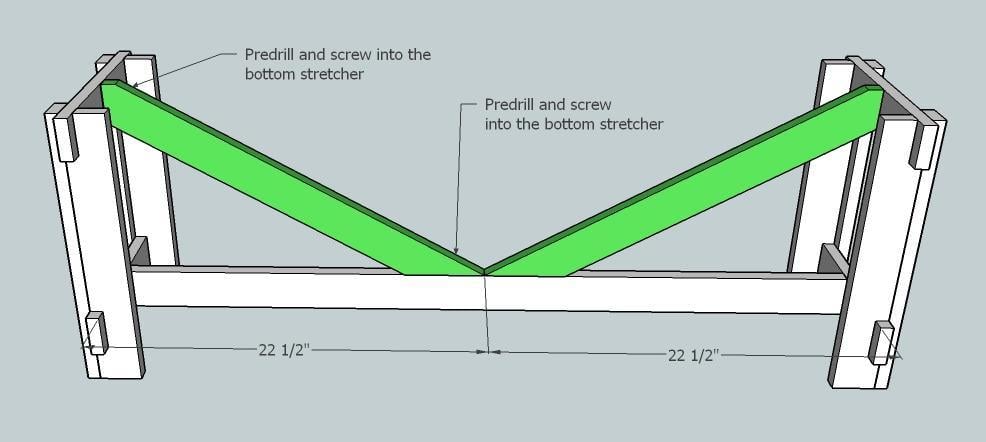
Step 4

Cut the Cross Supports. Cut the cross supports as directed above. Use your square to determine the cuts and mark on the board prior to any cutting. The overall length, from the longest point to the longest point is 25 3/4″. This is by far the trickiest step. What you will need to do on the end cut at two different angles, is first mark out the 60 degree angle from the top corner (when imagining the board in place on the bench). Also mark and cut the bottom angle. Then cut these angles and fit on the bench. Center the bottom on the stretcher. Then mark off where the top overhangs the top of the bench and clip off. This cut does not have to be perfect – you will just need to make sure it sits lower than the top of the bench.
Step 5
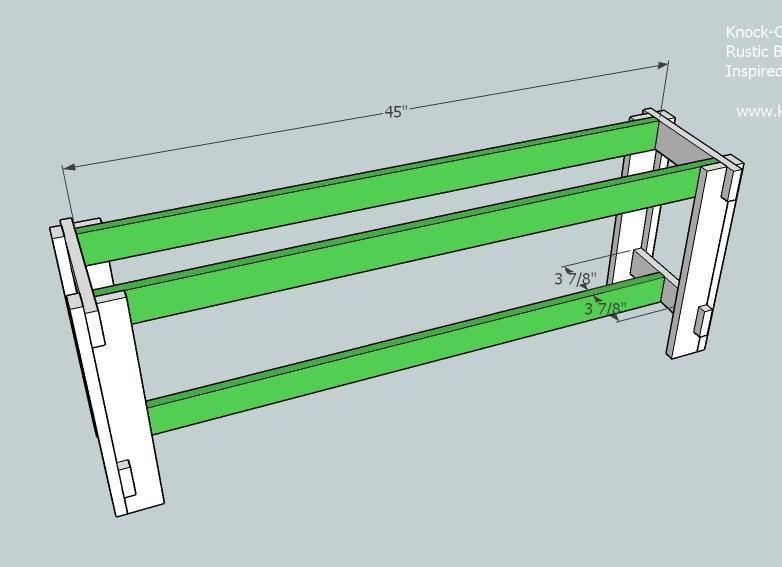
Step 6
aprons are not shown in the above diagram 6. Fasten the Cross Supports. Fasten the cross supports as shown above.
Step 7
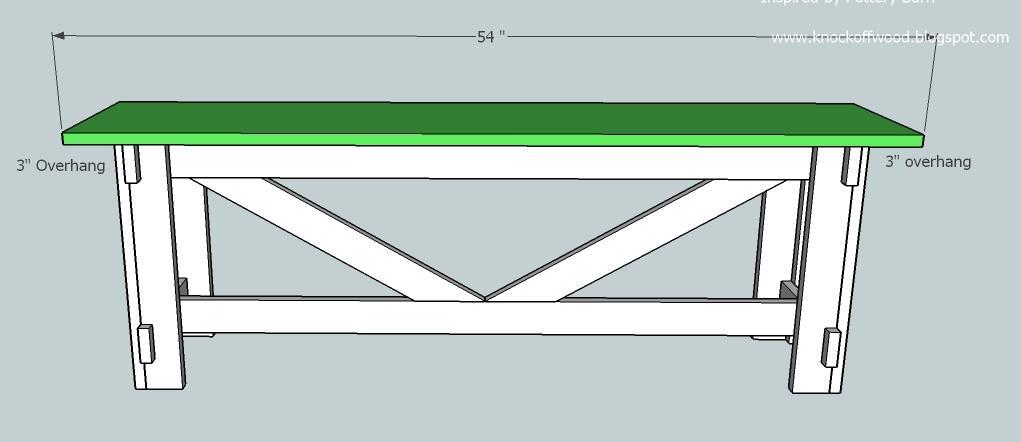
Top. Fasten the bench to the top, as shown here. If you wish to hide your screw holes, you will need to either predrill through the apron and screw into the underside of the bench or you can purchase small L brackets and fasten the top in place. If you are painting, you can simply predrill and scew through the top into the aprons.


Comments
Petit Debutant (not verified)
Tue, 01/19/2010 - 04:57
I just found your site and I
I just found your site and I just wanted to say THANK YOU! My to do list just grew and I can't wait to try out some of these projects. Thank you for your generosity in sharing your talent!
RHgaijin2
Tue, 05/28/2019 - 18:40
Bench
I made a step by step video for this project: I used reclaimed wood from 2x4 pallets
https://youtu.be/PdbMJPvWU8M
Anonymous (not verified)
Tue, 01/19/2010 - 07:22
I'm so inspired by you. My
I'm so inspired by you. My husband and i recently moved into our first home andwe need a ton of furniture on a 'new home owner' budget. awe have been looking all over town for furniture I like that we can afford, and needless to say after 3 months of looking I still am using Yaffa blocks as nightstands. I love your furniture and you make it look so possible. My new goal is to pick one of your peices to start with!
Thanks.
shelly (not verified)
Tue, 01/19/2010 - 07:52
Ok...so every time I come to
Ok...so every time I come to your site my favorite "next" project gets bumped by your latest post!!! Love, love, LOVE the bench!
Anonymous (not verified)
Tue, 01/19/2010 - 08:09
Oh boy, you really have done
Oh boy, you really have done it. I need to make myself a new bed. Thank you for the inspiration.
Carolien
Anita (not verified)
Tue, 01/19/2010 - 08:33
Wow, just found your site and
Wow, just found your site and have become a follower. I can't wait to do some browsing. I love furniture and anything related and can spend hours looking through magazines or walking through furniture stores. Come visit with me when you have a chance.
Anonymous (not verified)
Tue, 01/19/2010 - 09:21
I just came across your site
I just came across your site last night and I must say, I am SOO excited! We are doing some MAJOR remodeling on our home right now and I, like you am a stay at home mom with expensive taste, but a very frugal lifestyle. Thank you, I may just be able to get my home to look the way I've always wanted with your help!!
Rachel@onepret… (not verified)
Tue, 01/19/2010 - 13:18
Yay! I am loving your site
Yay! I am loving your site so, SO much! I actually have this bench and use it a ton... I would love to make one as well. Thanks so much for this, I'll be linking.
TaylorClan (not verified)
Tue, 01/19/2010 - 13:54
where do you get your lumber
where do you get your lumber from?
thanks, David
kathi (not verified)
Tue, 01/19/2010 - 14:42
Oh goodie goodie goodie! I
Oh goodie goodie goodie! I love your blog!! I'm making dollhouse miniature furniture and I LOVE this bench! Your plans could be done in 1 inch equals 1 foot. PERFECT for a dollhouse! :D
Thank you so much! I'm following!
Kathi
Brooke (not verified)
Tue, 01/19/2010 - 18:47
You are amazing. Yet again
You are amazing. Yet again you design beautiful furniture. I am asking for a nail gun for my Valentines, Mothers Day, Birthday, Anniversary gift :). Thanks Ana!
Jaymie (not verified)
Wed, 01/20/2010 - 11:21
I gasped out loud when I saw
I gasped out loud when I saw this bench! I have been looking for a bench for a long, long time, but refuse to pay a lot of money for one. Thank you, thank you!
Tami (not verified)
Mon, 02/08/2010 - 05:02
I just found your site and
I just found your site and LOVE it! I want to make so many of your projects. Your site has given me the inspiration to believe that I CAN build it! My husband and I picked a simple plan to start with - the Hyde Side Table.
LauraUmph (not verified)
Mon, 02/08/2010 - 07:43
Girl, you ROCK! Thanks so
Girl, you ROCK! Thanks so much for sharing your increbile skills with us.
Michelle (not verified)
Mon, 02/08/2010 - 09:04
LOVE this bench....would love
LOVE this bench....would love to see it in a console table height as well. Something for behind the couch, it is FABULOUS!!! Thanks so much for your inspiration!
Leslie (not verified)
Fri, 02/26/2010 - 11:47
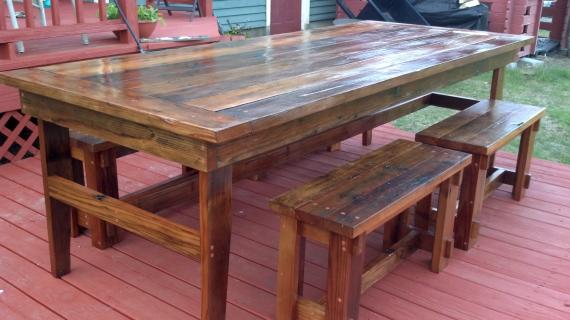
Is there a table that matches
Is there a table that matches this? I want to make a table and some benches that all look like this.
Julie (not verified)
Sat, 03/13/2010 - 18:53
I just built this today and I
I just built this today and I did it all by myself!!! I'm soooo proud!
I did find out though that you need more 1x3 boards than you have listed for materials and thought I would let you know. The 3 1x3's added up equals 288 inches. and if you add up the measurements of what you need cut it comes to 288.68 and that's without taking in to consideration that you will lose some length with each cut made.
I can't wait to paint it. And I will post a picture and a link when I'm done.
thank you for all you do and I am looking forward to building MORE!!!!
the Rew Crew (not verified)
Tue, 03/16/2010 - 09:33
Hi! Love your blog! I just
Hi! Love your blog! I just started working on this project today and have a question. My table is small, and I only have about 40 inches between the legs. So, I had my 1x12 cut only to 36" so that it would fit nicely under the table between the legs when not in use.
Now I am having trouble calculating the aprons/stretcher/cross supports. Help! To be precise, my bench top is 36 1/4" long. How do I calculate the size of the other parts? (I'm assuming my legs can remain the same)
Julie (not verified)
Wed, 03/17/2010 - 11:18
Here is a link to my finished
Here is a link to my finished bench. Love it! thank you soooo much for the plans.
http://buttonsbowsandmore.blogspot.com/2010/03/bench.html
Julie (not verified)
Wed, 03/17/2010 - 11:19
for some reason my link
for some reason my link didn't work
http://buttonsbowsandmore.blogspot.com/2010/03/bench.html
Julie (not verified)
Fri, 03/19/2010 - 11:45
I can't believe you put MY
I can't believe you put MY picture up there!!! I can't think of a BIGGER complement!
argylesocks (not verified)
Thu, 03/25/2010 - 15:27
I am the girl that took all
I am the girl that took all the boy classes in High School and College. I majored in Construction management with a specialty in furniture building. I love that you have this blog. My sister call me a couple of days ago and told me about it. I especially love that you are helping people realize that you do not need a degree to do stuff like this. Basic furniture really is basic. Rock on!
Kidzaplenty (not verified)
Sat, 04/03/2010 - 00:44
I just made this bench and I
I just made this bench and I am so pleased at how it turned out! I am especially happy at the techniques used, and it was so simple to make it longer than the designs called for. Here is my pic: http://www.facebook.com/photo.php?pid=1293884&id=1219127875
I have already modified some more plans that I plan on working on next week.
Kidzaplenty (not verified)
Wed, 04/07/2010 - 17:24
Just had to come back and
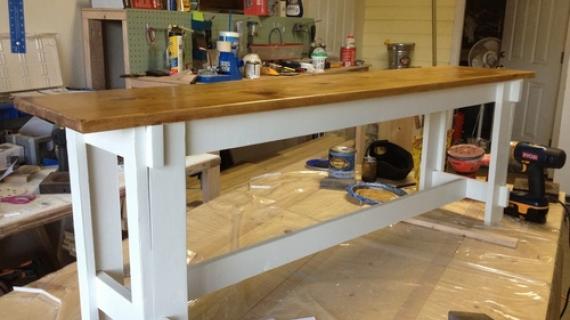
Just had to come back and post another comment. I modified this design a bit and built me a 7 foot long bench. I am very happy with how it turned out so I thought I would show it off. My pic is here:
http://kidzaplenty.xanga.com/photos/e8199266097066/
and here:
http://kidzaplenty.xanga.com/photos/7fcd2266097065/
Shannan (not verified)
Sun, 04/11/2010 - 15:25
I am getting ready to build 2
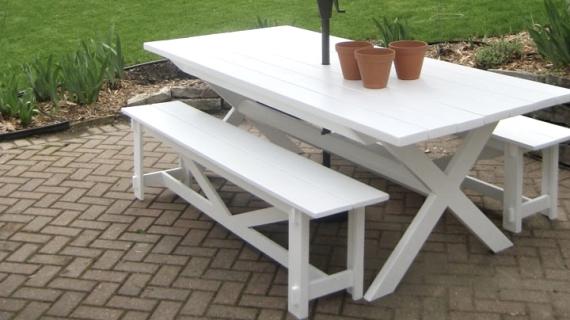
I am getting ready to build 2 of these benches this week. Your instructions say that it is 6 " shorter than the pottery barn bench. Just wondering if the large unfinished bench and black bench are the same as your plans? The bench in the You tube video looks a lot smaller.
Christina (not verified)
Mon, 04/19/2010 - 08:54
I also built this bench (with
I also built this bench (with the help of my dad's tools) yesterday. My 1x12 (unfortunately) was only 11.25" wide, as as a result, my base piece is sticking out beyond my top...however, we are taking a hand saw and whacking them off (or going to a different store to buy a different 1x12 that's wider!) Has anyone heard of a 1x12 being 3/4" narrower than the measure? I have definitely heard of them being 1/4" narrower, but 3/4"?!
Also, I needed 4 1x3's as well, as a previous poster mentioned. AND, we didn't use a jig saw, we notched the legs with a mitre saw and chisel for an more exact cut.
mcall (not verified)
Mon, 06/14/2010 - 10:38
Hi, I love the rustic bench.
Hi, I love the rustic bench. I'd like to make it bigger. How can I figure out the dimensions of the stretchers?
Guest (not verified)
Tue, 01/03/2012 - 21:52
Did you figure out cross support angles?
Hi, I am working on the rustic bench. I decided I was going to make it taller and turn it in to a table basically. I kept it 54" long but I made my legs 30". I got stumped when I came to cutting the angles for my cross support and saw your post and figured you may have figured it out! Please help!!!
That one girl (not verified)
Thu, 07/01/2010 - 10:41
I just found this site and
I just found this site and I'm pretty much in bloggy love. Excuse me while I buy all the lumber out of Home Depot...
Donna Lynn (not verified)
Mon, 08/23/2010 - 03:53
Thank you for your website!
Thank you for your website! My husband and I made this little bench yesterday in about two hours! Here is a link to it (we haven't done the finish yet)
http://countdowntoasimplerlife.blogspot.com
I will post another link after we have the finish on!
Again - thank you so much :-)
A Sand Dollar’… (not verified)
Mon, 08/30/2010 - 10:15
[...] raided my lumber pile,
[...] raided my lumber pile, and we decided to build another Rustic Bench for the foot of our Farmhouse Bed. We all had a hand in building it, and if you have a group of [...]
A Little Bite … (not verified)
Mon, 08/30/2010 - 15:11
[...] hope you liked this
[...] hope you liked this project – next up are the rustic benches to go with our table! I also hope you all go visit Ana’s site and start building something, [...]
rearranging… again (not verified)
Sat, 10/02/2010 - 17:02
[...] here it is “after”!Here
[...] here it is “after”!Here is a shot of the bench my dad made for us this week. We used these plans, only adapting it a bit to make it longer (66″). With all the rain this week he could [...]
Carole Zullo (not verified)
Thu, 10/07/2010 - 08:40
Thank you sooooo much! I
Thank you sooooo much! I found your site a few weeks ago. A friend mentioned you on facebook and I had to investigate. Finally this past weekend, my dear sweet husband was patient enough to show me how to use his saw, and power tools. He didn't even cringe when I used them wrong. So we made this bench and had a blast doing it. In fact all three of our boys played a part in building it too. I have shared your site with all my friends and can't wait to build more.
Ana you ROCK, and really I can't thank you enough!
Knocked Off: O… (not verified)
Mon, 10/25/2010 - 03:00
[...] many friends and is
[...] many friends and is witness to tons of amazing memories!” I built it intending to place our Rustic Bench at the foot of our Farmhouse Bed, and it’s the perfect addition to our [...]
Rooms You Can … (not verified)
Thu, 11/11/2010 - 08:35
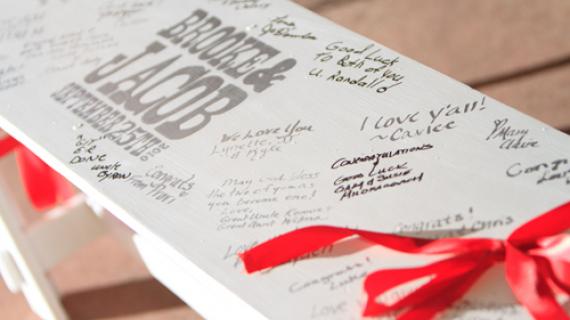
[...] A Rustic Bench as a
[...] A Rustic Bench as a wedding guest book! Plans are here. [...]
Aimee (not verified)
Sun, 11/28/2010 - 08:15
I would love to make these
I would love to make these longer to go with the Farmhouse Table with stretcher..is this possible???
guest (not verified)
Mon, 05/09/2011 - 11:41
the amount of wood you that
the amount of wood you that is on the shopping list isn't enough to make all the cuts that are needed and you might want to add fasteners to the shopping list as well because they are needed in step 3. disappointed
fethiye
Mon, 06/20/2011 - 10:14
cannot see the sizes on the images
Hi Ana, we no longer can click on the Google Sketch images to make them larger; yes, a larger window pops up but the images are no longer as big because of the space the ads take :(
SteinkeBeyer
Sun, 07/31/2011 - 14:13
Cannot see sizes on images...
Hi,
I'm brand new to the ana white website and love the furniture, but I too, cannot see the sizes on the google sketch images. Is there are fix for this problem. I'm a mac user. Thanks, Joanna
spiceylg
Sat, 08/13/2011 - 10:33
Font
My hubby and I are going to attempt to make two of these starting this weekend. I was going to start cutting however I am having a hard time seeing the measurements on all of the drawings. I enlarged them but they just get distorted and fuzzy. Can anybody help me with this? I don't want to mess it up. We have to finish them this week as they are for a fundraiser next weekend.
spiceylg
Thu, 08/18/2011 - 05:01
Thanx!
Thanx for enlarging the photos Ana, much better. Some of us have older eyes, lol!
mscaggs
Tue, 02/28/2012 - 06:33
I Love the Bench Plans
Thanks for the great bench plans...
Ashleigh (not verified)
Sat, 03/03/2012 - 21:34
Longer bench
I want to make this bench in an 84" length. do you think it's needs support in the middle?
Raelle616
Tue, 03/19/2013 - 12:26
Love this bench, looking for smaller plan...
Love this bench, looking for smaller plan to make wedding guestbook but can't find the plan...can anyone help me out with it?!
Many thanks!
cassiet717
Tue, 08/20/2013 - 10:04
Cross Supports
Are the cross supports a structural element or are they more for design? I want to make benches for your "Rustic Table", and these (without the cross supports) most closely match it. Thanks!
jev1977
Mon, 12/23/2013 - 13:53
Wood Filler & Sanding
Hi There,
For the legs, do you make them look like one piece of stock by using wood filler? To fill any small gaps between the 1x2 and 1x3?
I can't quite tell if the bench is sanded to soften the corners for the top, legs and other pieces.
Any feedback would be great. I will start this soon.
Christy_Roseveare
Mon, 10/20/2014 - 11:56
Notch Cuts
OK. I really want to make this bench, but I am afraid of the notch cuts. I can see how to do the L shaped ones on the top of the piece, but I cannot wrap my brain around the lower one with cuts on three sides. Advice?
Stephen Peters
Mon, 10/20/2014 - 14:56
How to do notch cuts with a jigsaw
Christy- here is picture of the three sided notch cut. It takes 4 cuts.
Have fun with your build!
Leischj
Sat, 02/07/2015 - 09:18
IncorrecT shopping list
I'm surprised nobody has pointed out the shipping list is incorrect for this project. You need 4 1x3s to complete this bench as described. Three 8 ft 1x3s is 288" of lumber. But if you add up all the 1x3s needed in the plan it comes to 301.5. Over a foot short.