


DIY wood cooler plans!
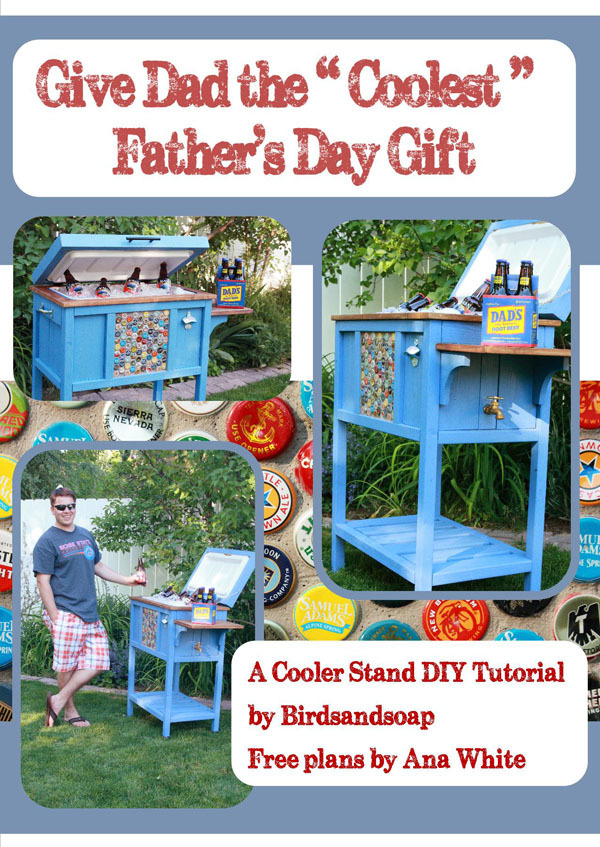


The coolest guy in the house deserves the coolest gift ever, right???
You all remember Jenny from Birds and Soap ... creator of the Sweet Pea Bunk Beds?

Well, Jenny's generous enough to share her newest amazing creation with us today!!!

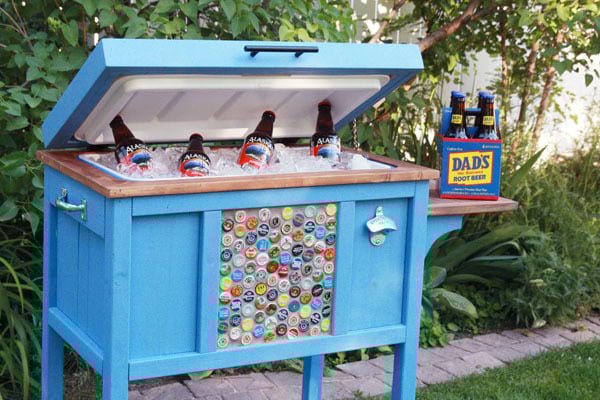
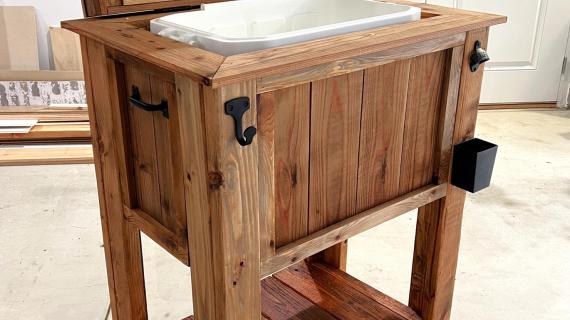
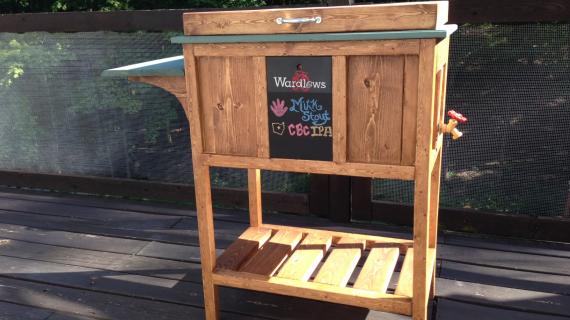
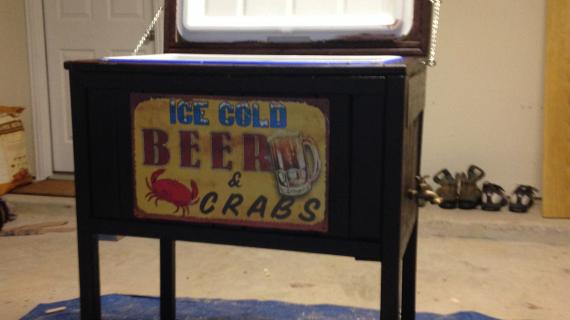
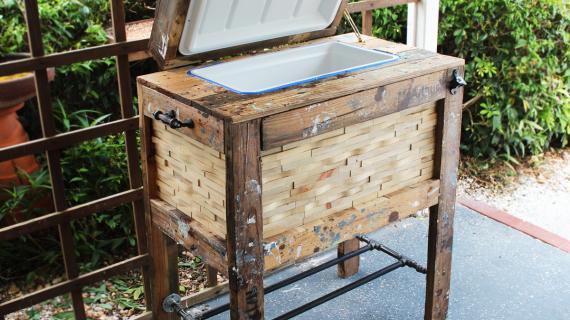
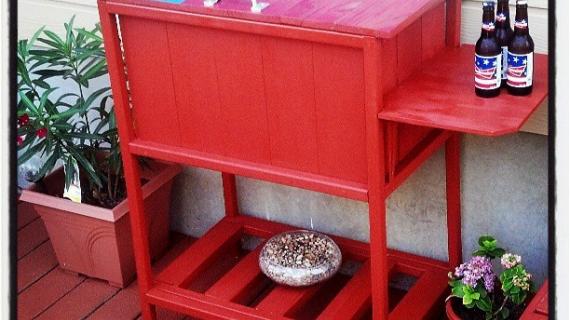
For Father's Day, Jenny made her husband a wood cooler!!
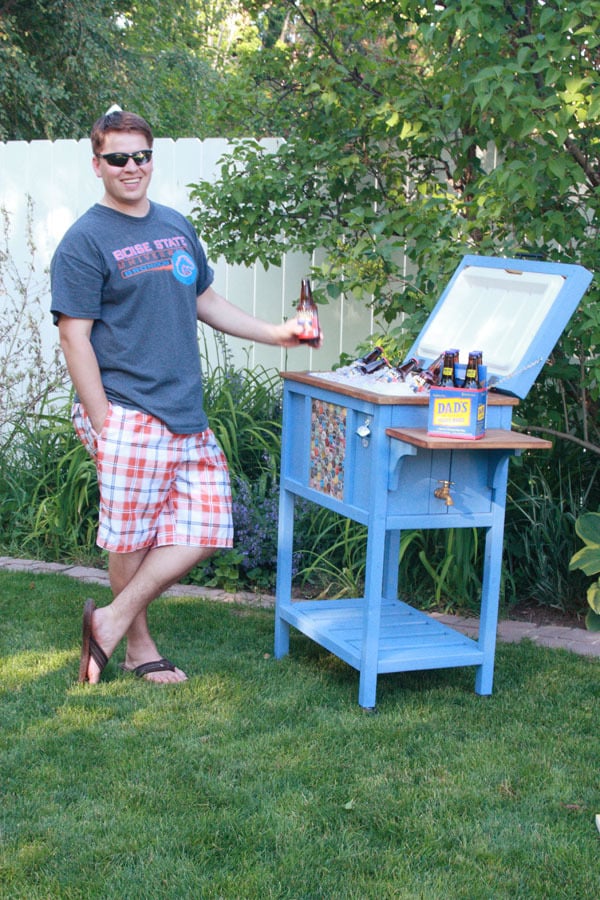
What Dad wouldn't want this???
Jenny designed and built this wood cooler, and was so kind to share the plans with you today here.
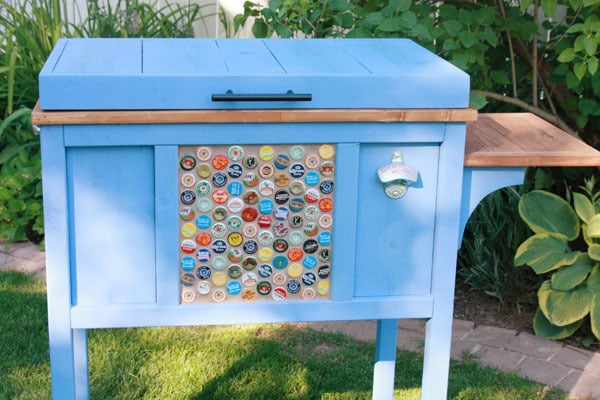
But before we get to the plans, you have to go read Jenny's post on how she built the cooler, how she accessorized with saved bottle caps, and what cooler she used, and how she modified it ... I'll see you back for the plans then, okay?
Thank you so much Jenny for sharing these wonderful plans with us today!
Preparation
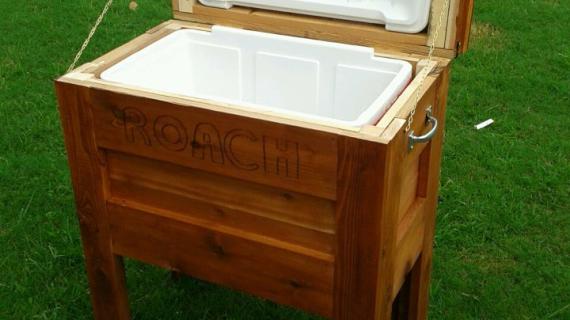
Cooler (designed to fit this one)
4 - 2x2 @ 8 feet long
3 - 1x3 @ 8 feet long
2 - 1x6 @ 8 feet long
2 - 2x4 @ 8 feet long
1 - 1x2 @ 8 feet long
Hinges, caster wheels if desired
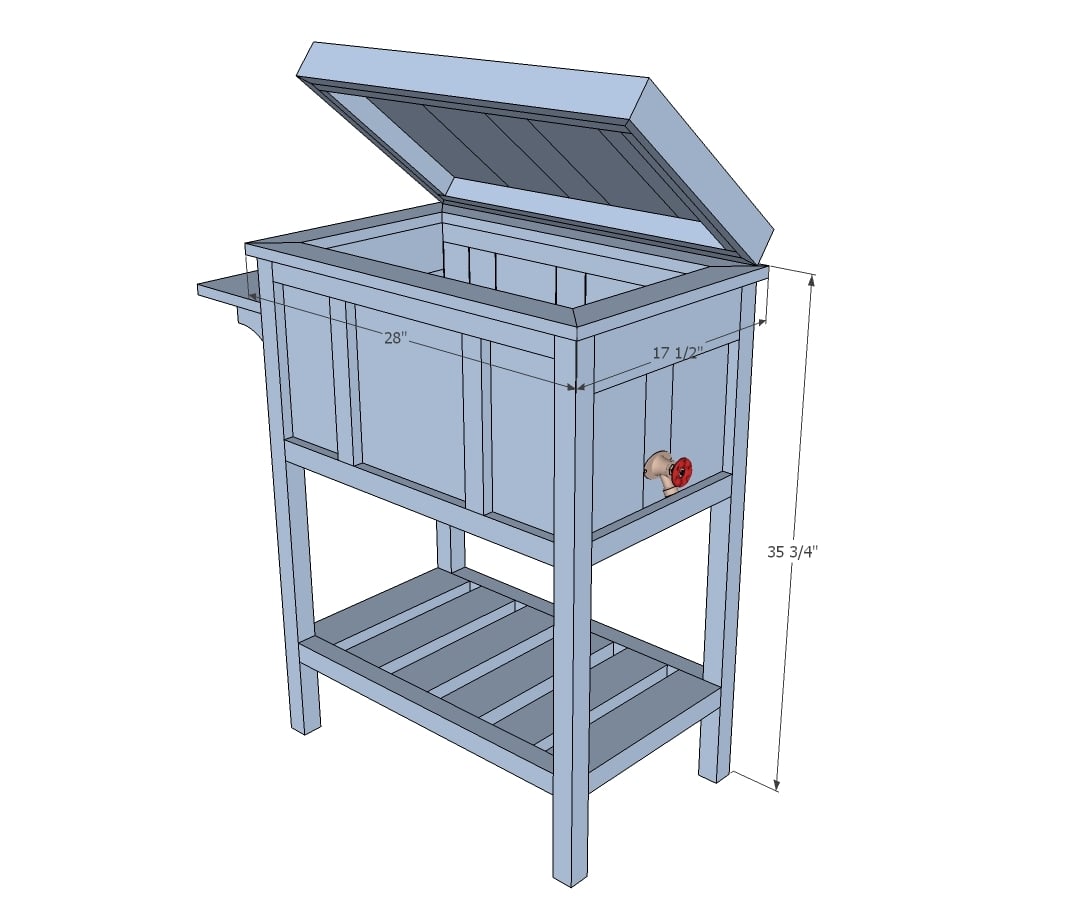
MAIN COOLER
4 - 2x2 @ 35" (legs)
6 - 2x2 @ 24" (frame for front/back)
5 - 1x3 @ 10 3/4" (back panel boards)
4 - 1x6 @ 10 3/4" (front and back panel boards)
2 - 2x2 @ 10 3/4" (front panel boards)
Scrap plywood 10 3/4" x 10"
14 - 2x4 @ 13 1/2" (sides and shelf slats)
4 - 1x6 @ 8 3/4" (Side panels)
2 - 1x3 @ 8 3/4" (side panels)
2 - 1x3 @ 28" - both ends mitered at 45 degrees NOT parallel, long point measurement (top frame)
2 - 1x3 @ 17 1/2" - both ends mitered at 45 degrees NOT parallel, long point measurement (top frame)
LID
2 - 1x3 @ 27" - both ends beveled at 45 degrees NOT parallel, long point measurement (top frame)
2 - 1x3 @ 16" - both ends beveled at 45 degrees NOT parallel, long point measurement (top frame)
4 - 1x6 @ 14 1/2" (top panel)
1 - 1x3 @ 14 1/2" (top panel)
2 - 1x2 @ 13" (inner frame)
2 - 1x2 @ 25 1/2" (inner frame)
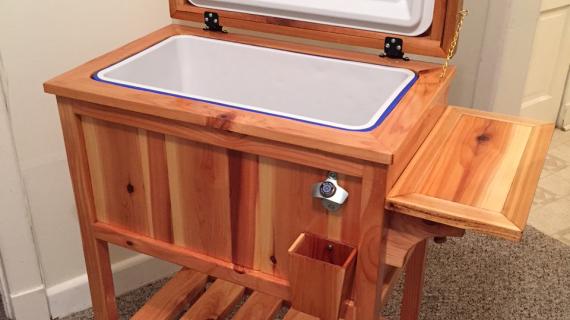
SHELF
2 - 1x6 @ 5 1/2" - cut out arch shape (supports)
1 - 1x6 @ 15" (shelf)


Please read through the entire plan and all comments before beginning this project. It is also advisable to review the Getting Started Section. Take all necessary precautions to build safely and smartly. Work on a clean level surface, free of imperfections or debris. Always use straight boards. Check for square after each step. Always predrill holes before attaching with screws. Use glue with finish nails for a stronger hold. Wipe excess glue off bare wood for stained projects, as dried glue will not take stain. Be safe, have fun, and ask for help if you need it. Good luck!
Instructions
Step 1
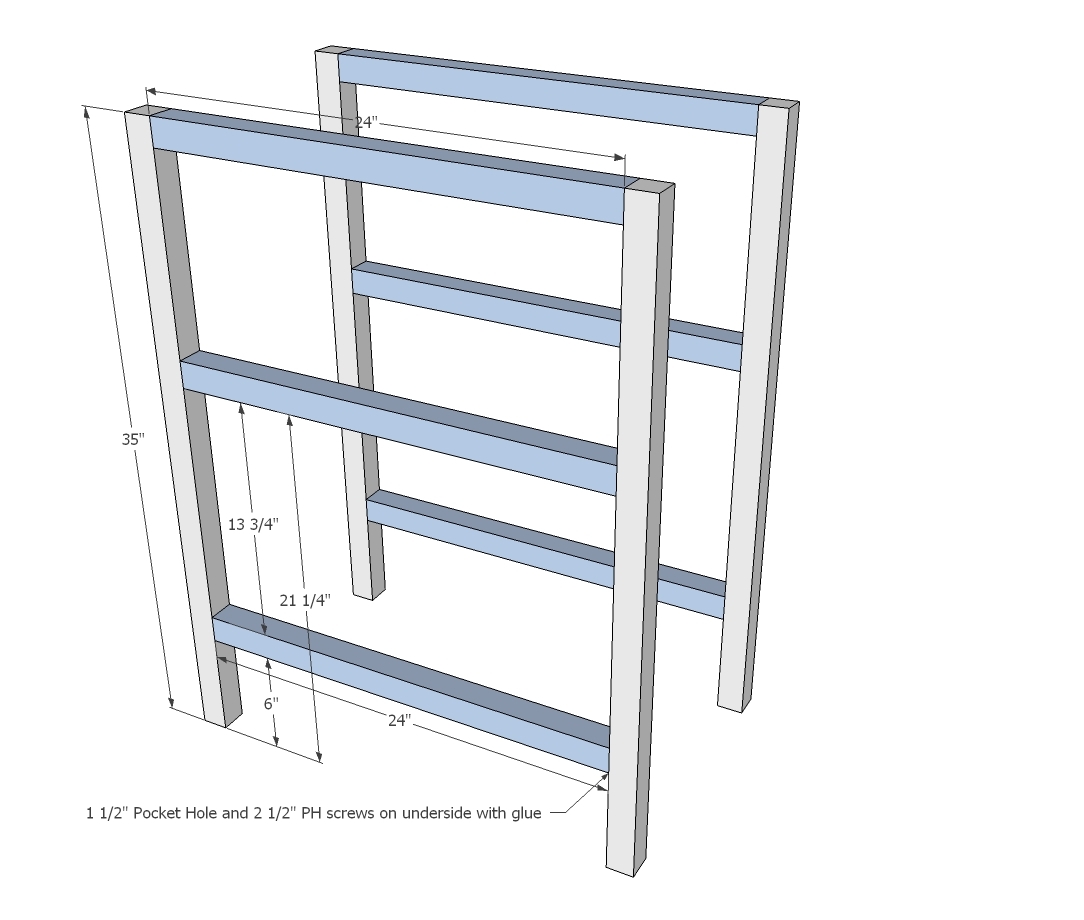
Build your two main frames as shown above.
Step 2
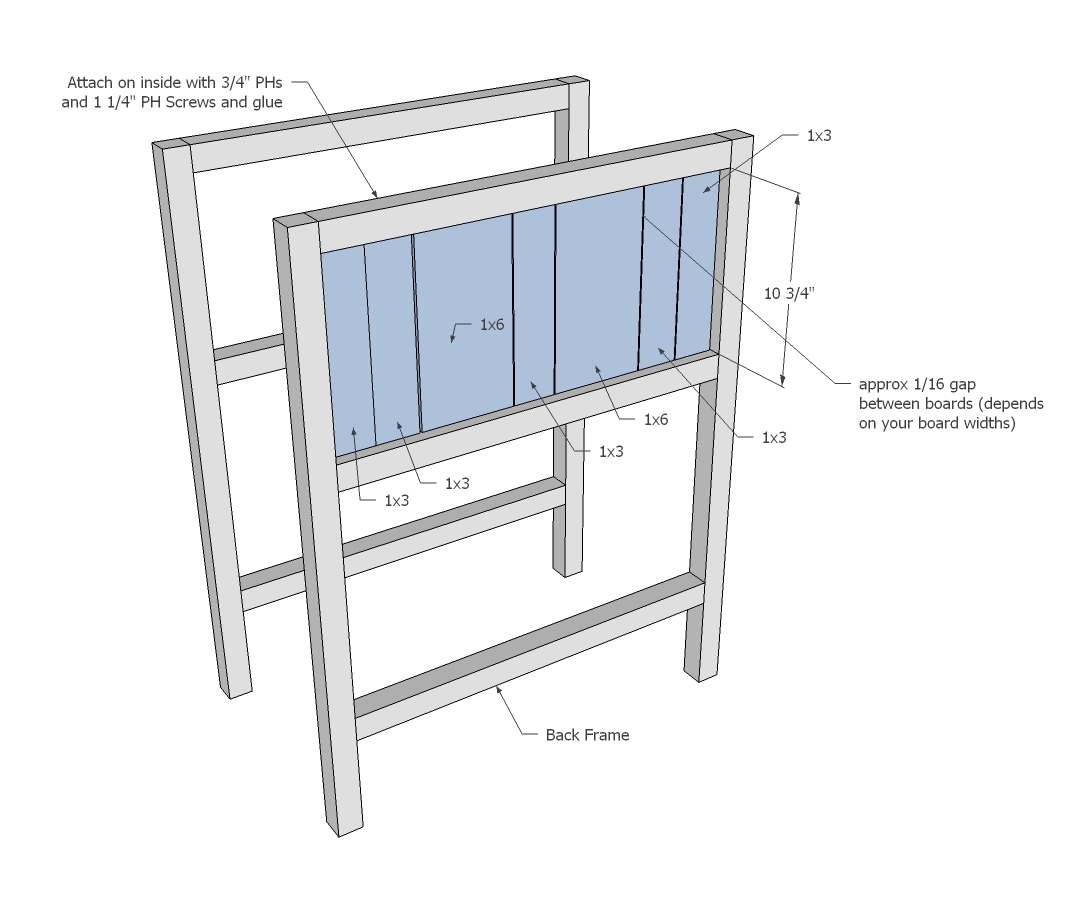
For the back frame, add paneling boards - there can be a gap in between these depending on your 1x board widths.
Step 3
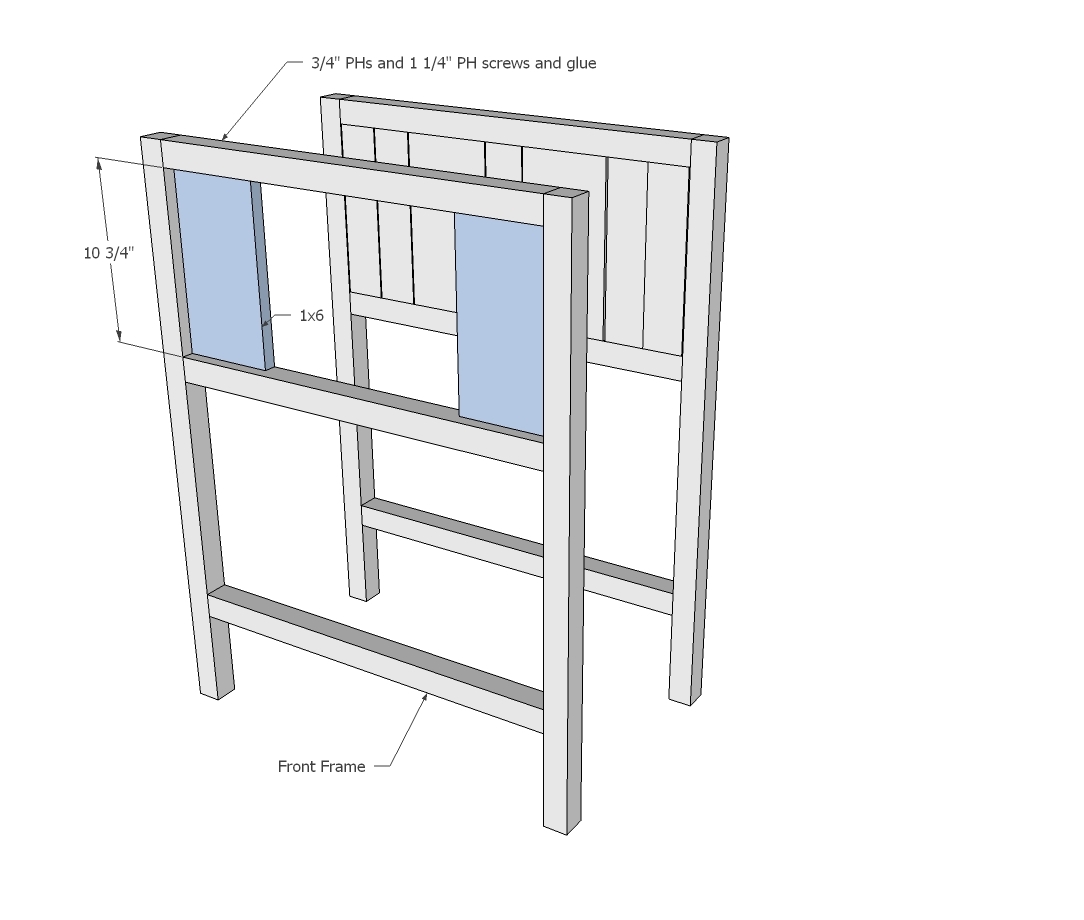
Then add the 1x6s to the front frame.
TIP: You can also drill 3/4" PHs facing the 2x2s for step 4 now to attach in next step.
Step 4
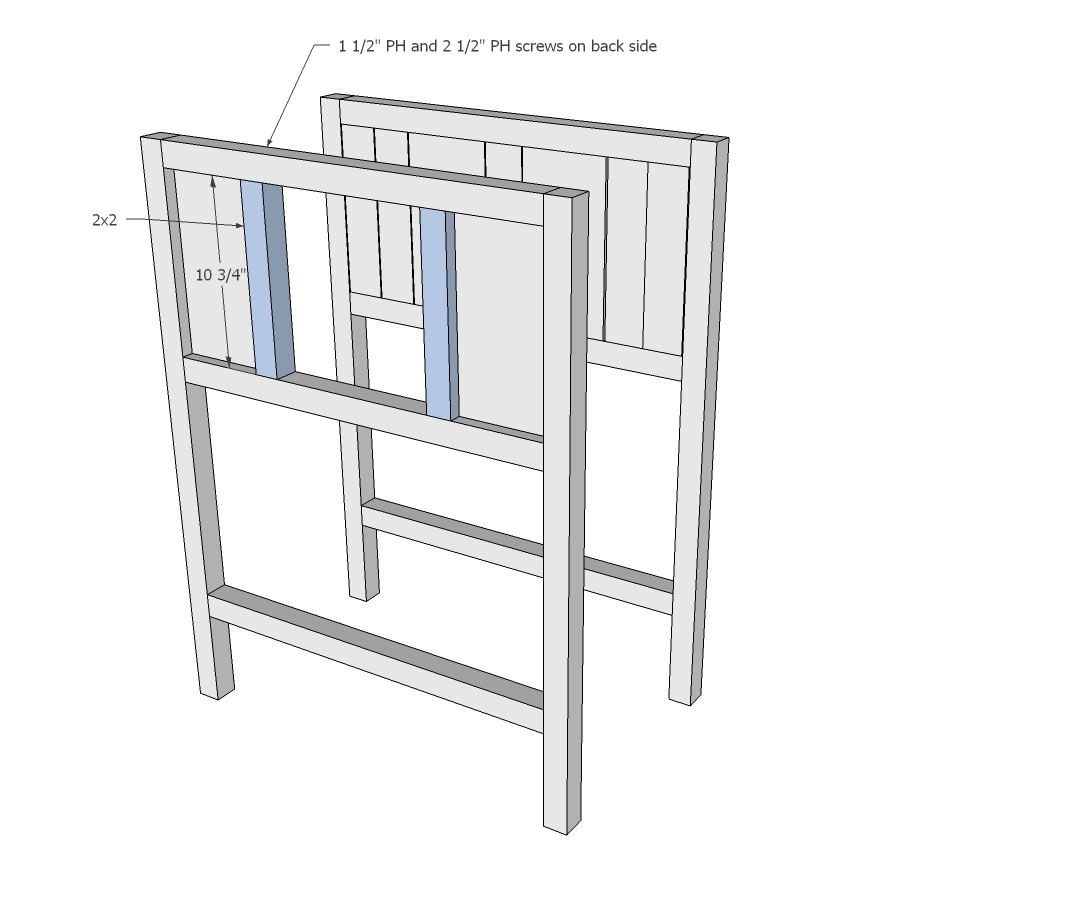
And then the 2x2s.
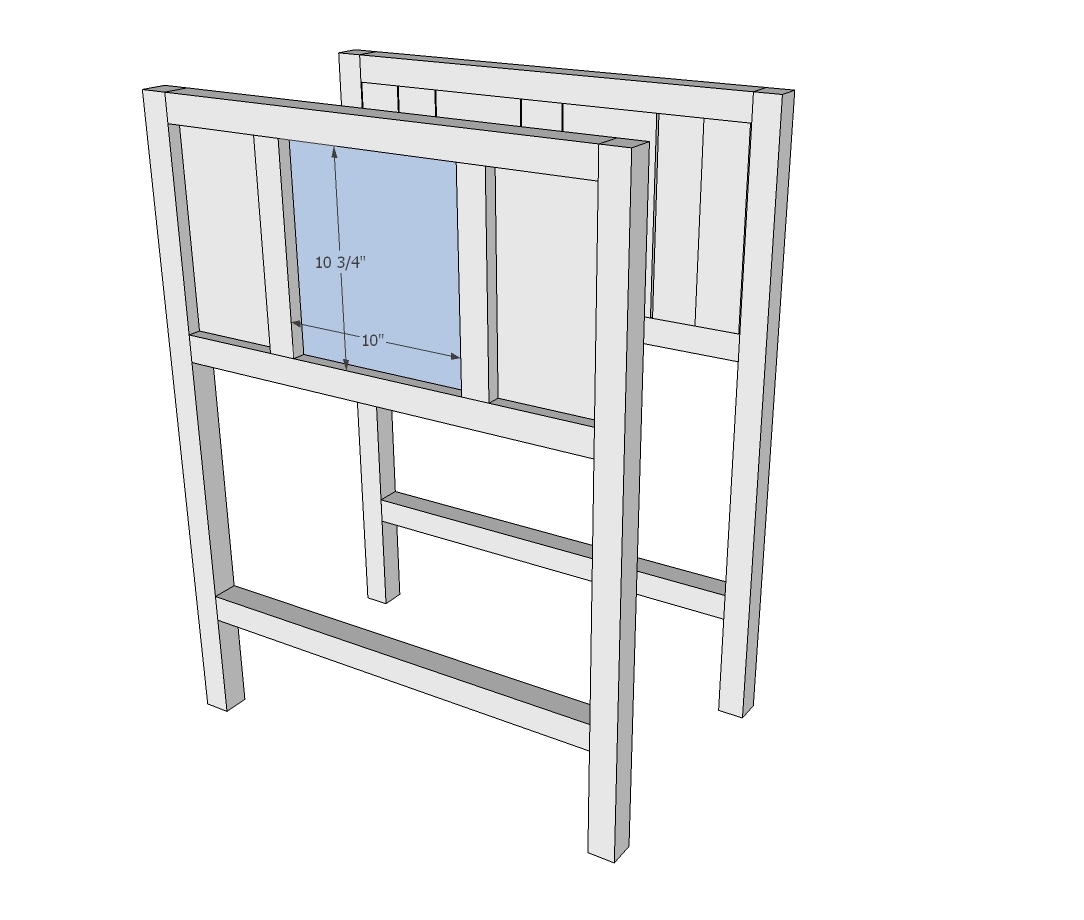
Step 5
Step 6
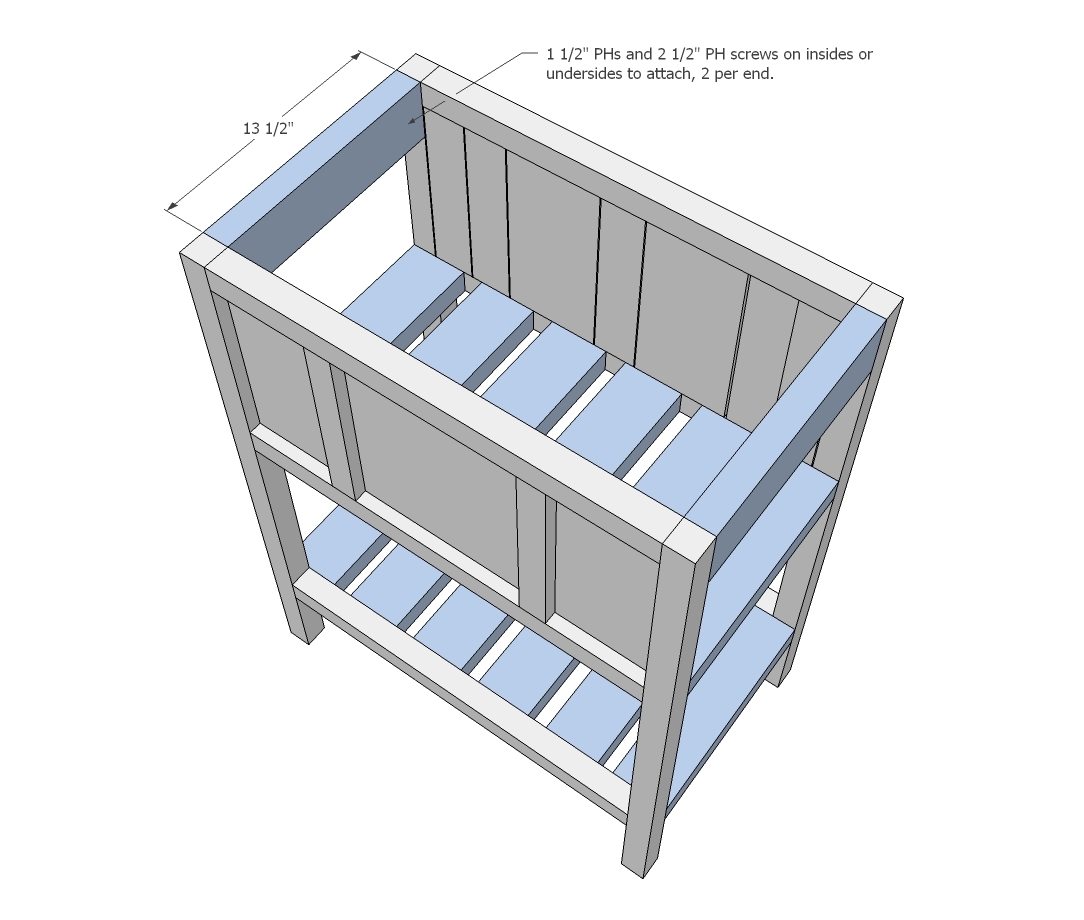
Connect the two frames with the 2x4s - spacing for the shelf slats is approximately 1 1/4".
Step 7
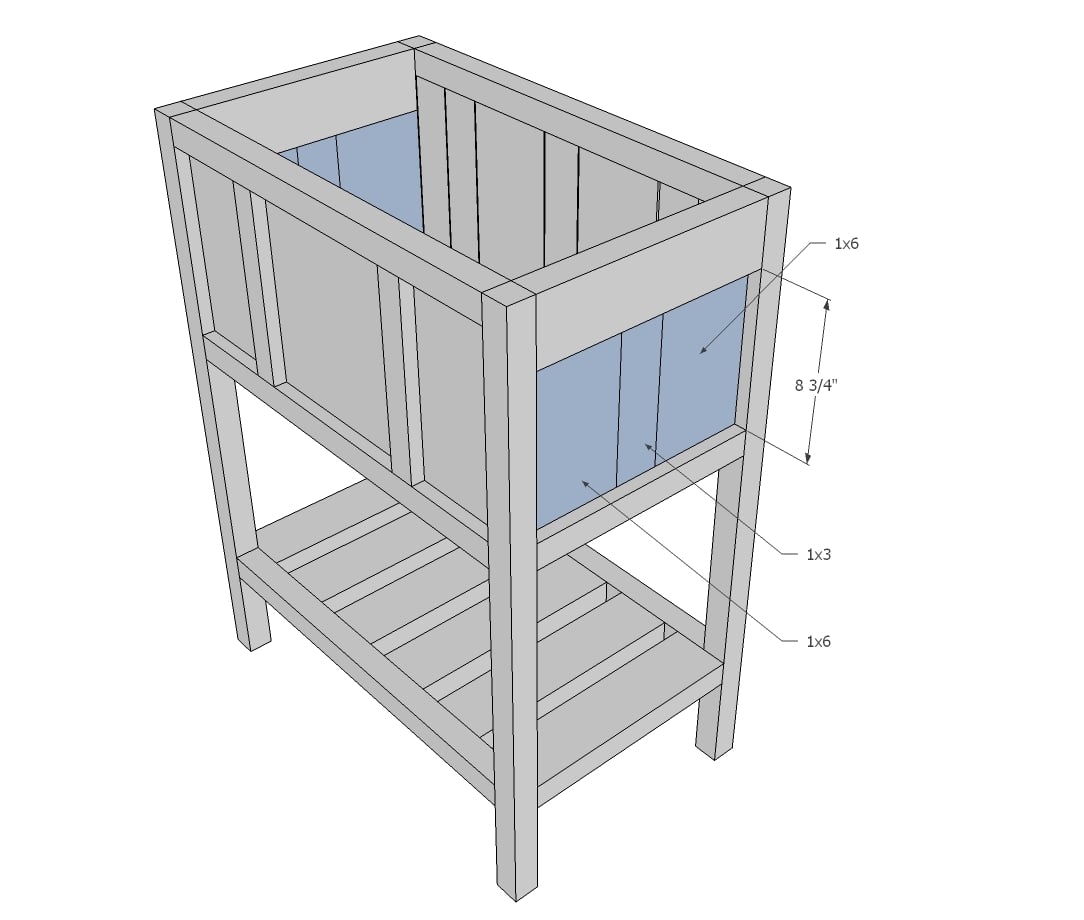
Then fill in your side panels.
Step 8
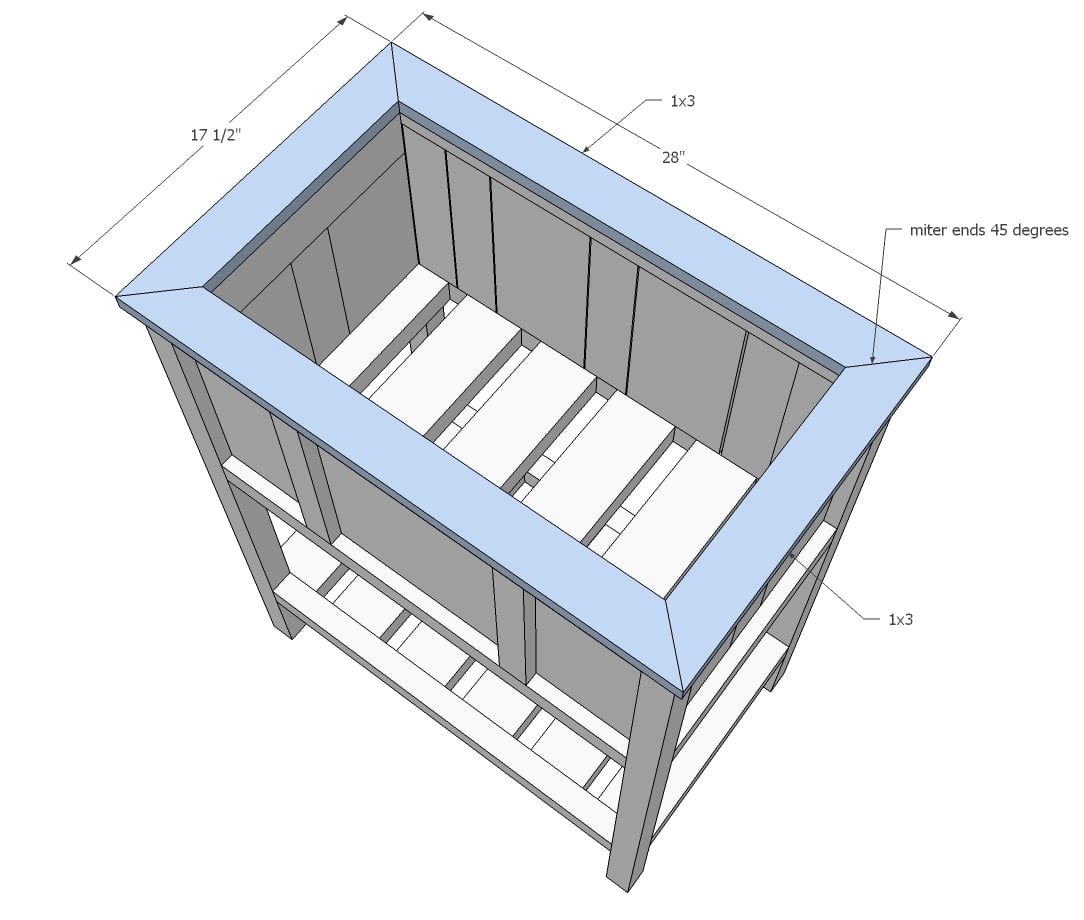
And build the top frame separately with 3/4" PHs/1 1/4" PH screws and attach to top. You can attach to top with countersunk screws or nails.
This completes the main wood cooler part.
Step 9

Moving on to the lid .... build your frame and add the panel boards.
Step 10
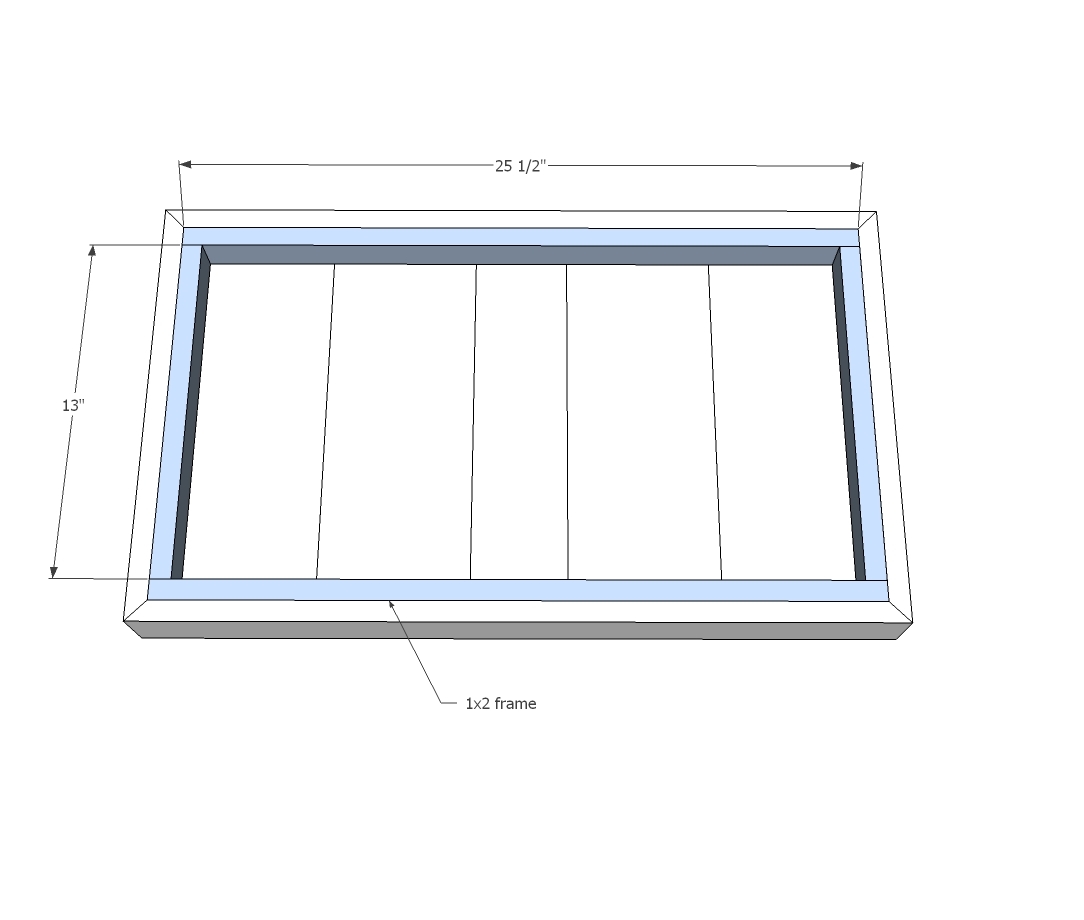
And then add the inner frame to keep the lid in place.
Step 11
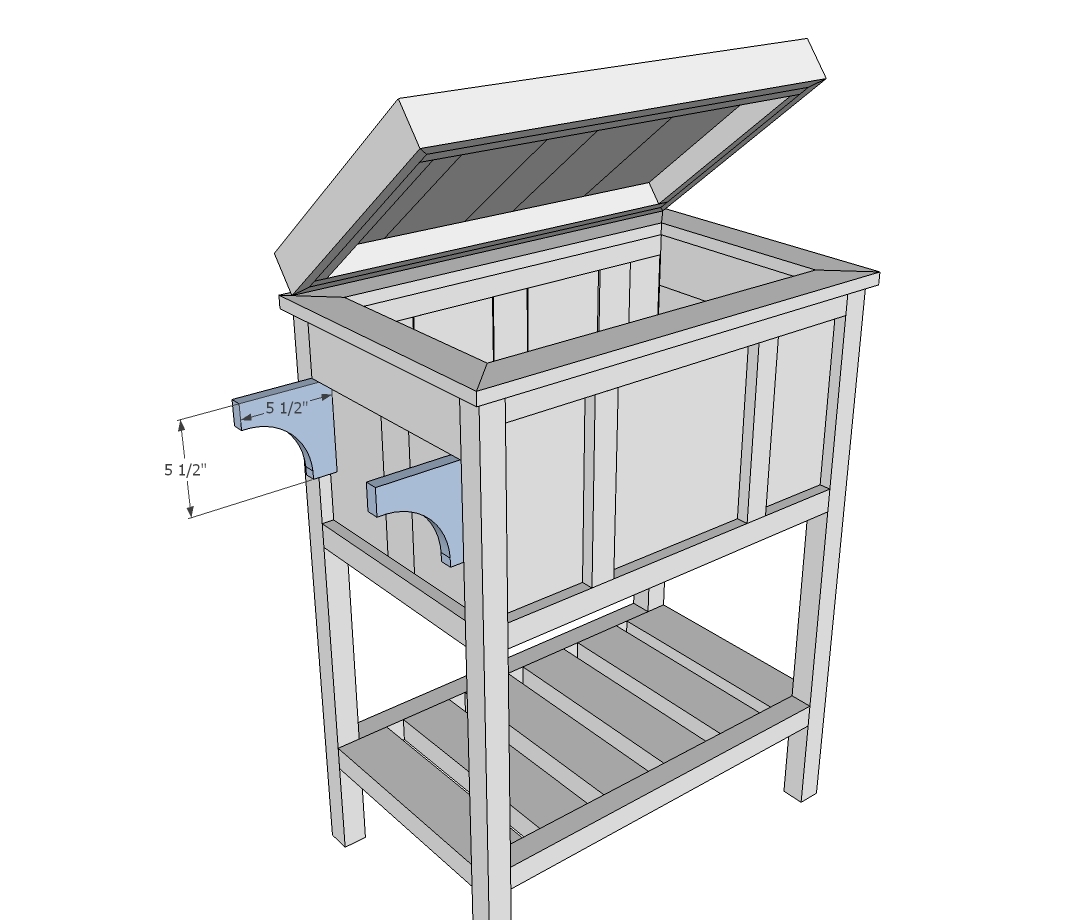
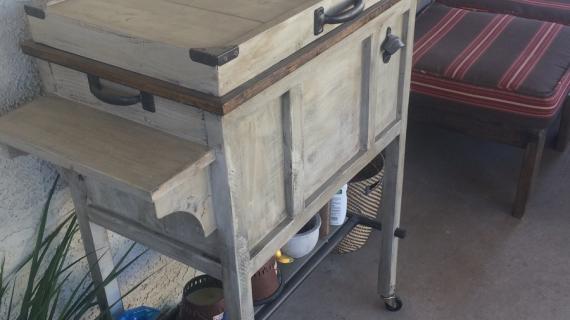
For the shelf, attach the brackets to the 2x2s - you can use PH screws or countersunk screws.
Step 12
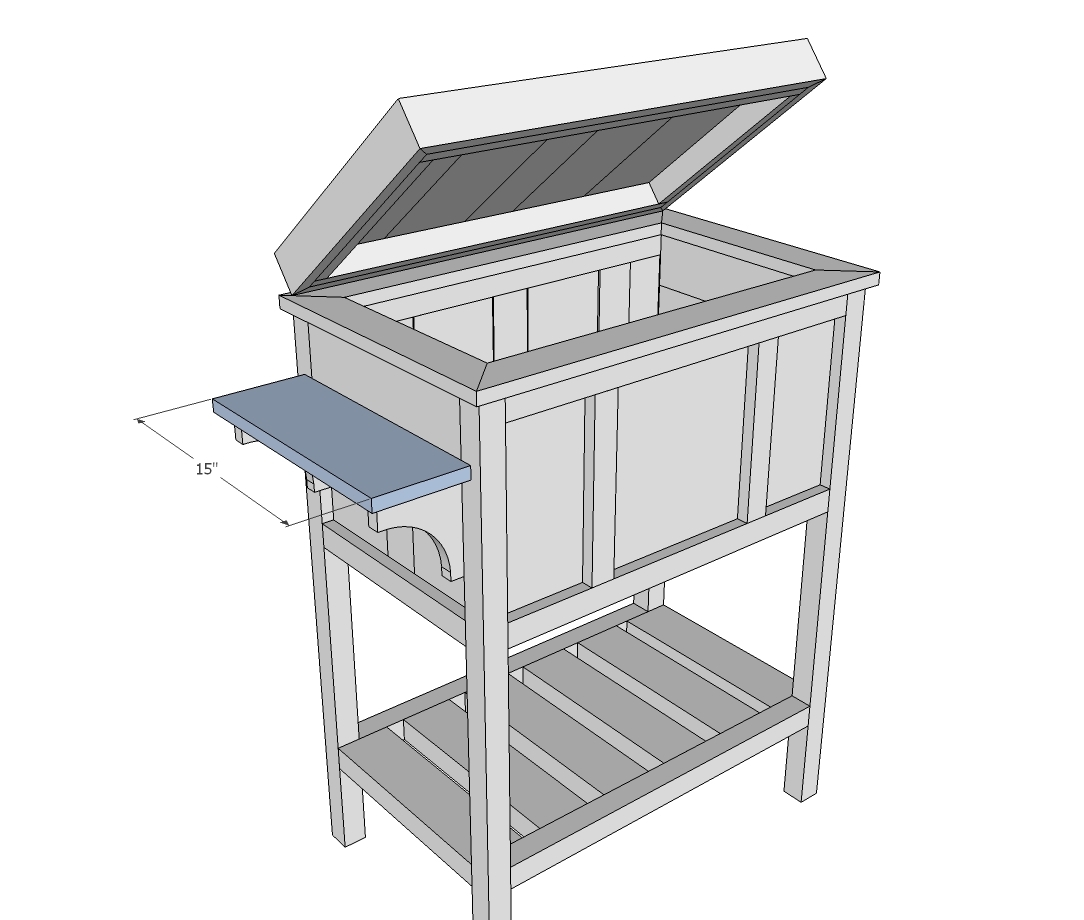
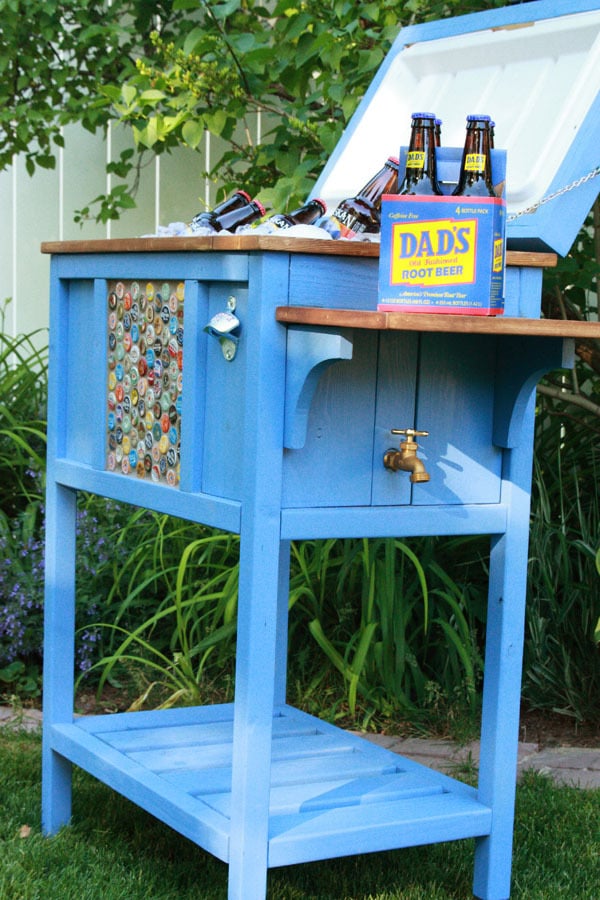
And the shelf on top. I simplified in the plans with the 1x6 shelf - I love how Jenny made her shelf here.
Step 13
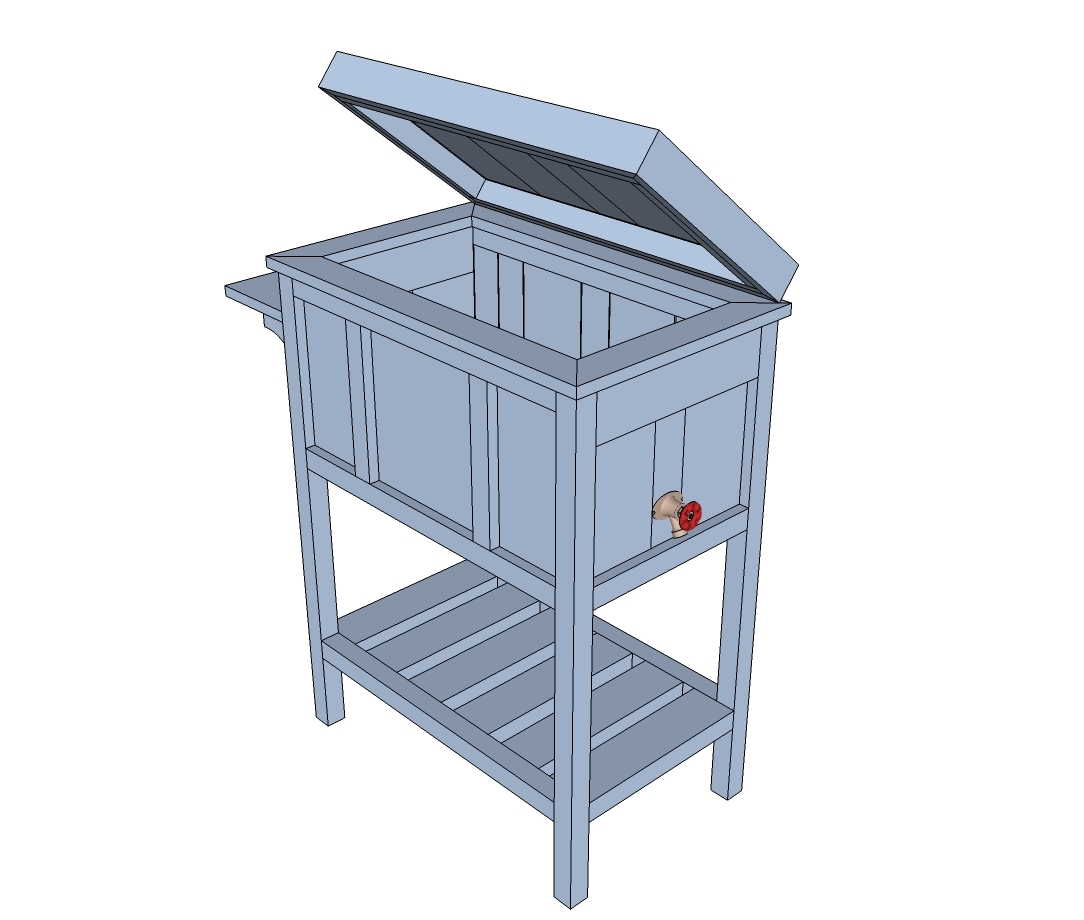
For more details on attaching the drain to the cooler - please read through Jenny's post as well.
It is always recommended to apply a test coat on a hidden area or scrap piece to ensure color evenness and adhesion. Use primer or wood conditioner as needed.

Comments
spiceylg
Tue, 06/11/2013 - 05:55
Cool
Very cool indeed! Nice job!
Chexmix09
Wed, 06/12/2013 - 05:09
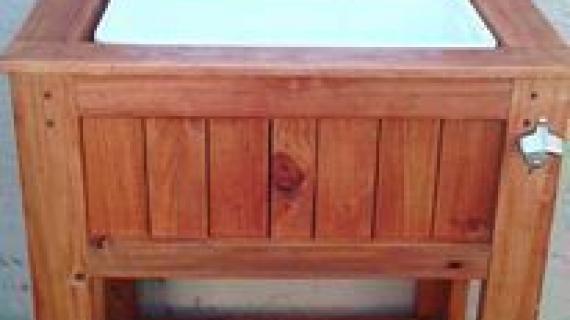
bottle caps
What is it that you are putting the bottle caps in?? Is that some kind of putty?
In reply to bottle caps by Chexmix09
birdsandsoap
Wed, 06/12/2013 - 21:13
The caps were glued onto a
The caps were glued onto a 3/4" plywood base, then grouted with a sanded tile grout.
Pharmdrxt
Tue, 05/18/2021 - 12:42
plans
are these plans still available
countrysideworkshop
Sat, 07/27/2013 - 19:48
HELP
I am trying to build mine, but on the first picture in the plan with the front and back legs there is a missing measurement. The overall length. The middle supports measure at 24" but the overall including the legs is what? I ask because I added 1.5" per leg (milled 2x2 size) to the 24" which would give it an overall 27". But then if you had the 1" for the top lip that is built later in the plan than the lip is one inch off all the way around. But the plan says the lip is 28"x17.5"
countrysideworkshop
Sun, 07/28/2013 - 12:26
Measurements Off, Maybe?
Are the plans made with milled dimension sizes? The lid isn't adding up. The panels (4 1x6 & 1 1x3 milled = 24.5"). If you create a frame that is 27x16 then it will be one inch to long. But if you used unmilled sizes then the frame would be 1 inch to short.
In reply to Measurements Off, Maybe? by countrysideworkshop
CSaintD
Sun, 01/26/2014 - 10:21
countrysideworkshop - 27" is
countrysideworkshop - 27" is the outside measurement of the frame. If you take off the 1.5" for each 2x2 leg (the panels go inside), then you get 24" to fill in for the panels. I ended up using 3 1x3's and 3 1x6's for the back panel - this fits exactly into the 24" frame.
kmkoncir
Thu, 04/28/2016 - 07:45
Same issue - help?
Hey countrysideworkshop. I'm having the same issue? What measurements did you use to correct the lid problem? Advice from anyone would be much appreciated!
CSaintD
Sun, 01/26/2014 - 10:09
help for building
Hi, I am building this right now and have a question about the panels. The plan says to use pocket holes and screws to attach the panels to the frame. Do I attach the panel pieces together first, or just screw them into the head and foot rails of the frame? I am concerned about the outside panels hitting the screws that I used to build the frame (from 2x2 to 2x2), also with the outside 2x4's intersecting the screws from the frame.
Thanks in advance. This is the first time I've built anything like this and so want to be sure of everything before I make a mistake.
ashleymdahl
Thu, 02/22/2018 - 00:23
Lid size seems off?
The width of the lid is the same as the base but the depth is 1/2 an inch smaller...is this an error in the plan or is it meant to be this way? It looks a bit "off" to me.
RHgaijin2
Sun, 04/14/2019 - 20:10
Wood Cooler
I made a video of the pictures I took while making this cooler. https://youtu.be/VfVbId3FeU4