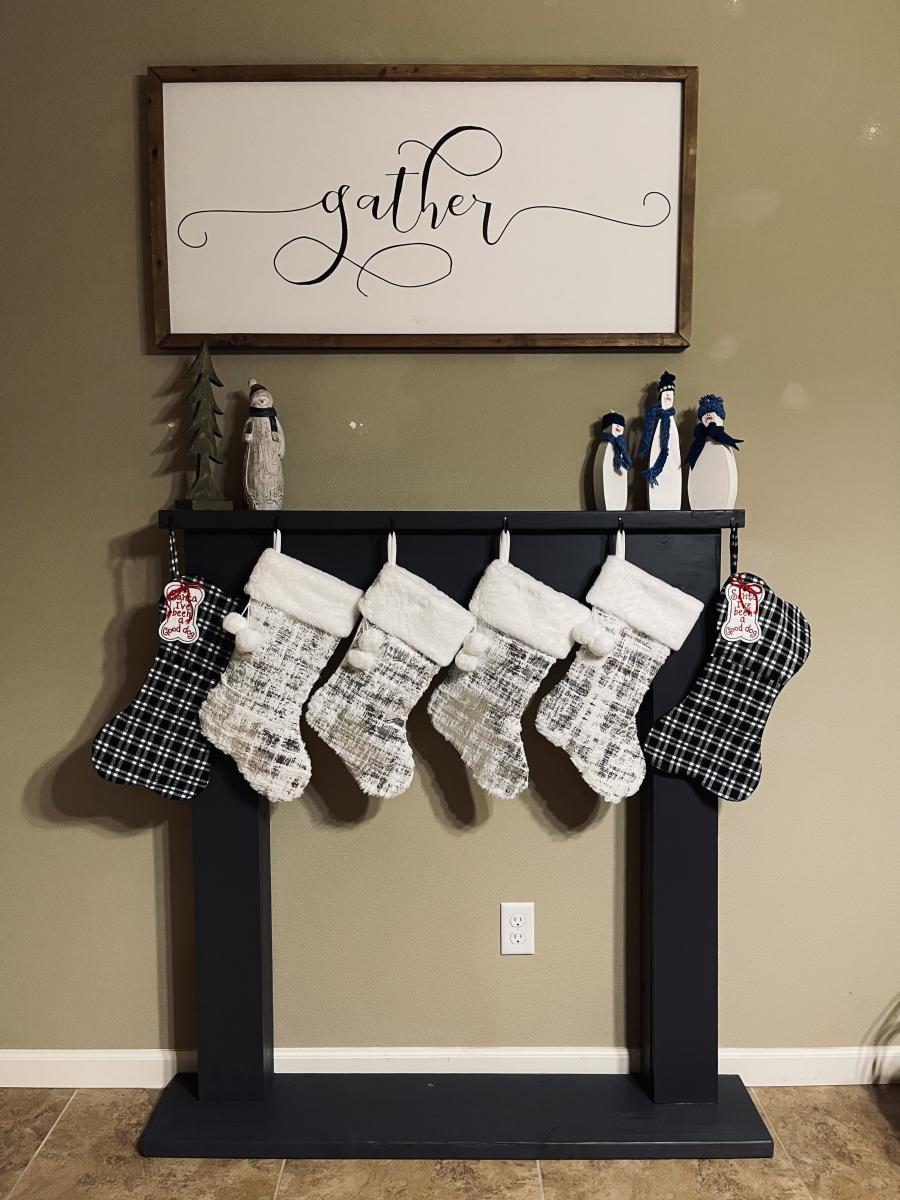
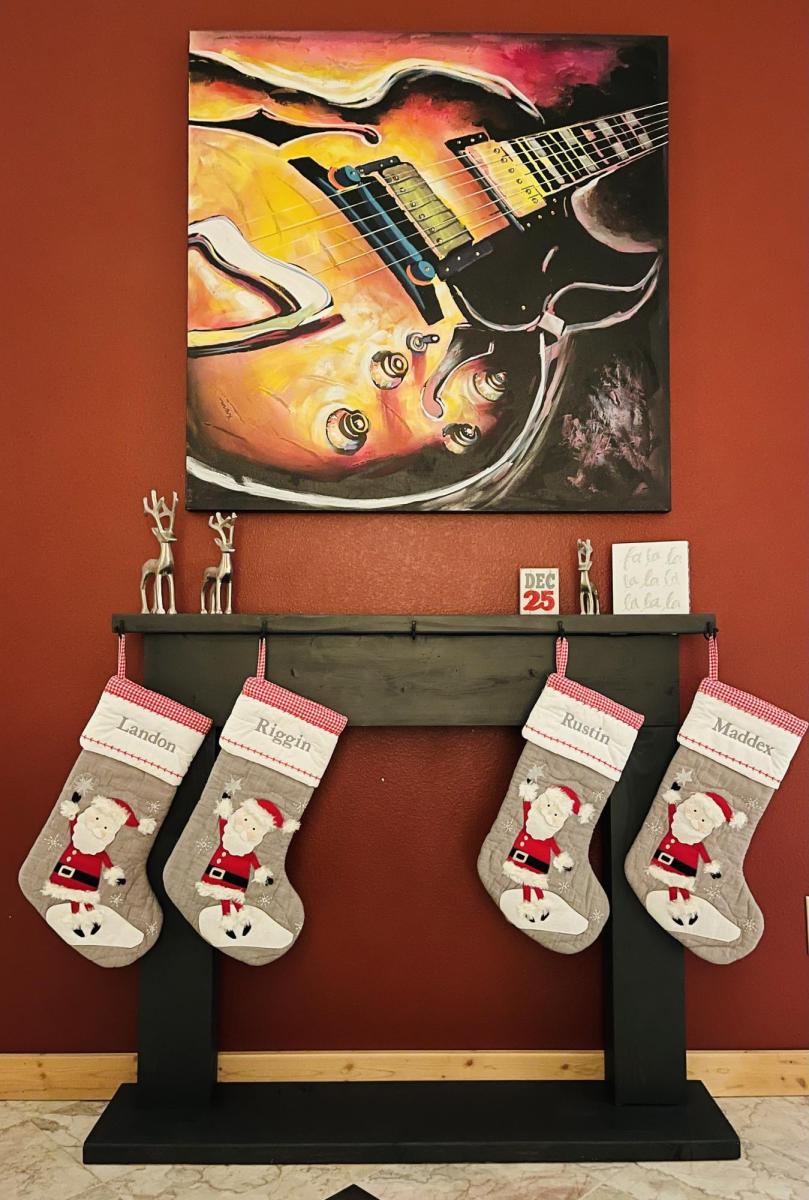
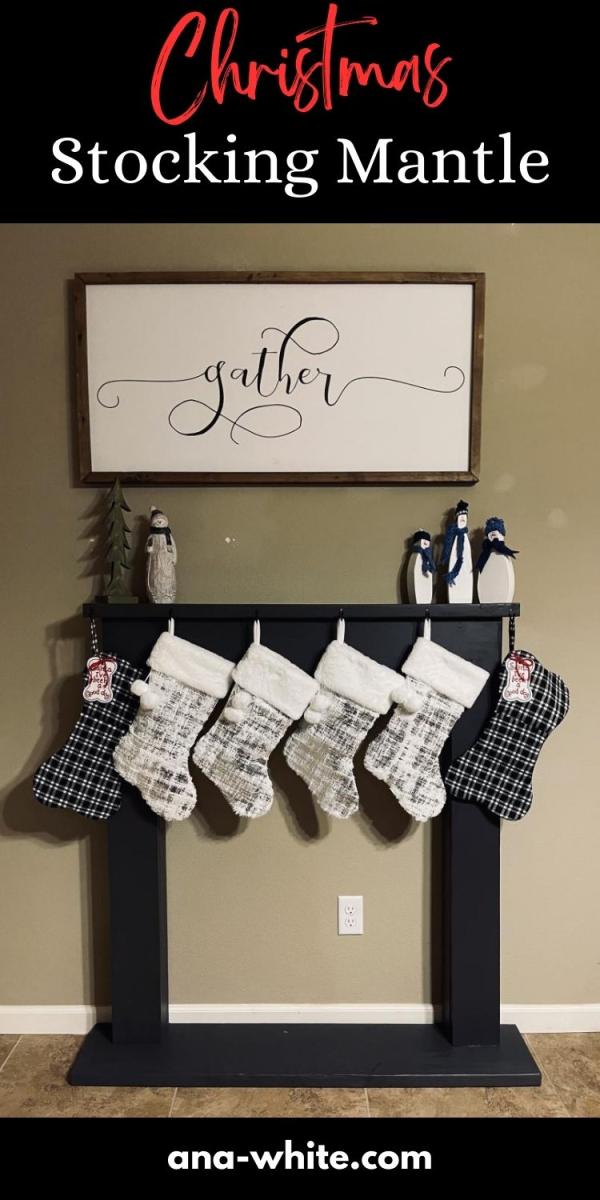
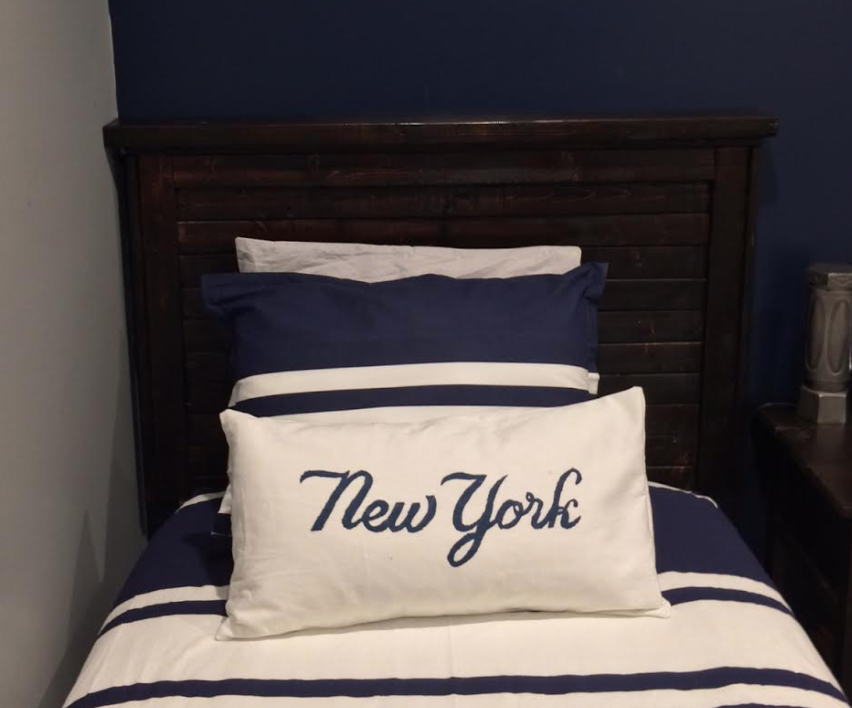
Christmas Stocking mantle
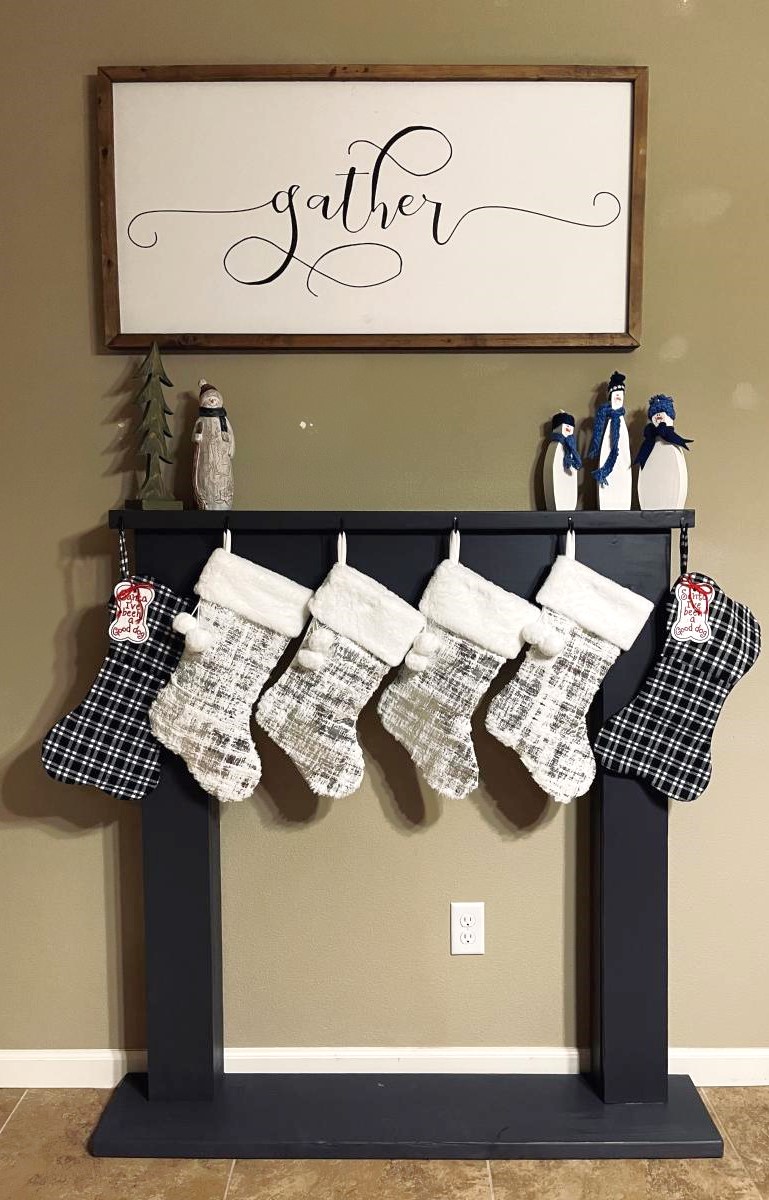
I made 2 different-sized mantles, one for my daughter’s house (taller and wider) and one for mine.
Built from Plan(s)
Seasonal And Holiday
I made 2 different-sized mantles, one for my daughter’s house (taller and wider) and one for mine.
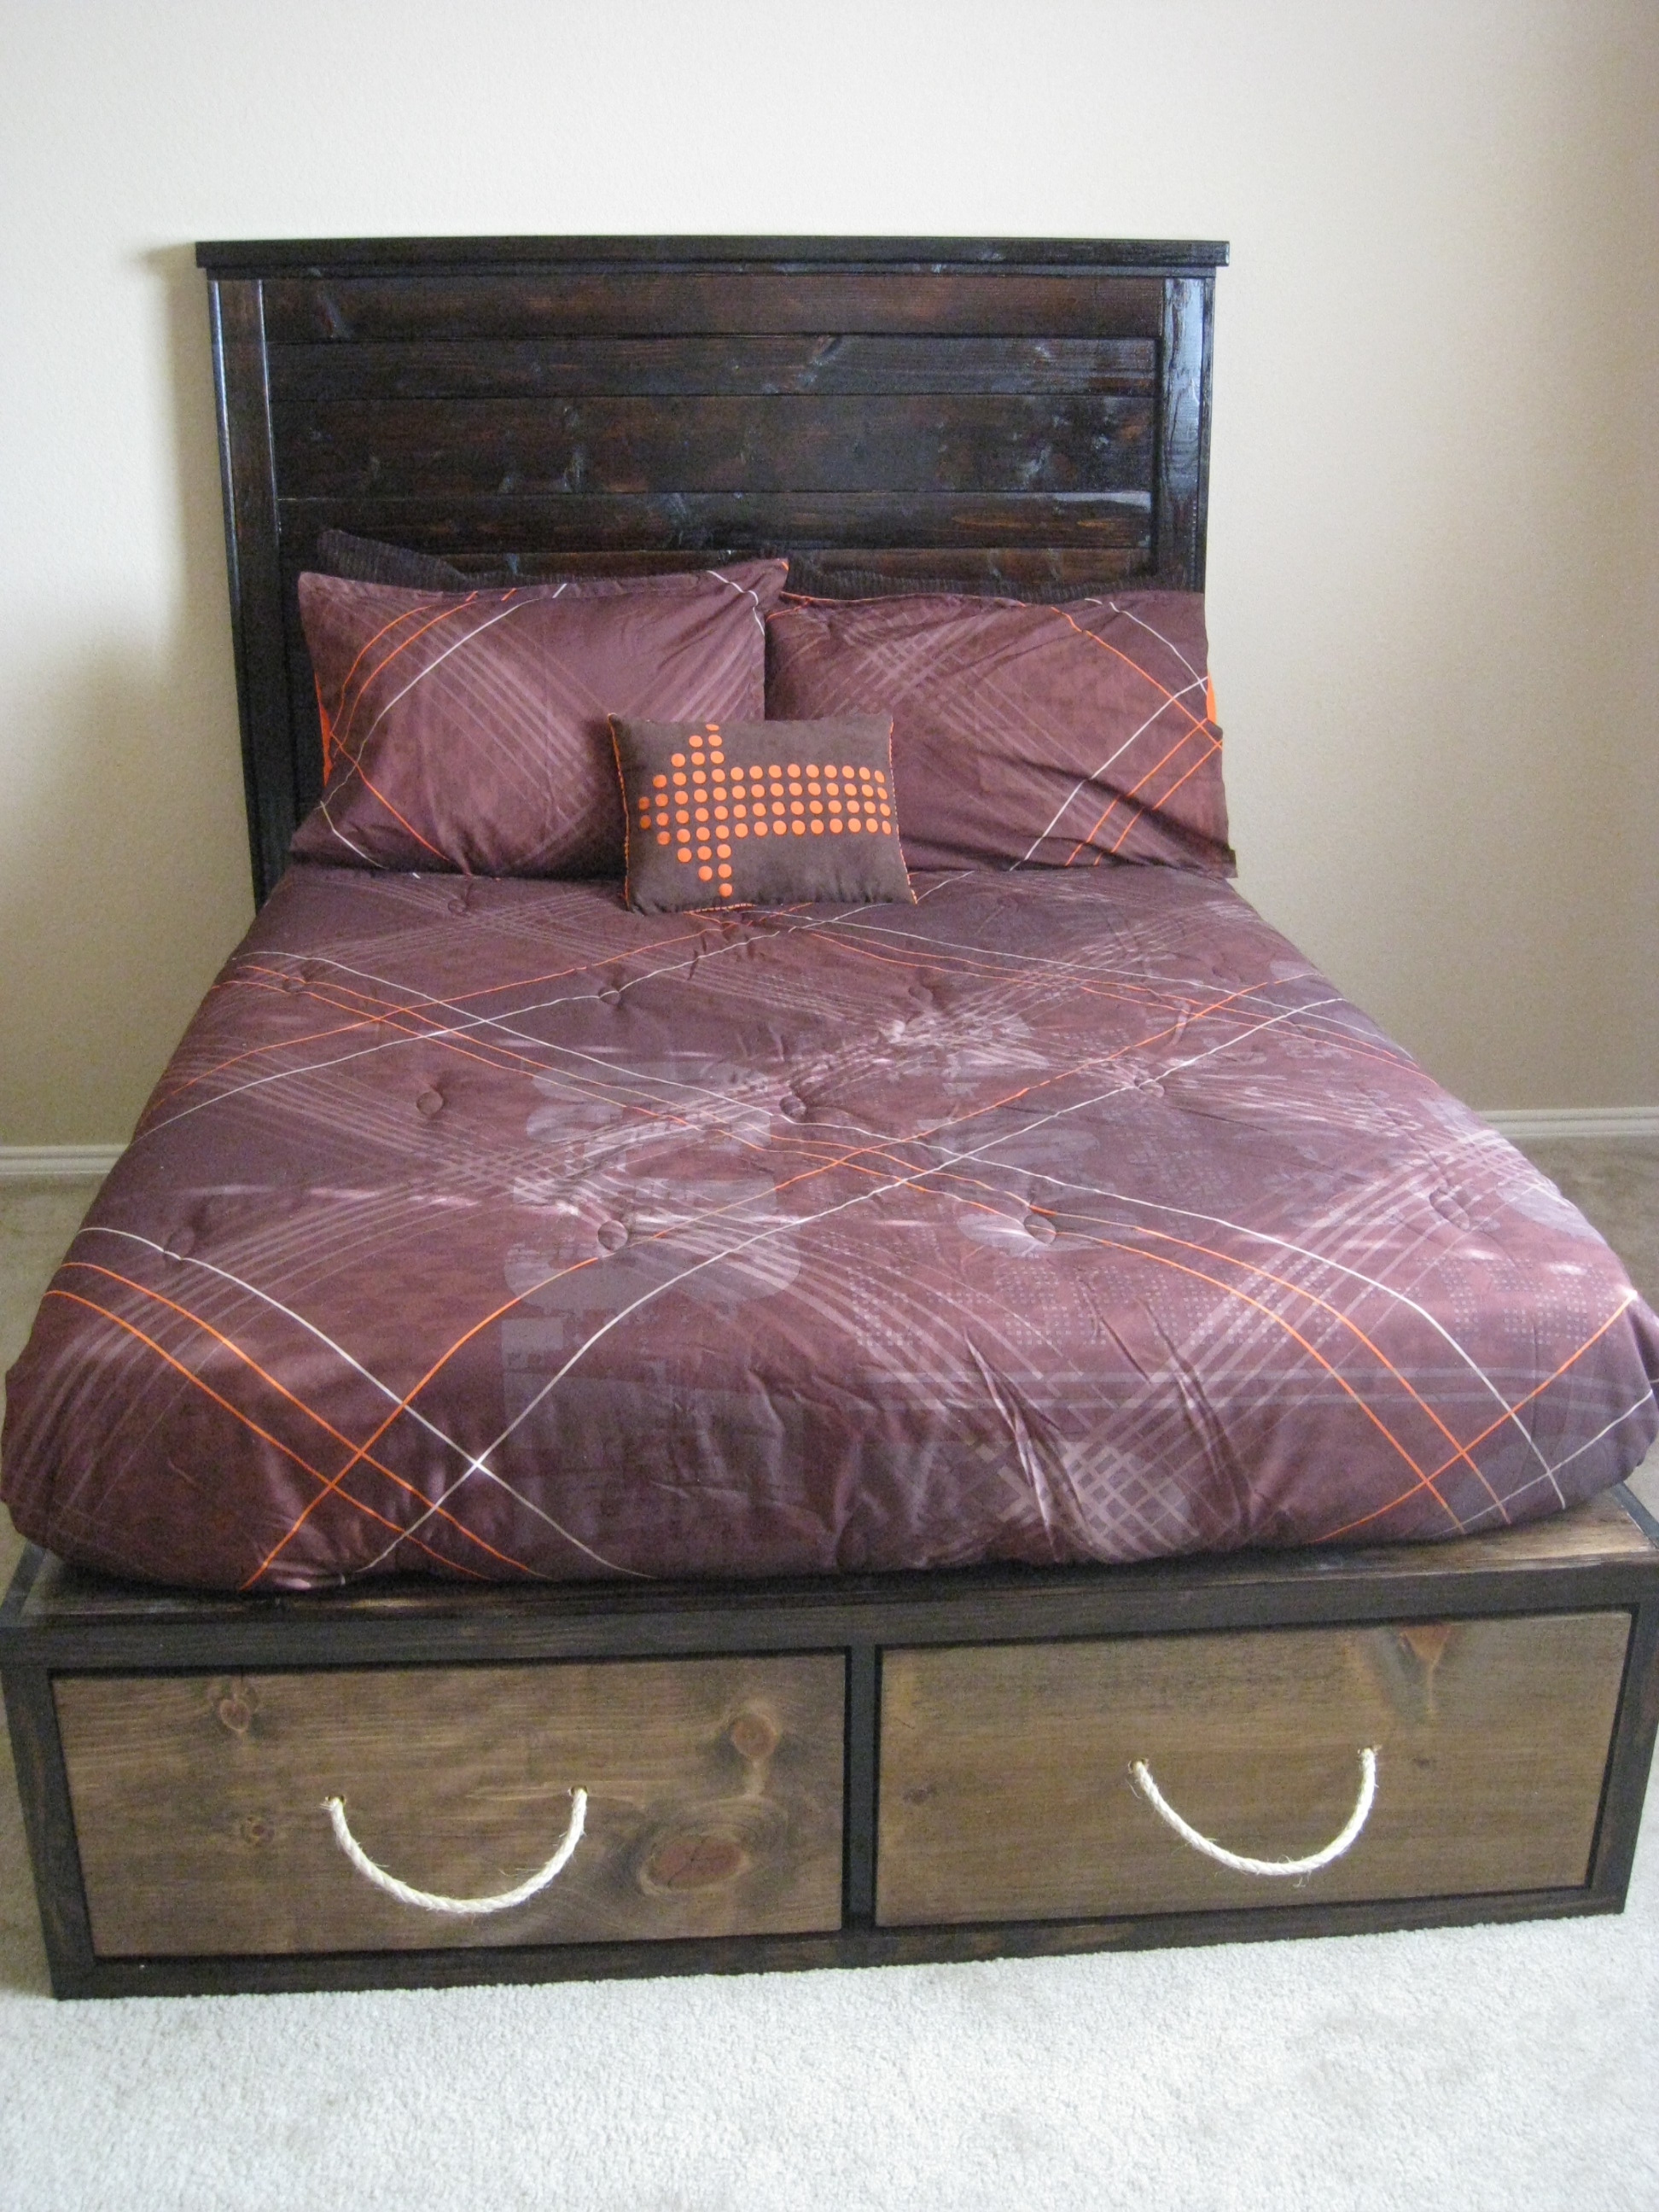
I built Ana's Full Storage Bed. This was fairly easy to build and it is a perfect bed for a child's room. I LOVE the added storage! You can see the plans for the crates I built to fit at our blog http://www.shanty-2-chic.com/2011/03/crates-for-storage-bed.html
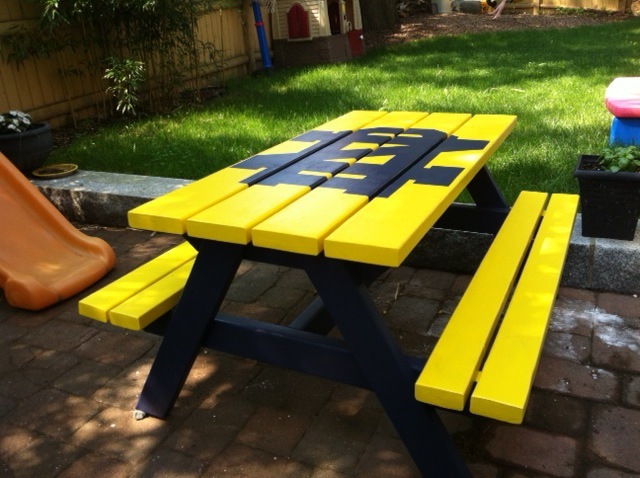
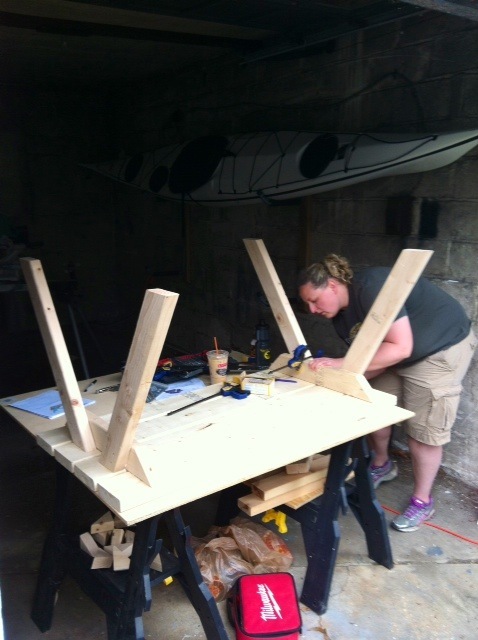
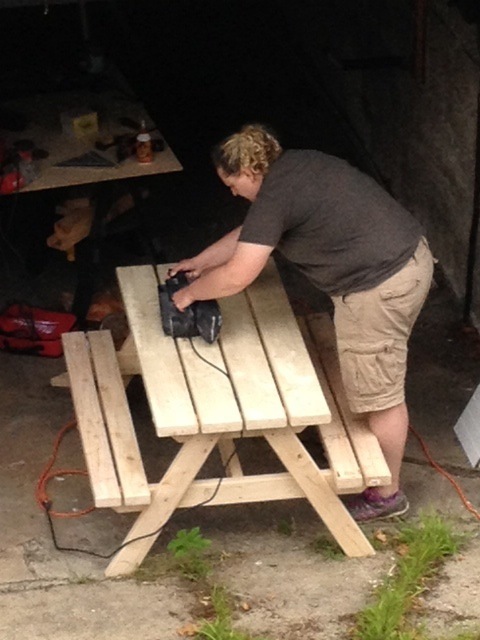
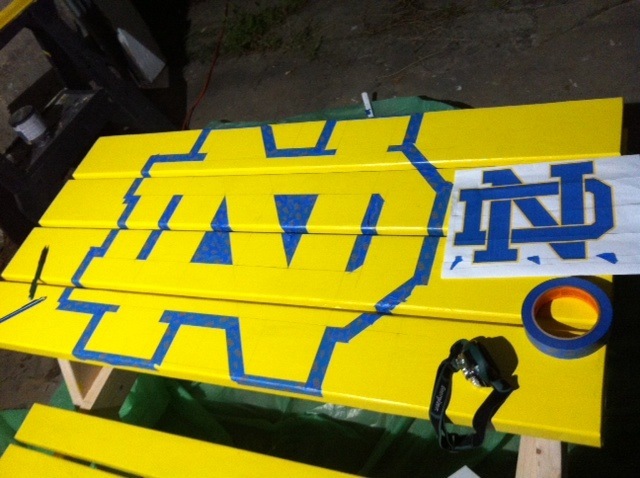
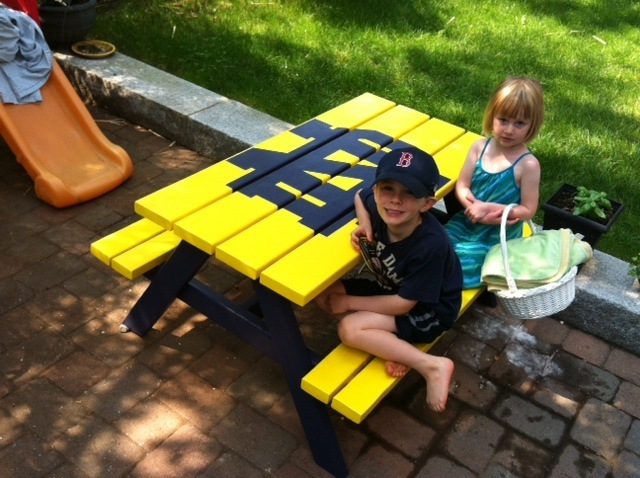
I wanted to make a gift for my friend's kids. I also didn't want to make something they didn't have room for and couldn't really use. The request was a picnic bench for their 3 and 5 year old. I offered to paint it to match the house and they said no, they wanted Notre Dame colors. One of the big box stores has official NCAA colors so it was a perfect match! The wood cost $25 (only 5 2x4 were needed) and the paint, screws, etc. brought the project up to $90. The instructions made it super easy to build and I really took my time making sure everything was square. Also just to build the table is a few hours, maybe not that much. The prep and painting took me a while.
The kids were happy with their table and their Dad, a Notre Dame alum, was thrilled with the design.

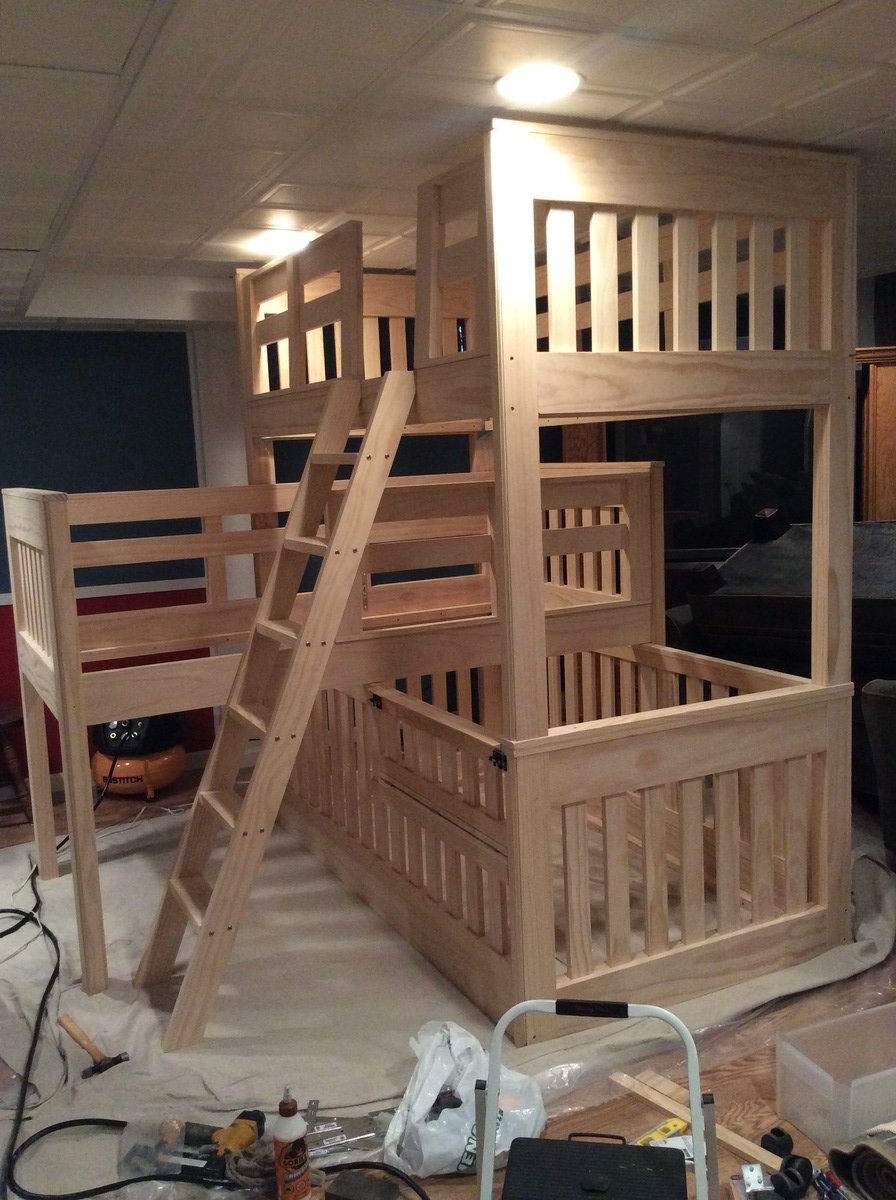
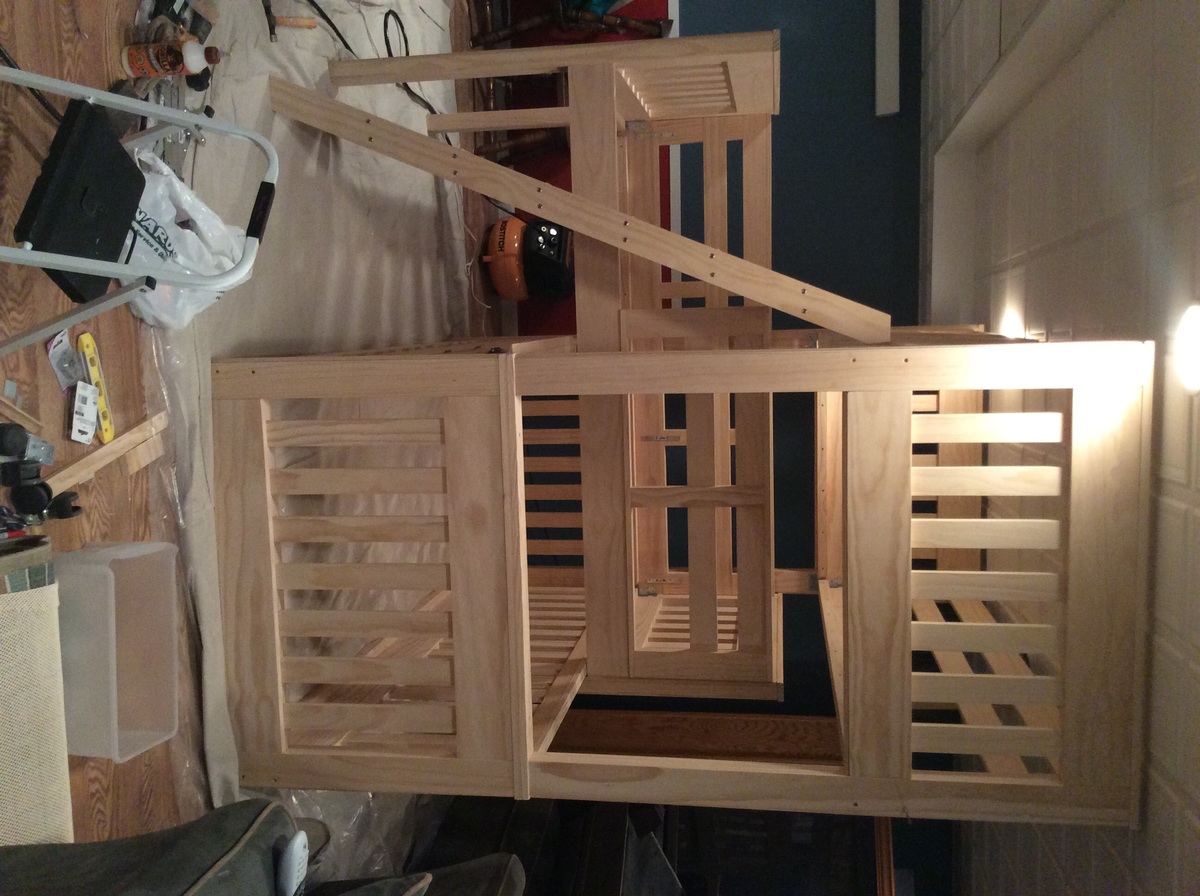
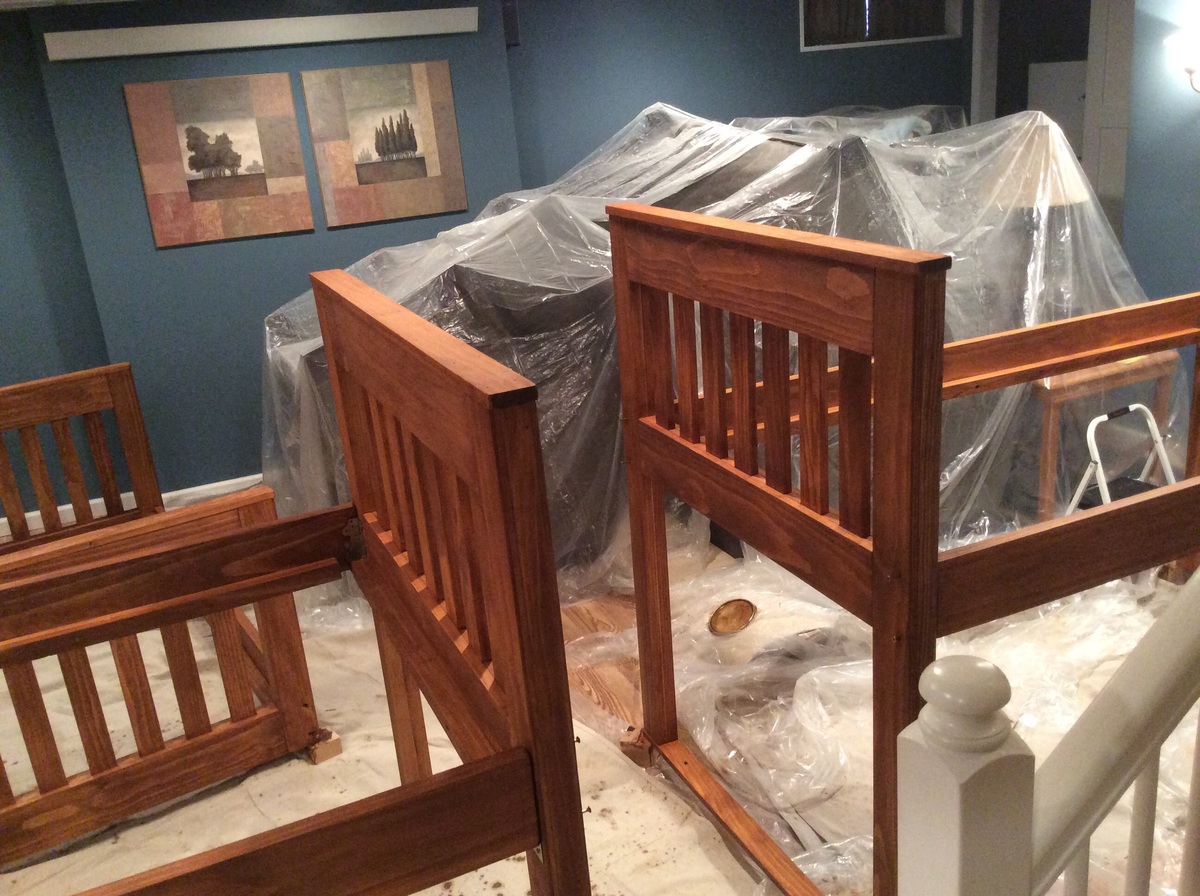
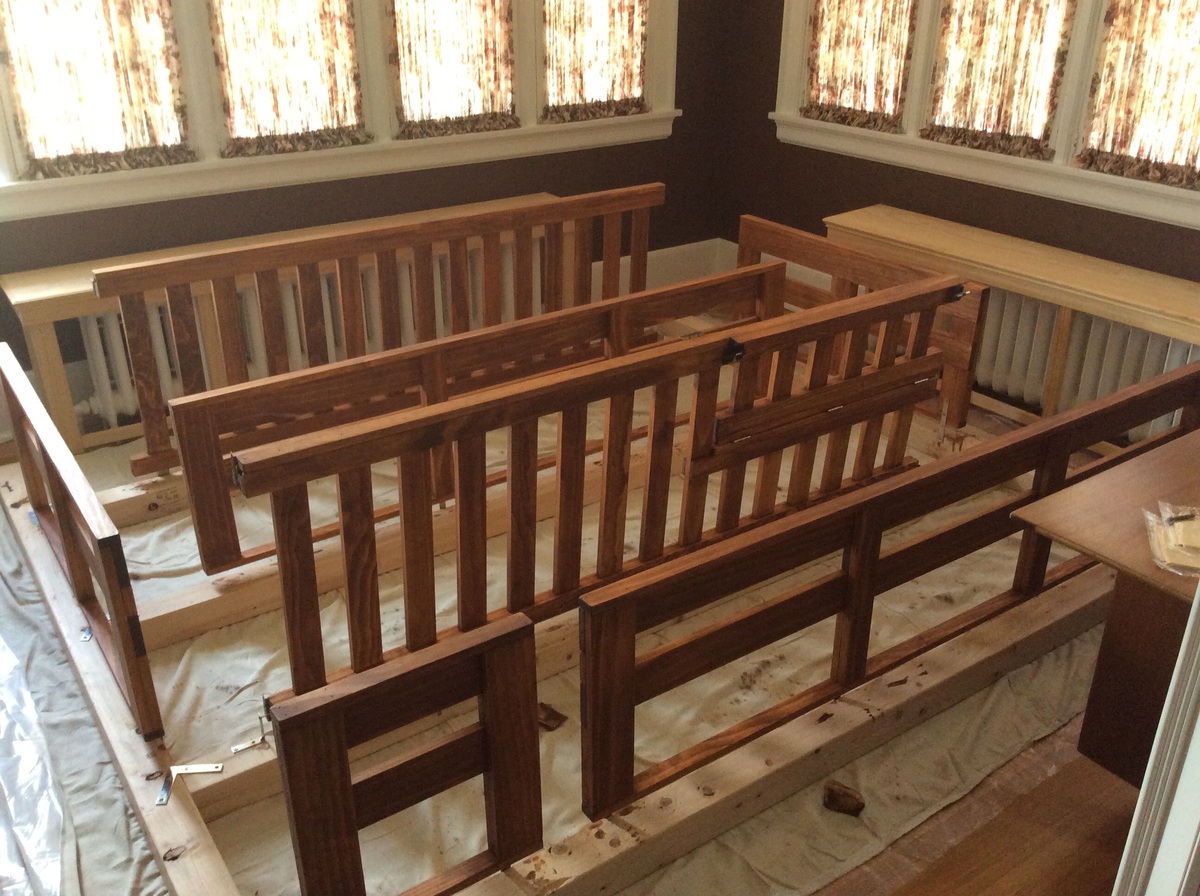
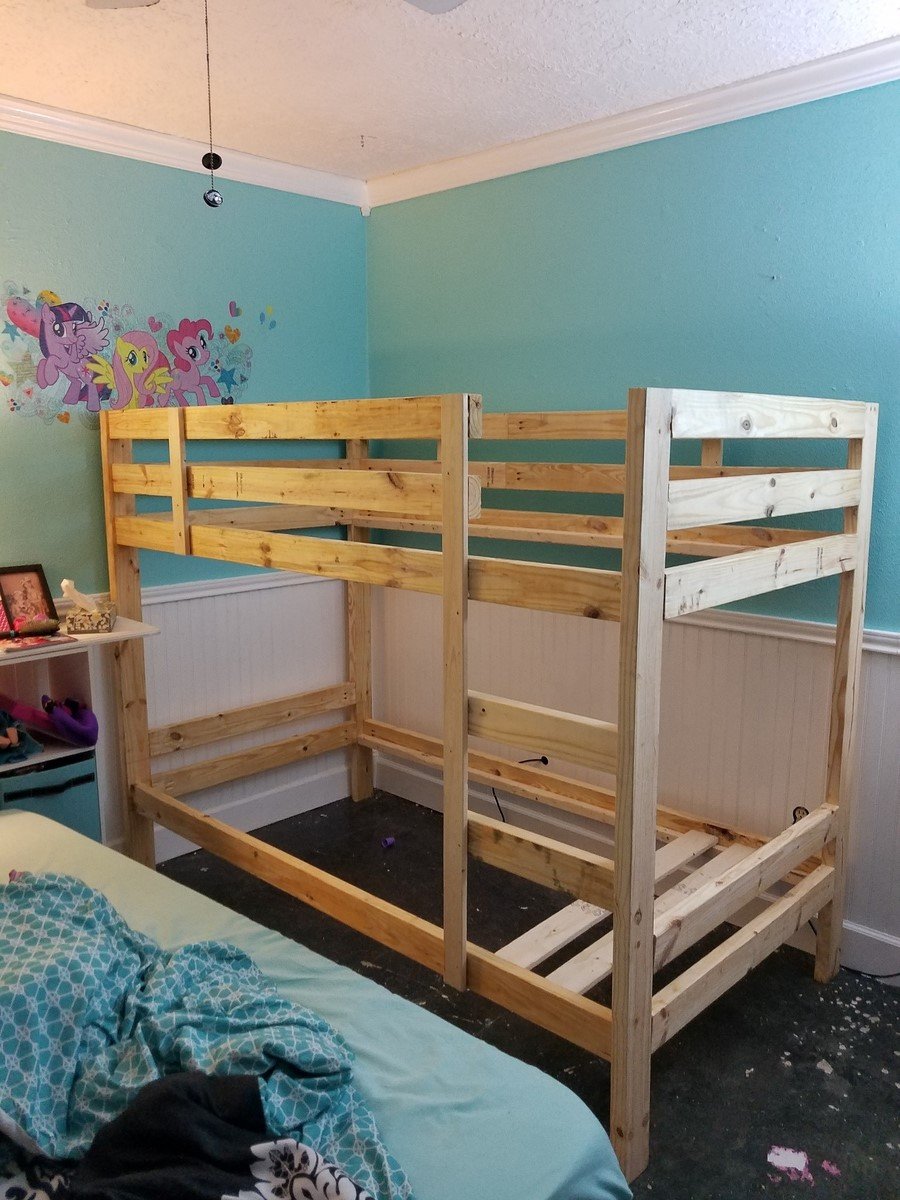
We needed beds for 3 children, one of which is 14 months old, in a small bedroom and with the simple bunk bed plan to start with I came up with this. The kids love it, although it took the 14 month old a few tries before she accepted the change from her regular crib in another room to this crib/bed and sharing a room with her siblings. Now it's all good!
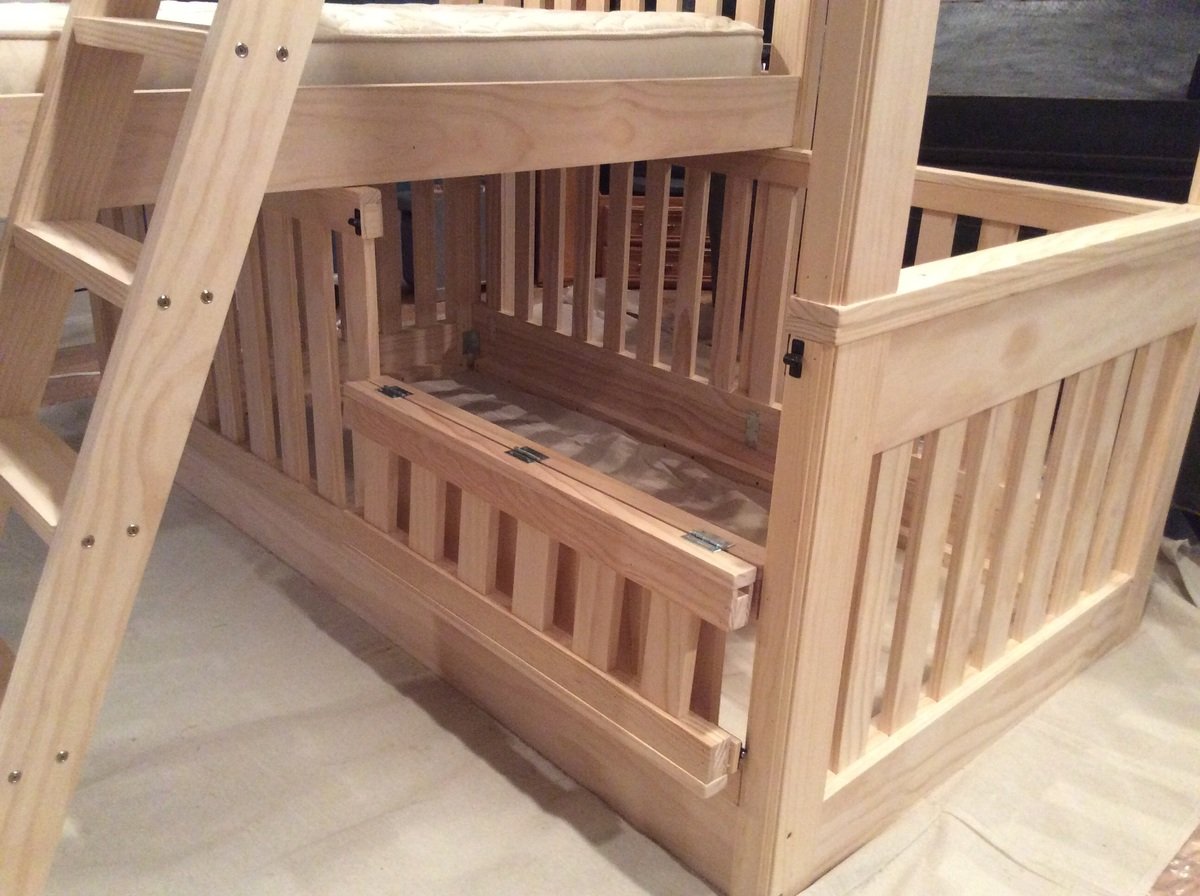
The beds can also be used separately. The top bunk and the middle bunk will stand 30 inches off the floor when used as separate beds, so like loft beds with storage space underneath for a dresser, reading nook, toys, etc. All side safety rails can be removed for unstacked beds as I finished them all separate from the beds. The bottom "crib" bed side rails can also be removed for single bed. At this point it would just sit on the floor as a single bed also but I may come up with some sort of feet to get it up off the floor when the time comes. They really wanted this set of bunks to be able to be used separately also. The fold-down portion of the "crib" side rail was designed to give easier access for changing sheets, etc. for the "crib". This "crib" bed also uses a regular twin mattress.
Wed, 11/23/2016 - 08:45
I have three boys (youngest is 10 months right now) and we're getting these built for us this summer. How did the baby take to it? Also, How tall was the bunk. I'm thinking about ceiling height.
Fri, 05/01/2020 - 12:50
Thank you for this idea! We have special needs son who won't stay in bed unless he has a rail. Now that he is 7 this might work. Keep him with his brother in the same room too.
The link for the plans is not the same bunk bed. Is there another set of plans or do I need to just improvise based on the photos?
Thanks again!
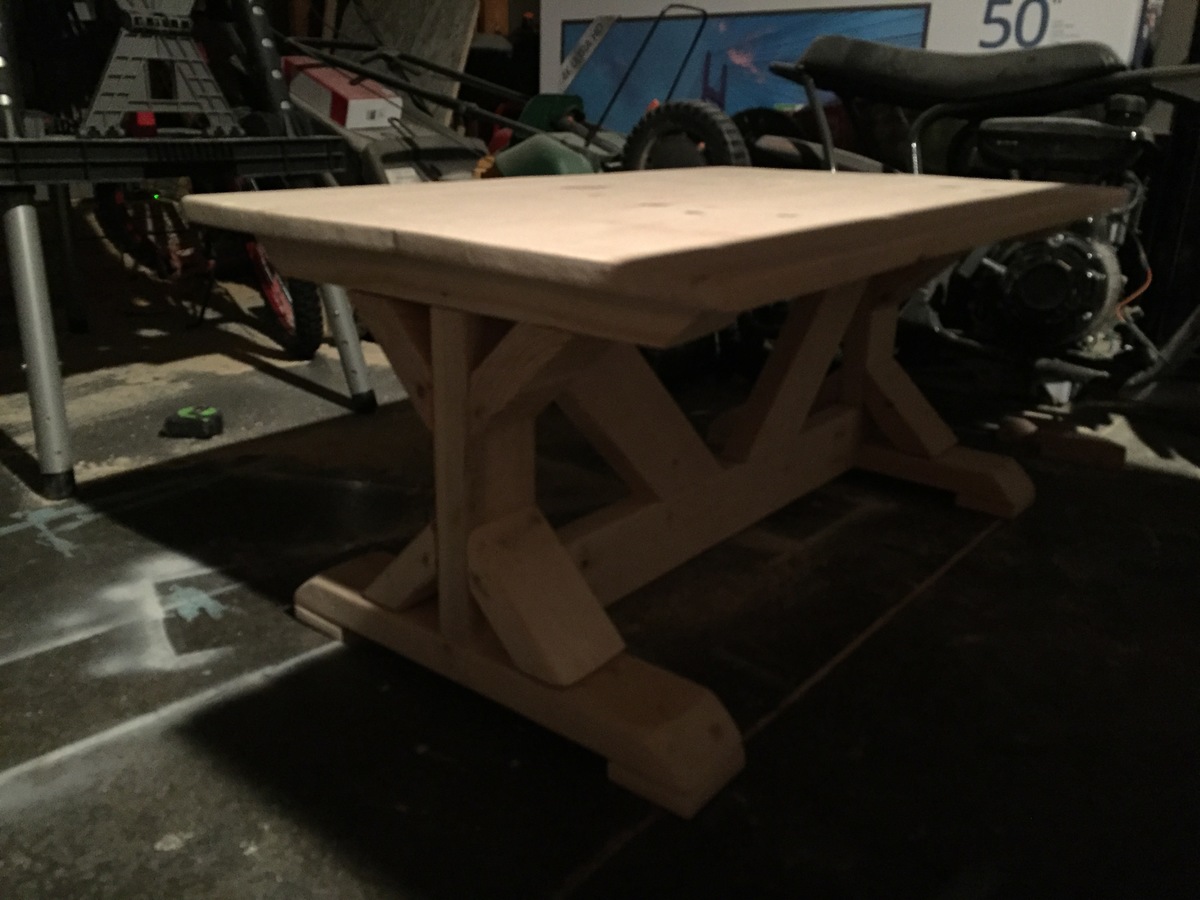
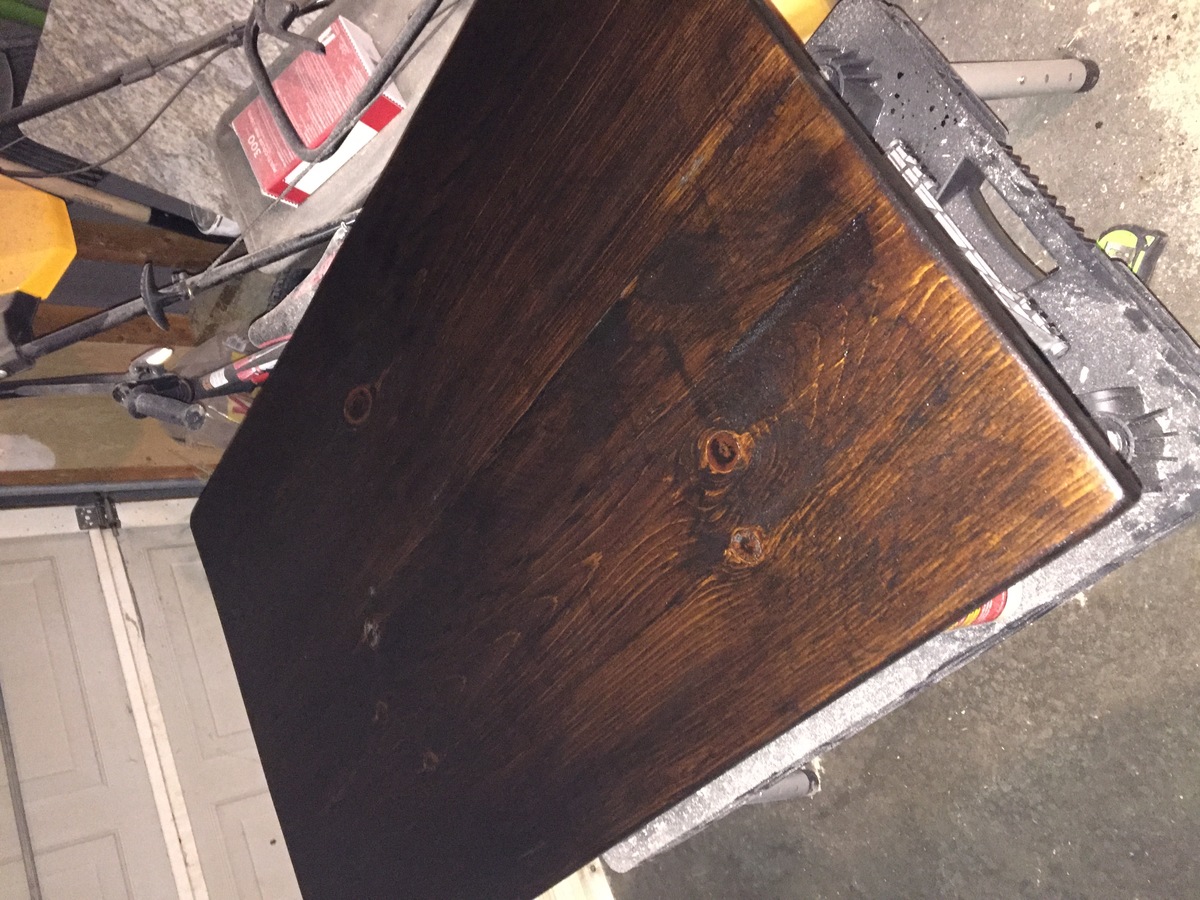
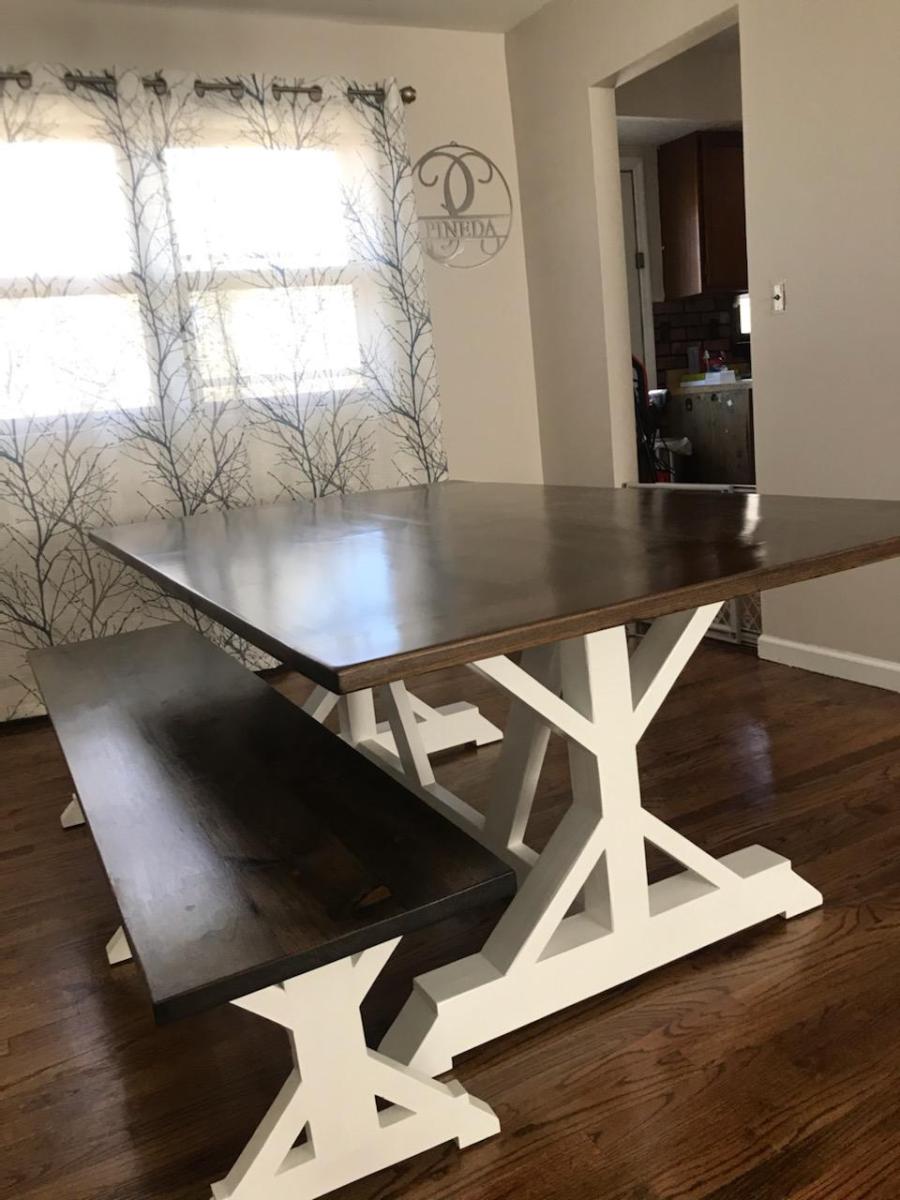
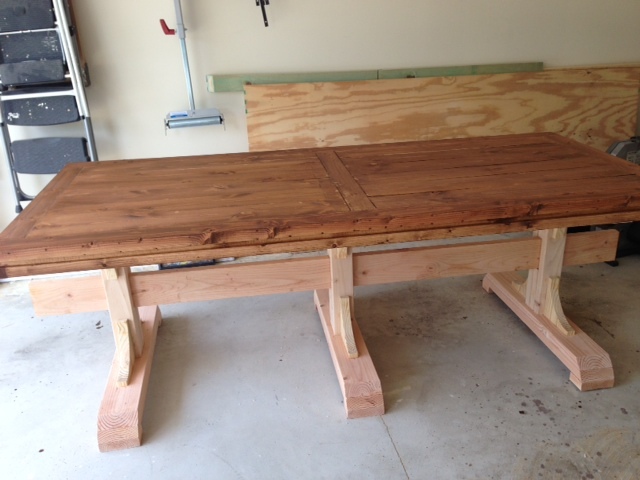
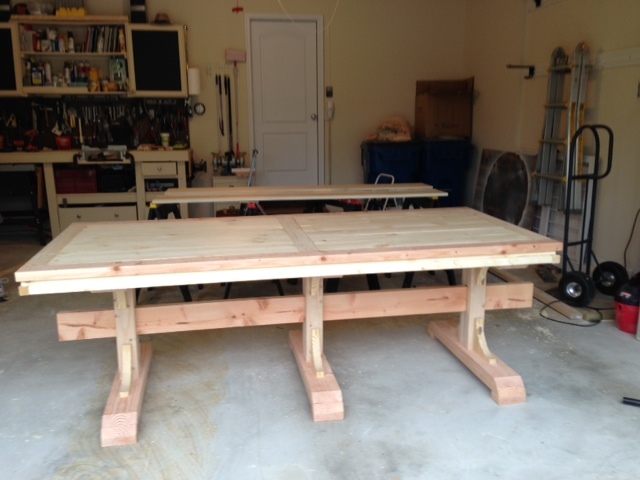
It’s not done yet, but I wanted to share my coffee table with y’all. I made it with the same proportions as Ana’s fancy x kitchen table just 3ft wide and 16 inches high. It’s going to be the same finish as Ana’s too. Dark walnut with satin polyurethane.

Merry Christmas Ana, Just a few of my projects inspired by your great work. I have no carpentry experience other than shop class 40 years ago. Love doing wood work thanks to you.
Happy New year Mikw

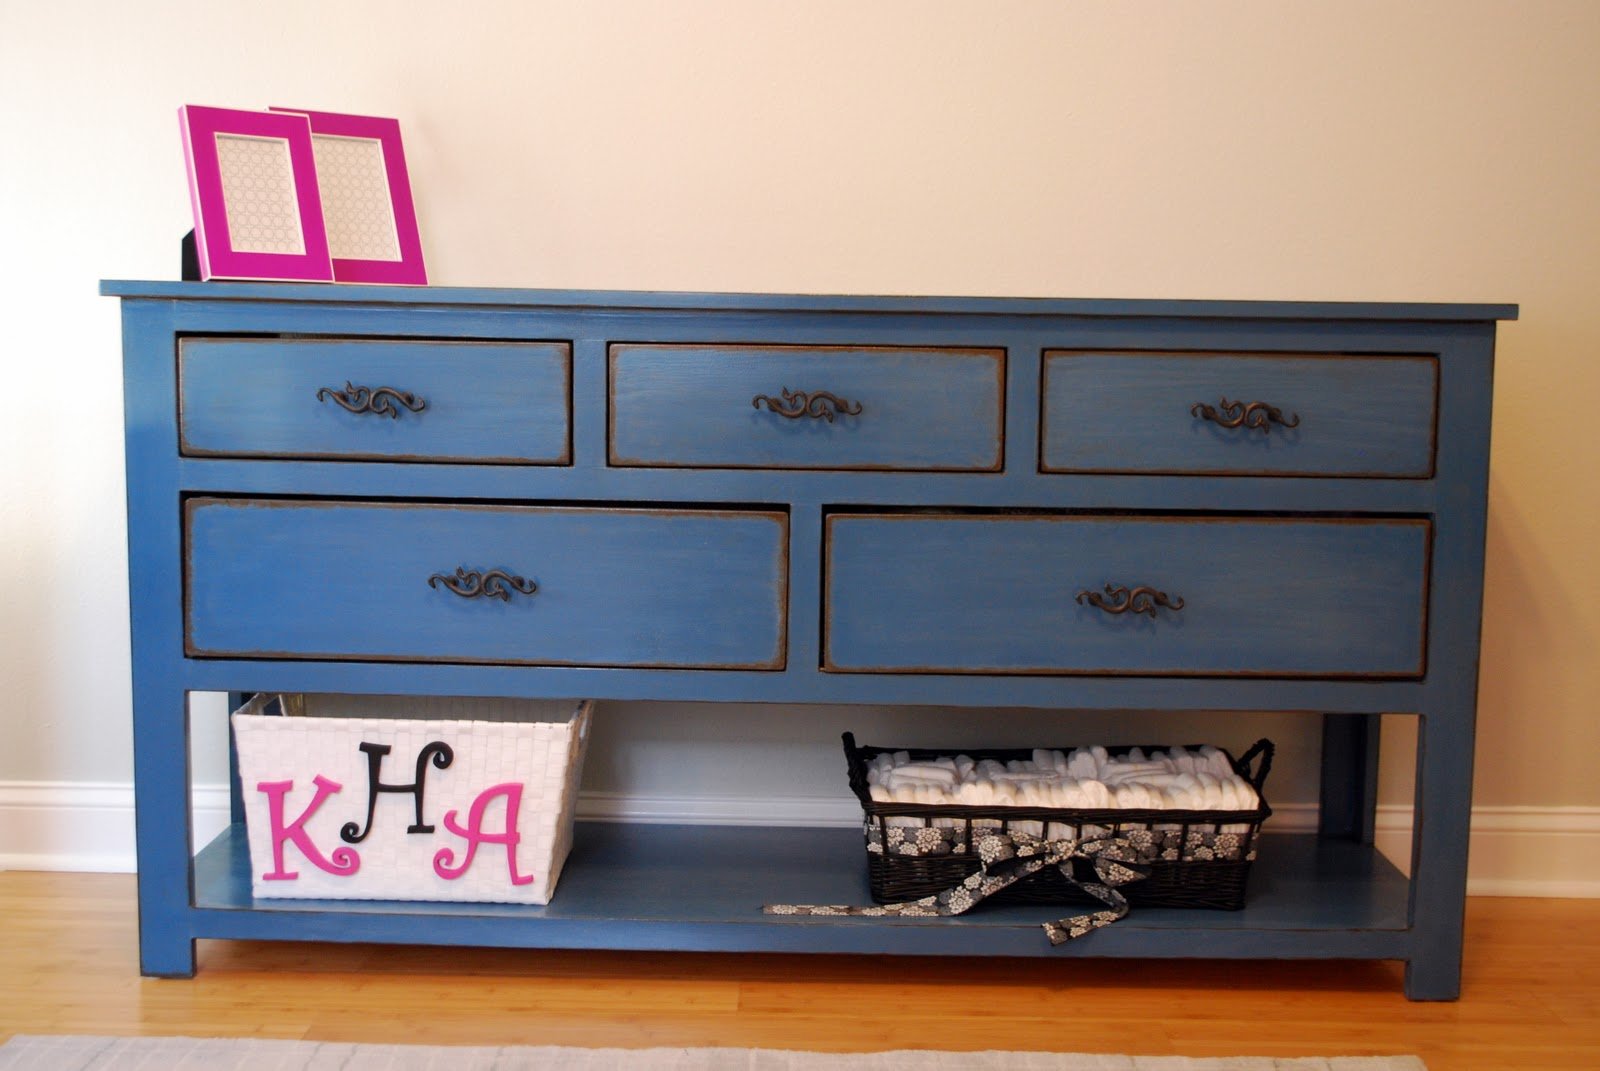
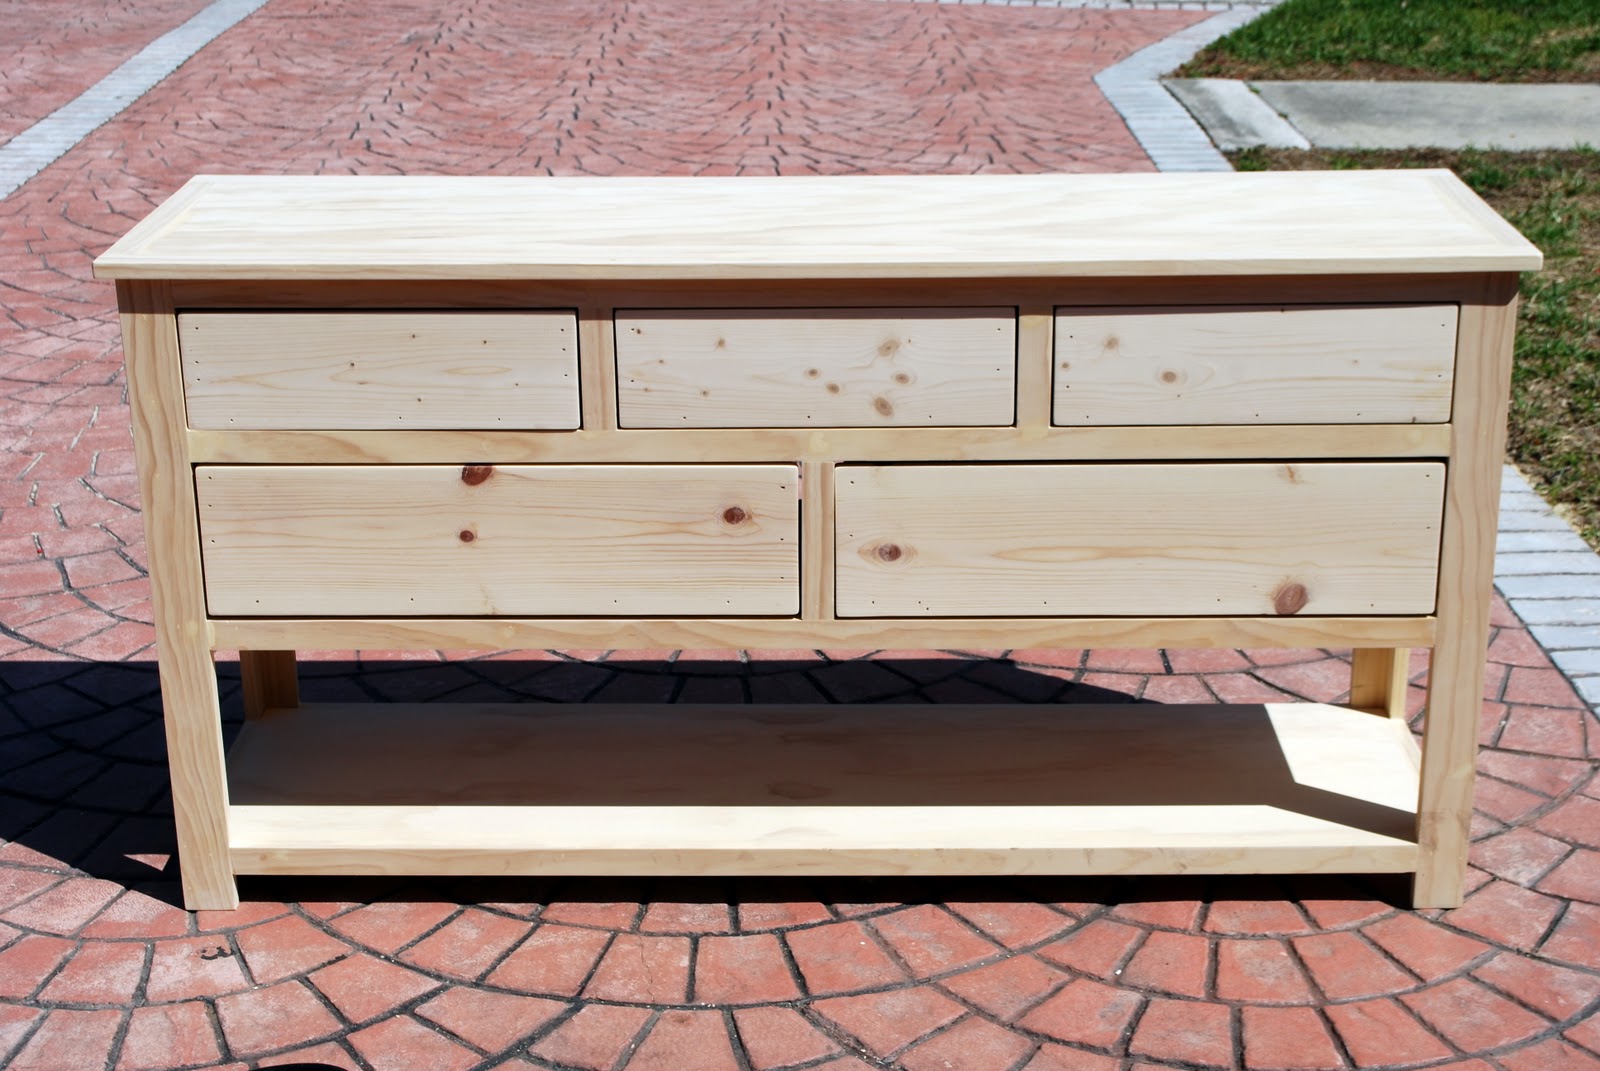
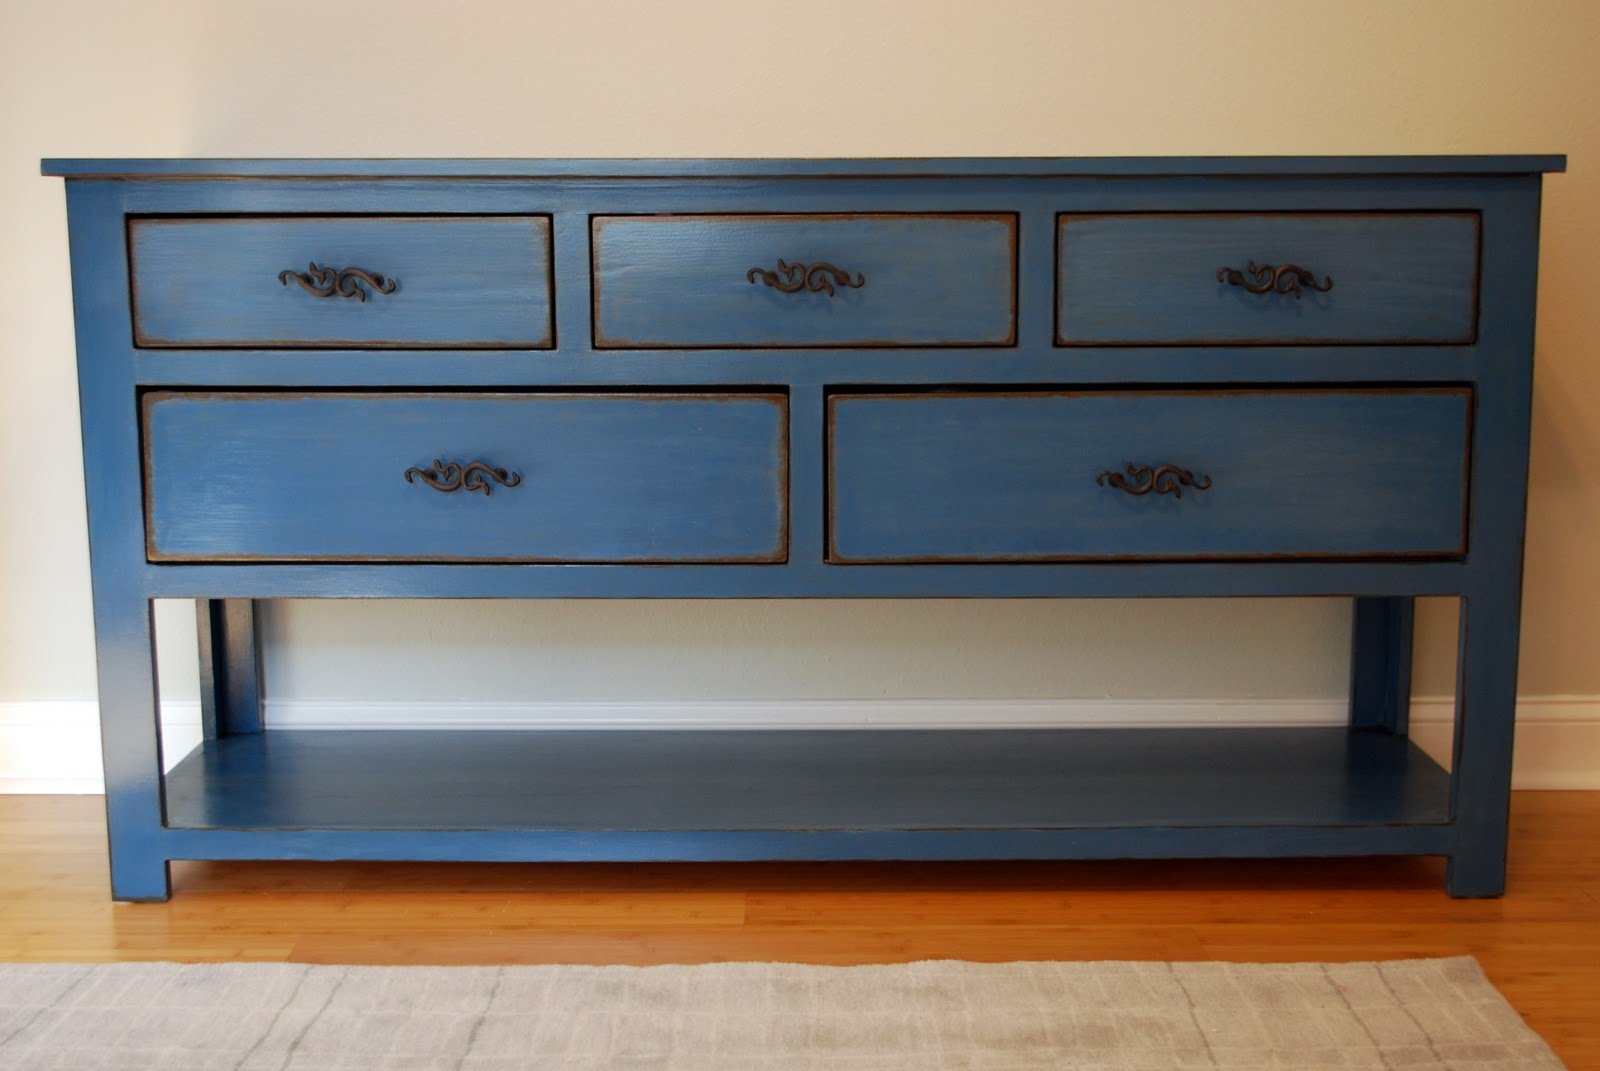
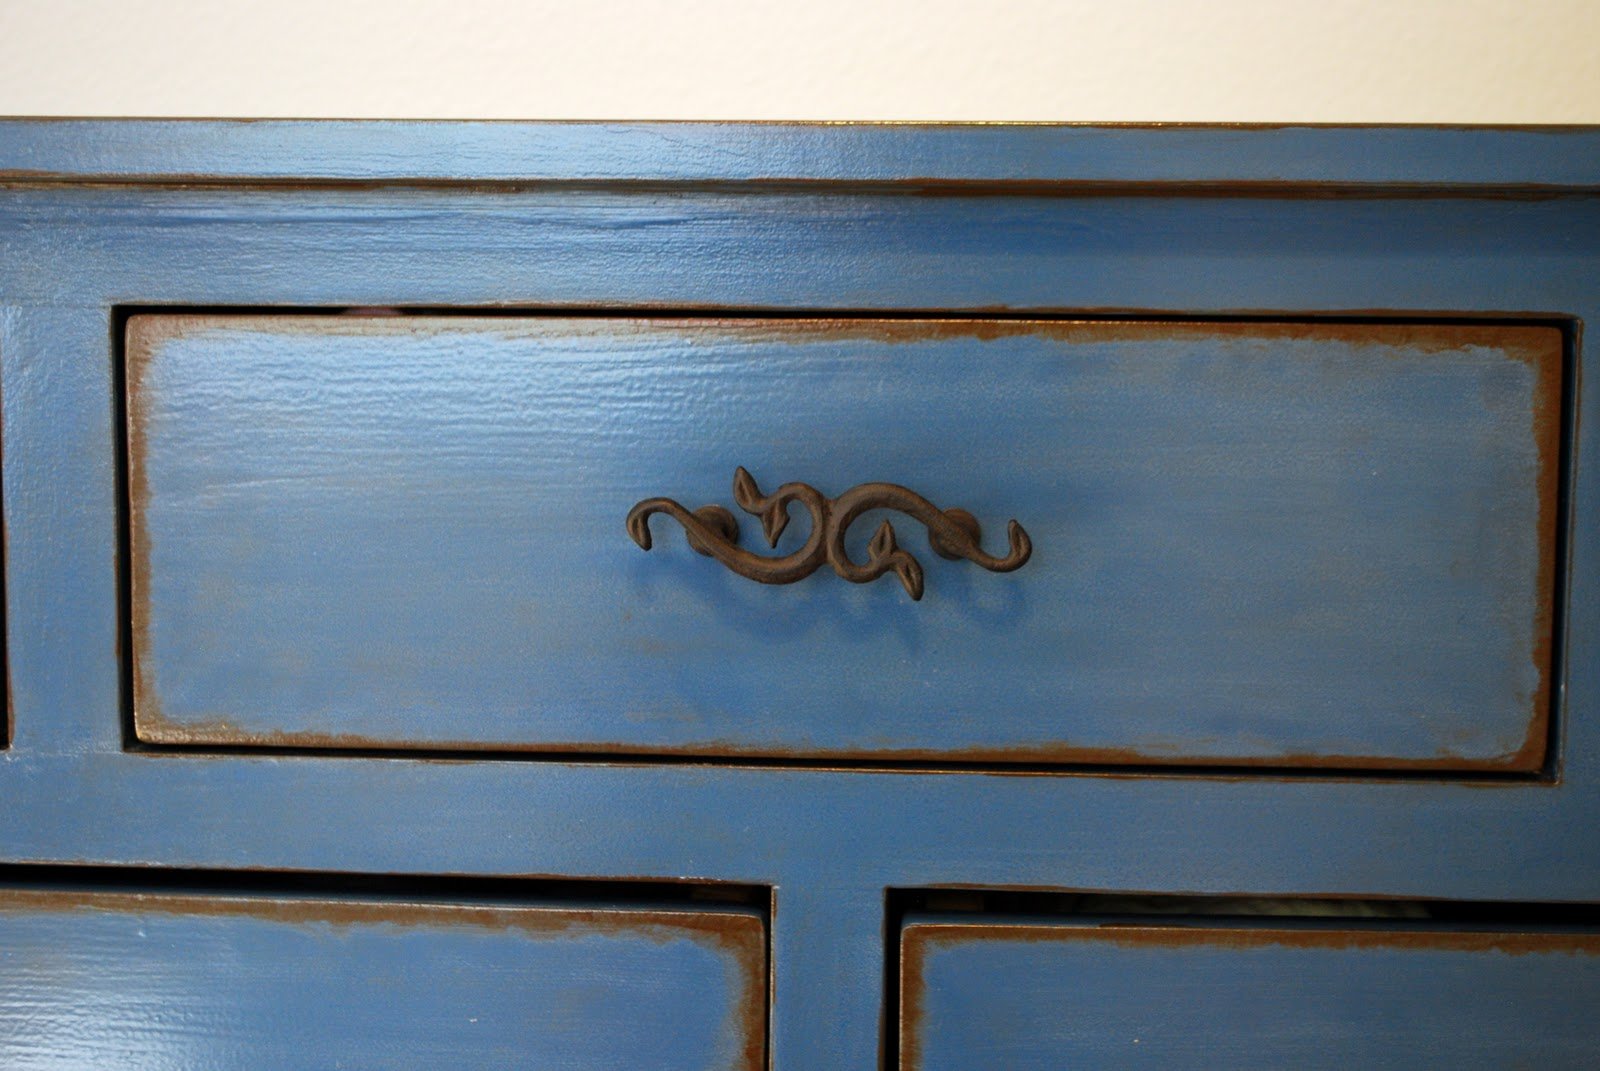
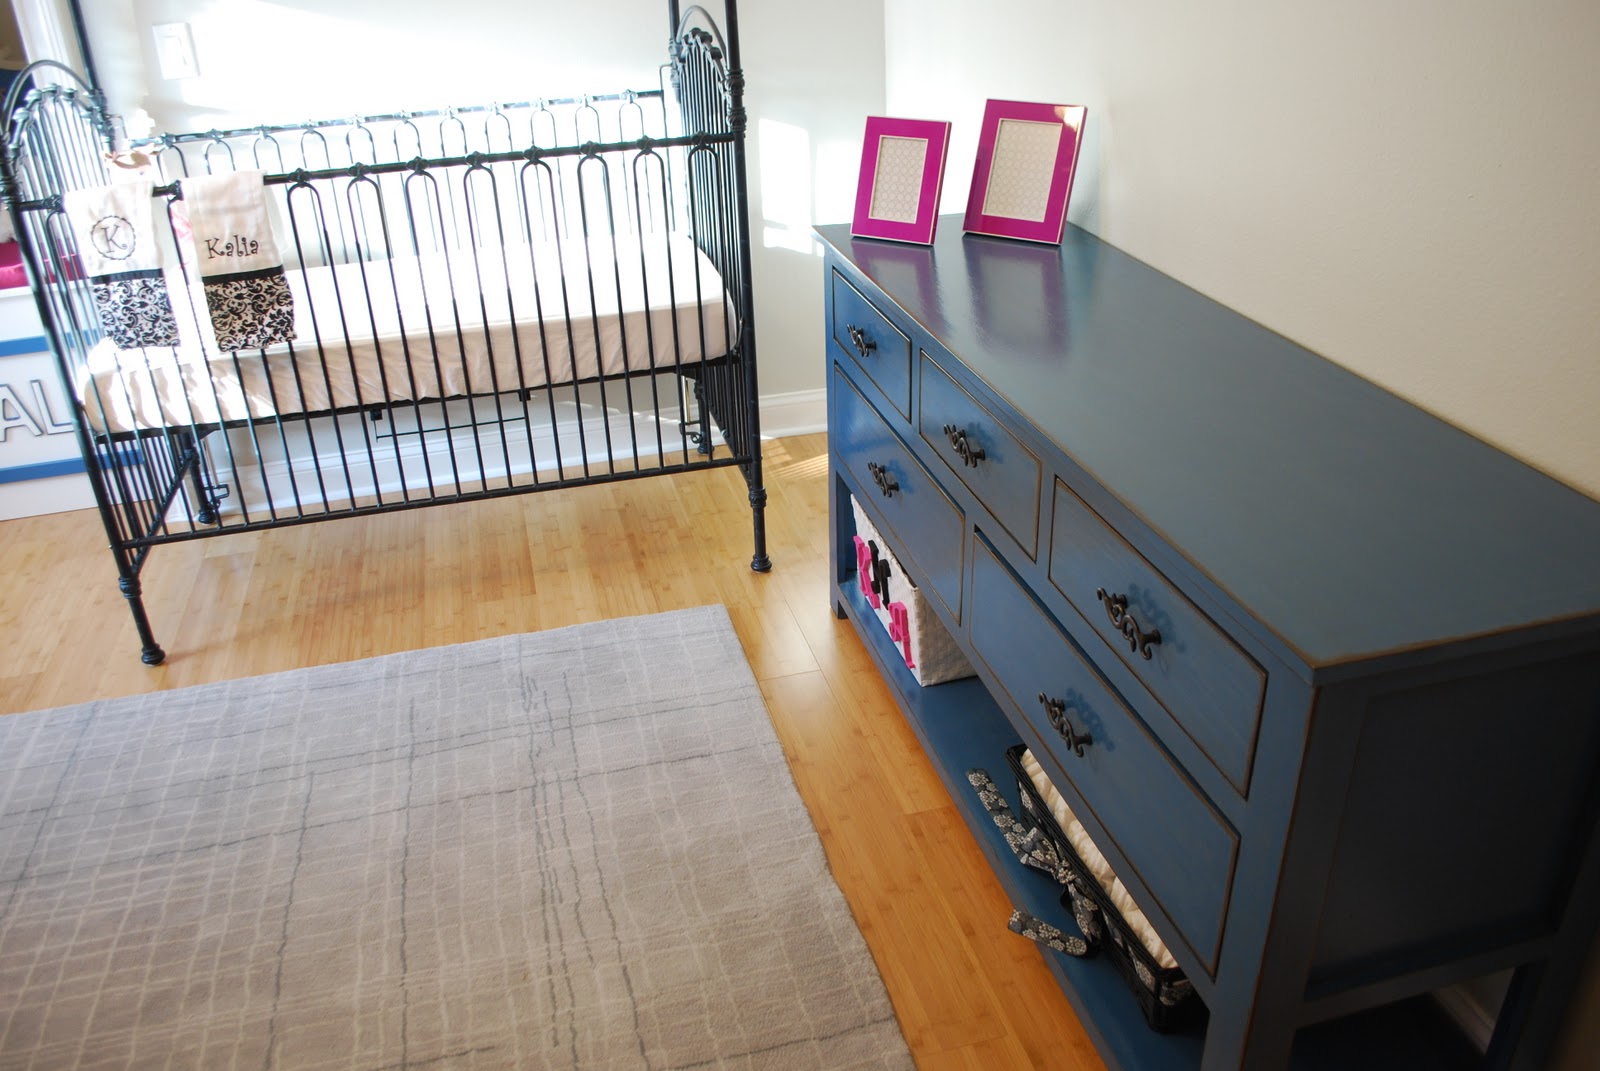
My husband and I built this dresser to use as a changing table in our daughters nursery. I explain the build process (with photos) in this blog post : http://mekhart.blogspot.com/2011/03/nursery-room-biggest-build-yet.html and the finishing process in this blog post : http://mekhart.blogspot.com/2011/04/nursery-room-finished-dresser.html . I'm so thankful to Ana...I love that almost every element of her nursery is home made!
After searching and searching for a decently priced bed for our two year old and failing to find anything that I liked under $400, I decided to do a google search and came across the directions for the Emme twin bed. I loved the design and the color of the stain in the instructions but had to go with white as everything in our toddlers room is white. My husband said the instructions were simple to follow. I think he did a wonderful job for his first time ever building anything. Not to mention my little girl loves the bed. Thank you Ana!
Tue, 03/11/2014 - 07:49
Hello - Your bed looks great! How did you attach your rails? I'm at this point in the build and trying to figure out the best option as my bed brackets aren't fitting.
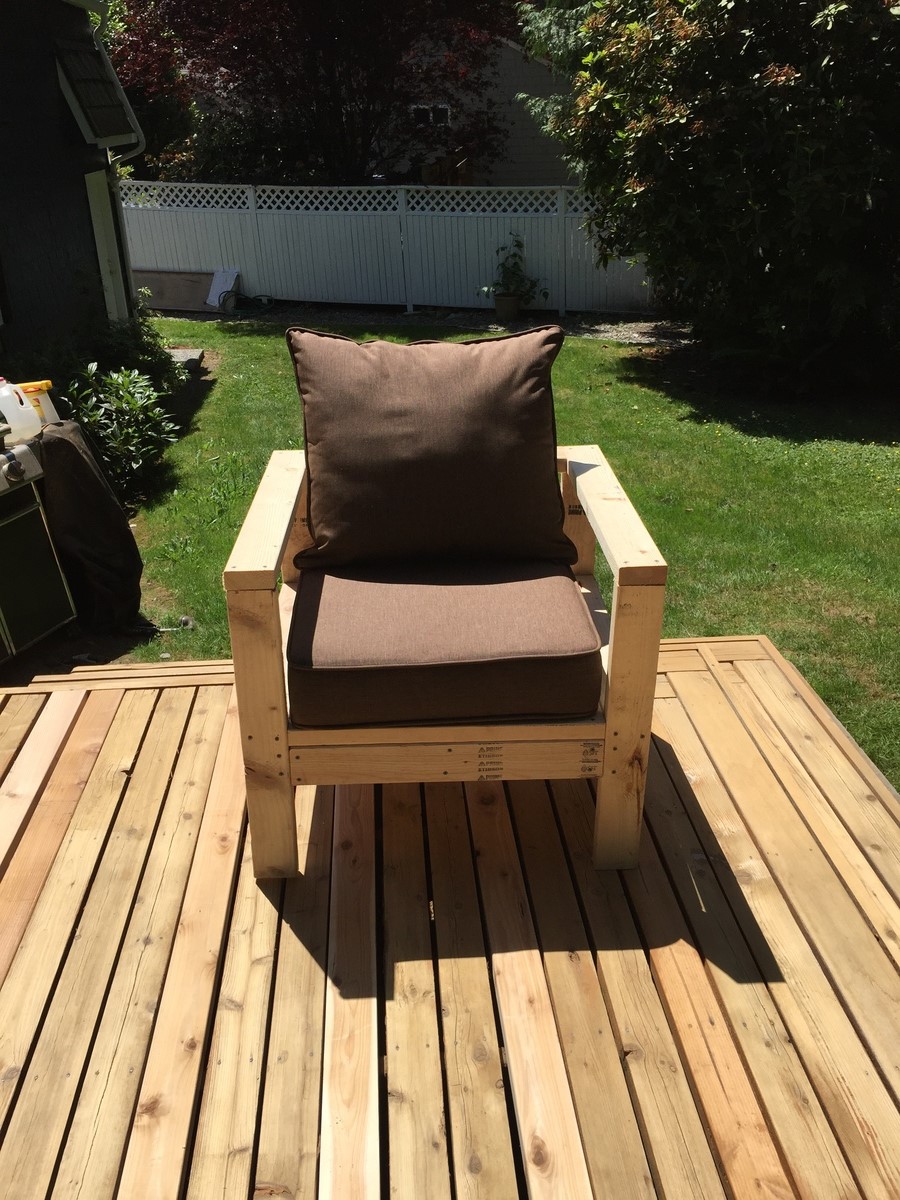
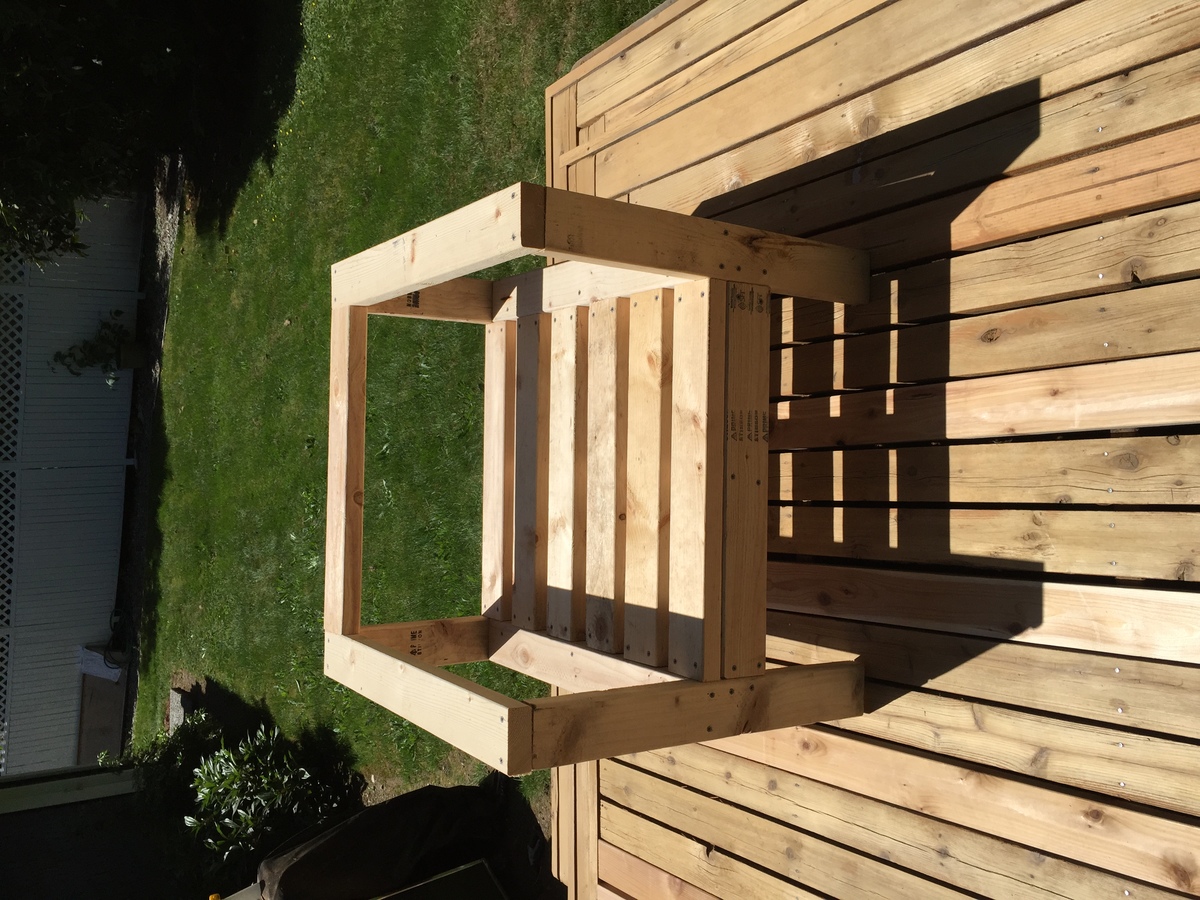
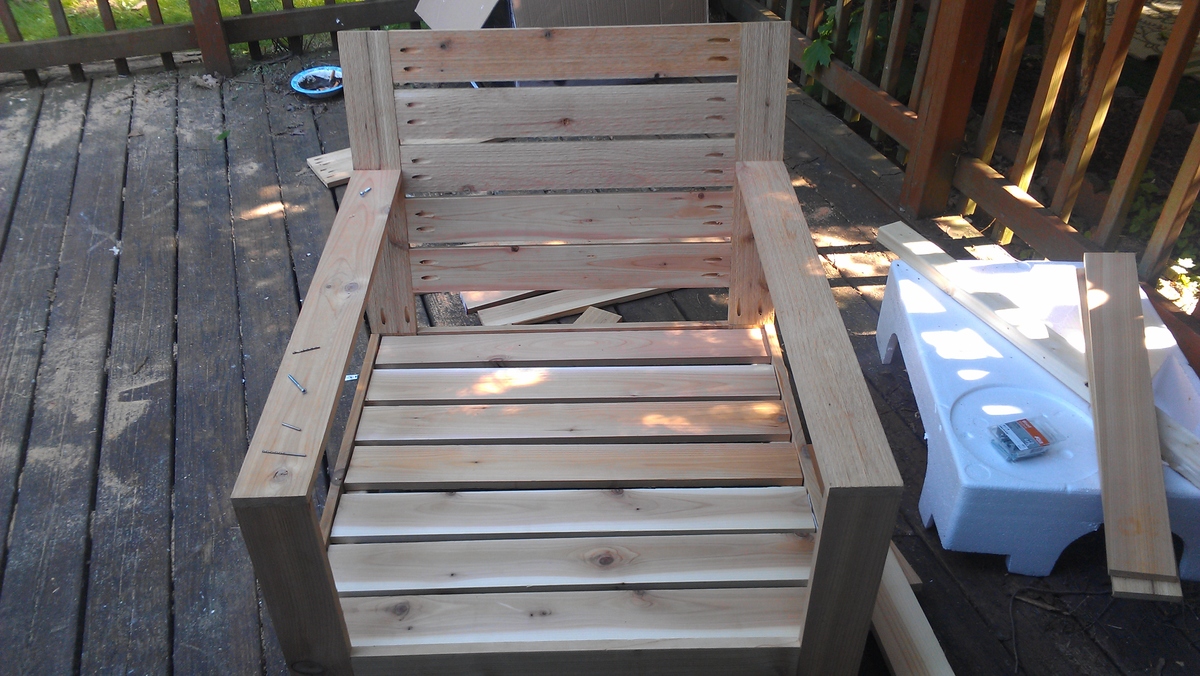
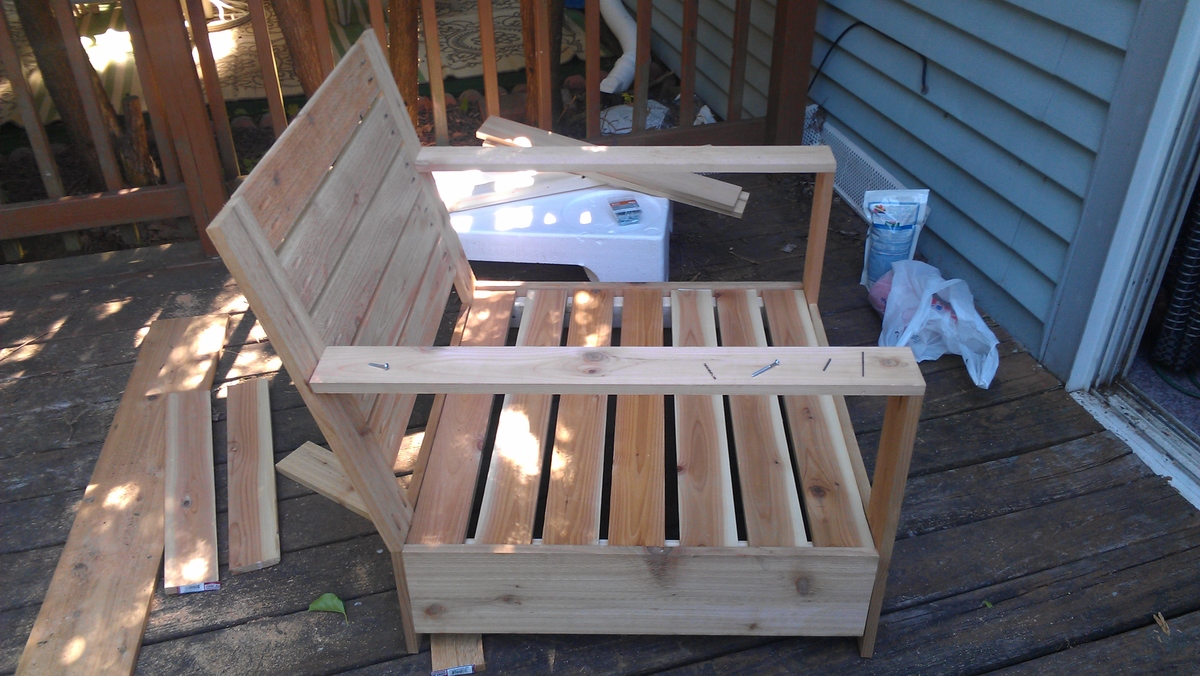
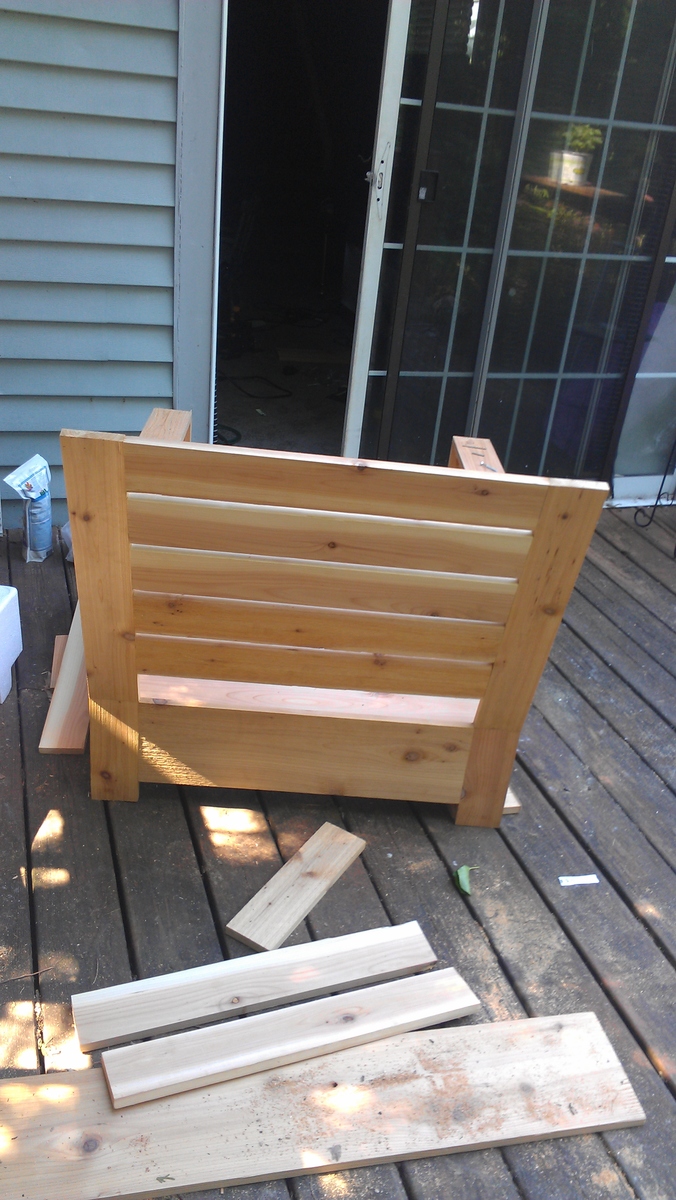
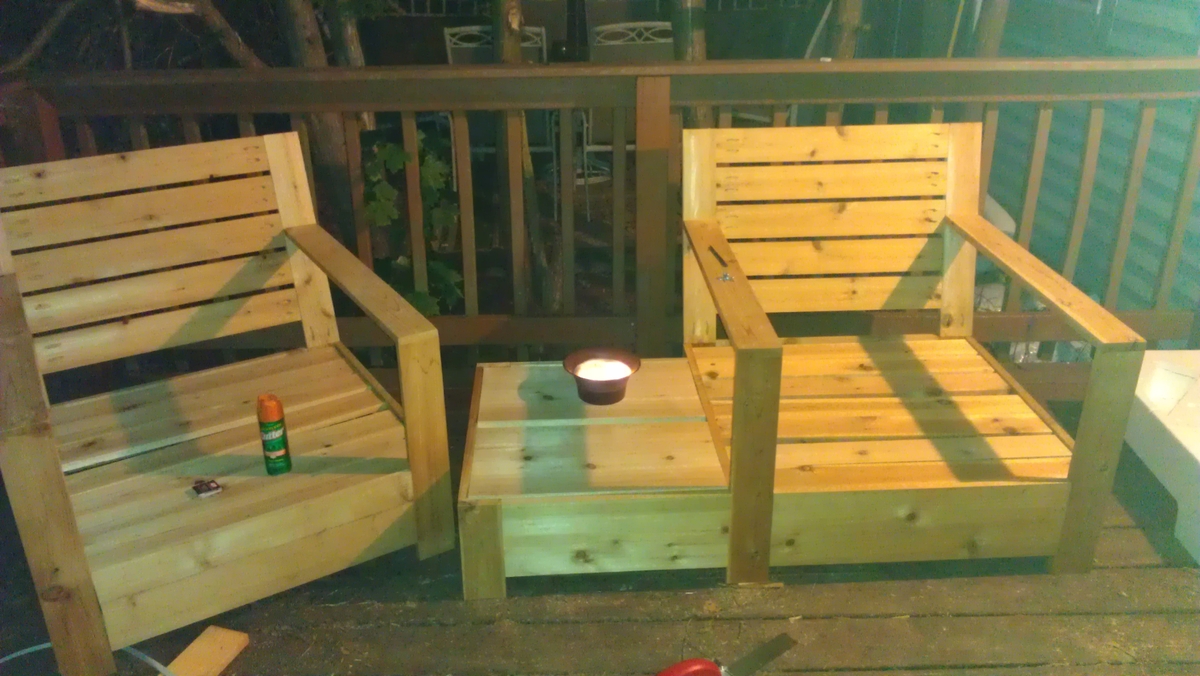
Clearly, not done with my project yet (sanding, priming/painting) but I was so excited I wanted to share right away. I've been checking Ana's site for about a year now and never had the courage to build anything... until today - I am thrilled I did. I had some cheap 2x4's studs at home so if I failed, no big waste of money. To my surprise... this was incredibly easy to build and that seat is sturdy. I modified the plan and intend to build 1 more chair and 1 sofa that accommodates 2 people. Thank you Ana! Amazing site and now I am so much more confident on my ability to build beautiful projects myself :)!
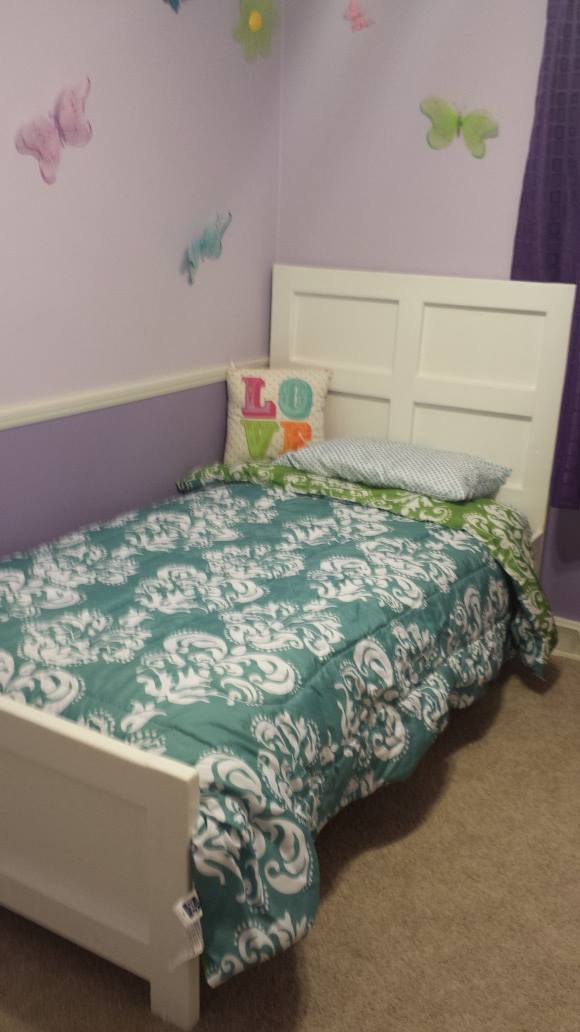
Built this for our 6yr old. She has decided she wants it to be pink so we picked out a beautiful Aubrey Hepburn worthy shade and will update our photo.
I built this to house some free lettuce seeds. Please see the full story on my blog!
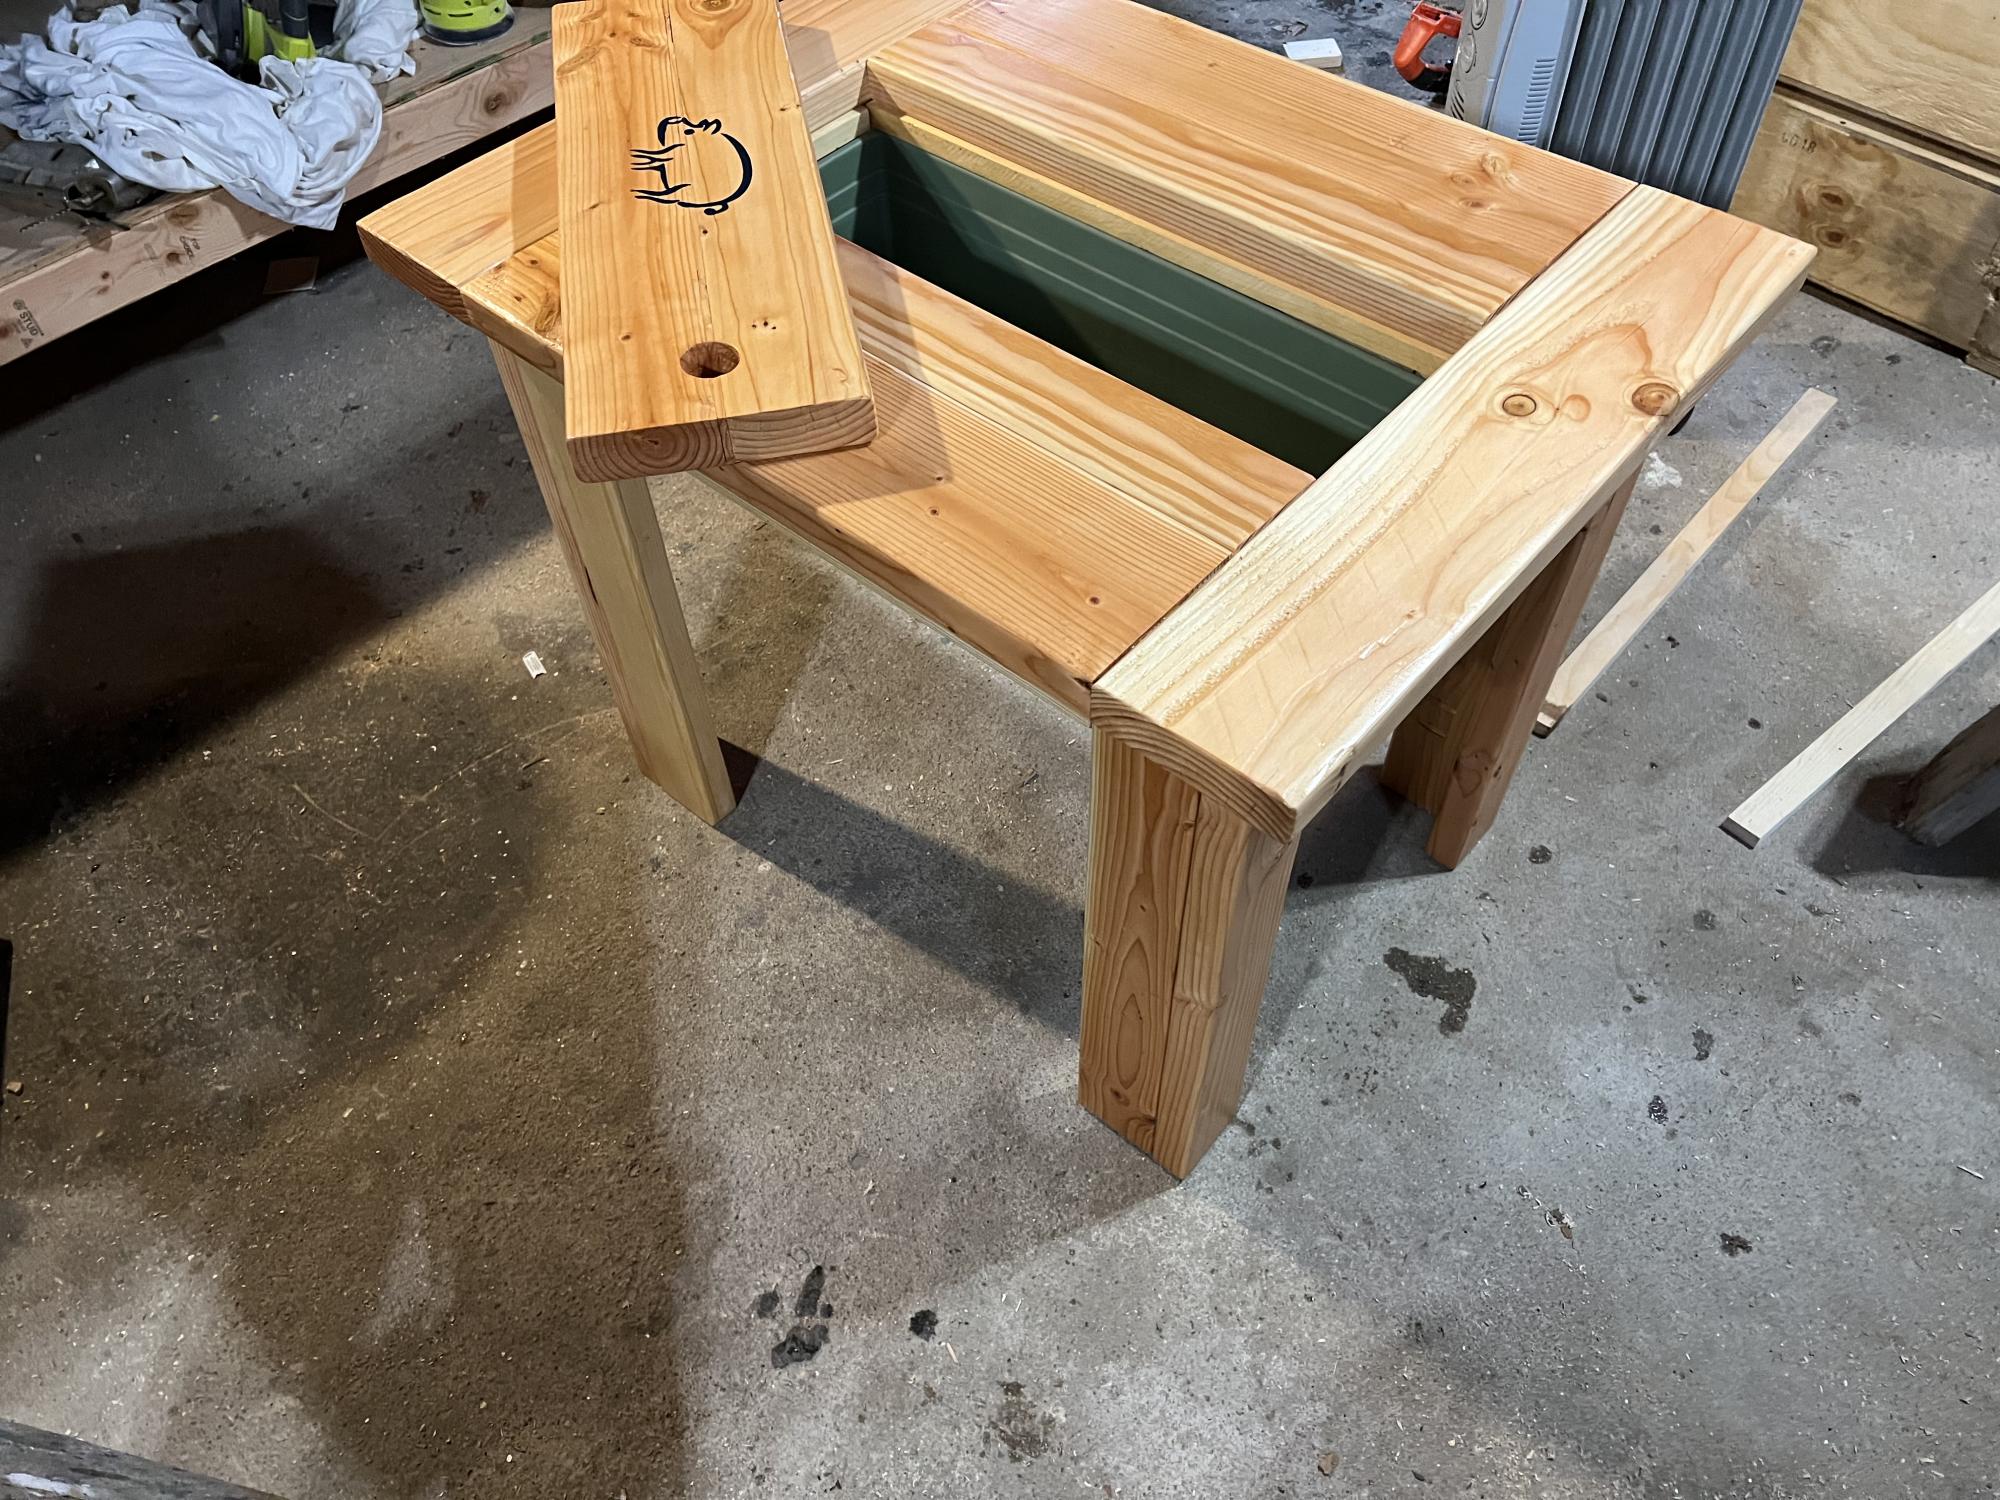
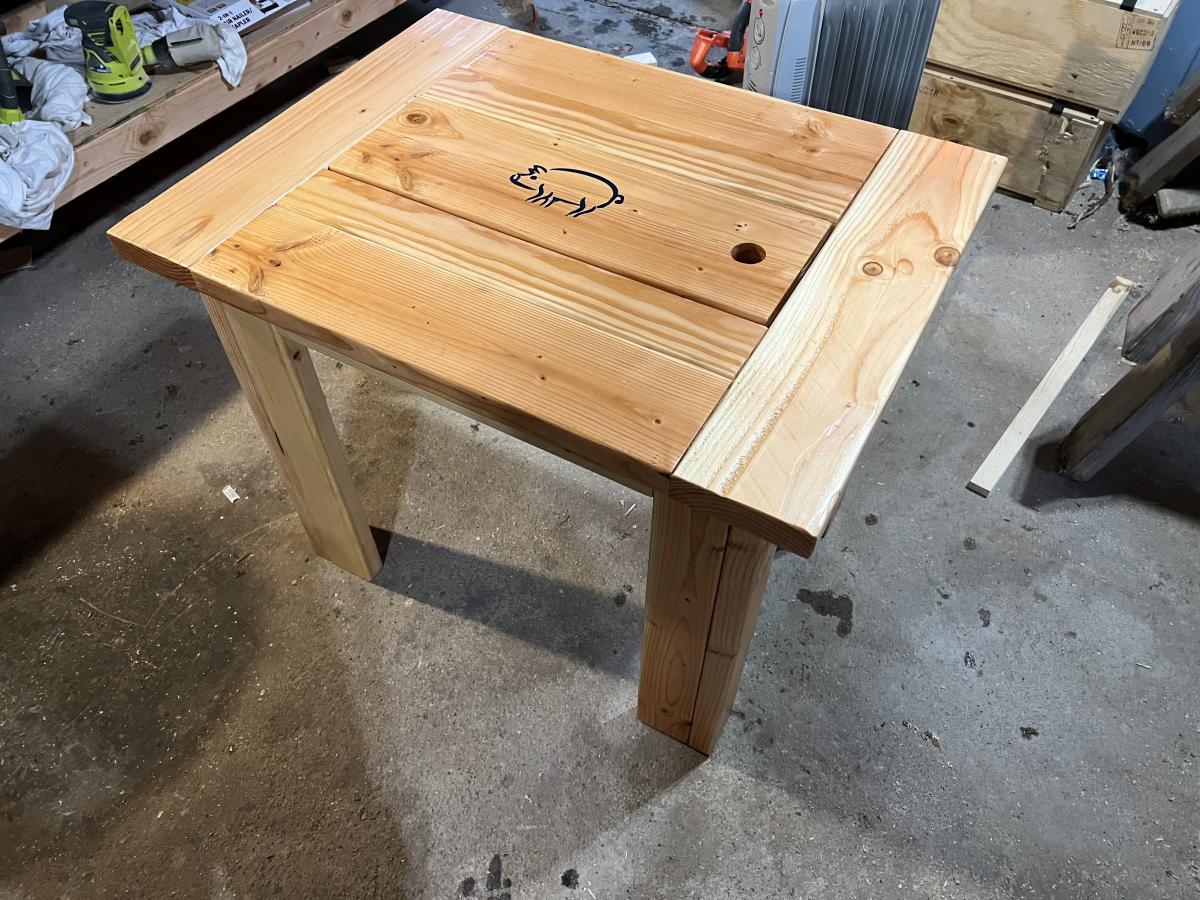
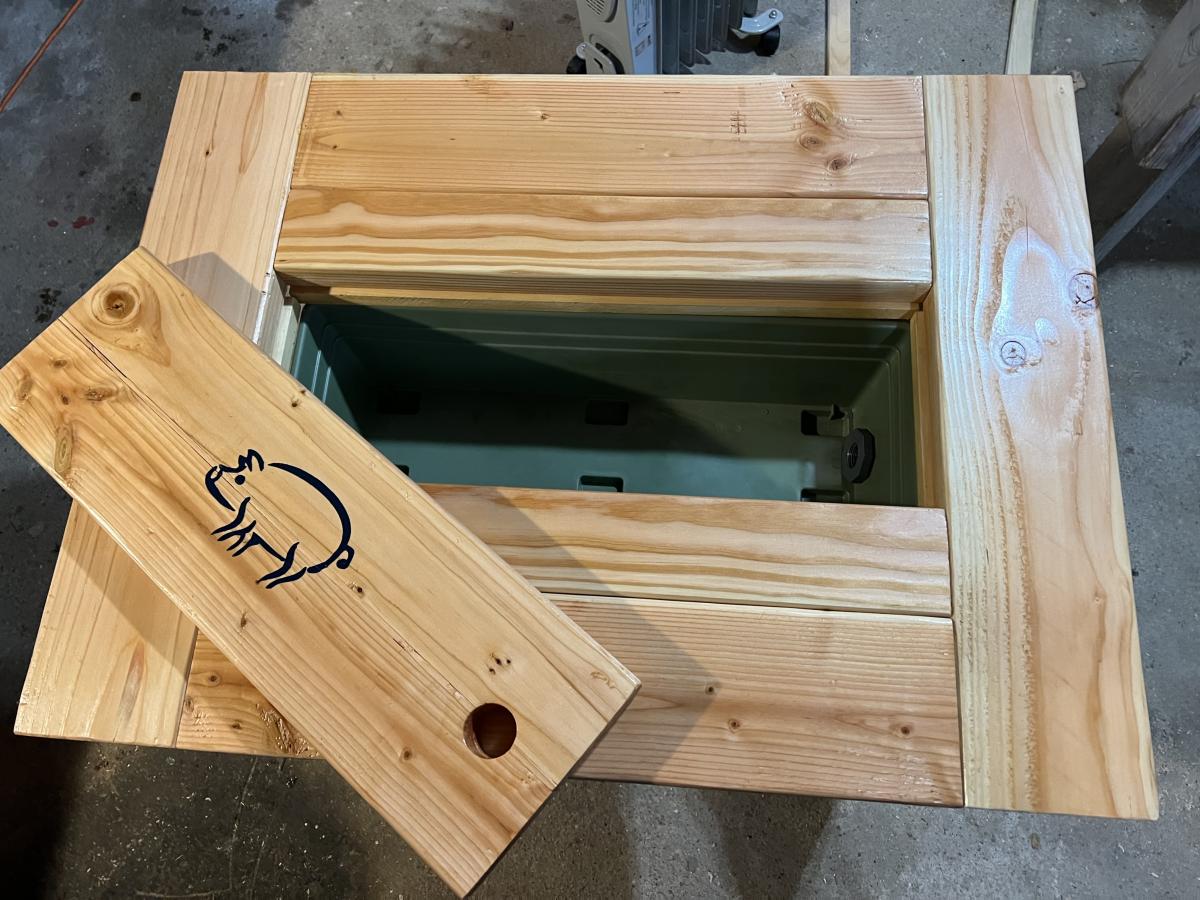
Bristol chairs with an attached side table. I added a planter box under one of the boards to fill with ice and beverages.
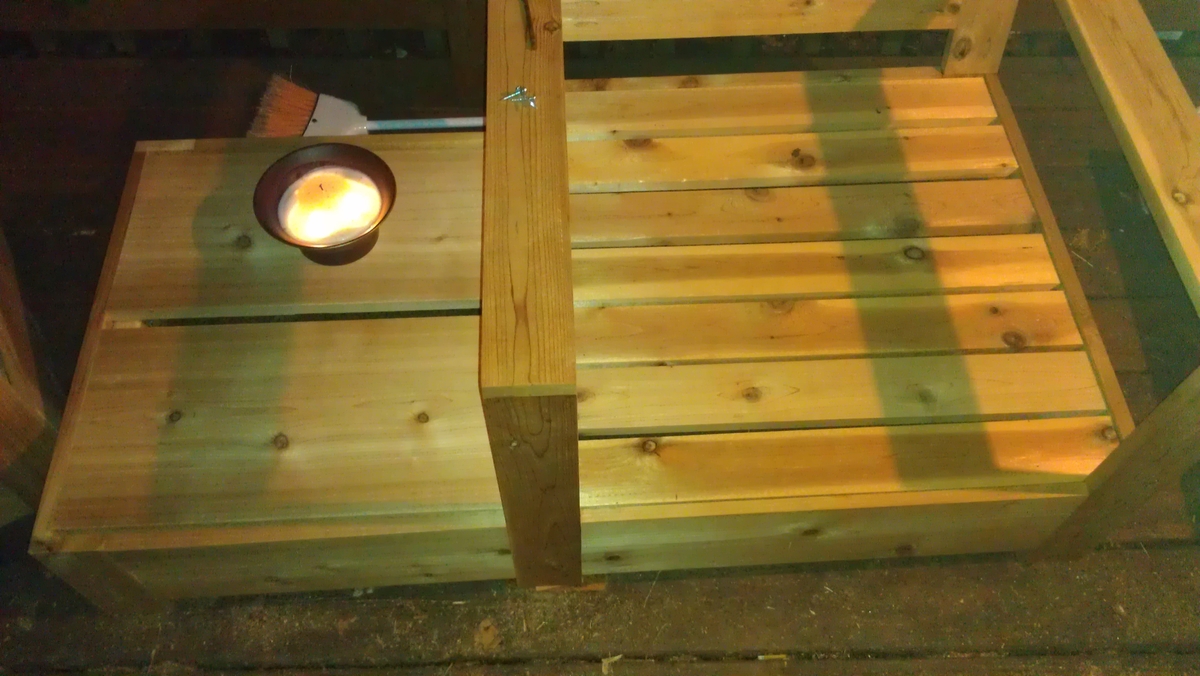
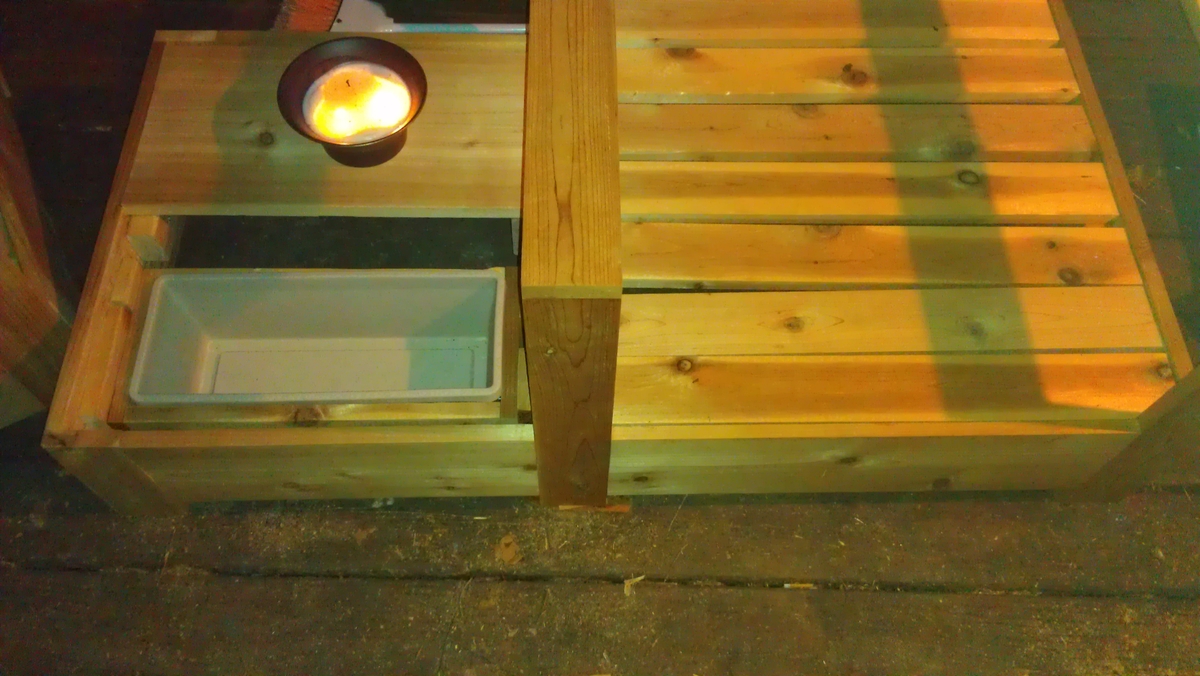

I wanted a Tiki Bar for my deck big enough to store bottles and trinkets, and put a spread on to eat outside. The simple potting bench was my base plans and i just expanded from there. I increased the depth by 4 inches and the width to 46 inches. I increase the height to 7 1/2 feet at its highest point. I used treated 4x4s for my legs and to provide the upright height. I used 2 (8 inch) Lag bolts where the roping is to keep it sturdy on top. All additional parts were bought at Lowes.
This ended up being about $200.00 but will last for a long time.
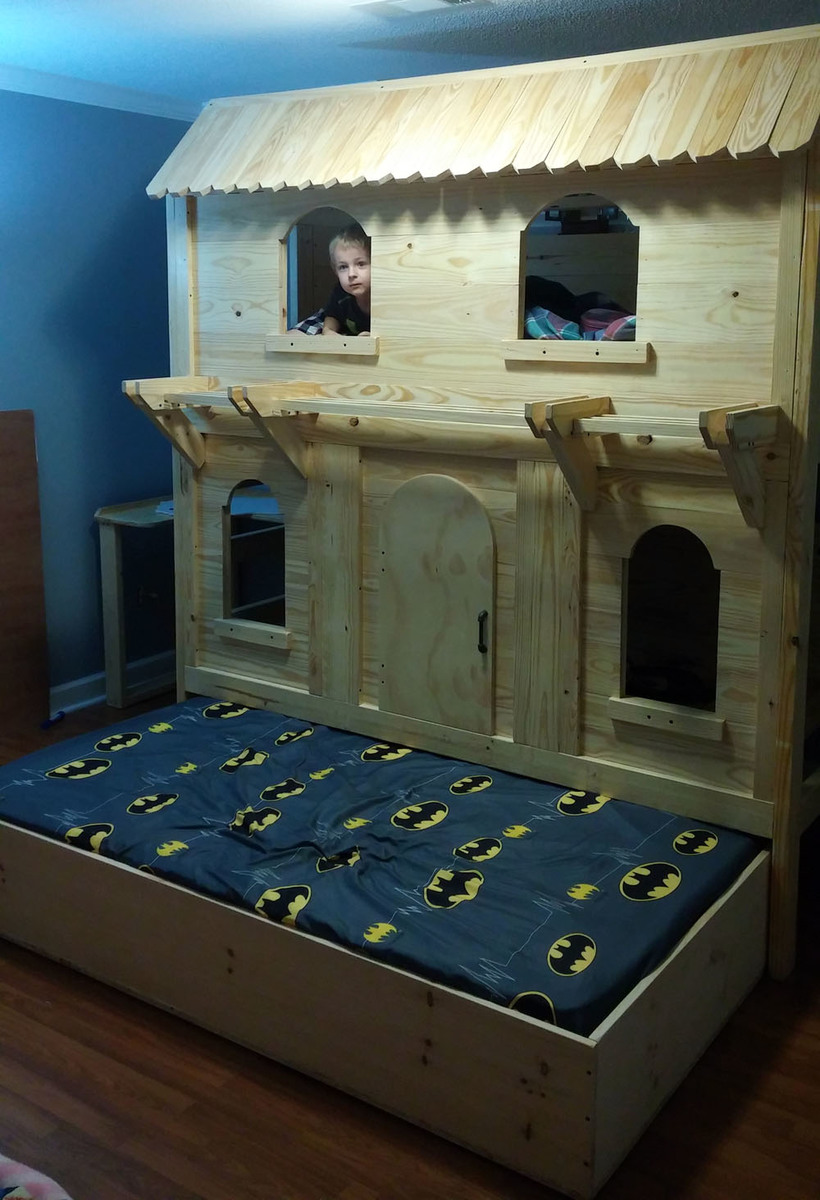
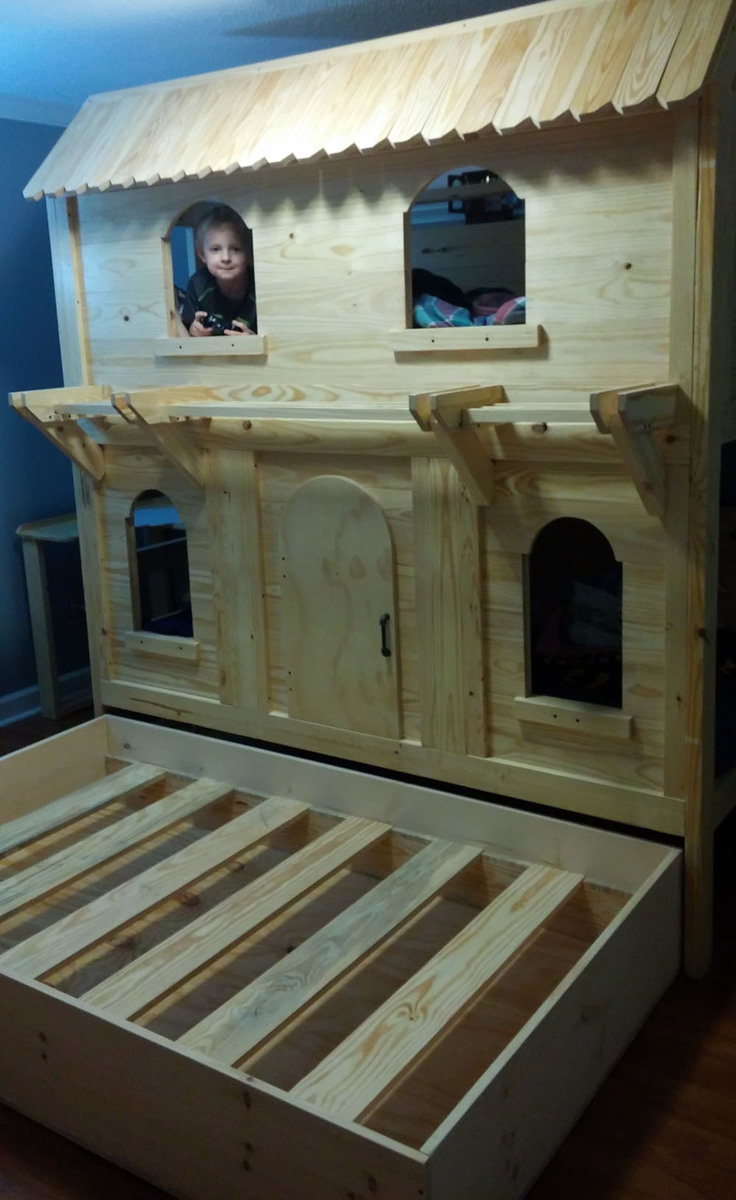
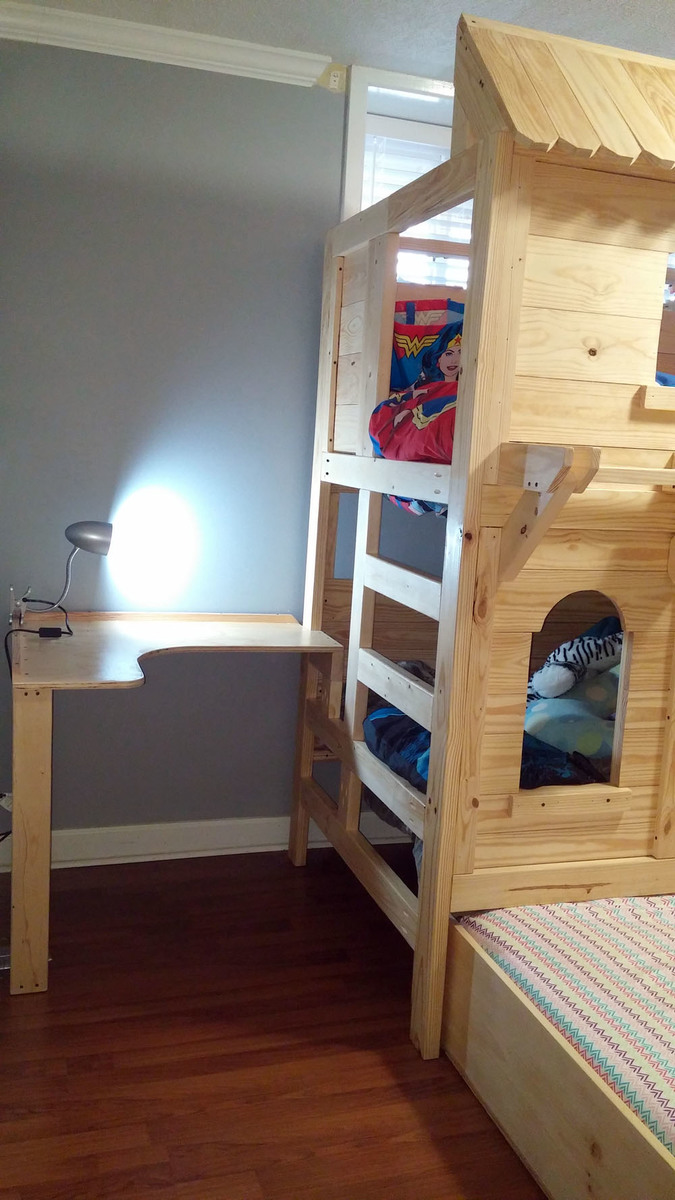
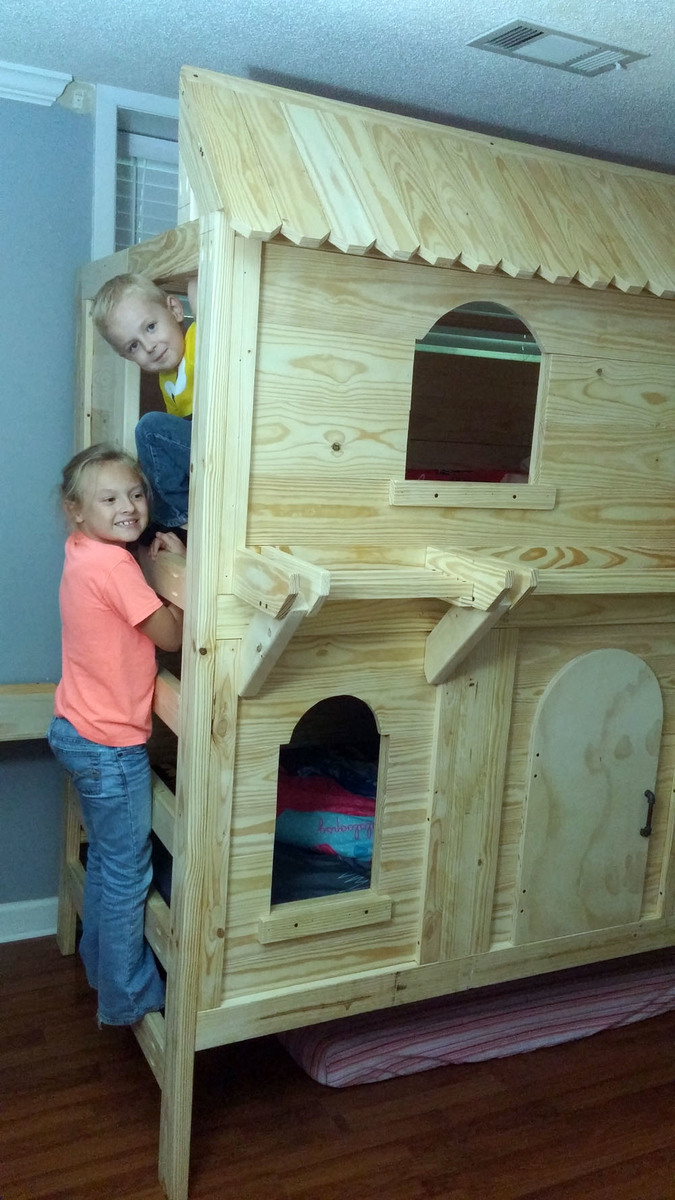
Trundle bed and desk addition.


Sat, 01/06/2018 - 11:51
This is awesome! Thank you so much for sharing! Ana
My first project!
Mon, 12/27/2021 - 11:40
Way to go this looks amazing, can't wait to see what's next!

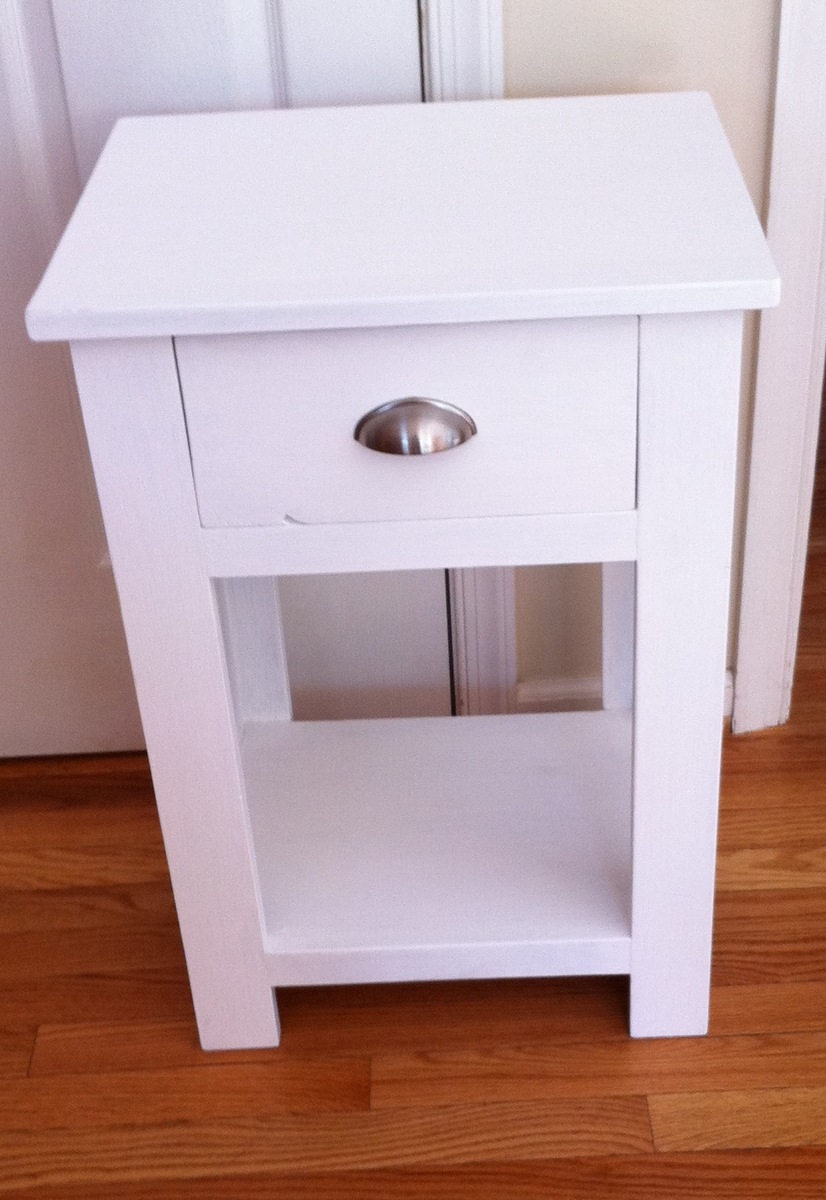
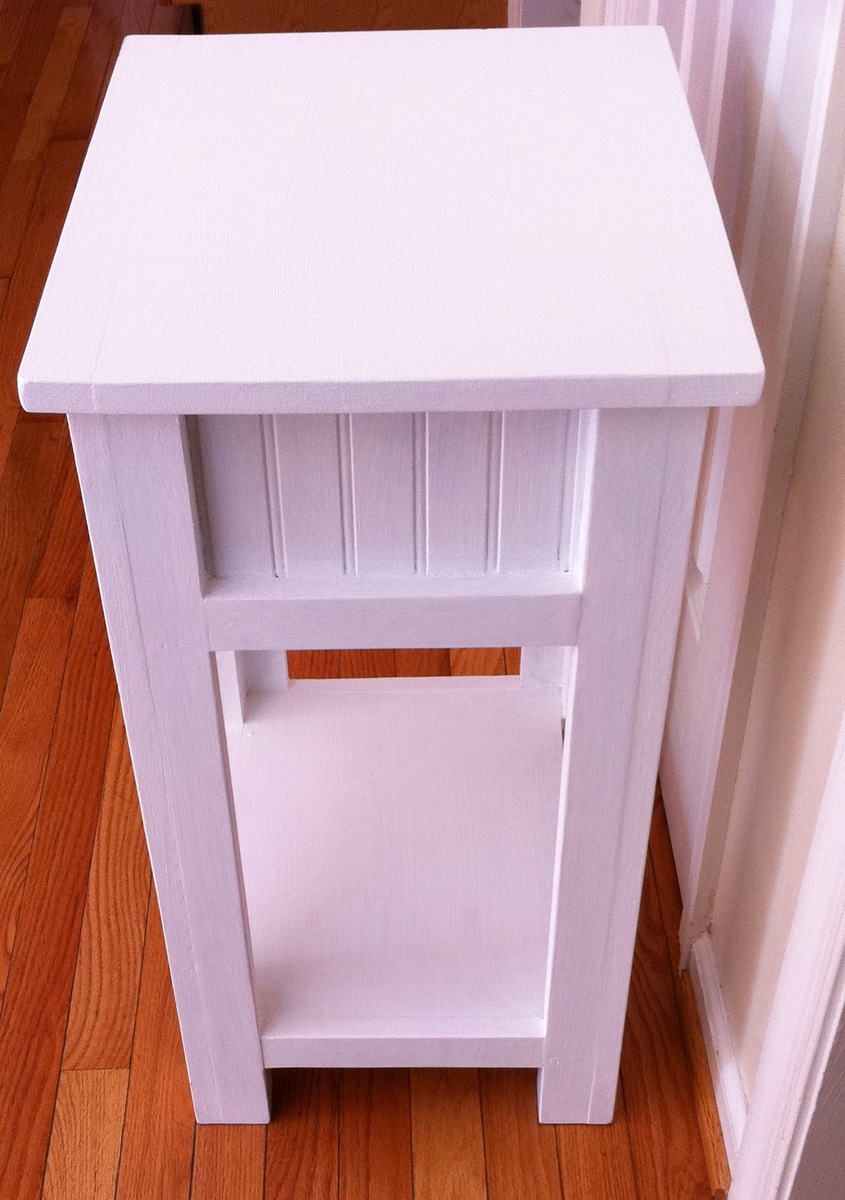
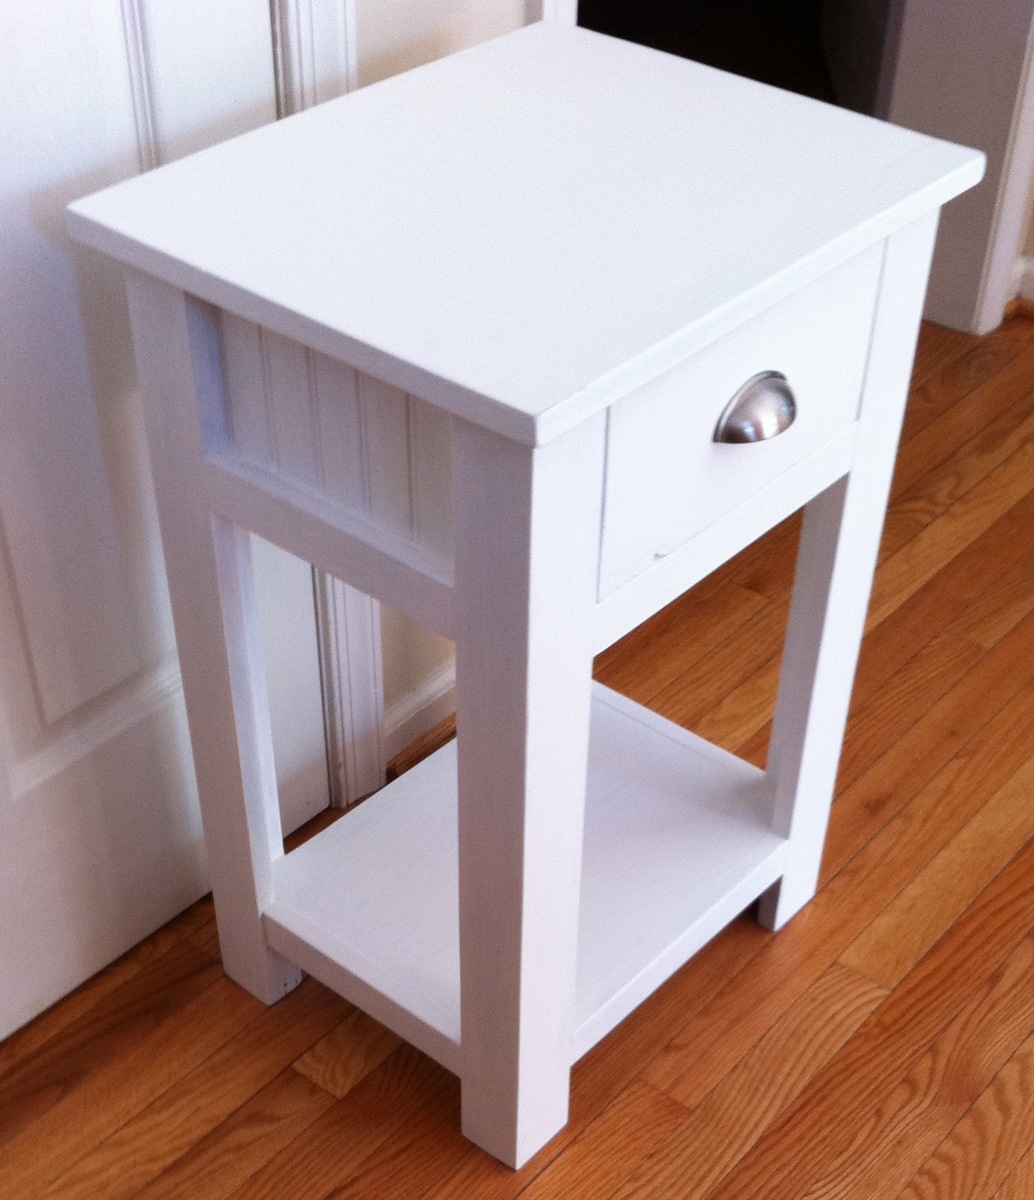
It is a friend's birthday on 5/6 and I noticed she didn't have a nightstand so instead of buying a present, I decided to make her a nightstand. I really liked how the person who built "Lee and Beth's Simple Nightstands" used bead-board on the sides, and I have a lot of bead-board left over from our master bathroom renovation, so I decided to use it, too, and that way I wouldn't have to buy the wood for there, because I didn't have any extra plywood to use there. I also used the bead-board on the back and as the bottom of the drawer.
It looks more modern-cottage than it does modern, like I wanted, but it still looks good.
Pictures are of what it looked like pre-sanding and wood-filling, with 1 coat of the stain on it, and then finished with white paint.
With the combination of scrap wood and new wood, I only spent $20 on new wood for the project, and $5 on the drawer pull!
For the top, instead of a 1x12 and 1x3, I used a 1x12 and and then flanked it with 2 1x2s - for a more balanced look. I also cut the 1x12 at like 19 1/2 inches instead of 18 1/2.

Ana thank you for the wonderful plans. It was my first major project, and it will not be the last. I purchased your book this weekend and love it!!! Thank you for all you post to your site.
I was able to make this with some leftover wood from other projects.

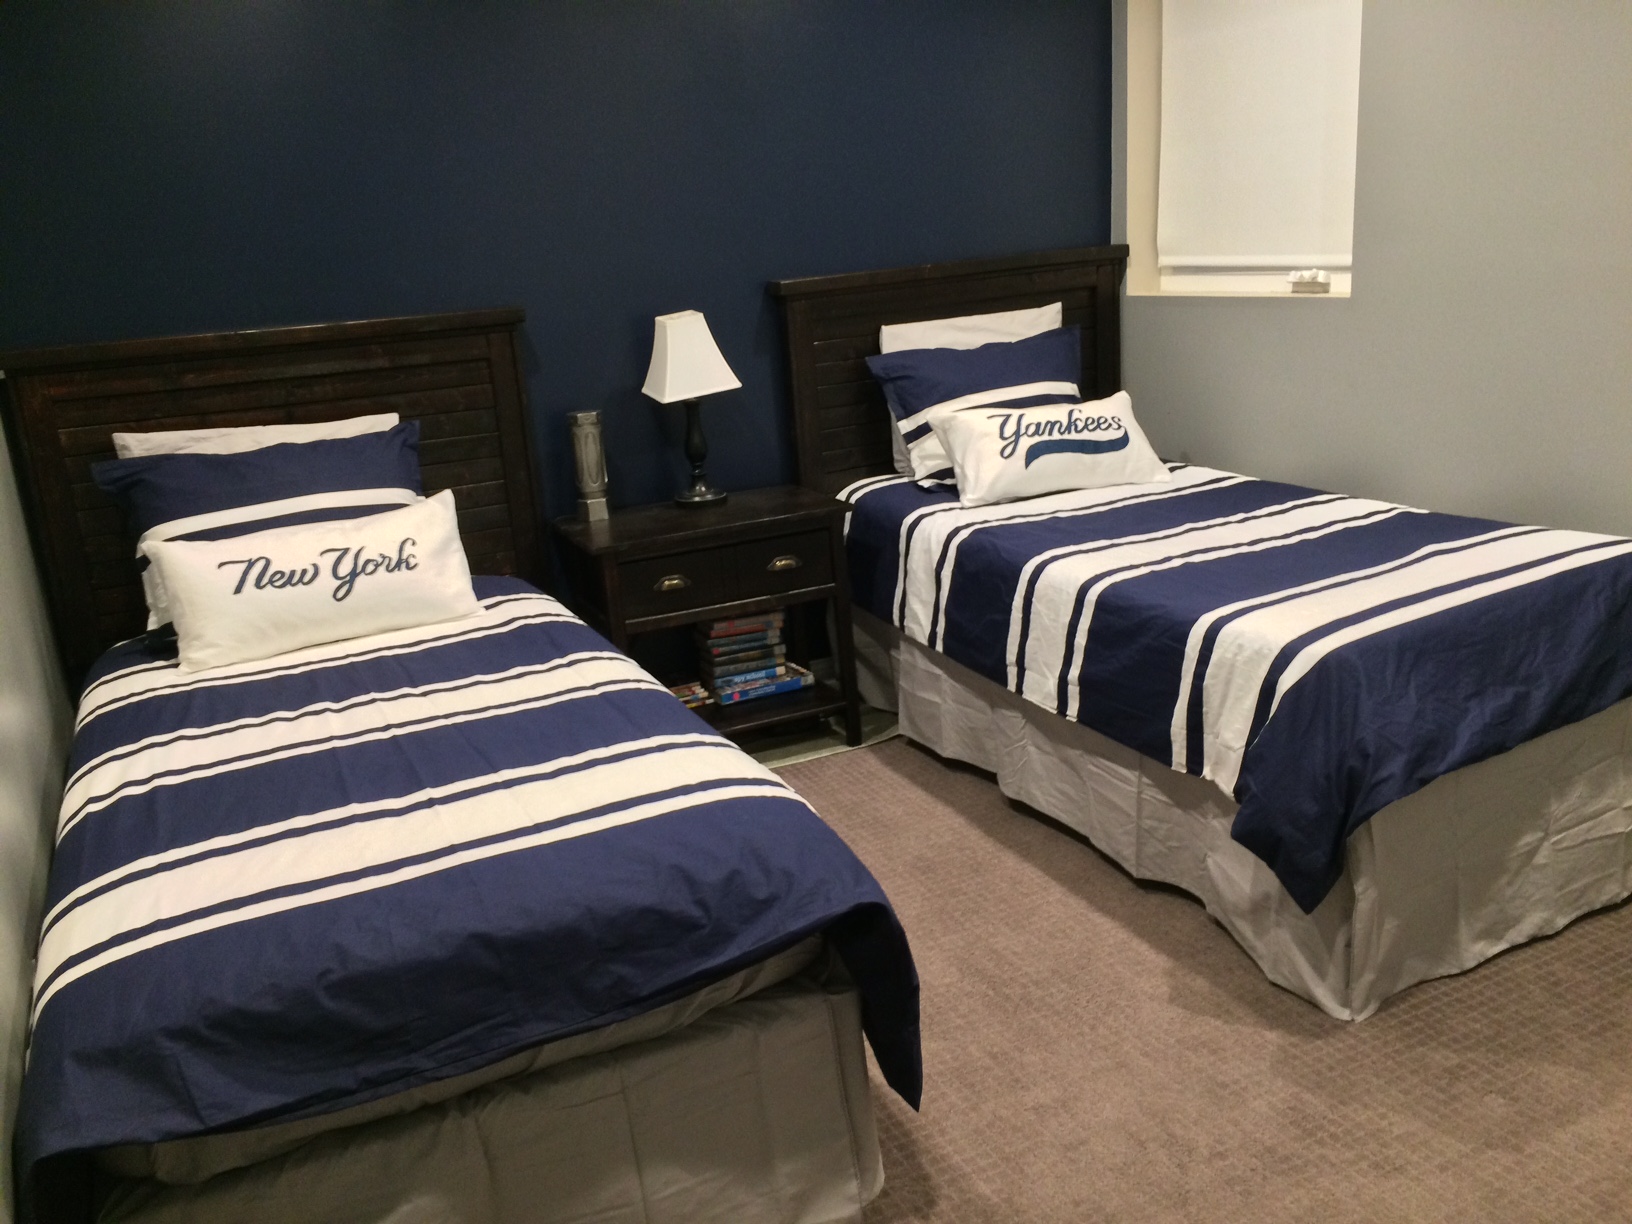
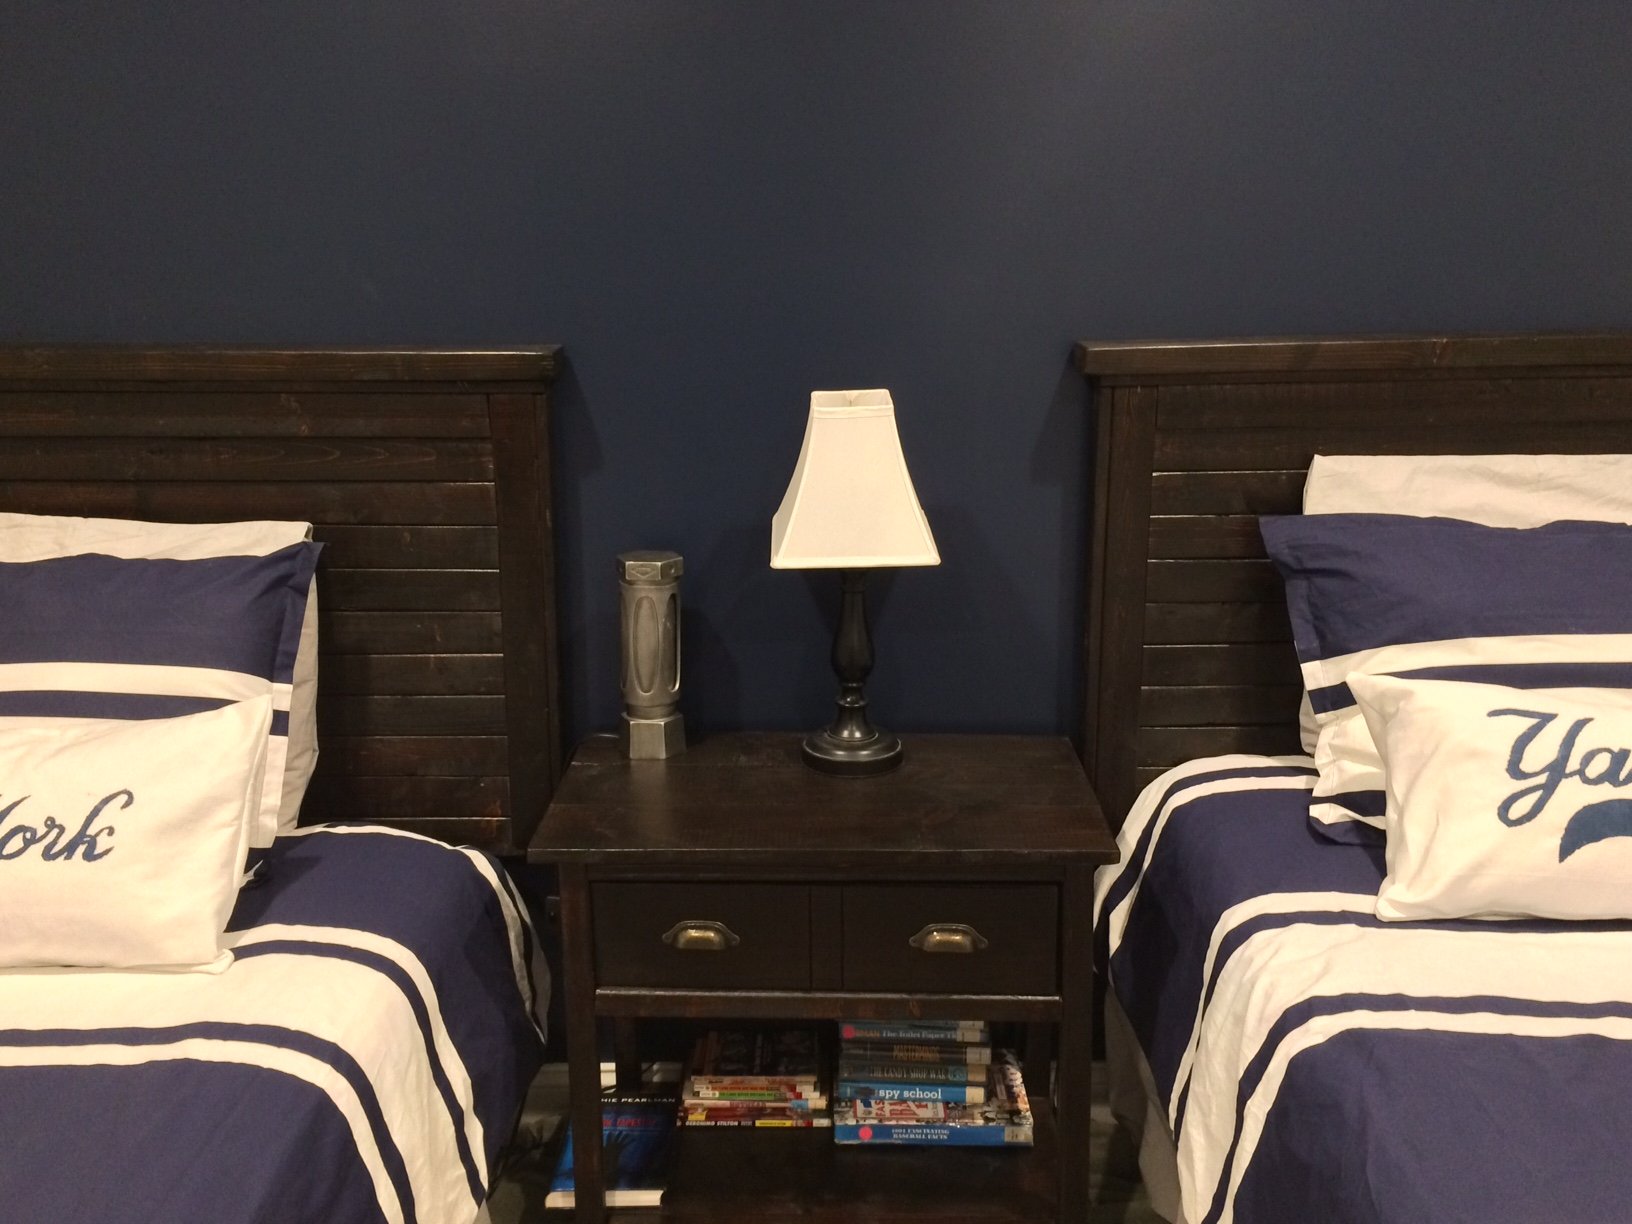
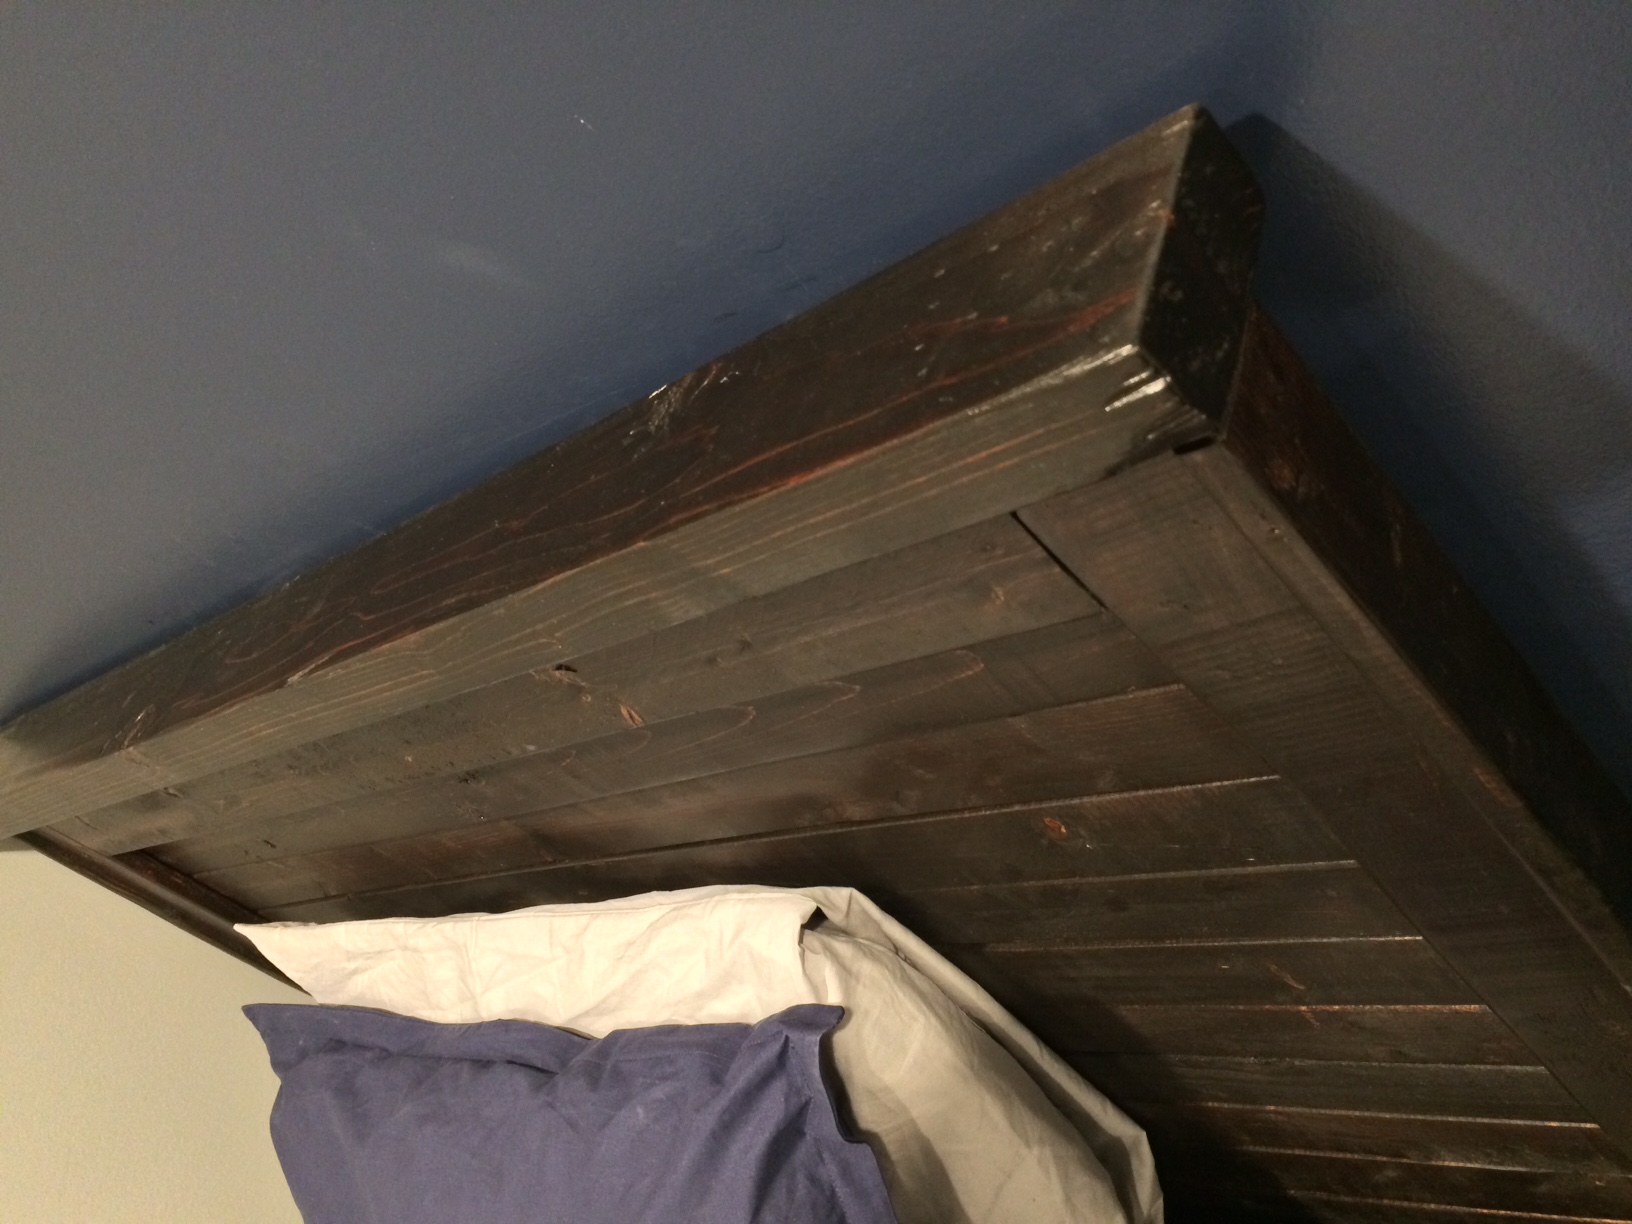
Built these for my boys room- these headboards are for highrisers so I did not use legs- they end at the bottom of the slats. I used 1x3 furring strips for the slats to keep the costs down, I believe I used 10 slats. In order to mount the headboards, they are completely mounted on the wall and not attached to the bed at all. I used 3-2'' Z clips, at the top, tried to get them drilled into wall studs. To keep the headboards even more secure, I used corner braces on the bottom- 2'' braces, drilled into the wall with anchorless screws and then drilled into the bottom of the headboard frame.
I also did not cut the wood at the hardware store- I purchased a circular saw and was very happy with the decision. Was MUCH better to cut as I built.
Wanted to try something different for my Secret Santa gift. Didn’t have the exact plans I needed so I based it off others. Built this to fit in and out of an RV entry door. It also has a drain valve underneath. This was my first without a plan project

In reply to Sweet side table! by Ana White Admin
Mon, 01/10/2022 - 10:07
Thanks, this was fun and the giftee loved it
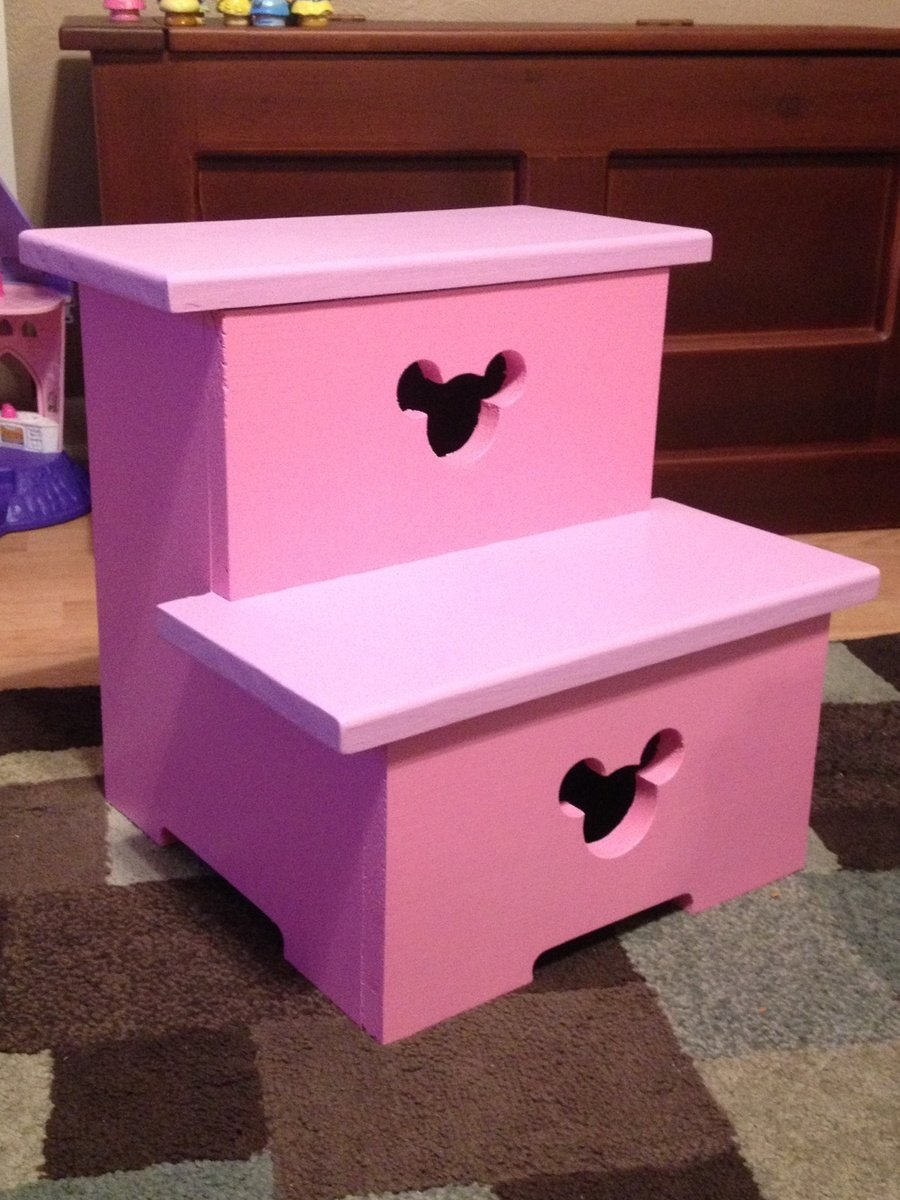
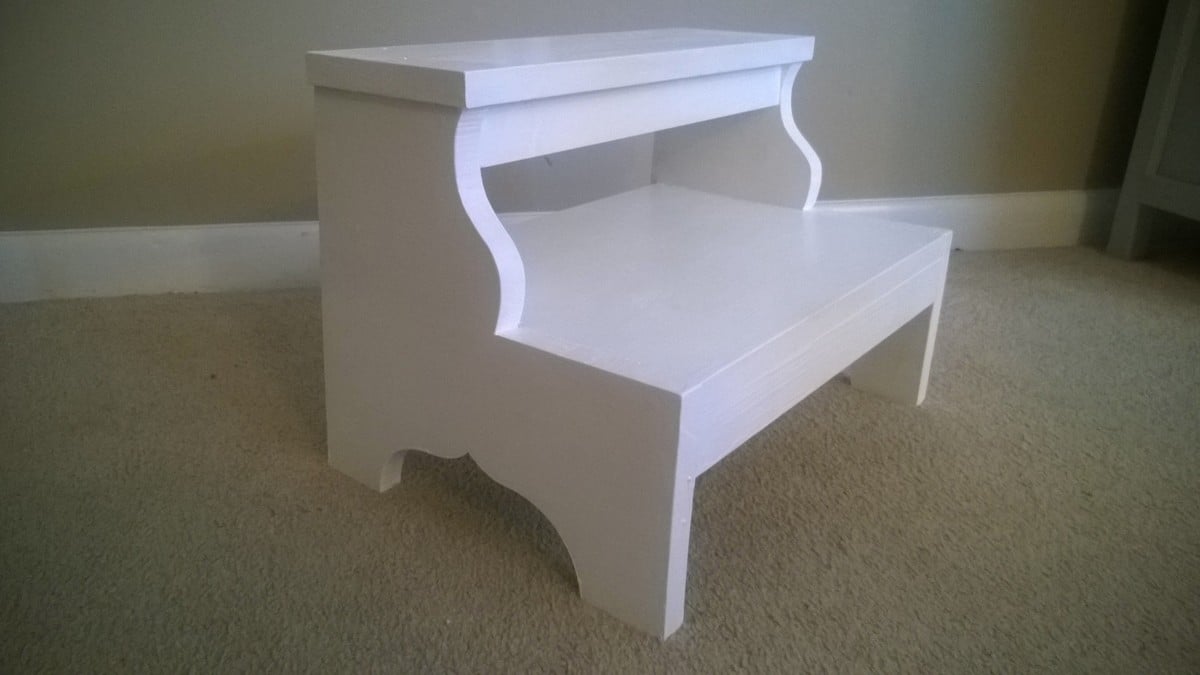
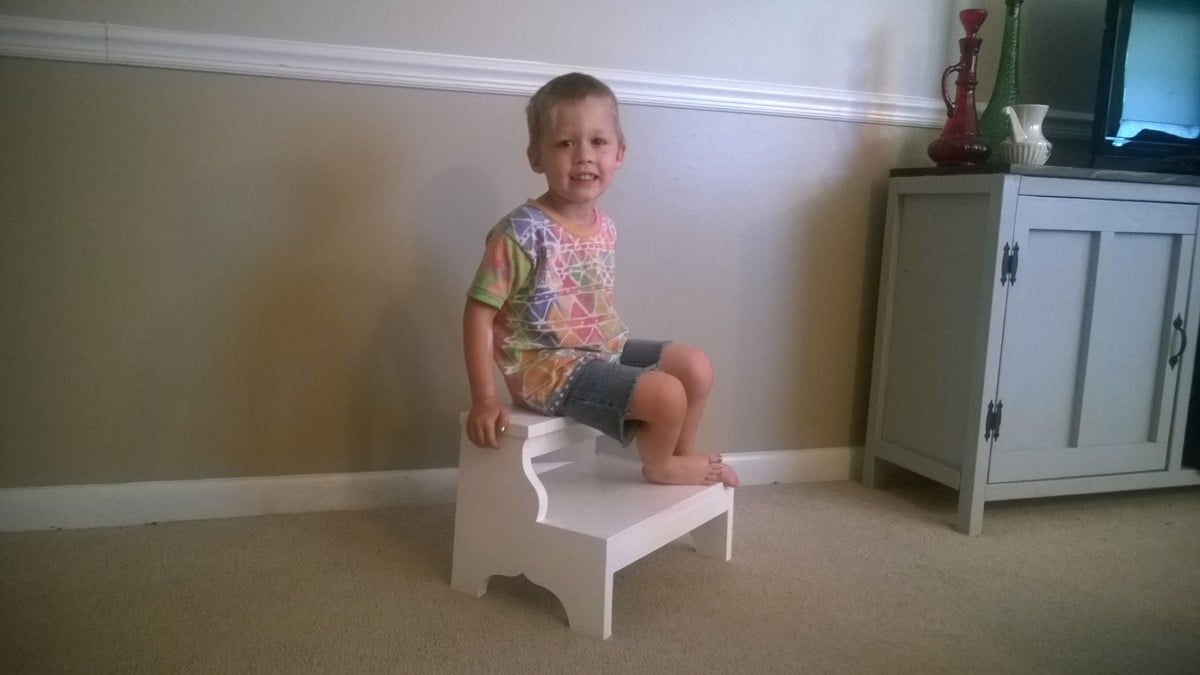
It was time for potty training and when it came time to wash her hands her arms were a little too short. So I threw this step stool together over a few hours and with the little one being a Minnie Mouse fan I had to add the Mickey head. Great project for those wanting something easy and quick.
Thu, 07/09/2015 - 11:31
Is there any instructions or measurements anyone can provide me with for this project?

Comments
Ana White Admin
Sun, 12/26/2021 - 13:43
AWESOME!
Those look great! Thank you so much for sharing:) Hope you had a Merry Christmas!