Search Results

… legs with the 2 1/2″ or 3″ screws and glue. Now it’s time to do the drawer. … Drawer Box Build the drawer box with 2″ screws and glue to fit the opening, leaving 1/2" gap …
Read More
Project Plan
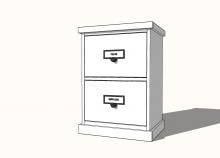
… narrower. If you want to run a charging cord or power strip into the drawer (you can pull it out through the notch in the drawer front for charging) make a hole near the top of the back board. … Jig or by drilling through the legs into the sides. … Install the drawer supports (D). They should be 1/2" above the bottom edge of the …
Read More
Project Plan
… Be safe, have fun, and ask for help if you need it. Good luck! … Drawer Case Start by cutting a ¾” by 1½“ notch out of both drawer box side panels as shown in #1. The 60 x 22 piece is the bottom of the drawer case. Attach the side panels using 4 – 2” wood screws per joint. …
Read More
Project Plan

… Attach bottom footer and top trim as done in the Open Base Plan. … Drawer Sides. In the same manner as the drawer back, fasten the drawer sides. But make sure you also fasten to the back, reinforcing the …
Read More
Project Plan
… - this is updated in cut list) to give you something to attach drawer slides to. … Build the front face frame and attach to front of … mitering corners at 45 degrees. … It's always a good idea to build drawer boxes to fit openings and spec with the drawer slides. Adjust to fit as necessary. … For bottom center mount …
Read More
Project Plan

… the two side aprons. … Now it's time to attach the base to the drawer box. Easy stuff, just screws the base to the drawer box. We'll leave the top off for now so we can reach in and get that drawer put on right. … Install the drawer in the cabinet, giving 3/4" …
Read More
Project Plan
… you go. Your drawers will not slide properly if your drawers or the drawer box is not square. Learn how to check for square in the HOW-TO … … Cut J and K as shown above and nail in place. Use 1 1/4″ nails. … Drawer Assembly If your bench openings are not perfectly square, your drawers will not slide right. Assemble the drawer by nailing the back of the drawer, M, to the bottom of the …
Read More
Project Plan
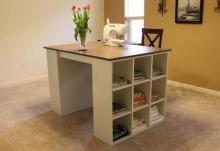
… surface. … Dimensions for the Tabletop with drawers is shown above. … Drawer Housing. Measure and mark out the sides of the drawer housing as shown above. Fasten the center to the sides, using 2″ … drawers will not slide right if you do not build perfectly square. … Drawer Housing to Top. Fasten the drawer housing to the top, using the …
Read More
Project Plan
… 1-1/4" brad nails and glue, all outside edges are flush. … Build the drawer with either 3/4" pocket holes and 1-1/4" pocket hole screws or … bottoms with 3/4" brad nails and glue. NOTE: You can build a deeper drawer by using 1x10s instead of 1x8s. You can save some money and use 1x6s but the drawer sides won't be as tall. Install drawer members of the drawer …
Read More
Project Plan
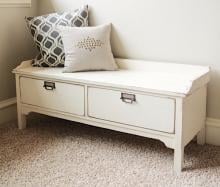
… Attach the two 1x2 front trim pieces to the bench legs. Note that the drawer faces (1x8s) are expected to be 7-1/4" wide - measure and confirm … spacing between these 1x2s should be 1/4" more in with than your 1x8 drawer faces. … Add the center divider between the drawers. … Attach the … trim piece with glue and nails. … These cleats are for attaching drawer slides. Use pocket holes for attaching center cleat and 1-1/4" …
Read More
Project Plan