

Easy to build floating shelves - build first, then hang for easy to finish and install. Free step by step plans with video from Ana-White.com
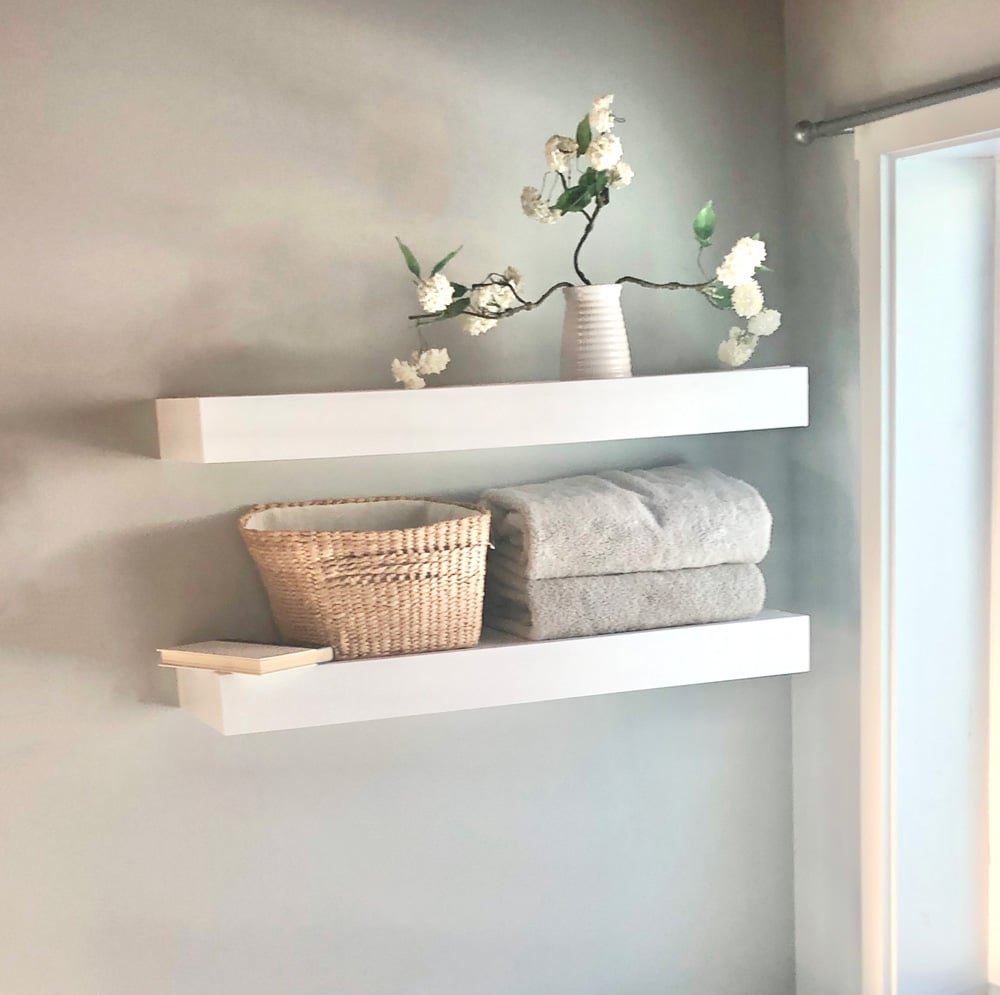
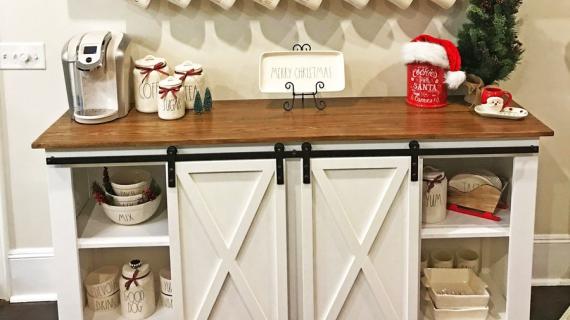
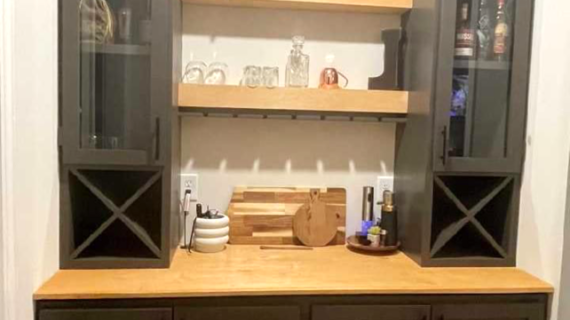
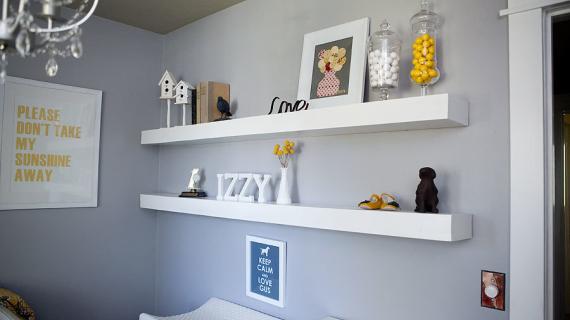
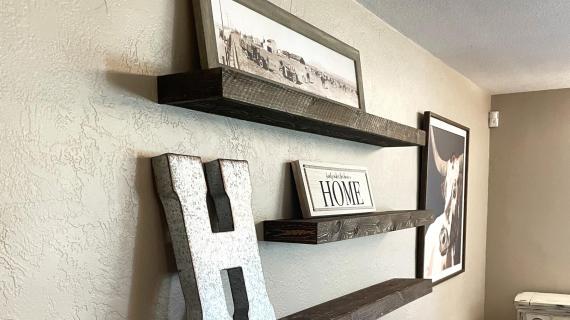
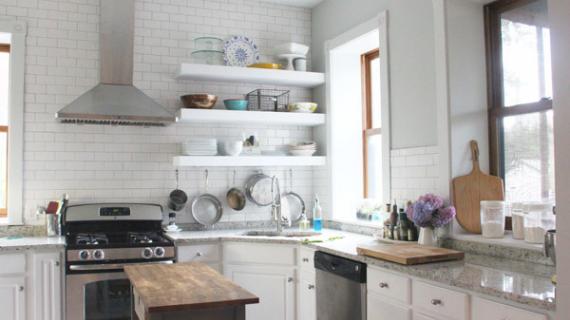
Floating shelves add an architectural element to your home, and also give you space to store and display favorite things. We love wood floating shelves, white floating shelves, kitchen floating shelves - whether your style is modern or farmhouse, floating shelves can work in your home!
In this tutorial, we make floating shelves as easy as possible to build.
- You won't need any special tools or a ton of building experience to whip these floating shelves out
- You can build, paint or stain, right in your garage, then just hang on the wall
- You can easily customize the length and depth to fit your needs
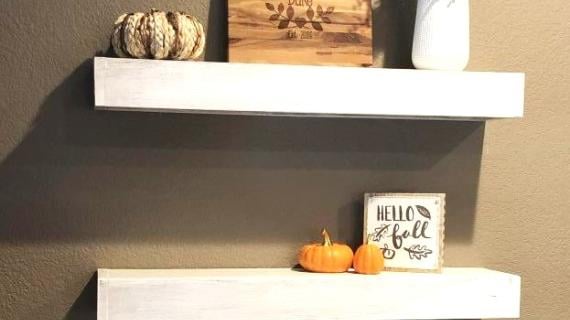
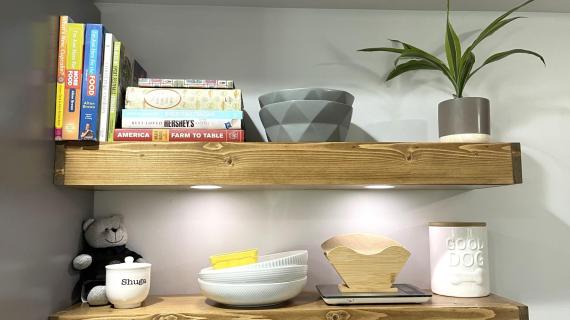
- Beautiful in both a painted or stained finish
Floating Shelf Strength
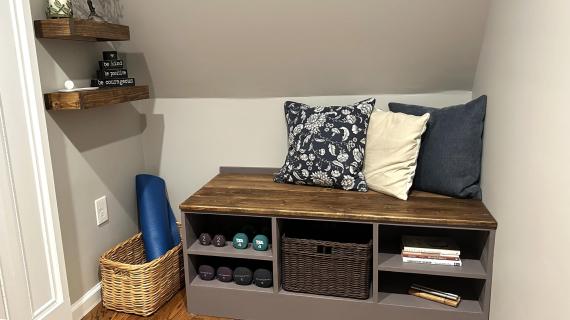
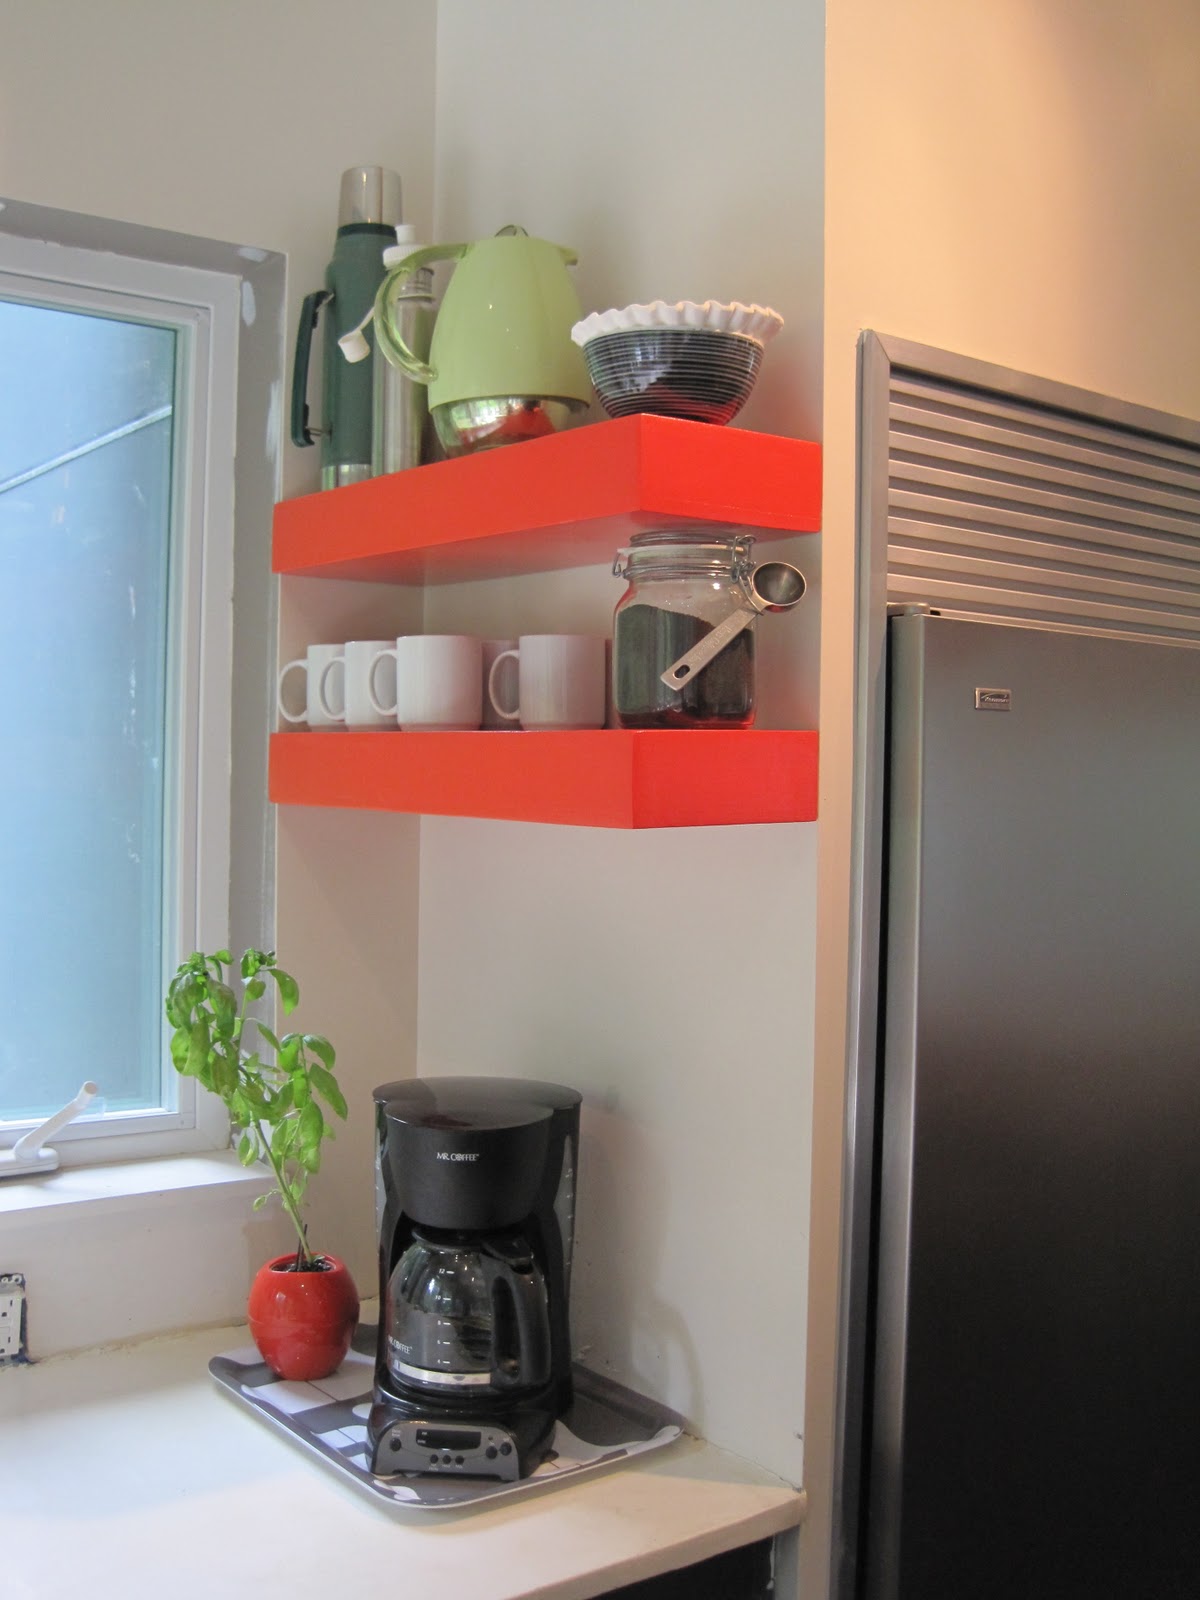
To test the strength of my floating shelves, I placed 10 pound weights per every foot of shelf and left overnight.
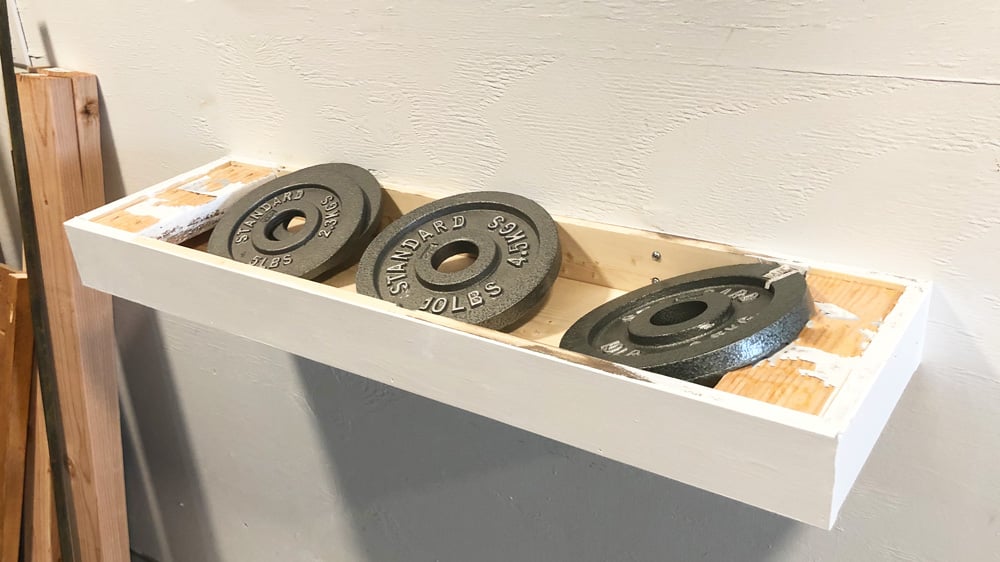
The floating shelf did not change and remained sturdy and strong.
Video Tutorial
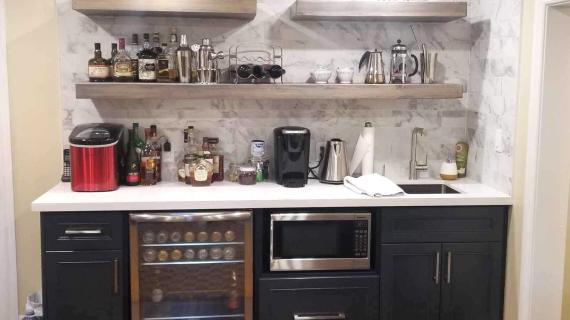
For my most recent floating shelf build in our bathroom, I filmed the process and created a video tutorial. There's lots of tips and tricks, so please watch before you build.
How to Make Floating Shelves
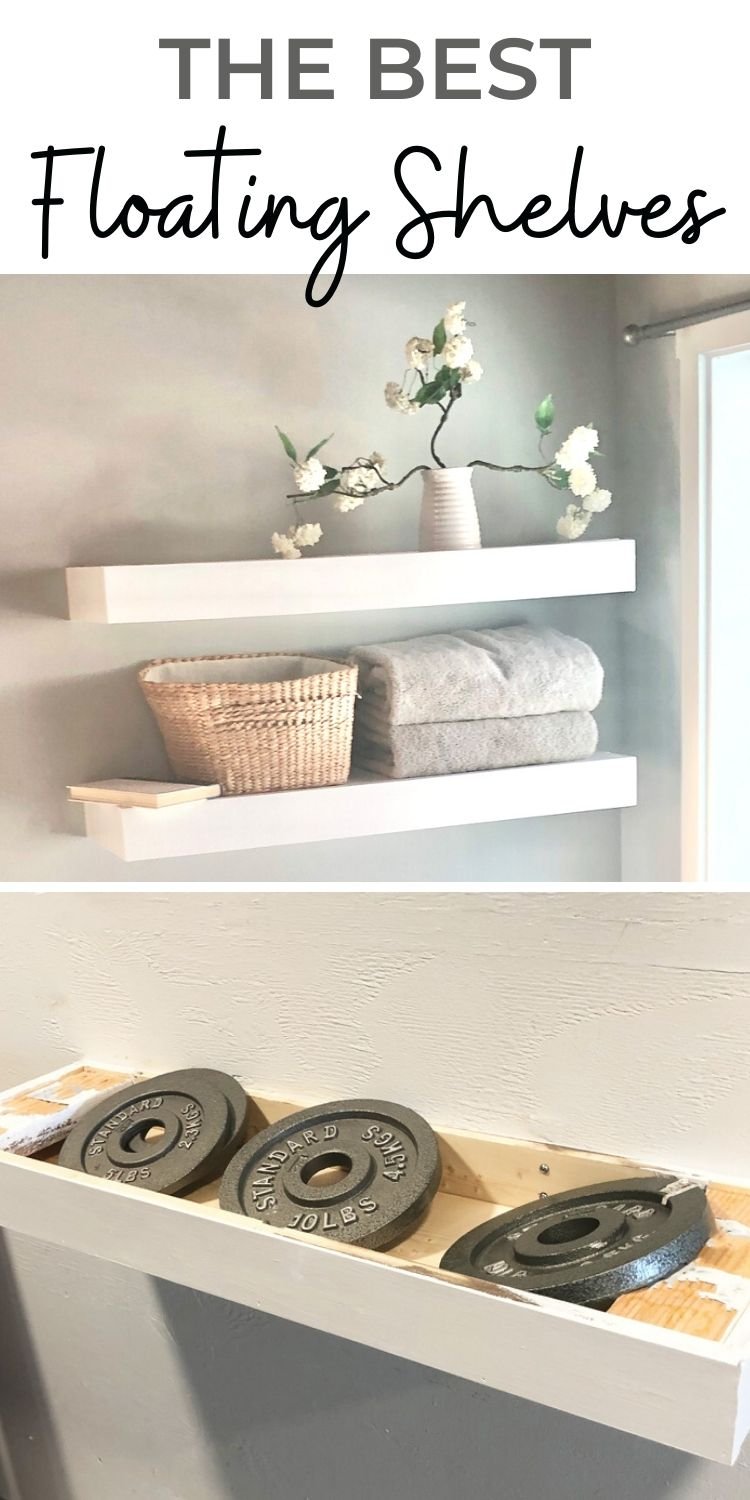
Pin For Later!
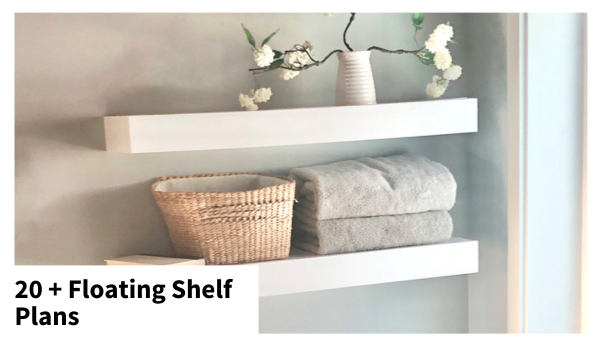
More Floating Shelf Plans
Want even more floating shelf plans? Here's a round-up of some of our favorites!
Preparation
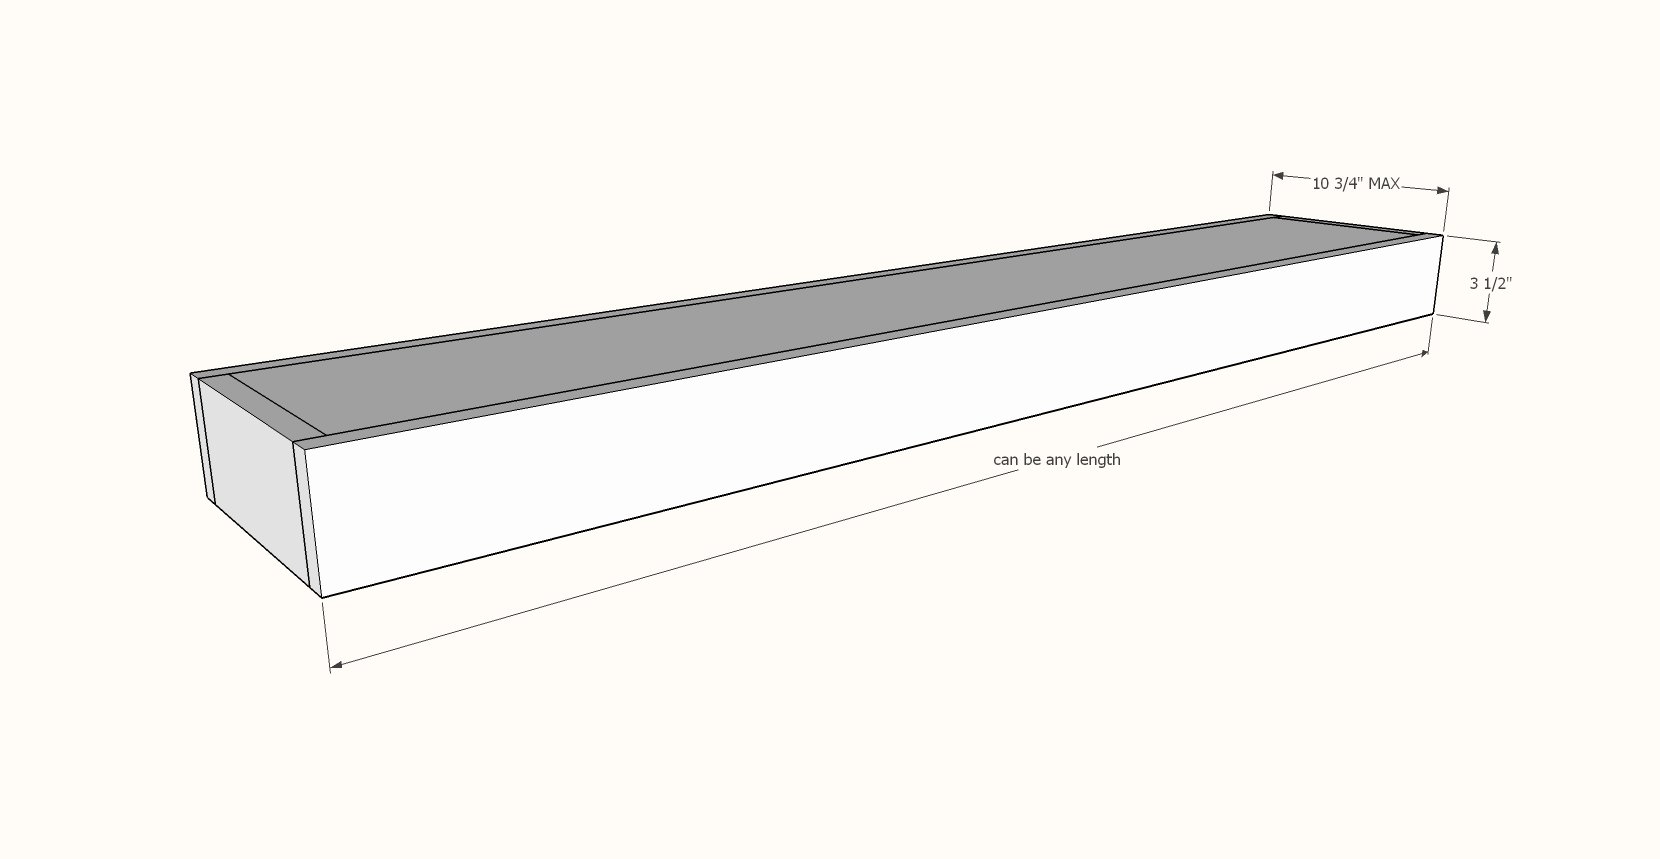
- 1x4, 1x6, 1x8 or 1x10 shelf top board in desired length of shelf, minus 1-1/2"
- 1x4 long enough to go all the way around your 1x shelf top board
- 2x3 or 2x4 - inside support pieces
- 1/4" plywood, same size as your shelf top board
- #8 2-1/2" to 3" long self tapping wood screws (like these from Home Depot)
- 3/4" and 1-1/4" brad nails


Instructions
Step 1
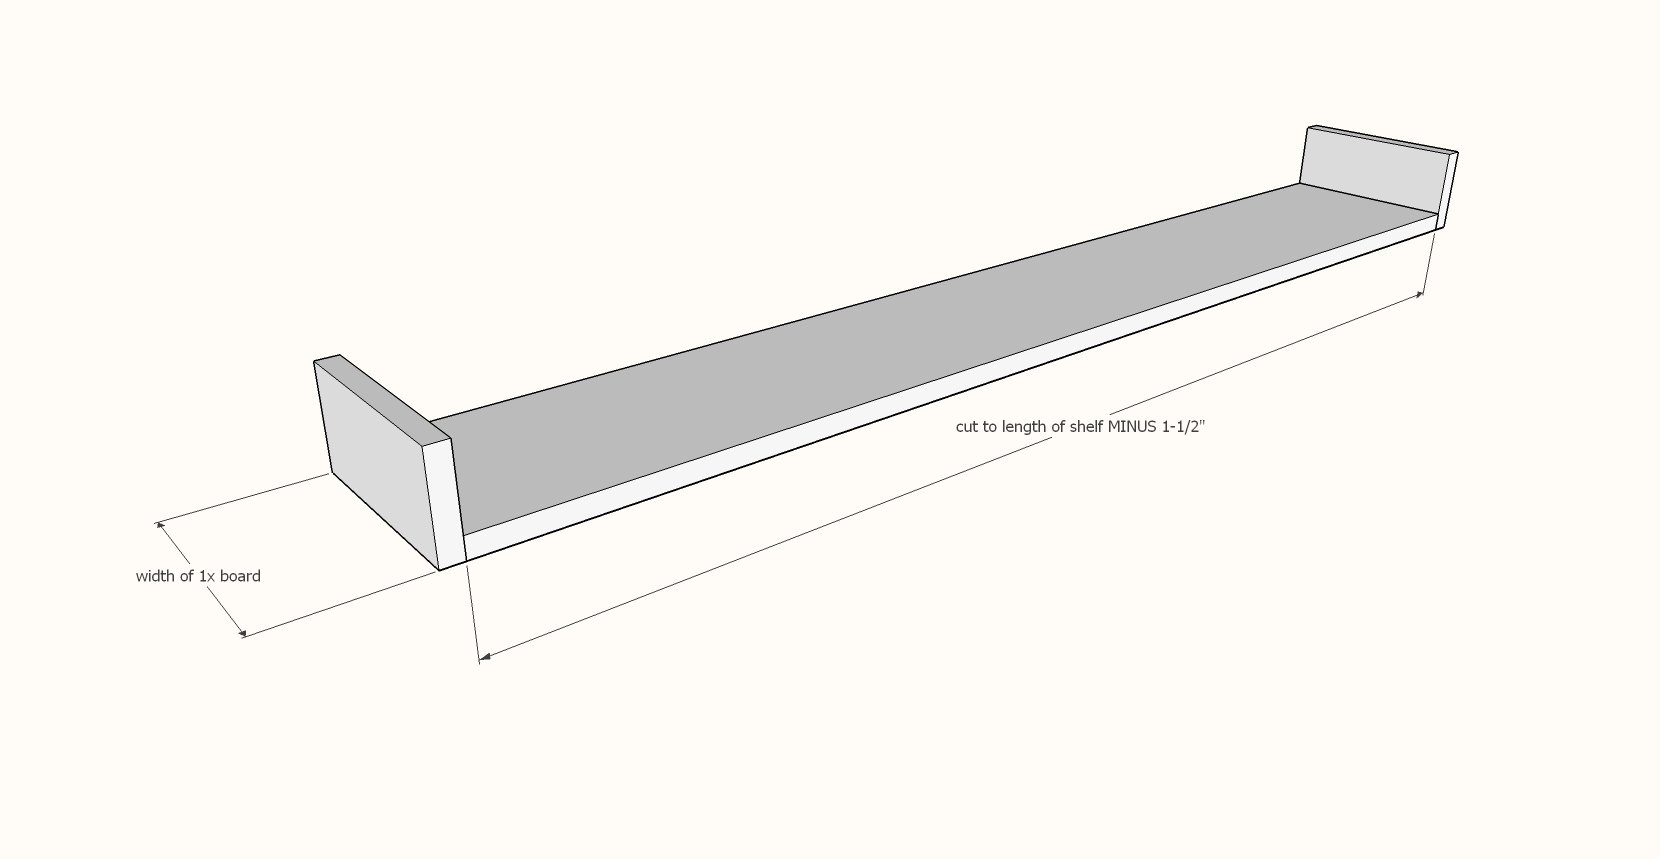
Cut your shelf top board to the desired length of your shelf, MINUS 1-1/2".
Cut 1x4 end pieces to match the width of your shelf top board.
Use glue and 1-1/4" brad nails to attach the 1x4 end pieces to the shelf top board. All outside edges are flush.
Step 2
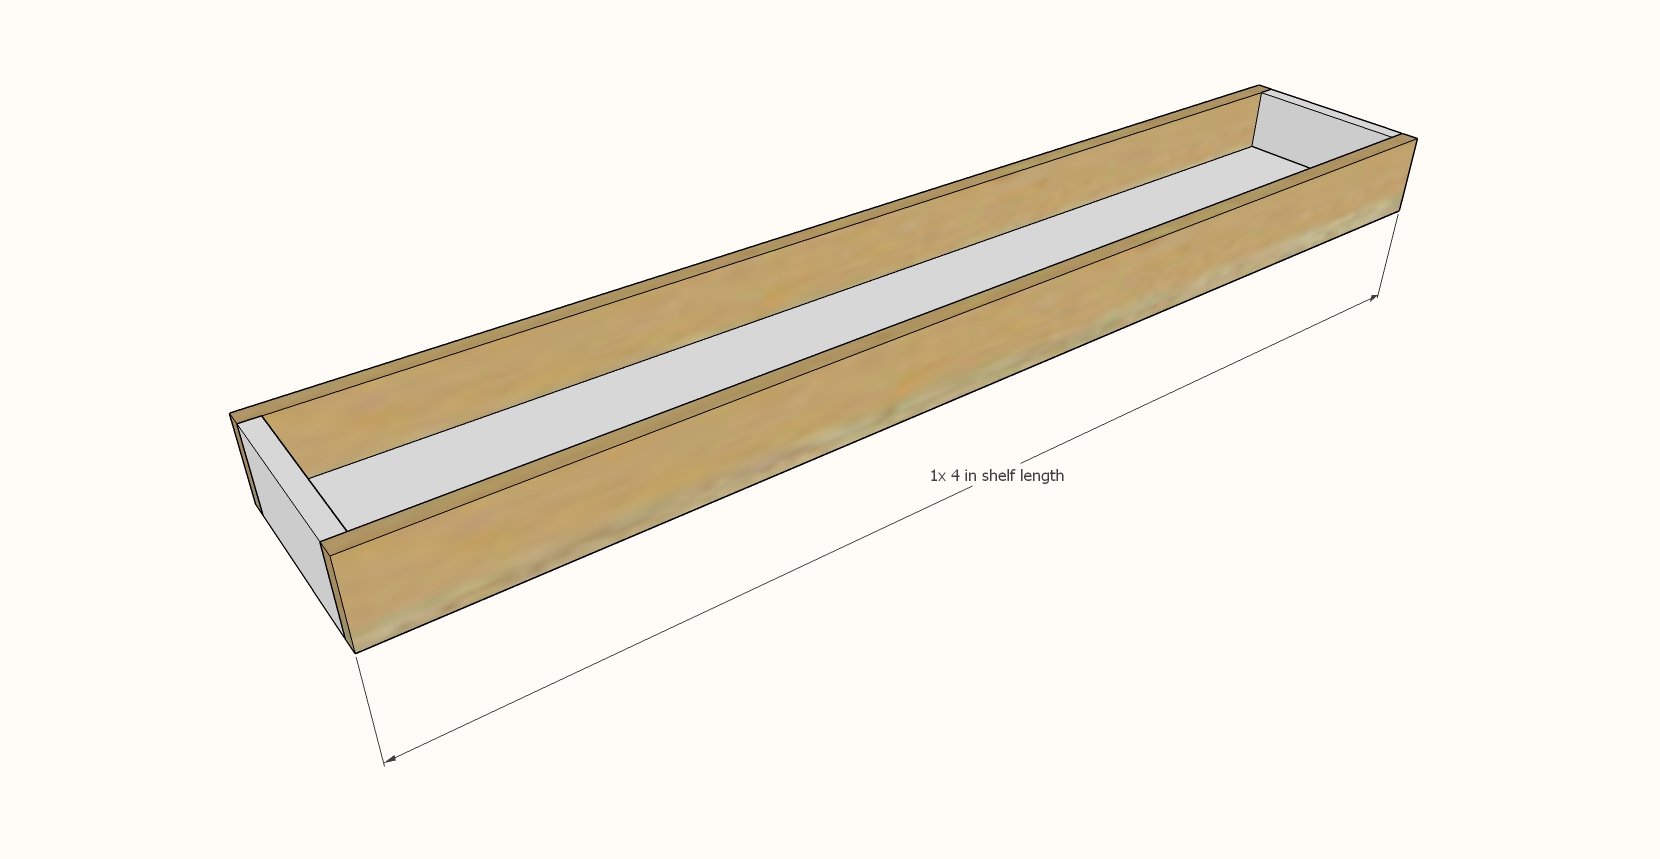
Cut 1x4 front and back pieces to match the shelf length.
Attach front of shelf with 1-1/4" brad nails and wood glue.
For back of shelf, for extra strength, you can attach with 2-1/2" self tapping screws and glue, or use nails.
Step 3
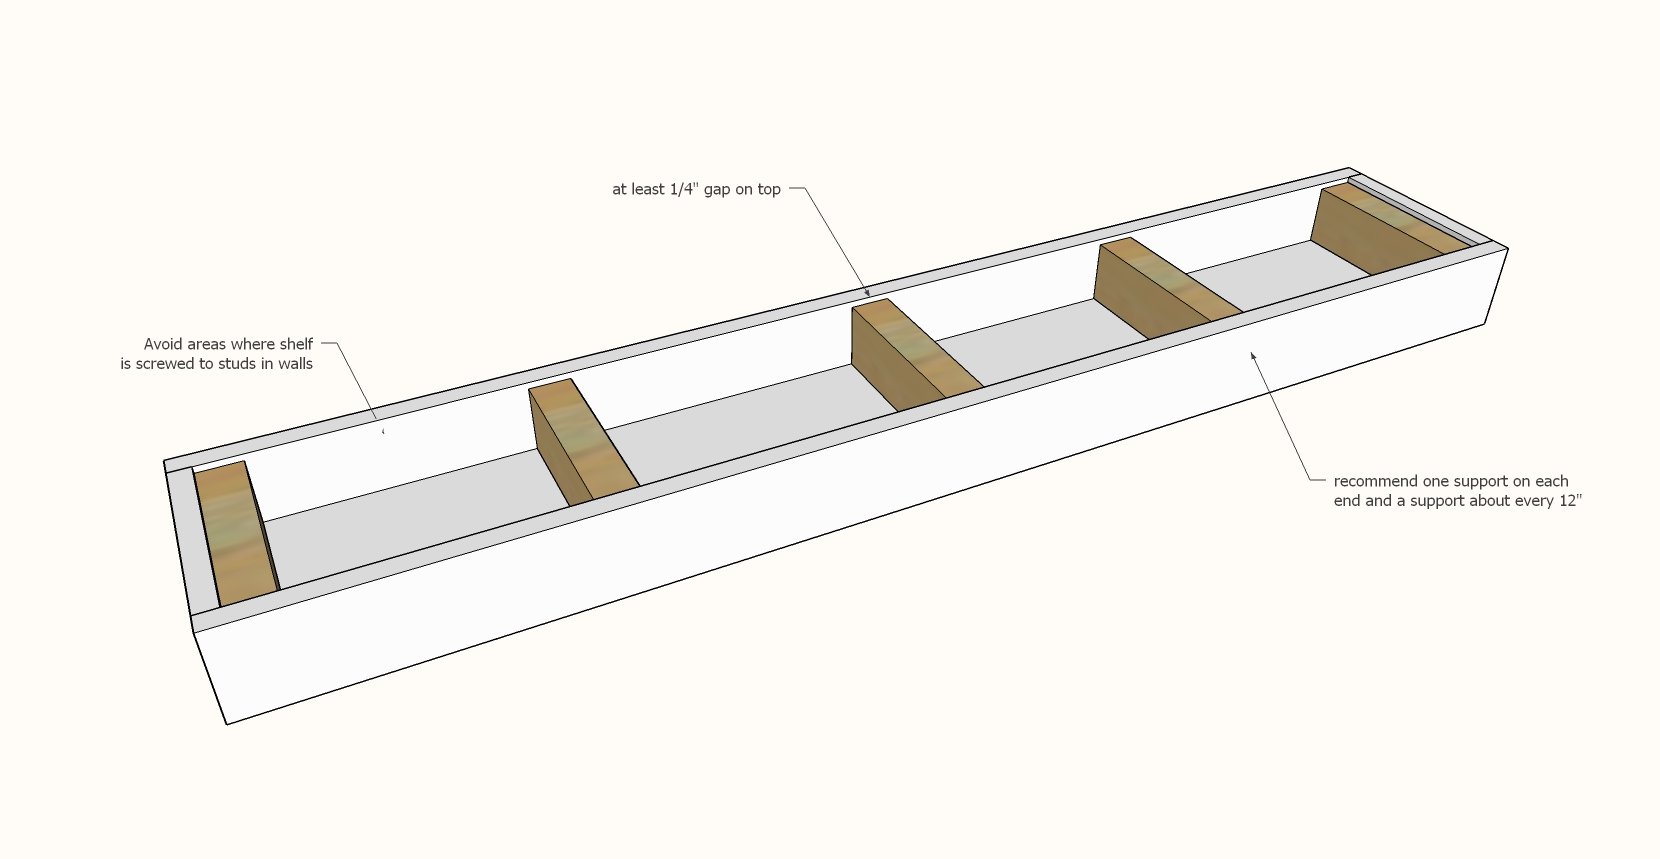
Cut 2x boards to match the width of your shelf top board.
For 2x3s, set inside the shelf, making sure there is 1/4" gap on top for the 1/4" plywood.
Attach from back with glue and 2-1/2" screws and from front with glue and 1-1/4" brad nails.
If using 2x4s OR 2x3s are too big to leave the 1/4" gap, turn the 2x board flat side up, and attach set down 1/4" from the top (as done in the video) with screws on the back side and 1-1/4" brad nails on the front side.
Place a support about every 12" and one on or near each end.
Avoid placing supports where studs in walls are located in the final hanging location.
Cut 1/4" plywood with a circular saw or tablesaw. Make sure it easily fits inside the floating shelf. Paint or stain the floating shelf and the 1/4" plywood panel and let dry.
Step 4
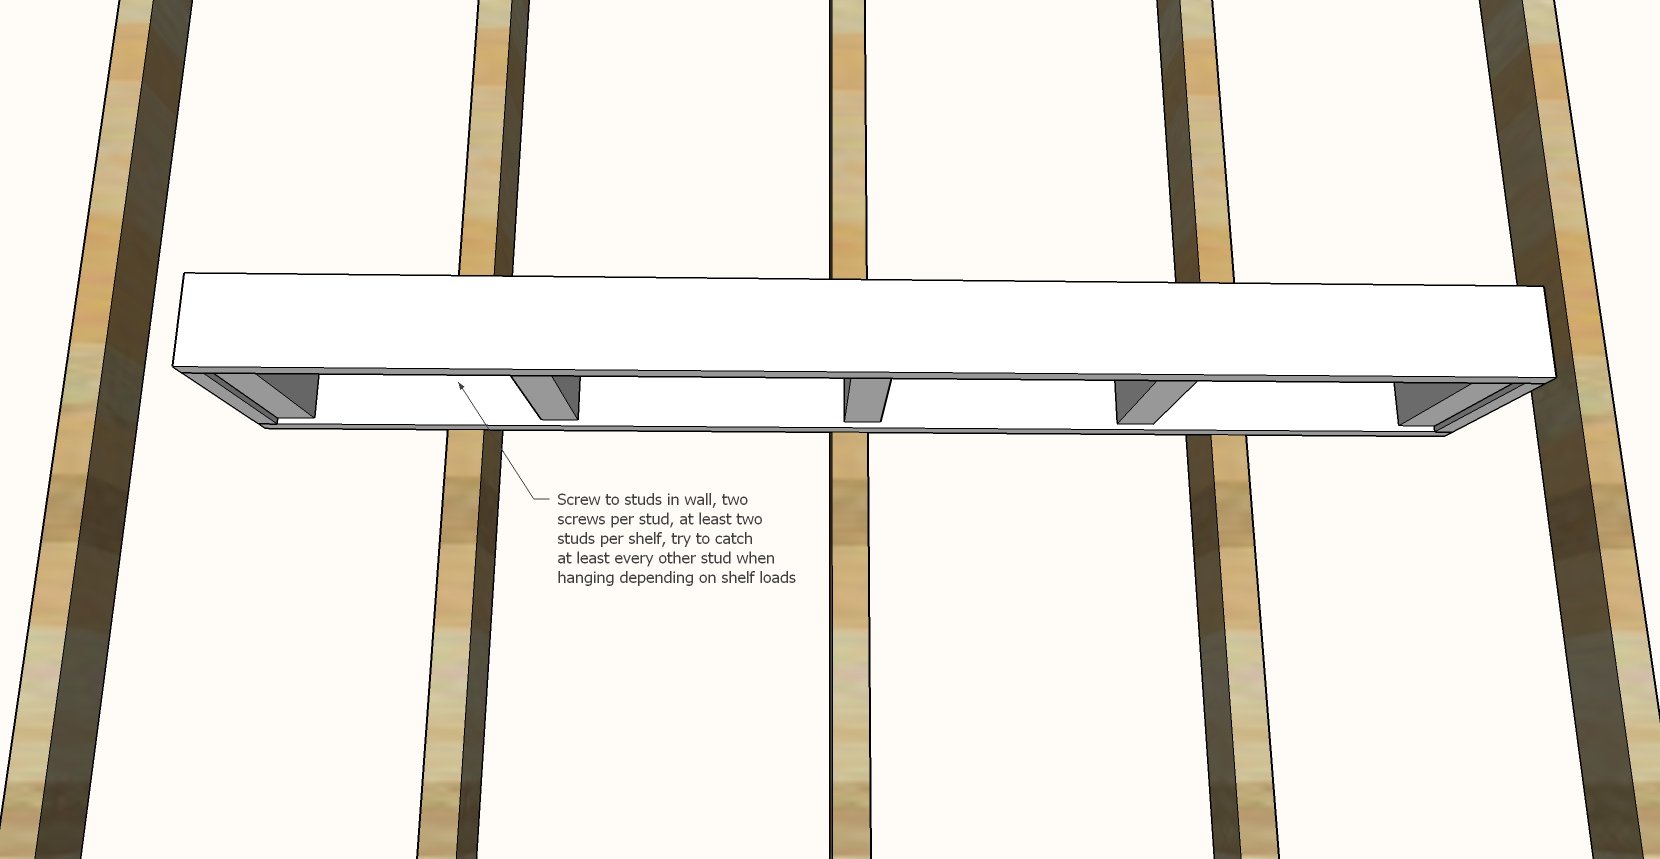
Locate studs in wall and hang the floating shelf through the back 1x4 board into studs in the walls using 2-1/2" or longer self tapping screws.
If you are attaching the 1/4" plywood to the bottom, hang the highest shelf first, complete the next step, than hang the next lower shelf.
If you are attaching the 1/4" plywood to the top, hange the lowest shelf first, complete the next step, than hang the next higher shelf.
Step 5
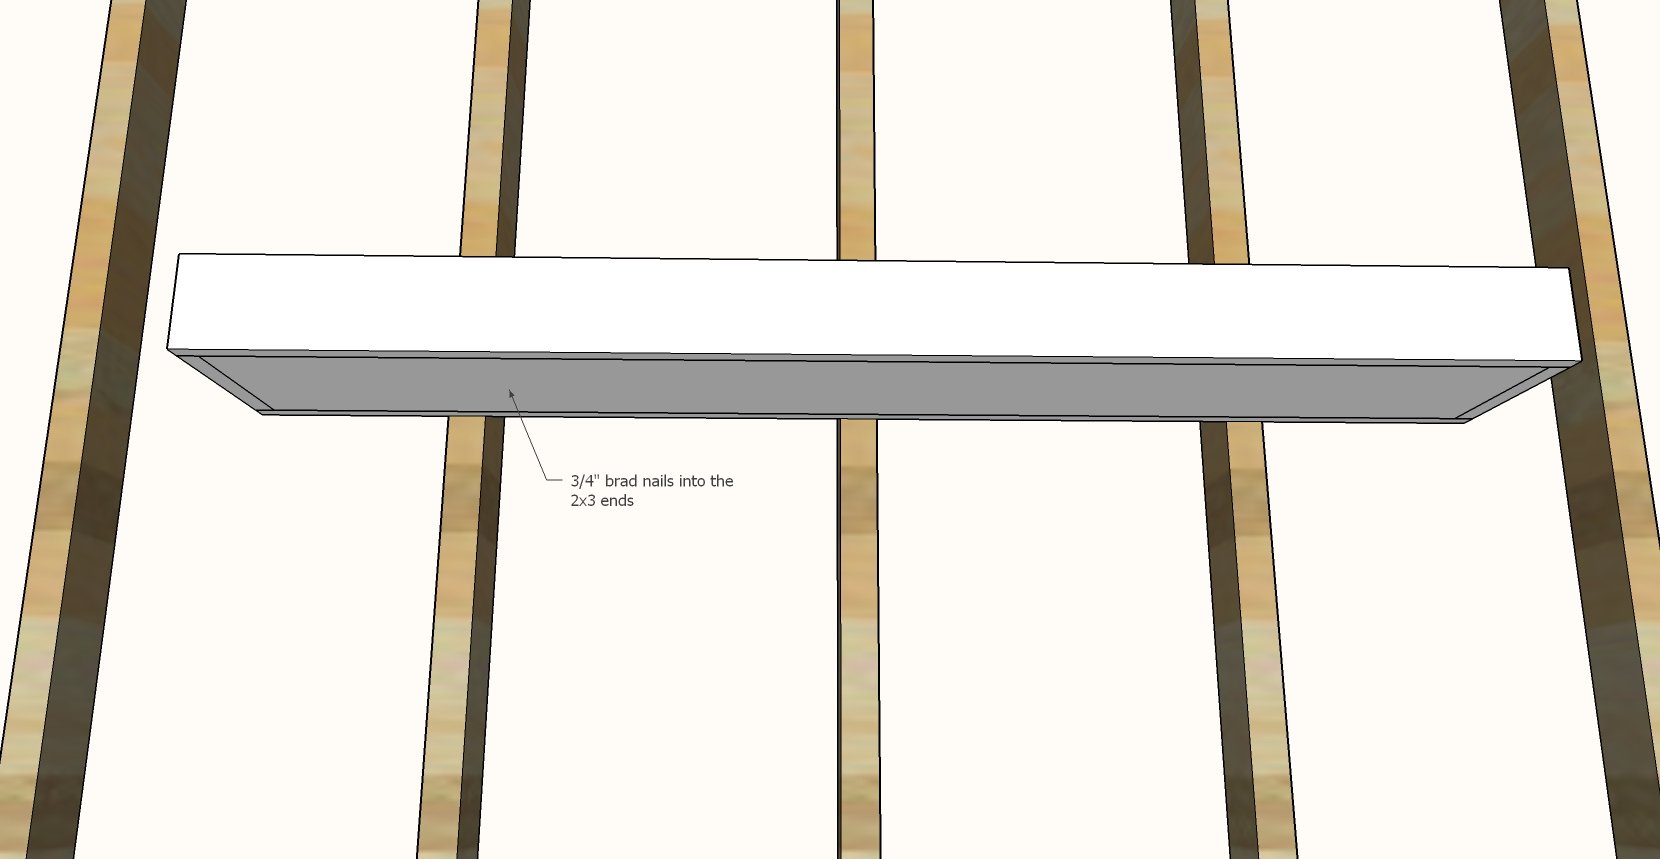
Place the 1/4" plywood panel inside the floating shelf and use the 3/4" nails to secure.
Touch up paint or stain as needed to finish the floating shelf.

Comments
GreenerLinen (not verified)
Wed, 04/14/2010 - 05:21
So cool! I love crossovers!
So cool! I love crossovers! I'd already devoured the YHL post when this showed up in my RSS feed. Keep up the good work!
Chelsea (not verified)
Wed, 04/14/2010 - 05:22
Thank you so much for these
Thank you so much for these plans, Ana! I've been wanting some big floating shelves like that for awhile now, but don't live anywhere near an Ikea. So thank you!! They look awesome!
Susan (not verified)
Wed, 04/14/2010 - 05:50
LOL! I've only just now
LOL! I've only just now realized that you are several time zones away from me and not just a night owl! I hope I'm not this dense once I start actually trying to follow your plans ;)
Cheryl (not verified)
Wed, 04/14/2010 - 06:13
I'm so happy the youngsters
I'm so happy the youngsters featured you on their blog again! I started following your blog after YHL posted something about Knock-Off Wood back in January. Thank you for doing all of this, Ana! You are so inspirational.
EmileeHope (not verified)
Wed, 04/14/2010 - 07:42
I am in love with the
I am in love with the adorable wood elephant on your top shelf! Too cute!! (Oh, and great job on the shelves too!)
Shanna (not verified)
Wed, 04/14/2010 - 08:11
I absolutely love your blgo!
I absolutely love your blgo! Especially since you're so skilled at SketchUp! Kudos to you! Keep up the amazing work! You're an absolute inspiration to me!
Lizzy @ Lizzy … (not verified)
Wed, 04/14/2010 - 08:41
So great! I have never done
So great! I have never done any carpentry, but one day I might just try these shelves, thank you! :)
Nichole (not verified)
Wed, 04/14/2010 - 09:21
YES!!! I was just about to
YES!!! I was just about to visit Ikea and buy a set of floating shelves for my dining room. But when I opened your website today and saw this, I changed my mind. Looks like I'm going to make a trip to Home Depot instead :-)
Donna @ Mudpie… (not verified)
Wed, 04/14/2010 - 10:27
THANK YOU!!!! I have been
THANK YOU!!!! I have been wanting floating shelves for several years now, but haven't been able to find them in the size I want. You just solved that problem.
Jo (not verified)
Sat, 04/24/2010 - 13:37
Ana, help!So I made three
Ana, help!
So I made three custom length shelves today! They are awesome! I will be ready to sand and paint them tomorrow. I was wondering if you had advice on what to do on the gaps between the plywood and pine. If it makes any sense at all.. it looks like there are “seams” inside the plywood and also a tiny gap between the plywood and frame. Will the primer/paint cover those gaps up? Your finish looked beautiful and I just want to make sure mine will look the same!!
Thamks,
Joanna
p.s. this was also posted on YHL's blog!
Jo (not verified)
Sat, 04/24/2010 - 13:39
oops. forgot to sign up for
oops. forgot to sign up for follow-up comments alert.
Ana White (not verified)
Sat, 04/24/2010 - 15:20
I used a wood filler and
I used a wood filler and filled all edges, much like you might use drywall spackle and cover screw holes. I filled any layer holes in the plywood edges too. Then I sanded well, using first a 80 grit, than 120 and than 150, until the edges were smooth. Then I primed with a thick primer and painted with a high quality gloss paint. Can't wait to see!
Jo (not verified)
Sun, 04/25/2010 - 03:05
Thank you so much Ana! I'm
Thank you so much Ana! I'm going to have to try my hand at this today.
Do you have a brand of wood filler you would recommend? I have a tube made my minwax but I find it incredibly hard to handle (or it could just mean I'm not good at it!).
Ana White (not verified)
Sun, 04/25/2010 - 05:31
My fav is PL Stainable. It's
My fav is PL Stainable. It's in a tub, and I just work with a handful. Keep the lid on, it dries out fast. Good luck!
Jac (not verified)
Fri, 05/28/2010 - 07:13
Ana, I posted this over on
Ana, I posted this over on YHL, too...but thought it might be better over here since it is an older post. Thanks for simplifying this process for us!
"I am a BIG fan of both YHL and Knock-off Wood. I love the idea of being able to customize these floating shelfs to fit my space. I plan on starting the project this weekend. This will be my very first project.
However, I am a bit confused on the measurements. I am probably just missing something, but I don’t understand how the frame fits inside the sleeve. Is a 1×2 actually 3/4″ wide? Otherwise, at 1″ the frame would be 71″ (69″+1″+1″) and the interior of the sleeve would be 70″ (72″-1″-1″). Please tell me what I am missing…"
Ana White (not verified)
Fri, 05/28/2010 - 08:24
Yes, a 1x2 is actually 3/4"
Yes, a 1x2 is actually 3/4" thick, so it's a nice tight fit.
Jonathan (not verified)
Mon, 05/31/2010 - 06:51
Ana,Thanks so much for this
Ana,
Thanks so much for this post. I have been wanting to make these for some time. How are yours holding up?
Is there a maximum length that you recommend? I would like to make one about 8' long. Is that too long?
Ana White (not verified)
Mon, 05/31/2010 - 08:31
Jonathon, the longer the
Jonathon, the longer the shelves, the better (as long as you are tying into studs all the way down). Mine are doing fabulous!
Jessica (not verified)
Fri, 06/04/2010 - 20:34
We're moving into our new
We're moving into our new house next month (yay!) and I'd like to make these shelves to hold our DVDs and TV components--DVD, DVR and VCR. Would there be an issue structurally if I increased the depth to 10"-12" for the components shelf? Maybe if I added some more frame studs? Thanks for the awesome plans!
Rebecca (not verified)
Sat, 06/05/2010 - 16:11
I was wondering the same
I was wondering the same thing. I saw that the Ikea ones are 10" Wide. Would that be a problem? I figure you were trying to get 3 out of 1 sheet of plywood and that is why they are smaller.
Ana White (not verified)
Tue, 06/08/2010 - 06:47
Jessica, Rebecca, I did
Jessica, Rebecca, I did choose the width to conserve materials, you are so smart! Yes, you can do a 10" width, but I would not go much wider. If you wanted to do a 12" width, I would advise you to build the frame from 1x3s instead of 1x2 to get a chunkier shelf that will have more support. Good luck with your shelves. Ana
MissK (not verified)
Tue, 08/24/2010 - 07:56
Ana I love these shelves!
Ana I love these shelves! One more question about wider shelves. Fiance and I are trying to make the shelves pretty deep - 16 inches. But we don't want them to be too thick so we wanted to stick with 1x2's. Would it be possible to use 1/8" plywood or lauan instead for the shelf sleeve to make it lighter instead of using 1x3s? Plus we already bought all the 1x2s AND 1/2" birch plywood before we realized it would be WAY too heavy! So, we really would like to use the 1x2s but we also want shelves that can hold more than say, a feather, a flower, and a baby's sigh. Help and Thank You!
Ontwerpduo Sha… (not verified)
Fri, 09/10/2010 - 18:51
[...] bookshelf behind the
[...] bookshelf behind the beds, IKEA, $19 to $30 or plans to build your [...]
Angie (not verified)
Tue, 10/12/2010 - 05:50
http://1.bp.blogspot.com/_qUy
I made these. Great plans, thanks! I wasn't prepared for the amount of sanding I had to do to get these smooth, so I think next time I will build them with slightly nicer wood. :) The paint color is Benjamin Moore Salsa and I clear coated.
Your site rocks! I will post the ledges I built after I get them hung. Working on cubbies next! Thanks so much!!!!
Angie
amber (not verified)
Sun, 11/21/2010 - 06:22
omgoodness! thank you soooo
omgoodness! thank you soooo much! strong and floating shelves have been something i have been truly boggled by and have tried looking into creating without a lot of success - not being an experienced carpenter. i saw the picture posted above with the frame exposed and it has made my day, lol! Awesome! thank you!
Adam (not verified)
Mon, 11/22/2010 - 17:27
I am working on putting these
I am working on putting these shelves together and just finished my first one of 4′. With the support and outer box, it all just seems pretty heavy to me. My 4' shelf will span 2 studs but I’m worried about the shelf holding itself up without sagging or falling off, and then of course even more worried about putting much of anything on it. Any suggestions or am I just being paranoid about this? How heavy were yours? Do you have an unofficial estimate of how much they can hold? I'll probably just end up putting it up and seeing if it falls down but I am a little nervous.
Katie (not verified)
Sun, 12/12/2010 - 17:48
Hi Ana! I love (LOVE!) your
Hi Ana! I love (LOVE!) your site and I come over here at night and look at all the things I'd like to do during tomorrows nap time. It's very cathartic. Got my mom hooked on Knock Off Wood too :)
My question is two-fold: (1) do you think this would support books, or would it be better used only for pretty vases and decorative stuff? ...and (2) Am I the only one who can't find 1x2x8 pine boards for less than five (!) dollars apiece at the local blue or orange? This is madness right? Or am I missing something? Perhaps it's where I live...
Thanks for any adice you can give and keep up the beautiful and inspiring work!!
PS...I built your picture ledge shelves for a bunch of rooms in our house and my husband now thinks I'm a rockstar :) Thank you!
babeigotanidea… (not verified)
Sun, 12/19/2010 - 11:38
[...] anything, so when I
[...] anything, so when I found Ana’s blog about simple plans to make furniture, I got so excited. This is the first project I started, and I have almost finished them, I have no idea why I can’t [...]
Top 5 (renovat… (not verified)
Sat, 01/08/2011 - 11:35
[...] & Hang Shelves in
[...] & Hang Shelves in Kitchen: I am in love with these shelves. I know we could be buy some at Ikea, but the closest store is 2.5 hours away. So the husband will [...]
Kristin Bradley (not verified)
Wed, 09/05/2012 - 15:22
Can I make them larger?
I love these! I'm looking for shelves to put above my desk that can hold a few books, paper, and office supplies. Do you think I could adjust this plan to 10 inches instead of 7 inches? I think 7 inches may be too narrow for what I need it for.
jtcdesigns (not verified)
Mon, 11/26/2012 - 12:07
Stability and support
This is an awesome idea.. and actually similar to a permanent design I’ve made for a floating computer desk… which is extremely destructive and permanent.. but worth it 100%.
I was wondering though since its only a 1×2 support.. how much weight can go on it? I’ll be making 2 or 3 48″ long shelves. My plan is to put books on them, preferably all of my computer and photography books and possibly light picture frames.
I’d probably rip down a 2 x 4 to a 1 x 3 making the shelves a bit thicker but offering a little more support and I can stuff 3 screws into each stud which should be a total of 3 studs.
What are your thoughts as far as its strength and it sagging?
kongk
Tue, 05/21/2013 - 04:47
you are in reality a
you are in reality a excellent webmaster. The website loading pace is incredible. It seems that you’re doing any distinctive trick. Also, The contents are masterpiece. you have performed a wonderful task on this subject!
Relationship with T-Lad Web
moseleyscott1513
Fri, 04/10/2015 - 05:24
Please send me plans.
Please send me plans.
Ana White Admin
Fri, 04/10/2015 - 11:51
Plan
Just click on the "printer friendly version" or "pdf version" just above the "comments" section for plans.
josiegrossy
Sat, 11/26/2016 - 22:27
Pocket holes
The step that includes the pocket holes intimidates me. Do you have any tips on creating the pocket holes? I do not own a kreg jig, would home depot do this for me? Any good youtube tutorials for the pocket holes? Thank you in advance.
nhollowell
Tue, 01/21/2020 - 06:07
Do you have any idea why a…
Do you have any idea why a couple of my shelves would be sagging?
They are pushed flush onto the wall and not loaded with heavy things at all.
Dee.Red
Mon, 12/21/2020 - 18:58
Thinner height
Hi Ana! Thank you so much for these plans can't wait to try them on, it will be my first project !!! I want them thinner so instead of 1x4 do I just use thinner ones ? I am planning for a 40 L x 8 W x 1.5 or 2H. Please advice and thank you in advance.
careaud
Mon, 03/08/2021 - 07:56
Floating book shelves for books
Love you site, and now that I've created an account, I may add some brags to it ( ͡• ͜ʖ ͡•)
I wish to use your floating shelves, for books, and have started building some (they are not fixed to my wall yet)
Since you have only tested this with 10lbs per foot, I'm very nervous... I've read that a fully loaded bookshelf carries a load of 20 to 25 pounds per running foot. That is more that 2x the weight that you have tested ( •︠ ₒ ︡•)
Has anyone used your plans, for books? (◎ ͜ʖ◎)?