


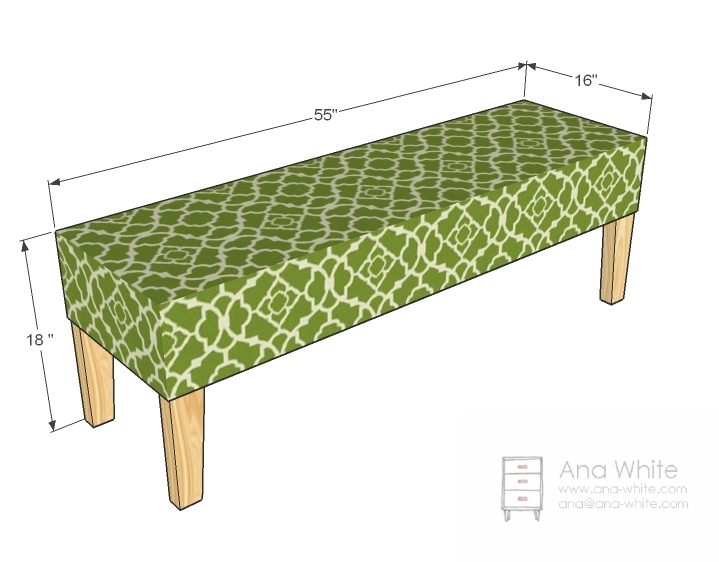
Quick and easy - build your own slipcovered bench! This is a free DIY project plan for a bench frame - just build, add a cushion and sew a cover for the top. Free step by step plans from Ana-White.com
Great for the end of a bed, under a window, in a hall or entryway - this easy to build slipcovered bench can be painted or stained, with your choice of fabric on top!
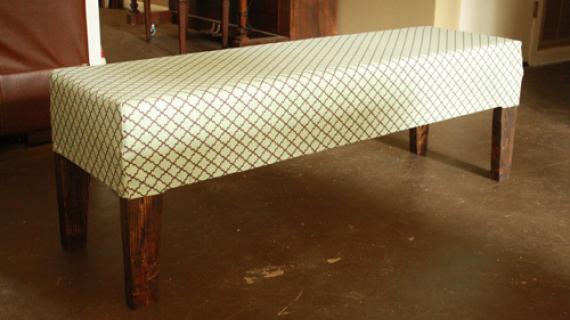
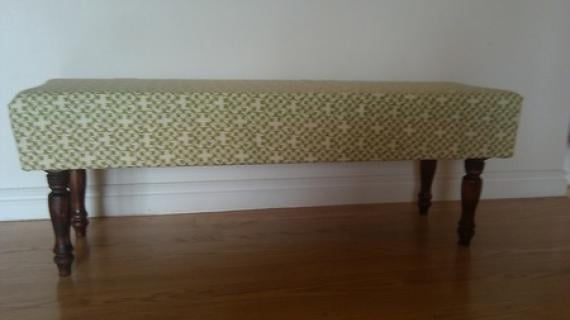
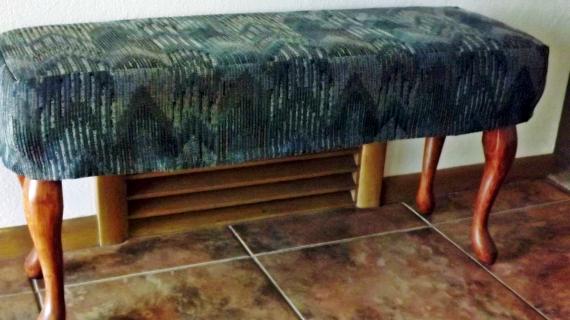
This slipcovered bench has been built many times, here's a few of our favorite reader builds -
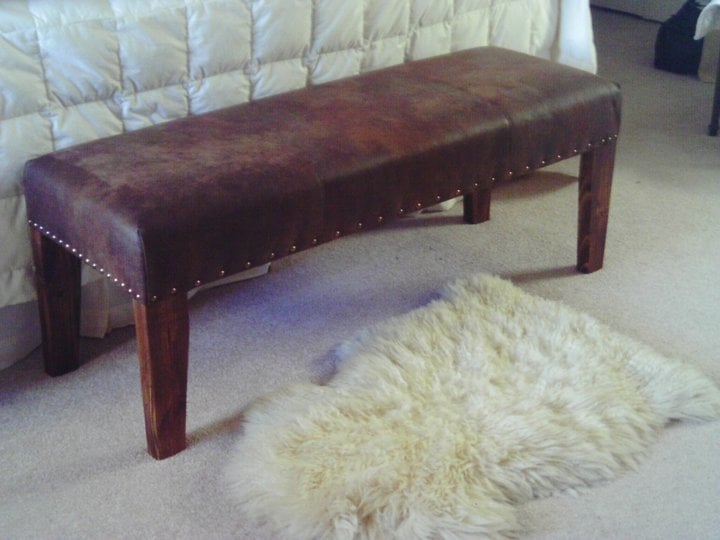
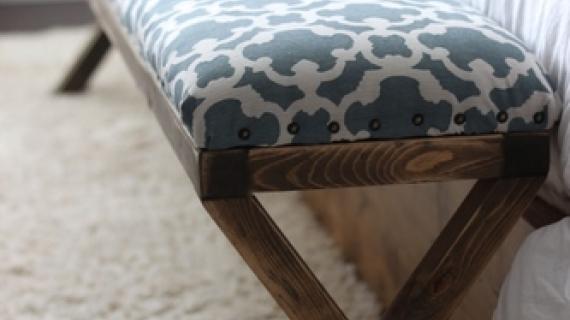
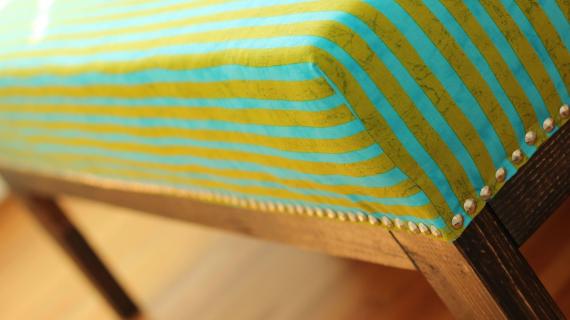
Western Style - a dark stain with a leather look fabric, attached with nail heads makes a beautiful western style bench. More details here.
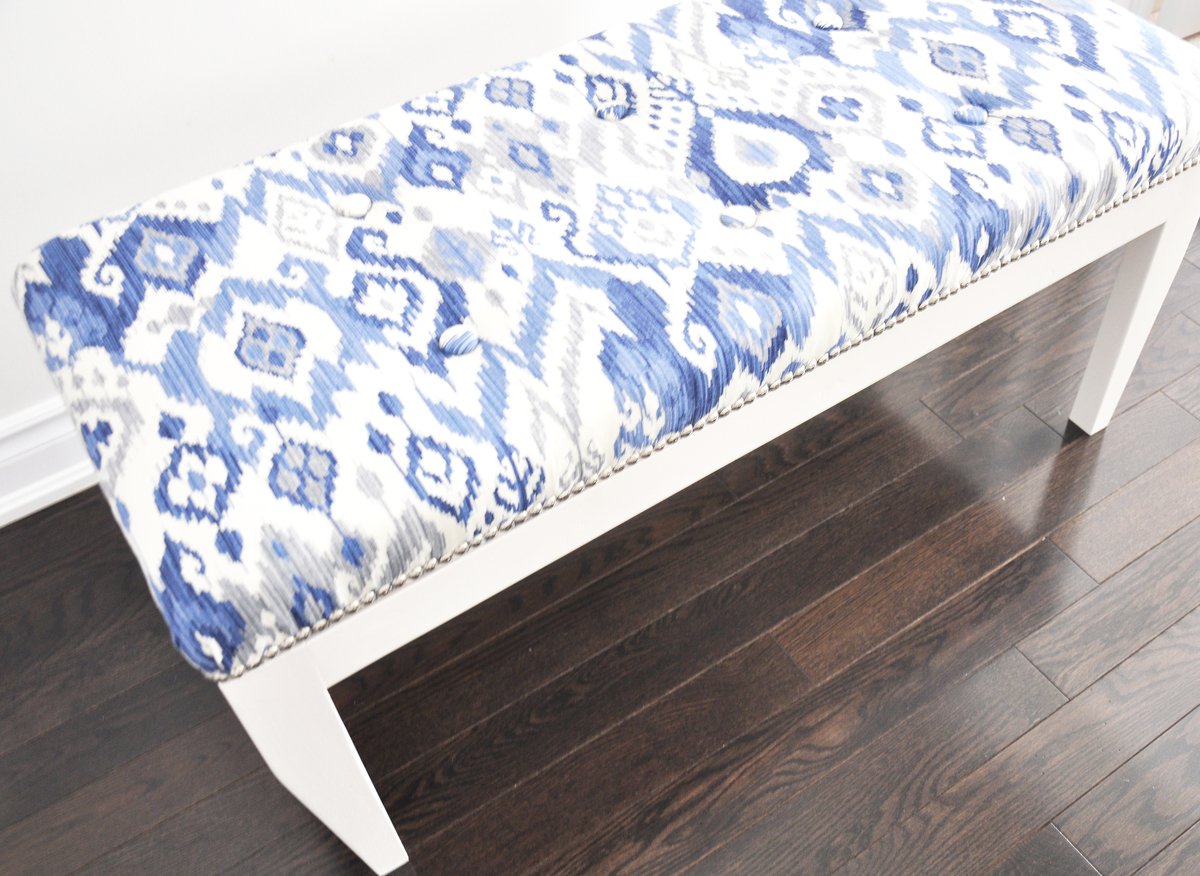
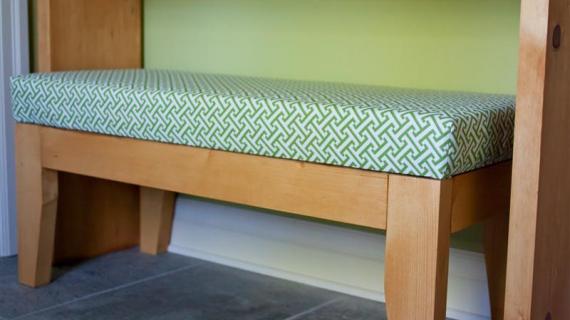
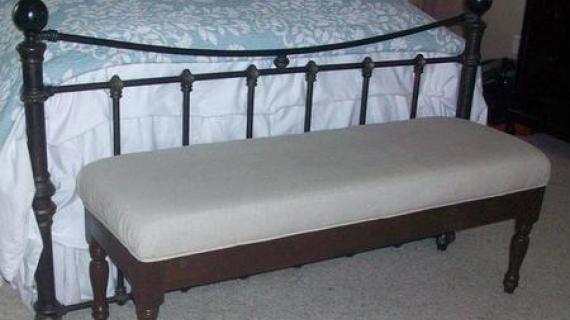
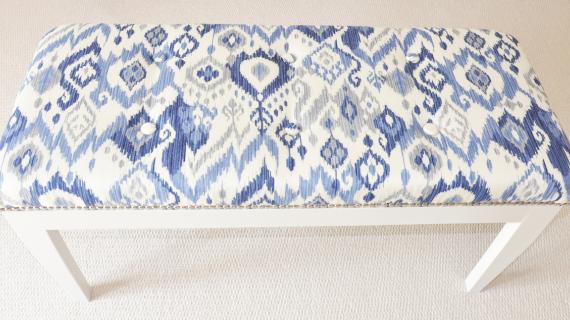
Crisp White with Trendy Fabric - We love how this bench is like a trendy pillow in the room. The crisp white paint balances the fabric, and the nail head trim makes it all look refined and complete. More details here.
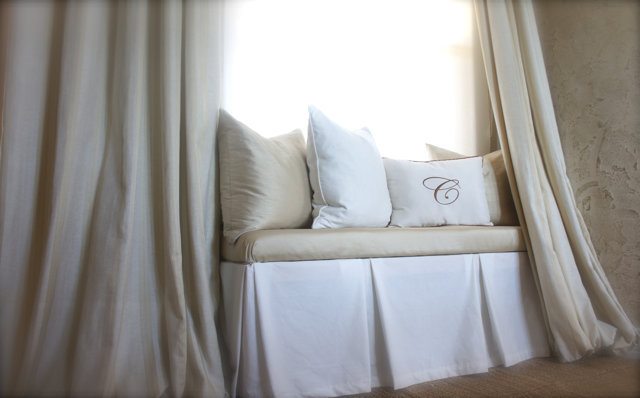
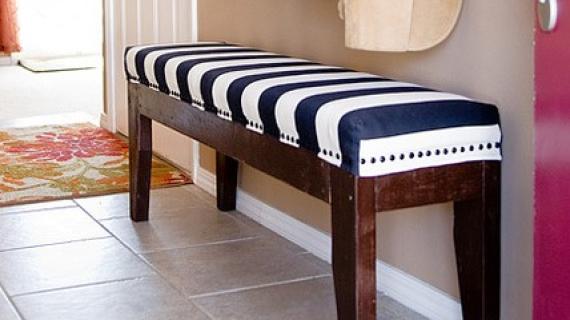
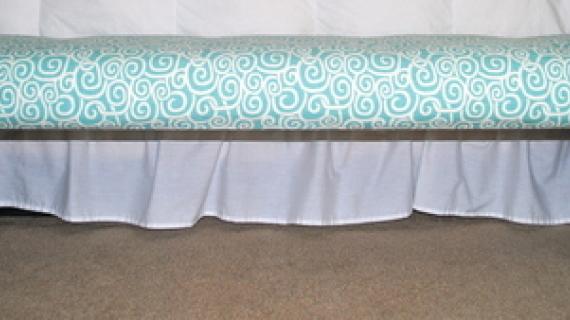
Full Length Skirt - This pleated full length skirt gives elegance and warmth to this room! More details here.
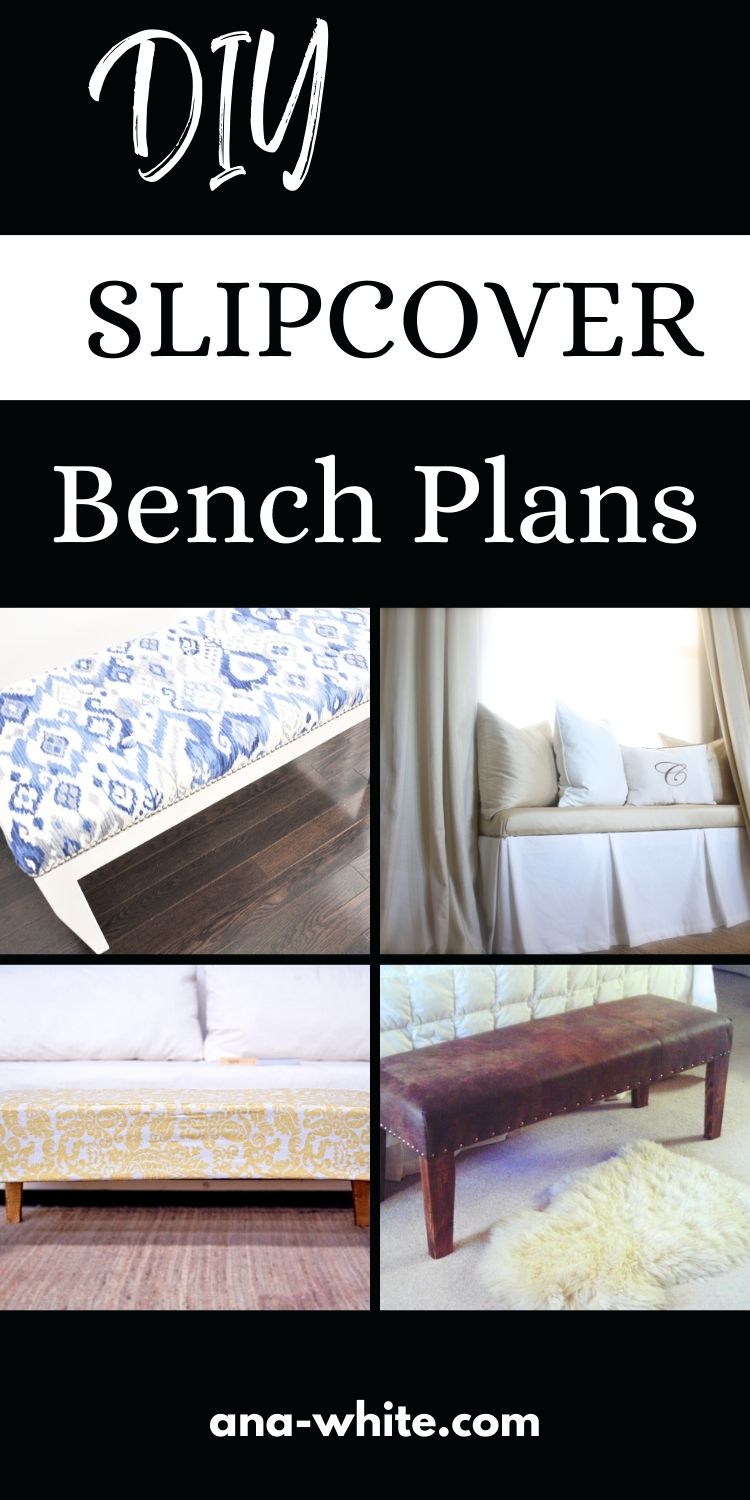
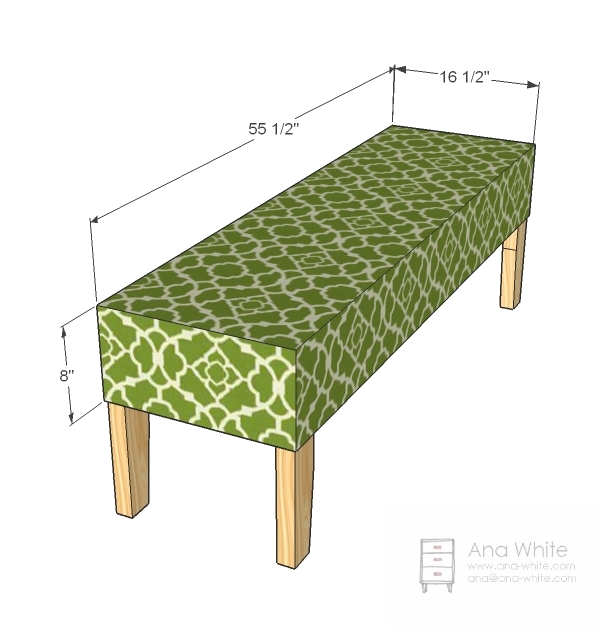
Free Plans - Build Your Own Slipcovered Bench
Pin for Later!
Preparation
- 2 – 2x4s, 8 feet or stud length
- 1 – 3/4″ Plywood or MDF or Particle Board or OSB 16″ x 55″
- 2" and 3″ self tapping star bit screws
- 1 yard 56″ wide decorator fabric OR 2 yards 45″ wide fabric (upholstery weight is best)
- 3″ foam, 16″ wide x 55″ long
- wood glue
- spray adhesive
- sewing notions
- paint or stain for the legs
- 4 – 2×4 @ 14 1/4″ (Legs – Cut legs longer if you are using thinner foam. For example, with 1″ thick foam, legs need to be 16 1/4″ long)
- 2 – 2×4 @ 13″ (End Aprons)
- 2 – 2×4 @ 49″ (Side Aprons)
- 1 – 3/4″ Plywood @ 55″ x 16″ (Seat)


Instructions
Step 1
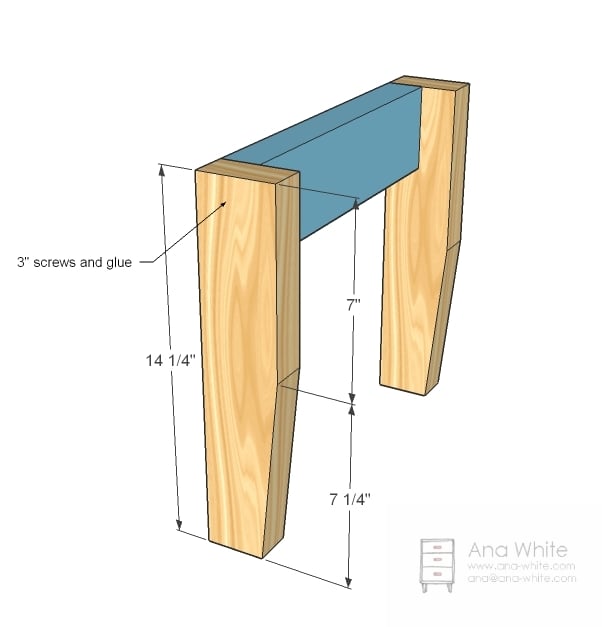
Ends
Start by tapering all of your legs with a straight cut on either a jigsaw or circular saw. Note that if you are using a less thick foam pad, you will need to increase the leg length. The goal is a standard 18″ high bench. Once legs are taperend, attach legs to the end aprons with screws and glue.
Step 2
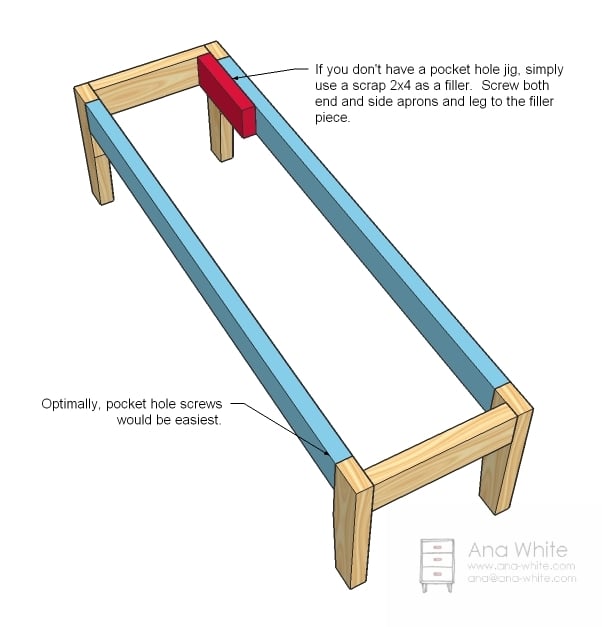
Side Aprons
If you have a pocket hole system, attach the side aprons to the legs. Otherwise, use scrap 2x4s to join legs and aprons together.
Step 3
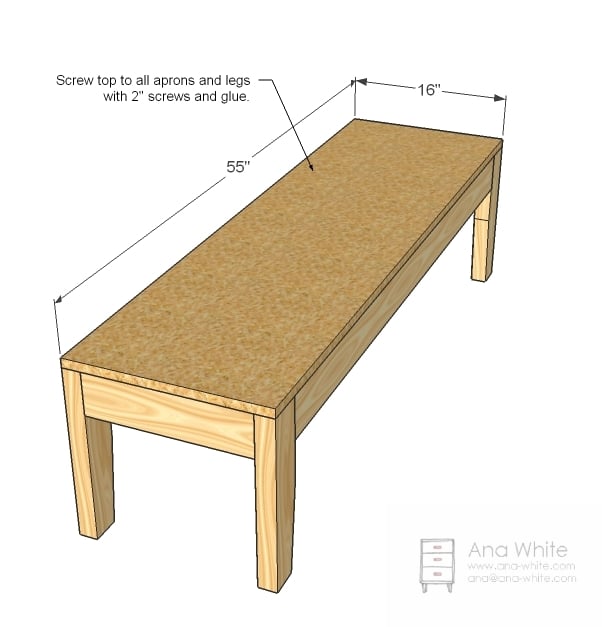
Top
Screw the top plywood to all legs and aprons.
Step 4

Foam
Spray adhesive the foam to the top plywood. You can also spray adhesive a layer of batting to soften edges and add some cushioning to the aprons at this stage
Step 5


Comments
Ana White (not verified)
Wed, 12/29/2010 - 21:59
Just one more note - measure
Just one more note - measure the width of your table if you plan on building a bench for it. Then make this bench to fit it. That way the bench can slide nicely under the table. Good luck!
Gabrielle (not verified)
Wed, 12/29/2010 - 22:22
This may be my first project.
This may be my first project. I've been wanting to put a cowhide covered bench at the foot of my bed for awhile now. I can purchase cow ride rugs here locally for $148. One cowhide goes a very long way! Also have plans to cover an old large upholstered ottoman with it for my living room.
Pat C (not verified)
Thu, 12/30/2010 - 02:56
Just lovely lines to this
Just lovely lines to this piece. I'm aiming to make this and paint or stain the legs.
Thanks!
Heather (not verified)
Thu, 12/30/2010 - 03:33
For the slipcover, you can
For the slipcover, you can also measure how long you want to make it on the sides, then cut a rectangle big enough to go over the top and drape down the sides as far as you want it. Notch four squares out (the measurements of the sides) in the four corners, then sew the sides of the cut-outs together to make a pocket of sorts. Then you'd just hem it all the way around and slide on. I can do a sewalong later if you need me to :)
Heather (not verified)
Thu, 12/30/2010 - 03:37
Forgot to add, I love this!
Forgot to add, I love this! I will definitely be adding this to my project list too.
And, an example on the slipcover, if you need 8" aprons, cut approx. 8" square in the corner of the larger rectangle you made (not the one of the measurements Ana listed, it's too small), then sew the cutouts edges to each other to make 4 pockets in each corner - it'll resemble a fitted sheet :)
Angela (not verified)
Thu, 12/30/2010 - 03:42
Wow love this one. I have a
Wow love this one. I have a list a mile ling of your projects that I want to do. This would be awseome for the foot of the farm house bed I want for my room.
Rebecca (not verified)
Thu, 12/30/2010 - 04:00
Love this! I think I'd add a
Love this! I think I'd add a ruffle to the bottom but I'm adding ruffles on a lot of things lately.
Whitney Smith (not verified)
Thu, 12/30/2010 - 04:07
Heather, I'd love to see
Heather, I'd love to see details on how to make this slip cover. I'd love to make this but don't sew! Ekk!
Ana, this is on my short list (once I get a borrowed sewing machine and a few hours of youtube tutorials!). Thanks again!
Whitney Smith (not verified)
Thu, 12/30/2010 - 04:11
Also, Ana, am I correct in
Also, Ana, am I correct in thinking that you did not use batting? I think I would like to, to have softer edges. Would that change my fabric measurments? (Excuse any stupidity on the sewing front) Thanks!
Libby (not verified)
Thu, 12/30/2010 - 04:46
This
This (http://www.westelm.com/products/tillary-ottoman-and-cushions-f784/?pkey…) has been floating around in my head. Thanks for the how to.
Sarah (not verified)
Thu, 12/30/2010 - 06:30
I just want to tell you, I
I just want to tell you, I think your work is awesome, and I am really thrilled that you put the plans online for others to use to build. I am going to build a table, I just have to find the right wood.... :-) oh and the time.
Lynn Peters (not verified)
Thu, 12/30/2010 - 07:54
Libby, I love that ottoman
Libby, I love that ottoman and cushions! I would love to make something like that, but need to figure out a back support board piece to keep the cushion from sliding off...oooh, more inspiration. If only I had an endless supply of cash for the supplies.
Joe (not verified)
Thu, 12/30/2010 - 07:59
You keep using whole where
You keep using whole where you mean hole and it makes my inner editor twitch.
Ana White (not verified)
Thu, 12/30/2010 - 08:41
Lynn, Libby, I've actually
Lynn, Libby, I've actually drawn these plans up several times, but just can't get the back cushions quite right. I even called West Elm and they said the cushions are just really really heavy at the base. Sandbags maybe? Rocks? Beans? Gotta build and test out before I can blog.
Ana White (not verified)
Thu, 12/30/2010 - 09:01
Joe, I can't spell! Someone
Joe, I can't spell! Someone asked me the other day if I write all my posts, and my response was, as long as you see annoying spelling errors, it's me making them. Thanks for pointing this out. I'll try to watch out for my grammar and spelling mistakes.
Erin (not verified)
Thu, 12/30/2010 - 09:40
Gold bouillon? it weighs the
Gold bouillon? it weighs the cushions down and you have a hiding place. Seriously, though, what about buckshot?
Jessica (not verified)
Thu, 12/30/2010 - 11:04
Loving this. I gotta say a
Loving this. I gotta say a lovely dark stain on the legs would just set it over the edge for me. Thanks!
Ana White (not verified)
Thu, 12/30/2010 - 12:46
I totally agree! Ran out of
I totally agree! Ran out of walnut :(
Ana White (not verified)
Thu, 12/30/2010 - 12:50
Thank you Sarah!
Thank you Sarah!
sally (not verified)
Thu, 12/30/2010 - 14:59
Oh, I've wanted something
Oh, I've wanted something just like this! This is going on the to-do list! :)
Kirsten Wright (not verified)
Thu, 12/30/2010 - 16:44
You know that mamma loves the
You know that mamma loves the yellow backdrop :) using it the way you did is super fitting. I too have plans for my own piece of that fabric. You are crazy awesome like always!
Kellie OBrien (not verified)
Sat, 01/01/2011 - 10:29
I love this! We are
I love this! We are rearranging our living room and I'm going to build two of these to go in a couple of nooks that we have. This is perfect! It's my first furniture building project though, so I'm a little nervous!
After looking over the plans, I have a question. As the legs taper down, what is the dimension of the leg at the bottom? You noted the dimension at the top, where to start the taper, but I didn't see the bottom dimension.
Thanks so much!!
lindsaydomyhair (not verified)
Sun, 01/02/2011 - 14:37
Hey Ana! Would it be a
Hey Ana! Would it be a totally different design if you wanted to make it tufted, or could I just sew buttons completely through foam? Maybe anchor them to the plywood somehow?
Mary (not verified)
Sun, 01/02/2011 - 18:29
I can't get over how stunning
I can't get over how stunning this looks for such a simple project. I may work up the nerve to try it. Someone posted your site today on the Dave Ramsey boards and I've spent a lot of time looking at your plans. Thanks for sharing what you've learned and making it accessible to us all.
Chris @ Our Co… (not verified)
Mon, 01/03/2011 - 16:45
My wife just had me take a
My wife just had me take a closet door down by the back door that she wants to convert to a mini (super mini - it's very small) mud room with a small bench. I'll try to adapt these plans to our opening size. Thanks for this!
Happy New Year,
Chris
Arlene (not verified)
Tue, 01/18/2011 - 09:07
Ana, I just want to tell you
Ana, I just want to tell you how much I love this plan. I think it will be my first project. Also, I'm struck by your comments and how humble your responses are. I can tell you put a lot of love and planning into what you do. Keep it up! You're a wonderful example!
Thanks!
Brooke (not verified)
Wed, 01/26/2011 - 12:57
I may be a total math spaz,
I may be a total math spaz, but I built the frame for this bench last night, and it's 56" long, not 55"! And as far as I know, that's what it would have to be, right? A 2x4 is 3.5" long, and since there's one on each end, that's 7", added to the 49" apron, that's 56"! Did I miss something? I'm cutting my foam to fit, so it's no big deal, I just don't know if I did something wrong or if there's an error in the plan...
Pam (not verified)
Thu, 01/27/2011 - 17:24
We just built this too, and
We just built this too, and you are right about the measurements. We had to remeasure a few times to make sure it wasn't us. :) It was short an inch on the plans. Great plans though! We have a made a few of her things and always have to double check before cutting because of minor errors. I don't complain though! I think she's still awesome!!!
Haley Folmer (not verified)
Thu, 04/14/2011 - 11:16
You were right: I could build this!
I added batting around the edges to soften it up, and I made it a custom size to fit in a strange nook in my house where I used to literally sit on the floor with pillows and my laptop because the heater vent is there and there's a nice view outside.
Guest (not verified)
Sat, 04/16/2011 - 20:10
Easy Bench
Guest (not verified)
Mon, 06/13/2011 - 15:47
OOOOPS!!!
FYI. This bench actually comes up to be 1 inch longer than stated! Make sure you check the measurements!
Pam555 (not verified)
Sun, 03/04/2012 - 13:48
Can I make this bench longer?
I want to make this bench for my son's wedding but I really wanted a 77" bench. Do you think making it longer will compromise the strength of it because there will be multiple wedding guests sitting on it.
nataliek
Fri, 04/03/2015 - 12:20
perhaps put some supports
perhaps put some supports across it underneath and maybe add extra legs in the middle.
nataliek
Fri, 04/03/2015 - 12:10
Looks awesome but..
I just priced out all the stuff to make this bench and it's $60 each bench (I need two) a far cry from the $20-$30 price range it's listed as. Where did you get the materials?
katiejai
Fri, 12/11/2015 - 12:52
slipcover
just wondered if this is meant to be taken off--but what if you do the button tufting---love the simple plan--where do I find plans for the table love it thanks! No one can be perfect at teverything--regarding whole/hole---as long as I know what is meant--good enough---would like to see an English professor do some of your projects!
TntMac
Sun, 04/05/2020 - 09:25
Thank you for the plan!
My hubby and I build this bench in a few hours (stretched over two days) for our game room table and I absolutely love it. We made the slipcover permanent by folding it over and stapling it to the underside of the plywood.