Community Brag Posts
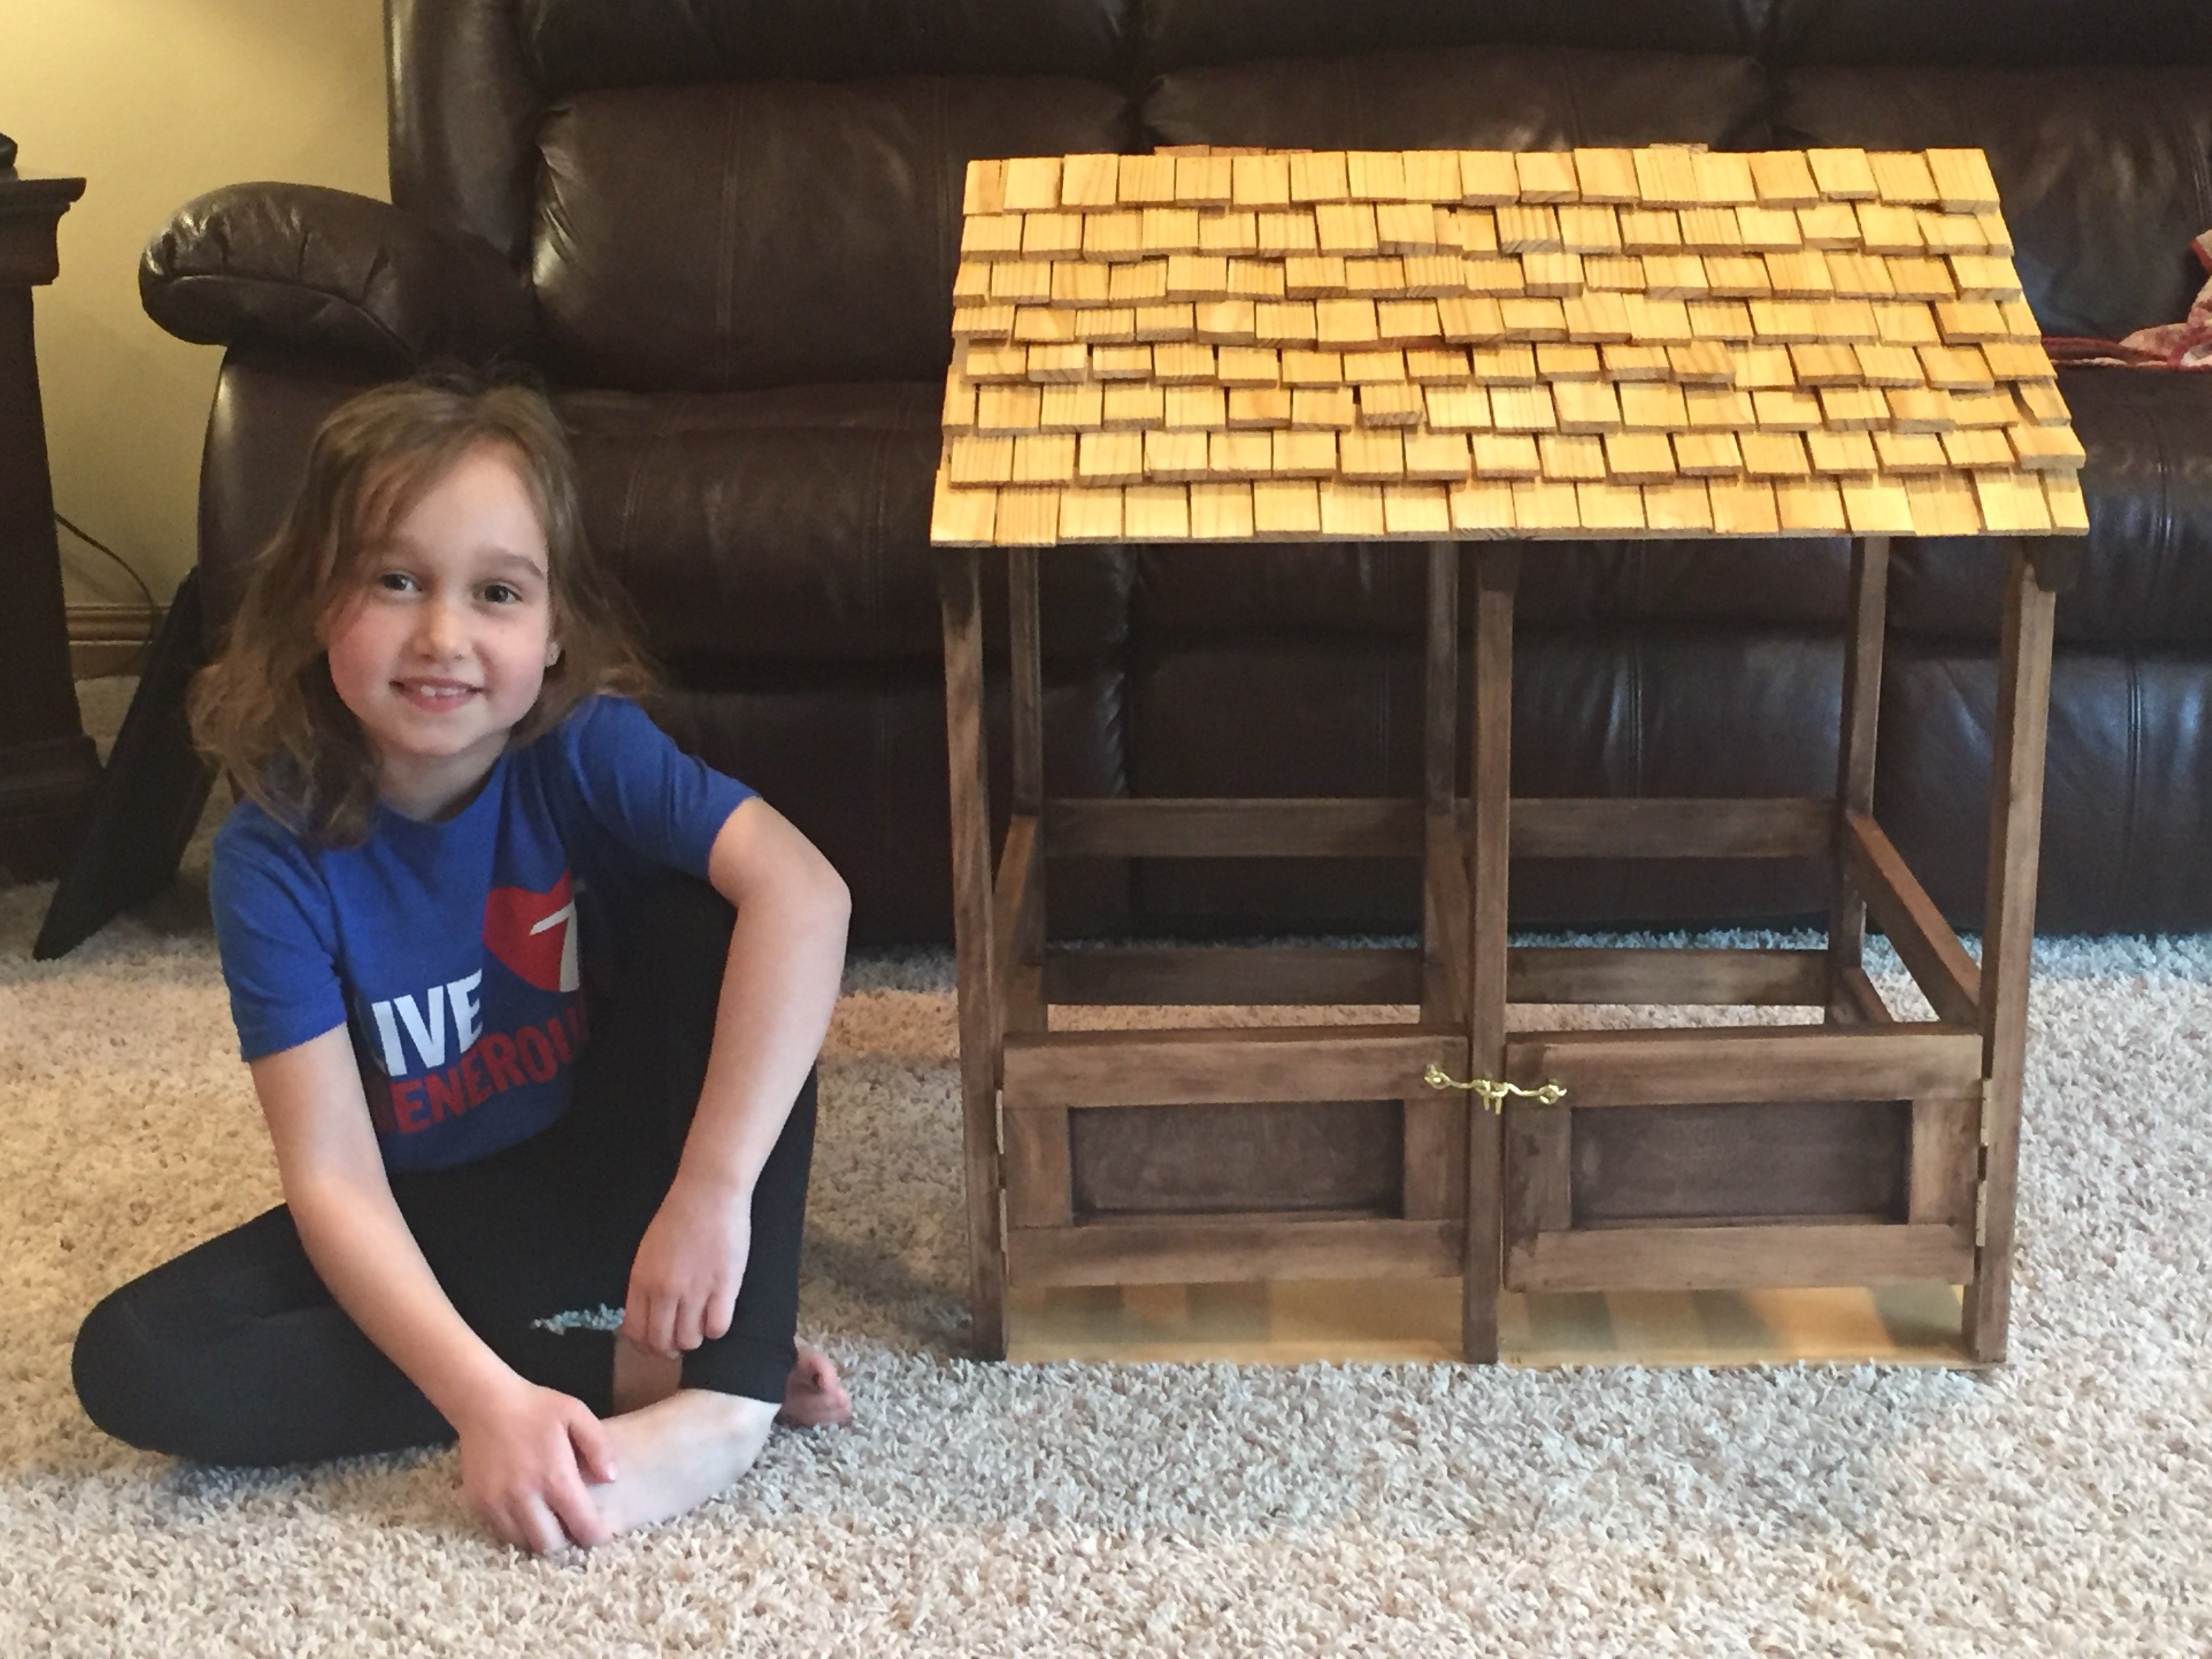
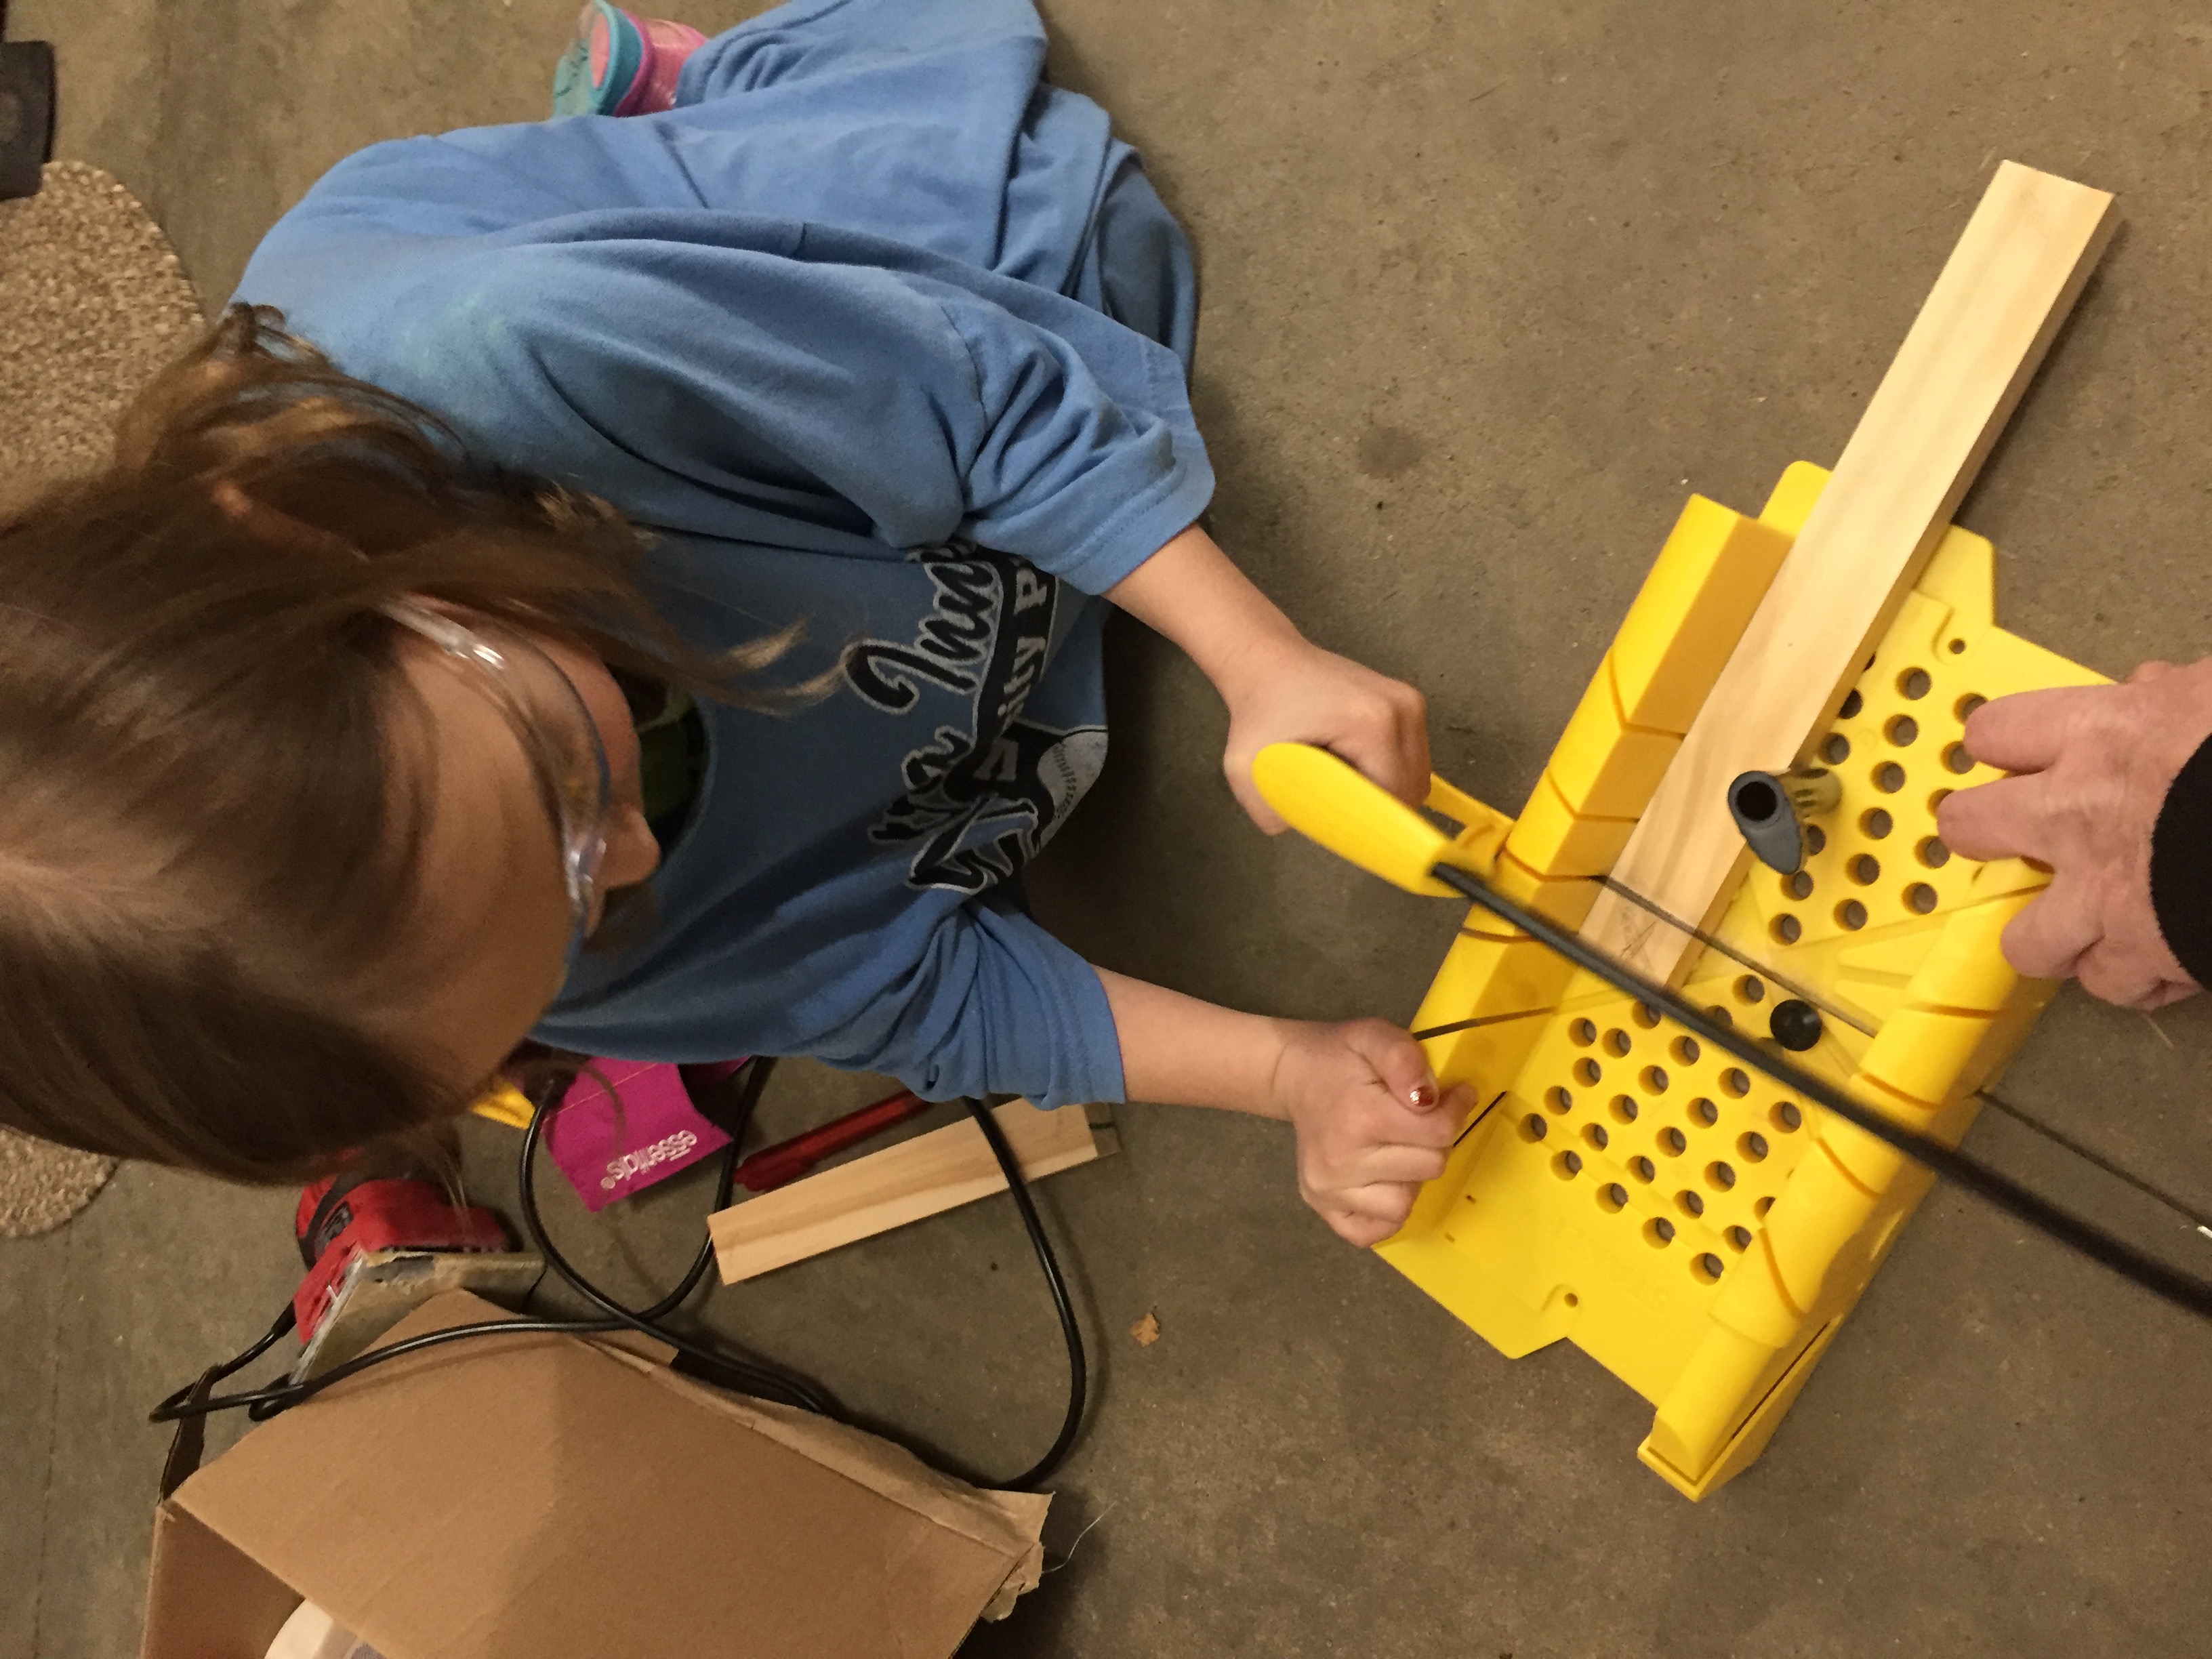
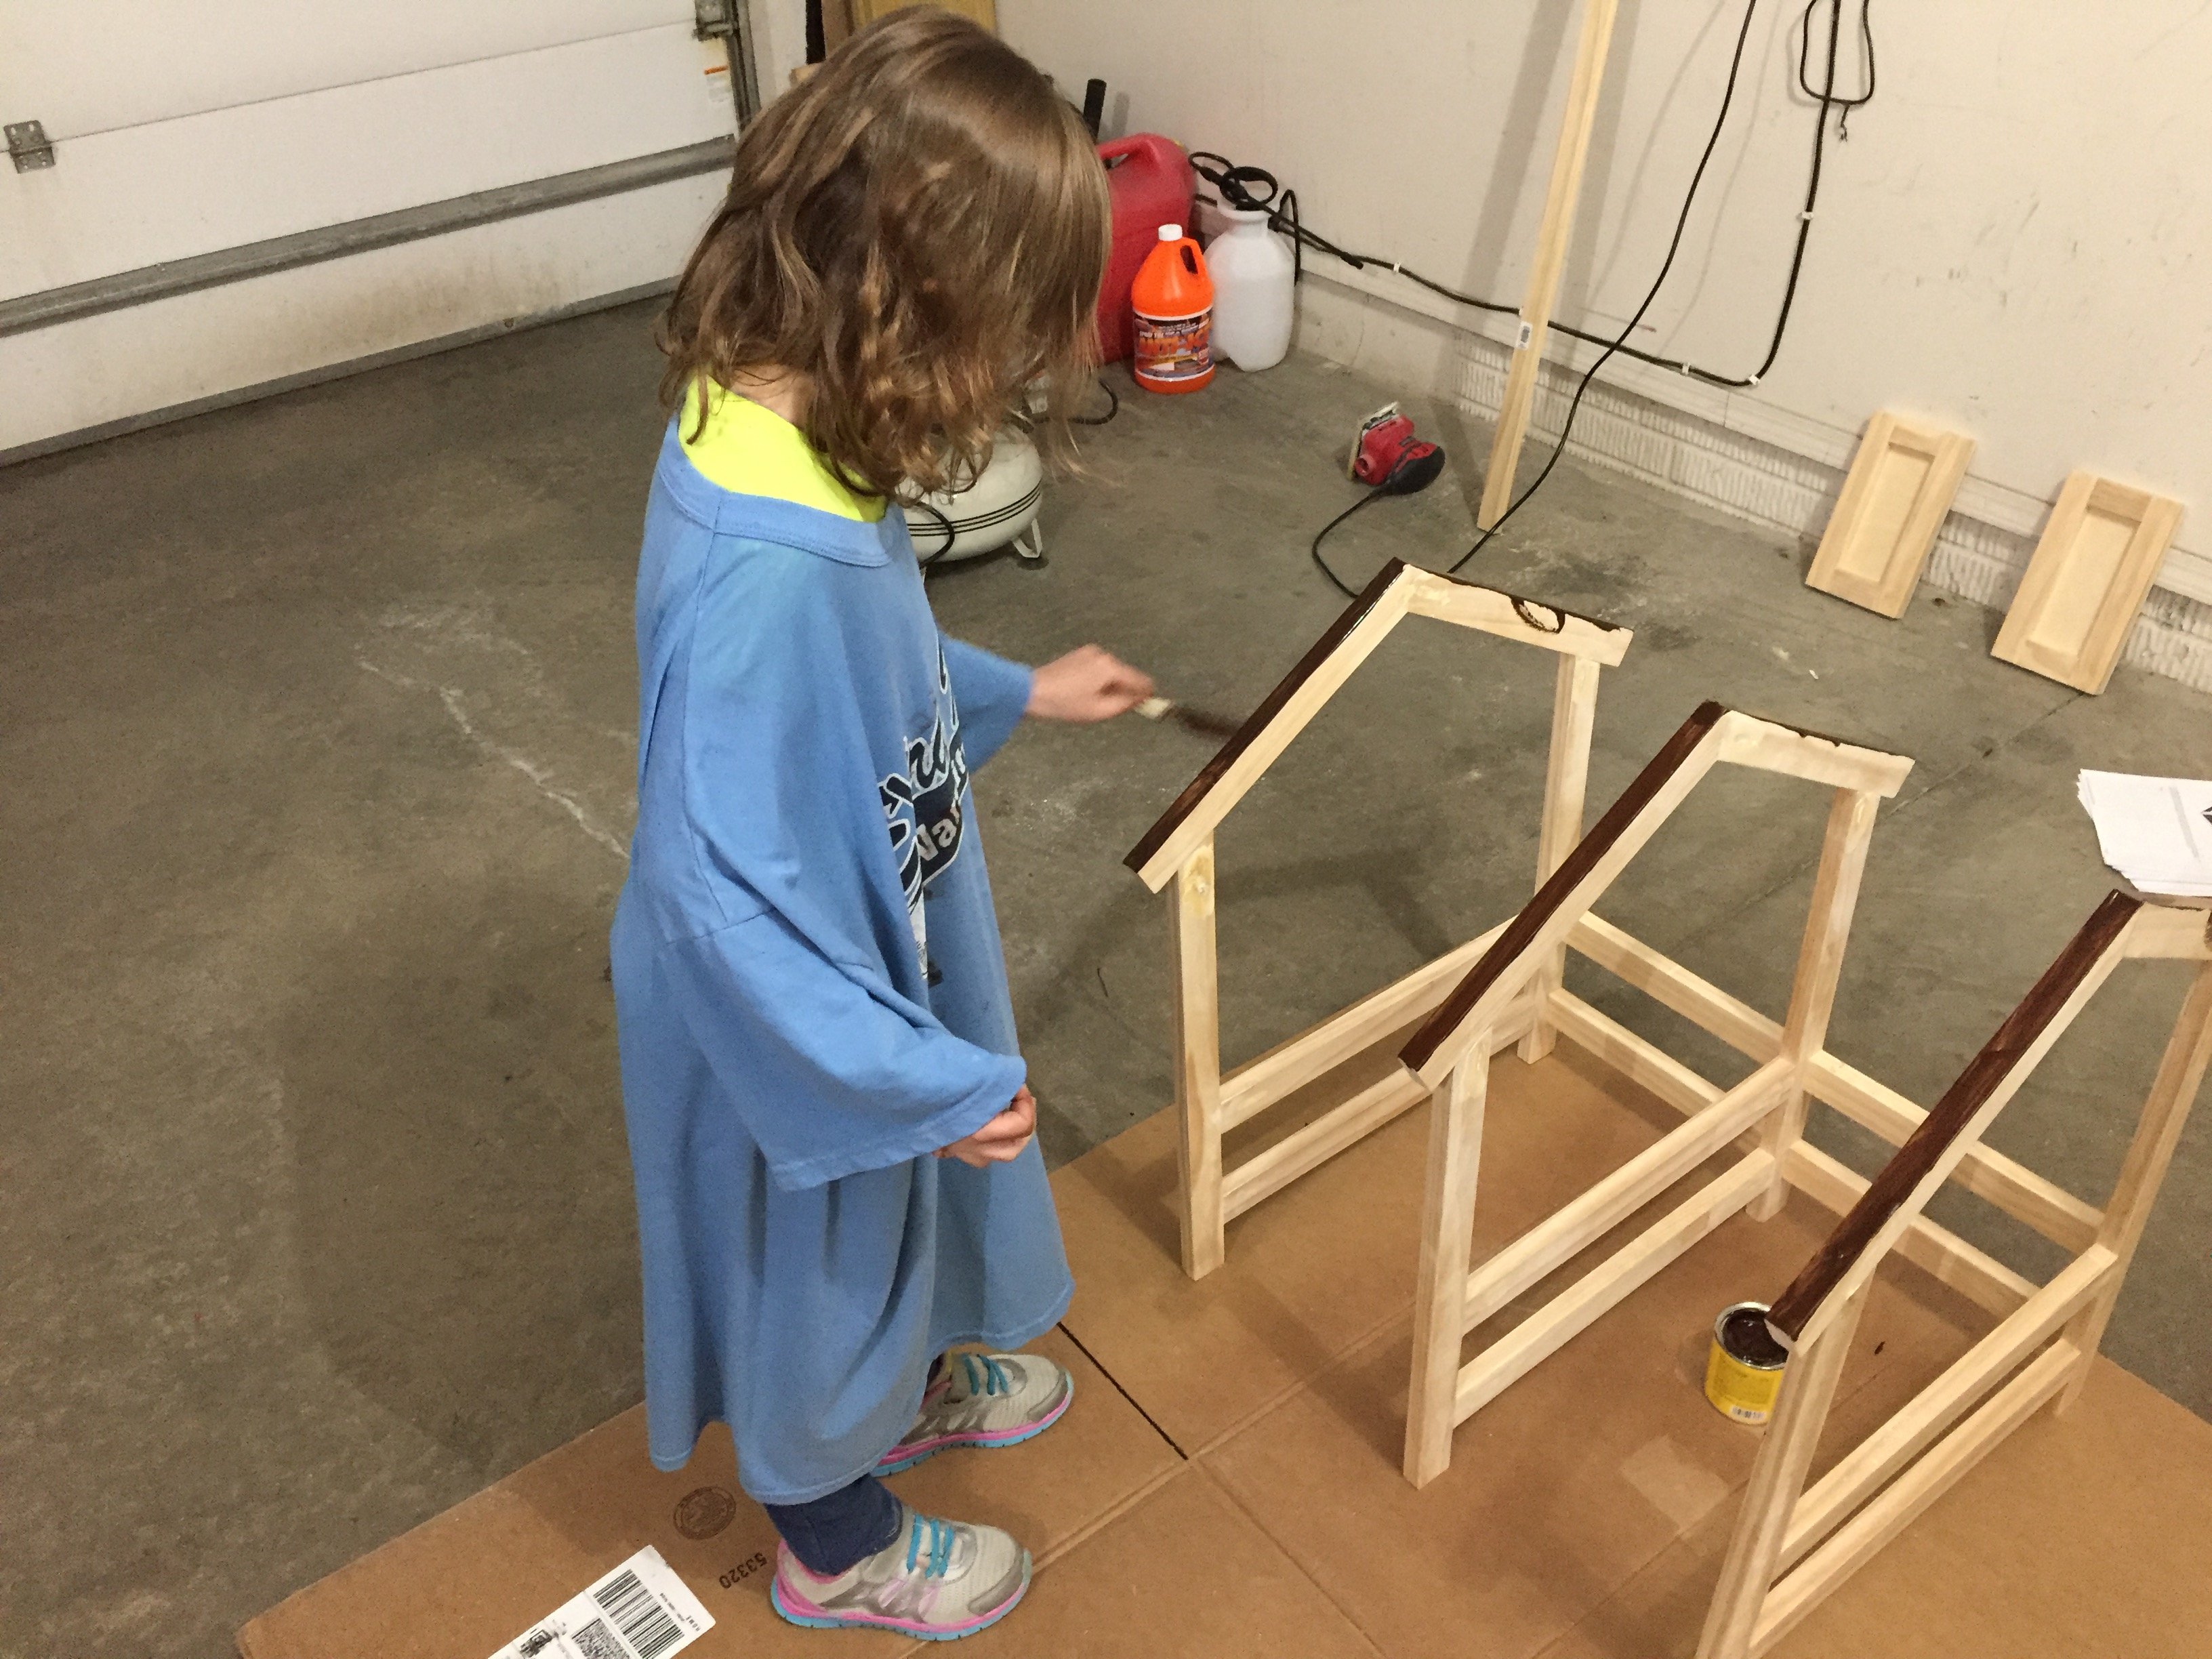
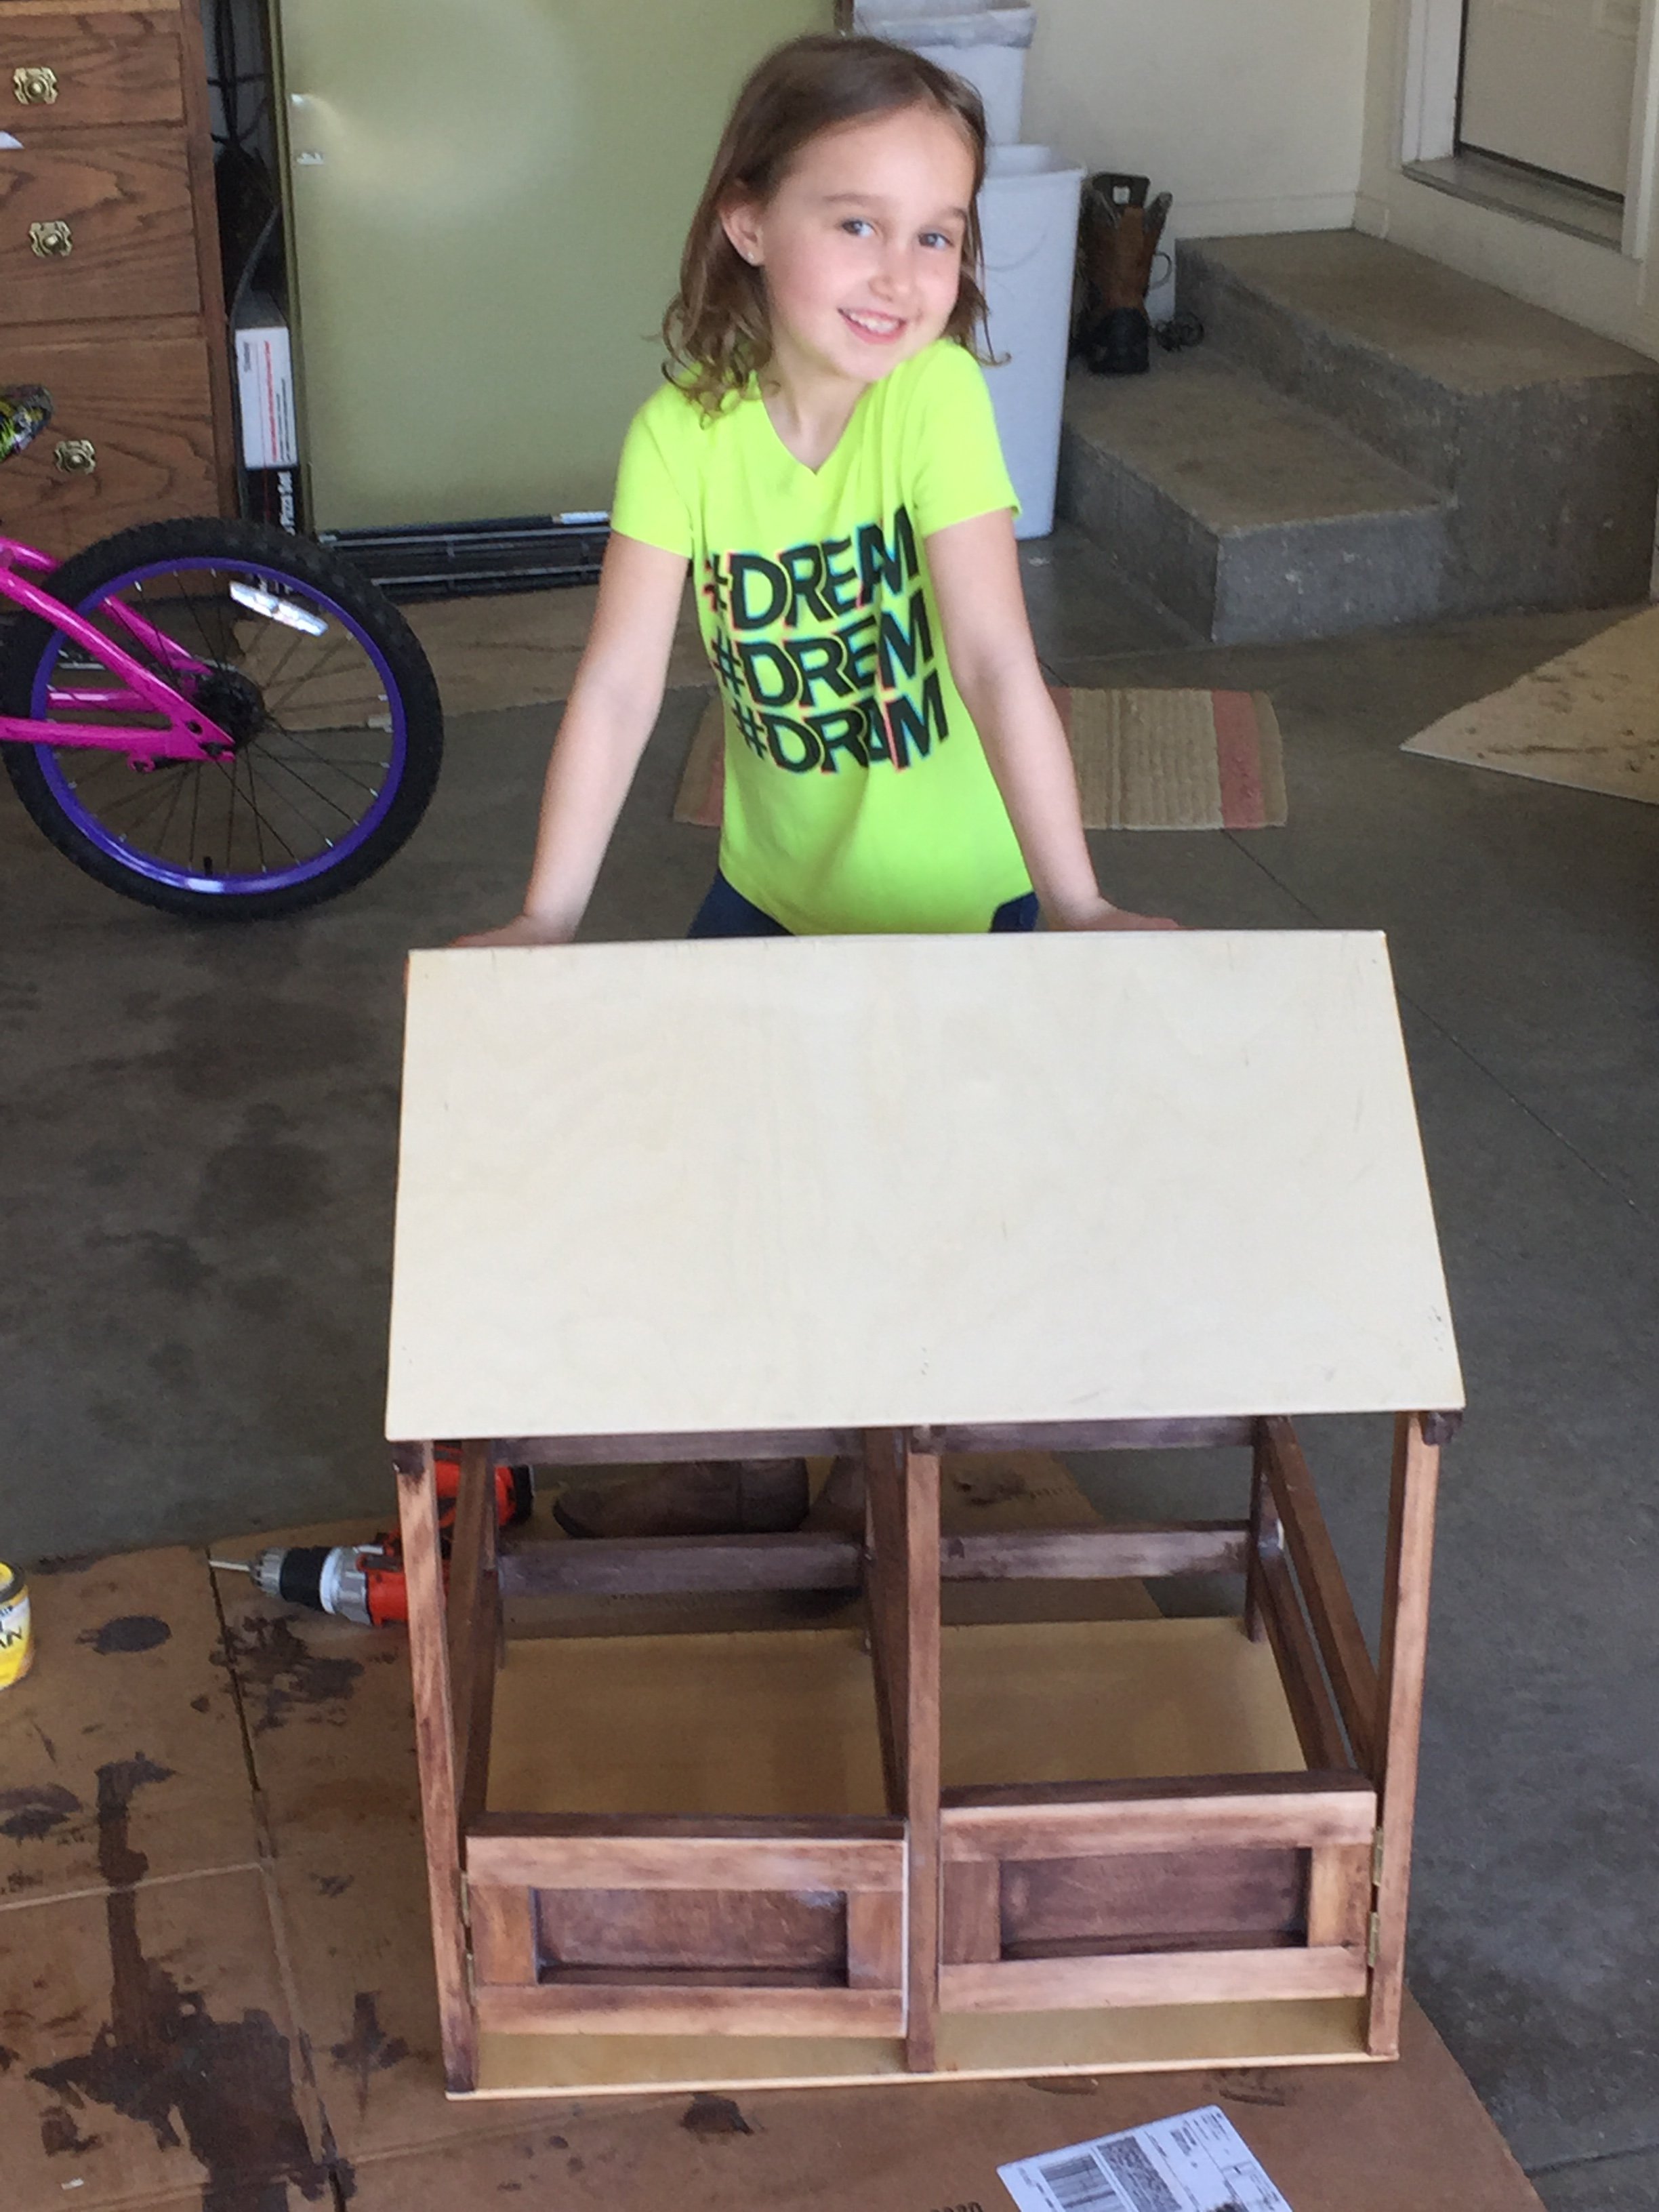
American Girl Doll Horse Stable
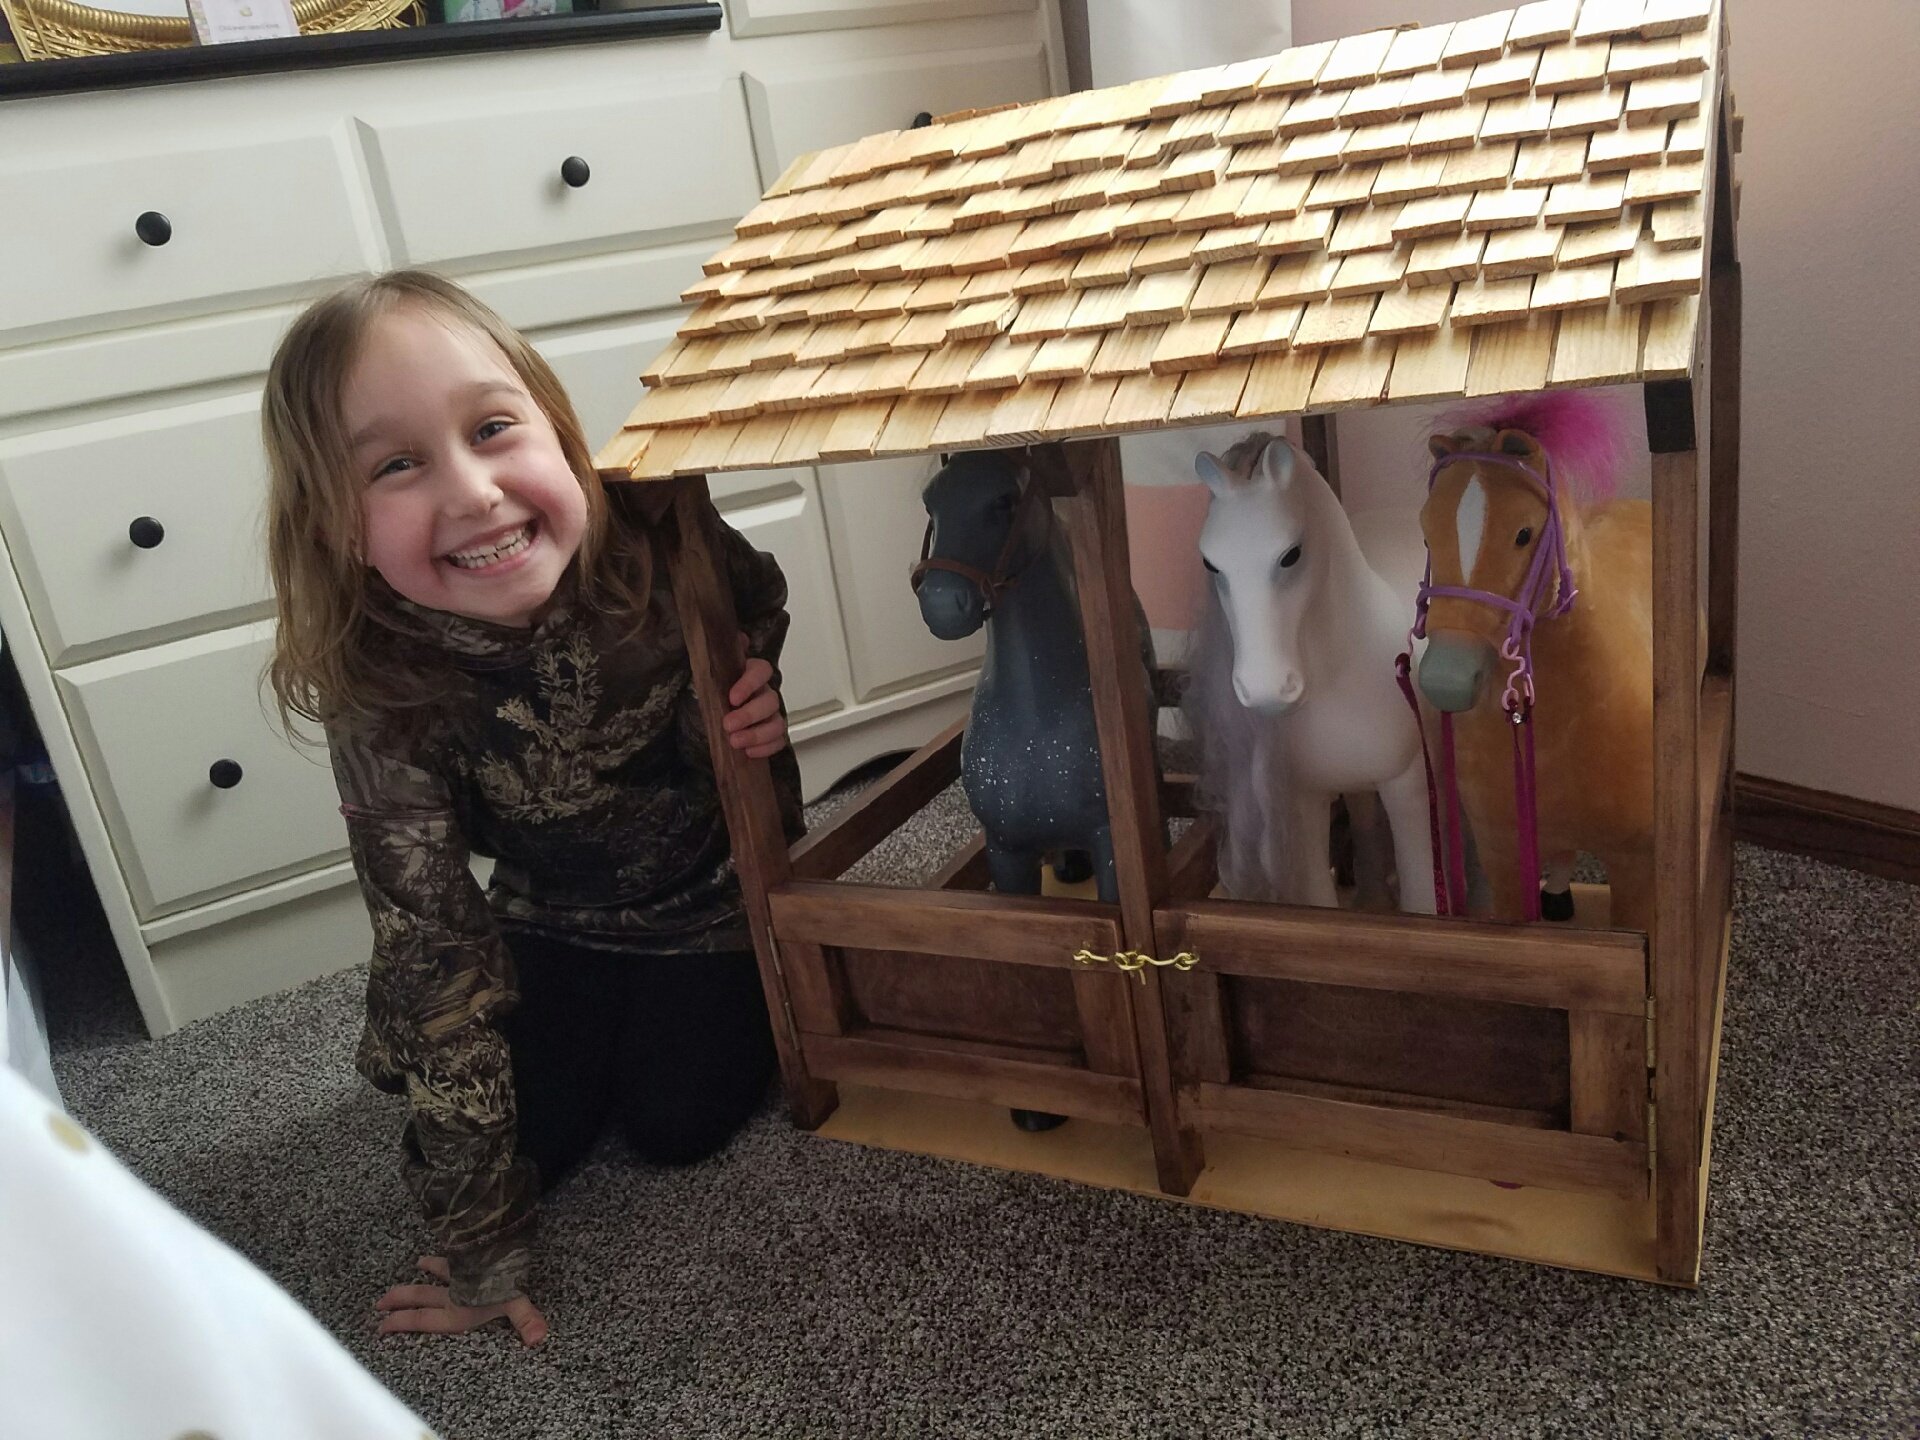
This was my first project with my daughter. After a divorce, I wanted something fun to do with my daughter-something where she would learn, have fun, and see a project from start to finish.
I did a lot of pre-cutting and prepping, but she did some cutting with a handsaw and mitre box, drilled holes with the Kreg jig, stained, used the nail gun, and glued. I installed the shingles, and touch up staining, but she did a lot of work for this project!
Since then, we have built a collapsible corral (fence) for her three horses, and next is the farmhouse bed for her doll!
Thank you for the great instructions, my daughter thinks I'm the greatest person on earth because of these projects!
Built from Plan(s)
Estimated Cost
I bought the Kreg jig, so my cost was a lot higher, but less than $75 prior to the purchase of Kreg jig (additional $40 with clamp).
Estimated Time Investment
Weekend Project (10-20 Hours)
Finish Used
Honey maple and dark maple
Recommended Skill Level
Beginner
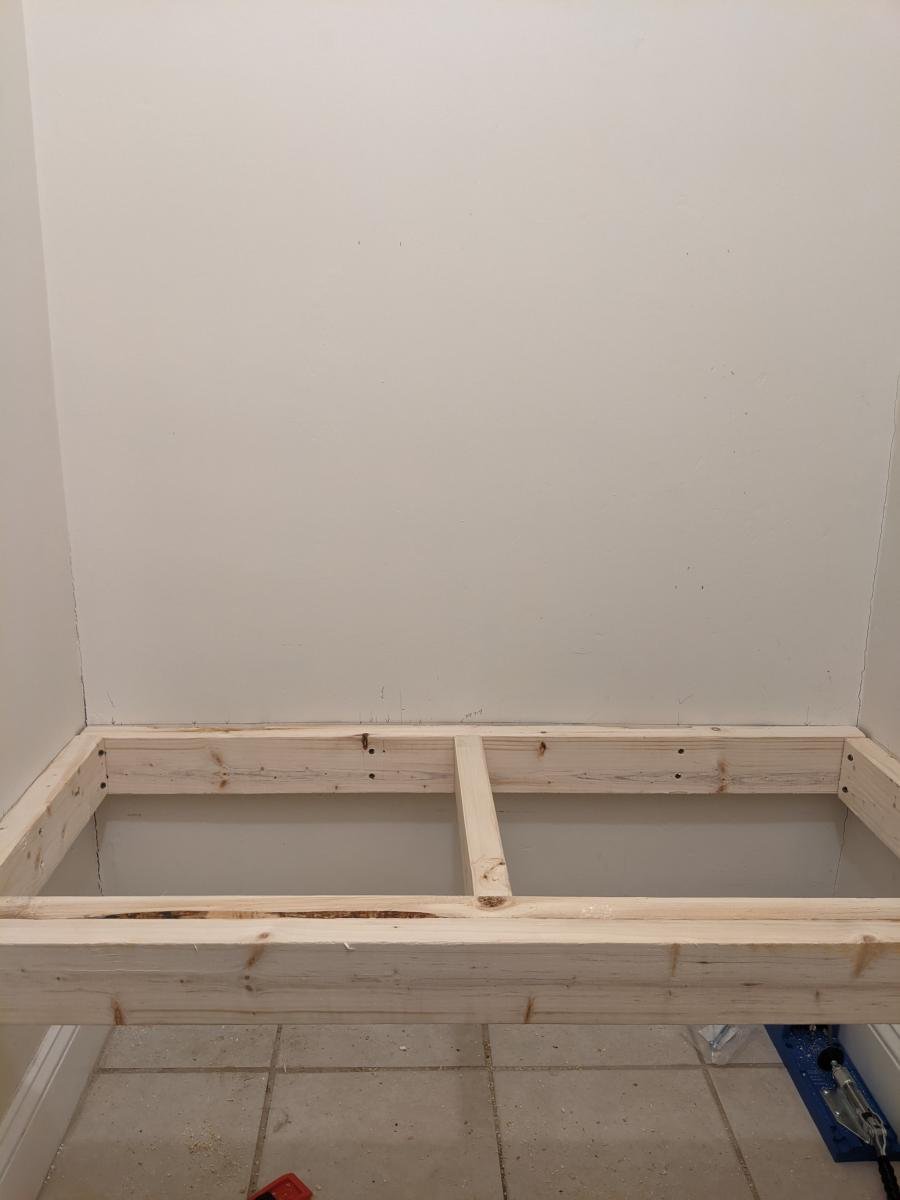
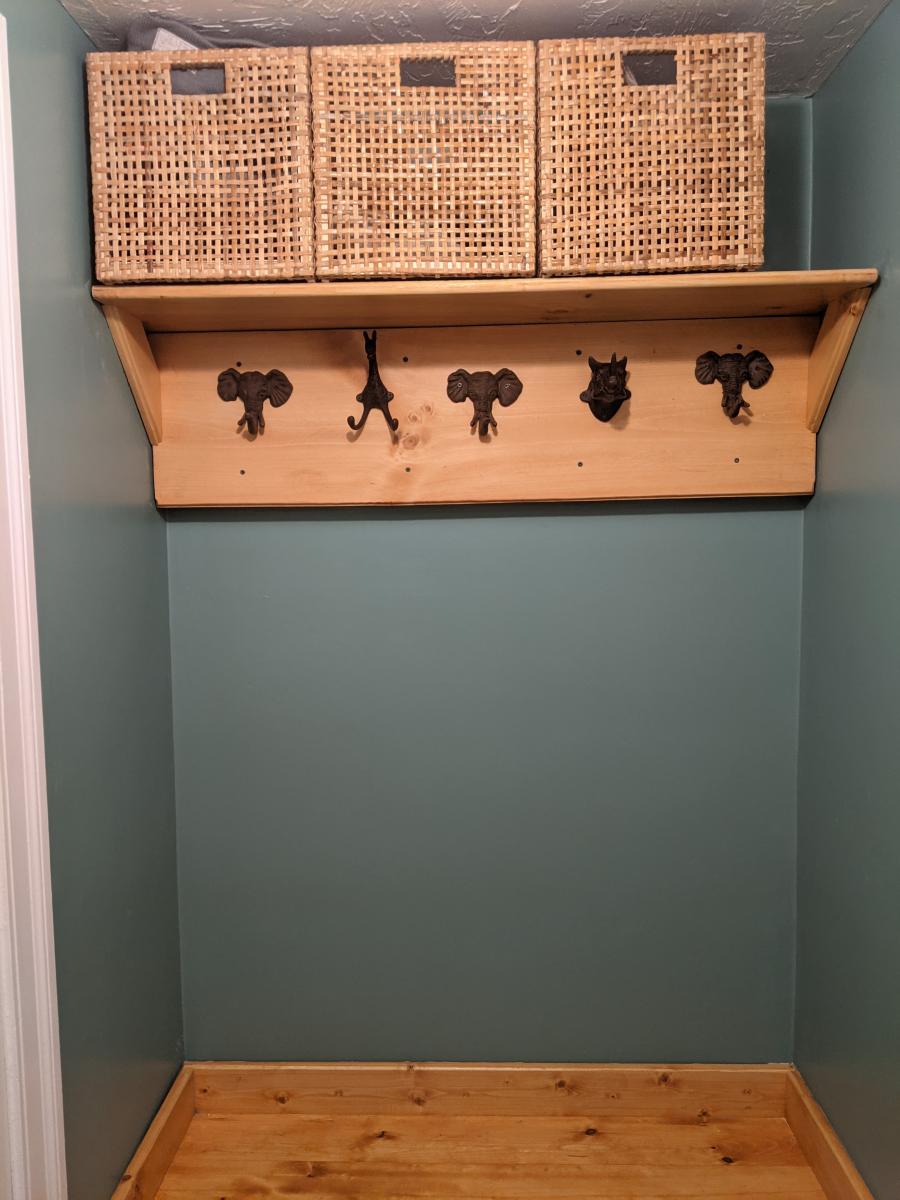
Floating bench for entryway alcove
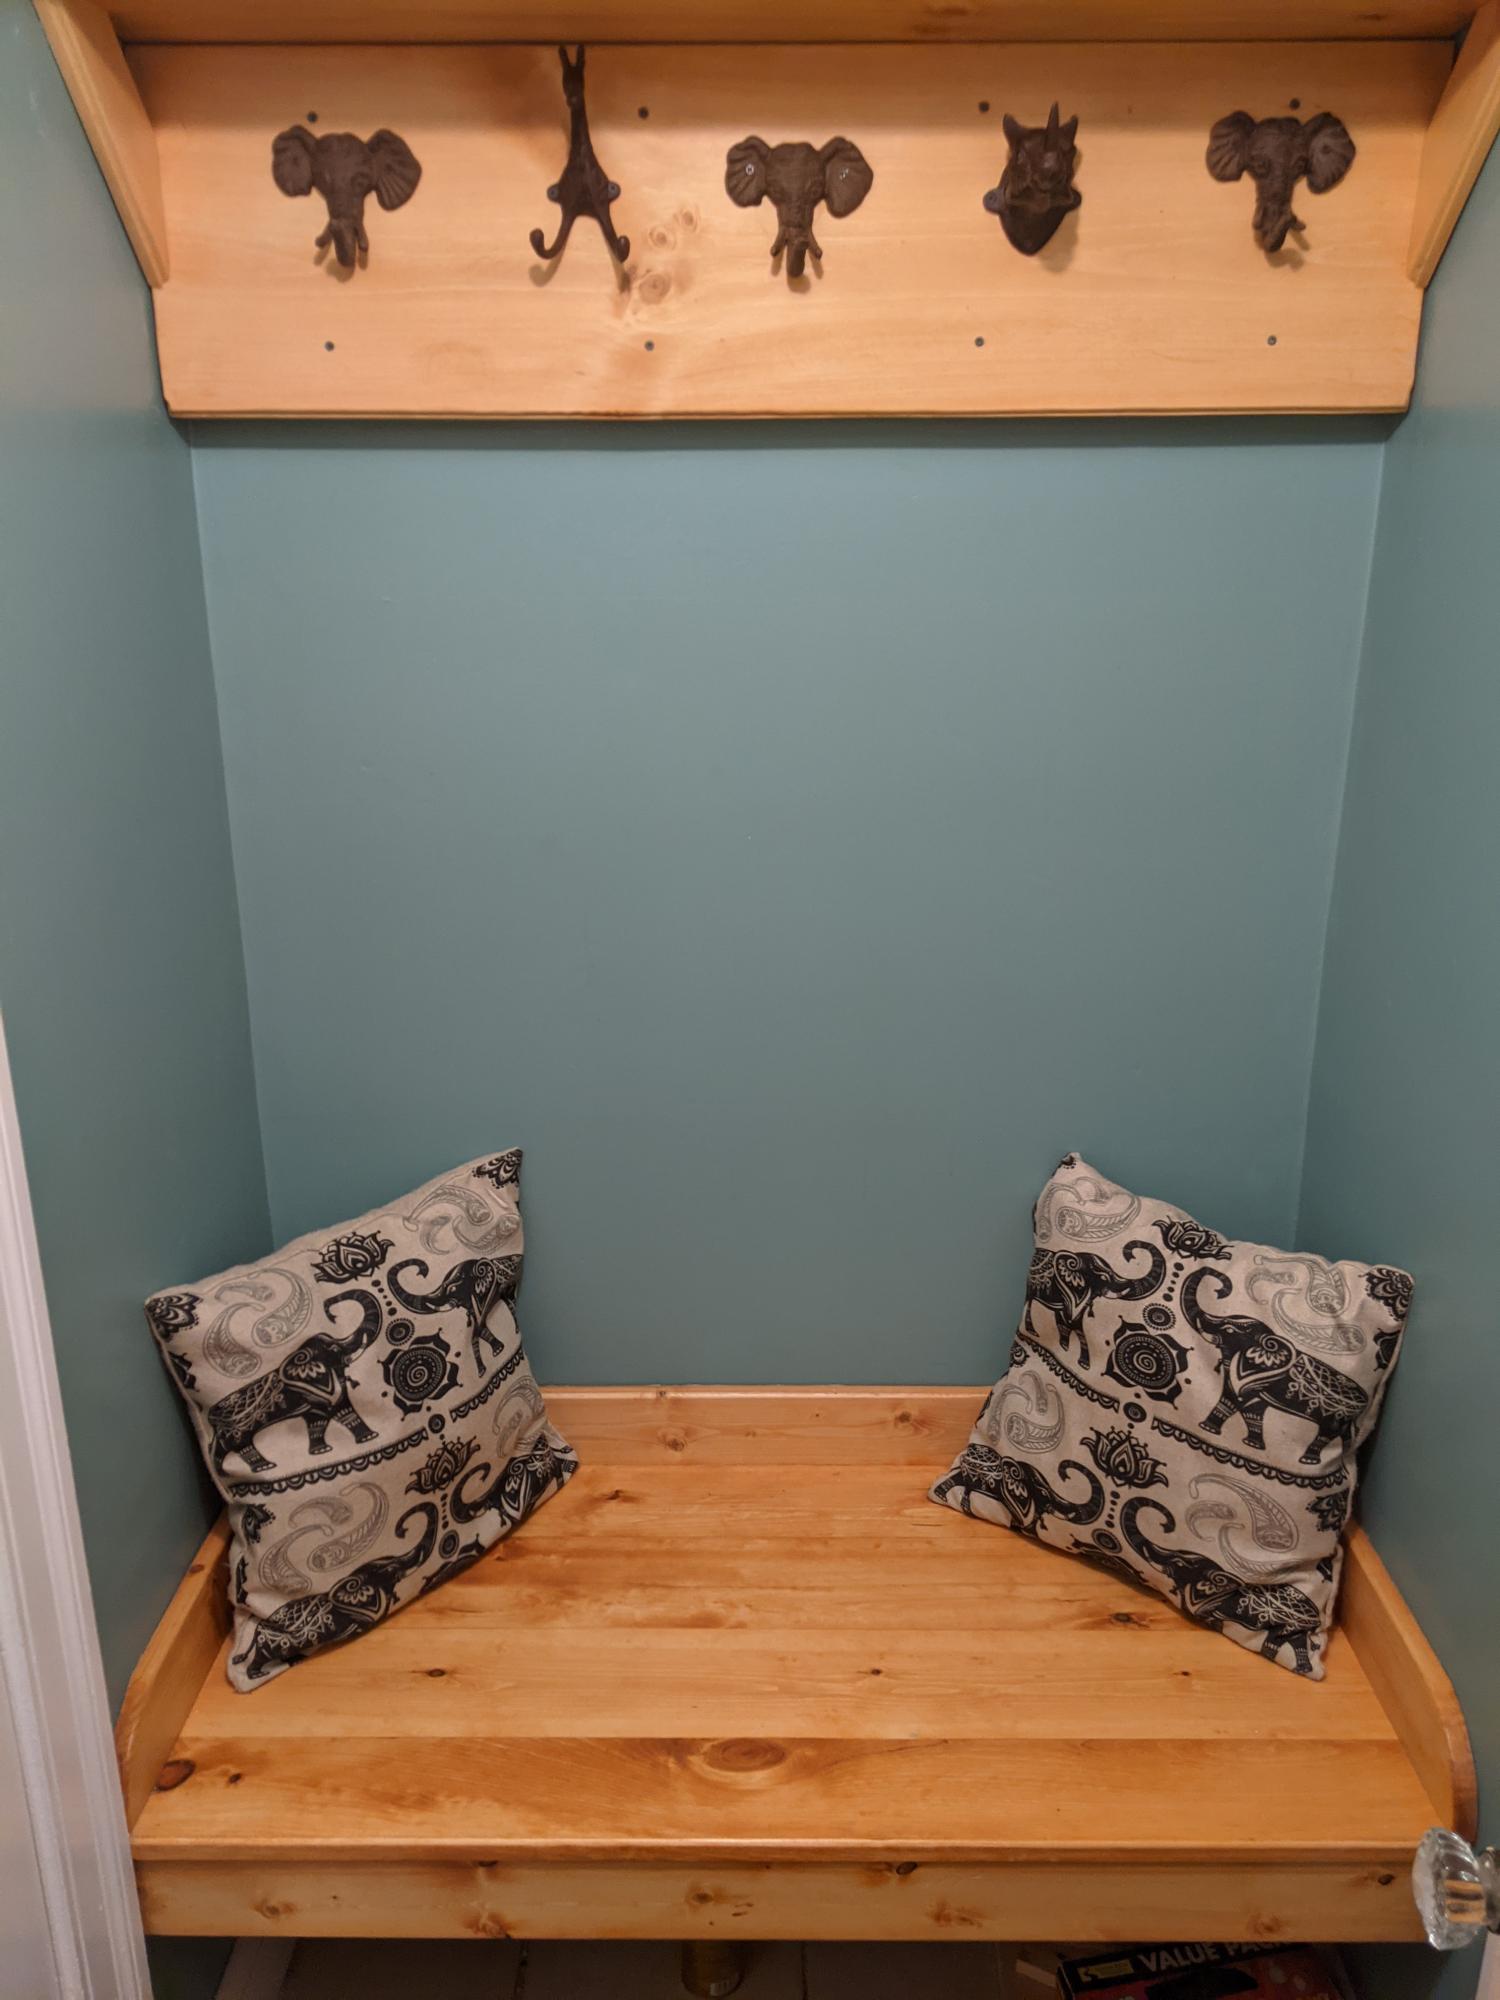
I was looking for some inspiration to clean up our small entryway room in our Cape Cod style home in Worcester, Massachusetts that was typically used for recycling and dirty shoes. These plans were very easy to follow and really spruced up the room quite a bit.
I used standard pine 2x4's for the frame and 1 inch boards for the bench platform and upper shelf features. The platform consists of four boards (3 1x6 boards and 1 1x5 board) that were glued together and sanded down. This was finished with Minwax Colonial Maple stain (a few coats), a couple coats of satin polyurethane, and then sanded down for a nice smooth finish.
I used a couple of 2x4's behind the vertical face below the shelf, giving it some depth and better stability.
Cast iron hooks were found on etsy, ebay, and Amazon.
Built from Plan(s)
Estimated Cost
$75-$100
Estimated Time Investment
Weekend Project (10-20 Hours)
Finish Used
Minwax Colonial Maple stain
Minwax satin polyurethane
Automotive turtle wax for a smooth shine
Minwax satin polyurethane
Automotive turtle wax for a smooth shine
Recommended Skill Level
Beginner
Kentwood Queen Bed
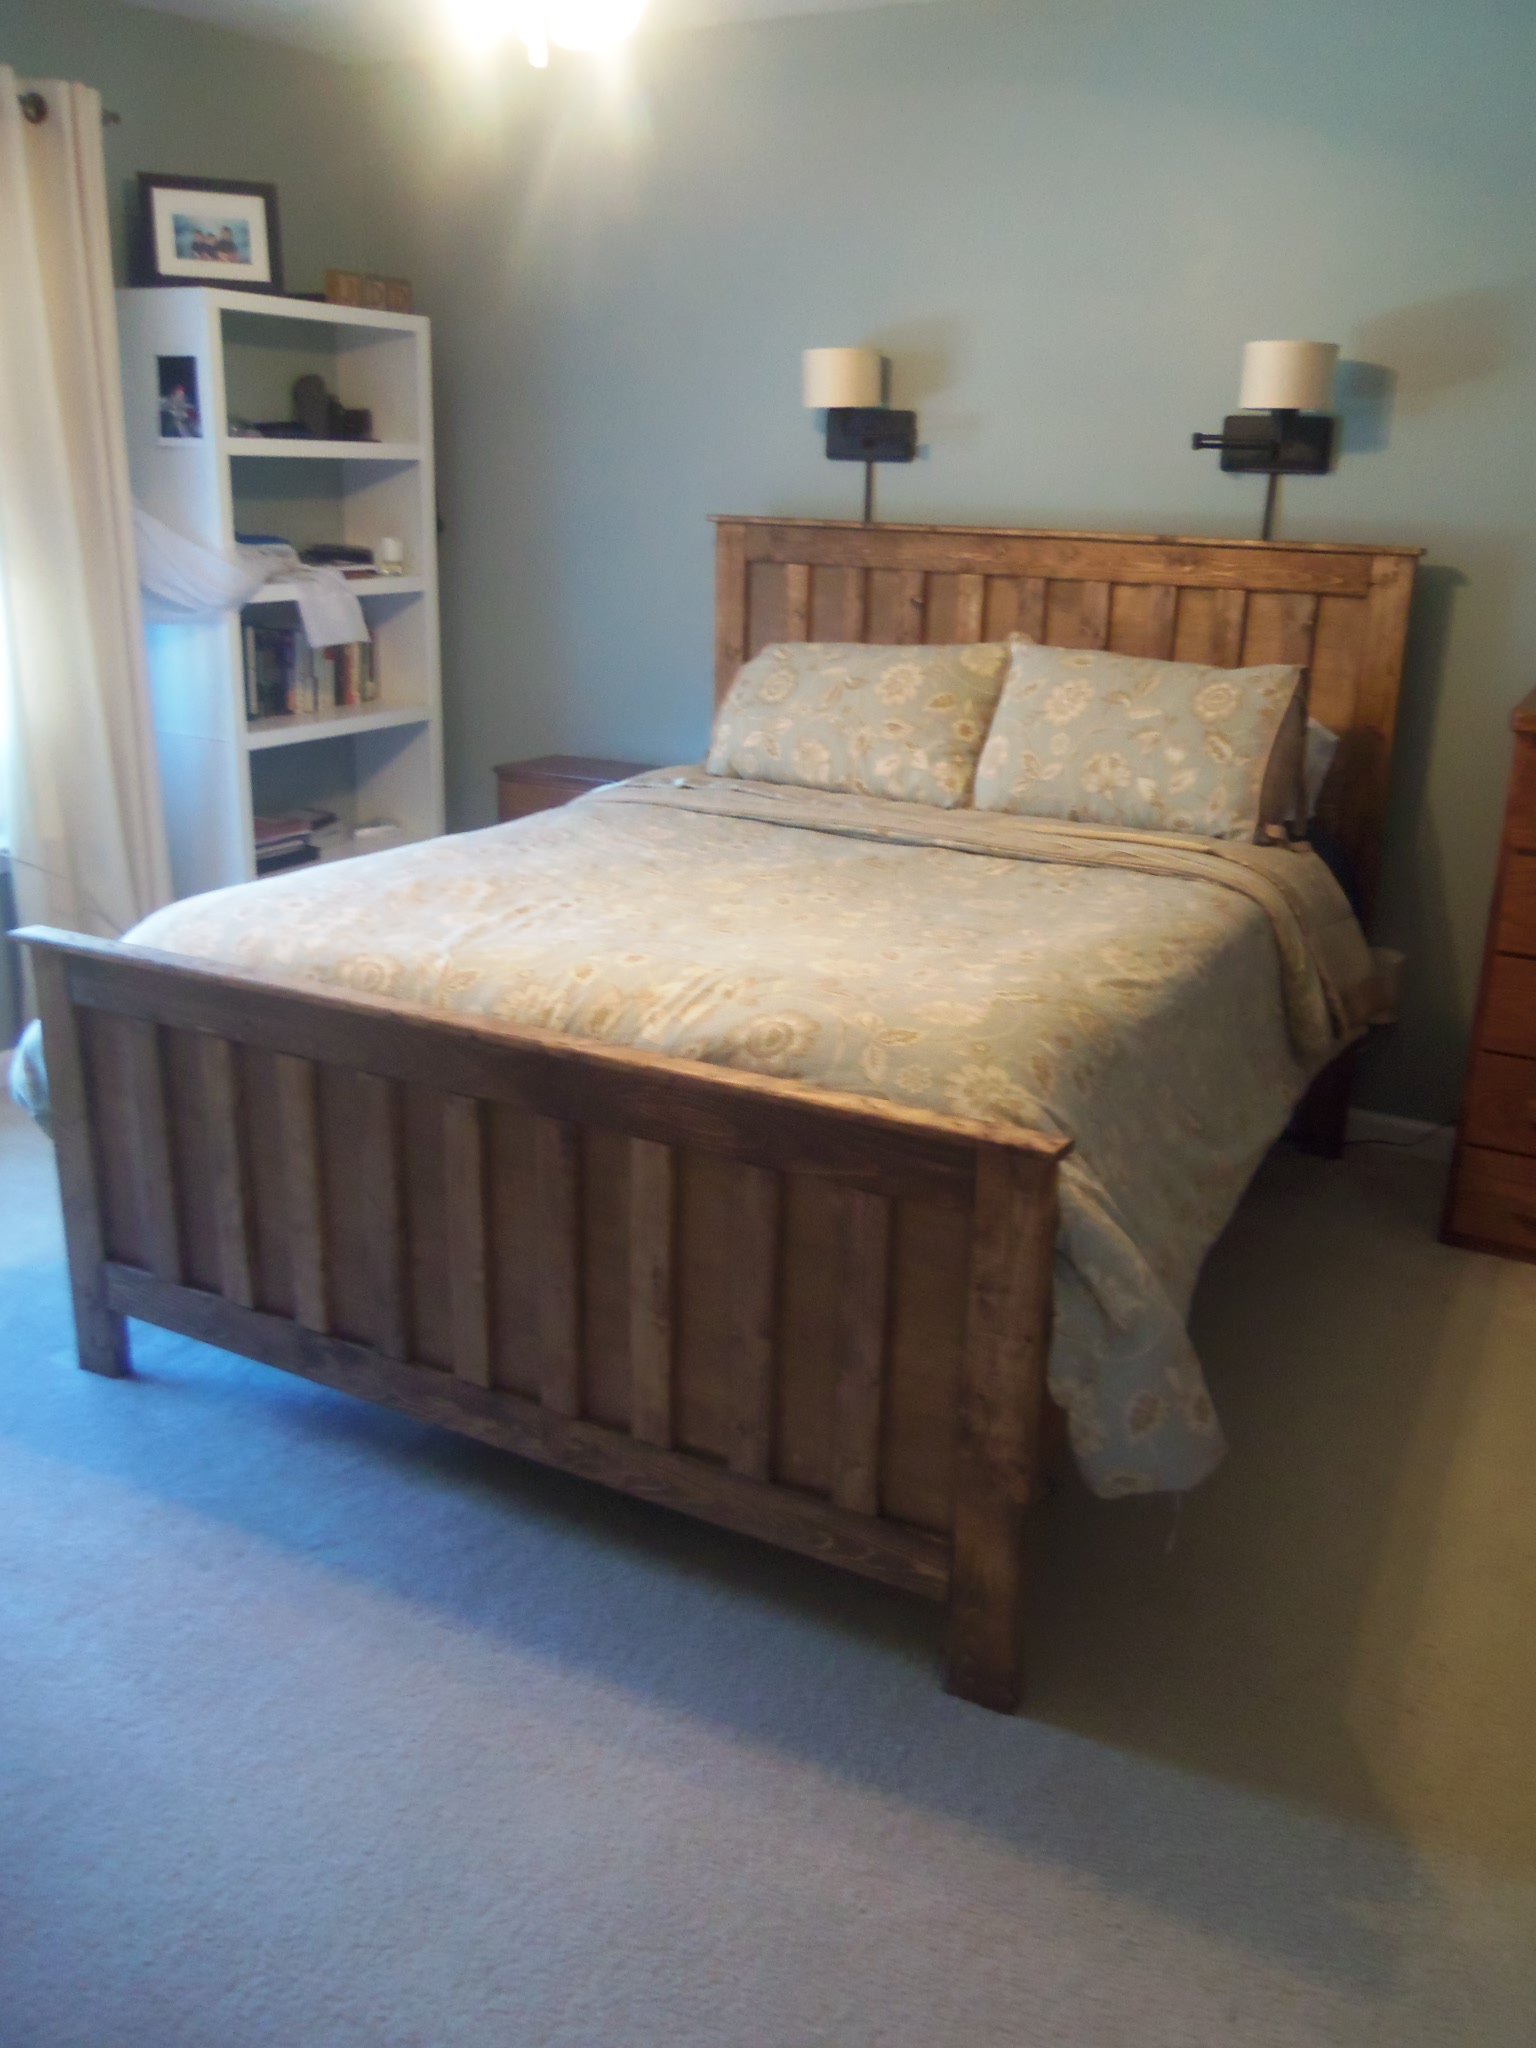
This is my first wood working project, ever. I think it was a little ambitious but I was inspired by the design and the simplicity of the directions. I was actually trembling when I used the circular saw for the first time. But now that the project is finished, I am inspired to do more. I have a list of other things I want to make.
Built from Plan(s)
Estimated Cost
$80 wood, plus materials
Estimated Time Investment
Weekend Project (10-20 Hours)
Finish Used
Minwax color Early American stain
Recommended Skill Level
Beginner
Comments
Tue, 03/05/2013 - 09:07
You did an excellent job! I
You did an excellent job! I would never look at this and think a beginner had done it - it looks very professional and expensive! :)
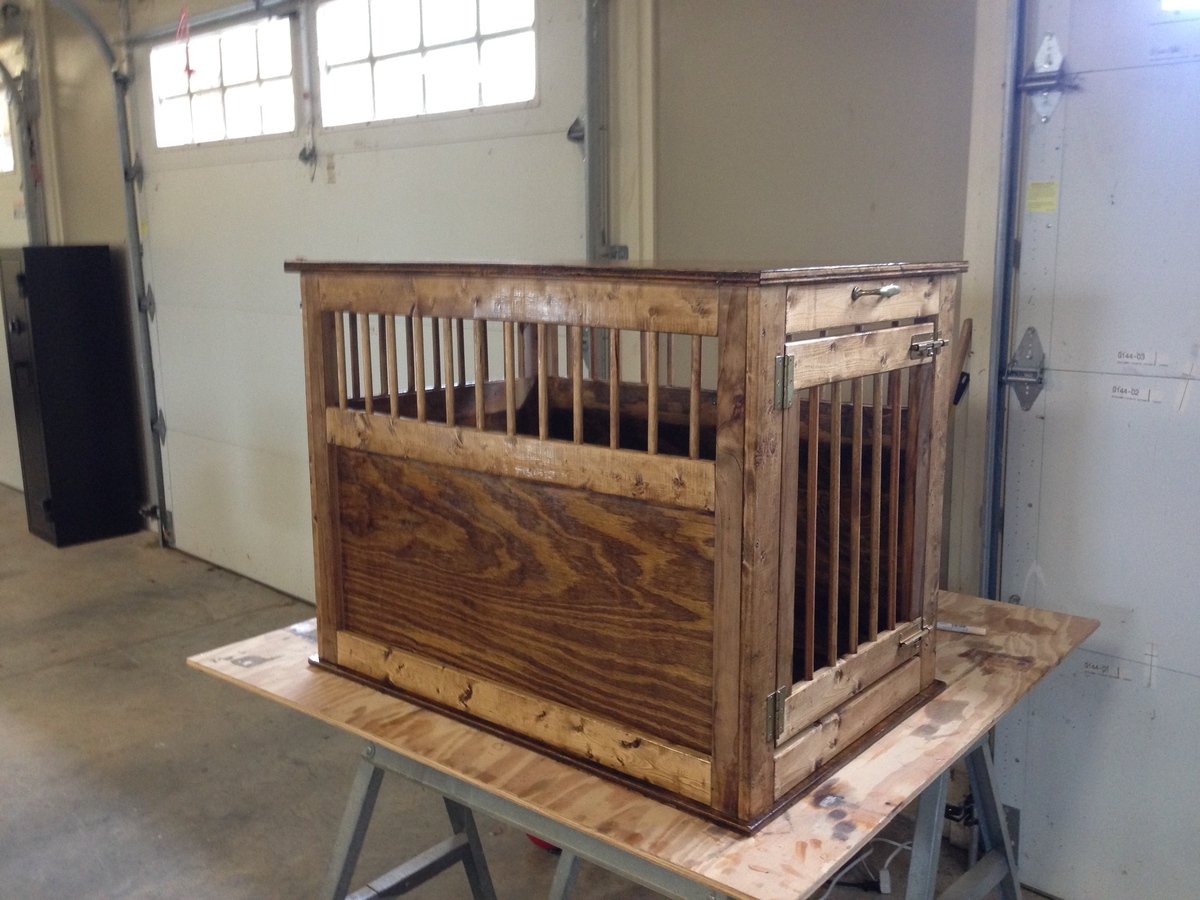
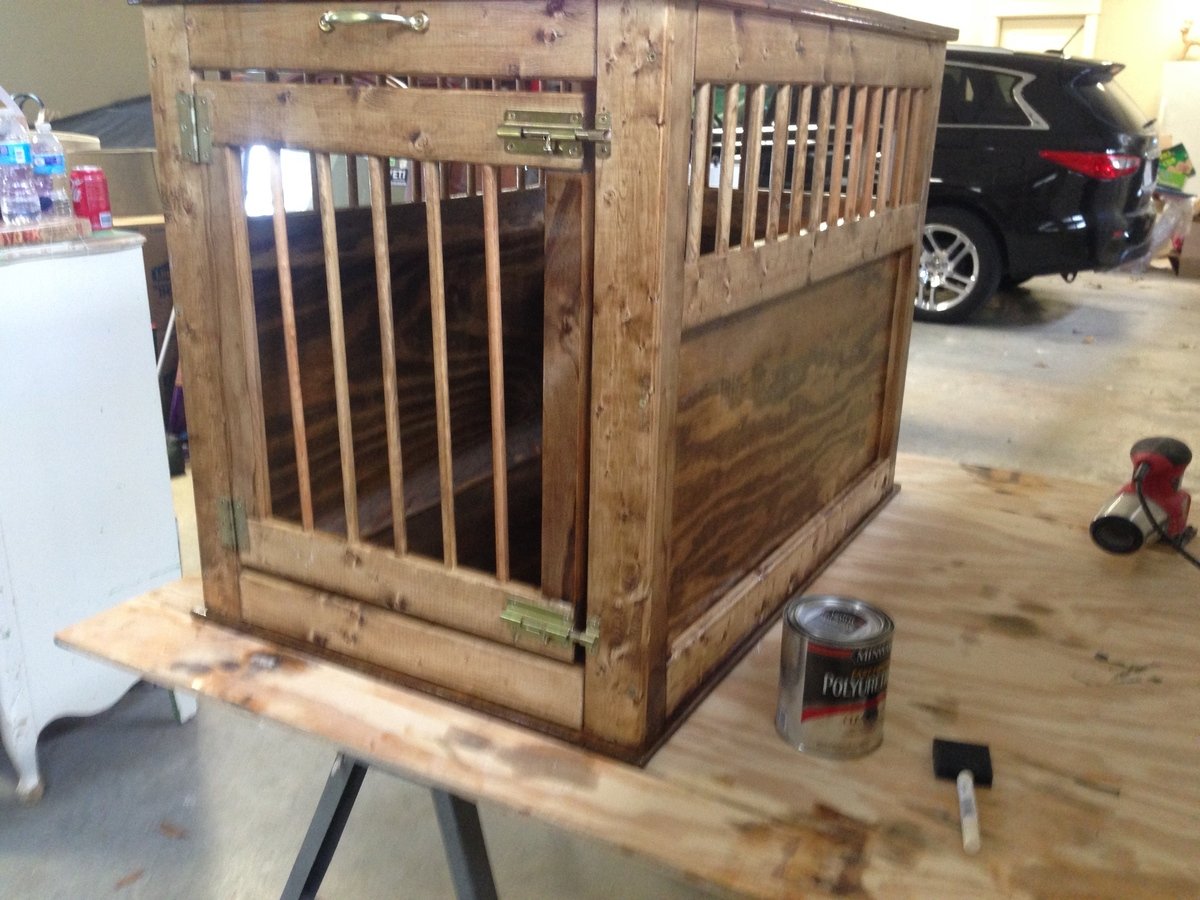
Pet Kennel
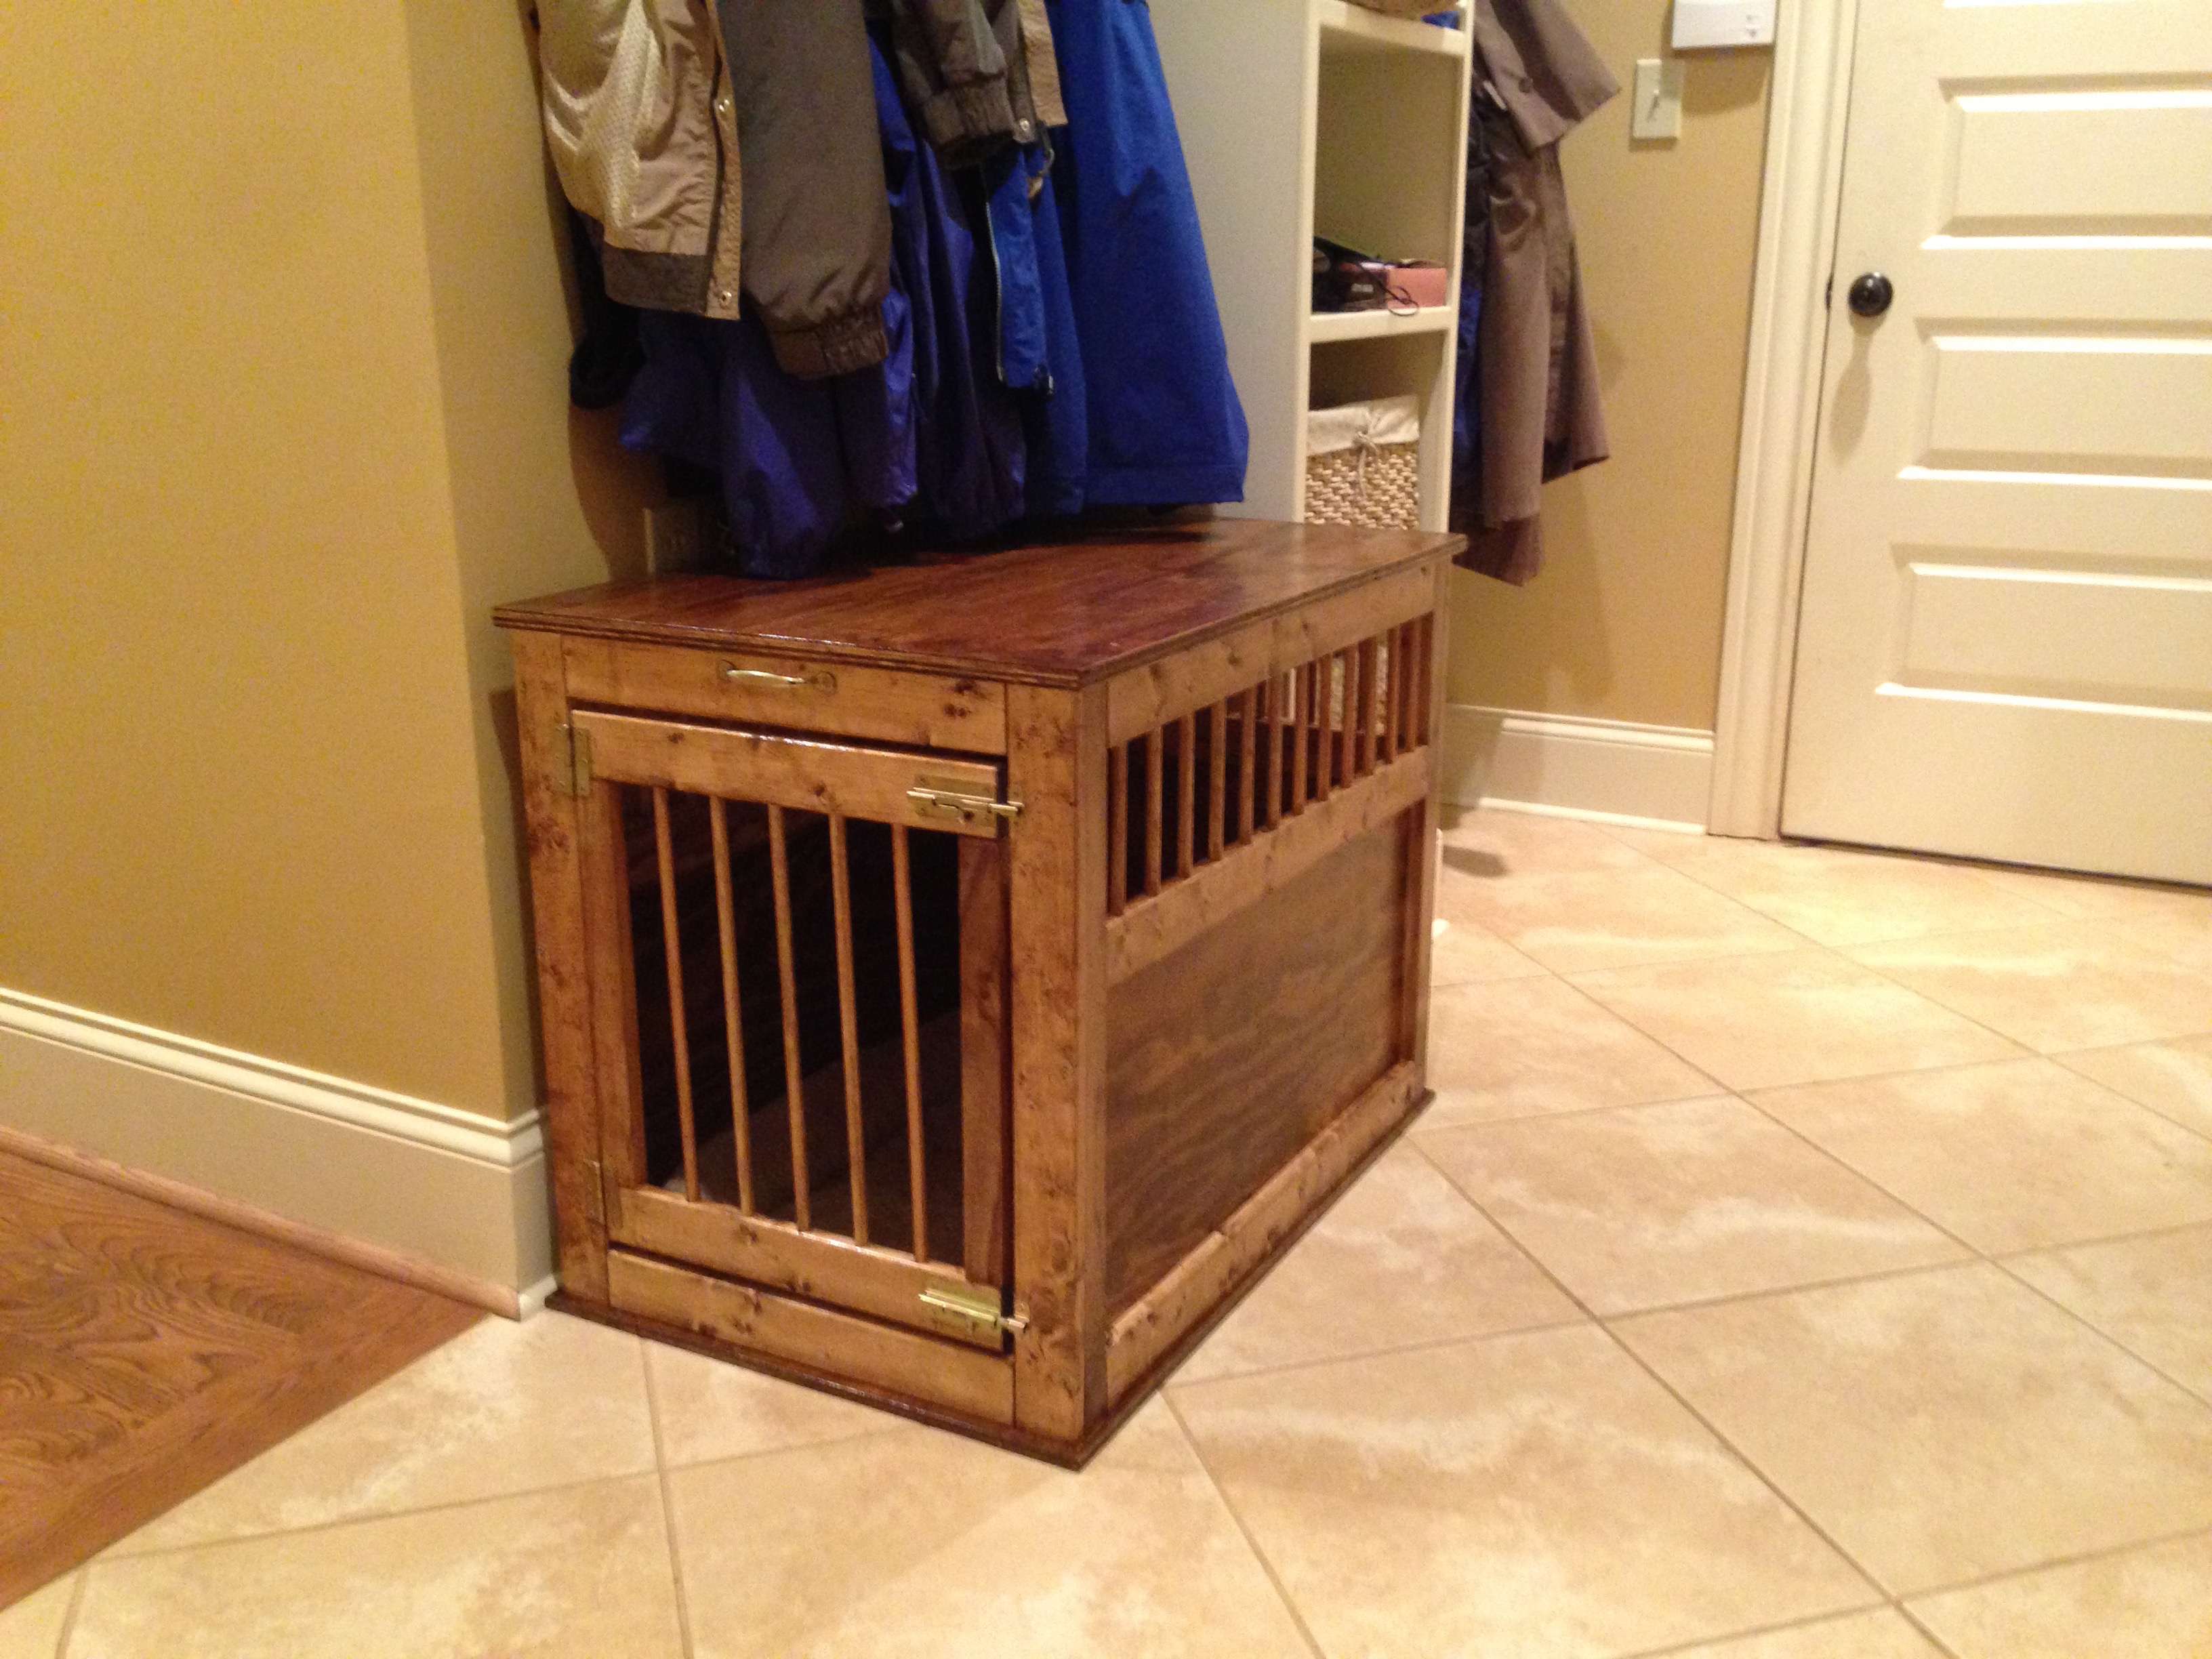
This is my first post. I have used a few of the plans off of here before but I thought this one turned out really well and wanted to share. I used dowel rods to give it a more open feel and think it looks good. My dog loves it! Thanks.
Built from Plan(s)
Estimated Time Investment
Day Project (6-9 Hours)
Finish Used
Minwax special walnut stain and polyurethane
Recommended Skill Level
Beginner
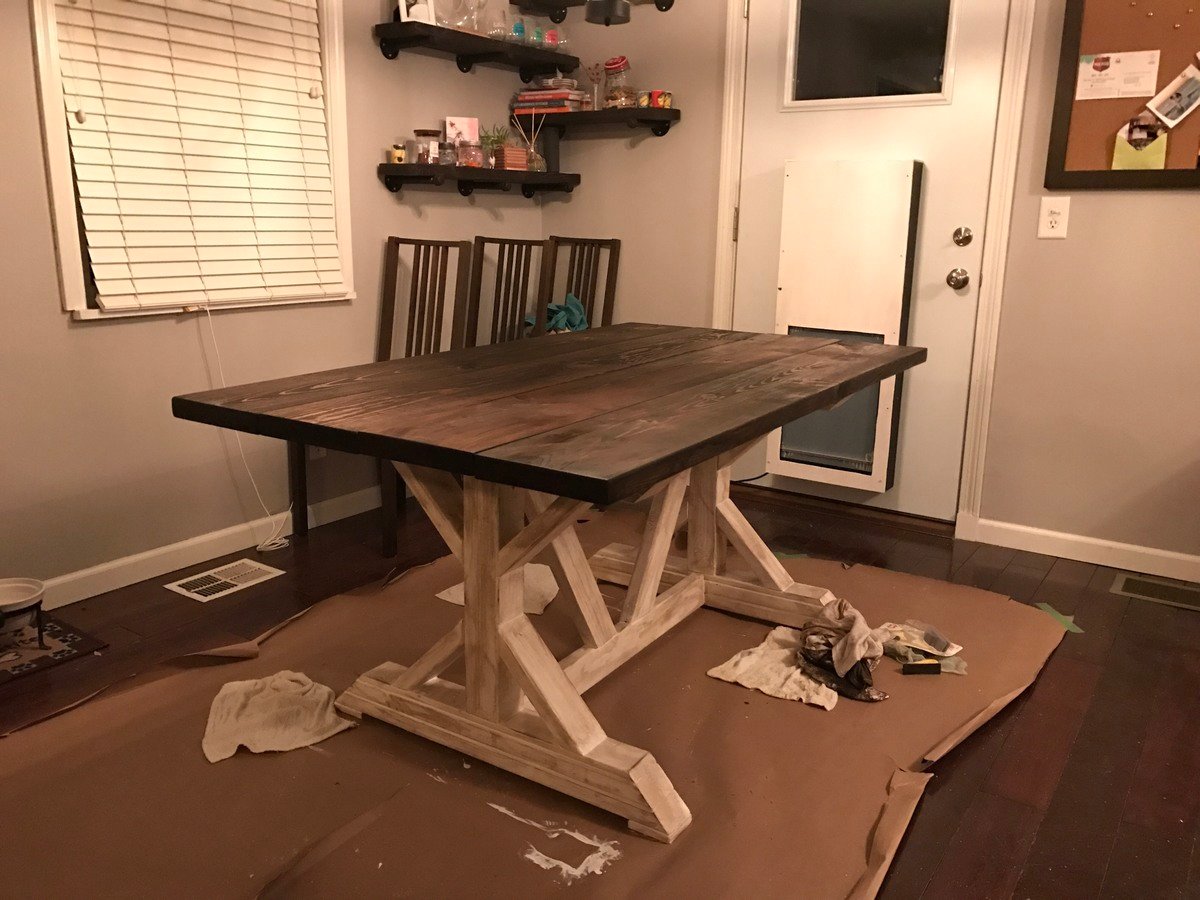
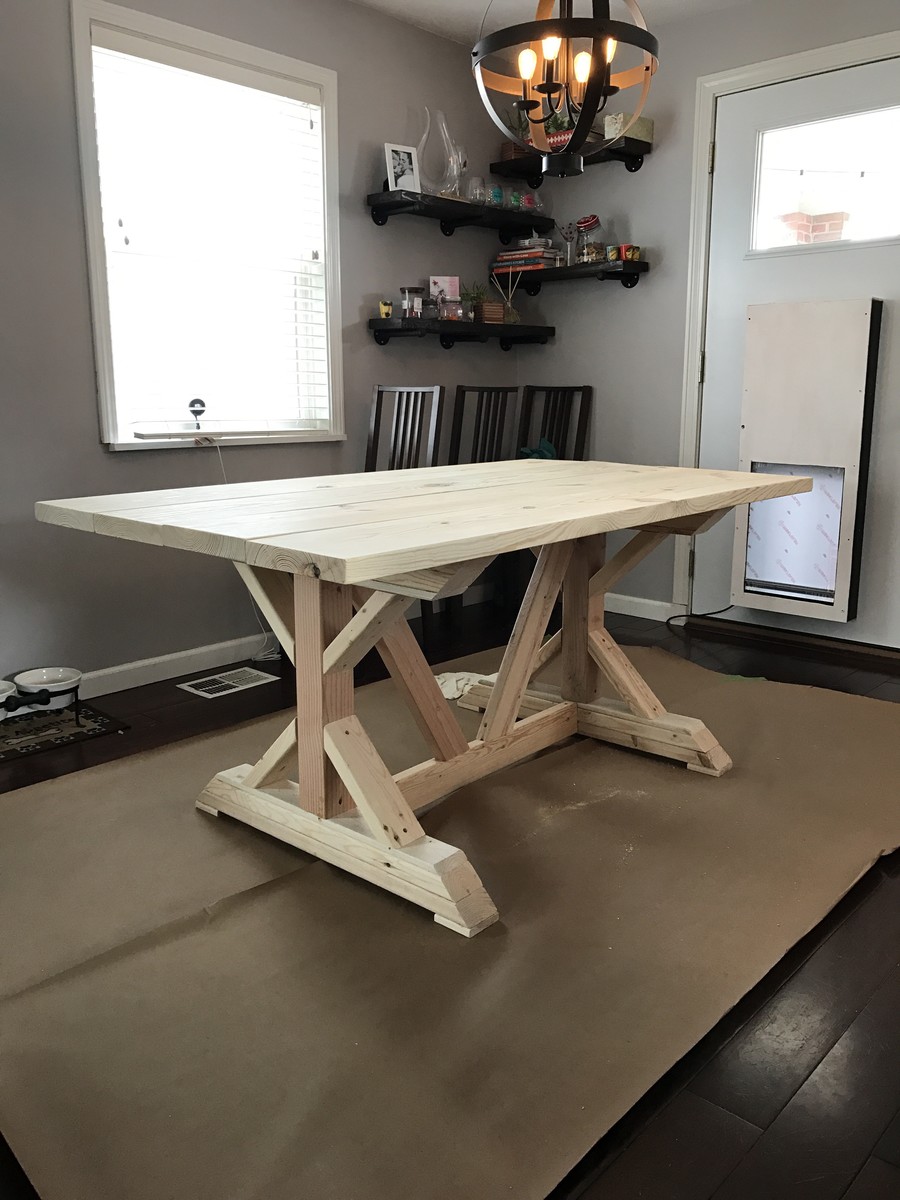
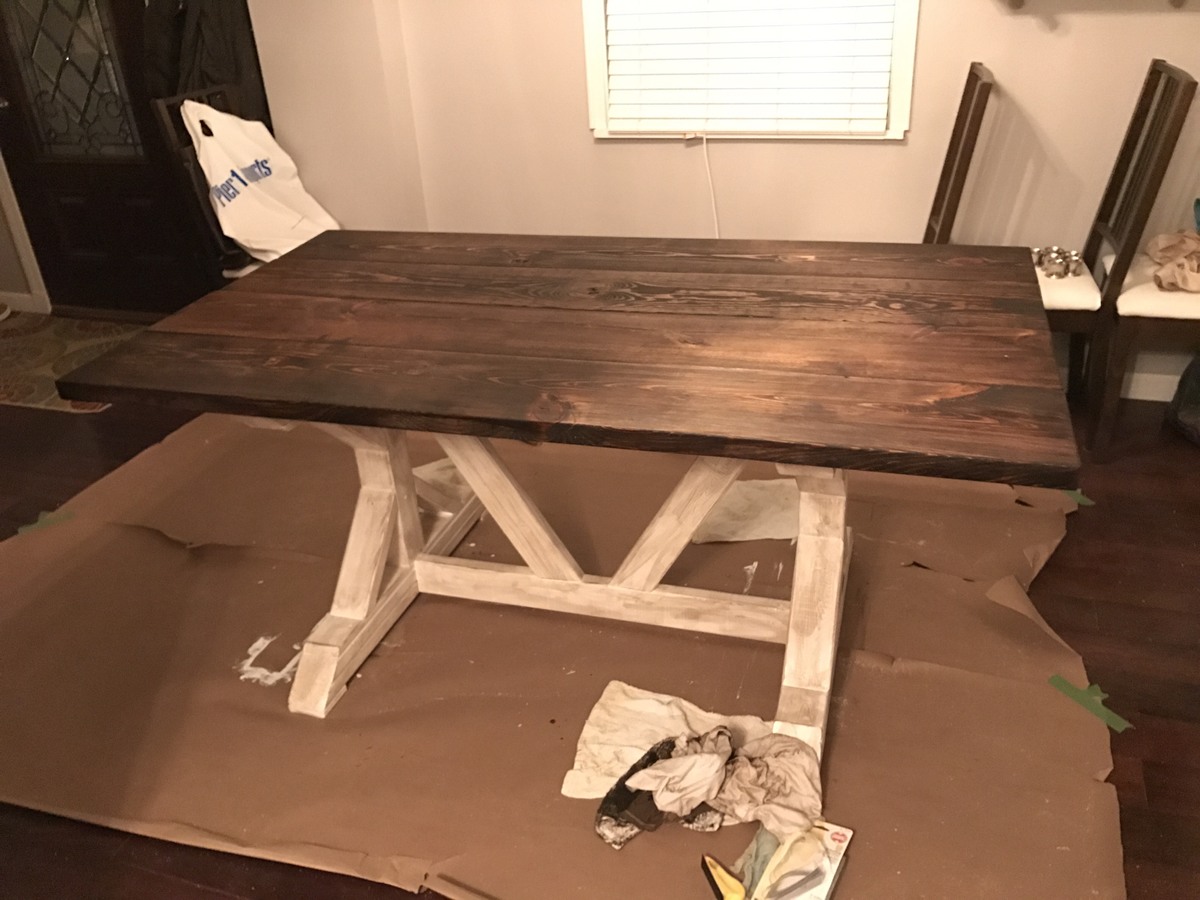
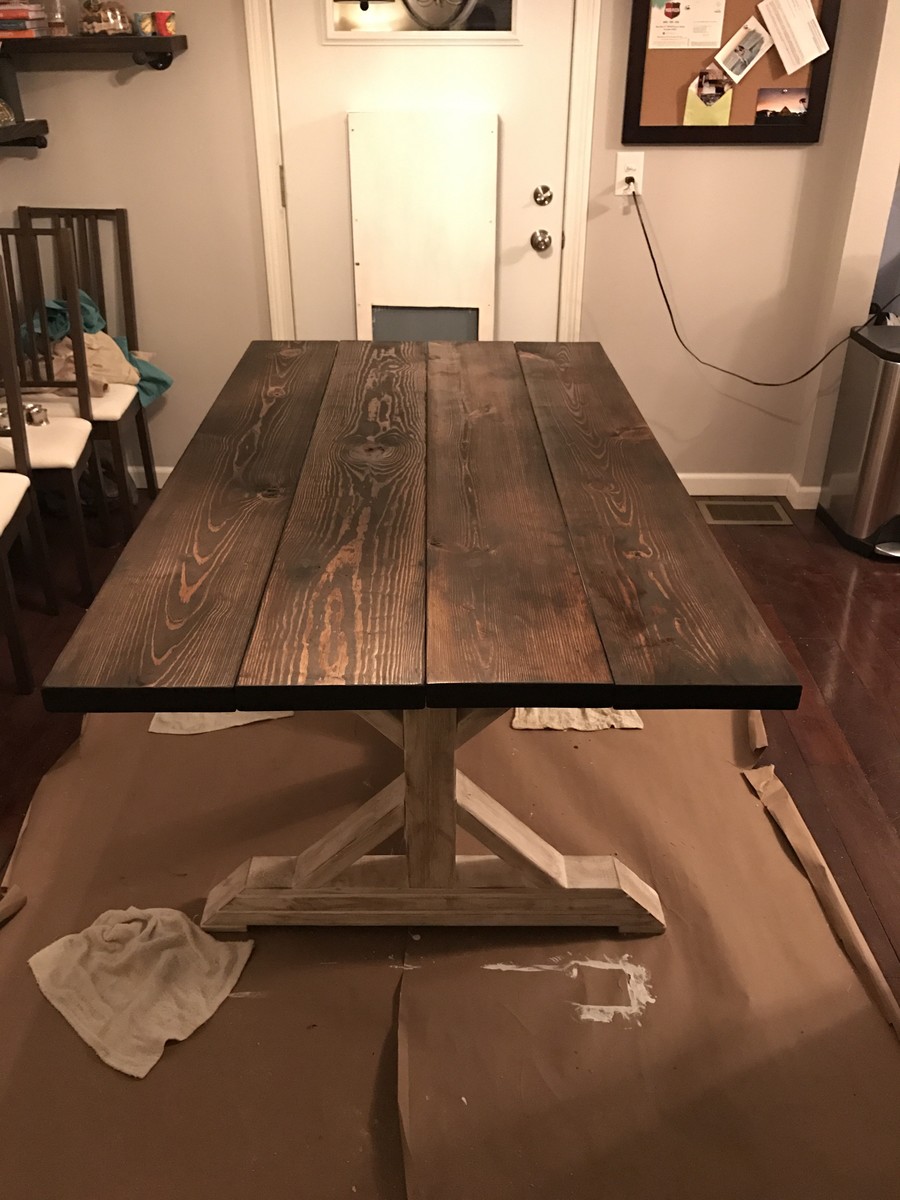
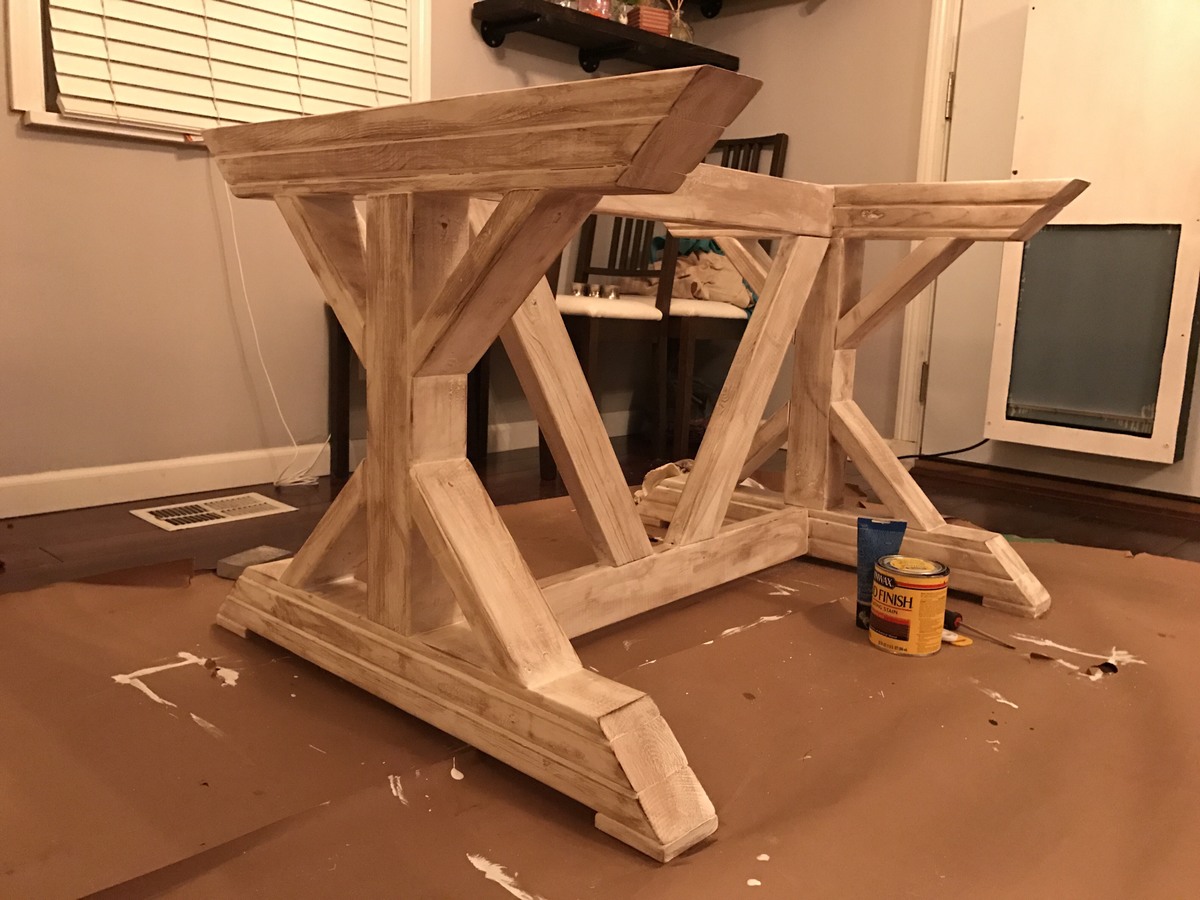
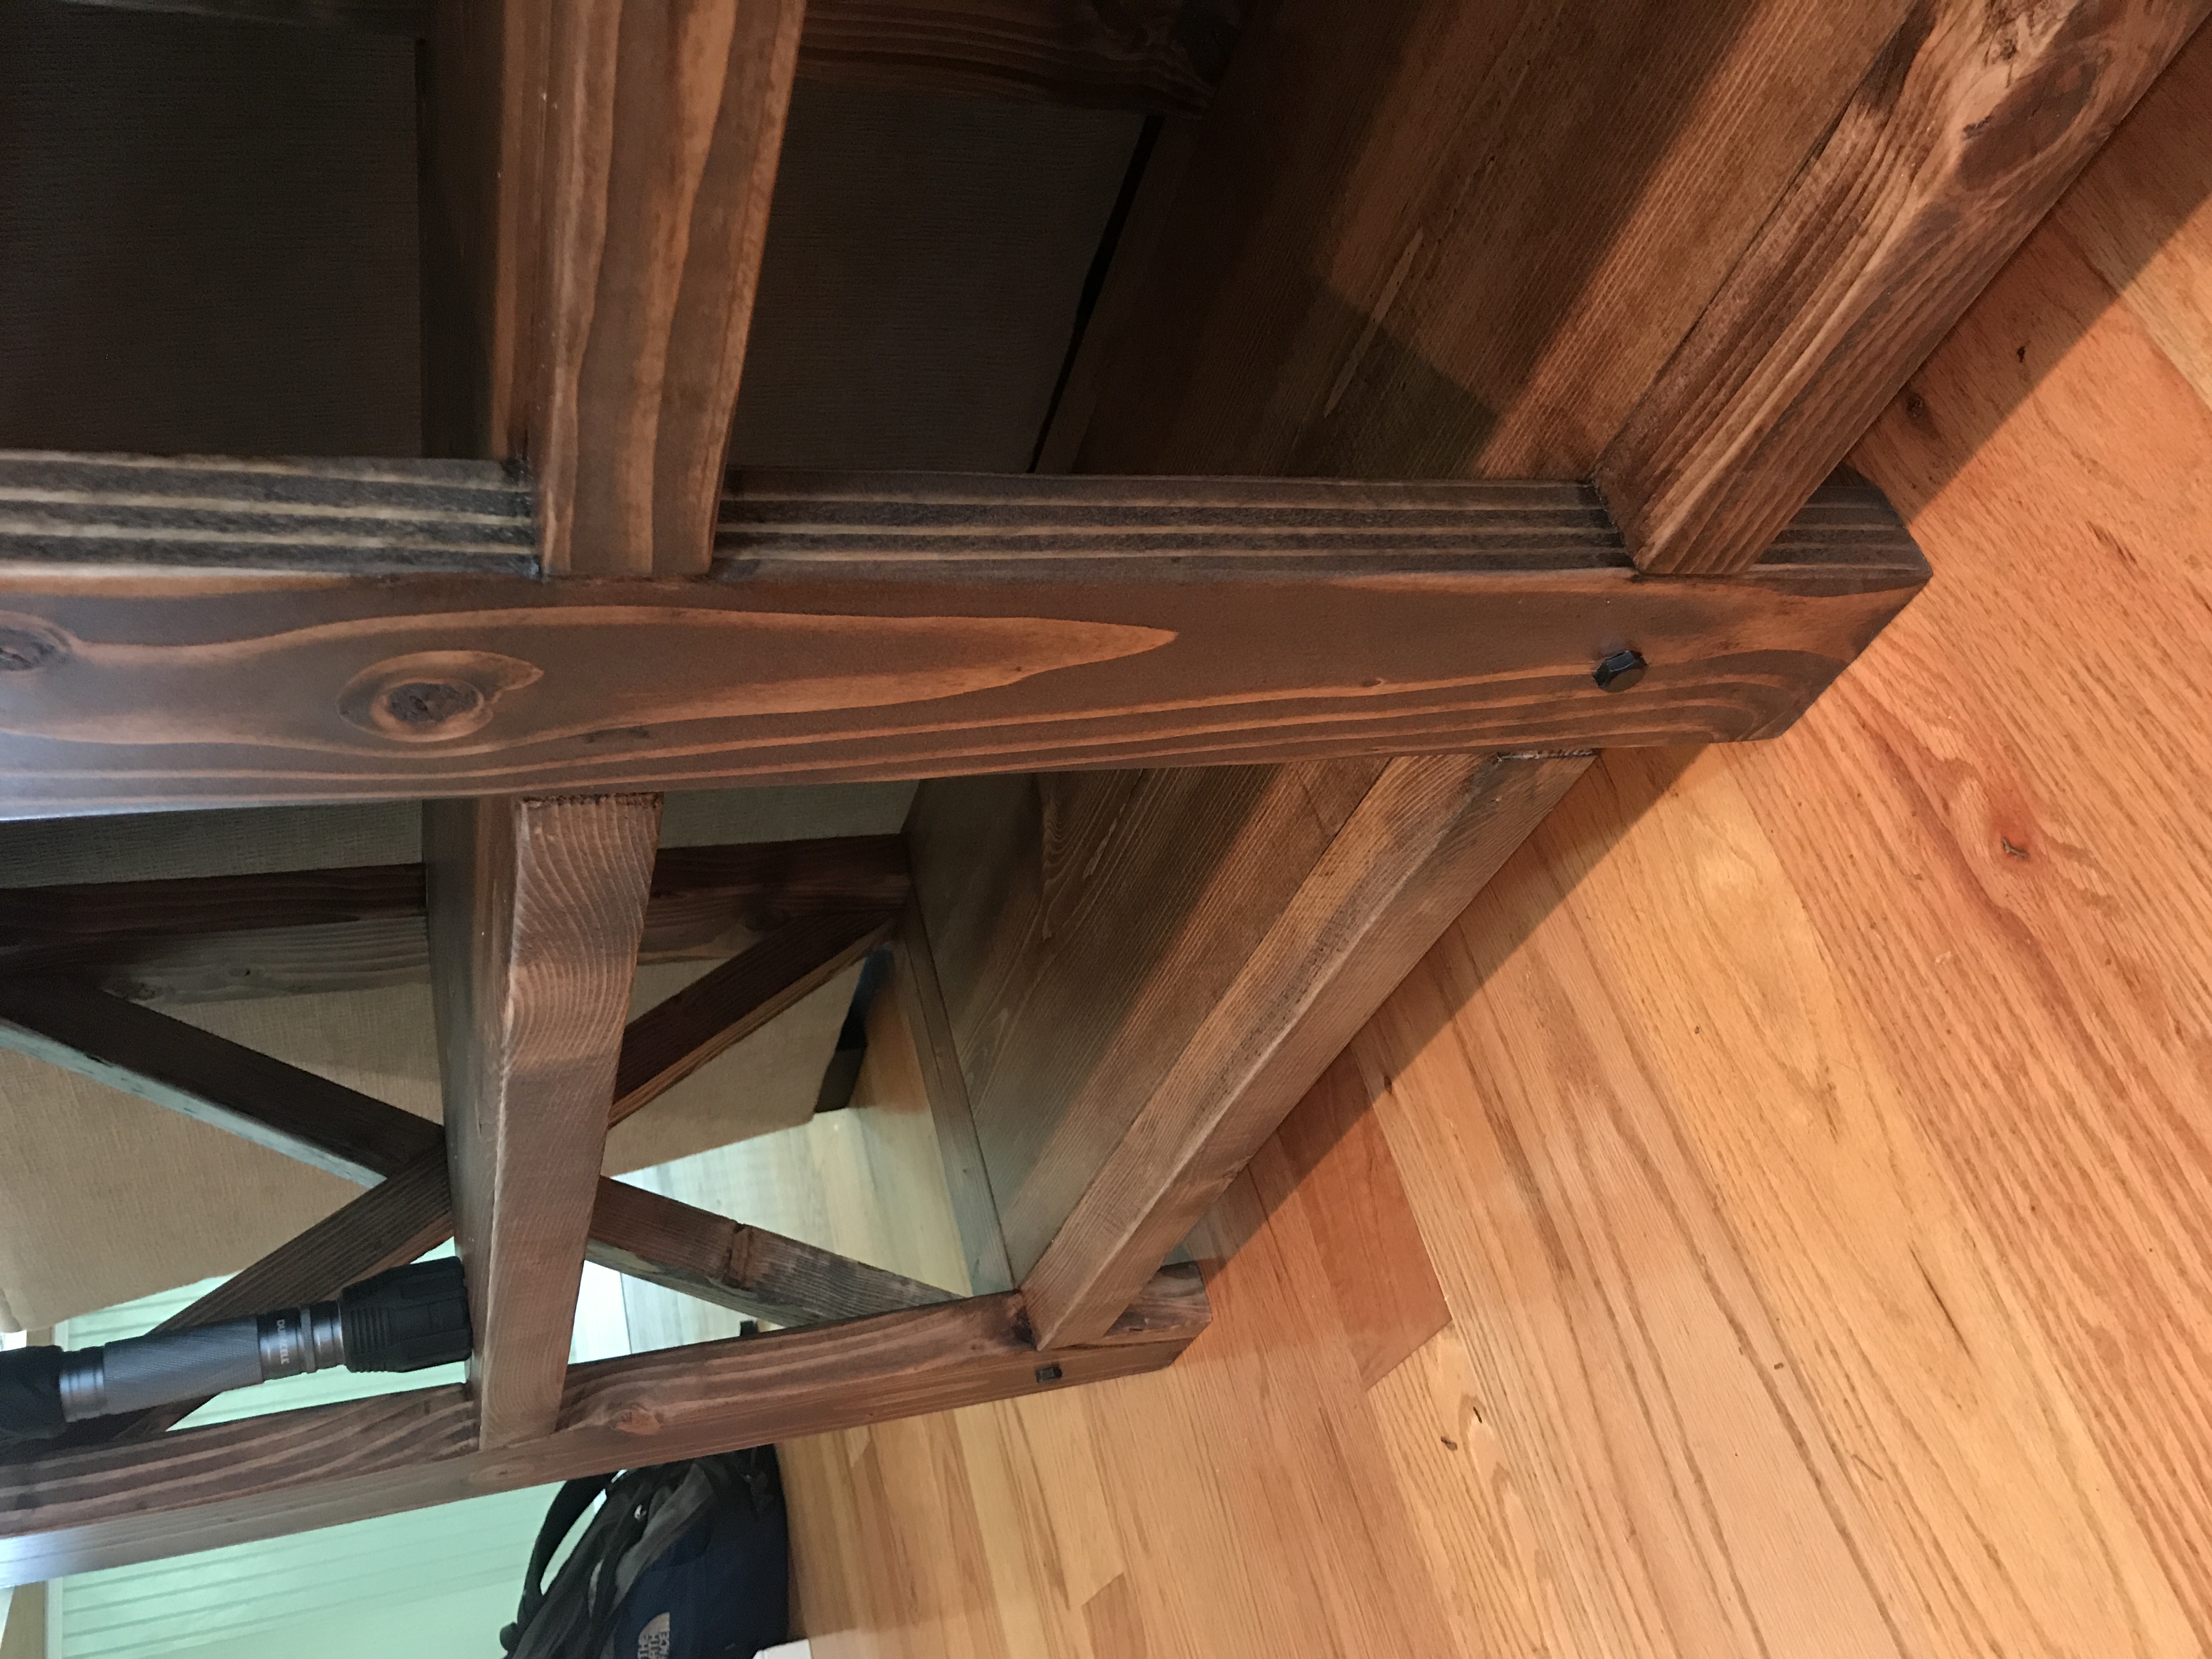
My X Farmhouse Table

I had to alter some of the measurements to a smaller size for our dining room. 66" long 2x10's on the top. & 39" 2x4's across the base.
Built from Plan(s)
Estimated Cost
~ $70
Estimated Time Investment
Weekend Project (10-20 Hours)
Recommended Skill Level
Intermediate
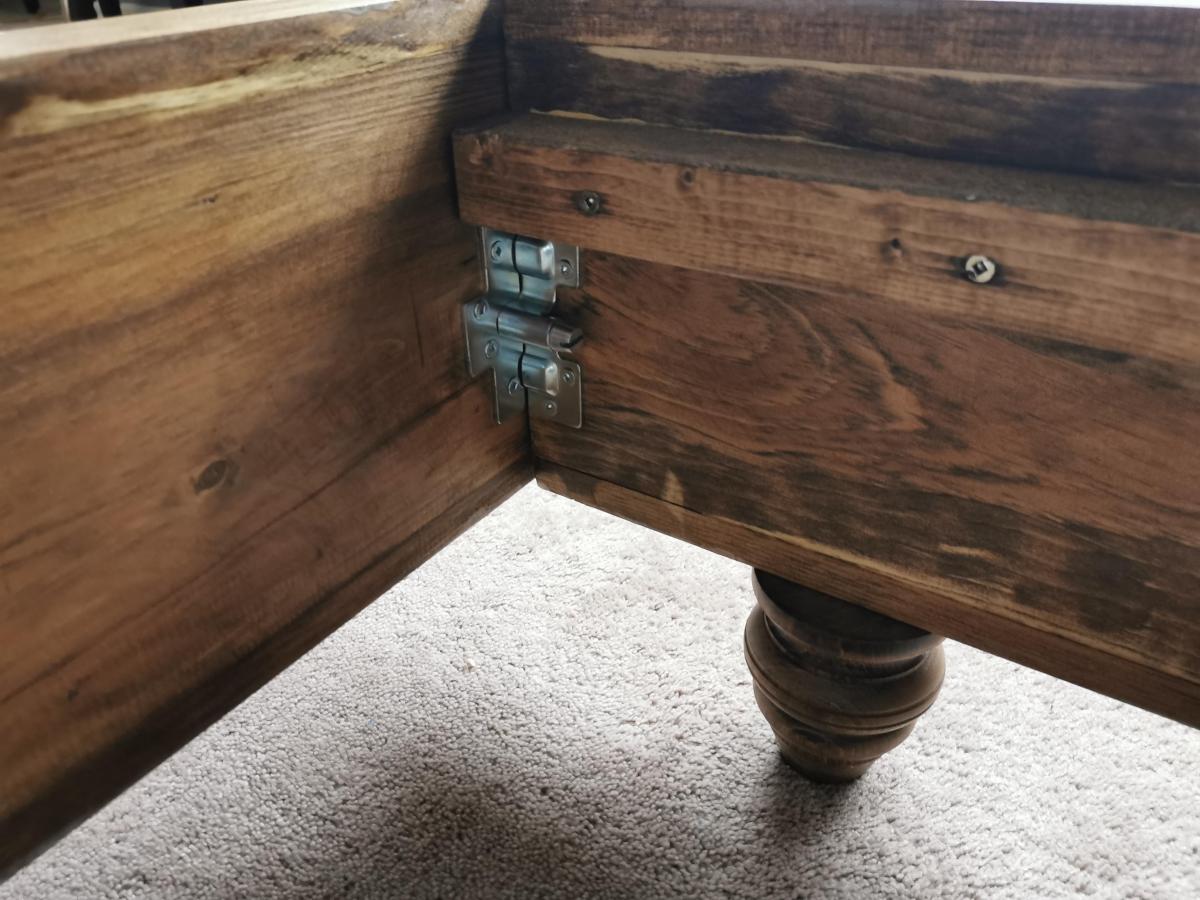
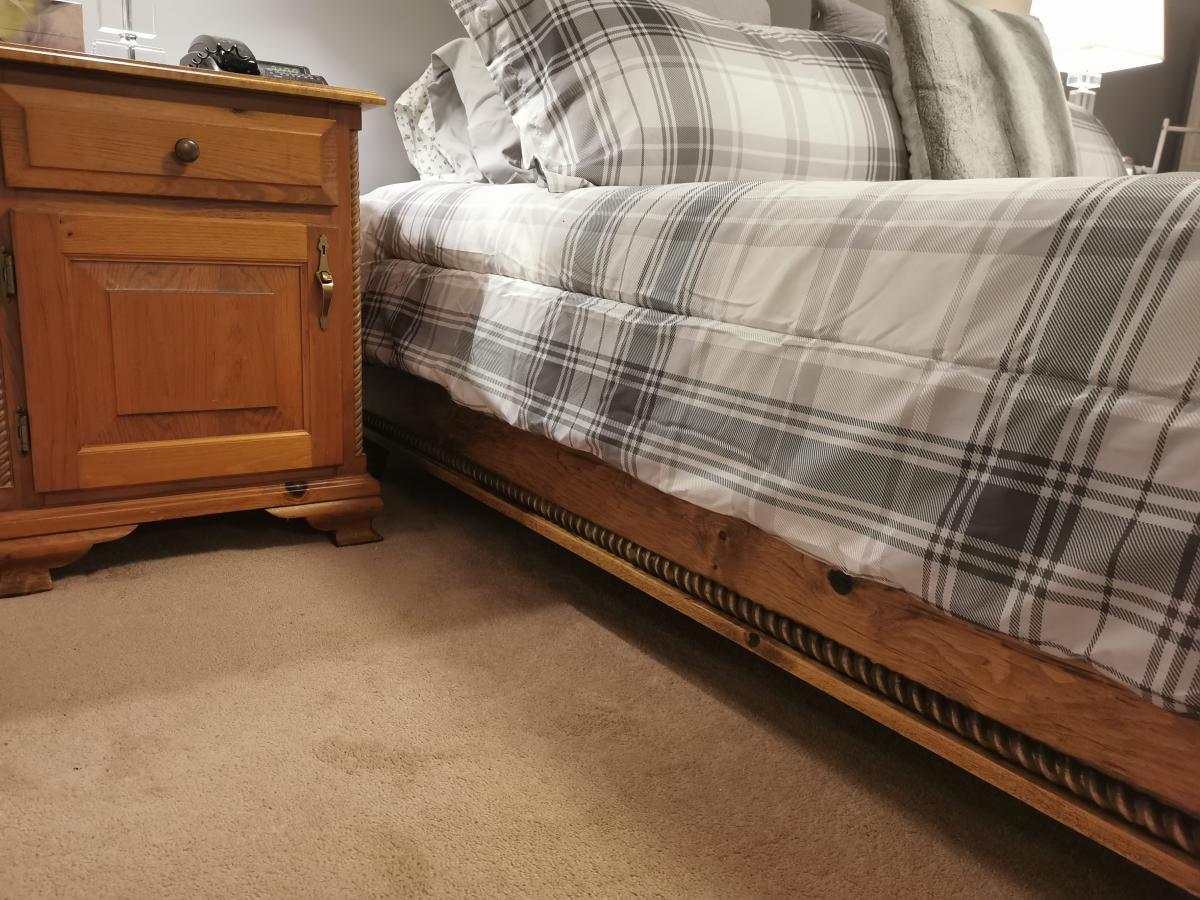
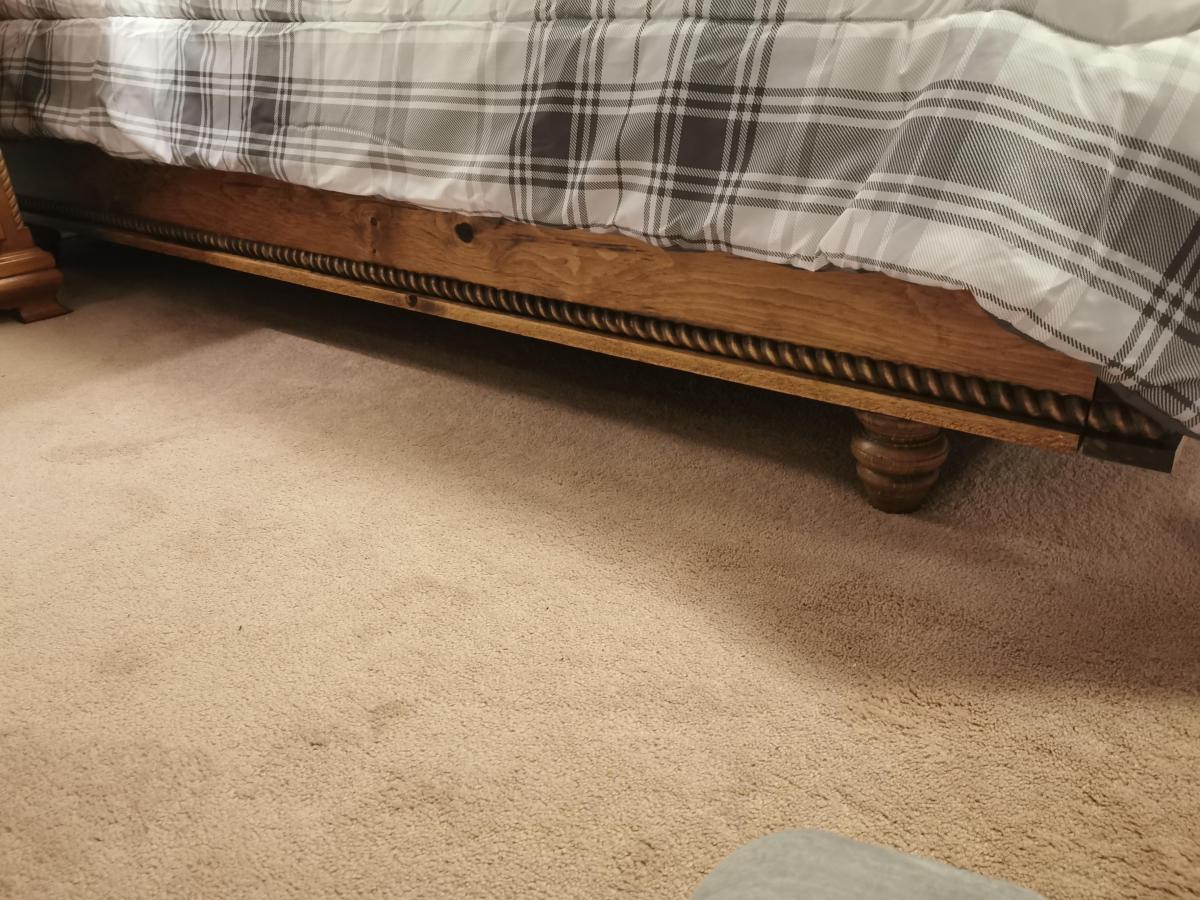
Chestwick Platform Bed - King Size
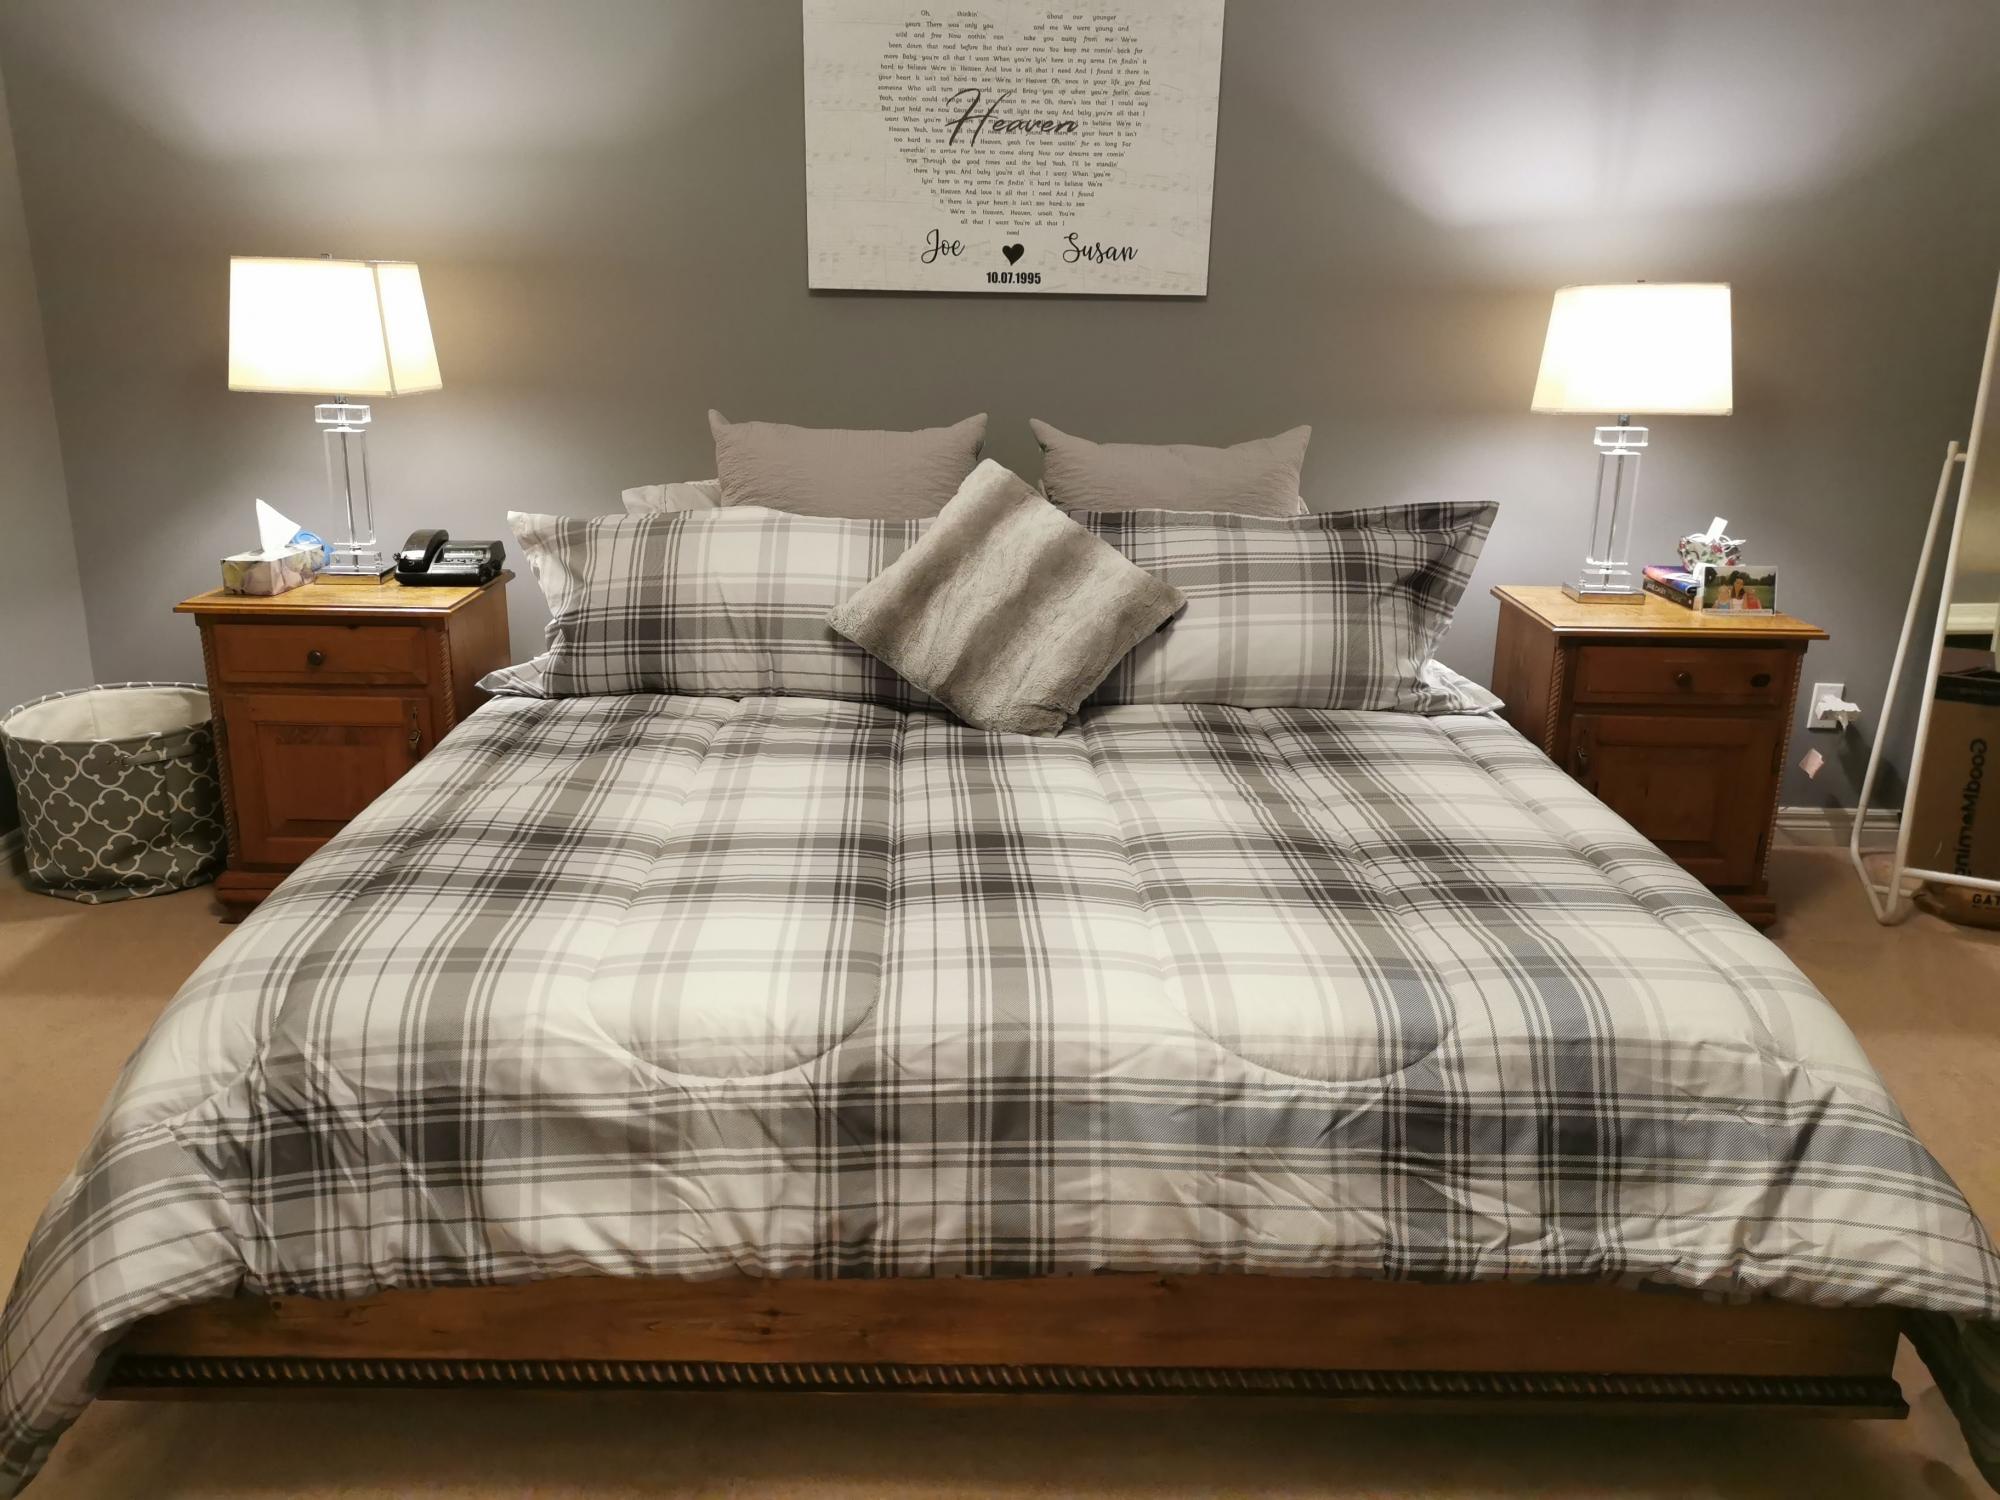
Wanted to build a simple platform bed to match our existing set that only had a queen. So I built a modified version of the Chestwick Platform Bed. Modified the plans to allow for a king size. I used rope molding at the bottom to match with our existing side tables. I wanted to be able to take it apart when needed, so I used knockdown hardware to be able to move it around in pieces if I ever needed.
Estimated Time Investment
Week Long Project (20 Hours or More)
Finish Used
Minwax Provincial
Recommended Skill Level
Intermediate
Comments
Tue, 10/26/2021 - 10:46
King measurements
Can you please provide the measurements for the king? Your bed turned out amazing! I love the details.
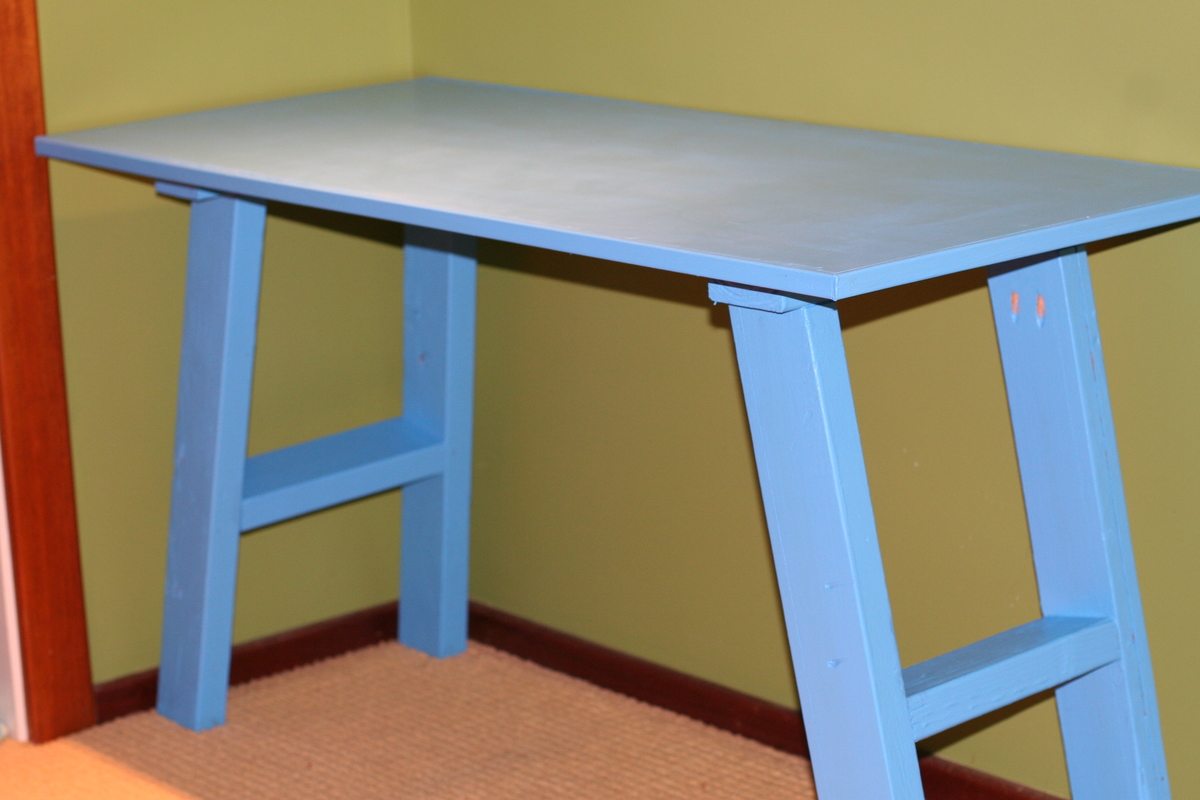
Simple Blue Desk
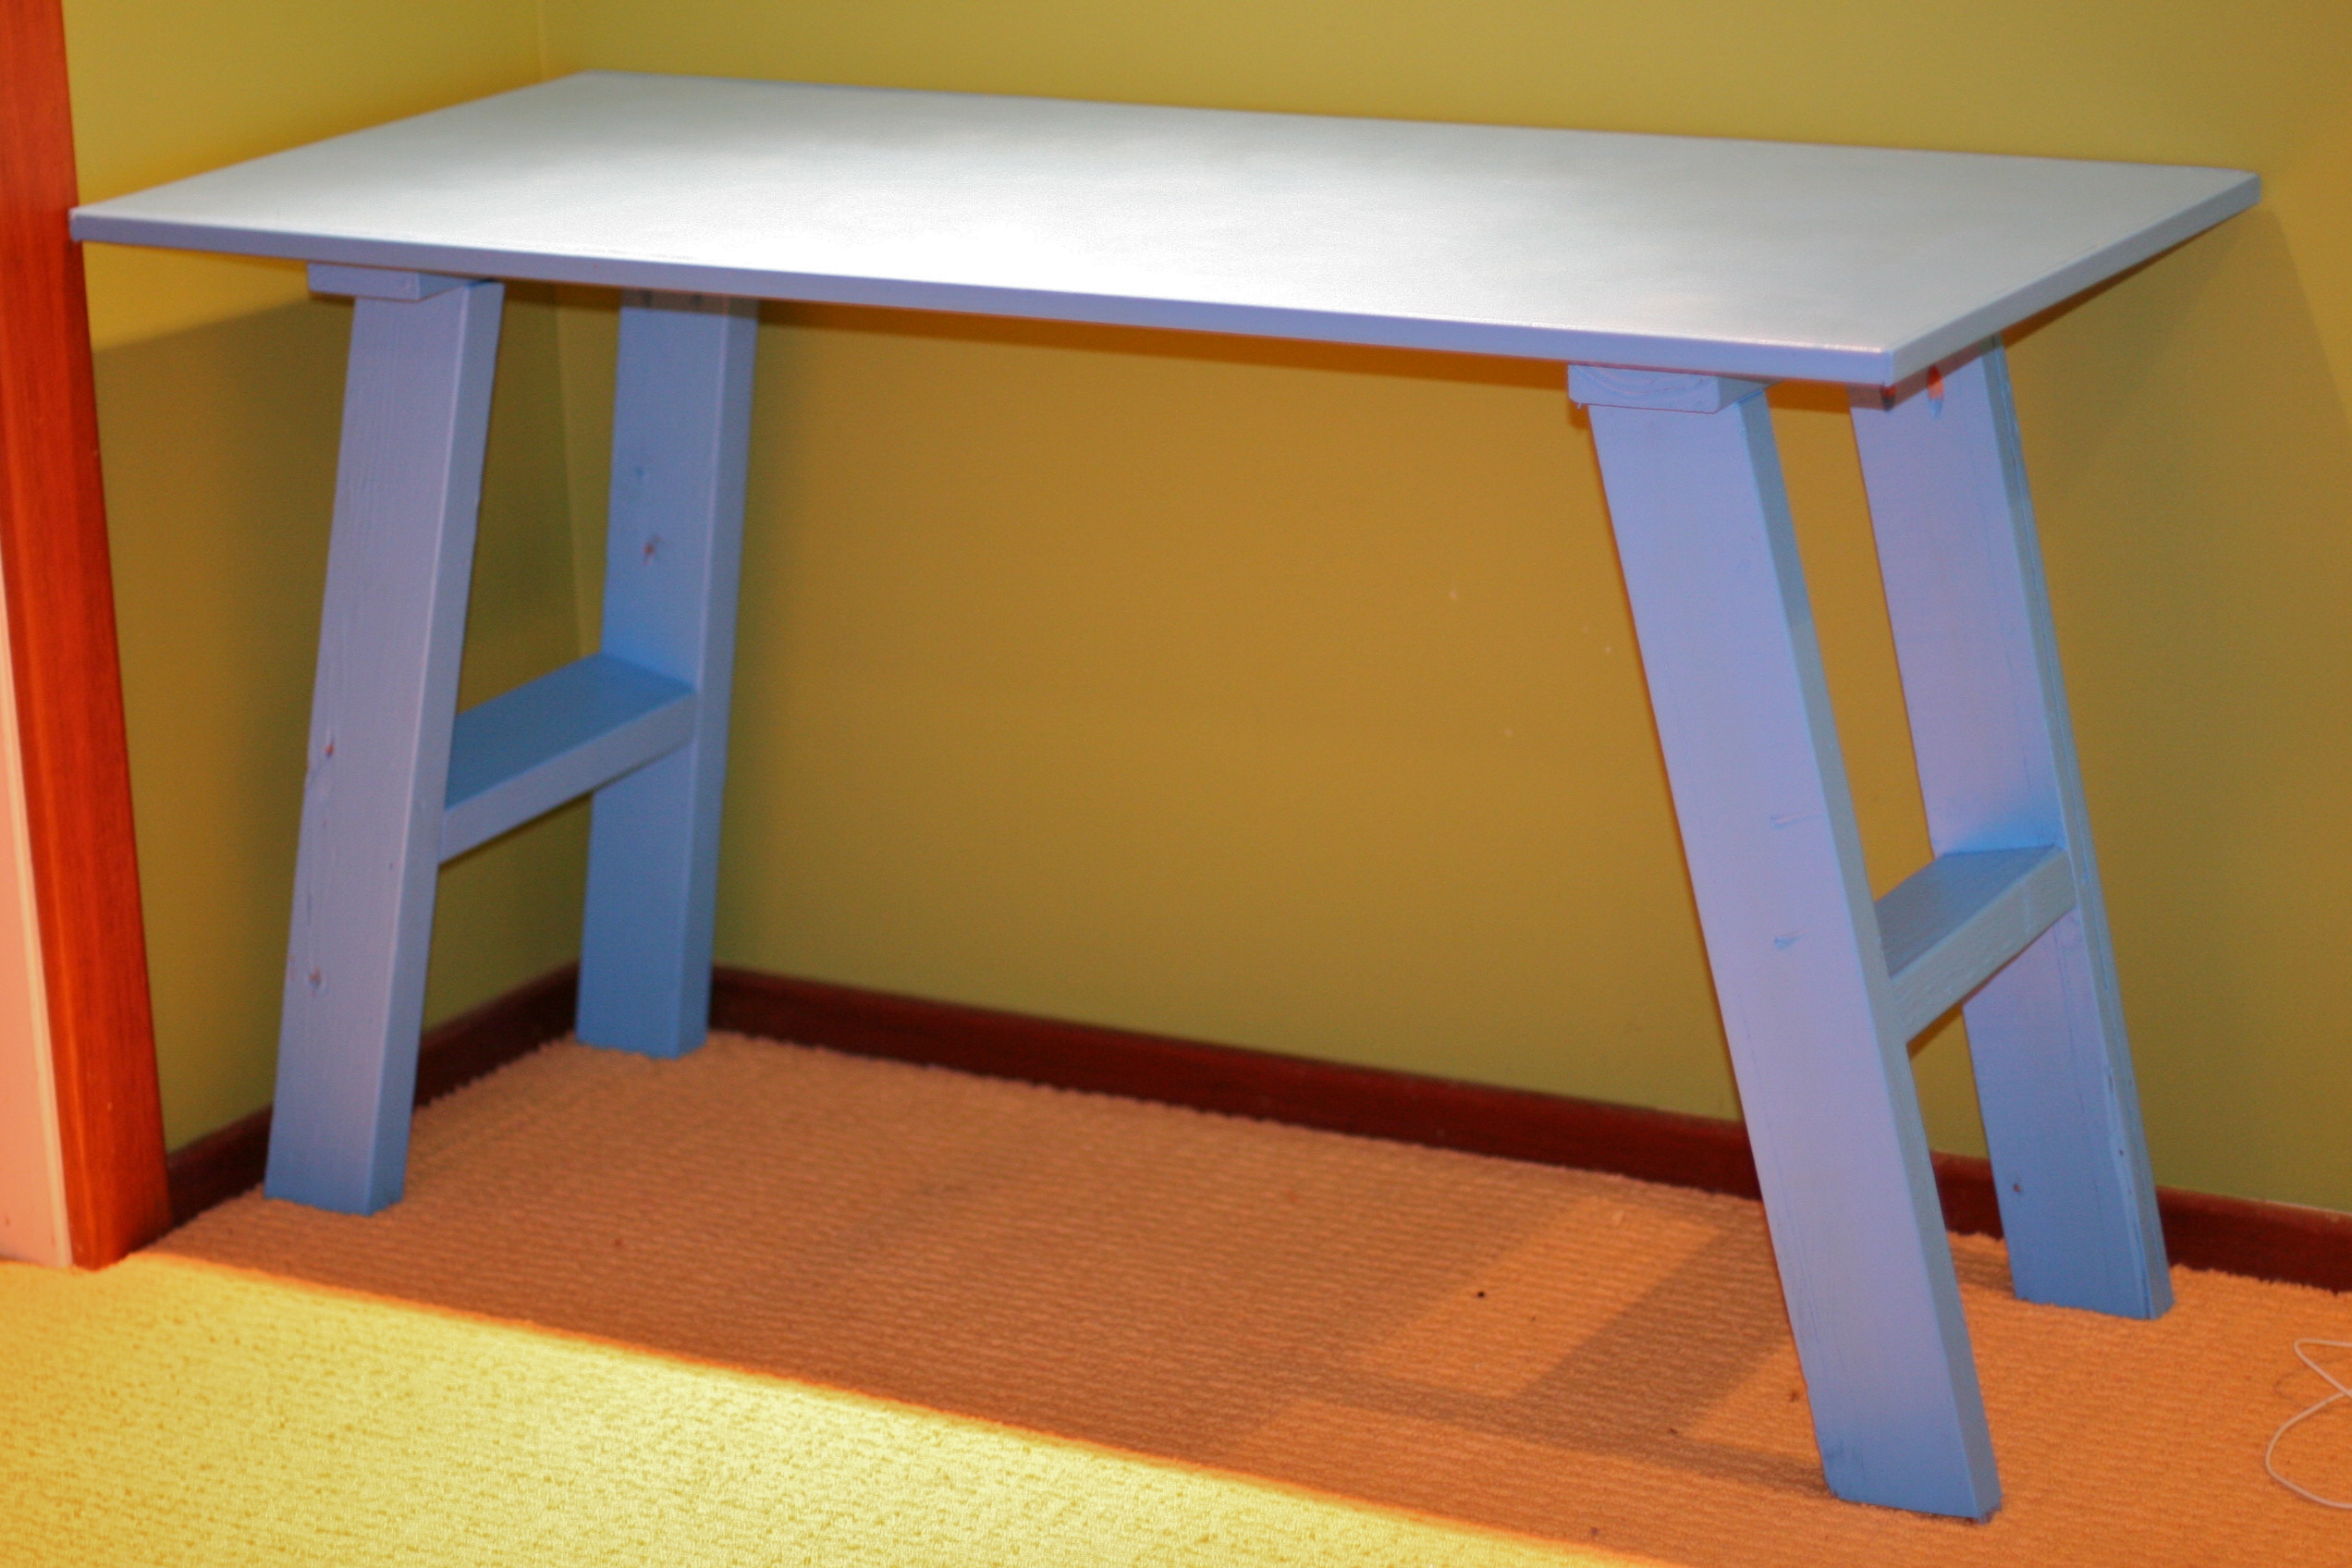
My daughter needed a simple desk for her room. I had leftover purebond plywood from another project and a bunch of 2x4 scraps from the Reuse Hawaii store. This made for an inexpensive desk. I based my desk off the simple trestle desk but made changes as needed to accommodate my materials. I used the plywood as the desk top and added some 3/4 flat trim around the edge. I used a 2x4 instead of a 2x6 to attach the legs to the table.
This was a quick project and my daughter loves the fun color!
Built from Plan(s)
Estimated Cost
$10 - leftover project wood and wood from a reuse store.
Estimated Time Investment
An Hour or Two (0-2 Hours)
Finish Used
Valspar signature paint in Splish Splash. Finishing wax on top.
Recommended Skill Level
Beginner
Comments
My Outdoor Sofa

Hi Ana
I would like to share my experience making this Outdoor sofa (see attached link). http://ana-white.com/2014/07/plans/outdoor-sofa-2x4s-ryobi-nation
The sofa is supposed to be made using 2x4 boards, but these are not a standard size in Australia so I substituted with 90 x 45mm pine boards. No other changes to measurements were necessary. I followed Ana's instructions and definitely recommend using wide clamps to hold the base when screwing together. I only had short clamps so was rather difficult keeping everything firmly in place when drilling the screws in.
Next step was preparation for staining. I used Cabot's pine filler to fill major holes, knots etc, then sanded lightly paying extra attention to the arms.
I stained using Cabot Exterior Varnish Stain (teak colour). This turned out a beautiful warm colour that I just love.
Finally the cushions....
For the base I purchased a 5inch thick foam single mattress (on sale $61 so worked out to be really cheap foam). I measured to fit base and cut using an electric knife - worked a treat! I had enough left over to do a cushion along the back plus two small side cushions to go along the arms.
Next step was covering the base and side cushions. I purchased some outdoor Decorating fabric from spotlight as sofa will be exposed to some QLD weather. For the base, I used a similar process to the Censational Girl box cushion cover using Velcro instead of zips.
http://www.centsationalgirl.com/2012/10/simple-sew-box-cushion-cover/
For the side and back cushion I made up 3 sides of the cover, then inserted foam and sewed the last end closed (cheating I know but just too awkward to do proper box ends).
Lastly, the throw cushions.....these were really easy I made envelope cushions from a single piece of fabric....once again no zips (hoorah!). They only took 10minutes each to make and look great. See tutorial below.
http://thehappyhousie.com/simple-speedy-stuffed-sewing-tutorial-diy-envelope-pillows/
My first build so extremely happy with the result!
Estimated Cost
$100 for wood, $25 for stain
Estimated Time Investment
Weekend Project (10-20 Hours)
Finish Used
Cabot Exterior Varnish Stain (teak colour
Recommended Skill Level
Beginner
Comments

Fri, 01/09/2015 - 17:12
Beautiful! I love that color
Beautiful! I love that color scheme and was going to ask where you bought the fabric, but it's probably not available here in the US.
Fri, 01/16/2015 - 03:08
Thanks Pam, the fabric is a
Thanks Pam, the fabric is a water and fade resistant polyester and was very easy to ses as it is not heavy like a canvas. I bought it from Spotlight here in Australia so may not be available in US. There doesn't seem to be a lot to choose from here in Australia (at least doe inexpensive fabrics) in comparison to US on-line stores such as Fabric.com.
Tue, 03/17/2015 - 04:28
Plan query
well done your project Jennyec -looks great and I'm going to attempt for my 2nd project.... I'm just a bit confused about the total timber needed for this project as my reading of the plans is 11 - 2x4x10' - did you use 11 pieces of 90x45mmx2.4m? Thanks heaps

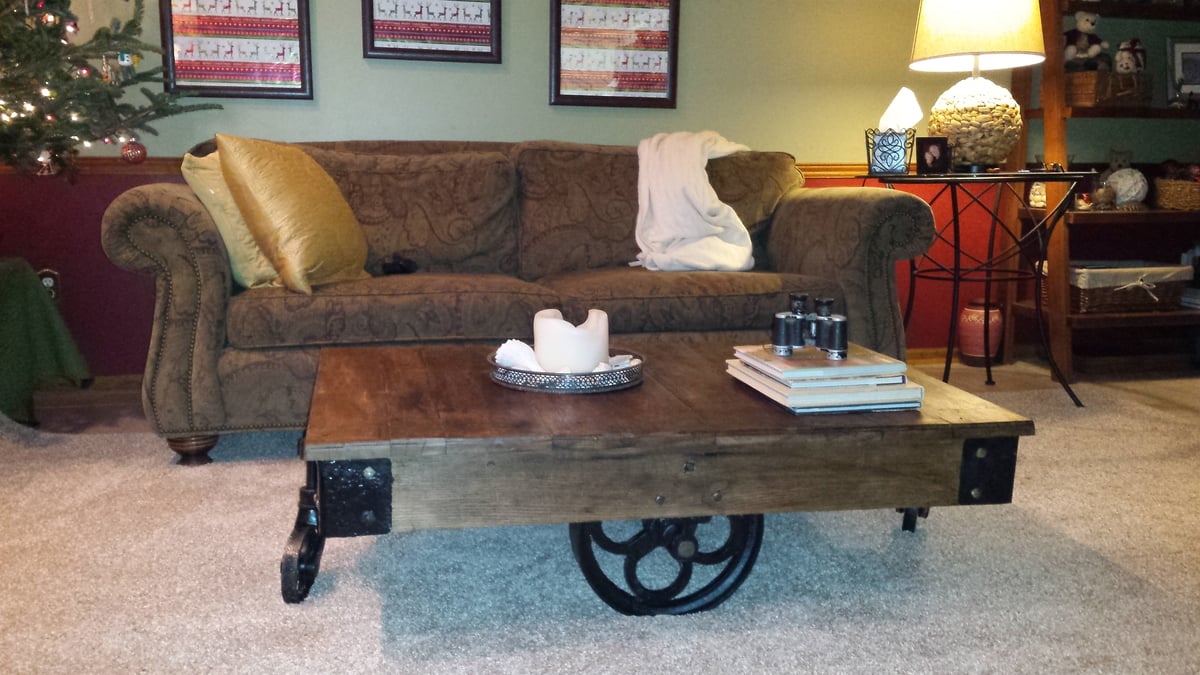
Easiest Industrial Cart

Thank you for the project idea! We used your Easiest Industrial Cart plans. Since this is our first project building anything ever; so please excuse any "mistakes" you may notice. We tried going with a blue stain instead of just brown, but we ended up giving the wood more character by staining over with my husband's "Warhammer Paints"...lol...
Built from Plan(s)
Estimated Time Investment
Weekend Project (10-20 Hours)
Finish Used
Behr "Gettysburg Blue" stain and sealer. Then went over it with dark "Warhammer Paints" stain.
Recommended Skill Level
Starter Project
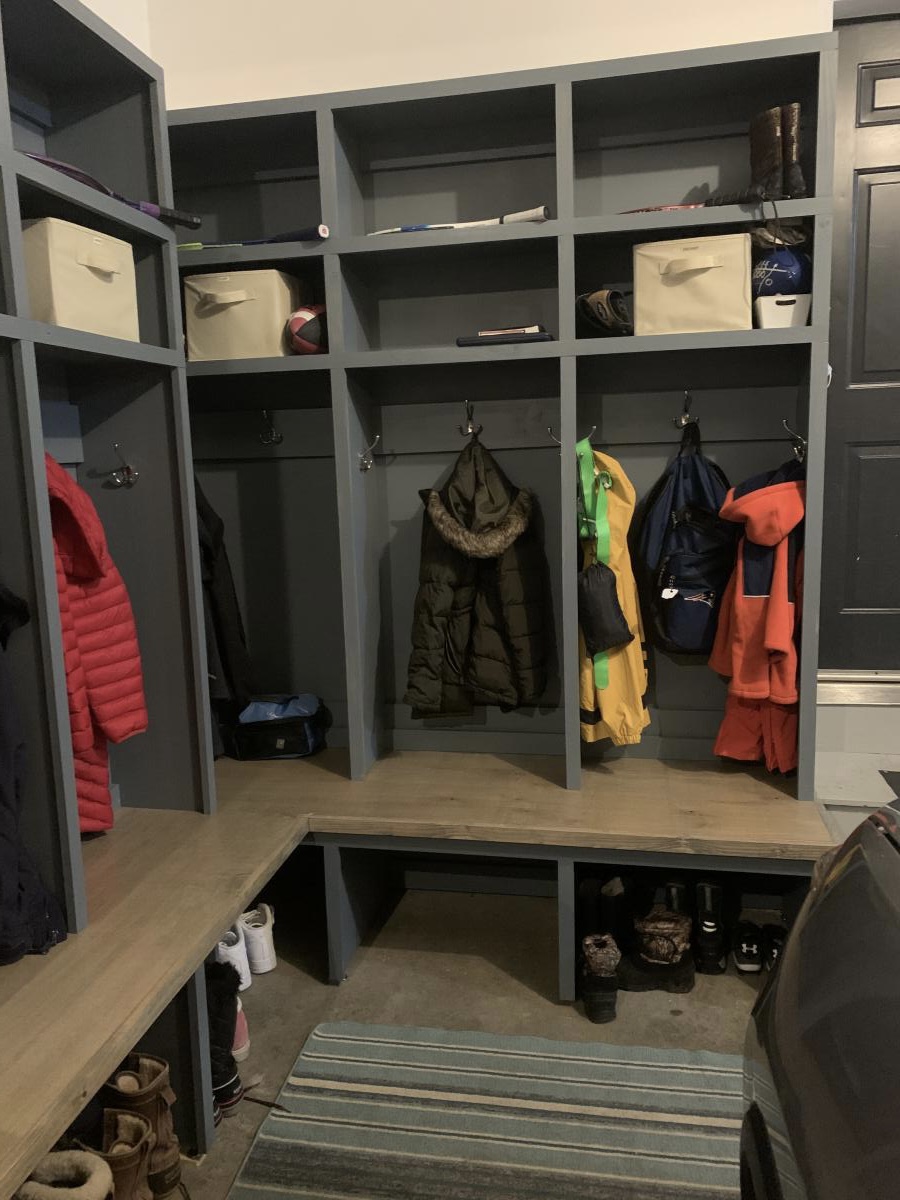
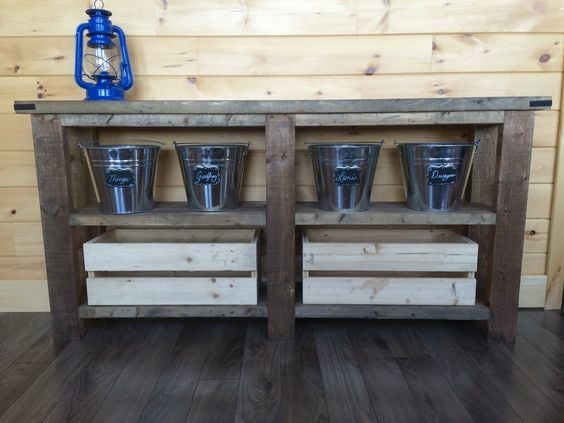
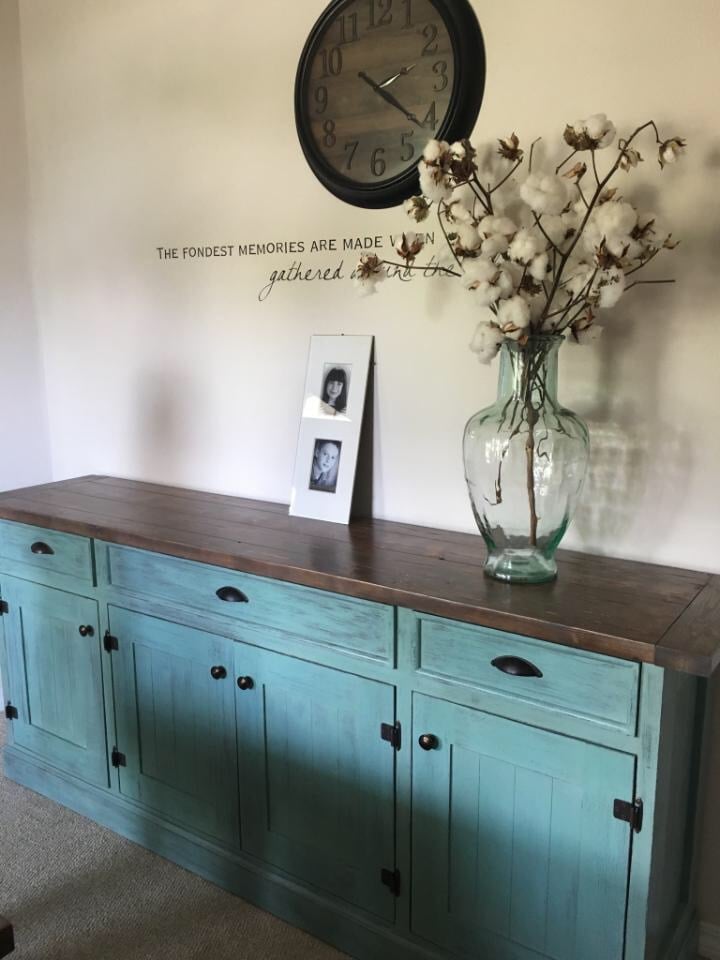
Drop Zone/mudroom
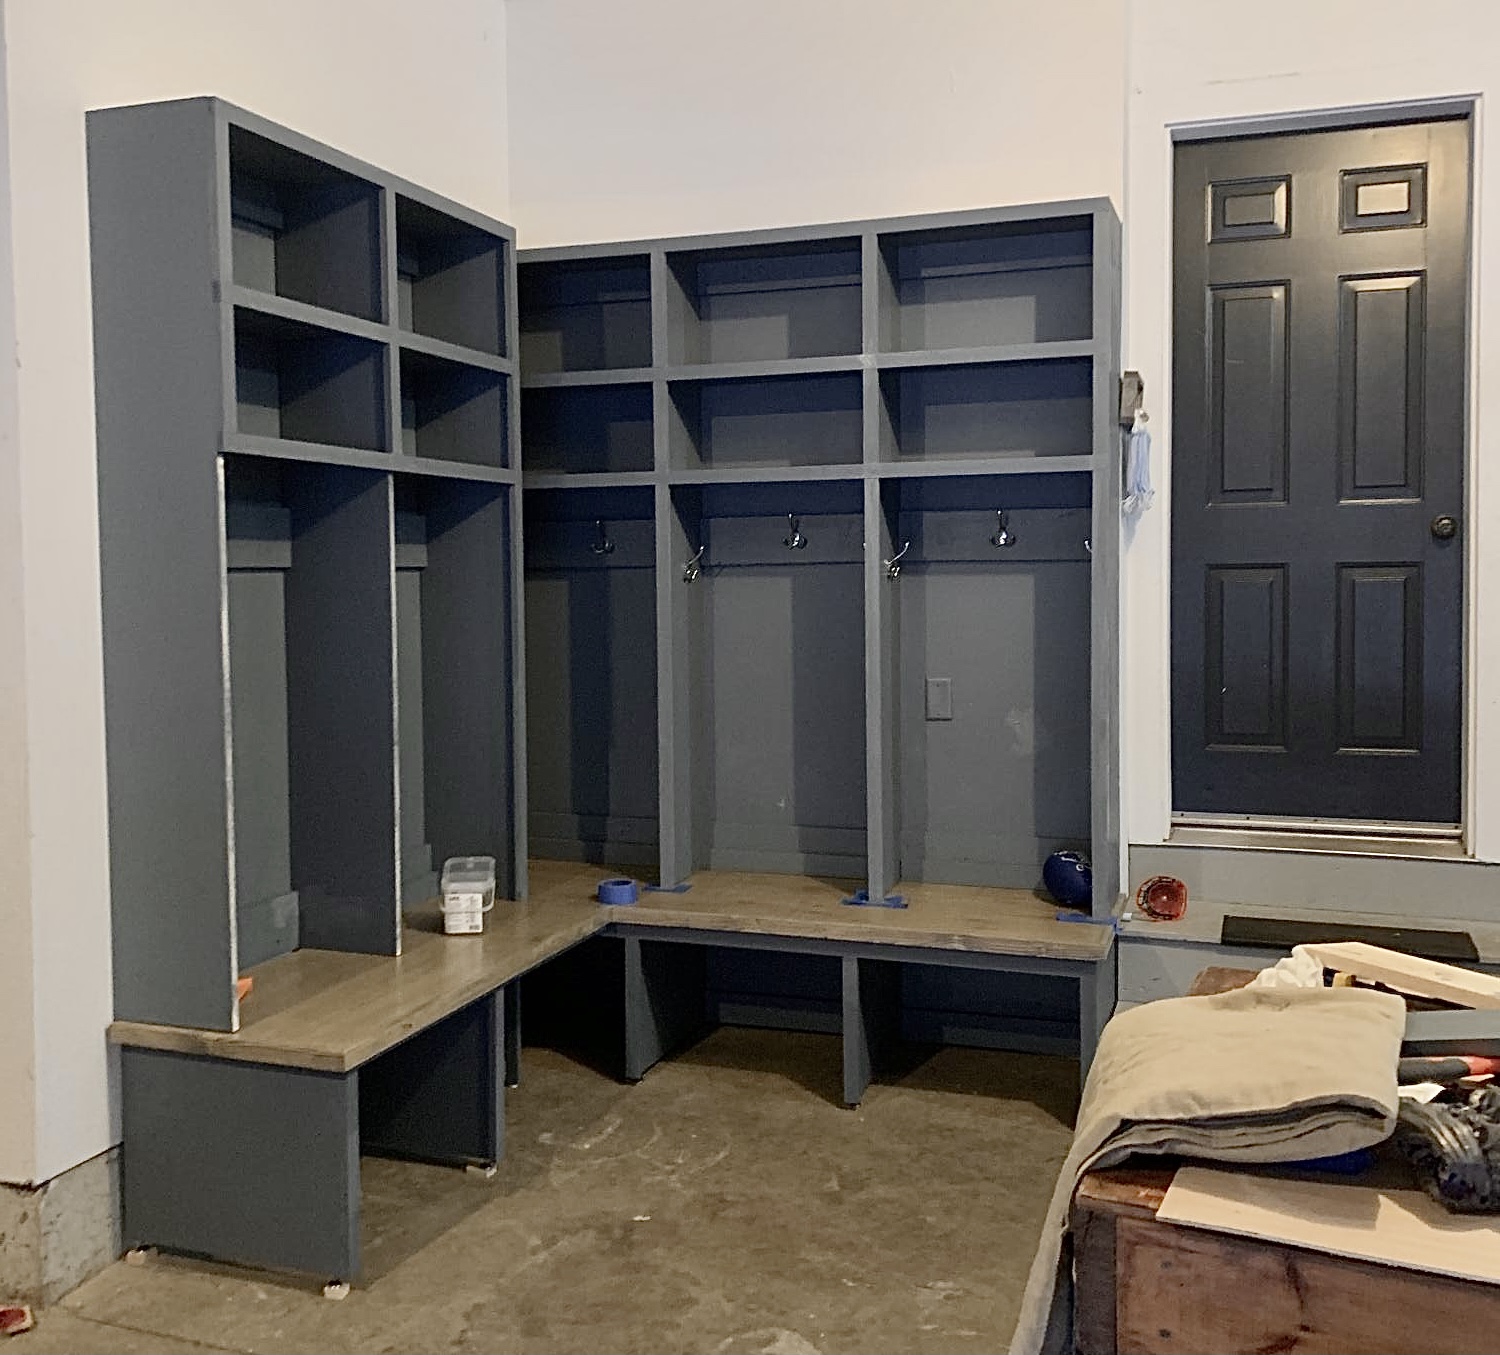
I used ShelfHelpNow which I LOVED! Got it delivered at the start of a snowstorm! Would never have made it then if I had to go get the wood myself!
Got so many compliments and requests
To build this.
Thank you for your easy plans and wonderful ideas!
In hindsight I would have either connected the two units or separated them more. I’m more a wing it/see how it goes type of builder for myself rather than a planner. 🤣
Diane
Built from Plan(s)
Estimated Cost
600 for carcass
Estimated Time Investment
Weekend Project (10-20 Hours)
Finish Used
Putting it together took a couple hours. Painting and waiting for things to dry took a lot longer!
Hopefully this will free up some room in my house for more utilitarian closet/pantry.
Hopefully this will free up some room in my house for more utilitarian closet/pantry.
Recommended Skill Level
Intermediate
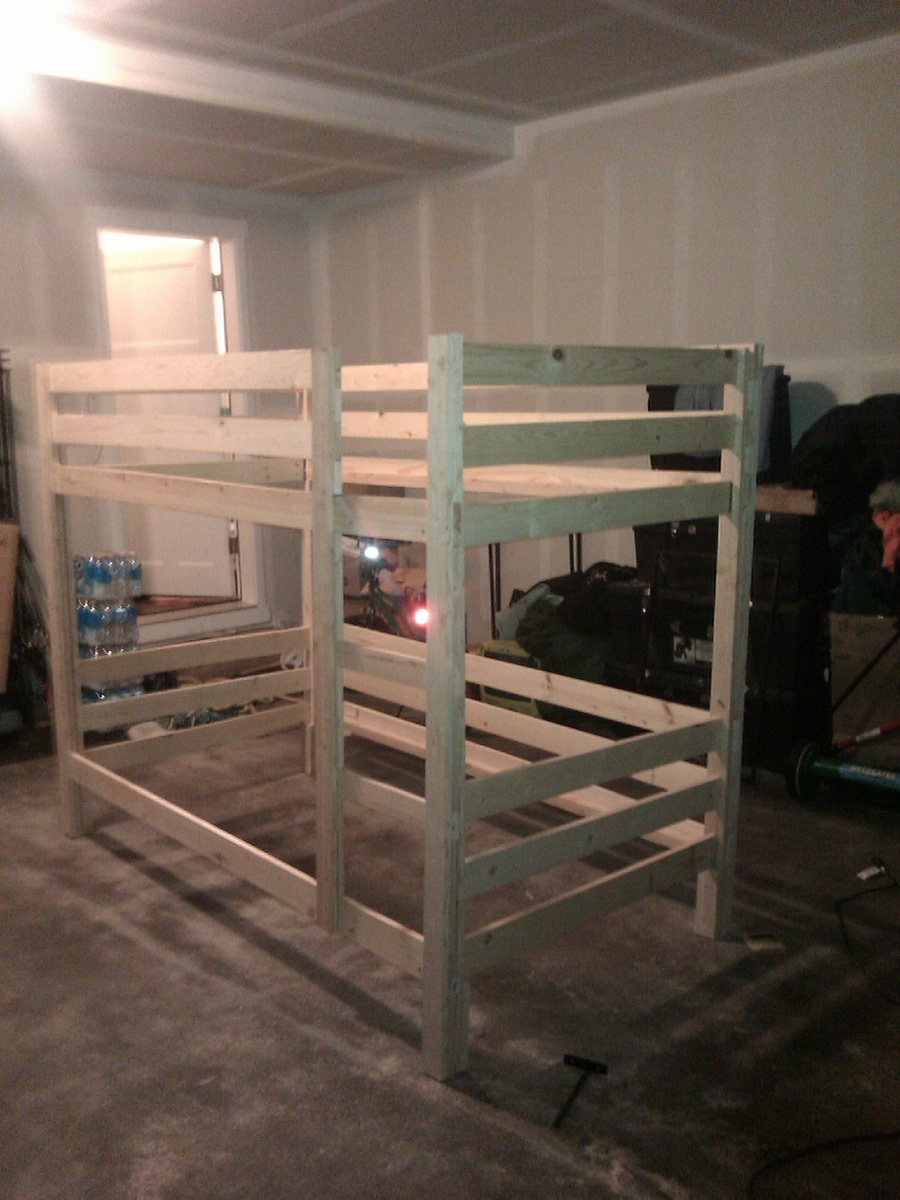
Classic Simple Bunk Bed
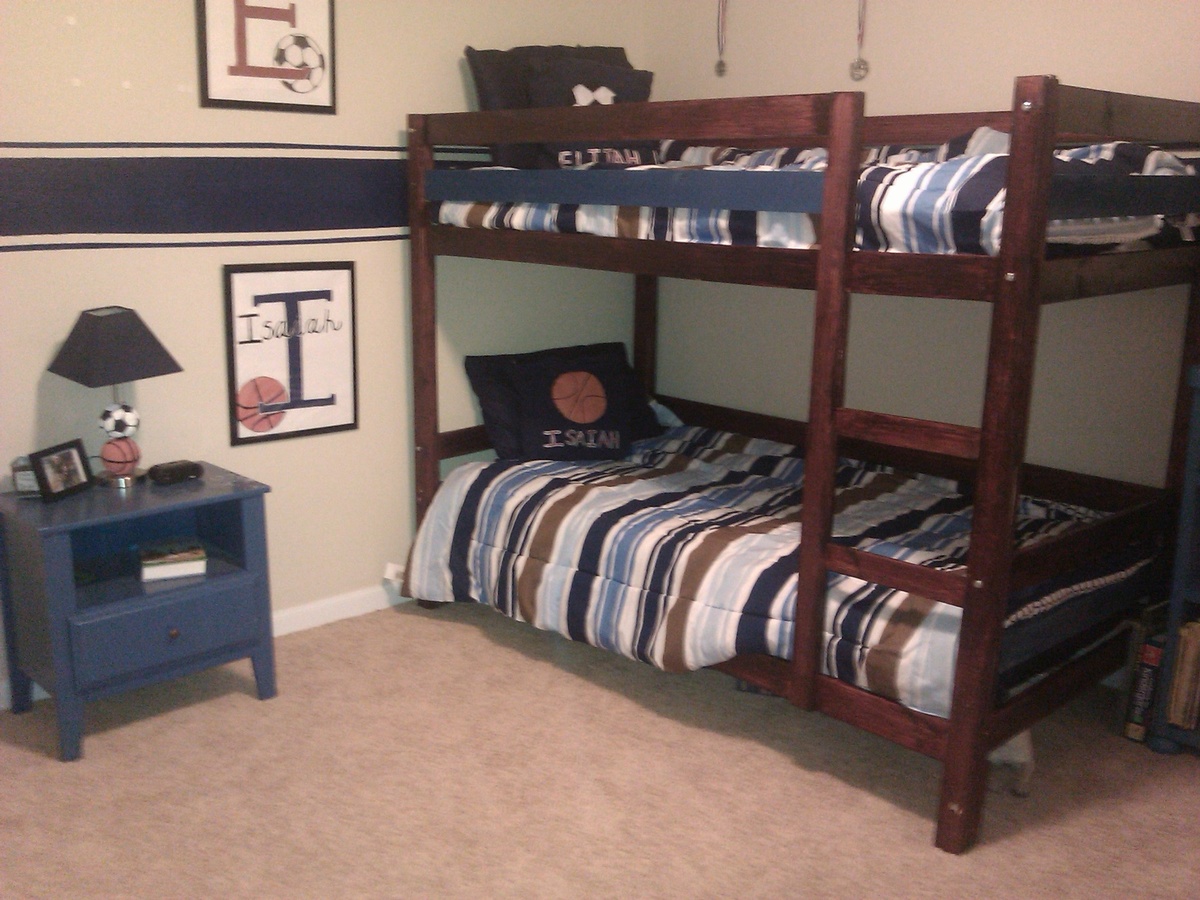
My boys had been begging me for bunk beds, but they were all so expensive! These were easy to make. I made these while my husband was away for military training. There are a lot of comments stating that you need more wood. And you do. The shopping list doesn't account for the 64" side rails. I ended up buying 11 of the 1x4 boards and that took care of everything with minimal left over. Lets see....what else...oh! When you are bolting the beds together, make sure you put a screw where there is another rail to catch it. The screws listed are long enough to go through the posts.. I had a lot of fun making these beds. My boys love it. I love this site and will be looking for more projects to get into!

Built from Plan(s)
Estimated Cost
$110
Estimated Time Investment
Week Long Project (20 Hours or More)
Finish Used
Mahogany stain
Royal blue
Royal blue
Recommended Skill Level
Beginner
Dog Crate Bookshelves

I took Ana's standard dog kennel, turned it 90 degrees and placed the door where the side would be. From there I built upward, including a book shelf section to use the space above the crate more effeciently. I also increased the height of the crate to 32 inches to match the height of a standard crate. The door was modified to use the large 3 inch pieces because the 2 inch was too flexible in my opinion. This is the second one I have built, learning from the mistakes of the first one. I added L brackets on the inside to make it so I could take it apart, and used the Kreig Jig so I can replace parts as they wear out or are gnawed on.


Built from Plan(s)
Estimated Time Investment
Weekend Project (10-20 Hours)
Finish Used
Red Mahogany to match my mahogany roll top desk next to it.
Recommended Skill Level
Beginner
Comments

Adjusted for less projection
I adjusted the projection of the table by using just 2 2X6's and adjusting the shelves accordingly. Planning on making the coffee table very soon. I used tea then vinegar/steel wool to stain. The top is waxed to make dusting easier. I then screwed on 2 right angle mending brackets for looks.
Estimated Cost
$50
Estimated Time Investment
Day Project (6-9 Hours)
Recommended Skill Level
Beginner
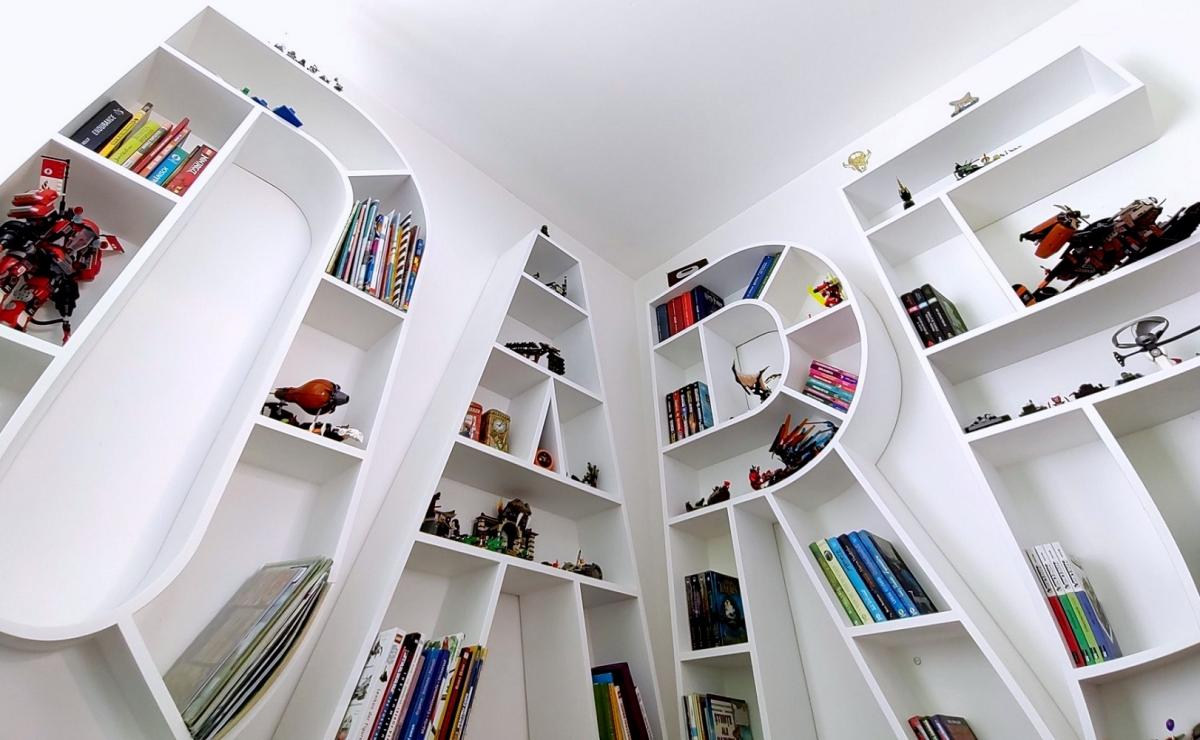
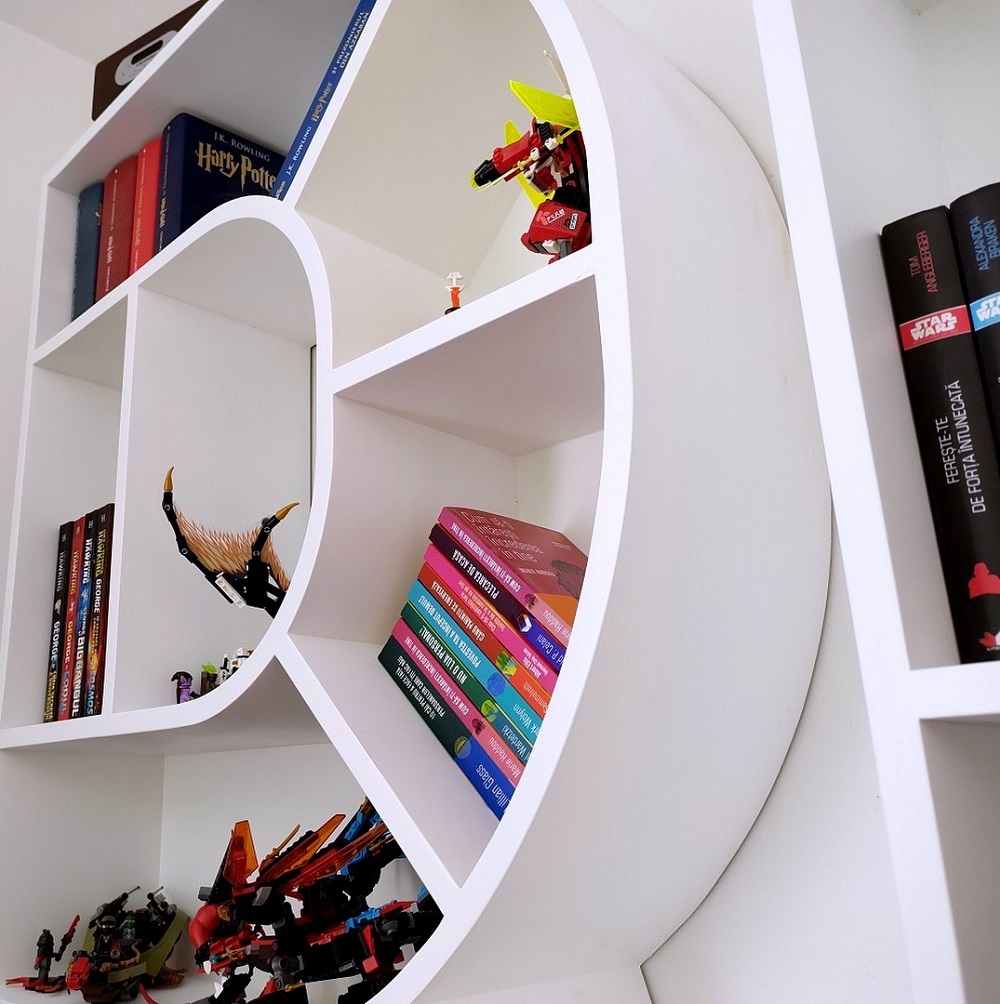
DARE bookshelves letters
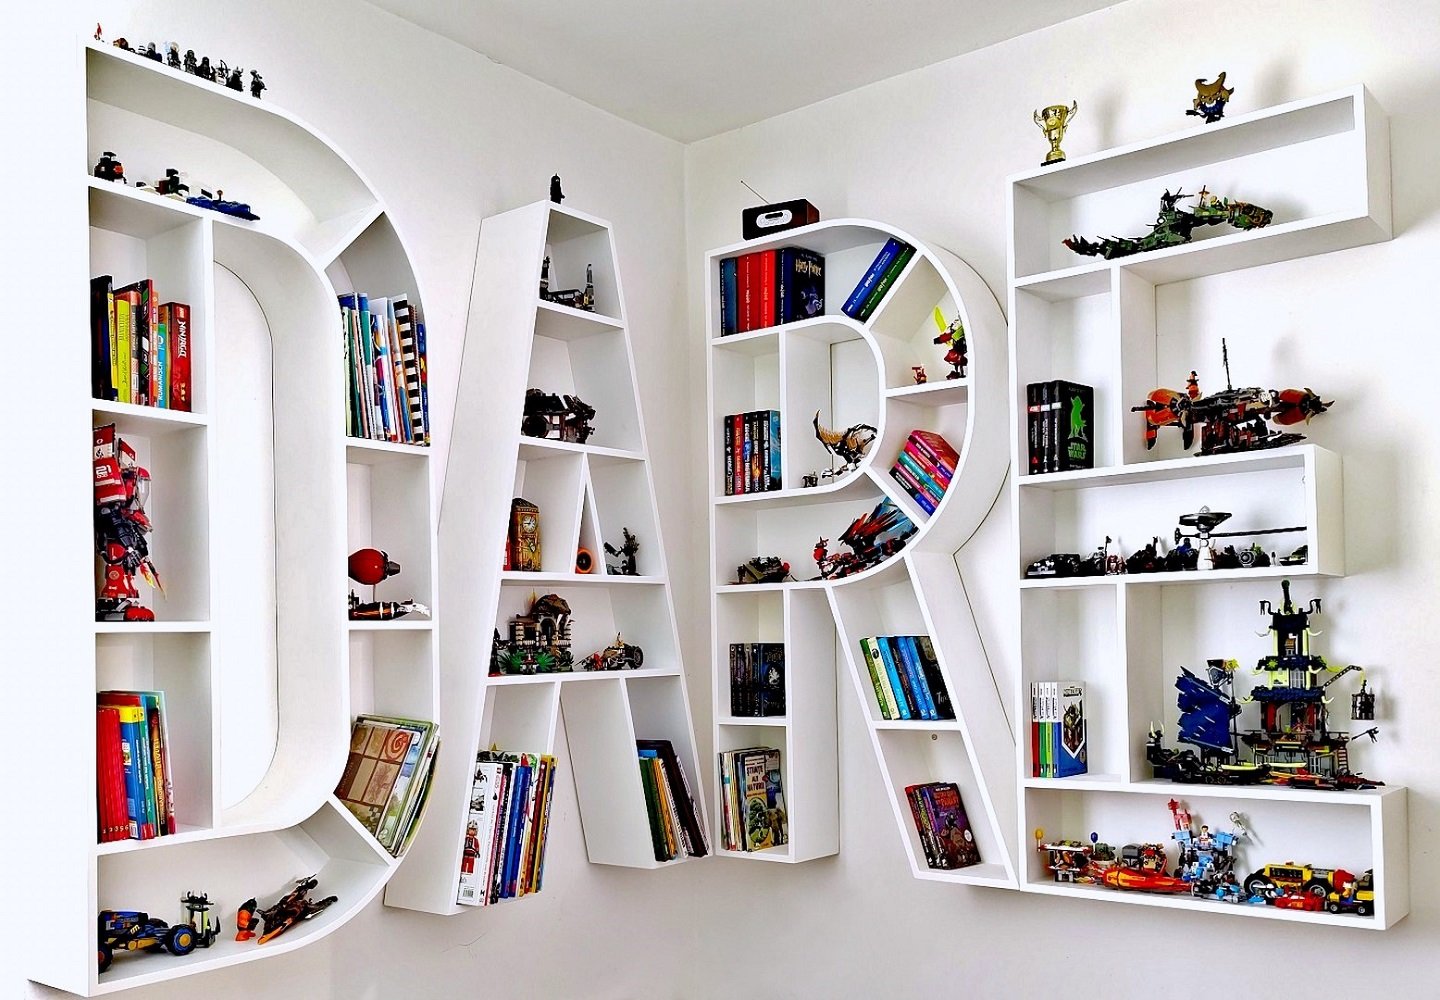
We built the letters bookshelves for our kids' room. First, we wanted to write READ on the wall, but in the end, we arranged them as DARE. We hope it will be a motivational message for our kids to have the courage to make the impossible possible.
The letters are built entirely out of MDF. The hardest thing was to make the curved walls. We cut a lot of curved MDF strips and glued them together to get the rounded shapes.
We described better the process on our blog!
Hope you like them as much as we do!
Estimated Cost
600
Estimated Time Investment
Week Long Project (20 Hours or More)
Finish Used
Polyurethane primer and white paint
Recommended Skill Level
Intermediate
Comments
Sat, 04/23/2022 - 09:59
Congrats! I am so proud of…
Congrats! I am so proud of them. I wish I also could write good essays, but it is very difficult for me to express myself and organize my thoughts and ideas. This is why it takes me a lot of time to write a good essay. So, sometimes I pay for paper writing because I like it when everything is done at the highest level. However, I really hope that these essays will help me to achieve my goals especially since I feel very motivated right now. Wish me good luck!
simple art table with storage!
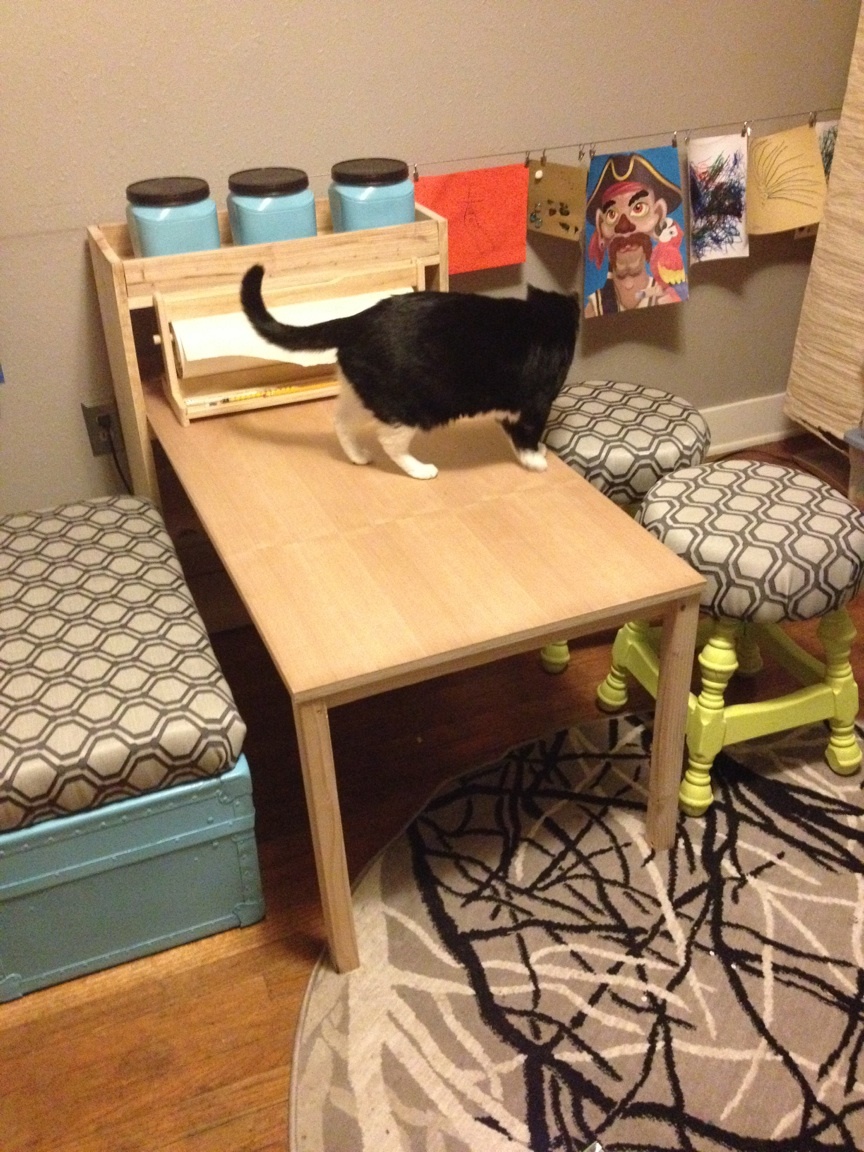
We created an art space for our boys to use (ages 3 and 5) but the table (2 IKEA Lack tables put together) was too low and small to do the job. I spotted this design and thought it looked like a straightforward build. It was! I don't have a Kreg Jig so still had to do everything the hard way, but it turned out okay. My plan with this one was I wanted to have it sturdy, but didn't want to paint it, and didn't want to worry too much about how great it is.
I used a cedar pre-cut plywood for the table top and had the lumber place cut everything for me. Unfortunately, their cuts were a bit uneven so I had to do some weird stuff to make everything go together. Since I opted for cheap pine for all the other pieces, the raw wood doesn't look as good as it could, but it will do the job. The nice thing about keeping it unfinished: whenever markers or crayons get on it, I can just sand it out! This is a great size for creating art. I'm just bummed my IKEA paper holder doesn't fit under the shelf. If I had thought about it in advance I would have made the bookshelf taller to accommodate.
Thanks Ana for helping me easily and affordably create a wonderful art table!
Built from Plan(s)
Estimated Cost
Probably $40.
Estimated Time Investment
Afternoon Project (3-6 Hours)
Finish Used
None!
Recommended Skill Level
Beginner

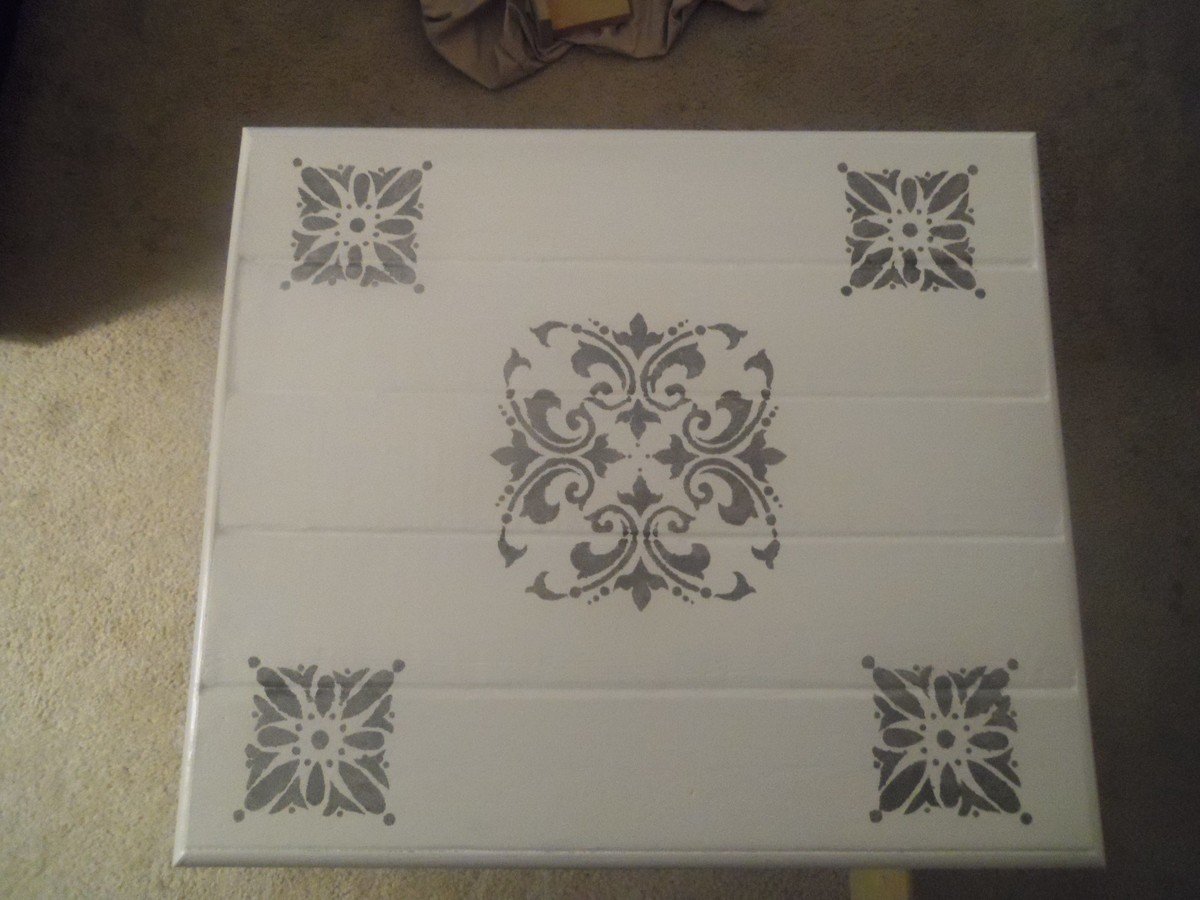
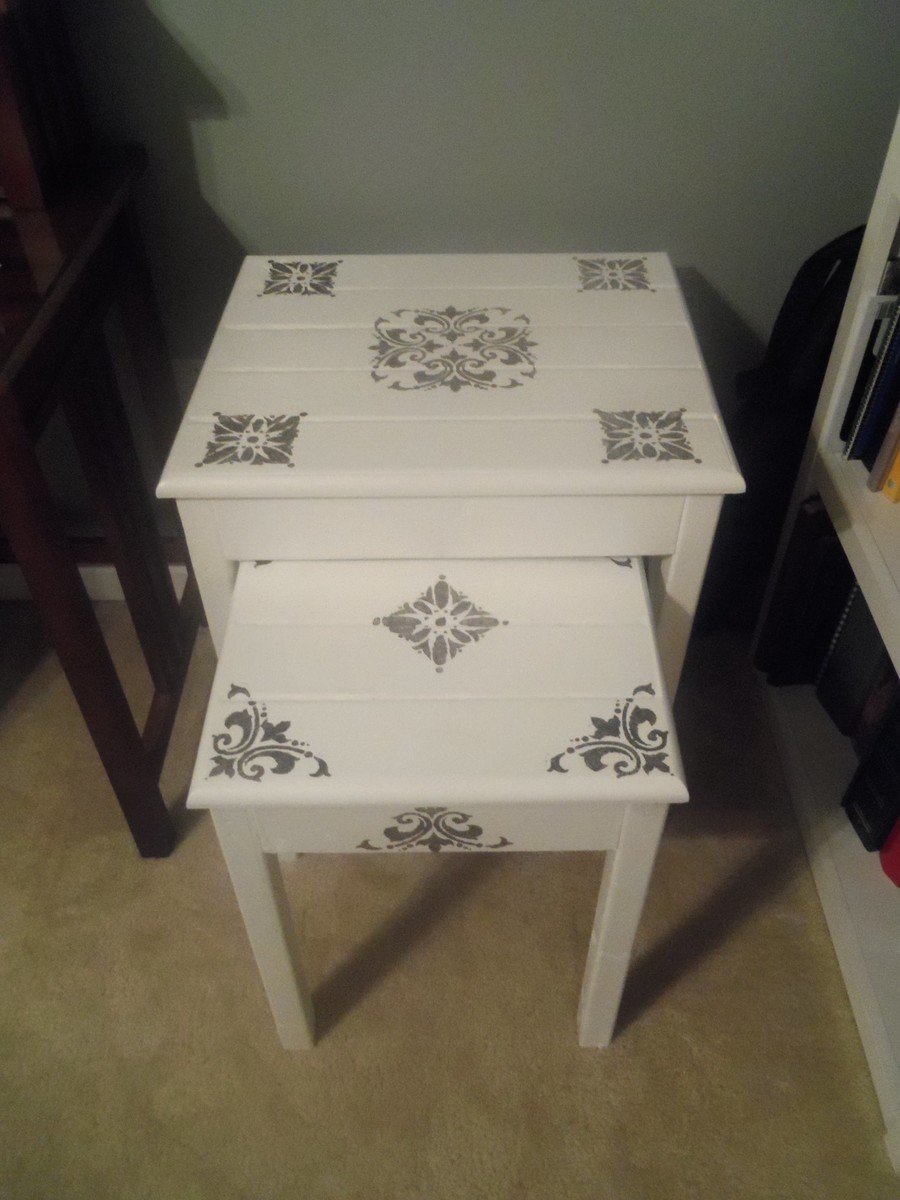
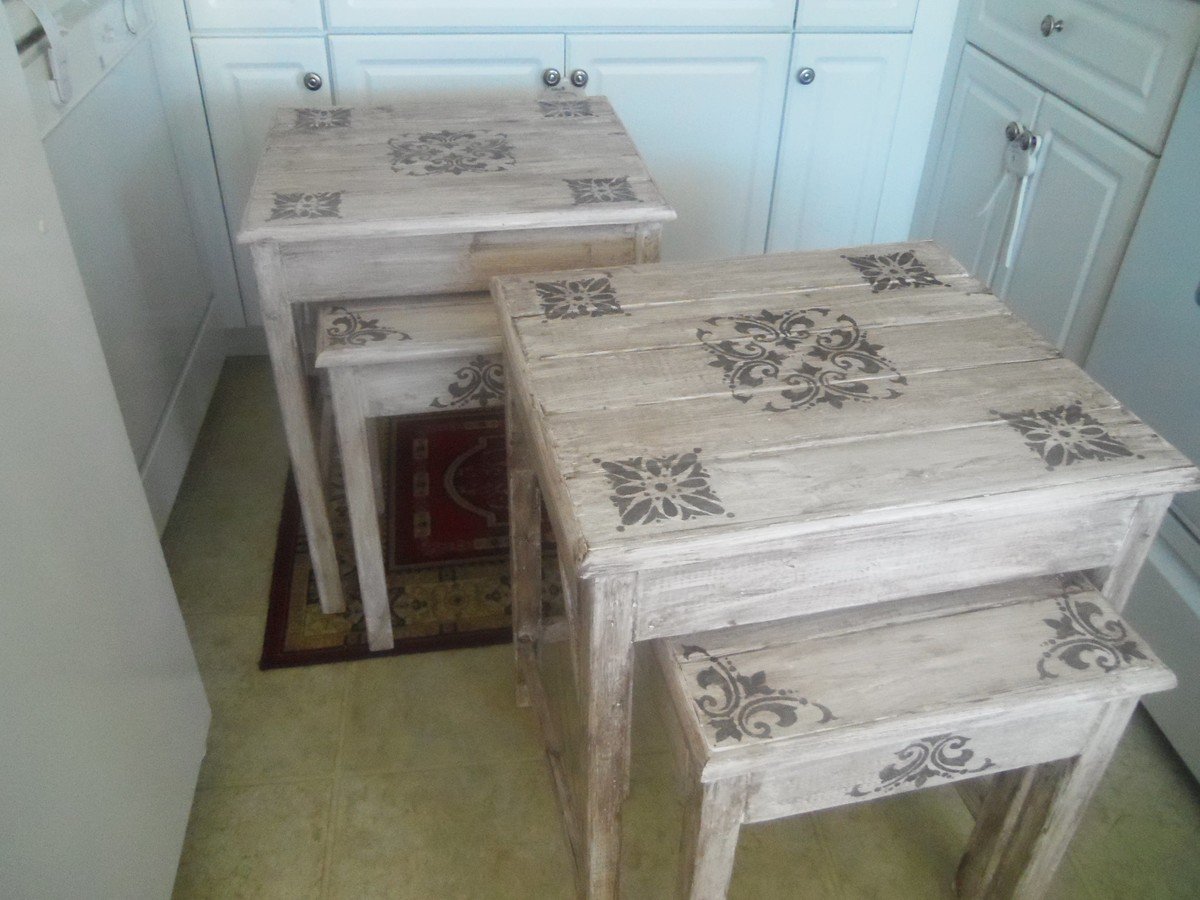
Nesting Tables
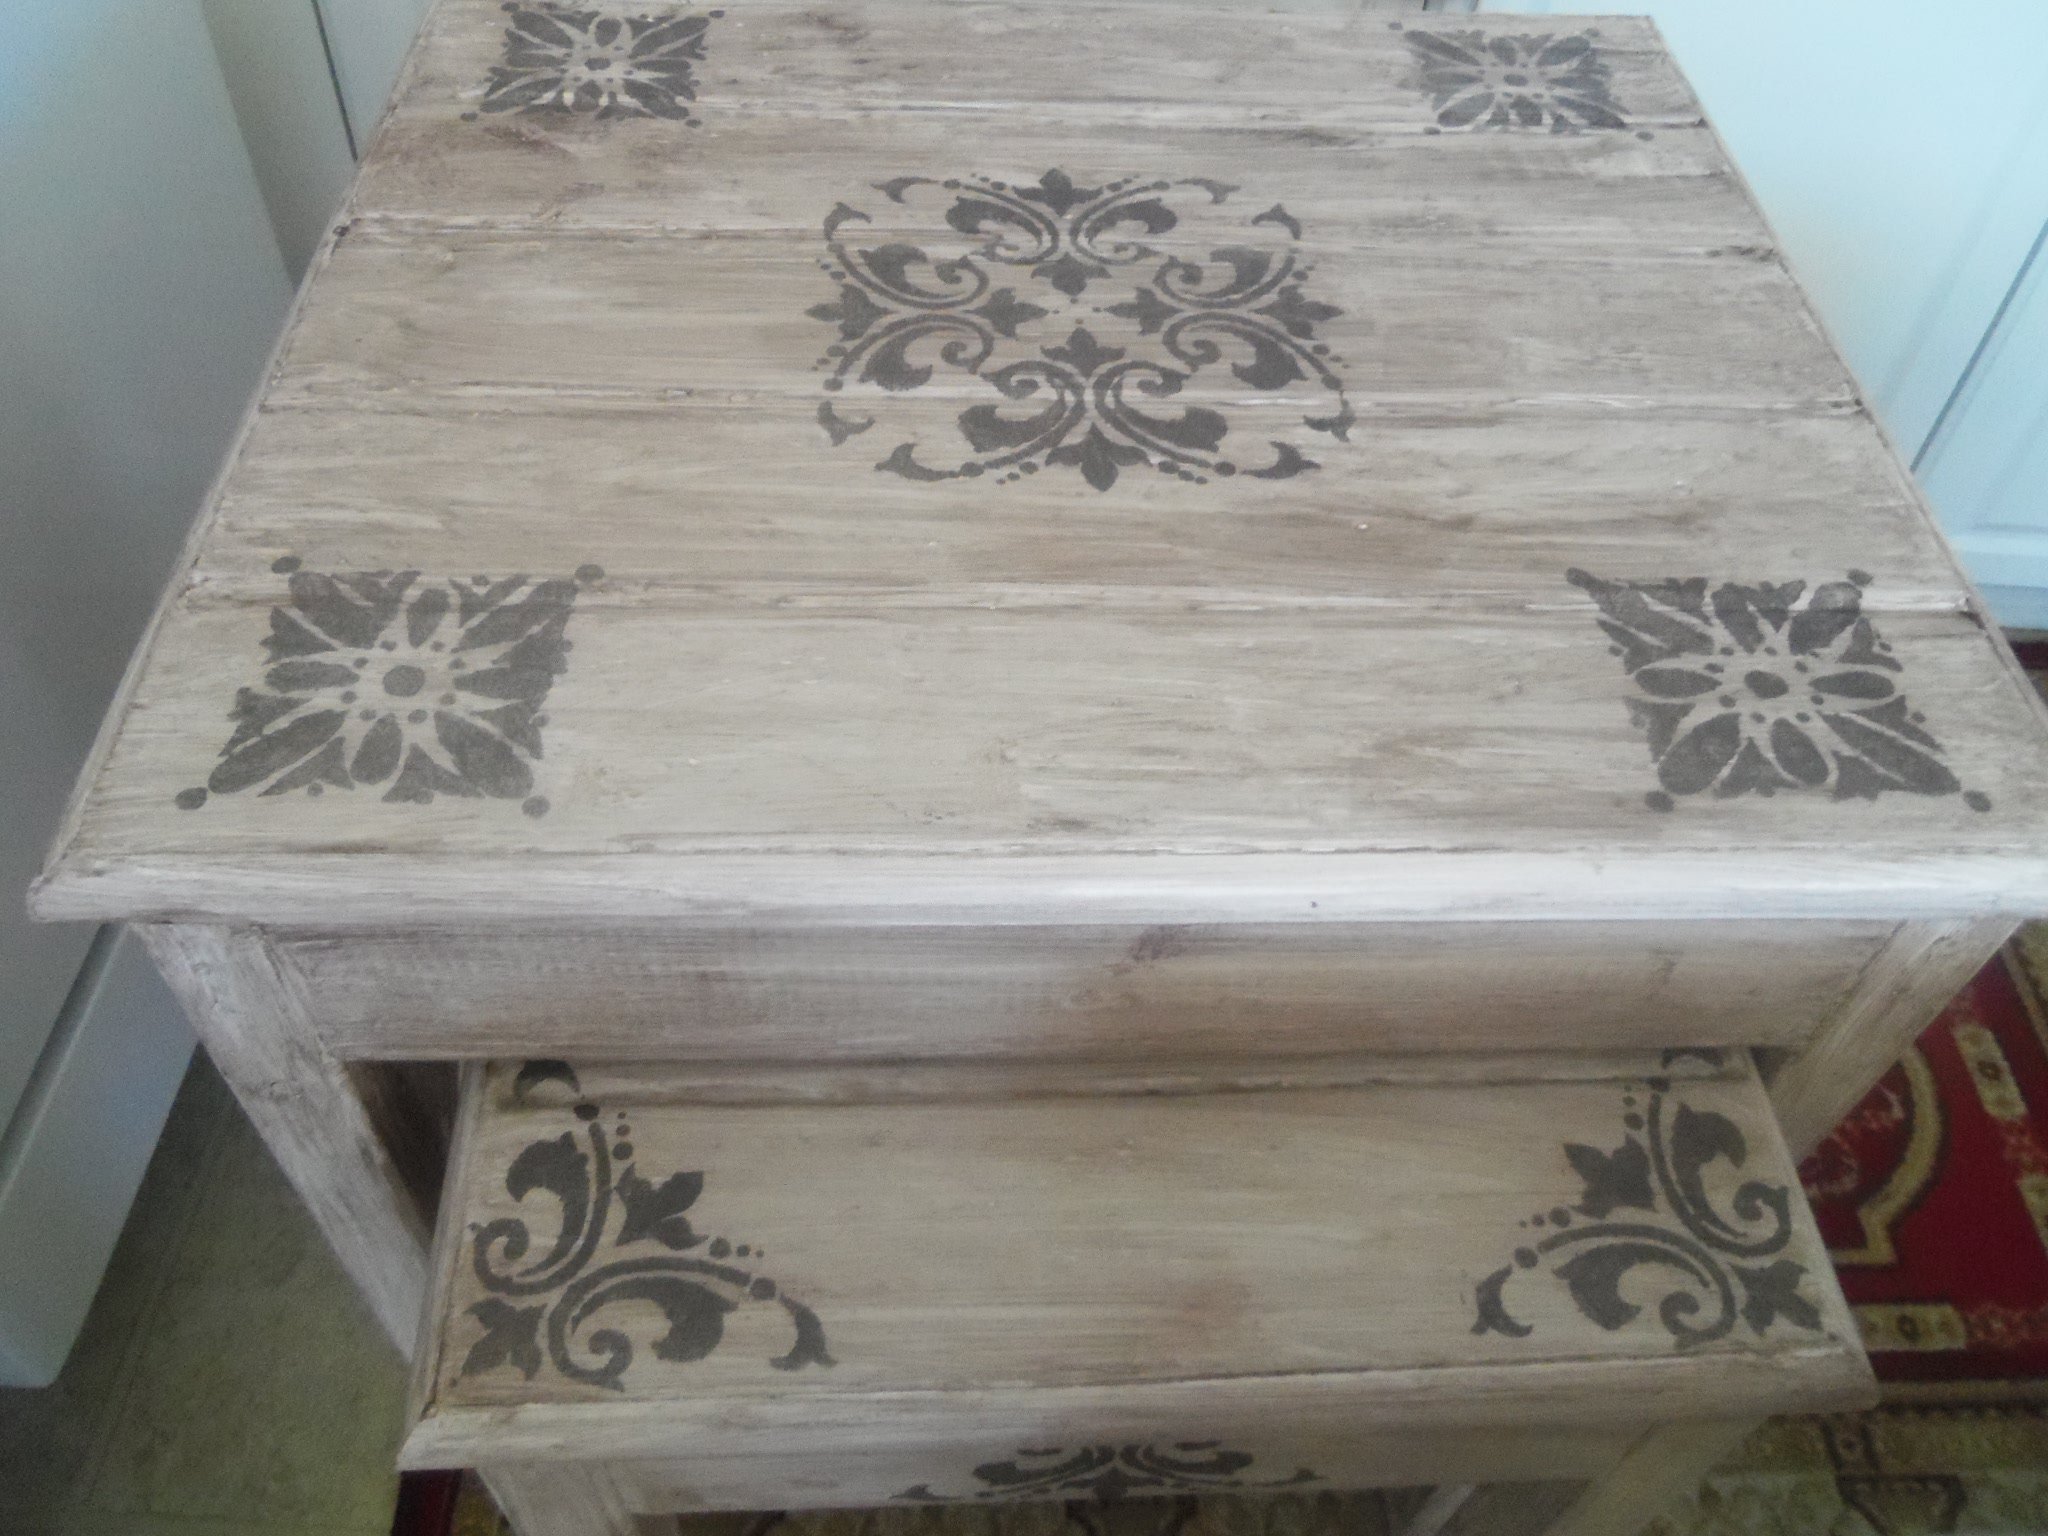
We needed some sturdy side tables since we have 3 boys who like to climb. I saw these and thought they'd do well at our house. I will say that next time I make any sort of table I will invest in some better wood. I got the cheaper wood and found out that getting it to be square was a problem. But I made it work. I would have liked to stain them but I ended up having to paint them because there were some gaps on the top I had to fill.

Built from Plan(s)
Estimated Time Investment
Weekend Project (10-20 Hours)
Finish Used
White semi-gloss latex paint. Stencil is from Home Depot done with Martha Stewart Living metallic paint in Thundercloud. But I didn't like the whiteness after all. So I got paint sample from Home Depot in Stone Hearth and made a wash of equal parts water and paint. I rubbed it in with a rag and when it was dry put on a coat of Minwax waterbased clear stain as a protectant. I like them much better now.
Recommended Skill Level
Beginner
Comments

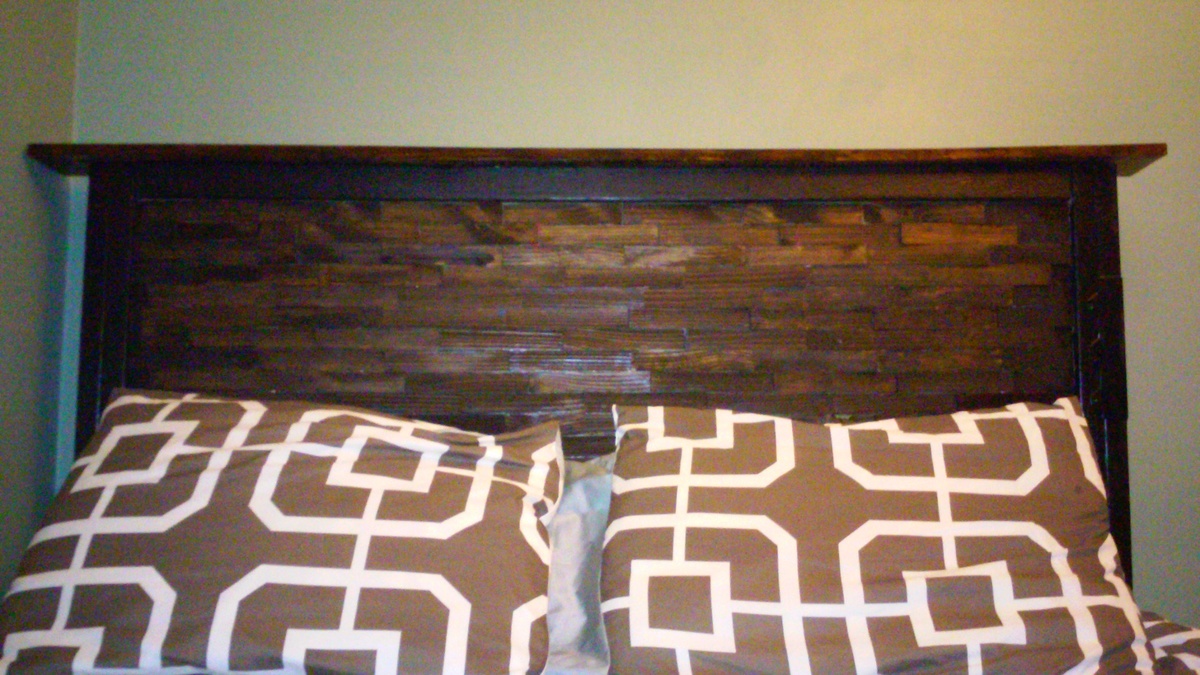
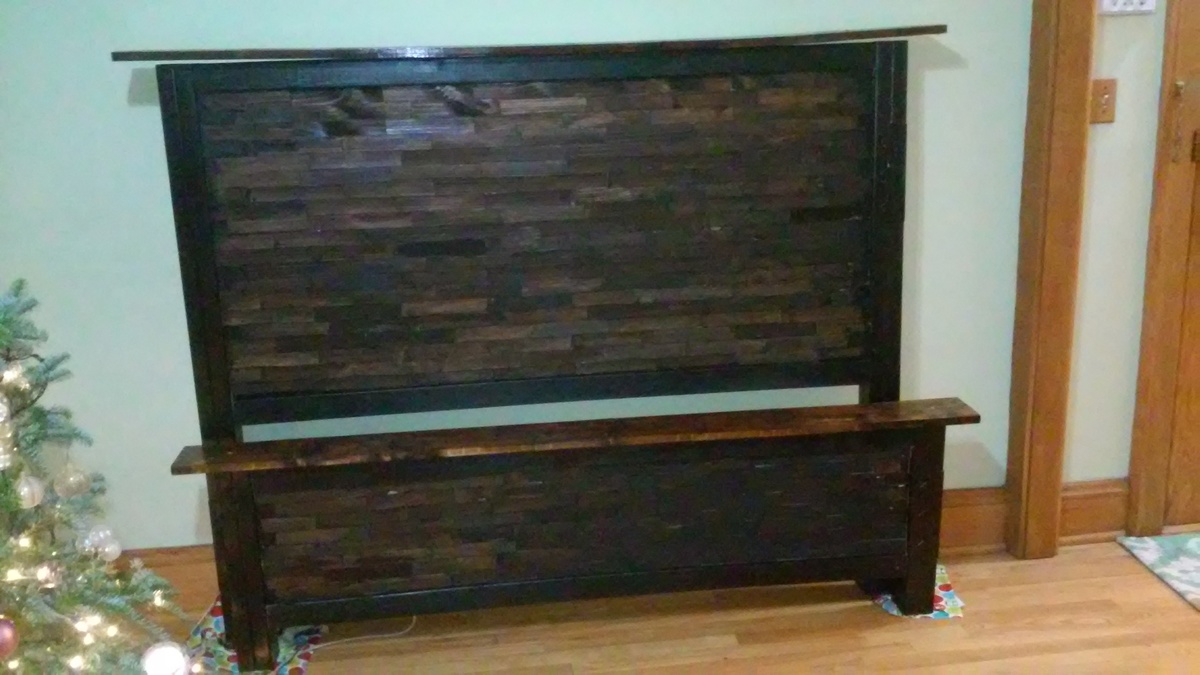
Shim Bed!
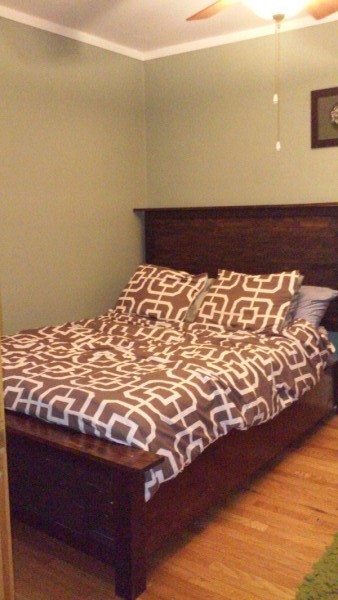
I have been working on this project intermittantly for months now. It is so amazing to have it finally finished and have it fit my style perfectly. Those shims took forever to apply. I stained them first and then attached them with wood glue to both the headboard and footbard.
I made a few modifications to the aesthic though none of the cut lengths. Instead of using 4X4 posts I used 2x4's and attached them with metal brackets to give it a slight industrial feel. I also painted the framing black and the posts black and stained the top 1X6 and 1X12 siderails the same color as I stained the shims which I thought tied it all together and made it look warm and rustic.
I did not build out the wood frame but instead used the metal frame I had already to set the bed down inside. I am really happy. Thank you Anna for this plan! I never would have thought I could pull something like this off!
Built from Plan(s)
Estimated Time Investment
Week Long Project (20 Hours or More)
Finish Used
Black Rustoleum paint and Minwax espresso stain.
Recommended Skill Level
Intermediate
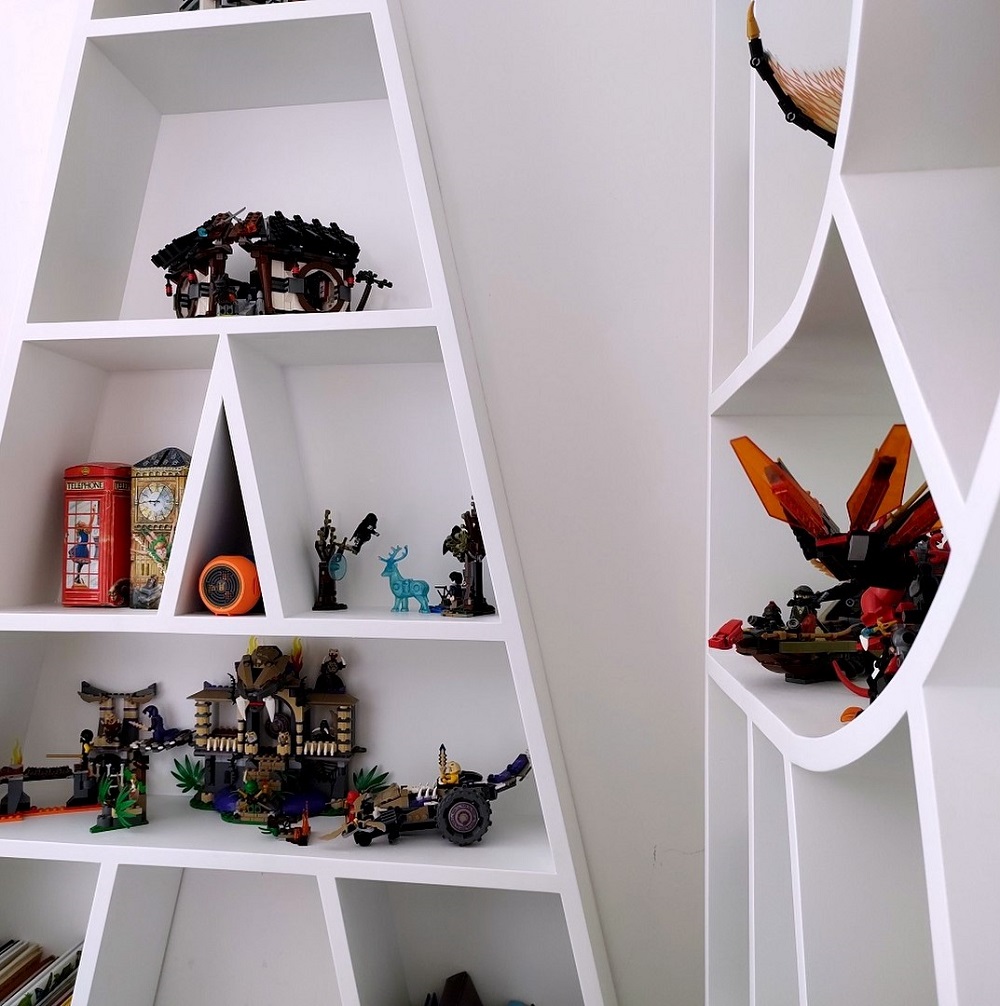
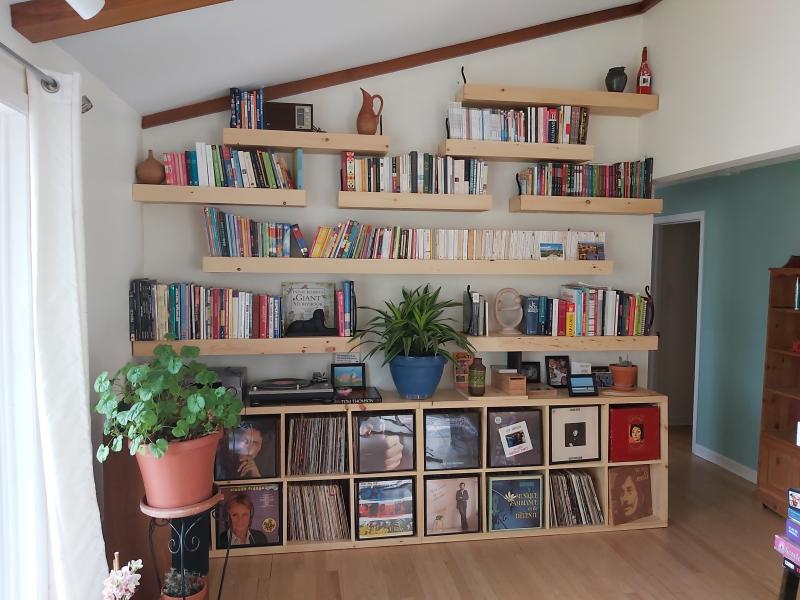
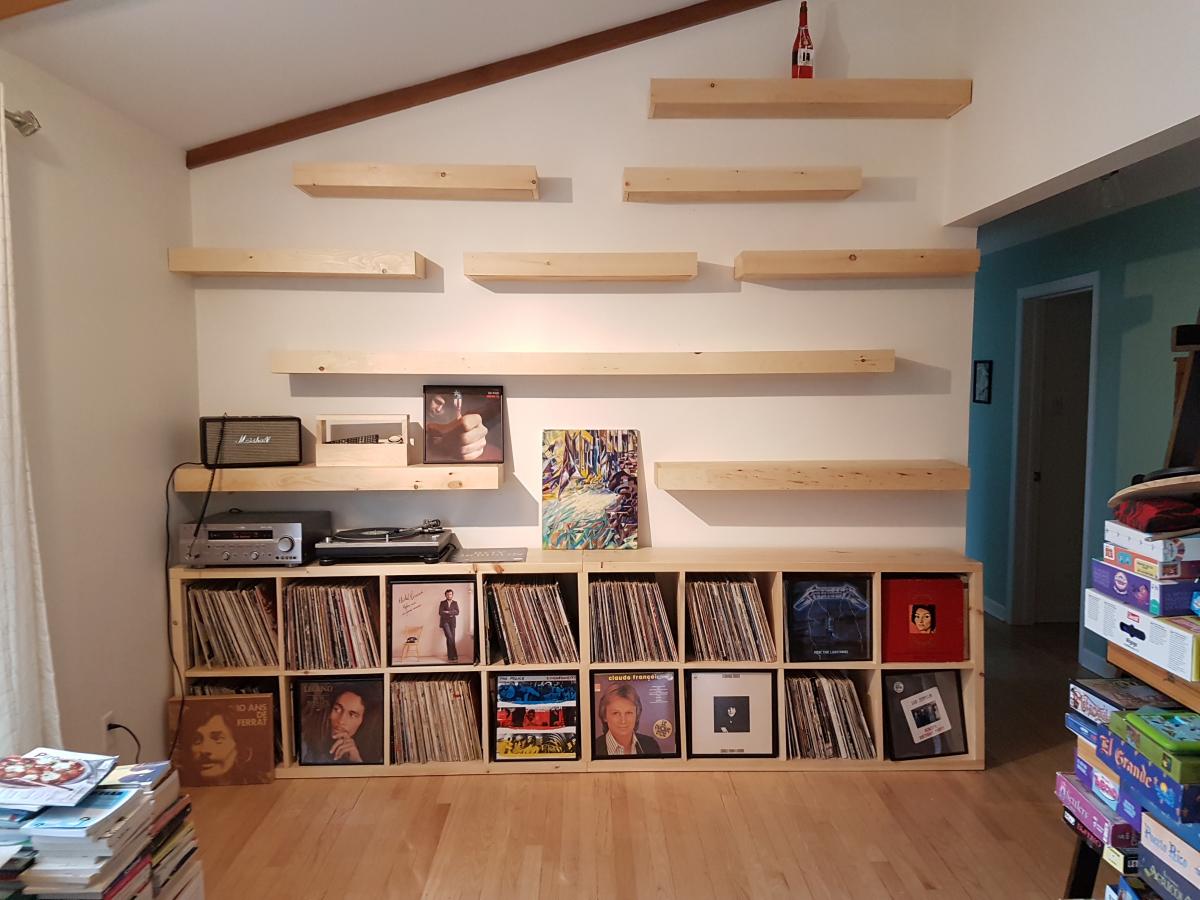
Floating shelves for books + Vinyl storage
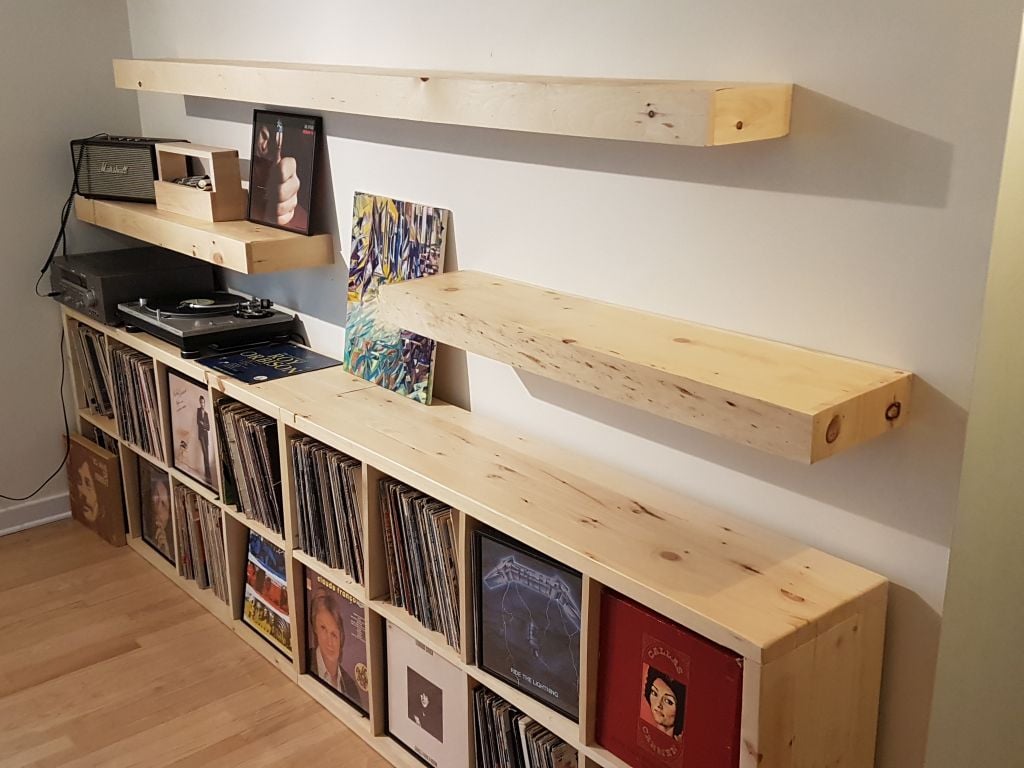
I love Ana Whites's site. I go to it all the time when I have project ideas. The Video tutorials, combined with plans, is just amazing. Plus, the brag pages of people that have done projects from what they found here. Thank you Ana.
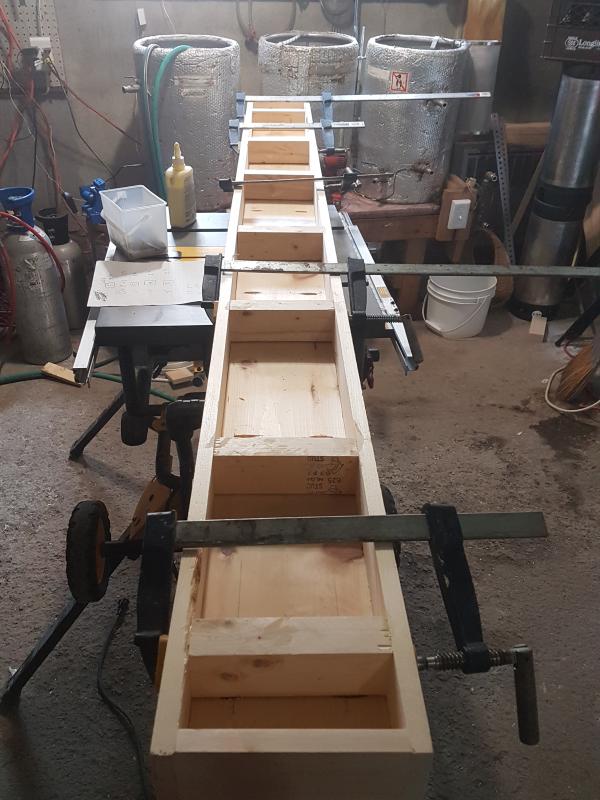
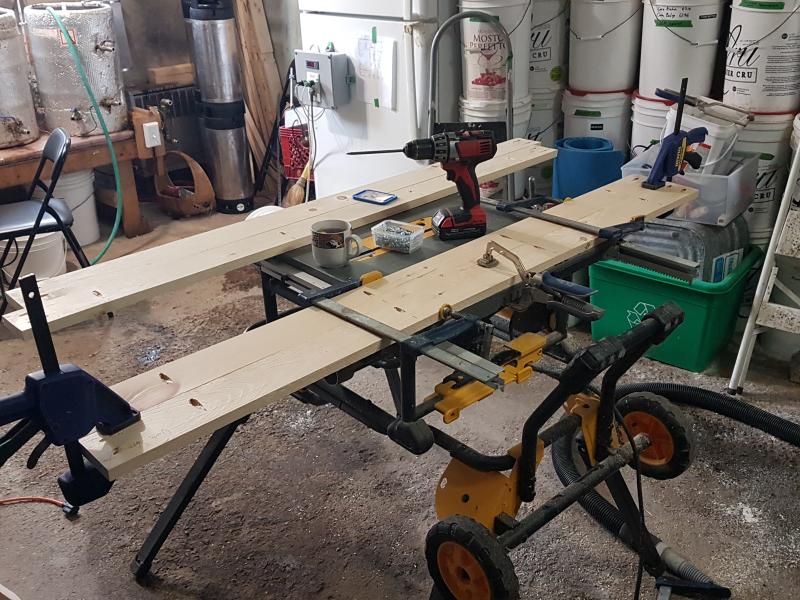
The floating shelves part was from Ana's site. The other part was done using my own plans (I used SketchUp to draw them)
My wife added the books, plants, and decorations, and I finally opened the dusty boxes that contained my insane LP collection. The experience has nothing to do with steaming music, it is far more complete.
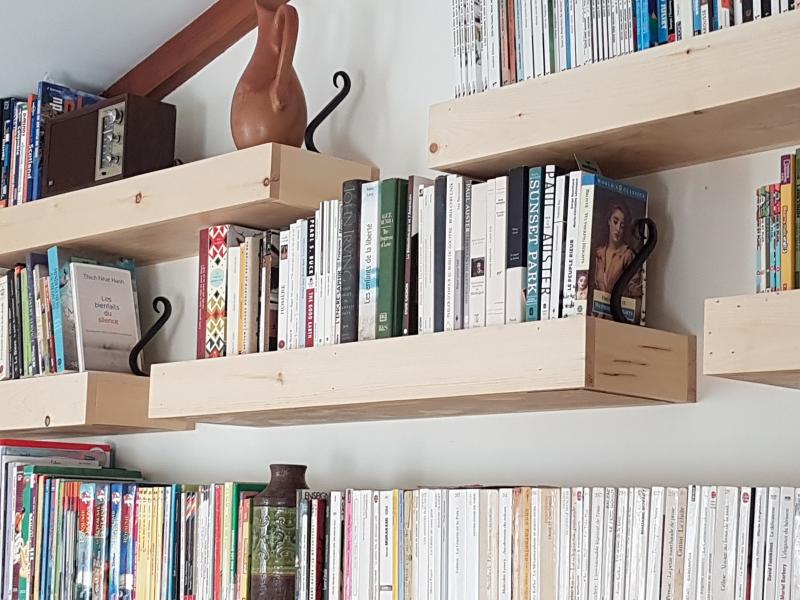
I used plant-lantern brackets to prevent books from falling from the sides of the shelves. All done, this is great.
I would like to change the main picture, but I get strange messages from the site when I do this.
Built from Plan(s)
Estimated Cost
This part is hard, as wood cost has never been this expensive. Also, the plant hocks were rather expensive. In fact, I don't want to know the total I've spent on this, but glad I did it myself, otherwise, cost would have doubled, if not more.
Estimated Time Investment
Week Long Project (20 Hours or More)
Finish Used
Hard wood floor stain (2 coats on the sides, 3 on the main surfaces).
Recommended Skill Level
Beginner