

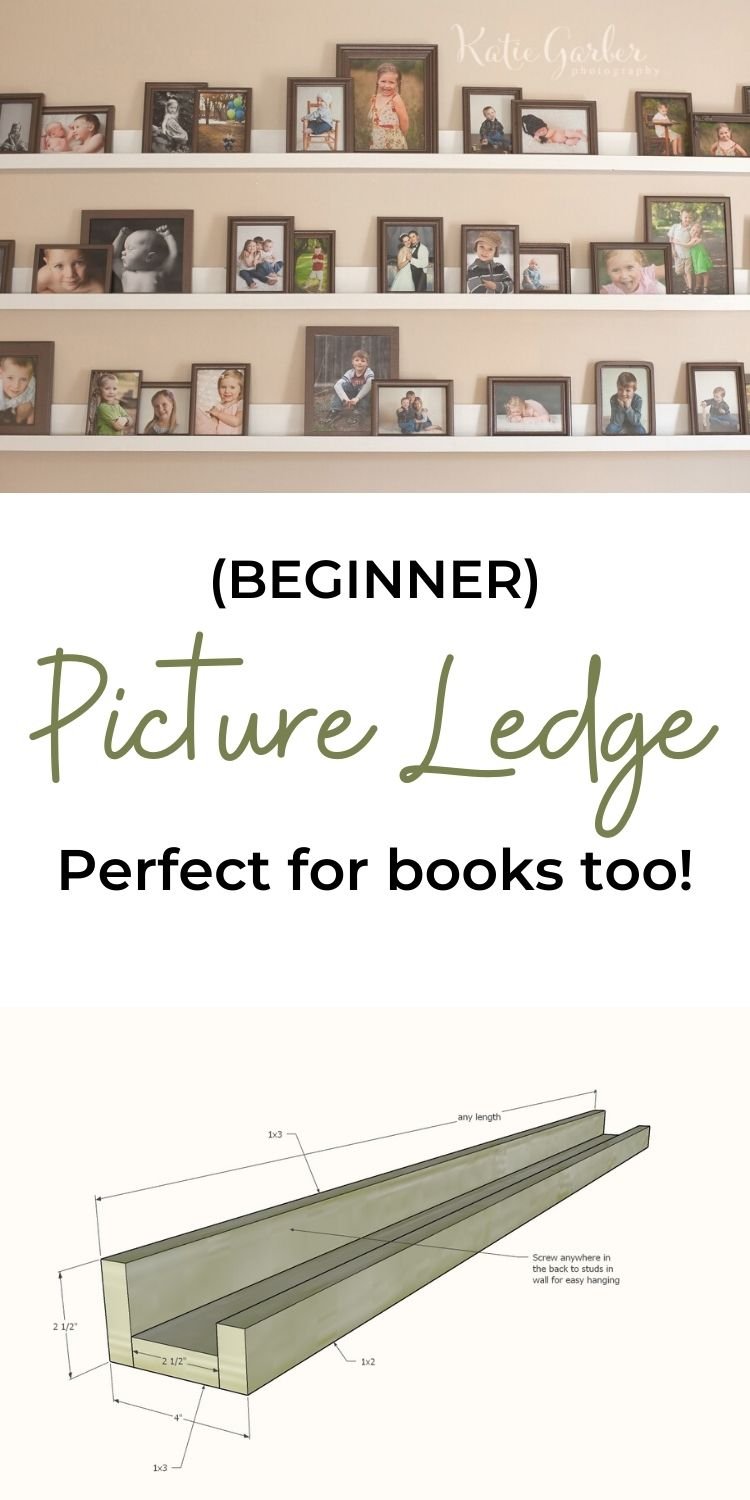
You can build your own picture ledge or gallery ledge for about a DOLLAR a foot. This easy to build picture ledge tutorial requires NO cutting and basic tools. Paint or stain any color you choose. Thousands of people have built this shelf and you can too - free step by step plans from Ana-White.com

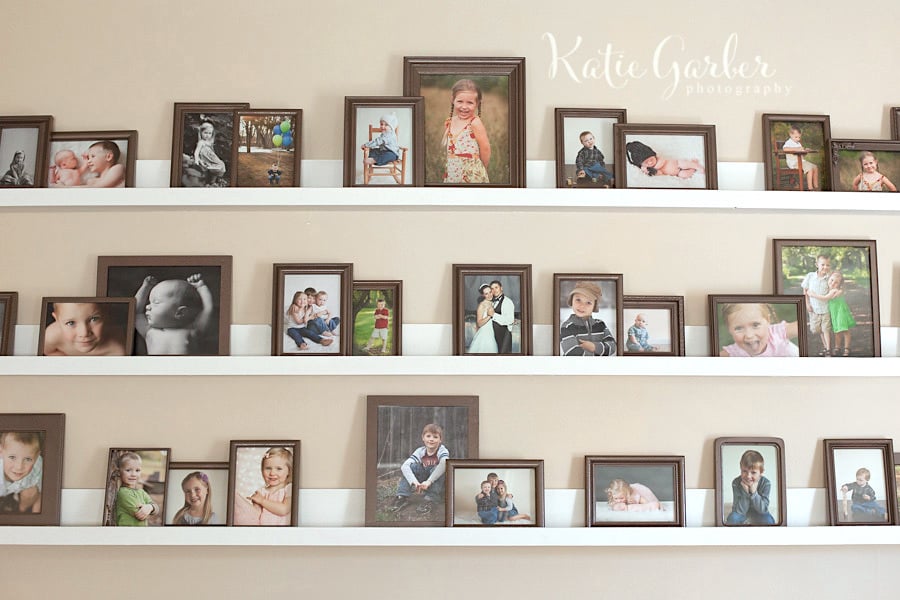
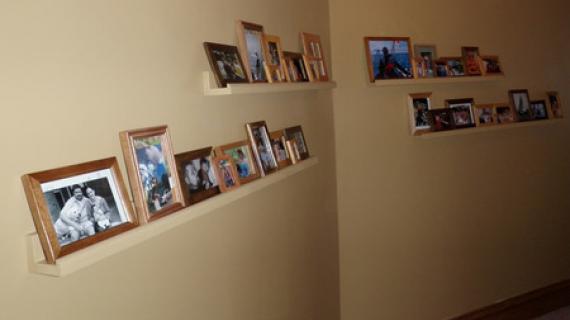
Reader submitted photo by Katie Garber
Need an inexpensive and beautiful way to display books, photos, decor or more on your walls? Our famous $10 picture ledge shelves are easy to build (you can even build these without cutting a single board!), can be built in any length, and are easy to hang!
What You'll Need
- Off the shelf pine boards available at any home improvement store
- Drill (used to build and hang the shelves)
- Screws (used to build and to hang the shelves)
- Paint or stain
- Level is recommended for hanging the shelves
- A stud finder is recommended for locating the studs in the wall to hang the shelves on
If you want to customize the overall length of the shelves, you'll also need a tape measure and any saw that can cut wood (this includes a handsaw).
But I'm Not Handy
These picture ledge shelves have been built thousands of times, by beginners everywhere. In fact, we recommend this project as your first project because it is SO easy and SO affordable! Our step by step tutorial makes it easy.
YOU can do this!
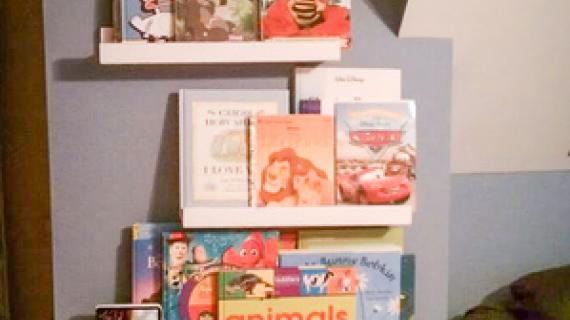
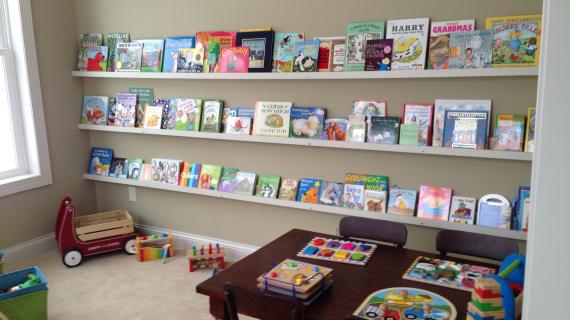
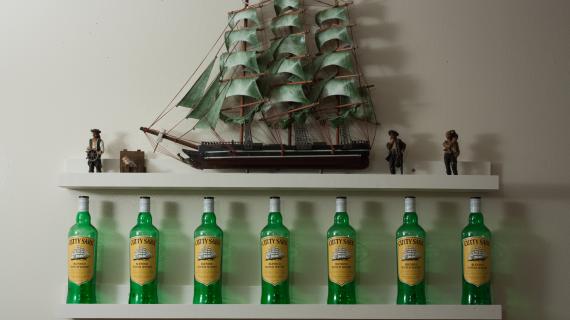
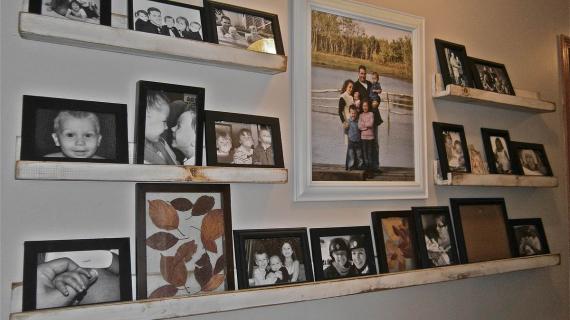
Reader Submitted Photos from Our Picture Ledge Tutorial
Here's a few different versions of our picture ledge, submitted by readers, and used in different ways.
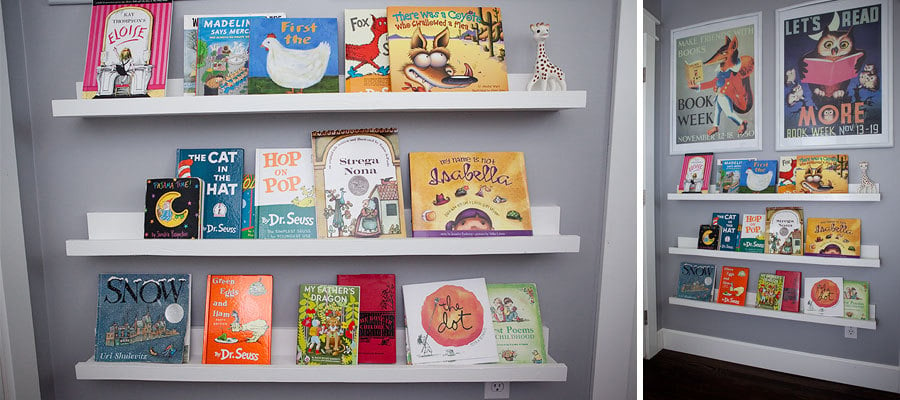
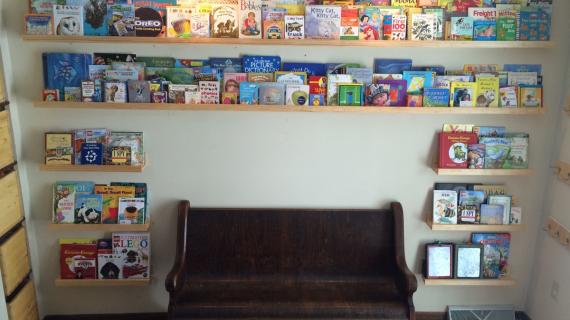
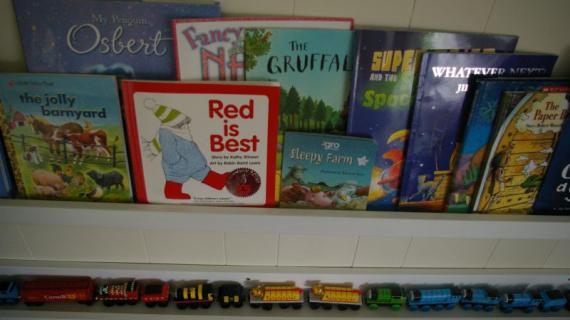
Book ledges by Crisaphi

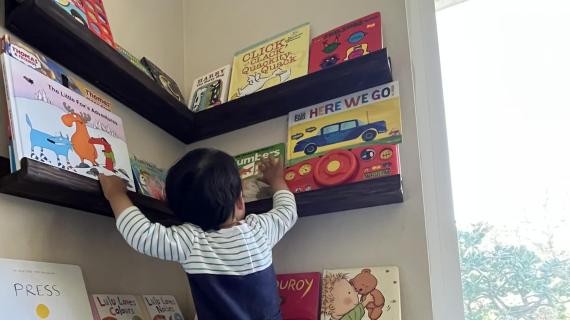
Reading nook by karahart
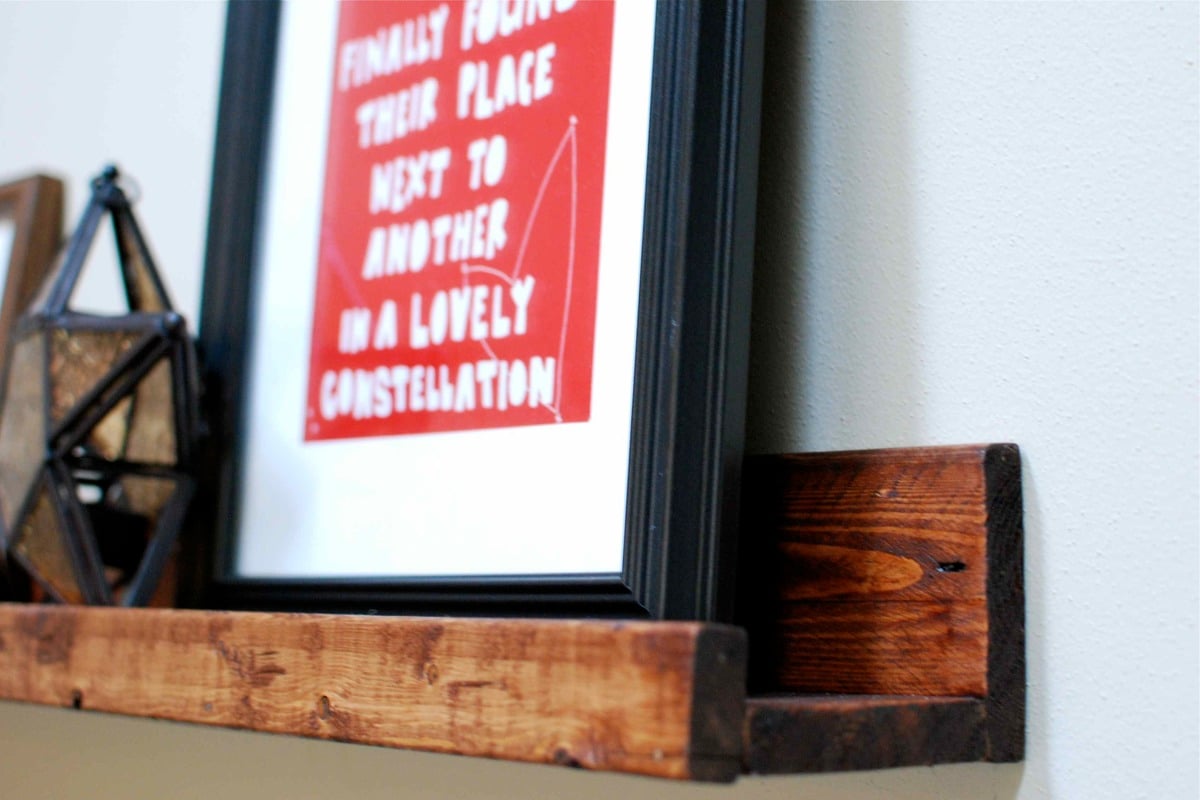
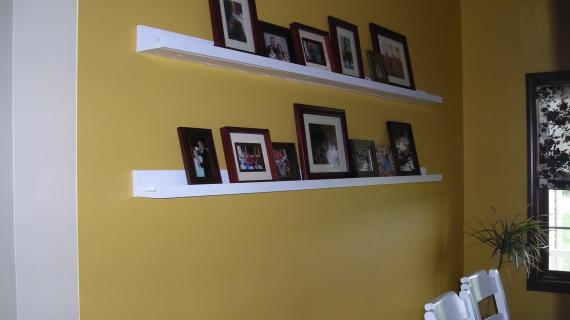
Rustic Stain by a.stauff

Easy Picture Ledge Tutorial
Pin For Later!
Avoid going to short (less than 24") because it may be hard to find a stud in the wall)
You can also make the shelf deeper by simply replacing the bottom 1x3 board with a 1x4, 1x6 or 1x8 board
Preparation
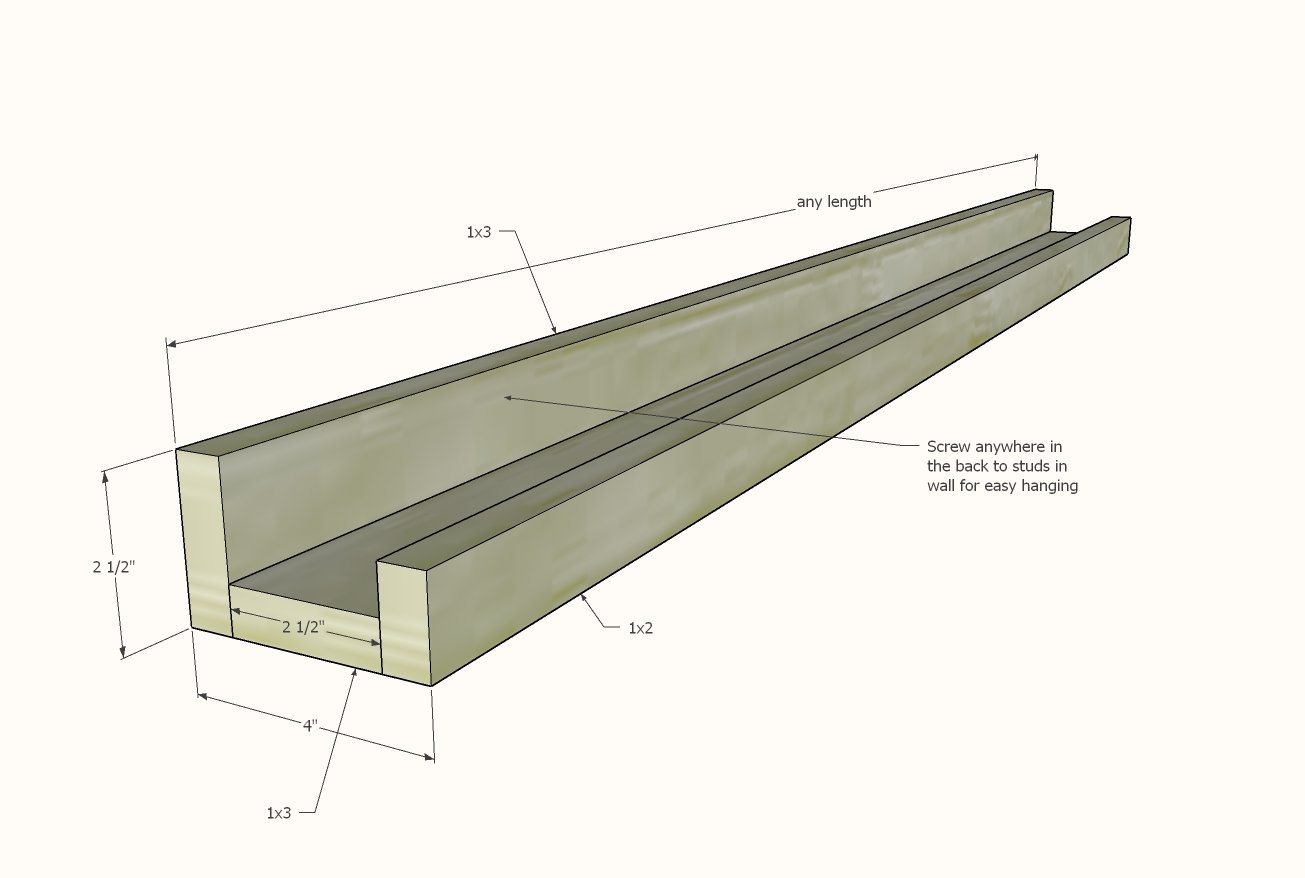
For (1) 8 foot long gallery ledge
- 2 - 1x3 @ 8 feet long
- 1 - 1x2 @ 8 feet long
- For every foot of shelving, you'll need about (3) 2" wood trim screws (like these that also include the drill bit)
What Type of Wood?
- The least expensive is pine furring strips (about $2 for a 1x3 and $1 for a 1x2) and will paint just fine and stain to that rustic look everyone is after these days
- You can use a select pine or hardwood board as well if you are trying to match other woodwork in your home or are looking for a more refined look
- I don't recommend MDF as it doesn't have much structural integrity
For 8 foot long shelving, NO cuts are necessary.
For shorter shelves, simply cut
- 2 - 1x3 @ desired length of shelving
- 1 - 1x2 @ desired length of shelving
EXAMPLE: For 36" long shelves, you would cut two 1x3 @ 36" and 1 - 1x2 @ 36"


Instructions
Step 1
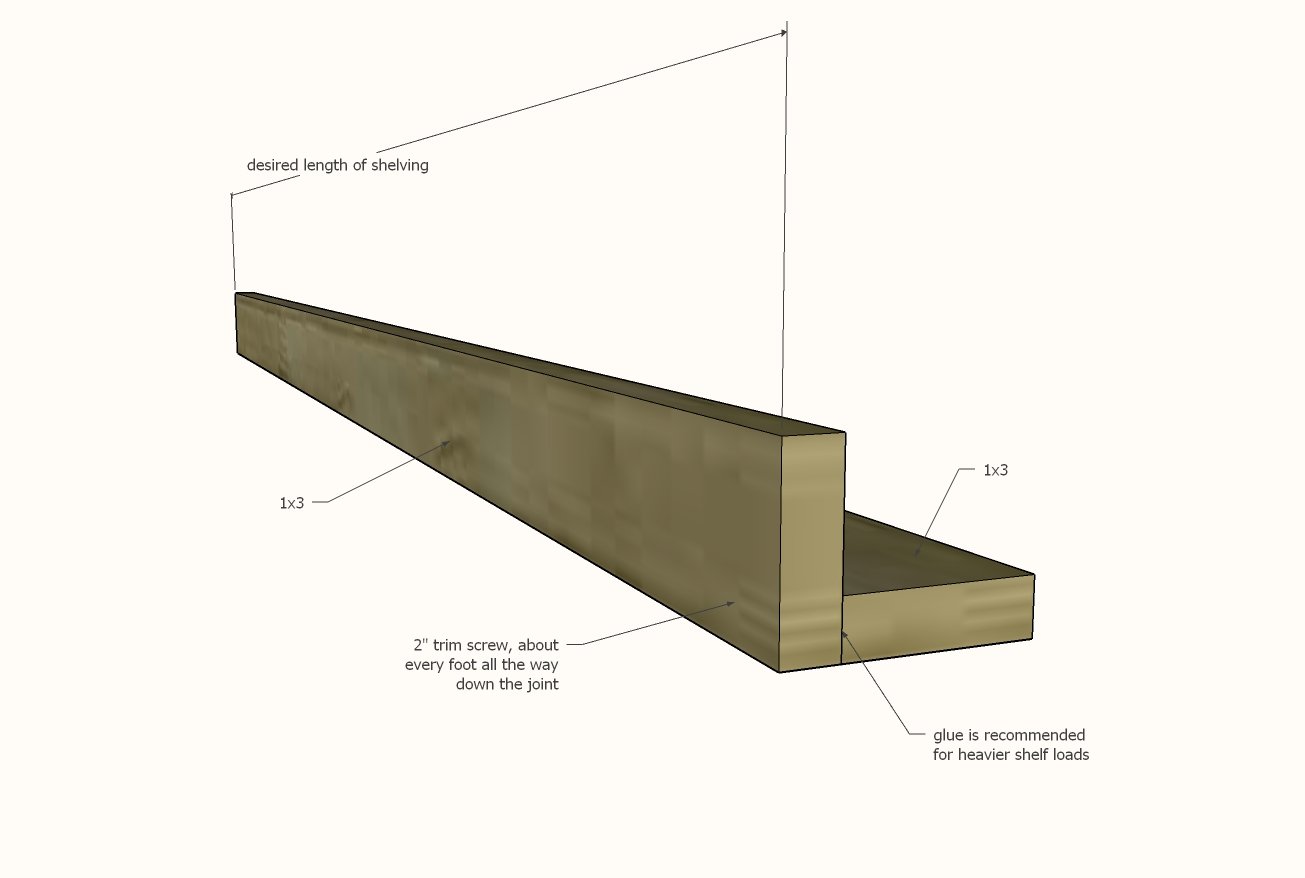
Attach the two 1x3 boards together with 2" trim screws, about every 12".
Step 2
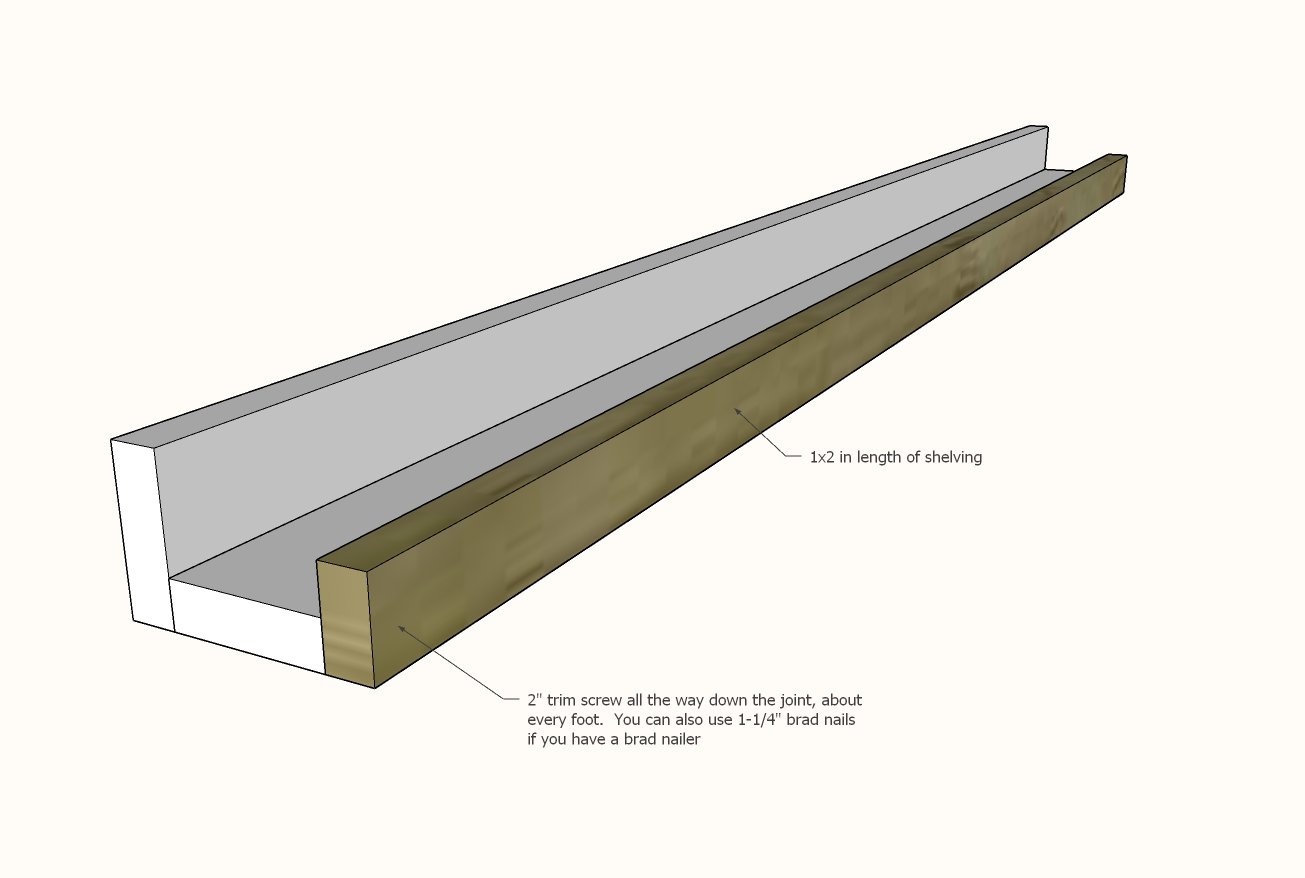
Attach the 1x2 to the front, with the 2" trim screws.
If you have a brad nailer, 1-1/4" brad nails and glue can also be used and will be easier to finish than screws.
- For a painted finish, fill the screw or nail holes in the front 1x2 only with wood filler. Let the wood filler dry and then lightly sand any excess off. Then paint as desired.
- For a stained finish, lightly sand the project. Then apply wood stain of your choice. Then use a stain matched wood filler to fill any holes.
Step 3
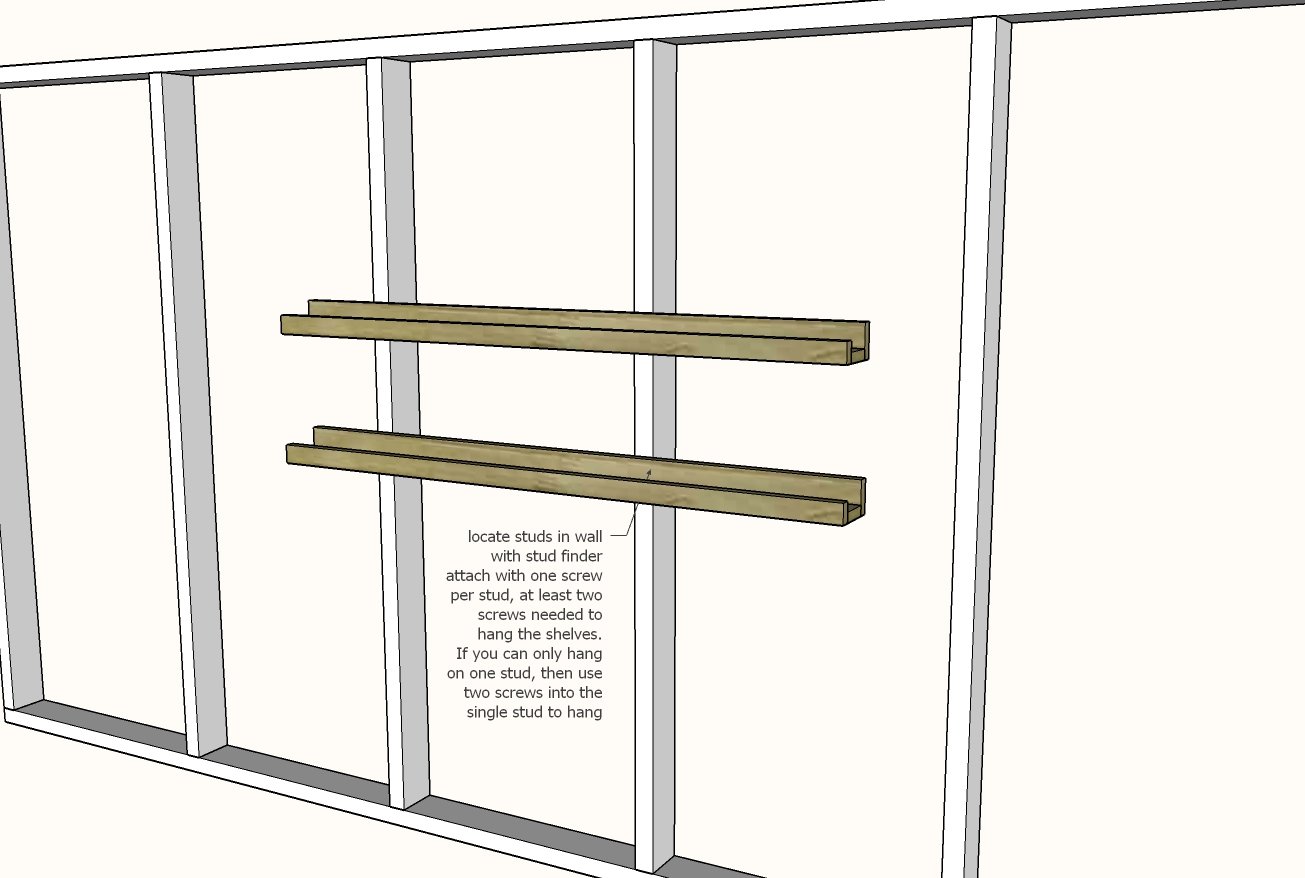
Locate studs in the wall with a stud finder.
Mark with a pencil.
Place the picture ledge up on the wall at the desired location and screw through the back 1x3 into the studs in the wall.
- At least two screws are needed to hang the picture ledge.
- One screw per stud in the wall
- If only one stud behind the picture ledge, than use two screws to attach to the one stud


Comments
Veronica_alma
Thu, 09/26/2013 - 13:58
How did you screw the 1x4 to
How did you screw the 1x4 to the wall?
Shorty
Fri, 10/25/2013 - 15:00
Loved this!
I was fretting over spending a few hundred dollars to buy a bookshelf for my daughter's books when I found this plan. What a cheap, easy, fast, GREAT build!
Marion_tx
Fri, 06/20/2014 - 18:02
Picture Ledge
Hello Ana :)
I built my first picture ledge today. After I saw your plan and the video I was fully optimistic that I will be able to make one too. Thanks so much for the great tutorial. It will be hung in my daughters room to put a few books near her bed. I used pine select grade and gave it a white wash. It was also my first time staining wood and I loved it so much, I will definitely be making more of these great and quick ledges.
Tami.Owen
Wed, 06/25/2014 - 03:53
How do you attach these to
How do you attach these to the wall?
kkidd44
Mon, 12/28/2015 - 12:17
Yes!
How indeed do these attach to the wall?!?! So frustrating. I mean, Im sure there's some kind of power tool with a zillion amps and a big old nail or screw that will (functionally) "hang" the thing (and leave a dime sized hole in the wall). But how do we elegantly and safely hang it?
pollyplum
Mon, 11/17/2014 - 19:45
I love the lege/shelves!!
I love the lege/shelves!!!looking at your shopping list, do Lowe's and HD carry a product called ' gallery ledge'? Or did you make yours from mouldind/baseboard?
Cdelsarto
Sat, 02/21/2015 - 14:11
Hanging
What is the best way to hang ledge shelf on the wall?
momof2hsp
Thu, 10/01/2015 - 11:17
question- need help
Can you make this without the pocket holes? I don't have the tools to make that. If so, what do you recommend? Thanks
Ana White Admin
Thu, 10/01/2015 - 12:11
No Pocket Holes Necessary
You could predrill, countersink and screw front and back board into bottom board. Fill holes, sand and finish. Hope this helps!
kkidd44
Mon, 12/28/2015 - 12:12
Total Newbie needs more help
Hi!
It's a lovely shelf. But how in the world does it get hung on the wall? What do I need to add to the thing that will make it hang and be stable? I've only hung picture frames before, and I can't imagine that tacking on a picture hanger or tacking wire to the back would much aid me getting it safely on the wall?
In reply to Total Newbie needs more help by kkidd44
Ana White
Mon, 12/28/2015 - 14:30
For this project in the video
For this project in the video, we drilled pocket holes on the back side,
and used them as "keyholes" for hanging with screws in the wall.
http://www.ana-white.com/2012/01/ten-dollar-ledge-project-video
For the ones at my house, I just screwed through the back into studs in the
wall - the frames covered all screws.
You could also use D-rings or any other type of picture hanging kit. Just
make sure you are properly secured to the wall and the hanging kit is
appropriate for the shelf weight and contents.
Hope this helps!
nandish777desai
Fri, 02/12/2016 - 12:38
Mounting?
Great instructions. Can't wait to make them. What is the best way to mount them to the wall?
In reply to Mounting? by nandish777desai
Ana White
Fri, 02/12/2016 - 14:00
Just screw through the back
Just screw through the back into your wall studs
Ckassar
Fri, 04/01/2016 - 11:28
Pocket holes
What tool do you use/recommend for the pocket holes? Thanks so much!
mitkoed
Sat, 04/02/2016 - 09:33
Pocket Holes
I use nothing but KREG Pocket hole jig. LOVE IT!
In reply to Pocket holes by Ckassar
Ana White
Tue, 04/05/2016 - 11:00
Kreg Jig K4 or K5 would be my
Kreg Jig K4 or K5 would be my recommendation.
Ana White Admin
Cazeliea
Wed, 01/11/2017 - 10:01
thanks for, as usual, great plans!
Thanks for all the wondeful ideas and tutorials! I made these for my bedroom and they make the room look so nice!
https://mrsonthemove.wordpress.com/2017/01/11/what-to-do-with-a-blank-w…
Tulip Girl
Fri, 01/26/2018 - 07:52
How to hang?
i love you plan and video. Made the shelves, but at a loss for how to hang them. Please tell us how so we can get this project finished. THank you
In reply to How to hang? by Tulip Girl
Ana White
Sat, 01/27/2018 - 22:30
Just screw through the back
Just screw through the back into your studs.
reikidancer
Mon, 11/05/2018 - 09:40
Can these be used for "Cat Super Highway"?
Ana,
I love these shelves! How deep can you make them? I want to use them as cat shelves, for what Jackson Galaxy calls a "Cat Super Highway". The recomendation is for shelves to be 9-12 inches wide. Would these work? Would I need to hang them differently?
Thanks,
Lisa
sjguess
Sat, 10/30/2021 - 18:47
Great little shelf!
I love how this turned out. I used select pine and stained to match my floors. Thanks so much!