
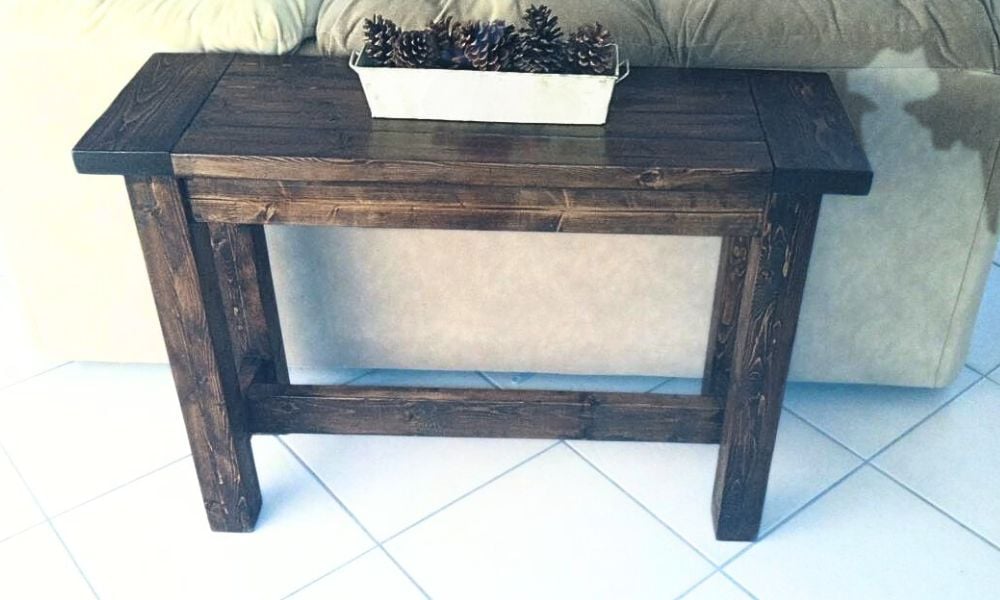

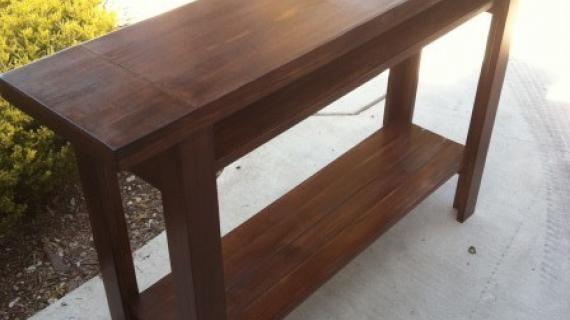
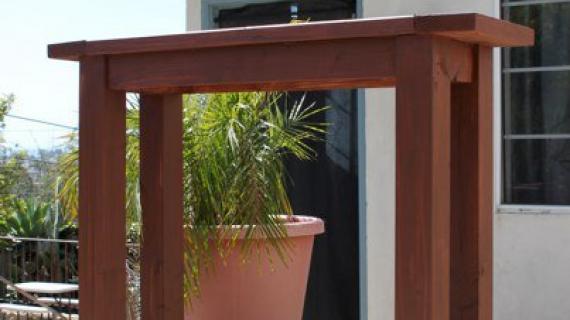
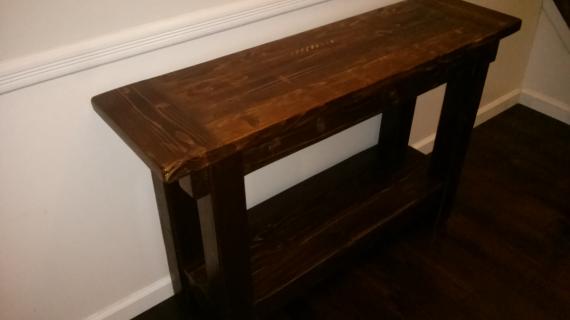
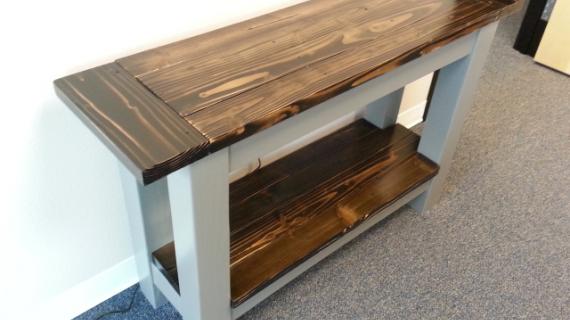
Build your own rustic console table! This beautiful solid wood table is made using pine lumber, so it's full of texture and made with soft, less expensive wood.
This is a DIY project plan with step by step diagrams, shopping and cut list - everything you need to build your own console table!
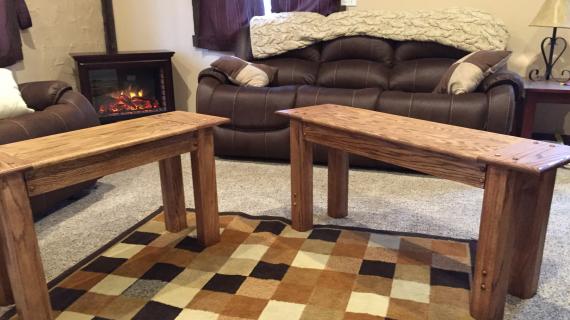
RELATED: Build the matching coffee table and end table with free plans from Ana-White.com
Preparation
- 1 - 4x4 @ 10 feet long
- 1 - 2x6 @ 12 feet long (can cut into a 4 foot and 8 foot piece for transport)
- 2 - 2x4 @ 10 feet long
- 2-1/2" pocket hole screws (about 50)
- 120 grit sandpaper
- wood glue
- wood stain and top coat
- right angle drill
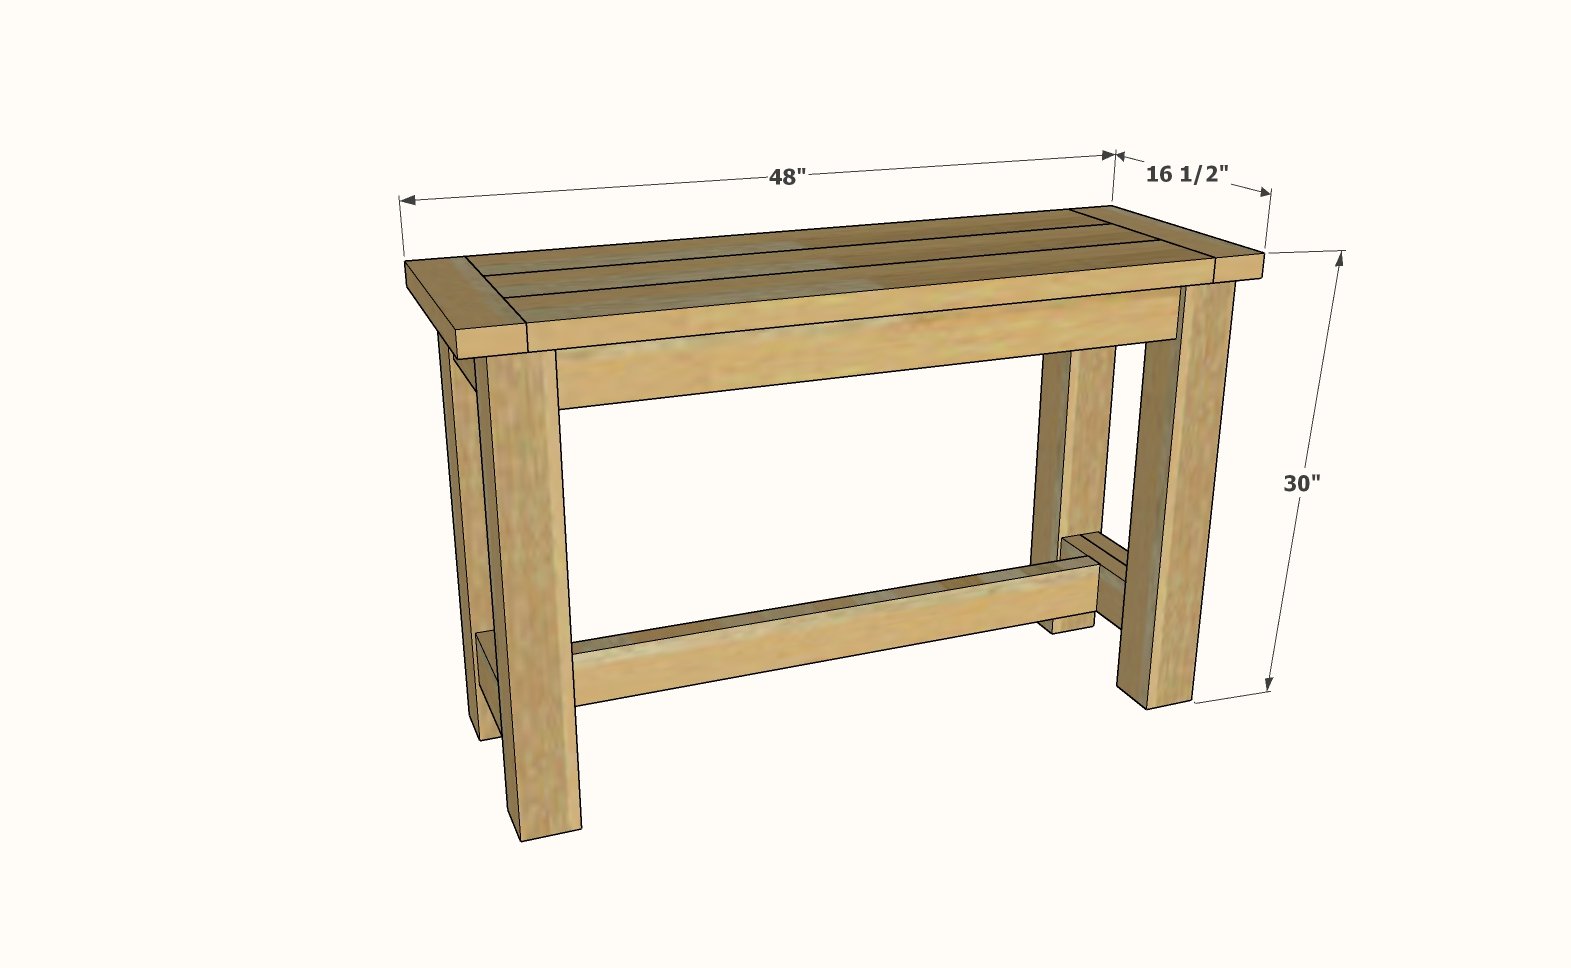
- 2 – 2×4 @ 16-1/2″ (Breadboard Ends) (You may wish to measure and cut these to get a perfect fit as you build)
- 3 – 2×6 @ 41″ (Tabletop)
- 4 – 4×4 Posts @ 28 1/2” (Legs)
- 6 – 2×4 @ 8-1/2″ (End Aprons and Stretcher)
- 2 – 2×4 @ 38″ (Side Aprons)
- 1 - 2x4 @ 38-1/2" (Stretcher)


Instructions
Step 1
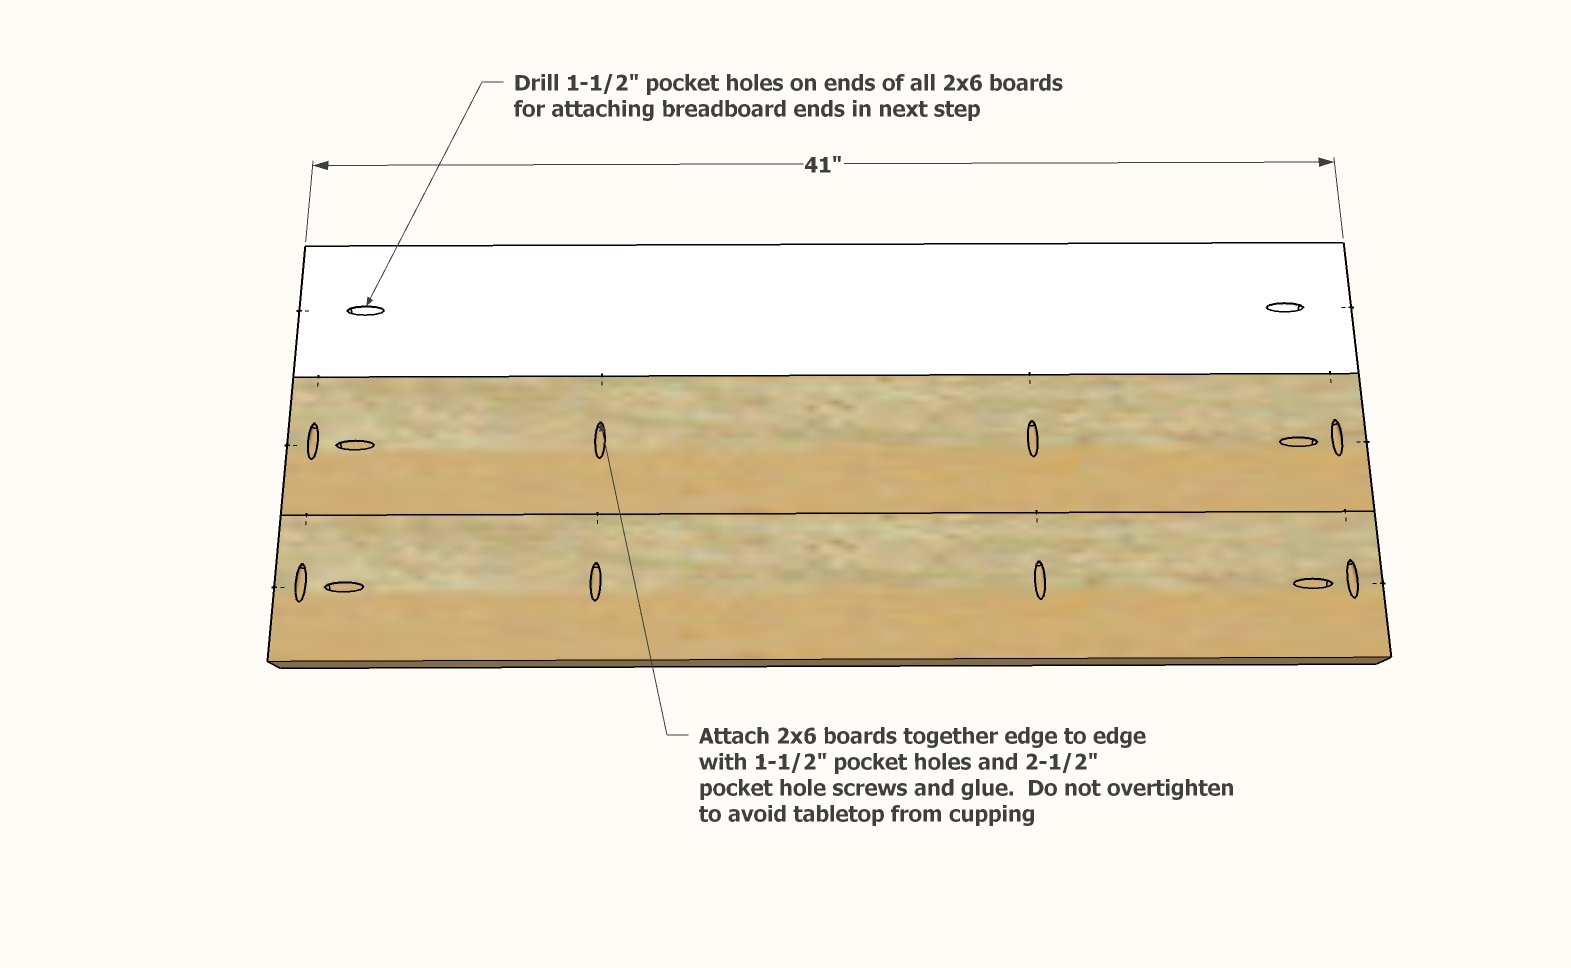
Prepare the tabletop boards by cutting and then drilling a 1-1/2" pocket hole on each end as shown.
Then on two of the 2x6 boards, drill 1-1/2" pocket holes along one long edge.
Attach with 2-1/2" pocket hole screws and glue.
Step 2
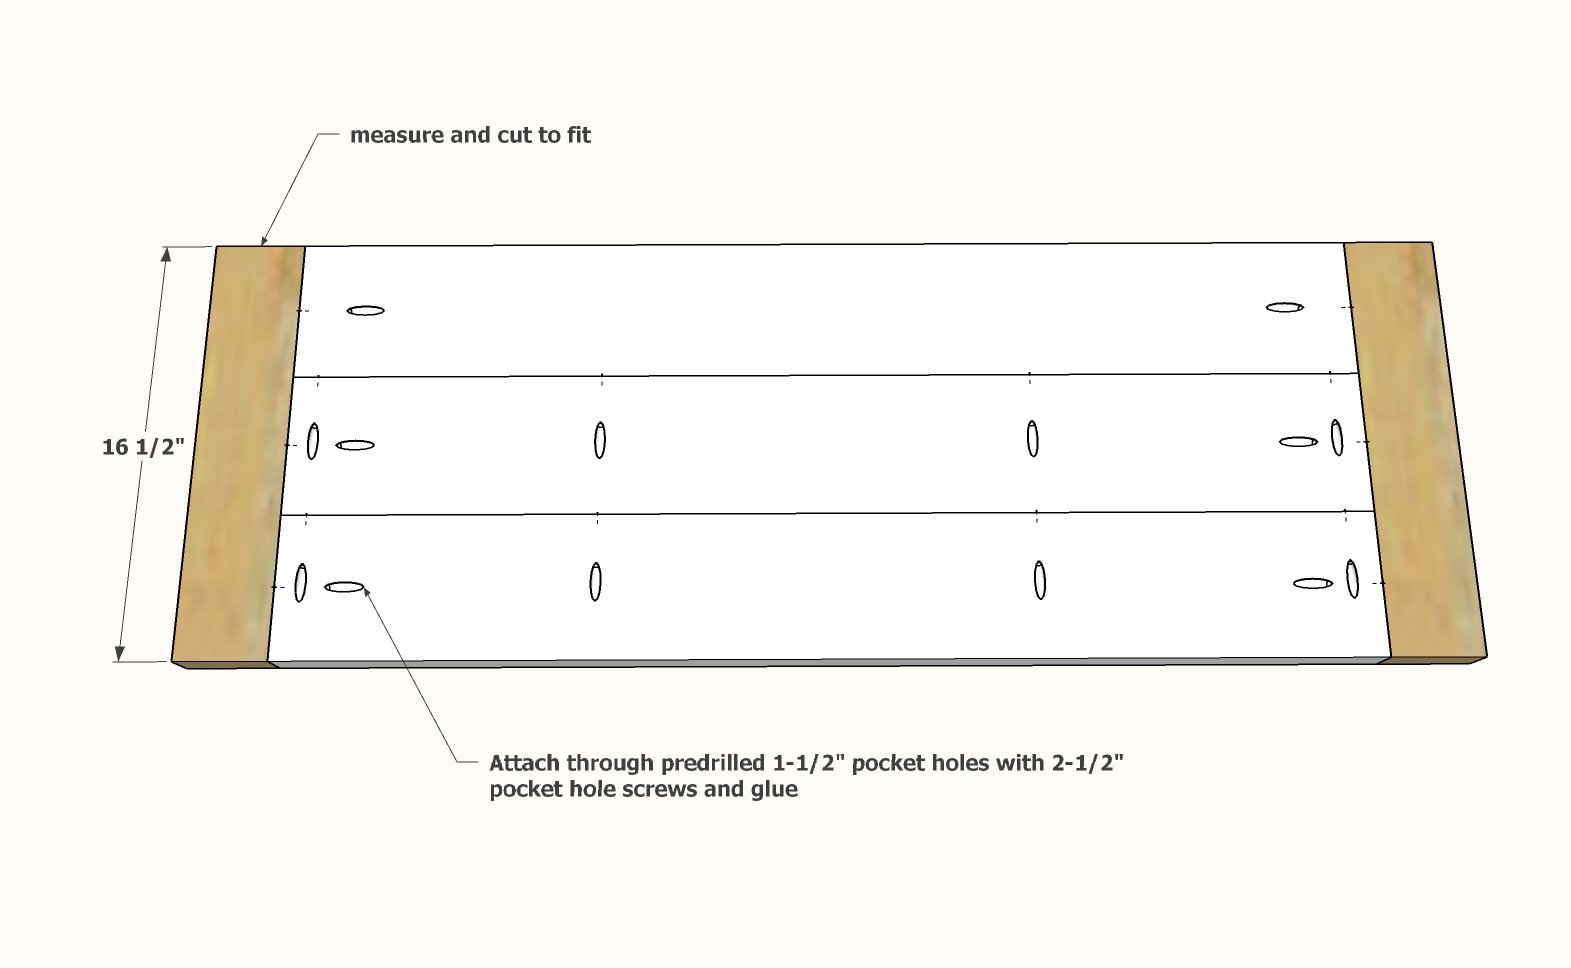
Measure and cut the 2x4 breadboard ends.
Attach the 2x6 center panel to the 2x4 breadboard ends with 2-1/2" pocket hole screws.
Step 3
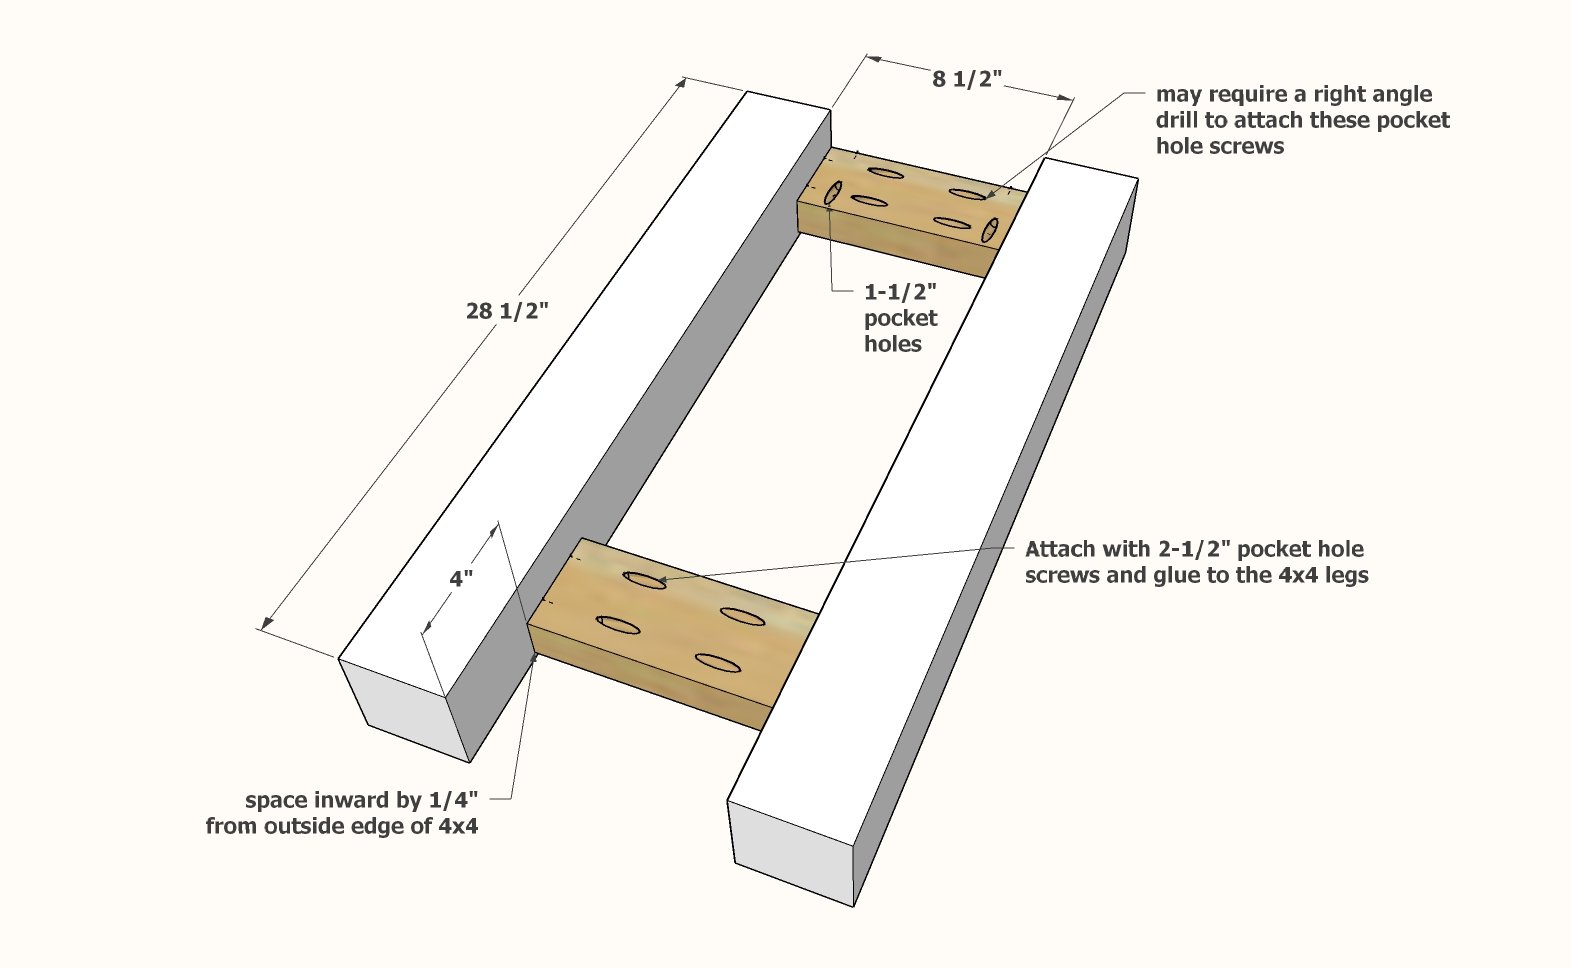
Prepare two of the 2x4 @ 8-1/2" long by drilling 1-1/2" pocket holes on each end, and then 1-1/2" pocket holes upwards for attaching the tabletop in later steps.
Prepare two more of the 2x4 @ 8-1/2" long by drilling 1-1/2" pocket holes on each end (to be used at the bottom stretcher)
Build two leg sets by attaching the short 2x4 pieces in between with 2-1/2" pocket hole screws.
Step 4
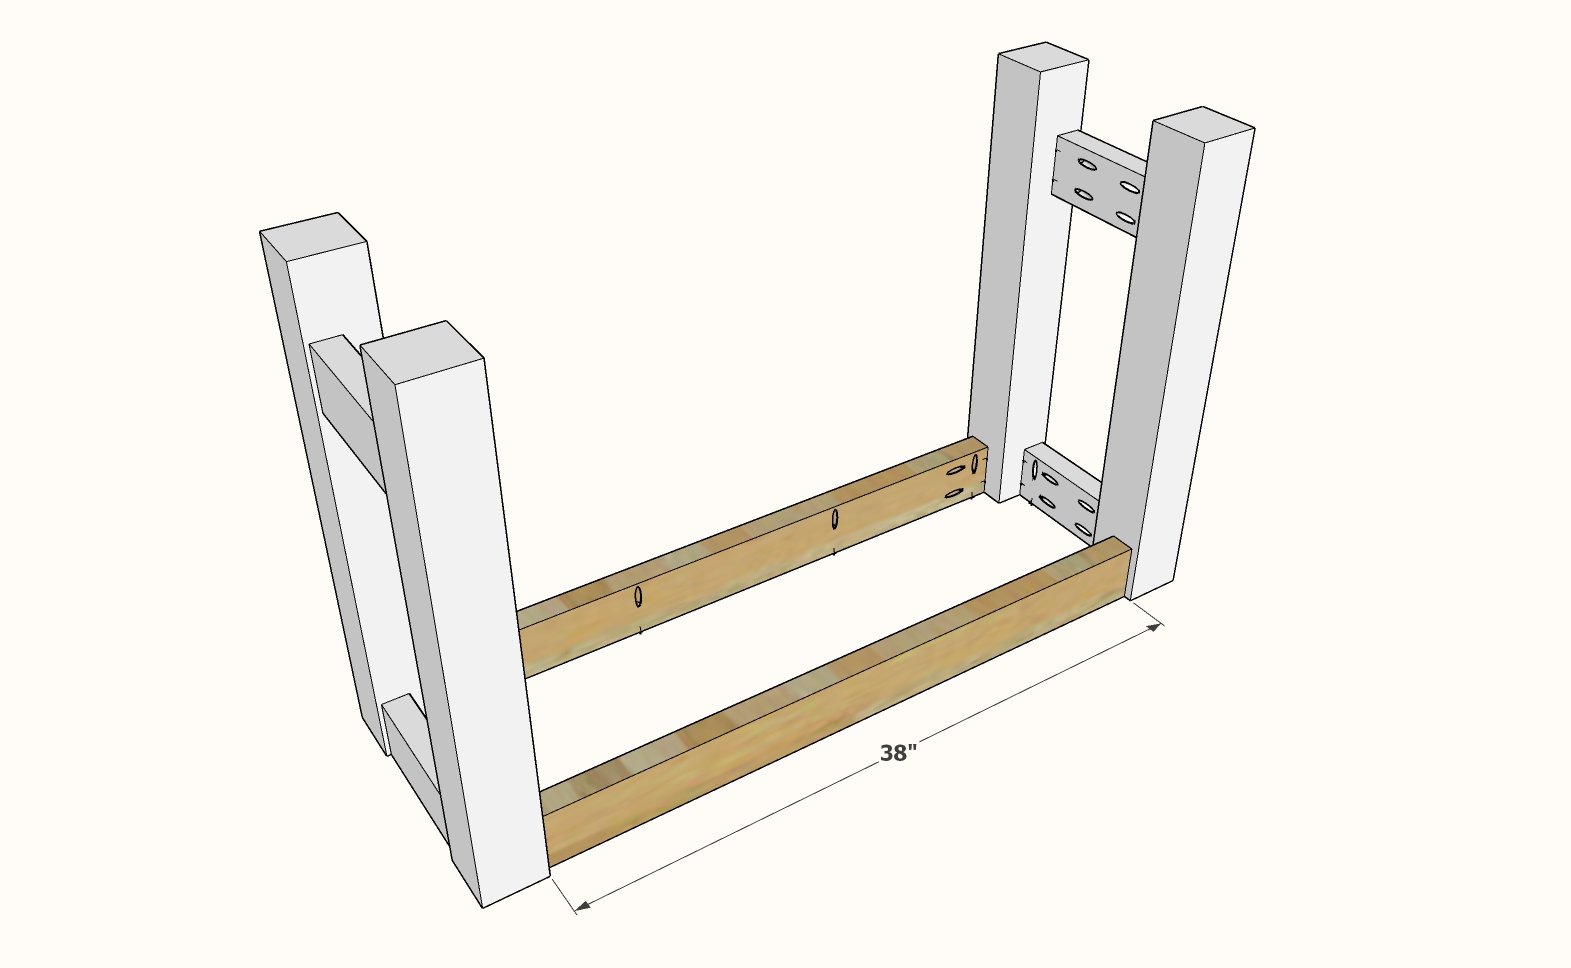
Prepare the two side aprons with 1-1/2" pocket holes on each end, and also facing upward for attaching the tabletop in later steps.
Attach the two leg sets with the side aprons using 2-1/2" pocket hole screws.
Step 5
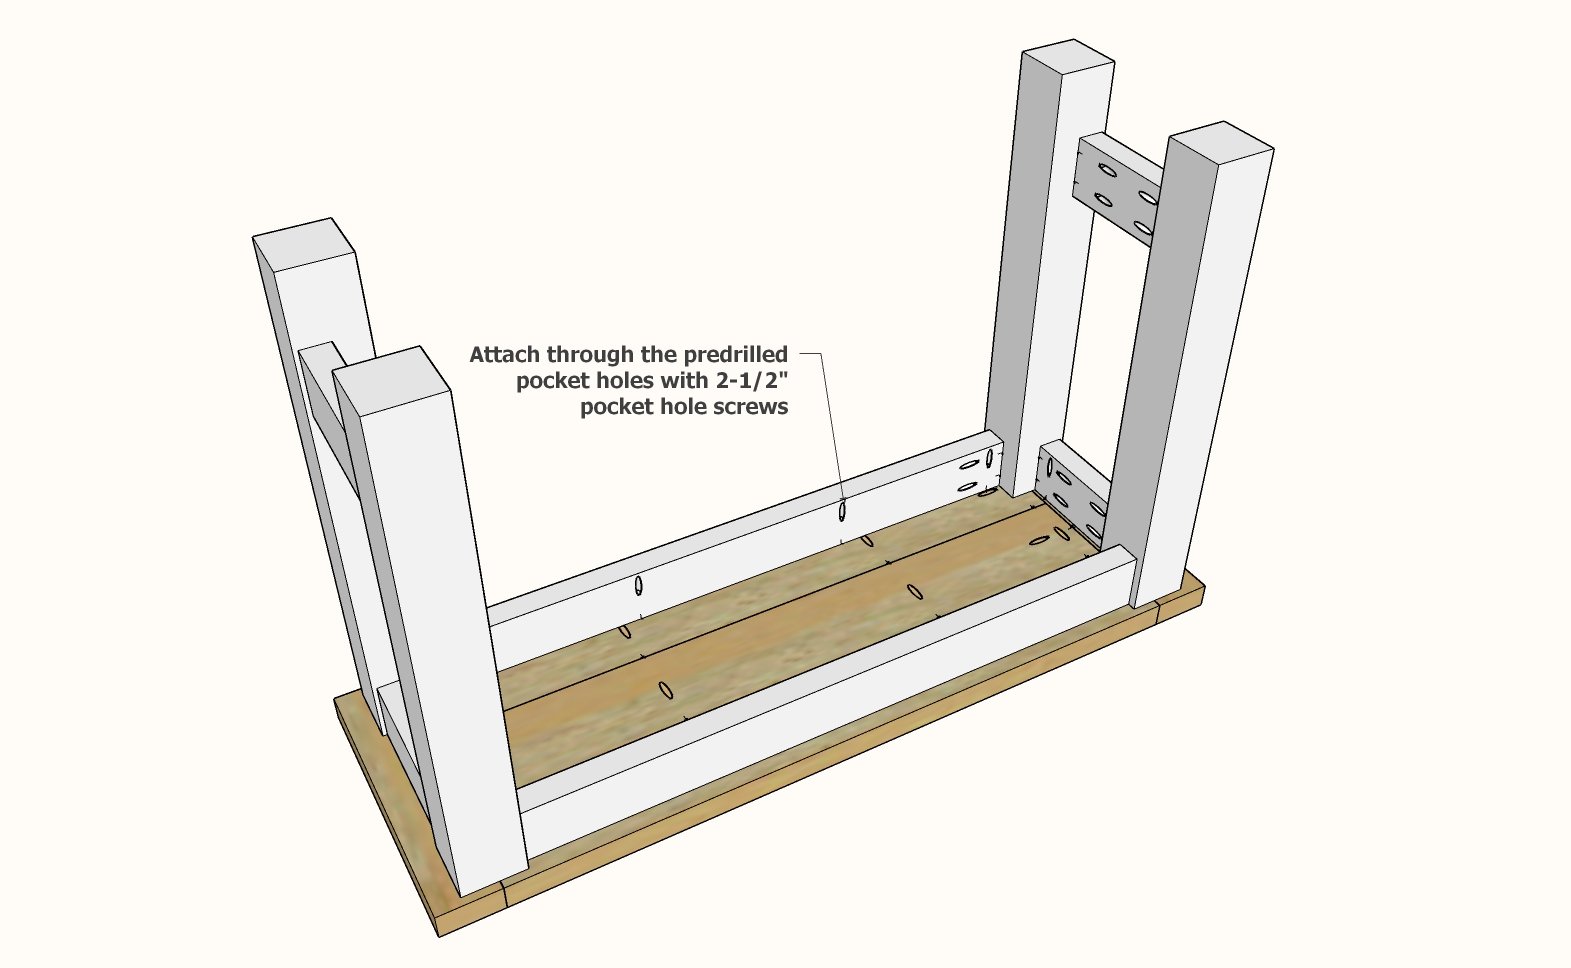
Attach the base to the underside of the tabletop through the predrilled pocket holes in the aprons with 2-1/2" pocket hole screws.
Step 6
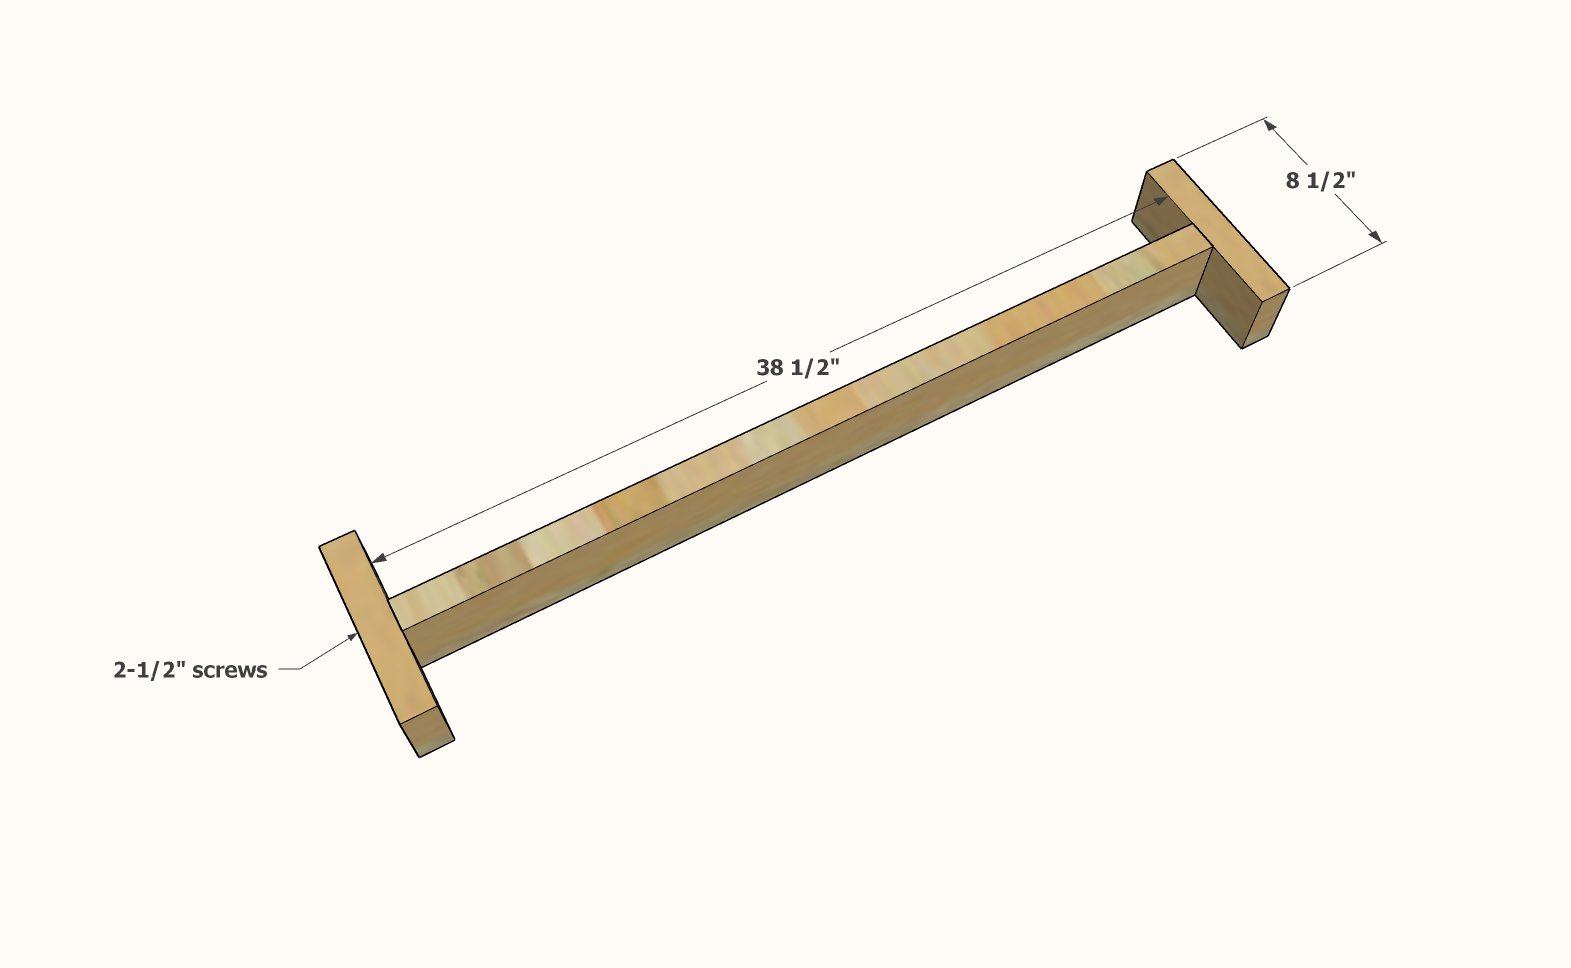
Build the stretcher with 2-1/2" screws - you can use pocket hole screws, just predrill so the head of the screw is sunken below the surface of the wood.
Step 7
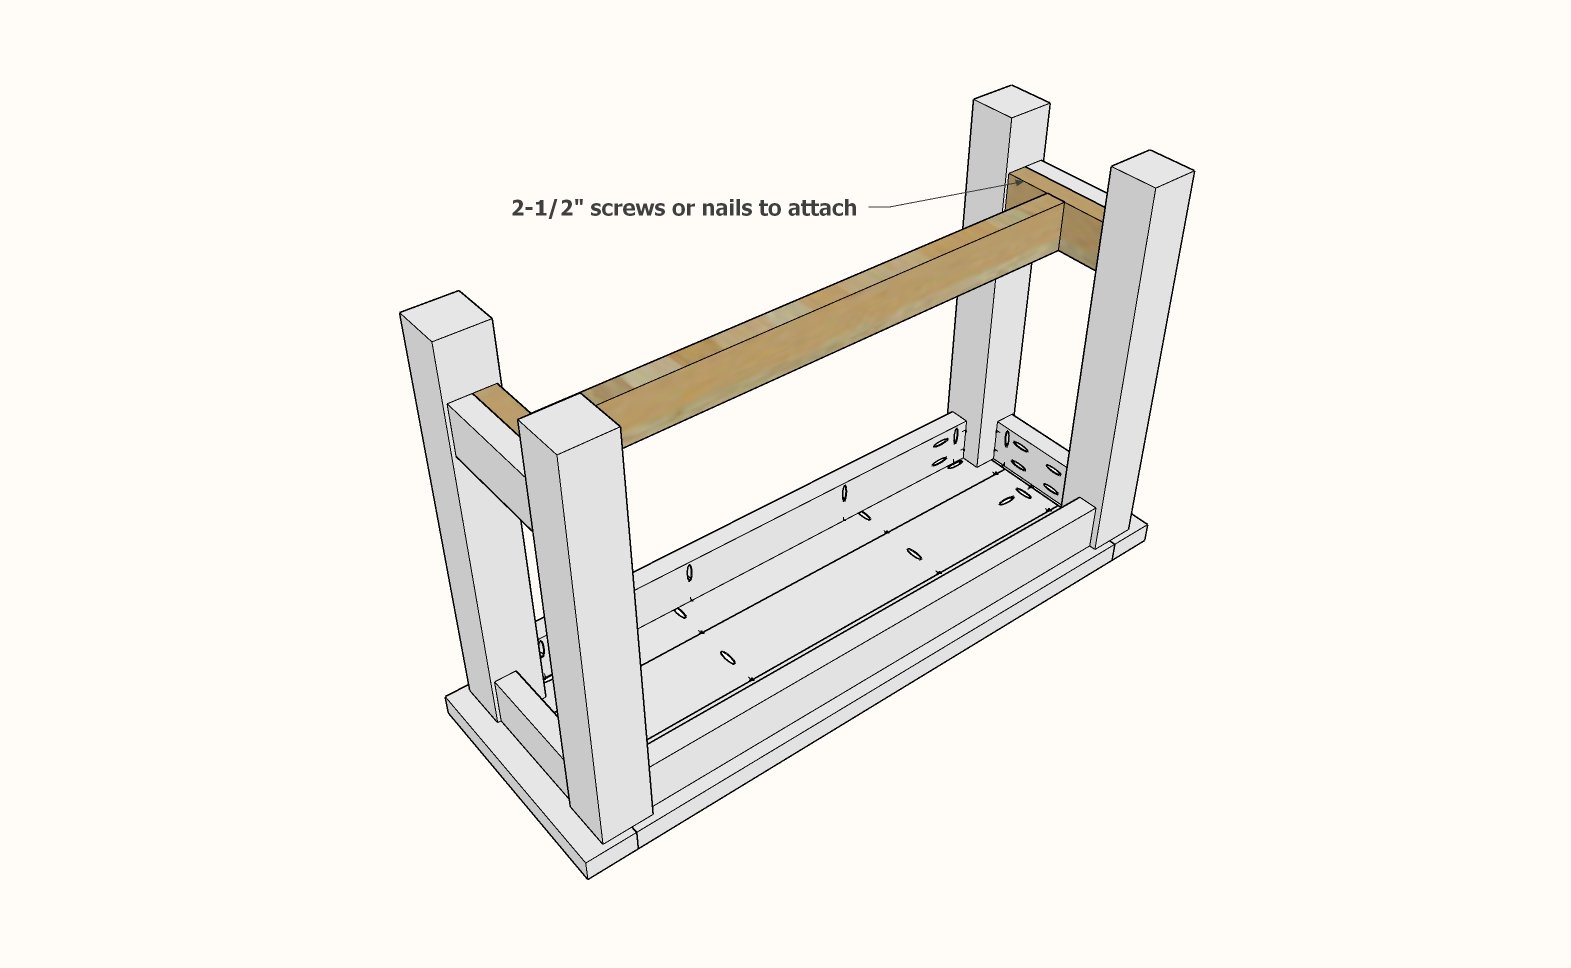
Place the stretcher inside the legs and attach with a couple of 2-1/2" screws (or can use 2" nails to hide better)
Remove all sanding residue.
When dry, add a clear poly top coat.

Comments
Peterson Family (not verified)
Mon, 01/04/2010 - 06:45
I am in LOVE with this table!
I am in LOVE with this table! I wonder if I can get Hubs to make it for me???? Hmmmmm....
lanisanford (not verified)
Mon, 01/04/2010 - 07:56
oooh Thanks for this one! I
oooh Thanks for this one! I don't need a dining table OR a coffee table but I am going to make an island that looks like this for my kitchen. Being a tiny kitchen I will have to make it bigger than the console table but smaller than the dining table :D I am going to put two shelves in I think...
JamesandKelsey (not verified)
Mon, 01/04/2010 - 09:32
My father and I just finished
My father and I just finished building this table! Your tutorial made it incredibly easy, and neither of us are carpenters so that`s saying something!!
I`m waiting for the finish to dry and then I`ll be sending pictures your way = D
-k
JamesandKelsey (not verified)
Mon, 01/04/2010 - 17:29
whoops! actually we made the
whoops! actually we made the simple, cheap, and easy console.
Melissa E (not verified)
Mon, 01/04/2010 - 18:58
OHHHHH yea! I'm so excited
OHHHHH yea! I'm so excited you posted this!! :) I think we are going to go for it this weekend!!
Anonymous (not verified)
Tue, 01/05/2010 - 17:42
Love this table..have been
Love this table..have been looking to buy one exactly just like it but cost too much $. Thank you so much for your site. I am totally clueless about building but you seem to make it took like I could do it. Just wondering what kind of wood to use??
Ana White (not verified)
Thu, 01/07/2010 - 06:37
The cheapest and easiest way
The cheapest and easiest way is to use stud grade lumber. It's already distressed. AND it's exactly what Pottery Barn uses for their pine colored table! I hope you take a second to look at the Beth's Hyde Coffee Table (http://knockoffwood.blogspot.com/2009/12/bragging-board.html ) and End Table (http://knockoffwood.blogspot.com/search/label/Bragging%20Board) - she used pine and it is beautiful.
Angela (not verified)
Sun, 01/10/2010 - 10:31
After looking through the
After looking through the plans you've done of benches for say a dining room table I think we're going to use the console table plan, shorten the legs and lengthen the top to make benches for our sorav dining table (world market). We got this table out of their dumpster last year. It took a year but we were finally able to get replacement legs and fix the damage to the table itself. This will totally save us the $500 for chairs and benches. Awesome!
Brooke - in Oregon (not verified)
Mon, 01/11/2010 - 06:35
Oh my gosh I LOVE THIS!!
Oh my gosh I LOVE THIS!!
The Faveros (not verified)
Mon, 01/11/2010 - 12:38
Me and my husband just made
Me and my husband just made this as a house warming gift for my Aunt! I was so worried because she has such a beautiful home but it turned out so great- can't wait to paint it and post pictures!! It only cost us 35.00 to build but we already had the 4x4's left over from something else!!
Crazy Girl Blond (not verified)
Tue, 01/19/2010 - 06:47
I love this table and have
I love this table and have plans to make it ASAP! I have one question. I was looking at the console table that Kelsey and her dad made (real simple console table) They added a shelf on the bottom. Can I do the same thing with this table? If so how do I do that?
Thanks for all you do! I can not wait to fill my house up with furniture!!!
Ana White (not verified)
Tue, 01/19/2010 - 08:32
to make a bottom shelf, you
to make a bottom shelf, you would essentially need to construct a second table top, much like you did for the top. Only this time, use 1x2s as the supports and aprons. I would extend the aprons so that they are flush with the legs, instead of inset.
Cover the top of the shelves in 1x4 boards. Copy the top by doing a "breadboard" end between the legs, and then fill in the remaining pices with 1x4s.
MaryBeth (not verified)
Tue, 01/19/2010 - 16:58
Hi. I just found your
Hi. I just found your website tonight and LOVE it! Back in October I had my husband make this table for me. Here's the link. Enjoy!
http://ilovethatblog.blogspot.com/2009/10/little-inspiration.html
Rachel (not verified)
Mon, 02/15/2010 - 12:38
I've been working on the Hyde
I've been working on the Hyde console table this weekend and wanted to share what i've found in doing it. (almost there--near the finish line!) One thing I noticed was that the cut list only calls for 2 side apron spacers, but you need 4 to put one on each leg. Not a major problem!
I think this makes for a good first project--definitely "doable," but I did have to "call for help" a few times. Looking forward to going out on my own for the next project (Farmhouse bed?) Pictures coming when its done! Thanks again, Ana!
Vanilla Comfort (not verified)
Sun, 03/07/2010 - 16:16
You can build one for me!
You can build one for me! Please?! Seriously though, I just found your blog and I want to thank you so much. I don't know if I will ever have the courage/time/money (yes, money, I'm that poor) to actually build anything, but it does make my pottery barn dreams seem a bit closer!
Lorilyn (not verified)
Thu, 03/18/2010 - 12:39
OH my goodness. I am so
OH my goodness. I am so excited to try and build this during the weekend! I figure it can't go any worse then my first pajama sewing project did (Pockets ended up down at the knees!)
Nancy @ Live l… (not verified)
Thu, 03/18/2010 - 14:41
This is exactly what i want!
This is exactly what i want! Now to convince the hubby!
~Nancy
Dee (not verified)
Sun, 04/18/2010 - 11:14
We just finished this project
We just finished this project & are so proud of ourselves. Thanks for this awesome plan. Will post pictures once we get it stained.
Tuli (not verified)
Tue, 04/20/2010 - 20:37
Are you all using green
Are you all using green lumber, as in not kiln dried? I live in Oregon and no one locally has this kiln dried...
Carpentr-E (not verified)
Sun, 05/16/2010 - 12:59
Hi, thanks for sharing your
Hi, thanks for sharing your wonderful plans! I want to make this console table, but I live in Atlanta and I'm having a super hard time finding a 4'x4' that is not pressure treated. I've tried the major DIY hardware stores, but no luck. Where did you find the 4'x4'?
BBFHOA (not verified)
Sun, 08/01/2010 - 11:23
Ana,I just found your blog
Ana,
I just found your blog and am very inspired! I'm a beginning woodworker and thought all furniture was hard to build...until I found your plans!
One question - where do you find your 4x4 lumber? I've checked both HD and LHI and found that they carry only pressure treated 4x4s. Any suggestions for those of us in the piedmont area of NC?
Joy (not verified)
Sat, 08/21/2010 - 18:24
Ana (and all!)Was wondering
Ana (and all!)
Was wondering if I could use this as the base idea for a side table/radiator cover? They are SO expensive to buy or have custom made and little fingers are curious... so I want to get started now before the heat comes on late this fall...
I would have to take out the last stabilizing piece but could put something on the outside of the legs if needed. Would also probably use metal perforated sheets to fill the other areas...
Unless radiator cover plans are coming!
Joy (not verified)
Sat, 08/21/2010 - 18:25
Ana (and all!)Could I modify
Ana (and all!)
Could I modify this to a table/radiator cover?
Little fingers are curious and I need to get started soon so I am sure to be done by late fall when the heat comes on...
unless there are radiator cover plans coming soon...
Erin I (not verified)
Wed, 08/25/2010 - 18:13
BBFHOA - If you are close to
BBFHOA - If you are close to Raleigh, NC, check out Capital City Lumber, right off 440 beltline. They have 4x4 untreated for about $8 for 8'.
ana (not verified)
Sun, 08/29/2010 - 18:51
Erin, thanks!
Erin, thanks!
Upcoming Proje… (not verified)
Tue, 09/07/2010 - 10:34
[...] first project will be
[...] first project will be the Hyde Console Table. Ana at Knock-Off Wood is a genius! I love all her projects and I have been dying to get on her [...]
Loralee (not verified)
Wed, 10/06/2010 - 04:48
Hi Ana, Thanks for these
Hi Ana,
Thanks for these awesome instructions! I was just wondering something-I noticed that the tables are longer in some of the pictures, and I'd like to make a table longer than 48"-which pieces do I need to change the cut length on in order to do that? I'm assuming it's the front and back aprons, tabletop pieces and the stretcher-am I correct?
I'm so excited to try this!!
thanks,
Loralee
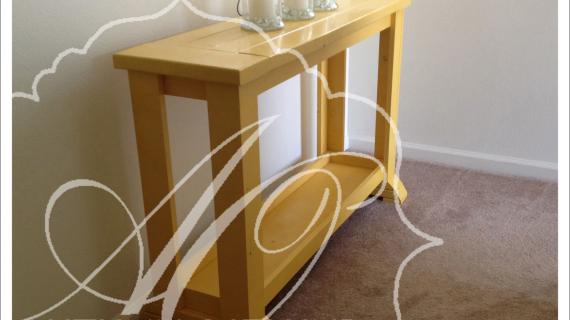
Ashley Mjoen (not verified)
Sun, 11/14/2010 - 17:39
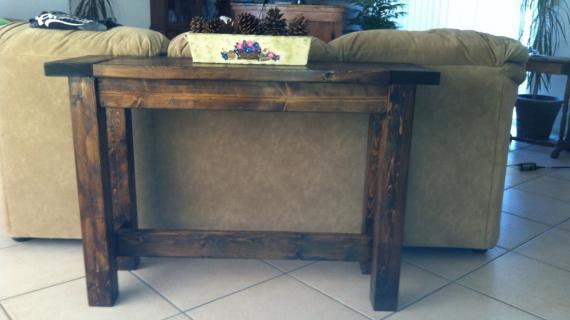
Here is out "Tryde" console
Here is out "Tryde" console table. We love it. We are now working on the side tables. We added L shaped brackets under the ends for extra support.

Lisa W (not verified)
Fri, 12/10/2010 - 17:18
Ana - I'm cutting the wood
Ana - I'm cutting the wood for this right now and wouldn't you need 4 of the side apron spacers labeled as B? Just want to make sure!
Joey Marcelo (not verified)
Mon, 12/13/2010 - 09:44
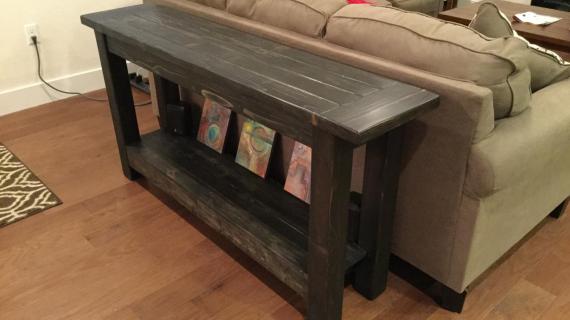
did my version of ana's
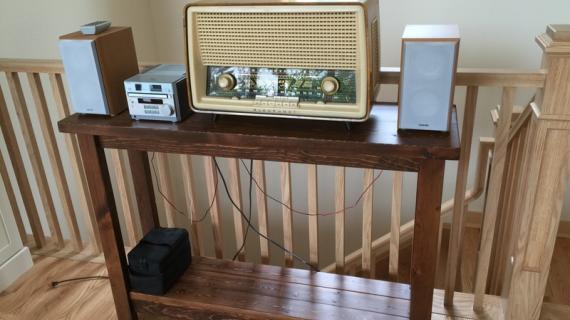
did my version of ana's design of the console table and might proud of the results!
did a dark stain of dark walnut to match my floors and staircare finish! thanks for the inspiration ana!
ACraftyCauldron
Wed, 03/09/2011 - 04:44
Oh WOW!
This is BEAUTIFUL!!! I think I'm gonna have to try the entire Tryde collection! :D
Guest (not verified)
Sat, 08/06/2011 - 17:38
How-To section
Ana, do you have a how-to section on this site? I've looked for it, but can't find it.
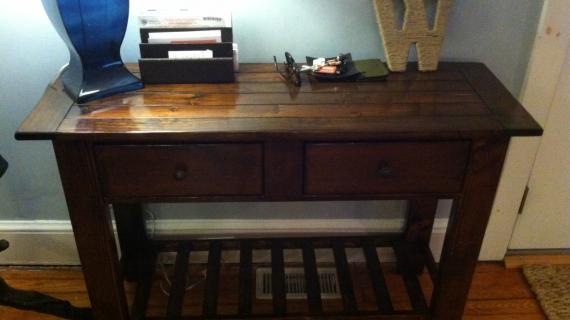
Dee22
Tue, 12/27/2011 - 17:33
Tryde Console Table
This was our first ever project from your site. We were so happy with the results. Thank you.
Jen Orgill (not verified)
Wed, 02/01/2012 - 15:57
Table stain
I love this table and especially love the finish. Can you tell me what finish you used on it? It is exactly what I am wanting to do a kitchen table in. Thanks!
Jaime_G (not verified)
Wed, 06/27/2012 - 08:46
Where can I buy the lumber
Where can I buy the lumber for this. Does Homedepot sell this kind of wood? or do I need to find a specialized lumber store?
davidmac (not verified)
Wed, 06/27/2012 - 13:33
Yes, you can get it at home
Yes, you can get it at home depot. Make sure you get the regular lumber and not the pressure treated kind.
JTF (not verified)
Thu, 08/30/2012 - 08:52
Step 6
About to start building this but can't figure out how to attach the breadboard ends in step 6. It says to use the 4" screws into the leg, but as it sits in the picture the table is resting on the breadboard end with only 1.5 inch overlap and there does not appear to be a way to screw the two together Almost seems like it would need an L-bracket. Or do I turn it over and screw into the leg from the top?
Also, the materials list calls for a Kreg jig and 1 1/4 and 2 1/2 PH screws but I can't see where in the instructions they are used. Any help would be most appreciated. Thanks.
alstonsmith
Fri, 08/16/2013 - 06:04
easy and good way
very simple way you have to describe all feature i am really impress thanks ANA.http://www.calendarprinting.org.uk
Kjm25bball
Fri, 03/04/2016 - 08:18
Kreg Jig
I'm buying Kreg jig to make this today but the plans don't make it clear where to drill the pocket holes? Can someone help me?
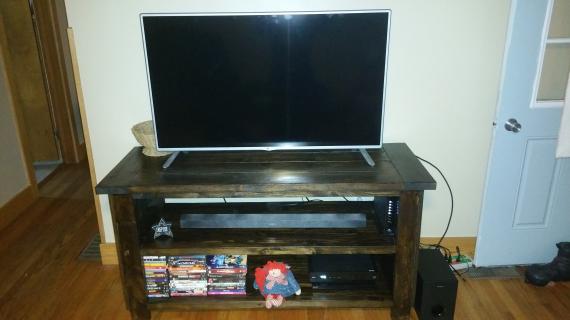
jfinch7
Mon, 01/02/2017 - 12:55
Turned out great!
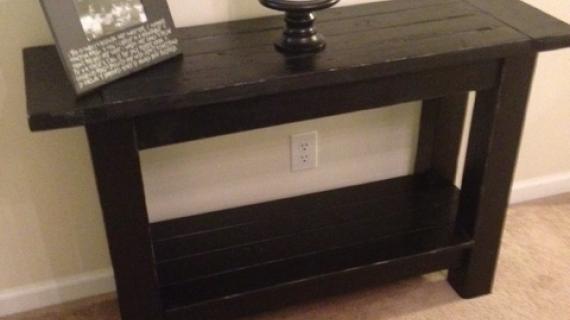
Just finished this table for my wife, with a shelf on the bottom. Turned out awesome!
atbrunette
Mon, 02/20/2017 - 09:22
Open bottom?
I want to build one like this without a crossbar at the bottom to allow small stools to tuck under. Can that be done?
steve.l.levine…
Mon, 10/12/2020 - 07:26
Correction to cut list
Going to try building this plan. On the cut list, shouldn't it be 4 side apron spacers, instead of 2?
marinaaamarie
Sun, 03/07/2021 - 17:38
What's the Stain?
Beautiful stain on that table! May I ask what the name of the stain is? It looks as though it would match our home furniture color and I'd love to try it!