


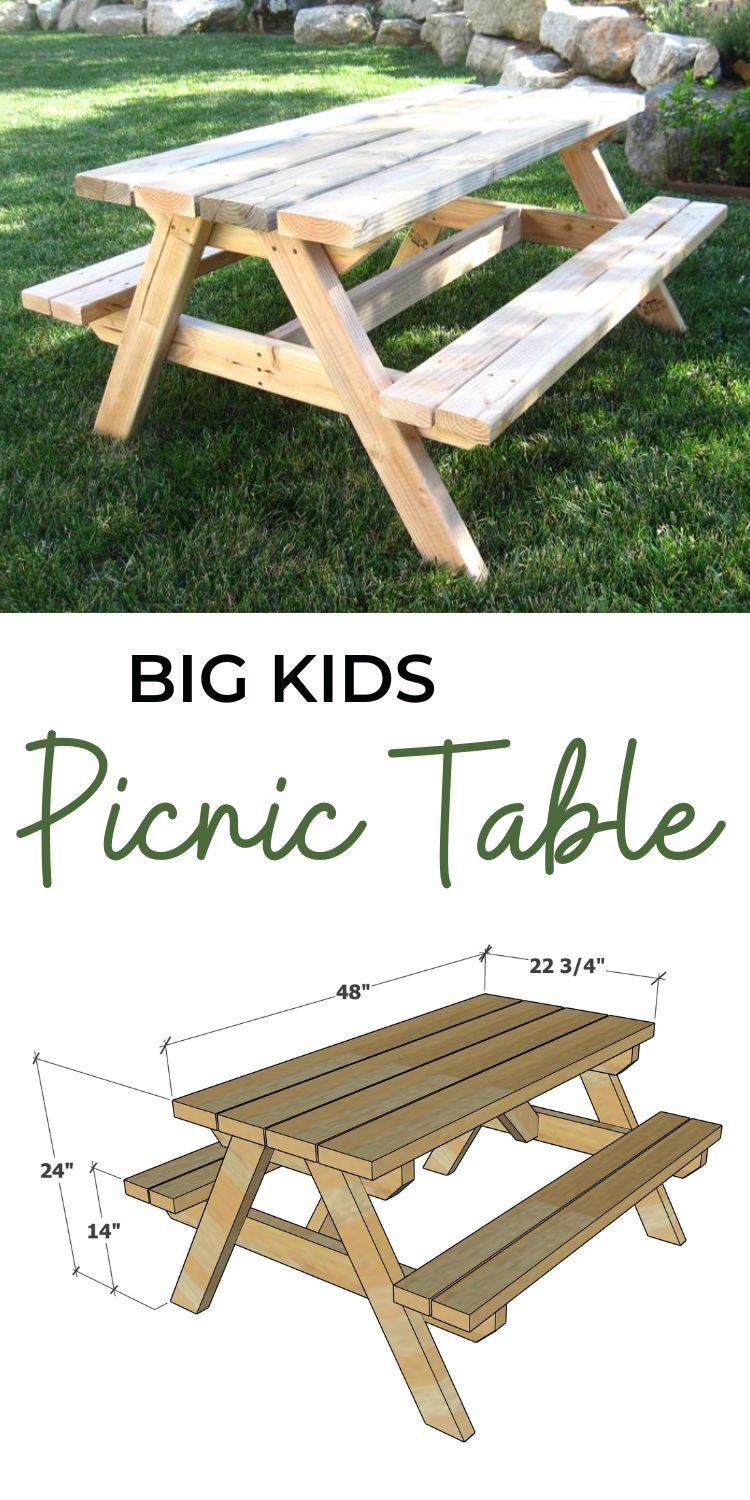
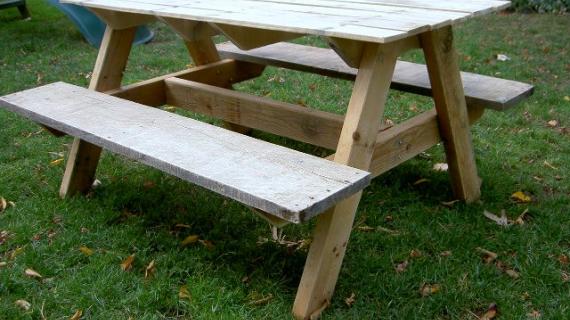
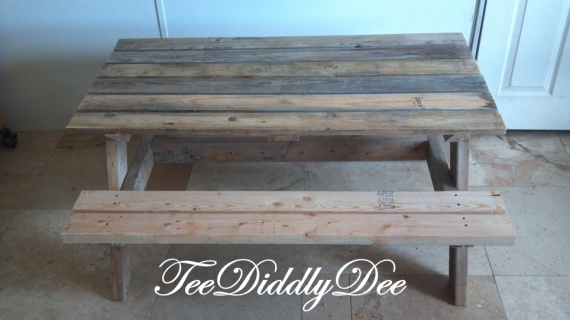
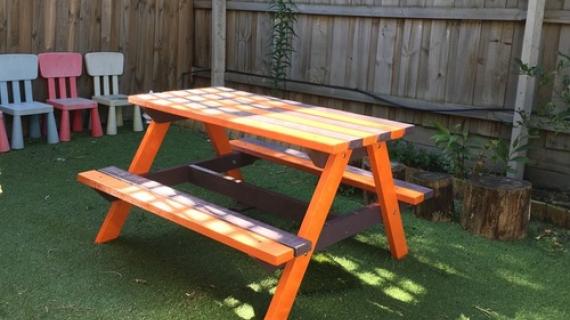
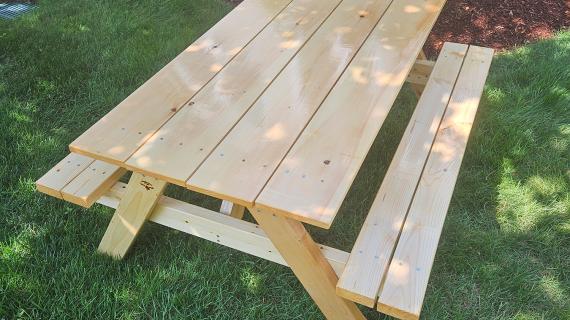
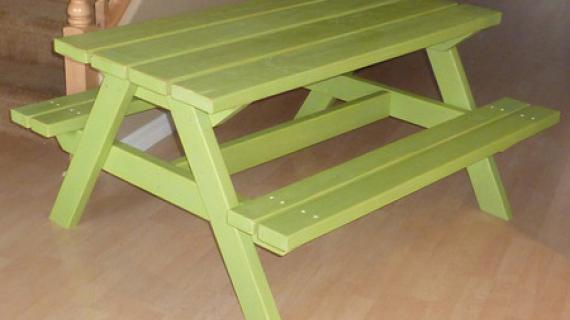
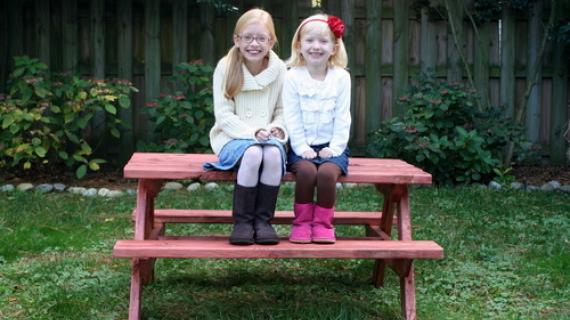
Our favorite kids picnic table! Designed to fit bigger kids, this super sturdy picnic table is big enough to sit a small adult too! Super easy to build design has been built hundreds of times already!
Build your own kids picnic table with the best plans - Step by step diagrams, shopping and cut lists with video tutorial from Ana-White.com
Here's Some Tips to Build Better Outdoor Furniture
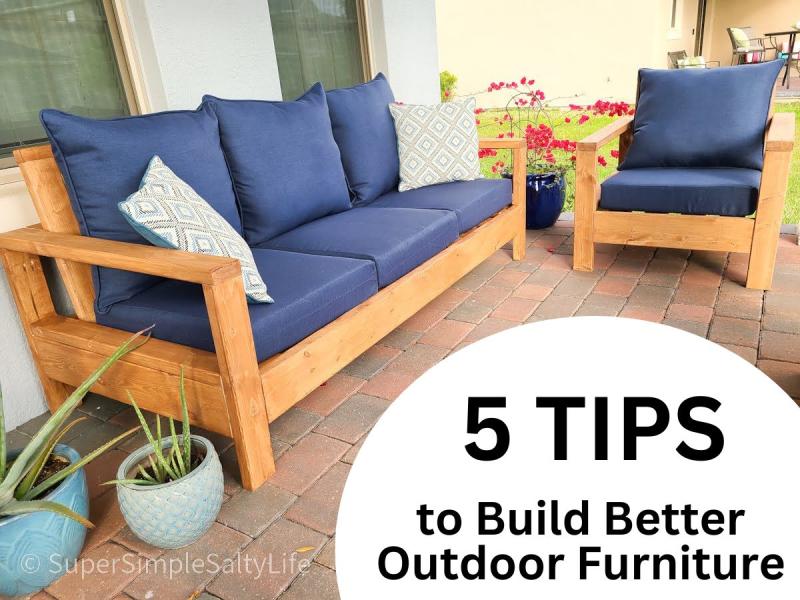
Want to build better outdoor furniture? Over the twenty years I've been building, maintaining, and enjoying my own outdoor furniture, I've learned a few tips that can help build longer lasting furniture.
Pin For Later!
Preparation
- 2 – 2×6 Boards, 8′ Long
- 6 – 2×4 Boards, 8′ Long
- 60 - 2 1/2″ self tapping star bit screws, exterior rated (can also be up to 2-3/4" in length)
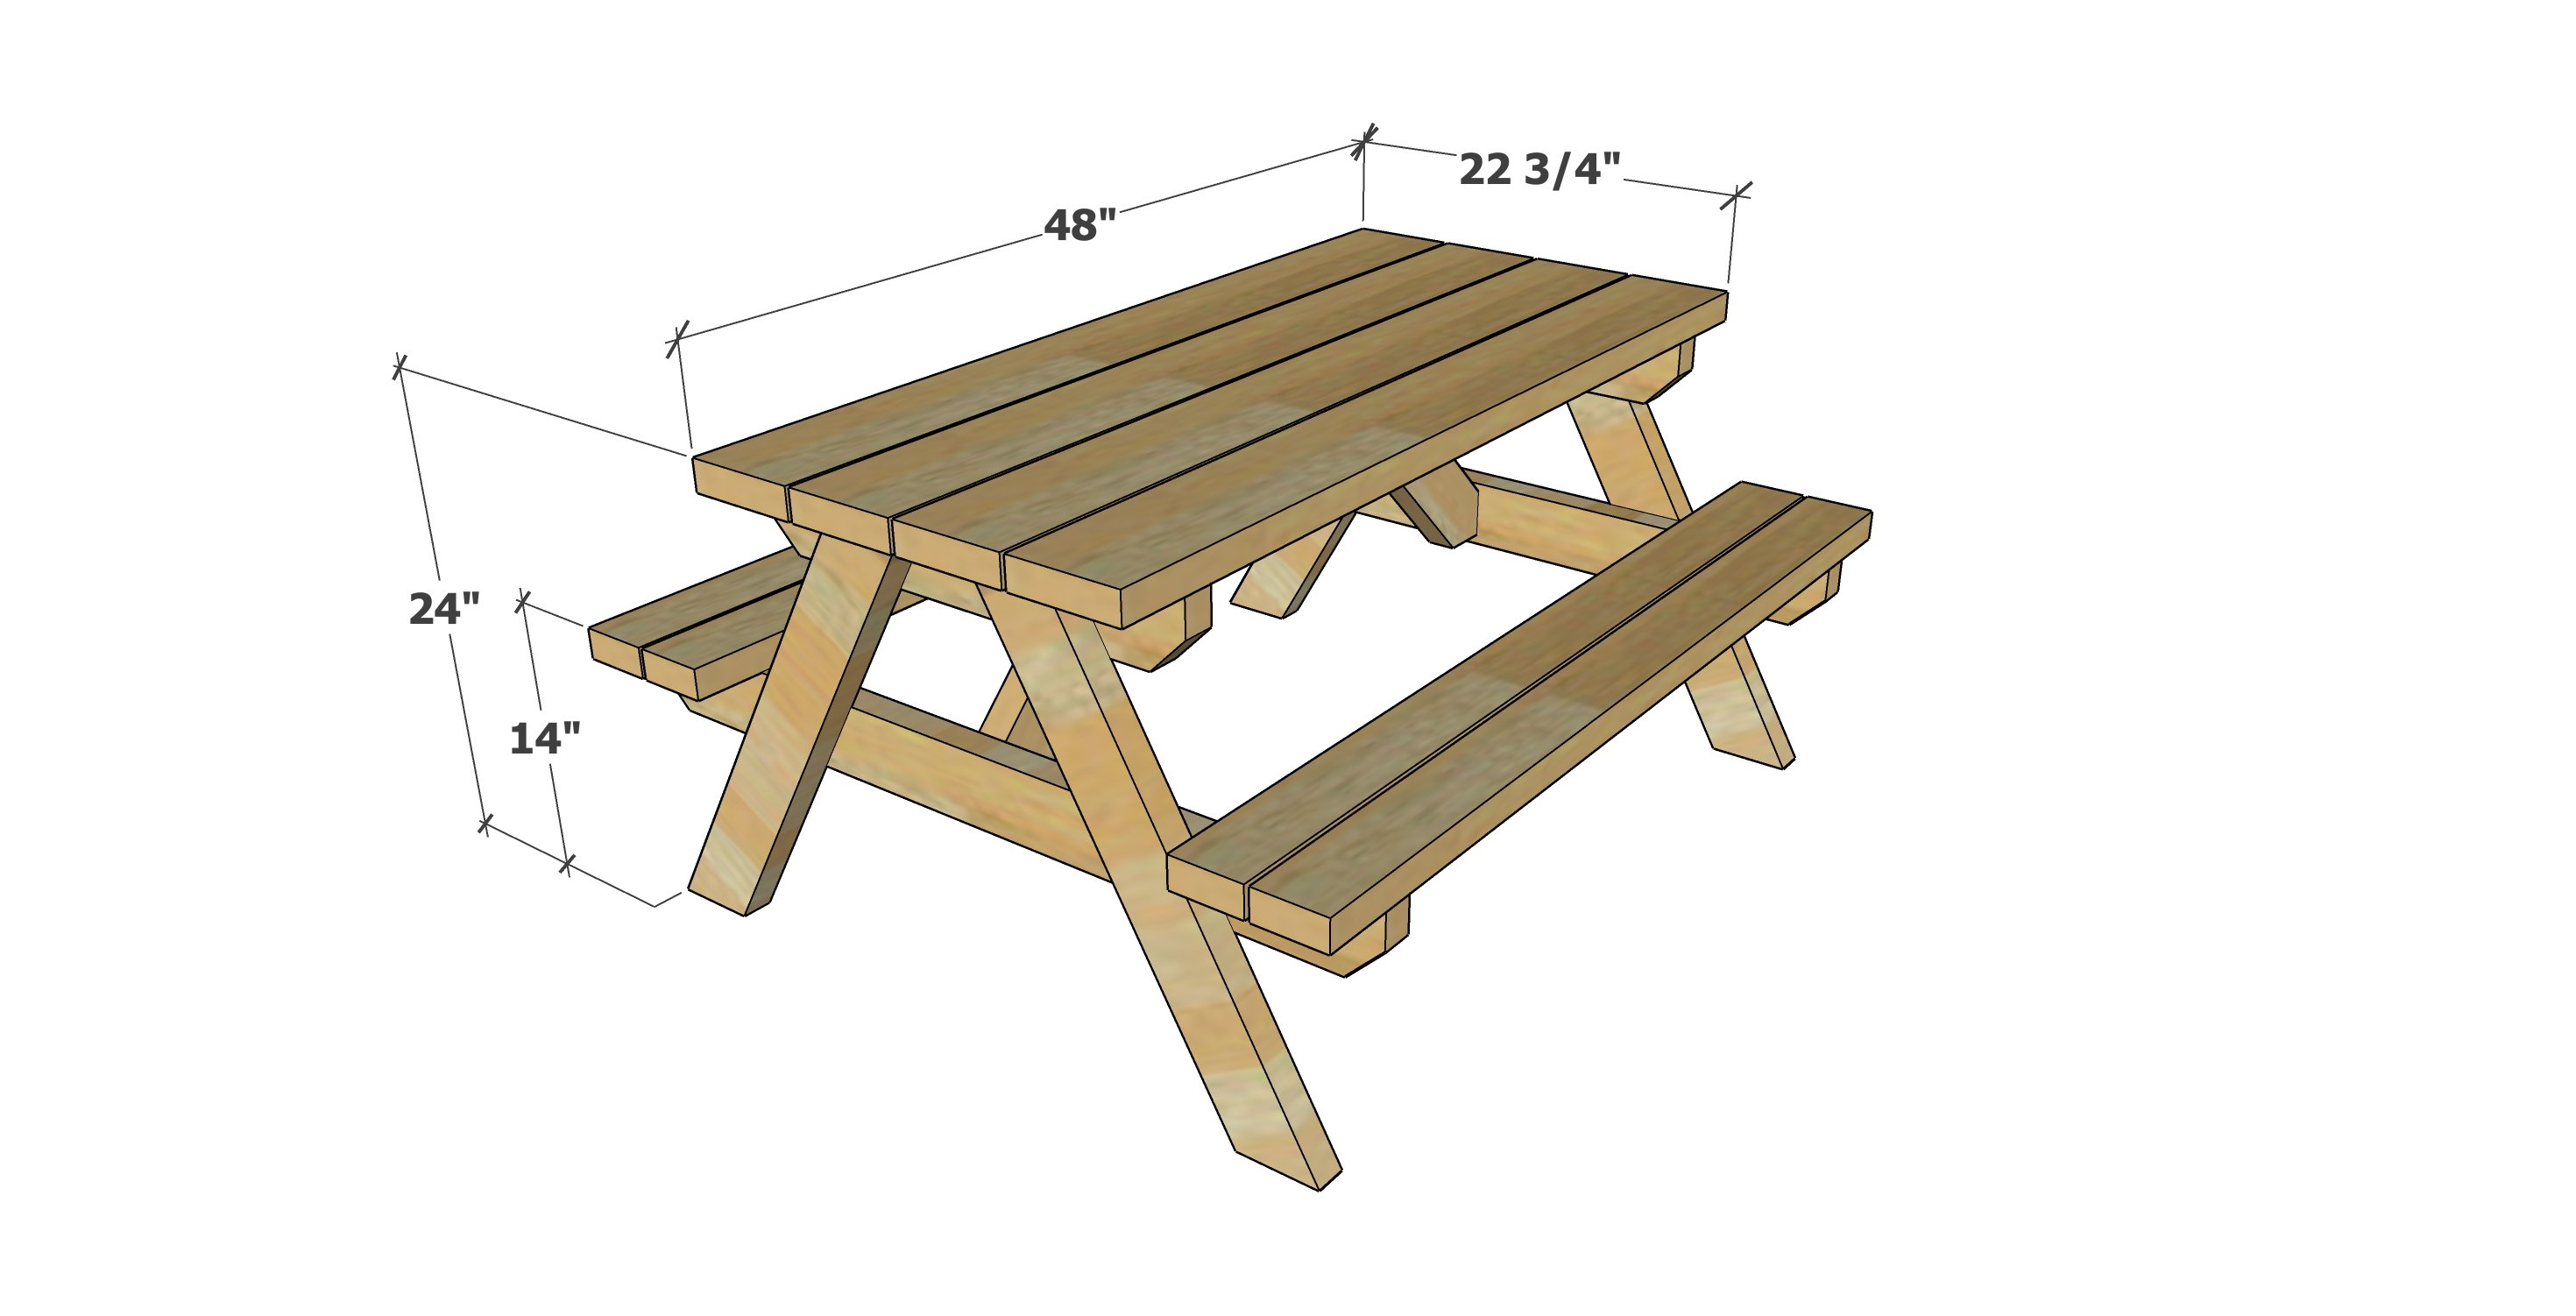
- 4 – 2×6 @ 48″ (tabletop)*
- 2 – 2×4 @ 22 3/4″ (tabletop supports)**
- 1 – 2×4 @ 38″ (center tabletop support)
- 4 – 2×4 @ 26″ both ends cut at 30 degrees off square, long point to short point measurement, ends ARE parallel (legs)
- 2 – 2×4 @ 41″ (seat supports)**
- 4 – 2×4 @ 48″ (seat boards)*
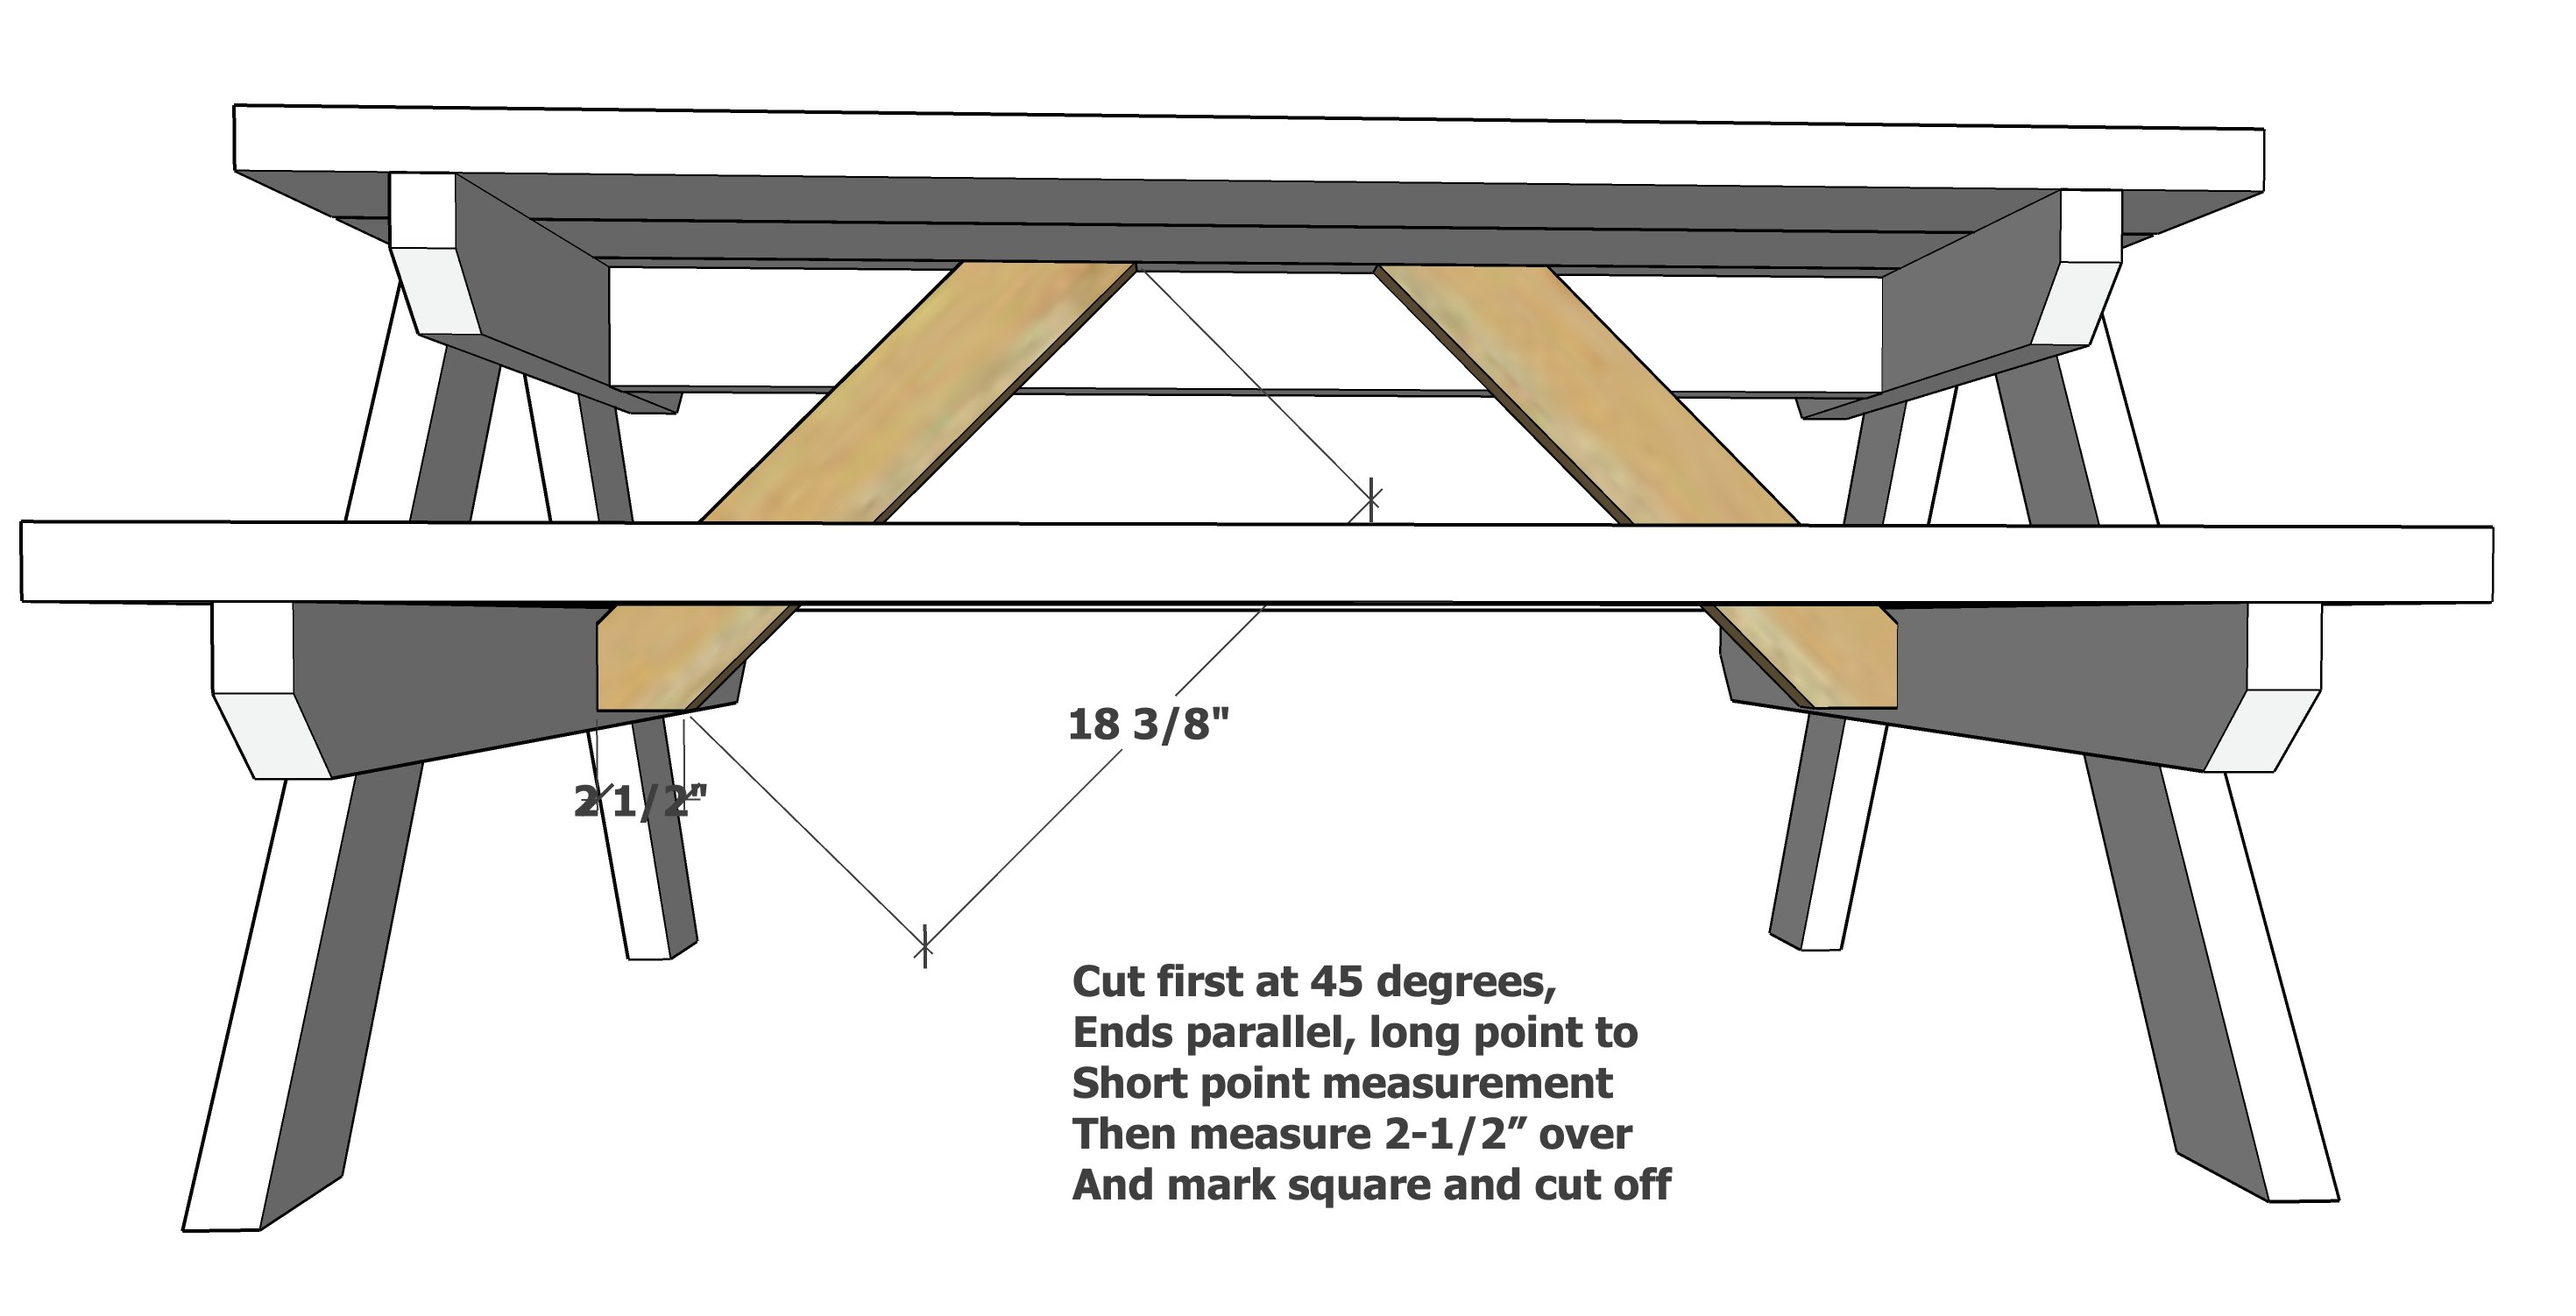
- 2 - 2x4 @ 18-3/8" long point to short point measurements, ends ARE parallel (cross supports)***
*If your lumber measures exactly 96" long, simply cut in half - the cuts may end up 47-7/8" or similar, it won't matter in the project
**Soften the ends at 45 degrees as shown in the plans
***Additional cut is needed to fit inside the cross support


Work on a clean level surface. Take a square of your project after each step. Predrill and countersink your screw holes. Use proper safety precautions and equipment.
Instructions
Step 1
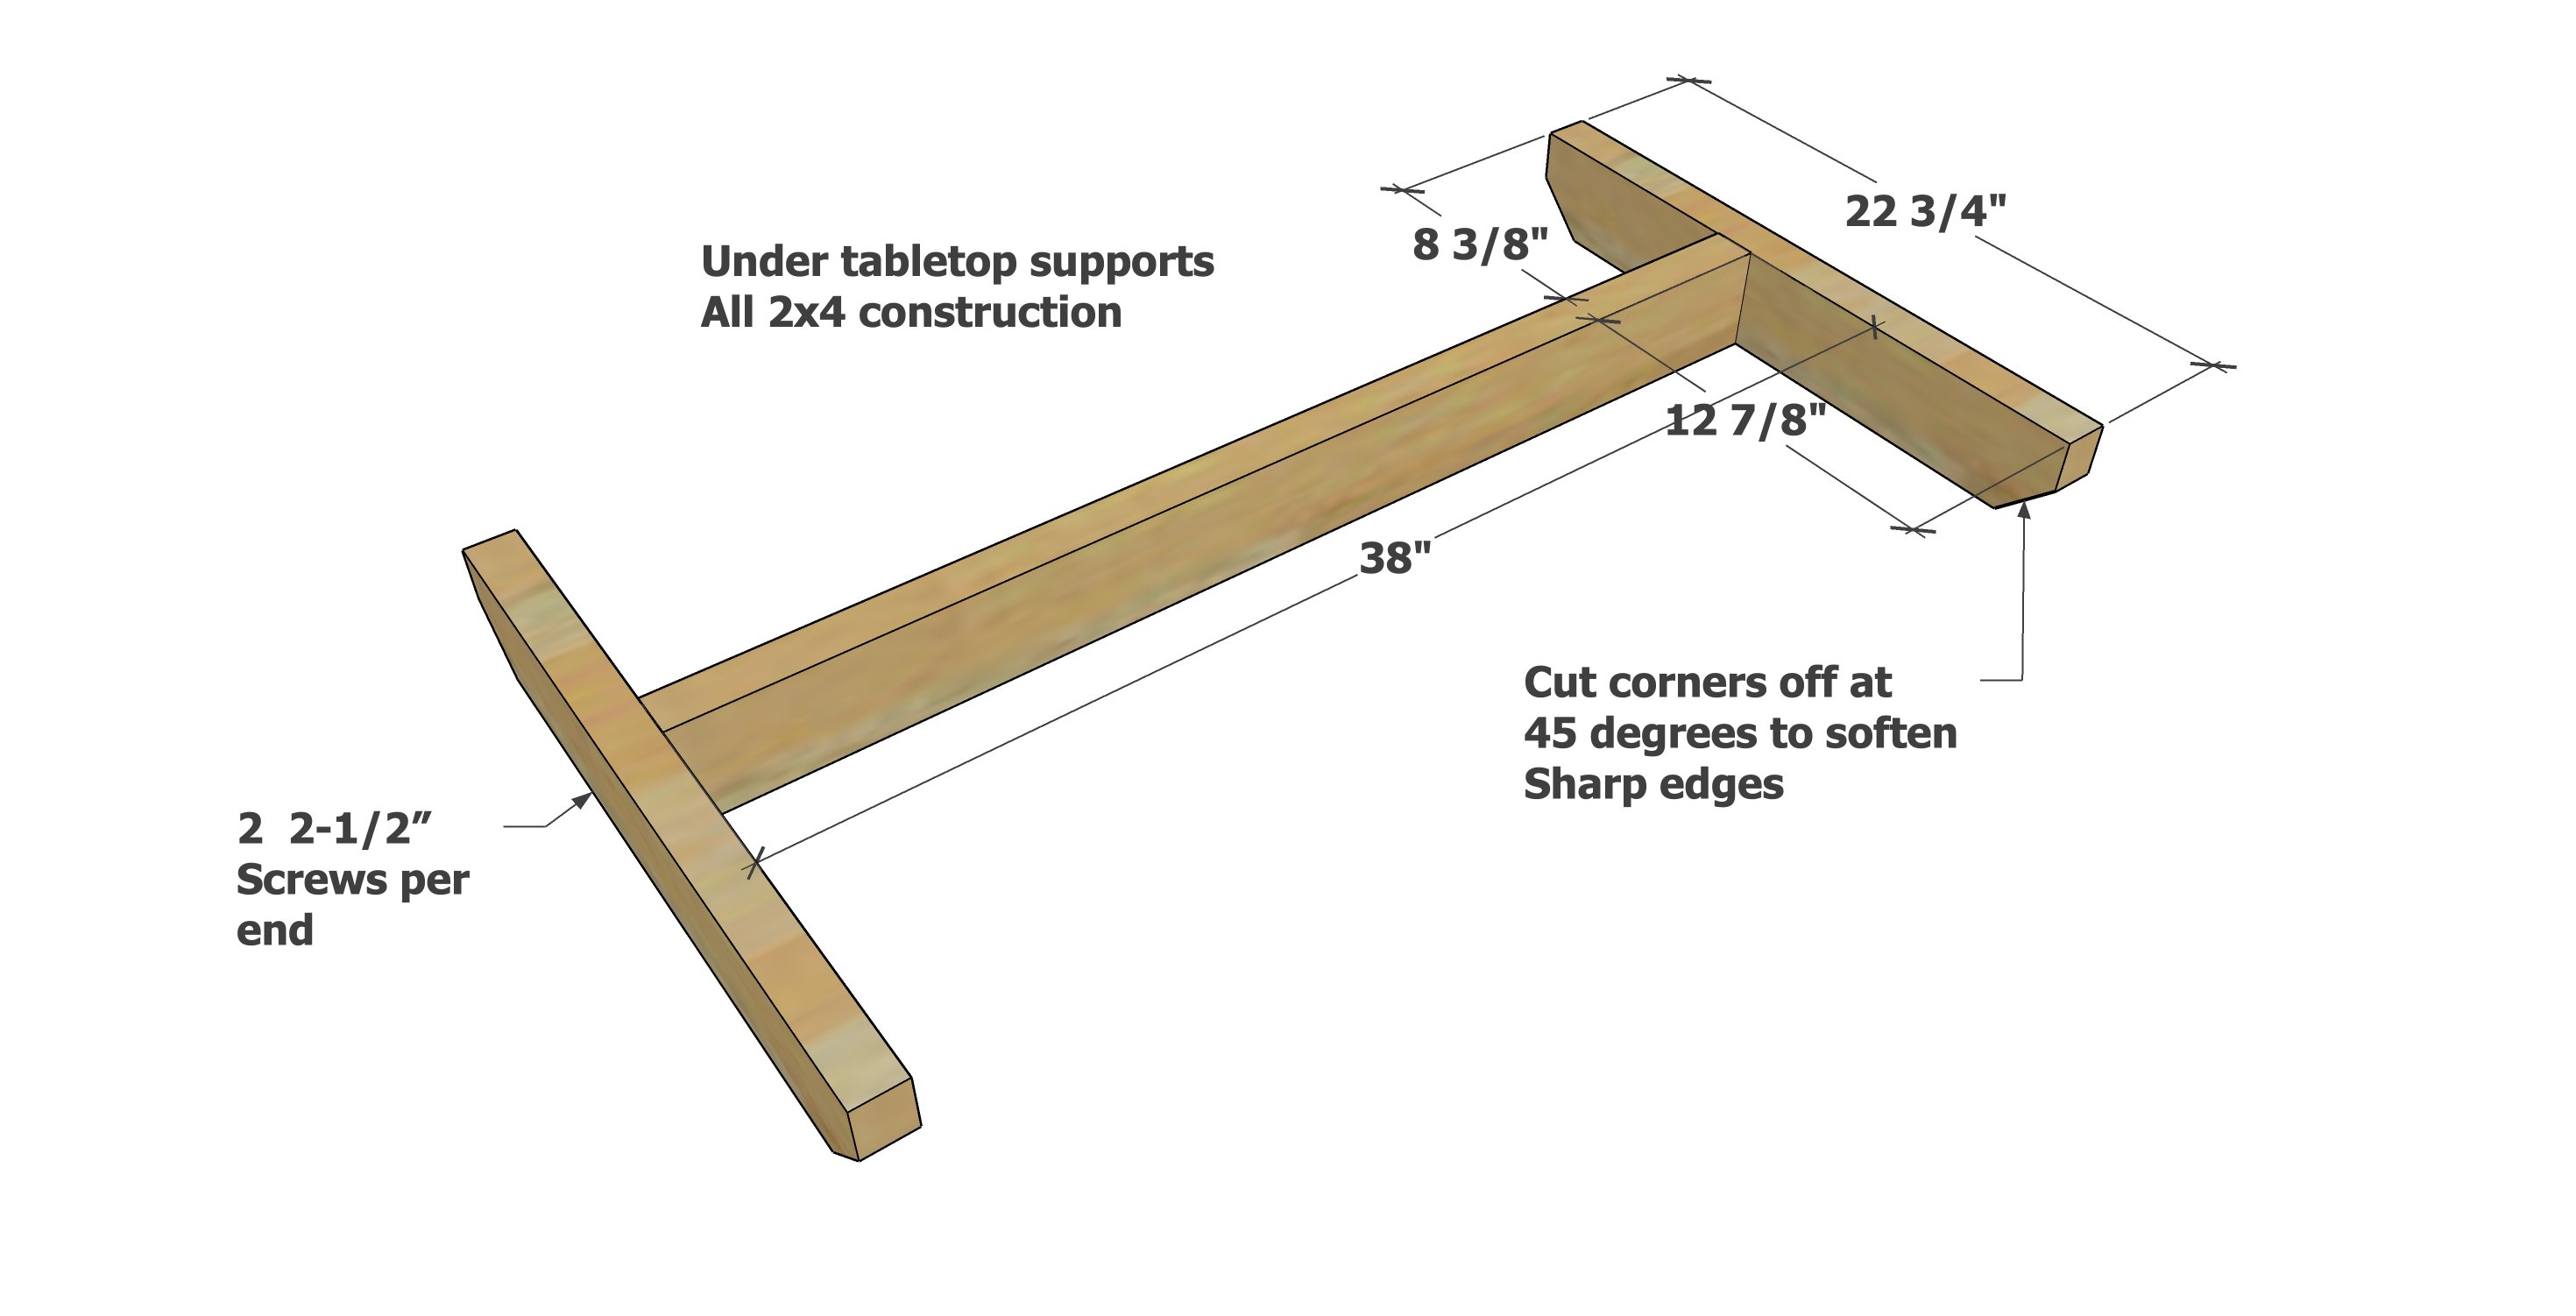
Cut the ends of the shorter tabletop support boards off at 45 degrees from the center of the end to soften sharp corners.
Then attach to the center tabletop support. Notice this board is off center - this is intentional to allow water to drain between tabletop boards.
Make sure the frame is "square" by taking opposite diagonals and adjusting until the opposite diagonal measurements match. This is to avoid the frame being a parallelogram instead of a rectangle.
Step 2
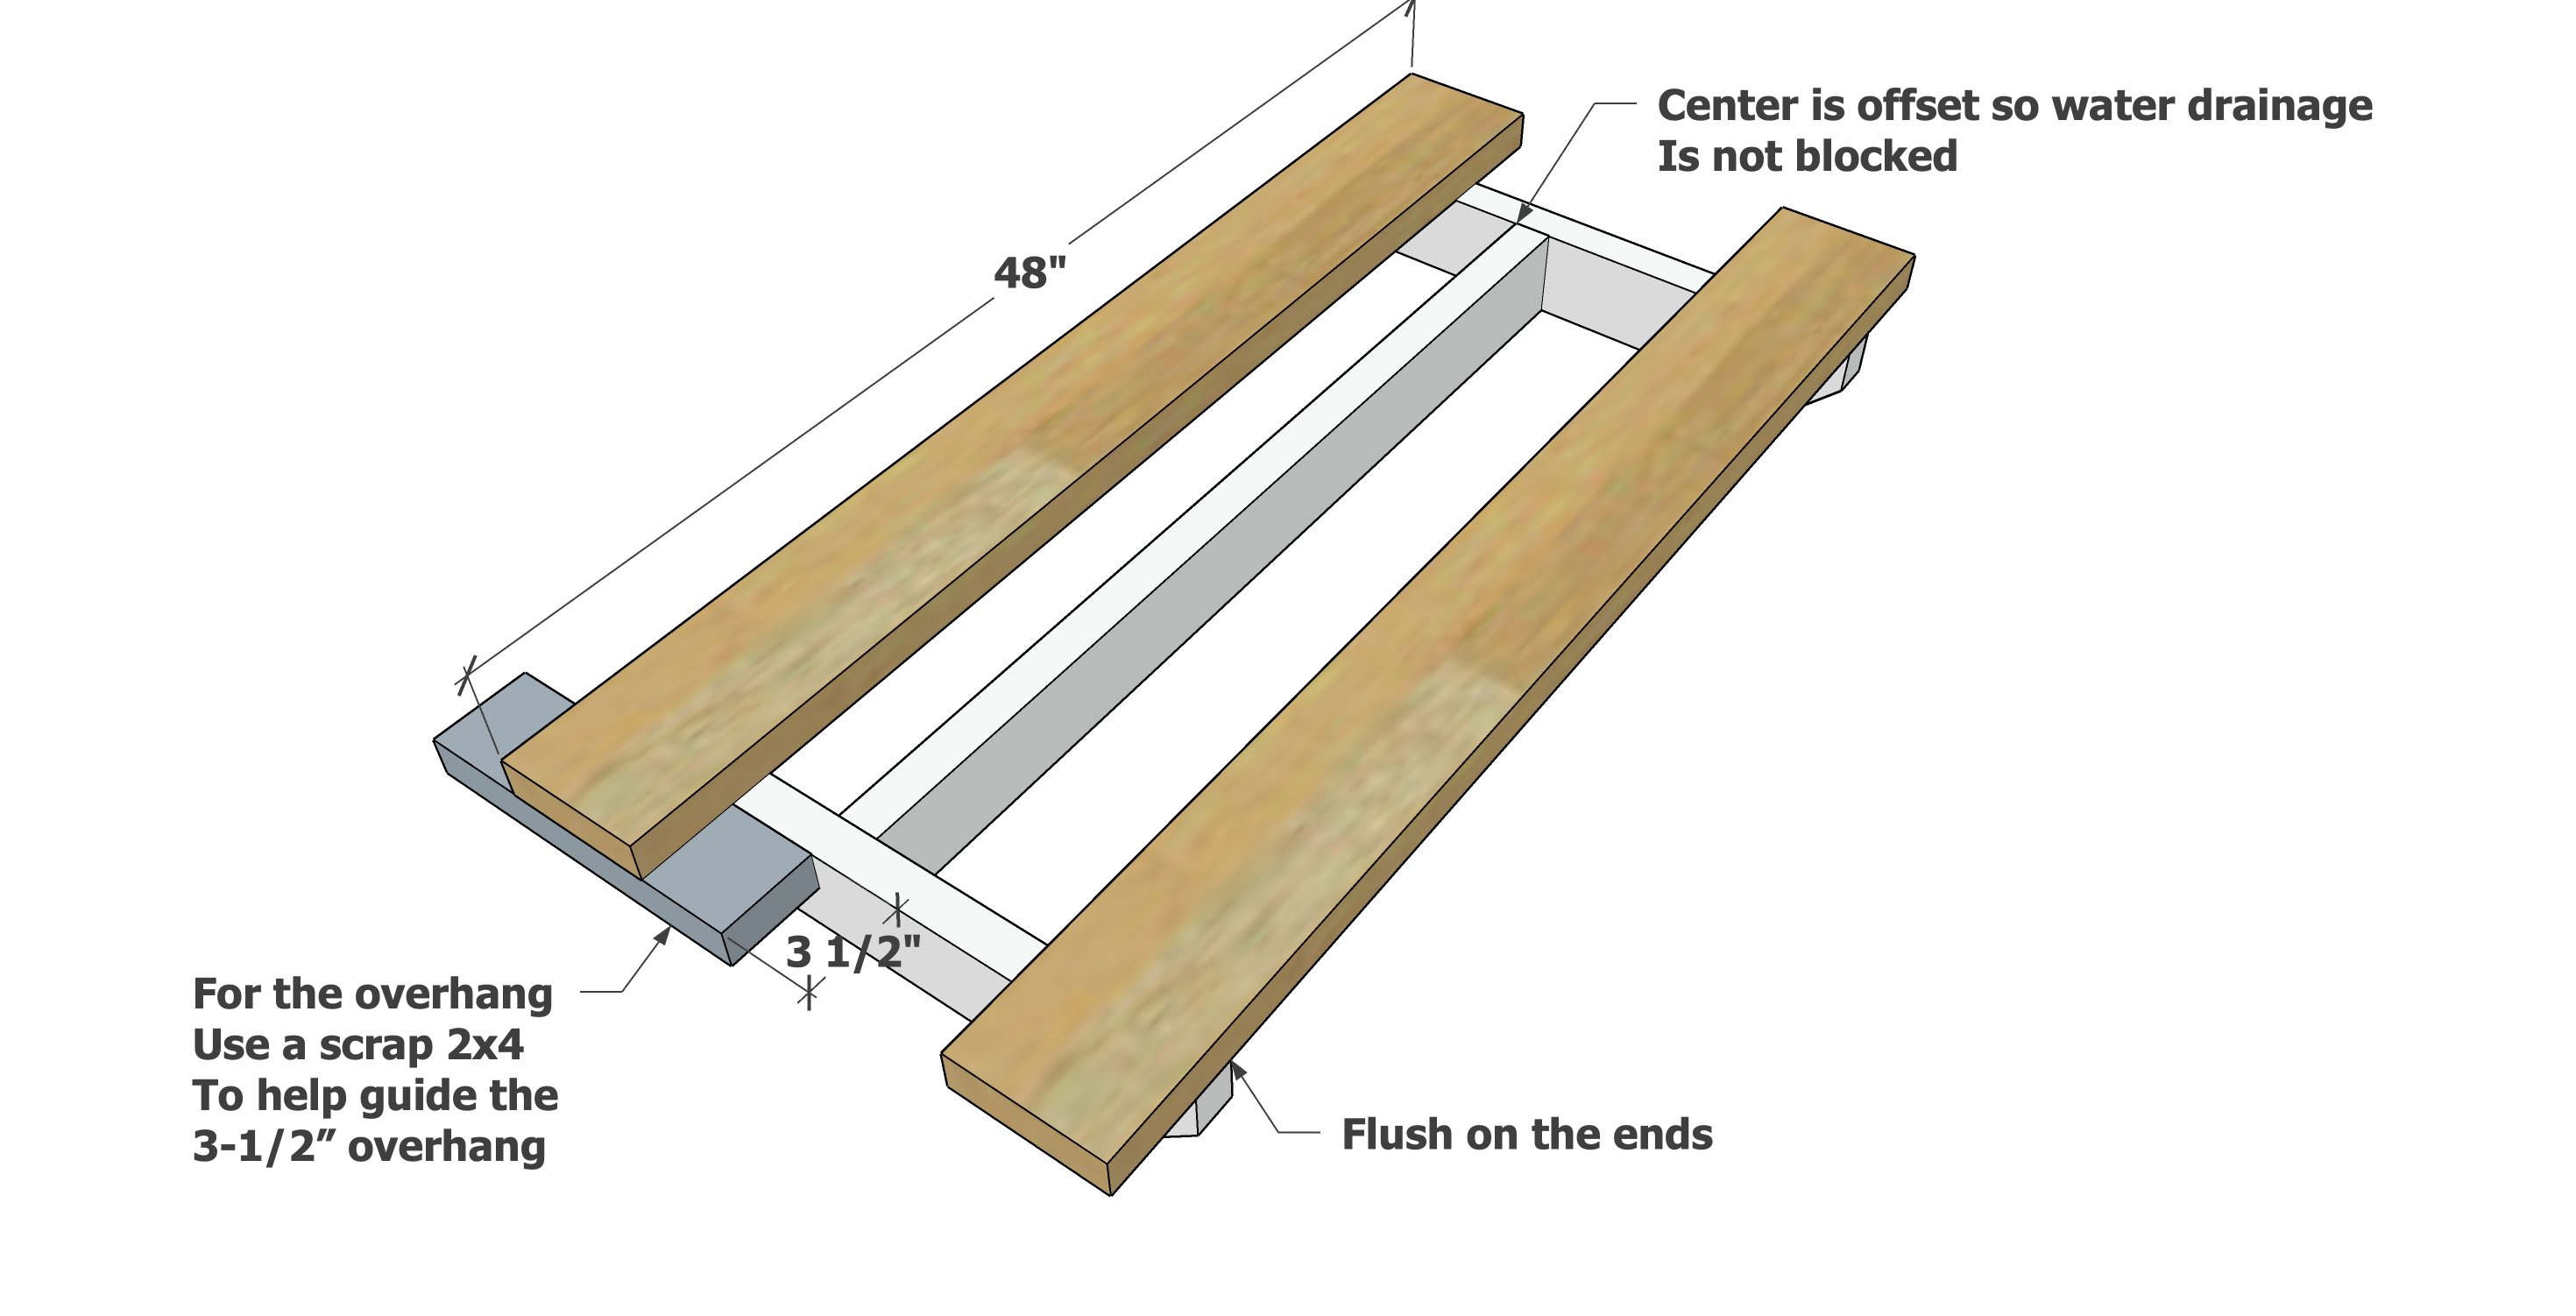
Attach the outer tabletop boards to the support frame with 2-1/2" screws through the top. Use a scrap 2x4 piece as a guide.
Step 3

Fill in the center tabletop boards, and space the gaps evenly. Screw down.
Step 4
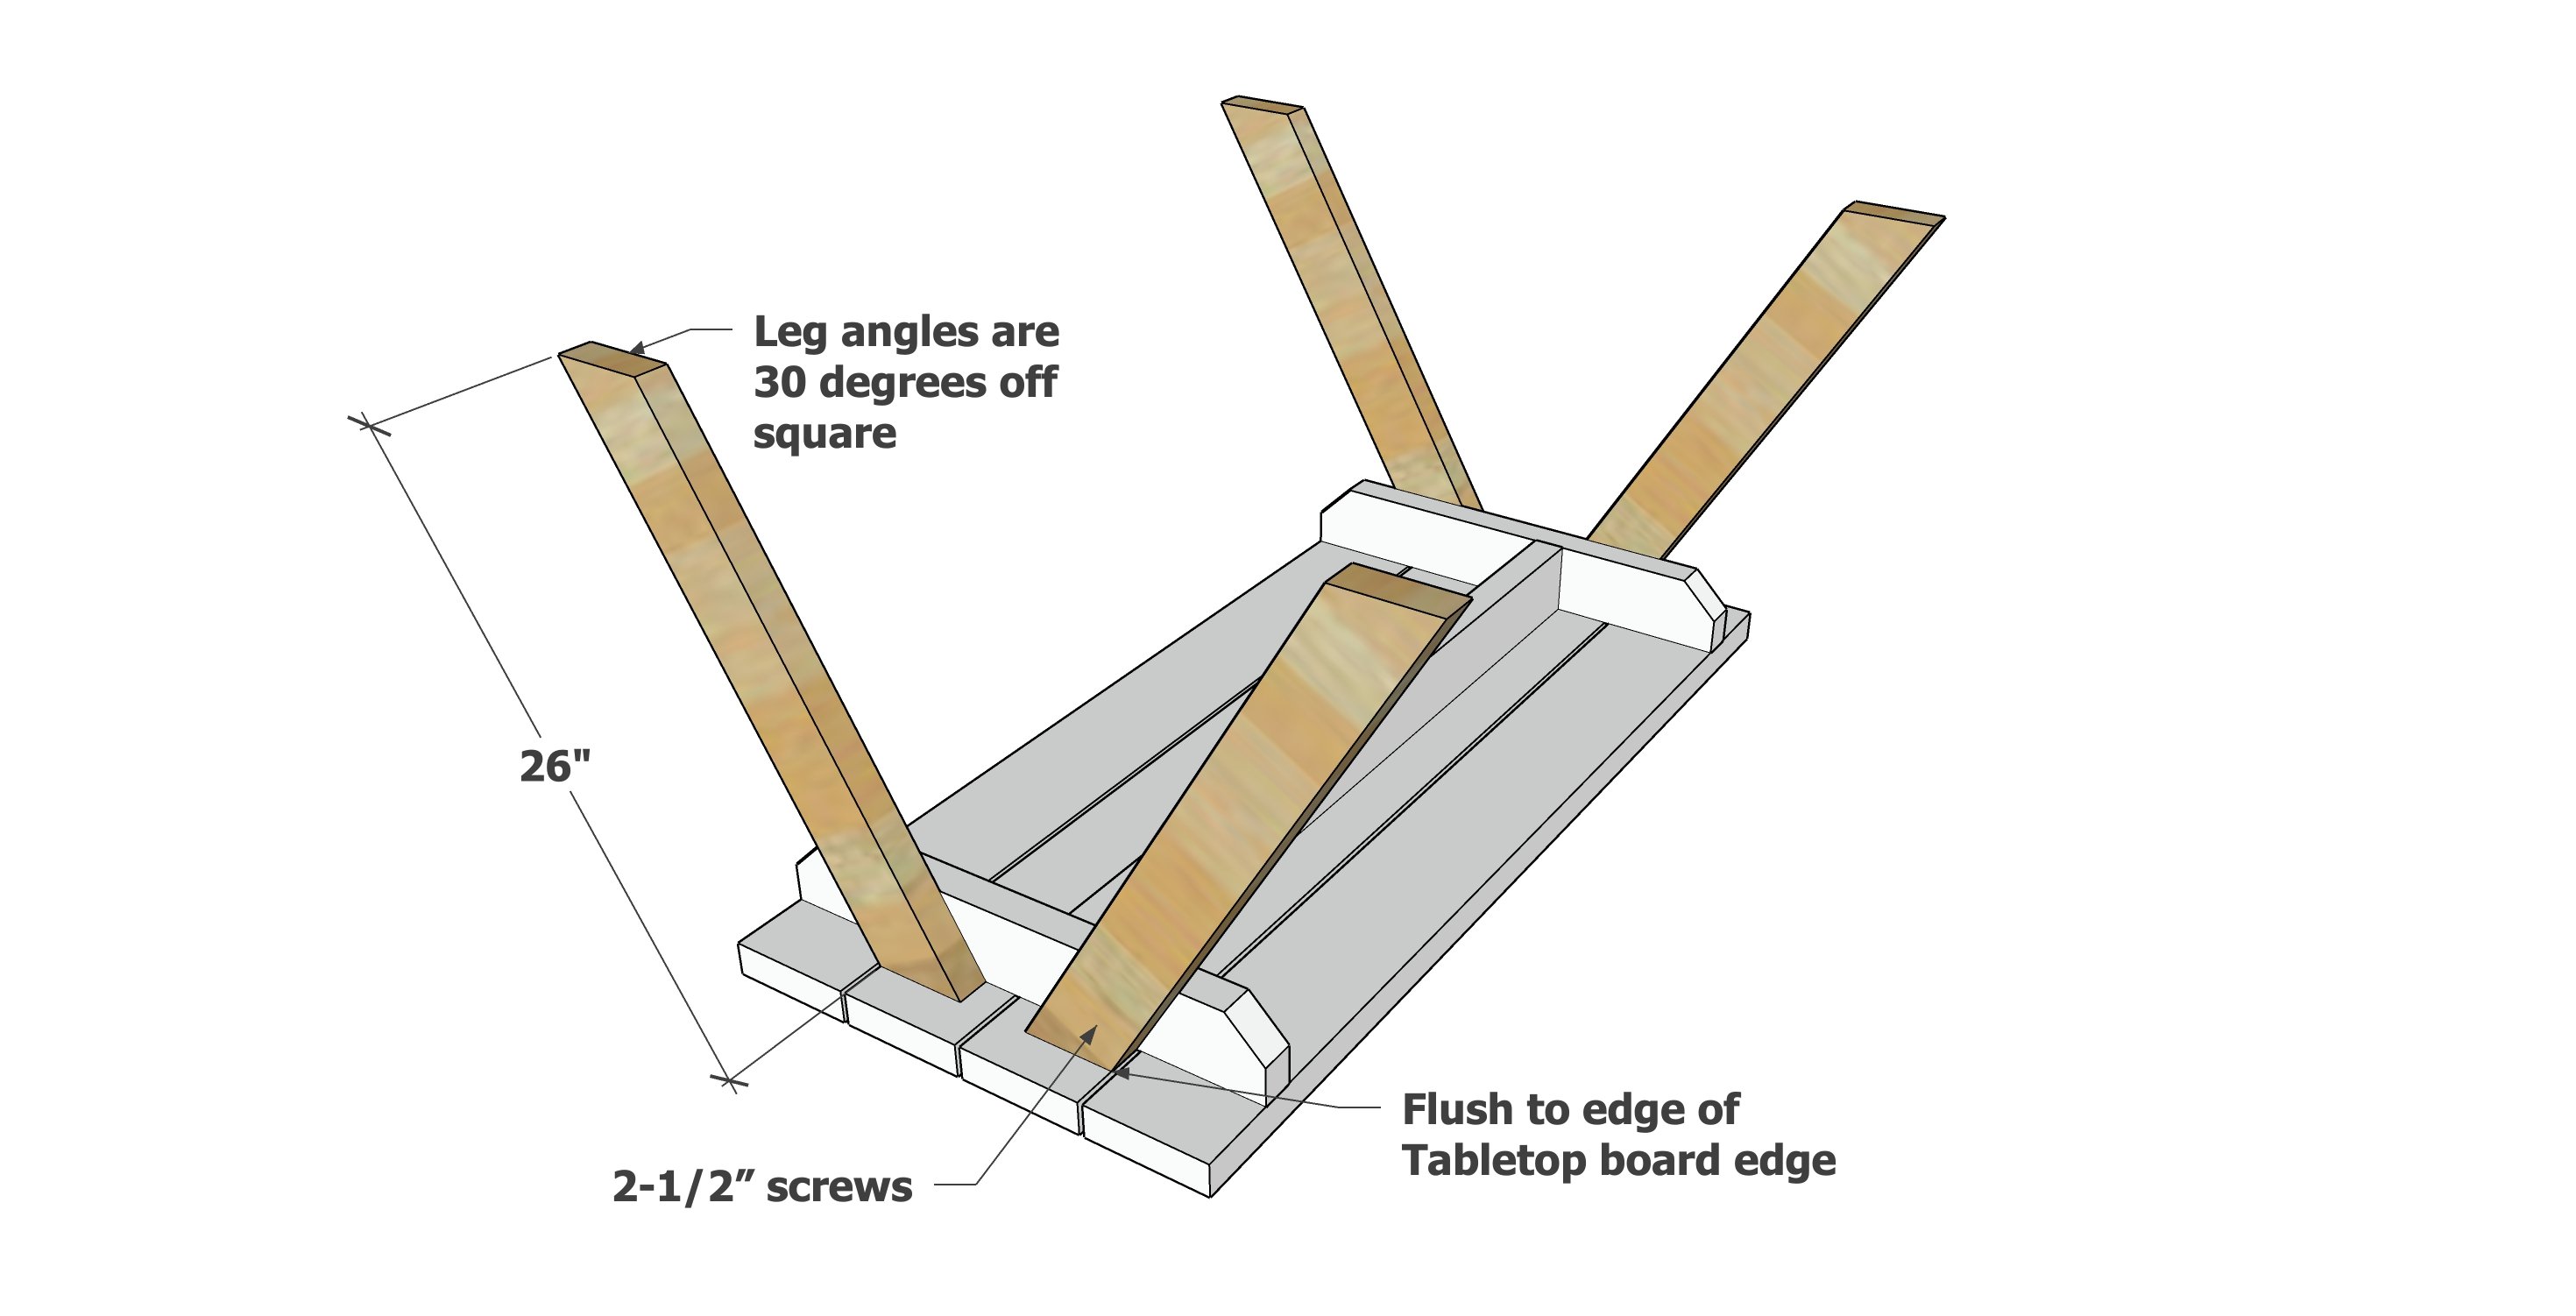
Attach the legs to the tabletop support frame with screws.
Step 5

Flip the project over on a flat, level surface. Make sure the table doesn't wobble - if it does, adjust a "short" leg by unscrewing and rotating to make it longer, and reattaching with screws.
Cut the corners off of the seat stringers at a 45 degree angle.
Set up on 9" tall wood scrap blocks, and adjust for an even overextension on both ends - about 9".
Attach with wood screws to the legs.
Step 6
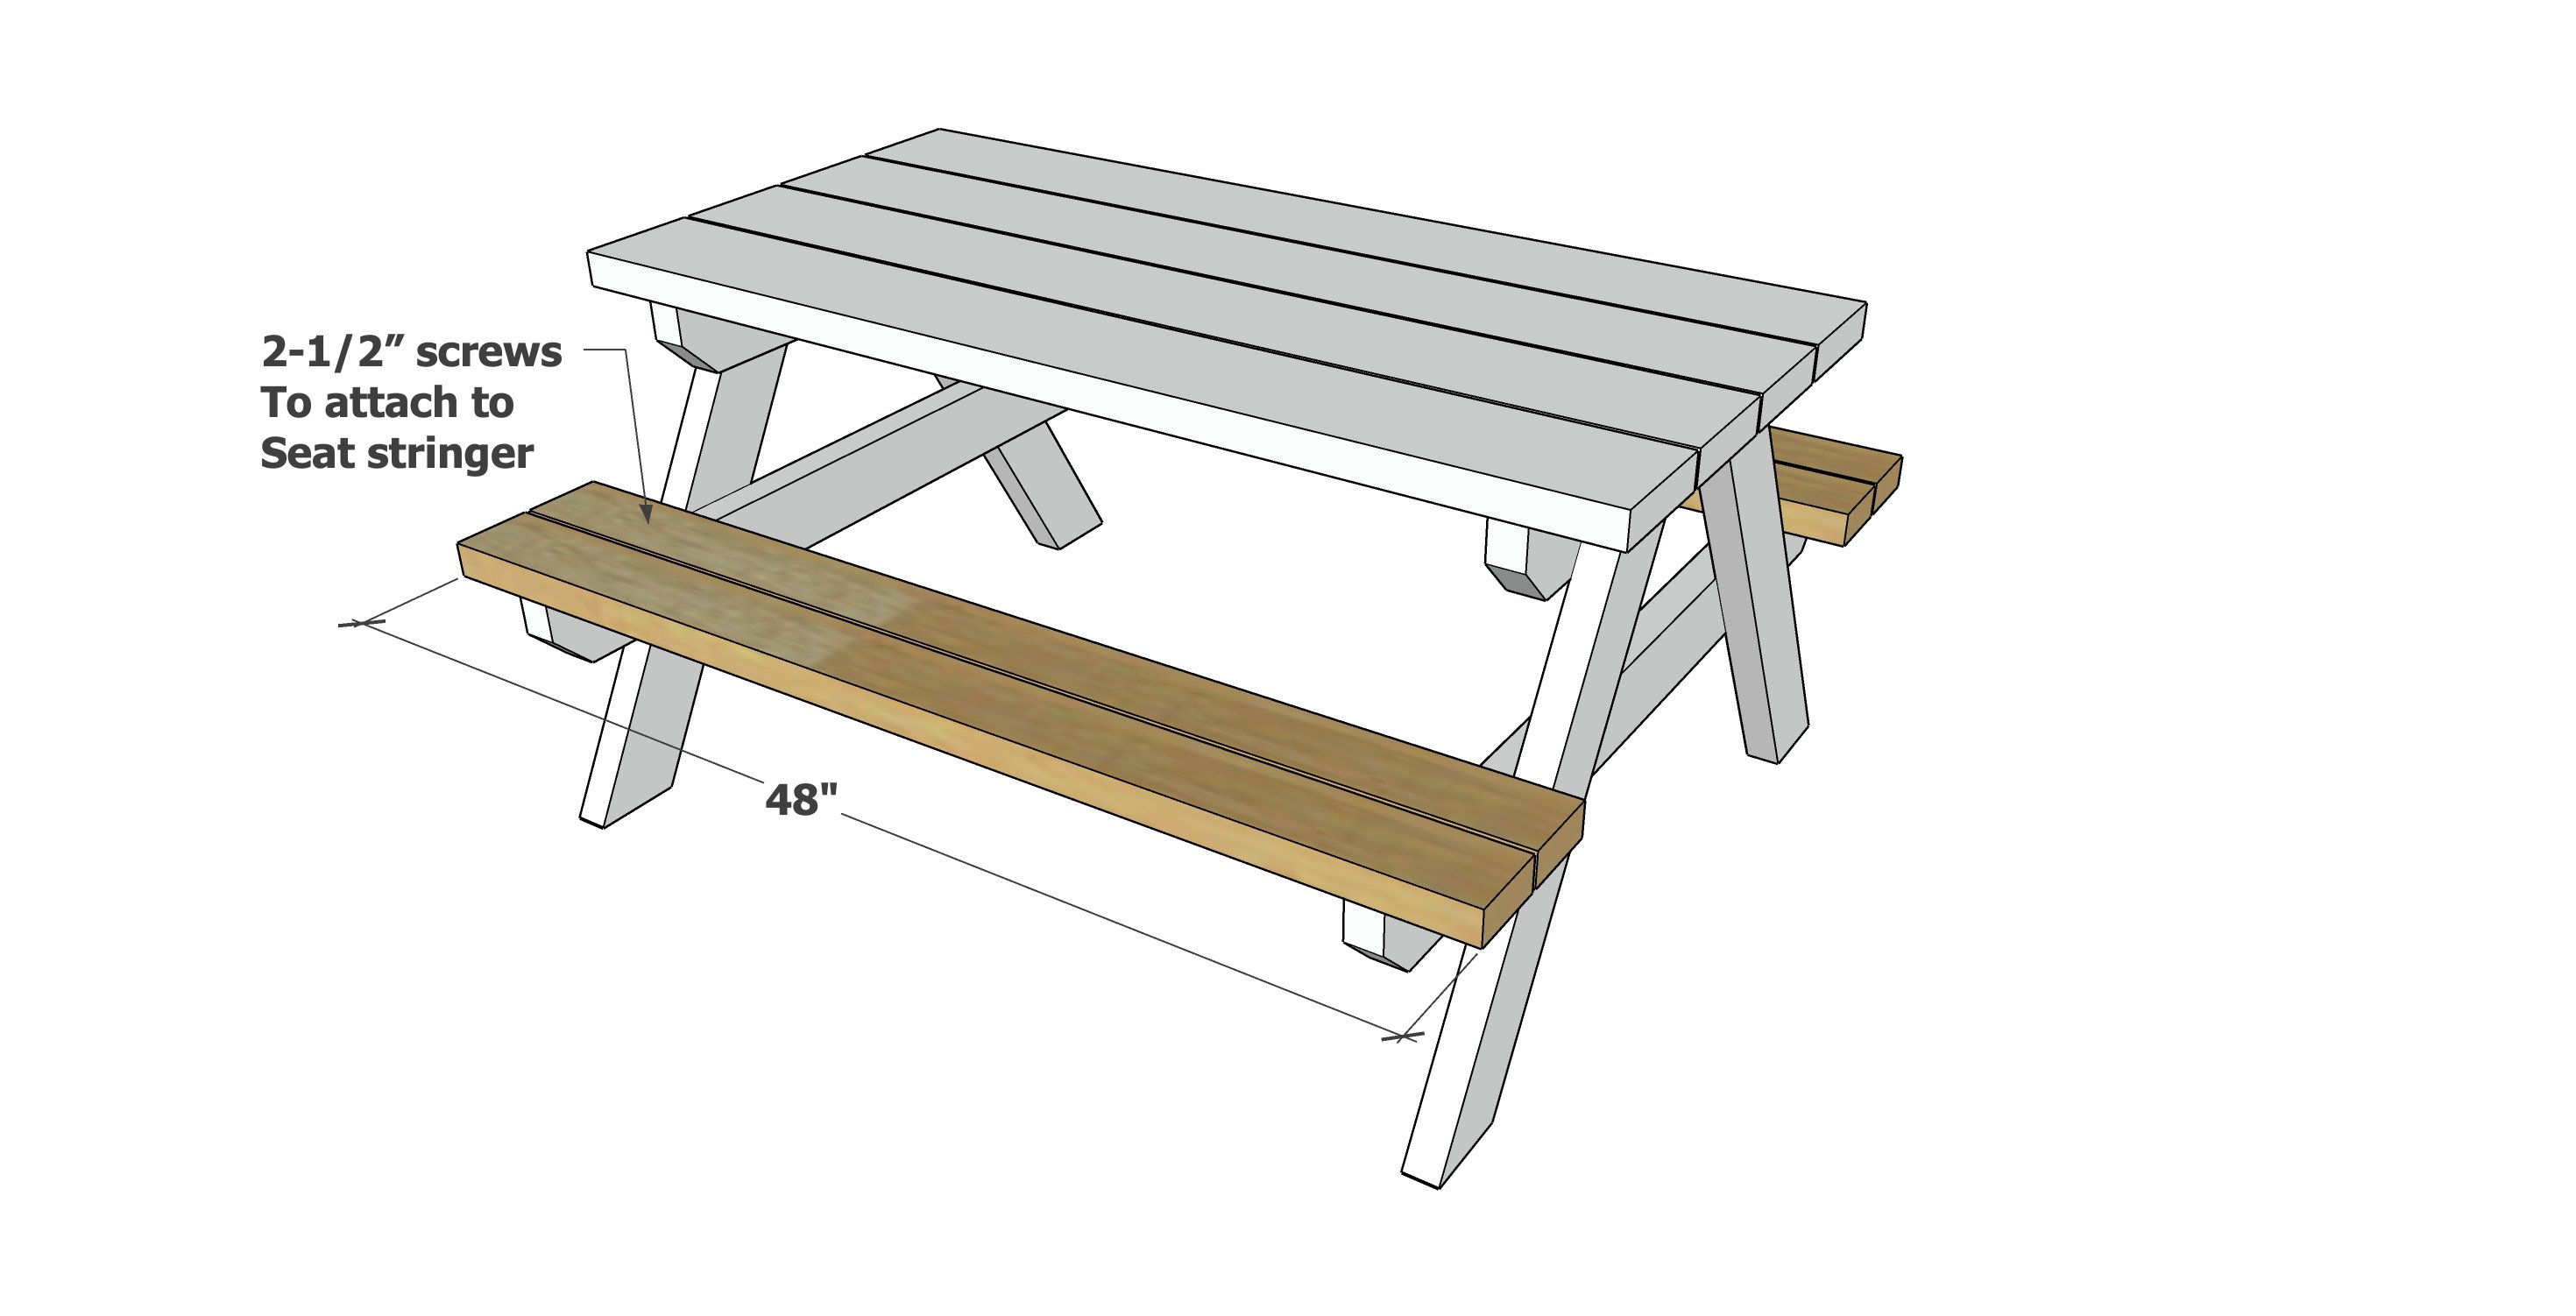
Attach the seat boards to the seat stringers, with even overhangs on both ends.
Step 7
Ensure the picnic table is on a flat, level surface and there is no wobble.
Cut the cross supports and attach to the inside of the tabletop with screws.
Sand well in the direction of the wood grain with 120 grit sandpaper.
Remove residue with a vacuum and damp, lint free cloth.

Comments
Bri (not verified)
Tue, 04/20/2010 - 13:41
I absolutely love this! I am
I absolutely love this! I am so inspired by everything you post! I need some more tools now! I'm going to end up spending a lot of time at my inlaws! My hubby built me 2 of the simple bookshelves and I'm excited to finish them and get them in our playroom. Next on my list is the play kitchen =) I'm running to home depot today to get the wood for this and I just watched your video about countersinking screws! I'm all ready to go!!!=)
Kellye (not verified)
Thu, 04/29/2010 - 03:32
Ana! I have to agree with
Ana! I have to agree with everyone above that we will keep coming back even if you only posted once a week! By all means though...one post a day will be GREAT!!!! Plus, it might give me a bit of downtime too. With all the great plans you post, my inspiration is in overdrive and I've never been to Home Depot so much in MY LIFE! LOL! In fact, my parents laugh at me that the one place I used to loathe going to is now one of those places on the list of "places you could max out your credit card". =)
AND....yay for this plan! I'm thinking this is the PERFECT picnic table for my nephew's upcoming birthday!!!! He's turning 4 and I think this would be PERFECT!!!!
J (not verified)
Thu, 04/29/2010 - 03:38
finished this plan. was very
finished this plan. was very easy and the plans were all spot on.
We under mounted the table supports so that you wouldn't see the screws on the top. worked well but was a little extra time involved.
teamshield (not verified)
Fri, 04/30/2010 - 01:23
This was my second project
This was my second project and it was so easy and the plans worked perfectly. On this project I learned how to use my husband's chop saw and I am in love. I broke my counter sink bit, so I now know I should buy those in multiples.
I bought the wood, cut it and assembled it while my kids were at school for the day and in between running my preschooler to school, feeding him lunch, etc.
One of my friends stopped by to pick up my daughter for carpool and asked me where I bought it! I told her I made it that day. Her response, 'oh, did you buy a kit'. Nope, I said, I bought 2x4's! :)
Thanks so much Ana!!! I am so pleased with my table (and myself)!
Liana (not verified)
Mon, 05/03/2010 - 16:13
J--Could you elaborate about
J--
Could you elaborate about how you did the undermount? I am a newbie and would love any details!
Thanks!
Alexis (not verified)
Wed, 05/05/2010 - 12:38
I stumbled upon your site on
I stumbled upon your site on Monday while searching for picnic table plans and build this big kid table on Tuesday! My very first project and I think I'm hooked!! Thanks so much for your awesome website and for giving me the courage to try.
Cherie (not verified)
Tue, 06/01/2010 - 08:37
I made this table this past
I made this table this past weekend. The plans were spot on and so easy. I just wanted to let you know that if you plan carefully you really only need 5-2x4's instead of 6. Cut 2-2x4's in half for the seats. Cut 2 legs and one seat support from the third 2x4. Repeat for the fourth 2x4 and finally cut the bottom suppport and the 2 table supports from the 5th 2x4. Just plan carefully.
Melanie Toutai (not verified)
Fri, 06/11/2010 - 16:35
Ana, thanks for the awesome
Ana, thanks for the awesome plans I am so excited about our new Picnic Table!! Here is a link: http://melanietoutaiphotography.blogspot.com/2010/06/lets-have-picnic.h…
thanks again you rock!!
mmlyssa (not verified)
Mon, 06/21/2010 - 15:00
My Husband just made this
My Husband just made this over this past weekend. Can i just say I am THRILLED!!! I have been wanting one of these for soo long and the price kept putting me off. My husband built this with all supplies from home depot for $35!!
THANK YOU!!
Allyson (not verified)
Sun, 08/22/2010 - 13:57
Hi! I just love all of your
Hi! I just love all of your plans. This is my first project and I have a question- I don't see where you cut the 45 degree angle on step one. Are you using a mitre saw on that cut?
Anna (not verified)
Tue, 09/28/2010 - 06:15
This table is so cute!! I
This table is so cute!! I haven't painted it yet, but here is the sanded ready-for-paint version. It took my husband about 4 hours total on a Sunday afternoon. We found scrap lumber from job sites around our neighborhood so all we needed was screws and wood filler. We love it!!
http://theharthcockhouse.blogspot.com/2010/09/table-for-two.html
Thank you Ana!!
susan (not verified)
Mon, 11/01/2010 - 13:39
How did you do the
How did you do the undermount?
sdeer76
Sun, 05/08/2011 - 18:31
General outdoor project question
I have a totally beginners question... Should this be built with treated lumber? Or can you use untreated if you are going to paint it with exterior paint? I'm thinking about trying this as a first project from this site. Notable difference in cost between treated and untreated so I thought I'd ask. Not expecting it to last forever, but I don't want it to rot away in a season either ;o)
I'm new here and not sure where you post questions.... Sorry if this is not the right route.
Guest (not verified)
Wed, 06/08/2011 - 10:15
I would not use pressure
I would not use pressure treated wood. Pressure treated wood contains arsenic. I definitely would not use it for something my children will be touching as they eat. Maybe consider a water based exterior stain?
Matt @ Ramblin… (not verified)
Tue, 03/13/2012 - 11:23
I know what ya mean!
My wife forwarded this post to me today because she wants me to build a kids picnic table. I was pleasantly surprised to see that this I'd a blog. Your opening statements on this post made me chuckle. My (almost) 5-year old son recently expressed his annoyance that I get up early every day to blog. I do this so that I can write undistracted while the rest of the house sleeps and also to not take away from family time. My sons solution is that I get up early only every other day! I considered his advice, but ultimately ignored it. Now he is urging me to wake him up at 5:30am so that he can have more time to play! Lol. Like father like son.
Matt @ Ramblin… (not verified)
Mon, 03/19/2012 - 03:11
Show off my results
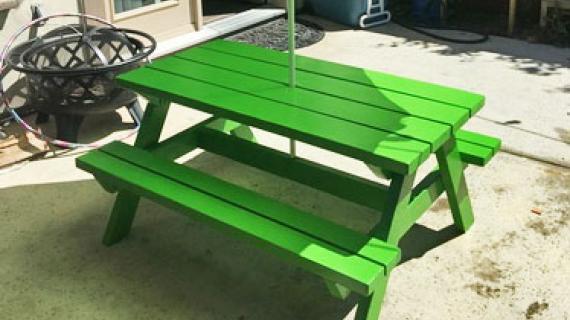
I wanted to show off my results, so I included a brief description of how the project went for me along with several pictures on a recent blog post. I modified the plans slightly, as I wanted to be able to drill a hole in the middle of a center board on the table top to insert an umbrella...
check it out @ http://money.ramblingfever.com/2012/03/rambling-road-kids-picnic-table-…
After these pictures were taken, one of the tables was stained with a dark cherry color... turned out awesome!
Rose Crooks (not verified)
Thu, 04/26/2012 - 07:43
bigger kid's picnic table
I love your plans for the table. I picked up plans at home depot. I am making four table for my grandkids. They range from 2 months to 11 yrs. I think this was great plans. One thing I did was used peassure treated wood for the legs. I made my screw hole and I am sanding and painting the pieces before puting together. I can;t wait to start another project but need to finish this one first. Two table I am painting red and black for the boys and pastels for the girls.It take less time to make more than one at a time.
davido850
Sat, 05/05/2012 - 09:53
just built this,used carriage bolts, really looks great
the carriage bolts added to the appeal. the table was still a little to tight between seat and top, but a friends daughters birthday was today. he reimbersed my expense and the girl has a great table. already have the material for v2. just going to add a few inches to the legs and it will be perfect for my crew and me. thank!
The Occasional… (not verified)
Mon, 05/28/2012 - 20:31
Kid's Picnic Table
Found your site and your plans. Great stuff! Thanks for details and I'm sure I'll be back for more.
http://theoccasionalwoodworker.wordpress.com/2012/05/28/kid-picnic-tabl…
How to Build a… (not verified)
Tue, 07/03/2012 - 20:55
Beautiful
LOve this website. Very clear plans for kids picnic table. This should be an easy project that you could easily do over a weekend!
Jules Hall (not verified)
Mon, 07/09/2012 - 20:46
Solid Plan.
Thank you very much for these plans.
I used all your dimensions, but modified the assembly a bit:
- under mounted all the screws with a drill press 3/4" counter sink. This way the table will last outside for years. ( if you used cedar! )
- mainly used 3" screws as a result.
- extended the leg attachments to only 2" on the outside to give an extra 4" seating room ( can fit 6 kids at the table)
- used 3-1/2" lag bolts rather than screws to attach legs.
As a result of using lag bolts - there was no need for the middle support. It was solid without it, and if it ever does loosen - you can just tighten the lag bolts!
I remember as a kid always smacking my shins on the center support, so doing away with it was great!
Thank you.
Jules
Sarah Knopp (not verified)
Fri, 11/09/2012 - 14:12
Bigger Kids Picnic Table
Do you think it would work to use this pattern, but then use plywood or some solid sheet of wood for the top? I like the attached benches, but would like to make a more smooth top for my kids for their "project" table. Let me know if you think it would still work?
Thanks!
Sarah Knopp (not verified)
Fri, 11/09/2012 - 14:14
Bigger Kids Picnic Table
Do you think it would work to follow this pattern for the frame and the attached benches, but use a flat top like the kids trestle table? I LOVE the attached benches, but want to make a flat top table for my kids to color and do projects on. Let me know if you think it would work? Thanks!
peke
Sun, 04/07/2013 - 02:39
Dimensions
Hi,
First off all i love the design, in fact everything on this site :D
I'm from Belgium, so i would like to ask if its possible to get the entire plan in metric version with centimeters instead of inches :D
Thanks!!
TrefW
Wed, 04/15/2015 - 10:21
Better bracing
I've built two of these and changed one thing. Rather than put the 2x4 between the two legs, I cut the wood to create two triangles from the center of the seat supports to underneath the table top. Not only does this increase the stability of the entire table, but it keeps the shown center support from becoming something that hurts the little shins of those sitting at the table. No additional wood is needed. Just cut the center support differently.
Chrislange79
Fri, 04/08/2016 - 09:19
Angles
Ana what are the angles supposed to be for the tabletop supports?
NathalyKCornej…
Fri, 07/08/2016 - 07:12
A little help please
Where do you use the pocket screws vs the regular screws?
Thanks :)
gsnpbc
Mon, 04/24/2017 - 09:56
Bigger Kid's Table
My son and I just made this table using your plans this weekend and it turned out great for the grandkids. It only took a couple of hours after all the boards were cut. Thank you for the easy directions and most of all for sharing them.
In reply to Bigger Kid's Table by gsnpbc
Ana White
Tue, 04/25/2017 - 19:00
Great!!!
Great!!!
bhutch216
Sat, 06/20/2020 - 20:10
Knocked it out in about an…
Knocked it out in about an hour. Review the plans before cutting because there are a couple 45 degree end cuts that aren't listed on the cut list. Very easy to build though.
Ken Stegeman
Mon, 08/03/2020 - 18:36
Bigger Kids Picnic Table
Ana - I have always loved your plans and have used a lot of them! For this particular one, I was able to build it with(5) 2x4's instead of the (6) called out in the plans, which was definitely a WIN! Just a matter of planning cuts to get the most out of the materials you have to buy and taking advantage of any scrap materials you might have around.