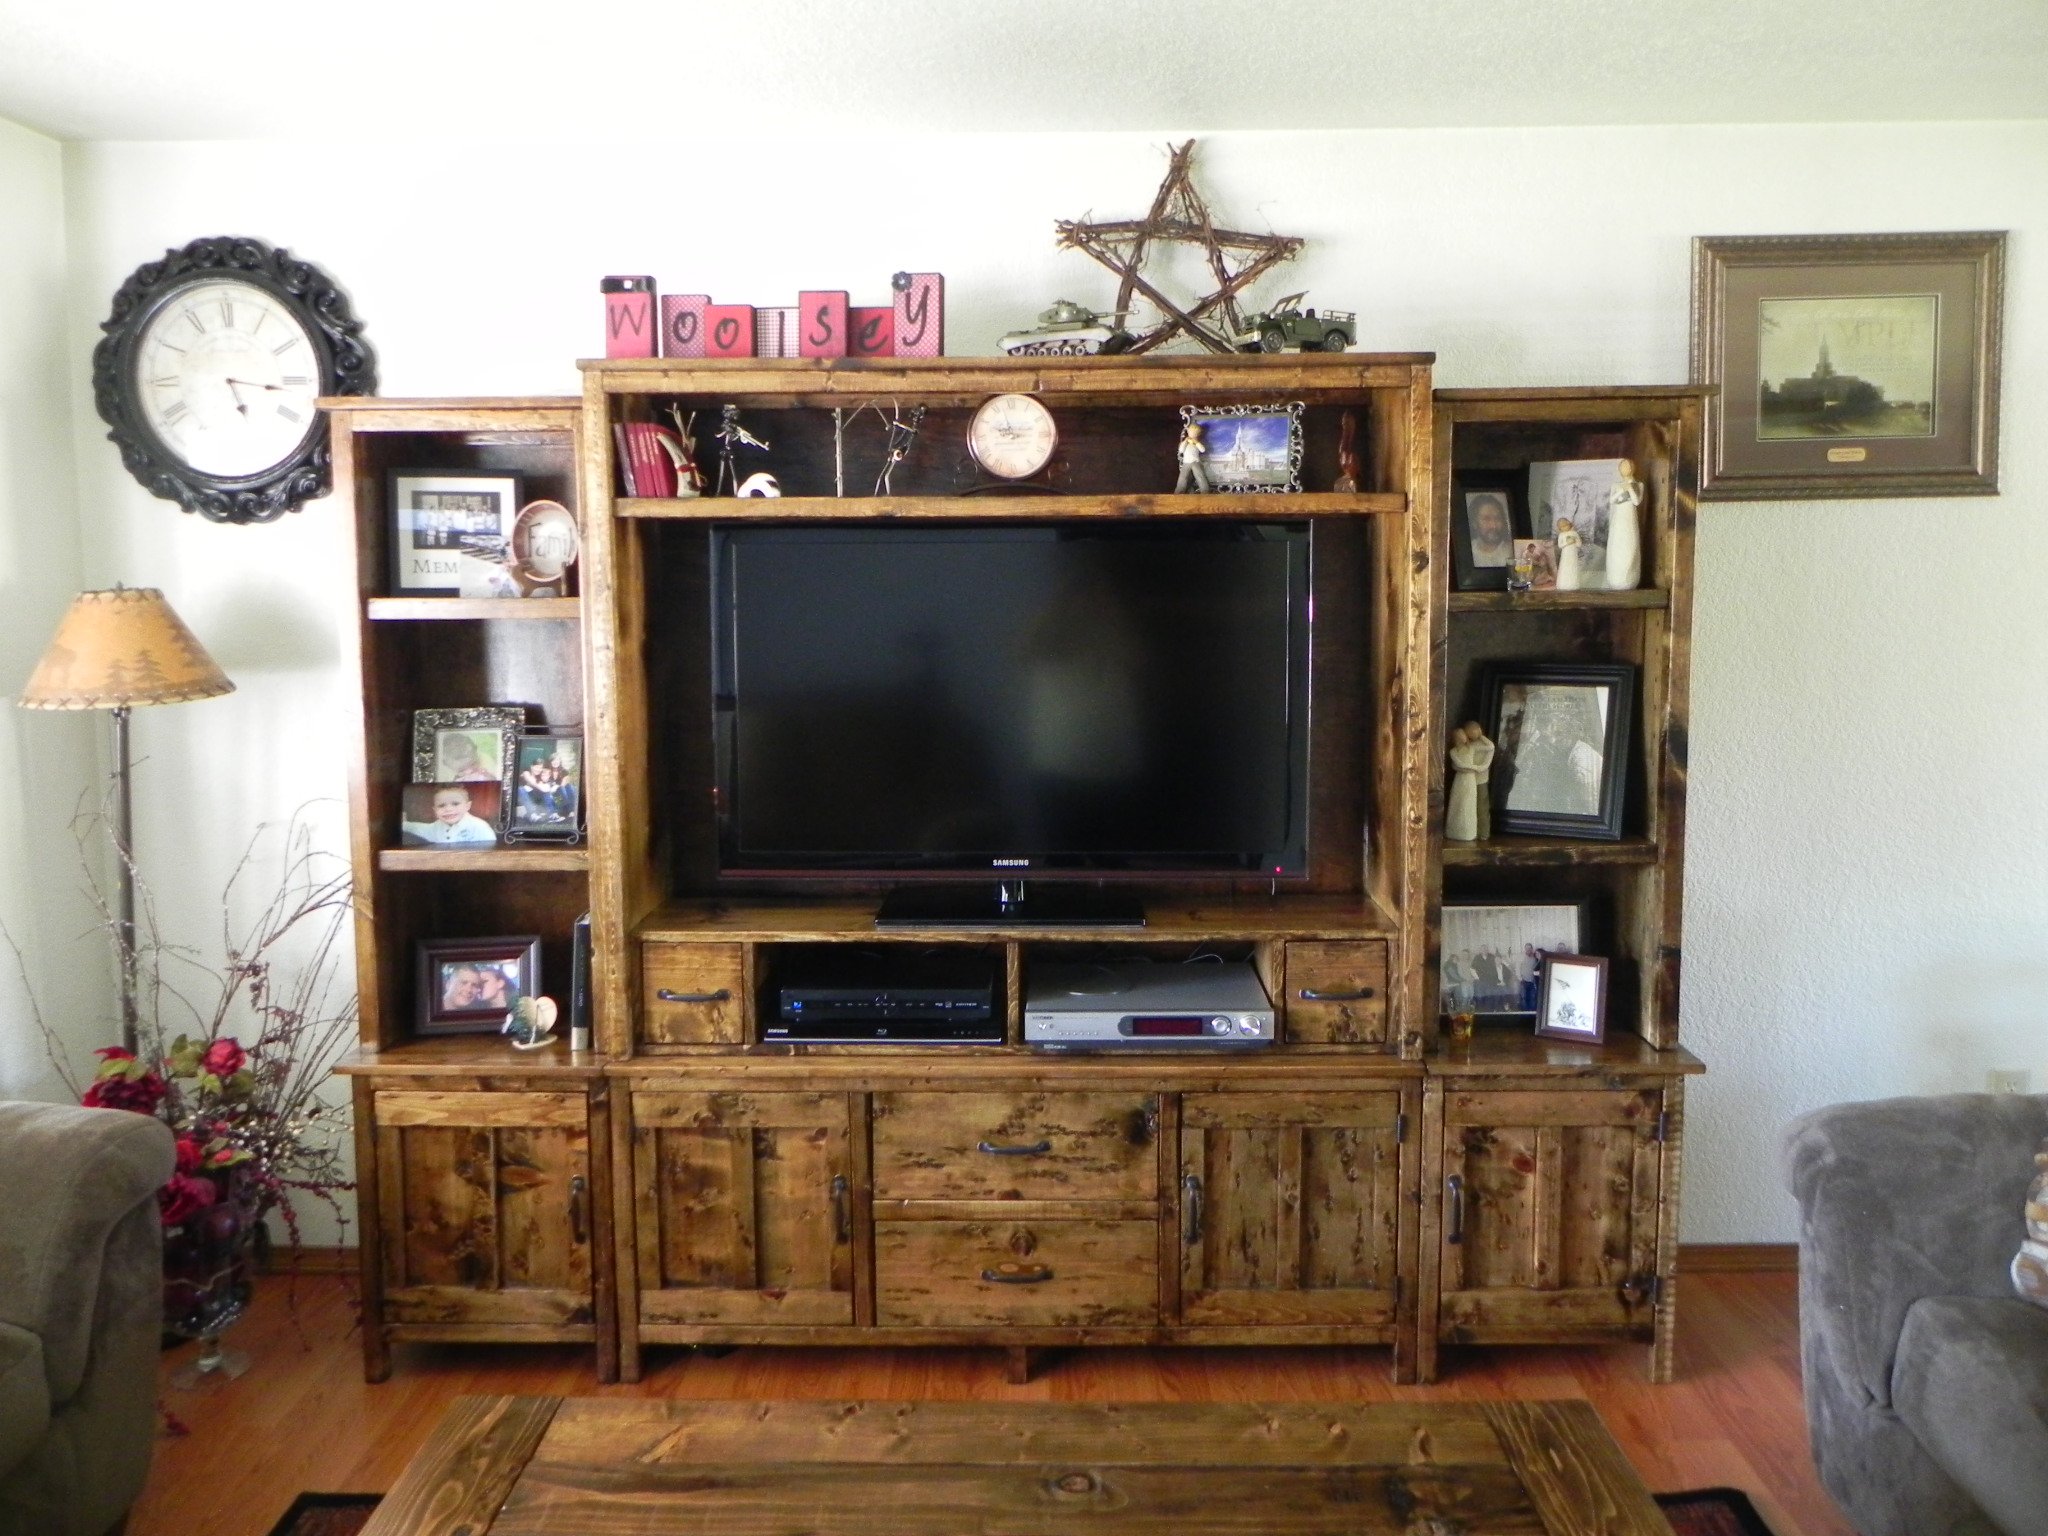
Dark Stained Wood Barn Door Console
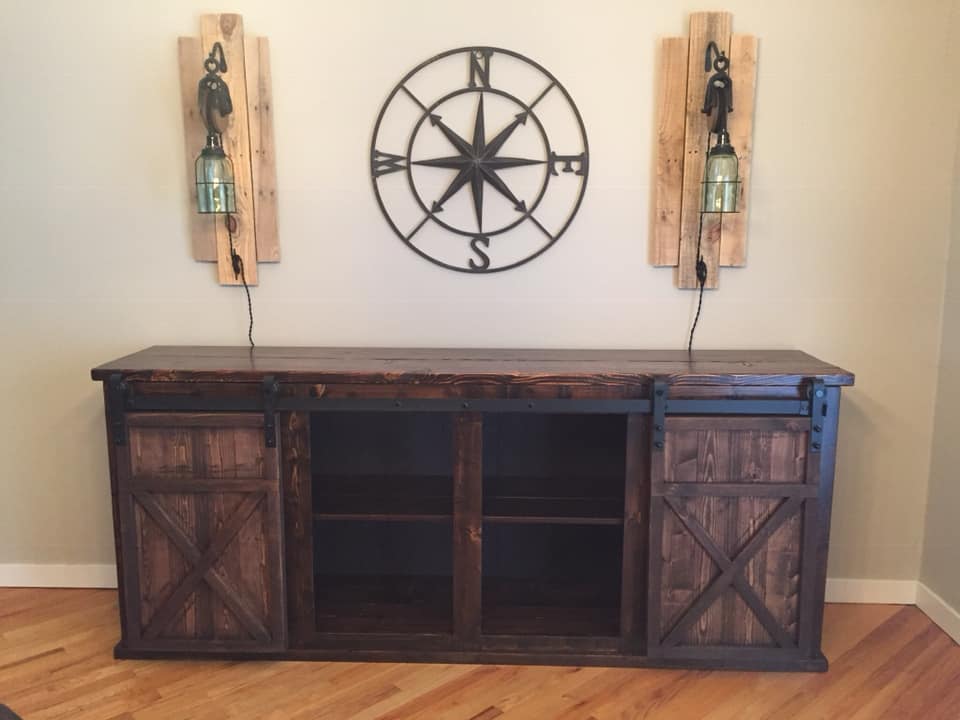
Built by Susan Boucher
Built from Plan(s)
Built by Susan Boucher
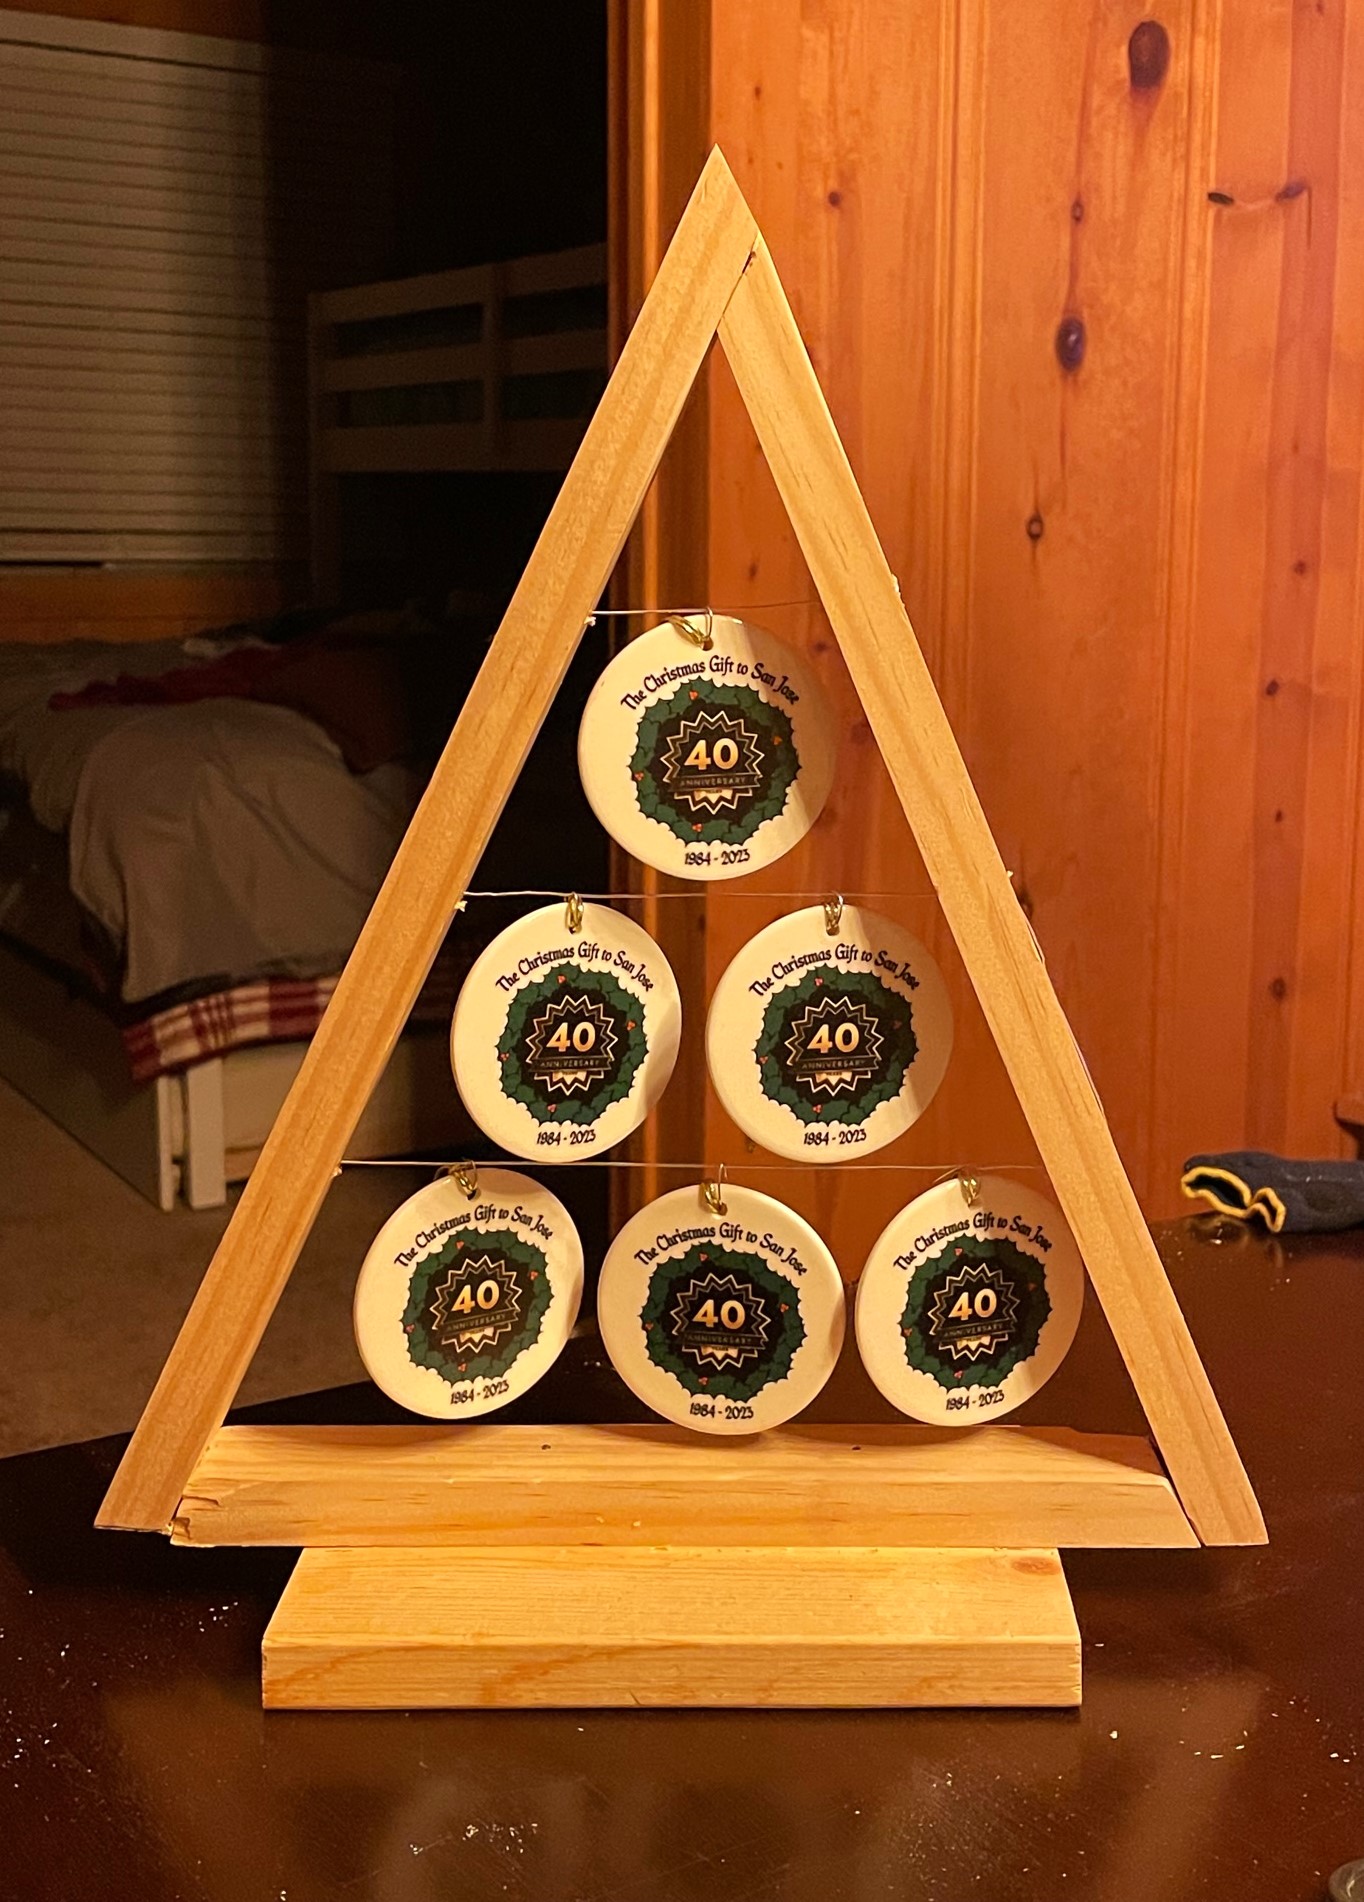
I made 15 of these ornament trees for our church's Christmas banquet. We adjusted the height to 14". I locked the wire in place with 8 x 3/4 screws that were countersunk. I plan to paint the trees gold.
Don Fugate
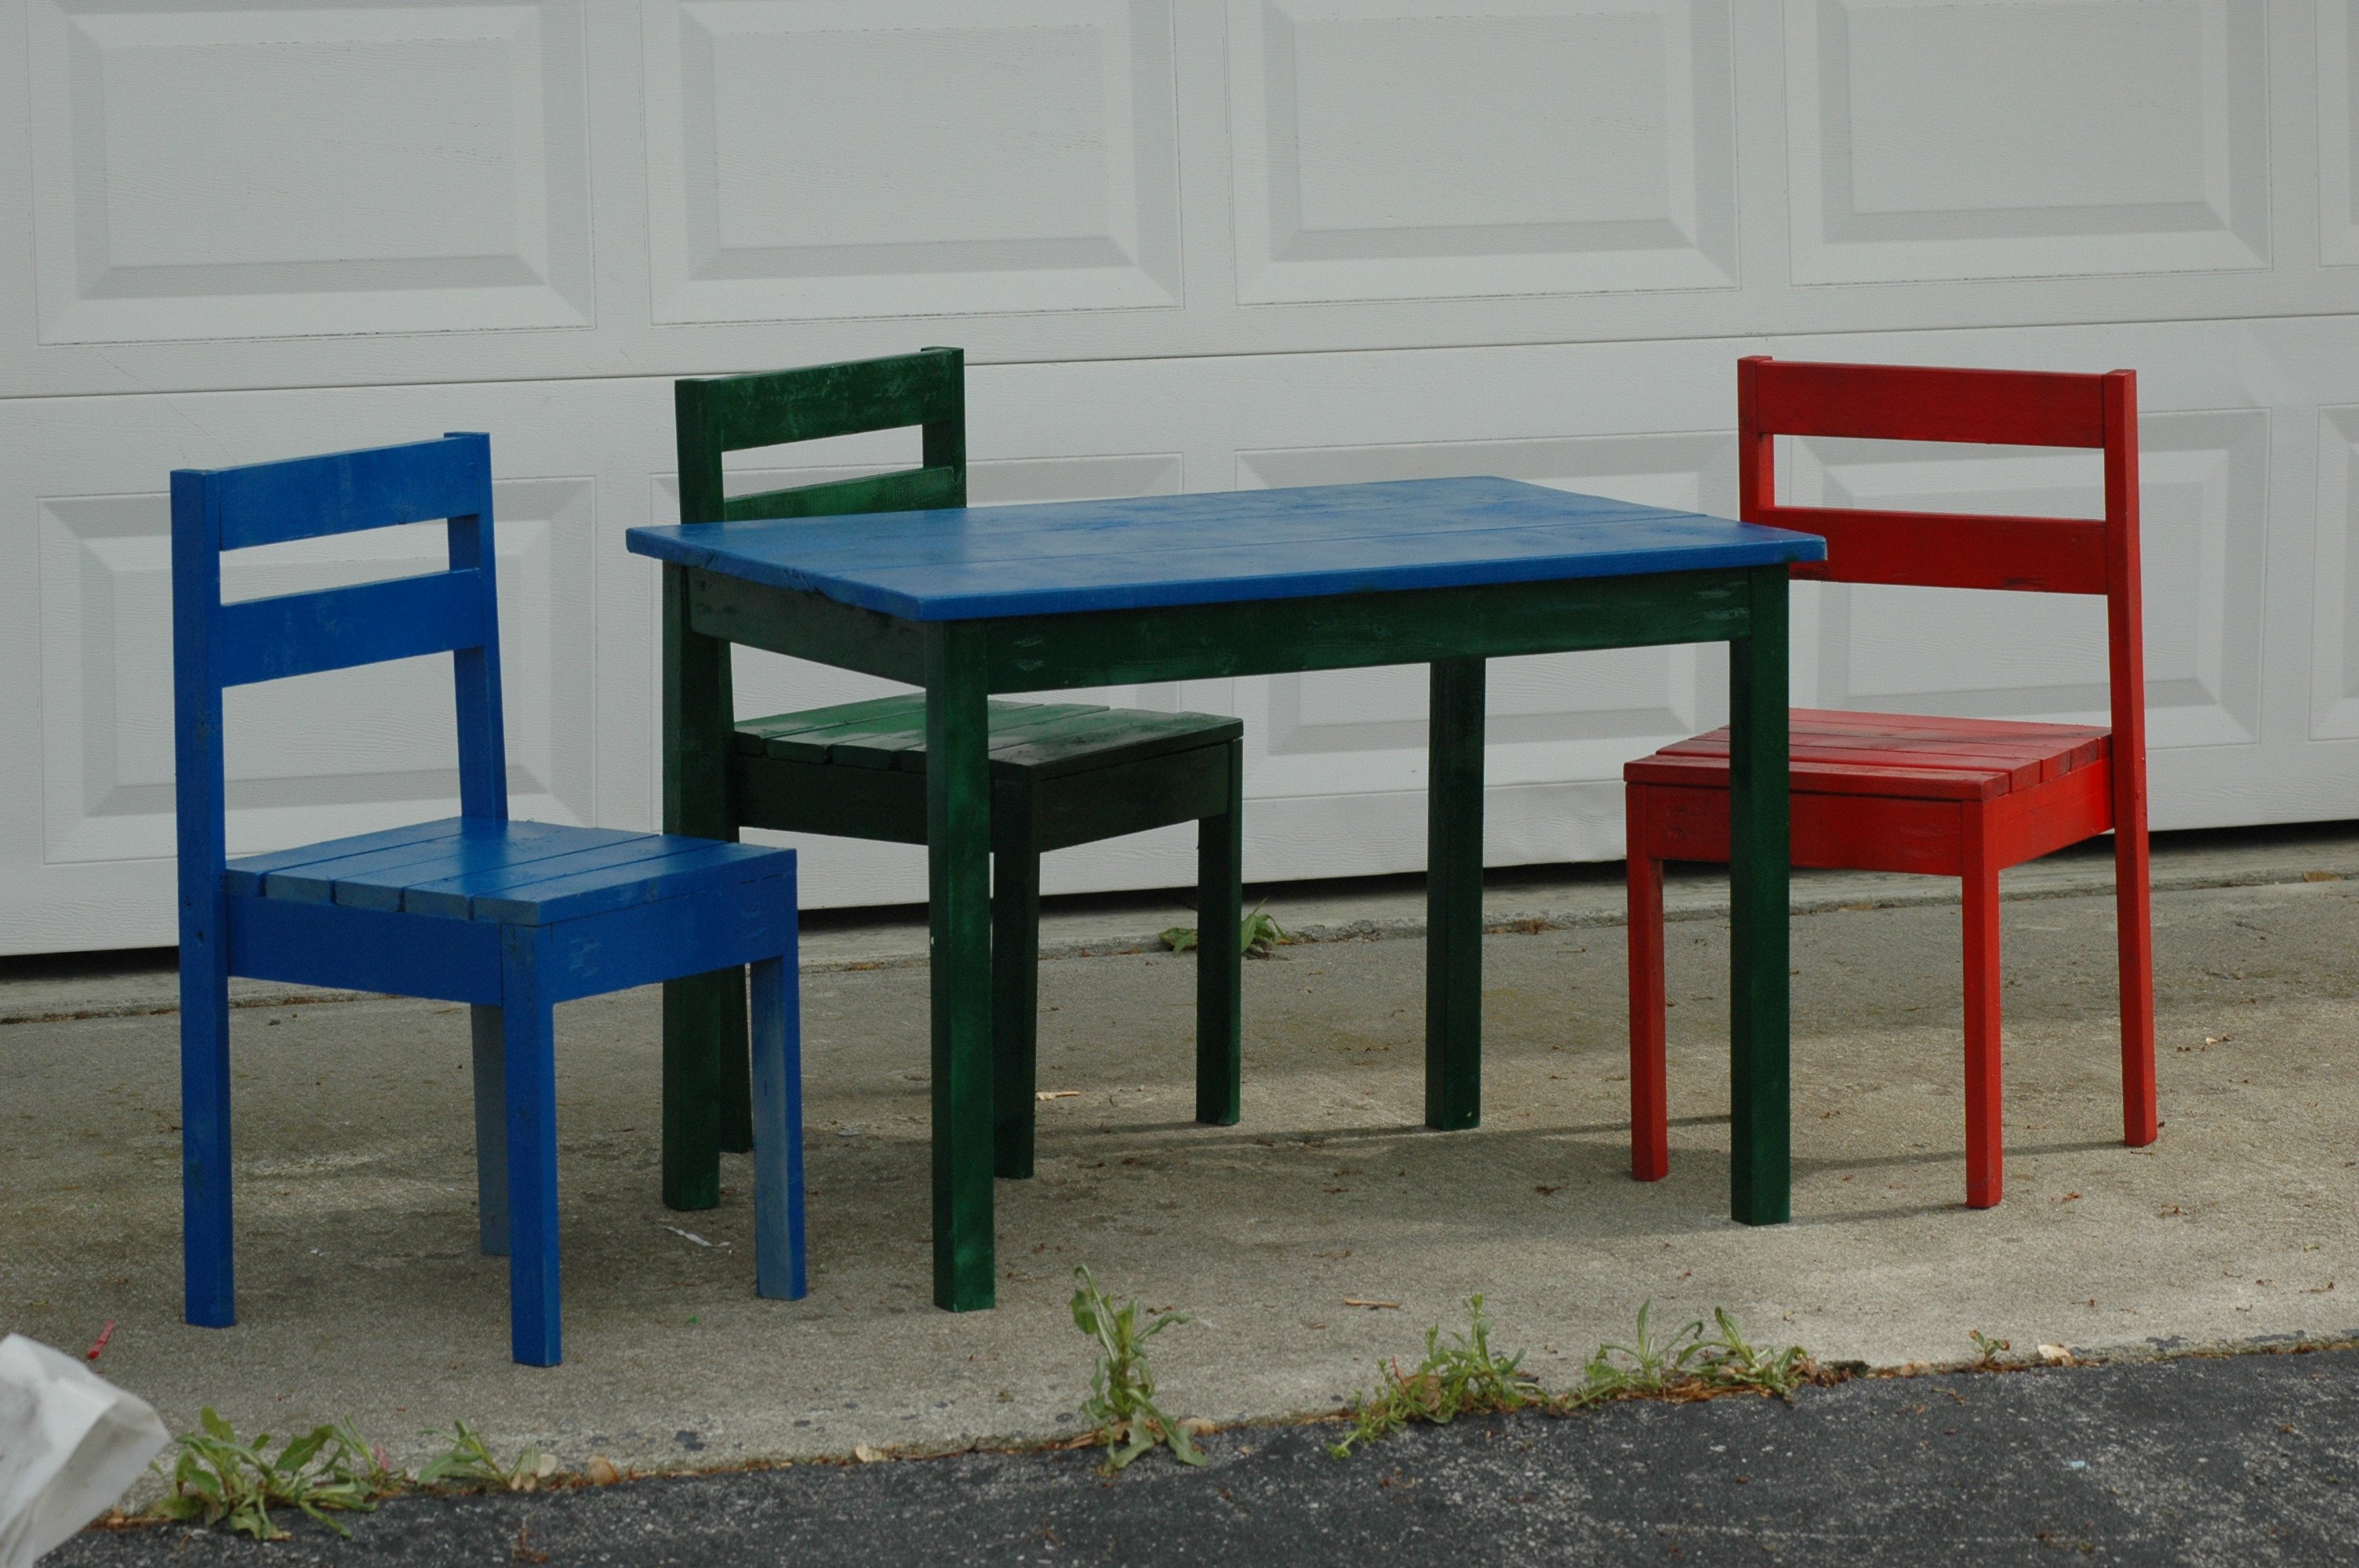
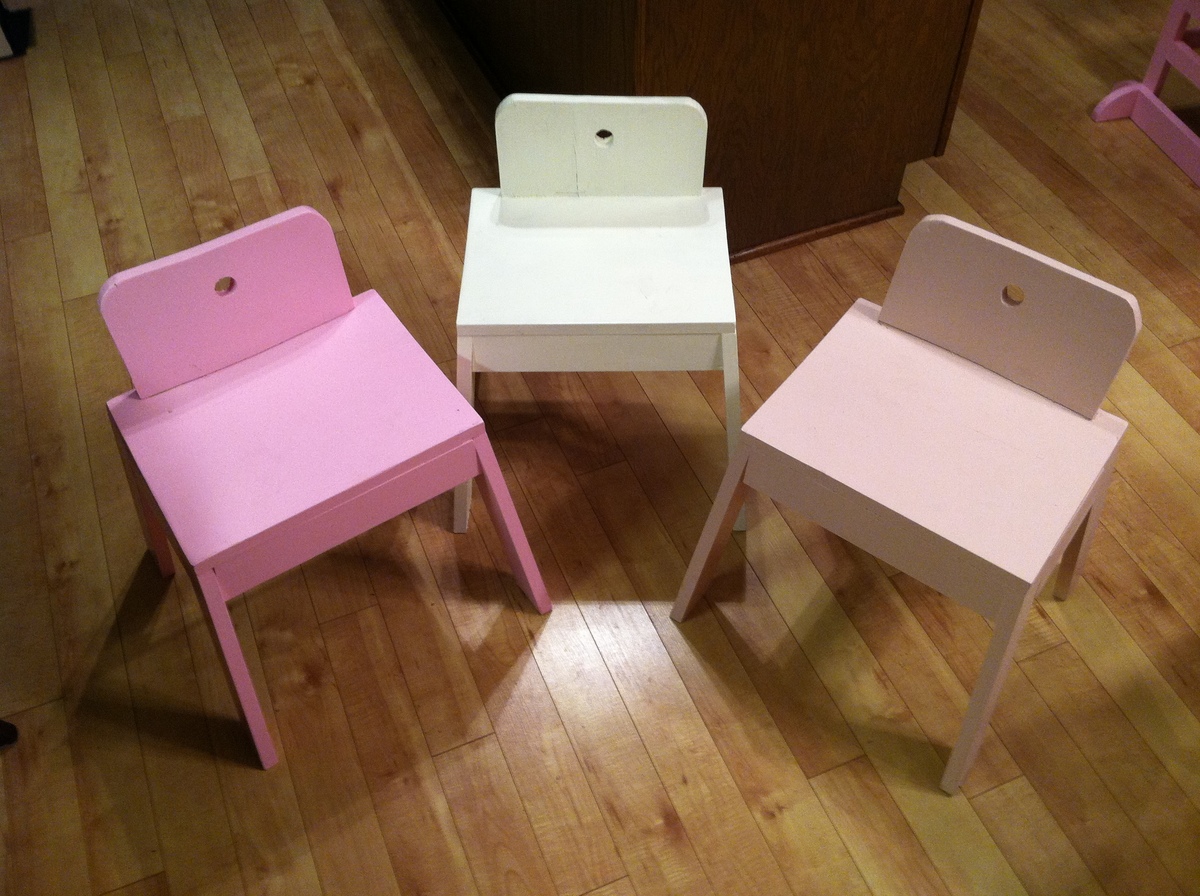
Fun, easy build. This is the first project from this site and the kids loved helping make their own chairs. They got to pick their own color paint - I think I spent more on paint than I did on the wood!
I saw this project and fell in love with it. Ive never done a wood working project before and wanted to do this all on my own so i wouldnt let anyone help just to know if i could do it. It didnt turn out perfect but i CAN NOT stop looking at it. Ana thank you somuch for theses plans!
Mon, 02/24/2014 - 11:22
Looks amazing! I'm dying to build this also and am nervous about trying out that finish. Where did you get the corner hardware?
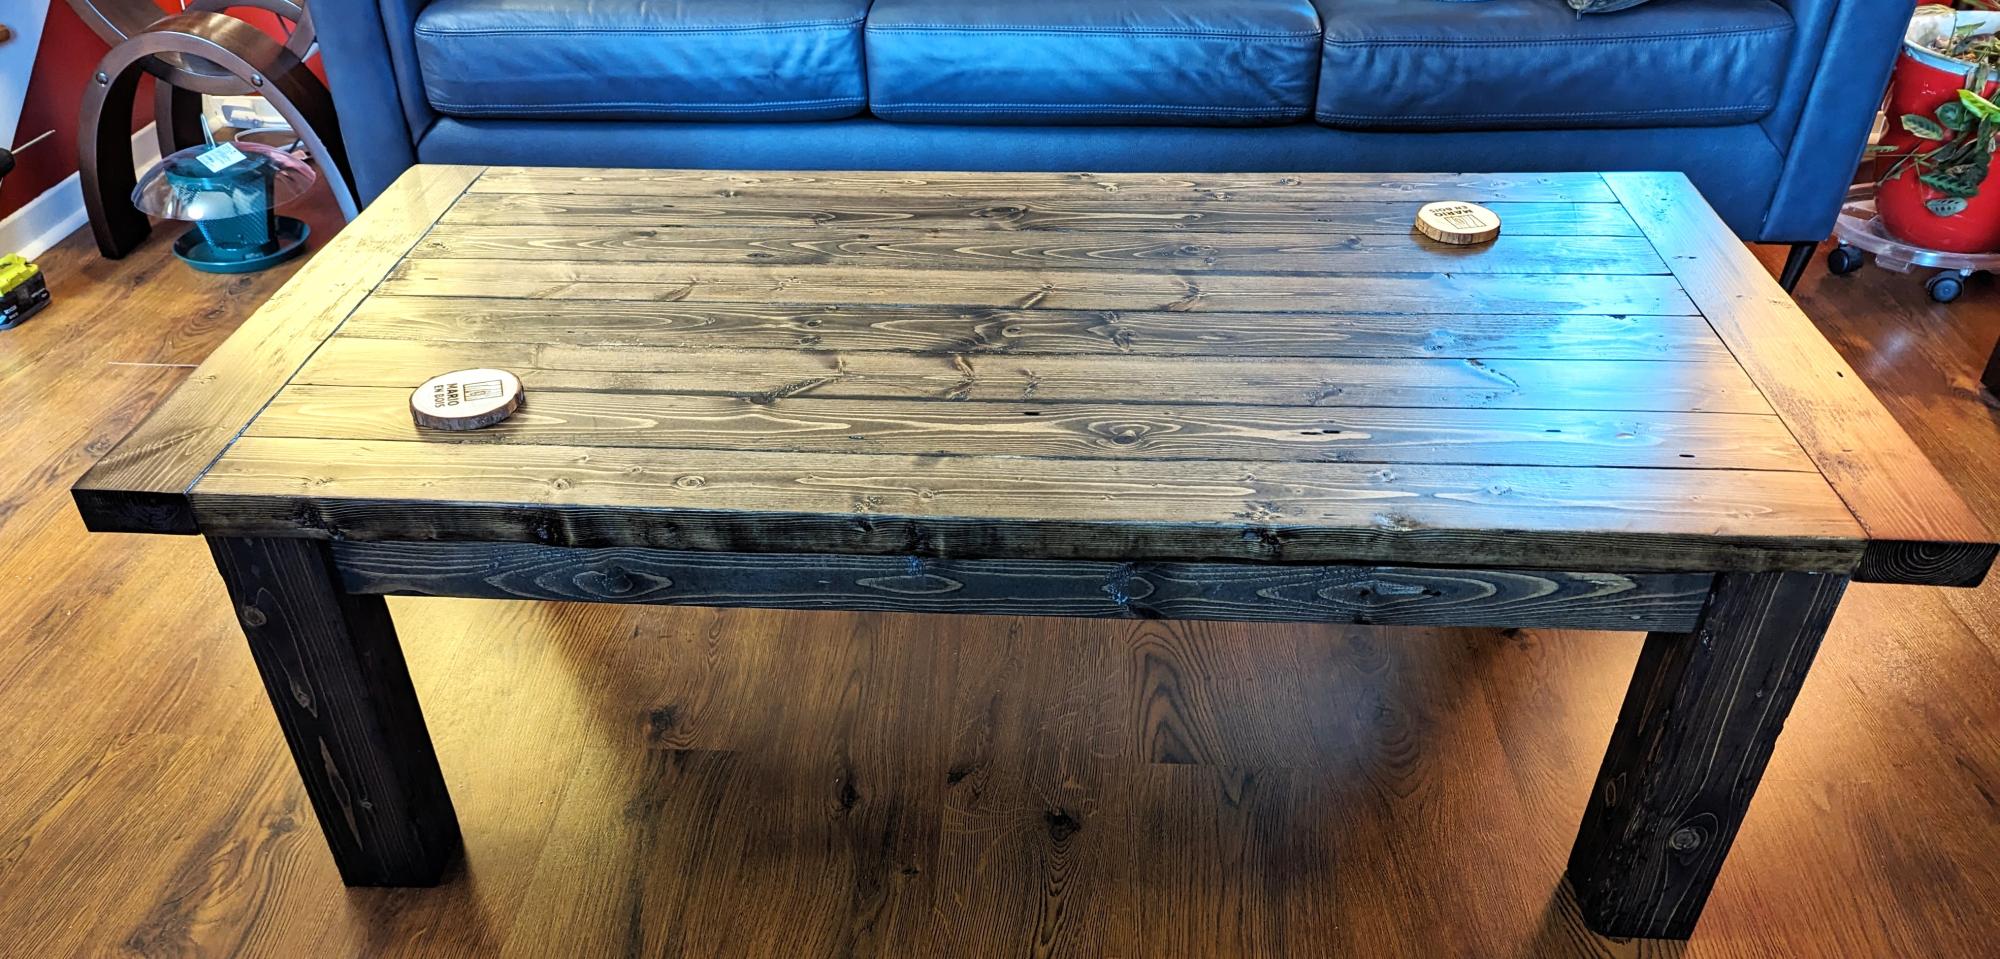
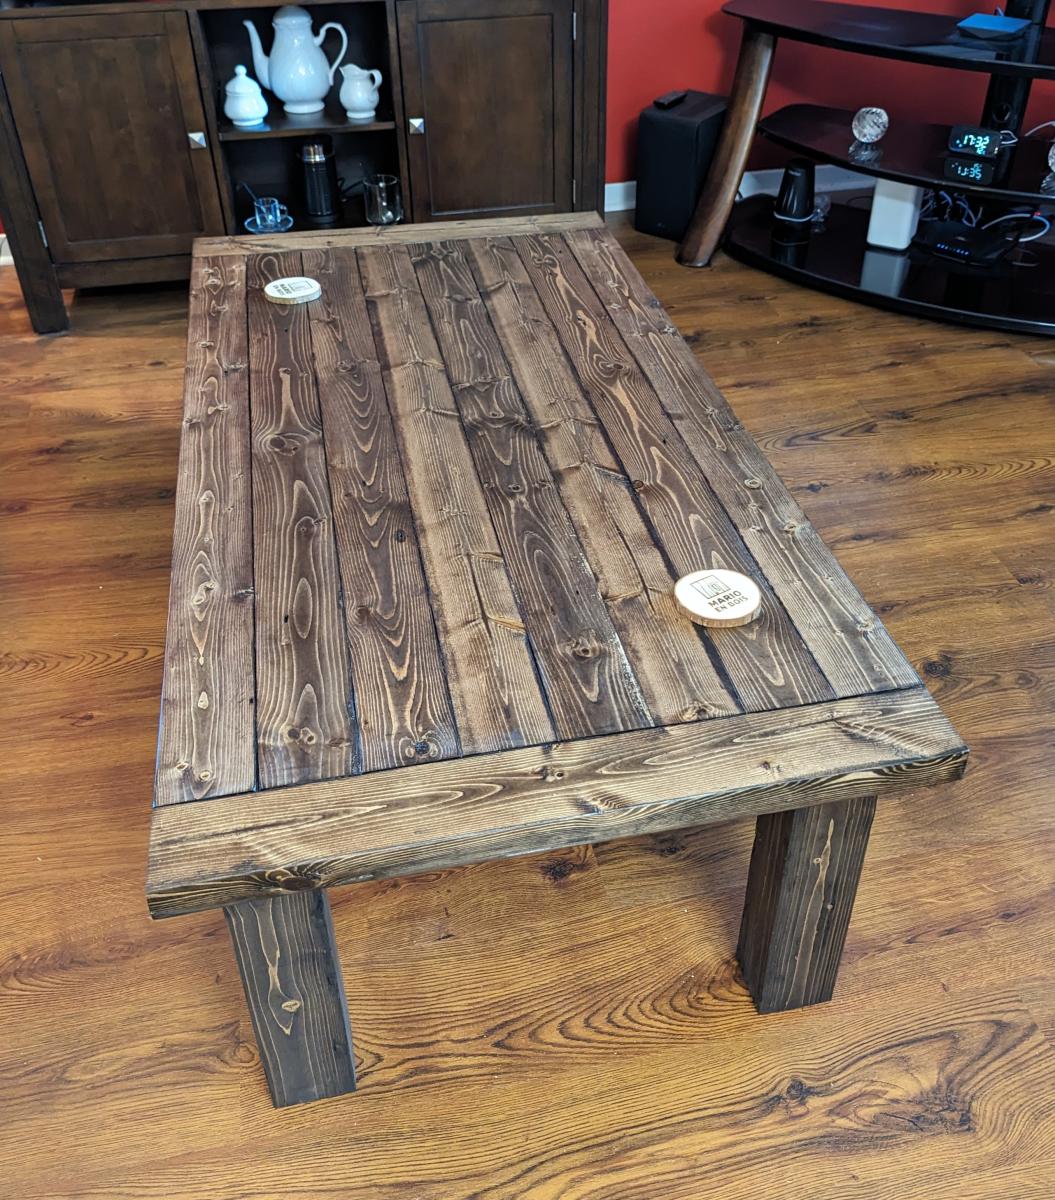
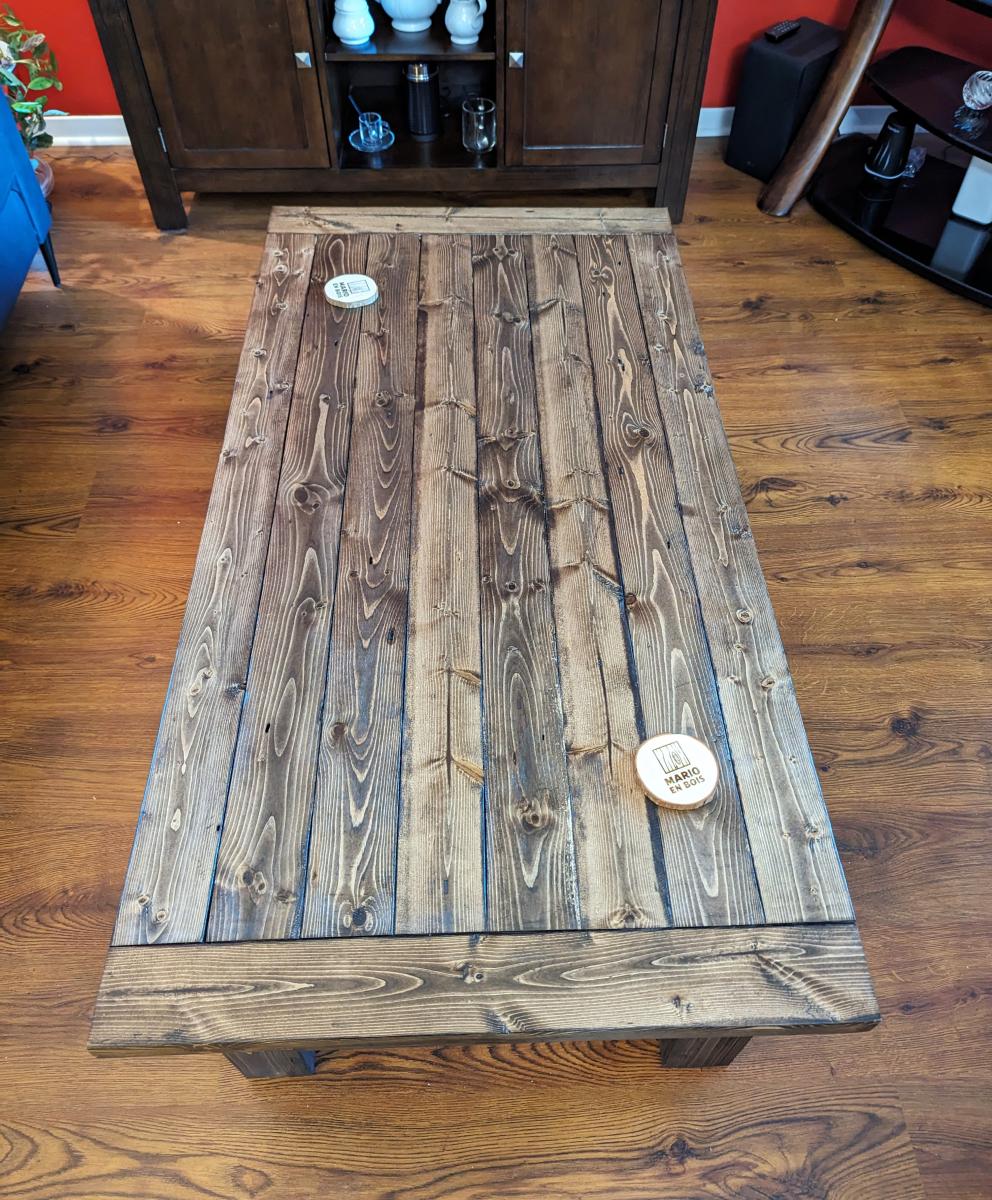
Rustic Farmhouse Table with pocketholes and Special Walnut Finish
Make sure your wood is straight withno warping!
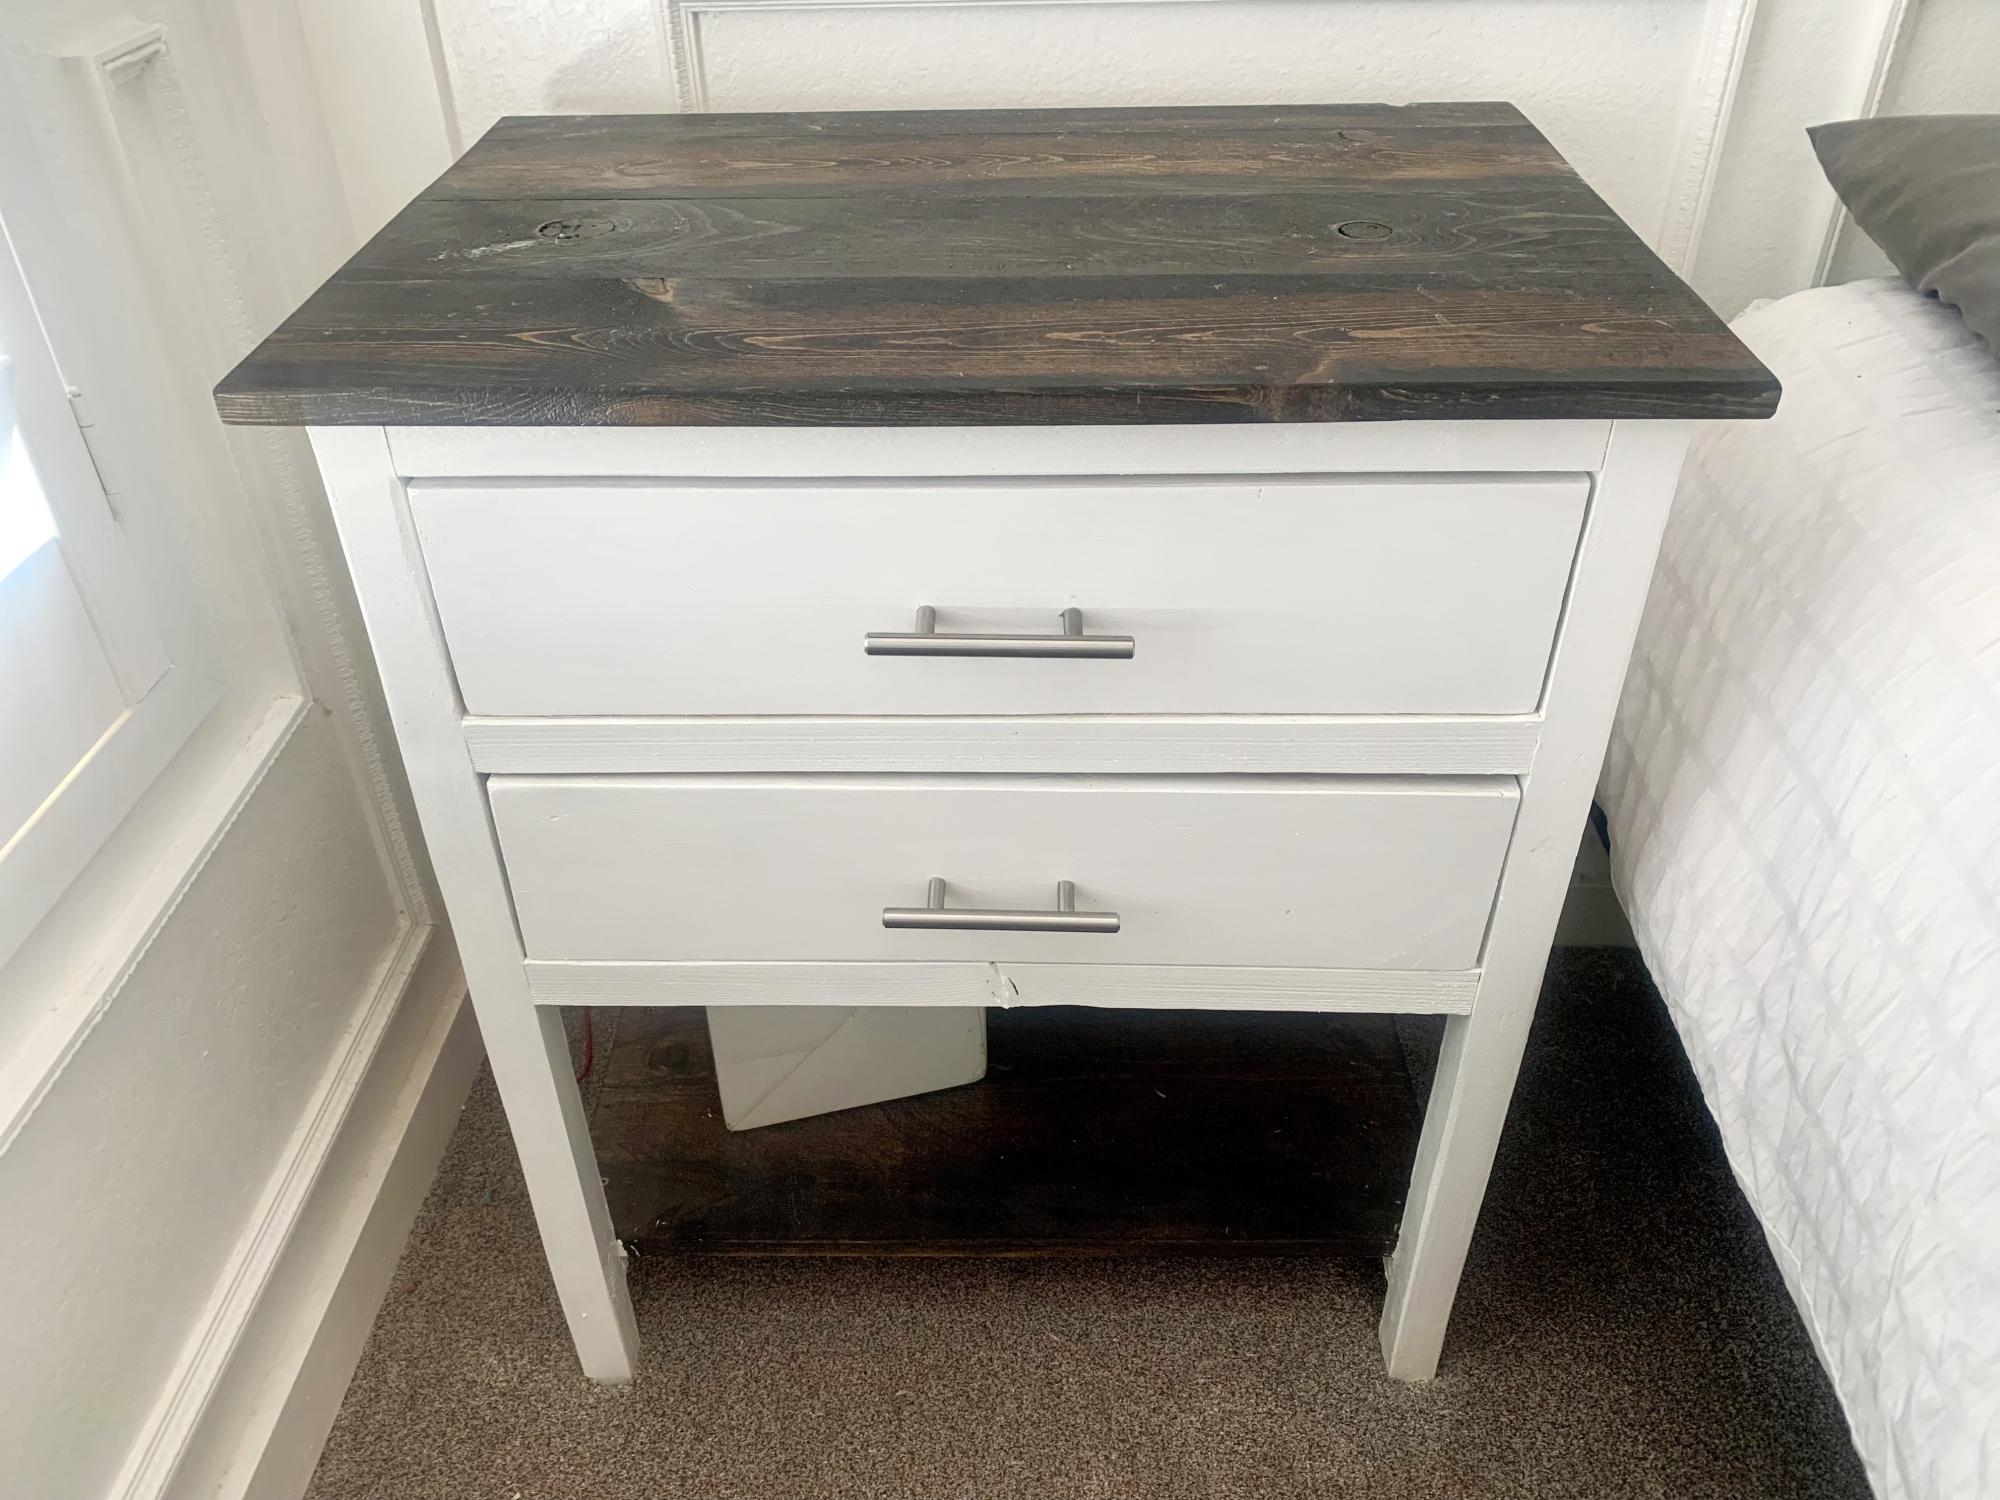
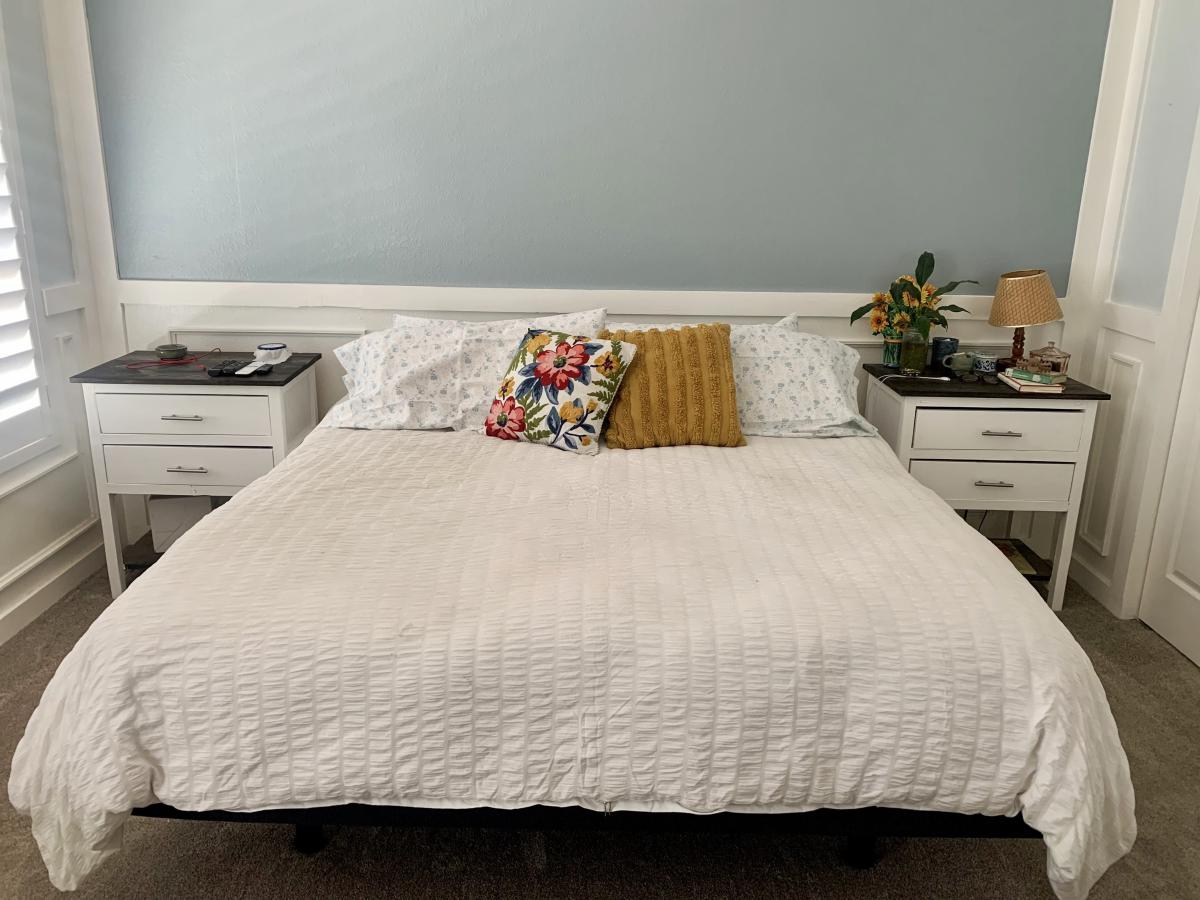
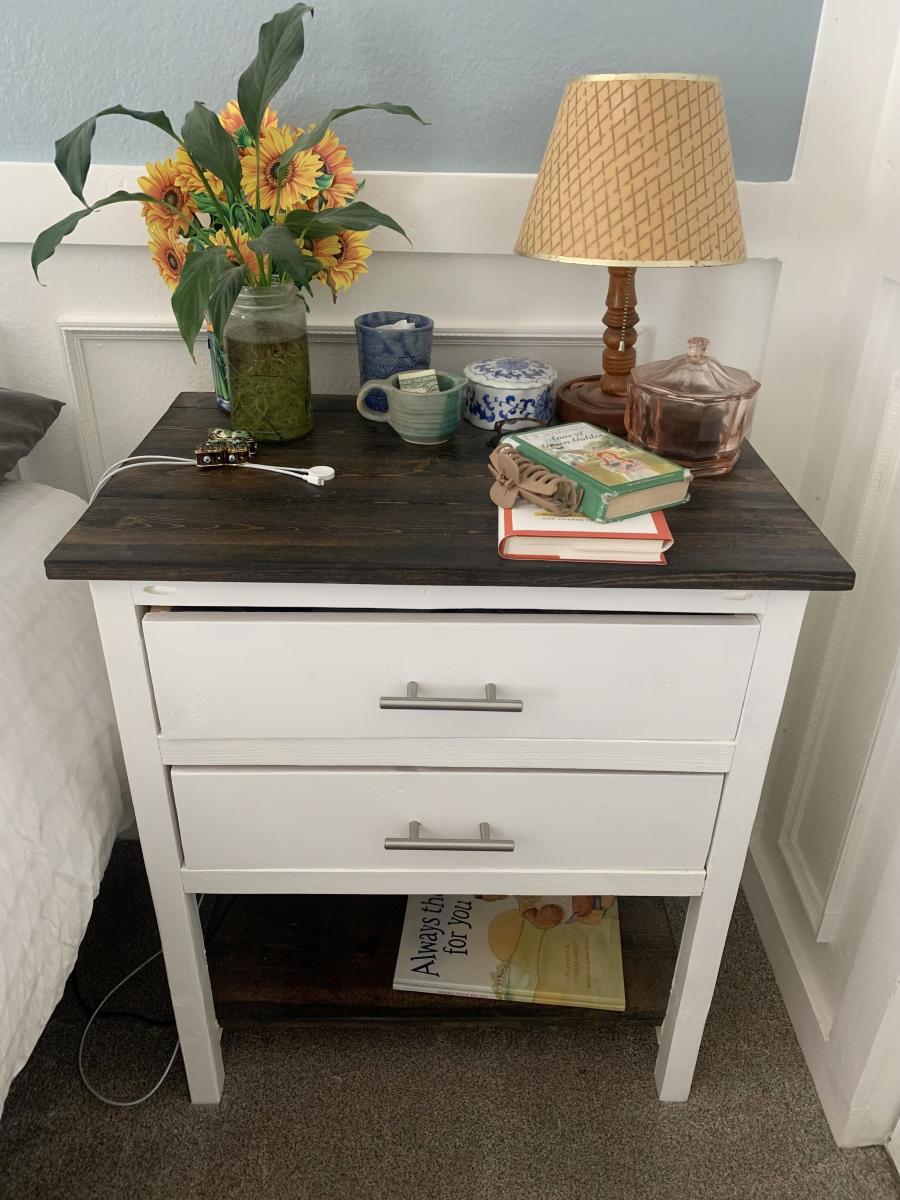
I have always wanted to build some furniture. So, when we were looking for some nightstands for our bedroom and couldn’t find any we liked I found your Farmhouse Nightstand plans and decided to build them as a surprise gift for my husband for Valentine’s Day. I personalized them by adding an extra drawer and making them a little taller and wider to fit the space we had. We absolutely LOVE them! Thank you, Ana, for helping to make a dream of mine come true!
Toni Imlay @ toniimlay.com
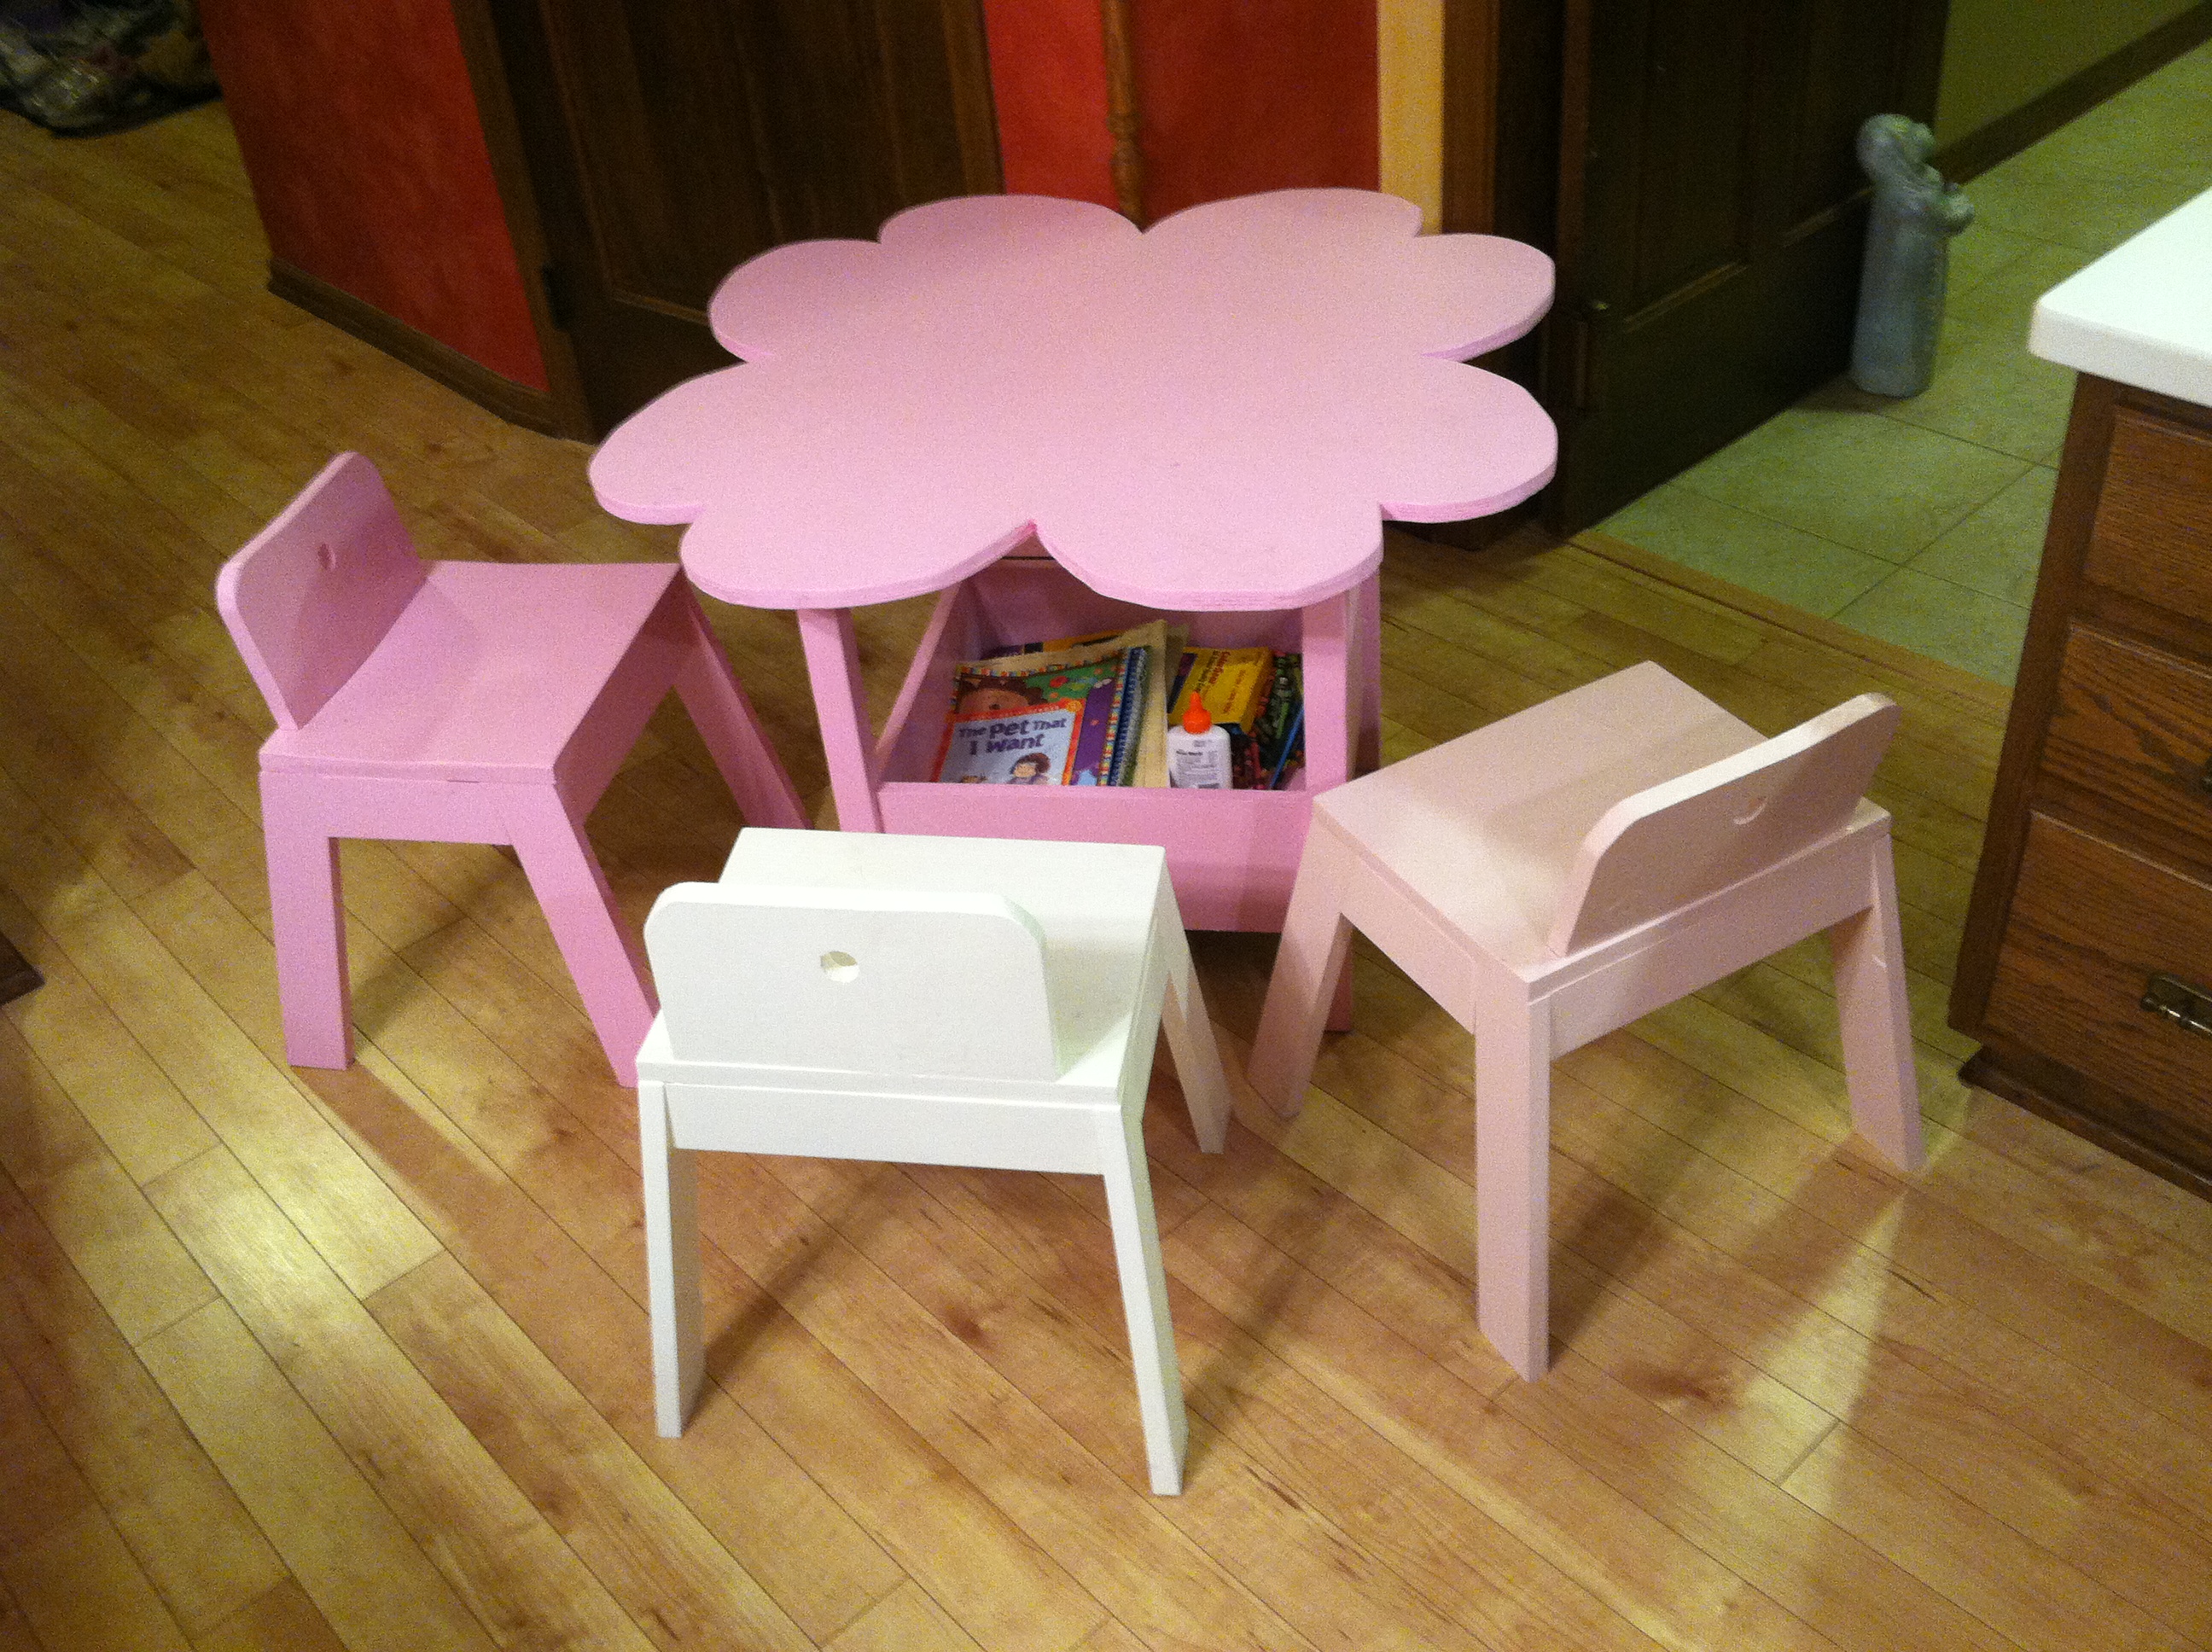
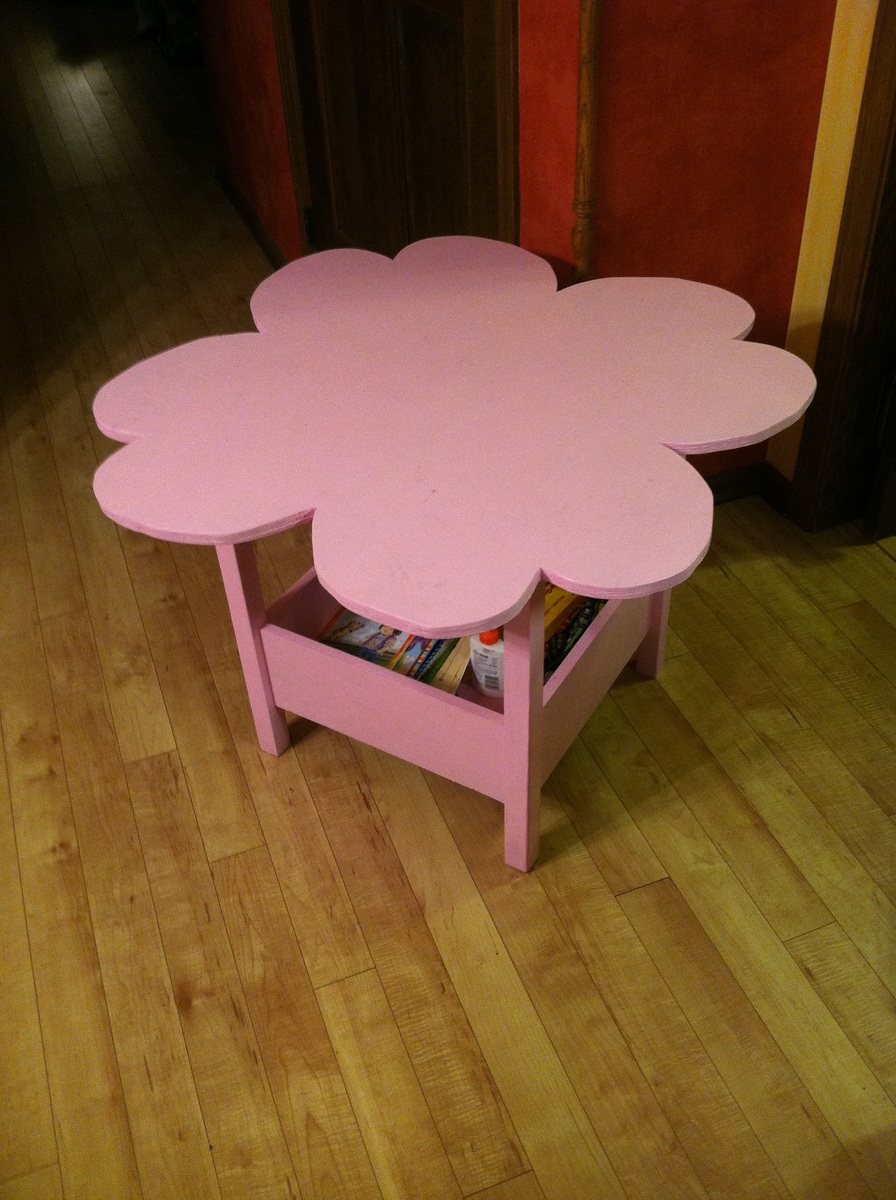
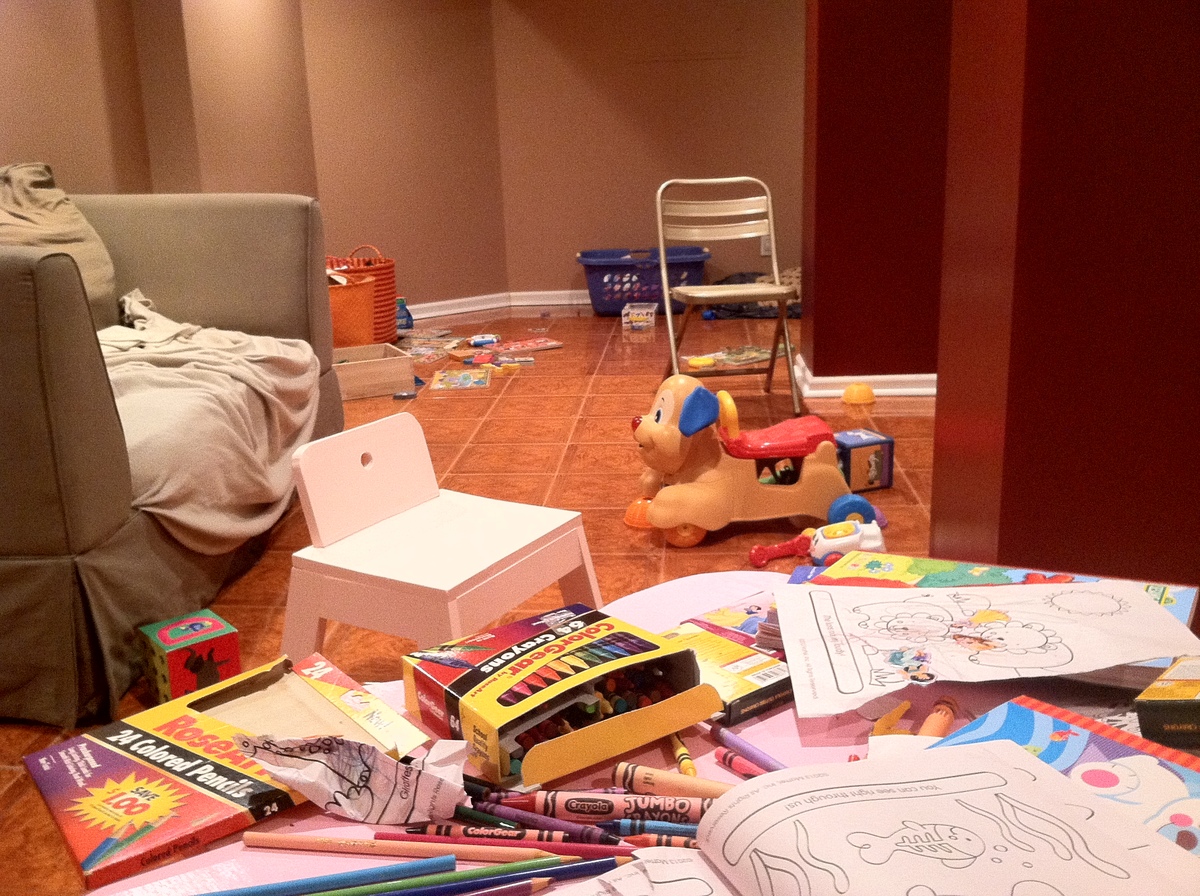
I put together the flower storage table and the thumb chairs during the week leading up to our daughter's first birthday party. With a lot of older toddlers/kids at the party, the table served as a perfect coloring station in our basement (as you can see from the mahem/aftermath photo below). In any event, as my daughter is about to turn two, she has really grown into using the table and chairs for completing her own arts and crafts projects.
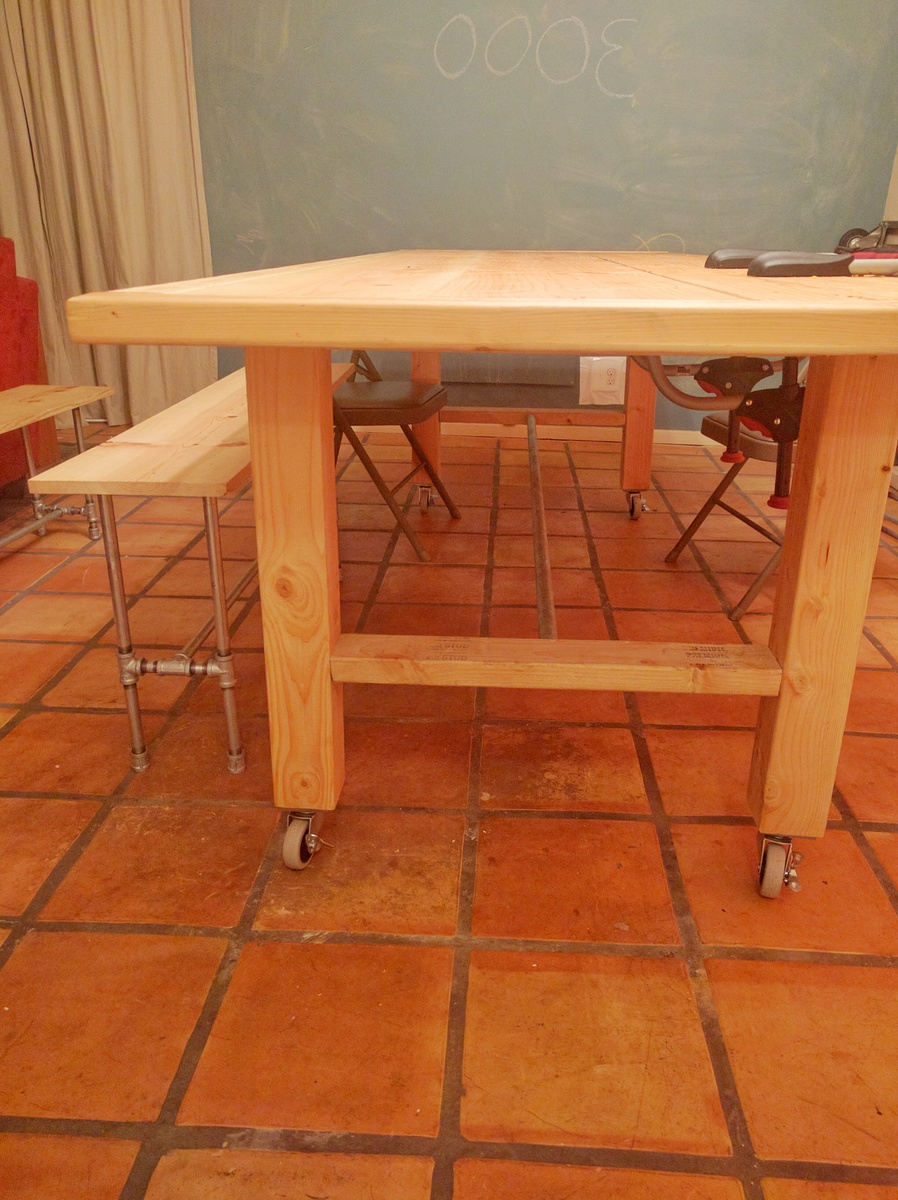
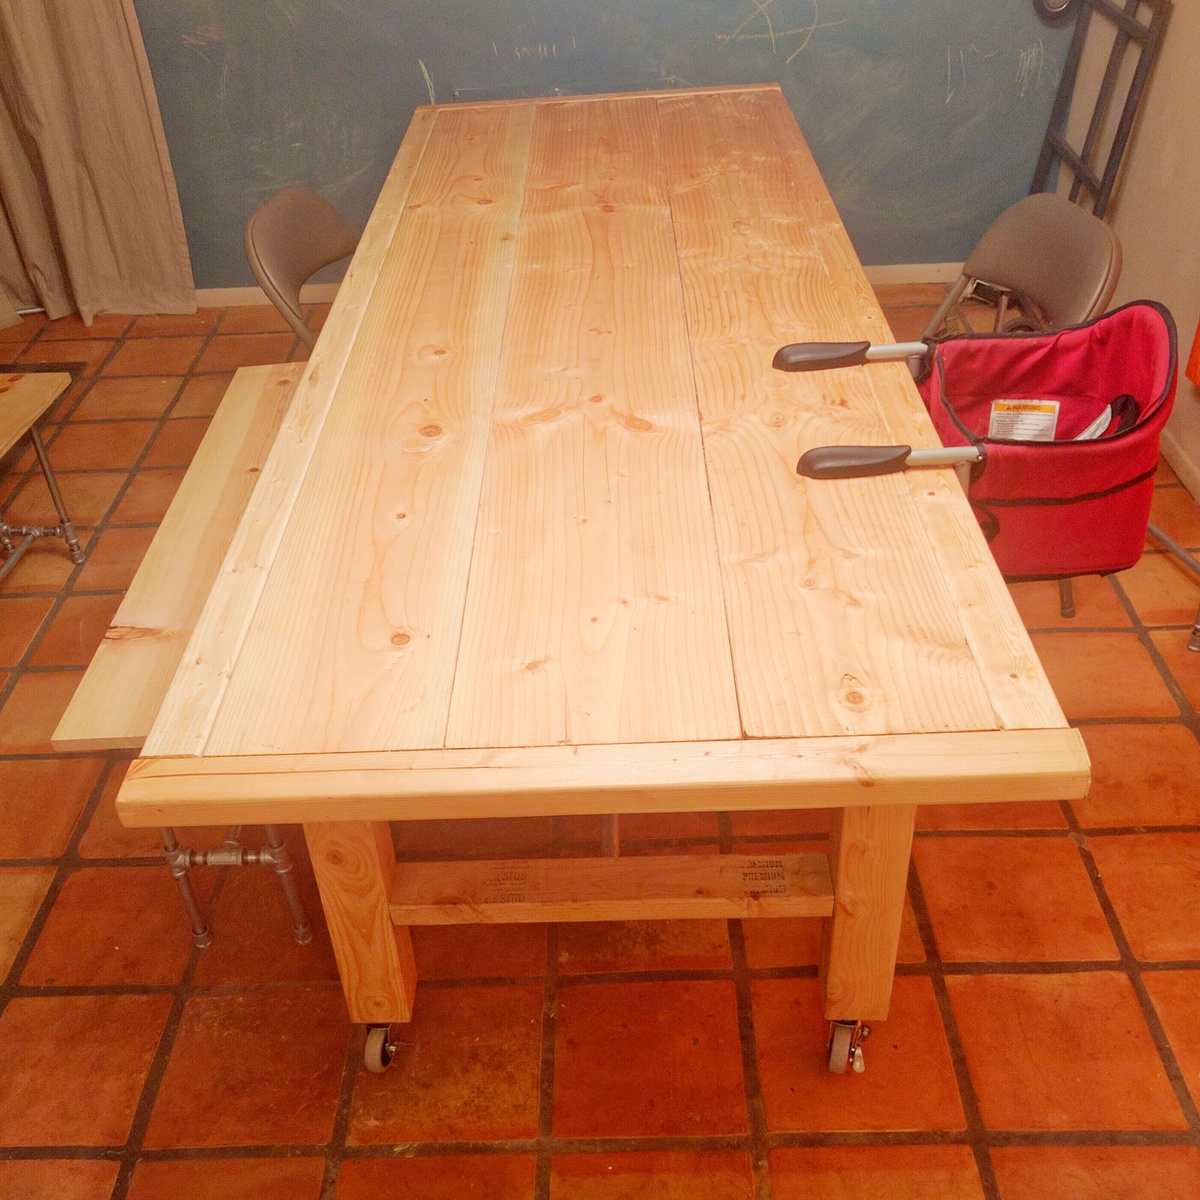
Modified top boards, 3/4 inch galvanized pipe as center support to reduce cuts needed, and casters so the massive thing can be moved.
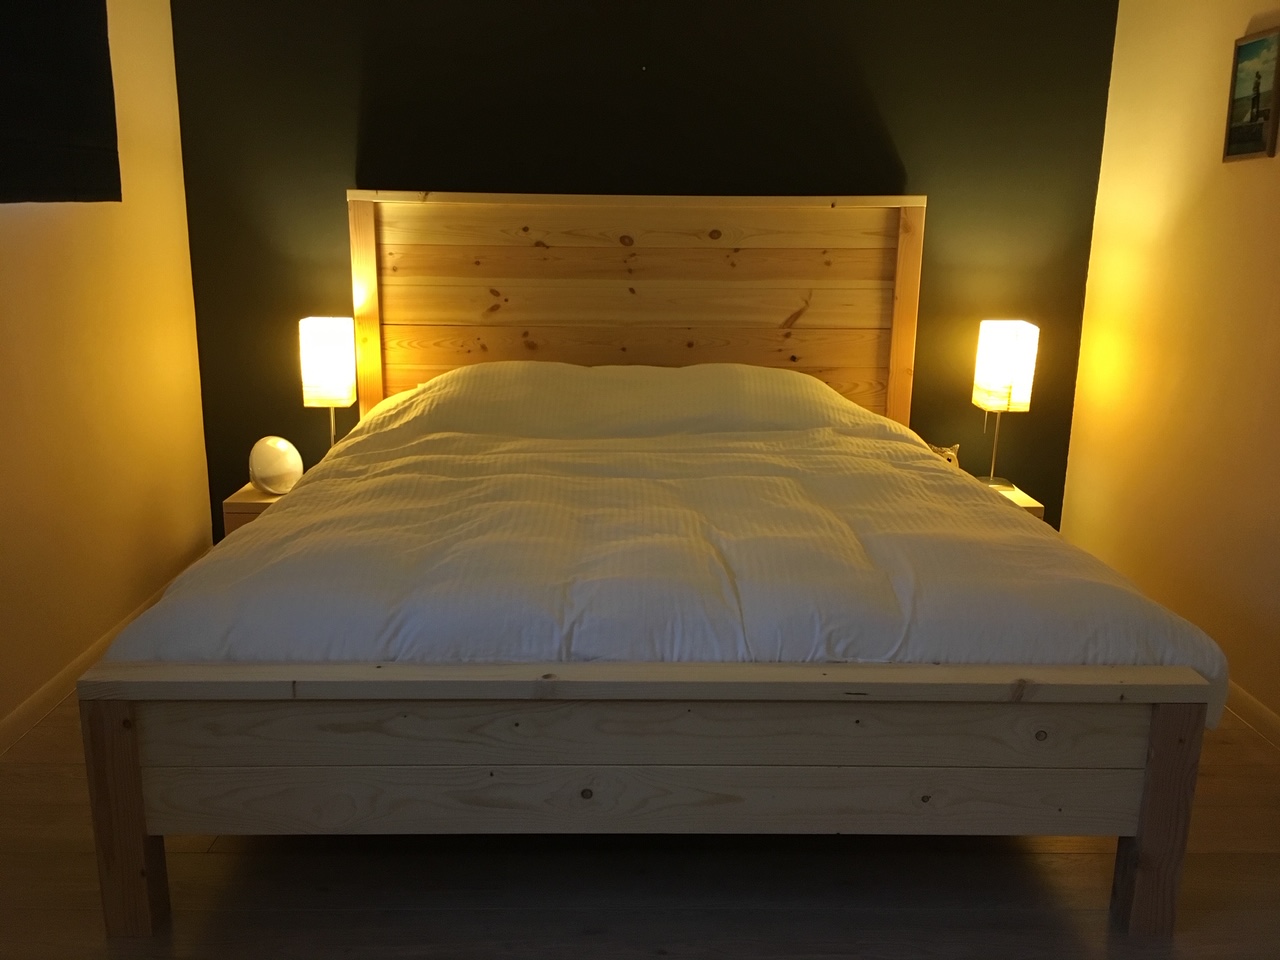
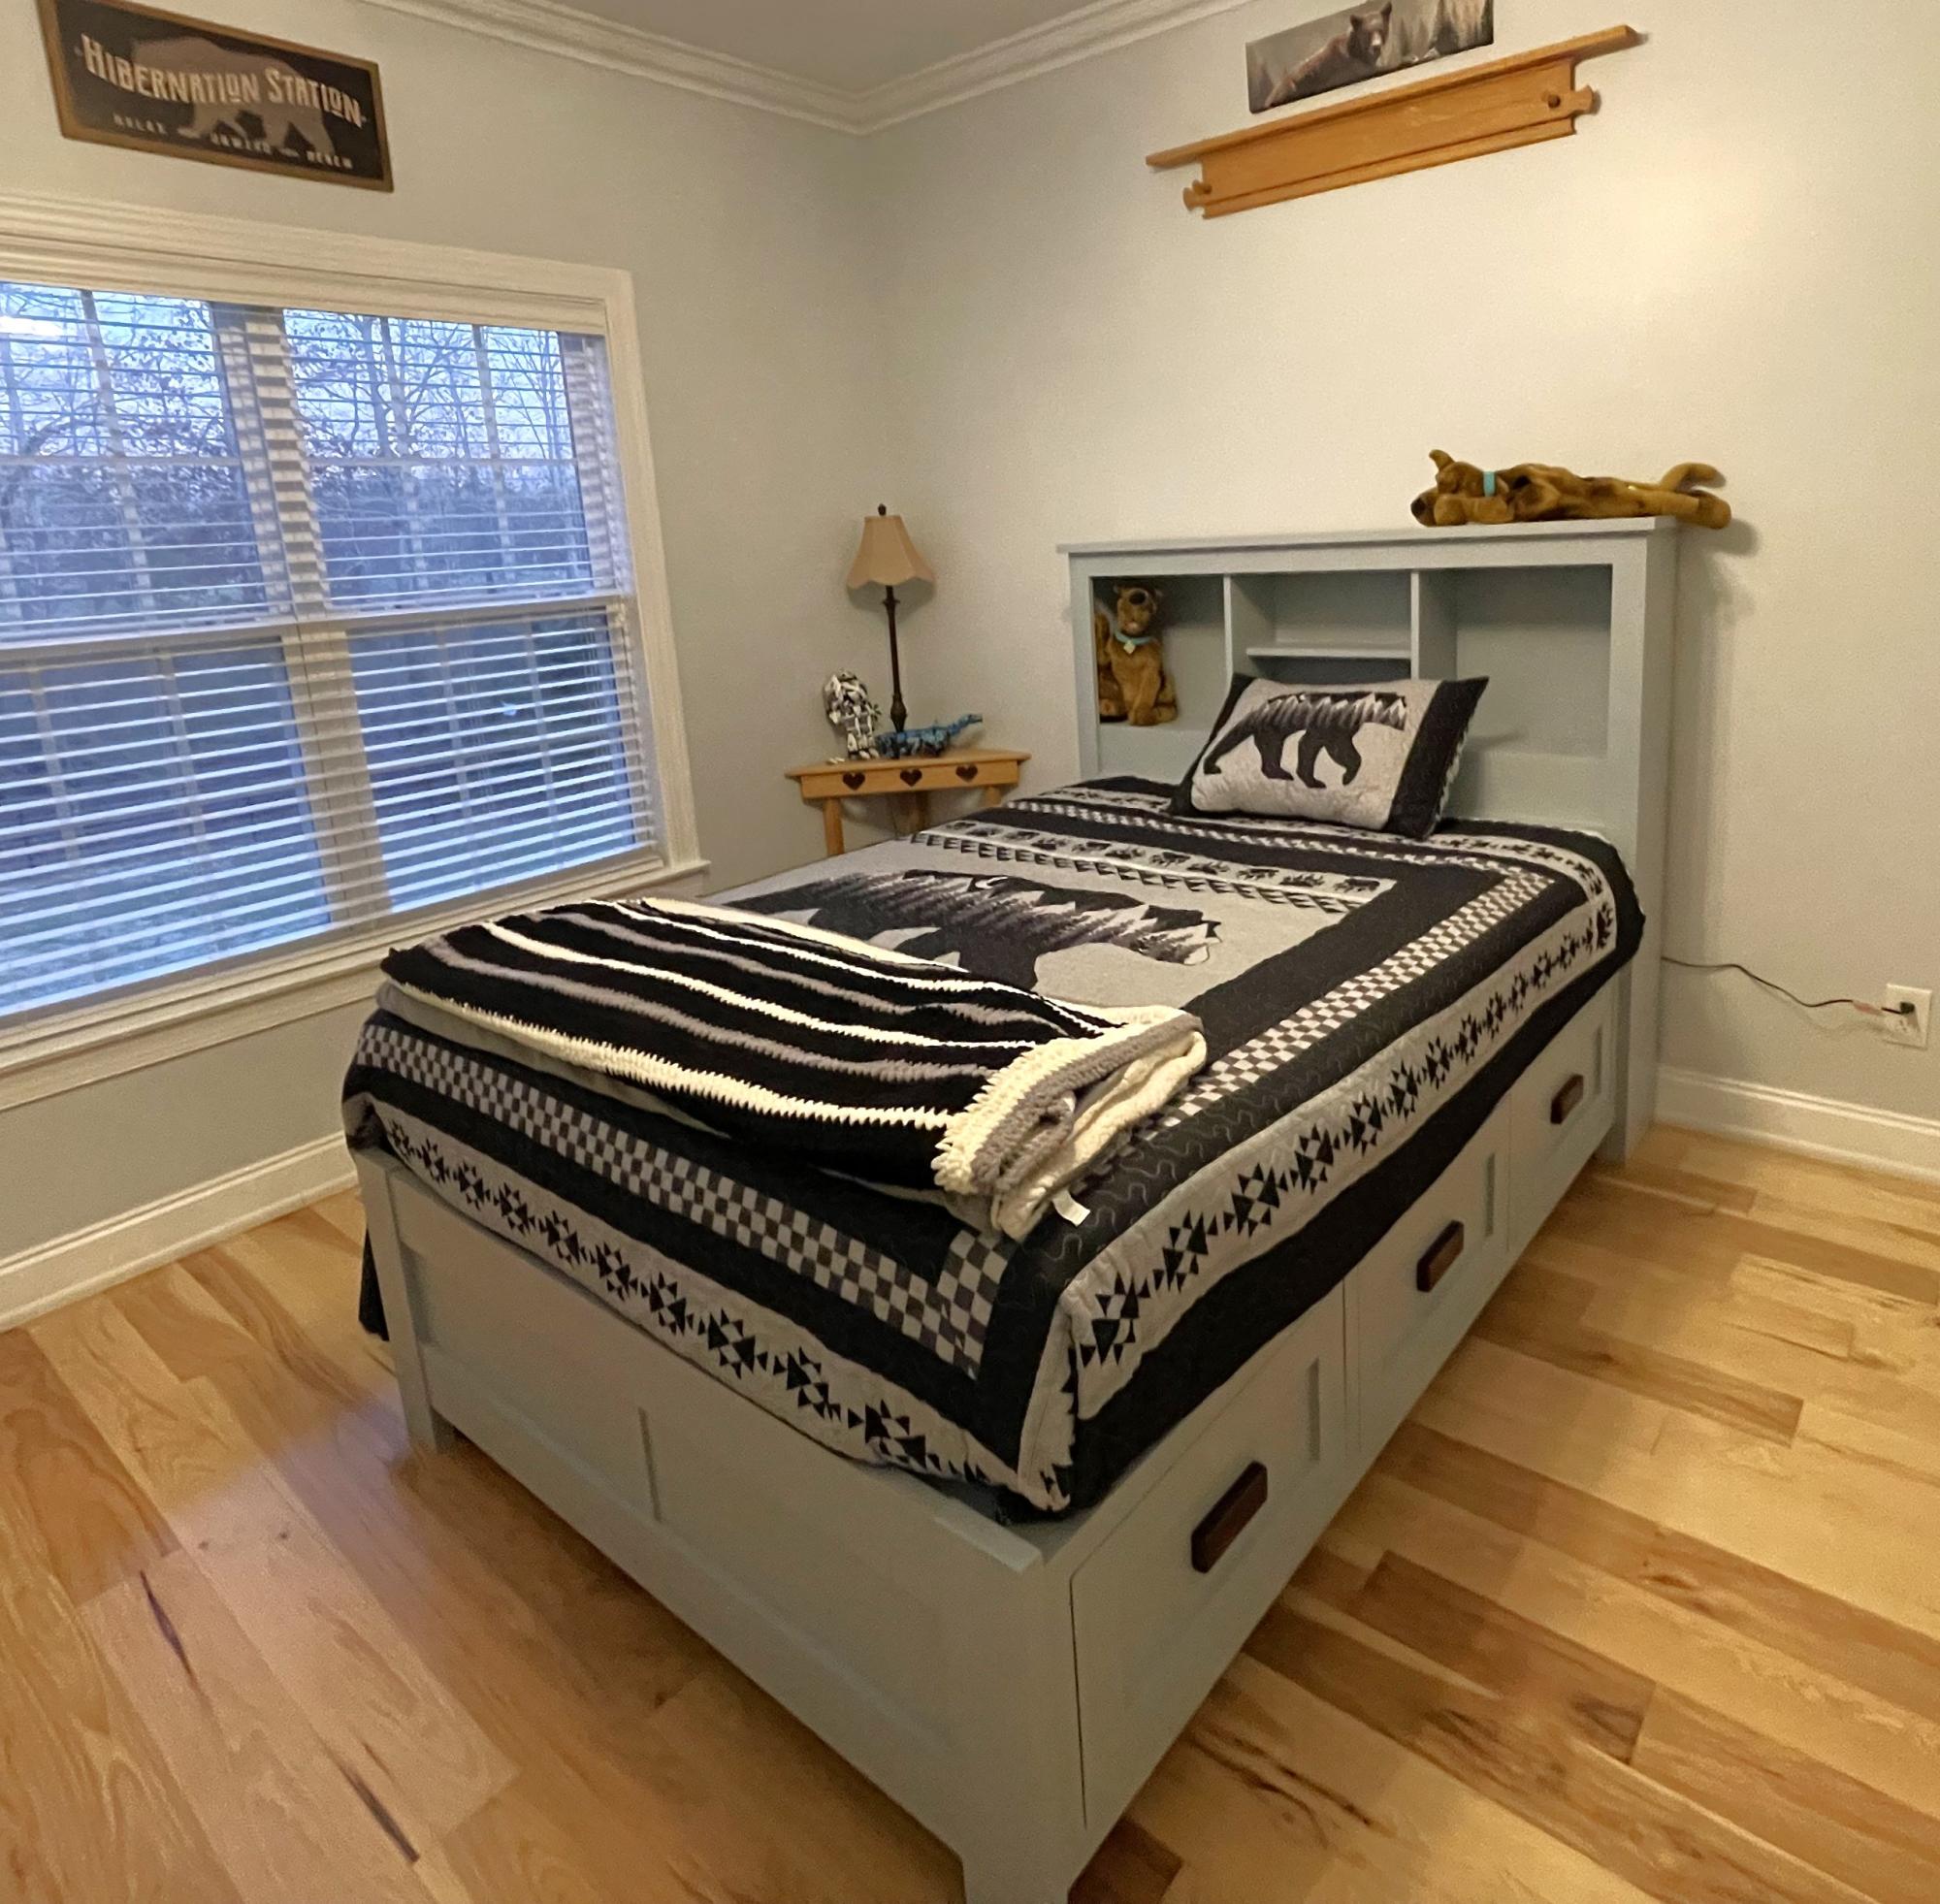
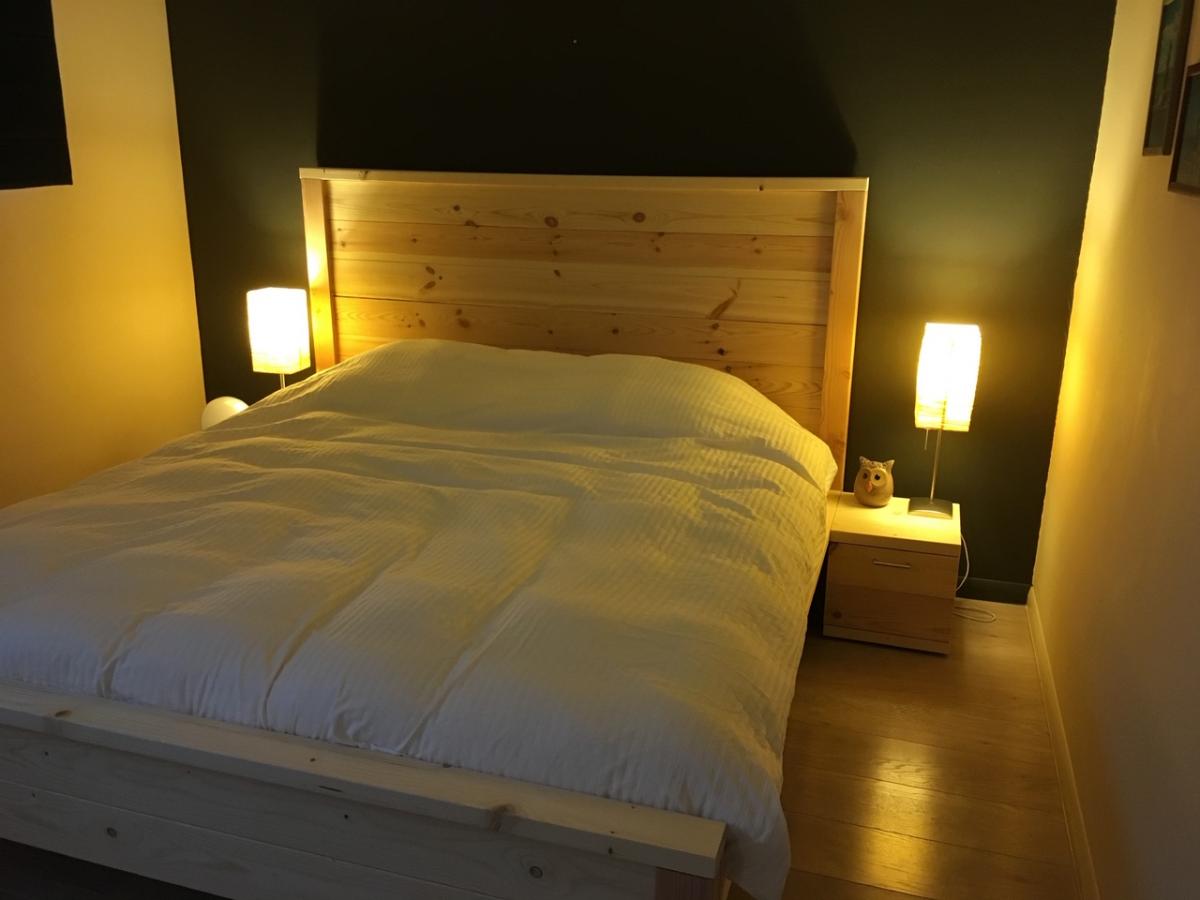
I made this beautiful bed in just one (long) day (12h). The next day I made the nightstands with the scraps of wood from the bed.

Loved building this table. Look forward to building more! Thanks Ana!
Easy, fun great project that my husband and I did together. This project cost about $202, and I will take that price over the price that you would have to pay in the furniture store any day. We found some great wood at Lowe's that worked perfectly and gave it the "rustic" look that we like. Thanks Ana for the plans and sharing them with us.
Wed, 05/16/2012 - 19:01
That's a fine quality piece of furniture!
Why can't I get dark walnut stain to look like that?

Wed, 05/16/2012 - 19:45
Debi_G, I've had lots of trouble getting stains to look the way I want too. What I've taken to doing is either mixing my own (see http://claydowling.com), as well as trying out various commercial stains until I find one that satisfies my desires. Good use for your scrap.
So far the best commercial stains I've found are from General Finishes. They're designed to sit partially on top of the wood, which prevents some of the splotchy and washed out look that make some stains unpleasant to work with.
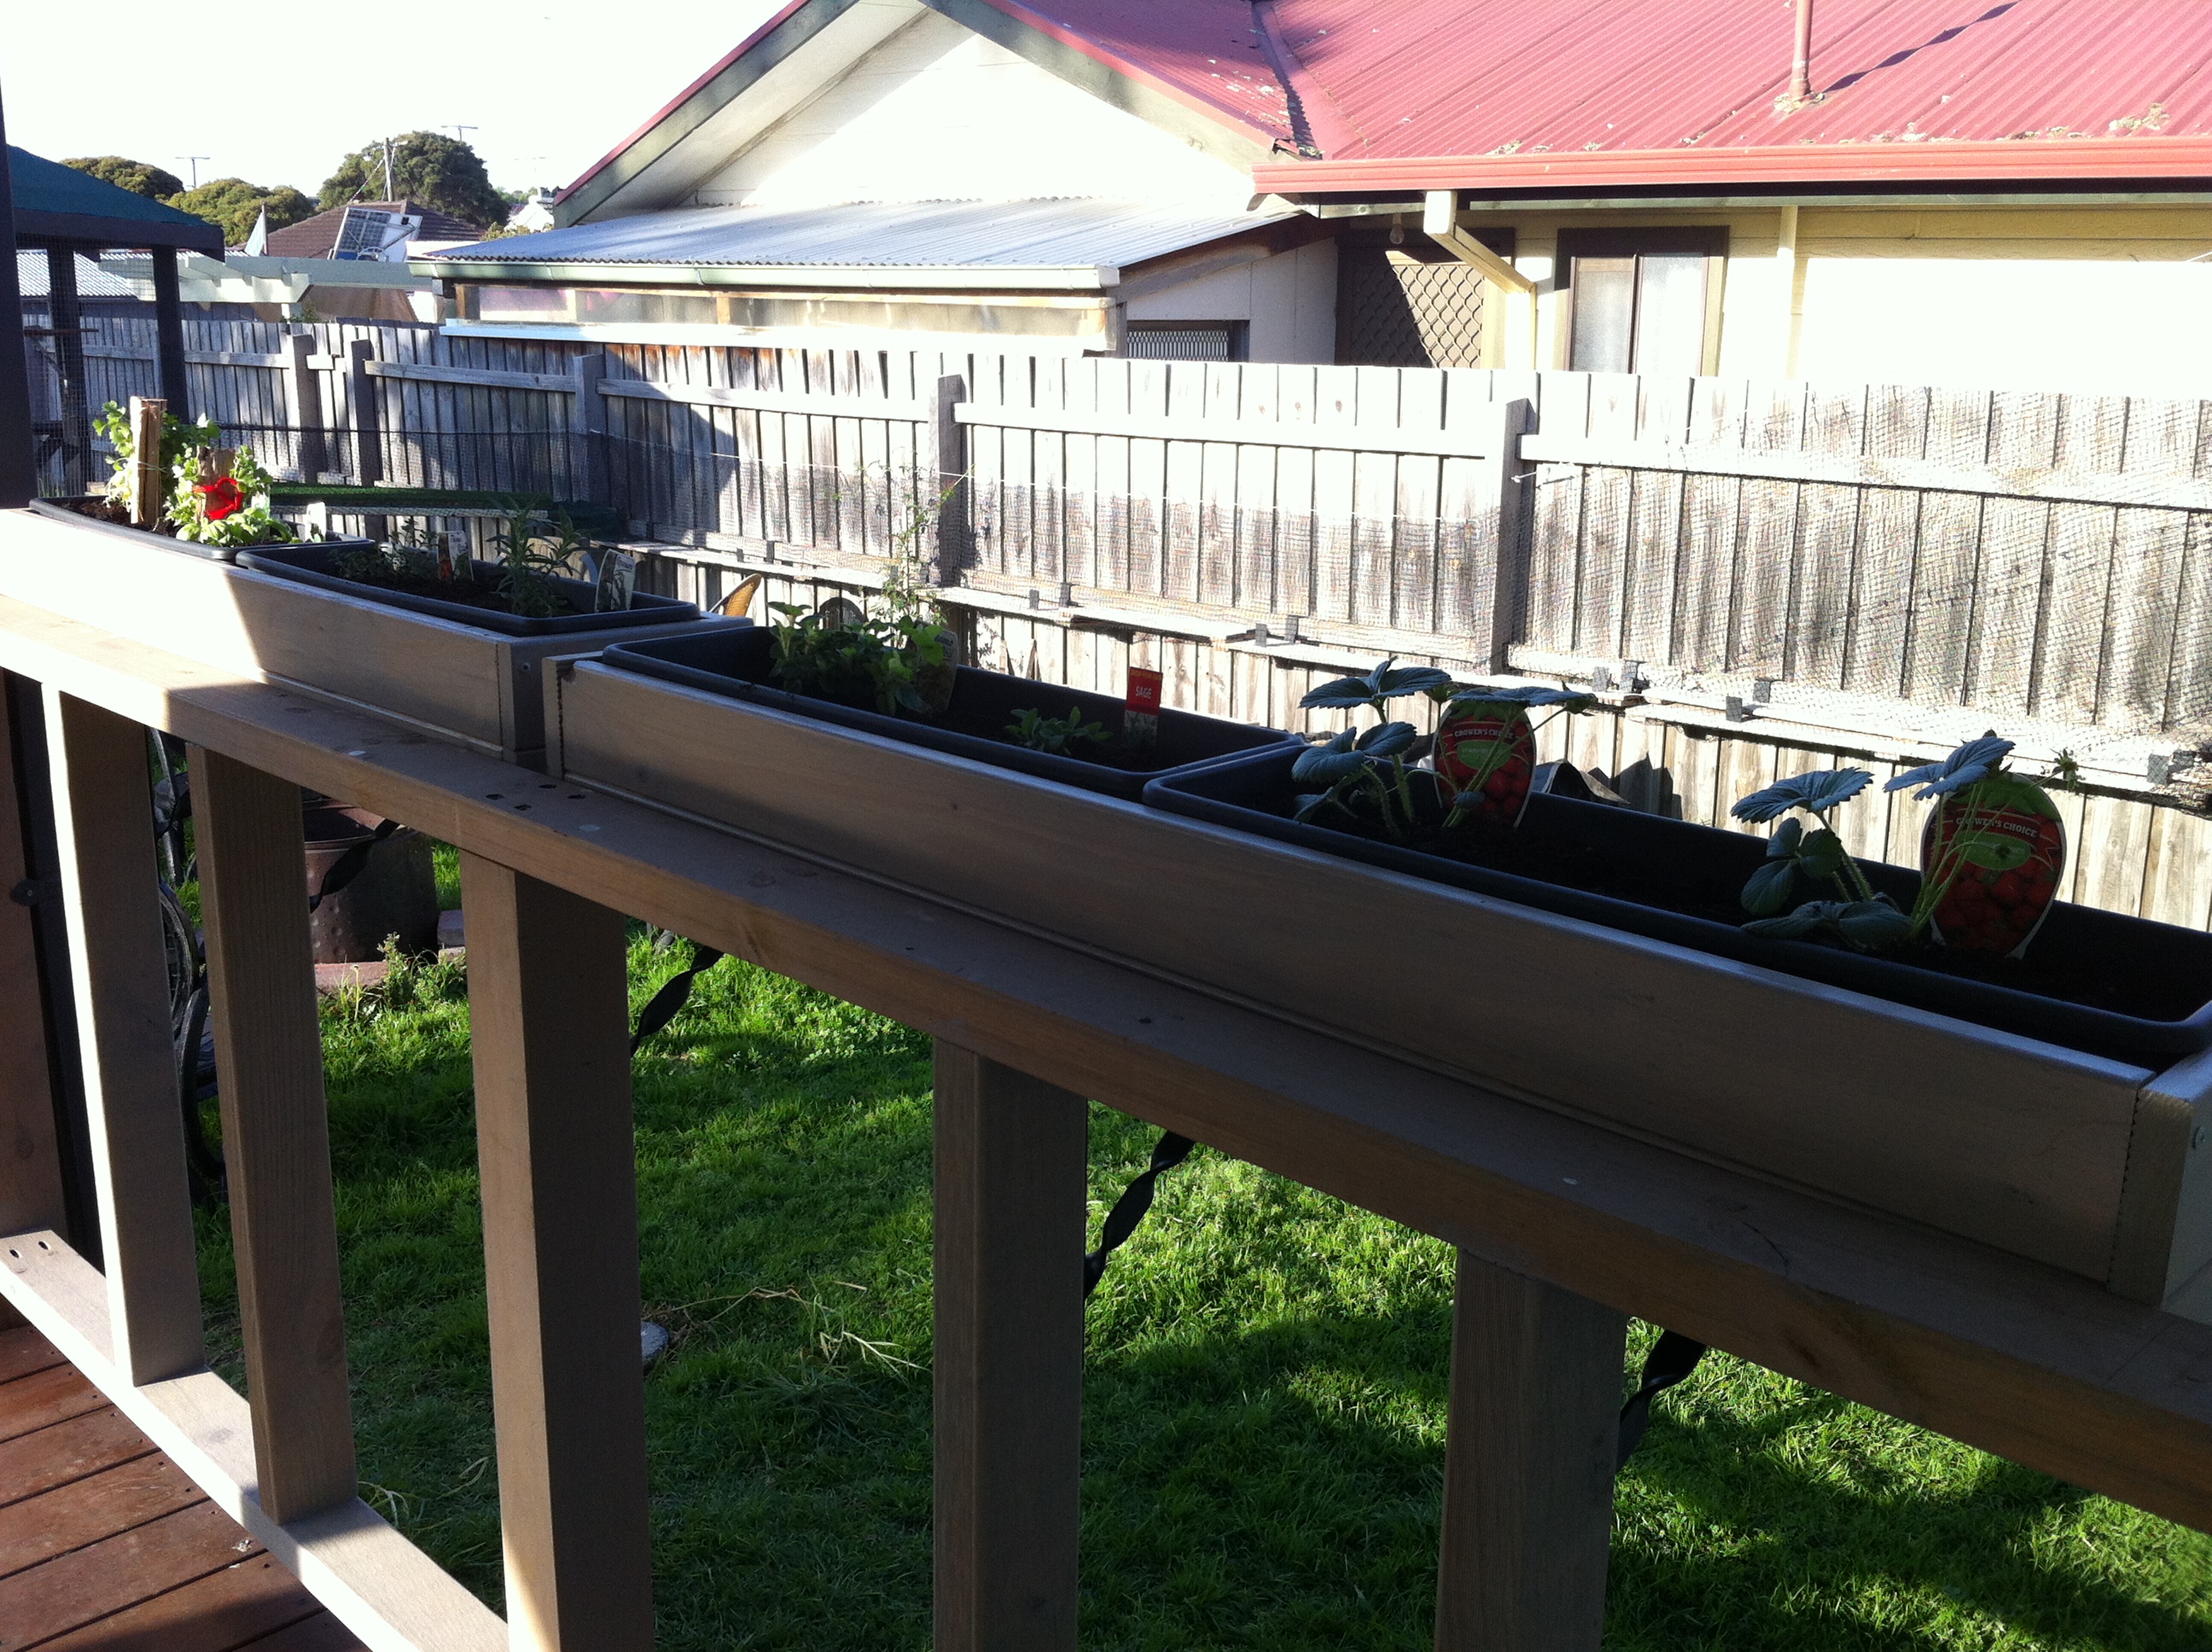
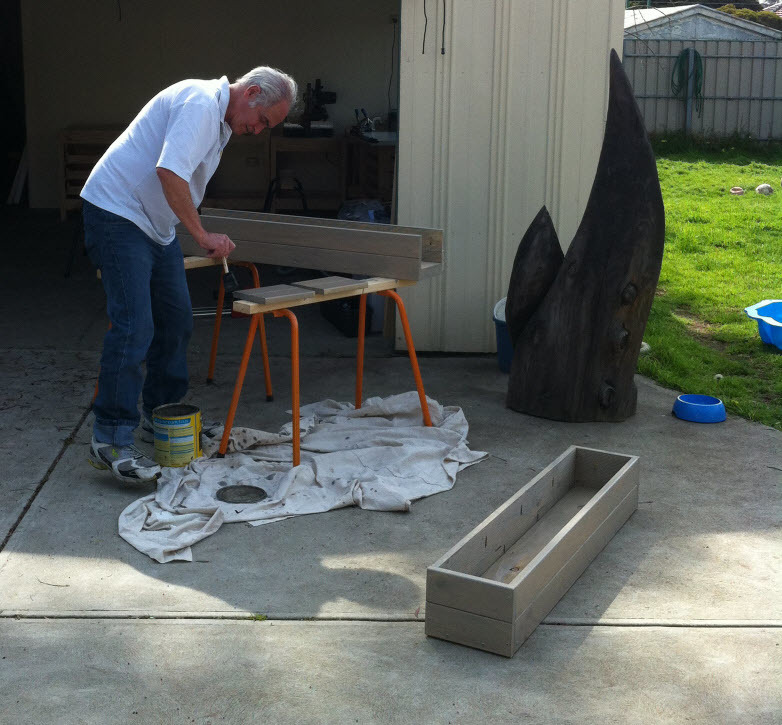
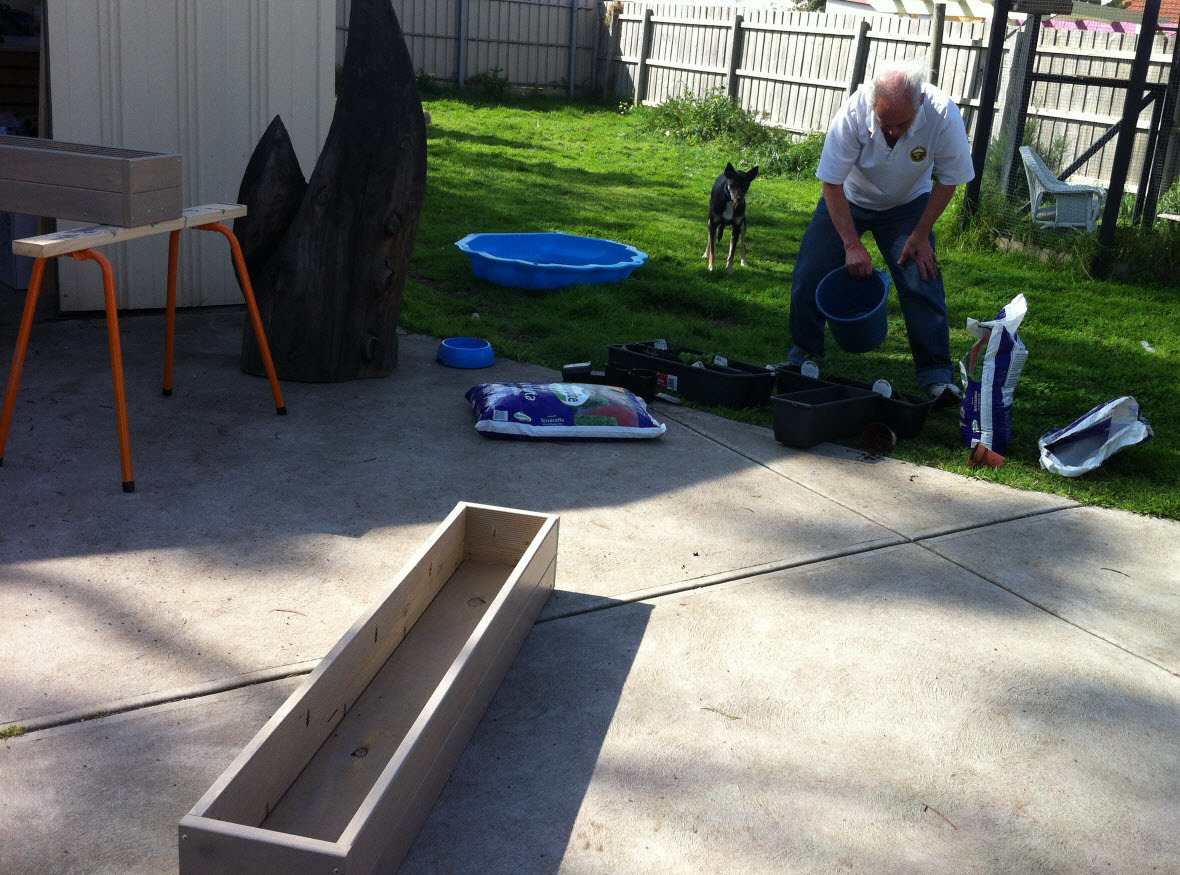
I made these boxes with my dad one afternoon. We had a great time! We wanted our herbs to be close to the kitchen and still get plenty of sun, so attaching them to the deck railing was ideal. I made them out of timber decking with pocket holes, and attached them to the railing with metal brackets underneath.
This was by Far The Best Sectional plans on the Net! Very Easy To Make! Thanks Anna white

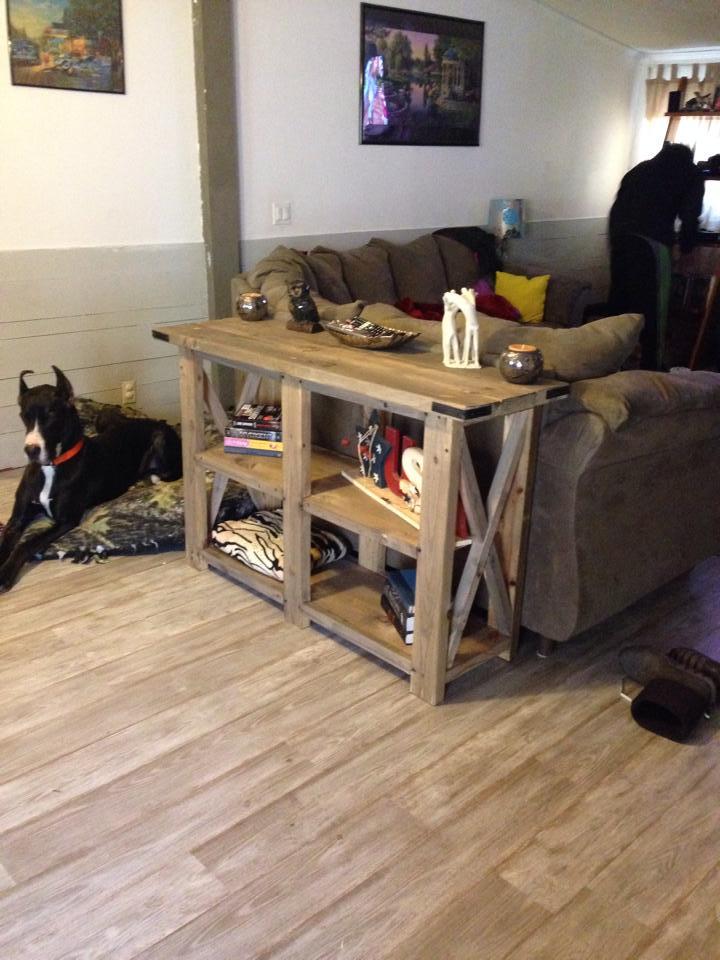
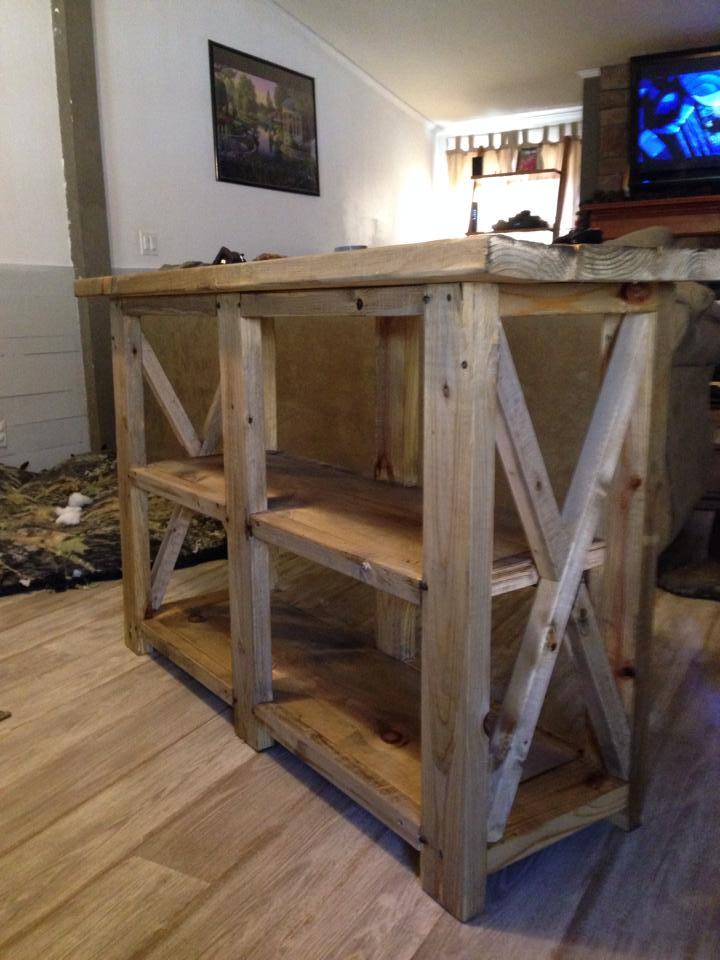
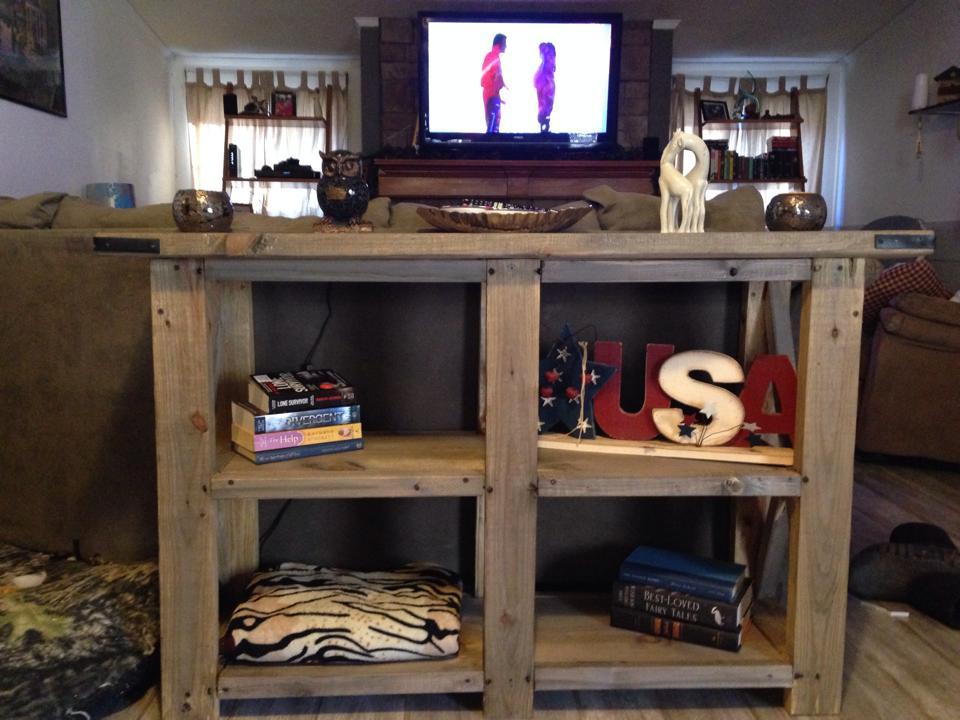
I wanted to build something a little bigger than the Rustic X Console table. So my wife and I came up with the plans for this 5 shelf "Rustic X" Book Case. Took me about 20 hours to build over a three day weekend.


Tue, 03/04/2014 - 10:23
I like how your bookcase is wider but more narrow. Did you see these plans? http://ana-white.com/2013/08/plans/rustic-x-tall-bookshelf
Wed, 04/16/2014 - 08:18
What dimensions did you end up using?- the proportions look great! Even the shorter legs look great! And did you just use 2x6's for your trip on the top? We would love to follow your design to a t!
Wed, 04/16/2014 - 08:37
We were thinking of increasing the overall height to 84" and the width to 48" (keeping the depth) but weren't sure if that would mess up the ratio.
Tue, 08/27/2019 - 17:53
I think your looks much nicer than the original due to the finished top. It looks complete with the way you've made the overhang. How much of a overhang is it?
I love the rustic x console and coffee table but hated the bookshelf due to the odd looking top, thank you for your inspiration!
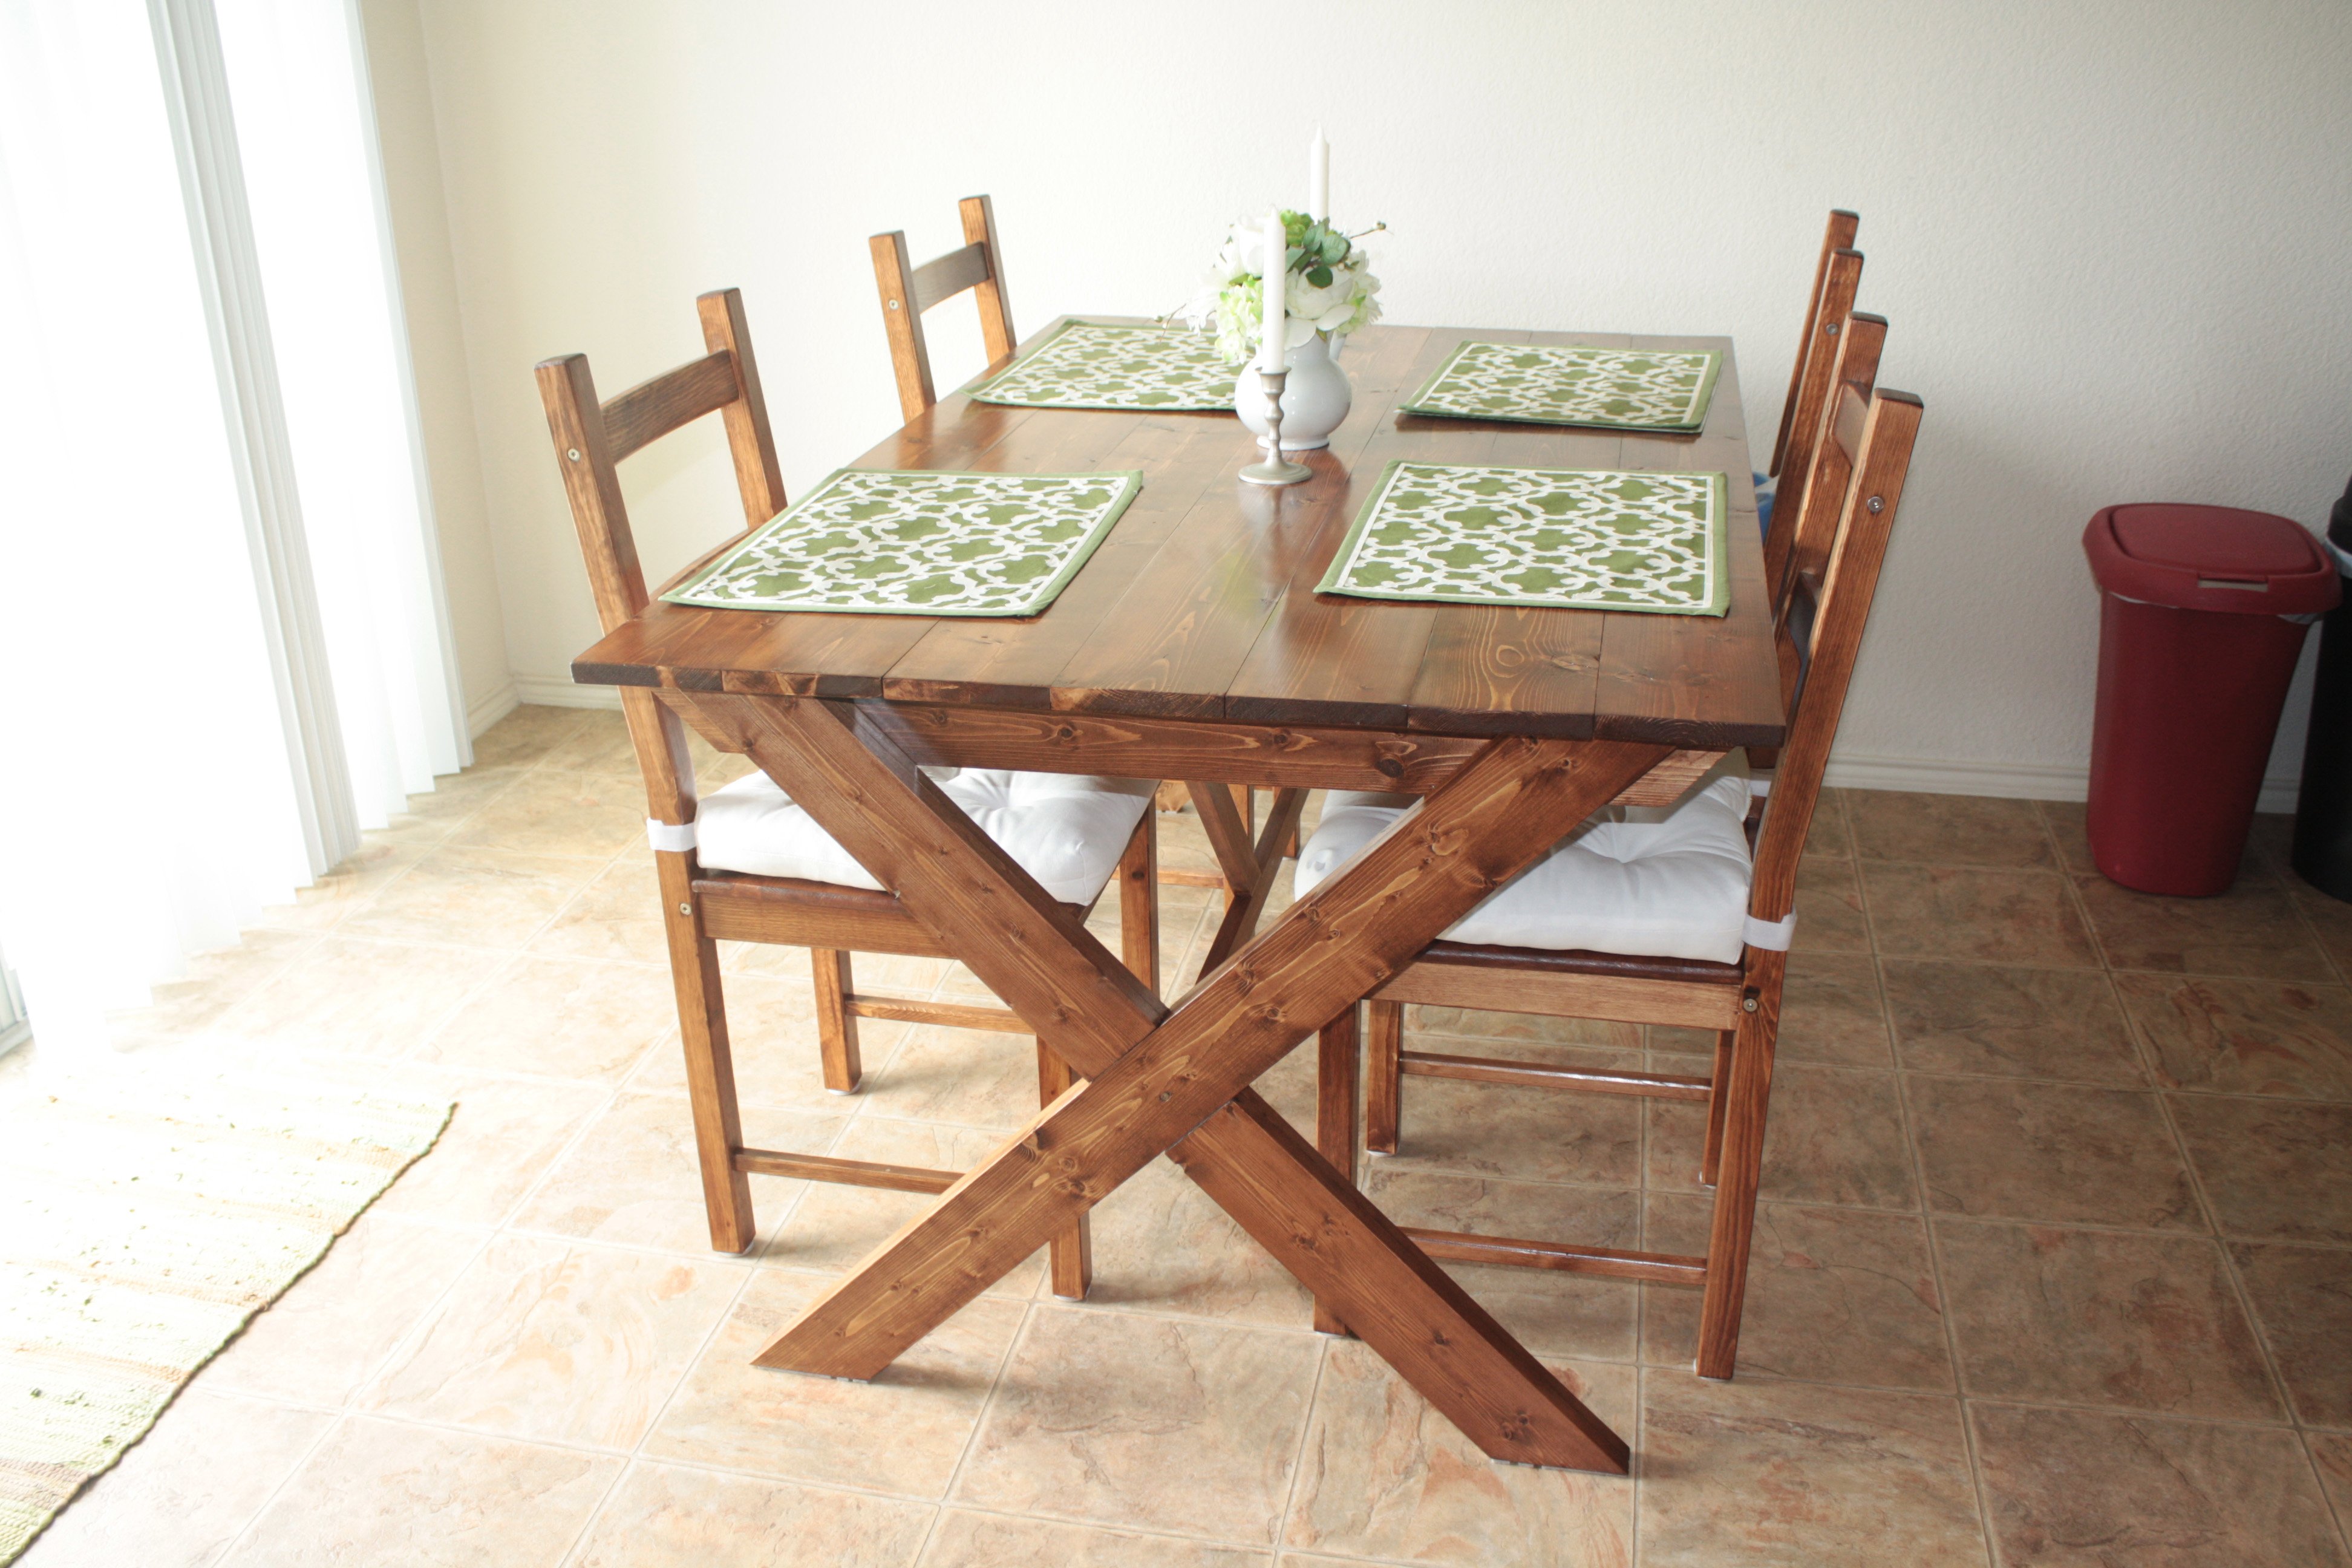
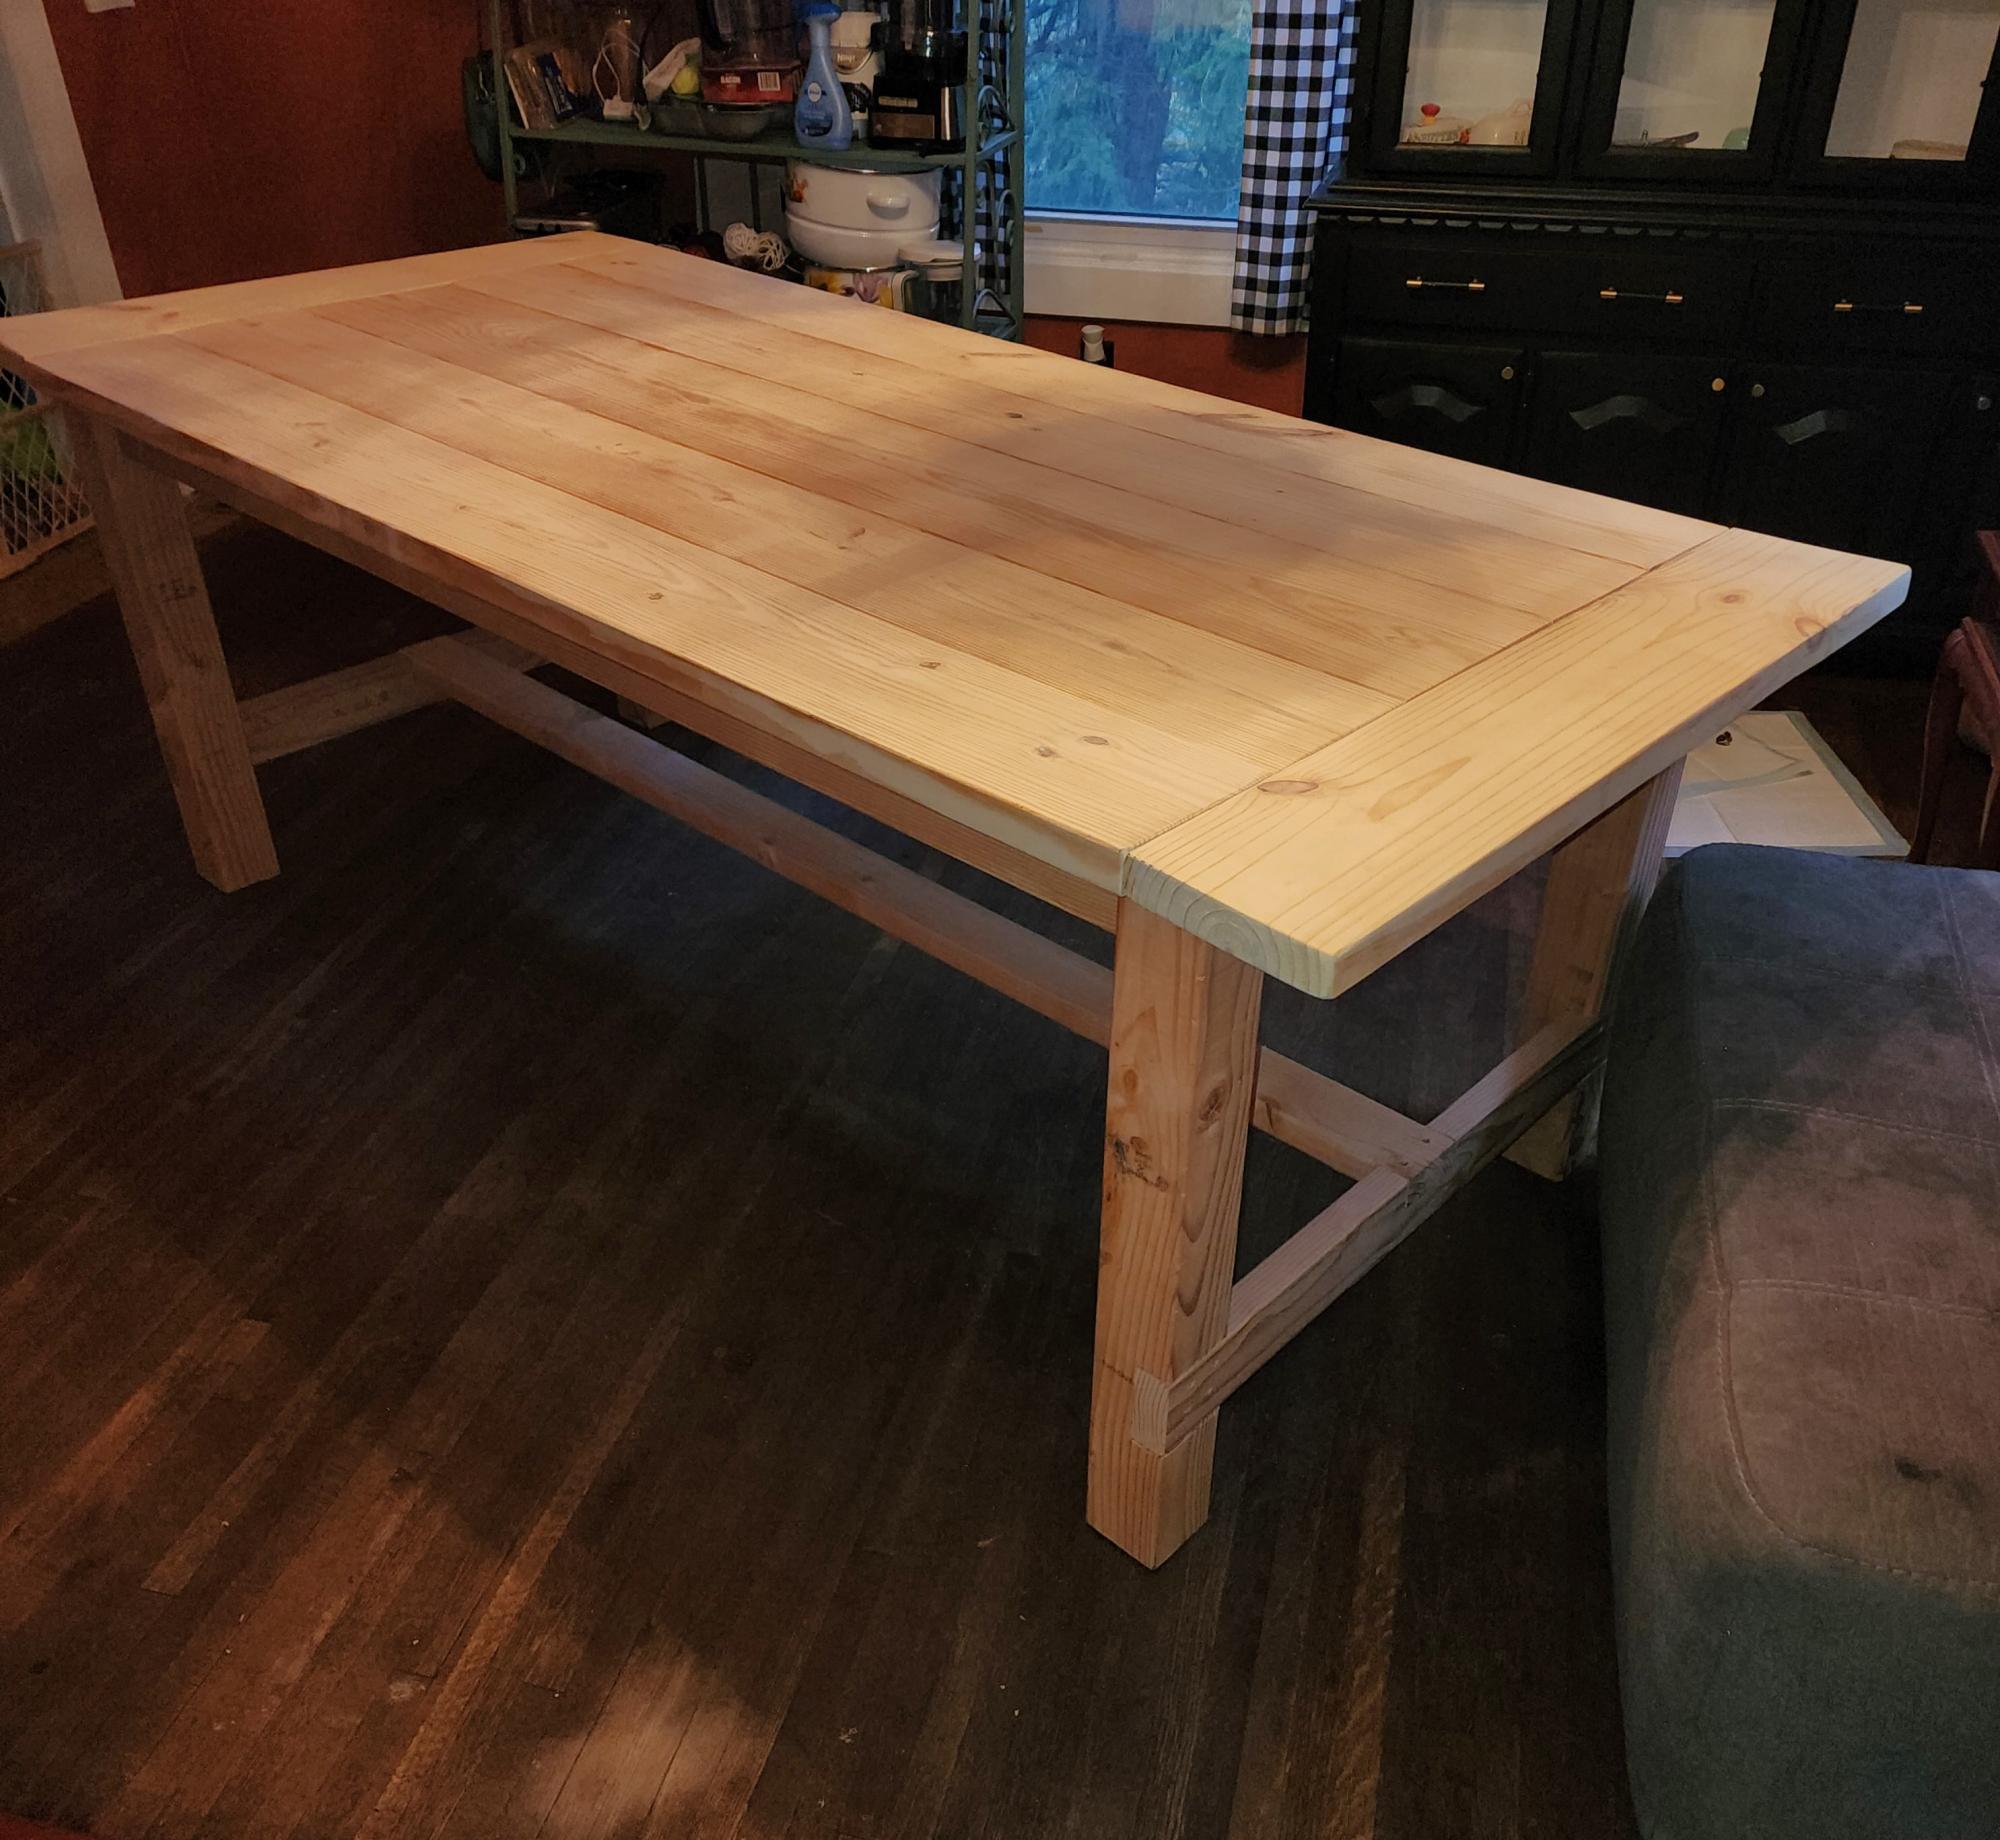
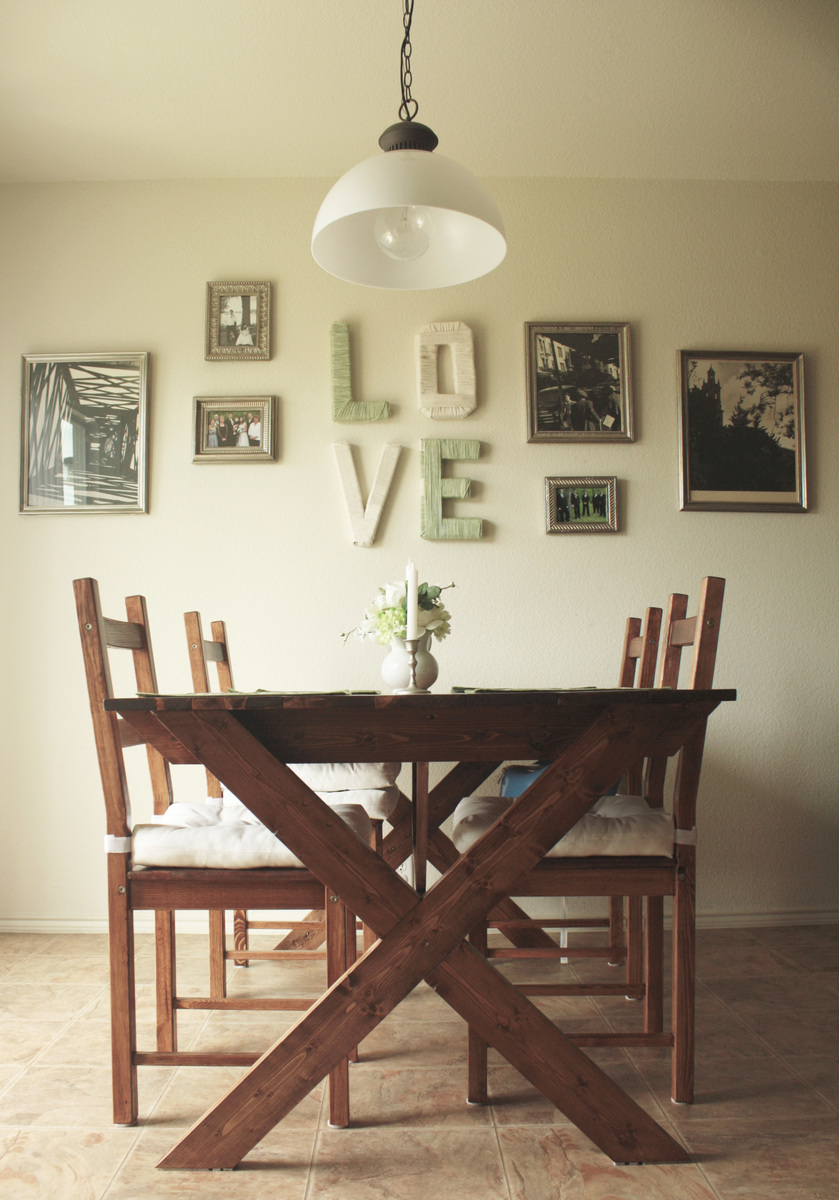
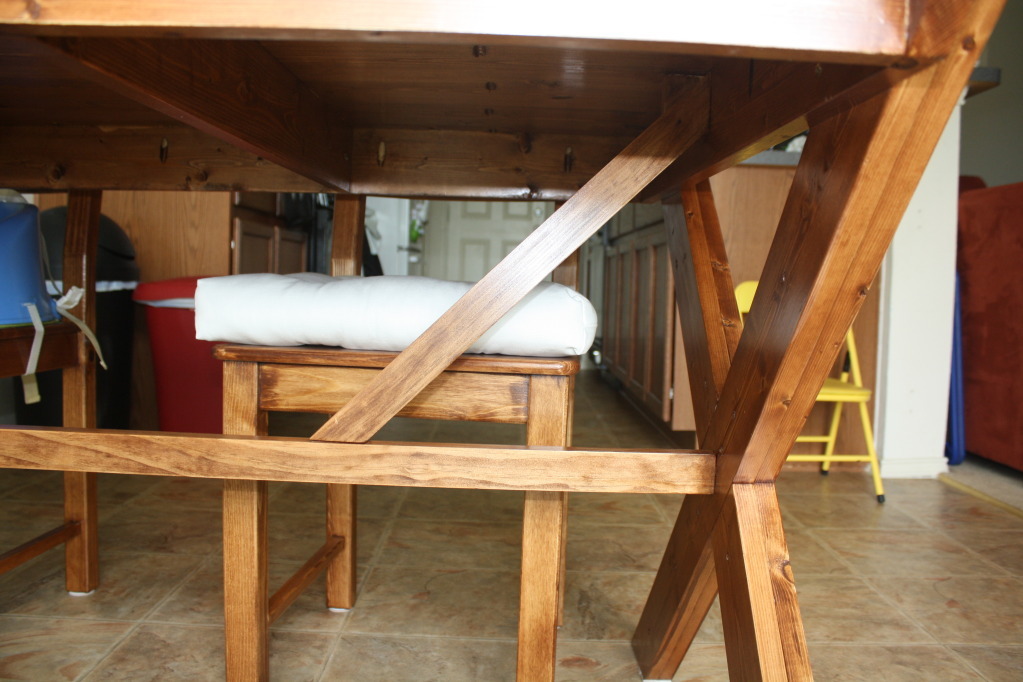
This table was built using the Vanessa's X Picnic Table plans but made plenty of modifications to it. We used 3/4 thick boards and made the table 60 inches long instead of 71 3/4". We have a small dining room and wanted a table big enough for four people so this size worked for us. Since we made adjustments to the length we used less supports under the table top. We made the table top using pocket holes and only two joists were needed. We added extra support between the table top and the stretcher because the table wiggled more than I wanted it to. This nipped the problem in the butt! I knew I wanted to build this table but my concern was finding chairs to suit the table. I ended up getting unfinished chairs from Ikea for $19 a piece and finished them myself. I feel like this project took forever, but that table itself was assembled in a weekend. The finishing process took an additional weekend since we had to do the chairs as well.
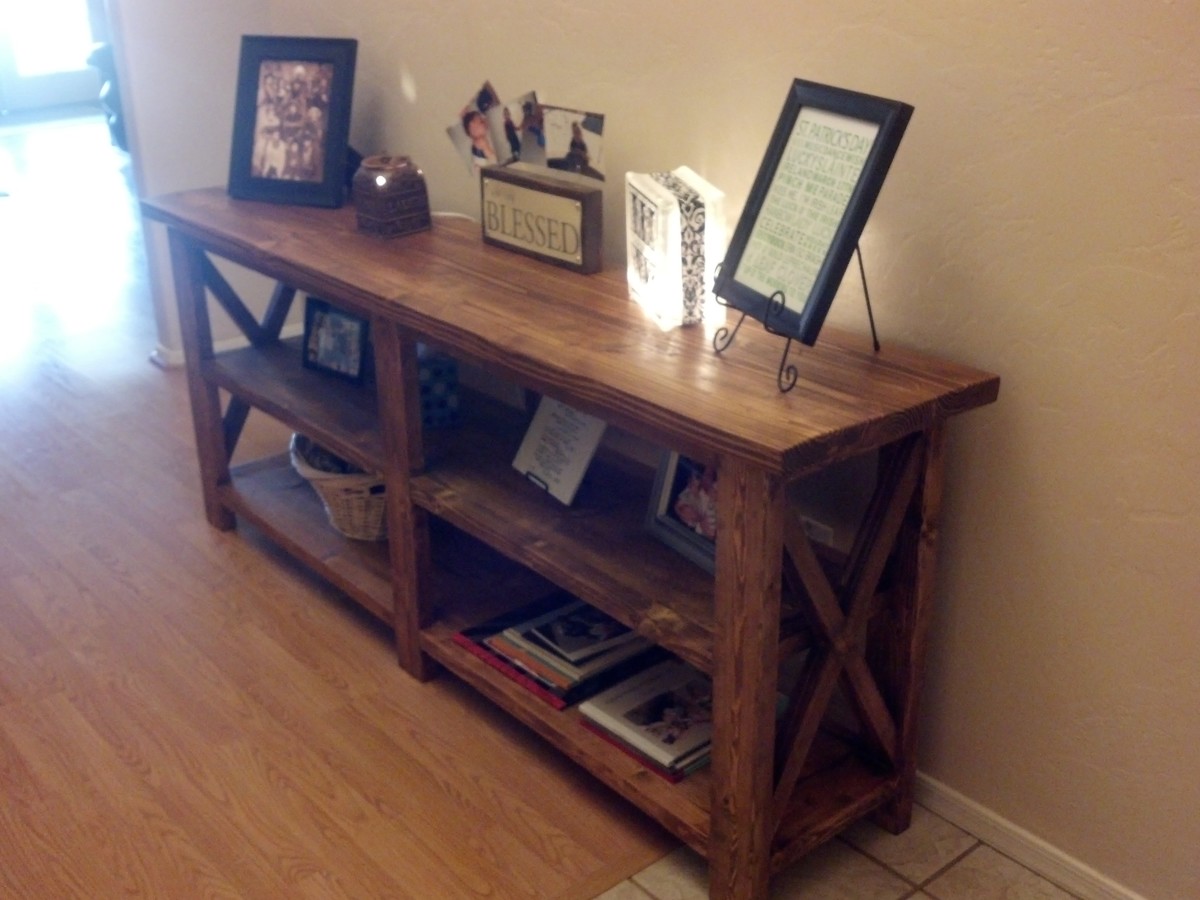
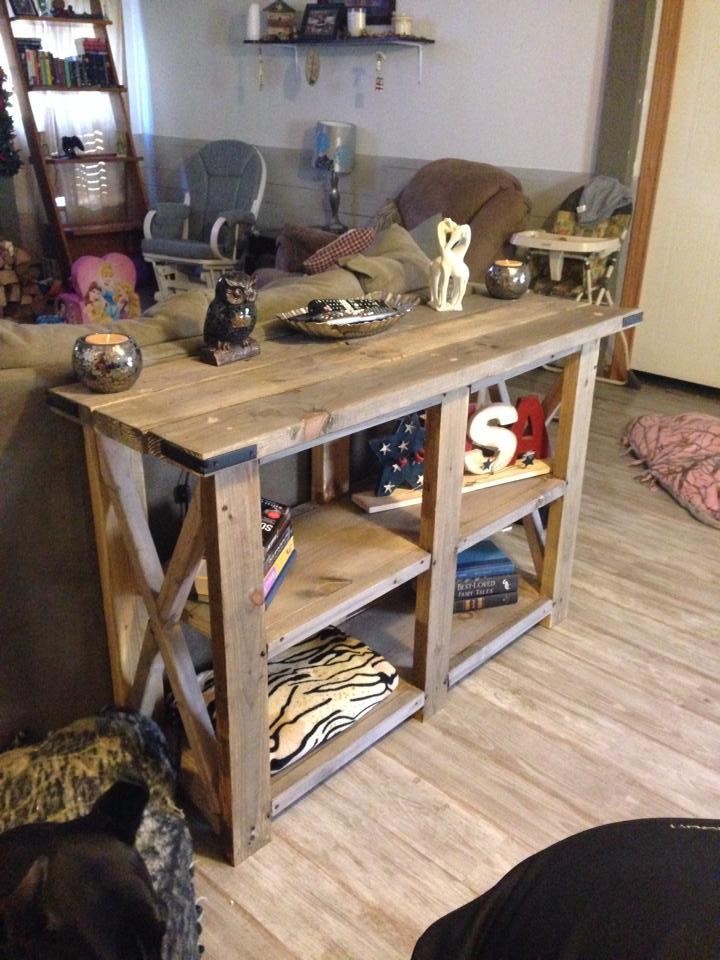
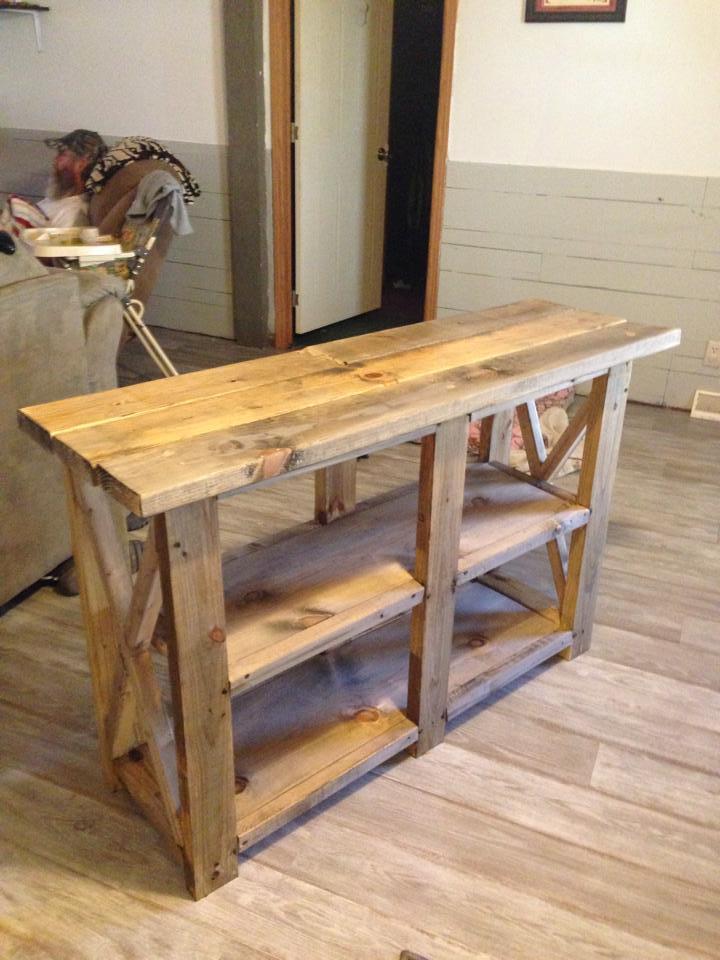
My husband built this Rustic X Console table to plan. We love it so much he is now building the coffee table and end tables to match (and I may convince him to build the bookcase too!)
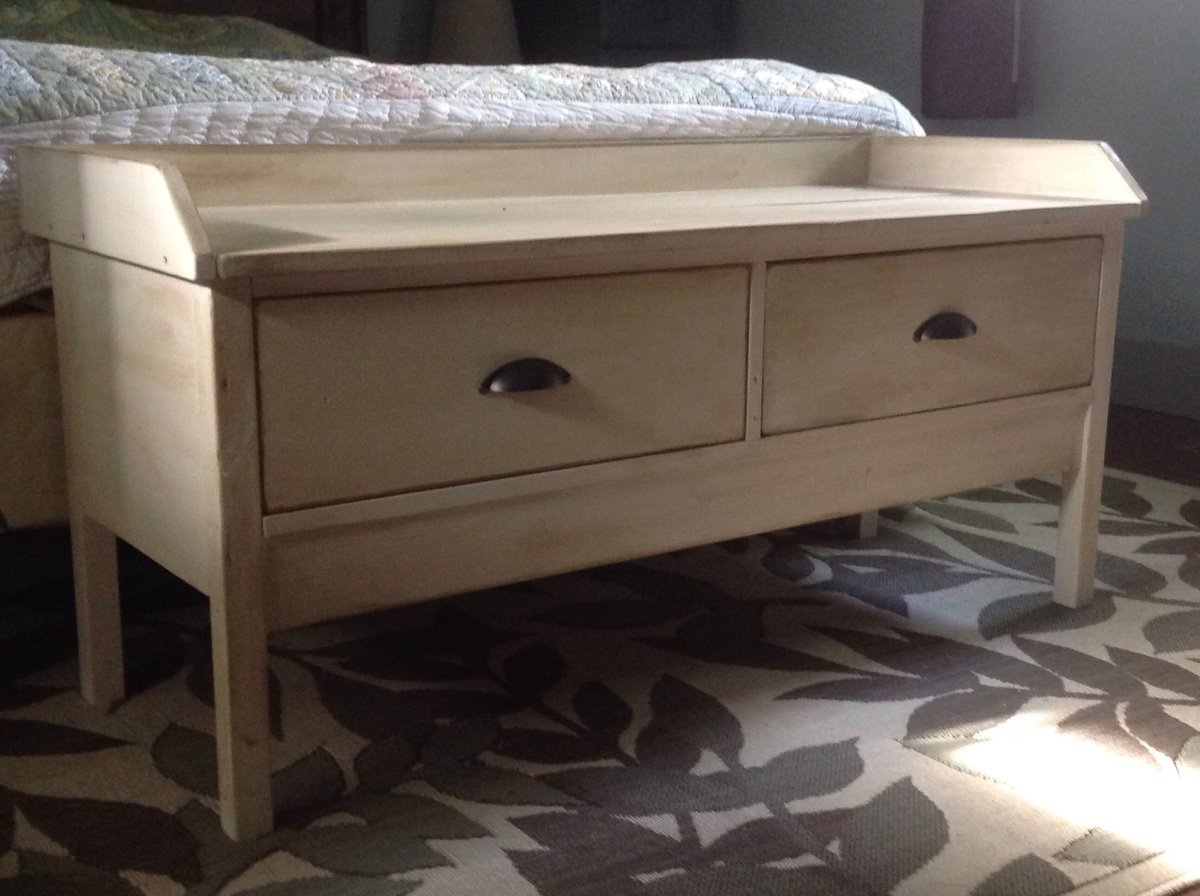
This was a very quick and easy build that was completely finished in an afternoon. My Kreg jig was loaned out, so I have exposed fasteners, but I prefer to let them show instead of filling the holes. I built this with 20" legs to make it a little taller and more comfortable for my height. I also prefer straight lines and angles, so I changed the trim pieces a bit to suit my style. The hardest part was getting the drawer slides lined up. The finish is Rustoleum Heirloom White with a coffee colored glaze. The picture makes one drawer look darker, but it's really just a shadow. I'm in love with this project!

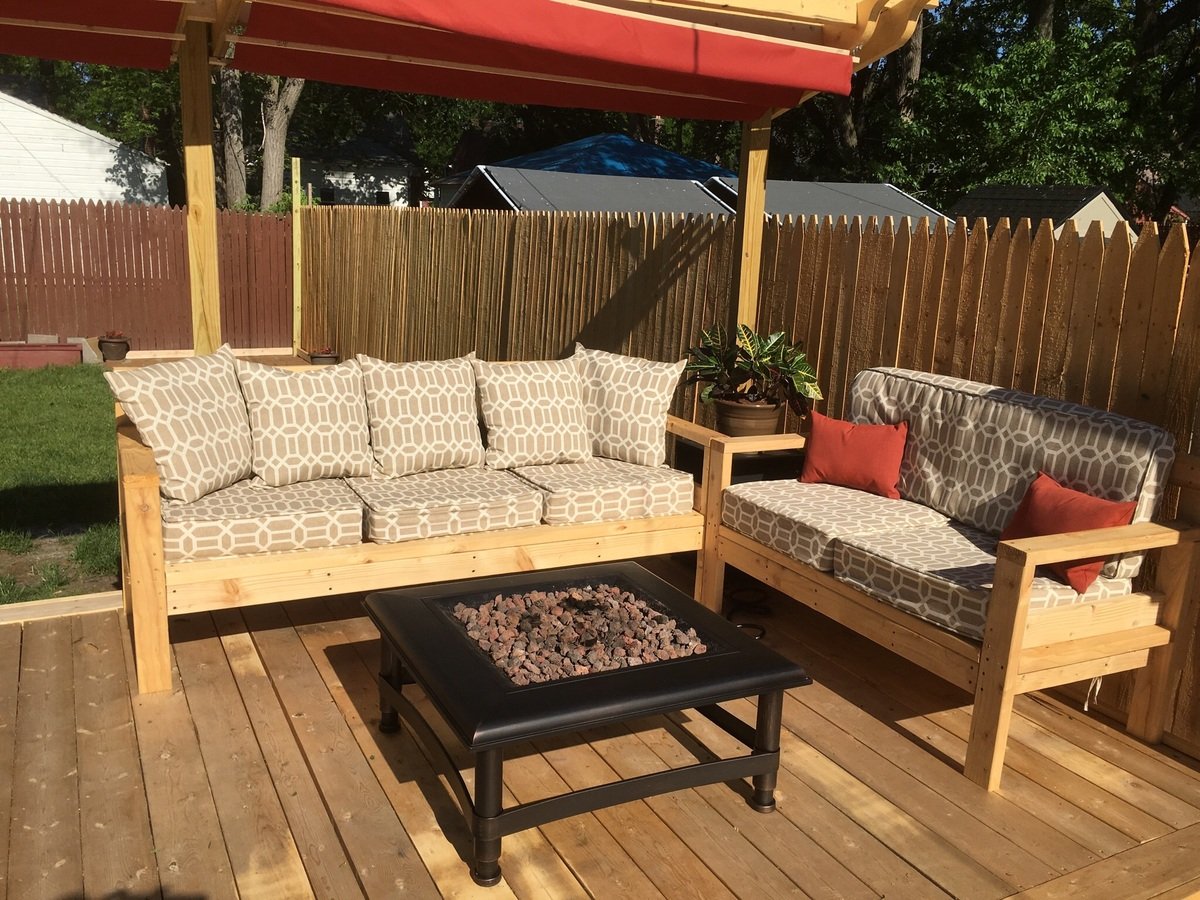
We are stuck at home for the Shelter-In-Place due to COVID-19 so we decided to use the scrap wood left over from our new deck. Because we didn't have the materials exactly meeting the specifications in the directions, we had to adapt the design significantly but we're really pleased with how it turned out. My 16-year-old daughter made it with me so it was a great to get her involved in building
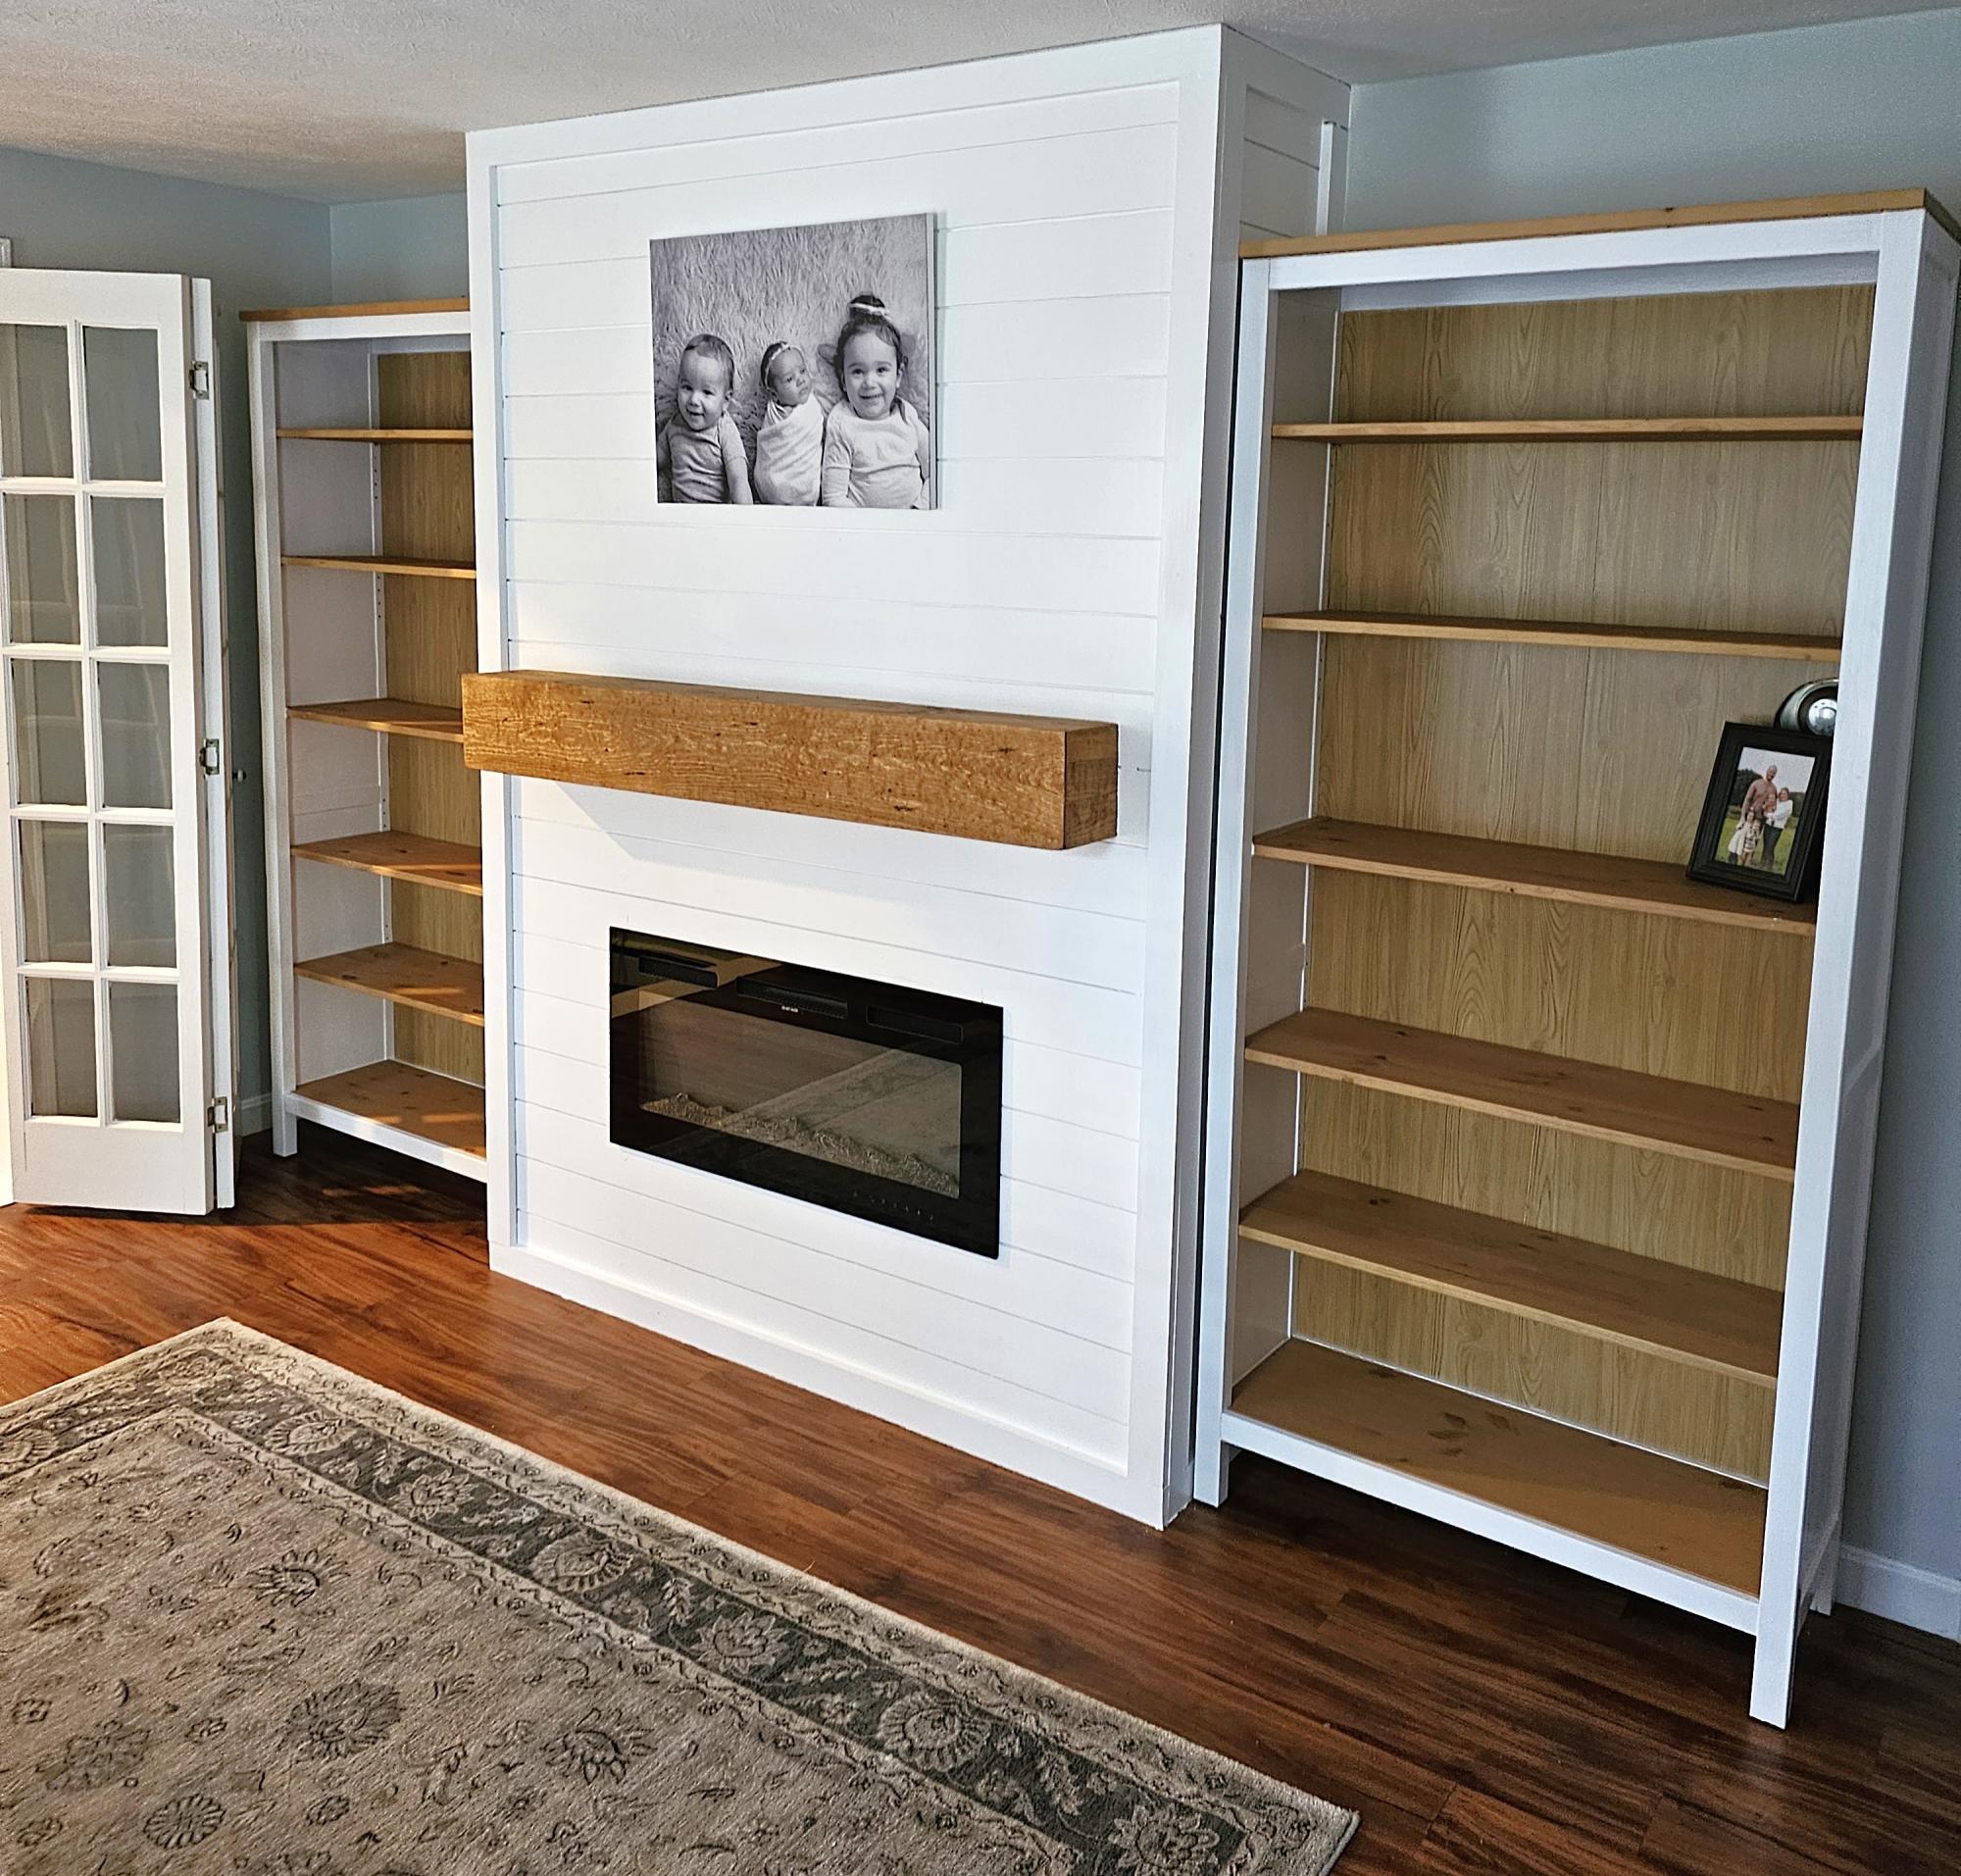
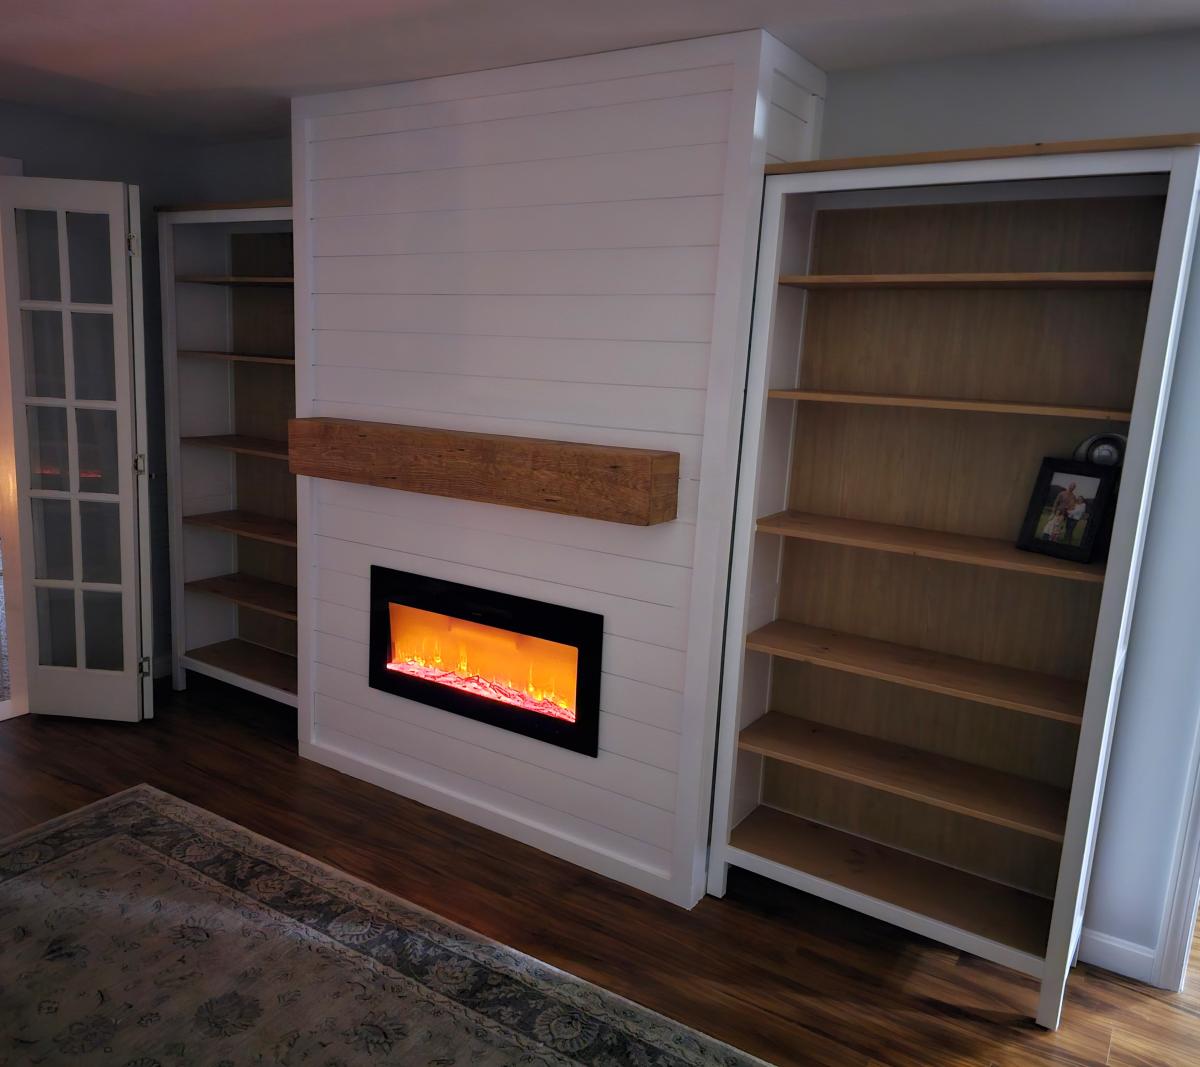
I used your guide for the shiplap fireplace and paired it with some ikea bookcases. Surprised the wife with it and she was completely blown away.