Modern Adirondack chairs
We used Ana’s plan for modern Adirondack chairs and modified them to build out heat treated pallet wood. The chairs are very comfortable. We appreciate her plans!
I made these chairs and table for my father as a Christmas gift to sit next to his pool. The chairs were fairly easy to make. To stay within budget I did use inexpensive white wood so the quality of the grain was not quite what I had hoped but I believe they still came out very nice. I used BEHR weather proofing wood stain in RedWood which turned out very nicely. The only thing that is currently lacking are the cushions. Due to the price of the foam that will have to wait.
For the table I started with the original plans on the site but when I realized just how long it would be I cut it down and added the two thin strips to break up the pattern.
If I were to do anything differently I would shrink the overall size of the chair to the size of standard cushions that can be purchased at local department stores or outdoor furniture stores to minimize the cost.
My first attempt at serious home project. My daughter needed a Kitchen Island and purchasing one was out of the question.
Not too tough.
I build a Star Wars themed end table from a sheet of plywood and some scrap pine. Eventually, I'll add lazy susan hardware to make it spin. The top is glitter covered with a layer of resin. Click on the blog post link for a full tutorial on how to build it. :o)
I started with the no pocket hole plans. I then shortened them to fit my kitchen, and modified them to use the pocket holes.
We have quite a fixer upper and while re-doing the bathroom, I came across Ana's Island plan in her book, The Handbuilt Home. This isn't the finished picture as we have installed the sink fixture and pipes, where I wrapped the exposed pipes with twine to give it a more rustic look. The table was modified in size and the mirror was a salvaged piece where I made a backer and framed it. Though still in need of some finishing touches, the look so far is spectacular... I wish I had a before and after photo. Much of what you can see, such as the tile in the shower and mirror has been made from found materials around the house or were items that were going to be sent to the dump. I love recycling!
New to building,
Stephanie Broker
Shortened the design to fit the spot and used a slab of white oak I had laying around.
Sun, 03/01/2015 - 08:01
I love the live edge piece you added for the top. It brings the perfect rustic element! :)
Just finished my very first wood project ever . I think it turns out pretty good . But if I did it again I’d make some adjustments . This version is made from pine as cedar has been unavailable for weeks . Thank you for the plans
This was a quick, easy project. I needed a way for the dogs to easily get on the bed and I also needed a place to store their toys. This was a great solution to both problems. I made it a few inches loger and added carpet to make it easier for them to use. I also cut arches out of the bottom back to give them easy access to their toys.
Great buffet for any dining room. Made with pocket hole joints. Built by mgwood_work on instagram
Made the farmhouse hall tree from the plans on the site. I added wallpaper in front of the panels and it looks wonderful!
I used 4x4 post for the base.
Fri, 03/06/2015 - 15:54
This is really pretty! I love the way that you staged it too!
Tue, 05/10/2016 - 10:20
I'd also like to build this table using 4x4's. Can you tell me how you came up with the lengths for the diagonal pieces? Also, how did you attach the perpendicular end pieces to the top? I've been looking to do that as well and on all the plans I've seen they used pocket holes and I know that will not last before the end pieces begin to sag.
Thank you!
Mon, 08/19/2019 - 07:45
Did you ever find the measurements and details? I'm interested in making the same table!
I wanted some Cornhole Boards and I wanted to make them myself. I used some vinyl stickers (distressed American flags) that I got on Amazon! I also bought the Cornhole Bag set on Amazon as well! I added some carrying handles from hardware At Home Depot. I found the link here on Ana's website! I love them!
This is my very first project, and is from The Handbuilt Home. I had an old dresser mirror that I just couldn't throw away, and now I'm glad I didn't! It fit the frame perfectly. This project only took a few hours, and the plans were so easy to follow. Just have to get the hooks and she's done! Thanks Ana!
In reply to I really like the stain you by dsteinberg
Thu, 01/23/2014 - 21:42
Thank you!
Val
My wife had decided we need to do something special for our great niece's. .Oh that I should. Lol..It was a great experience, and I would do it again. .
Mon, 03/09/2015 - 15:16
These are darling! What lucky girls your nieces are! Awesome job!
Was a fun build. Took 3 days. Ana your awesome.
The Francis dining table by Arhaus was out of my budget, but with the table top plan by Ana White and the table base plan by Jen Woodhouse, I was able to create my own copycat version of the Francis table. It took me some time to figure out the stain order and combination, but I couldn't be happier with the vintage farmhouse stain I achieved with just a few layers and some wax. The table is light enough to carry upstairs, but it's also incredibly stable and solid.
My wife has been asking for new dressers for the boy's room for a while now but every time we go out shopping for them I am very disappointed in the quality of what is available. So I decided to make them myself. I have not made any furniture before and needed a few tools to help me out and thought what better way to get both the practice and the tools then build my own router table.
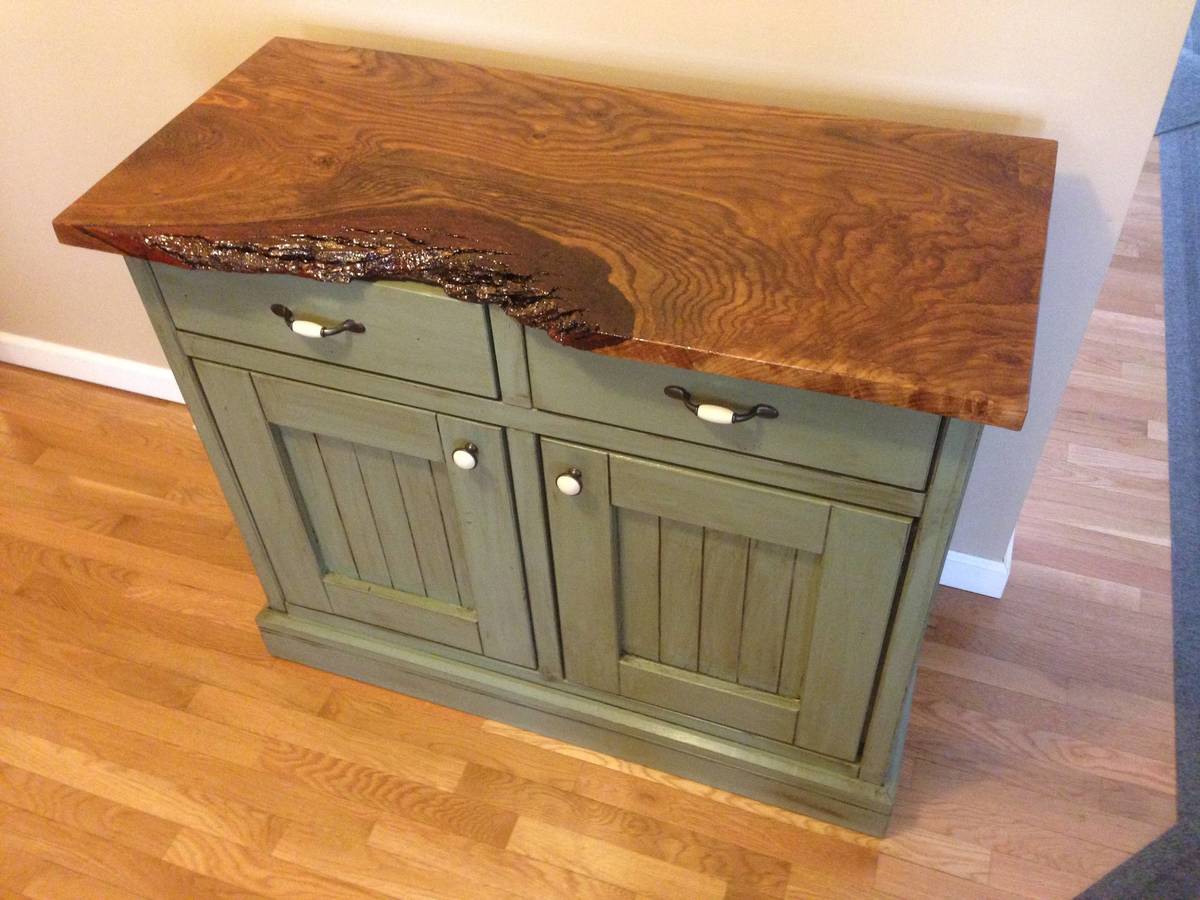
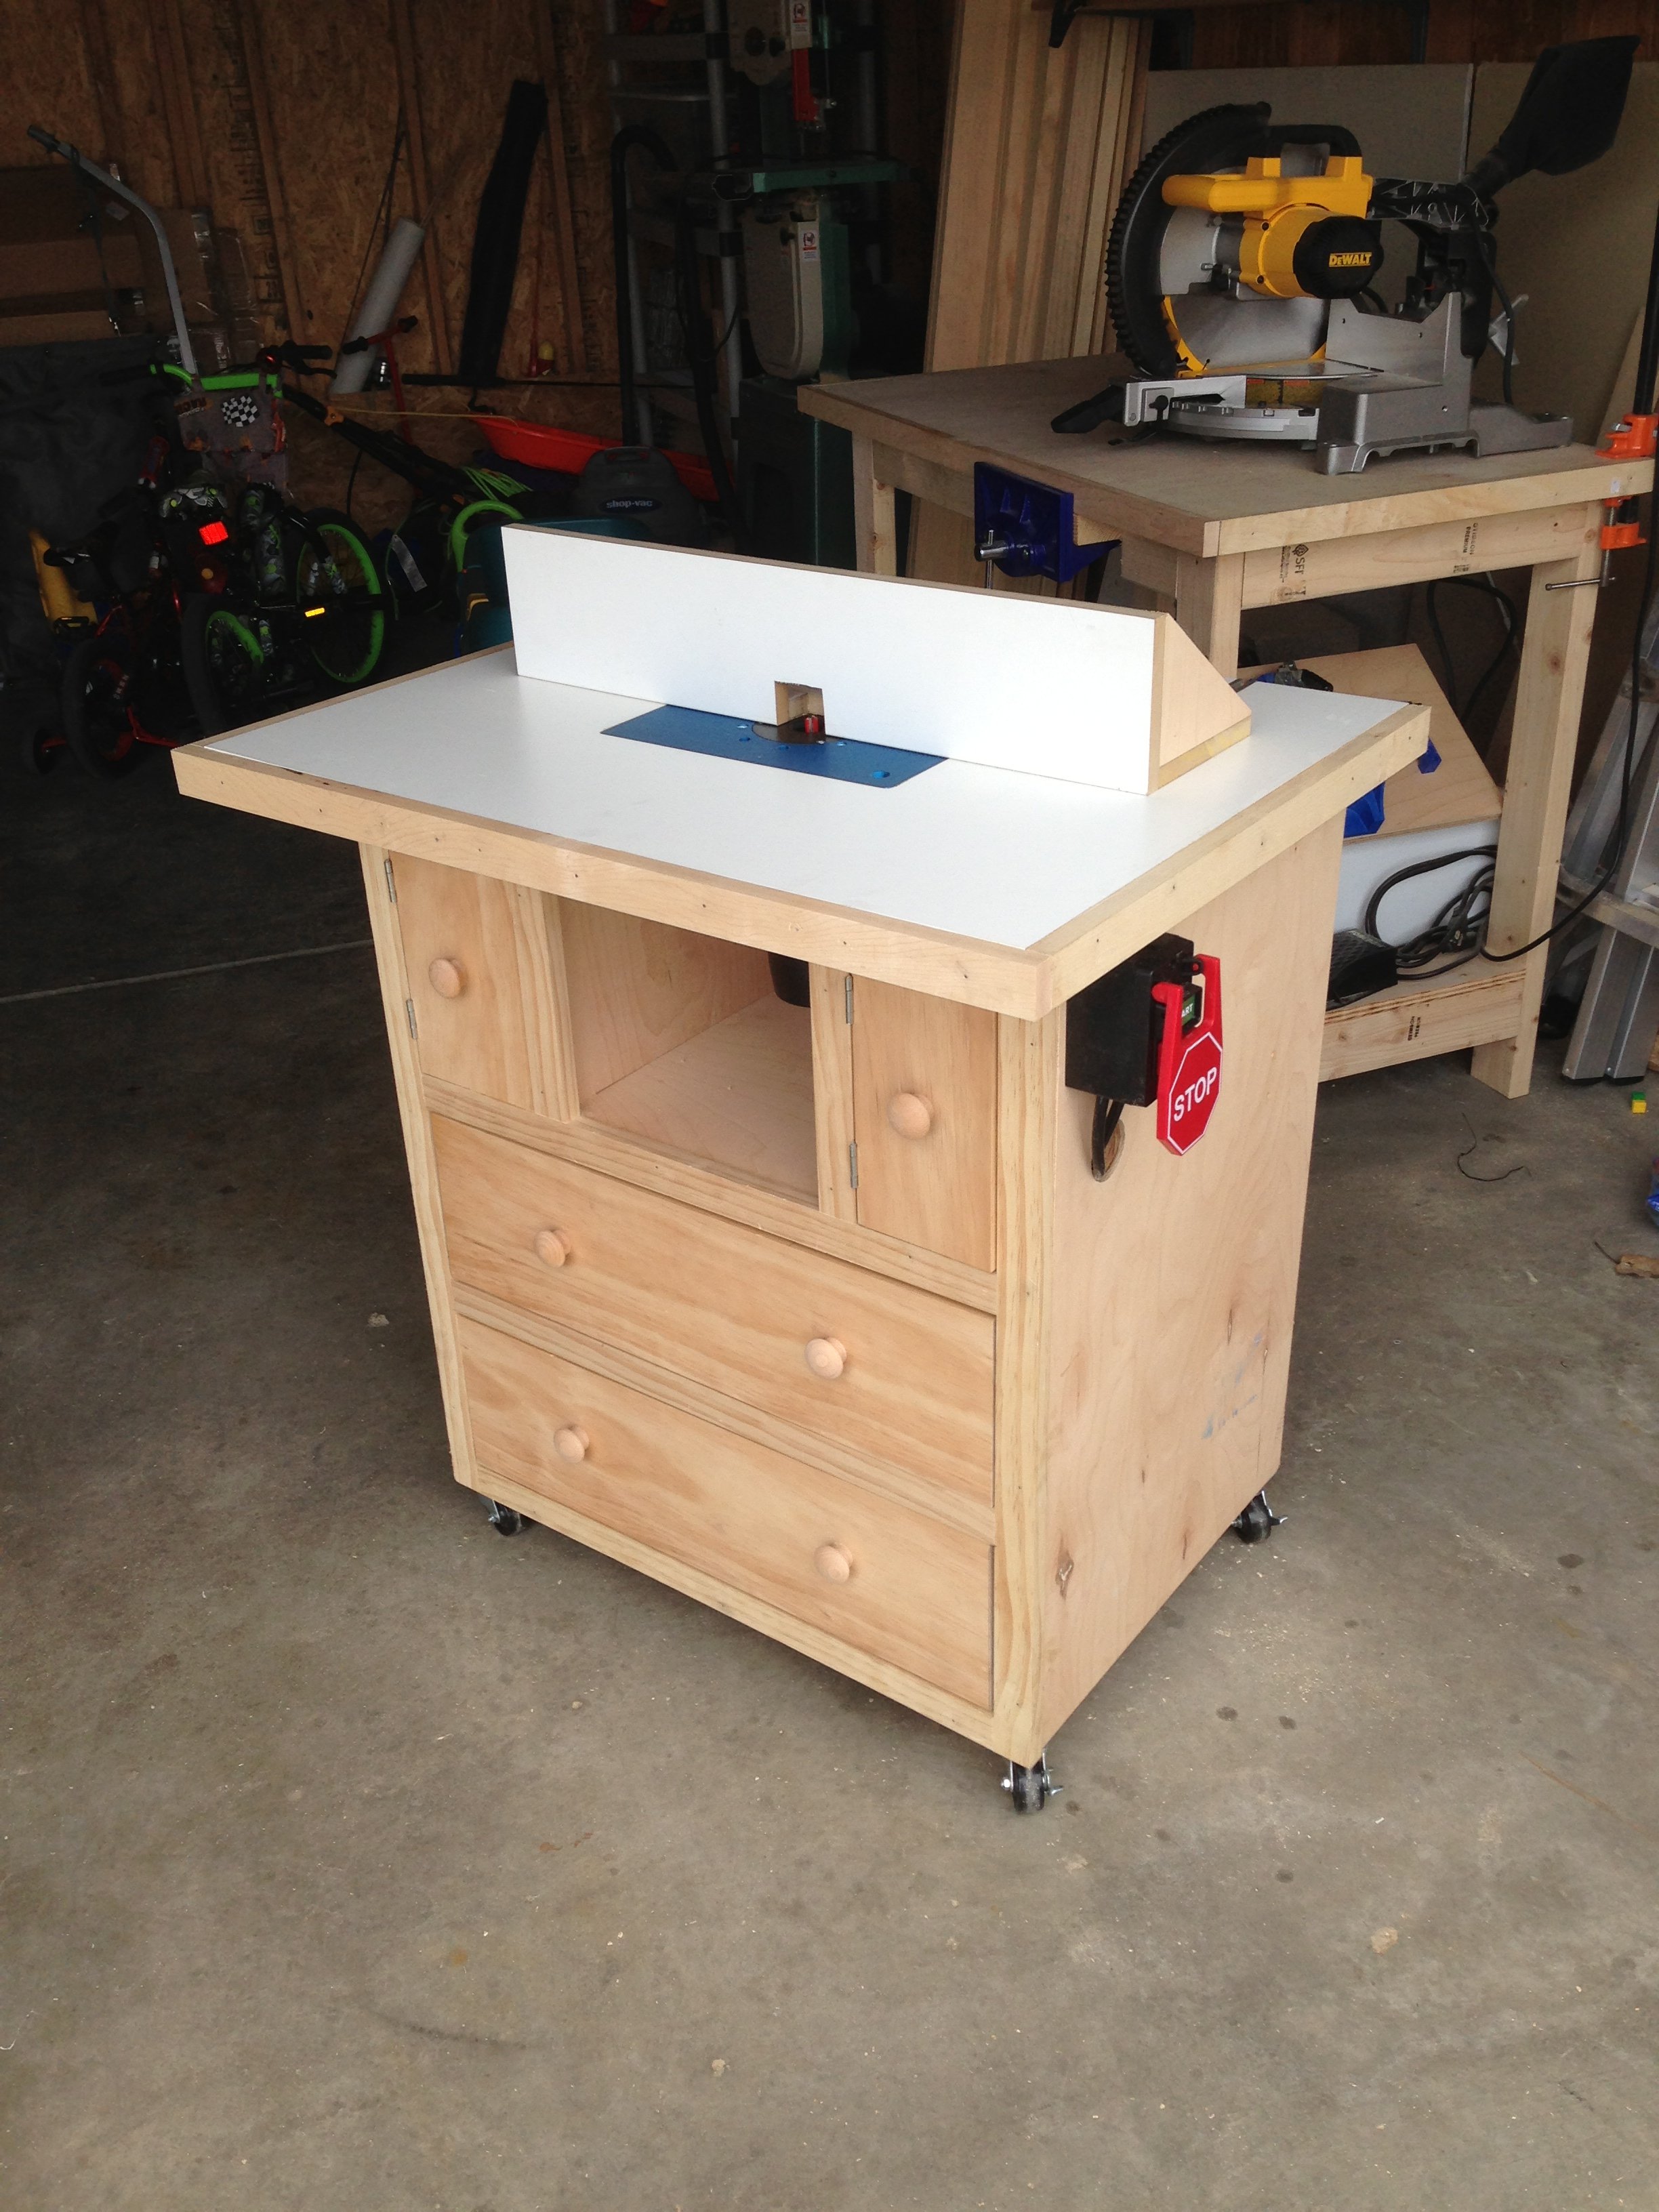
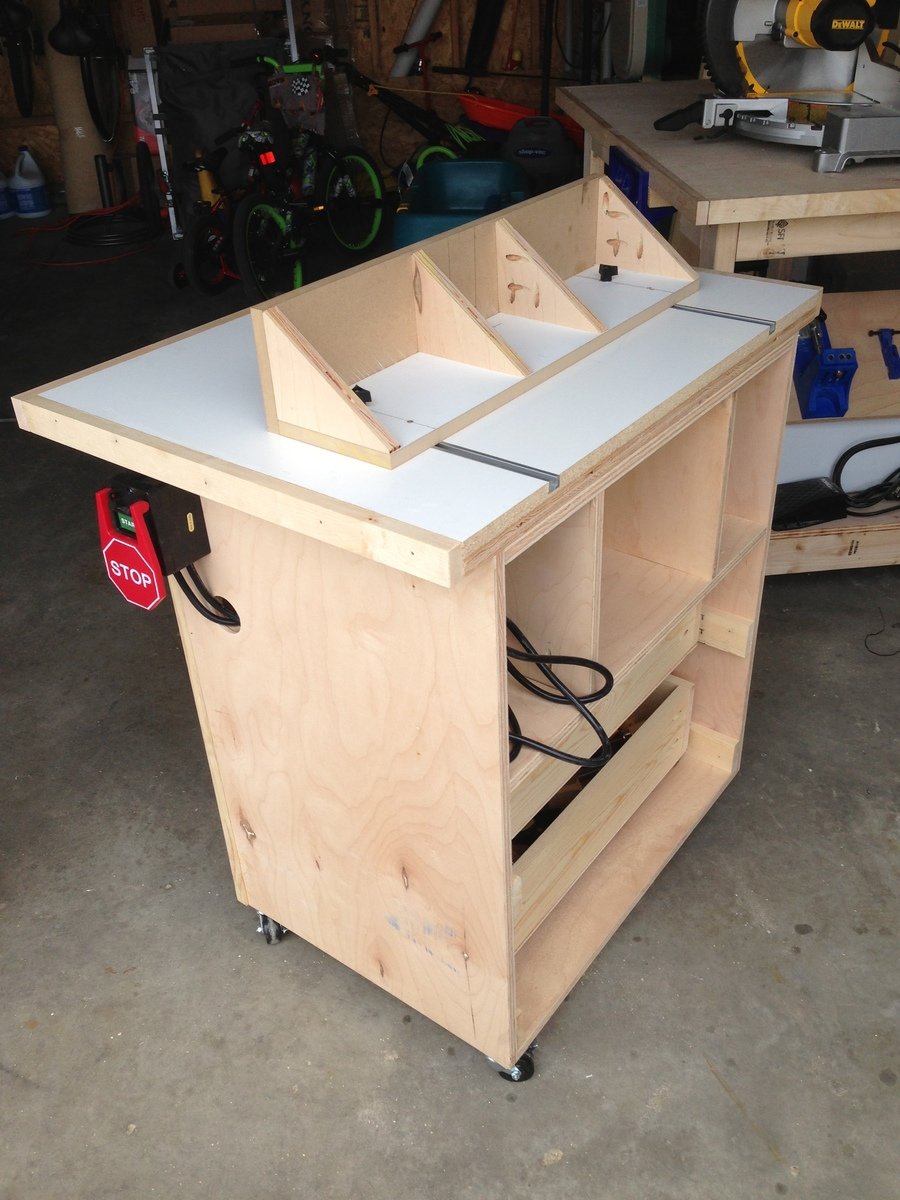
I searched the web for plans and found these great ones. I loved these plans but wanted to make a couple of changes anyway. I decide to build the table top as well as the cabinet and decided to make it a little taller to fit me better. Due to the changes and making the table top it took me 2 days to finish, 1 day for the cabinet and 1 for the top and to put it all together. (Not having used a router before it took me a while to get the template just right to cut in the insert.)
It works great and looks great in my shop. Now on to the dressers.
Sun, 04/21/2013 - 10:55
I need to build one of these!!
Yours looks very nice!
I'm a mother of three kids, so it took me a while to finish, but I also did some additional work on it so I would be able to stain rather than paint it. I used a countersink drill bit to put in a bit of a hole that I filled with wood by using a plug cutter so that it would match more. I also used epoxy in the knot so my son's baby toes wouldn't get hurt. That's it. I love it!
Sat, 03/14/2015 - 20:25
I need to add this project to my todo list. My little one can't walk just yet, but it's coming soon. This will be a cool piece of furniture to have when the time comes. Great job on the build! :)