
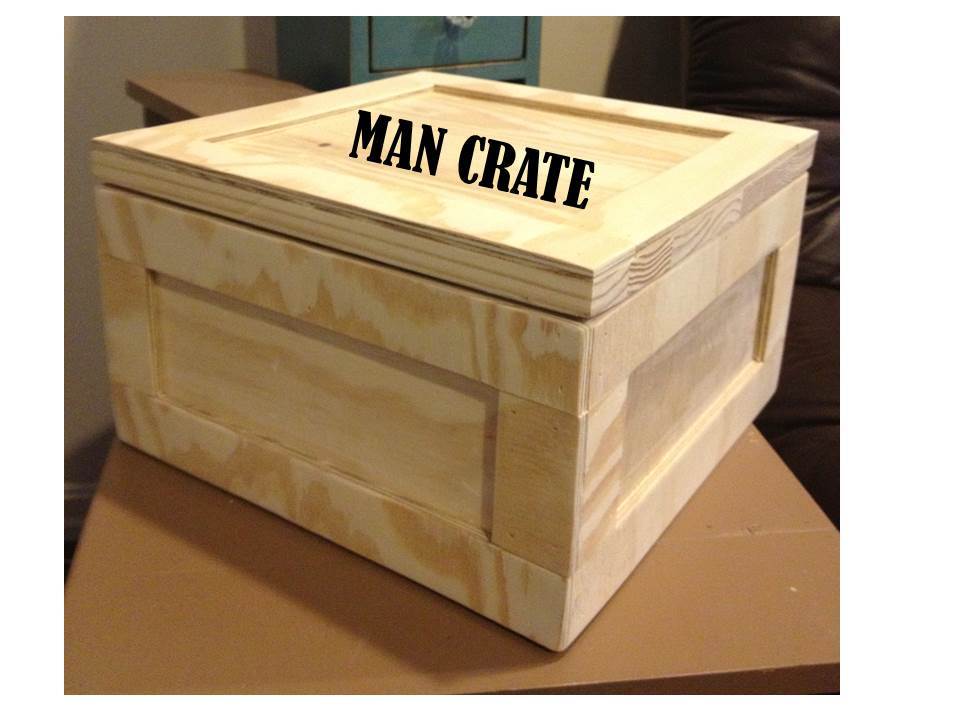

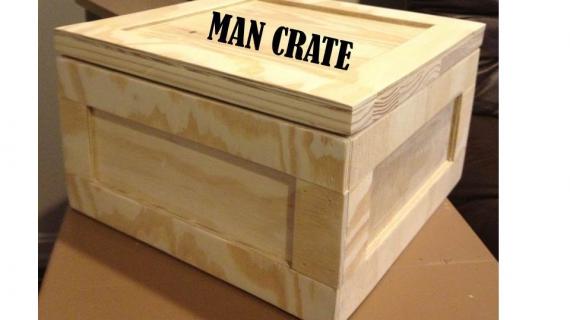
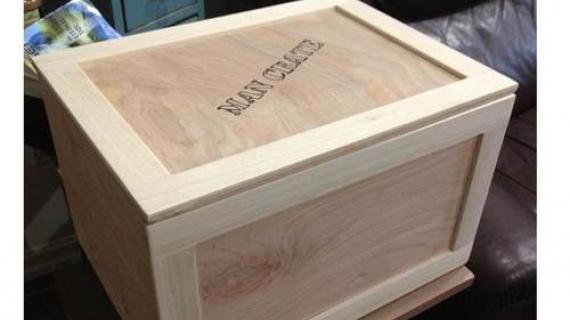
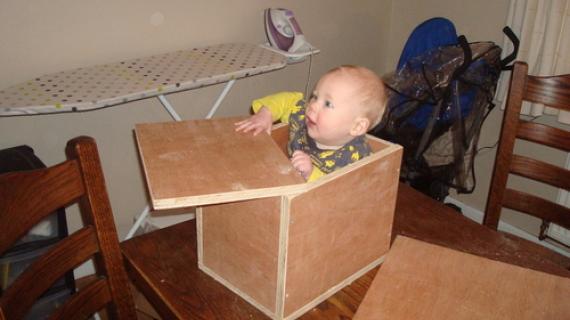
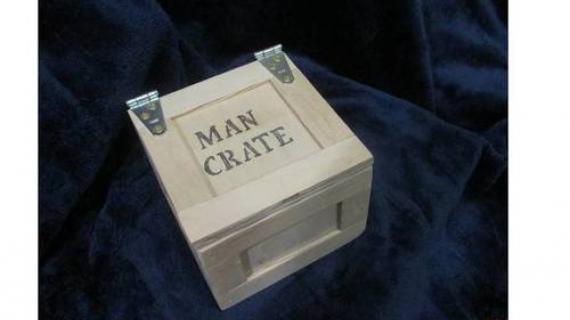
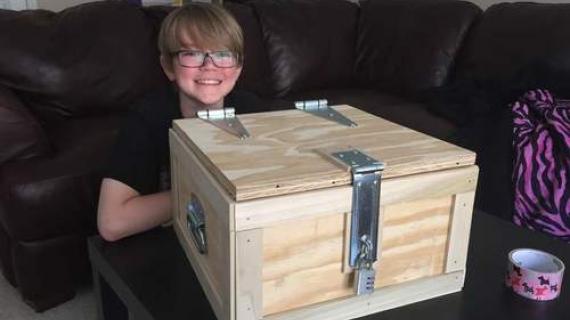
Build this crate and fill it with gifts, nail the top on, and present it along with a crowbar to open it! Who wouldn't have fun opening a gift with a crowbar?
Preparation
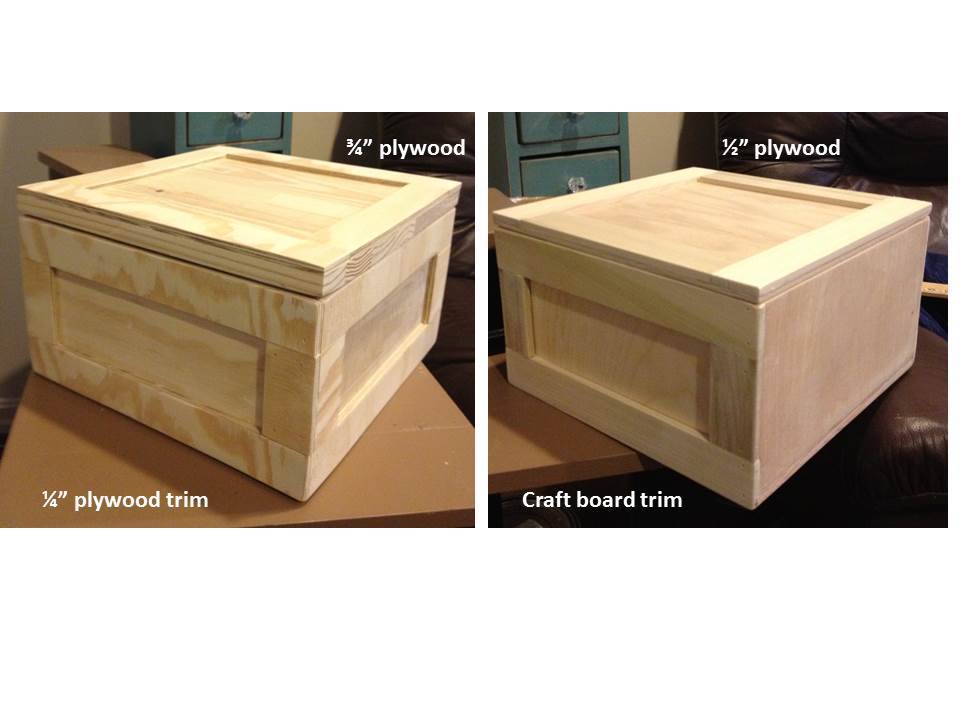
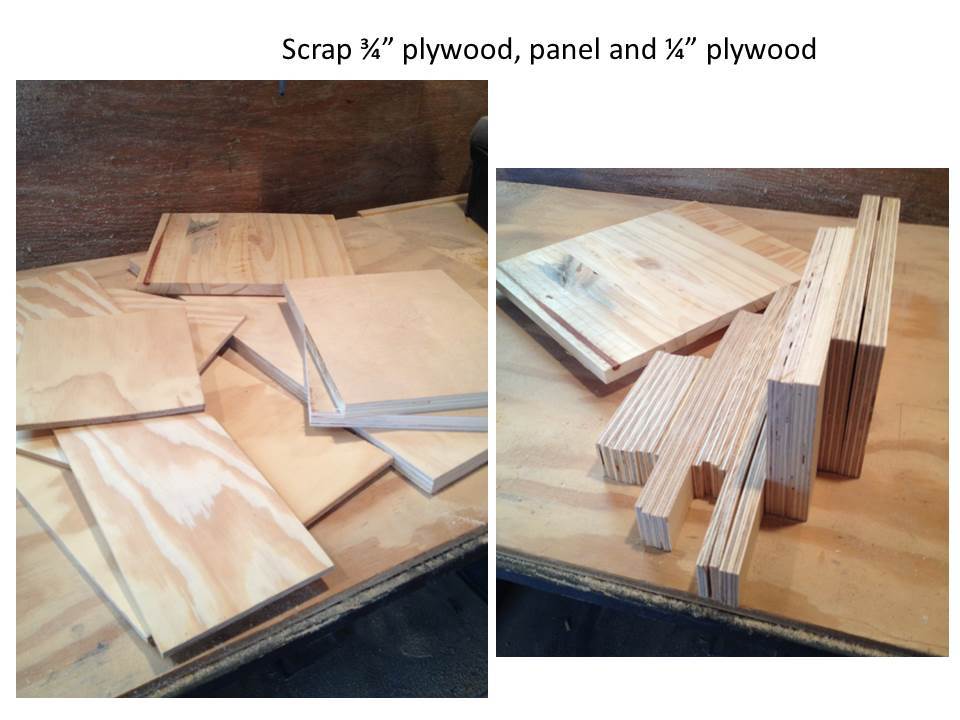
1 pc ½” or ¾” plywood @ 2’ x 2’
4 pc ¼” x 1 ½” x 4’ poplar craft board
OR two 8’ sticks of ¼” x 1 ½” pine lattice
OR 1 pc ¼’ plywood @ 2’ x 2’, cut 8 strips, 1 ½” wide, (this will use half of the piece)
1 ¼” wire nails (for attaching the top -- you want these nails to be removable)
1 – 7” pry bar ( for opening up the sealed crate)
Finishing materials for desired finish
Supplies list:
Miter saw
Circular saw or table saw
Nailgun and hammer
Sander or sandpaper
Measuring tape
Wood Glue
1 ¼” finish nails
5/8” brad nails
Finishing materials as desired
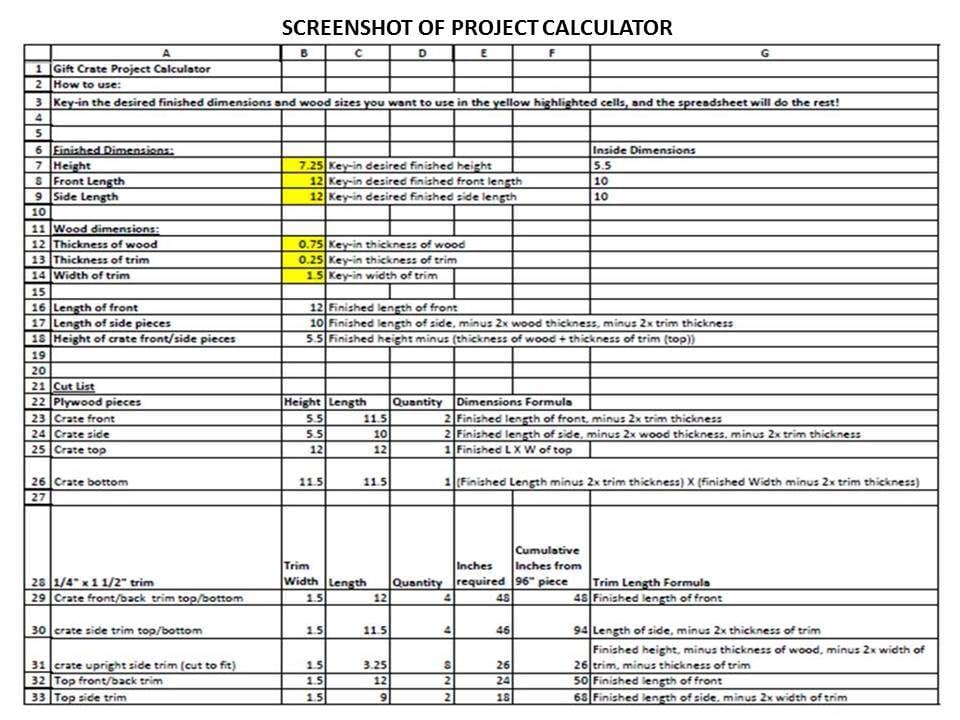
Crate dimensions: 12” L x 12” W x 6 ¾” H
½” plywood:
2 pc @ 5 ½” x 10 ½” (sides)
2 pc @ 5 ½” x 11 ½” (front/back)
1 pc @ 11 ½” x 11 ½” (bottom)
1 pc @ 12” x 12” (top)
¼” x 1 ½” craft board/trim:
Crate:
4 pc @ 12” (front/back upper & lower trims)
4 pc @ 11 ½” (side upper & lower trims)
8 pc @ 3” (side upright trims) (measure and cut to fit)
Top:
2 pc @ 12” (front/back trims)
2 pc @ 9” (side trims)
Cut list for ¾” plywood:
Crate dimensions: 12” L x 12” W x 7 ¼” H
½” plywood:
2 pc @ 5 ½” x 10 ” (sides)
2 pc @ 5 ½” x 11 ½” (front/back)
1 pc @ 11 ½” x 11 ½” (bottom)
1 pc @ 12” x 12” (top)
¼” x 1 ½” craft board/trim:
Crate:
4 pc @ 12” (front/back upper & lower trims)
4 pc @ 11 ½” (side upper & lower trims)
8 pc @ 3 ¼” (side upright trims) (measure and cut to fit)
Top:
2 pc @ 12” (front/back trims)
2 pc @ 9” (side trims)
Cut lists for 3/4" and 1/2" plywood are included.


Please read through the entire plan and all comments before beginning this project. It is also advisable to review the Getting Started Section. Take all necessary precautions to build safely and smartly. Work on a clean level surface, free of imperfections or debris. Always use straight boards. Check for square after each step. Always predrill holes before attaching with screws. Use glue with finish nails for a stronger hold. Wipe excess glue off bare wood for stained projects, as dried glue will not take stain. Be safe, have fun, and ask for help if you need it. Good luck!
Instructions
Step 1
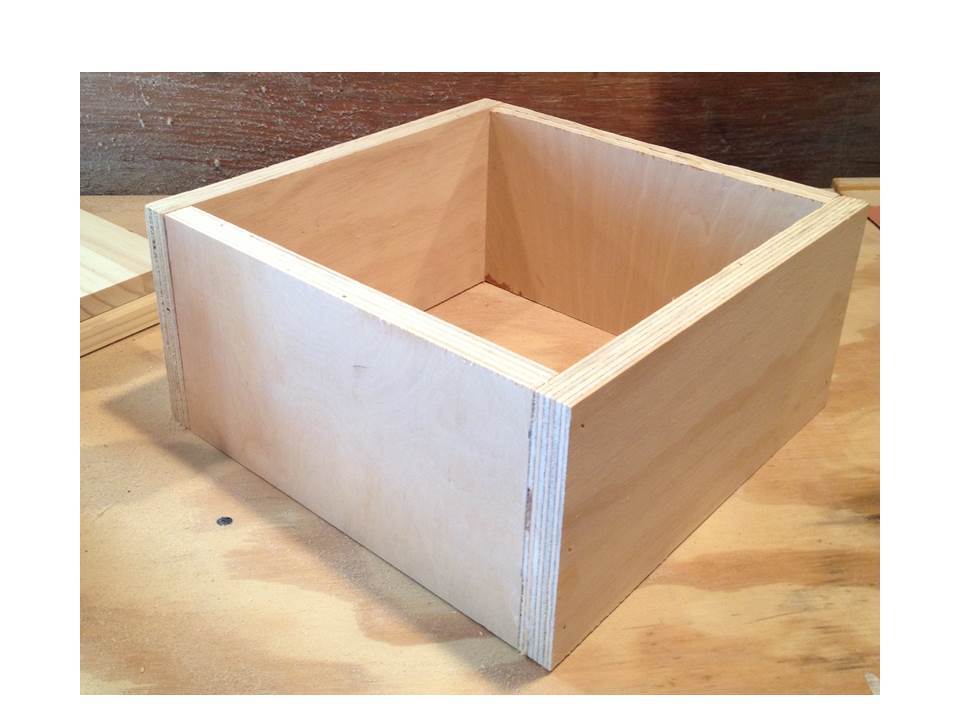
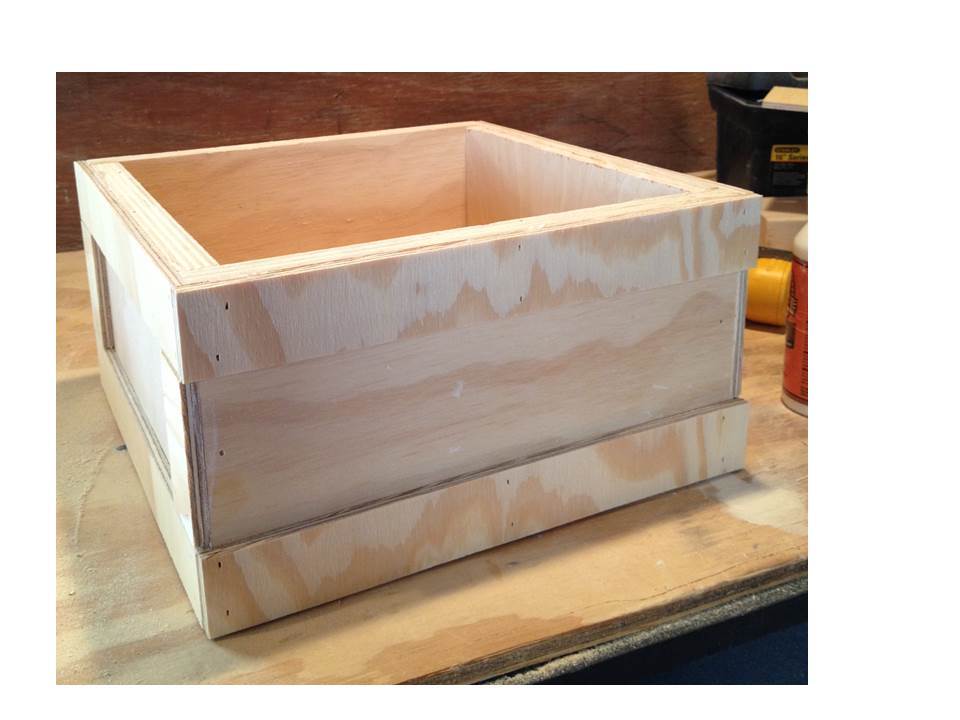
Attach sides between front and back as shown. Use glue and 1 ¼” finish nails.
Step 2
Attach bottom to box, keeping outside edges flush. Use glue and 1¼” finish nails.
Step 3
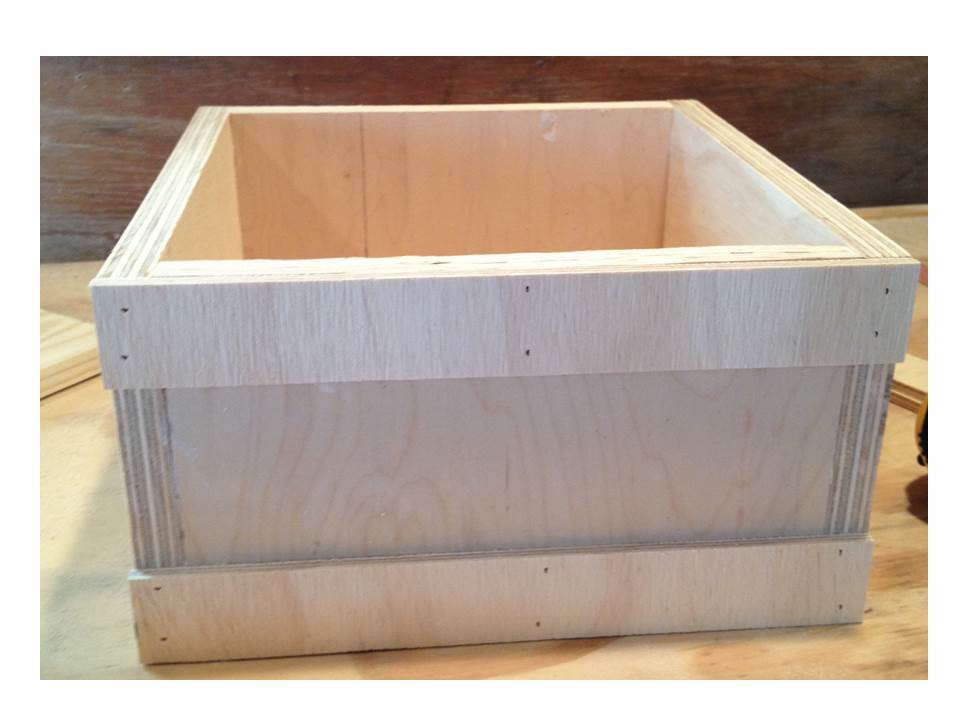
Attach upper and lower trim to sides of box, keeping top and outside edges flush. Use glue and 5/8” brad nails.
Step 4

Attach upright trims to sides of box, keeping outside edges flush. You should measure and cut these to fit. Use glue and 5/8” brad nails.
Step 5
Step 6

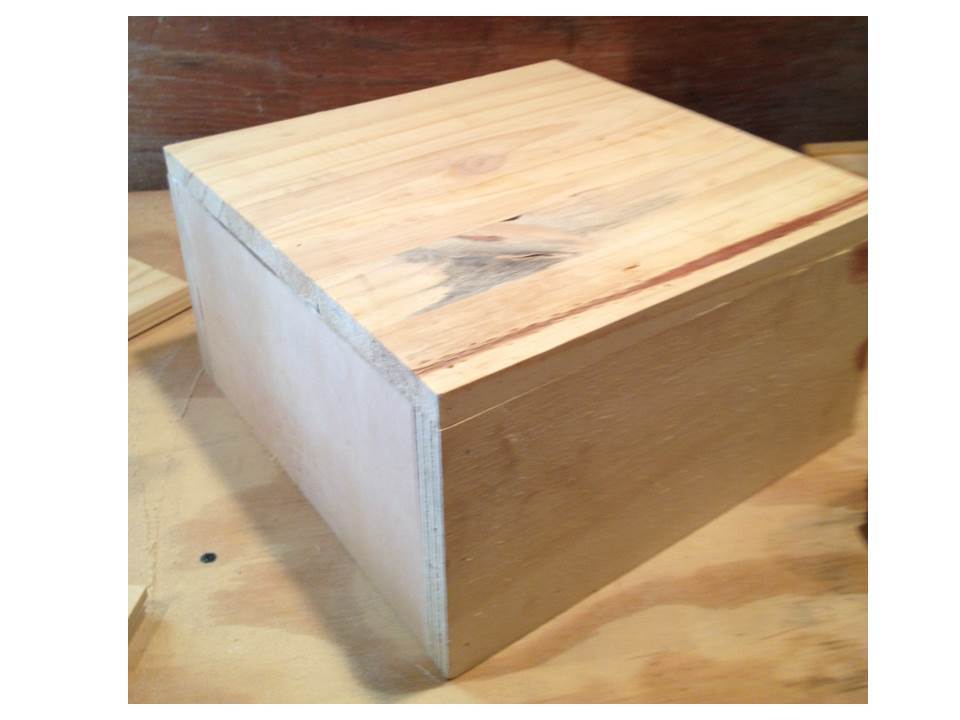
Attach upright trim to front and back of box, keeping outside edges flush. You should measure and cut these to fit. Use glue and 5/8” brad nails.
Step 7
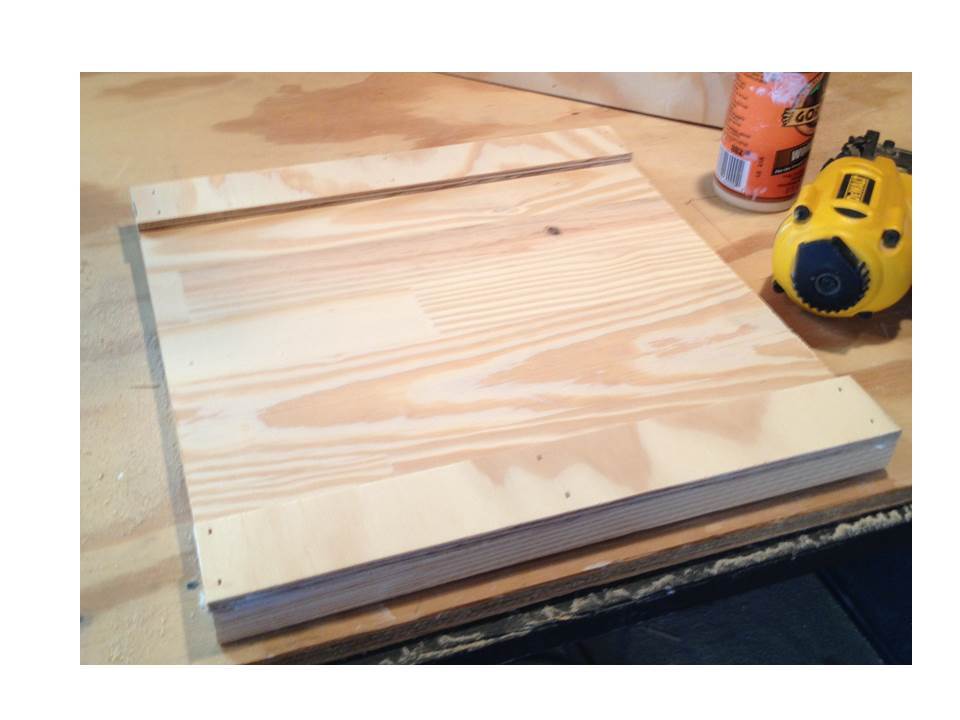
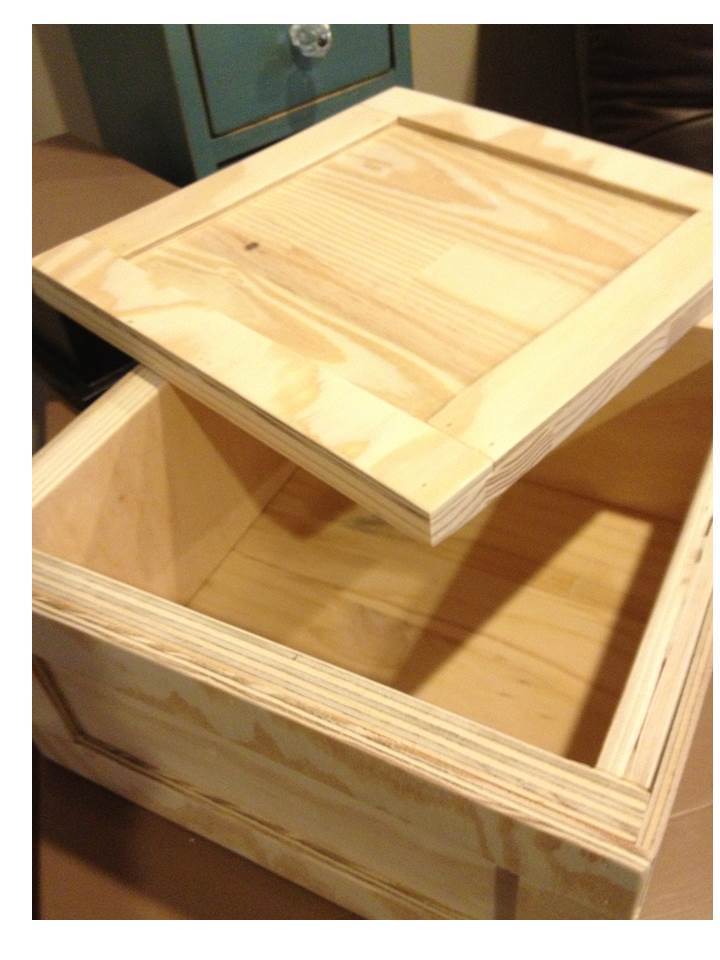
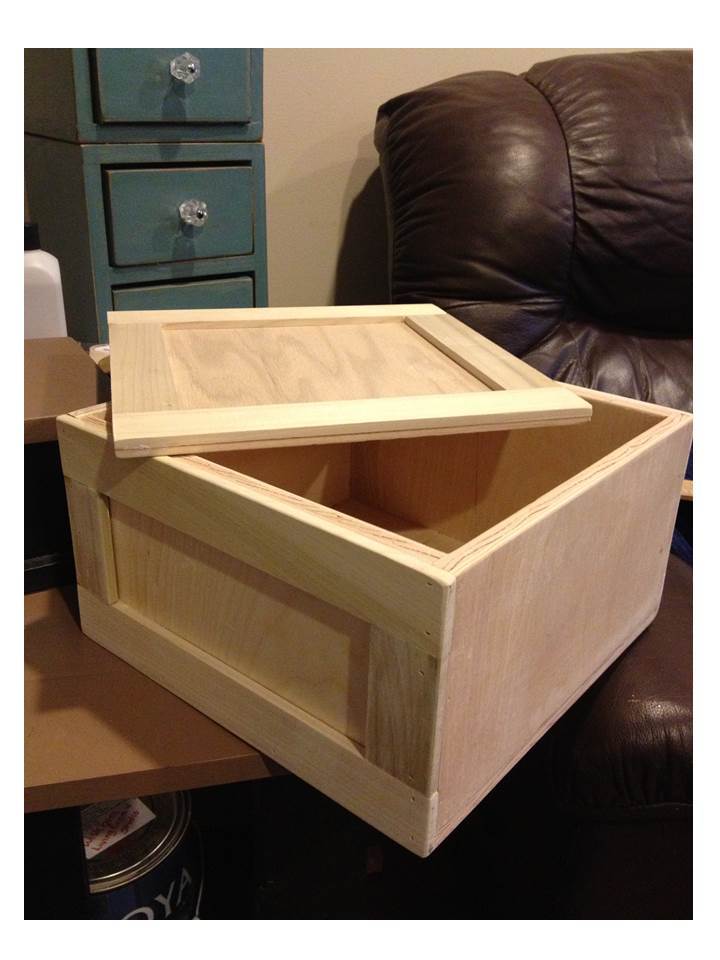
Attach front and back trim to box top, keeping outside edges flush. Use glue and 5/8” brad nails.
Step 8
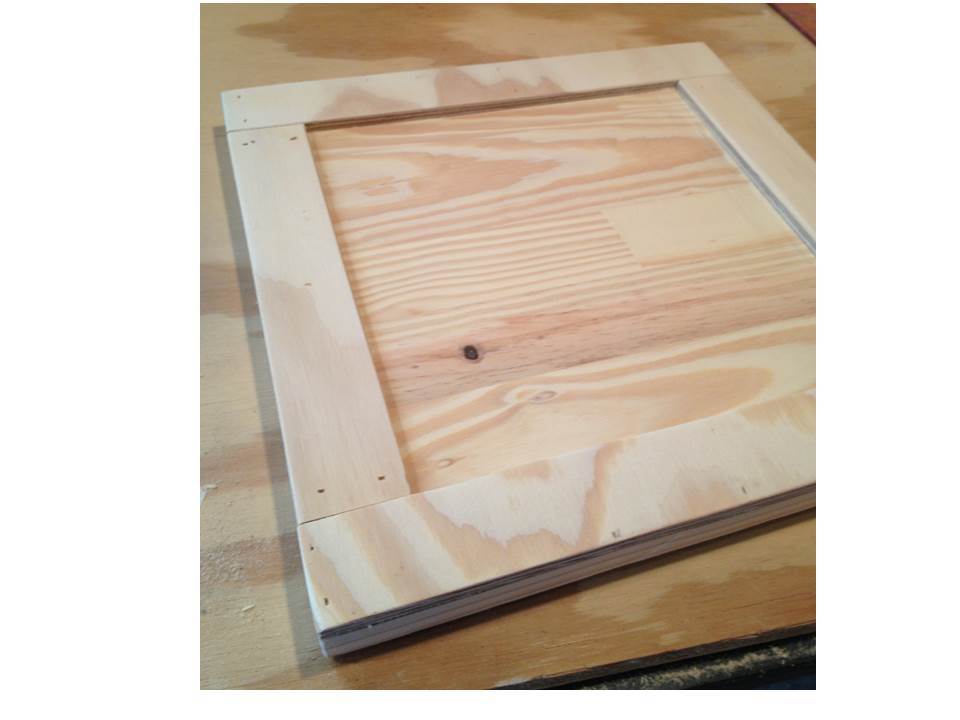
Attach side trim to box top, keeping outside edges flush. Use glue and 5/8” brad nails.
Step 9

Sand piece to smooth cut edges and any rough spots. Finish as desired. You could leave unfinished if using as a “man crate”. If desired, you could stencil “Man Crate” or a fun caption on the side after sanding.
Step 10
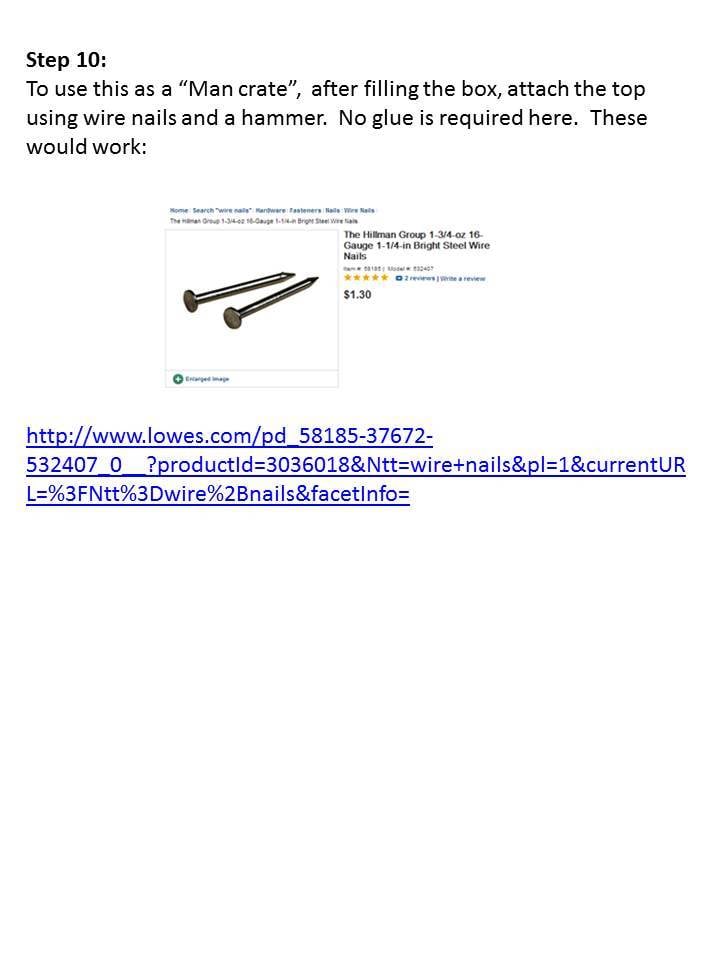
To use this as a “Man crate”, after filling the box, attach the top using wire nails and a hammer. No glue is required here. These would work: http://www.lowes.com/pd_58185-37672-532407_0__?productId=3036018&Ntt=wi…¤tURL=%3FNtt%3Dwire%2Bnails&facetInfo=
Step 11
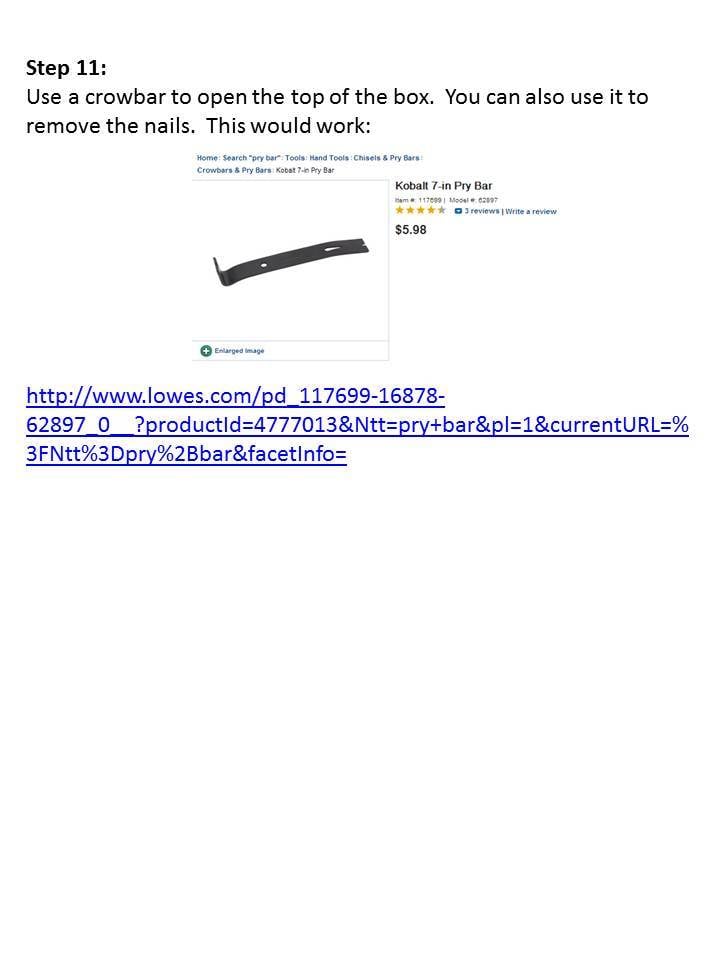
Use a crowbar to open the top of the box. You can also use it to remove the nails. This would work: http://www.lowes.com/pd_117699-16878-62897_0__?productId=4777013&Ntt=pr…¤tURL=%3FNtt%3Dpry%2Bbar&facetInfo=
It is always recommended to apply a test coat on a hidden area or scrap piece to ensure color evenness and adhesion. Use primer or wood conditioner as needed.

Comments
yurra-bazain
Tue, 11/12/2013 - 20:26
This is getting me excited!
I am now feeling excited for Christmas if only to make a Man Crate to give my husband, crowbar and all! Best of all, if he doesn't want to open it, I can! Haha. =D Love your version of this neat idea! Putting this one of my "To Build" list.
JoanneS
Wed, 11/13/2013 - 18:03
Thanks Yvonne!
Thanks Yvonne! Building these got me into the holiday spirit too! I started shopping for the gifts to fill these over the weekend. Can't wait to see what you build! These were really fun - now I'm thinking of ways I could use this type of crates for decorative storage too. I might make some and stain them gray, to hold stuff for my new work table (BTW- it's already broken in - there are some paint splotches on it ;)
Val Manchuk
Sat, 11/16/2013 - 23:09
Great Idea!
This will make Christmas so much fun! My husband and two boys will be the lucky recipients of some Man Crates this year! Thanks for a cool idea!
Val
artsybuildinglady.blogspot.ca
In reply to Great Idea! by Val Manchuk
JoanneS
Sun, 11/17/2013 - 05:32
Thanks Val!
Thank you for the nice comment, Val! I've had a ball making these. Yesterday I built one with hardwood plywood for someone at work who is retiring next week. The team will be giving him his gifts in his very own man crate, and he'll have to use a crowbar at his retirement party (roast!) :) I think the folks are also going to sign the top. That will be fun!
ManCrates
Fri, 11/29/2013 - 09:33
We're so flattered!
Great minds must think alike. We're all about guys getting better gifts- thanks for putting together this DIY on how to build a Man Crate (TM). If we could add our expert advice- we'd advise sealing the crate with Gorilla wood glue (allow overnight to dry) or industrial hot glue instead of nails.
Nails pry off more easily, and exposed nail heads in the lid are hazardous once the guy gets into the awesome contents of your crate.
Craft hot glue can also work, just make sure you apply some pressure to the lid while it dries.
If you don't want to DIY check out the awesome options at www.mancrates.com
Azule74
Tue, 03/10/2015 - 13:21
Excel sheet
Does anyone know where I can get the excel sheet? I am being lazy and not wanting to figure out the measurements today. I tried to email Ana White's crew and they said that it was not from Ana White and someone here might know who the original creator is.
JoanneS
Tue, 03/10/2015 - 17:32
Excel sheet
Hi Azule 74, just click on my name and send me a note through the 'contacts' tab, and I will reply and email it to you.
JoanneS