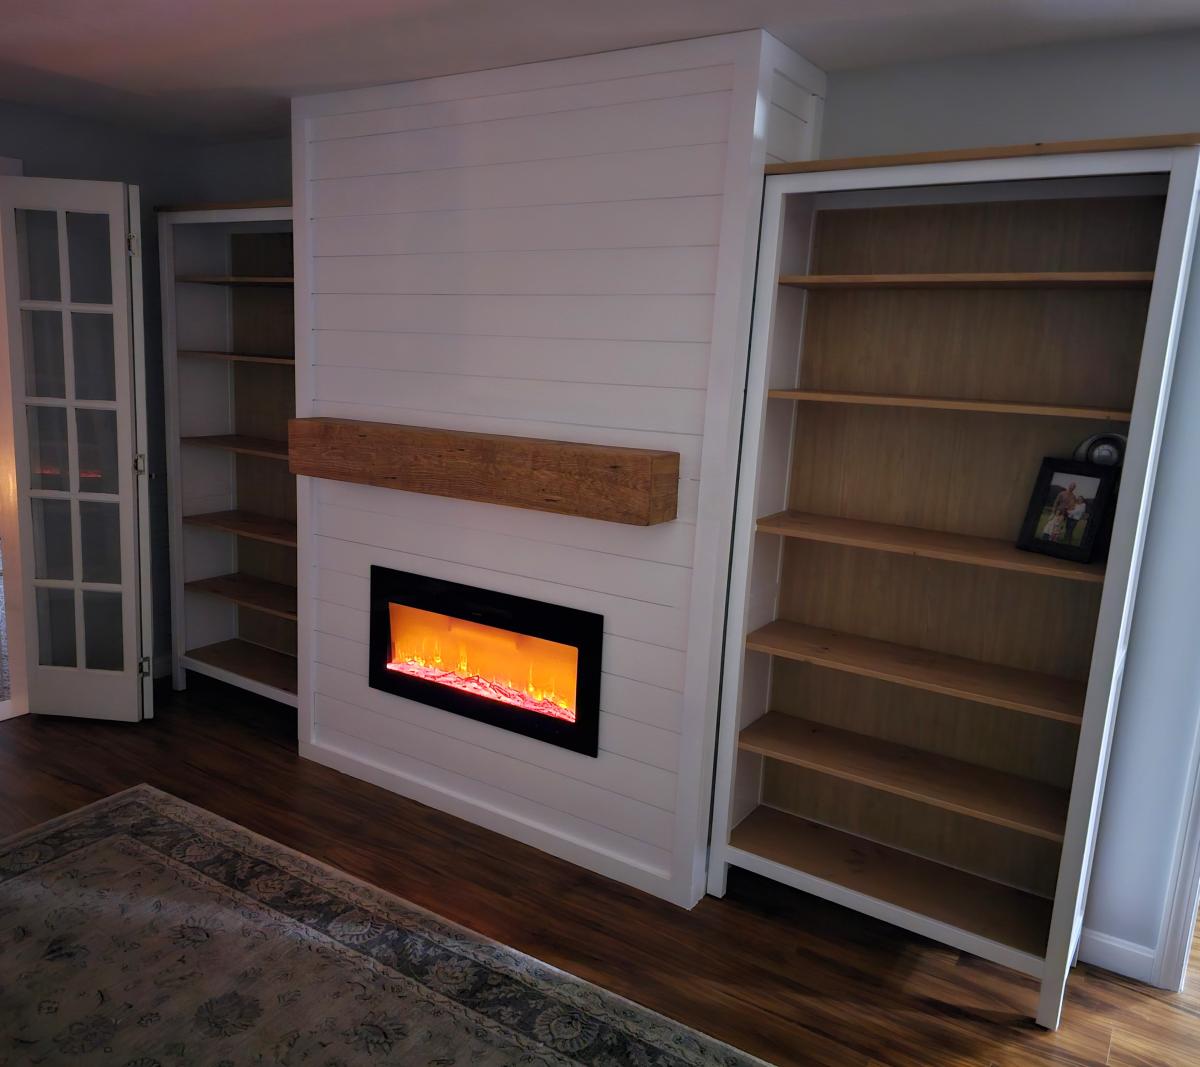
Fireplace and Bookcase Built-in
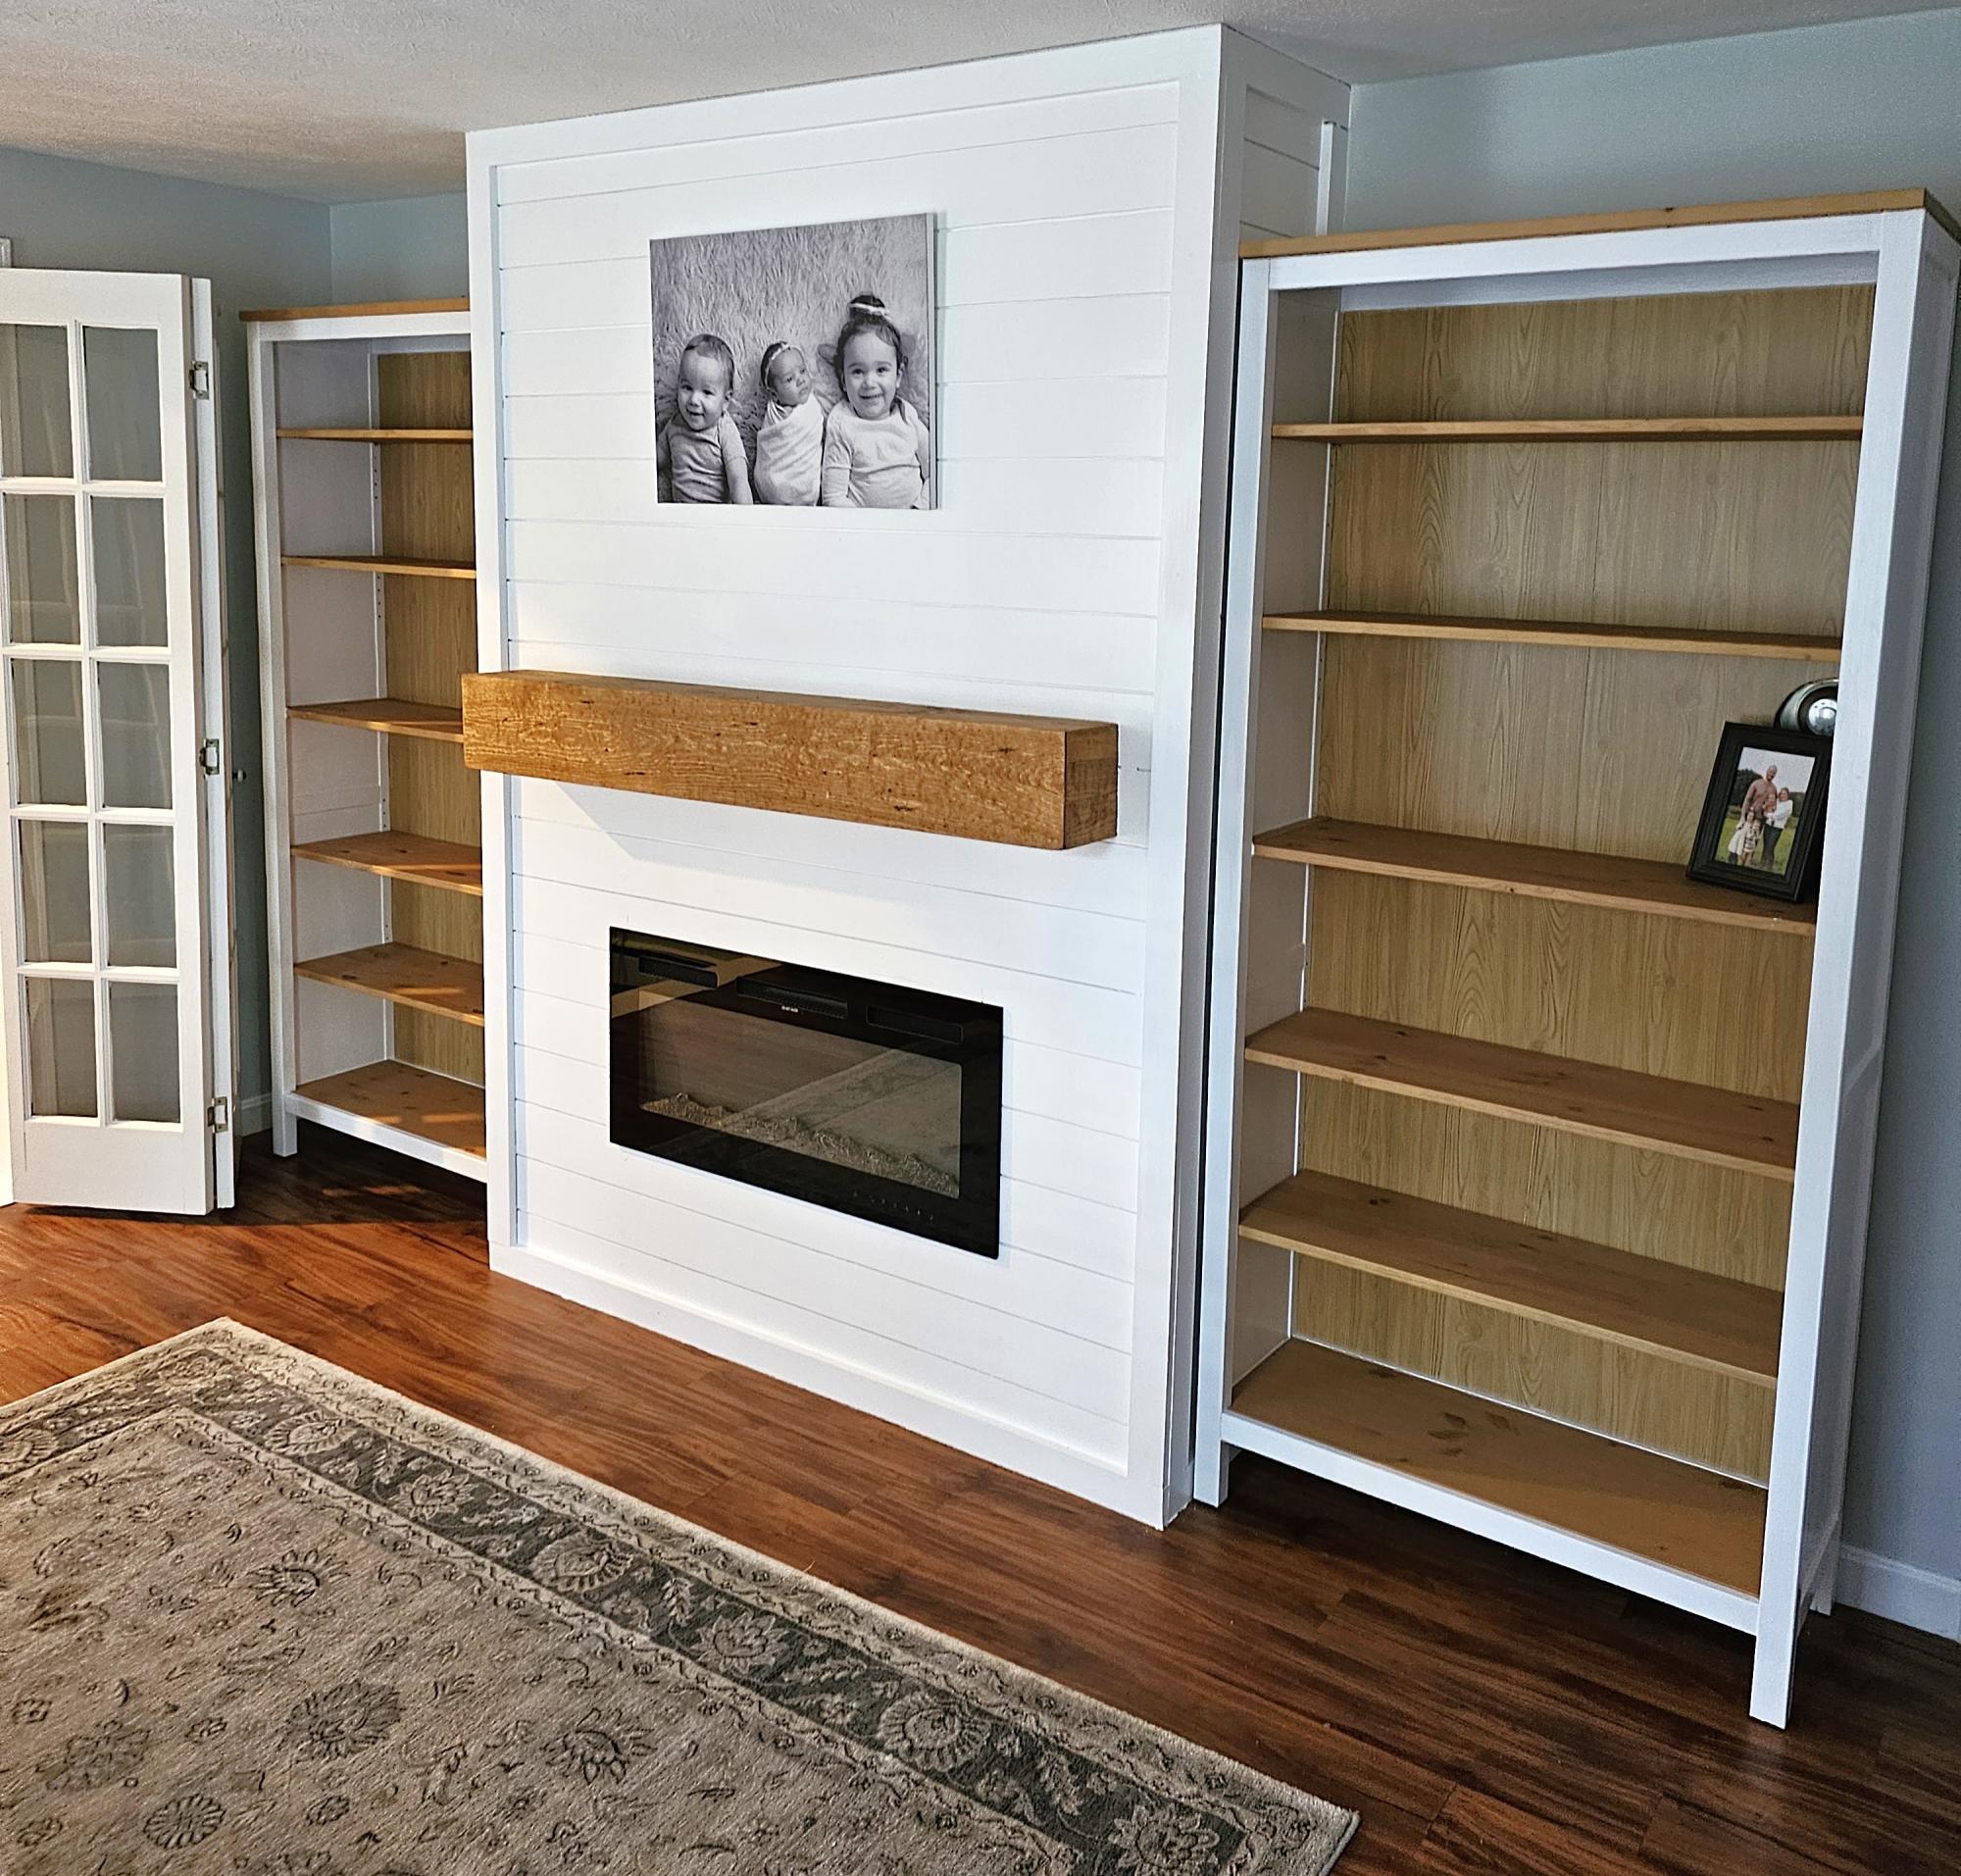
I used your guide for the shiplap fireplace and paired it with some ikea bookcases. Surprised the wife with it and she was completely blown away.
Built from Plan(s)
I used your guide for the shiplap fireplace and paired it with some ikea bookcases. Surprised the wife with it and she was completely blown away.
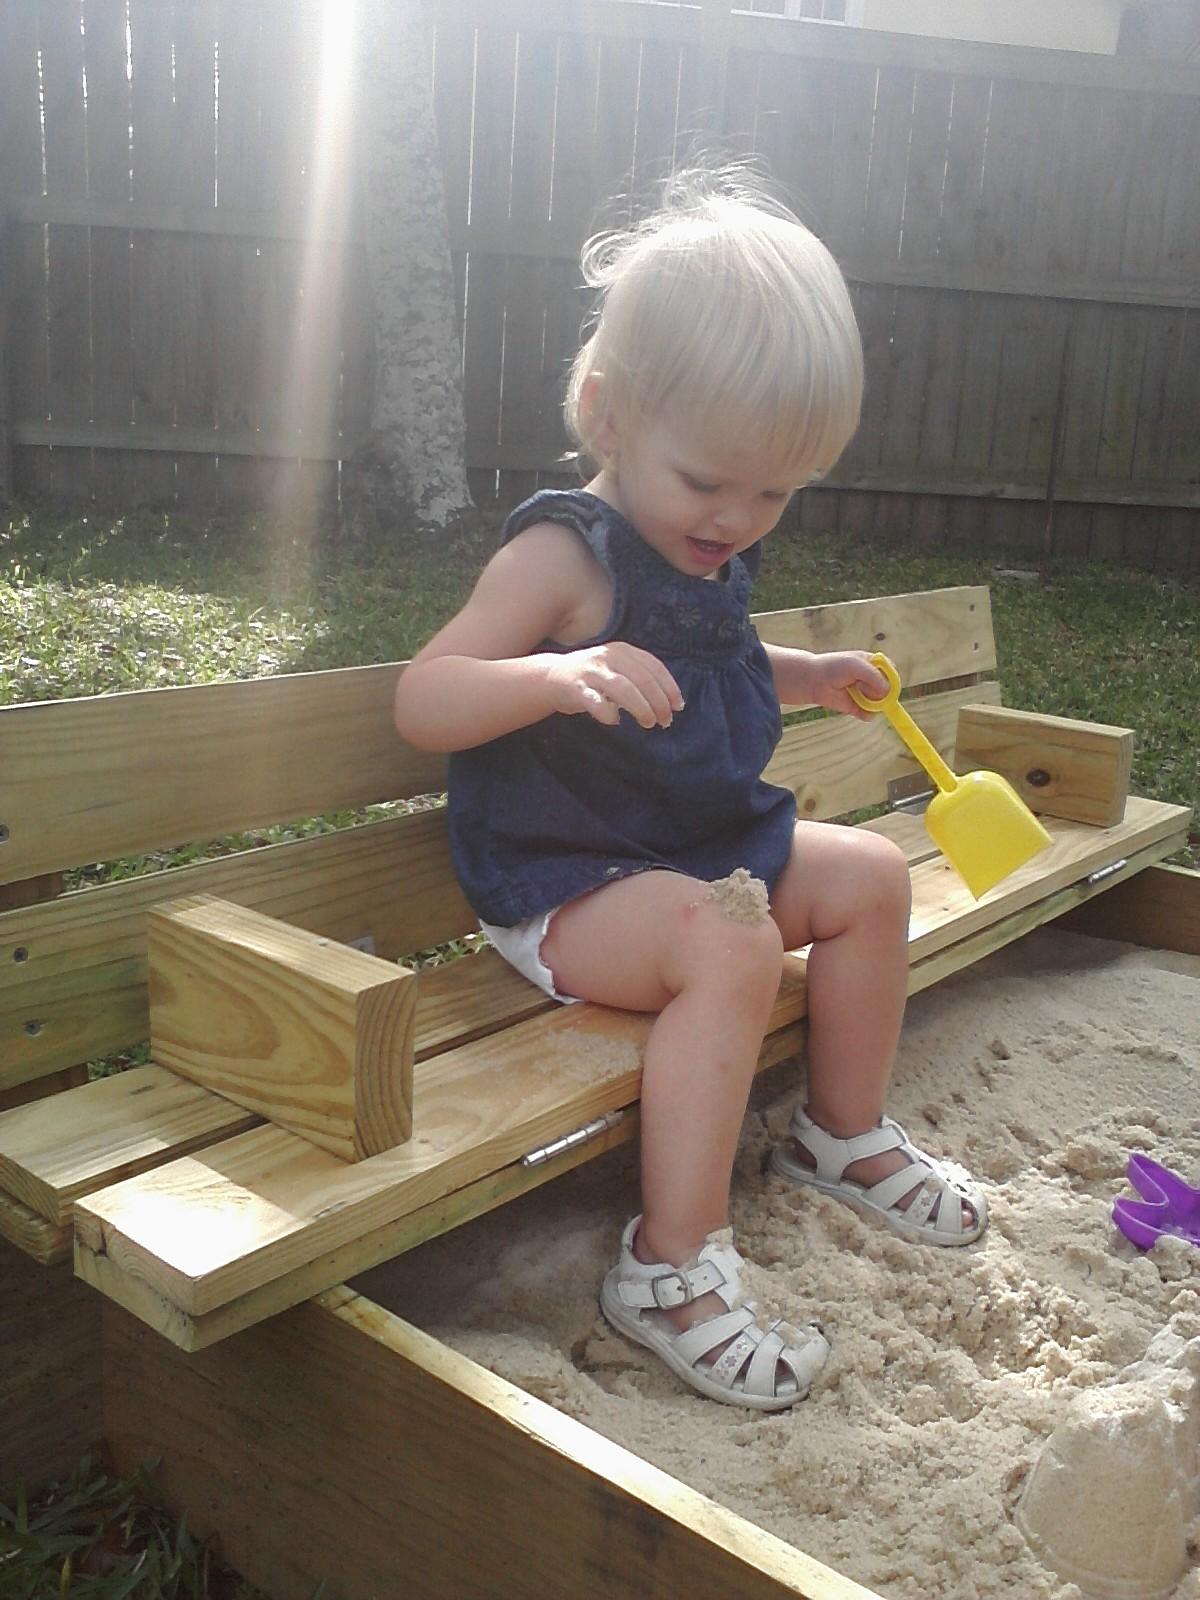
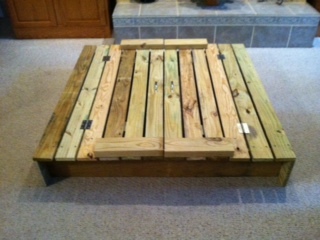
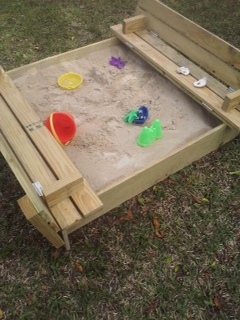
This is the first thing I have ever made out of wood in my life! I'm a quilter, I have never even used a screwdriver, but I followed your plans exactly and made this for my grandchild! I am so proud of this sandbox. (I did talk the guy at Lowe's into making the woodcuts for me).
Thank you so much for this plan and thank you for making it so easy to follow. Sherry
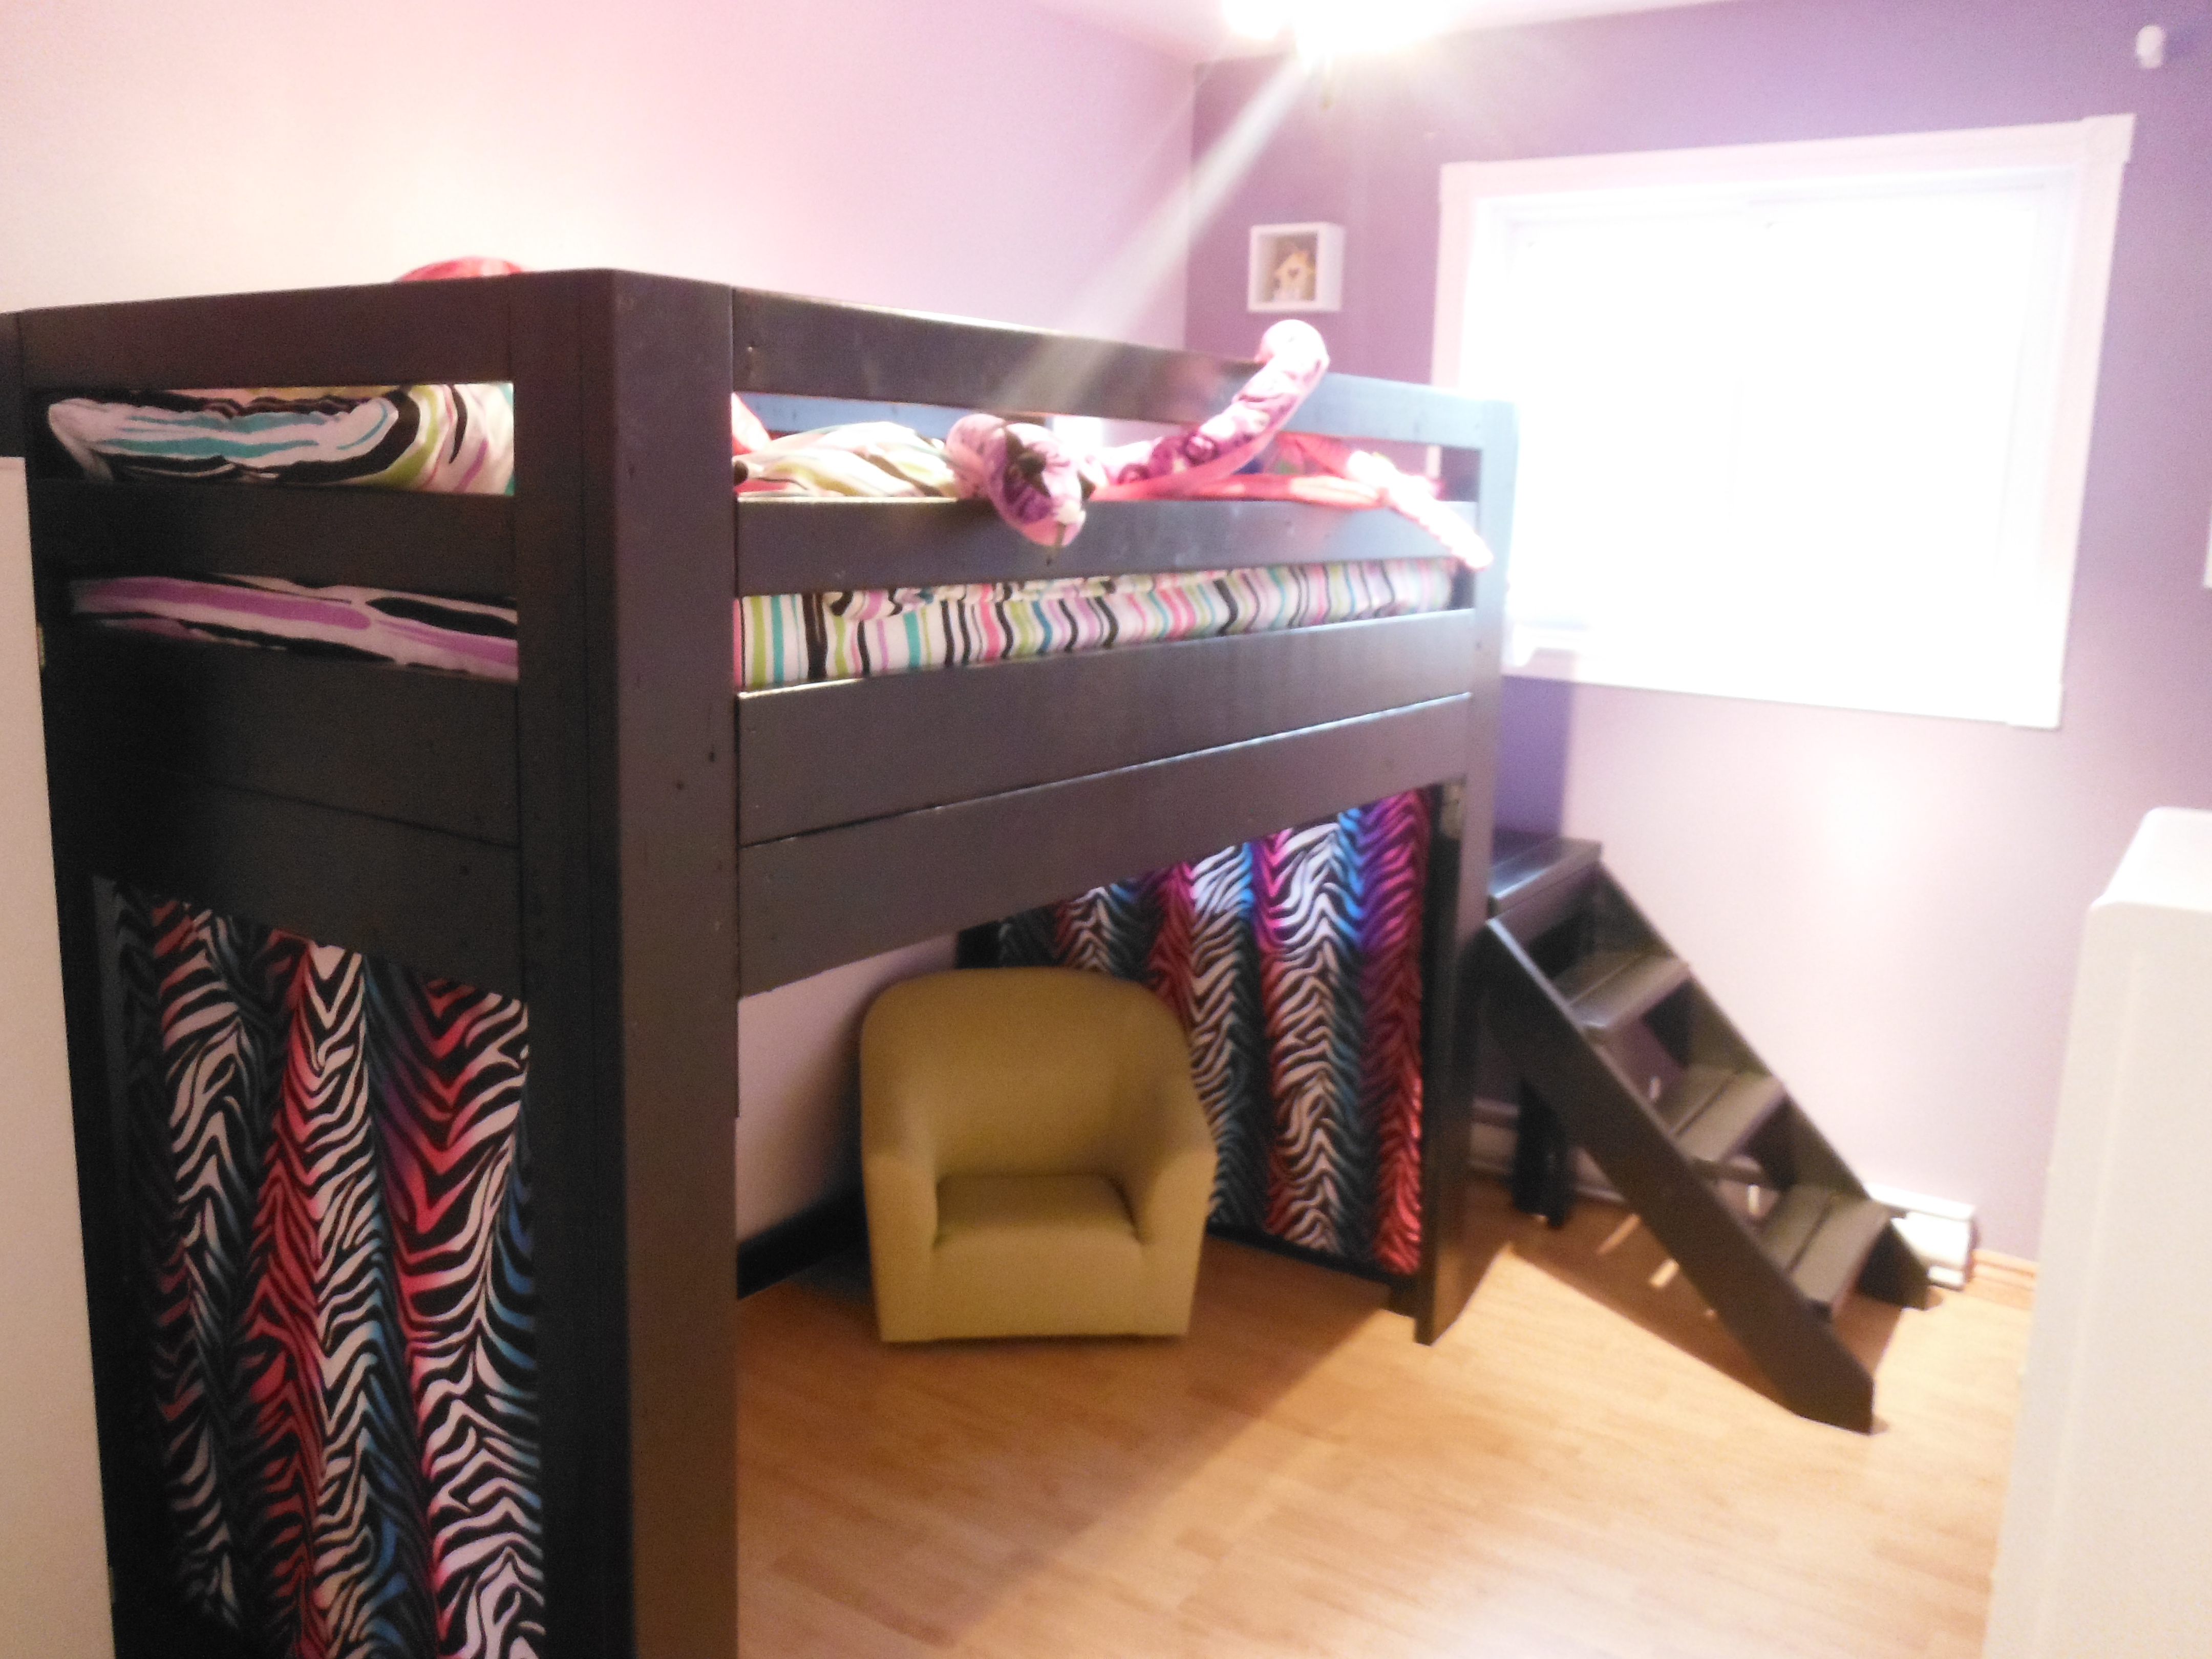
My wonderful hubby built this bed in a short amount of time and I did the sanding and staining. We made it for my 6 year old daughter for her 6th birthday surprise. Her reaction… a high pitched scream of excitement.
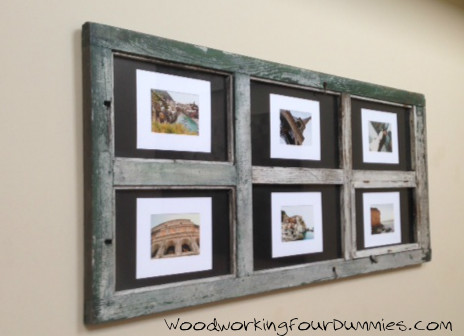
Our house walls are still pretty bare, we wanted some artwork. We bought an old door at a flea marker last summer and decided to turn it into a large picture frame.
More details and photos on my blog:
http://www.woodworkingfourdummies.com/blog/door-picture-frame
Cheers,
Ian
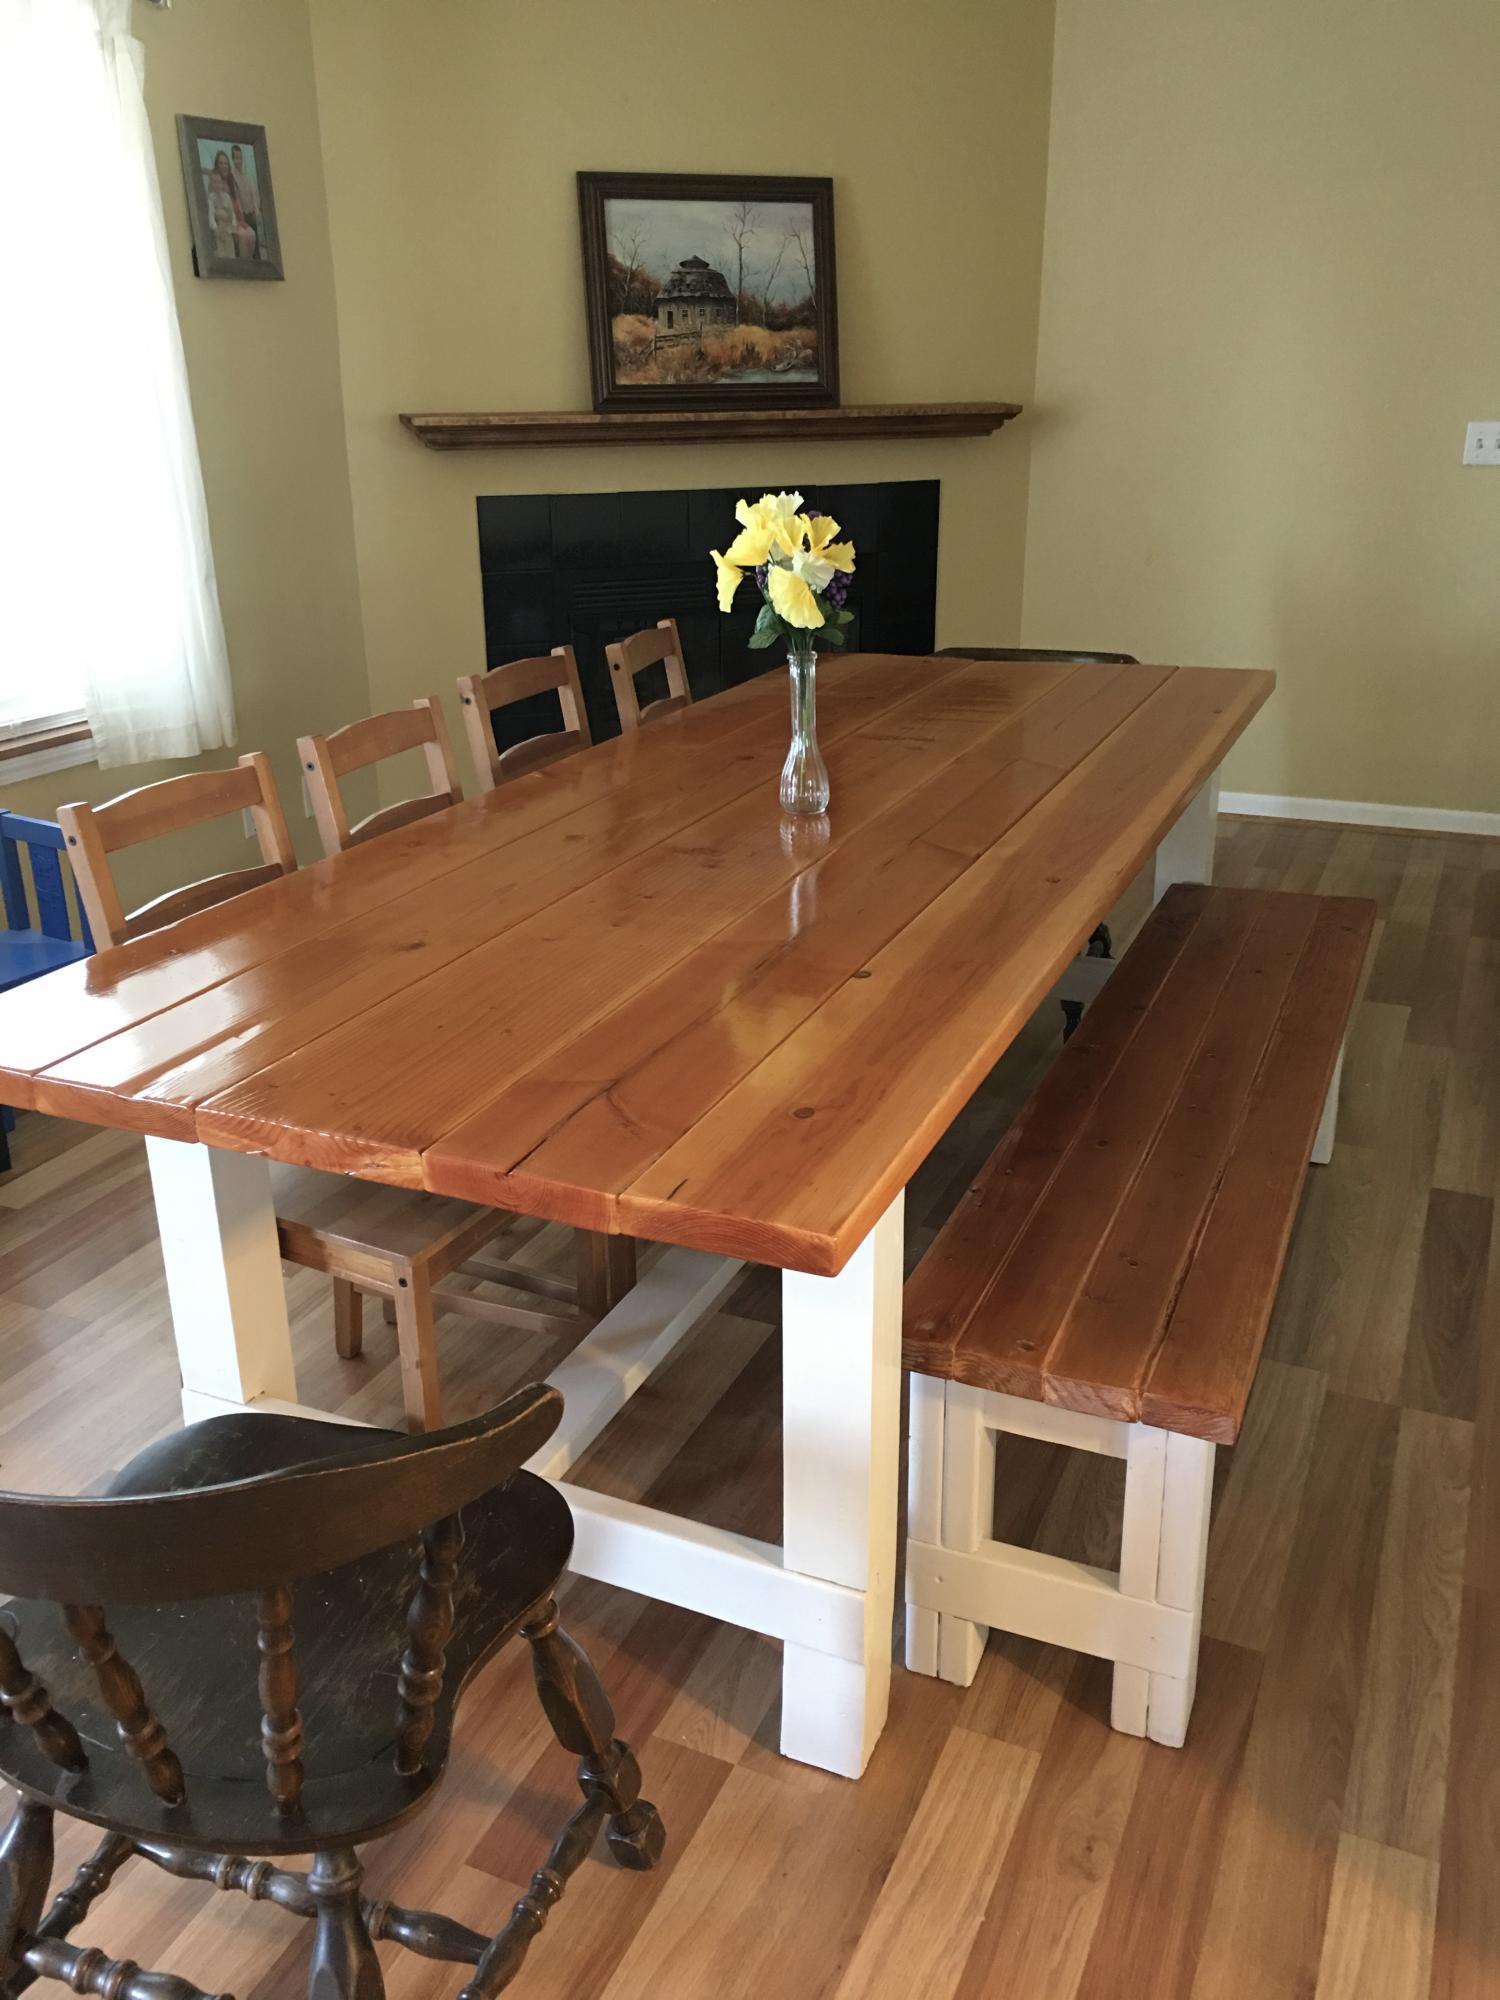
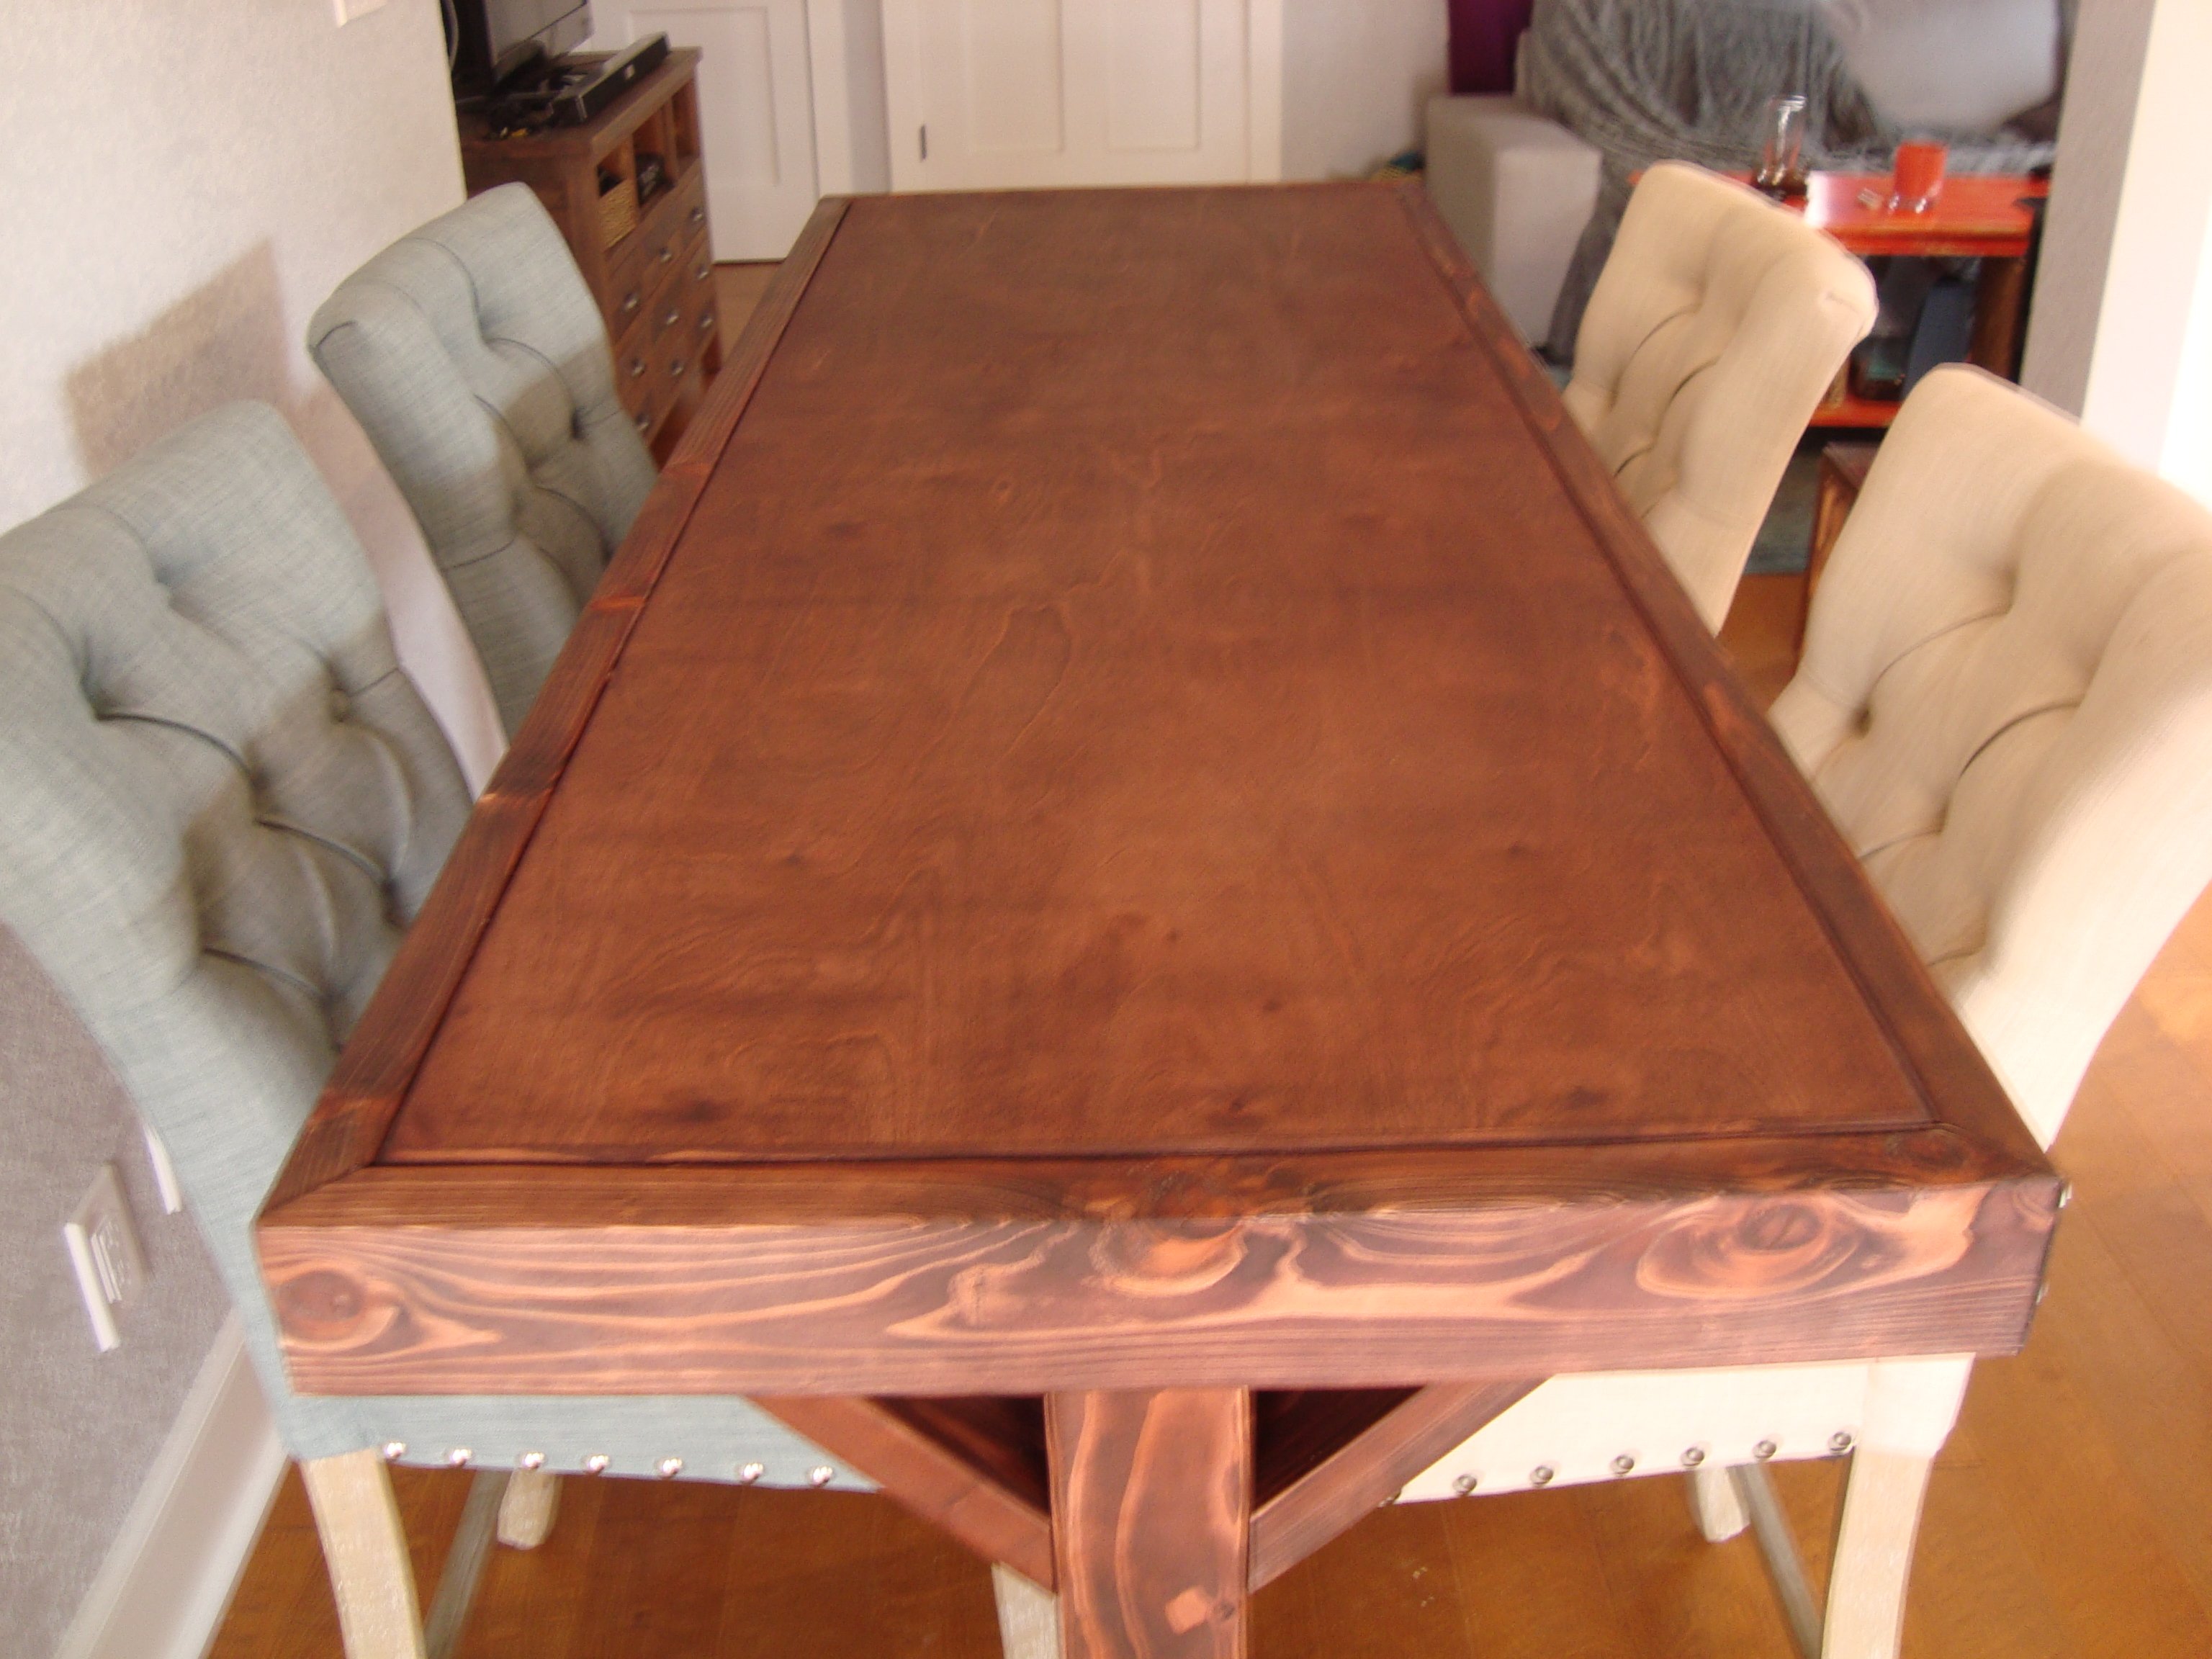
We NEEDED a table really bad when we moved into our first home. This was really easy to build as it was only my second project doing woodworking. I must have put 5 layers of polyurethane on the finish, but it was sooooo worth it!
I have done quite a bit of woodworking never being great at any of them . But I truly love furniture building.
I have built several furniture pieces in my home several coming from you.

Tryde coffee table pattern with added magazine rack. We used pallet wood which was sanded but still retained it's rustic appearance. Dark walnut stain was used to finish!

Thu, 01/16/2014 - 21:19
I love this coffee table! Do you have the new plan with the added magazine rack with the pallet wood? Thanks so much!
Wed, 03/12/2014 - 07:29
How can I get the plans for the TRYDE COFFEE TABLE with the magazine rack. Thx
Loved building this for my son, much easier than I expected it to be.
Total build time was about 3 hours, and another 3 hours for finishing. We've had it only a few days and it's already a staple in the kitchen, used for everything from peeling potatoes to feeding his horse!
Thank you so much for making these plans freely available.
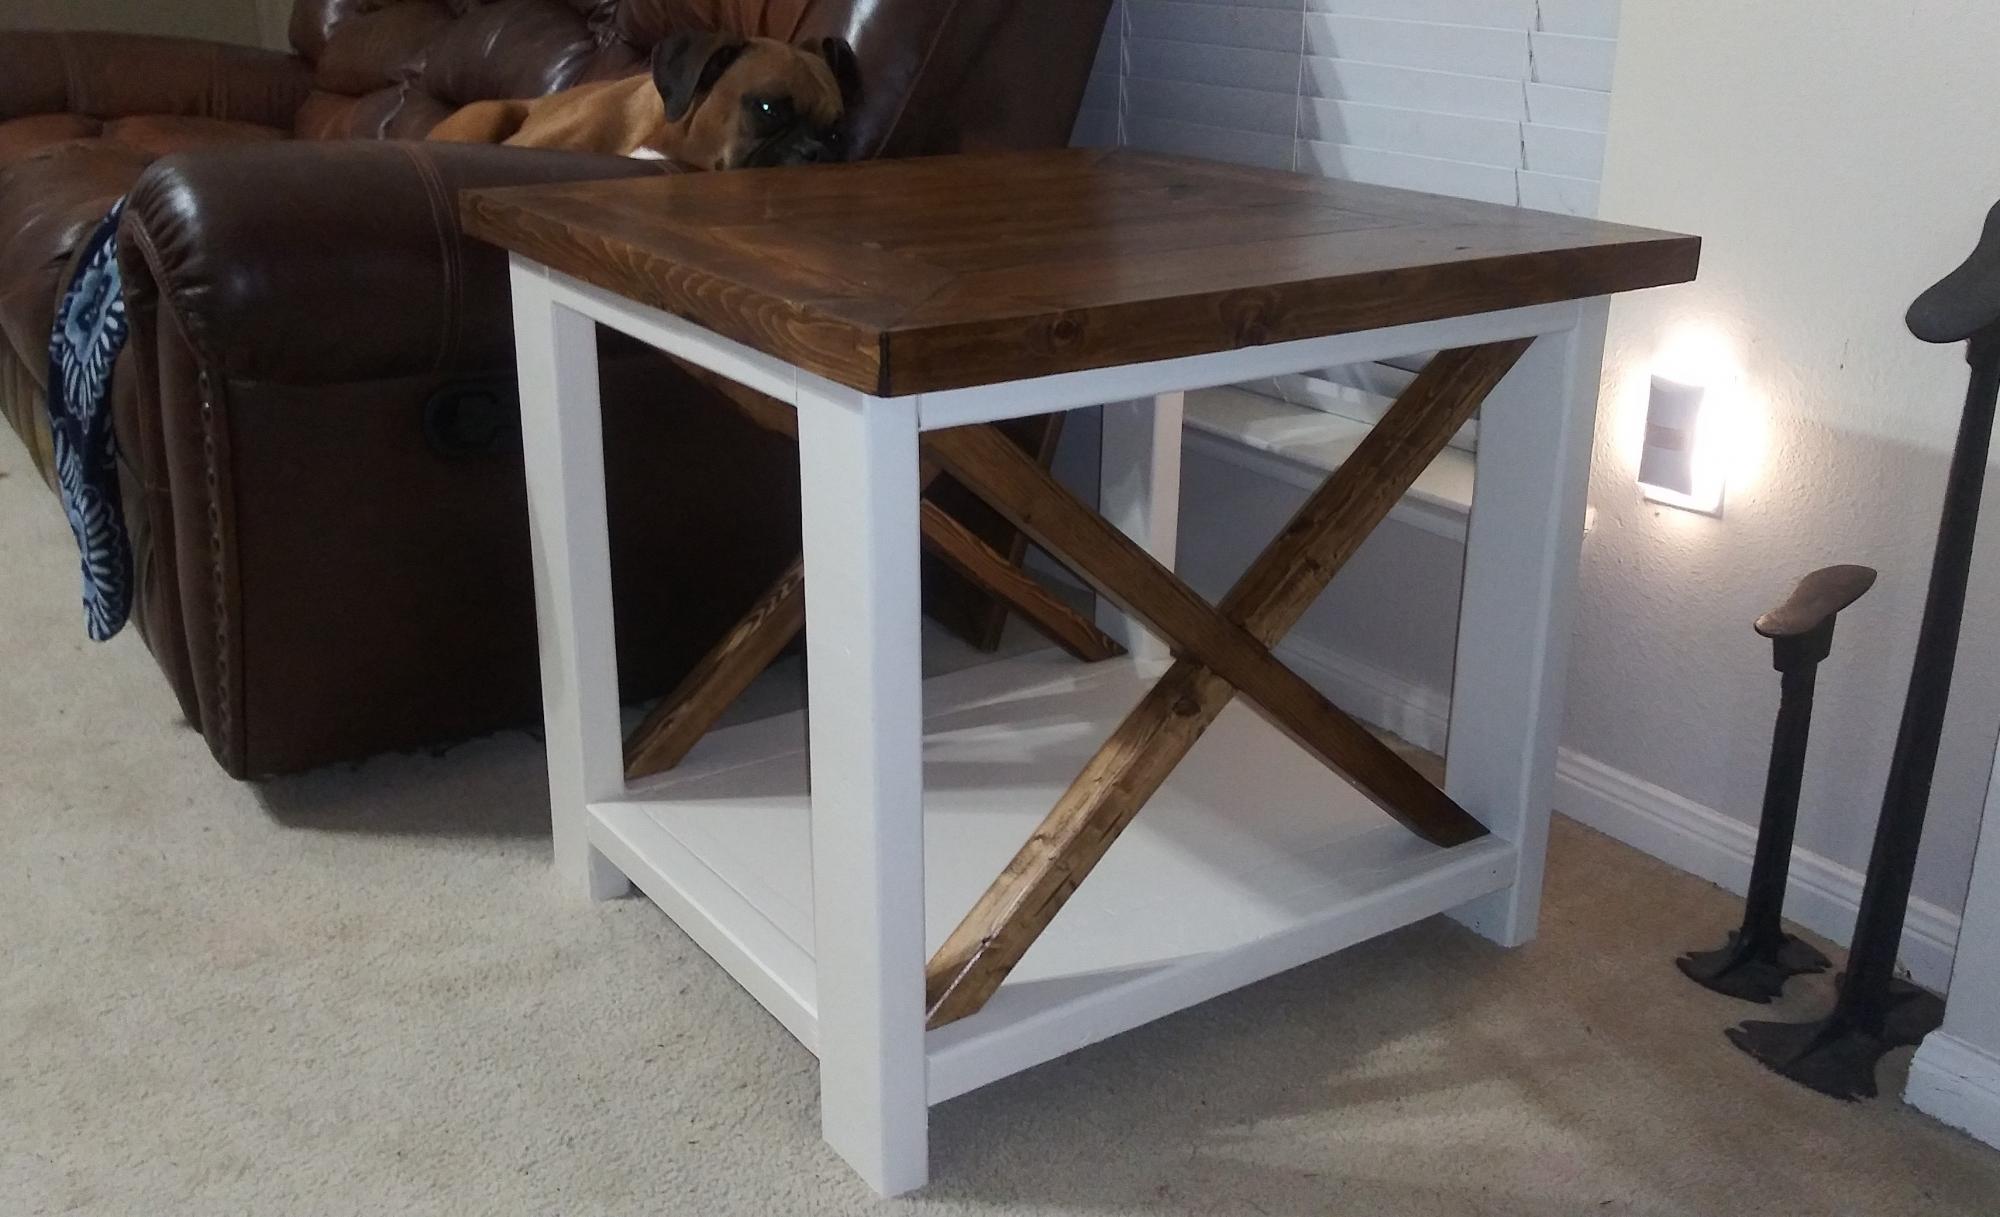
I used the rustic X end table plan to make a set, went a different route on the color and stain. I also used plywood on the bottom instead of 1" by 12".
My building write-up goes with the post for the plans. The only thing I need to add here is the change I made on the toddler rail. The first one I did wasn't quite long enough for my little guy. He's quite the squirmmy bug at night, so he kept slipping off the bed with the shorter one. He never just really fell hard, but it was enough to wake him up a few times, so I added a little more length to the rail and it seems to be working much better. I'm excited to see how this bed will evolve :) Hoping to make a few additions to it a little further down the road!
I'm so excited, this is my first furniture project. My husband was a little hesitant initially but is happy with the completed bed. This bed is so sturdy, I can easily sit on the edge and even lay down with my daughter. She loves her new bed and her brothers are a bit jealous. I told them to go through Ana's site and find something they like! Thank you so much for the projects you offer on here.
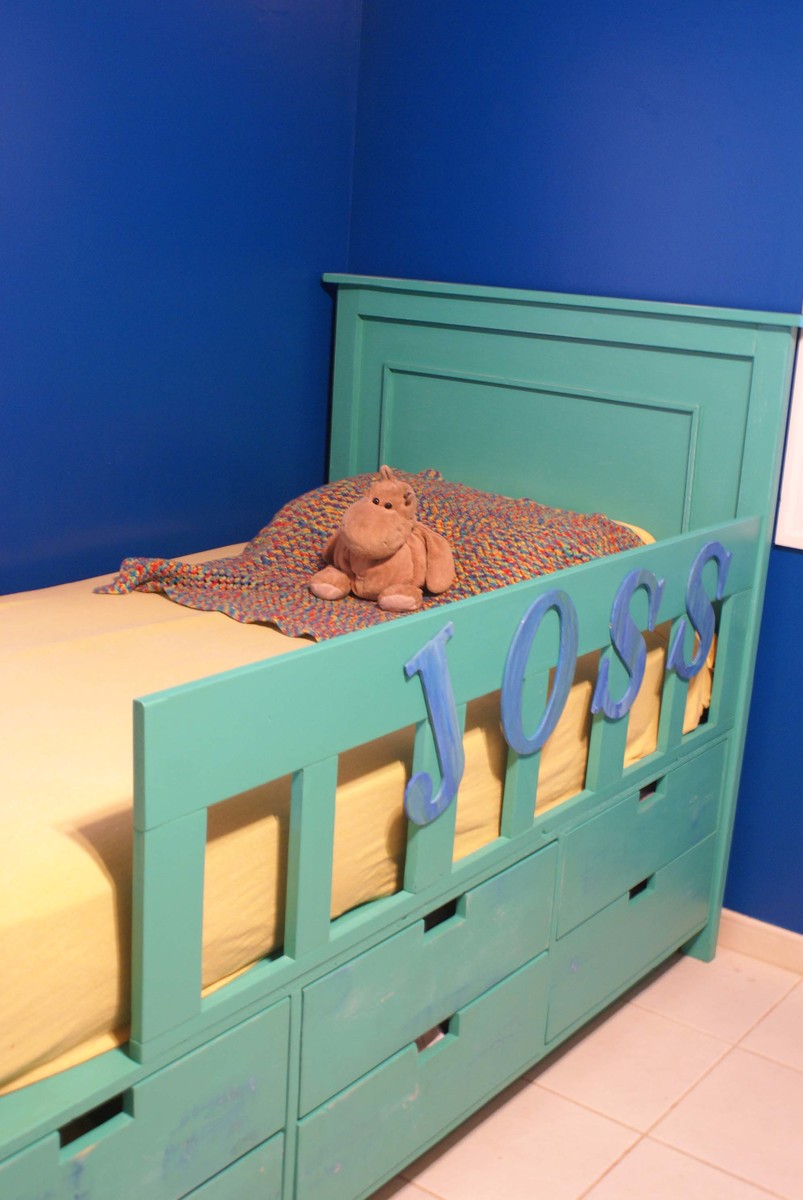
I altered the plans for a 28" wide crib mattress. Instead of a 1 x 3 on the ends of the head and footboard, I used 1 x 4s all the way across.
I also altered it to be 3" taller because I need a little extra storage space under my daughter's bed.
I did not use a nailer, just a hammer and nails. I found that it helped to use legs and shims on the bed rails frame and get to perfect level and then nail the footboard to the frame. Next, I screwed the frame into the footboard. This might be unnecessary info, but as a beginner, this part gave me a bit of trouble.
I used Behr Premium in Ultra Pure White with an Eggshell finish.

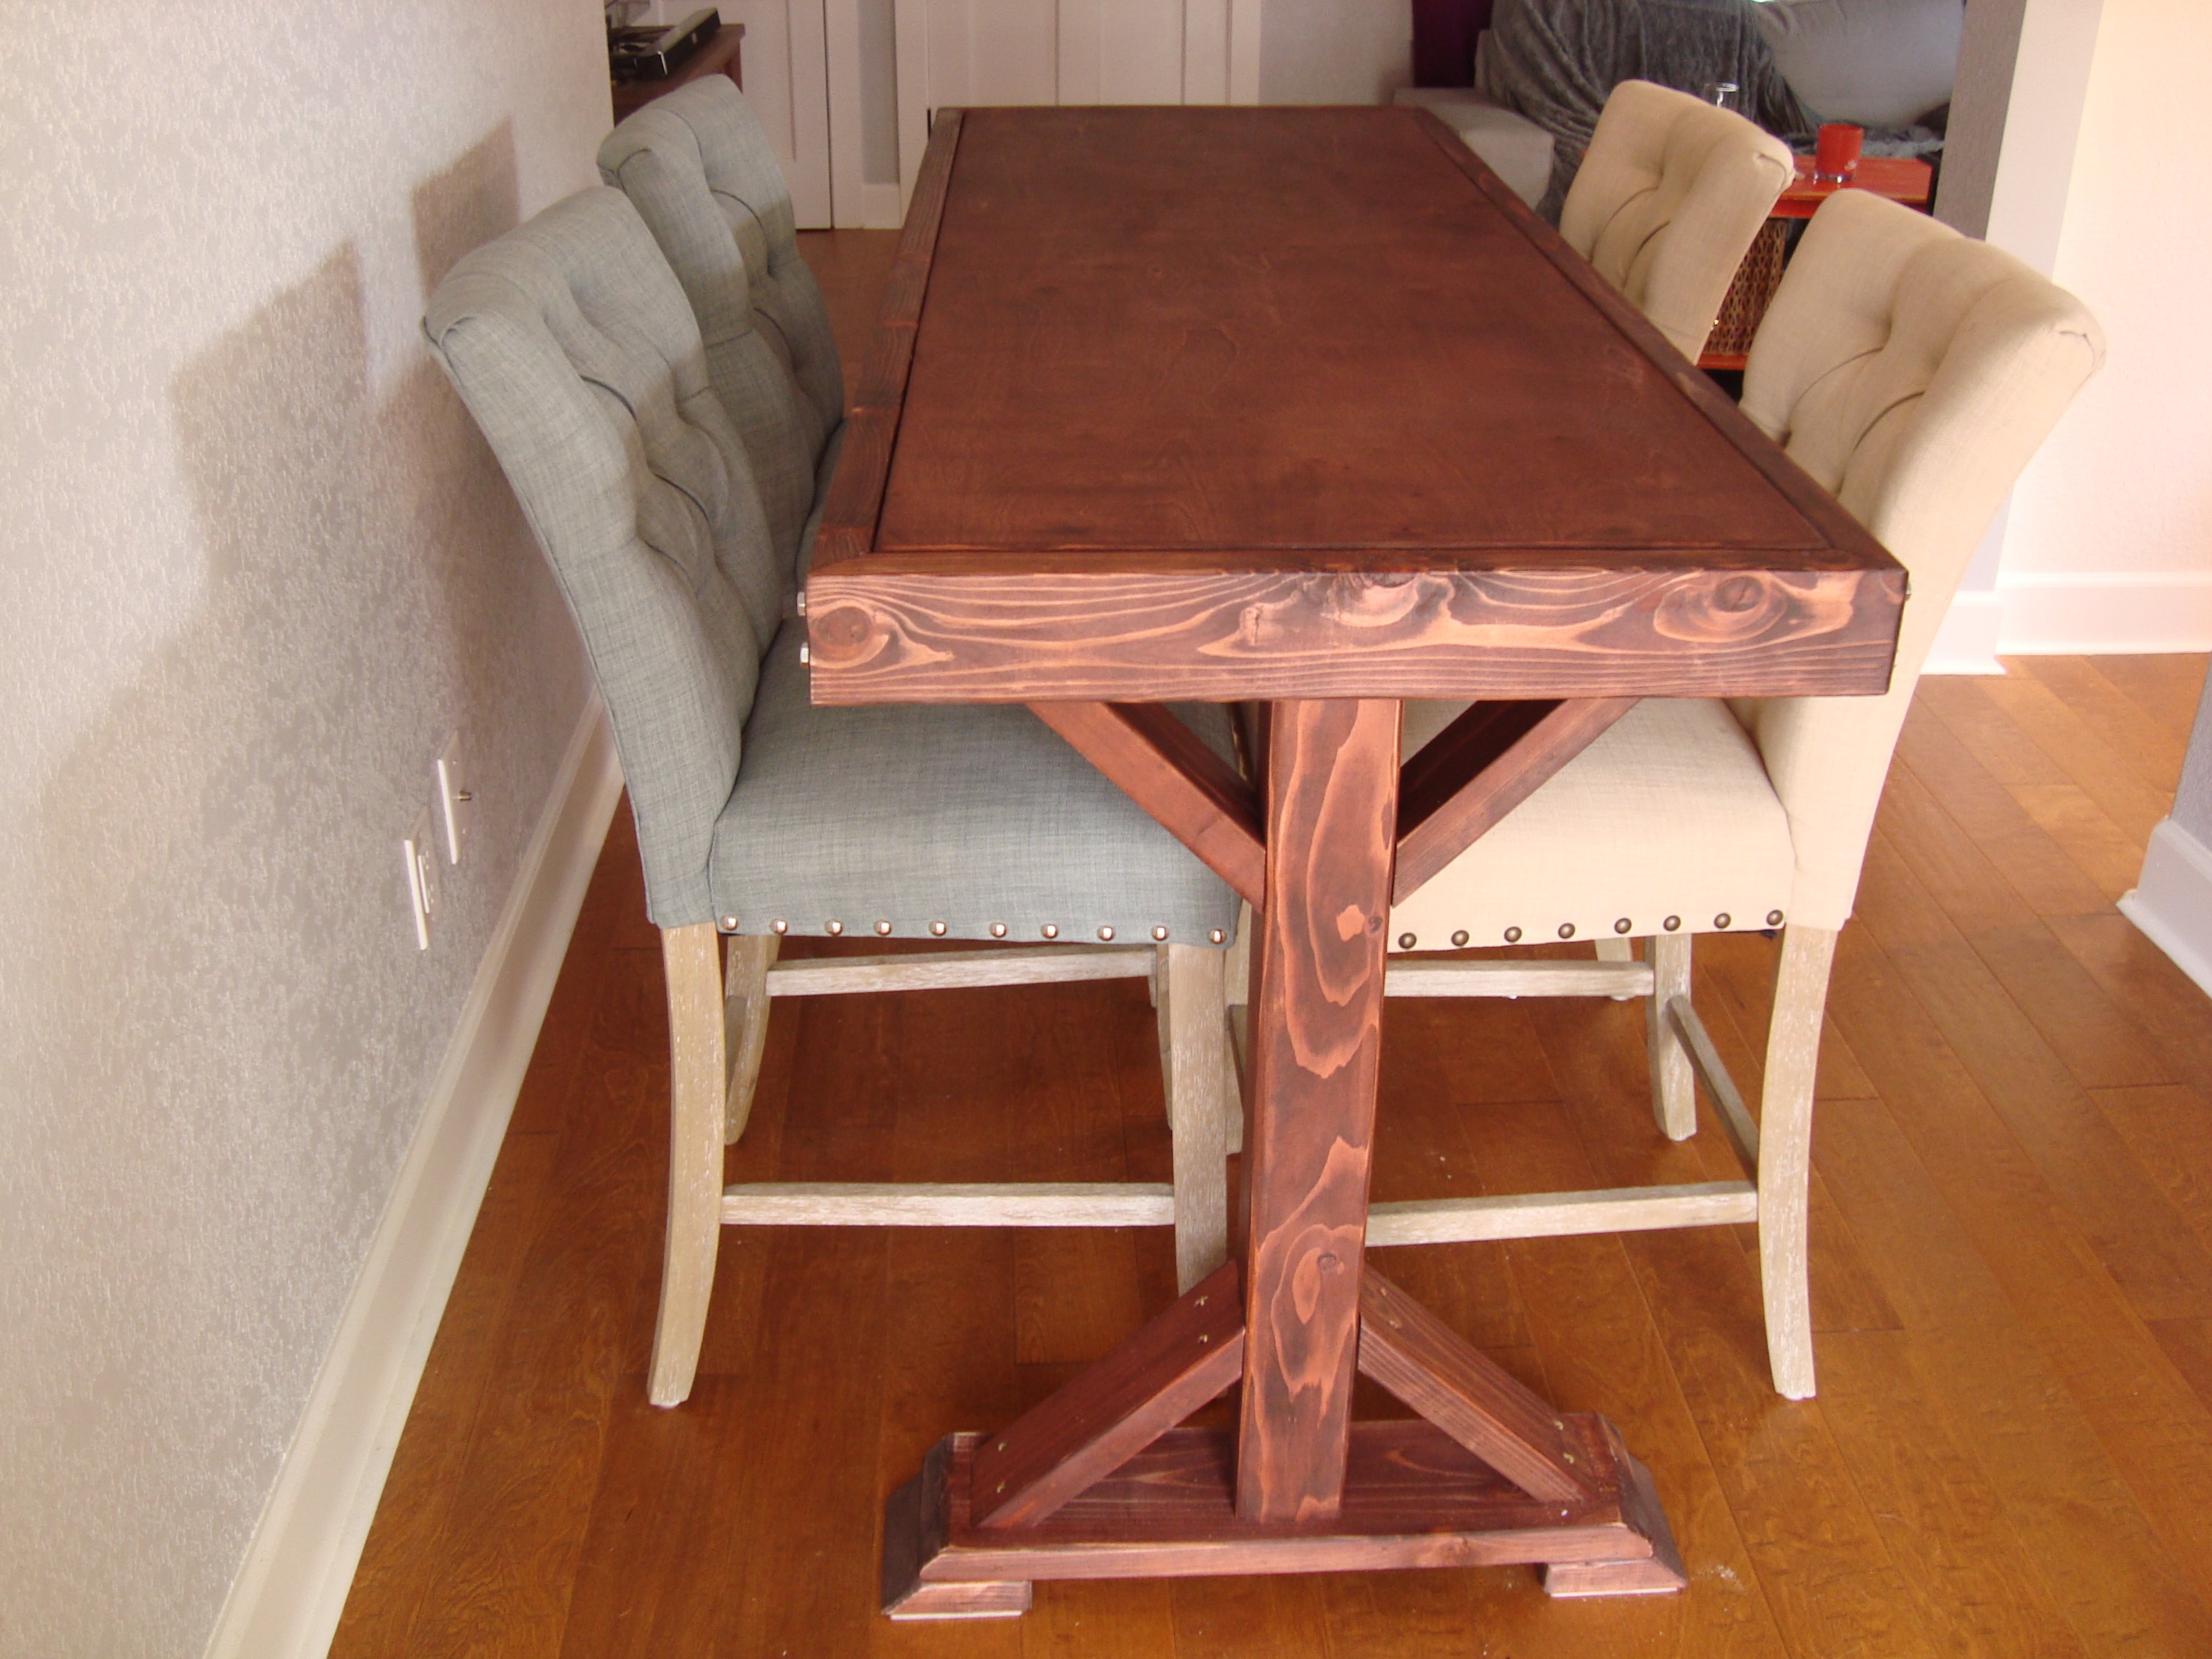
This is an adapted plan from the:
Chunky X Base Table
http://www.ana-white.com/2016/02/free_plans/chunky-x-base-table-featuri…
I made it counter height, made it skinnier at 27" depth and really long at 72" long.
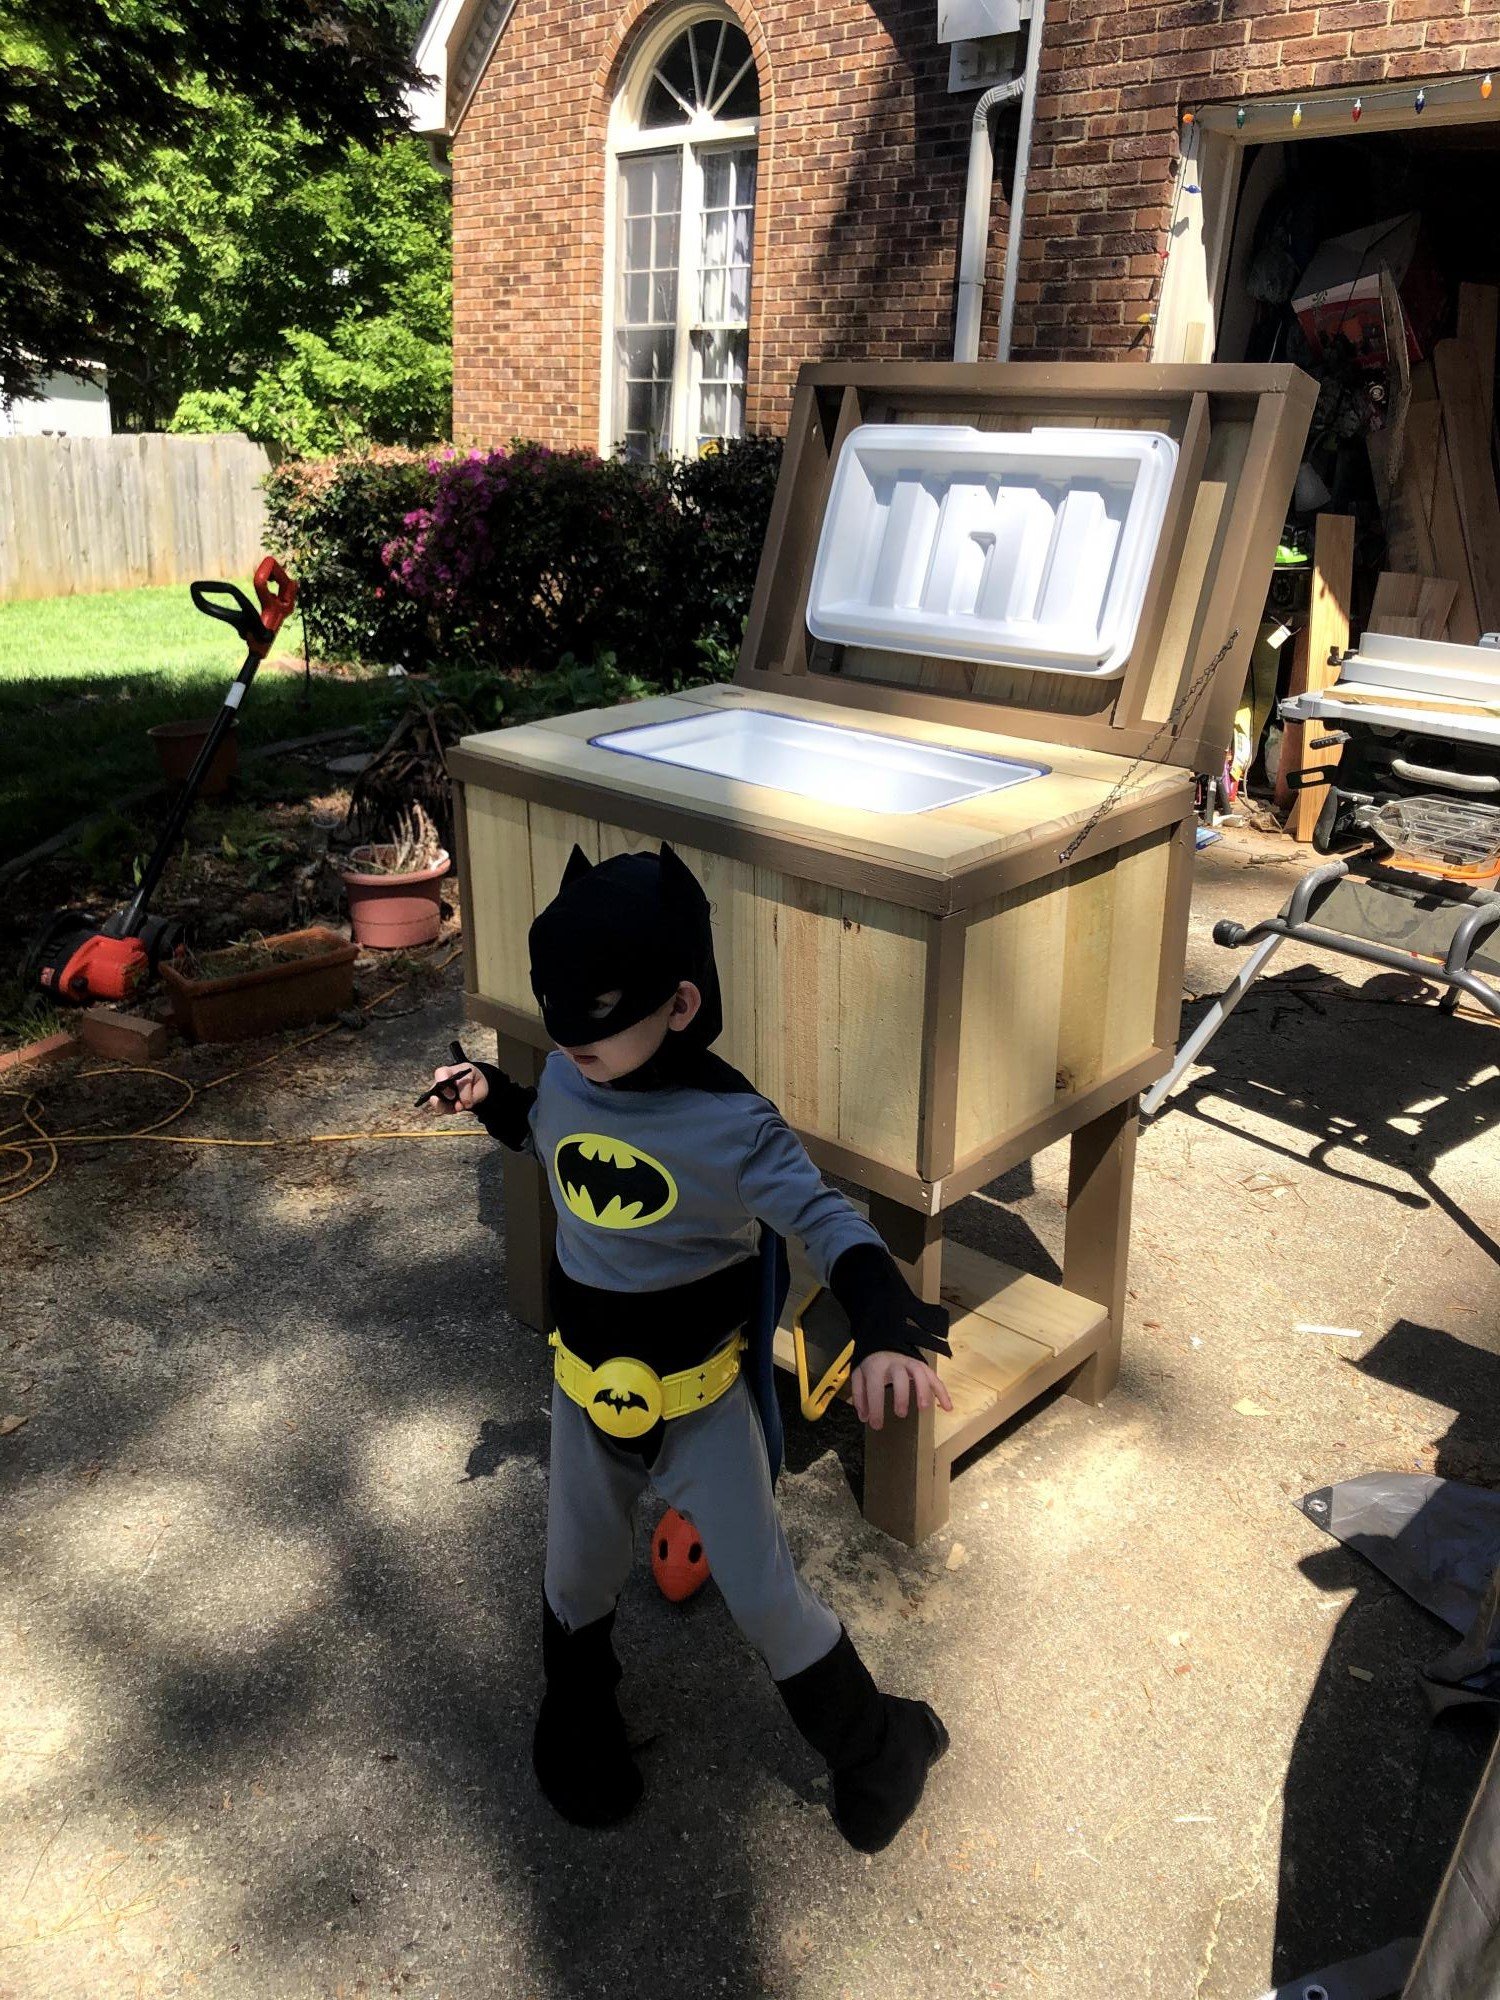
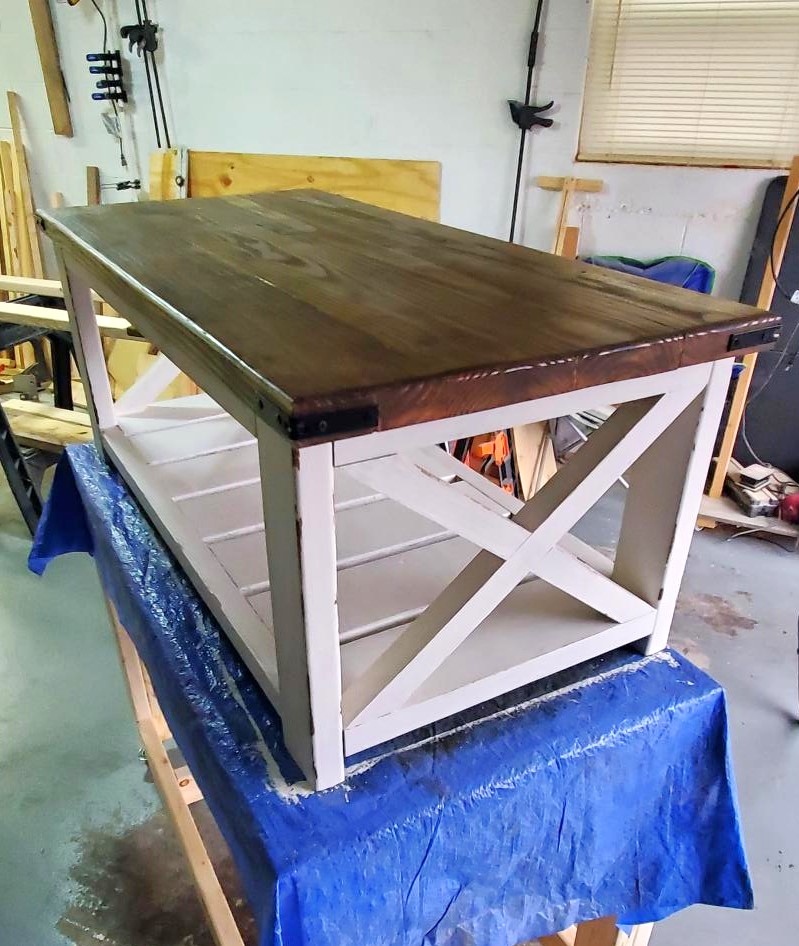
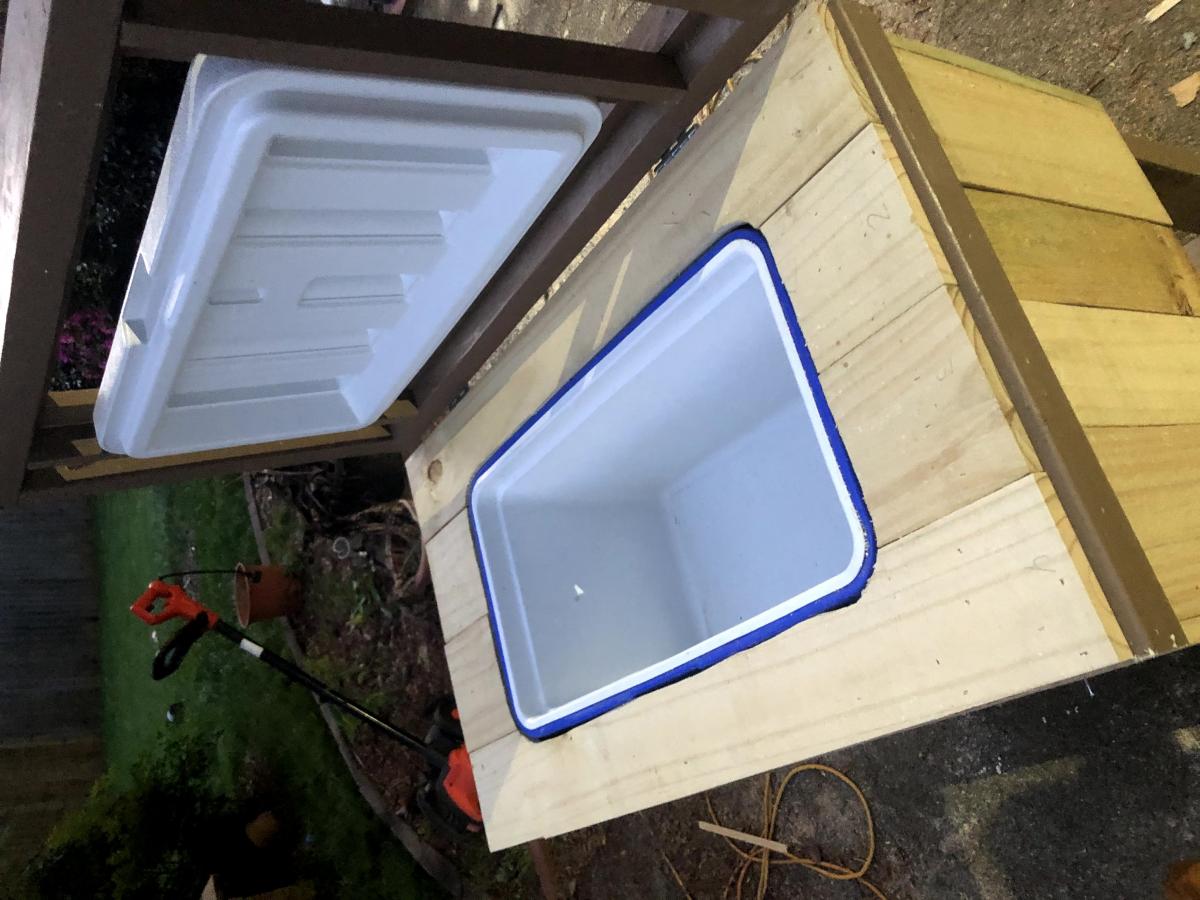
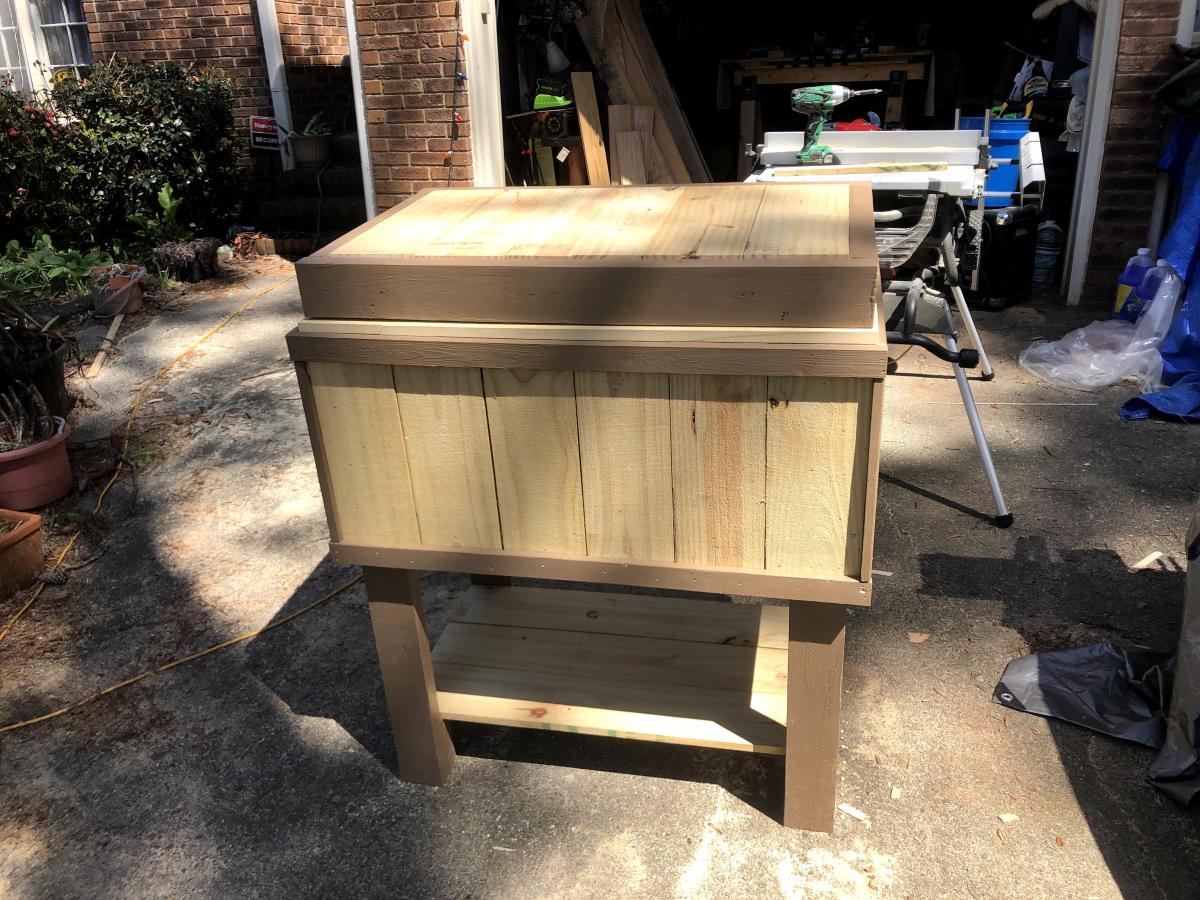
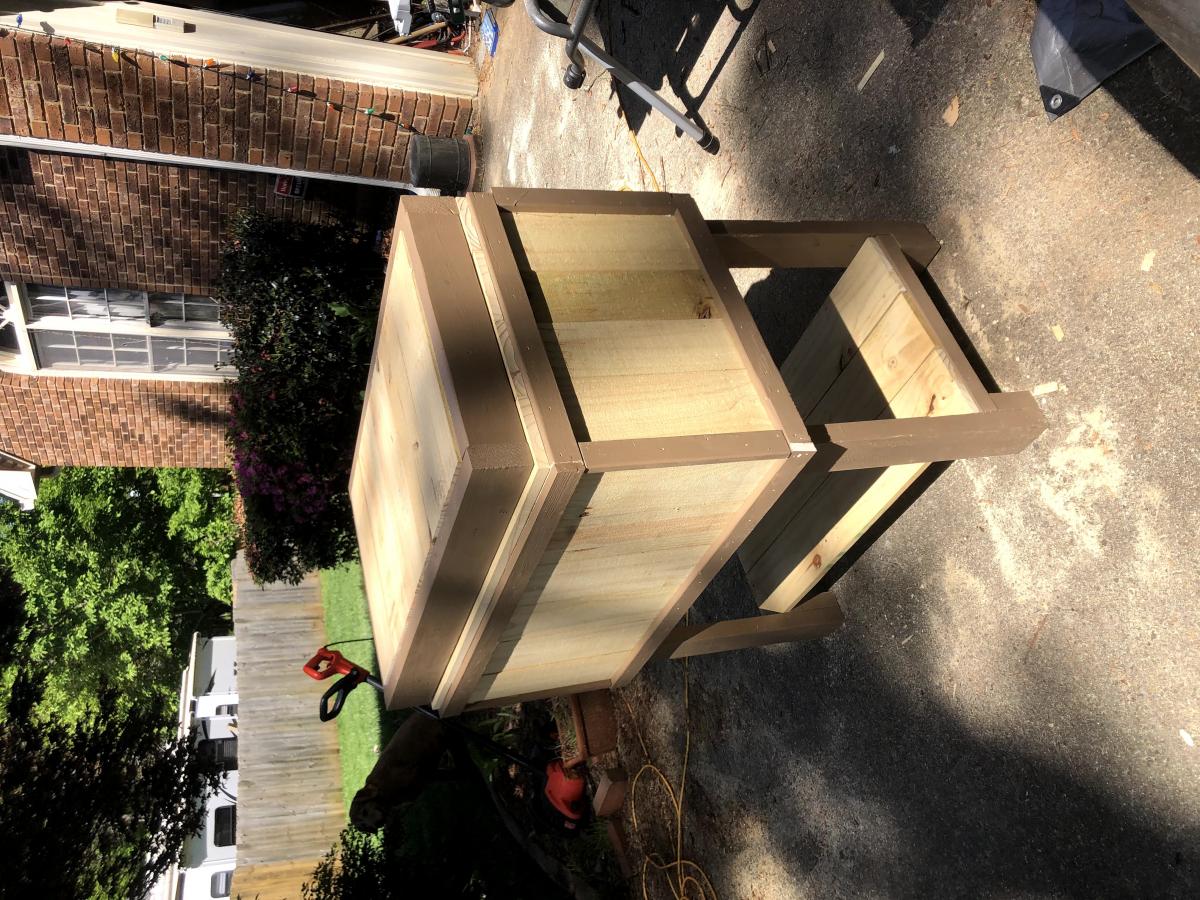
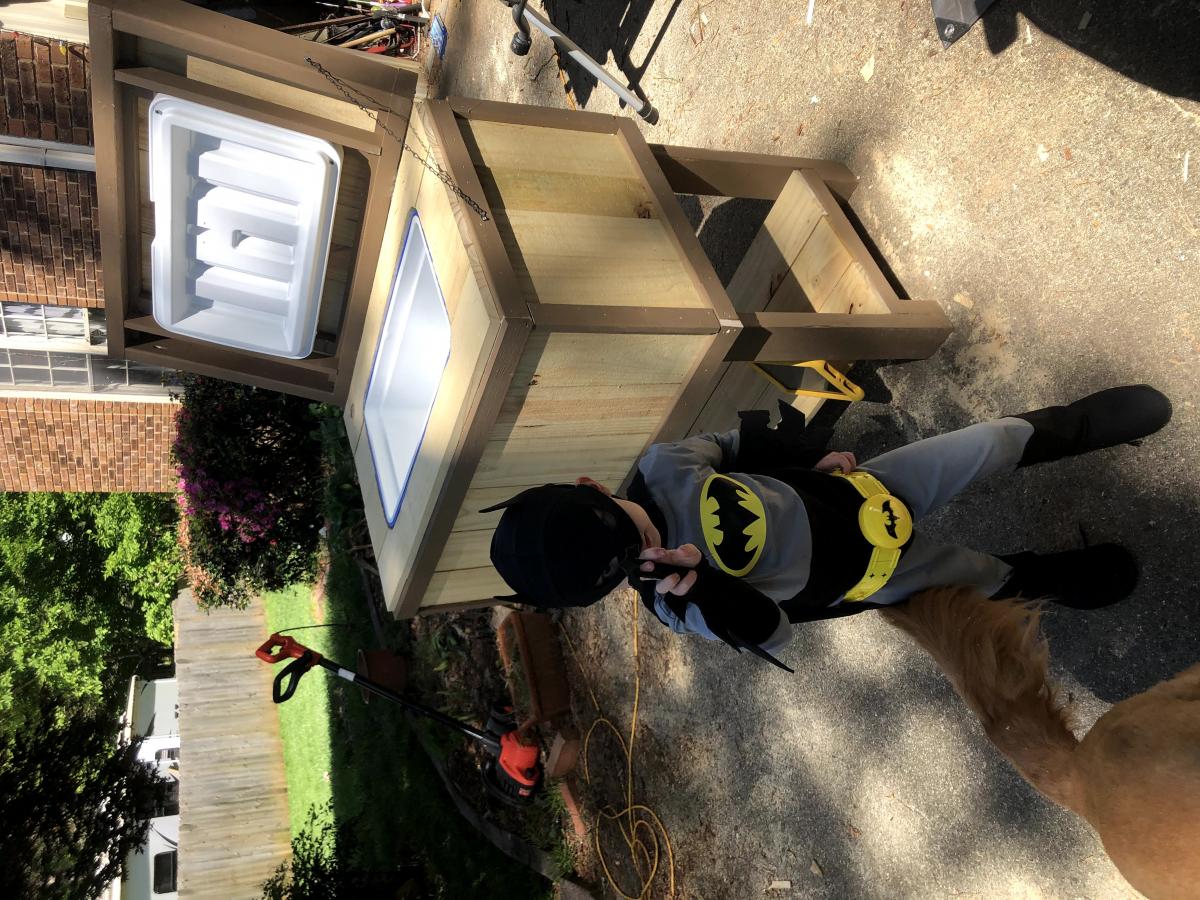
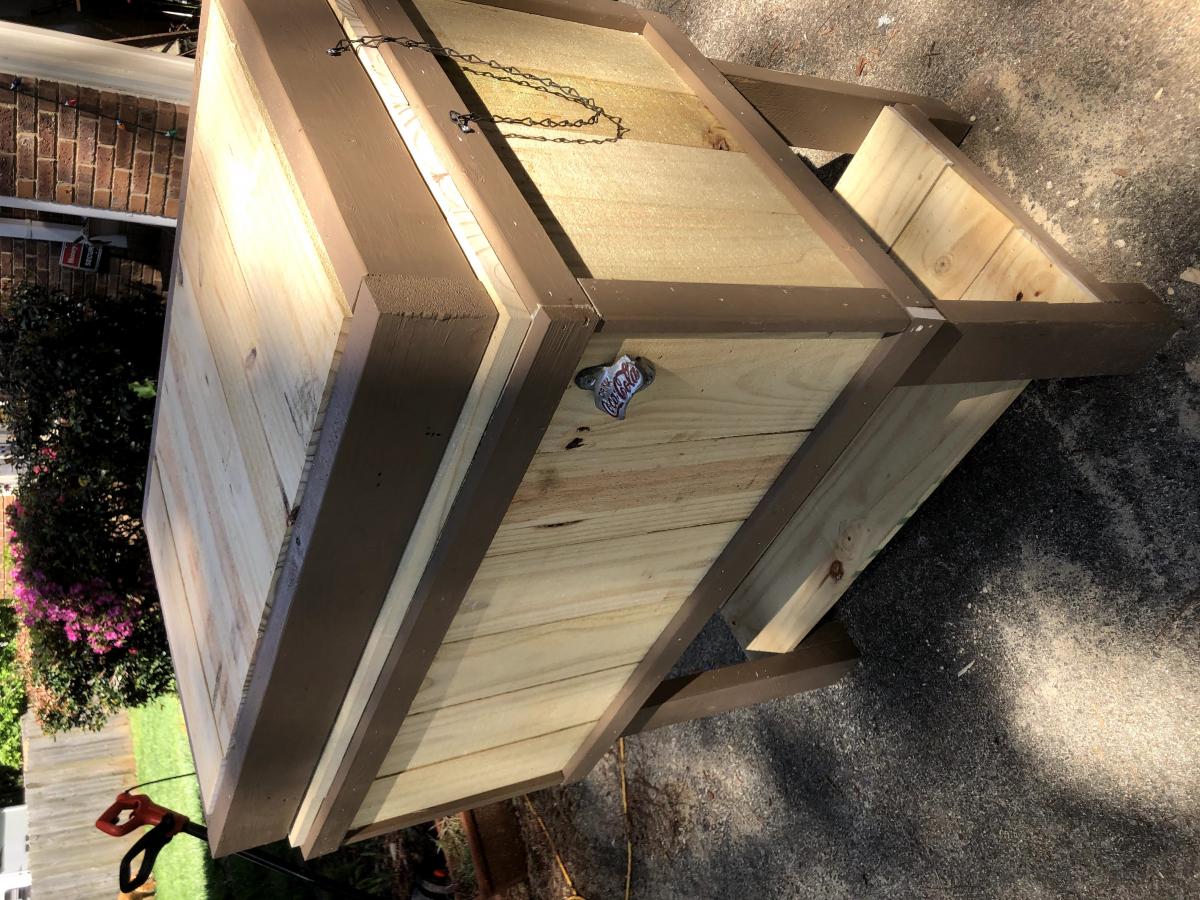
Wood Cooler Stand

Beautiful table riser centerpiece ( with lights!) from Ana White plans. This made a lovely Thanksgiving table. Very easy to make. Thank you.
Maureen Kane
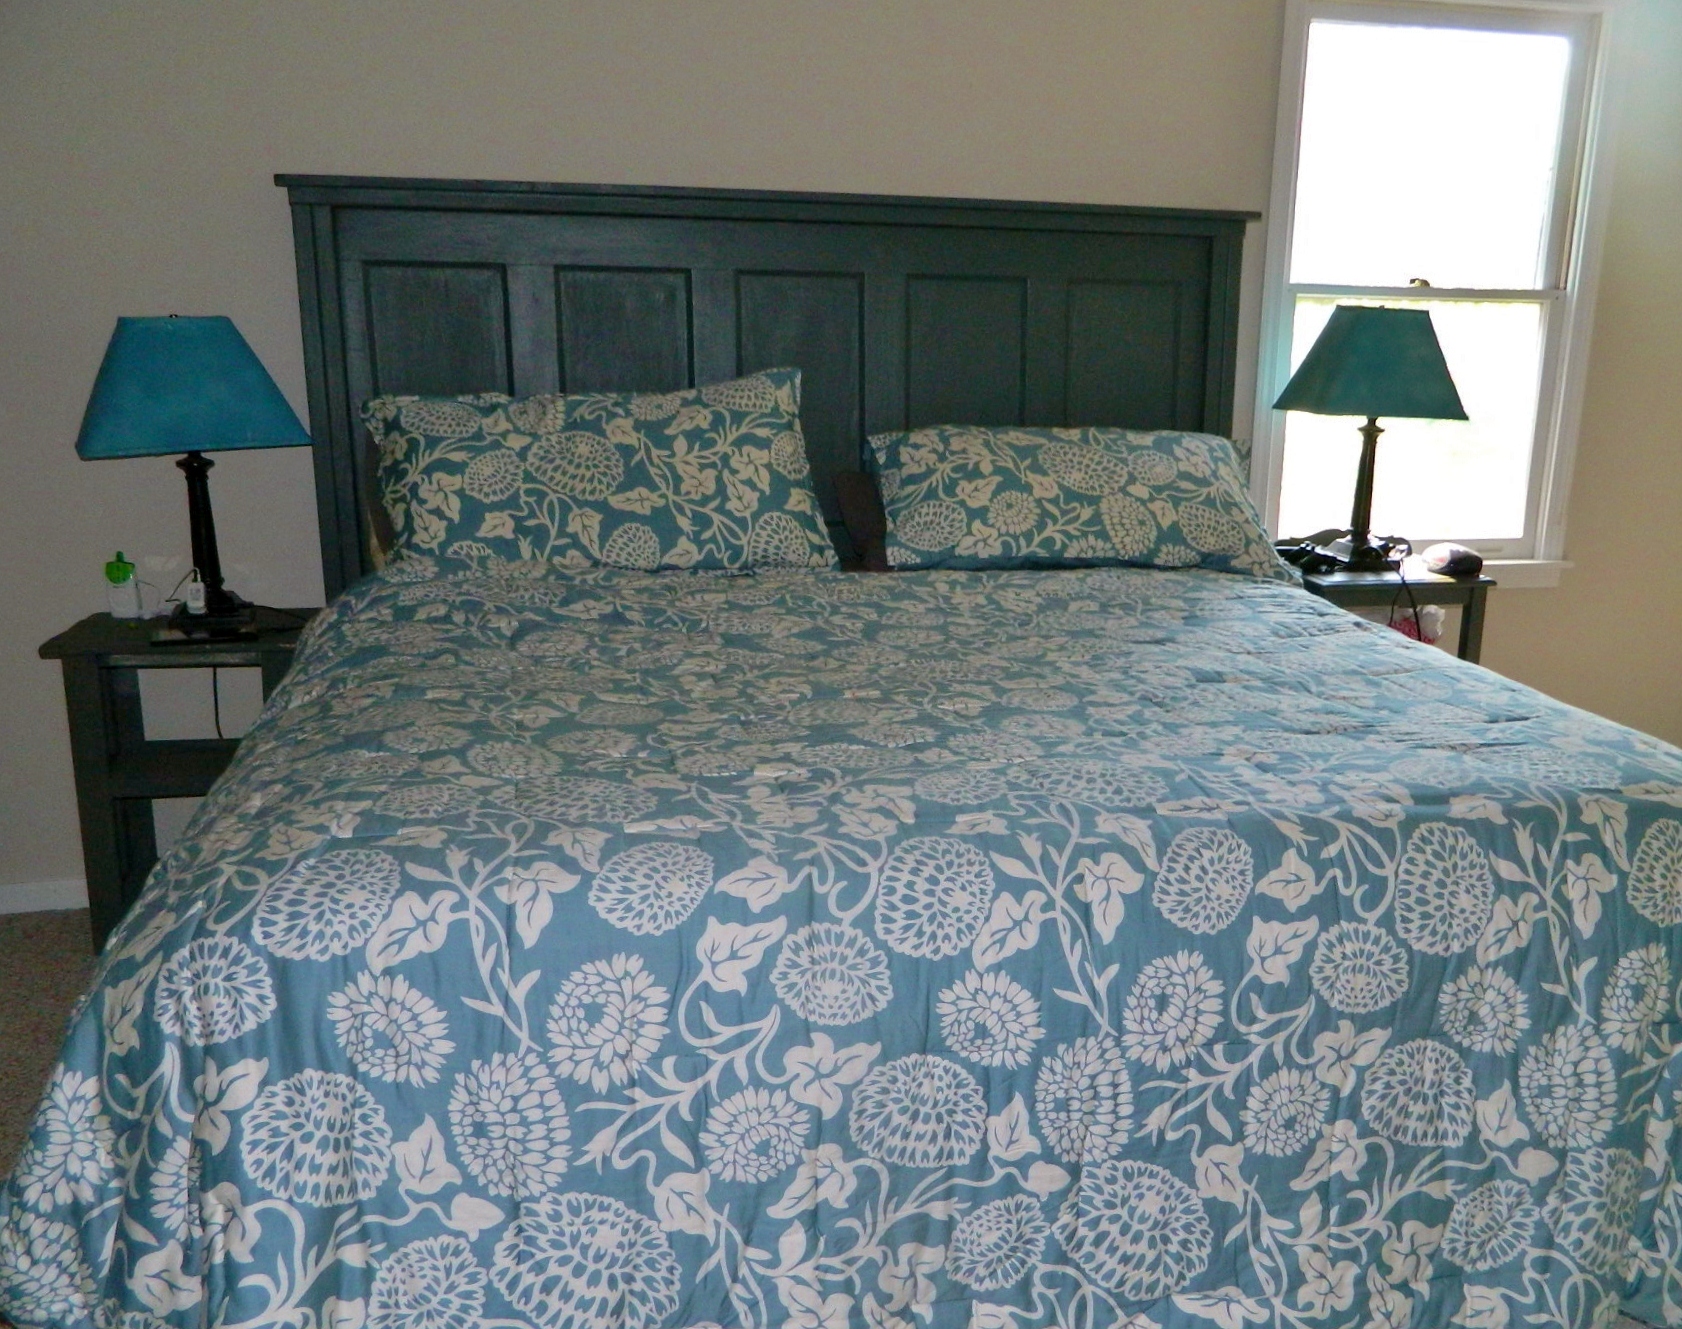
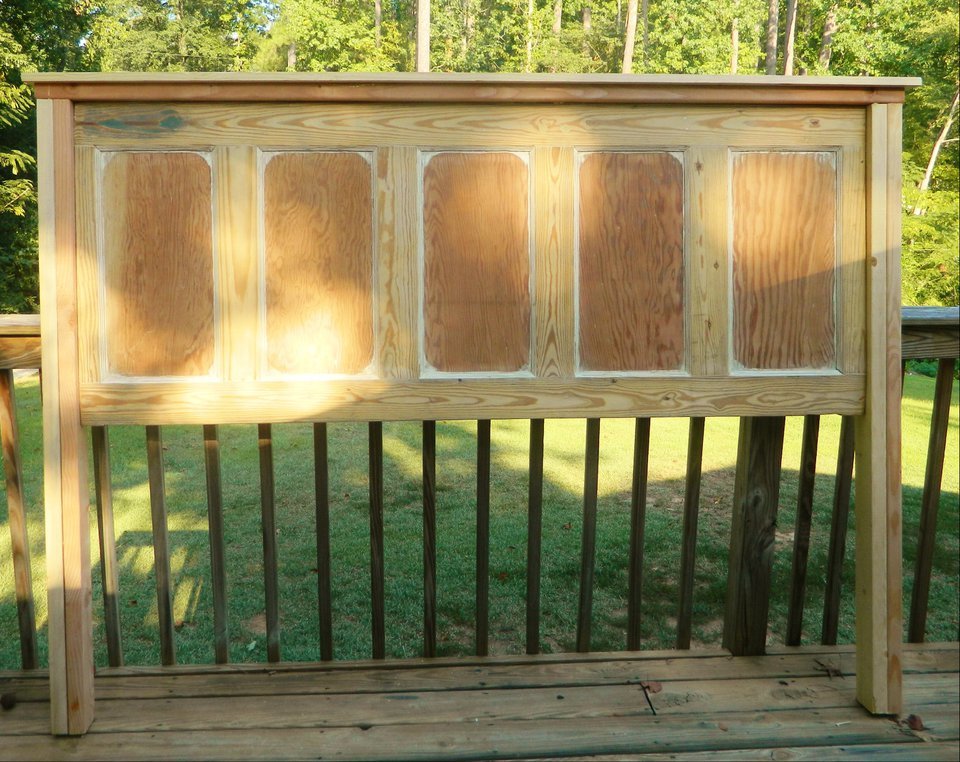
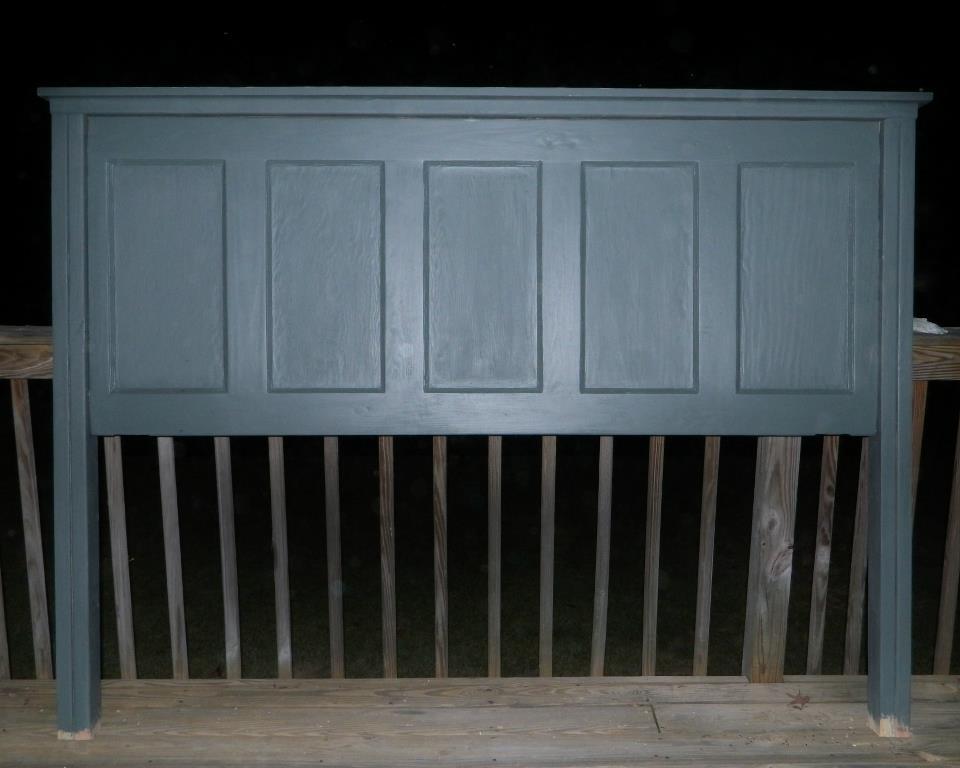
I made this headboard last year. I got tired of my 5 year old shutting the door on my 2 year old, it was a large heavy old wooden door, so I took it off the hinges and had it sitting there staring at me forever. So I decided to make a headboard out of it. It was simple, just using the basics of the farmhouse bed around it. I love it :D
http://ana-white.com/2010/09/pb-kids-caroline-craft-table
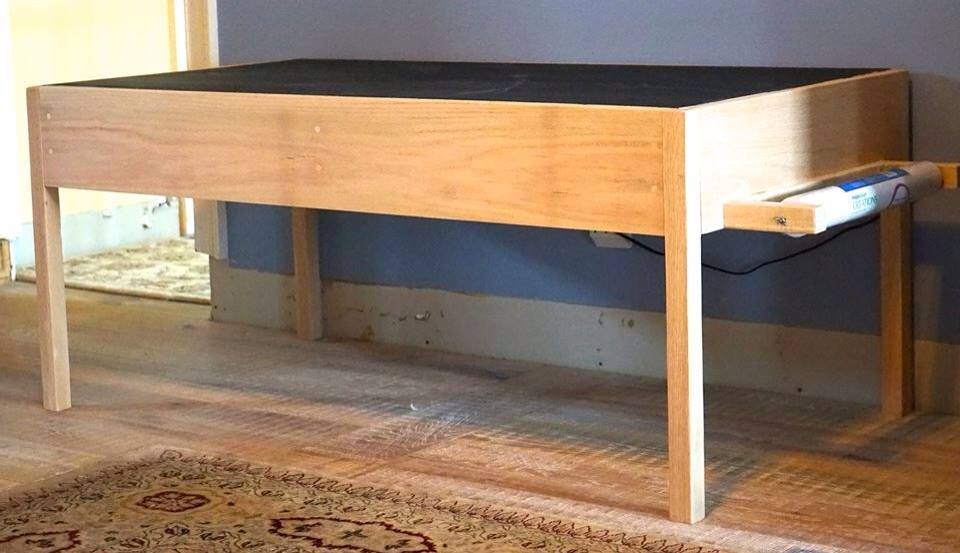
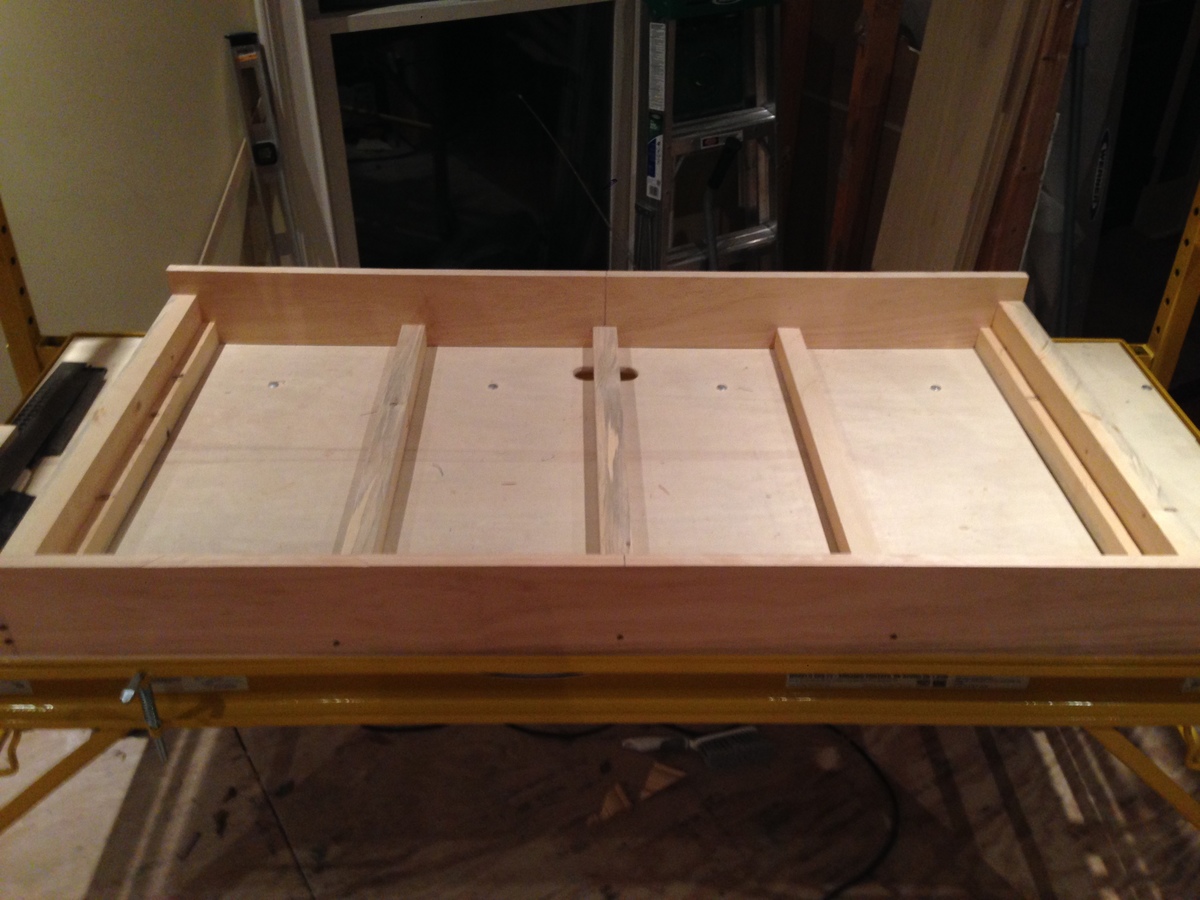
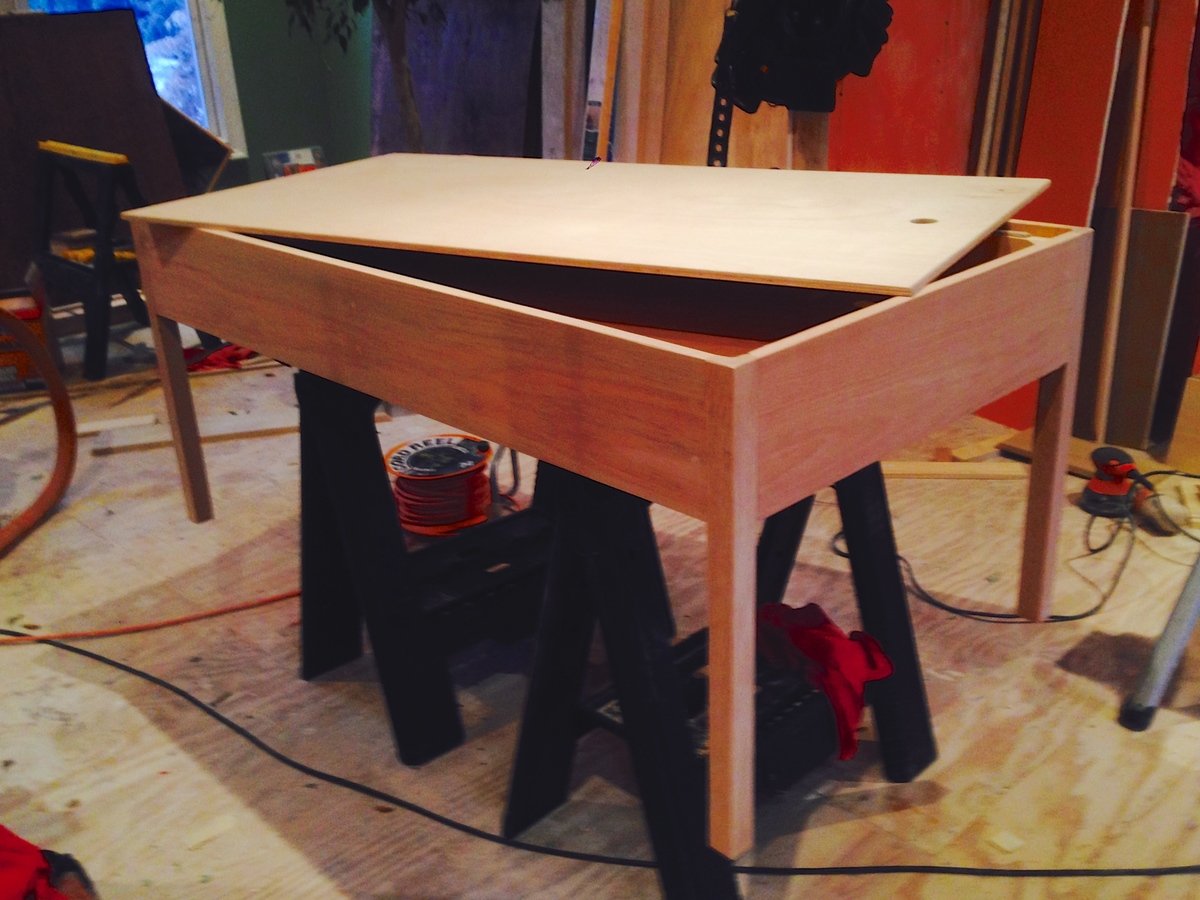
*** apologies for the missing baseboard in the photo- we are in the midst of a remodel ***
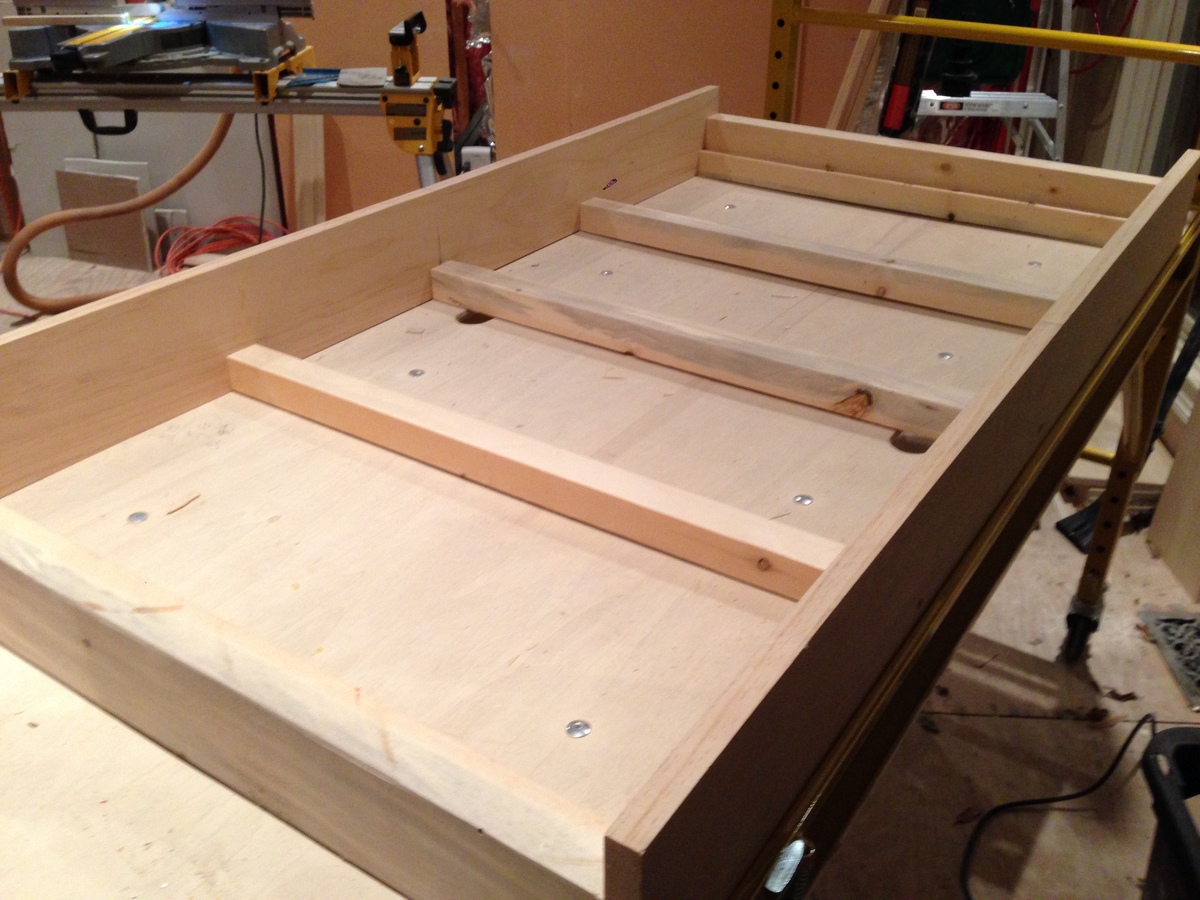
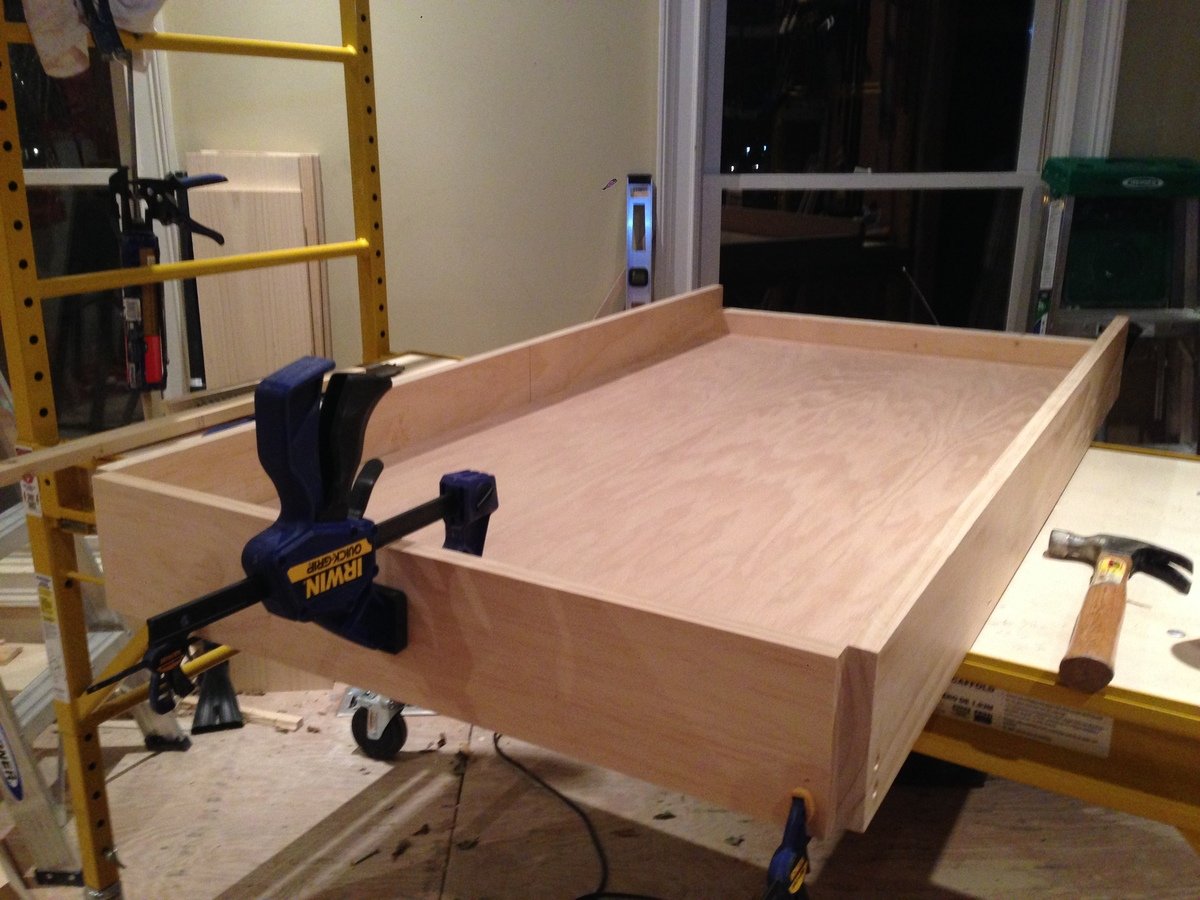
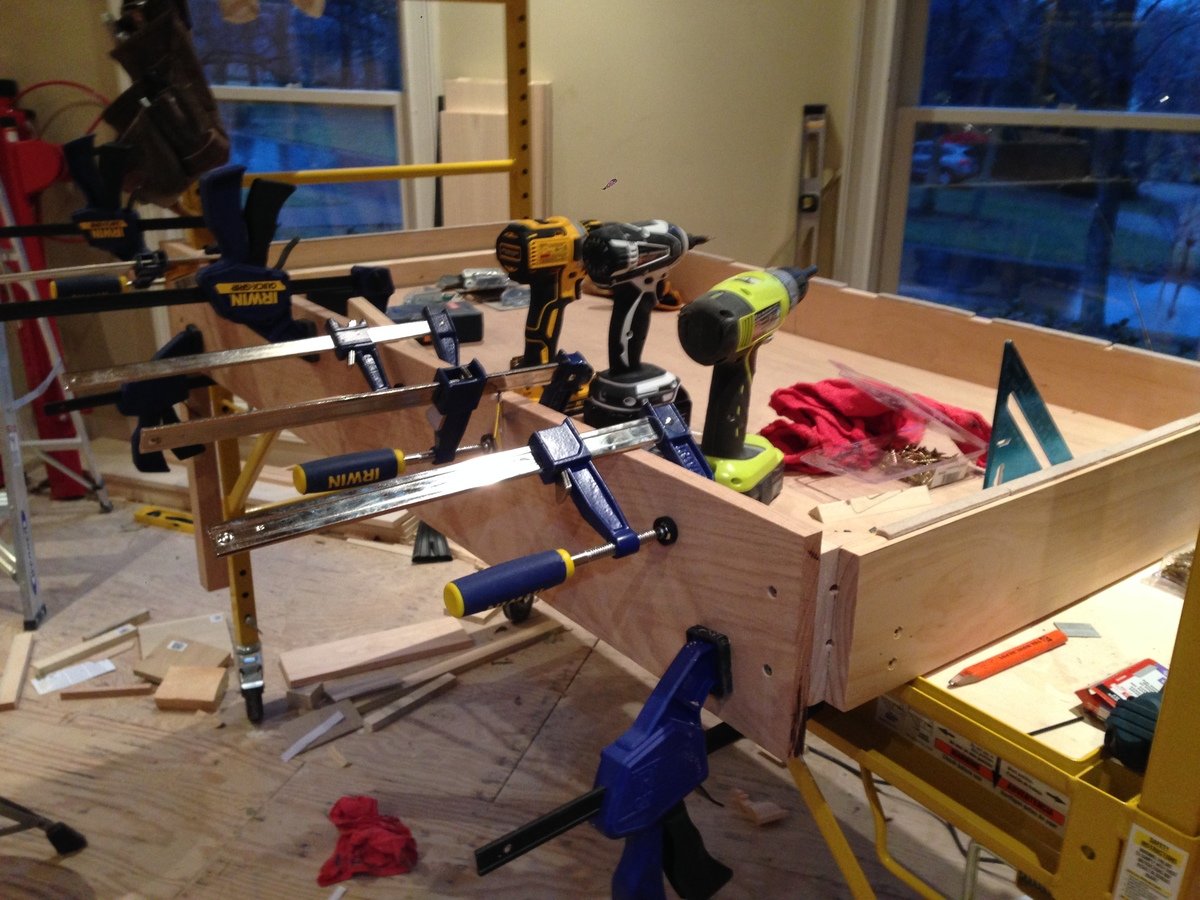
We wanted a high quality table so we researched the Parker Play Table ($1200) and the Carolina Craft Table- ($600).
In the research i found the plans for the Carolina table on this site- and modified them a bit (we wanted the removable storage top).
We painted the top with White board on one side and Chalkboard on the other.
The table has 22" legs and they can be changed out with a second set of legs when our daughter gets taller.
There is plenty of storage for all the art supplies in the unit and a art paper dispenser on the end.
The unit is made of poplar on the inside and the legs and facia are all red oak- a very dense and beautiful wood.
All exterior screws are counter sunk and hidden under face grain wood plugs that are surface sanded. i chose to do no finish as the wood grain is beautiful- although i may do a timber oil or tung oil at some point -
the project took about 2 days total time- $150 in supplies (including paint) and the piece feels substantial..... like it will be used for my daughters children.
you will want to have access to a table saw and some clamps, wood plugs and a countersink bit for your drill
Great first project!


My first big project. Great for beginners.
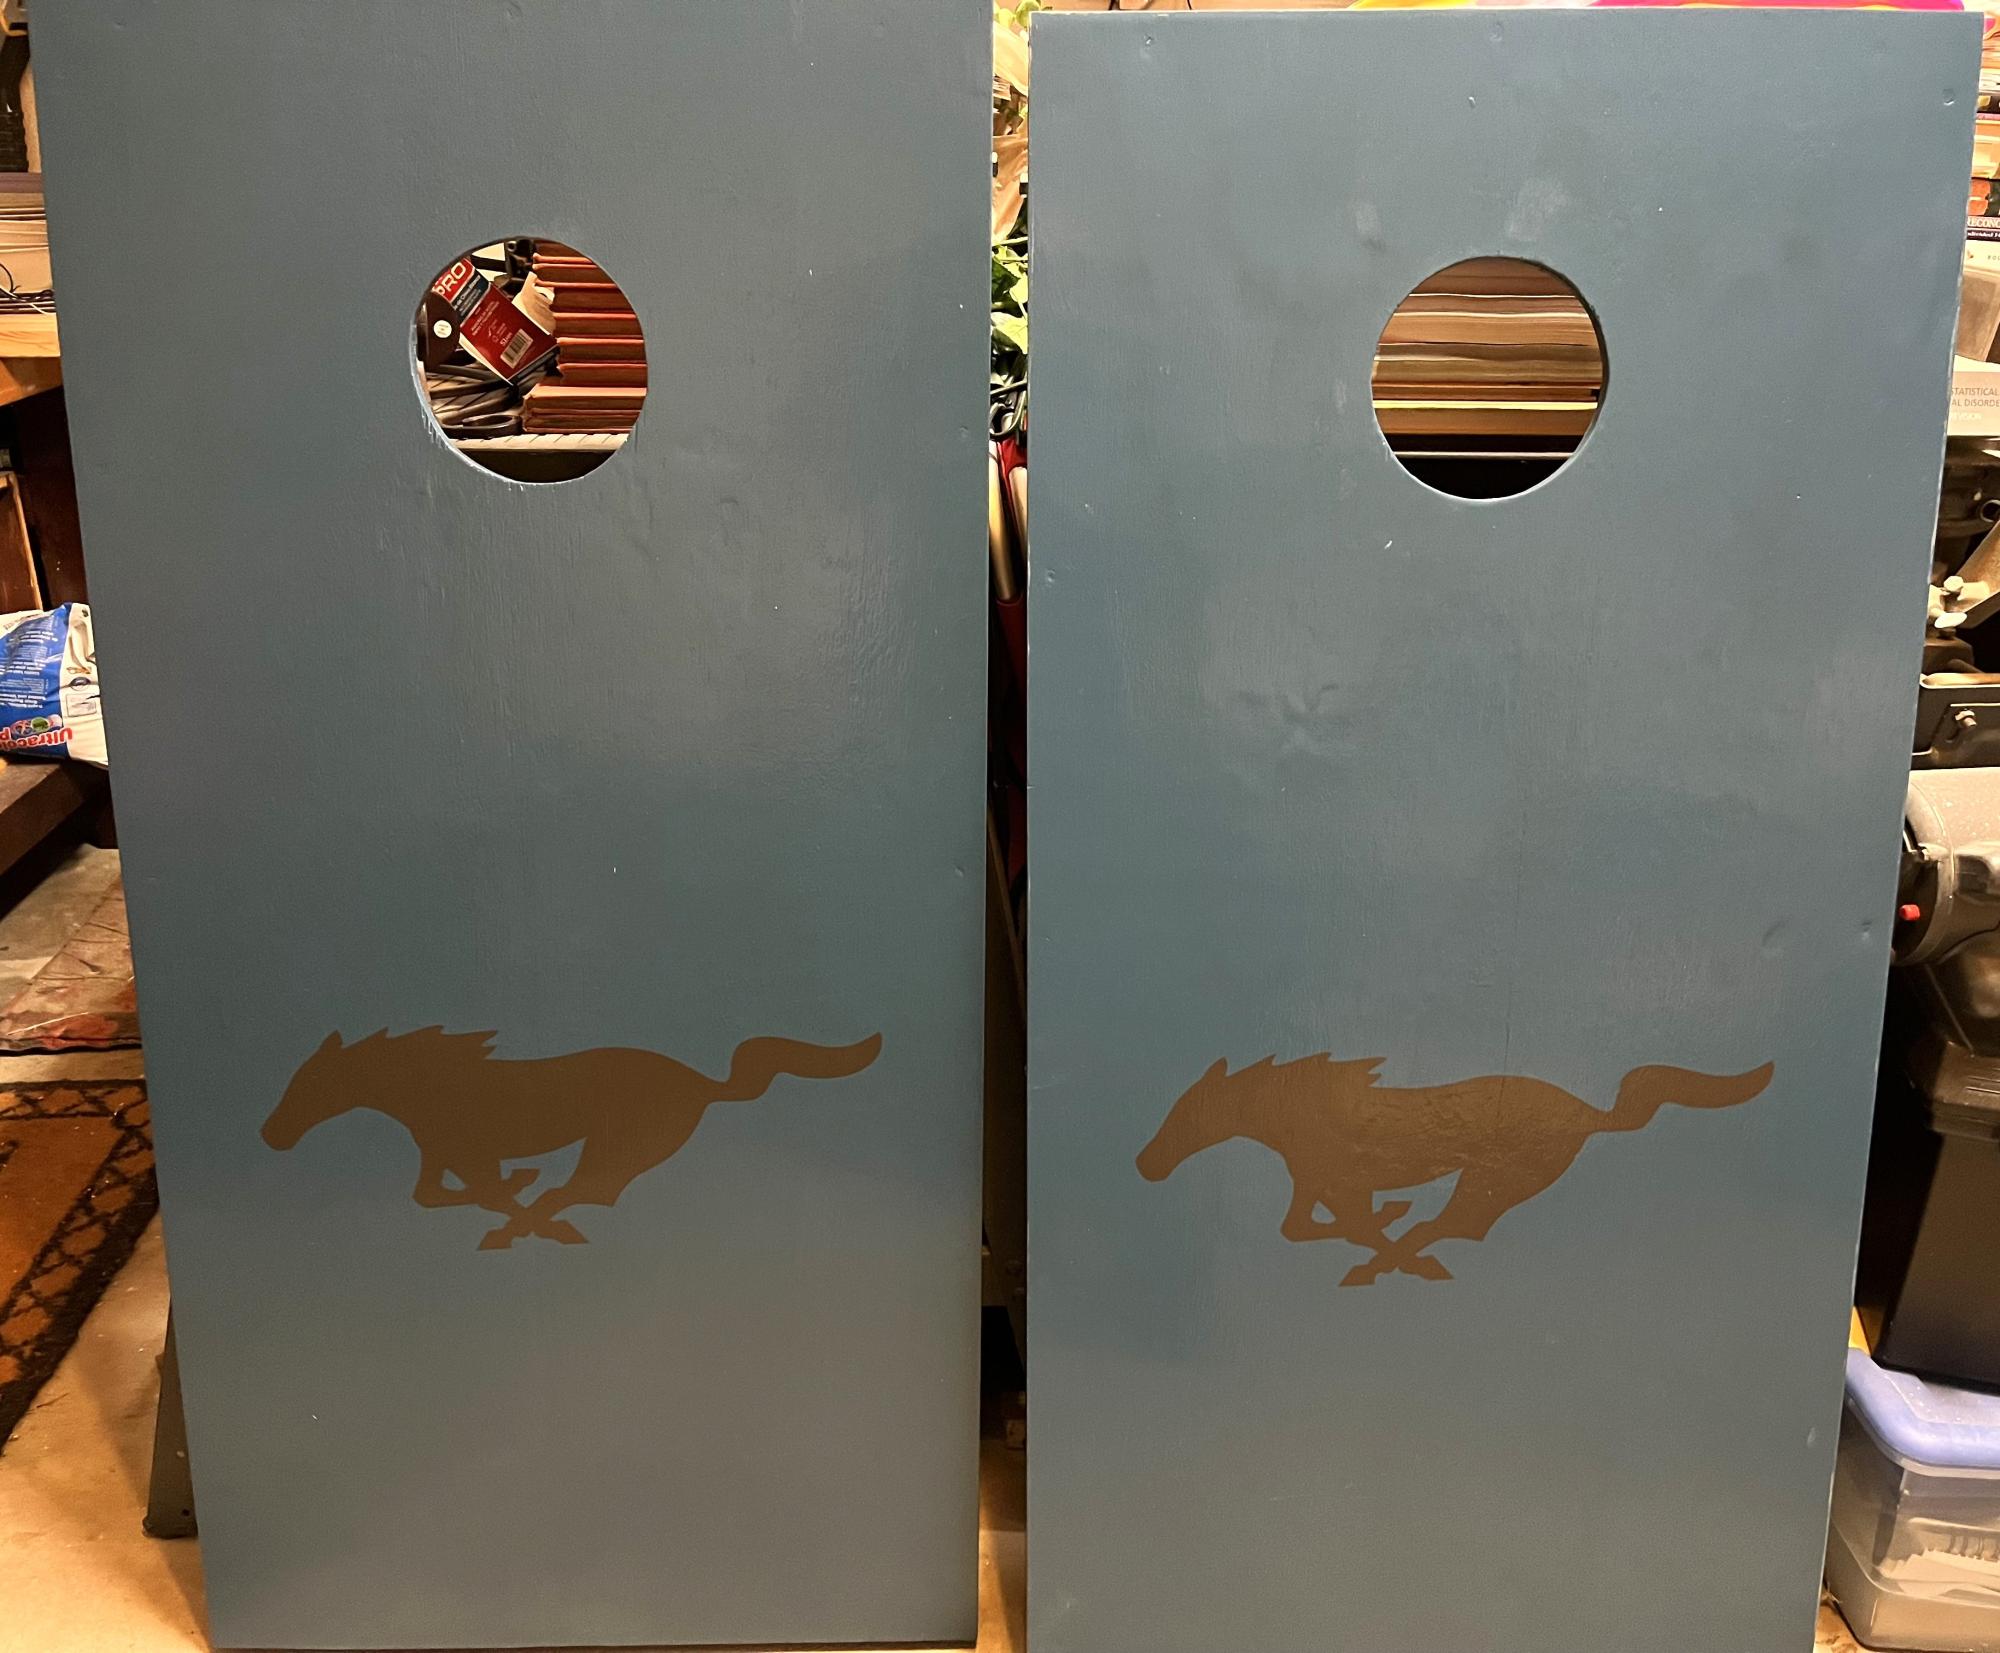
Corn Hole Boards by Tim
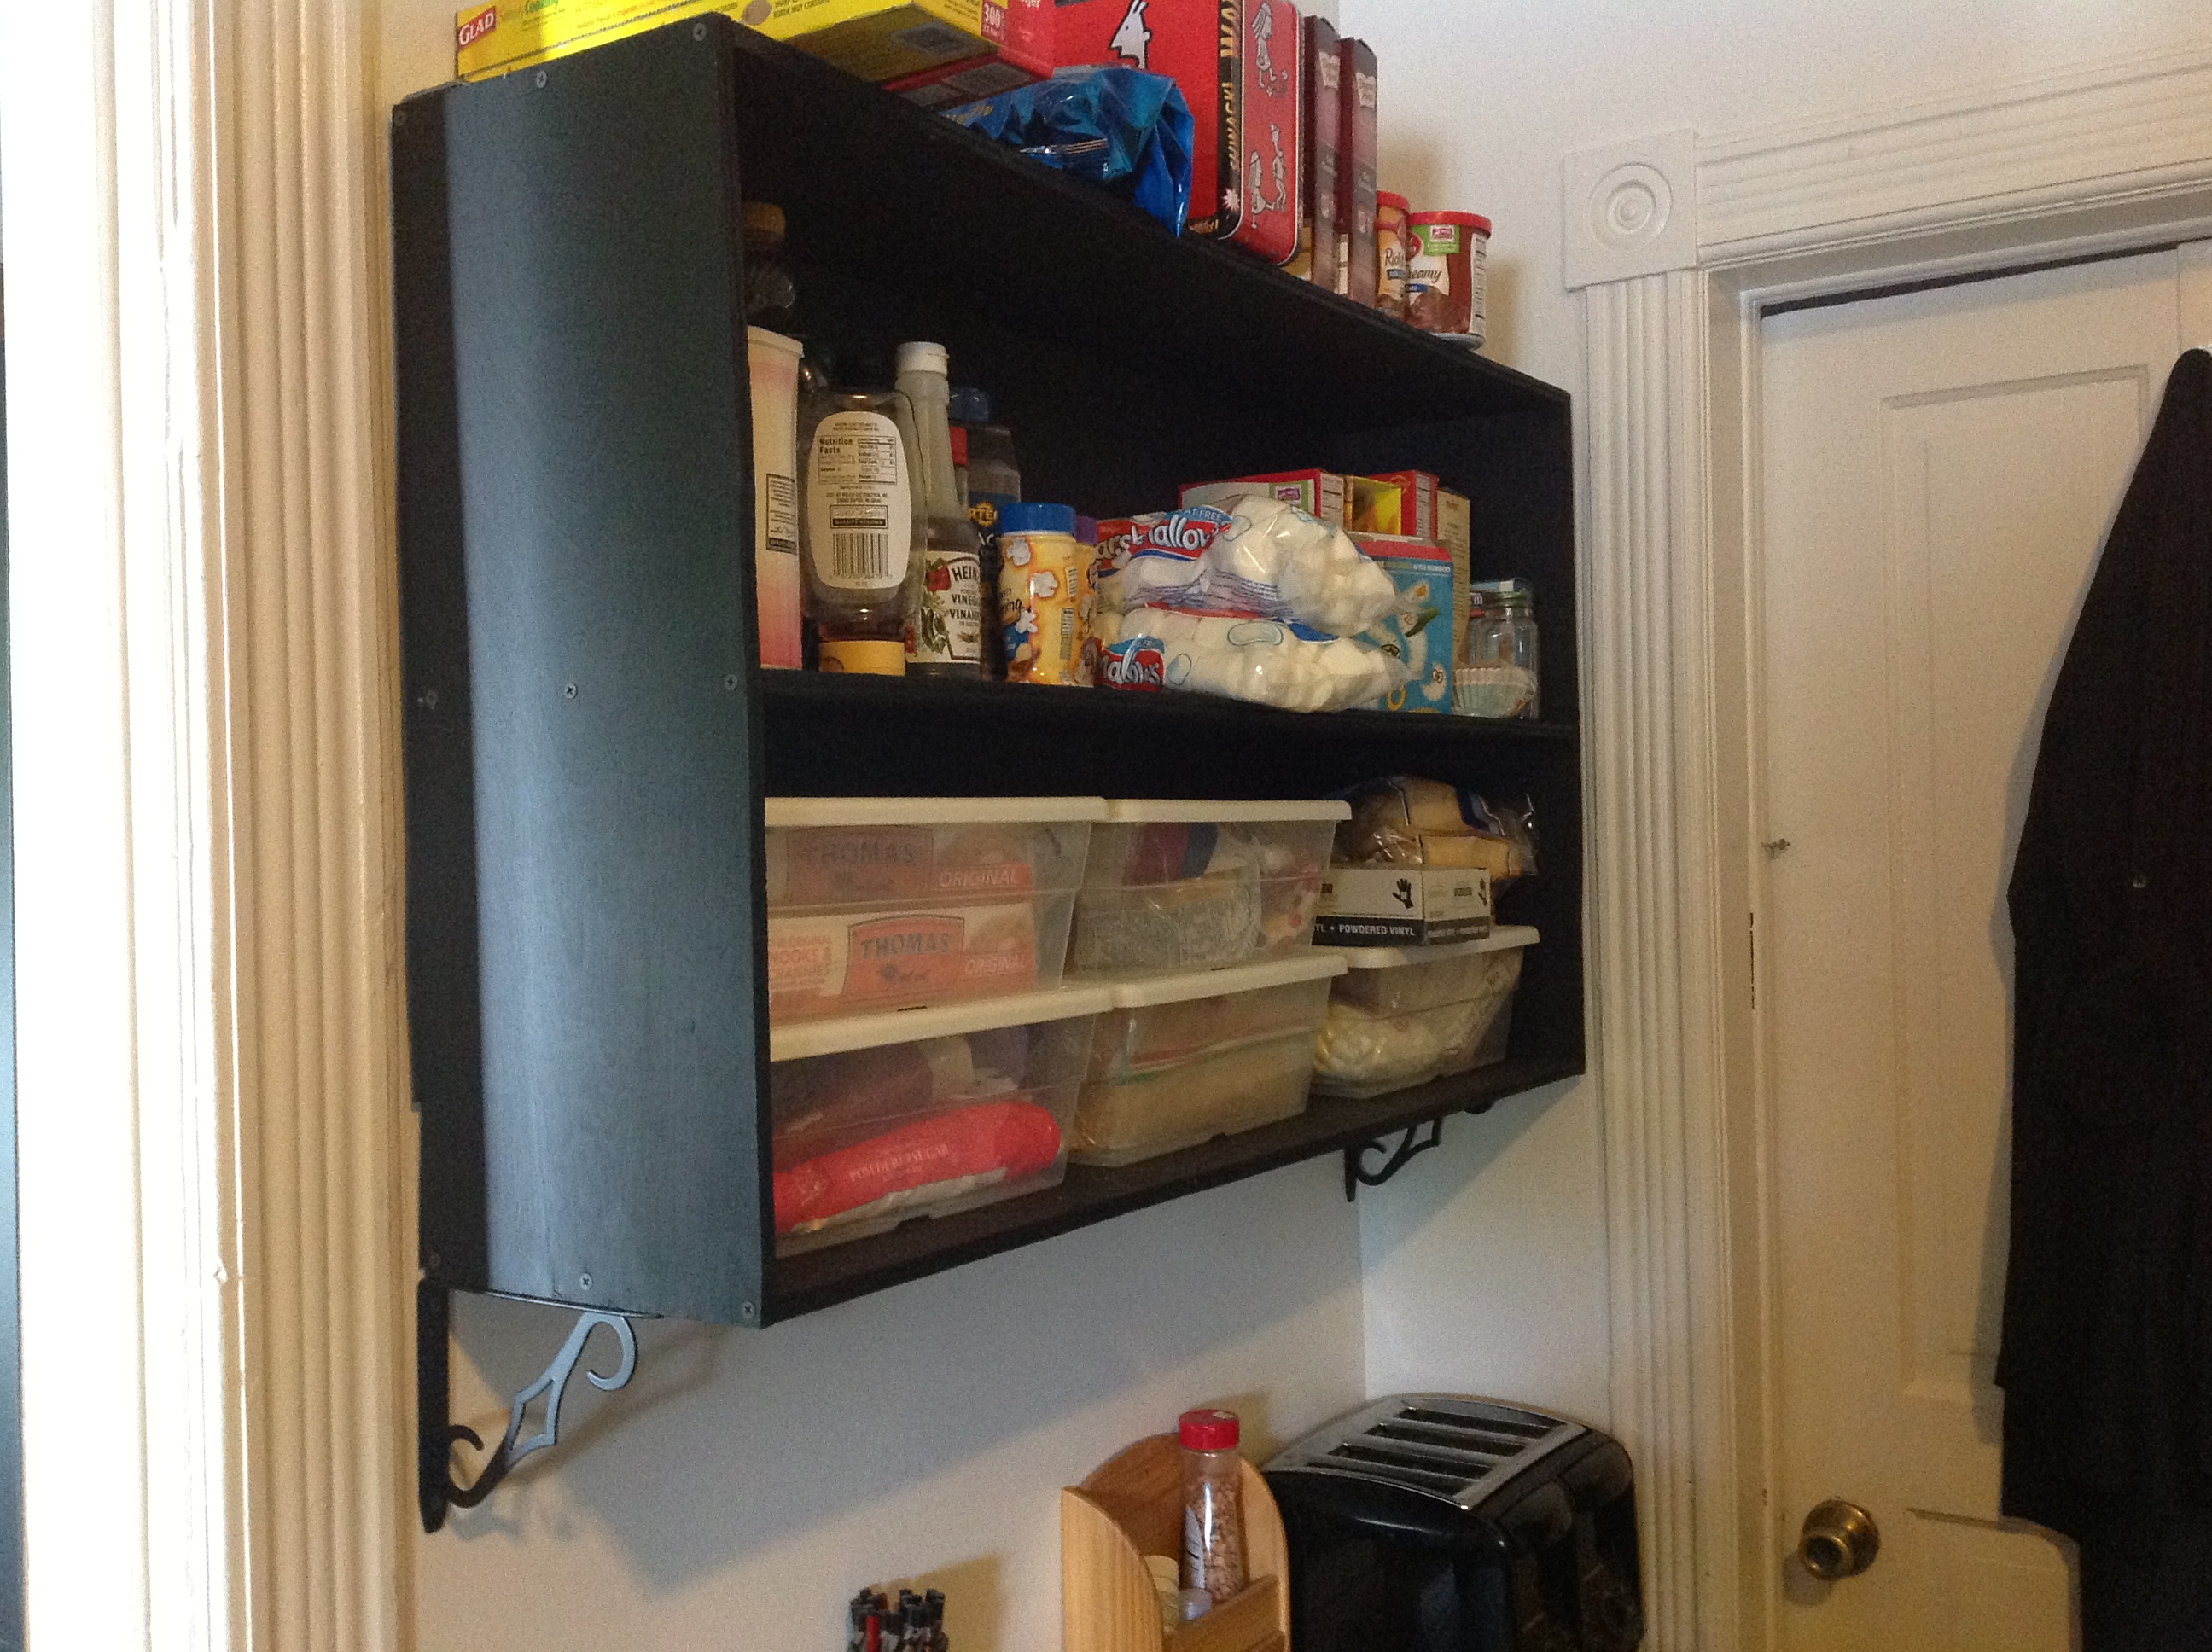
Anther creation of my own but this would easily be created from Ana's plans for this wall shelf. There isn’t much cupboard storage in our kitchen so when friends gave us a sideboard they didn’t have use for & it fit perfectly in one of our kitchen’s oddly spaced corners we were thrilled. It became our “Toasting Station” where the toaster & Panini grill are. I decided that we needed matching shelving to house our “Carbs” since it was much easier to make toast & sandwiches when the bread was right above the toasting implements.