Rustic x console
One of my first projects and I really felt like I had good cuts, however it was still a real challenge for me. I ended up doing the bottom in white to hide some of the errors. In the end I am happy with the resultes.
Essential Low Bunk Bed by Brian James
My son loves his tower! We didn't attempt the curved sides, but made it work by adding a door with a toy steering wheel instead :)
Fri, 10/07/2011 - 06:24
So Cute! I wish my guys were this little again - enjoy him!
Fri, 10/14/2011 - 19:16
I think the added steering wheel is a great idea!
Wed, 12/05/2012 - 18:58
I love the paint and steering wheel! I'm making this now and, first time using a jigsaw, my arches look awful! I think I'll just go with them but this was a good innovation.
Sun, 02/10/2013 - 17:57
We're actually going to drop the arches so ours will fit underneath our counter when not in use. :)
Solid wood is an amazing material because it can be cut, re-shaped, extended, filled, sanded, stained, painted, and essentially re-used almost endlessly.
Last week, I took old cabinet doors (from when we gutted the mouse-hole kitchen cabinets that used to be in our apartment before we moved in) and turn them into a free cubby for my daughter's closet. :)
Mon, 10/07/2013 - 19:43
Beautiful Cubby from old doors! The trim adds elegance with the white color and it fits perfectly. Looks adorable! :)
In reply to Great project! by JoanneS
Tue, 10/08/2013 - 19:30
Mahalo, Joanne! :) I'm looking forward to your great builds coming up! =D
I used Poplar for the top and Pine for everyting else. Only took about two hours from start to finish. This is my first project using a Kreg Jig and now I don't know why I didn't get one of these years ago!
Dinning Table in honey brown finish!
Had some scraps hanging around and thought I would try using Ana's plan to organize the mess. Wow. What a difference. So nice to build something to fit your space rather than working around a preformed, plastic or metal utensil holder. Thank you Ana!
Utilizing the Hannah Canopy Bed plans, I made 2 changes that I am really glad I made. First, I added bead board to the headboard to give it a little style instead of the flat plywood. Second, I used 2x4's on all 4 corners because I could not find any 2x3's that were anywhere close to being straight. Overall I love the final project! It was nice, simple, and quick to get it all put together!
The only difficult part of this plan was making sure all the cuts were precise and fit together as they should.
This is my first wood project, and first time using a Kregg jig. A HUGE THANK YOU TO ANA! Next is the matching end table and then outside chairs and a pagoda.
Jeff F.
I built this storage bench and my wife stained and painted it. It is for use at the kitchen table as well as have storage for baskets underneath. This is my 1st project I have used my Kreg Jig on. Absolutely love it!!!
Tue, 04/24/2012 - 08:54
I was thinking about building mine with the top having some over hang and like how yours turned out. Did you lay the boards on top of another piece used to make the top or where they laid on the open top and screwed to the sides?
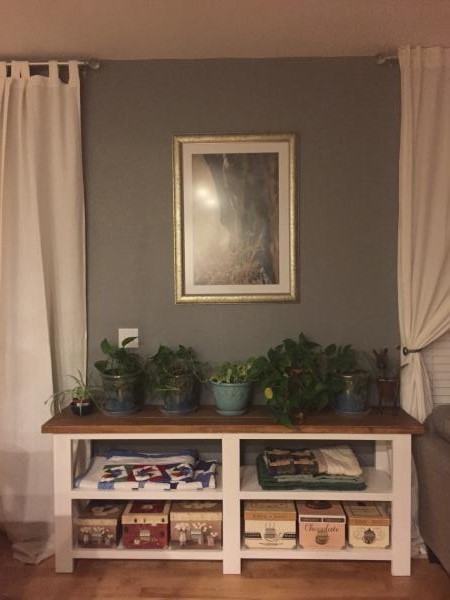
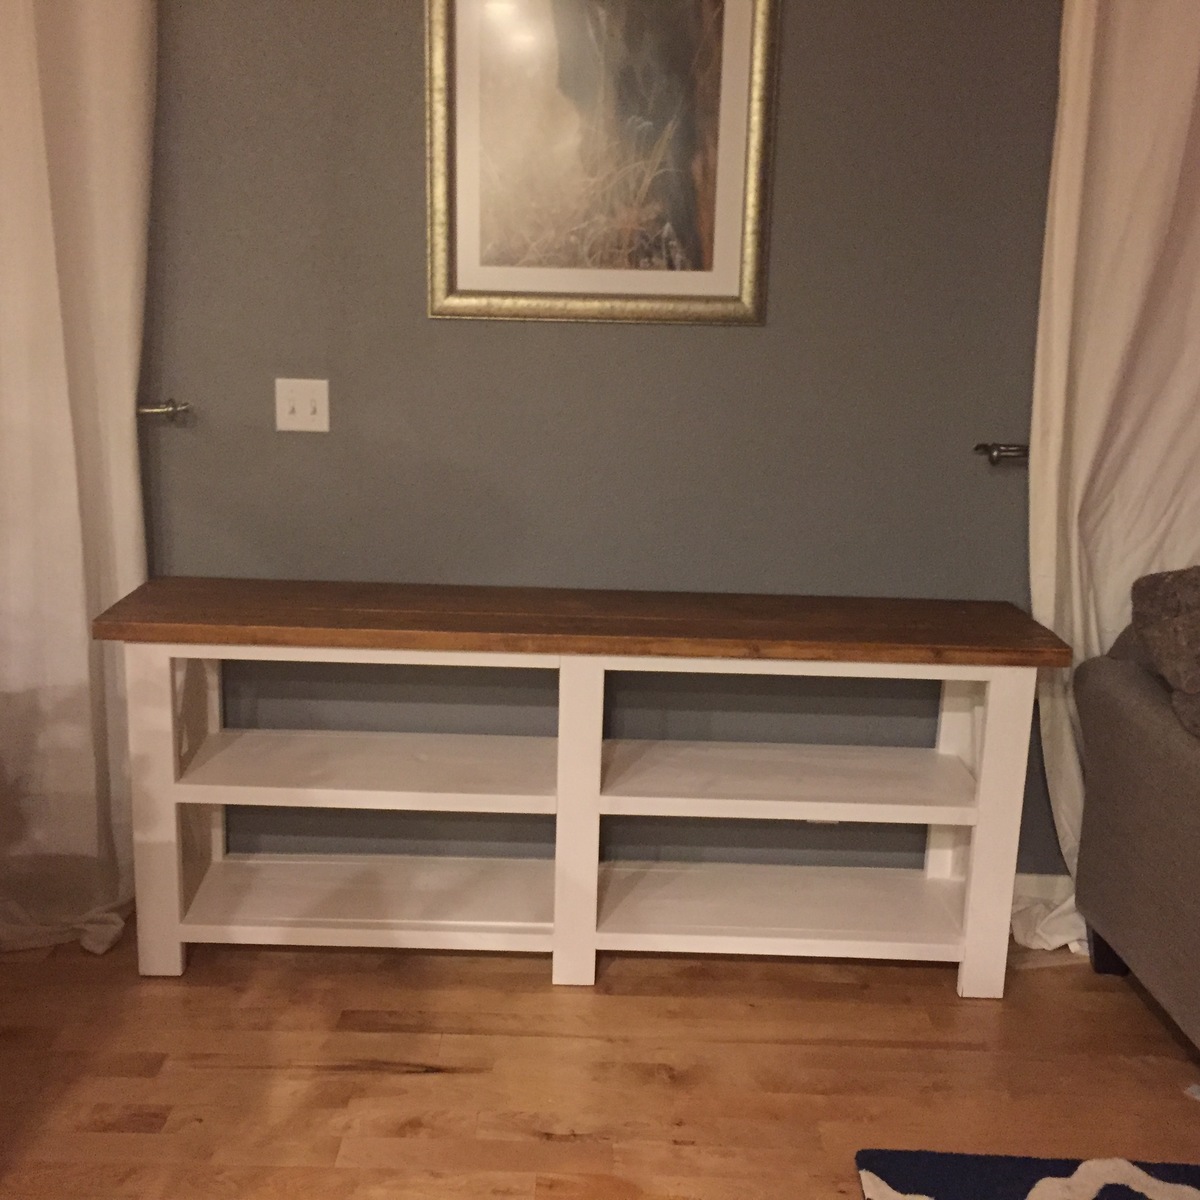
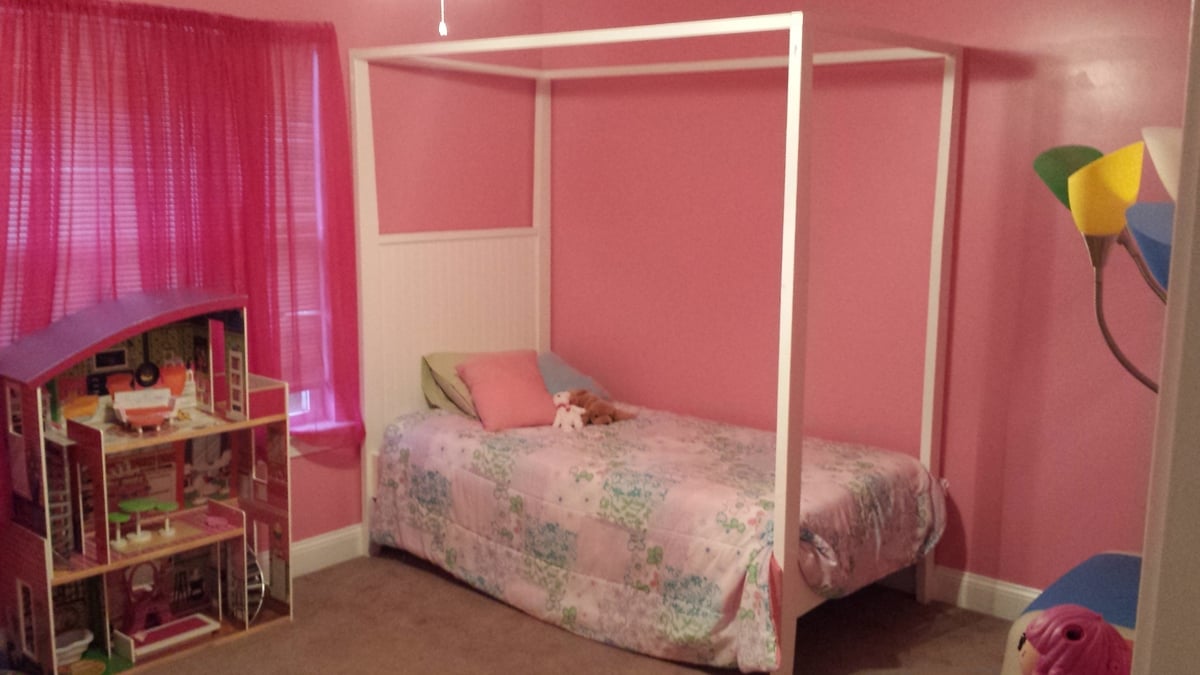
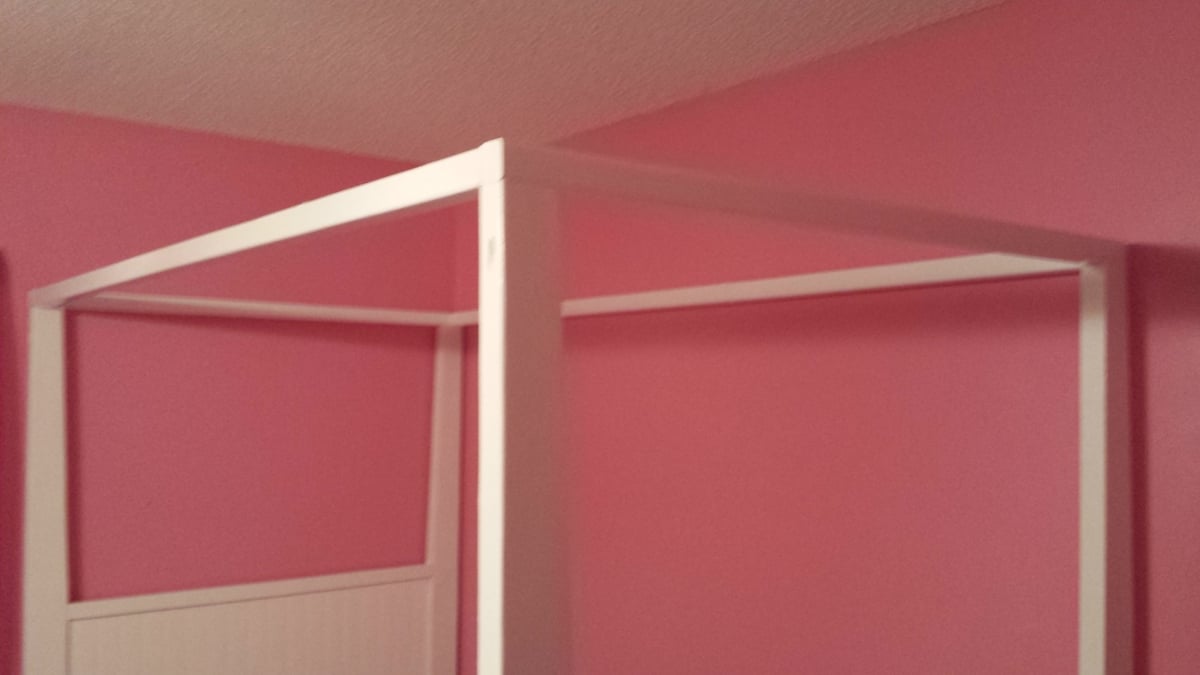
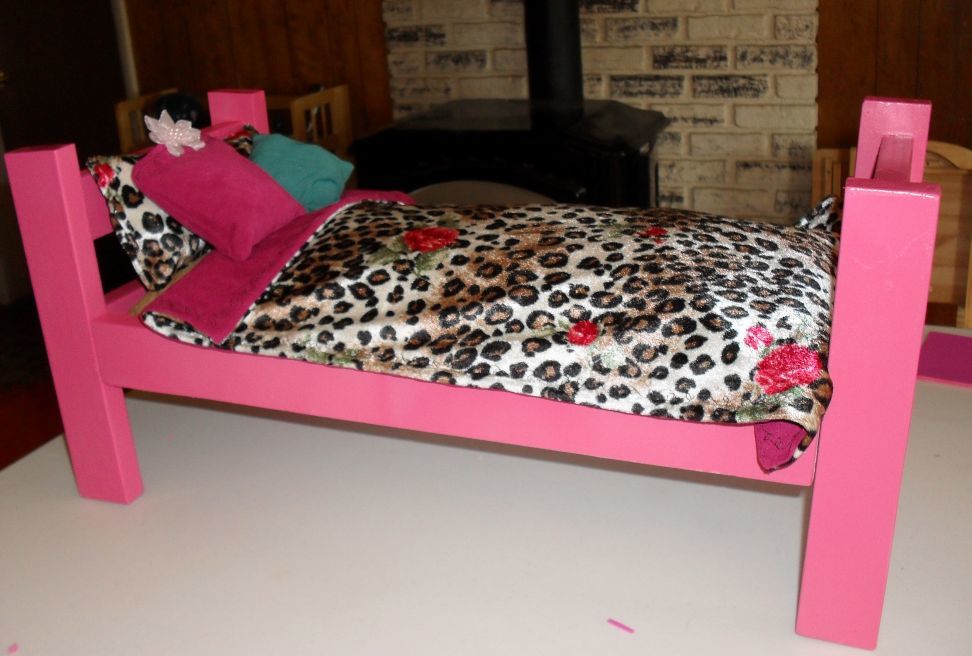
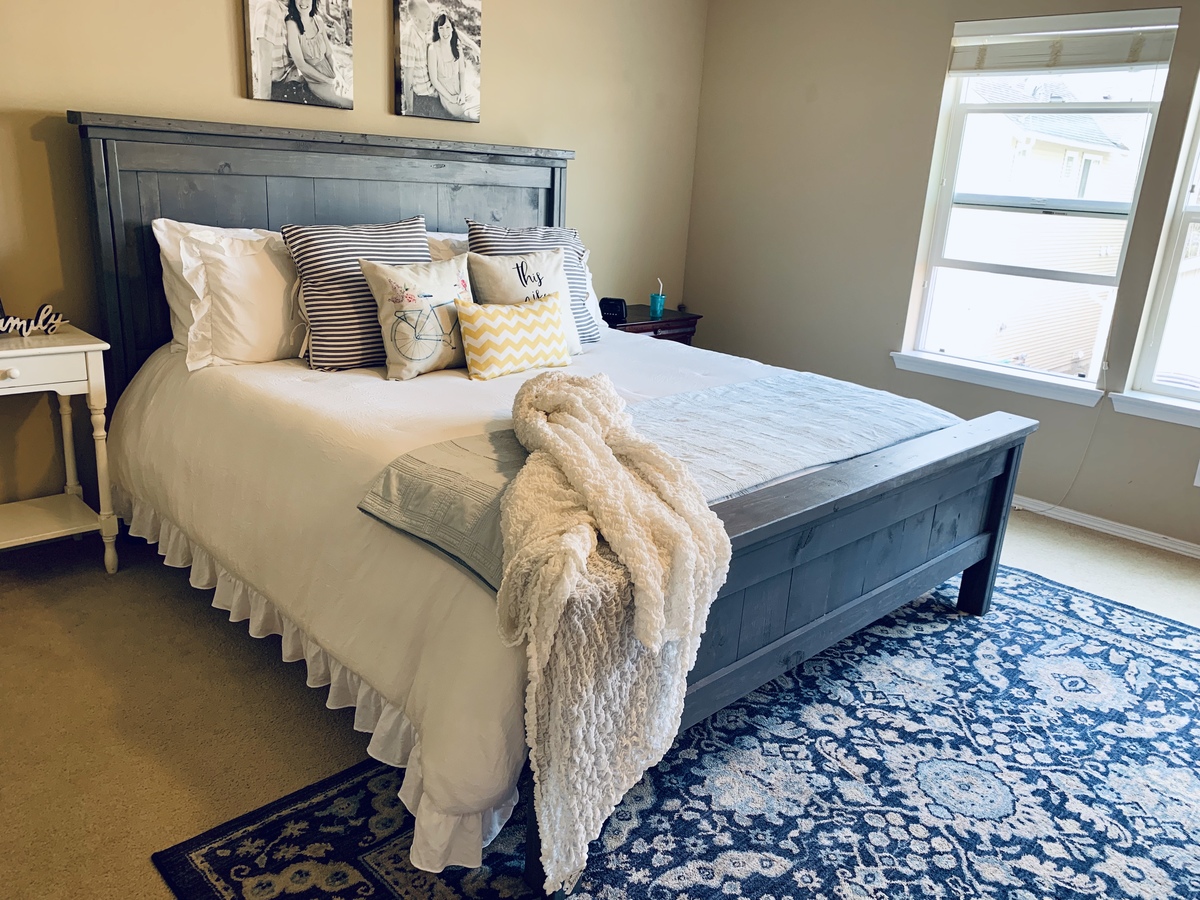
I made this as a gift for my niece. I fully assembled it, instead of presenting it as a kit. When I made the frame, I hadn't quite figured out how to make perfectly straight cuts with my circular saw, and I cut all the pieces before I came across Ana's tutorial on using a circular saw. So the bed is not perfectly square. Fortunately, a few pieces of thin craft foam glued to the bottom of a couple of the legs eliminated most of the wobble. That, and a generous application of pocket holes and screws. Each side rail is attached to the headboard/footboard with (6) 1 1/2" screws! I could probably jump up and down on the frame and it wouldn't budge. And I think I over-painted. Not to good with my spray painting technique yet. Plus, I forgot to sand between coats, and I didn't have time to add a clear topcoat.
When I look at this project, I see every flaw and mistake and feel dissatisfied. But, I just remind myself that I am my own worst critic. My niece, on the other hand, loved it. And no one else seemed to notice the mistakes: I received several nice complements. And the best part: it was practically free! I bought a can of pink spray paint, but everything else came out of my wood stash or my fabric stash. A present made with love, not money. And my first "real" building project.
This was a Christmas gift for my husband, who has resurrected his old turntable. I wanted the stand to be the same height as the chest I had previously refinished to house our stereo and cds. I also wanted to have two shelves for vinyl, so I modified the Channing bookcase to fit.
Mon, 02/26/2018 - 20:53
My husband has been looking for a stand for his turn table and this one looks perfect! Do you mind my asking for the adjusted measurements? I’d love to see if we could make one for him, if you don’t mind sharing. It looks fantastic!
Sat, 12/01/2018 - 12:11
Apologies, I have not checked the site in almost a year. The height of the unit is 37,3/4' tall, the shelf widths are 14" inner width, and the spacing between shelves is 13" between the lower 2 shelves for vinyl, and 5" for the top shelf (for brushes or an occasional CD. Hope that helps.
Okay, I hope you like this... it was the second and third thing I ever built!!! The table is made from 2 doors hinged together with accent hinges screwed on top. In the middle there are locks (hook and latch) for design. The frame is oak. measures 81X 56 and fits a good 10 people around.
The bench is an old cherry tree slab that someone I know did not want. its about 72 inches long and it is slighly curved. I ushed a shilac and kept the same color.... I just sanded it down.
We stuck with th original plans, but instead of making table ends, we did full 2x10x8 boards and capped it with 1/3’s. We filled in the gaps in the wood with stainable wood filler. We also used a 1/2@ Forstner bit and recessed the screws and used wooden dowels to cover the screw holes. It gives it a beautiful finish. We also enjoy our pew pews, so we recessed .40, .45, .223, and .22 empty shells into the table. My husband wood burnt a message in the center of the table, then we sealed it all with one step minwax finish in mission oak.
After replacing that trashed out IKEA dresser with the fire fighter style locker in the boys room I started taking apart said dresser to put out on heavy trash day. It was then I realized that while it wasnt the BEST materials, the top and sides were actually not all that bad. As it was the piece was too wide for the space I was looking to fill, so I did a little trim of the top, replaced the supports and framing and rebuilt this into a shelving unit.
I bought a couple 1x2s to frame shelf supports and actually used the base of the drawers as a shelf.
My neighbor across the street is a DJ and has about 100 million plastic crates in his garage that he is getting rid of (they used to hold his vinyl). So I took a few and have been finding uses for them. I spray painted 2 of them red and used them as the basis for where to attach the shelves.
I also had a couple of other baskets for toys that were just the right size for the small top shelf. I just need to go back and paint those red too.
Love this bench, you can fit lots of kids on it and it is very sturdy.
This was my husband's 3rd or 4th Ana White project. We also had to go back for mre wood as the shopping list was not complete.
Mon, 05/13/2019 - 15:53
This is gorgeous, can you share what you had to go back for? Also, what is the finish?
Gorgeous Barnwood Fireplace Surround by Scott Snyder