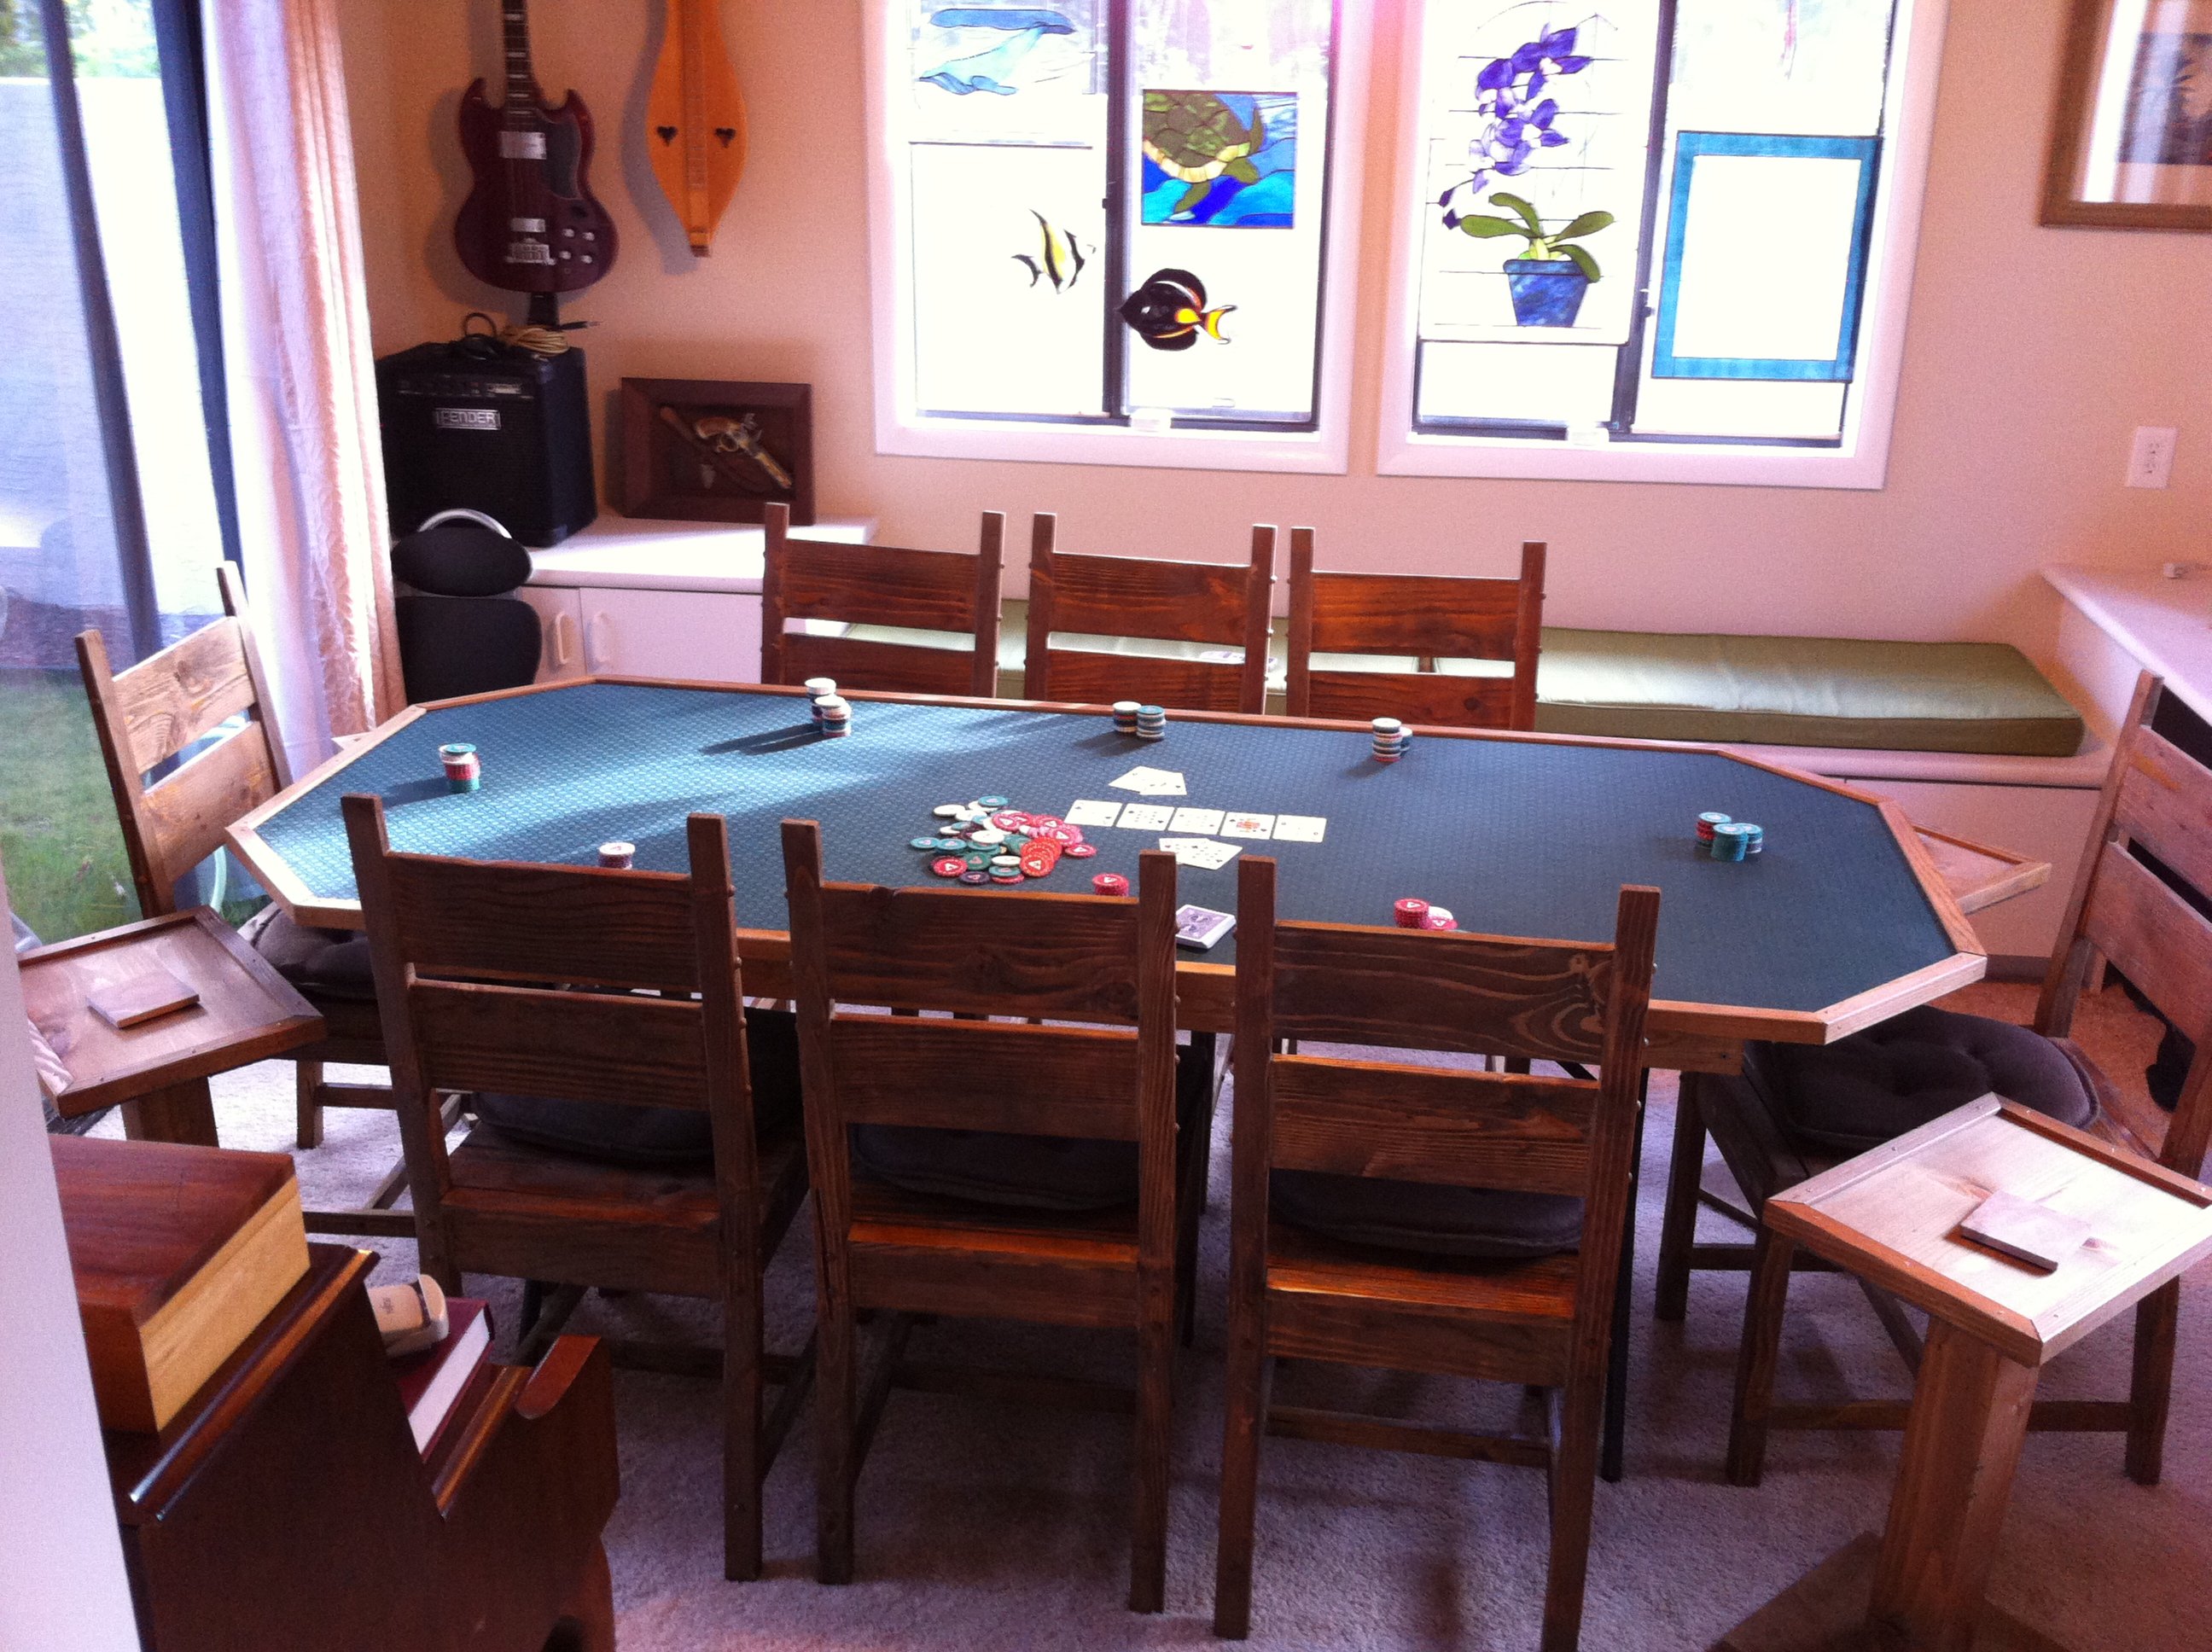
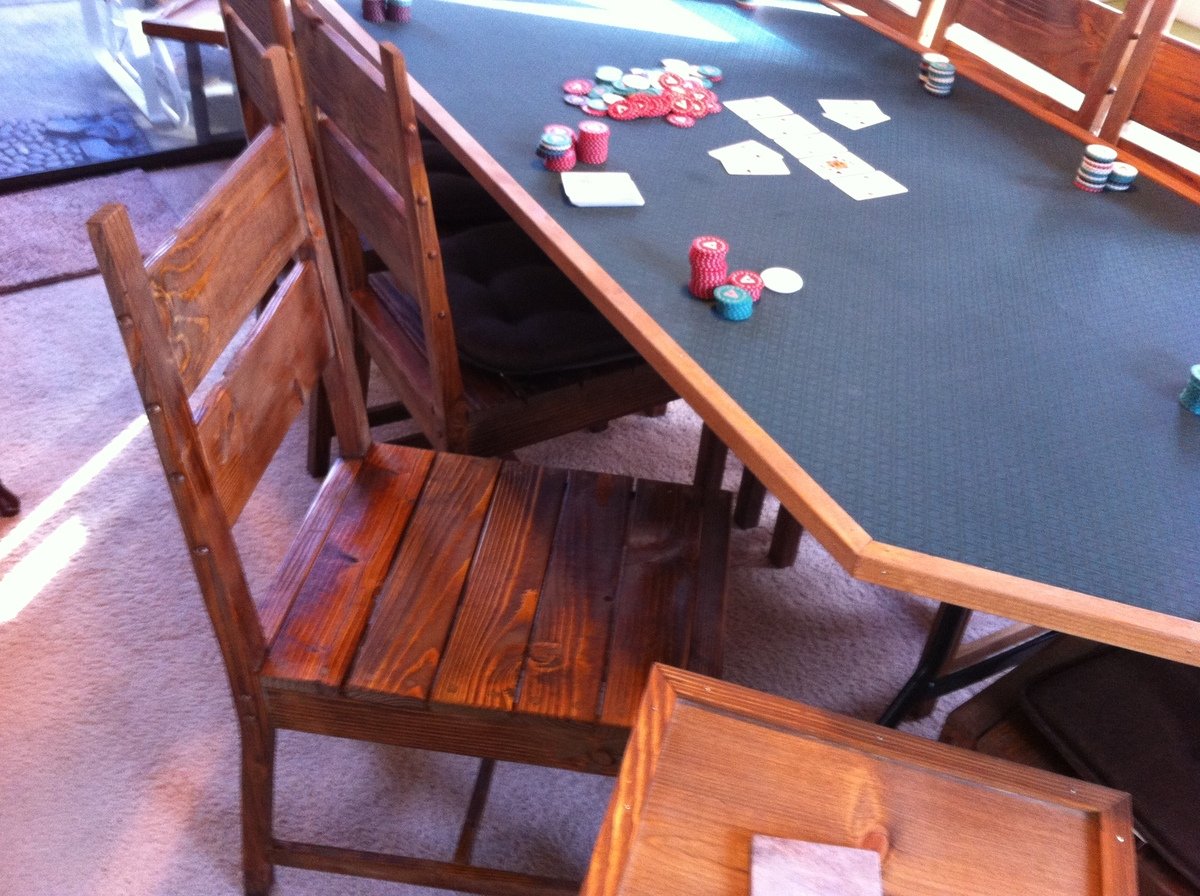
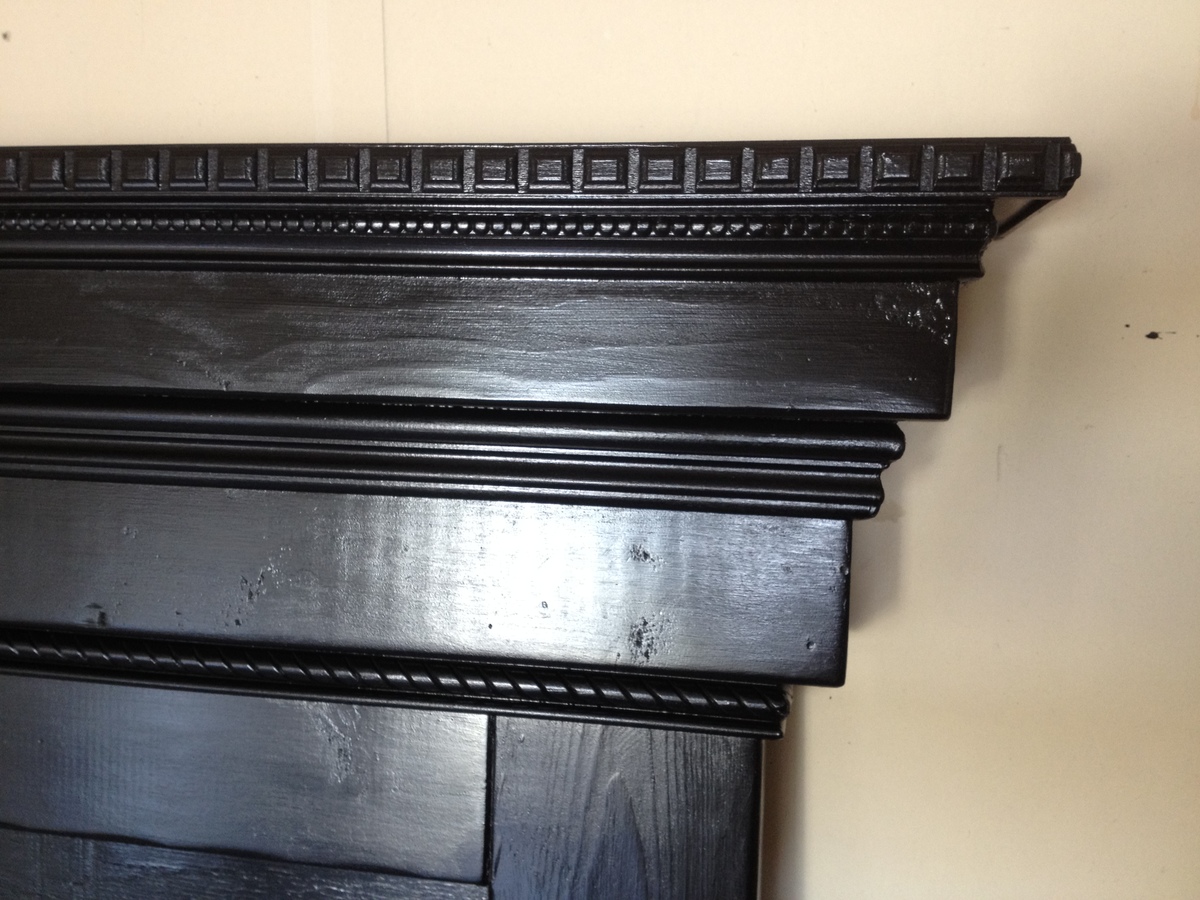
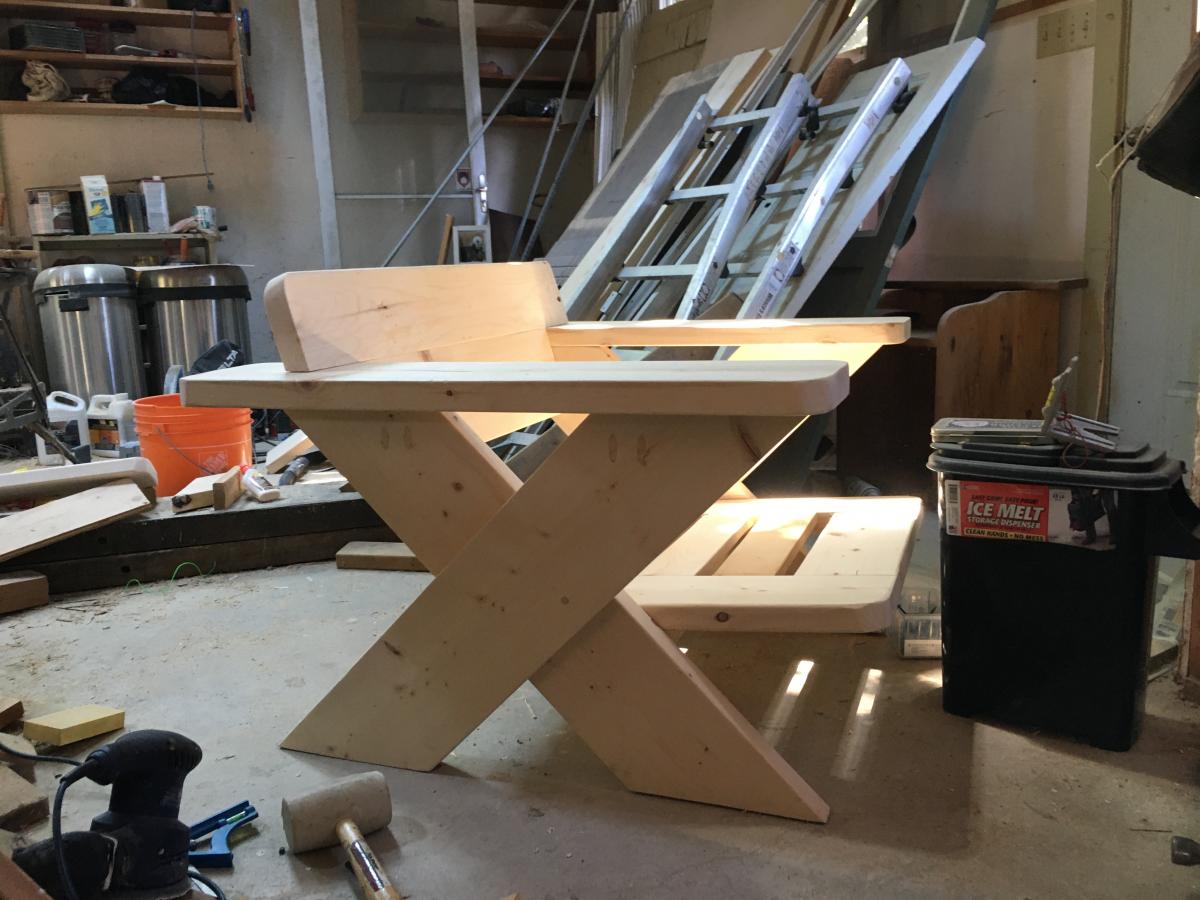
Community Brag Posts

X chair copy

Submitted by Anonymous (not verified) on Sat, 07/25/2020 - 10:32

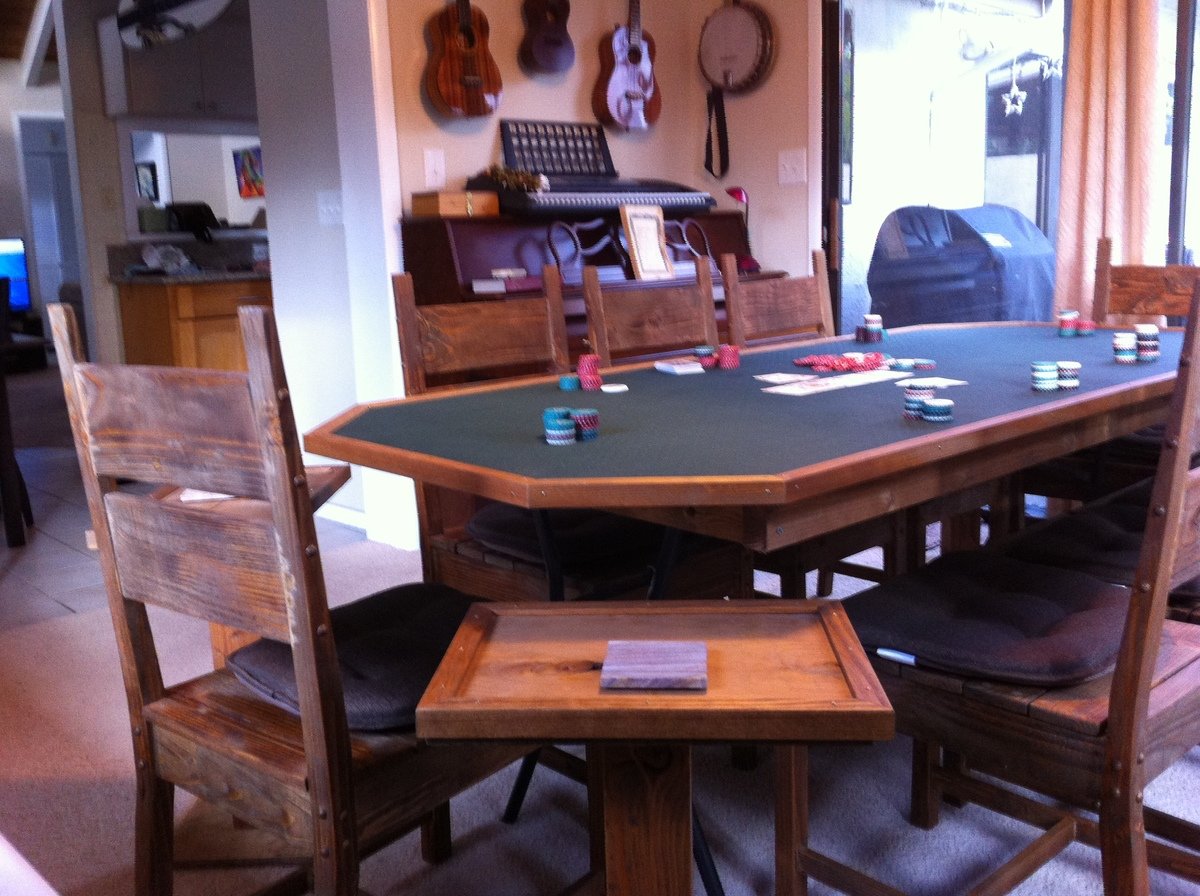
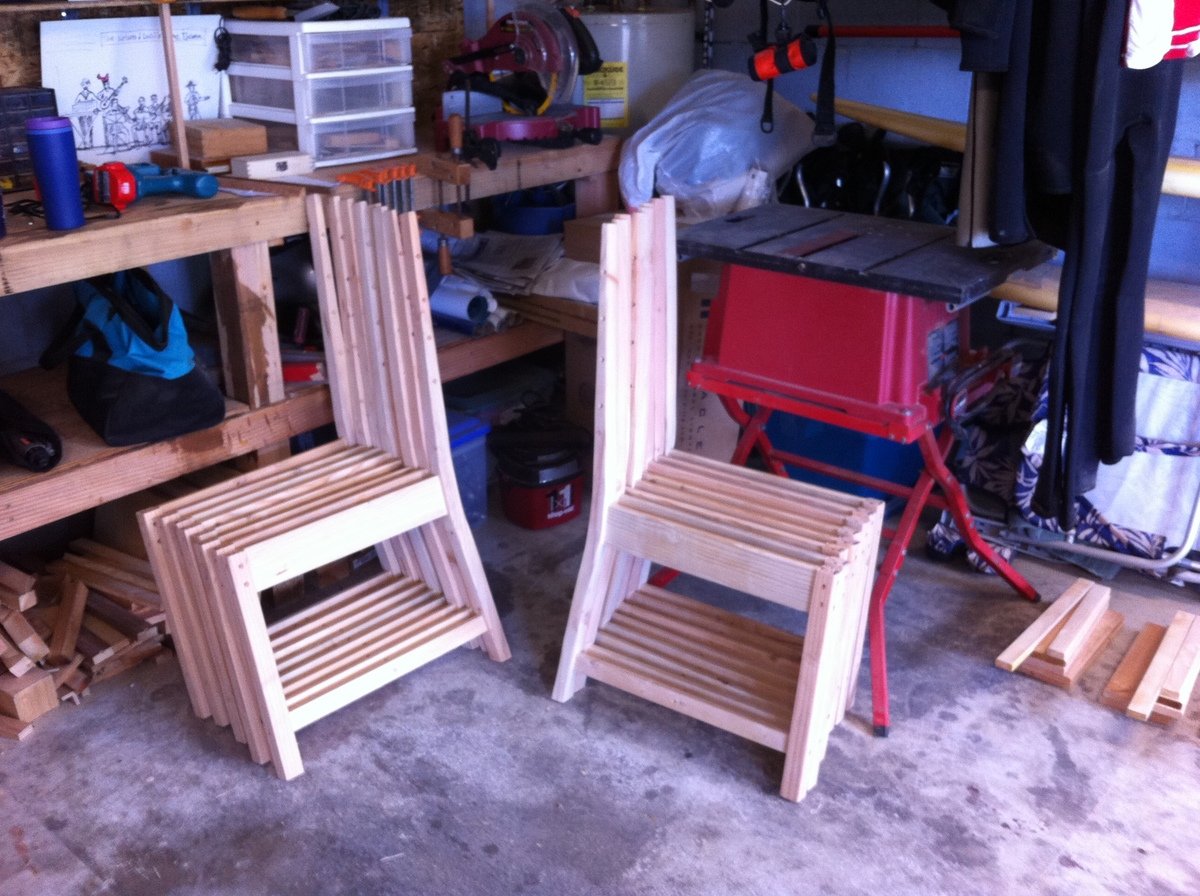
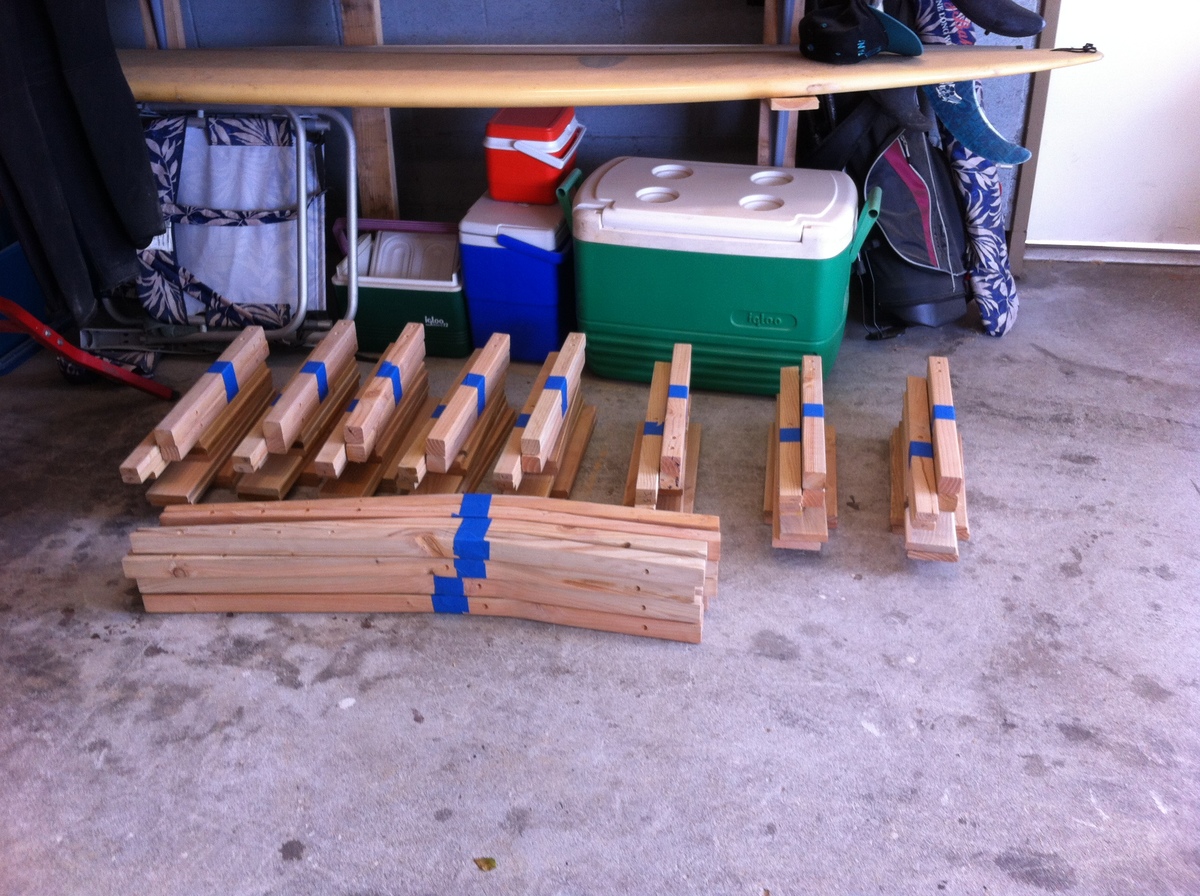
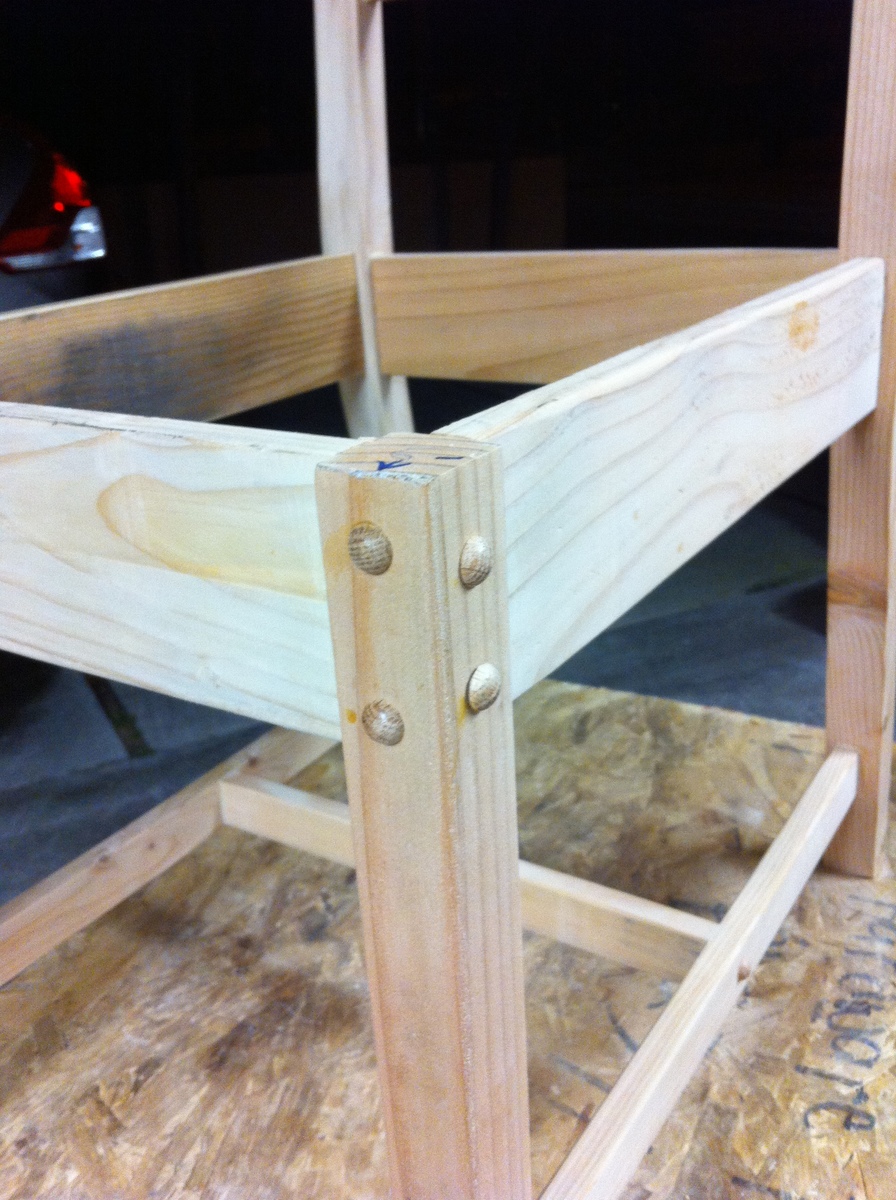
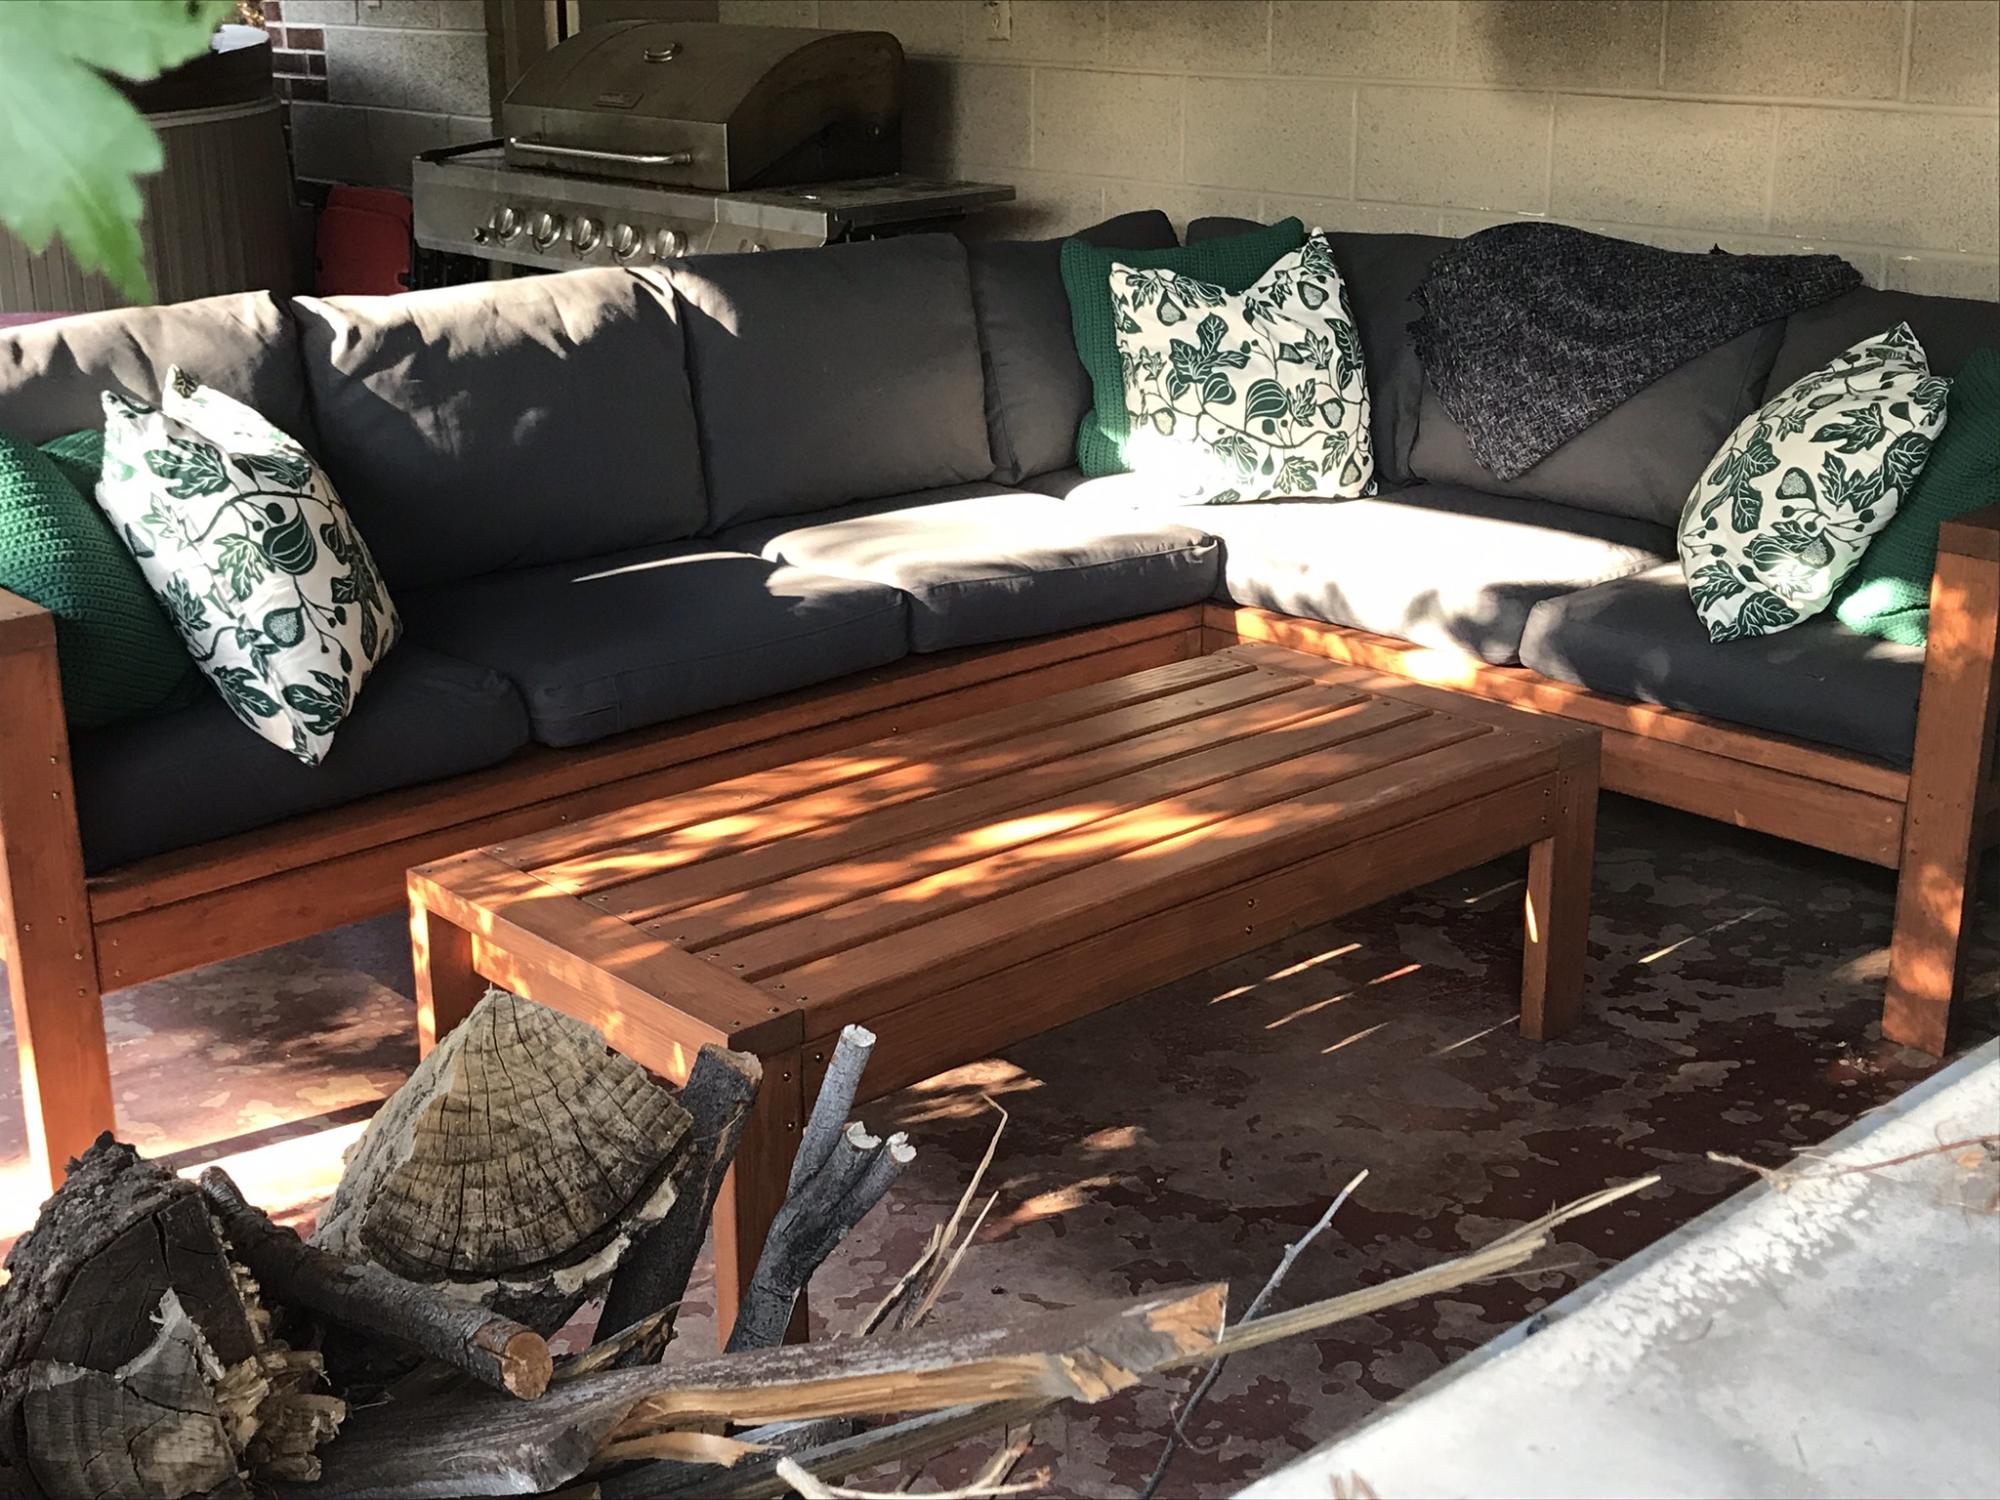
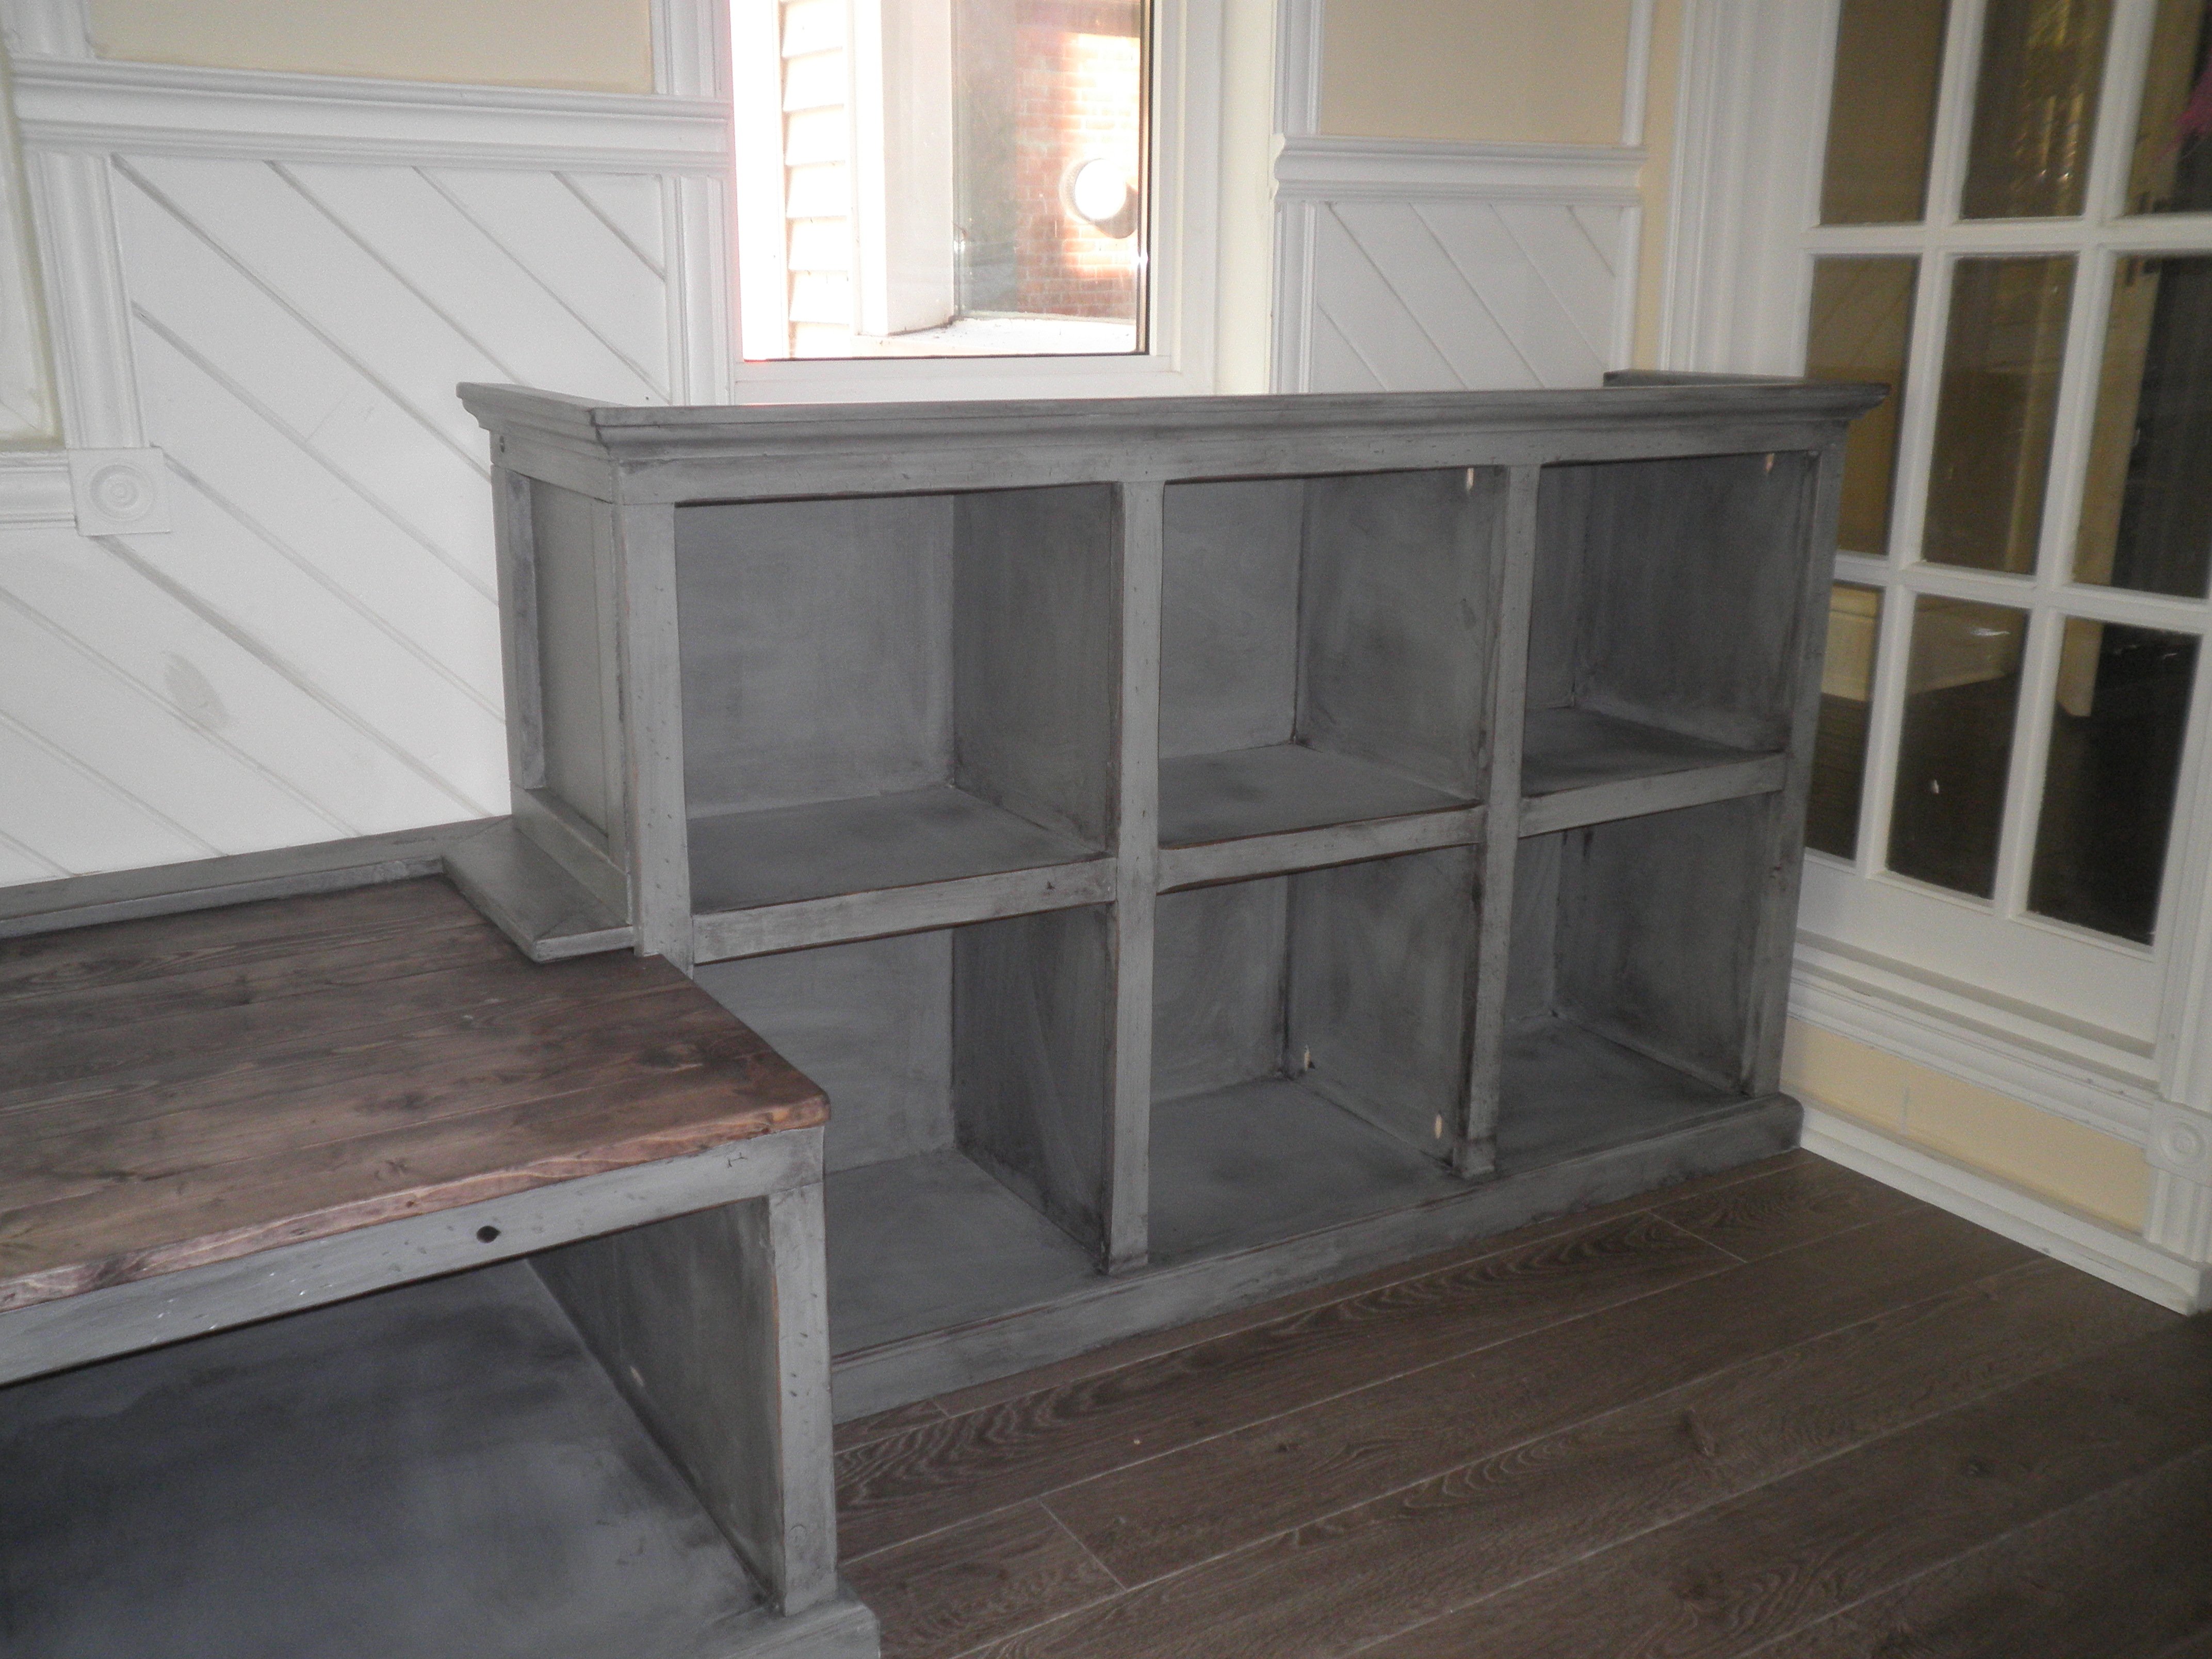
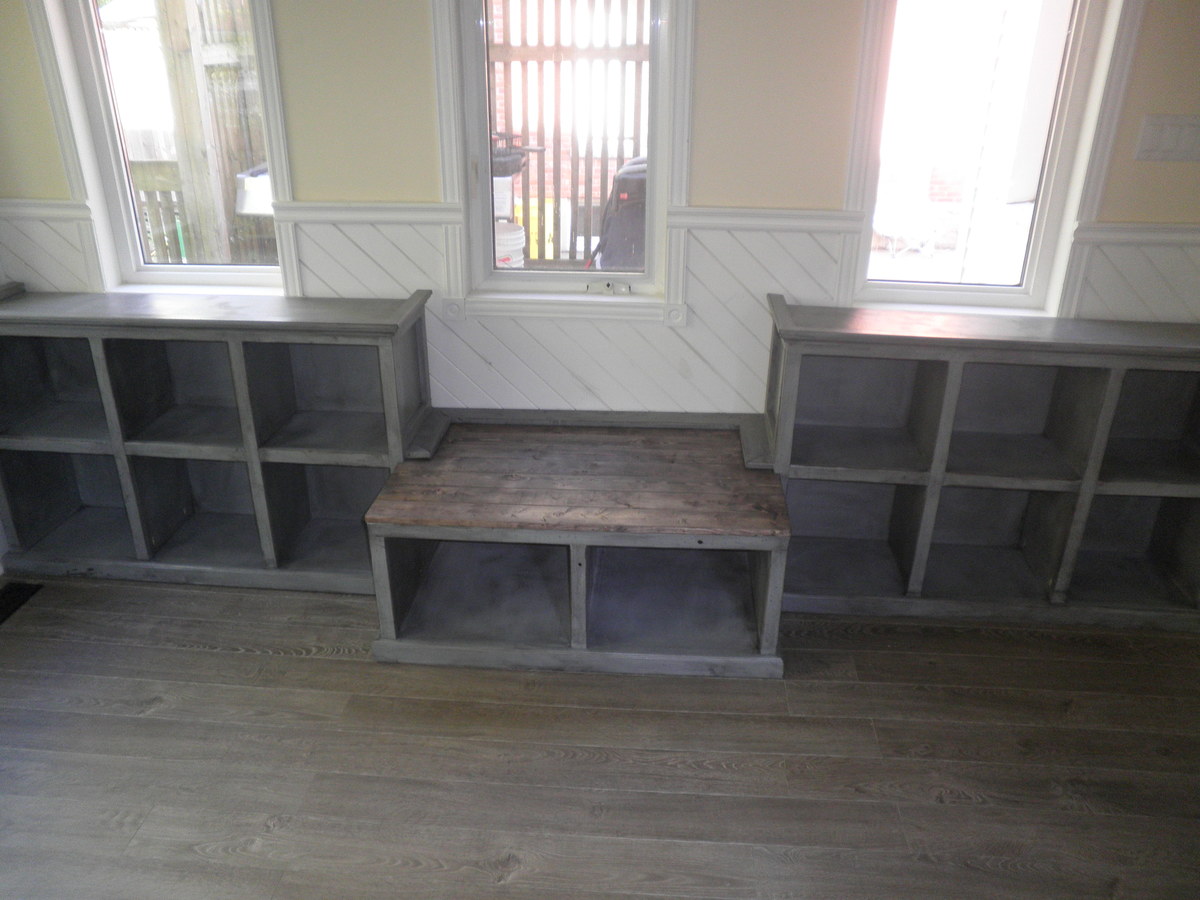
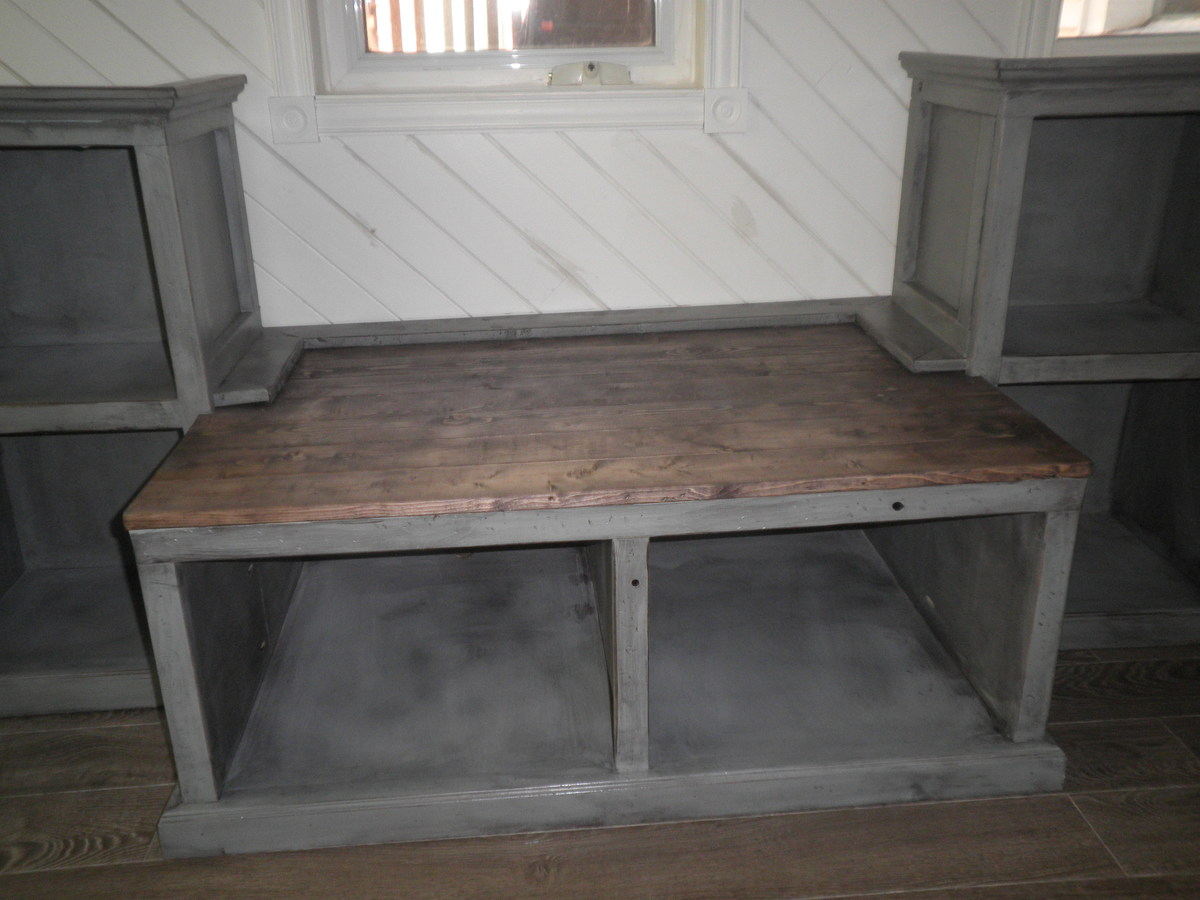
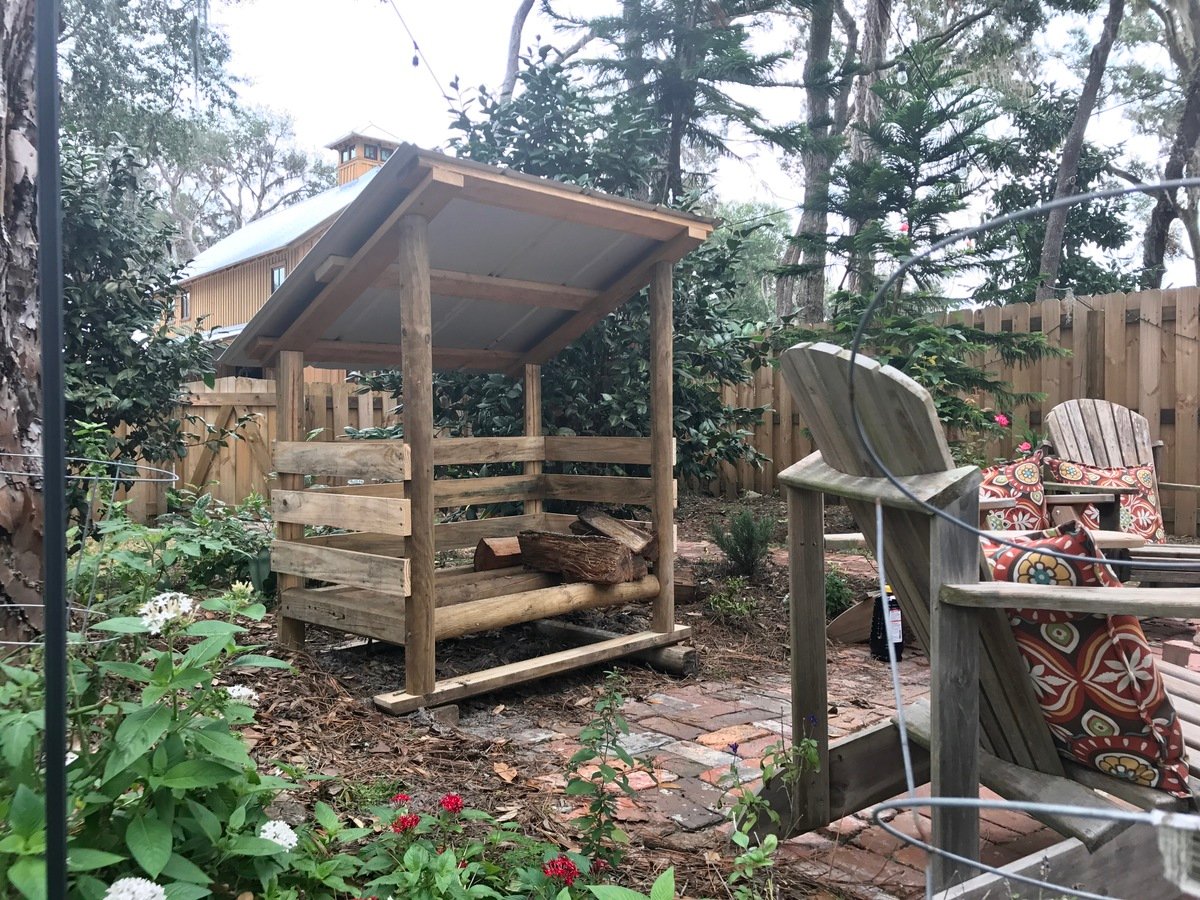
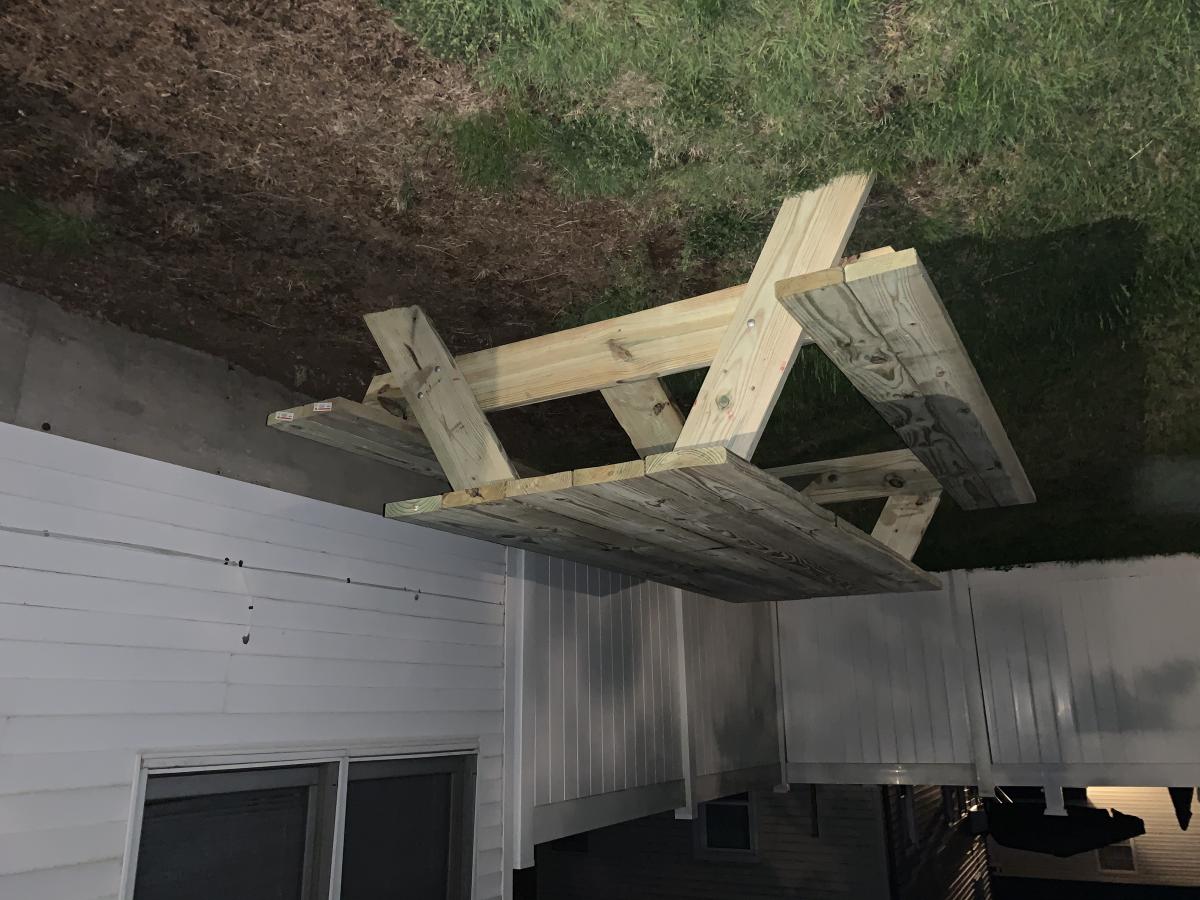
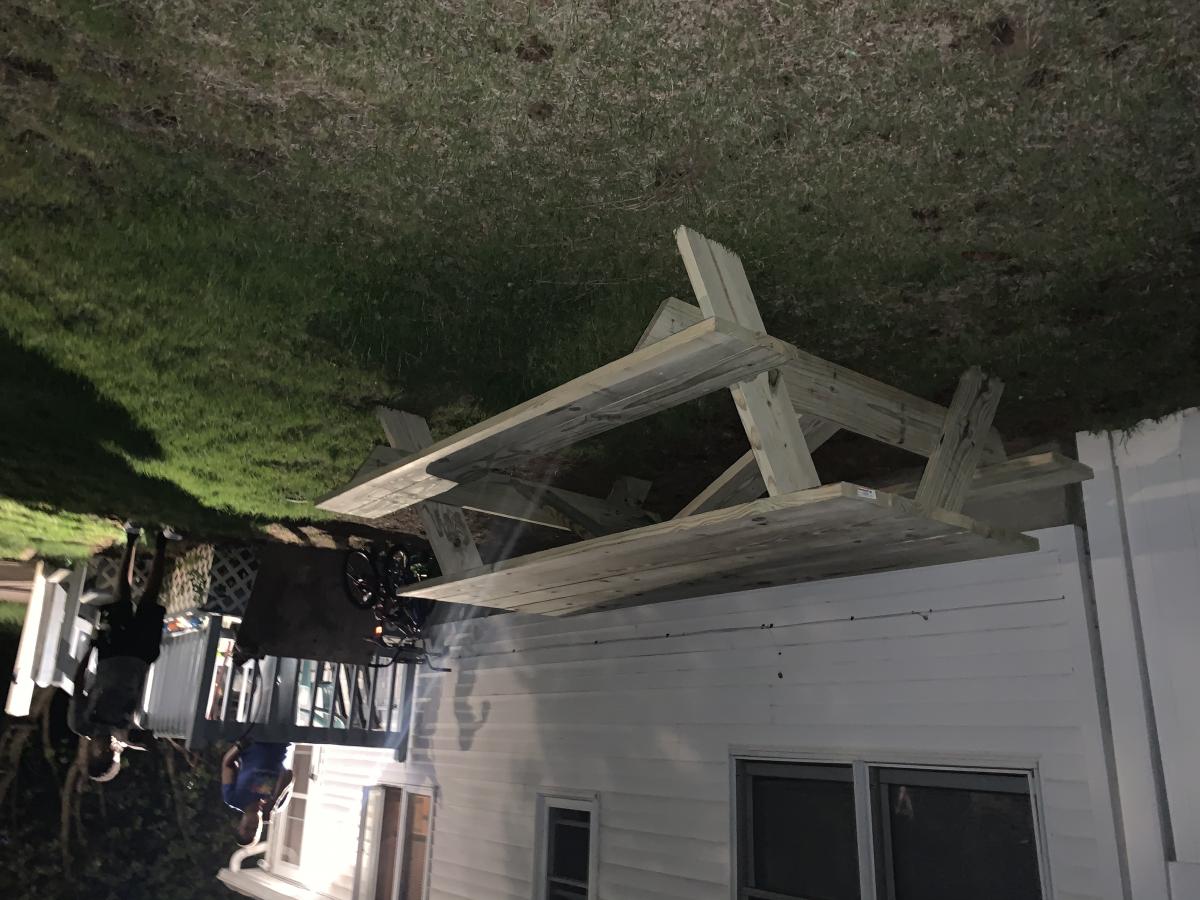
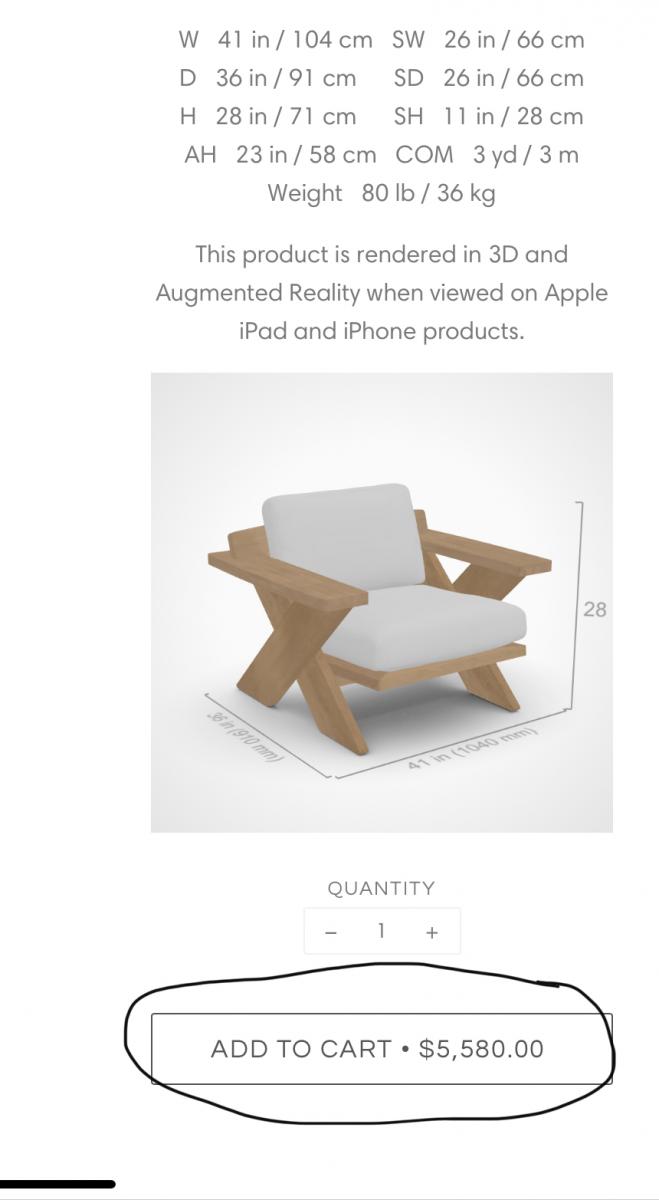
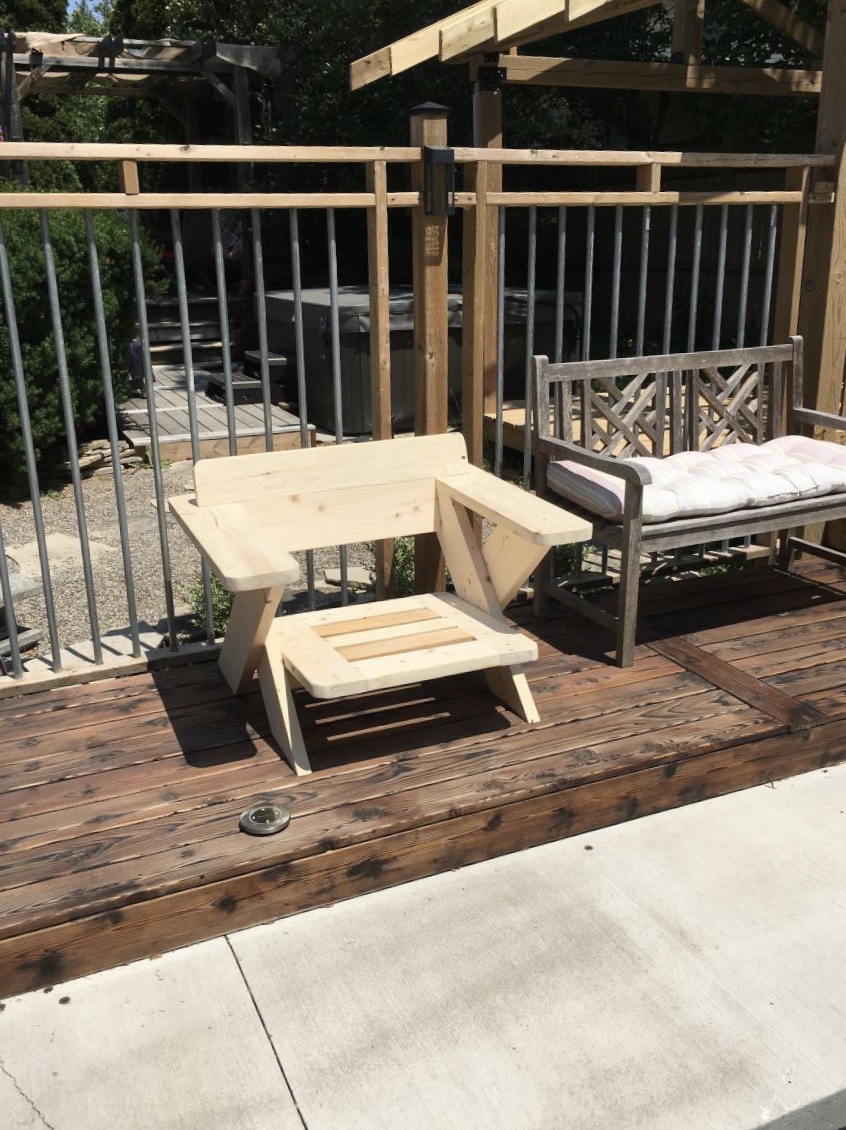
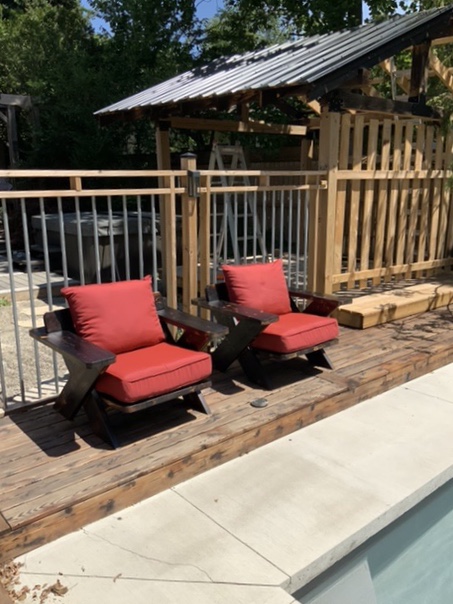
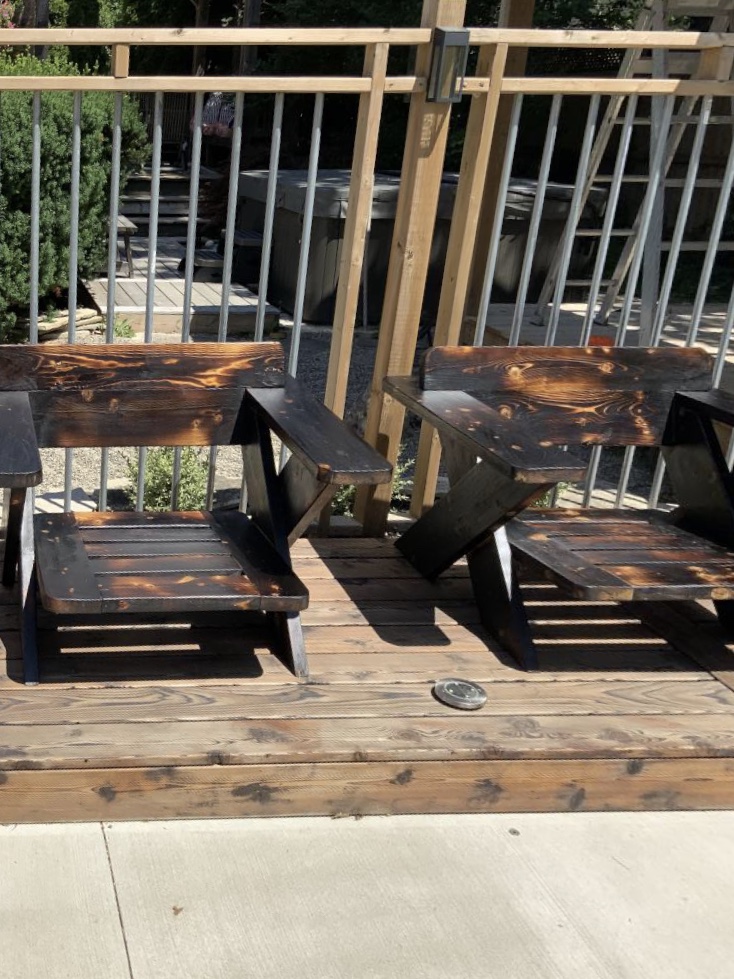
I saw these chairs online at a cost of $5,580 each . I thought they were very nice, but way too expensive. Using the online photo and dimensions I was able to more or less figure out the way it was made. The tool required are a mitre saw, table saw, kreg pocket hole jig, drill and palm sander. The chairs were then burned with a torch to waterproof them and bring up the grain in the wood. 3 coats of spar varnish cut with mineral spirits were applied to finish the project. The cost was about $130 Canadian each including the cushion, around 2% of the chair seen online.

Estimated Cost
130
Estimated Time Investment
Weekend Project (10-20 Hours)
Finish Used
First shou sugi ban (Japanese wood burning technique) the wood and then 3 coats or spar varnish.
Recommended Skill Level
Intermediate

Farmhouse bed with Cathedral Window quilt

Submitted by calara on Thu, 10/04/2012 - 12:07

Farmhouse bed with 2 inch foam mattress and fitted sheet set with cathedral window quilt (blocks made half size)

Estimated Cost
free
Estimated Time Investment
Afternoon Project (3-6 Hours)
Recommended Skill Level
Starter Project

2x4 Bench

I found this plan on morelikehome.net and had to try it this was my first project in 20 years and I had so much fun building it. I am looking forward to building more in the future! Enjoy!

Estimated Cost
50.00
Estimated Time Investment
Day Project (6-9 Hours)
Finish Used
Brown semi - solid stain
Recommended Skill Level
Beginner

farmhouse queen

Submitted by hurley on Mon, 11/07/2016 - 12:05

This was my second project. I built it with my hubs and we had a blast. We have a boxspring so we used 2x6s, but laid them flat. We also used 2x12s for the sides and instead of attatching the sides permanantly we used bed hooks that we ordered online to attatch the sides. 4x4s were impossible to find. We ended up buying treated ones and sanding them for ages.

Built from Plan(s)
Estimated Time Investment
Weekend Project (10-20 Hours)
Finish Used
minwax special walnut
Recommended Skill Level
Beginner

Patio table

Submitted by Anonymous (not verified) on Mon, 07/27/2020 - 21:37

Modified some measurements and squared the legs. Also added LED lights under it for night mood setting.

Built from Plan(s)
Estimated Cost
$50
Estimated Time Investment
Weekend Project (10-20 Hours)
Finish Used
Used Stain + Sealer from Behr brand. Color is called Pewter.
Recommended Skill Level
Beginner

Classic Chair X 8, a poker room is born

Great, beefy chair with a rustic look around the poker table with side tables (another project that took longer than anticipated); the plans were great and easy to follow. I made a few modifications:

- Reduced the width from 19" to 16" to fit around the table.
- Made the seat out of 1x4's horizontally mounted with an extra support underneath. It helps to keep the cushions from sliding and I liked the look.
- Rather than pocket holes I counter-sunk and used oak plugs.

I did the whole thing assembly-line style creating "kits" as I went along. That allowed me to make jigs for each cut so things were reasonable close from chair to chair. Also, I only made one attempt at the jigsaw cut for the rear angle...the jigsaw got very upset. For the rest, I used the chop saw to make little slices and then chiseled and sanded.

Two coats of Danish Oil on everything gave me the look I was trying for, kind of the back-room-in-an-old-John-Wayne-cowboy-movie vibe. Leave your pistols at the bar.

The times and costs are per chair, the whole thing took a whole lot longer!

Estimated Cost
$35/chair
Estimated Time Investment
Weekend Project (10-20 Hours)
Finish Used
Danish Oil, Dark Walnut
Recommended Skill Level
Intermediate

Outdoor Sofa & Coffee Table

Submitted by Ulrike on Fri, 07/31/2020 - 09:38

This project took a while. Stained everything before assembly which made it easier. Plans are easy to follow. Thank you for making them available. Our property is starting to look a lot like your website.

Estimated Cost
180
Estimated Time Investment
Weekend Project (10-20 Hours)
Recommended Skill Level
Beginner

Comments

jwood4

Mon, 08/02/2021 - 08:35

Looks amazing! What method did you use (pocket holes, dowels, deck screws, etc) to join the visible portions like the arms?

Horizontal 6 hole cubby

Submitted by angeleyes on Tue, 10/09/2012 - 19:04

I really wanted a built in unit for toy storage for our kids toy room but truth be told couldn't afford what I wanted ie pretty and solid. So while searching on refinishing furniture I came across this site. Thanks a bunch Ana. You've inspired me to create things I didn't think possible, all on a modest budget - diy. This was my first woodworking project. It was actually easy to me because it follows the same principles as sewing in which the depth of the wood is like the seam allowance. I really liked the 6 cubby plan but wanted it horizontal. I had to replan this piece as the plan dimensions changed when I changed the orientation of it. I also added crown moulding (but this was kind of a ledger style that rested ontop of the 1x2 - they use it as a door headers). I initially intended to paint this white but decided that it would have got lost in the white wood panelling. (DH even commented that i was taking way to long on this project but after seeing the finished results said it looked amazing.) So I painted it a grey blue, distressed the edges and then used a stain that I bought from benjamin moore's mis-tint section for $5.00 which says it's a danish walnut based but seems to have a slight purple huge to it. thanks again Ana, its because of you I don't have to stare at a messy toyroom any longer!

Built from Plan(s)
Estimated Cost
$125-$150
Estimated Time Investment
Weekend Project (10-20 Hours)
Finish Used
paint, then stained washed and sealed
Recommended Skill Level
Beginner

Comments

Bunk Bed Build!

Submitted by ladyj on Sat, 08/02/2014 - 12:46

I built this for my kids who are now having to share a room due to another baby on the way. These plans appealed to me because it's junior height and it had stairs instead of a ladder, both of which made the top bunk sleeper feel safer. It was my first furniture build but I do have quite a bit of building experience. I was pregnant but loved these plans and had to build it! I stained/painted each piece separately before assembling it. I also drew up my own stair plans so I could add more storage (it fits 18 cube storage bins!) and built it using 2x6s and 2x12s and galvanized steel pipes for a railing. I added a bottom bunk as well. Under the top bunk mattress, I stapled a $7 grey flat sheet, with the staples hiding, to cover up the 2x4s supporting the upper mattress. The kids love it! Thanks Anna for the inspiration!

Estimated Cost
$250
Estimated Time Investment
Weekend Project (10-20 Hours)
Finish Used
Minwax classic gray, then flat latex white ceiling paint, distressed with sandpaper, then top coated with two coats of minwax polycrylic.
Recommended Skill Level
Intermediate

Mini Firewood Shed

I made this using plans submitted by pericles49. Thank you, pericles49!


I altered the design to use materials I had laying around, and changed the size to fit my space. That made it take a little longer - especially because changing the fastening pattern is still tricky for me - trying to keep screws from hitting each other.


Design

I made mine a little deeper 27-1/2" instead of 24 on the plan.


Materials

  • Landscape timbers I had laying around. To save on weight, and wood, I ripped a couple of the landscape timerbers down the middle.
  • Roof - 5-V crimp tin roof
  • 1x4 pine boards (2nds from other projects)
  • 1x4 and 1x2 cyprus boards (2nds from a construction project)

What I'd do differently next time

  • The weight of the firewood is resting on the screws that fasten the floor to the posts. Next time I'll make the wood support the weight, and the screws just hold it in place.


Built from Plan(s)
Estimated Cost
$6
Estimated Time Investment
Afternoon Project (3-6 Hours)
Recommended Skill Level
Beginner

Six Cube Bookshelf

Submitted by skane724 on Sat, 10/13/2012 - 12:40

I have been searching for something to replace my son's plastic Fisher Price bookshelf/toy box for some time now. He had so many books on the shelf it was sagging. I came across this plan and thought it was perfect. I love that the shelves are tall enough for his bigger books to stand up. I picked up three red totes at Target to hold his smaller toys on the bottom. This plan was easy to follow and I had no problem when putting together the frame of the bookshelf. I did however have some problems when it came time to put in the dividers for the shelves. They are not evenly spaced, but I don't think you can even tell. The best part is my son loves it and that is the most important. It is easy for him to go over and pick out a book whenever he wants.

Built from Plan(s)
Estimated Cost
$35
Estimated Time Investment
Day Project (6-9 Hours)
Finish Used
Rustoleum Painter's Touch White (2-3 Coats)
Recommended Skill Level
Starter Project

My Pallet Bookshelf

Submitted by Amy_C on Tue, 08/05/2014 - 10:16

I live in a small northern town that has very little choice for affordable furniture. After scouring kijiji for months I decided to make my own.

I was very happy with how my bookshelf turned out - using 2 pallets. I used wider shelves than this post said because my books won't fit on 4" shelves, and it was next to impossible to remove the pallet slats for re-use without splitting them. I used 4 - 6" and 2 - 8" shelves.

Power sander was my best friend.

Buying the shelving and stain cost me $20 for this project!

Estimated Cost
20
Estimated Time Investment
Day Project (6-9 Hours)
Finish Used
Ebony Woodstain.
Recommended Skill Level
Starter Project

Washer & Dryer Pedestal

Submitted by T.R. on Fri, 11/18/2016 - 07:51

Good, sturdy pedestal is a nice addition to the laundry room.

I used the plans from Sausha’s Washer/Dryer Pedestals and added a pull out to place the laundry basket on.

Estimated Cost
About $100
Estimated Time Investment
Afternoon Project (3-6 Hours)
Finish Used
White paint
Recommended Skill Level
Beginner

Ladder Shelf DIY

Another one bites the dust. Made this out of Ana instructions for a ladder shelf. Like the way this turned out alot. Ana White knows whats up :)

Built from Plan(s)
Estimated Cost
$100
Estimated Time Investment
Day Project (6-9 Hours)
Finish Used
Minwax Wood Finsih; Classic Grey
Recommended Skill Level
Starter Project

Moulding Mantel headboard variation

This was my very first building project and I'm officially addicted! I made the headboard as a surprise for my husband while he was in Africa. I used a variation of moulding and am tickled by the outcome! I adjusted the plans to fit a king-sized bed.

Built from Plan(s)
Estimated Time Investment
Week Long Project (20 Hours or More)
Finish Used
Black paint with a light coat of polyurethane to finish.
Recommended Skill Level
Beginner

Comments

JoanneS

Sat, 10/20/2012 - 13:13

Wow, this is so beautiful! You did an absolutely amazing job on this! Congratulations on a fab first project, it is prettier than any headboard I've seen in a store. :)
Joanne

5 tator tots (not verified)

Tue, 10/23/2012 - 19:09

I have so much trouble getting a smooth painted finish, always have brush or roller marks even with quality paint and paint conditioner. How did you paint your beautiful headboard?

In reply to by 5 tator tots (not verified)

bethhamstra

Fri, 10/26/2012 - 20:01

Thanks for the compliment. I did a light sand between coats and then finished with a very light coat of polyurethane. I hope that helps a bit!

Sabrina426

Sun, 03/24/2013 - 13:34

You did an unbelievable job! I'm planning on this for my first project.

Do you have the dimensions you used for the king size??

bethhamstra

Wed, 02/26/2014 - 19:07

I'm sorry I didn't keep the dimensions on the cut list. Basically you just need to add 16" to every piece that will run the length of your headboard. A standard queen bed is 60" wide whereas a standard king is 76". Hope this helps!

bethhamstra

Thu, 02/27/2014 - 13:45

2 – 2x6 @ 59 ¼”
2 – 2x6 @ 70"
2 – 2x2 @ 8 ½”
1 – 2x2 @ 84"
1 – 2x6 @ 84"
2 – 2x4 @ 3”
1 – 2x4 @ 87"
1 – 1x6 @ 89"
1 – ¼” plywood @ 72" x 22 ¾”

Margery

Sun, 10/05/2014 - 18:30

oh my gosh...this is so beautiful!  I want one just like it!  I just might attempt it after I make my faux fireplace mantel :D

GREAT JOB!!!

Twin Storage Beds

Submitted by anne_c on Thu, 08/07/2014 - 07:36

This was really my first build and it stemmed from not being able to find the kind of beds I wanted for my girls. My brother helped me cut the wood and assemble the first one and my husband and I did the second together. It was so rewarding to make them and I love how they turned out! You can store so much and they are sturdy pieces. My girls love them too. (bedding is from Pottery Barn) I would stay this is a beginner's project. You don't need any specialized tools. it was a lot of fun and now I'm it itching to buy a Kreg Jig so I can complete many more projects!

Estimated Cost
$150-$175 per bed
Estimated Time Investment
Weekend Project (10-20 Hours)
Finish Used
After they were built, I sanded them and primed. The paint I chose was Polar Bear, which is a pretty true white, Behr brand from Home Depot. I used 2 coats of water based polyeurethane (Verathane brand), which has really protected it from knicks and scratches
Recommended Skill Level
Beginner

Console table

Submitted by Anonymous (not verified) on Mon, 11/21/2016 - 16:15

My husband made one for me and we loved it so much that he made a second one that we sold just a few hours after it was finished.

He is now working on a set of console, coffee, and side tables; and later he will attempt to buil a round dinning table for our house... wish us luck!

Built from Plan(s)
Estimated Cost
$70
Estimated Time Investment
Weekend Project (10-20 Hours)
Finish Used
Minwax grey, minwax walnut, white wash
Recommended Skill Level
Beginner

First big build - workbench

Submitted by Pizzle on Mon, 08/10/2020 - 18:50

This is my first big build and I couldn't be happier with how it turned out. There are a few things I would do different but its all a part of the learning process :-)
I cut the leg blockings down to 4" and added casters so I could move this around.

Estimated Time Investment
Week Long Project (20 Hours or More)
Finish Used
Shelves --- > Varathane Premium Weathered Gray + Polyurethane
Legs + Skirtings ----> Behr Blue Endeavour Semi-gloss
Recommended Skill Level
Beginner

Sewing Table with ironing board leaf

Submitted by tink32784 on Mon, 10/22/2012 - 12:49

I followed Ana's plans as written. However, I couldn't find a locking hinge the comments suggested. I will keep on the look-out for this though. I used 3/4" hardwood and had Blue do all the cuts for me. Easy-peasy. I painted the whole thing with left-over paint and then randomly taped off stripes using more leftovers and then protected everything with a coat of poly. Finally, I used a double layer of quilt batting and 100% cotton fabric to upholster one of the leaves for use as an ironing board. Literally finished this today, so I haven't had a chance to use it, but I'm so excited with how it turned out!

Built from Plan(s)
Estimated Cost
$60
Estimated Time Investment
Weekend Project (10-20 Hours)
Finish Used
Paint with polyurethane top coat
Recommended Skill Level
Beginner

Comments